A typical situation all photographers encounter sooner or later is a scene that doesn’t have enough light. To obtain the optimal exposure, you need to choose the right settings and, in some cases, push the camera to its limits.
The good news is that Sony full frame models have great sensors as well as excellent autofocus performance in low light. They provide all the tools you need to survive your night photography session or any other low light situation you might come across.
In this article, I’m going to guide you through the best settings for low light photos, show you how to set up your A7 III for night photography, and explain how I took various examples.
A7/A9 series compatibility
I may only mention a few model names in some paragraphs to avoid too much repetition, but rest assured that this guide is valid for all the most recent Sony full frame cameras such as the A7 III, A7R III, A7R IV, A9 and A9 II. The differences between the various models are highlighted throughout the post. Owners of the A7 I and A7 II series can refer to this guide as well, although be aware that some settings and features are missing.
I’ll be mentioning various settings in the menu system throughout the article, so here is a quick recap on how the menu is organised on the latest cameras.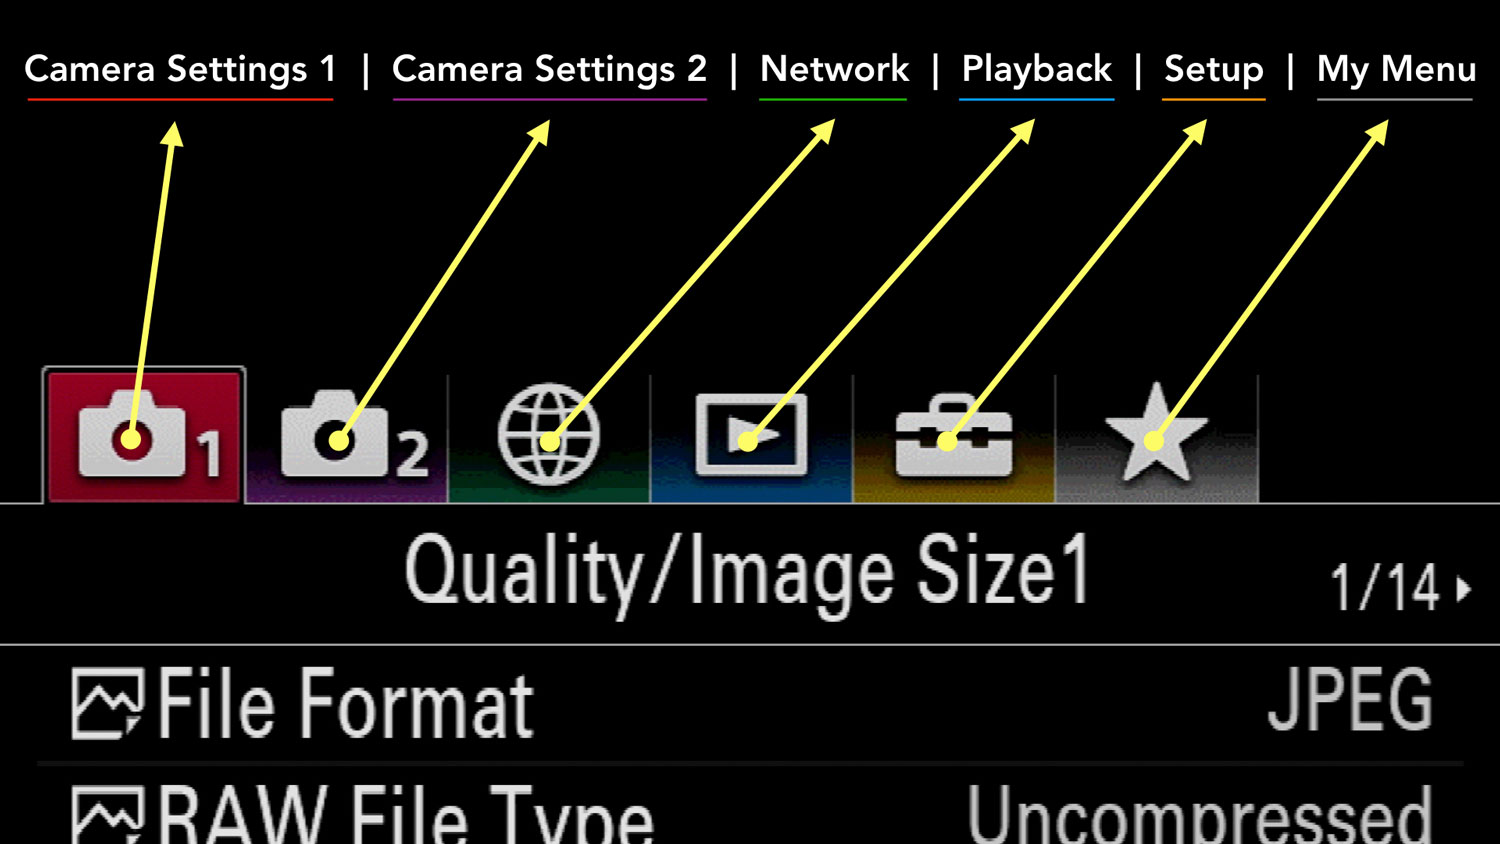
The location of certain settings can vary depending on the specific model. Most of the time it is a matter of checking the previous or next page. The mark I and mark II series have an older menu setup with differences concerning icons and names (Camera Settings 2 is called Custom Settings for example).![]()
![]()
Ethics statement: we own the Sony A7 III and Sony A7R III, and we’ve tested most of the mark I, mark II, mark III series as well as the A9 line-up. We were not asked to write anything about these products, nor were we provided with any sort of compensation. Within the article, there are affiliate links. If you buy something after clicking the link, we will receive a small commission. To know more about our ethics, you can visit our full disclosure page. Thank you!
TABLE OF CONTENTS
1. Preamble: flash
2. Low Light Settings
3. ISO
4. ISO Invariance
5. Image Stabilisation
6. Autofocus Settings
7. RAW and JPG Settings
8. Image Samples and Case Studies
Reminder: the links below are affiliate links. If you decided to buy something after clicking the link, we will receive a small commission.
Check price of the Sony A7 III on:
Amazon | Amazon UK | B&H Photo | eBay
Check the price of the Sony A7R III on:
Amazon | Amazon UK | B&H Photo | eBay
Check price of the Sony A7R IV on
Amazon | Amazon UK | B&H Photo | eBay
Check price of the Sony A9 on
Amazon | Amazon UK | B&H Photo | eBay
Check price of the Sony A7 II on:
Amazon | Amazon UK | B&H Photo | eBay
Check price of the Sony A7R II on:
Amazon | Amazon UK | B&H Photo | eBay
Second-hand Sony gear on
MPB US | MPB UK
Preamble: low light photography and flash
In this article, I decided to concentrate on the best settings to use when there is a lack of light. The aim is to give you tips and advice so that you can make the most out of your Sony camera and the limited light around you.
That being said, remember that one of the best solutions to counteract a low light situation is to use a flash. Of course there will be situations where it won’t make a difference (urban cityscapes) or where it is not allowed (museums). But it is a good thing to learn how to use it, especially when photographing a subject at a short distance or people at an event.
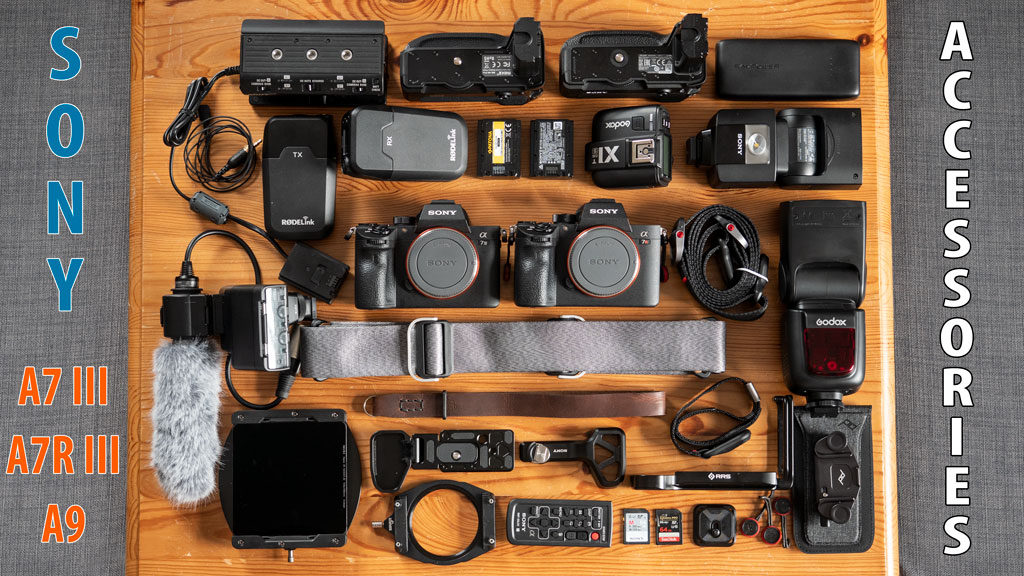
If you’re looking for a flash for your A7 camera, check out our recommended accessory list below.
Sony A7 III, A7R III, A9 Low Light Settings
In good light conditions, you generally want to keep your ISO level down for optimal file quality, then set the desired shutter speed and aperture according to the type of subject (still or moving), or effect (narrow or shallow depth of field).
In less than ideal conditions, you need to make use of that limited light to the best of your knowledge and find the best low light settings to use on your A7 III to get a good exposure. There are different ways to do that, and none of them are very complicated.
One or a combination of the methods below is what you need to set up your Sony A7 III low light photo settings:
- use a fast aperture (if you have a fast lens)
- use a slow shutter speed (with the camera on a tripod, or with the help of image stabilisation)
- raise the camera sensor’s sensitivity (ISO)
Adjusting your aperture and shutter speed can certainly help, but they’re not always a luxury you can afford. You may not have a fast prime lens with you, or you may need to keep a fast shutter speed to freeze the action. In that case, you have to turn to the third setting of the exposure triangle: ISO.
Sony A7 III, A7R III, A9 Low Light Settings: ISO
The first important setting you want to change in a low light situation is the ISO. It helps you making your image brighter or darker.
Trivia: ISO means International Organisation for Standardisation. I know, not an exciting acronym, but it is important in the sense that it standardises the sensitivity measurement across different camera systems, so that photographers can apply the same rules regardless of the product they use. It finds its origin in film, and when transitioning to digital cameras, the same number system was retained to make things easier.
What is ISO on your A7 III, A7R III, A9?
Simply put, it is a function that allows you to increase or decrease the electric voltage on your sensor, making your image darker or brighter. ISO is often described as the setting that allows you to change the sensor’ sensitivity. Technically speaking, this is not entirely correct, but symbolically speaking, it makes things easier to understand, and we like easy!
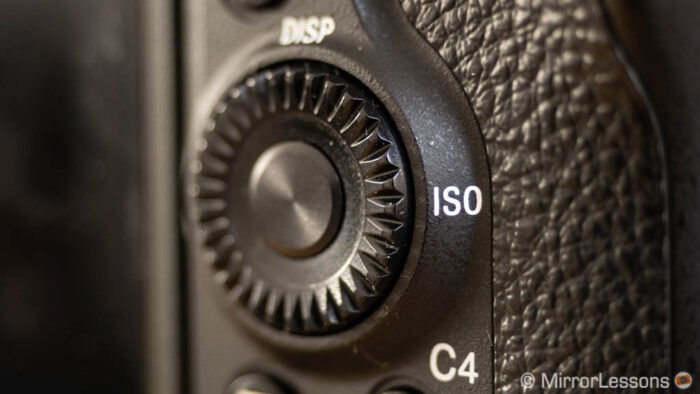
On your Sony A7 / A9 camera, ISO can be controlled with the right button on the rear control wheel, unless you assigned this function to another custom button.
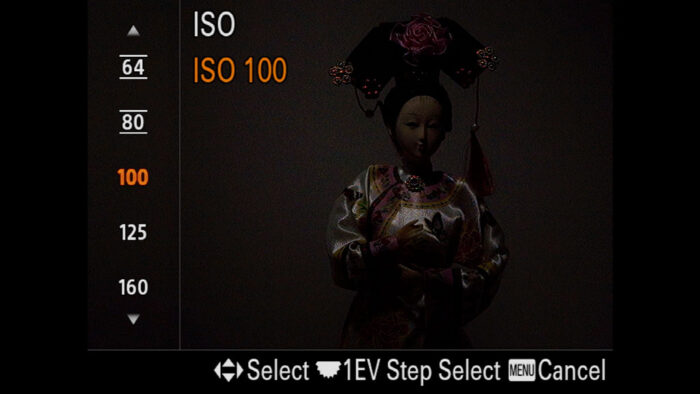
- Set your desired aperture and shutter speed
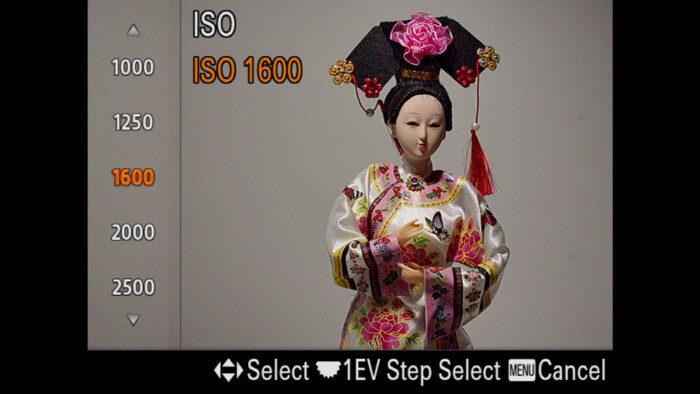
- Press the ISO button and scroll through the ISO range until you reach a level that shows optimal brightness on the screen. If Settings Effect On is active for Live View Display (Camera Settings 2, page 7/9), you should see the change in real time. Alternatively, you can check the metering measurement at the bottom centre of the screen.
On a digital camera, there are three types of ISO:
- native: the level for which no change in voltage to the sensor is required
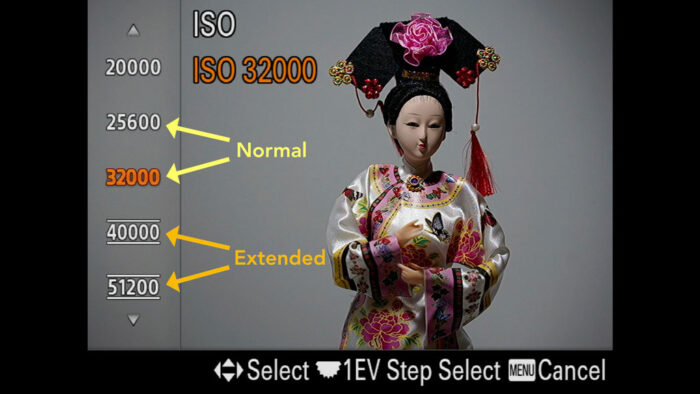
- amplified (also referred to as normal range): the range in which you can decrease or increase the voltage to the sensor
- simulated (commonly know as extended): the level where the brightness of the picture is decreased or increase by the camera software.
The native ISO is rarely mentioned in camera specifications.
The normal range of your Sony camera starts from 100 and, depending on the model, goes up to 25600, 51200 or even 102400 ISO. The extended ISO is displayed with over and under lines and can go as high as 409600 on certain models.
| Camera model | Normal range | Extended range |
|---|---|---|
| A7 III A9, A9 II | 100 to 51200 ISO | 50 / 204800 ISO |
| A7R II, A7R III A7R IV | 100 to 32000 ISO | 50 / 102400 ISO |
| A7, A7 II | 100 to 25600 ISO | 50 ISO |
| A7S, A7S II | 100 to 102400 ISO | 50 / 409600 ISO |
From all this technical information, what you really need to retain is this: the more your raise the ISO, the more noise will appear on your image. This happens because the voltage increases on the sensor and the electric signal is amplified as a result. More signal equals more noise.
The good news is that your A7 III is very good in low light, and so is your A7R III, A7R IV and A9. They all deal with noise very well.
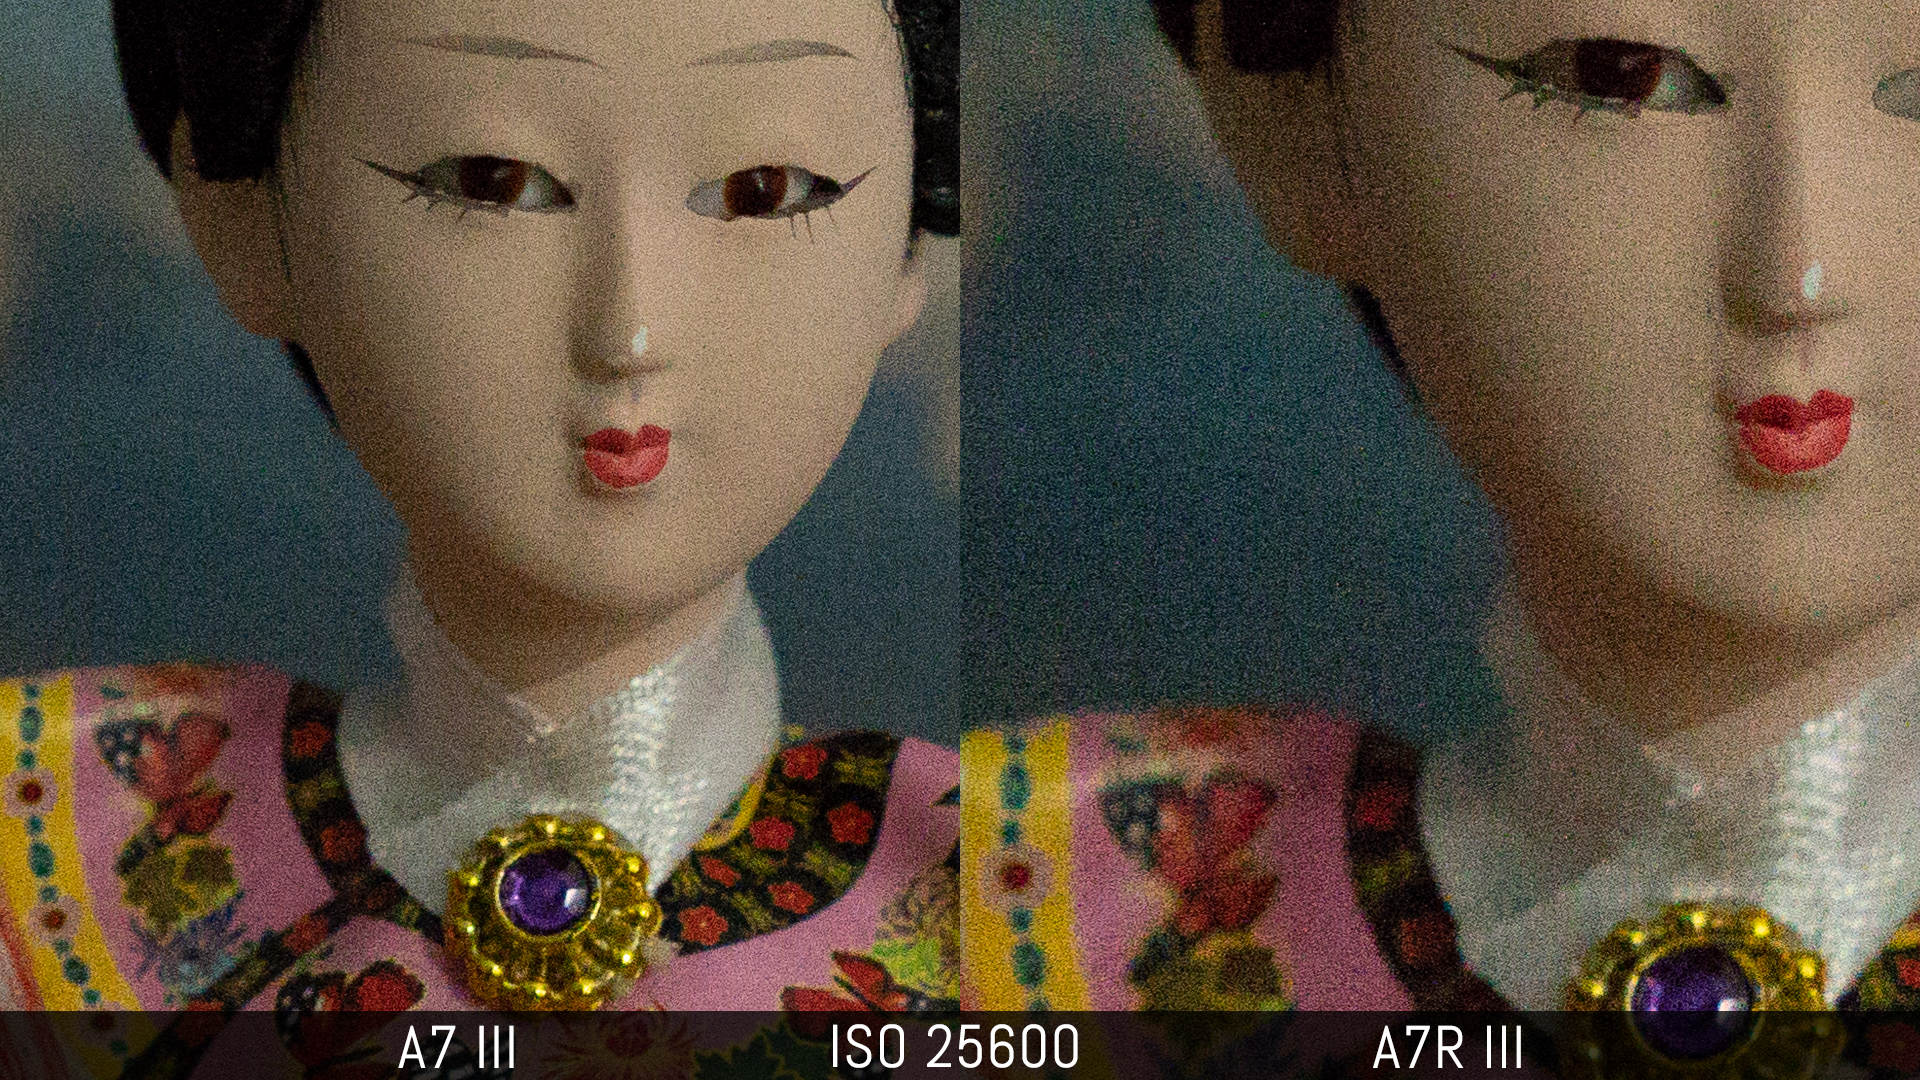
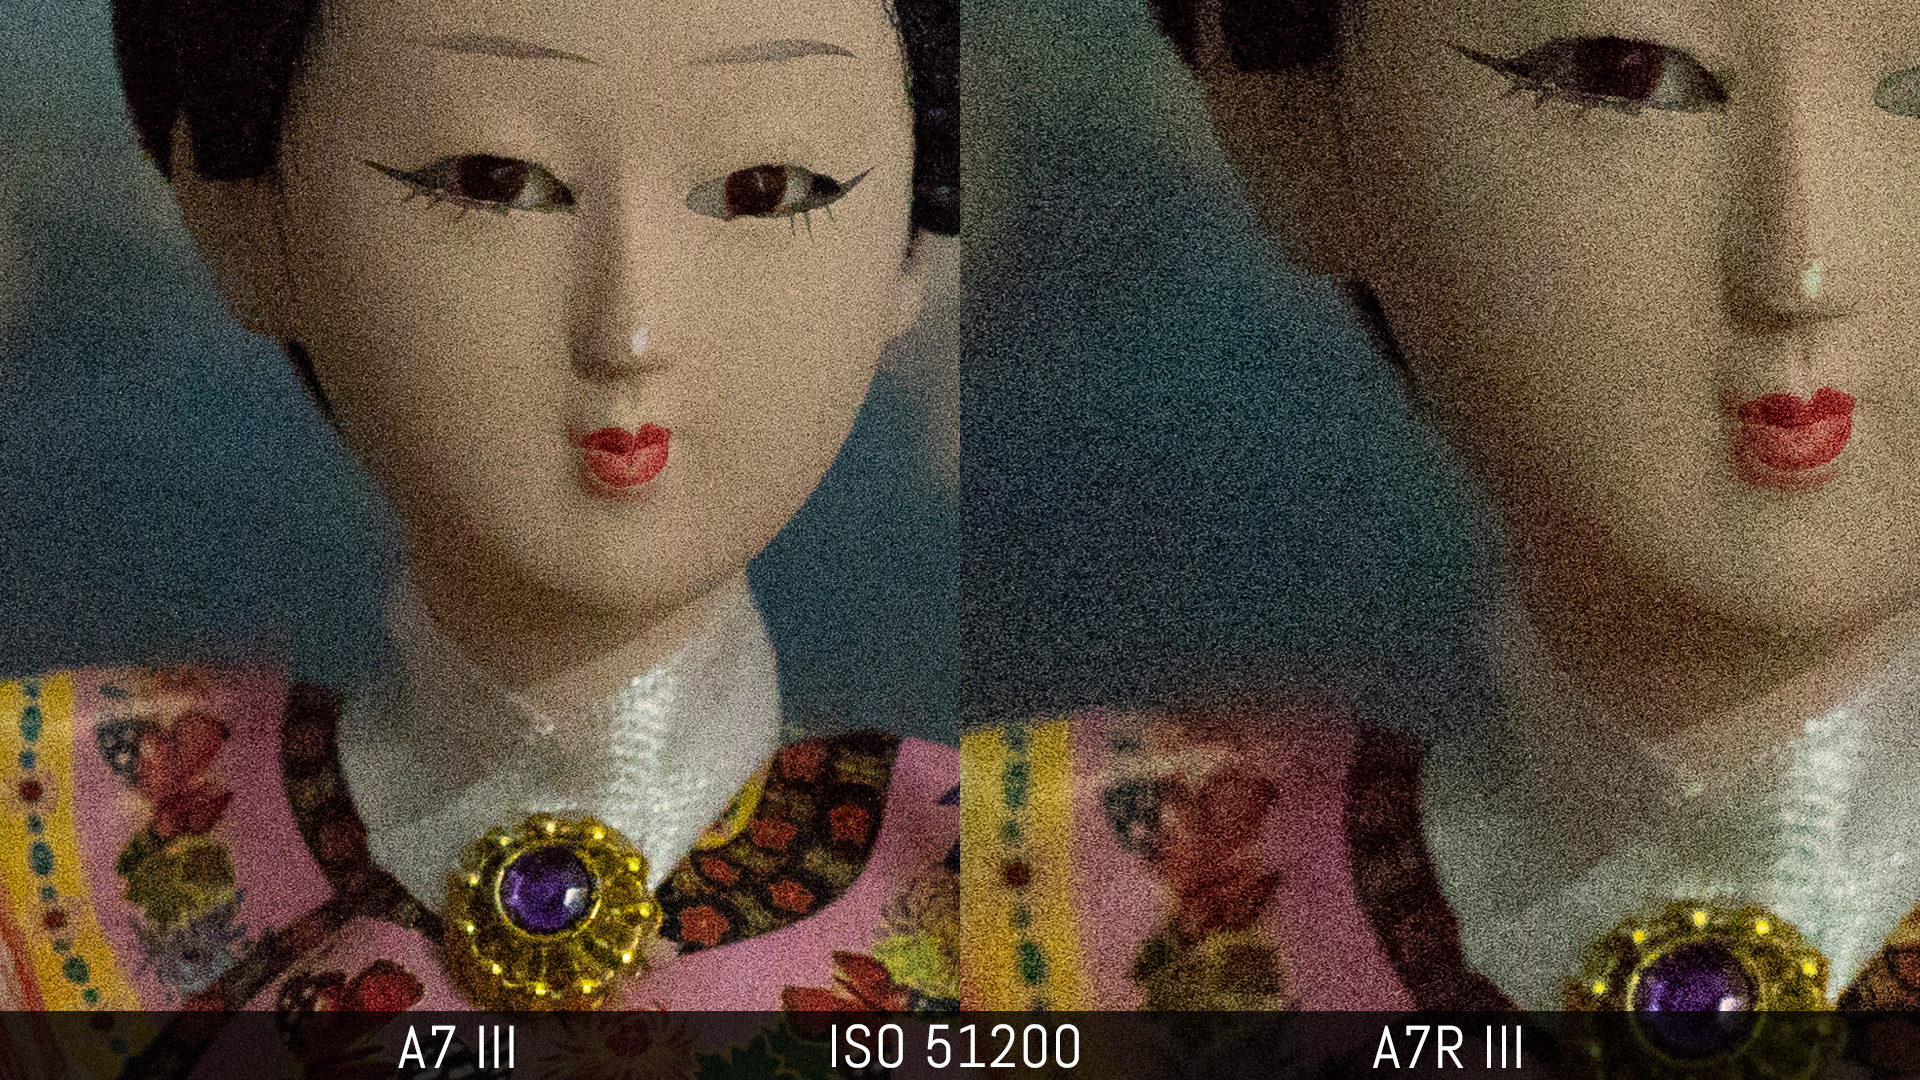
I have no problem pushing the A7R III or A7R IV up to 6400 ISO, or even 12800 ISO if I am in a difficult situation. With the A7 III and A9 series, I am comfortable up to 12800 ISO and can occasionally push it 25600 ISO if that means bringing the shot home. The A7S is the most capable of all E-mount products thanks to the lower megapixel count.
Generally, I avoid the extended high ISO setting because the quality really deteriorates.
You can see an example below that compares the A7 III and A7R III.


To see more side-by-side high ISO comparisons between Sony cameras, check out the following articles:
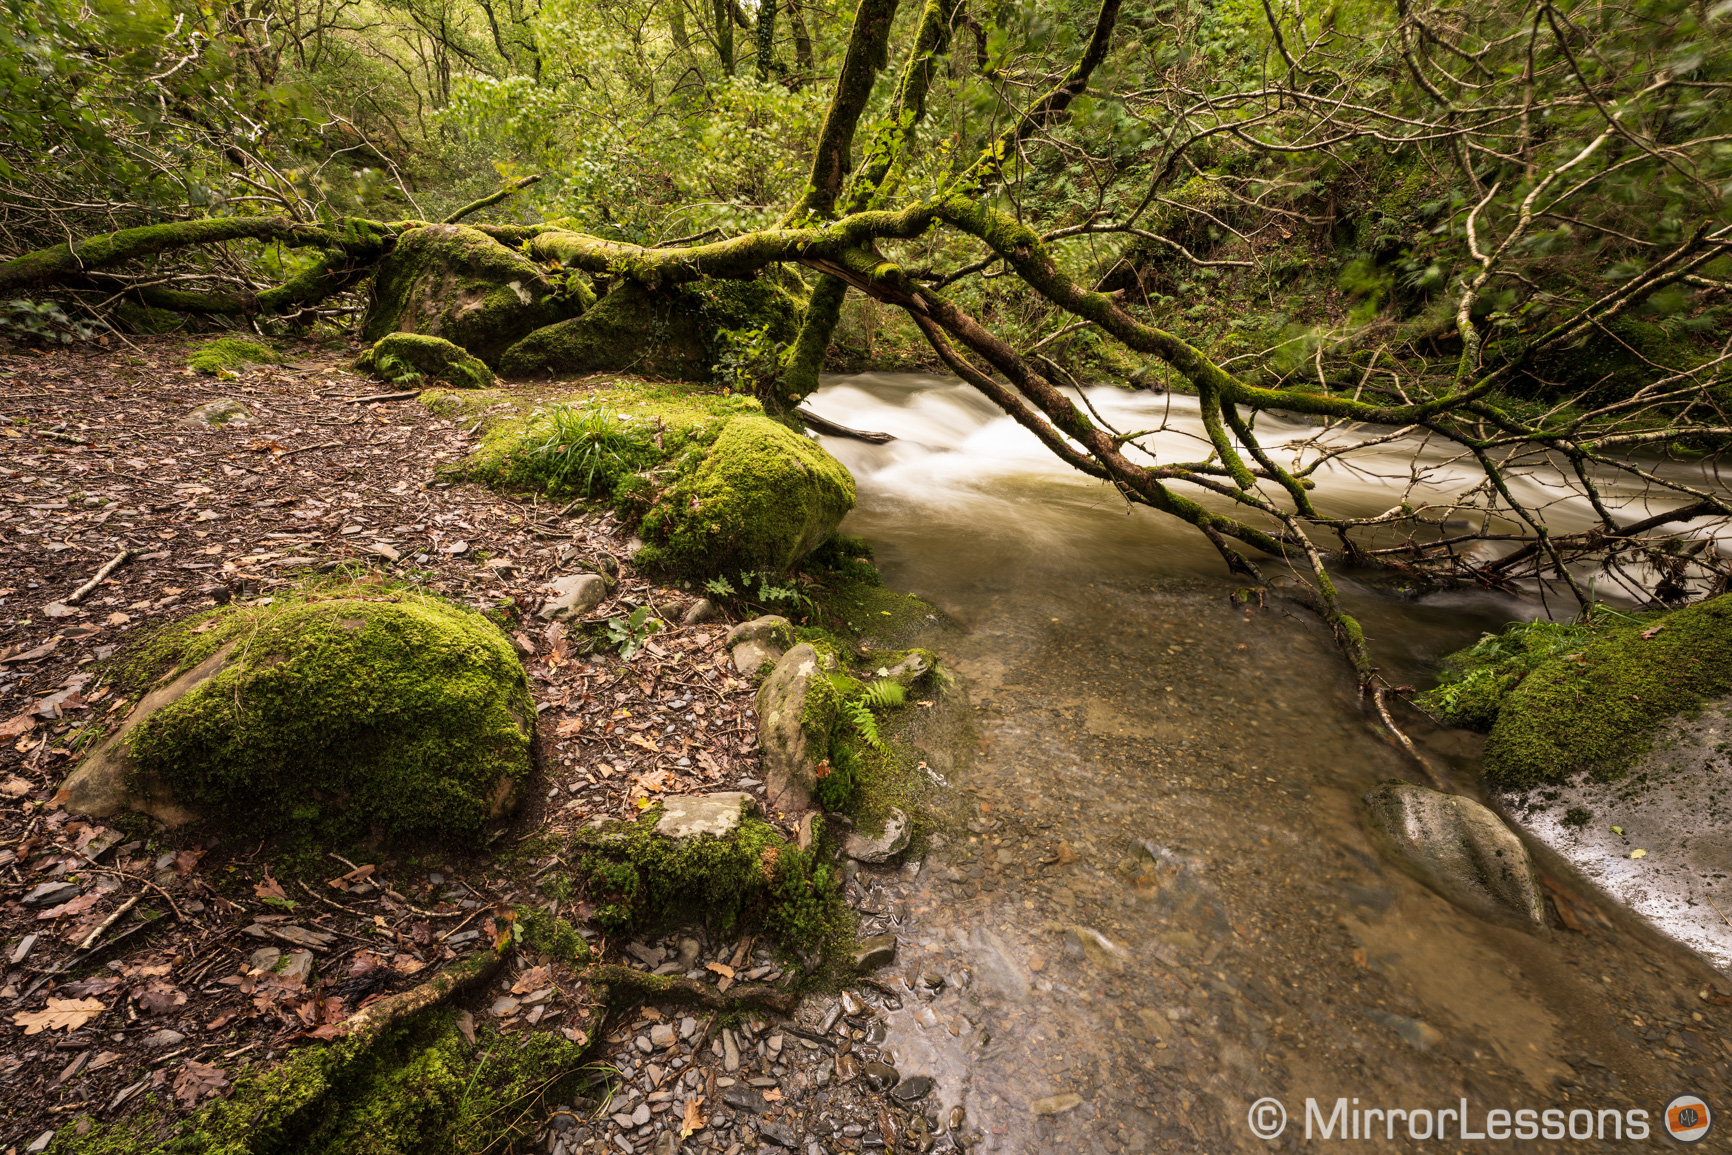
With extended “pull” values (below ISO 100), you have a little bit less dynamic range but it can be useful in certain situations. For example if you’re taking long exposures of a small river in the woods during the day, stopping down from ISO 100 to ISO 50 allows you to set a slower shutter speed and further smooth out the movement of the water. It won’t make a huge difference, but if you don’t have your ND filters with you, it’s better than nothing.
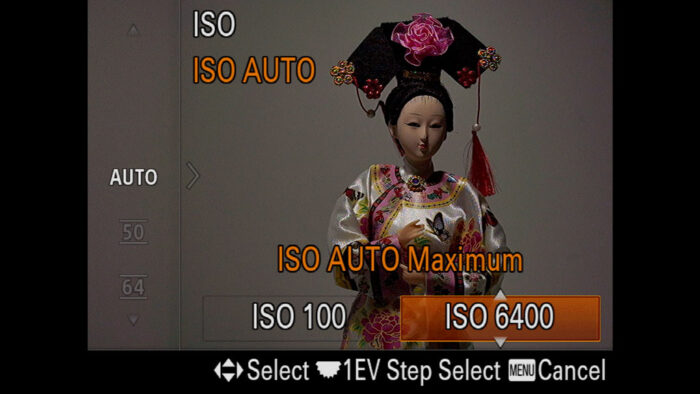
If you’re unsure which ISO level to use, you can set it to Auto.:
- Press the ISO button and scroll up until you reach Auto
- Use the left and right button to select the minimum and maximum value you want the camera to work in
- Press the Centre button to confirm.
Auto ISO is a very useful setting and I use it a lot for events, sports and wildlife.
Note: the extended high ISO values are not available with Auto.
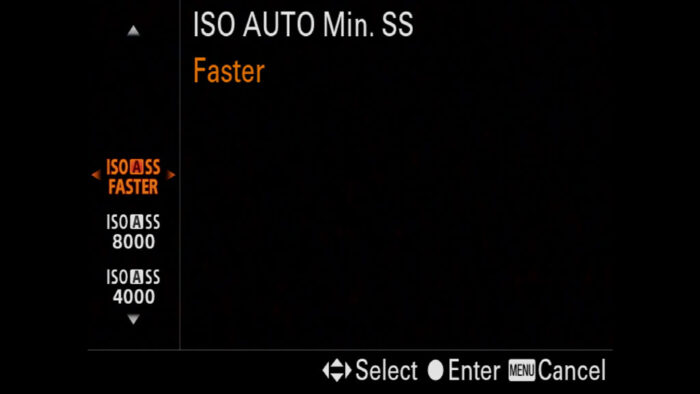
Along with Auto ISO, there is another setting called ISO AUTO Min. SS. With it, you can instruct the camera to not go below a certain shutter speed when working in P or A modes (Program or Aperture). This is useful in situations with movement or action, or in other words, where you don’t want the camera using an overly slow shutter speed.
This setting is not available on the A7 I series or the A7 mark II model.
To configure ISO Auto Min. S.S.:
- Go to Camera Settings 1 / Exposure 1 (page 9/14)
- Go to ISO AUTO Min. S.S.
- The first option allows you to choose a Slower / Slow or Fast / Faster speed in comparison to Standard. If for example the camera is using 1/30s with standard and you want the speed to be higher, choose Fast or Faster. Fast corresponds to +1Ev (so 1/60s in our example) or +2Ev (1/125). Slow and Slower will do the opposite, selecting 1/15 or 1/6s.
- The second option is to choose the shutter speed limit manually. If you choose 1/250s for example, the camera will try* to not go under it.
*Important: if the camera can’t expose properly with the maximum ISO set in Auto ISO, it may use a slower shutter speed that the one you selected. If you can, test the ISO AUTO Min. S.S. setting beforehand to make sure that the camera is following your directions. If it doesn’t, you can try using the exposure compensation dial (negative values) to force the camera to do so.
Sony A7 III, A7R III, A9 in Low Light: ISO Invariance
Dig a bit more into ISO technology and you’ll hear about something called ISO invariance, or ISOless sensor.
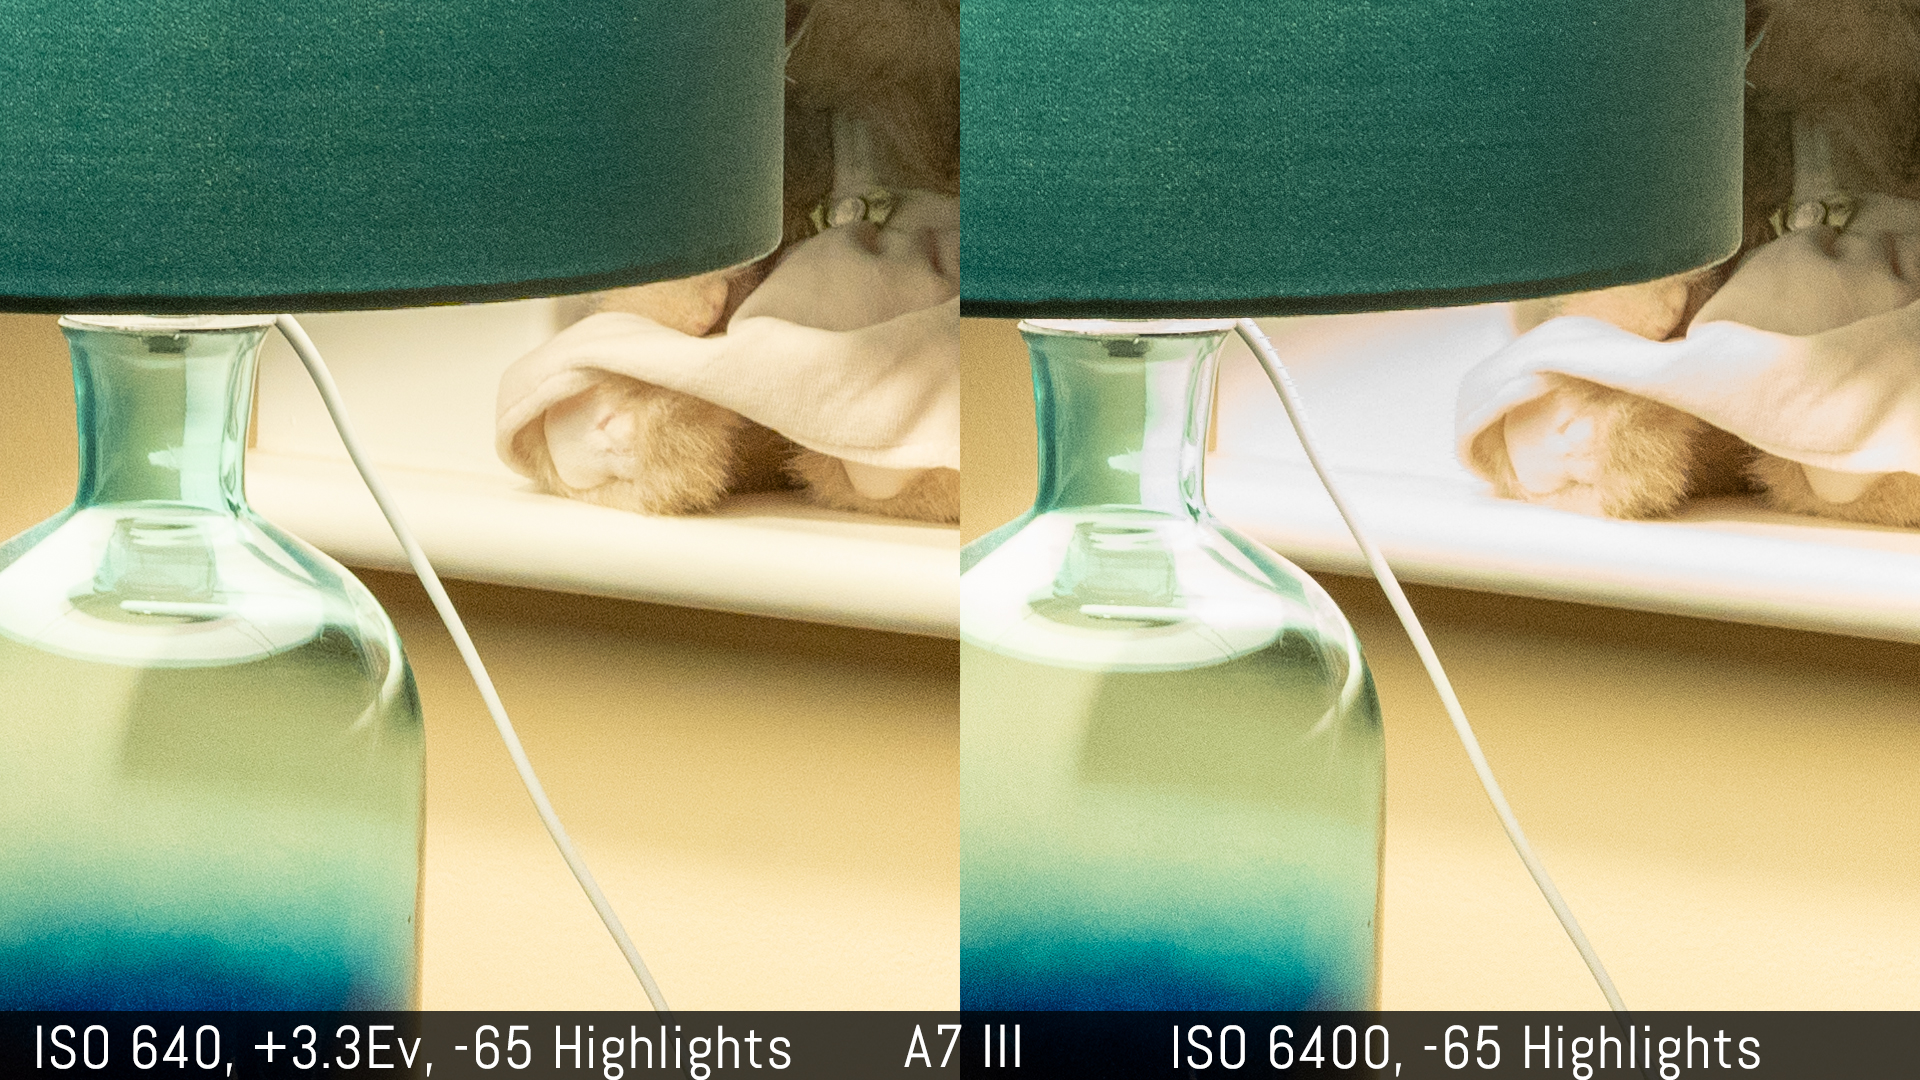
What this means is that instead of shooting at high ISOs, you can keep a lower level (underexpose your image) and raise the brightness with your photo editor software. The amount of visible noise remains more or less the same with the advantage of preserving more highlight information (because the shot was underexposed).
The mark I and mark II series don’t have an ISOless sensor.
Furthermore, recent Sony cameras have more advanced sensors with a dual gain architecture. In layman’s terms, this means that there are two native ISO levels: 100 and 640 ISO. From 100 to 500, the first gain operates. From 640, the second gain takes over. This allows these sensor to have better performance at high ISOs.
Below you can see a practical example with the Sony A7 III, where I took a correctly exposed image at 6400, and then a second where I dropped the ISO level to 640 and recovered the exposure in post.
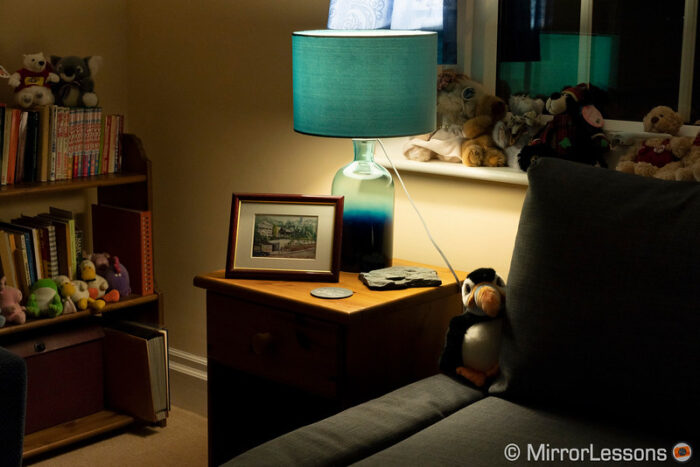

Personally, I rarely use this method because I like to get my exposure correct while shooting. But in some situations, I acknowledge it can be useful. For example if you live in a big city and like to do night photography with your Sony A7 III, underexposing your shot will help you preserve more highlights around the multiple vibrant sources of artificial light that fill the streets.
Sony A7 III, A7R III, A9 Low Light Settings: Image Stabilisation
A basic solution to deal with night photography is to put your camera on a tripod and use a very slow shutter speed to give the sensor more time to capture the light. But what if you don’t have a tripod?
Well, this is where the in-body stabilisation of your camera can help you. Every A7 model from the mark II generation onwards comes with 5-axis stabilisation. The A9 series is equipped with the same technology as well.
The sensor is attached to a floating mechanism that can compensate for vibrations when using the camera hand held. Sony calls this Steadyshot.
If you own an original A7, A7R or A7s model, there isn’t any IBIS, but you may still be able to get something out of a lens with good optical stabilisation.
How to turn on Image Stabilization on the Sony A7 III and other cameras
You can activate stabilisation in Camera Settings 2 / Shutter Steadyshot (page 4/9).
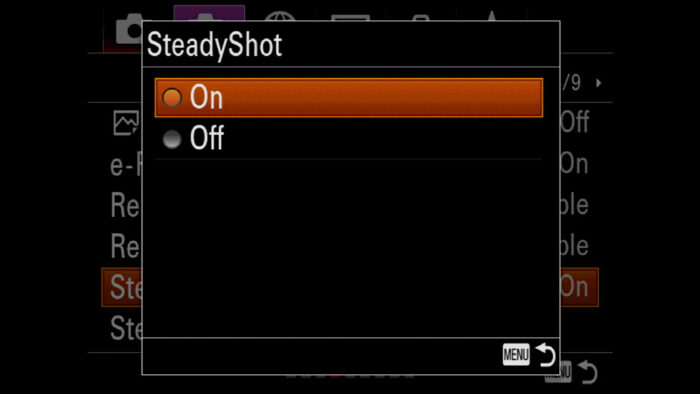
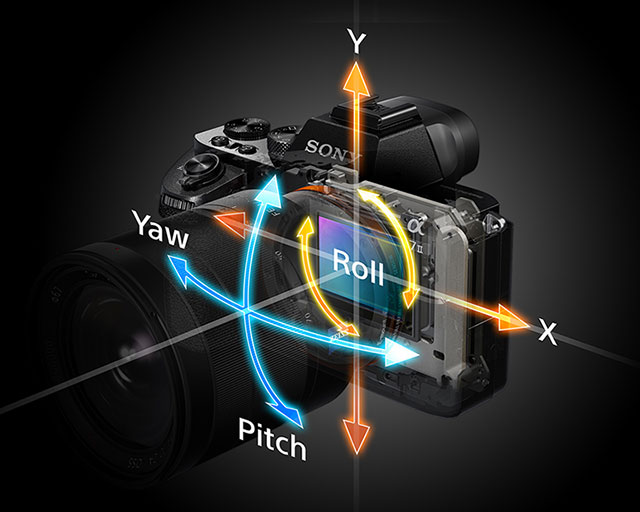
Once activated, the image stabilisation system works automatically with the lens. If the lens is not stabilised, 5 axes are used on the sensor: Pitch, Yaw, Roll, Y and X.
If the lens has OSS, three axes are used on the sensor (roll, X, Y) and combined with the two axes on the lens which are Pitch and Yaw. This is valid for adapted lenses too as long as the adapter and the lens have electronic contacts to communicate with the camera.
The performance of Sony’s five axis stabilisation is good but not exceptional, so you’re going to have to learn your and the camera’s limits. I am saying “your and the camera” together because some people are more steady than others (and can therefore get better results) when taking pictures hand-held.
Personally, I find that the Sony A7 III works well down to 1/10s. This means that I can take a picture at that speed and know that it will be ok most of the time. The performance is not always constant, so it is good practice to double check sharpness in playback mode.
My feedback remains more or less similar for the other models. In fact, I’ve found the performance to have hardy improved since the A7 mark II which was Sony’s first mirrorless camera with IBIS. The more recent A7R IV has brought a few improvements concerning the constancy of performance and the keeper rate, but nothing drastic.
It is possible to use slower shutter speeds than 1/10s – in fact, I’ve been successful even around 1s a couple of times, but it requires some patience and multiple attempts. Also keep in mind that a short focal length (wide angle) will give you better results and a higher keeper rate.
Tip: to minimise motion blur, turn On the e-Front Curtain Shut. The camera will use the electronic shutter when starting the exposure instead of the mechanical curtain, avoiding any possible vibrations caused by the movement of the first curtain. You can find the setting in Camera Settings 2 / Shutter SteadyShot (page 4/9).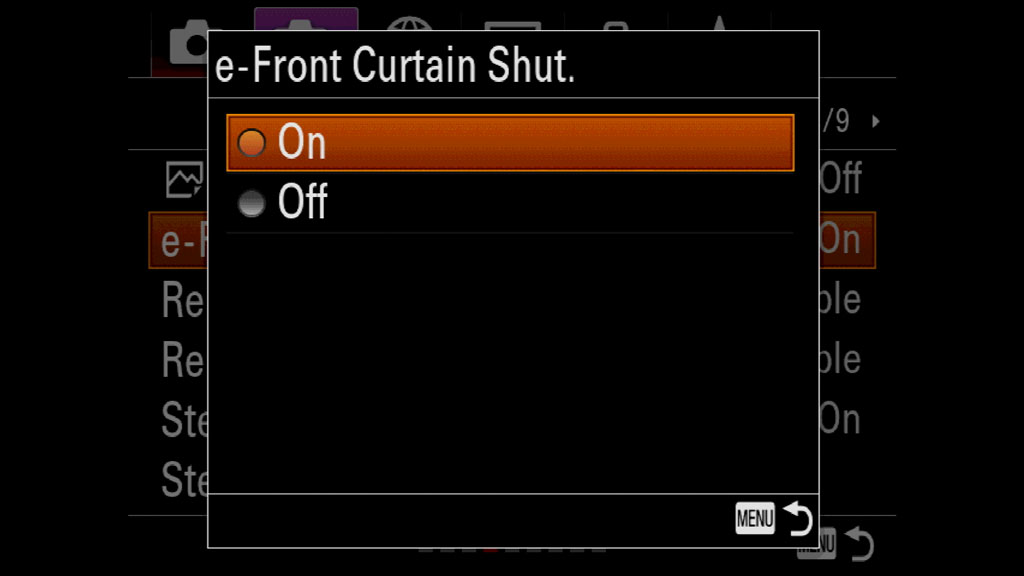
Sony A7 III, A7R III, A9 IBIS Settings for manual focus lenses
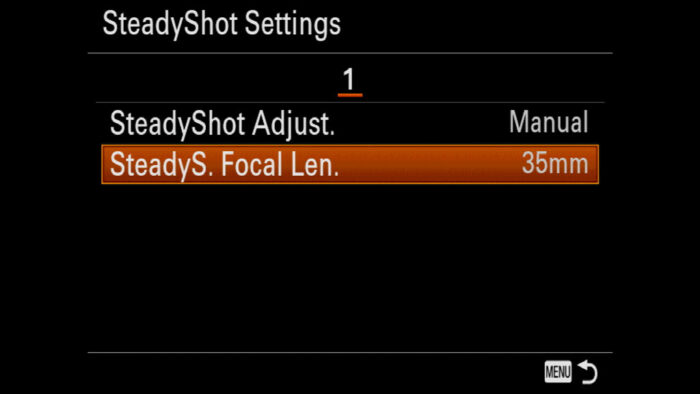
If there are no electronic contacts (for example when adapting an old manual focus lens), you can still use Steadyshot but you need to manually adjust it. For that:
- Go to Camera Settings 2 / Shutter Steadyshot (page 4/9)
- Scroll down to SteadyShot Settings
- Set SteadyShot Adjust to Manual
- Select the focal length in use. That guarantees the optimal performance with your lens.
The performance is not as good as when five axes are used, but you can still get decent results, especially with short focal lengths (wide angle lenses).

To turn the IBIS off and on on your A7 III and other Sony cameras, my advice is to assign the SteadyShot setting to a custom button (mine is on C3). You’ll find it much quicker to activate or deactivate the stabilisation that way.
To learn how to customise your Sony camera, check our article below.
Tips to get better stabilisation with your Sony A7 III, A7R III, A9:
- Make sure that SteadyShot is turned On (Camera Settings 2, page 4/9)
- Activate the e-Front Curtain Shutter (Camera Settings 2, page 4/9); this helps reduce motion blur caused by the movement of the first mechanical curtain
- Press the left button on the rear control wheel and set the Drive Mode to Continuous Shooting Medium or Low; taking multiple pictures in a row raises the chance of having one perfectly sharp
- Put your body in a comfortable and stable position, try to have your feet on an even surface
- If you’re using slow shutter speeds such as 1/2s or 1s, try to hold your breath before pressing the shutter release button
- If you can, rest against a wall, a railing or anything that can provide more stability for yourself
- If you’re not having any success, consider raising the ISO a little and using a faster shutter speed.
- If you’re using a manual focus lens that doesn’t have electronic contacts, the performance is a bit worse (3 axes are used instead of 5) so keep a safer shutter speed.
Sony A7 III, A7R III, A9 Low Light Settings: Autofocus
One factor that determines how good a camera is when focusing in low light is the AF sensitivity range. It goes from a minimum value (for example 0Ev) to a maximum value (for example Ev20). Each Ev step represents a luminance level. The lower the camera can go, the more capable it is of focusing in a dark scene. Remember that this doesn’t tell you whether the camera can focus fast, it just indicates how capable it is of focusing in low light.
Here is the minimum focus sensitivity rating for all the A7 cameras (measured with a f/2 lens):
| Camera model | Minimum focus sensitivity |
|---|---|
| A7S, A7S II | -4Ev |
| A7 III, A7R III, A9, A9 II, A7R IV | -3Ev |
| A7 II, A7R II | -1Ev |
| A7, A7R | 0Ev |
The table above tells us that the A7S series, as well as the A7 III/A9 series, have a better chance of focusing successfully in dark environments than the other models.
I’m not going to dive too much into the autofocus settings because we have a main article dedicated to that.
When it comes to the A7 III and low light photography, just remember these simple tips.
Fast lens? Use it!
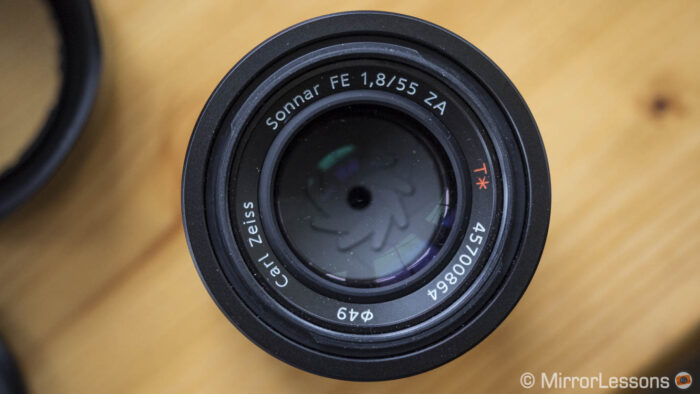
First, if you have a fast lens (f2.8 or faster), use it. Even if you set a higher F number, the camera will open the aperture while focusing in live view. For example, if you have the FE 55mm f1.8 ZA with an aperture set to f/4, the camera will open the iris to f/1.8 to focus, then close it to f/4 to capture the shot. So the larger the aperture, the more light reaches the sensor and the better / faster the camera can focus.
About Stop-Down Focusing
When working in C-AF, Sony cameras may use the aperture you selected while focusing (stop-down focusing) rather than opening the iris to collect more light. This is apparently designed to prevent focus shift on the image, but it can slow down the performance in low light as a result. Turning Settings Effects Off for Live View Display (Camera Settings 2, page 6/9) can solve the problem but apparently it doesn’t work with every lens.
Switch back to AF-S
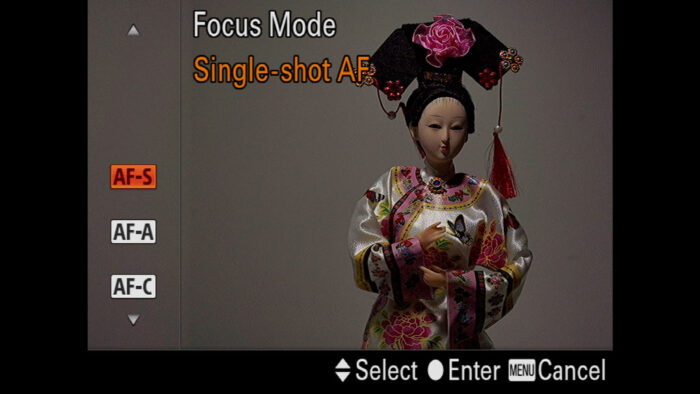
If you don’t have a fast lens, you can still focus fine. Generally, the Sony A7 III in low light will prioritise contrast detection when working in Single AF mode, and will use the larger aperture available to acquire focus (as explained in the paragraph above). The acquisition speed may decrease but contrast detection can prove more useful in very dim situations in comparison to phase detection. So if you are in AF-C and the camera is struggling, try switching back to AF-S.
Change the Focus Area and its Position
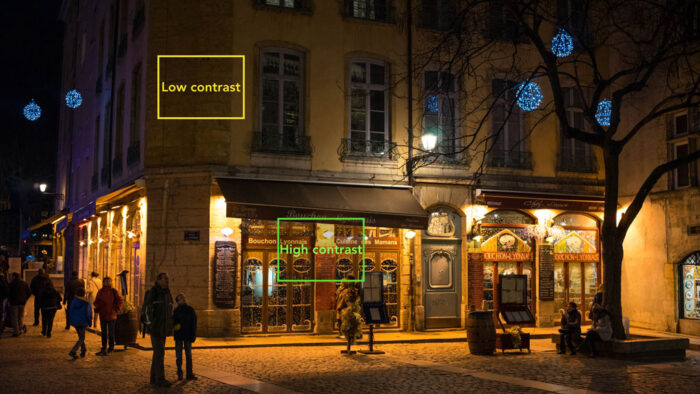
If your camera is struggling, sometimes you need to change the focus area. For example if you’re taking a picture of a building, there might be parts with better contrast than others. Choose the Flexible Spot Area and move it to a zone where there is a better distinction of bright and dark areas. You can also increase the point to Large so that the camera can analyse a bigger area.
Use the AF Illuminator
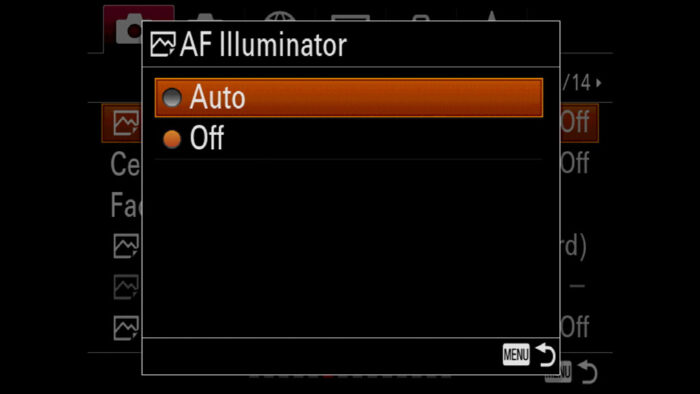
If your subject is close, you can activate the AF Illuminator. The camera will use the LED light at the front to illuminate the subject momentarily and focus. I usually turn off this setting because it makes you less discreet and can annoy people, but in a low light situation it can be very helpful.
Desperate Measure: Use Manual Focus
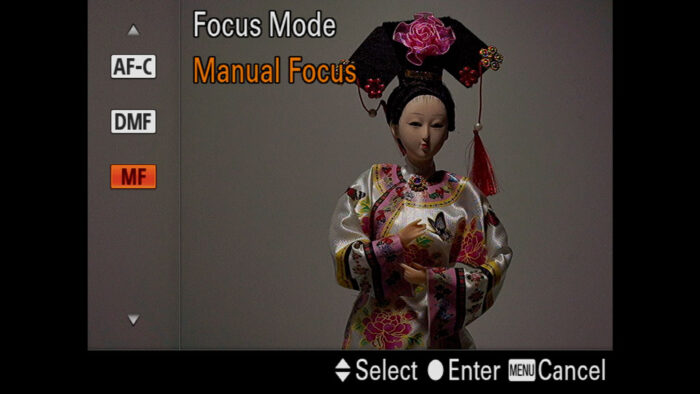
If the camera can’t focus automatically, you might need to switch to manual focus. Make sure that MF Assist is On (Camera Settings 1, page 13/14). That way when rotating the focus ring, the live view magnifies automatically to help you focus more precisely.
To know more about the autofocus settings of your Sony camera, check the article below.
Sony A7 III, A7R III, A9 Low Light Photos: RAW vs JPG
We discuss the difference between RAW and JPG in our Photography Settings article, so I’m not going to repeat everything here.
When dealing with low light situations, choosing between RAW and JPEG can lead to different results.
With RAW, you can control the amount of noise more precisely when post processing the image. If you’re using a good photo editor such as Lightroom, Photoshop, Capture One or similar, you have access to different tools to find the best balance between preserving details and reducing the amount of noise.

Without NR: Color and Luminance NR to 0
With NR: Color NR 15 (Detail 50), Luminance NR to 15 (Detail 80)
Personally, I always choose RAW in low light scenarios, but once again RAW means post production, and some of you might prefer to have a file ready to be shared. This is where JPEGs come in handy.
If you’re shooting JPGs, there is a setting related to the ISO called High ISO NR. It is found in Camera Settings 1 / Quality Image Size2 (page 2/14).
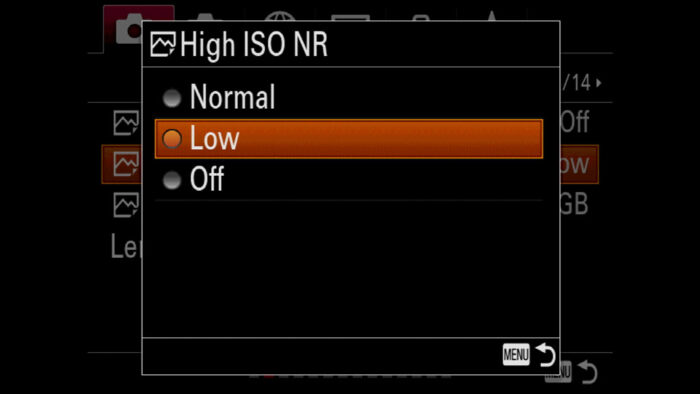
High ISO NR (Noise Reduction) lets you control the amount of noise reduction applied by the camera software to the JPEG file. There are three levels:
- Off: more details are preserved but there is more colour noise
- Low: good compromise between the other two setting, it is the one I use all the time
- Normal: eliminates more noise but washes out more details as a result
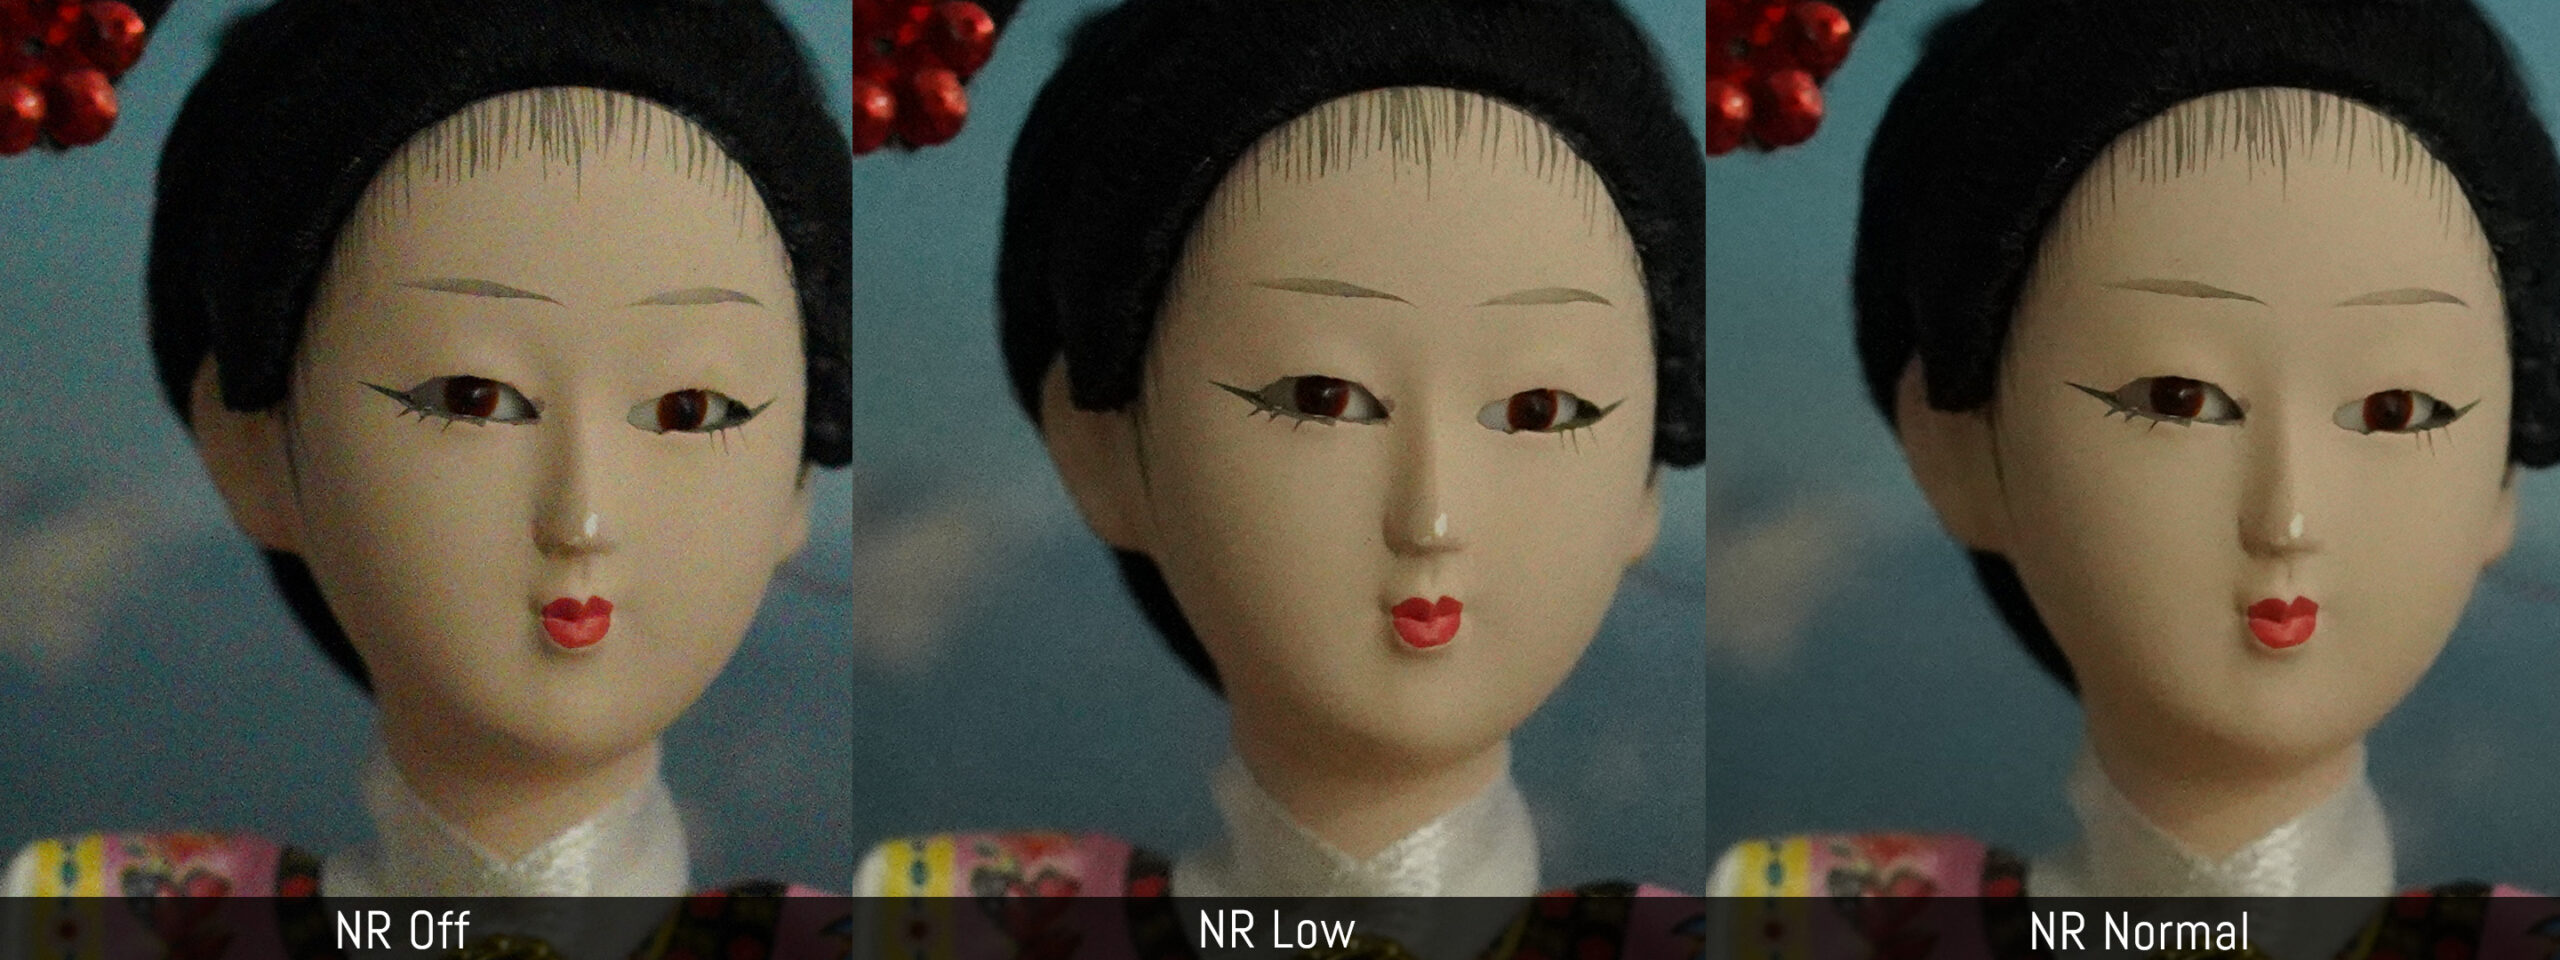
Note: the quality of the High ISO NR setting can vary from camera to camera, especially from an older generation model to a more recent model. The difference is not huge, but camera software and processors improve every year and that can positively (but not always) affect the image processing capabilities of new A7 and A9 models.
Sony A7 III, A7R III, A9 Best Low Light Settings: case studies
Now that we’ve talked about the A7 III settings for night photography, let’s analyse some low light photos taken with the A7 III and other Sony full frame cameras.
Sony A7 II, A7R II Night Shots: Streets
A likely scenario you can find yourself in with your A7 is night street photography. A big city like London can be very well illuminated, whereas a smaller town can be darker.
Our first image was taken while testing the Zeiss Loxia 21mm f2.8. I didn’t know the lens that well back then so I kept an aperture of 5.6 to ensure good sharpness. Going slower than 1/5s was a bit risky, so raising the ISO to 400 gave me a good compromise to retain all the quality of the A7R II files.
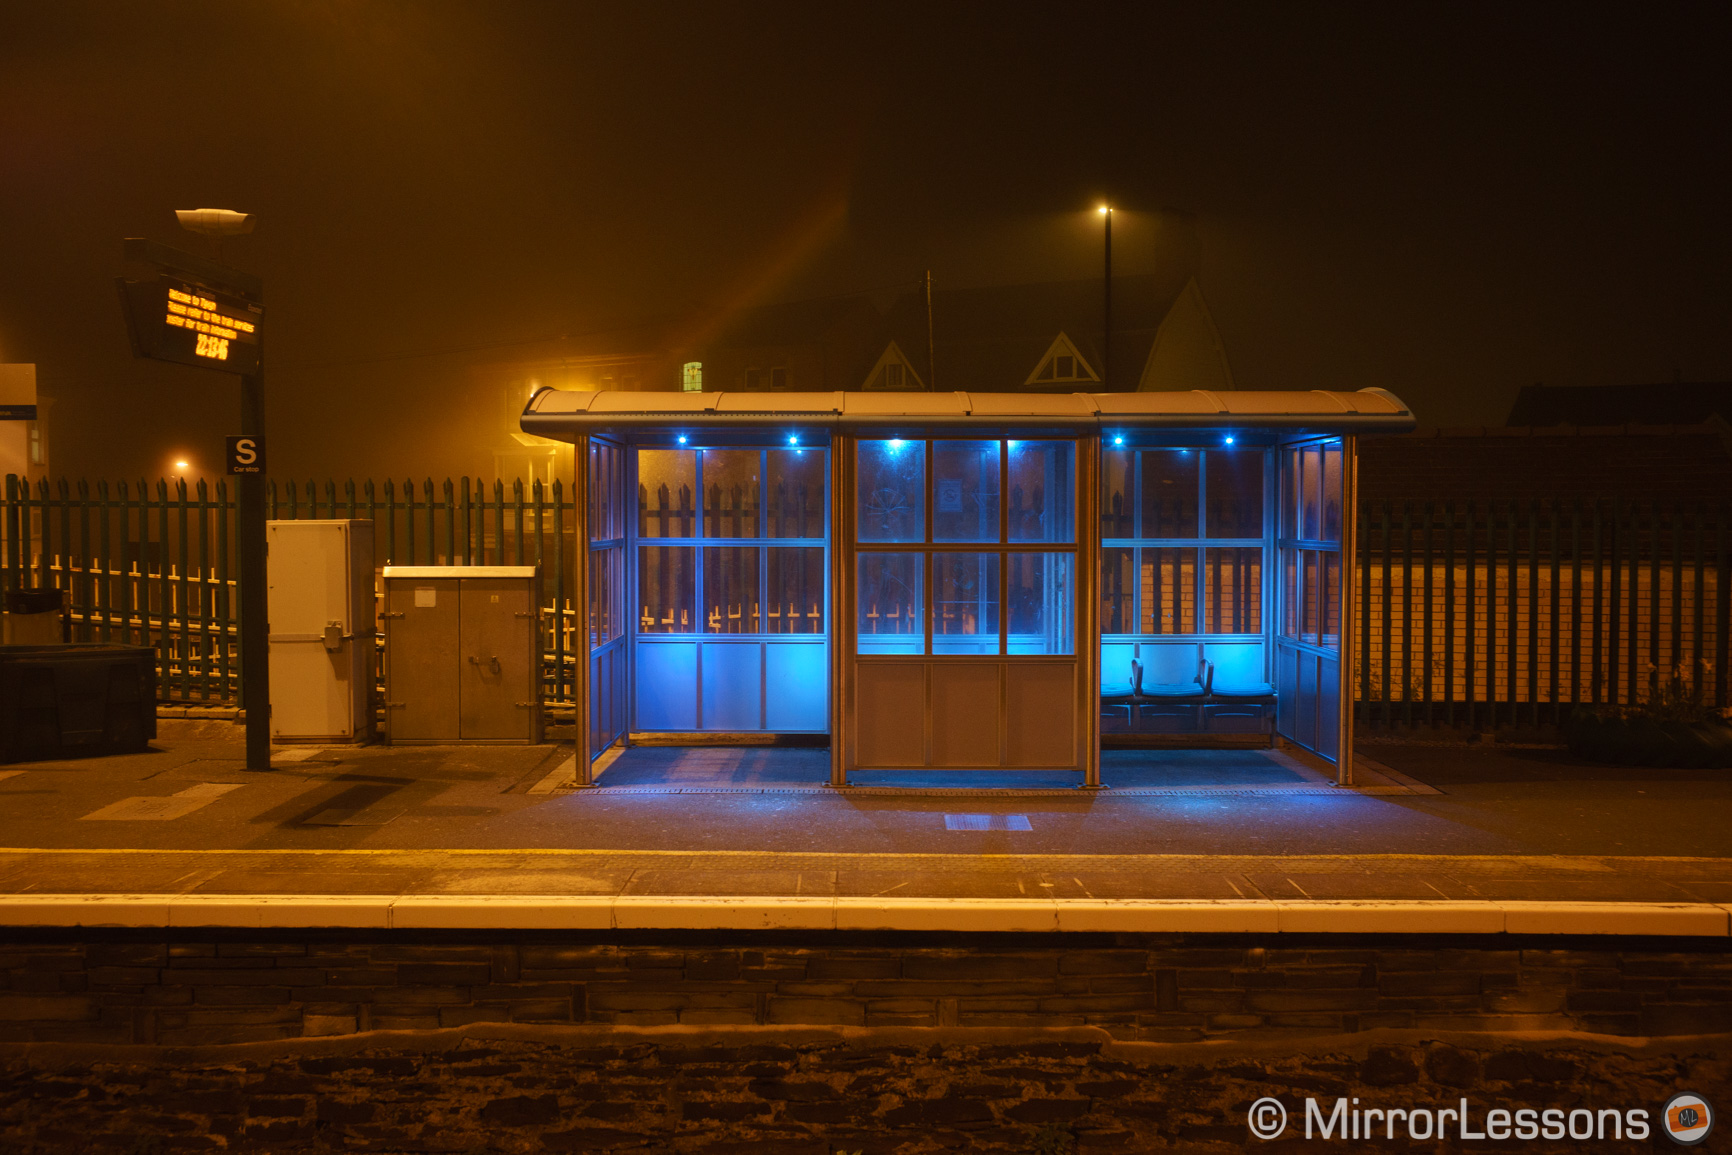
The second example is a deserted train station. I was using a Leica M Summicron 50mm lens, which means that the in-body stabilisation was working on three axes instead of five. After a few attempts, I understood that I had to stay above 1/10s to get a sharp shot. I set the aperture to f/4 (if my memory serves me well because there is no exif data in this image) and raised the ISO to 1600 to have a good exposure.
The last image was taken while I was testing the A7 II for the first time, and I tried to push the 5-axis stabilisation to the limit. To my surprise, I managed a good result down to 1 second, but not without several attempts. It shows it’s possible, but requires some patience and you really need to be as stable as possible. The slow shutter speed allowed me to choose the aperture that I wanted and keep the ISO way down.

Sony A7 III, A7R III Low Light Shots: Indoors
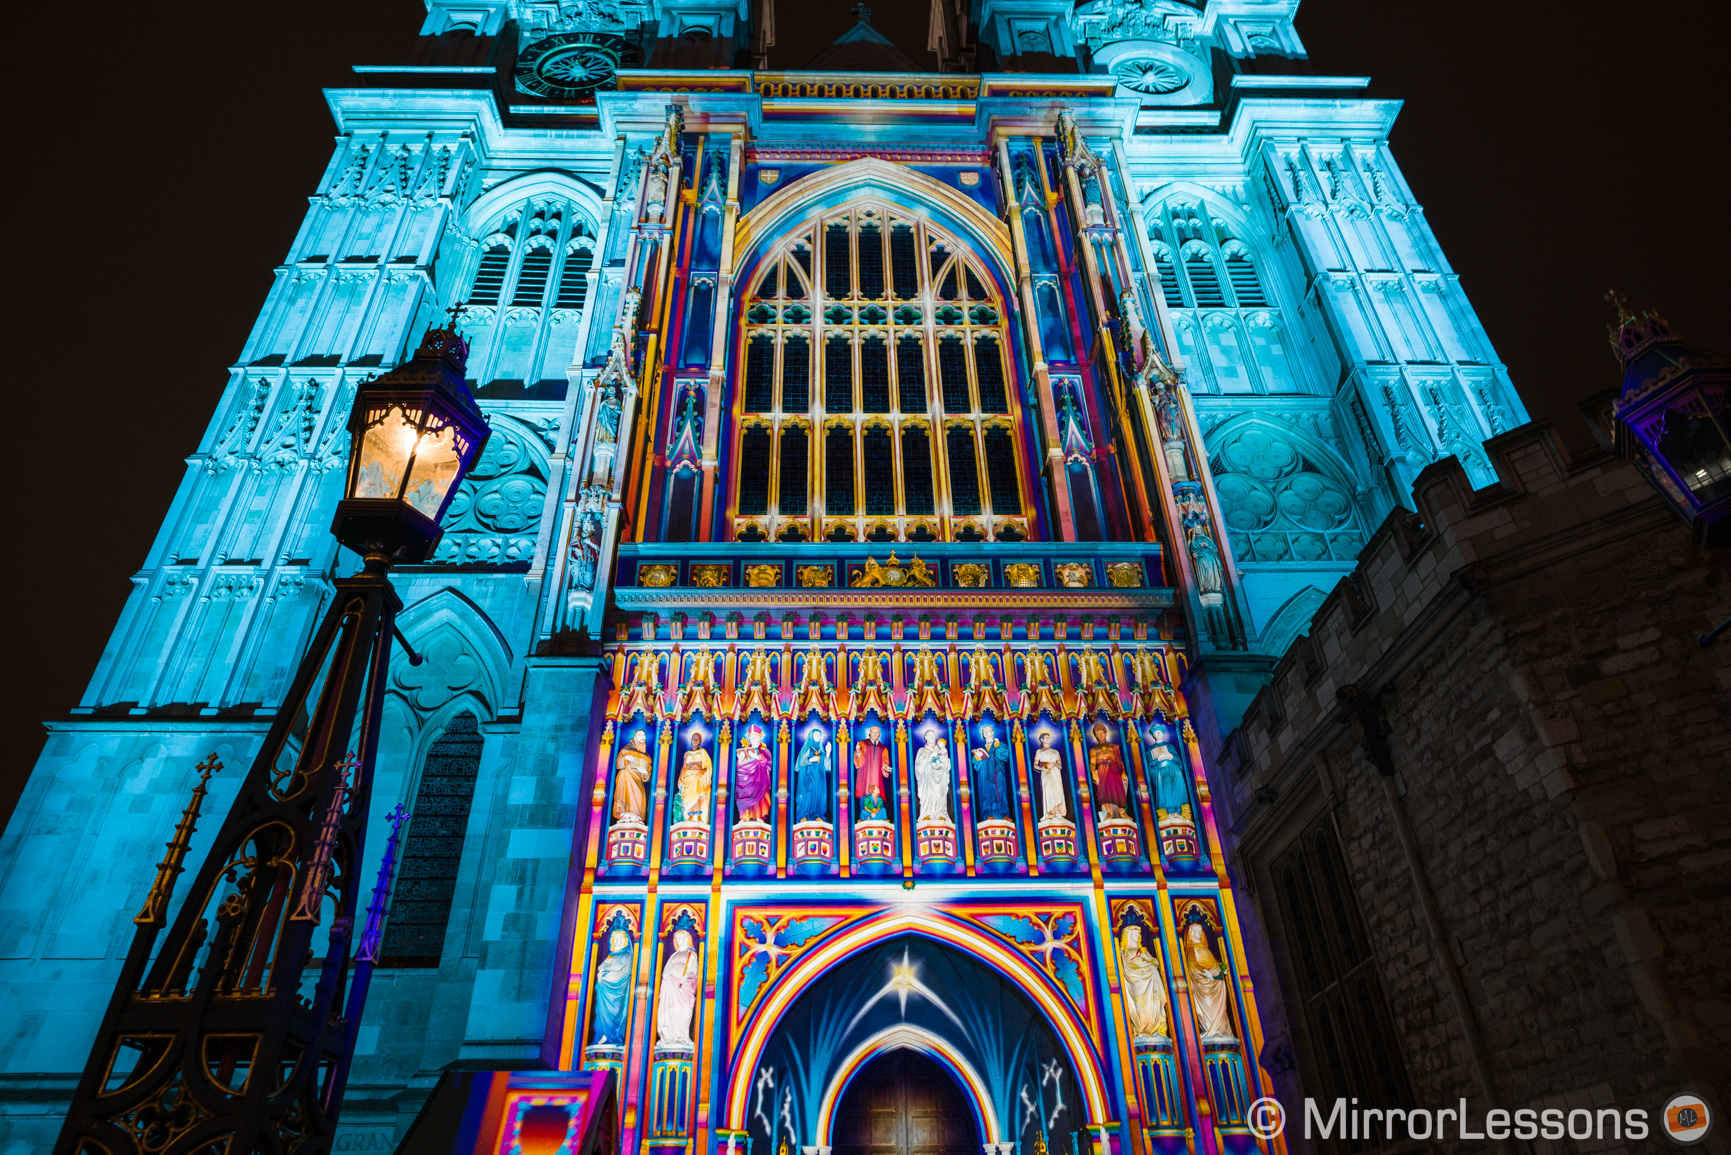
Indoor locations may have a suggestive lighting atmosphere, but that often translates into poor light for our cameras. Even during the day, there might not be enough coming in.
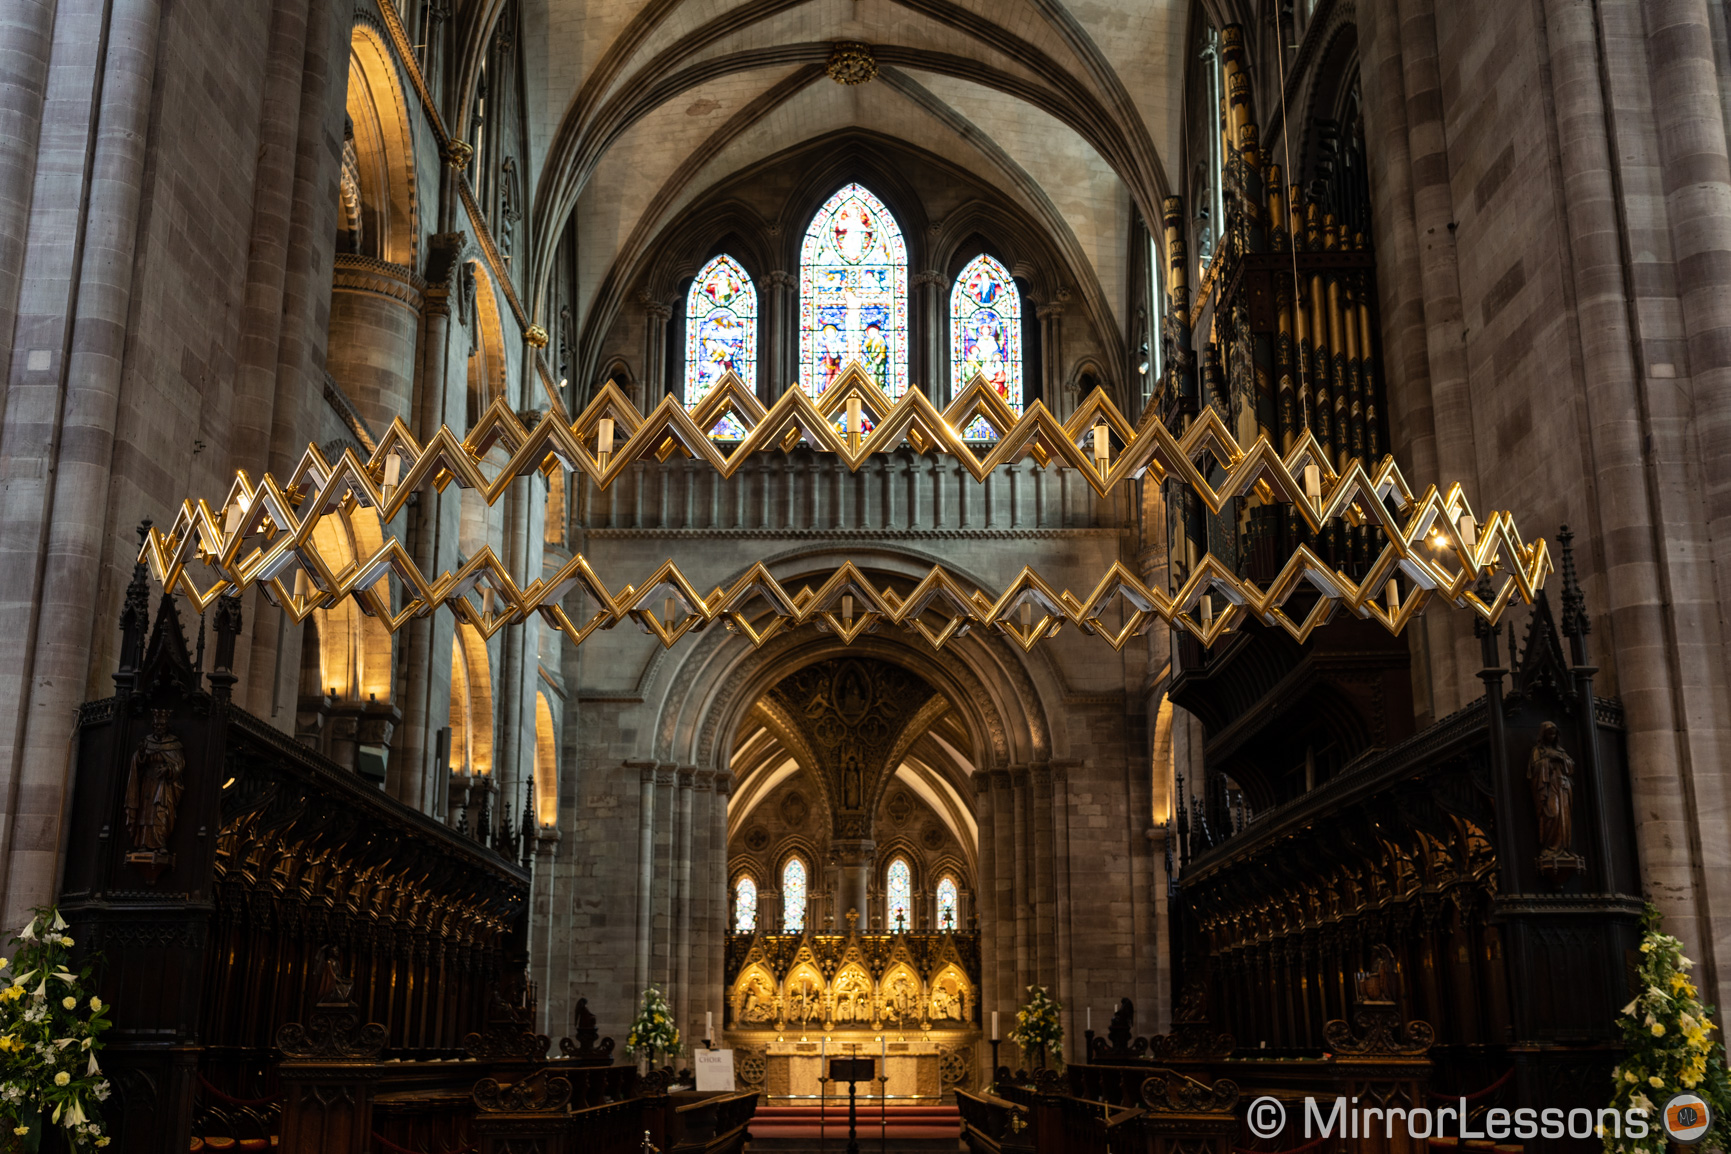
Take the first image below. At first glance you wouldn’t think that it represents a low light situation but if you read the settings I used, you will realise that it was a dark situation indeed. This is because the church is located in a place that is sheltered from sunlight. I was using the 16-35mm 2.8 GM and wanted optimal sharpness across the frame so I set it to 5.6. I pushed the internal stabilisation to to 1/3s (the short focal length helped) and ISO 200 proved to be enough.

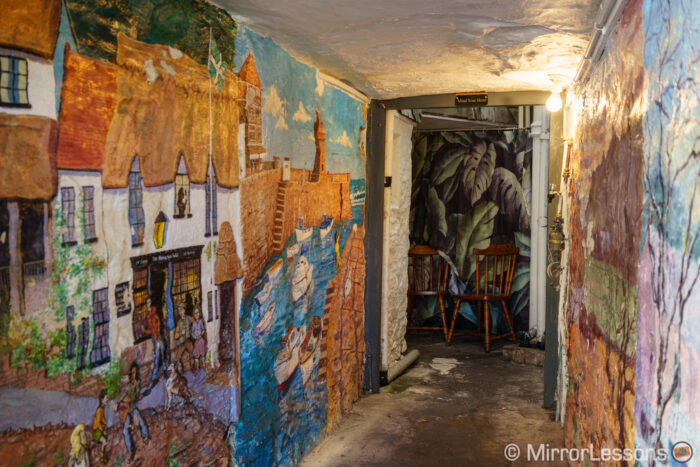
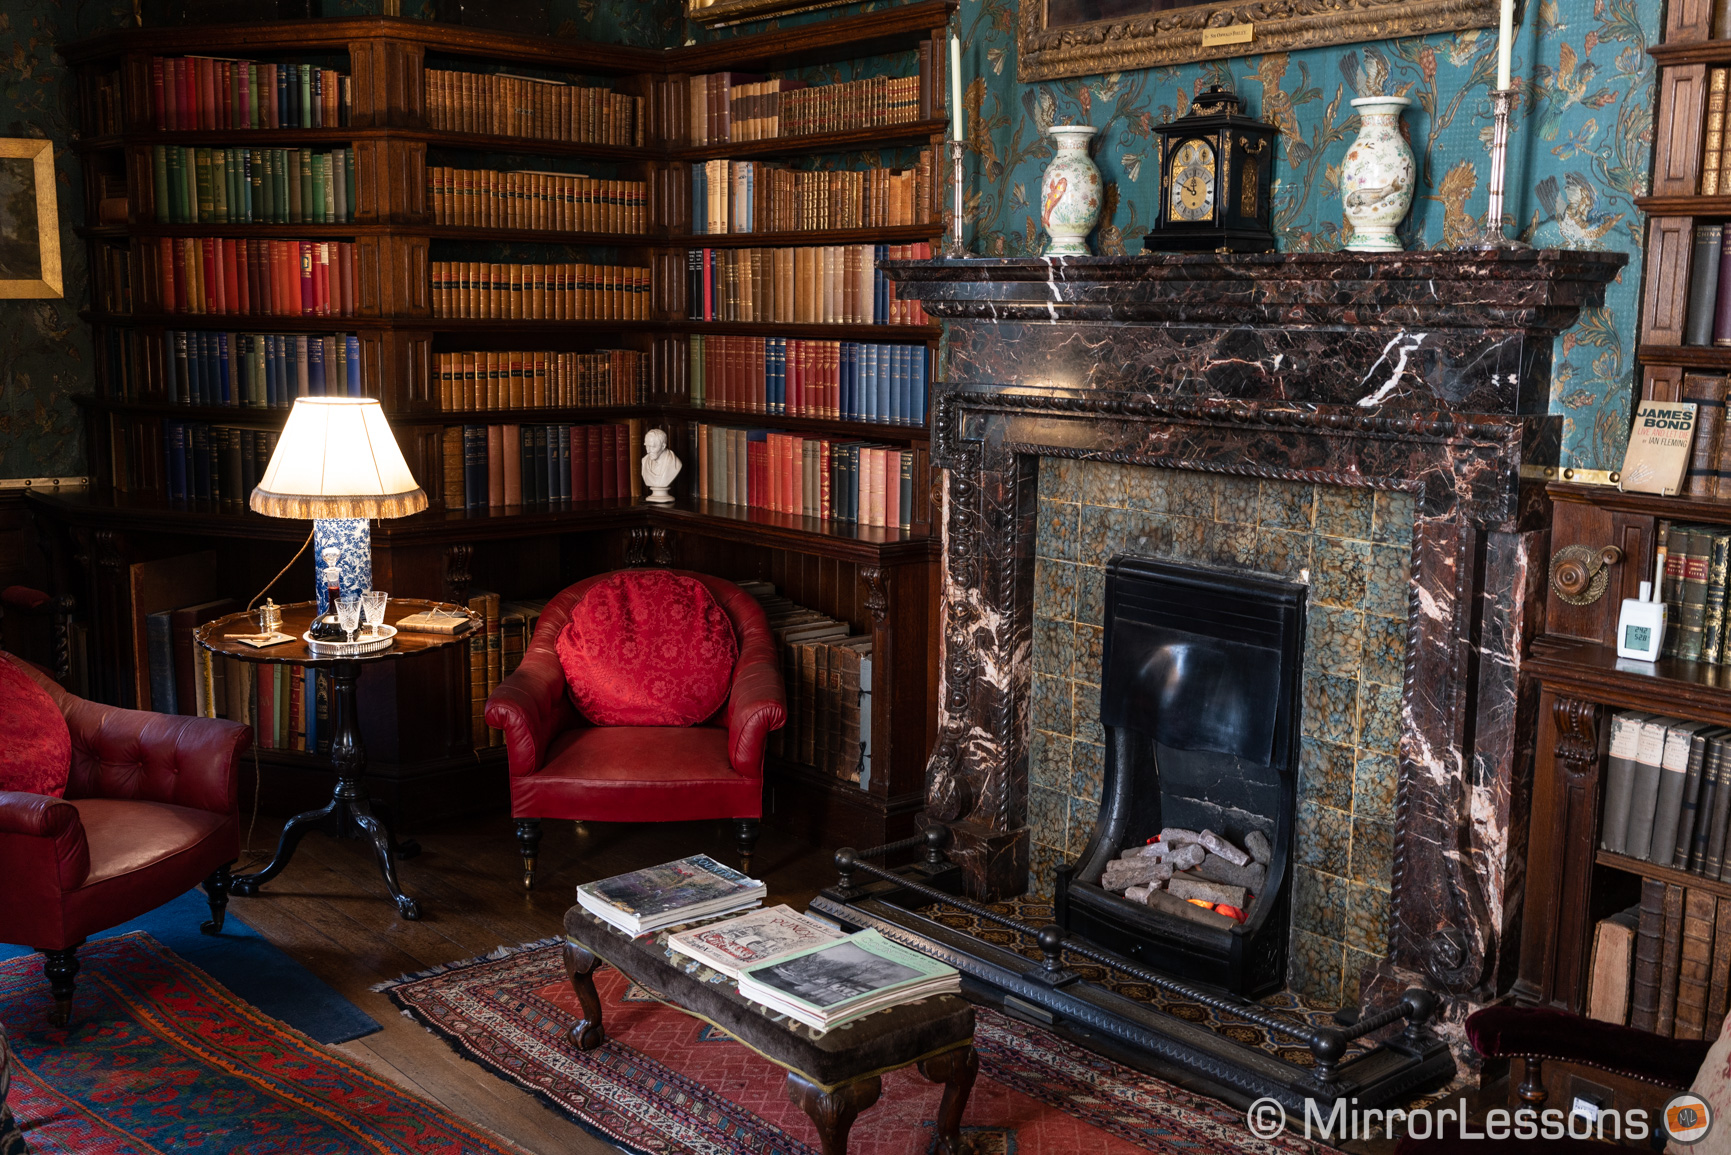
Here is another example of a reading room inside a National Trust building. The FE 35mm 2.8 ZA is good at f2.8 but sharpness improves at f4, especially in the corners. I didn’t want to go below 1/8s to avoid taking the picture too many times since there were people behind me waiting. (Often you can’t walk wherever you want in these places and need to follow a precise path).
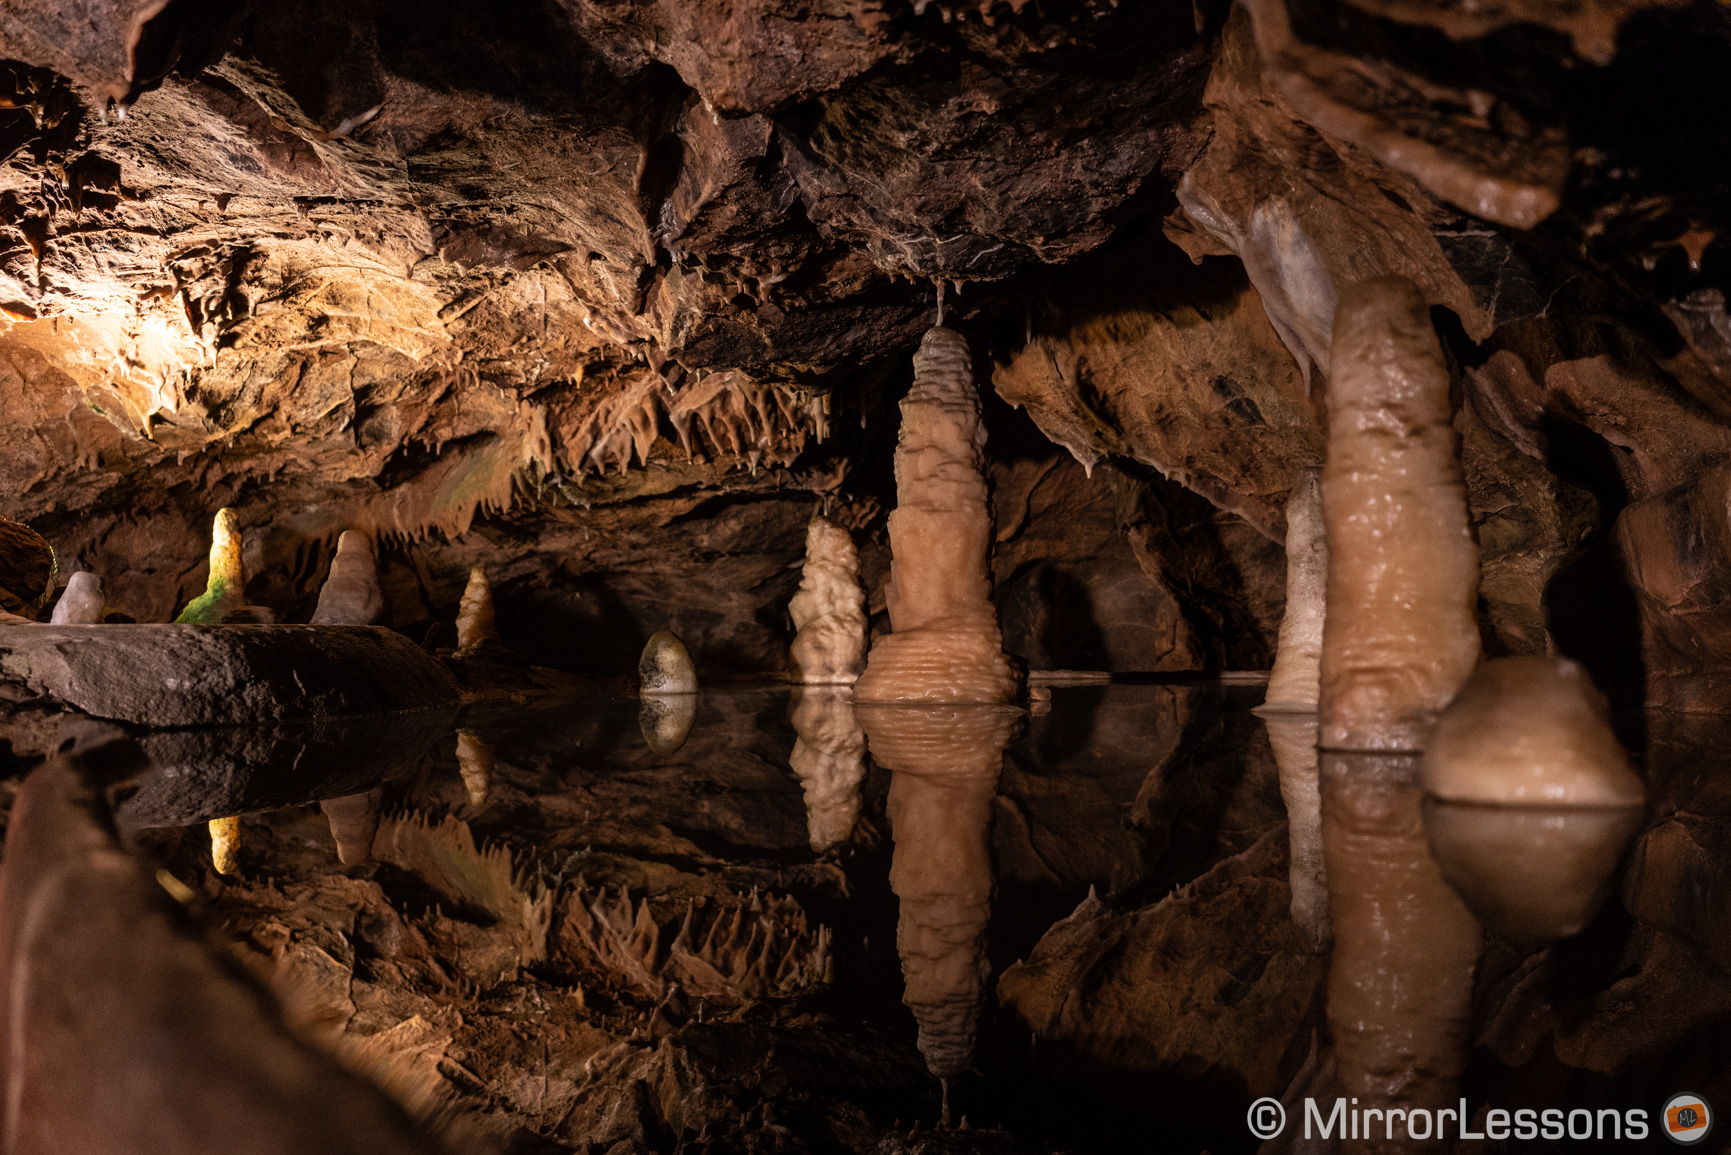
What about a cave for a low light situation? Well, the one in Cheddar proved a bit more challenging than expected. After my first batch of shots, I realised that my images had motion blur at around 1/10s. Perhaps I wasn’t stable enough so I raised the shutter speed to 1/20s. I would have loved to use a smaller aperture to have more depth of field but I didn’t want to raise the ISO too much so I ended up choosing f/4 and ISO 3200.
Sony A7 III, A7R III Low Light Shots: Living subjects
One difficult situation I found myself in was when a local cinema asked me to take photos of people and their dogs during a dog-friendly screening.
The cinema has a lovely warm atmosphere with dim light at bar, and as much as we love it, it is very bad for our digital cameras. I was testing the Samyang FE 35mm 2.8 AF, which doesn’t have the fastest AF motor so I had to be careful. Dogs rarely stay still either, so I had to use at least 1/100s to freeze them. Even by using the fastest 2.8 aperture, my ISO went up to 12800 most of the time. I used the Expand flexible spot and AF-C, but in the darkest corner I sometimes changed to AF-S. (Eye AF for Animal wasn’t available yet)

Here we are at the same location, this time with the house band playing. I stayed around 1/100s but occasionally went down to 1/60s like in the photo below. As you can see, the face of the singer is sharp but her hand is not because of the movement. Despite the imperfection, I quite like the image.

Sony A7 III, A7R III Night Photography: Bonfire party
Perhaps the most challenging evening I faced was a bonfire night organised with friends.
Two of them went on a paddling board while there was still a bit of post sunset light in the sky. This created a nice silhouette opportunity. Having the 1.8 lens helped the camera a lot and the A7 III managed to focus well despite the low contrast. That being said, I took multiple shots and some were out of focus. I also had to crop the image a lot because 55mm was too short.

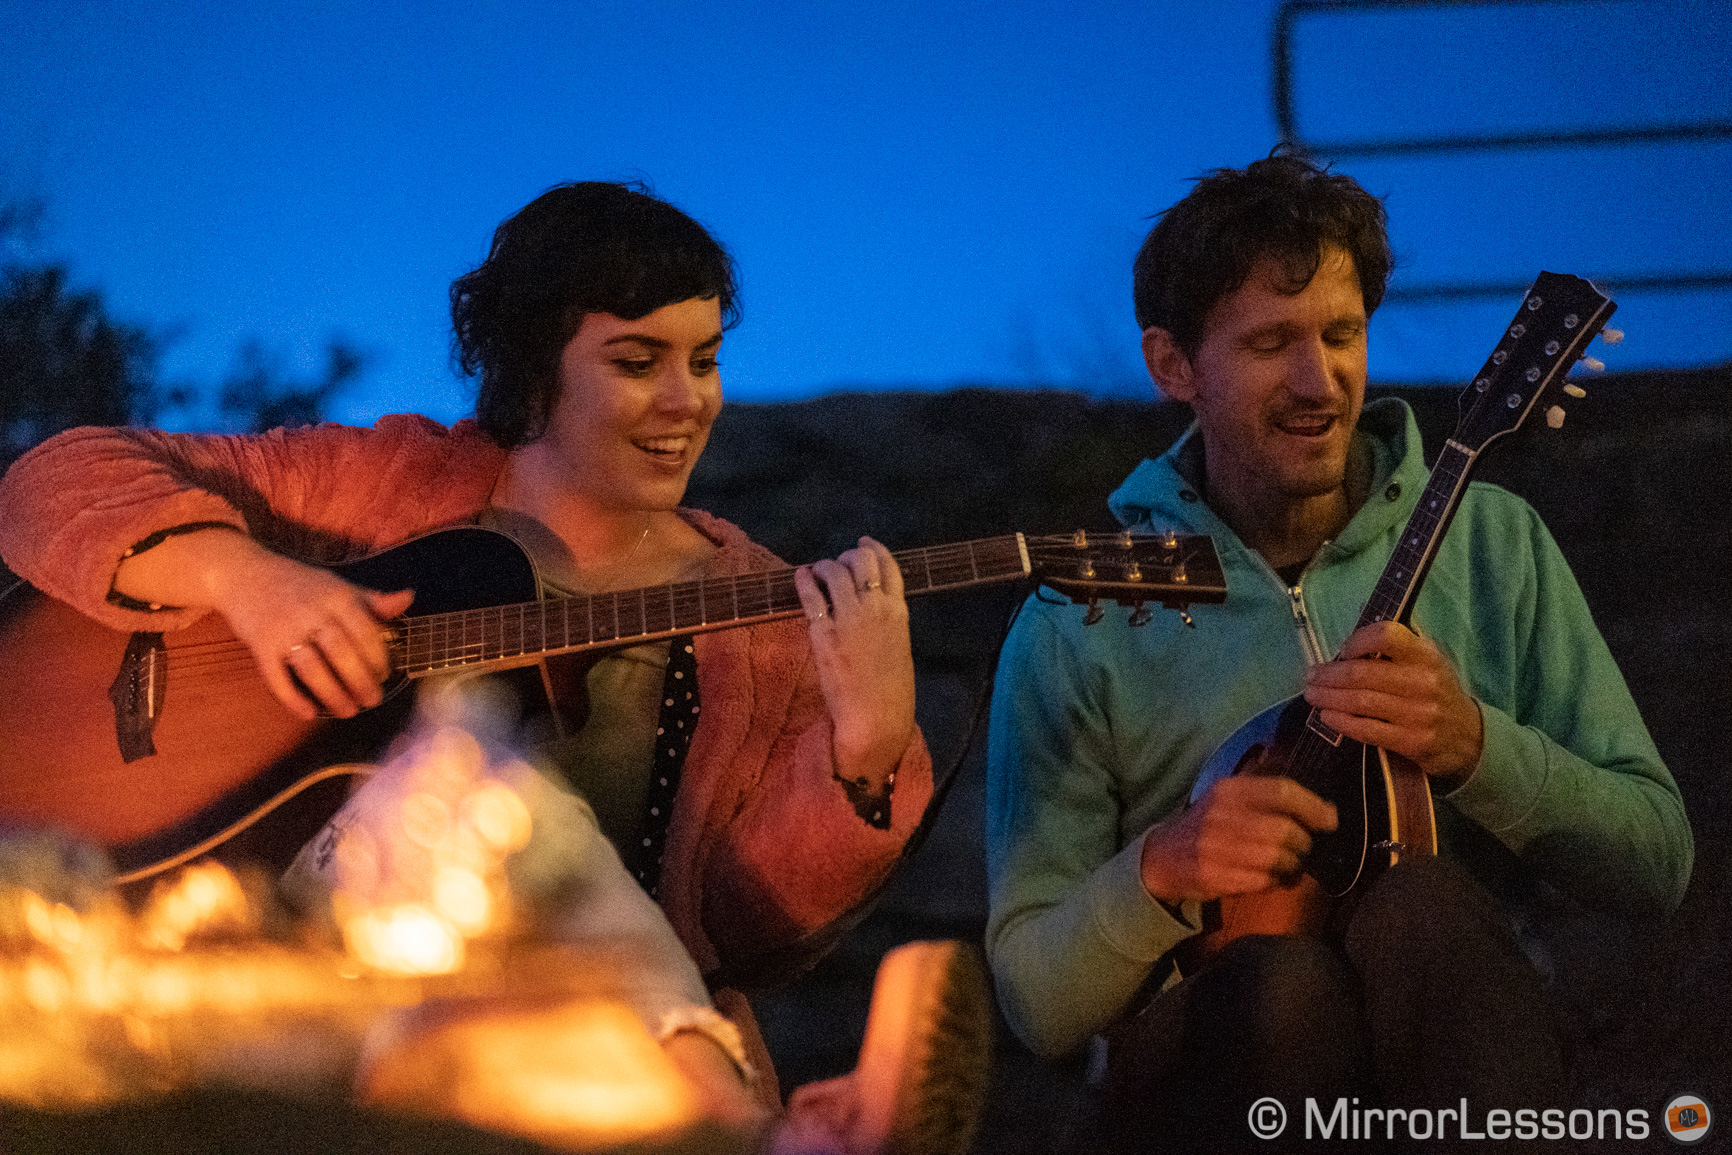
After that, the only source of light was the fire, with a bit of blue left in the sky. The fire wasn’t powerful enough yet, so I had to switch to manual focus because the camera just couldn’t focus. I had to keep a decent shutter speed because my friends were moving a little, and crank the ISO all the way up to 25600. I also had to push the exposure in post as the image was still a bit dark. Not a technically perfect image but a very good memory.
Near the end, I took a group shot with the Laowa 15mm which has a bright aperture of f/2 and is manual focus only. Nobody was moving a lot so I decreased the shutter speed to 1/13s. I still needed ISO 25600 however.

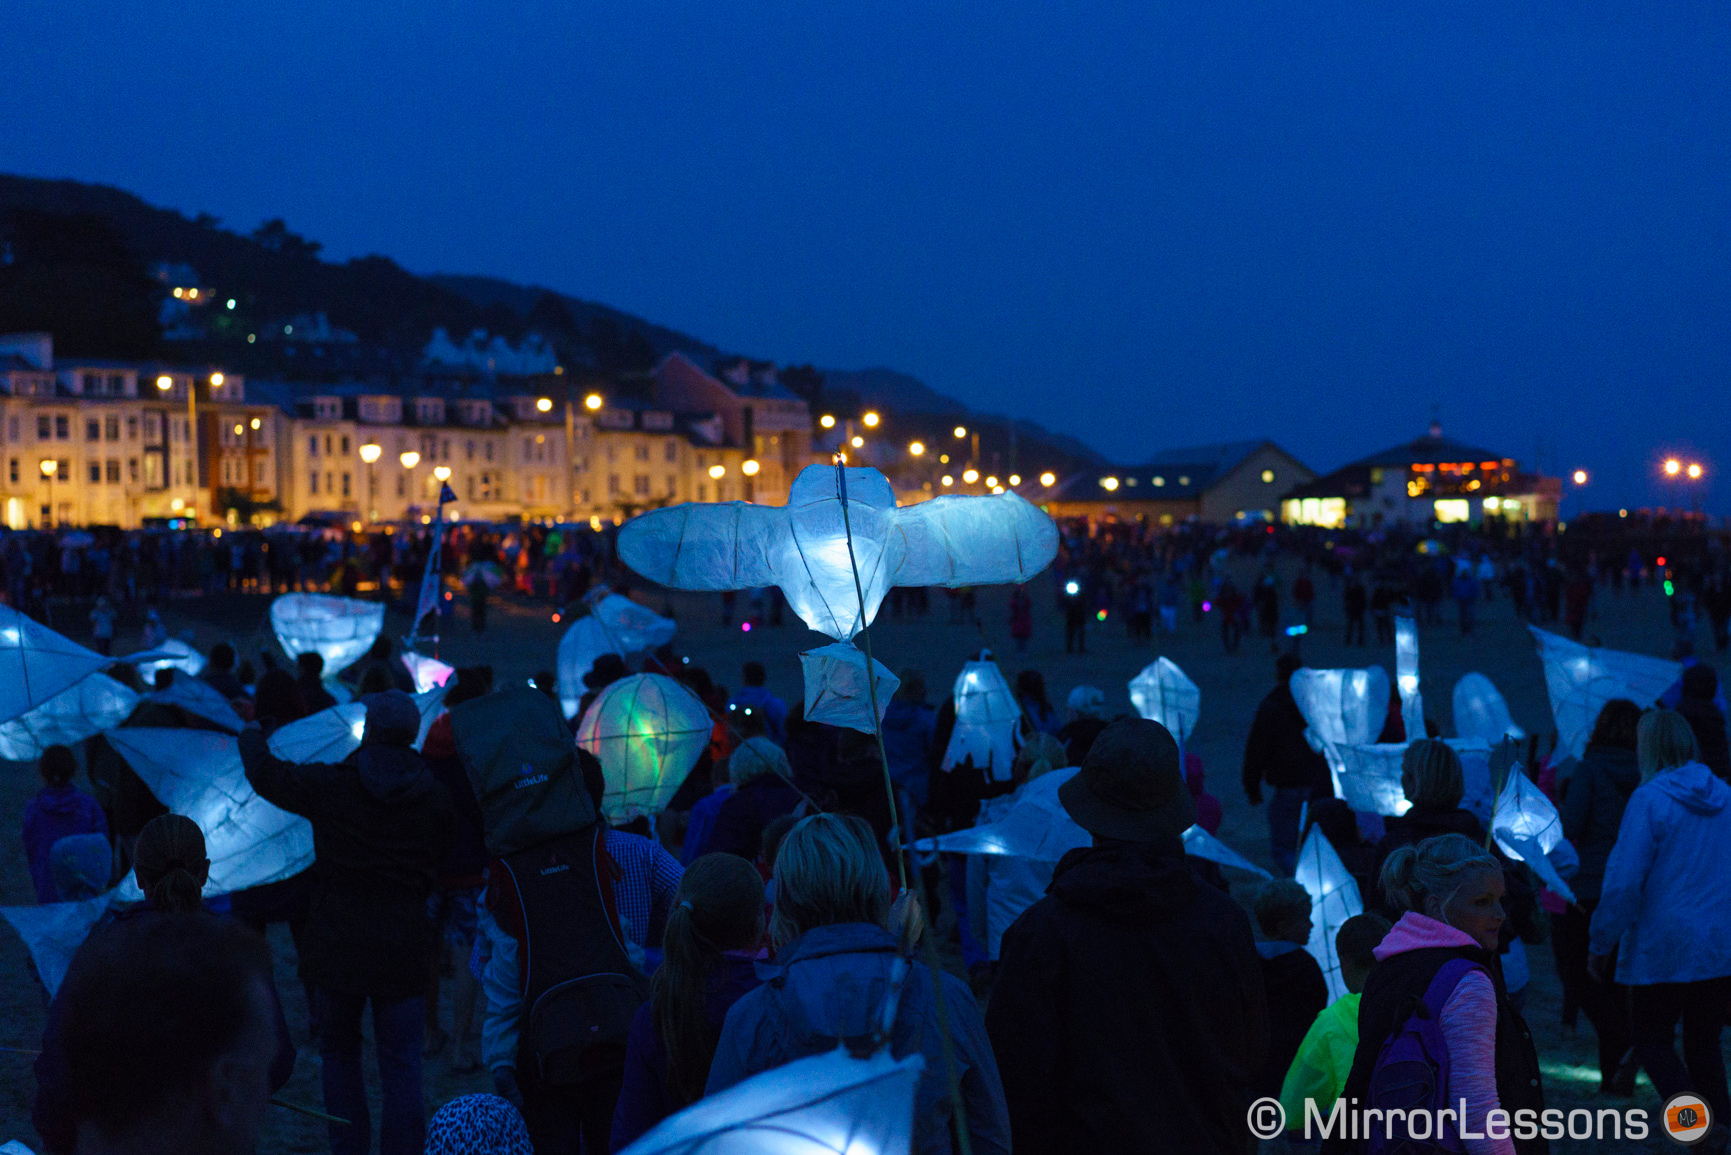
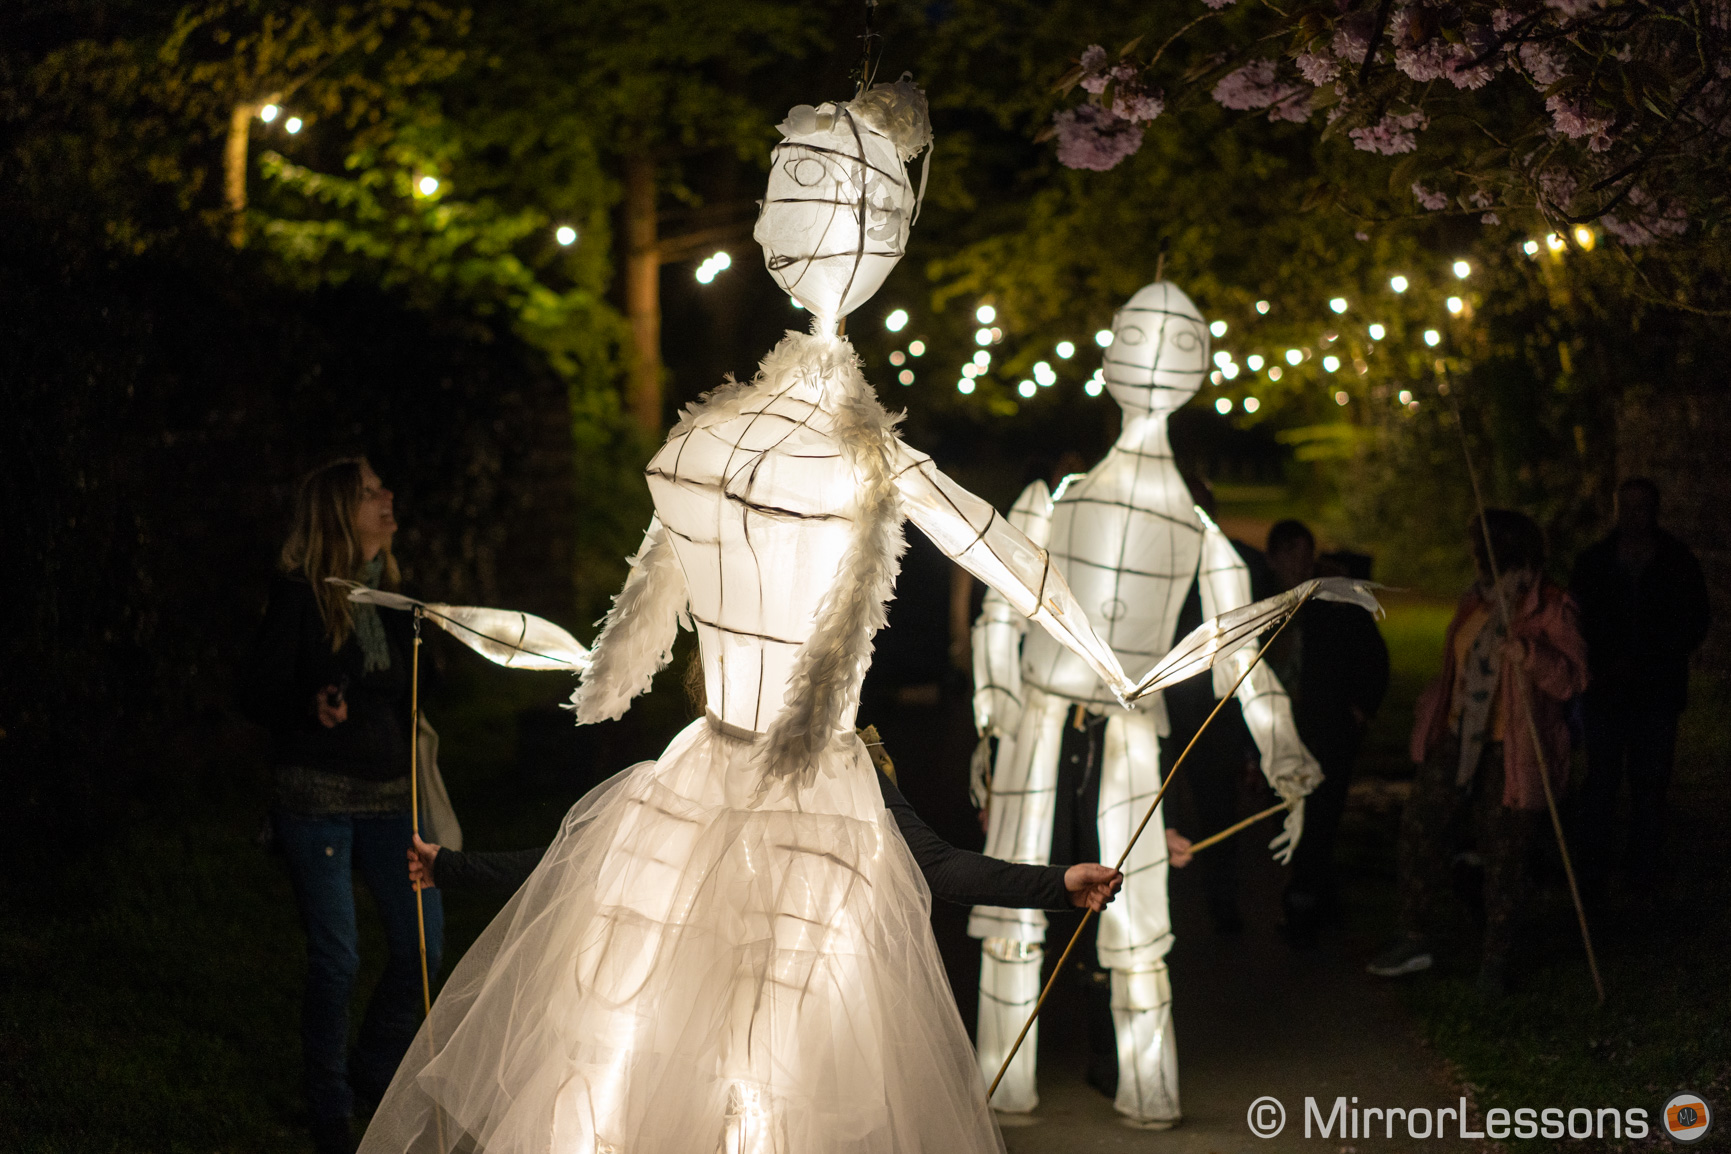
Sony A7 III Night Street Photography: Lantern Procession
Another situation you can come across at night is an event. There is likely to be movement so you don’t have the luxury of using a slow shutter speed. One that I like to photograph on a regular basis is the Lantern Parade in Machynlleth.
In my first image, the lantern was moving along a path that was lit for the occasion, so the situation wasn’t too bad. The lantern itself is illuminated, but the goal was to capture some of the ambience around it, so it was better not to meter just for the lantern. I opened the shadows a bit in post as well.
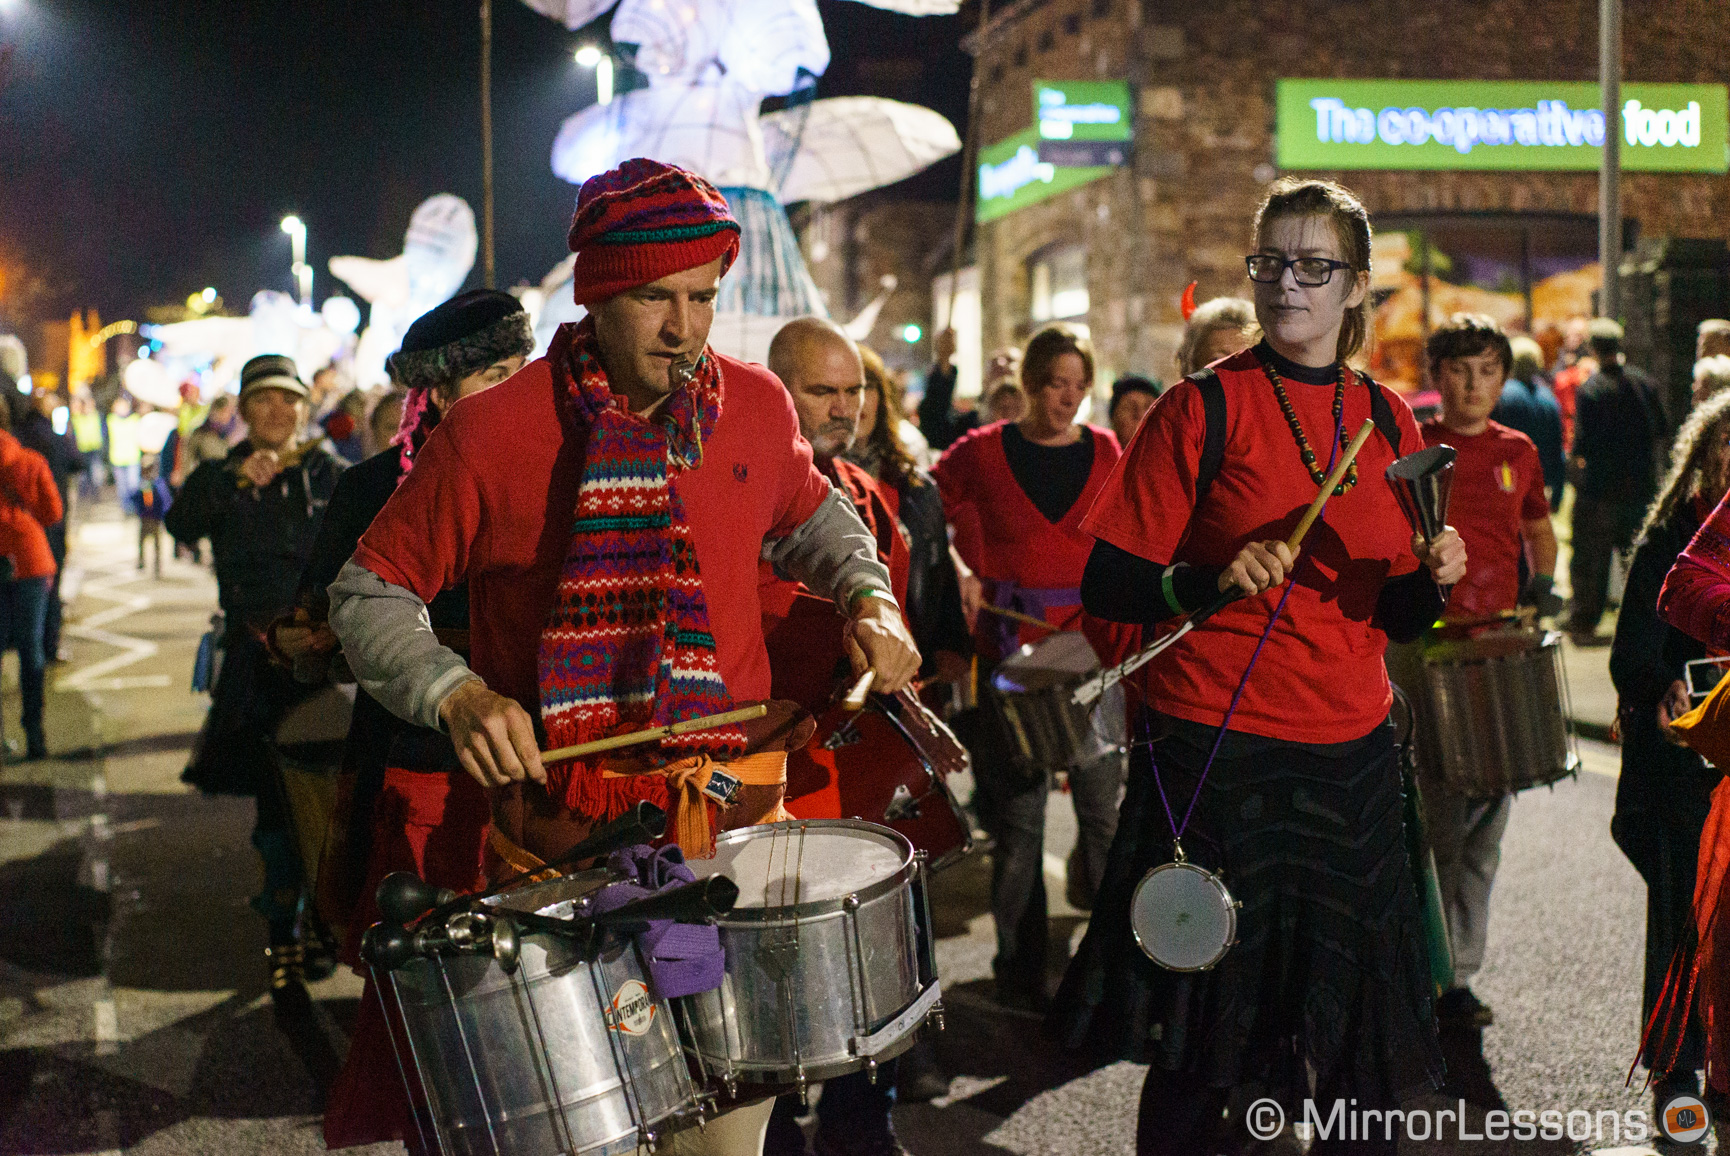
The procession I photographed in 2015 with the A7S II proved more challenging. In the street at night there are lighter and darker zones. It is better to take pictures when the subjects are in a more favourable light zone, but it’s not always easy especially if the street is crowded.
In the example below, the musicians have less light on them than the elements in the background. Fortunately the A7S II focused well. I recovered some shadows in post, and thankfully shooting at 12800 ISO on the A7S II is a no brainer. I used the Large Flexible Spot to have better focus precision.
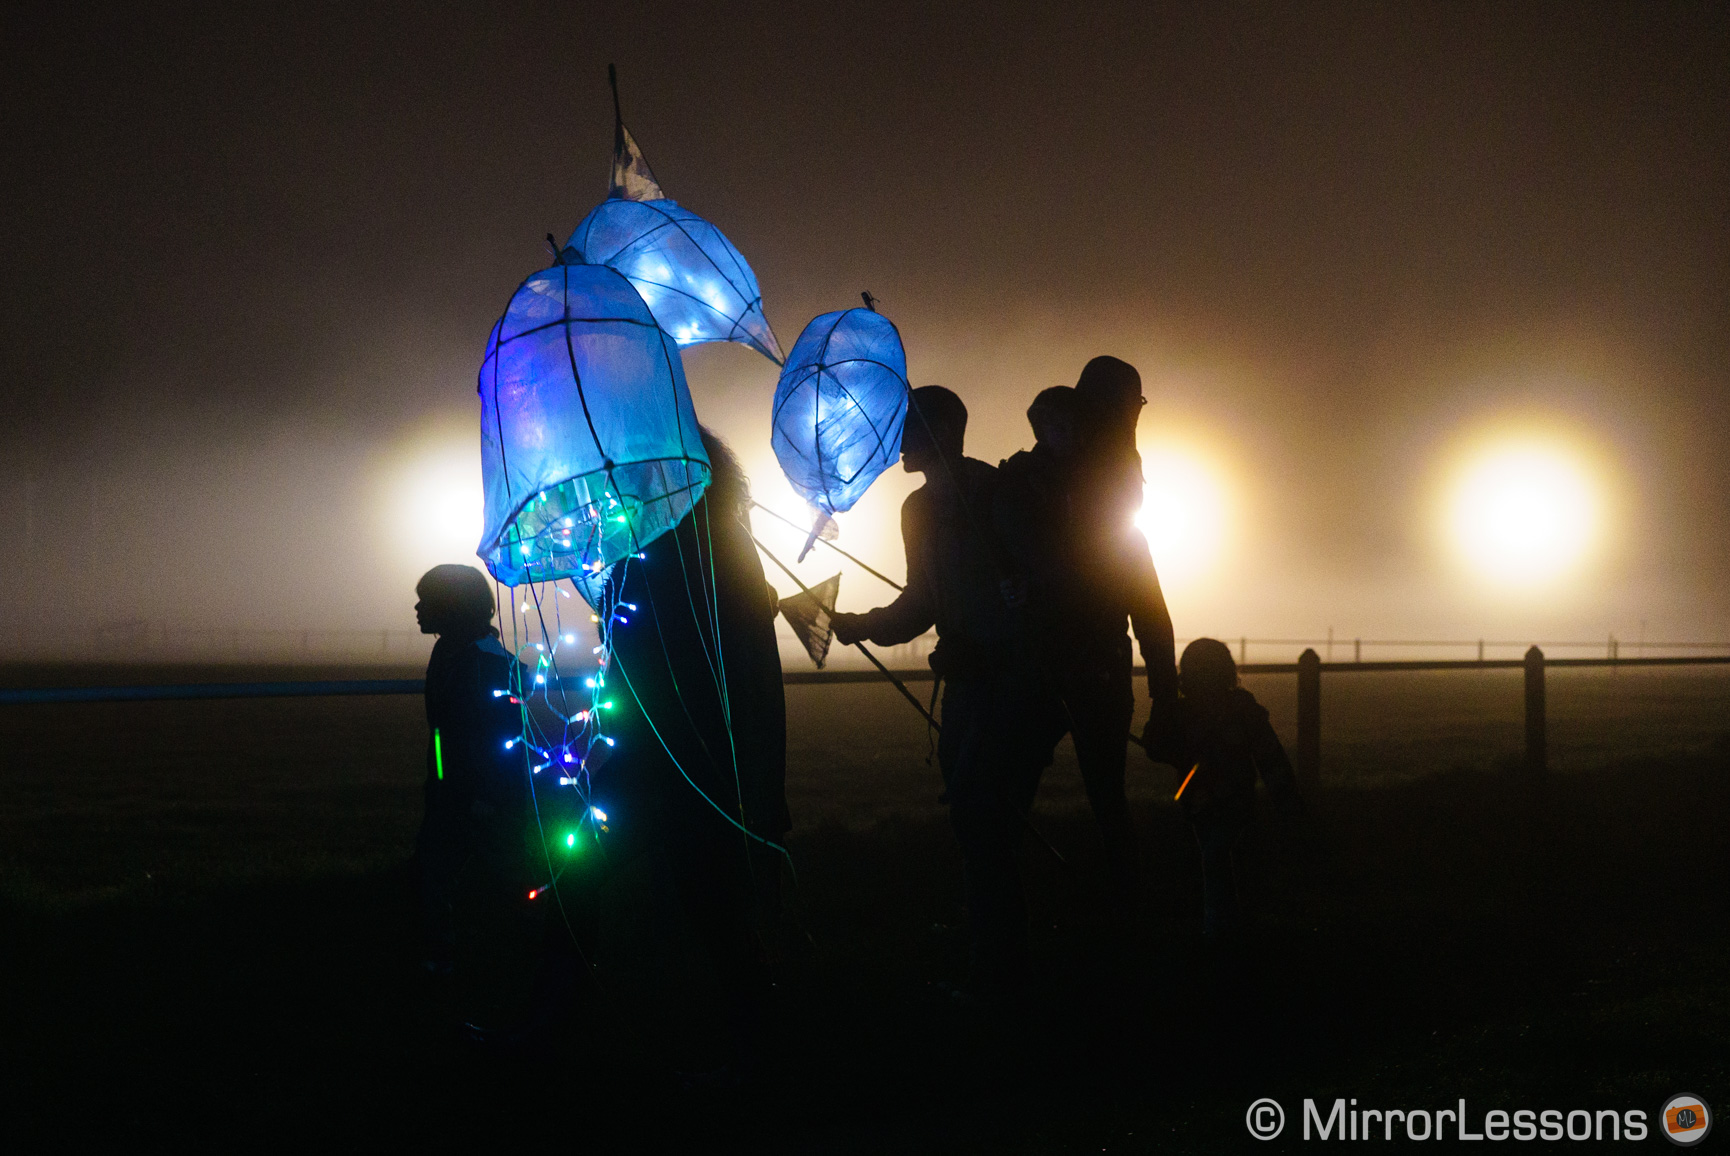
A few minutes later, the light started to get really poor as the procession was walking through a park. I had no choice but to raise the ISO further.
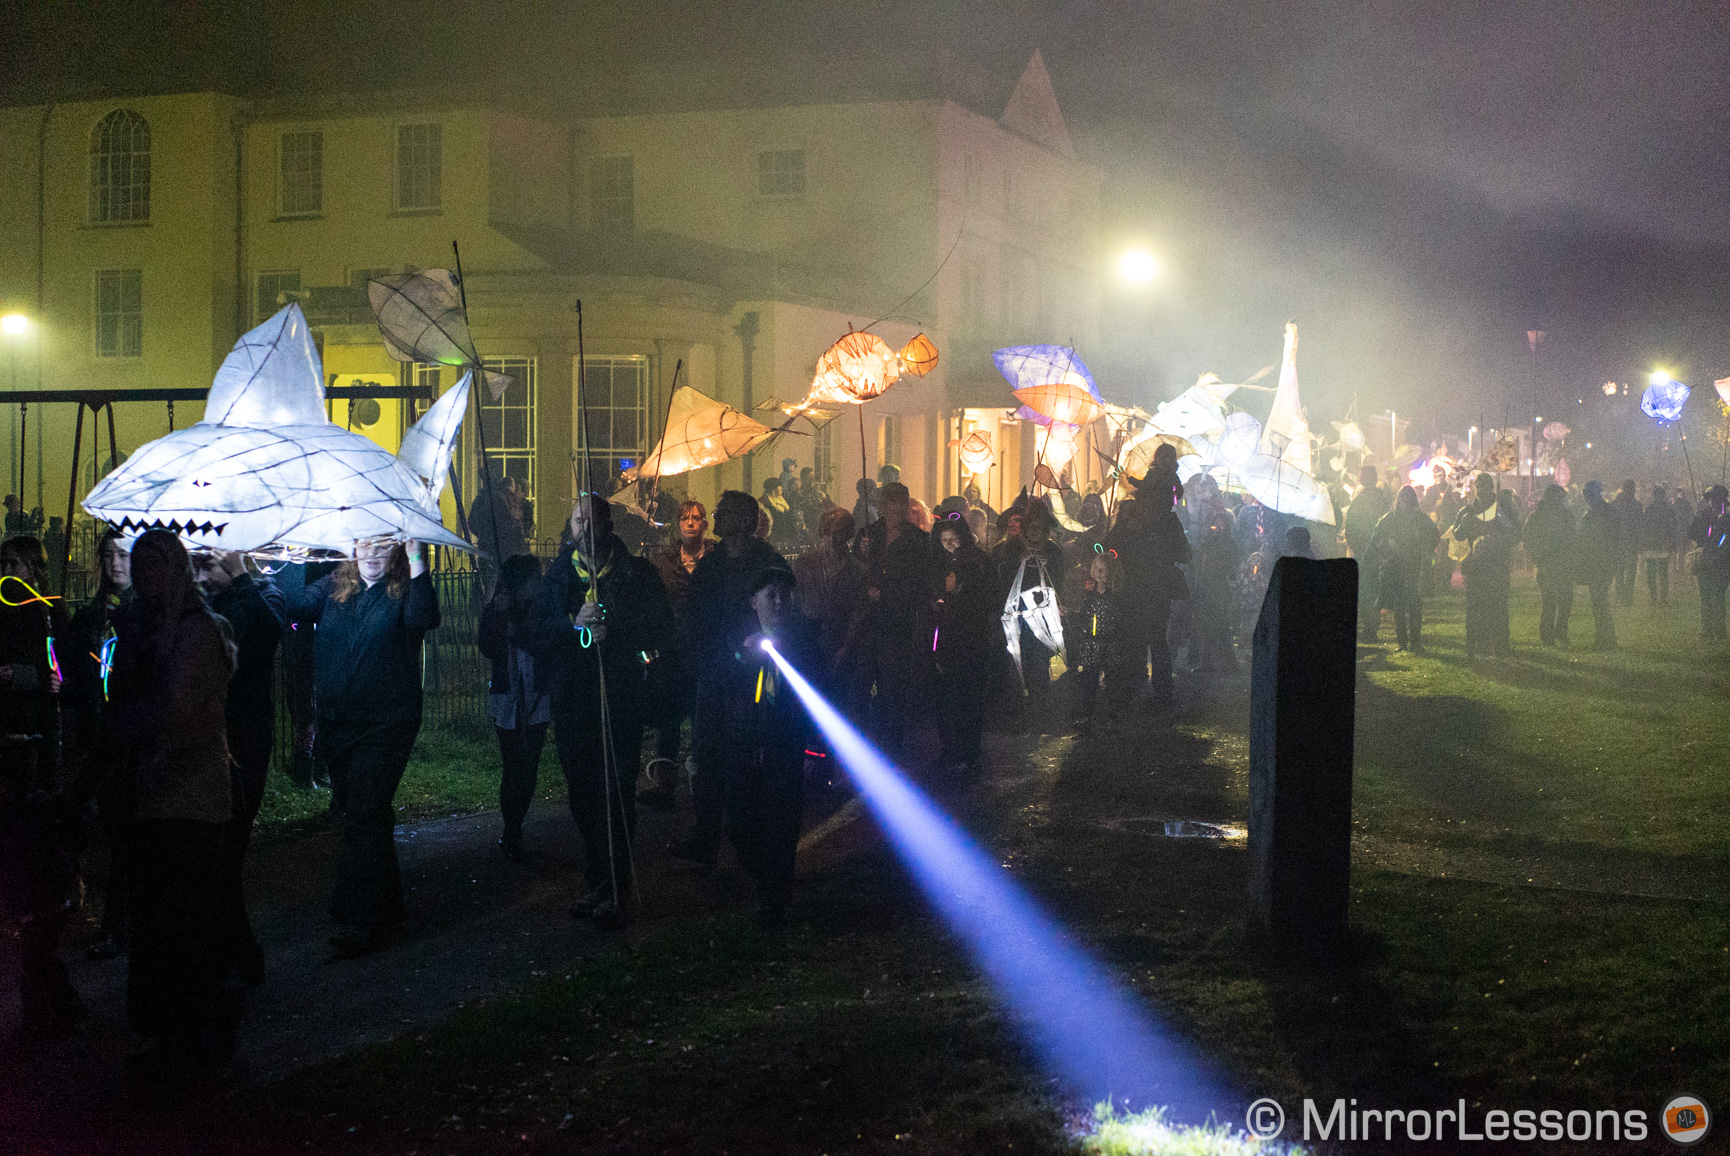
Fortunately, some fog came in to create a dramatic fairytale effect. The lights of the nearby football field created a perfect backlit situation, allowing me to close my aperture and reduce the ISO.
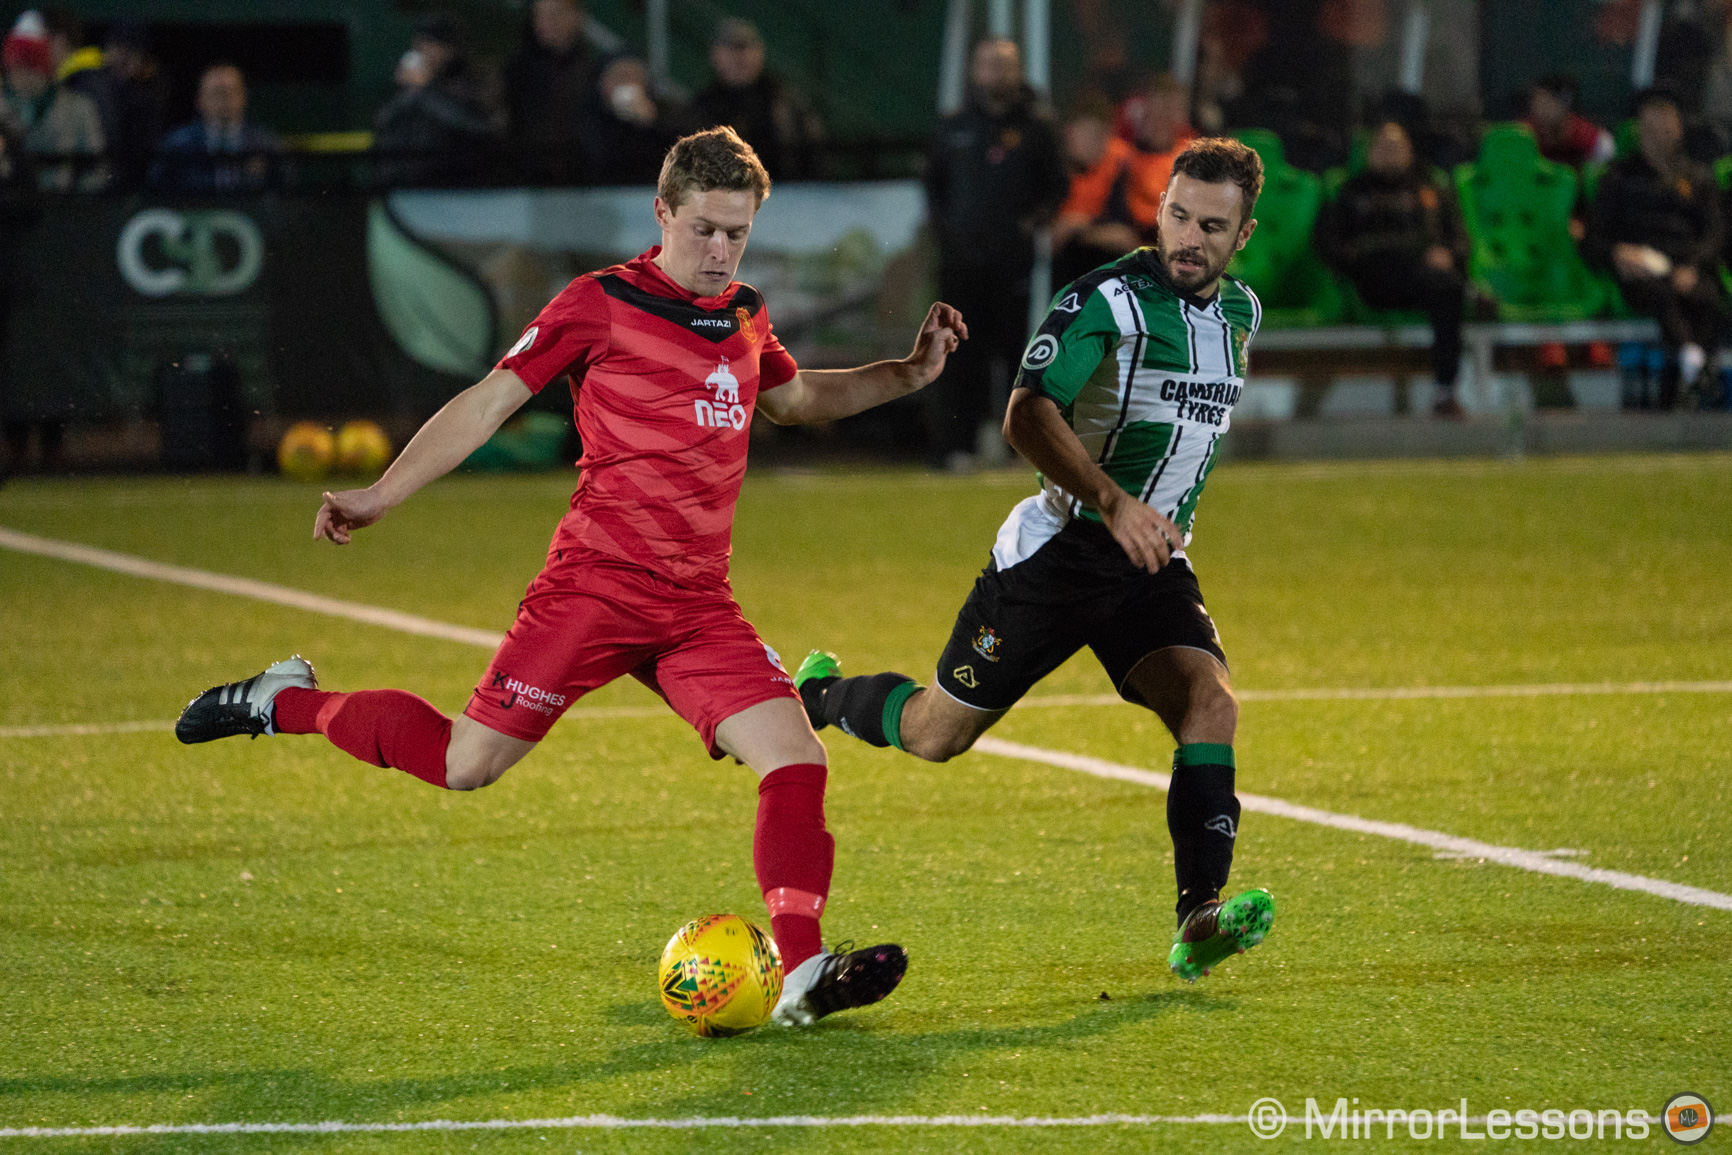
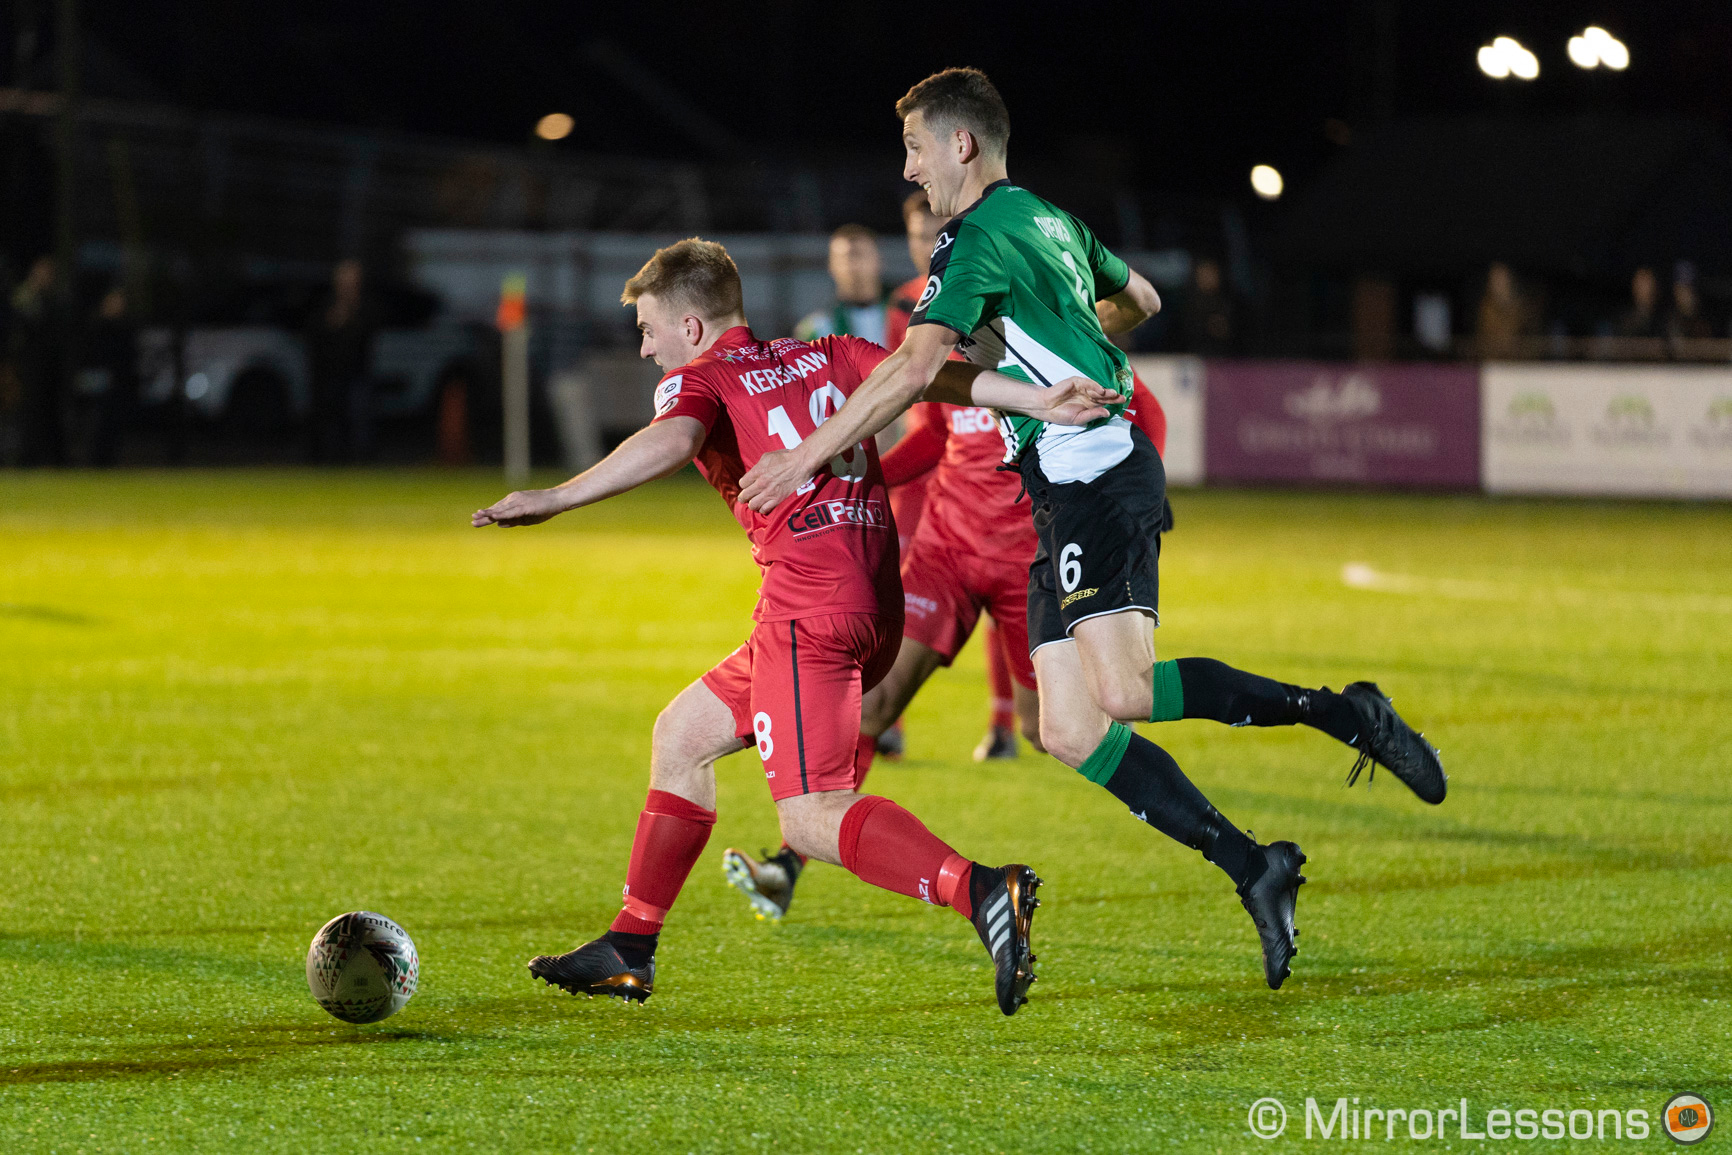
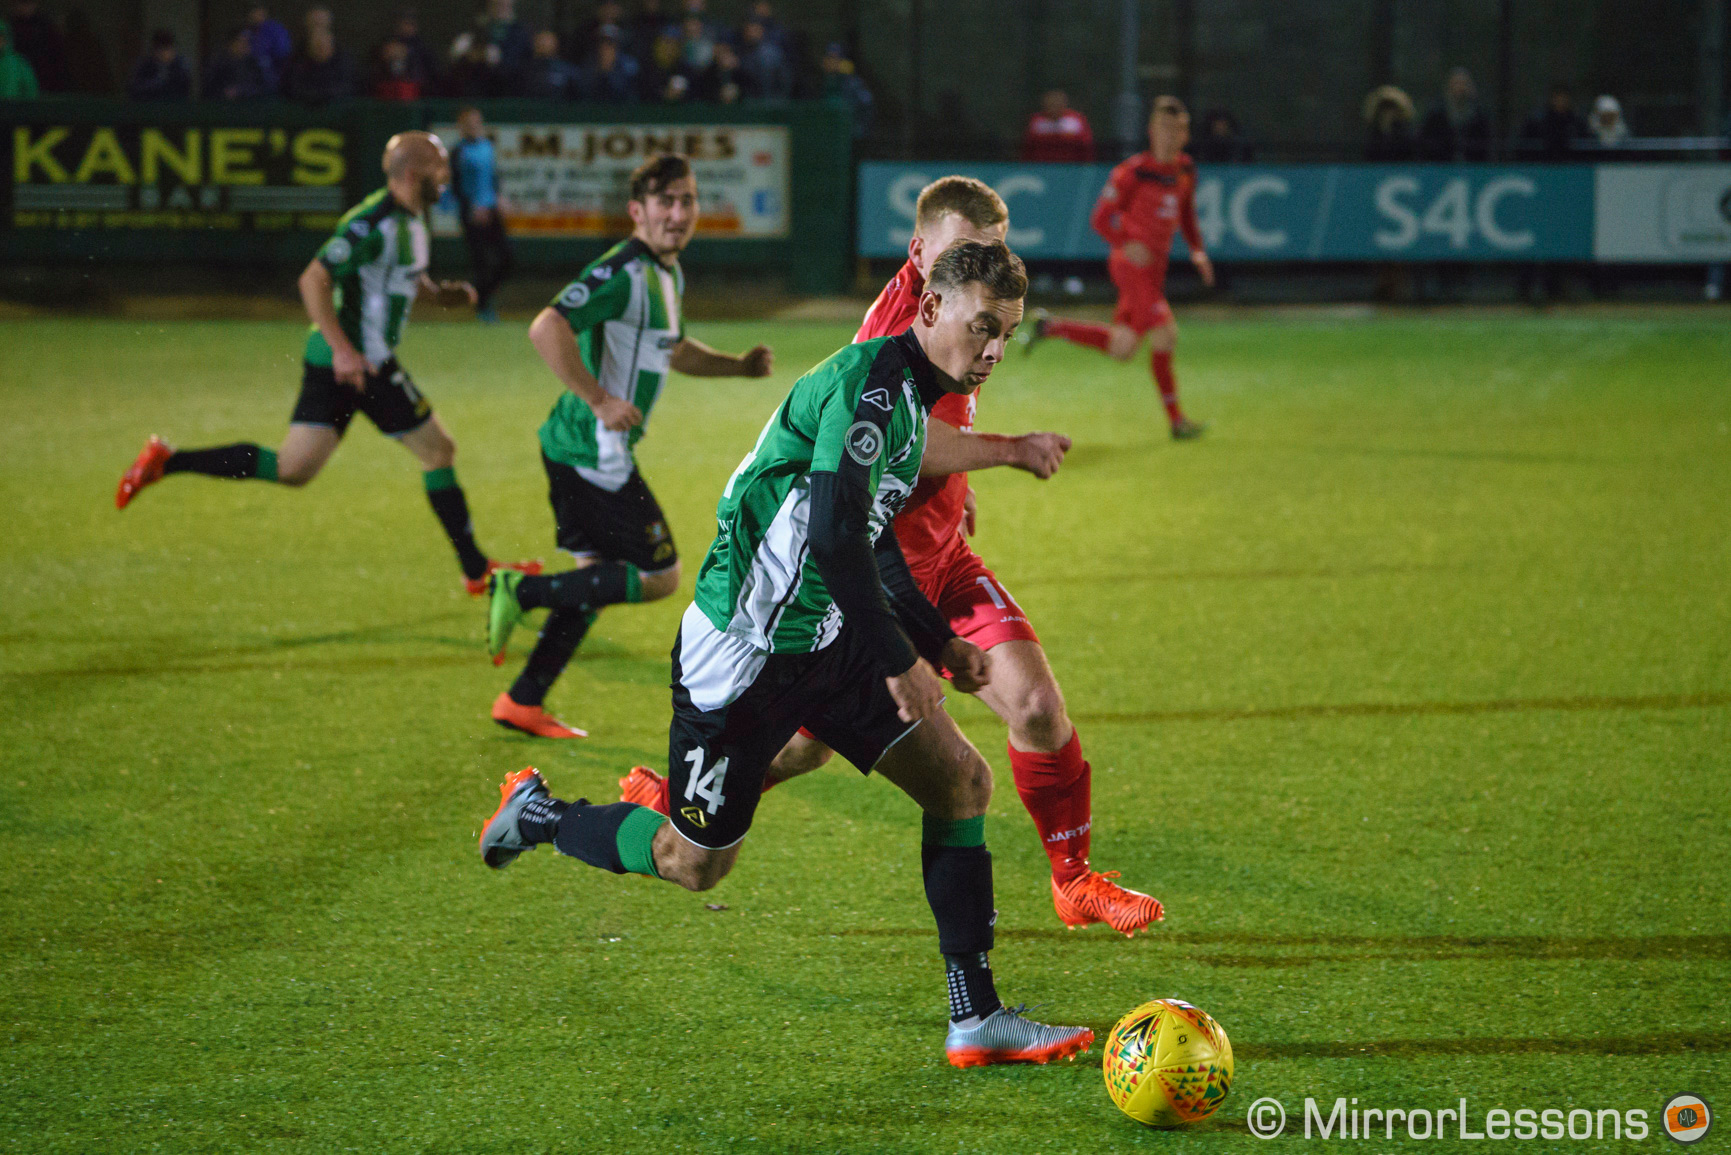
Sony A7 III, A7R III, A9 Low Light Photography: Sports
Our last example shows a situation with fast action. For football, you want to keep a shutter speed of at least 1/640s to freeze the action. (Sometimes you need more than that).
Fast speeds such as this don’t allow the camera to get a lot of light, so we need to compensate by using a fast aperture. F/2.8 is ideal, but in some cases I had a slower lens with me. That leaves you no other option than to raise the ISO as high as you can.
In these situations, I always use Zone Area with C-AF and none of the latest cameras had any problem in focusing fast and accurately.
Reminder: the links below are affiliate links. If you decided to buy something after clicking the link, we will receive a small commission.
Check price of the Sony A7 III on:
Amazon | Amazon UK | B&H Photo | eBay
Check the price of the Sony A7R III on:
Amazon | Amazon UK | B&H Photo | eBay
Check price of the Sony A7R IV on
Amazon | Amazon UK | B&H Photo | eBay
Check price of the Sony A9 on
Amazon | Amazon UK | B&H Photo | eBay
Check price of the Sony A7 II on:
Amazon | Amazon UK | B&H Photo | eBay
Check price of the Sony A7R II on:
Amazon | Amazon UK | B&H Photo | eBay
Second-hand Sony gear on
MPB US | MPB UK
Sony A7 / A9 Mirrorless Cameras Resources on Mirrorless Comparison
We have even more tutorials for your A7 camera, as well as many comparisons. Check the list below!
Real World Comparisons
- Sony A7 III vs A7R III
- Sony A7R III vs A7R IV
- Sony A7R II vs A7R III
- Sony A7R III vs A9
- Sony A7 III vs Nikon Z6
- Sony A7R III vs Nikon Z7
- Sony A7R III vs Fujifilm GFX 50s
- Sony A7R III vs Panasonic S1R
- Sony A7 III vs Canon EOS R
- Sony A7 III vs Fujifilm X-T3
- Sony A7 II vs Canon EOS RP
Sample Photos
- Sony A7 III sample images
- Sony A7R III sample images
- Sony A7R IV sample images
- Sony A7 II sample images
- Sony A7R II sample images
- Sony A7S sample images