Among the various improvements brought to autofocus technology over the years, I consider eye detection one of the most interesting. Why is this?
Well, the explanation is quite simple: when you take a picture of a person, achieving correct focus on the eyes is essential. If the eyes are out of focus, even just slightly, part of the identity of the person being photographed can’t be read and as a consequence, the emotional connection the eyes transmit is lost. Of course there can be exceptions if the photographer is trying to communicate a specific message, but the general rule is that a good portrait must have the eyes in focus.
With face detection, it is not uncommon to end up with the ears or the nose in focus instead, especially if you play with shallow depth of field and close focus distances. Some products can pick out both faces and eyes at the same time, but if the camera concentrates its resources on only one thing, it can be more efficient.
Sony is the brand that has made the most progress in this segment. Thanks to the advancement of the company’s phase detection autofocus, as well as the more elaborated software algorithm for subject tracking, Sony’s Eye AF has set a benchmark in the camera market.
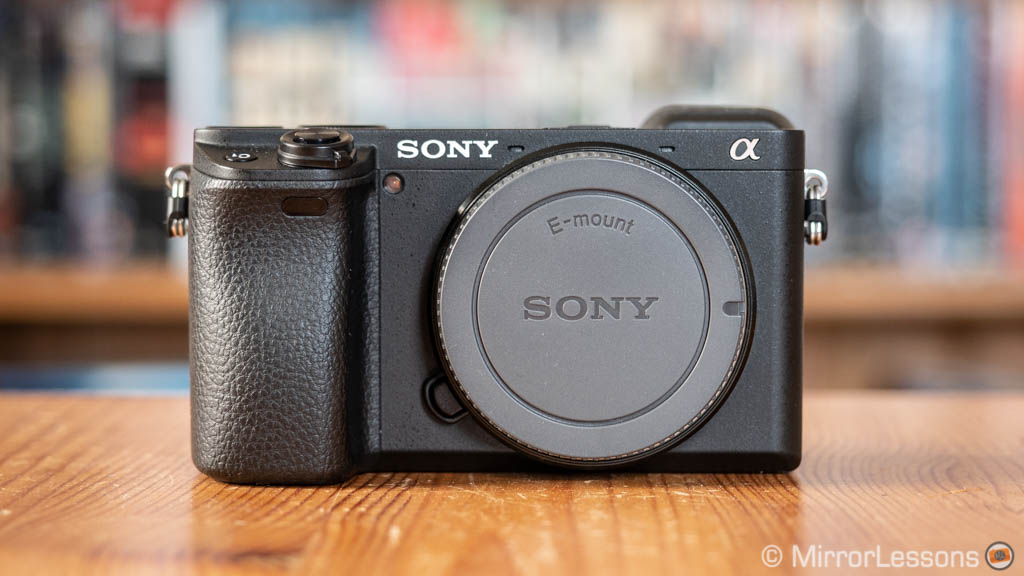
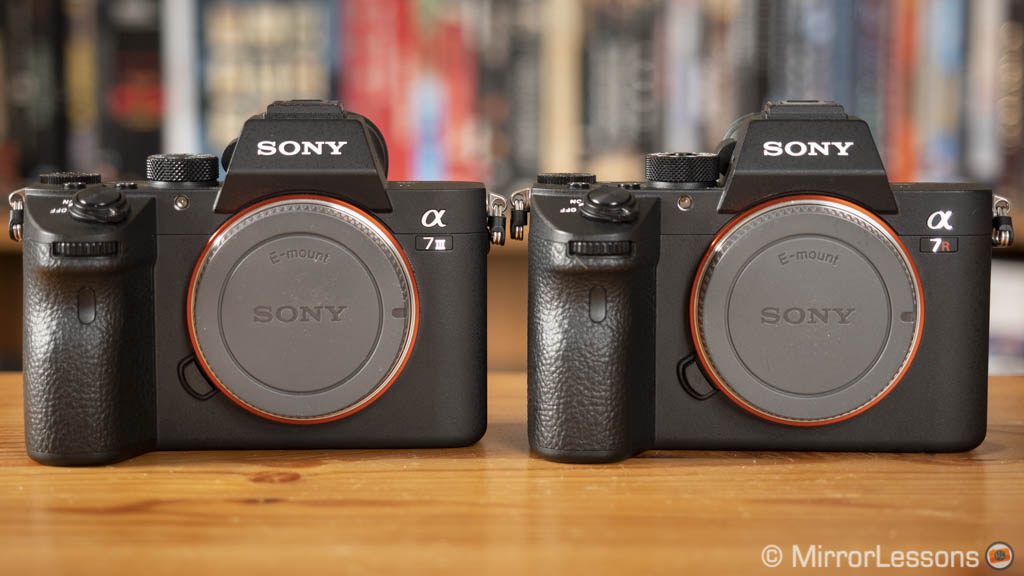
Ethics statement: the following is based on our direct experience with the Sony A6400, A7 III and A7R III that we bought for review and comparison purposes. We were not asked to write anything about these products, nor were we provided any other compensation of any kind. Within the article, there are affiliate links. If you buy something after clicking one of these links, we will receive a small commission. To know more about our ethics, you can visit our full disclosure page. Thank you!
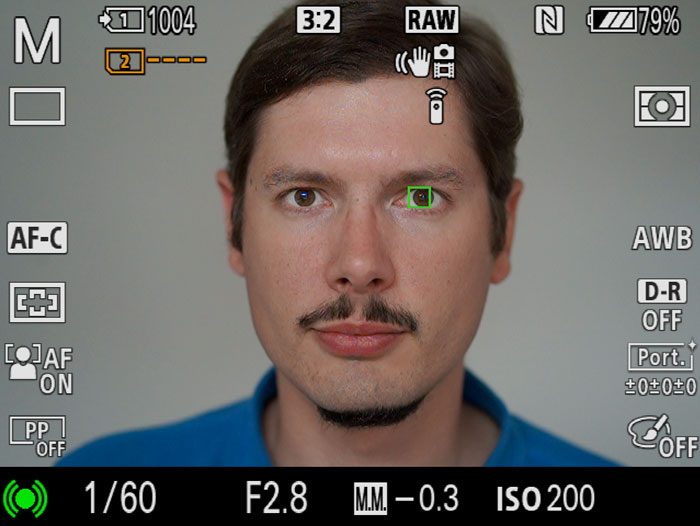
Eye AF works by using a single point on the eye of the person. Because it has become so reliable on the most recent E-mount products, the photographer can concentrate on expression, position and movement of the subject without worrying about positioning the single focus point. The camera always follows the subject even if he or she turns to the side. If the person turns 180˚ or disappears momentarily, Eye AF is very quick to resume tracking when the eye becomes visible again. This is why it has become a great tool for portrait photographers.
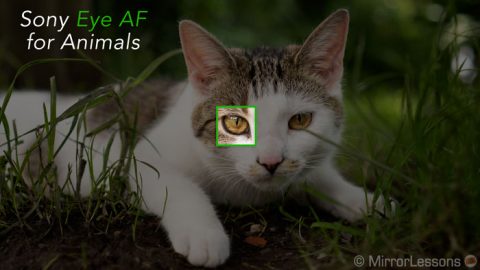
The next step in the Eye AF evolution is for it to recognise other types of living beings. The principle remains the same: rather than tracking the entire body, the camera focuses on the eye of the animal to guarantee sharpness.
Sony has introduced Eye AF for animals via a series of firmware updates. I first tested it with the A7 III and A7R III in March, and then more recently with the a6400. The A9 should receive this feature sometime soon. It works for stills only (no video).
Note: if you want to know how to update the firmware of your Sony camera and setup Eye AF for animals, I’ve left some instructions at the end of this article.
I don’t have pets at home (I live in a flat and unfortunately animals are not allowed) but many of my friends are either cat or dog lovers so it wasn’t difficult to find some fluffy models to photograph.
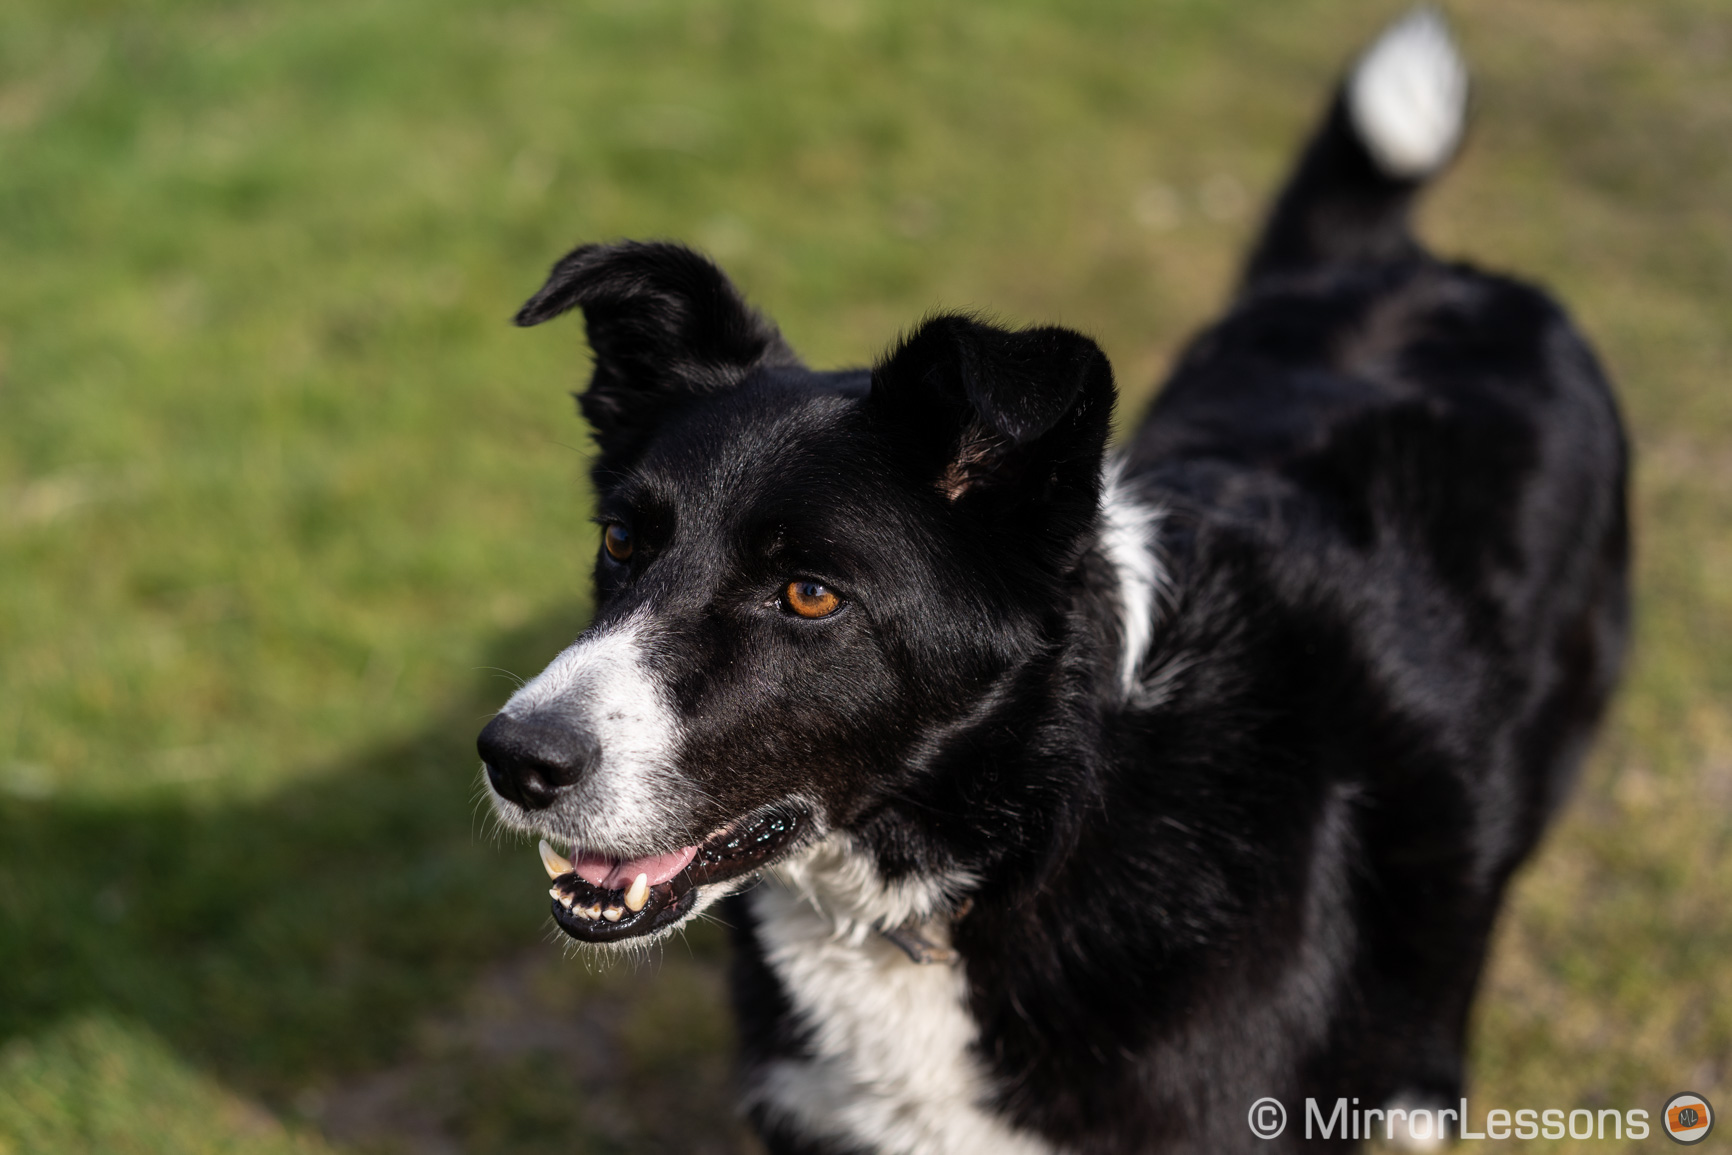
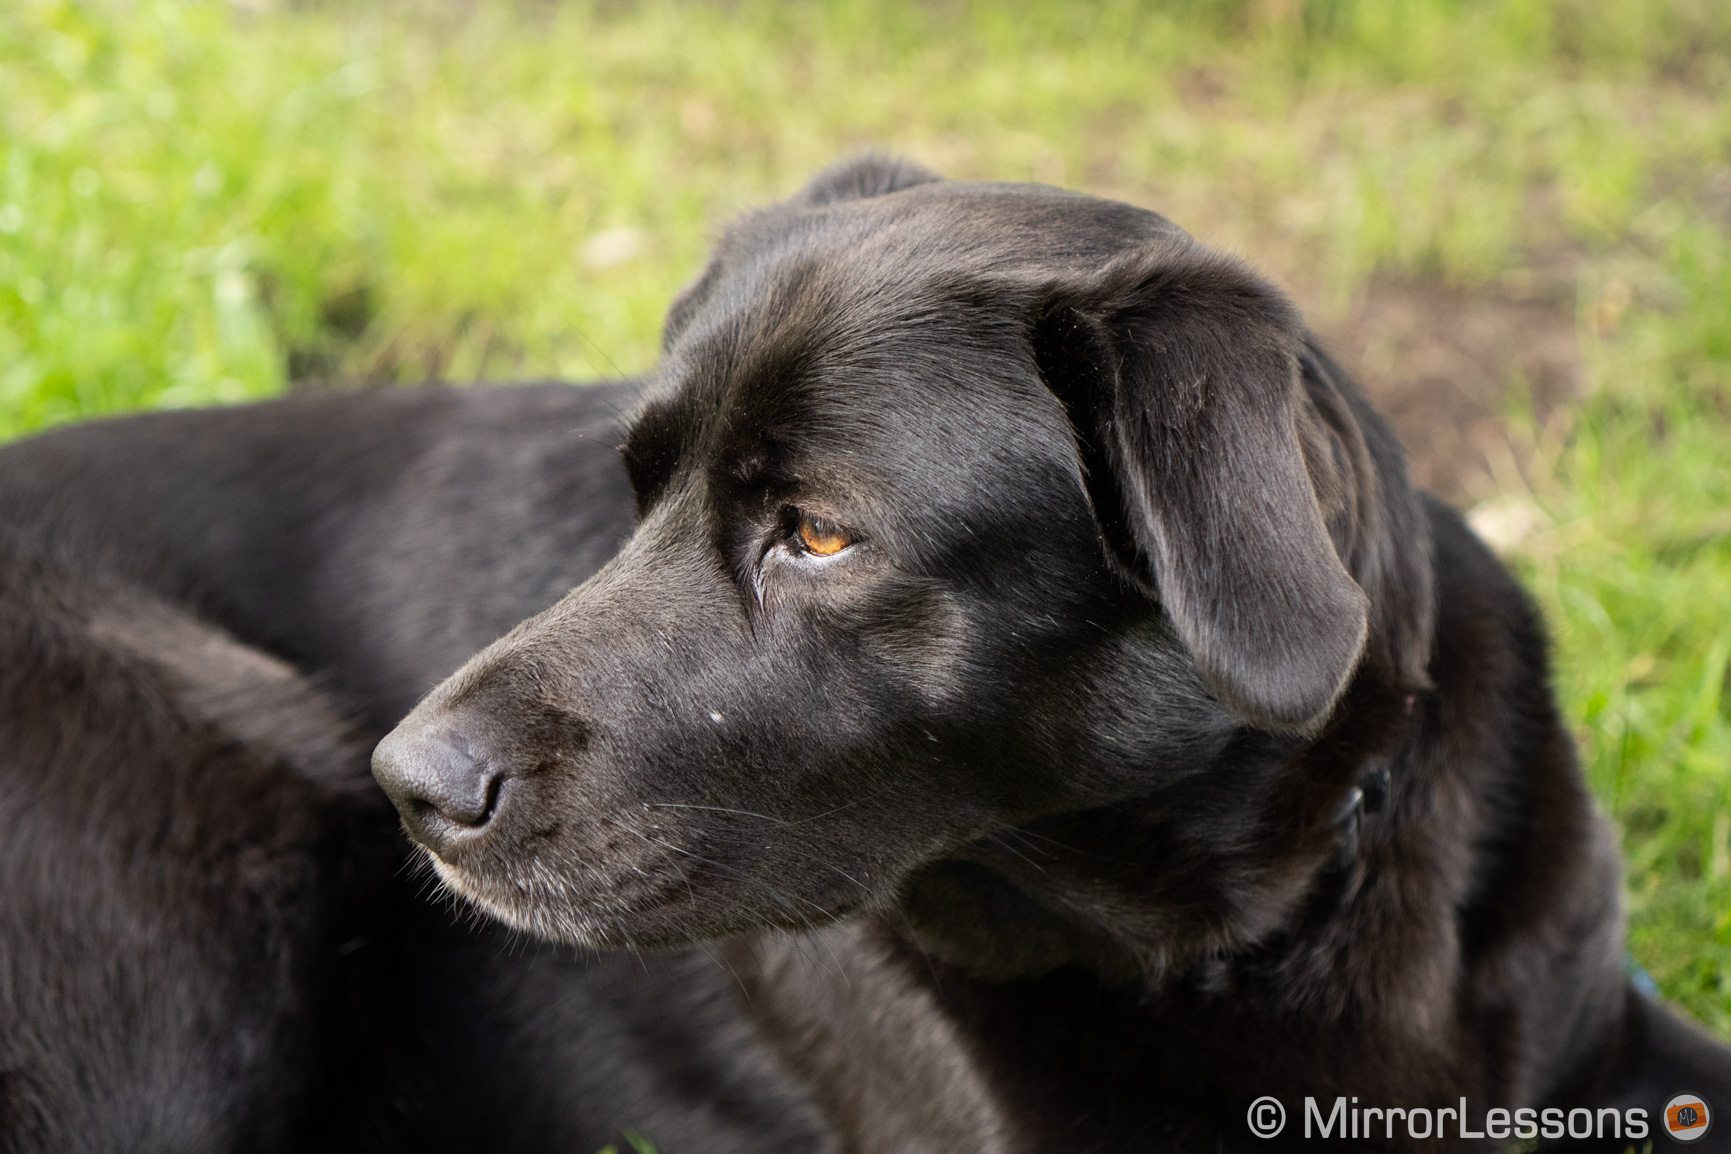
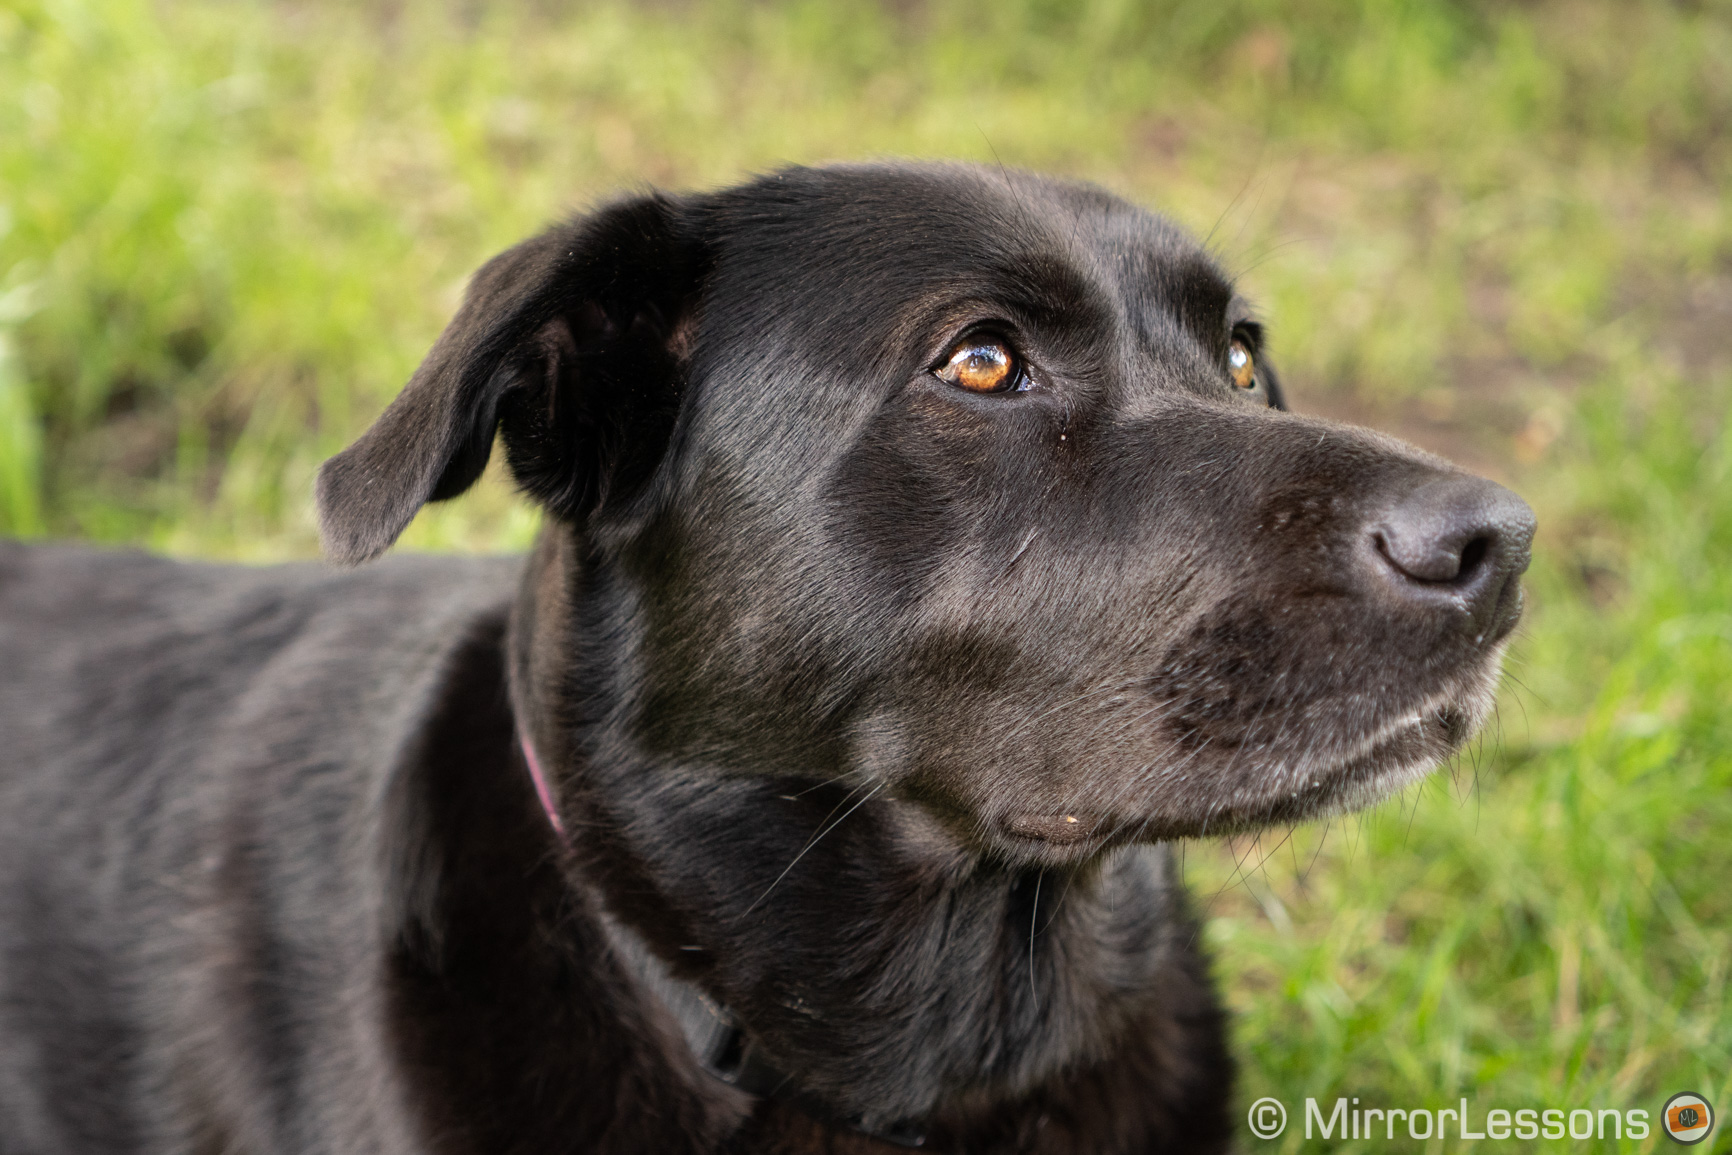
My first outing with the A7 III and A7R III was very positive. Eye AF was fast and responsiveness when following the exuberant and friendly Jes. It really felt like using the normal Eye AF that we’ve been accustomed to for some time now.
The animal needs to be close enough or in other words, fill a good portion of the frame, for eye detection to activate. If the animal is too distant, the Wide or Zone area do a good job of tracking the animal, so keeping Eye AF in real time mode worked well for me.
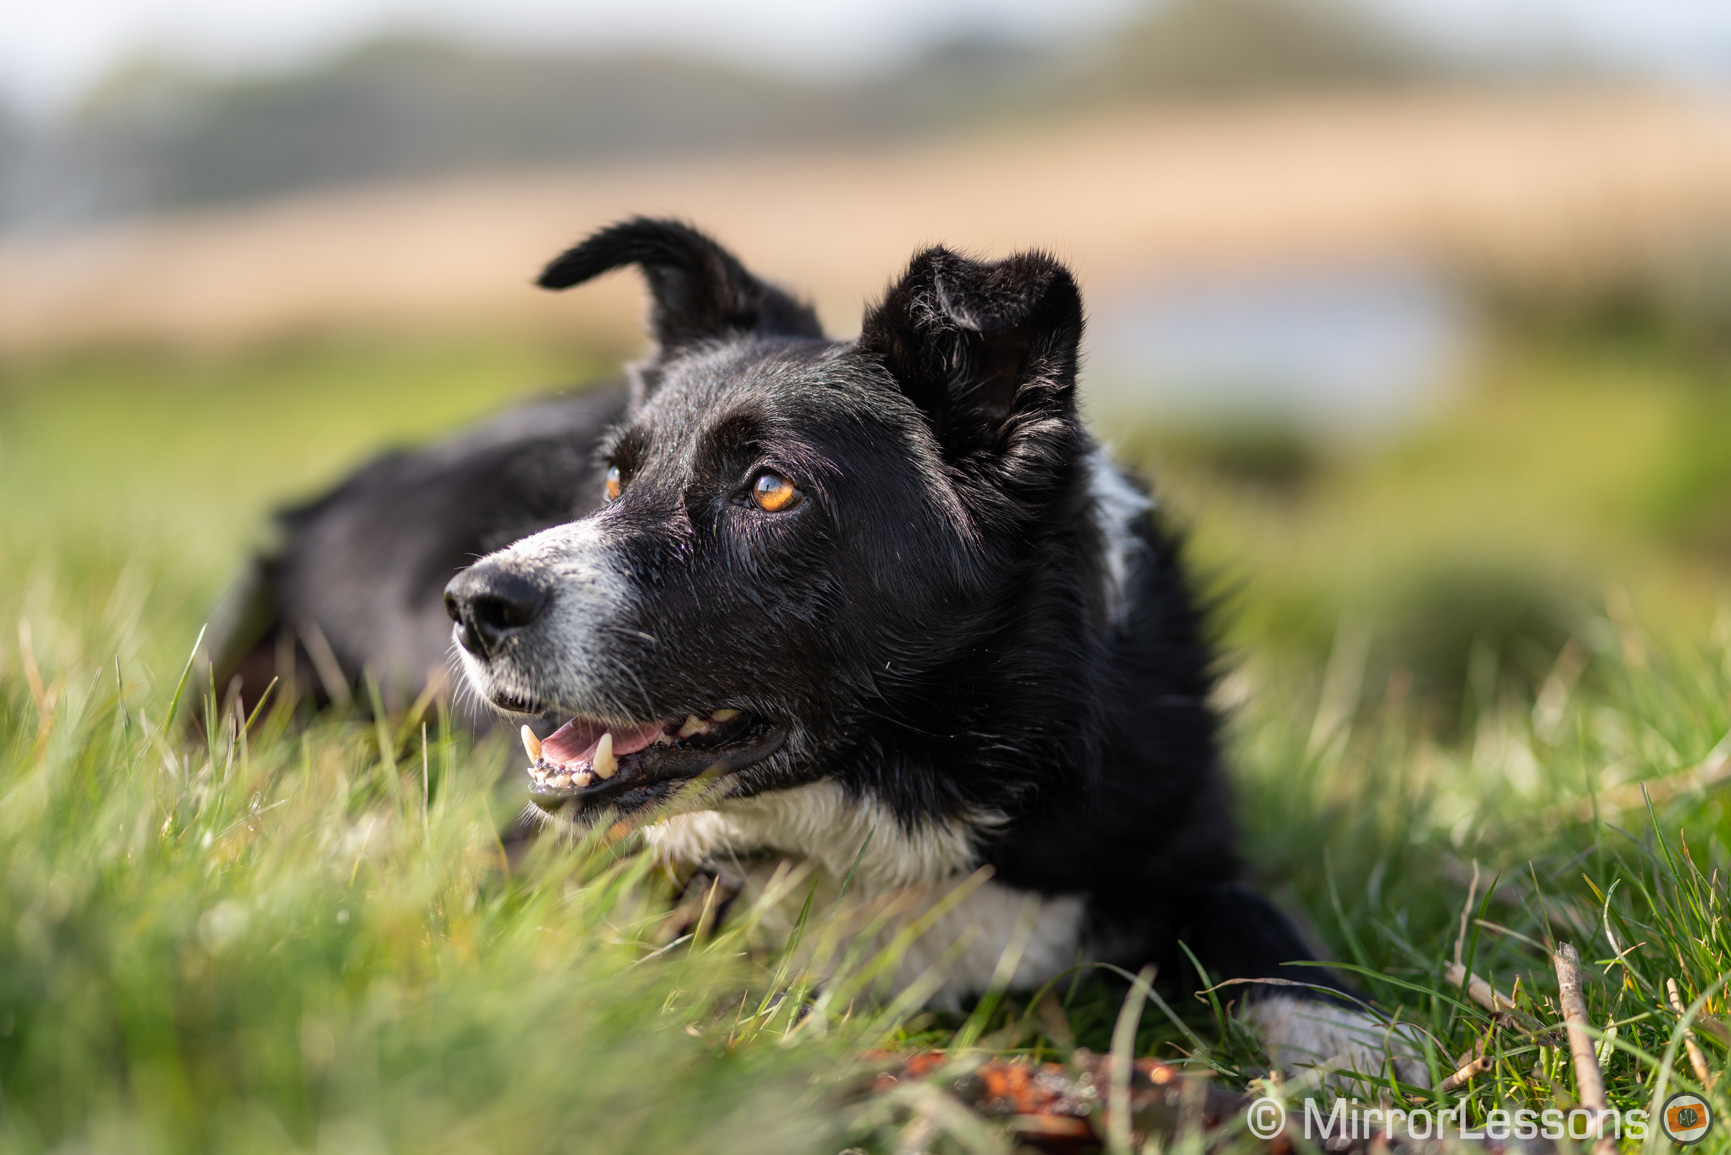
When reviewing the images at home, focus accuracy was spot on most of the time. In a few shots, the camera mis-focused on the nose or behind the eyes, probably because it was confused by the high contrast on the black fur of the dog.
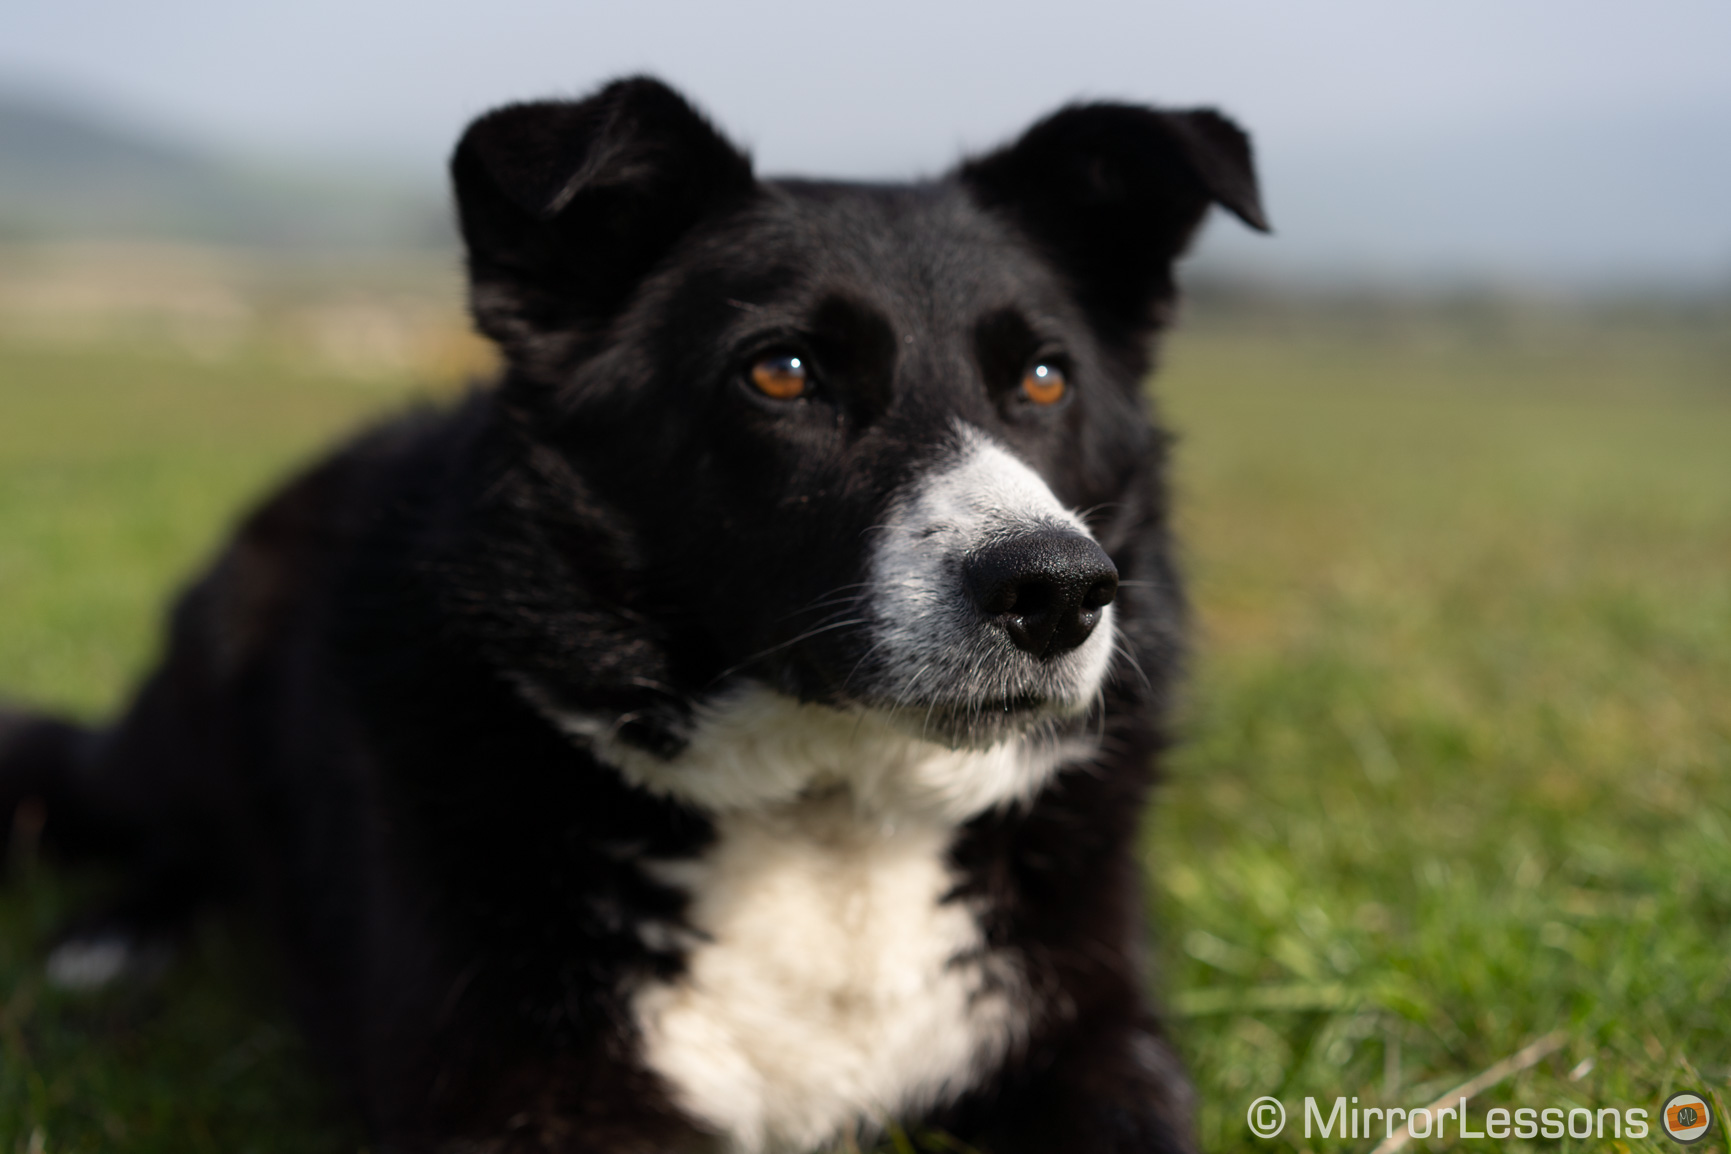
An example of misfocus on the eye
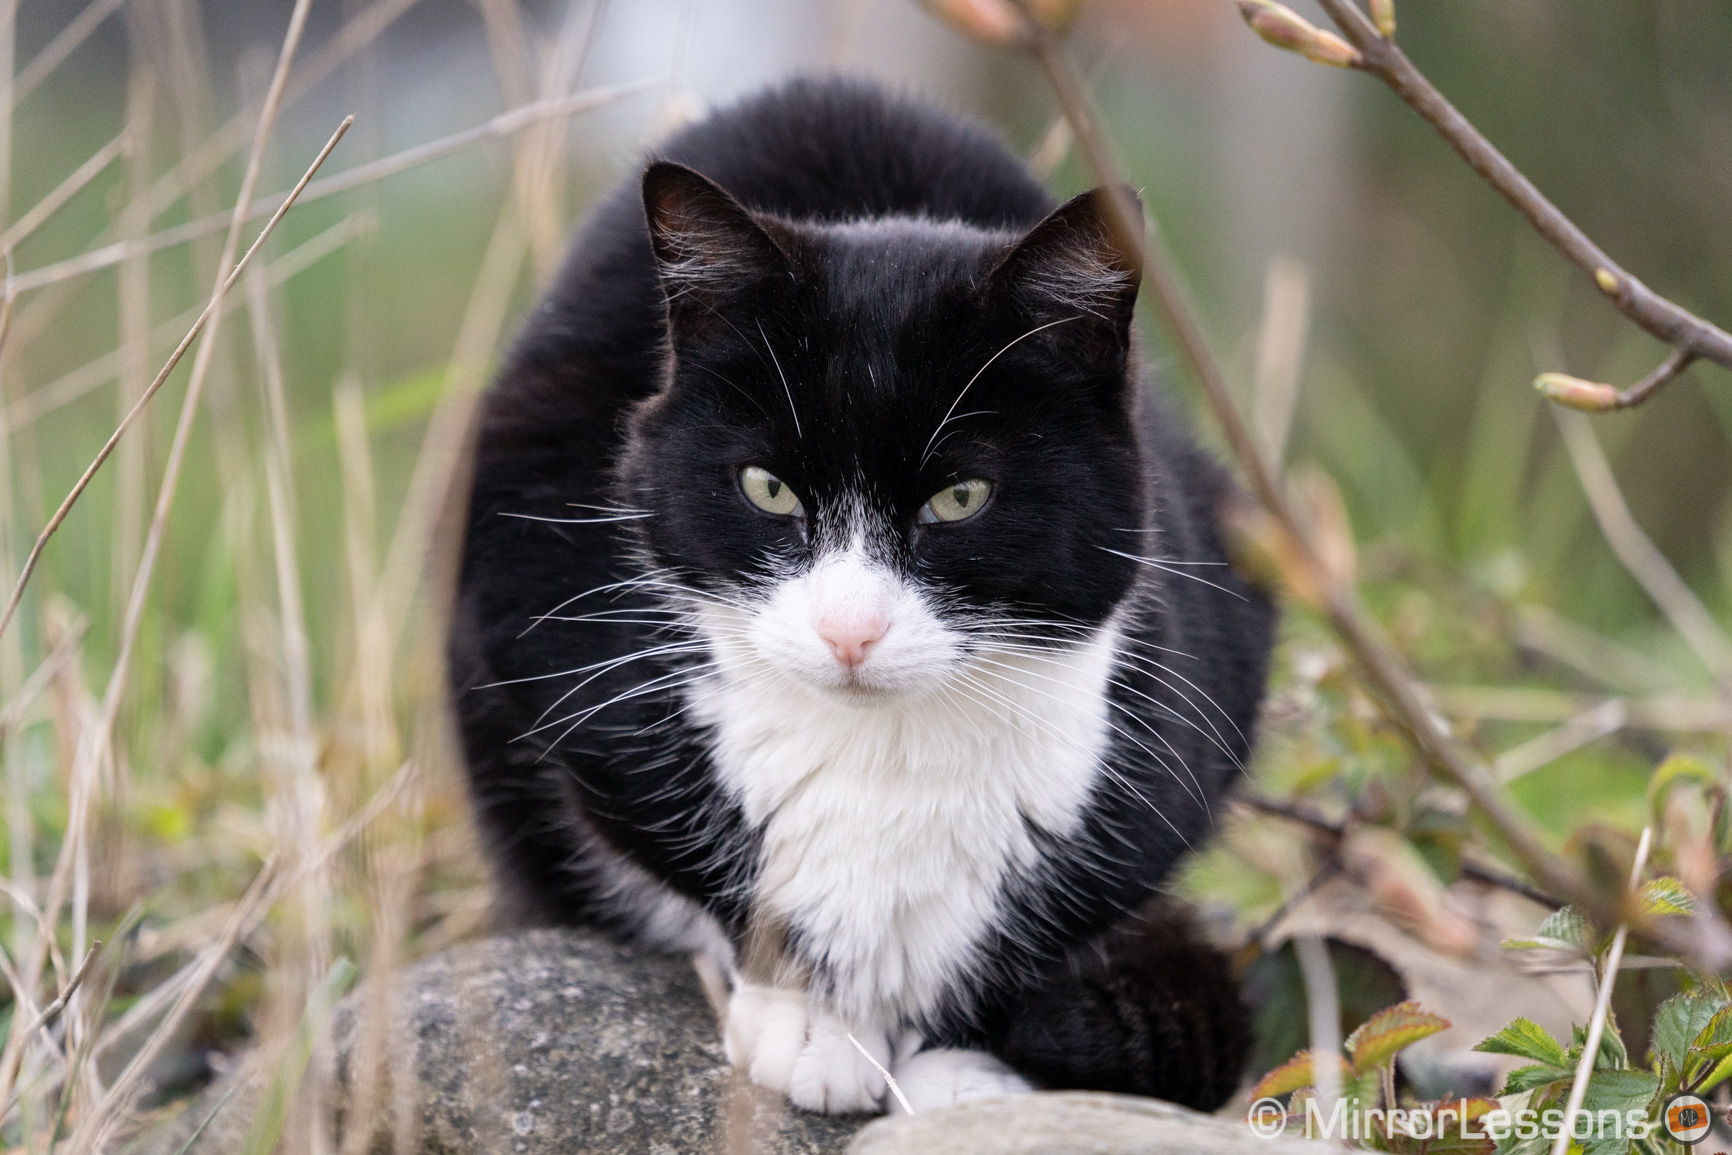
Later in the evening, I brought the A7 III on a walk in the hope of spotting some other animals. I saw a cat hiding in the tall grass and Eye AF worked right away.
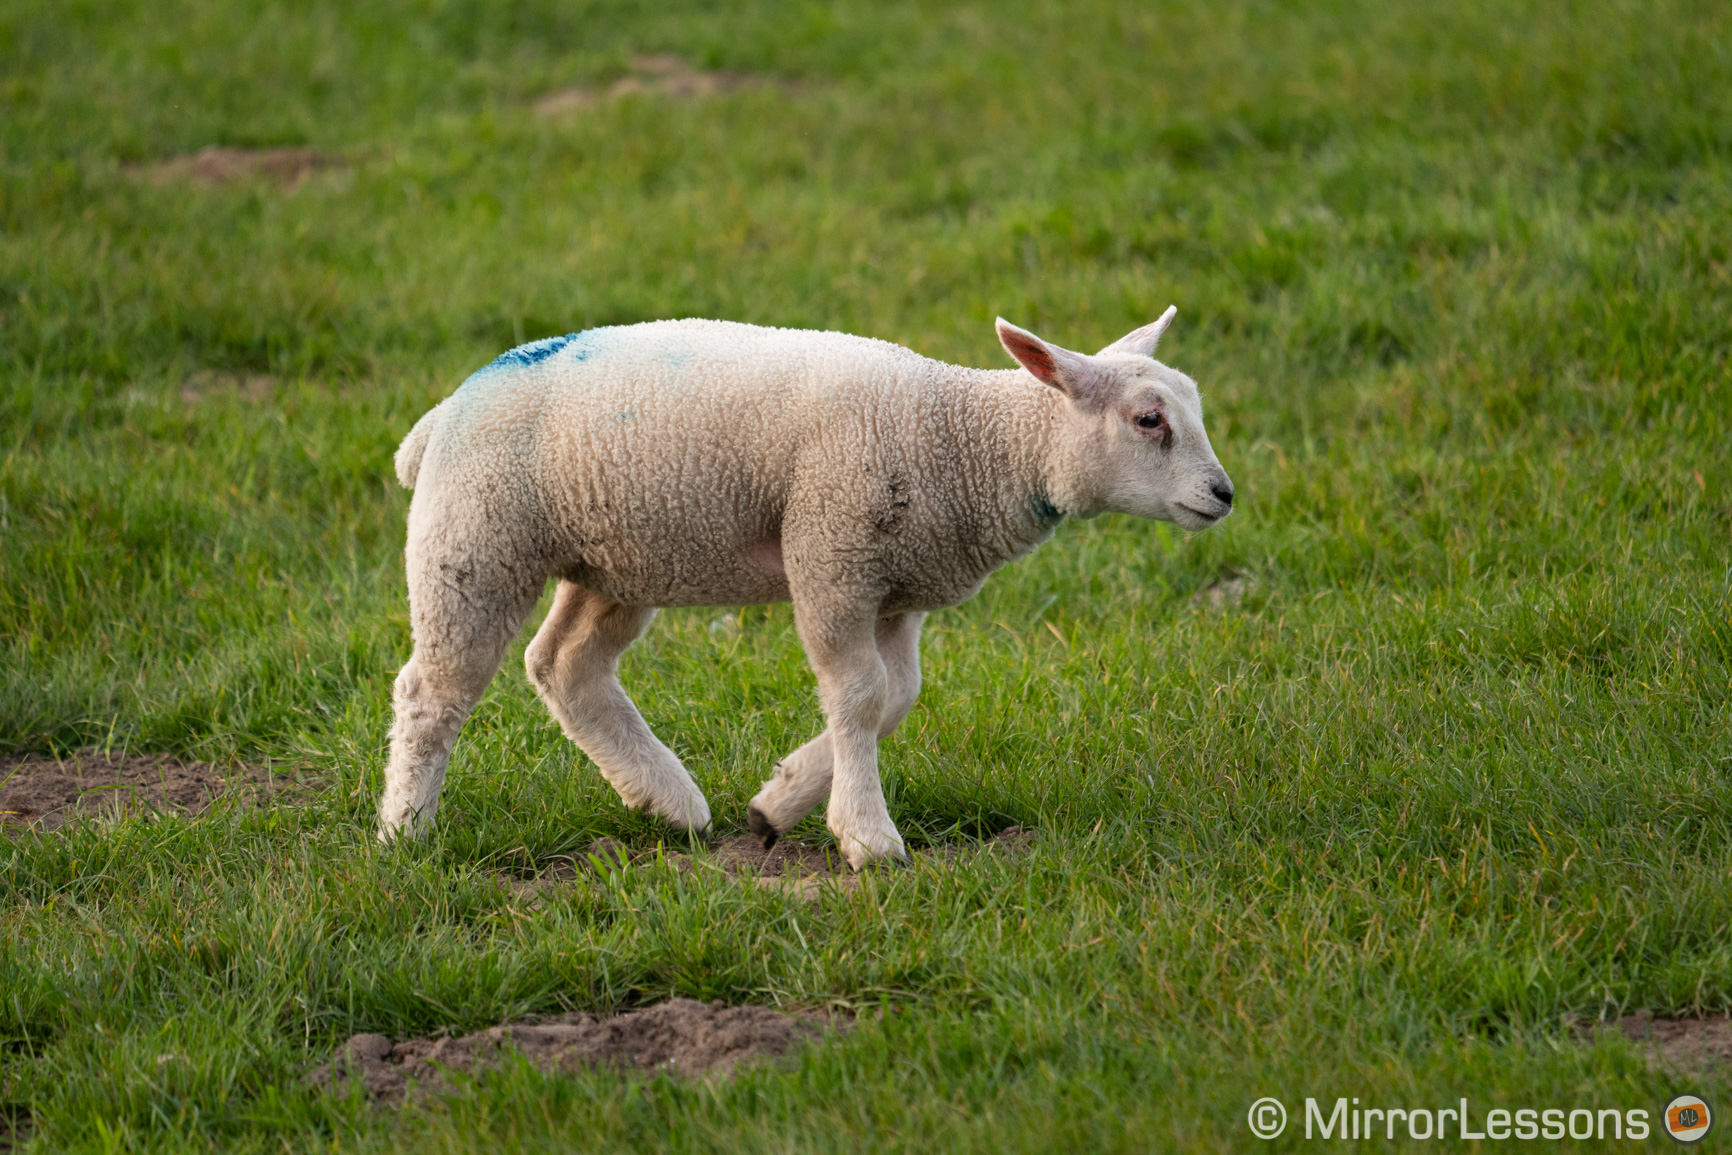
Then I tried it on a bunch of sheep and lambs resting in the field. With sheep it was less successful mainly because they were more distant but when a few lambs decided to run closer, the camera started to detect the eye even when the animal was facing sideways.
On the seafront, I spotted some seagulls resting on the groins. Unfortunately in this case Eye AF was hopeless, even when the bird filled a large portion of the frame.

In this example the eye wasn’t detected.
Another occasion to test Eye AF for animals came with firmware 2.0 released for the a6400 in June.
I spent a nice time at a friend’s house playing with her two dogs and one cat. The puppy, Clara, is one month old and wasn’t easy to photograph. Not only would she not stay still for more than a few seconds, but she also tried to jump on my hand several times (I guess the camera looked like a nice toy to play with).
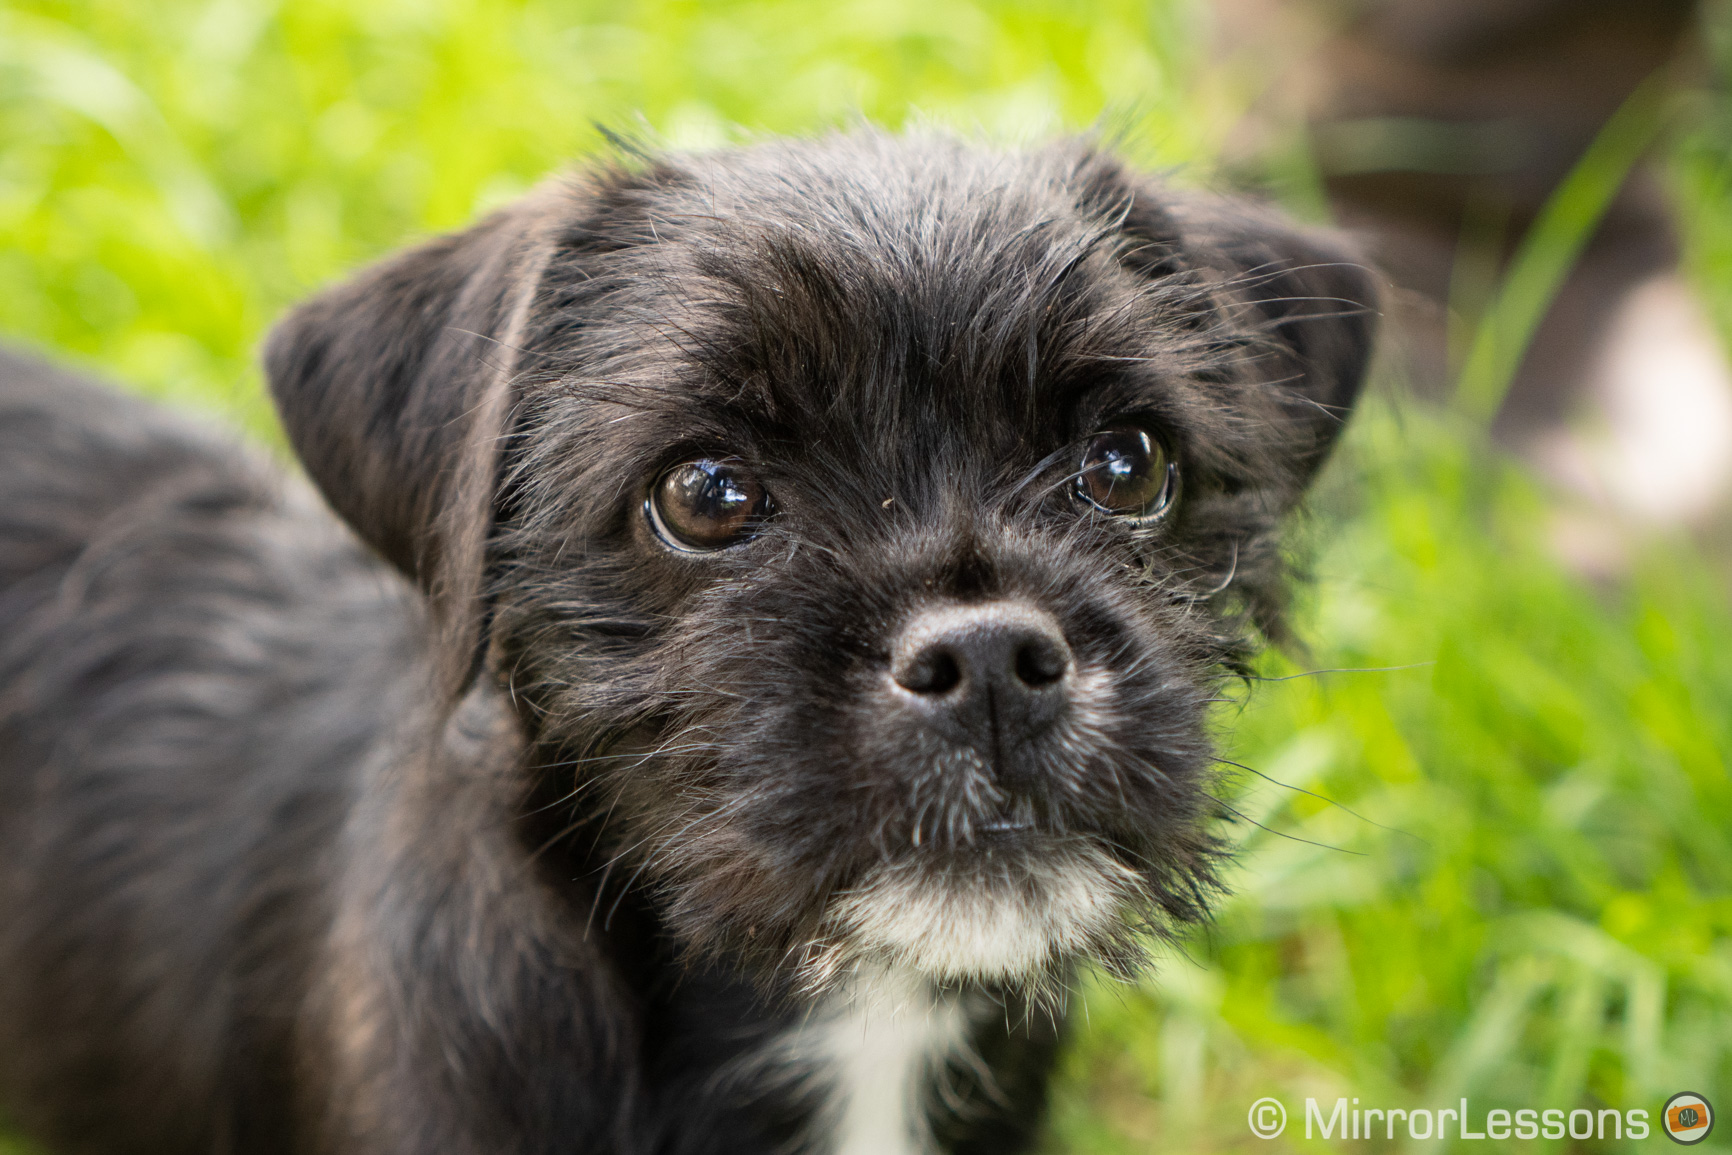
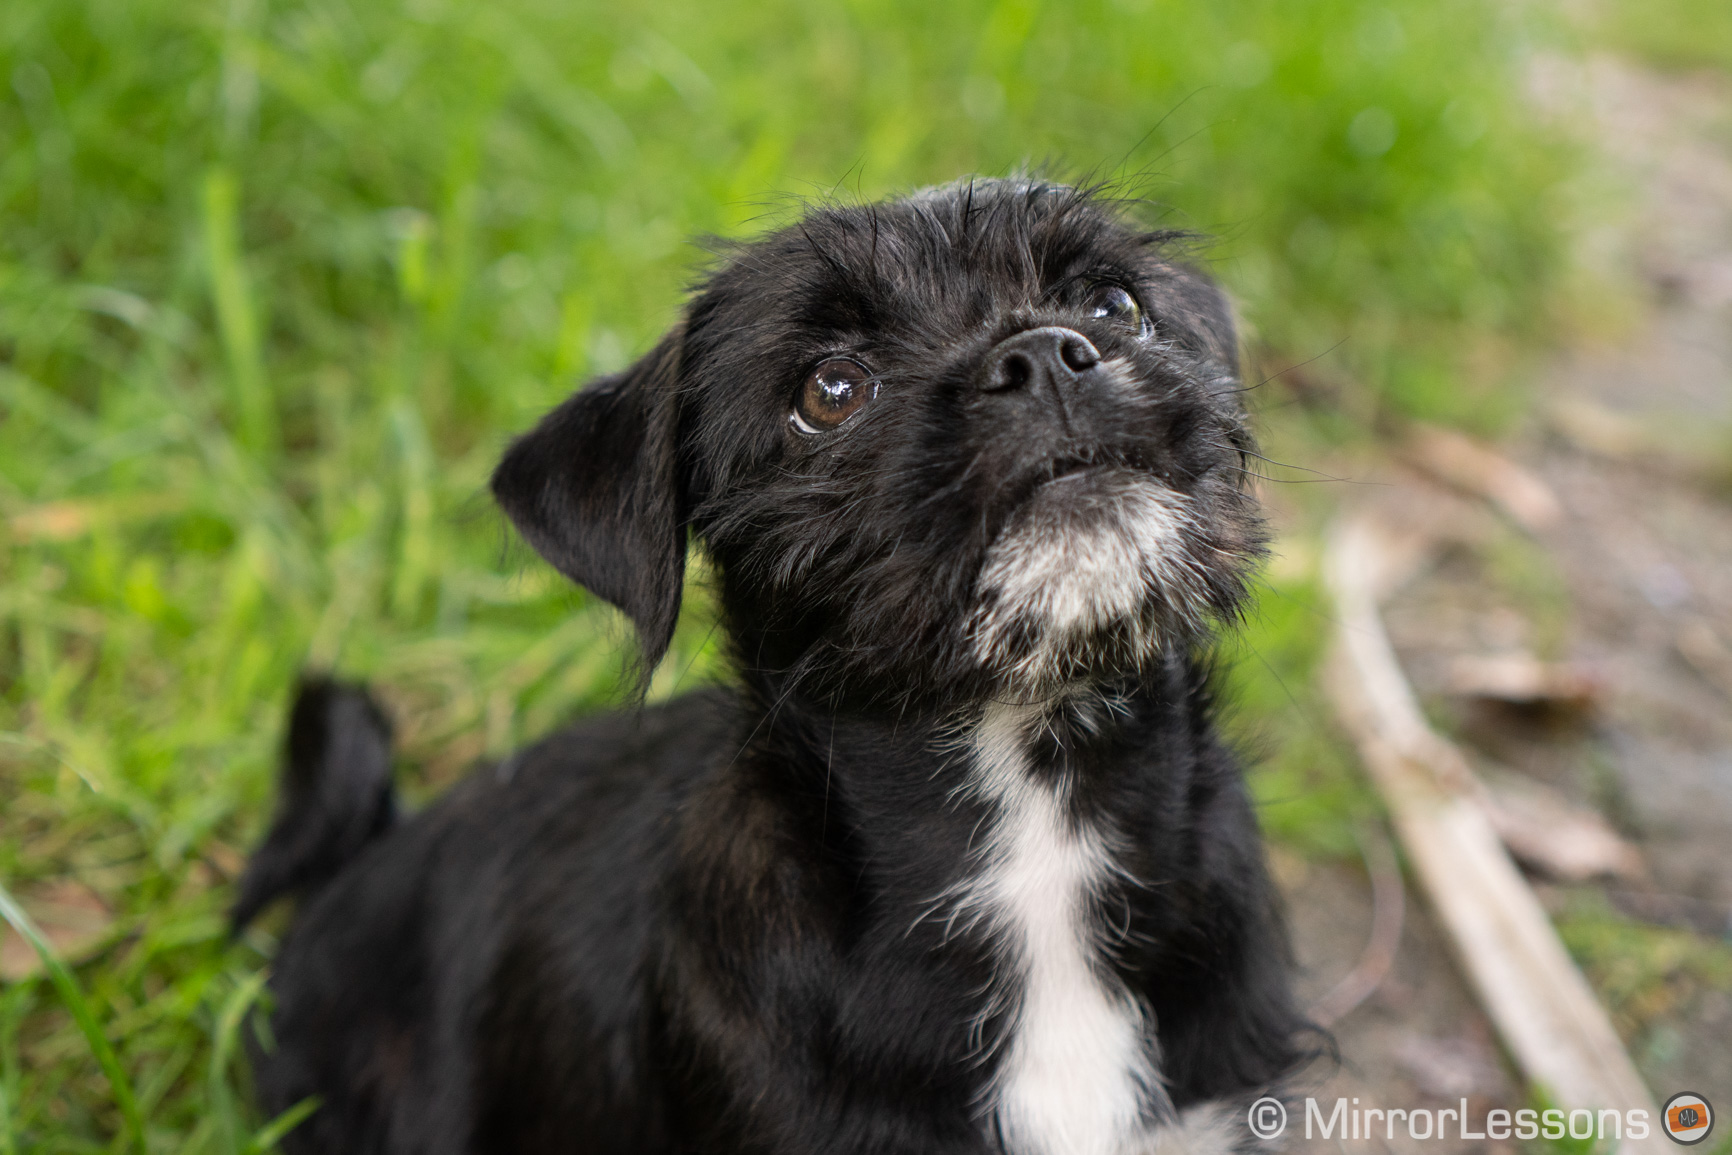
The older dog Mavis is also black, and every time the two were in shadows with the light behind them, the camera struggled to detect the eye. When the light was favourable however, the a6400 didn’t have any problem at all. I ended up with a few soft results, probably as a result of focusing too close and the dogs not staying still, but overall the performance was solid.
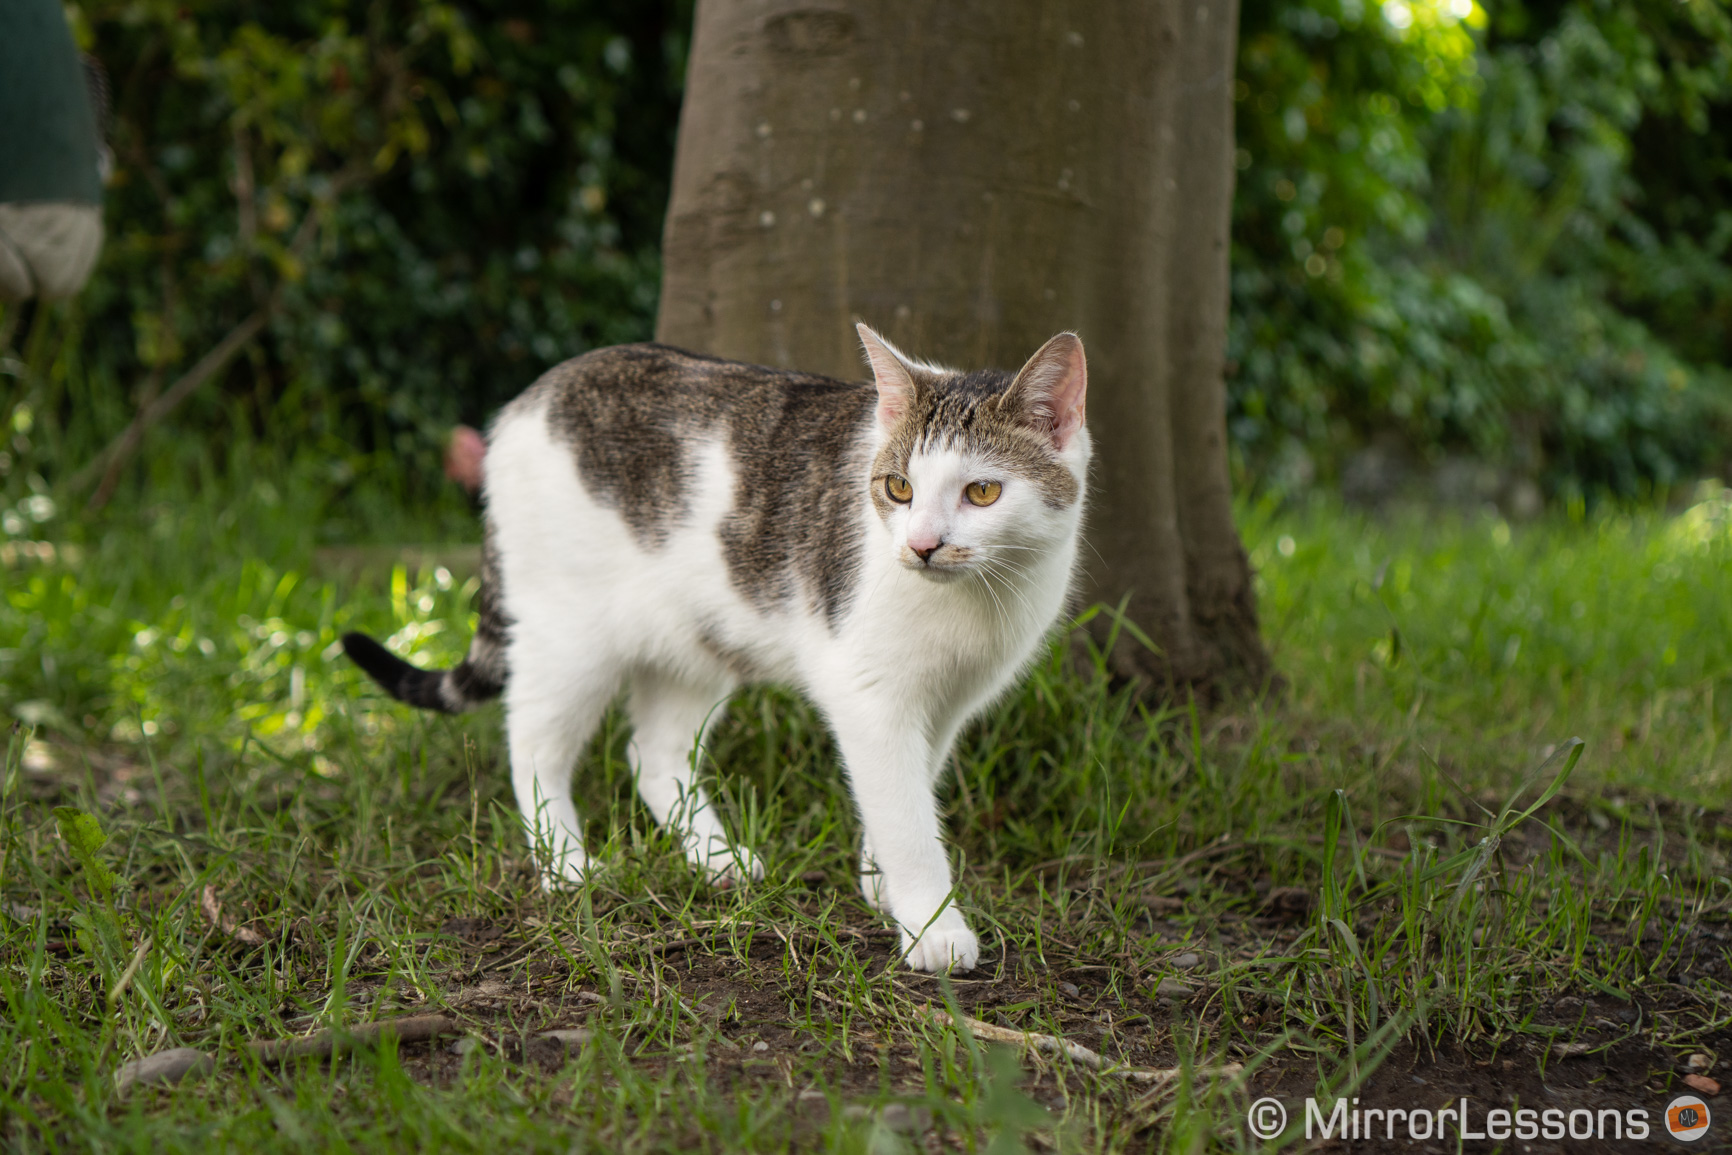
Tess the cat, who was elusive at first, decided to steal the show at some point by posing in the shade to the surprise of her owner. The cat, being much lighter in colour, was easier for the a6400 to detect even when she wasn’t very close.


Before wrapping up I decided to do one more test at home. I was curious to see how many different animals the cameras would recognise. I simply focused on my computer screen while displaying various photos found on the web. From lions to cows, from iguanas to snakes, the recognition capabilities were pretty good. Dolphins didn’t work but seals did. I even tried dinosaurs but it would often detect the eye in the wrong place (like the nostril of the T-Rex!)
Another thing I noticed is that sometimes the camera won’t detect the eye unless you are really close to the subject. Once it is detected, you can move back and the eye will still be tracked.
Interestingly, the a6400, A7 III and A7R III all detected the eye of an eagle and red kite right away, whereas seagulls weren’t recognised at all, which explains why it didn’t work in my real world test earlier.
I don’t think Eye AF is really necessary for birds in flight, but it could be useful for close-ups when certain species allow you to photograph them at short distances.
I am sure that Eye AF for animals will receive further tweaks with the next generation of firmware updates and camera bodies but I have to admit I am quite impressed by the performance so far.
Reminder: the links below are affiliate links. If you decided to buy something after clicking the link, we will receive a small commission.
Check price of the Sony a6400 on
Amazon | Amazon UK | eBay | B&H Photo
Check price of the Sony A7 III on
Amazon | Amazon UK | eBay | B&H Photo
Check price of the Sony A7R III on
Amazon | Amazon UK | B&H Photo | eBay
How to use Eye AF for animals on your Sony camera
If you own a Sony a6400, A7 III or A7R III mirrorless camera, you can use Eye AF to focus automatically on the eye of your favourite pet and many other animals.
Tools
- Sony a6400, A7 III or A7R III E-mount camera
- Computer with internet connection (Mac or PC)
- USB cable
Instructions
Part I: check and update your camera's firmware
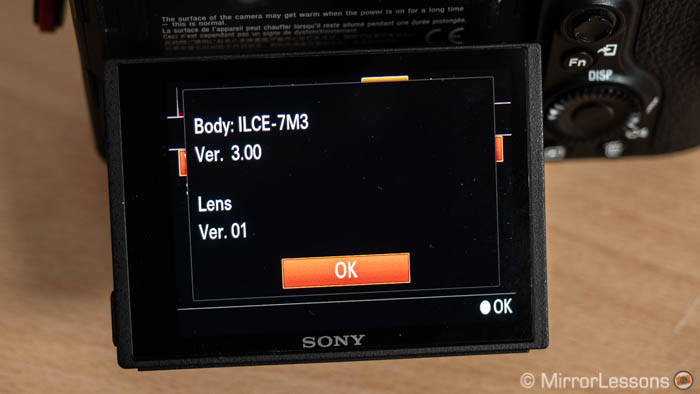
- Turn your camera on, go to page 7 in the Setup menu, select Version and check the body firmware version. You need 2.0 or greater for the a6400, 3.0 or greater for the A7 III/A7R III. If you have the correct version, skip to the second part. If you need to upgrade, go to point 2.
- In order to update the camera's firwmare, you need to download a software that contains the new version. To do that, open a broswer page on your computer and navigate to the Sony Support website.
- Select your camera series (ILCE-6000 for the a6400, ILCE-7 series for the A7 III/A7R III), choose your camera model and go to the download section. You should see a link with the words System Software (Firmware) in it. Choose the Mac or Windows version accordingly and follow the instructions.
- Make sure to have a fully charged battery inside the camera before running the update. Also, check that Mass Storage is selected in the USB Connection setting (Setup Menu, page 4). Open the downloaded software and follow the instructions. For Mac users running Mojave (10.14), you may need to open the Resources folder and double click on the SystemSoftwareUpdater.app to make it work.
- The upgrade process can take about 10 minutes. Once it is finished, close the updater sofware and disconnect the camera from your computer.
Part II: setup Eye AF for animals
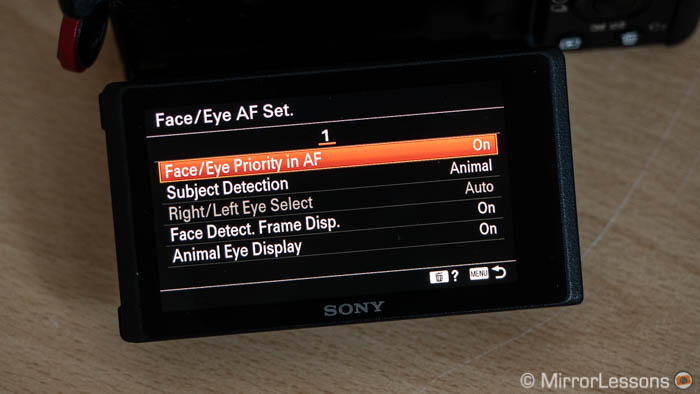
- Turn the camera on and navigate to the AF2 section (Shooting Menu 1, page 6). Select Face/Eye AF Set. and click the OK button.
- Choose On in Face/Eye Prty in AF: this activates and prioritises face and eye detection when focusing.
- In Subject Detection, select Animal. Note that you can't track humans and animals at the same time, you always have to choose one or the other.
- Ignore the Right/Left Eye Select setting: it only works with human subjects and it is not available on the A7 III and A7R III.
- Ignore the Face Detection Frame Display setting (you can activate it when tracking people however).
- Turn on Animal Eye Display: it gives you a visual confirmation that the eye has been detected successfully.
Part III: use Eye AF for animals
- Make sure to have the camera set in still mode and not movie mode; Eye AF doesn't work for video.
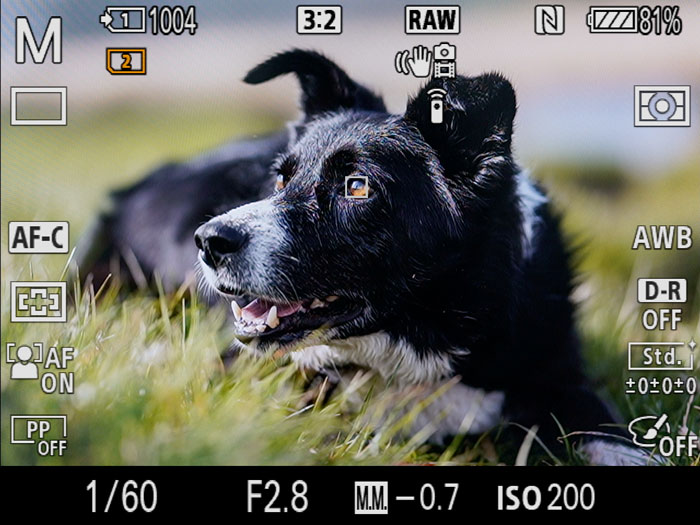
- Eye AF is available in AF-S, AF-A and AF-C modes, but unless your subject is perfectly still, I recommend to choose AF-C for better performance.
- Eye AF works in real time when half pressing the shutter button (or pressing the back button focus if your camera is configured that way): you should see the small green rectangle overlaying the eye of the animal on the LCD monitor or viewfinder. To make sure Eye AF works properly, select a large Focus Area such as Wide or Zone.
- Take a shot and enjoy!
Notes
Another method to use Eye AF is to assign it to a Custom Key (function button). The advantage in this case is that the custom key will override any focus area selected, so you don't have to worry about choosing a large focus area such as Zone or Wide.
- Go to Custom Operation 1 (page 8 in the Shooting Menu 2) and enter Custom Key.
- Choose which button you want to assign Eye AF to, and scroll the list until you find Eye AF (it should be around page 6/AF3). Click ok, then exit the menu.
- Compose your image, press and hold the custom key you chose in point 2 to start tracking the eye.
Tips and tricks
Recommended Products
Disclaimer: the links above are affiliate links. If you buy something after clicking one of these links, we will receive a small commission. If you wish to find out more, please visit our disclaimer page. Thank you!