Updated on: January 8th, 2019
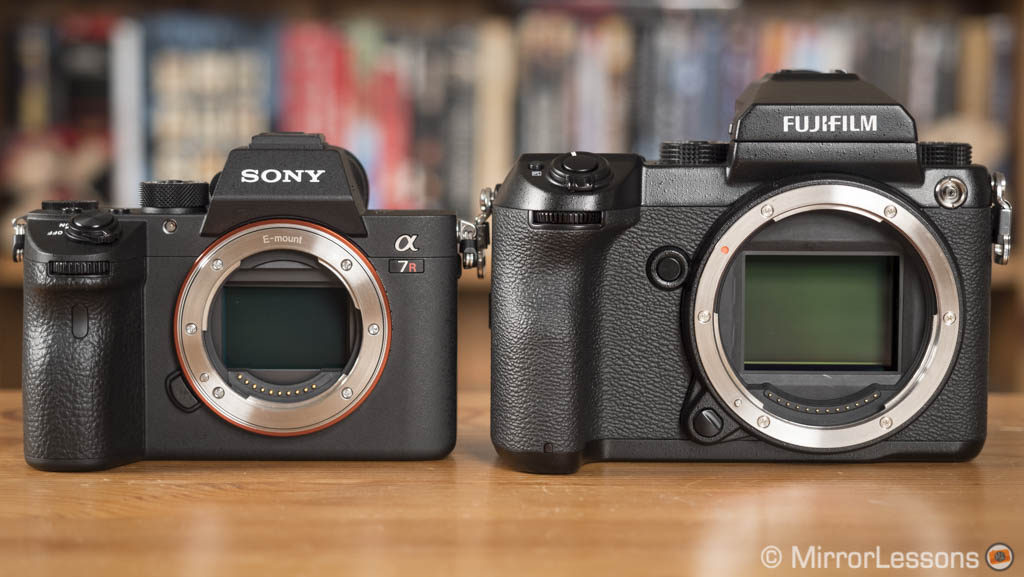
Not even two years ago, the idea of a mirrorless medium format camera felt like something completely out of reach. Then, out of the blue, Hasselblad announced the X1D system and only a few months later, Fujifilm followed suit with the GFX. The latter has been more successful overall, in part because it is priced more competitively than the X1D and in part due to the popularity of the Fujifilm X-series.
On the other hand, we have Sony which is not only known for its cameras but also its sensors. One of the best 35mm chips ever made powers the A7r III but the company, being the largest image sensor manufacturer in the world, also produces sensors for other brands, including Fujifilm. The 50s sensor is also used by Hasselblad, PhaseOne and Pentax, although Fuji claims that the one inside the GFX comes with some tweaks.
So, here we have two of the best mirrorless cameras on the market in terms of image quality. But just how much of a difference is there between them? Let’s find out!
*: Before the X1D, PhaseOne designed digital backs for Alpa film cameras which lack a mirror, so technically the A-series can be considered the first mirrorless medium format despite not being a completely original digital product. The price is also much higher.
Ethics statement: We bought the Sony A7r III for our personal use to write reviews and comparison articles. The Fujifilm GFX was loaned to us for two weeks. We were not asked to write anything about these cameras, nor were we provided with any sort of compensation. Within the article, there are affiliate links. If you decided to buy something after clicking the link, we will receive a small commission. To know more about our ethics, you can visit our full disclosure page. Thank you!
[toc heading_levels=”2″]
Article updates
- January 2019: extra info about latest firmware updates
- July 2018: a few minor edits following the release of firmware 3.10 (GFX) and 1.10 (A7R III)
- March 2018: Dynamic Range section updated to correct information concerning the DR settings of the GFX
Main Specs
A7r mark III
- Sensor: 42MP 35mm format BSI Exmor CMOS
- Lens system: E-mount
- Weatherproof: Yes (dust and moisture)
- Internal Stabilisation: Yes (5-axis)
- Autofocus: Hybrid with 399 phase and 425 contrast detection points
- Continuous shooting: 3fps to 10fps with AE/AF Tracking
- ISO Sensitivity: 100 – 32000 ISO (pull 50, push 51200 to 102400)
- Shutter Speeds: 1/8000 to 30s
- Viewfinder: 0.5in OLED with 3,686k dots, 23mm eye point, 0.78x magnification and 120fps refresh rate
- Rear monitor: Tilting 3″ LCD (1.44M dots) with touch sensitivity
- Movie recording: 4K up to 30fps, Full HD up to 120fps, S-Log and HLG gamma
- Built-in Flash: No
- Extra Features: WiFi, Bluetooth, Bracketing, Pixel Shift Multi Shooting, Tethering, Dual SD slots
- Dimensions: 126.9 x 95.6 x 73.7mm
- Weight: 657g (including battery and memory card)
- Firmware version: 2.10
GFX-50s
- Sensor: 51.4MP medium format (43.8×32.9mm) CMOS
- Lens system: GF
- Weatherproof: Yes (dust, moisture and -10°C)
- Internal Stabilisation: No
- Autofocus: Contrast detection with 117 points
- Continuous shooting: 3fps with C-AF
- ISO Sensitivity: 100 – 12800 ISO (pull 50, push up to 102400)
- Shutter Speeds: 1/4000s to 4s, up to 1/16000s with electronic shutter, Bulb up to 60min
- Viewfinder: 0.5in OLED with 3,690k dots, 23mm eye point, 0.85x magnification and 60fps refresh rate
- Rear monitor: Tilting 3.2” LCD (2.36M dots) with touch sensitivity
- Movie recording: 1080p up to 30fps
- Built-in Flash: No
- Extra Features: WiFi, RAW Conversion, AE and Focus Bracketing, Tethering, Dual SD card
- Dimensions: 147.5 x 94.2 x 91.4mm
- Weight: 825g (including battery and memory card)
- Firmware version: 3.30
Preface: 35mm vs medium format
The Sony A7r mark III features a 35mm format sensor (35.9x24mm) which is smaller than the medium format chip found on the GFX-50s (43.8mm x 32.9mm). The difference in size isn’t enormous as you can see below: the GFX sensor is approximately 1.7x bigger. In fact, there is a bigger difference between a 35mm and APS-C sensor than there is between these two.
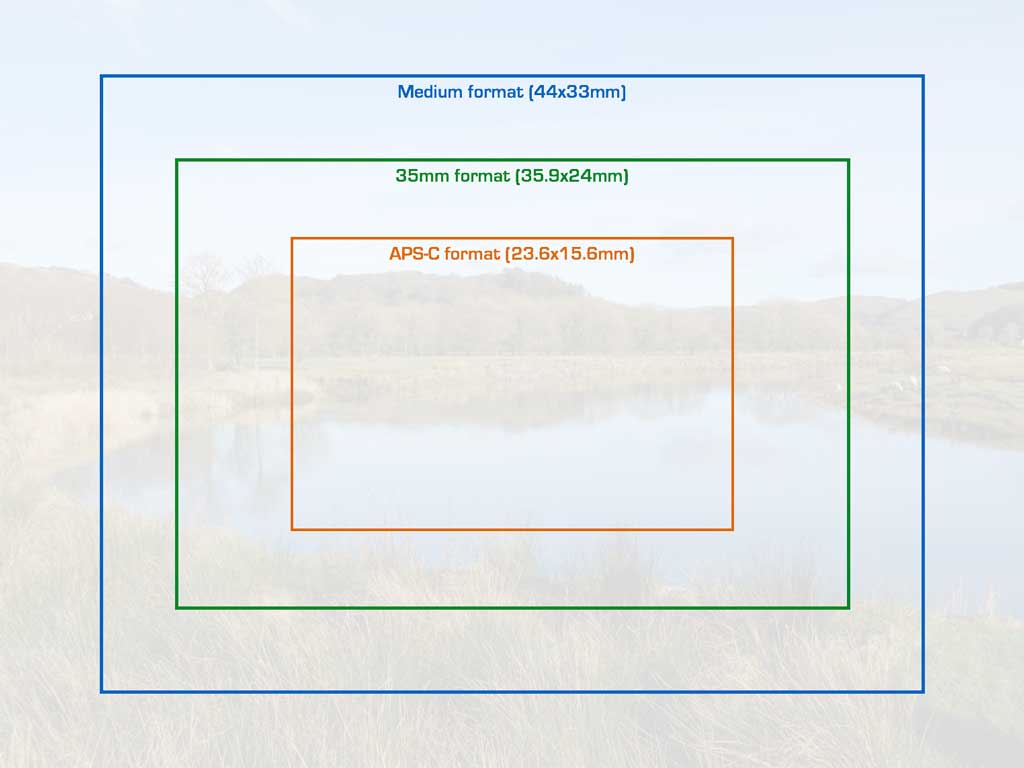
When referring to photography gear, we tend to use the 35mm format (also called full frame) as a reference when it comes to crop factor, field of view and aperture equivalence. But how does it work with a larger sensor? Well, here are some quick numbers to give you a better idea:
- the crop factor between the two formats is approximately 0.8x, which means that a 63mm lens designed for the GFX-50s gives you the same angle of view as a 50mm lens designed for the A7r III
- the aperture equivalence (valid for depth of field only) follows the same math: a 2.8 aperture on the GFX sensor gives you roughly the same depth of field as a 2.2 aperture on the A7r III (with same angle of view and focus distance).
The sensor of the GFX can be considered the “APS-H” of medium format since it is smaller than the popular 120mm film. There are some digital cameras (Hasselblad H6D-100c and Phase One XF 100MP) that are considered the “full frame” cameras of medium format because their sensor size (53.9×40.4mm) is closer to 120mm film.
Coming back to our two contenders, there are a few extra technical points to explain. The A7r III has a resolution of 42.4MP while the GFX has 51.2 effective megapixels. The GFX sensor has a 4:3 native aspect ratio while the A7r III, like all 35mm cameras, is 3:2. Note that in many of my examples, I cropped the GFX shot into 3:2 to make the images easier to compare.

The Sony uses a BSI sensor (Backside Illumination) which means that the photodiodes are closer to the on-chip lenses and can collect light more efficiently than a Front-Side Illuminated sensor. Neither has a low-pass filter so as to maximise sharpness.
One interesting thing I noticed in my tests is that the GFX underexposes a little more than the A7r III (with the same exposure settings, of course). A possible cause could be the light transmission being slightly different between the lenses used, or because Fujifilm uses a different ISO standard than Sony. In real world use though, I wouldn’t worry about this too much.
Another curiosity is that both cameras have a crop mode that works with RAW and JPGs files: Super 35/APS-C for the A7R III which gives you an 18MP image, and 35mm Format Mode for the GFX (firmware 3.00) which gives you approximately 30MP.

To close this preface, a word about the lenses: I performed all my tests with the FE 55mm f/1.8 on the Sony and the GF 63mm f/2.8 on the Fuji. Ideally I would have liked to work with the same field of view but these two lenses were the closest I had access to at the time. They’re both really sharp and performed well for the requirements of this review.
Dynamic range
Let’s kick off with a topic that is always amongst the most popular: dynamic range, or how much detail the two cameras can capture in the shadows and highlights. Both products can shoot uncompressed RAW with 14-bit. The A7r III has a compressed option while the GFX has a lossless compressed setting.
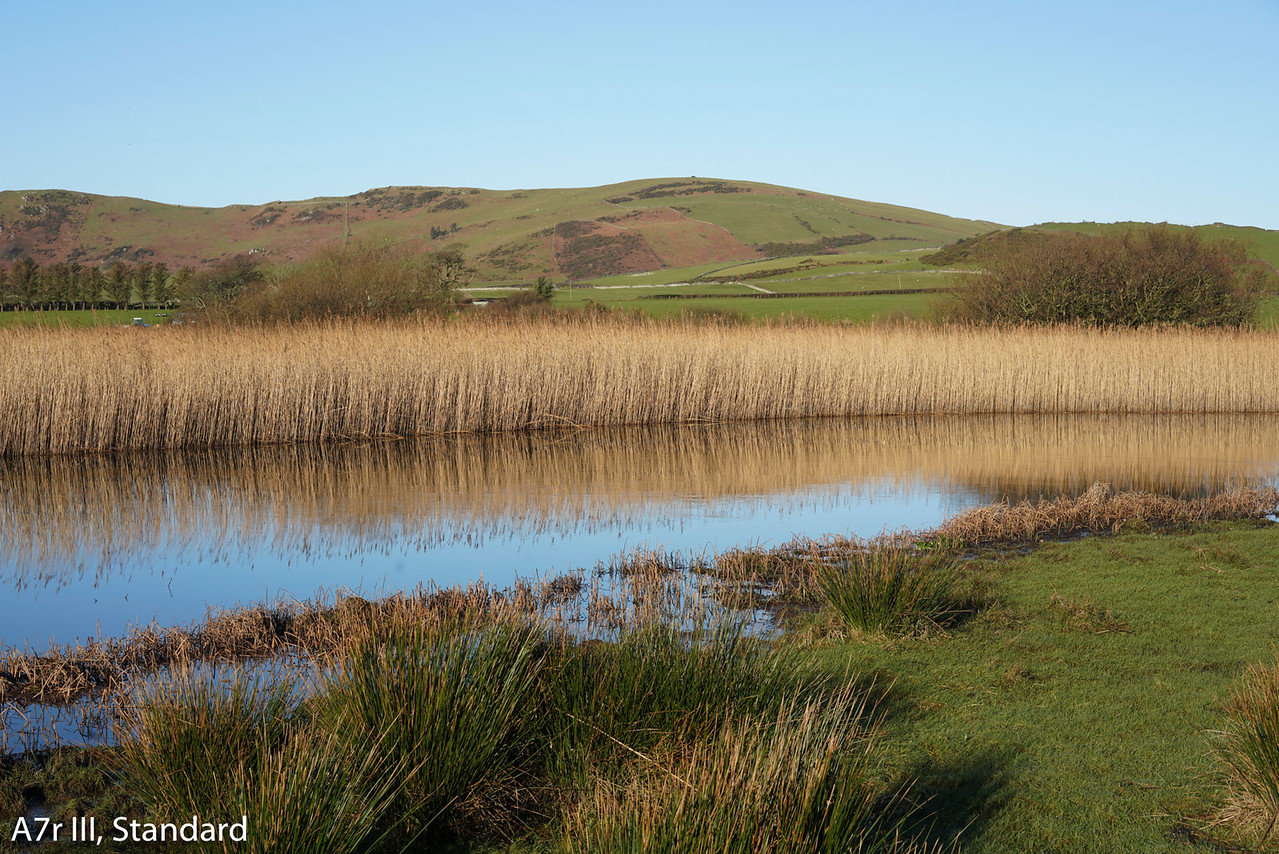
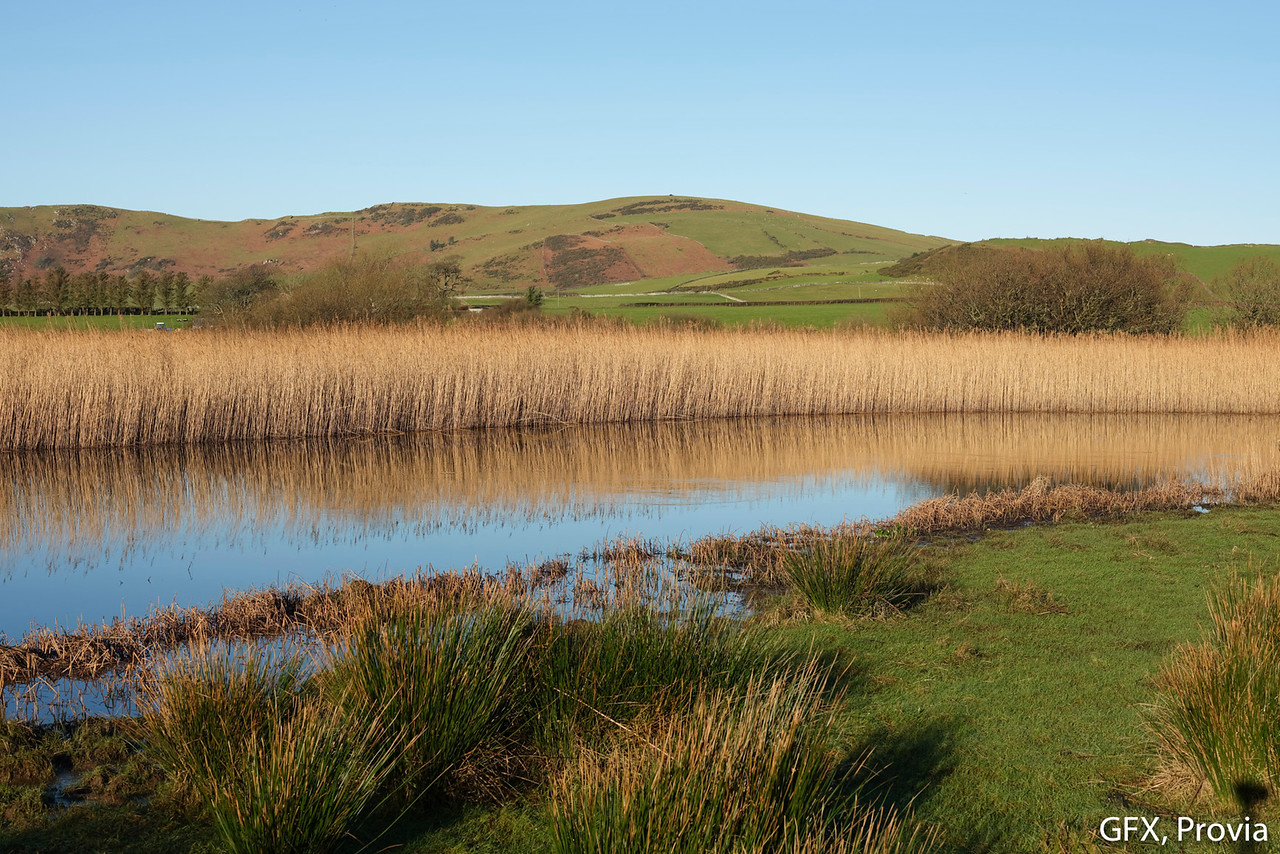
Our first example is a picture taken in the woods with the sun behind the trees in the morning. It was purposely underexposed to see how much I could recover the shadows. As you can see, the results are pretty similar. The only thing worth mentioning is the sharper details in the Fuji image. The A7r III file also required a little bit more noise reduction to get rid of colour noise.


Our second example was taken indoors with less light than in the park and this time the difference is more relevant. The Sony displays more noise and the strong shadow recovery causes some colour cast as well. I adjusted the exposure of the GFX image by an extra 1/2Ev to match the brightness of the Sony.


The same shot – this time overexposed to analyse highlight recovery – tells us a different story: it is actually the A7r III that recovers more information in the highlights.


The GFX has a setting called DR that can be set to 200 (for ISO 200 and above) or 400 (for ISO 400 and above). It underexposes the image by one or two stops to preserve more highlight information and boost the shadows. With the RAW files, it is less relevant because it is no different to underexposing your image by 1 or 2 stops manually and recovering the shadows in post production. It can make a more relevant difference to the SOOC JPGs as you can see further down.
The final RAW file test was another indoor scene in the evening with just one small source of artificial light. The purpose was to test the ISOless capabilities of the sensor. ISOless means that I can underexpose a shot, bring the exposure back in post and (theoretically) obtain the same result as if I had raised the ISO in the first place. Neither passed the test 100% but once again the GFX does better at extreme shadow recovery.


What about straight out-of-camera JPGs? I set the DRO (D-Range Optimiser) to +5 on the A7r III and chose the Deep style which gives you the widest range of the various profiles. On the GFX, I used ISO 400 with DR400, set -2 for the highlights and shadows and chose the Pro Neg Std profile. The Sony displays more brightness in the darker areas but the Fuji doesn’t lose any highlight information. The GFX version has less saturation due to the profile I chose but I could have increased that in camera.
ISO sensitivity
Low light performance is definitely another popular theme when we talk about image quality. But first, let me share some official figures:
- The A7r III has a normal range of 100 to 32000 ISO and extended values that go as low as ISO 50 and as high as 102400 ISO.
- The GFX has a smaller range of 100 to 12800 ISO but the extended levels are the same with pull 50 and push up to 102400.

Up to 3200 ISO, the GFX defends itself really well. From 6400 it starts to display more noise. At 25600, the GFX is already working with the extended values and you can see the degradation more clearly. 51200 is the last acceptable result for the A7r III. Overall the Sony files require a little more noise reduction to minimise colour and luminance noise.


Looking at the SOOC JPGs, it’s interesting to note how well the GFX behaves with noise reduction kept to a minimum (between -4 and -2) because there aren’t any traces of colour noise, unlike the Sony images. At the highest level though, the GFX result looks a little bit waxy.

Colours and picture profiles
As always when we reach this chapter, it is important to remember the difference between RAW and JPG files. With the former, colours can change depending on the profile applied by the software. For example, Lightroom uses Adobe Standard by default for every camera while Capture One applies its own for each. So right from the start, one RAW file taken with the same camera can assume a different look depending on the post processing software you open it with.
Now the nice thing about RAW files is that they make it easy to match the two cameras. Let’s analyse the landscape image below: opened in Lightroom without any tweaks, the Sony file displays more of a yellow tint but it only took a few adjustments to match a very similar result with the GFX.
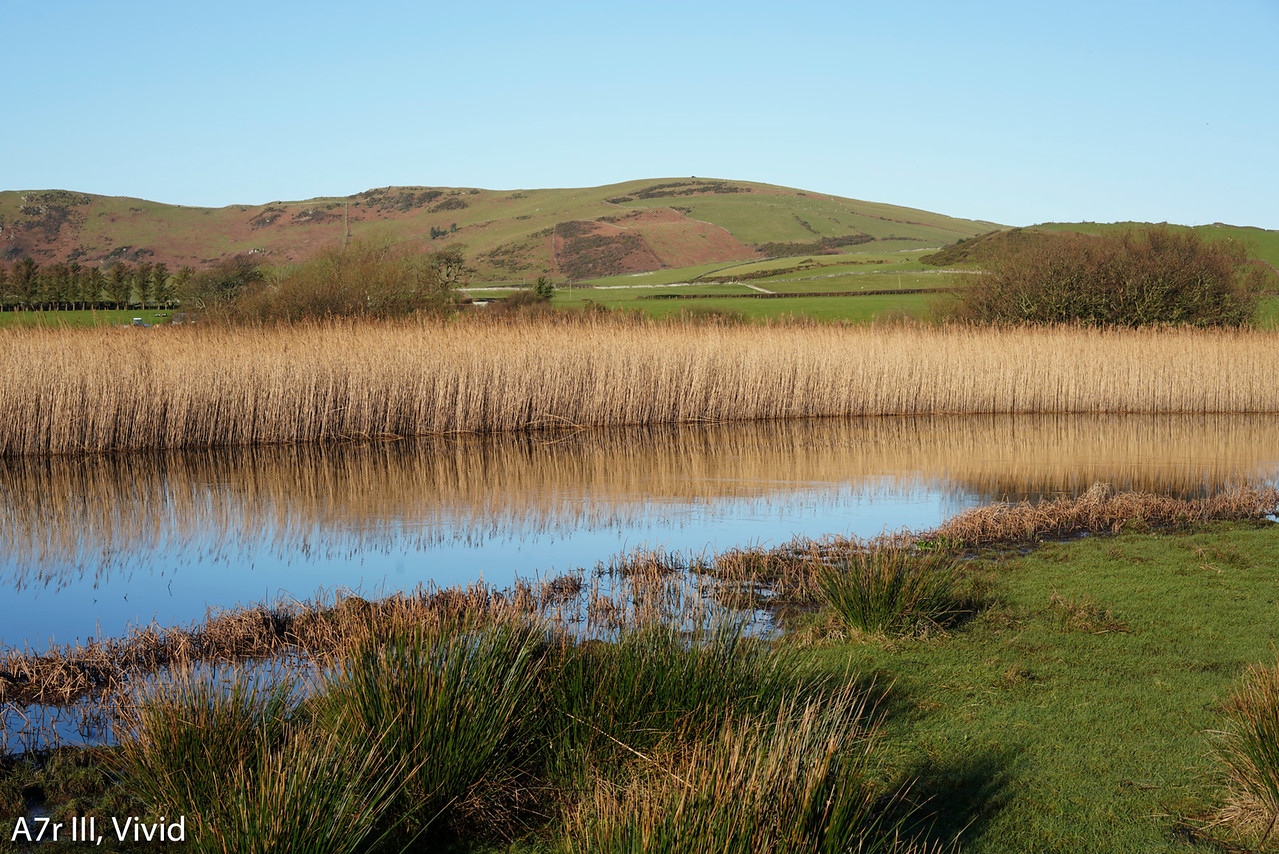
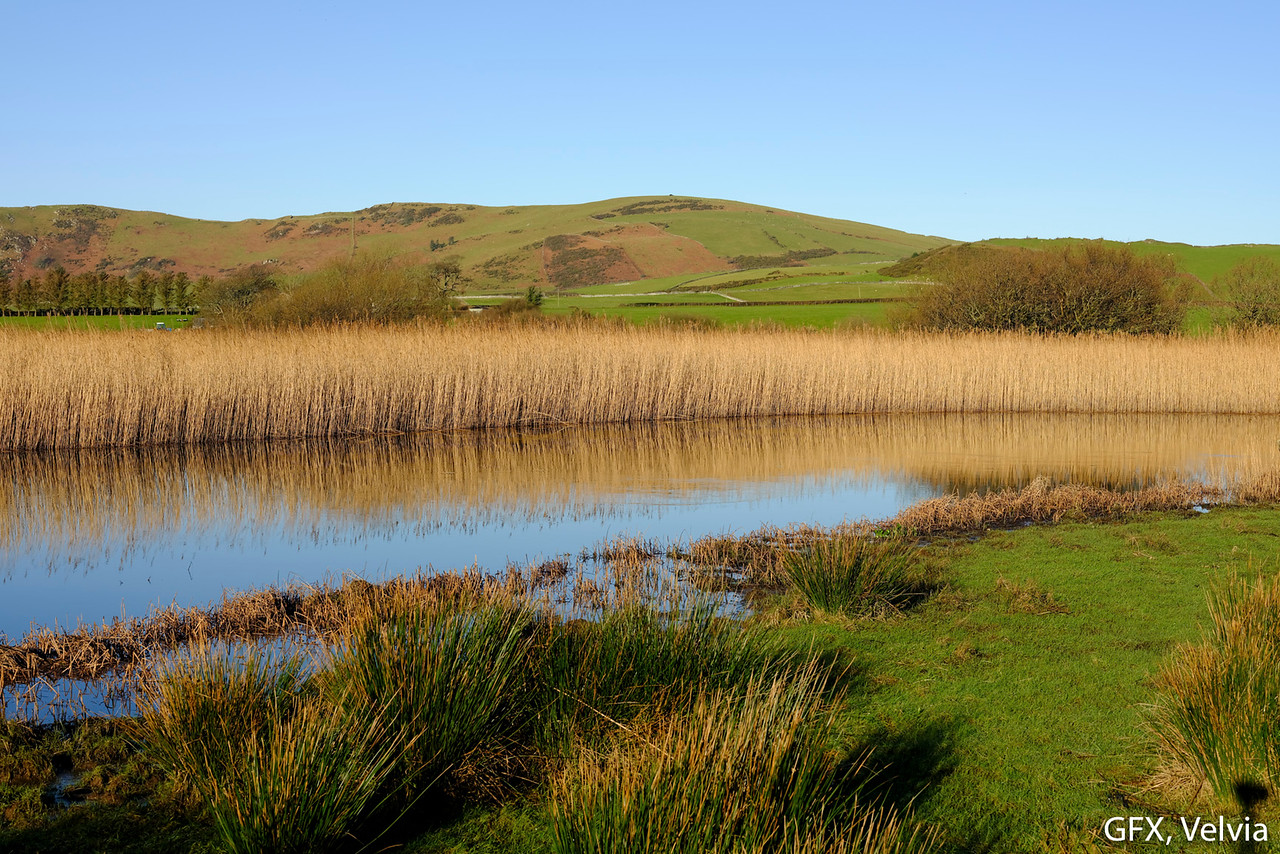
Now if I analyse the in-camera colour profiles (Creative Styles for the Sony or Film Simulation modes for the Fuji), it’s a different story. By comparing the two standard settings (also called Provia on the GFX), we can see that the Fuji produces a warmer and more vibrant look. The difference is more evident when comparing the two vivid profiles (Velvia on the GFX). The Landscape style on the Sony pushes the colours more but I still prefer the GFX image.
Note: you can tweak the in-camera settings on both to increase the saturation or warm-up the image to your taste but so as not to overcomplicate the article, I stuck with the default values unless otherwise stated. Also, some software programs like Lightroom include these profiles so that you can apply them to your RAW file and bring back the colour palette you saw in camera.

An even more significant difference is observable in cloudy natural light. As you can see in the second example below, the Sony has a much cooler rendering with the same Kelvin temperature in comparison to the GFX. Although they can easily be matched by using the RAW files, it is more evident with the camera profiles.


The third example was taken indoors with one source of artificial light. Here the same reasoning for the RAW files applies, although more adjustments were required to match the two images. There are still a few subtle differences in certain colour tones as well.


The in-camera profiles show interesting results once again. The GFX tends toward a yellowish/greenish tint when you select the Kelvin value manually, so I adjusted the WB Shift (R+1, B+1) to make it look more natural.


Browsing through the individual profiles, there is one that really stands out for me on the GFX and that is Classic Chrome. By tweaking the settings further (color at +2, shadow at -1 and Chrome Effect on Weak), the camera really proves capable of delivering a very distinctive colour palette.

That being said, the Sony can do well with the right Creative Style and I particularly like how Neutral works here, although a small push in saturation would be welcome.

I could continue but you get the idea. The differences in colour rendering may appear subtle in some cases but they are definitely there. The GFX has more settings that tweak the results in-camera and the built-in RAW converter allows you to save a TIFF file as well so you can have a high quality file ready in-camera. (I wish I could select TIFF when shooting!)
Last but not least, I always like to remind people that colours are subjective: what suits my taste may not suit yours. And of course there are additional factors to consider such as monitor calibration and the whole printing process.
One last word about the white balance behaviour of both cameras. In natural light they work in a similar way: the AWB gives a slightly cooler image by default. With artificial light the results can vary dramatically.
You can see below that while the A7r III required some WB adjustments in manual mode, the result was fine with the AWB setting. The GFX on the other hand needed extra adjustments (WB Shift) for both Auto and Manual modes.


Skin tones
Portrait photographers are sensitive to skin tone rendering so I decided to separate it from the previous chapter even though it is closely related.
Again with the RAW files, the results can easily be matched. The A7r III produces slightly more red but it’s not a drastic difference.


With the camera profiles, the GFX has richer tone transitions but I like how the A7r III keeps the skin colour uniform. With all Fuji profiles I had to correct the White Balance shift to get rid of the greenish dominance (R+1, B+2 worked fine in this case).


WB Shift R+1, B+1, +2 Color for Classic Chrome
Monochrome profiles
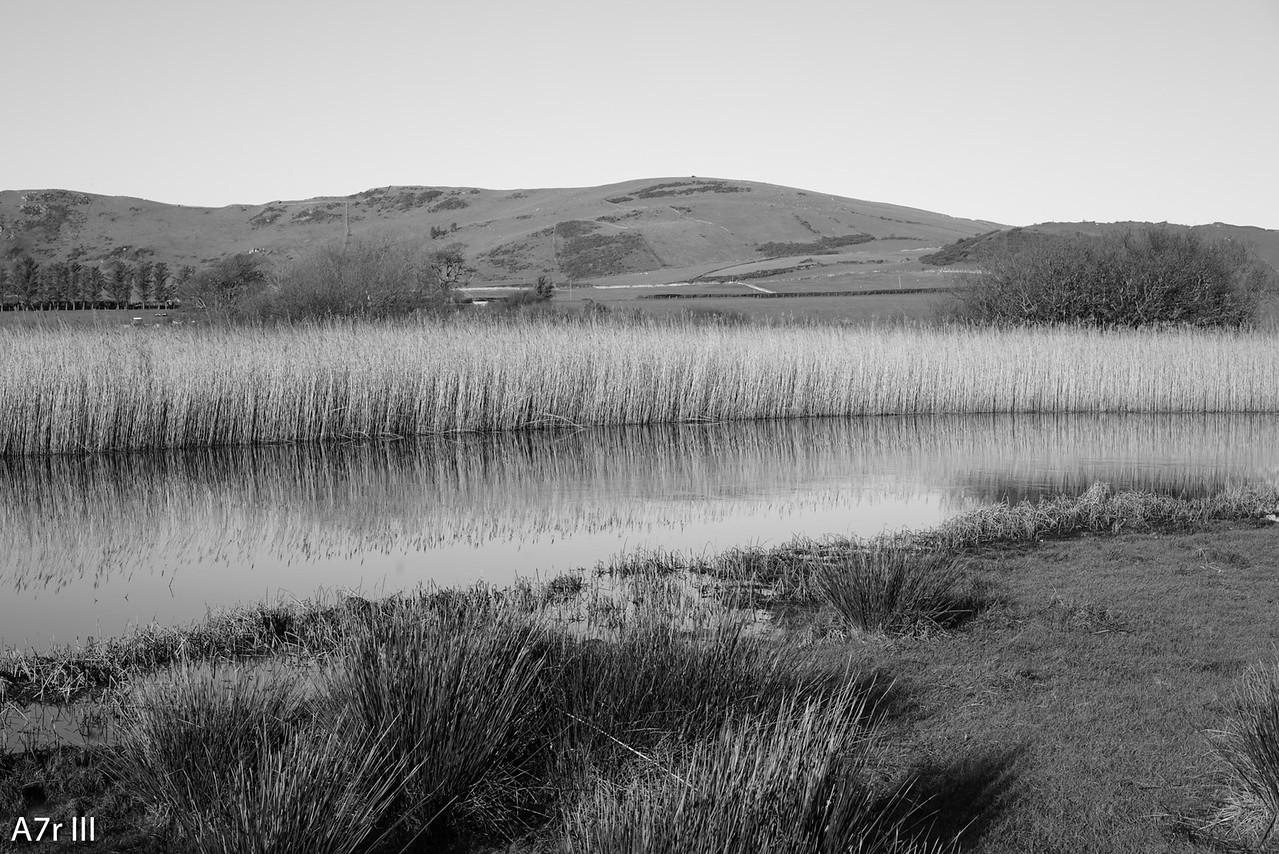
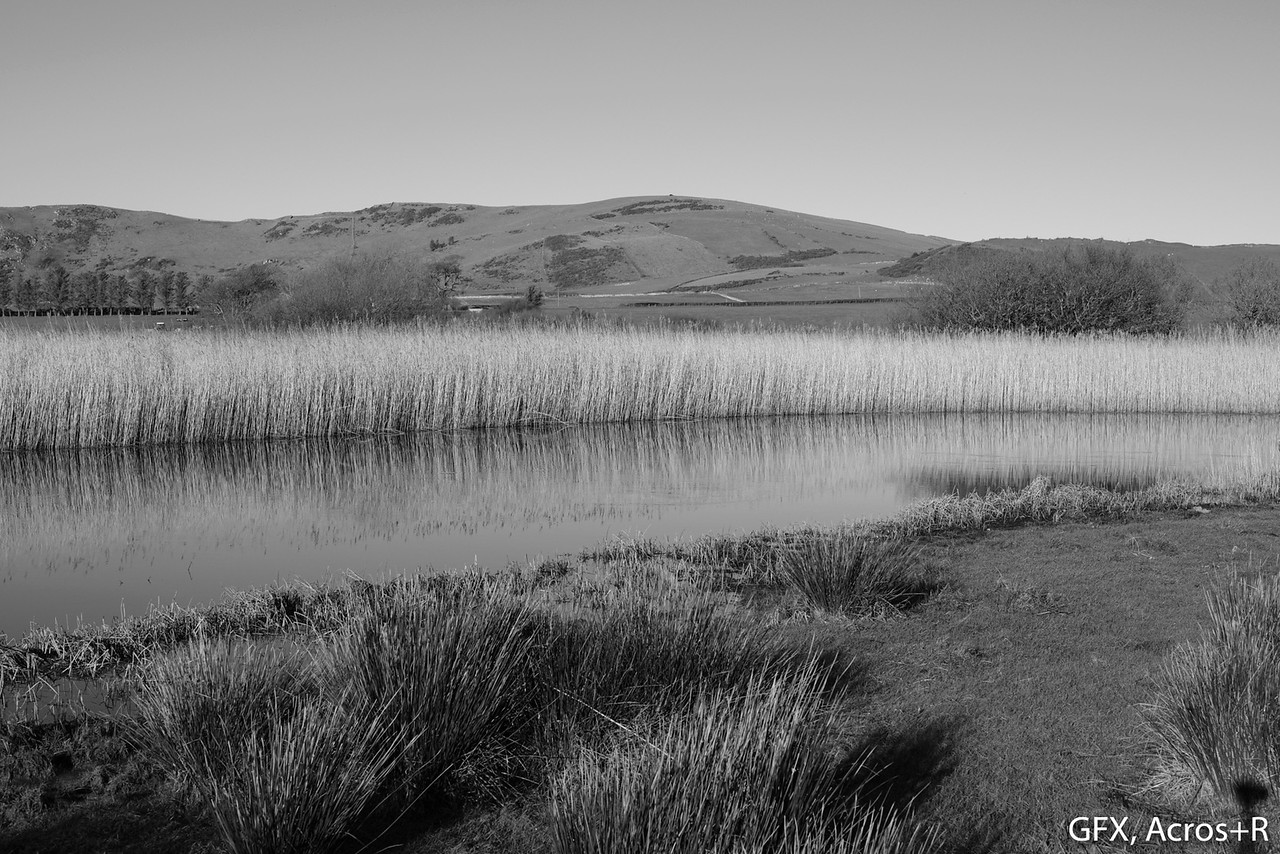
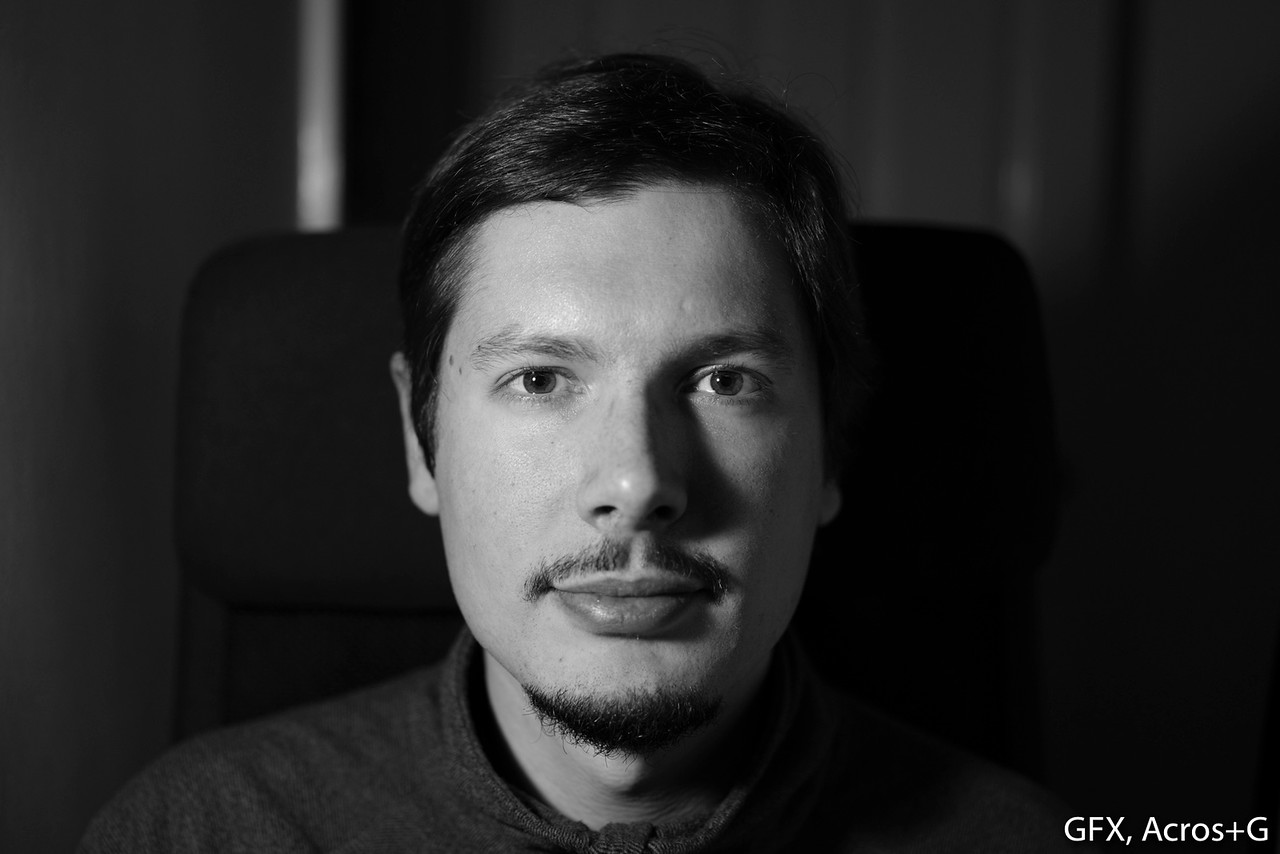
All the possibilities with RAW files, presets and third party software programs aside, it is worth noting that the two products have a different way of treating monochrome in-camera. The GFX includes more options: it has two main profiles – Monochrome and Acros – and for either you can select four different versions (normal, Yellow filter, Red filter and Green filter). The Sony has one monochrome profile and you can only tweak contrast and sharpness.
I selected a few examples based on the images seen before to show you how the profiles of the GFX deliver different grey tones depending on the filter selected.


Sharpness and detail
Finally we can pixel peep in the pure sense of the term. The A7r III and GFX-50s are close when it comes to resolution: the difference between 50 and 42MP is not huge. As said at the beginning, they both lack an Anti-Aliasing filter as well.
The GFX maximises even the finest details and performs better than the Sony overall. However the A7r III has an ace up its sleeve: thanks to the Pixel Shift Multi Shoot mode that takes advantage of the sensor shift hardware, it can take four images and composite them to increase detail and colour accuracy (each point of the image is taken with at least one red, green and blue pixel).
Note: I adjusted the sharpness settings to make the most of the RAW files. With the Pixel Multi Shoot image, I used Sony Imaging Edge and increase sharpness by 50% or 100%, which improved the details without creating any artefacts.


The Pixel Multi Shoot mode has some limitations though: it can only be used on a tripod and because there is a significant gap between each shot (0.5s minimum), you need a perfectly static scene to avoid artefacts. Furthermore you need the Sony Imaging Edge suite to merge the files. This means that while the A7r III can’t match the GFX in every situation, it can be a good ally in some.


As for the SOOC JPGs, the A7r III does slightly better than the GFX especially when you look at the grass in front of the door. You can tweak the sharpness settings on both cameras: +2 seems to be the sweet spot for both. However remember that increasing sharpness doesn’t produce pleasant results in all situations (portraits especially).

Prelude to the conclusion I: lenses and depth of field
Something you might expect by default from a camera with a larger sensor is the possibility to achieve more shallow depth of field. However for that to be true you need an appropriately fast aperture to work with and so far, the native lenses designed for the GFX are not enough to rival the Sony full frame system. Surprising? Well, look at the example below: see how the 55mm at f/1.8 gives more shallow depth of field than the 63mm at f/2.8?


Of course this could change if Fujifilm releases faster lenses, or if you adapt third party glass with a larger aperture (there are several adaptors available for the GF mount).
Then we have sharpness. While I already covered this topic with regards to the sensor, we must not forget that lenses play a crucial role. And if there is one thing I can’t fault about the GFX system, it is the optical quality of the lenses. I had the chance to use three of them (GF 23mm f/4, GF 63mm f/2.8 and GF 110mm f/2) and they all deliver stunning sharpness wide open from corner to corner. The 110mm is probably the one that shines the most as it is capable of giving you everything you crave from such a system: an impressive level of sharpness at the fastest aperture, a lovely bokeh, great subject separation and a true tridimensional feel.


The advantage of the E-mount series is without a doubt the wider selection of lenses. There are options for those on a budget, as well as those who want the best optical quality. And while I agree that medium format can give that extra “je ne sais quoi”, there’s no doubt you can achieve a great look with some of these FE lenses.


Prelude to the conclusion II: ease fo use and general feedback
This article mainly concentrates on image quality but it is only fair to spare a few paragraphs for other important characteristics of the cameras – especially how different they are.
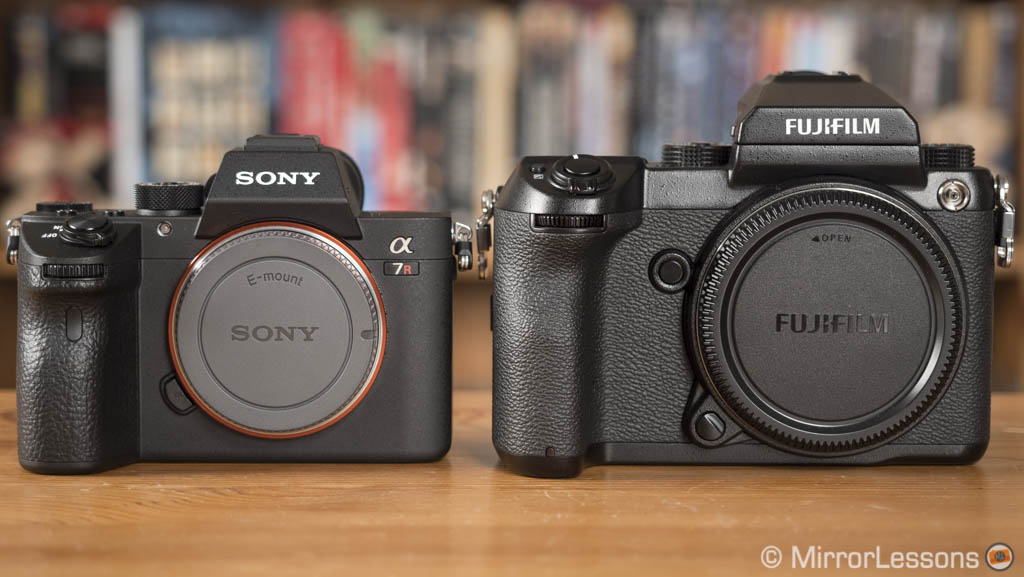


The A7r III is obviously smaller and lighter and so are the many lenses available for the system. The GFX is a larger system but there are a few benefits that come with that such as the bigger and far more comfortable grip.
The viewfinders share the same resolution (3.690k dots) and eyepoint of 23mm. The magnification is larger on the GFX (0.85x vs 0.78x) but the A7r III has a faster refresh rate (120fps vs 60fps). They’re both nice and comfortable to use. Their rear screens are touch sensitive and can be used to autofocus or move the focus point. On the A7r III, you can use the latter as an AF Pad as well but I prefer the AF joystick.
When it comes to the user experience, the GFX wins thanks to its exposure dials, intuitive menu system and top LCD screen. The A7r III may have fewer dials but has a more responsive system and comes with lots of customisation possibilities. It requires more time to find the optimal configuration but it’s time well spent.
Speaking of autofocus (and speed in general), the Sony is clearly superior (unsurprisingly). It features 399 phase detection points that makes it faster and more accurate while the GFX only uses 117 contrast points. The continuous shooting speed goes up to 10fps (versus 3fps on the GFX with AF locked on the first frame) and the buffer capabilities are superior as well.
Naturally the GFX is not an action camera but I found the autofocus more than decent in good and low light considering that medium format cameras are not renowned for their fast AF. Some lenses like the 63mm are slower because they lack an internal stepping motor but the only time I really struggled with it was in backlit situations.
The A7r III is more versatile thanks to its excellent 4K video capabilities which come with lots of dedicated profiles including S-Log2 and S-Log3. The GFX can record in 1080p at 30fps but there is plenty of aliasing and again, it’s not designed for this purpose. The Sony also features 5-axis stabilisation which is the same technology that allows for the Pixel Shift Multi-Shoot mode I mentioned in the sharpness section. The IBIS performance isn’t impressive but certainly helps when using non-stabilised lenses.
Both products use large batteries but the GFX’s drains faster. There are battery grips available for both. Among the useful connections, you’ll find USB Type C ports that can be used for Tethering. Since firmware 2.0, the A7R III shows a warning on the LCD screen after you’ve inserted a third party battery (more details here).
Finally, the GFX offers more extra features such as Time-Laps shooting and Focus Bracketing.
Conclusion
I am sure that many of you came here more out of curiosity than because you are seriously torn between the two models. After all, there is a significant difference in price: the Sony body is half the cost of the Fuji and the GF lenses are also more expensive. So the only question left to answer is: is the medium format camera worth it?
Certainly the GFX-50s delivers the best image quality I’ve seen from a mirrorless camera to date. Landscape, portrait, architecture or still life photographers who seek the ultimate sharpness, dynamic range and colours can find in the GFX the perfect companion.
However it is also true that the A7r mark III’s performance comes close and retains a few advantages such as the better high ISO output. So if you add in the additional versatility (fast AF, 4K video, 5-axis stabilisation etc.) as well as the lens choice and price, it is hard not to see the A7r III as the best option on the table.
But speaking purely from the heart, I admit that there is something rather special about the GFX. The distinctive look produced by the sensor, lenses and colour profiles working together is second to none in the mirrorless category. Yes, it is niche product and I would probably never buy one, but I can understand why some photographers wouldn’t hesitate to do so.
Check price of the Sony A7r III on
Check price of the Fujifilm GFX-50s on
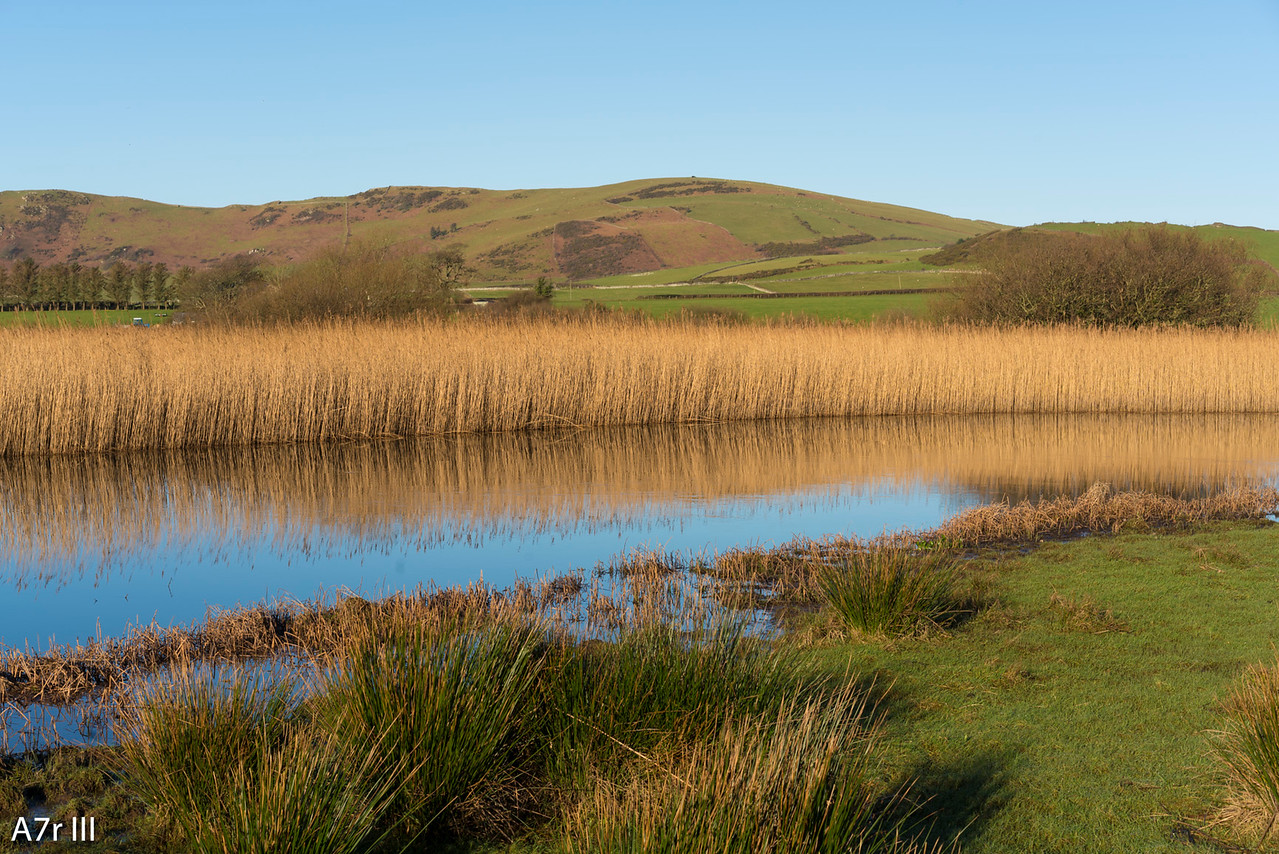
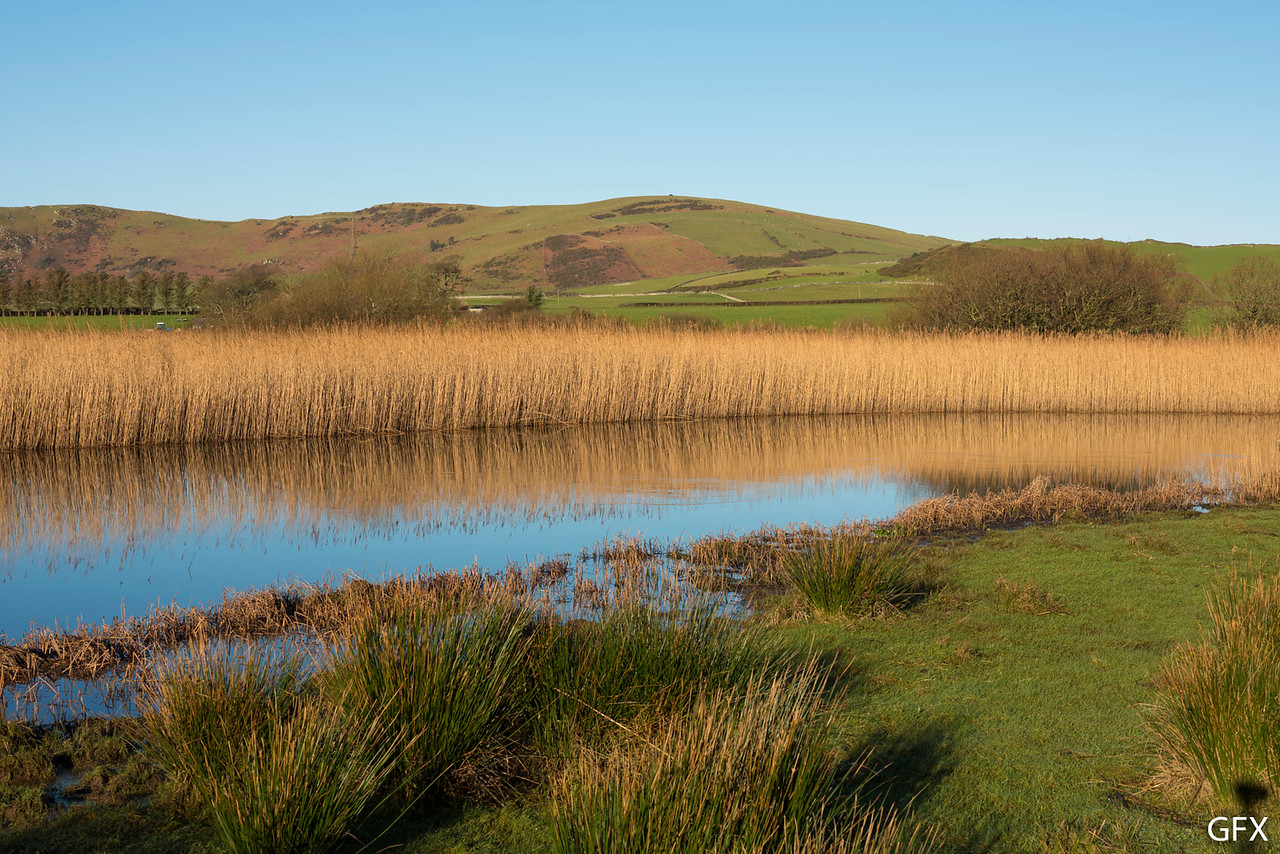
Sample Images
A7r III


GFX


