Since moving to Wales, I’ve started to take advantage of the nature around me, not only for landscape photography but also wildlife and birds. The latter is without a doubt the genre I’ve focused on more than any other thanks to the repetitive autofocus tests I’ve done at my favourite Red Kite feeding station in Bwlch Nant Yr Arian.
I also had the chance to take other wildlife pictures with various mirrorless systems, and I thought I might put all that I’ve learned to good use.
Most E-mount cameras, including the Sony A7 III, are very good for wildlife, especially now that there are more lenses to choose from. If you just got a Sony A7 for wildlife photography and wish to start exploring this fascinating genre, I hope this article can give you some good tips on how to set up your camera.
A7/A9 series compatibility
The information contained in this article is valid for the recent Sony models such as the A7 III, IV and A9 series. Since I also have experience with the older cameras, I’ve included a few words about the A7 I and A7 II generation too.
Note: All the settings mentioned in this article are indicated in the menu so that you can find them more quickly. My reference is the latest Sony menu system which includes titles and page numbers. Please note that some settings might be on a different page depending on the specific model. Some of the basic settings I mention are probably saved to custom buttons, Fn Menu or My Menu on your camera.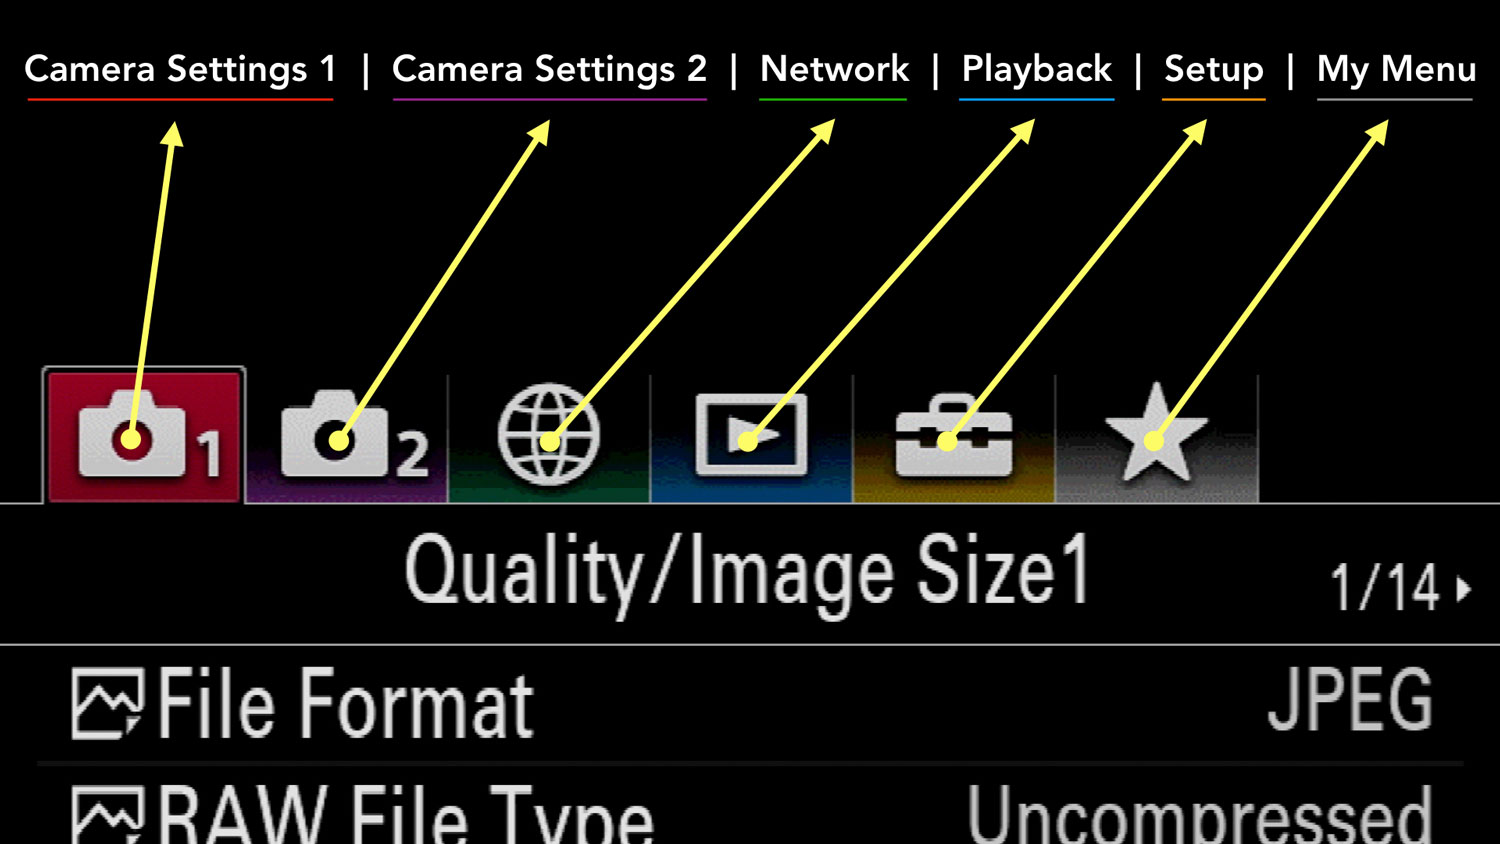
Less recent models such as the A7 and A7 II series have an older menu system so the differences can be more significant, and some settings are not available (this is also mentioned throughout the article).![]()
![]()
TABLE OF CONTENTS
1. Prepping the Camera
2. Exposure
3. Metering and AEL
4. Autofocus Settings
5. Drive and Shutter Modes
6. Additional Settings
7. Sample Images
8. Sony Mirrorless Resources
Ethics statement: this guide is based on our personal experience with Sony cameras and wildlife photography (especially birds), with a focus on the A7 III and A7R III. We were not asked to write anything about these products, nor were we provided with any sort of compensation. Within the article, there are affiliate links. If you buy something after clicking the link, we will receive a small commission. To know more about our ethics, you can visit our full disclosure page. Thank you!
Reminder: the links below are affiliate links. If you decided to buy something after clicking the link, we will receive a small commission.
Check price of the Sony A7 III on:
Amazon | Amazon UK | B&H Photo | eBay
Check the price of the Sony A7R III on:
Amazon | Amazon UK | B&H Photo | eBay
Check price of the Sony A7R IV on
Amazon | Amazon UK | B&H Photo | eBay
Check price of the Sony A9 on
Amazon | Amazon UK | B&H Photo | eBay
Check price of the Sony A7 II on:
Amazon | Amazon UK | B&H Photo | eBay
Check price of the Sony A7R II on:
Amazon | Amazon UK | B&H Photo | eBay
Sony A7 III, A7R III, A9 for Wildlife: Camera Setup
Let’s begin with a few recommendations on the must-have settings for wildlife on your A7R III or other A7/A9 model.
Button Customisation
Animals are unpredictable and the opportunity to take a good shot can last just a few seconds. You want to spend the least amount of time changing the settings on your camera so that you can concentrate on your scene and what’s happening. Here is my personal suggestion of how configure your Sony camera.

Older models have fewer buttons and customisation options in comparison to the ones I mentioned above.
In addition to the custom buttons, there are other settings you want to be able to access quickly. Going through the menu is more time consuming and a bit confusing as well, so consider saving the settings below to the Fn Menu or My Menu:
- File Format
- RAW File Type
- White Balance
- Metering
- Focus Mode
- Priority Set in AF-C
- Face/Eye Priority in AF and Subject Detection
- Finder Frame Rate
- e-Front Curtain Shutter
- Rec. Media Settings
- Custom Key
If you want to know more about all the customisation options your Sony camera has to offer, check the article below.
Image quality
Camera Settings 1 / Quality Image Size1 (page 1/14)
When taking pictures of wildlife, I always shoot in RAW and I strongly recommend you to do the same. You don’t always have perfect light conditions when venturing into the nature, so you may have to push the exposure up or recover some highlights in post. The RAW files offer the kind of flexibility that JPEGs don’t.
Recent cameras allow you to choose between Uncompressed and Compressed RAW. When shooting in continuous mode, I always choose Compressed because the RAW files are smaller and help the camera clear the buffer more quickly. The burst also lasts for longer at full speed.
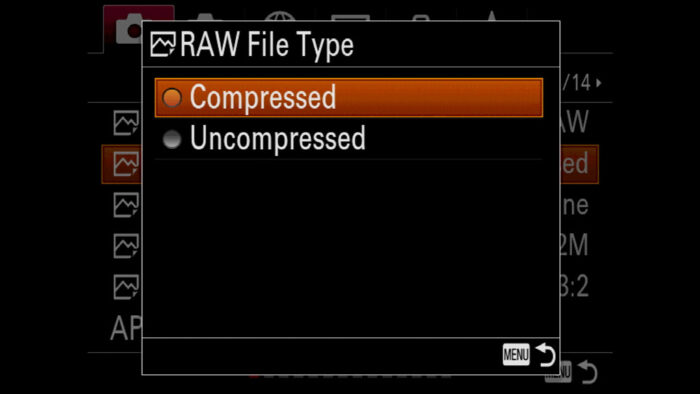
RAW FIle Type is not available on the A7 I series (RAW is compressed by default).
Because you’re going to shoot RAW, you don’t need to worry about the Creative Style settings (colour profiles): they affect the JPGs only.
A similar thought applies to the white balance, but it is a good practice to set it up correctly to have a better preview in camera. Even just selecting one of the presets or leaving it to Auto is enough.
APS-C Mode
Camera Settings 1 / Quality Image Size1 (page 1/14)
All Sony A7 and A9 cameras allow you to activate an APS-C capture mode, where a more central portion of the sensor is used to take images. It corresponds to a 1.5x crop.
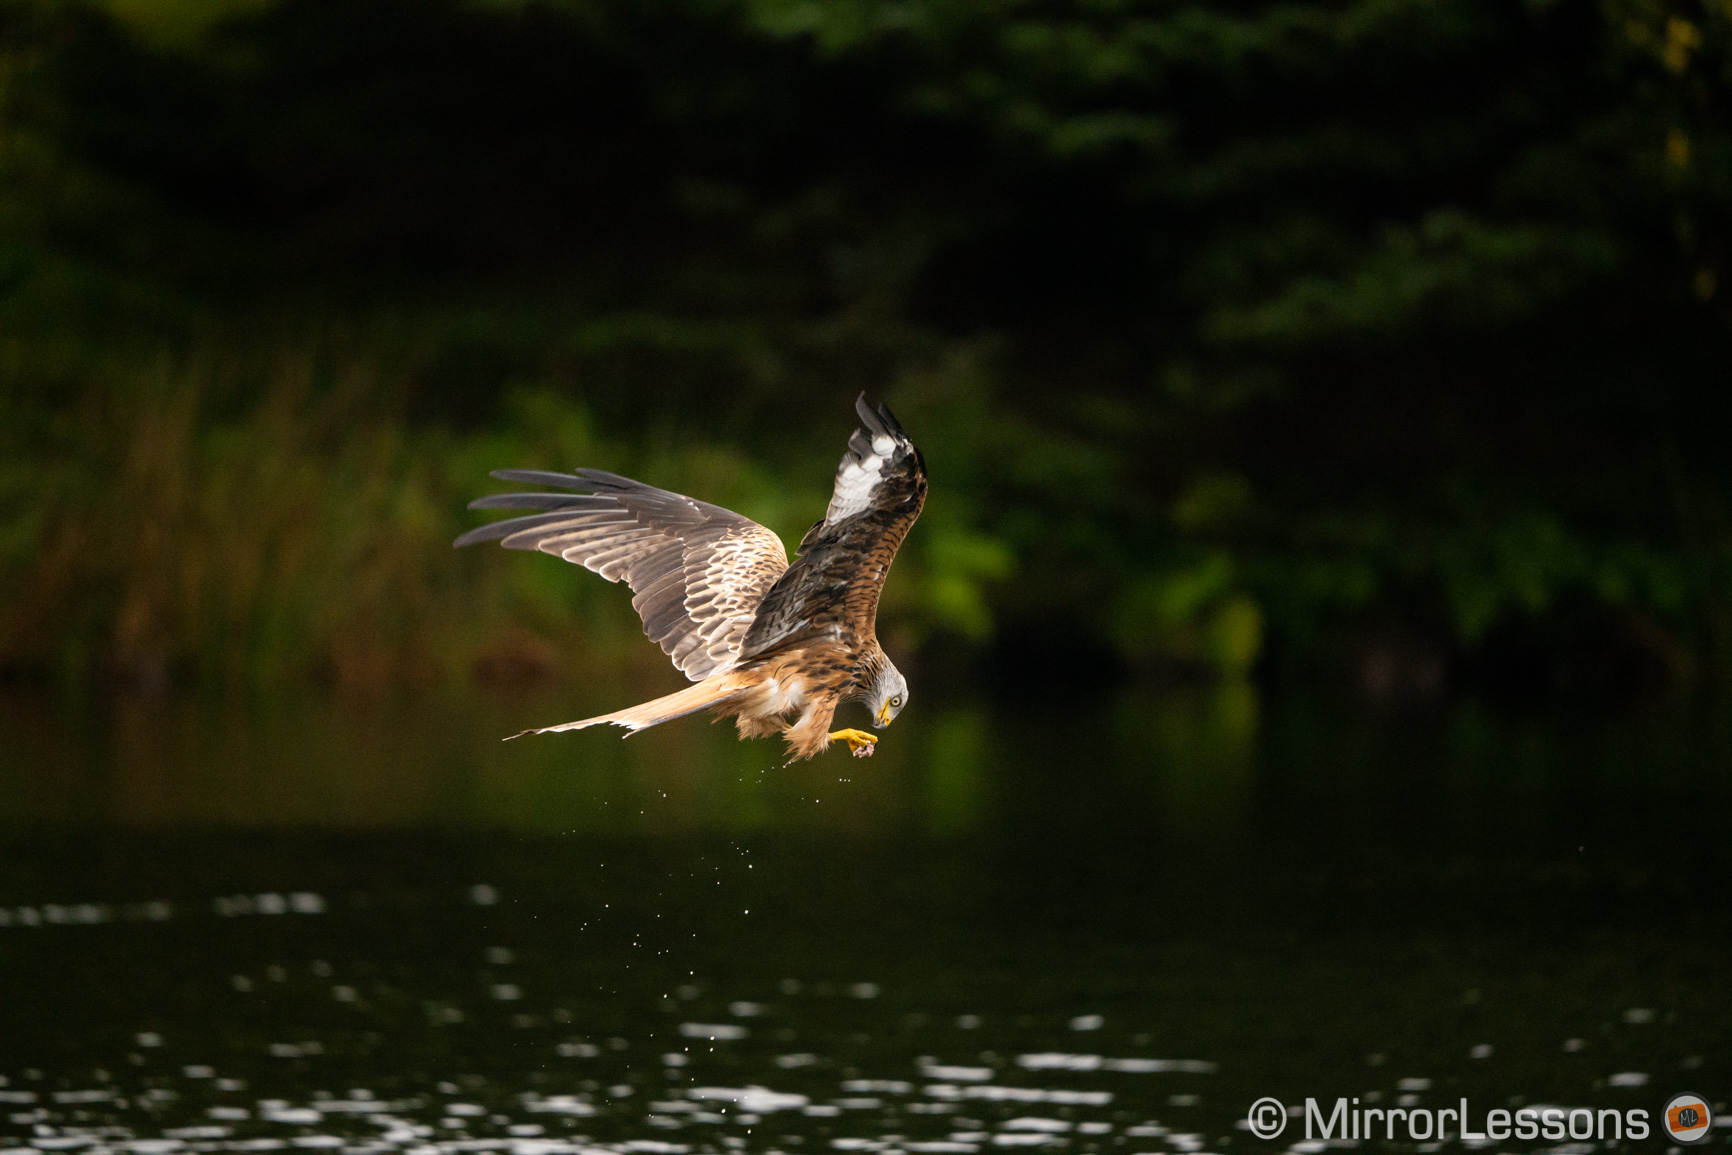
The advantage of the APC-S mode is that you get more reach which is useful when your subject is far away. For example, a 600mm lens will give you the same field of view as a 900mm lens (600×1.5).
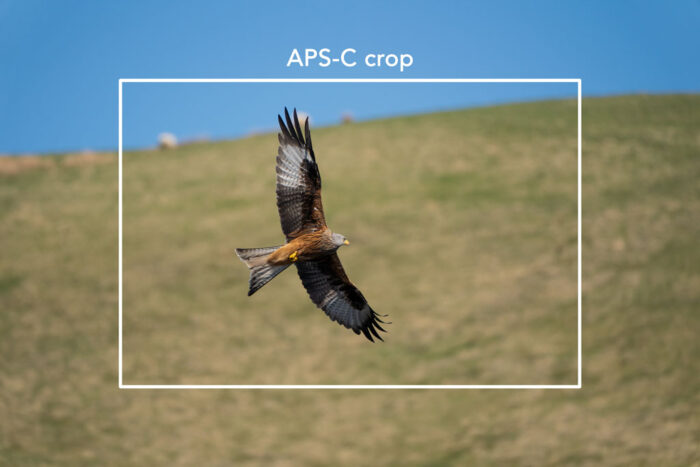
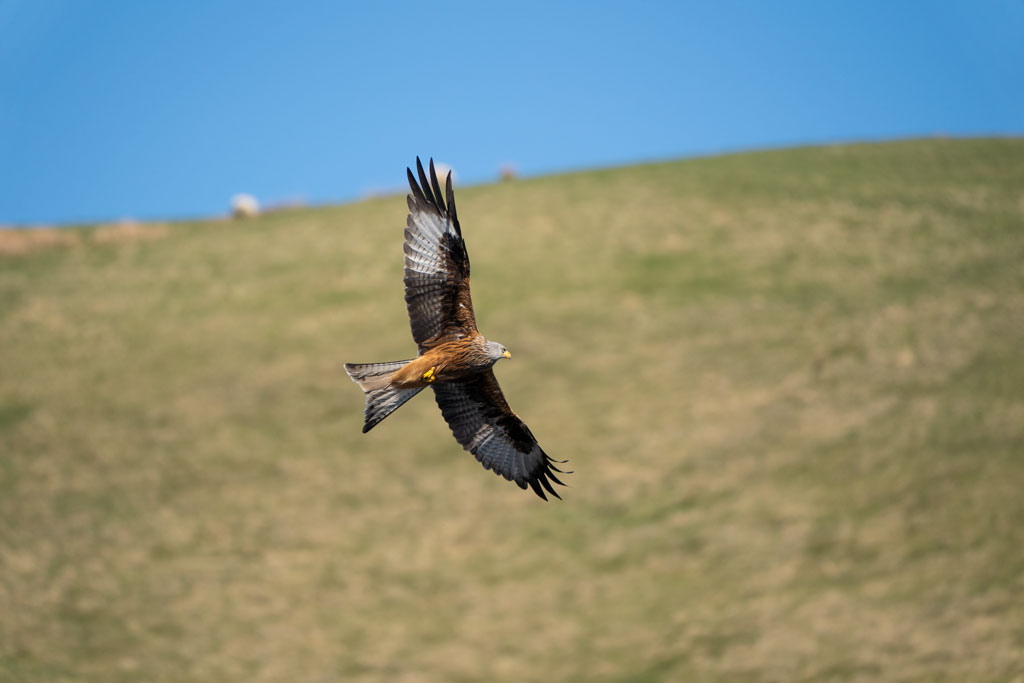
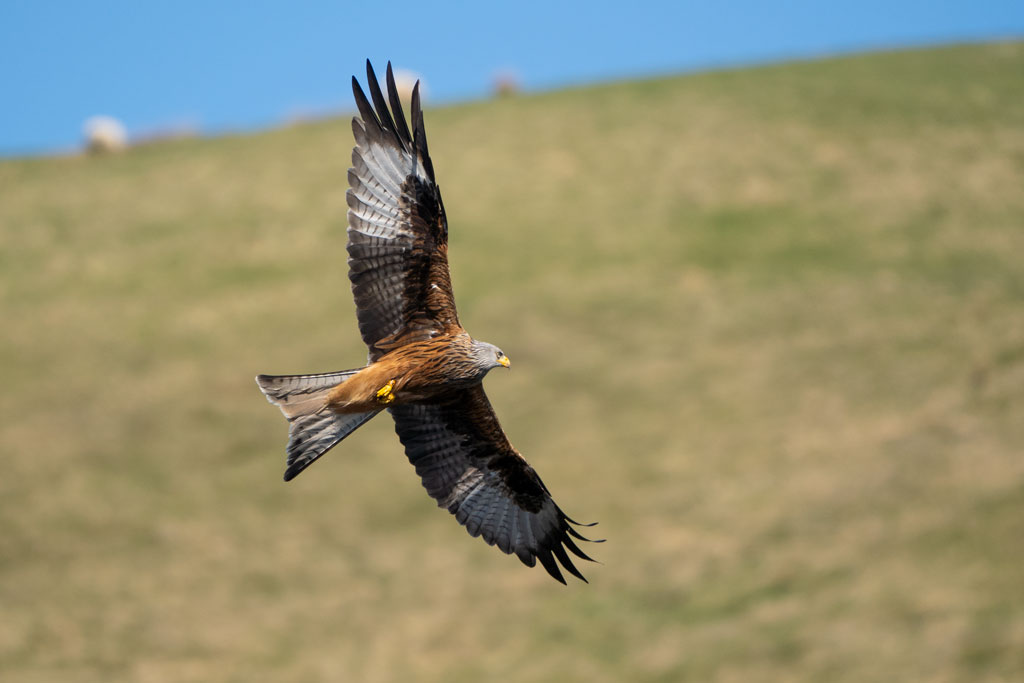
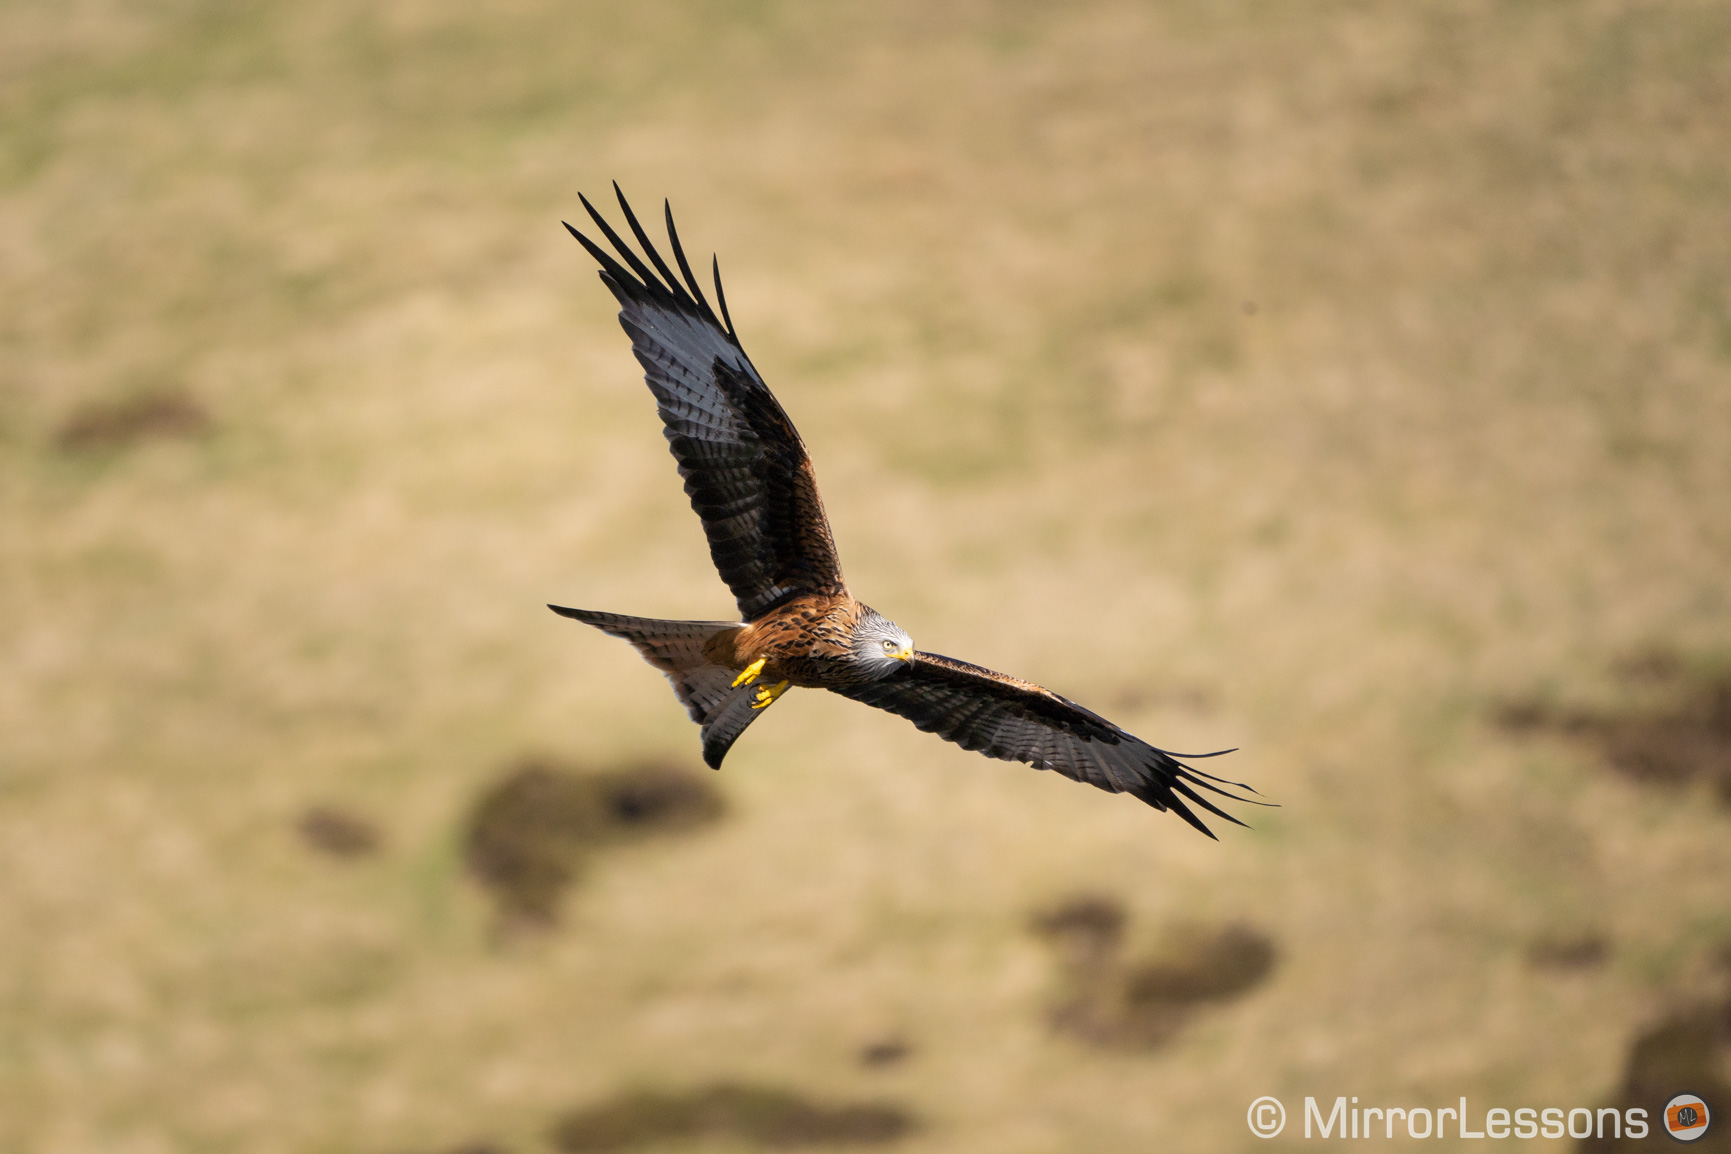
This was shot at 560mm. The equivalent in APS-C terms would be 840mm.
However, keep in mind that cropping the sensor means less resolution. Looking at the table below you can see how many megapixels each camera loses with the APC-S mode.
| Full Frame | APS-C | |
|---|---|---|
| A7R IV | 60MP | 25MP |
| A7R II, A7R III | 42MP | 18MP |
| A7R | 36MP | 15MP |
| A7, A7 II, A7 III, A9, A9 II | 24MP | 10MP |
| A7S, A7S II | 12MP | 5MP |
You may debate whether it is better to crop in-camera, or do it later in post. In other words, is it better to bring home more megapixels and carefully decide how much you want to crop, or do it in-camera and deal with less resolution later?
Personally, I don’t think there is a good or bad method, but having the APS-C crop means that the view on your EVF also changes, so you’ll see your subject better. Plus when it comes to wildlife, it is not unusual to add an additional crop when editing the photo. Even if you bring back home a 42MP shot rather than a 18MP shot, you might end up with a final image of 16MP, and in that case taking the picture in APS-C mode would not have been a disadvantage.
Of course, the more resolution you have from the start, the better. From this point of view, the A7R II, A7R III and A7R IV are very interesting cameras for wildlife photography.
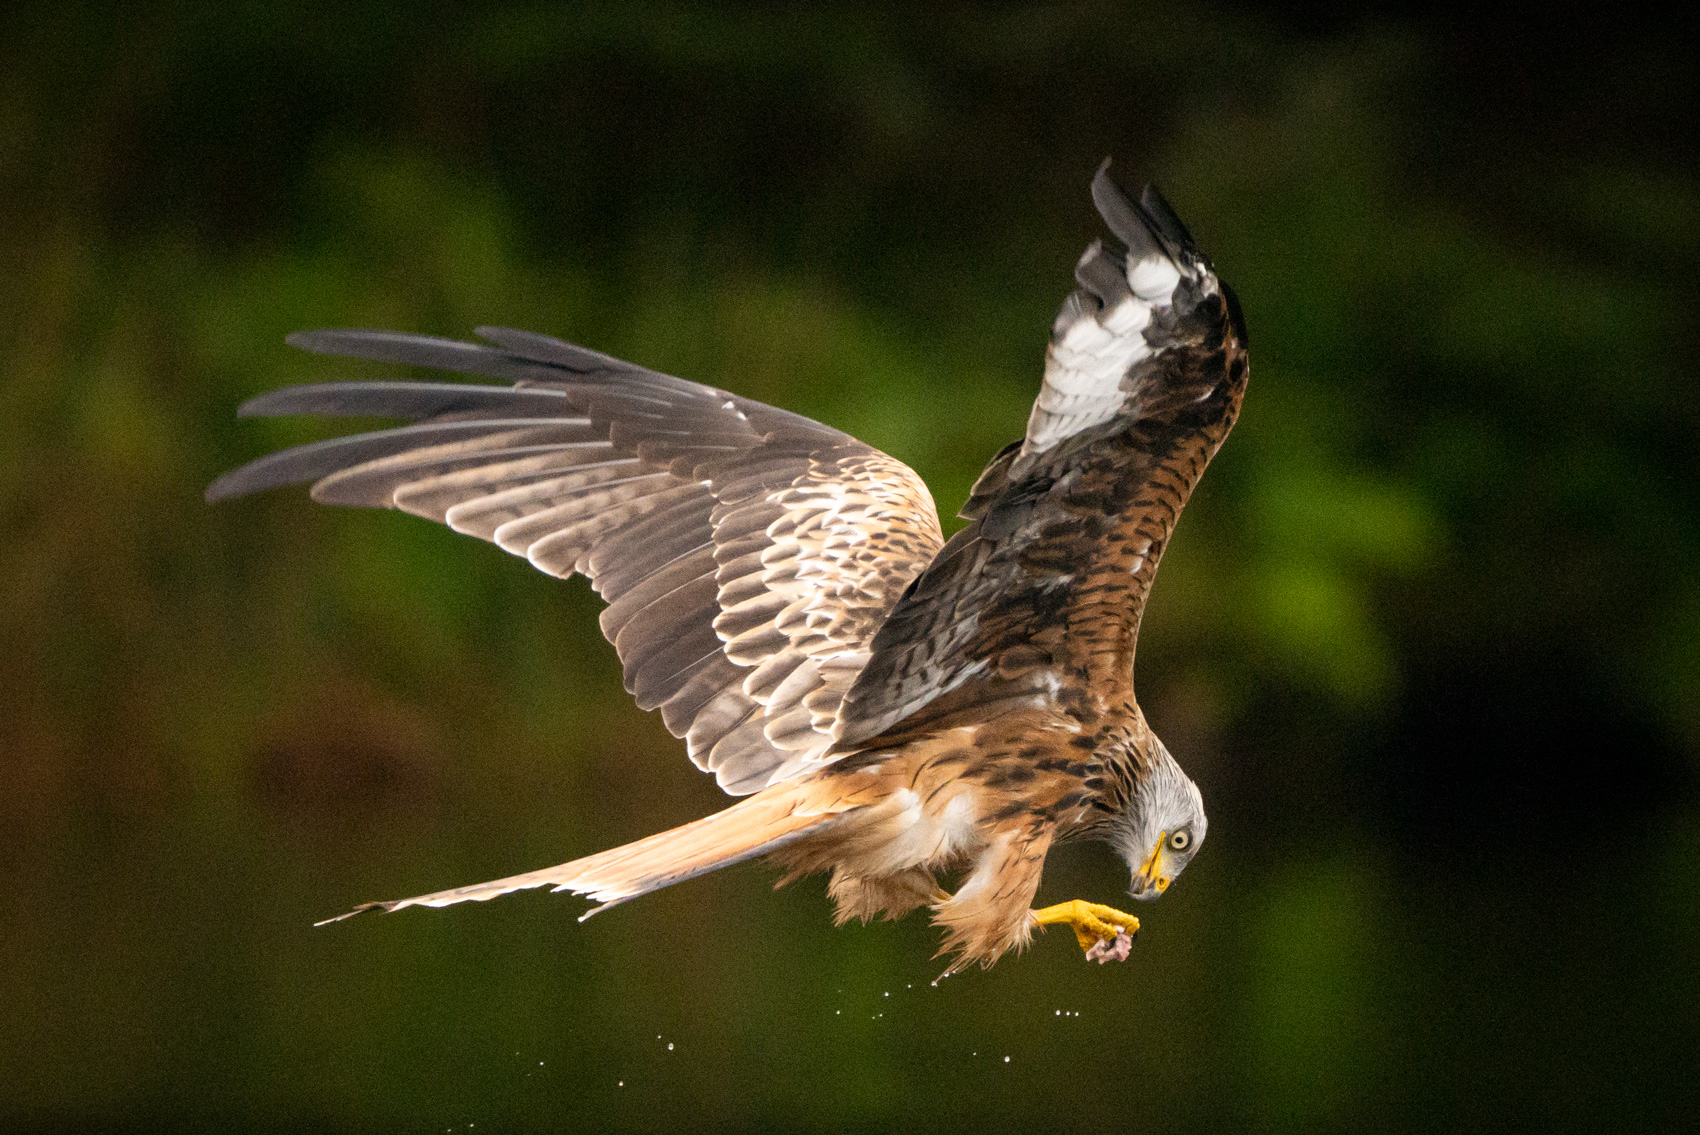
Full frame shot with no crop (60MP)
SteadyShot (Image Stabilisation)
Camera Settings 2 / Shutter SteadyShot (page 4/9)
In-body SteadyShot is not available on the A7 I series.
Image stabilisation (SteadyShot in Sony’s terms) can be very useful when taking pictures of wildlife for a couple of reasons.
The first reason is that because you’re working with long focal lengths (300mm to 600mm, if not more), every small movement of your hands and arms while holding your gear is amplified in the viewfinder, and consequentially affects the image you take.
Normally a speed such as 1/200s wouldn’t be enough with a 400mm lens, but optical stabilisation can help you avoid motion blur and get a sharp image. It is especially useful if your subject is static.
The second reason is that with the SteadyShot active, the stabilisation is previewed in the EVF when half-pressing the shutter button, and that helps you frame your subject more easily when using a long focal length.
Note: you’ll most likely use a lens with OSS, and when such a product is attached to the camera, in-body sensor stabilisation is combined with the optical stabilisation of the lens. In many cases, OSS will have priority over IBIS at long focal lengths.
But what about stabilisation when shooting at fast shutter speeds?
It depends. If your shutter speed is set at around 1/500s, I would still keep IS active, especially if your focal length is longer than 400mm. When the shutter speed increases beyond 1/1000s, it is less necessary.
In fact some photographers believe that stabilisation can even cause some issues when panning really fast (loss of sharpness), so they prefer to turn it off. I personally never really encountered this kind of problem, but it also true that if you’re shooting at 1/2000s or 1/4000s, stabilisation won’t contribute to the quality of your image.
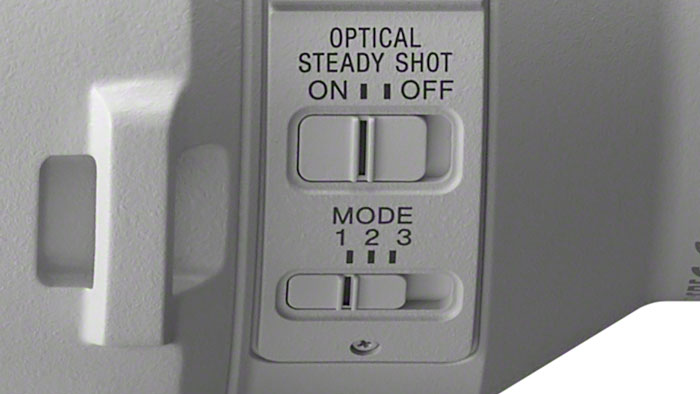
On modern OSS lenses, you can activate or deactivate the setting with the dedicated switch on the barrel which is very handy (it also deactivates in-body stabilisation since the two are linked together). There is also a second switch with Modes 1, 2 and 3:
- Mode 1 works in every direction (vertical and horizontal)
- Mode 2 prioritises vertical shakes, which is helpful when panning
- Mode 3 improves the stabilisation in the viewfinder to help you track your subject more easily.
When taking pictures of birds in flight, I tend to use Mode 2, because you still get some benefits (stabilisation preview in the EVF) but, by correcting only the vertical movements while you pan horizontally, you can avoid the issue of stabilisation impacting negatively on your image.
Other wildlife photographers like to keep stabilisation off to make sure the camera focuses as quickly as possible. In some situations, even a fraction of a second can make a difference. In my experience I never found this a problem, but if you’re using a support such as a tripod with a gimbal head, stabilisation is not essential as long as your shutter speed is safe.
Sony A7 III, A7R III, A9 Wildlife and Bird Settings: Exposure
I always shoot in M mode (Manual Exposure) when photographing wildlife, and I advise you to do the same.
Shutter Speed
Like all action scenes, the shutter speed is the most important setting to freeze the movement and ensure your subject is sharp. Most of the time you’ll be using a long telephoto lens which also needs to be taken into consideration.
The general rule is to set a shutter speed whose value is the reciprocal of the focal length. For example, if you’re using a 400mm lens, you should stay at 1/400s or above.
The rule is not a bad starting point but it doesn’t take into account the movement of your subject or the effectiveness of the image stabilisation. Not all of us may have the same strength when holding a lens and some photographers like to use a monopod or tripod with a gimbal head, so as you can see, the options vary.

The truth is that wild animals can be unpredictable, so keep a fast shutter speed of at least 1/500s even if they don’t appear to be moving, or if they are moving slowly. If they move faster, stay above 1/1000s.
Remember that your subject might move at different speeds. For example, for birds there are two speeds to keep in mind: hovering or moving from point A to point B, and the flapping of their wings which can be really fast. For small birds, you may need to go up to 1/3200s or more.
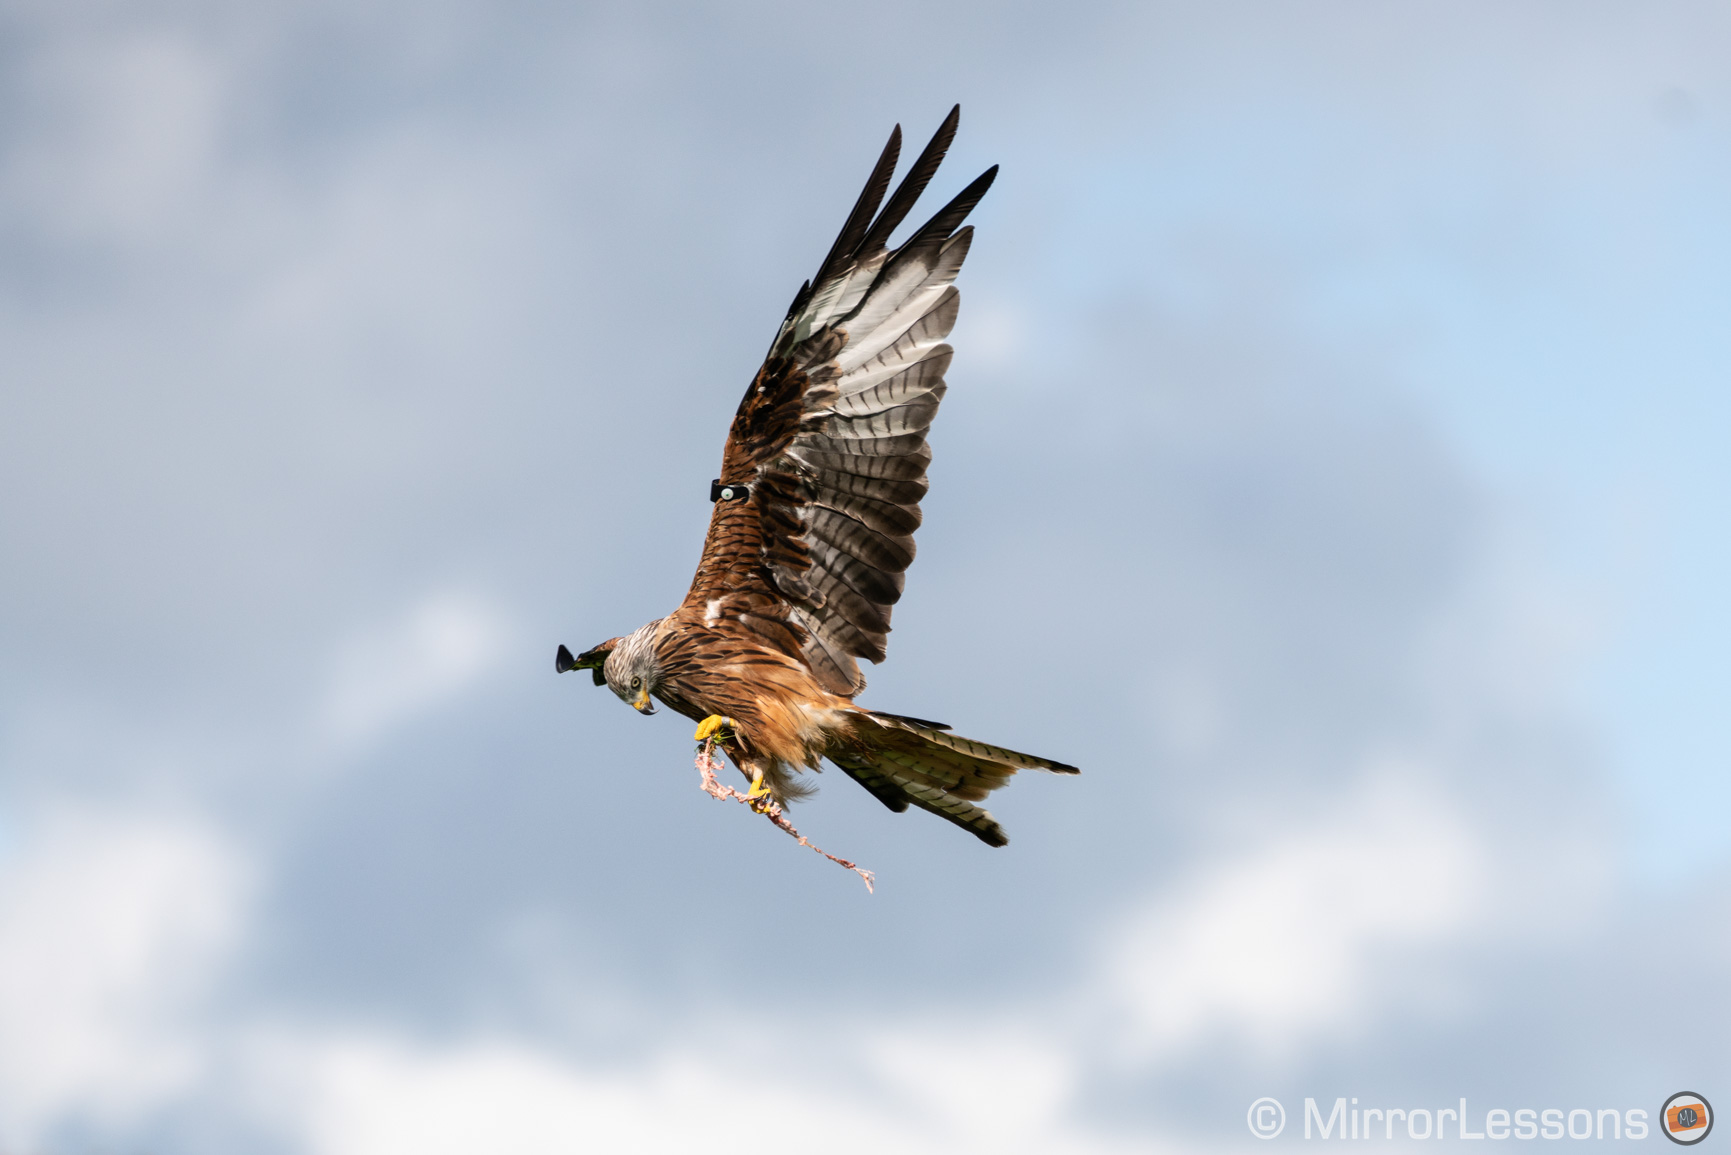
When taking pictures of red kites, I always try to stay around 1/2000s. If the light conditions are good, I can go even higher than that. The faster you get, the higher the chance of having not only the body of the bird perfectly sharp but also the wings. Of course you may like a bit of motion blur on some parts of the bird to give an impression of speed and movement. This is where a bit of artistic intent comes into the picture.

On a few occasions, I’ve used a speed slower than 1/1000s and ended up with good shots but the keeper rate wasn’t as good as with faster shutter speeds. The reason I did that is because there was a really poor light or it was raining, so I tried to find the best compromise in my exposure settings in order to not have too much noise in my image.
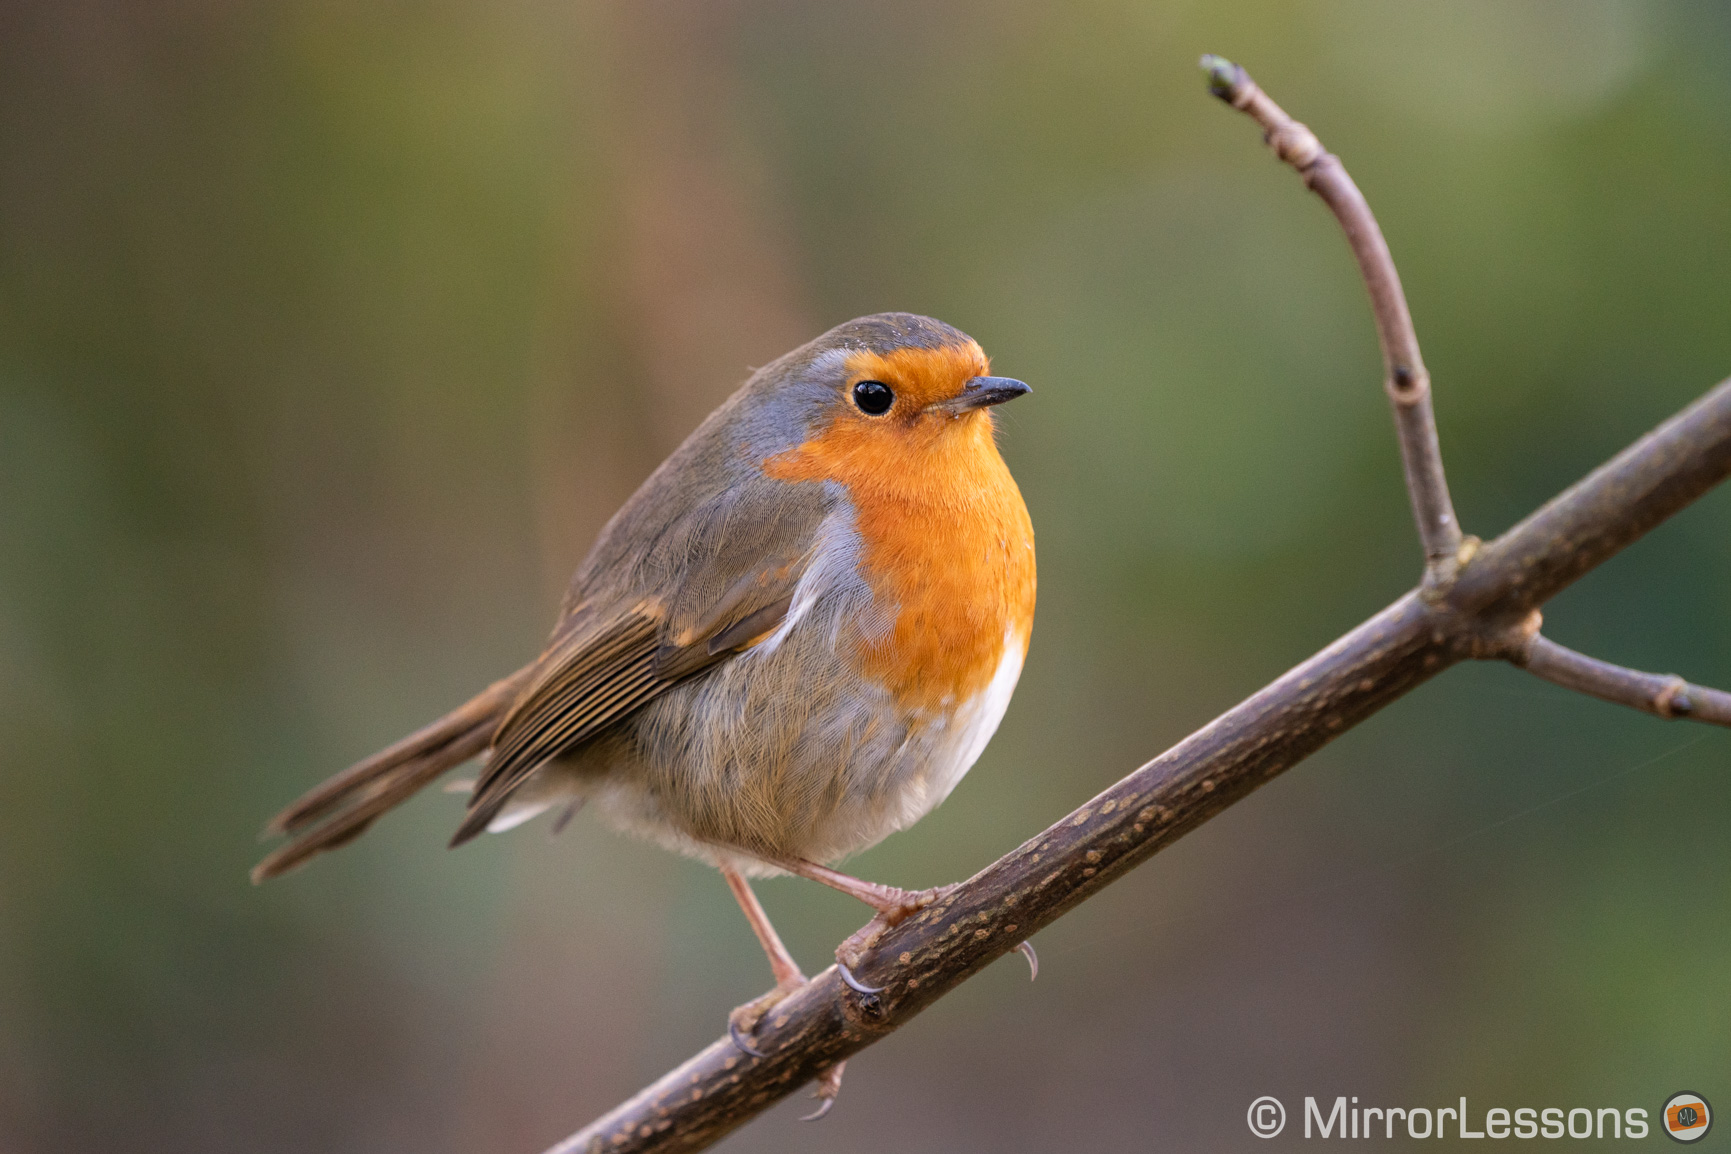
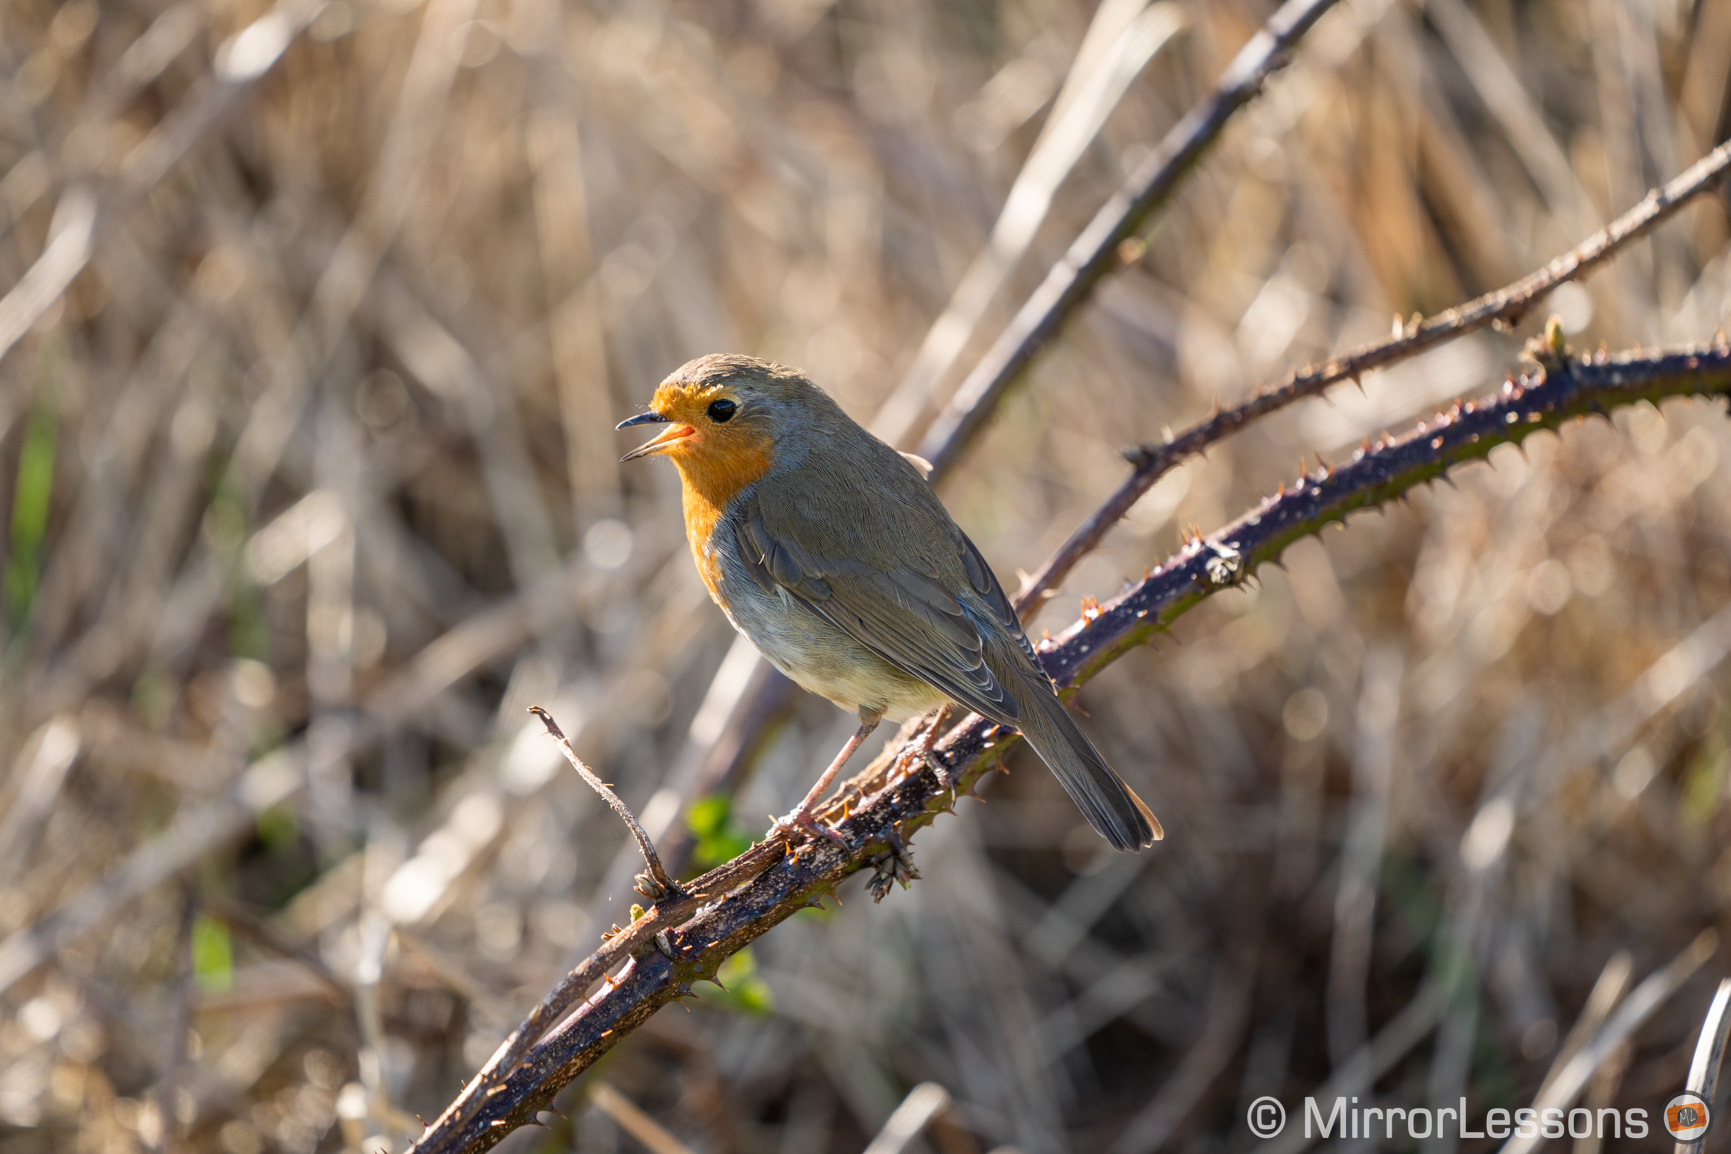
When the subject is static, such as a bird resting on a branch, you can try to lower the shutter speed below 1/500s. I have been successful even at 1/100s but you need to carefully observe your subject because it may not be entirely still. Small birds for example constantly turn their heads and change position. You need to time your shot at the precise moment it stays still.

Aperture
I follow a simple rule when it comes to wildlife and birds. I use the fastest aperture my telephoto lens provides, as long as sharpness wide open is good enough.
Most of the recent lenses designed for the E-mount system are excellent at their fastest apertures. This is important because you have more leeway to keep your ISO level down or increase your shutter speed (especially if you’re using a fast lens such as f4 or f2.8).
If the light is favourable, like a nice sunny day with a blue sky, then I can sometimes close to f8 or more depending on the lens to maximise sharpness or have a bit more depth of field.
Even if you’re using a full frame camera, shallow depth of field won’t be a big problem as long as your subject is far away. When you get closer however, you should definitely pay more attention if you want most of the body of your subject in focus.

ISO Setting
The only setting I don’t control manually is ISO. I set it to Auto with a maximum value of 12800. I know Sony sensors well and they provide good results up to this level.
This way I have one less thing to worry about when setting my exposure. If I need to make some quick changes to the shutter speed, the camera will automatically adjust the ISO value accordingly.
On older models such as the A7 II or A7 I series, keep it one step lower at ISO 6400.
Sony A7 III, A7R III, A9 Wildlife and Bird Settings: Metering and AEL
On your A7 or A9 camera, there are various ways of checking in real time if your exposure is correct or not.
Exposure Preview in Live View
Camera Settings 2 / Display Auto Review2 (page 7/9)
One of the main advantages of an electronic viewfinder is being able to see a real time preview of your exposure, as well as colours and contrast. If something is wrong, you notice it right away and that’s why, most of the time, I advise you to keep this feature activated. On Sony cameras, it is called Live View Display / Setting Effects.
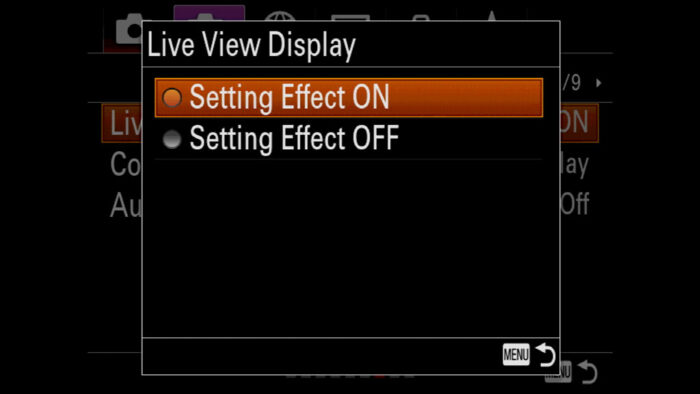
However in some situations I prefer to turn it off, particularly when taking pictures of birds in flight. The reason is that birds can change their position a lot in the air. One moment they are in a favourable light position, and a few seconds later they are against dark trees in the shade, or against backlight. This can cause a lot of changes in brightness in the EVF and I find it annoying.
With Setting Effects off, the viewfinder keeps a constant and optimal brightness regardless of the light conditions of your scene. Of course this means you need to keep an eye on your exposure in another way.
Metering Mode
Camera Settings 1 / Exposure1 (page 9/14)
Metering measures the amount of light coming through your lens and is an important tool to check your exposure. It also determines how the camera chooses the exposure settings if you’re working in automatic or semi-automatic mode. (Including M mode with Auto ISO.)
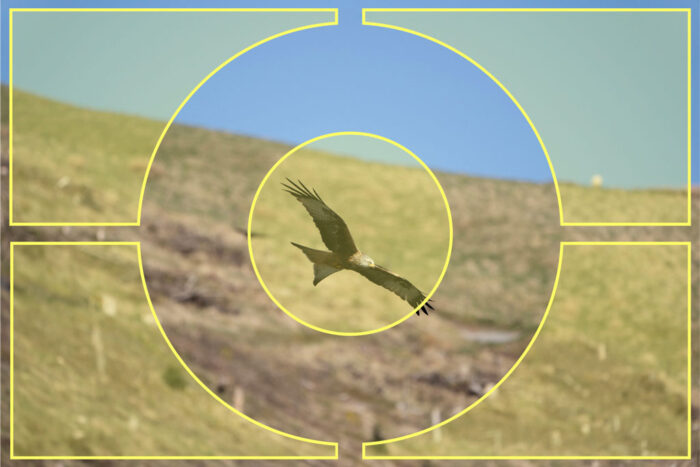
There are various metering modes: some will measure the entire frame, whereas others concentrate on the centre.
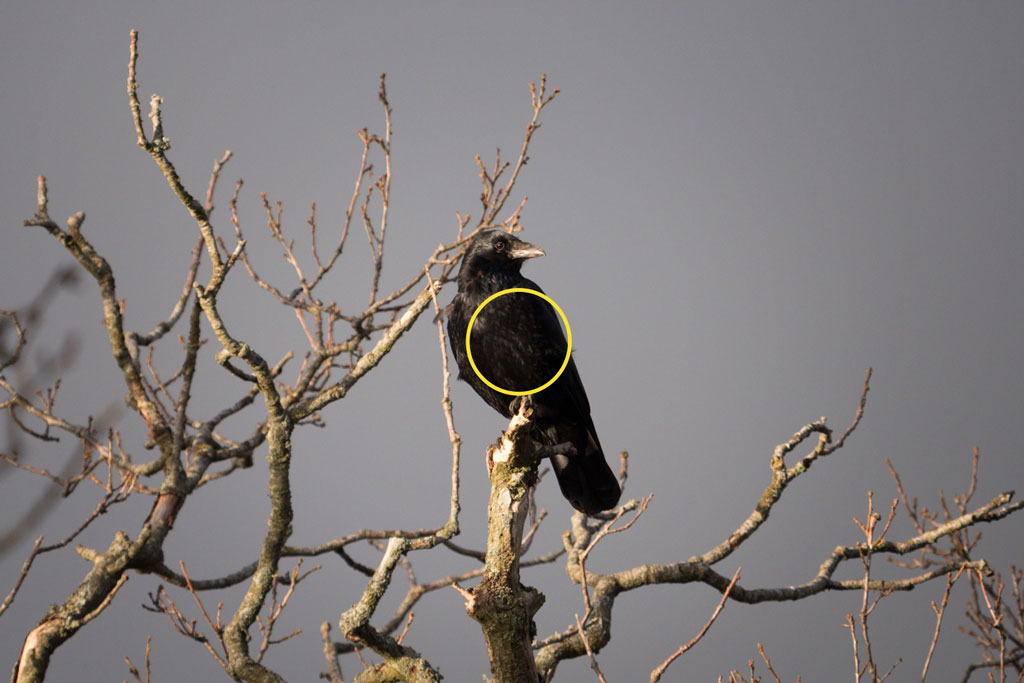
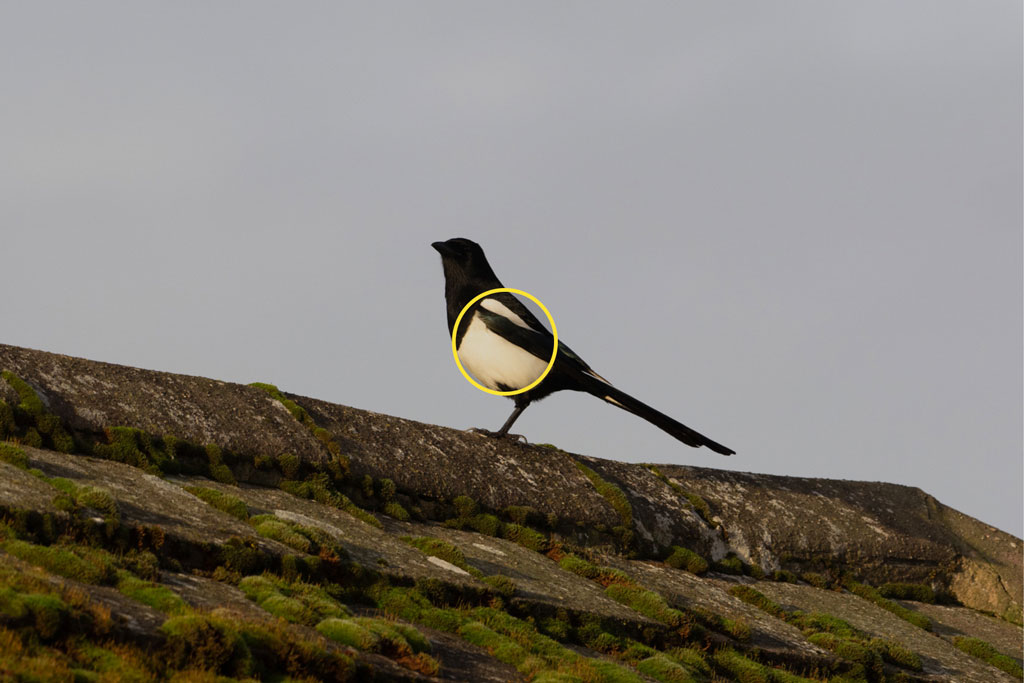
When your subject is in the middle of the frame, and doesn’t occupy a large portion of it, you would think that Spot Metering is a good choice. The camera only measures the centre and ignores other zones that might have more or less light.
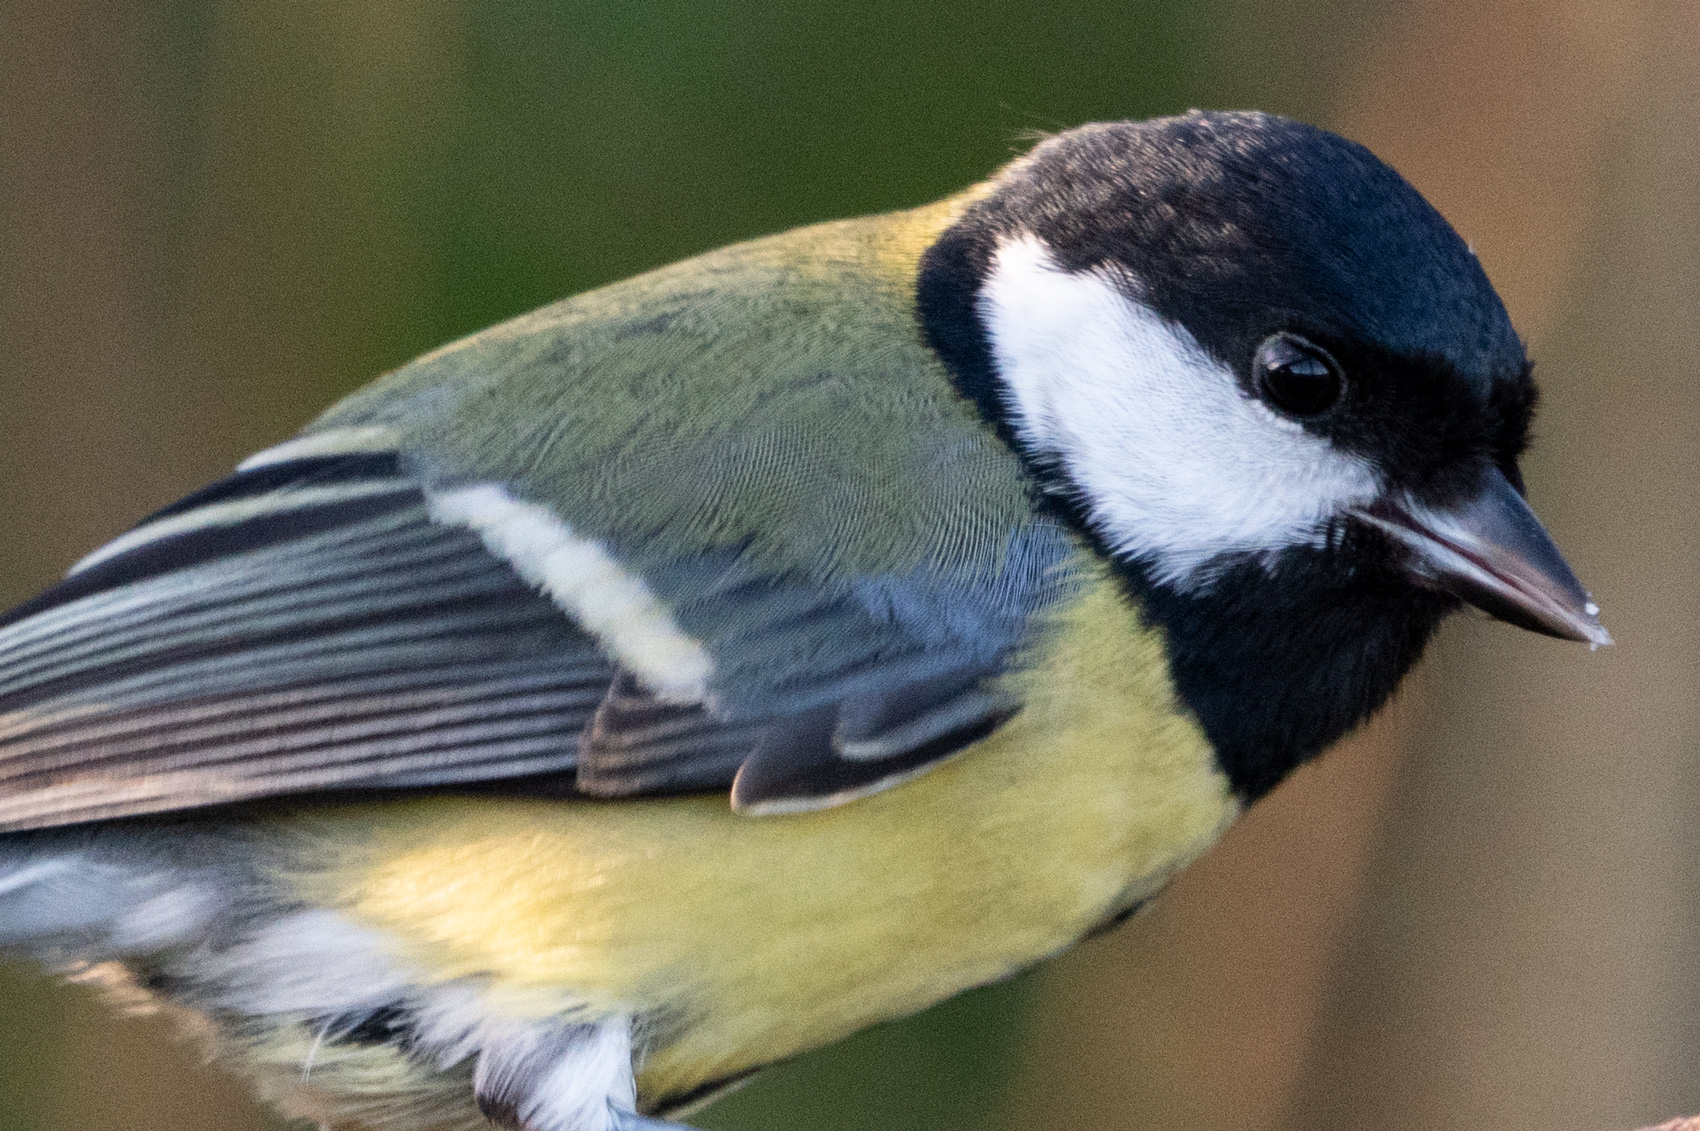
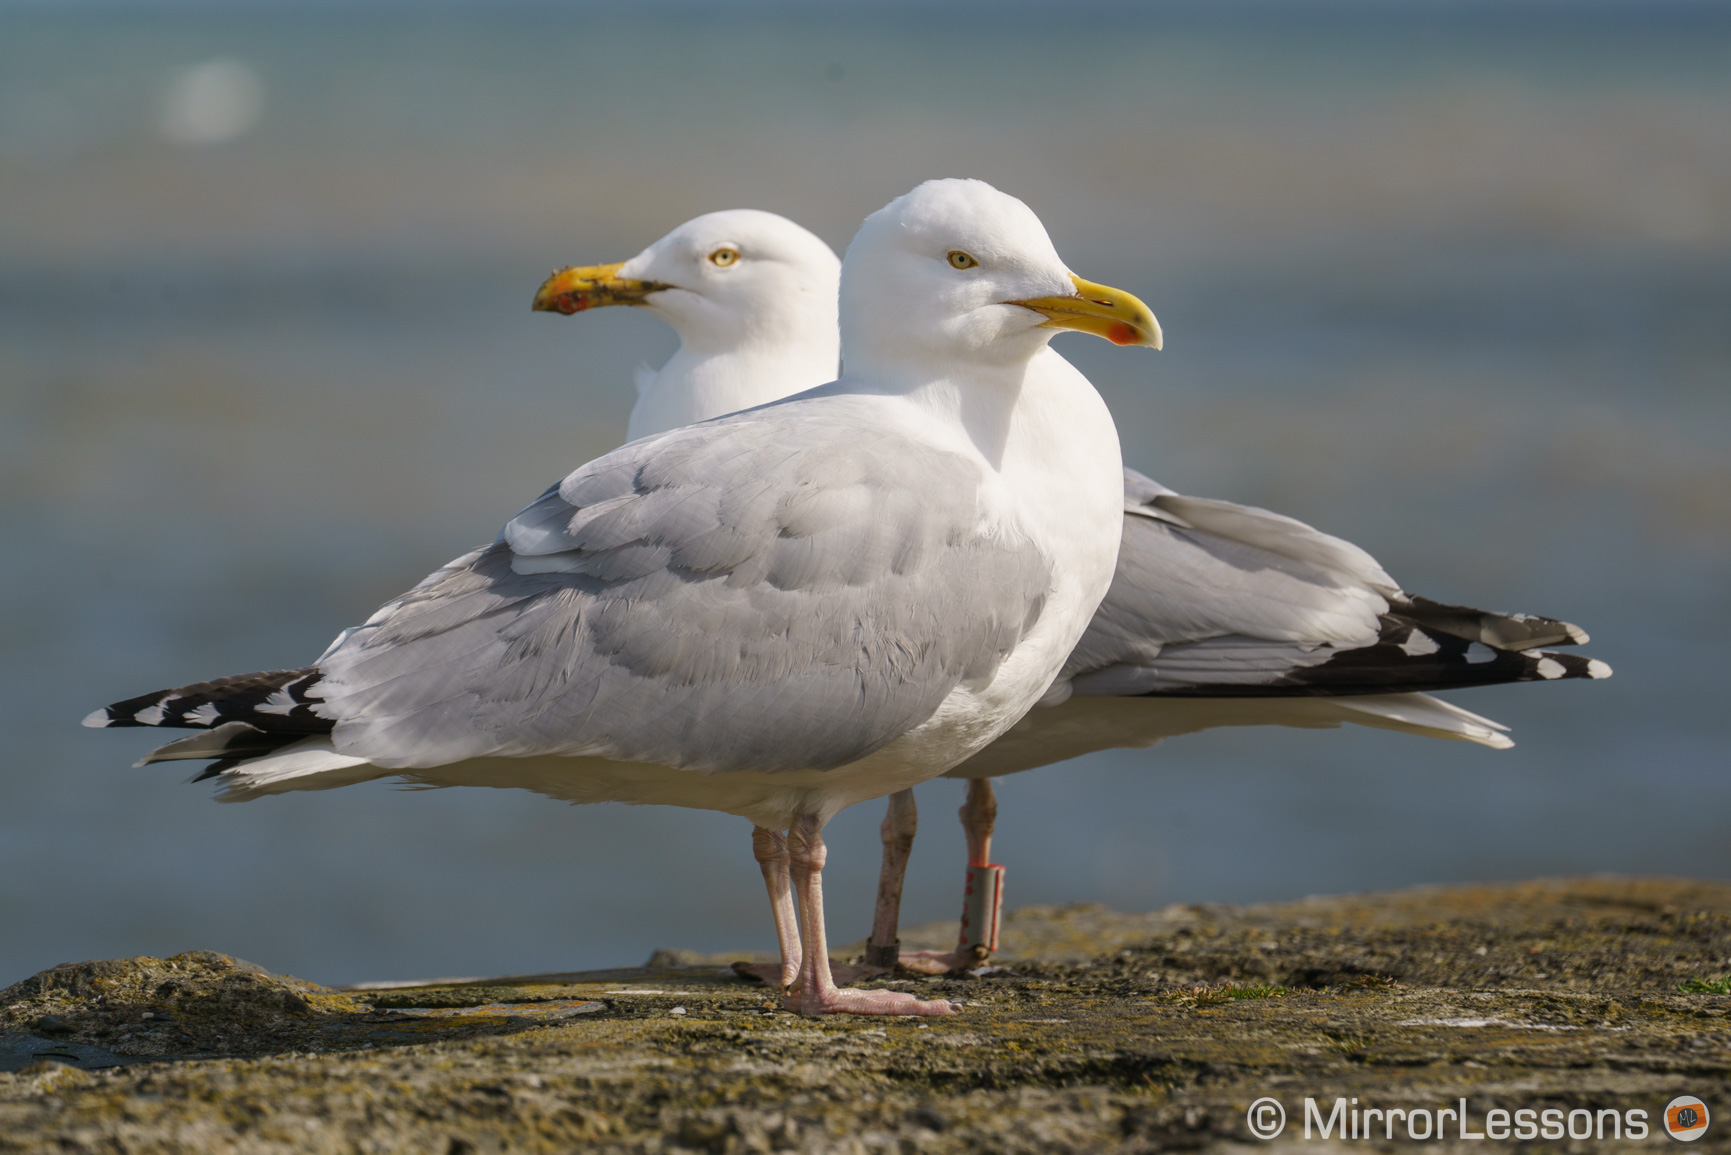
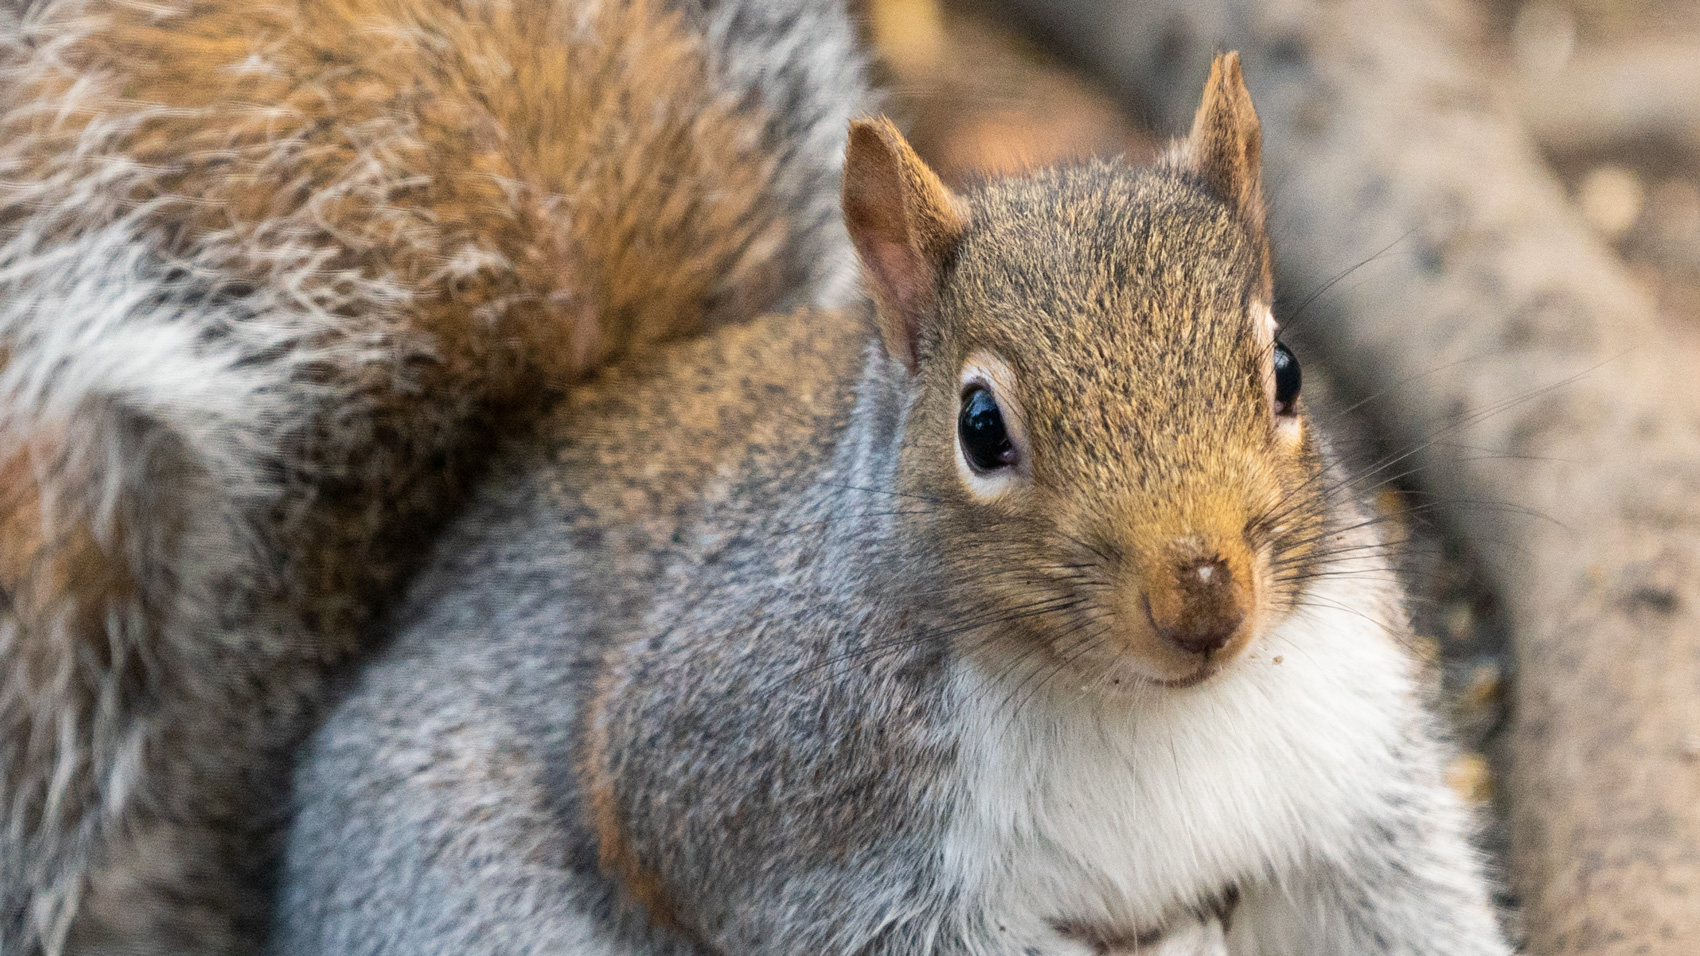
However, Spot metering can give you very different results depending on how light or dark your subject is, and that includes the colour of its fur or plumage. Look at the examples below with the Standard Spot size.
Sony camera allows you to adjust the size of Spot metering. The examples above are with the standard size, but if you choose Large instead, the camera has access to more elements around the subject to evaluate the light, which can lead to a better exposure.
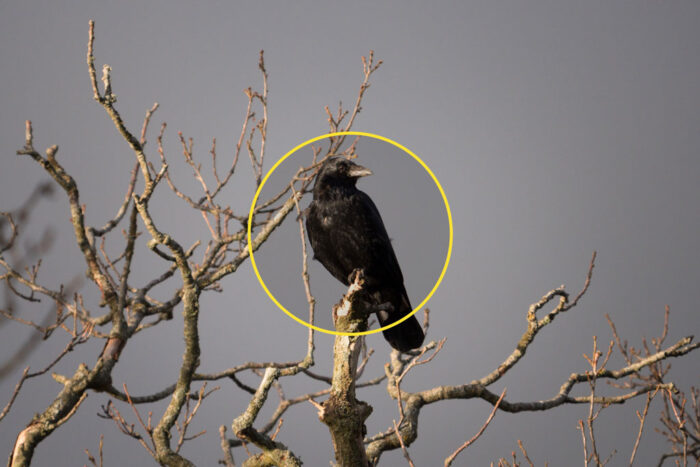
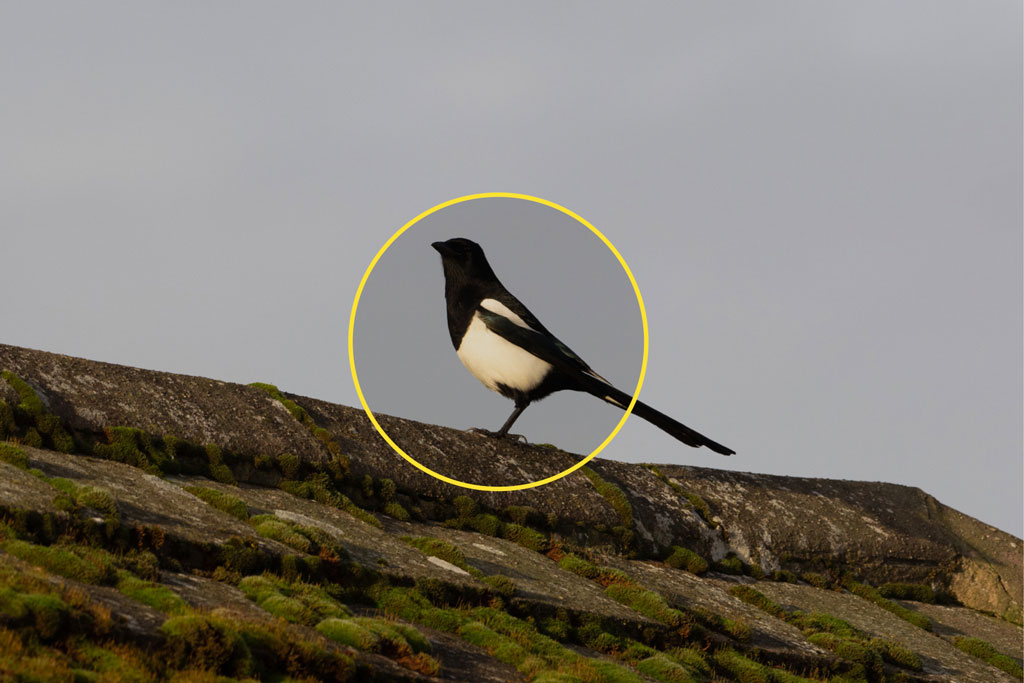
Spot Large looks like the better option, but it is still limited in my opinion. If the subject is close (filling much of the frame), you’ll get the same problem as with the Standard size. It can work when there is less contrast in the image, for example if the bird has medium to bright colours on its body, and the background is darker or at the same brightness level. Otherwise, you need a more flexible setting.
The metering mode I use all the time is Multi. The camera measures brightness on different areas of the image to balance the entire frame. This is also the setting that will work best for birds in flight.
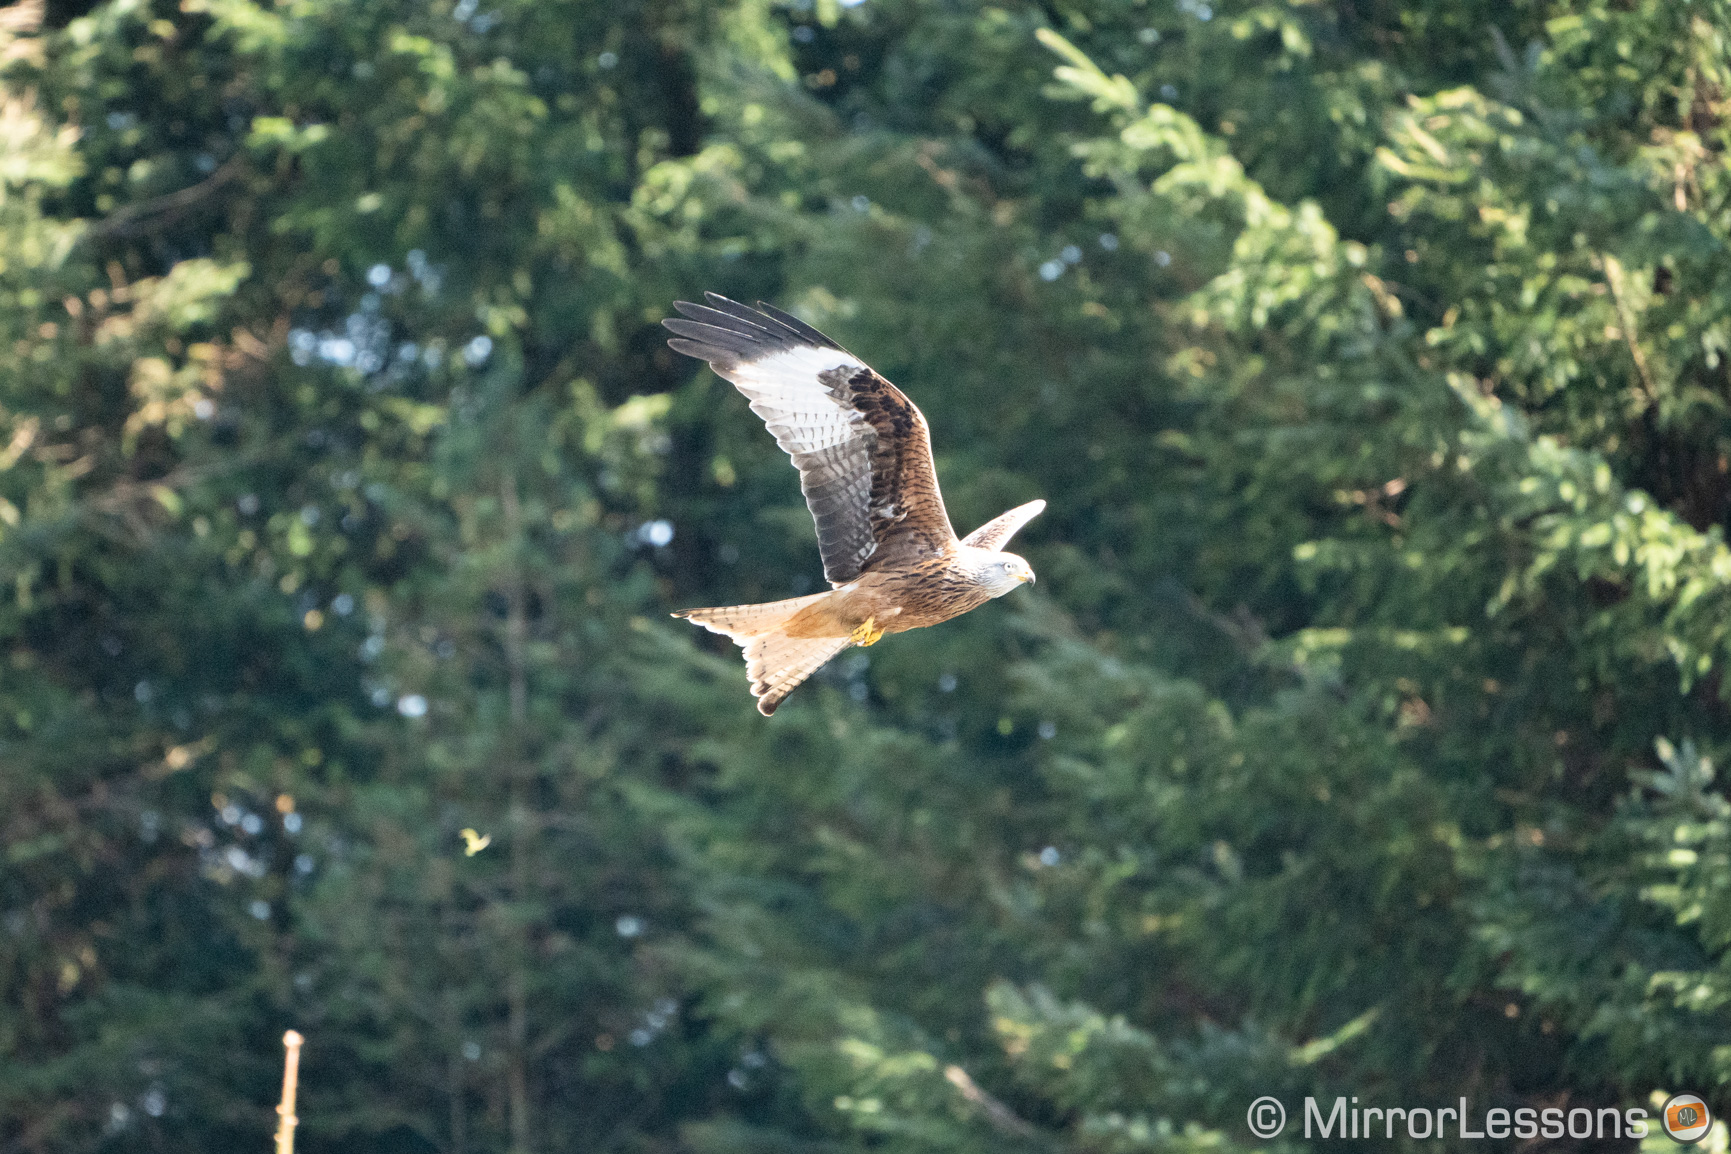
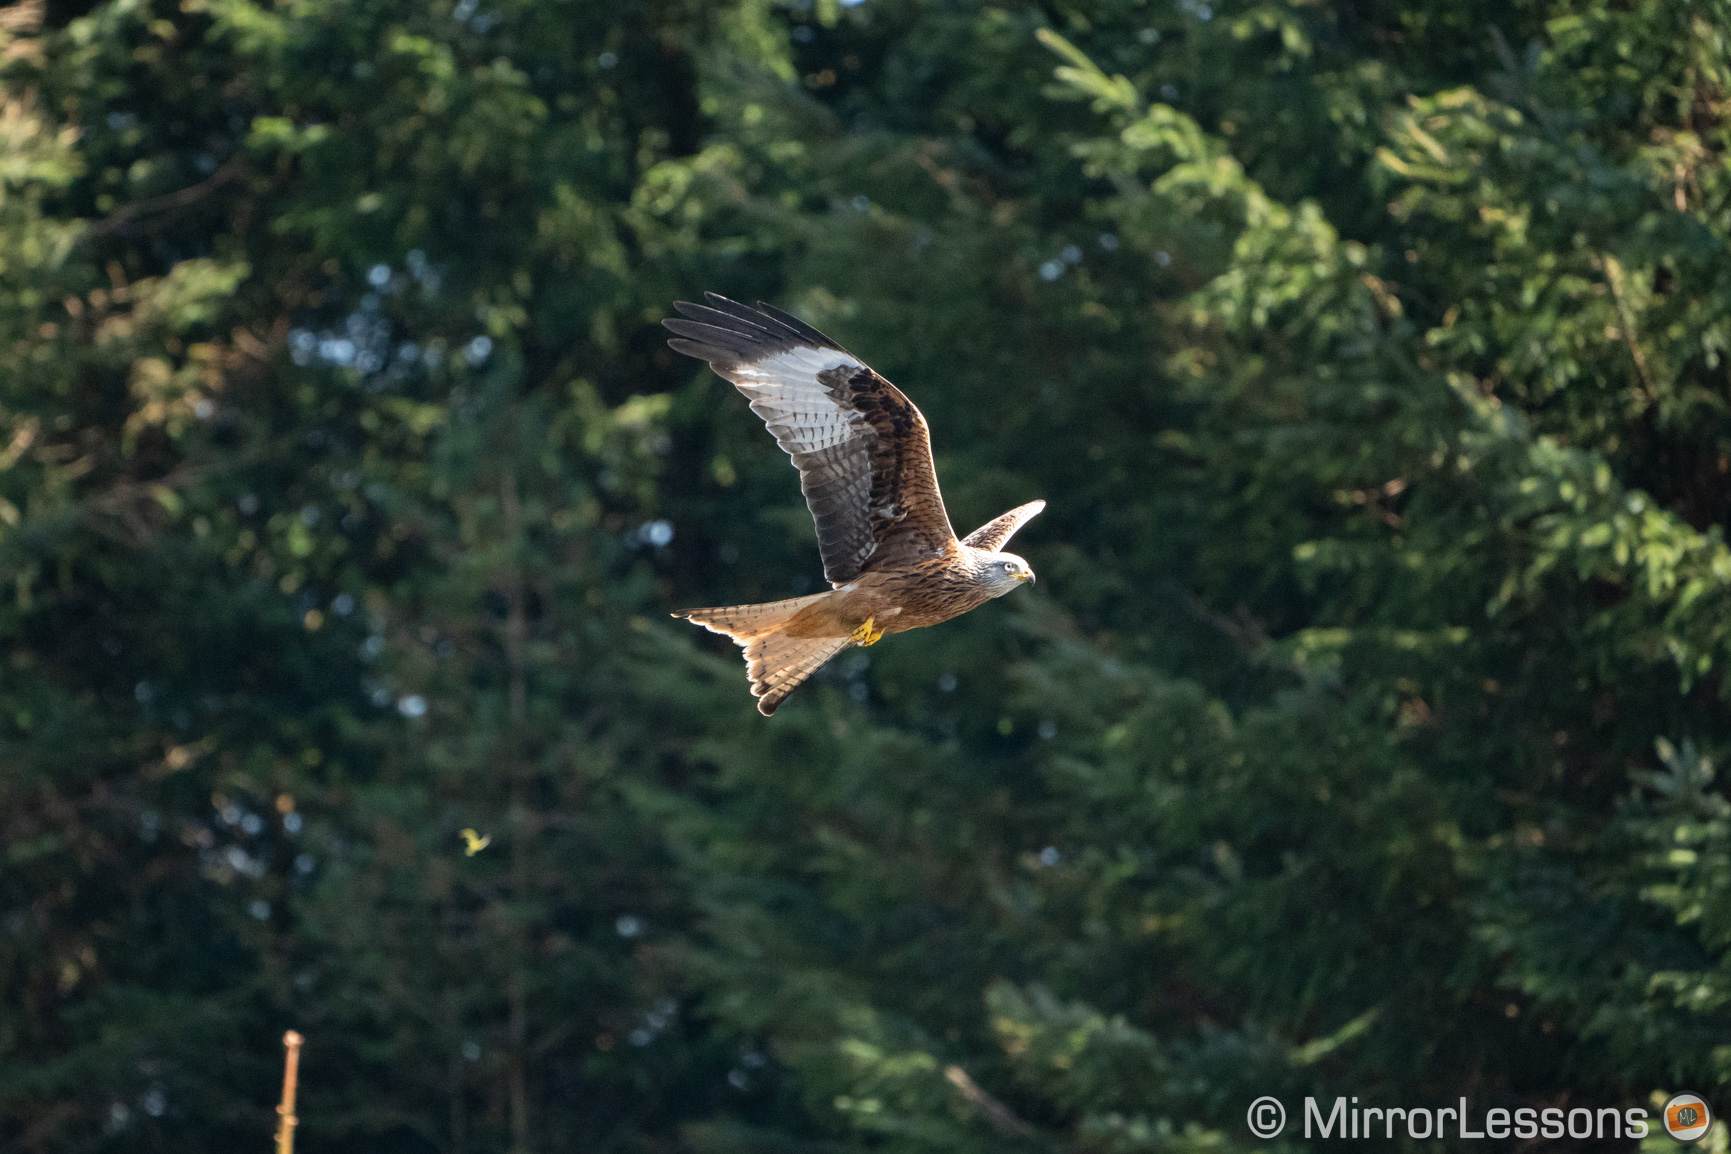
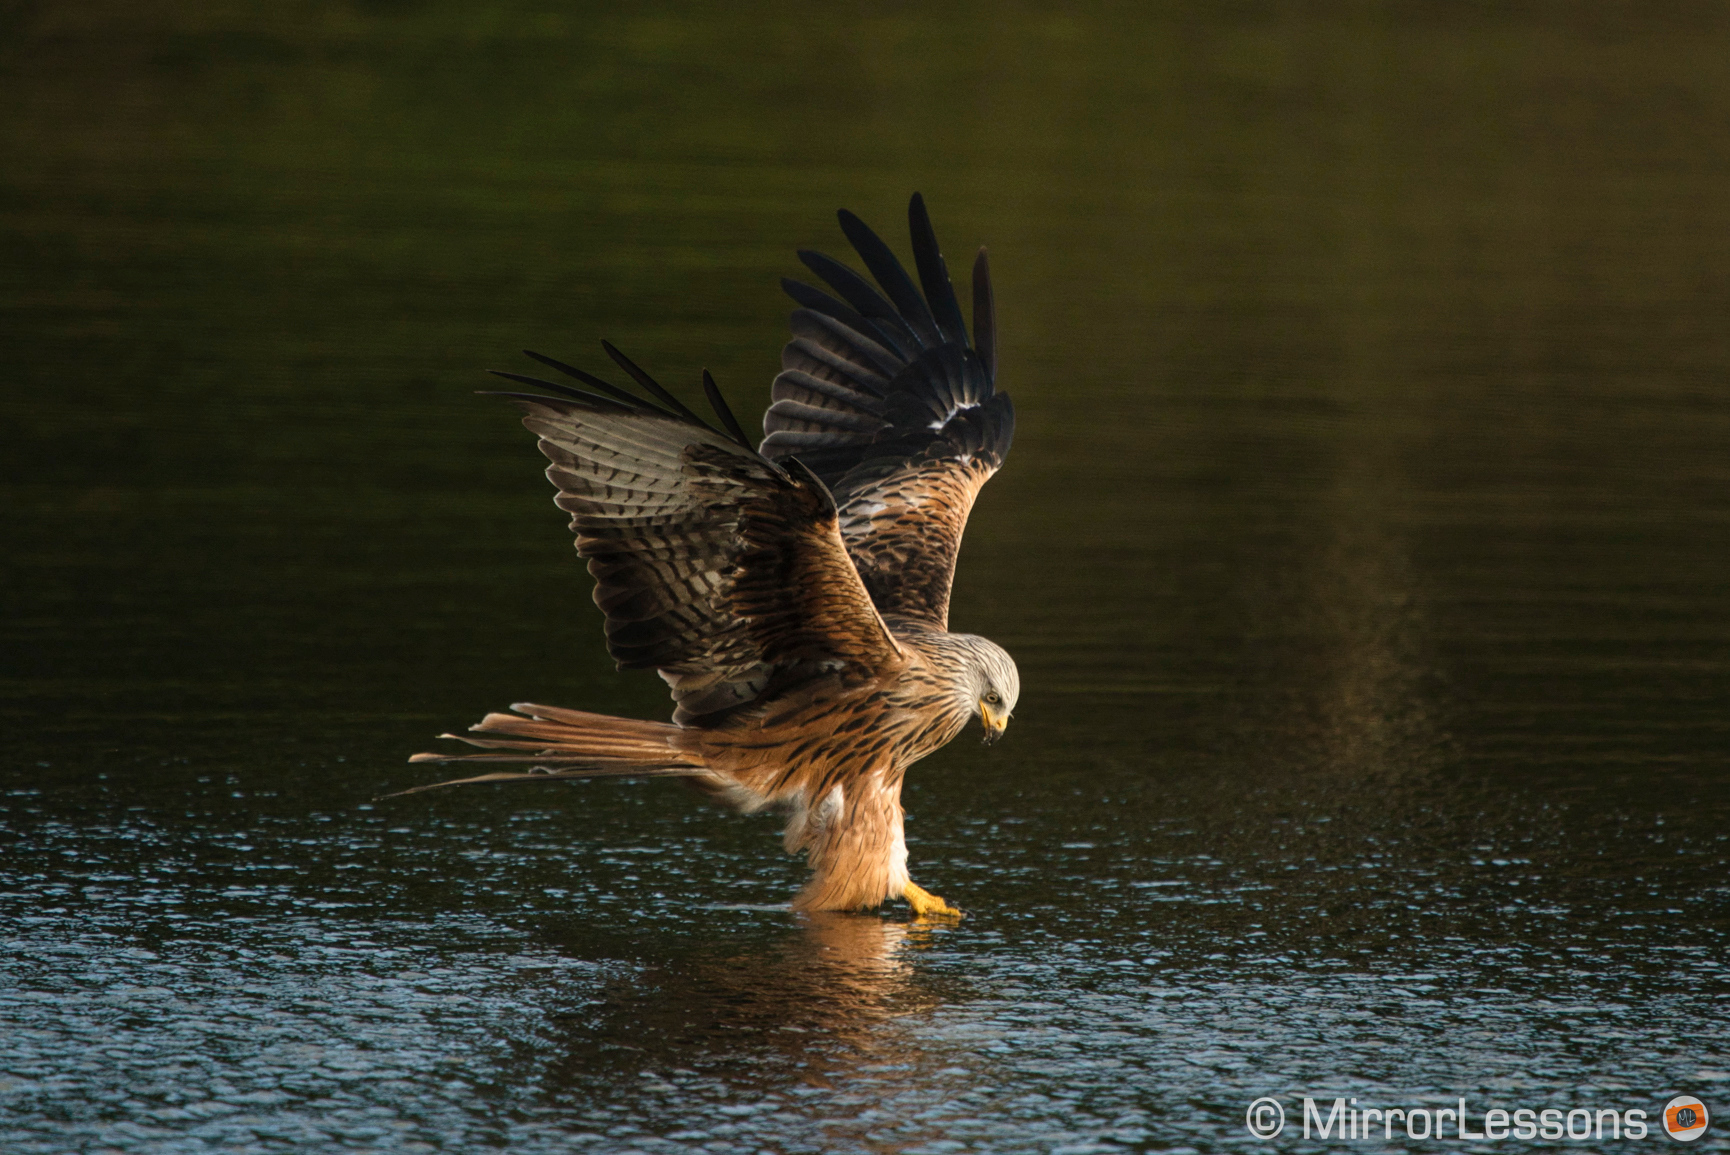
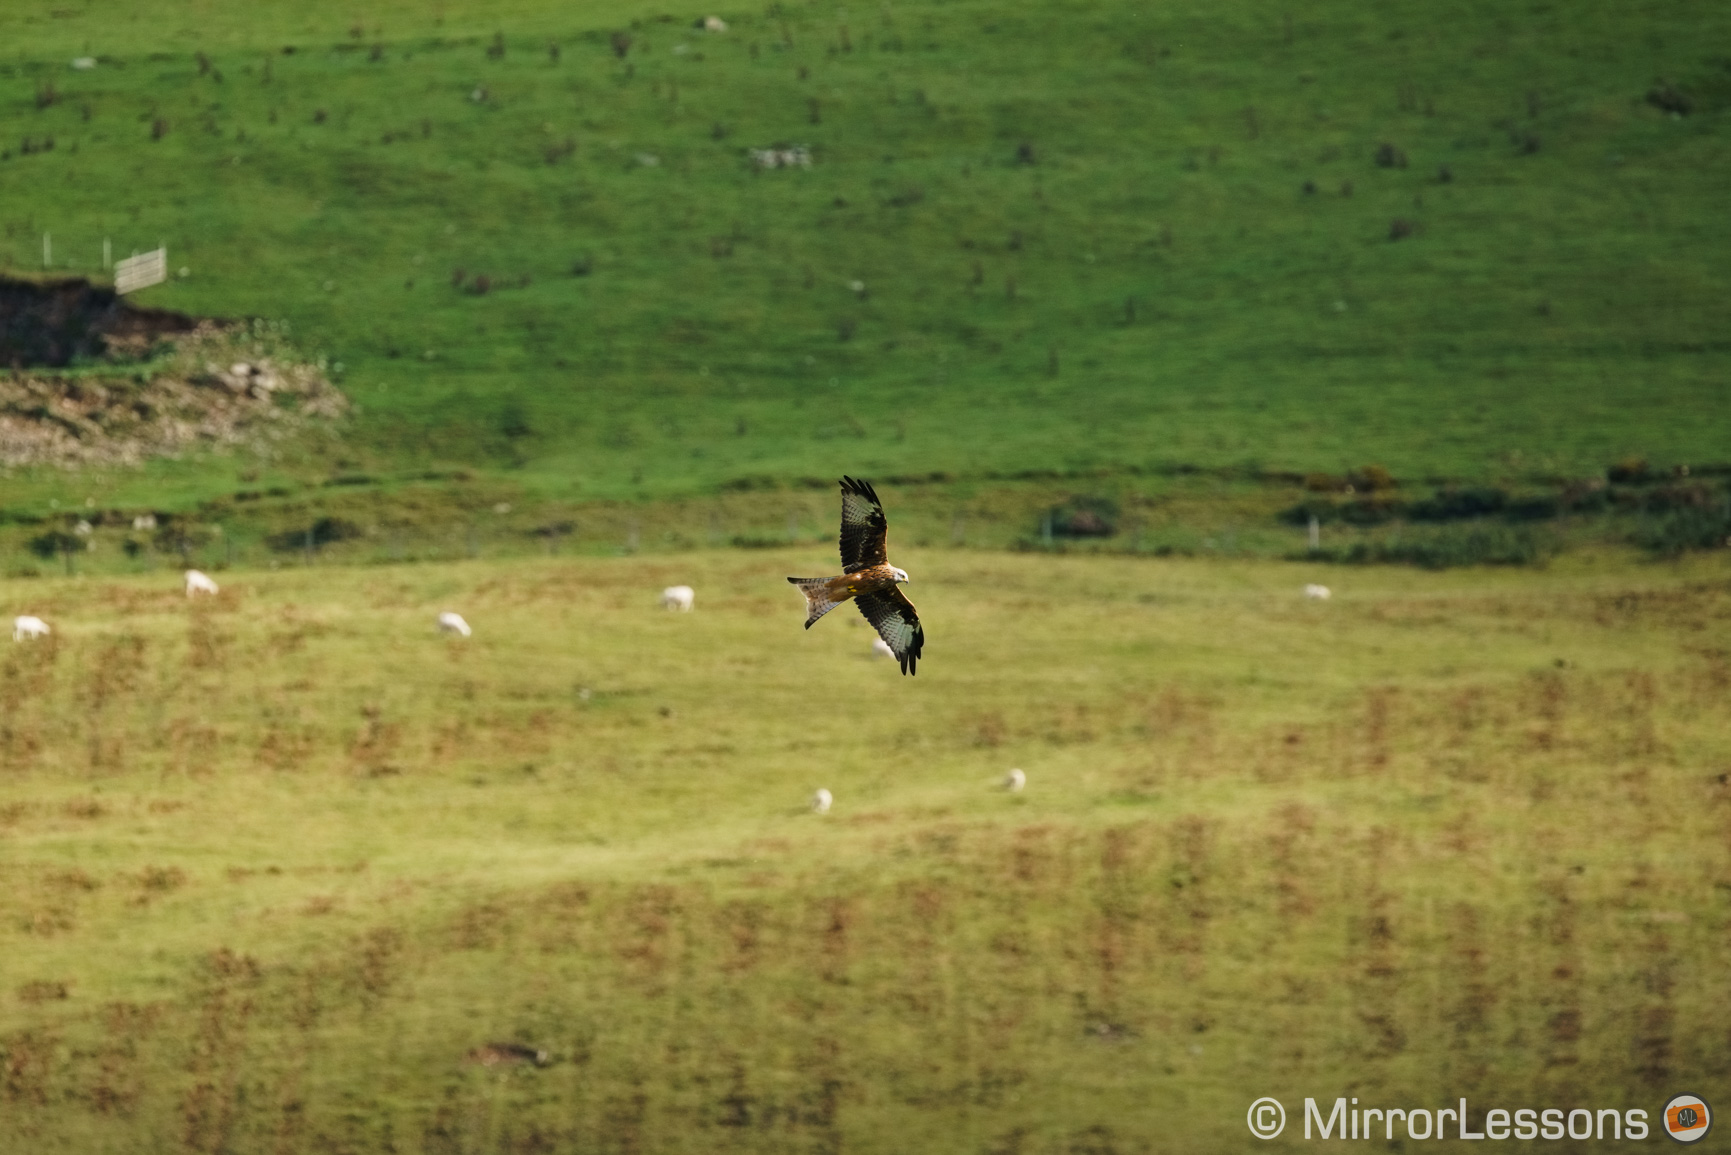
In the example below, most of the kite body is in the shade except for the small head. But the camera analyses the light in four other areas around it, so the exposure is balanced.
Now an animal can change positions quickly when moving, which means that the background around it can change too.
For example a bird can go from a bright background (blue sky) to a dark background (trees in the shade) and that is going to challenge the Multi metering mode and make the camera overexpose or underexpose.
To deal with all this, you need to use exposure compensation along with Multi metering. Your Sony camera has a dedicated dial on top for that and you can use it to force an increase or decrease in the brightness of your image.
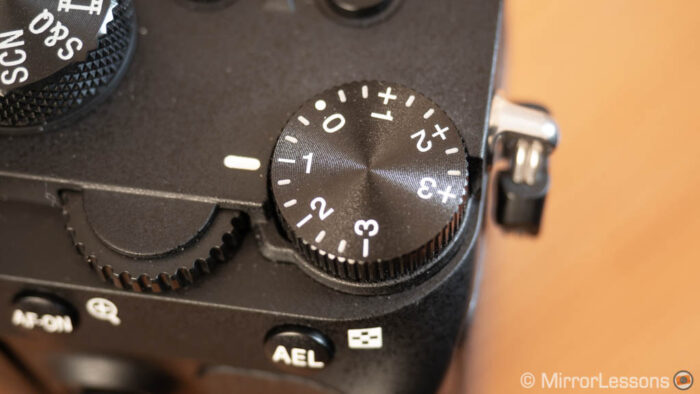
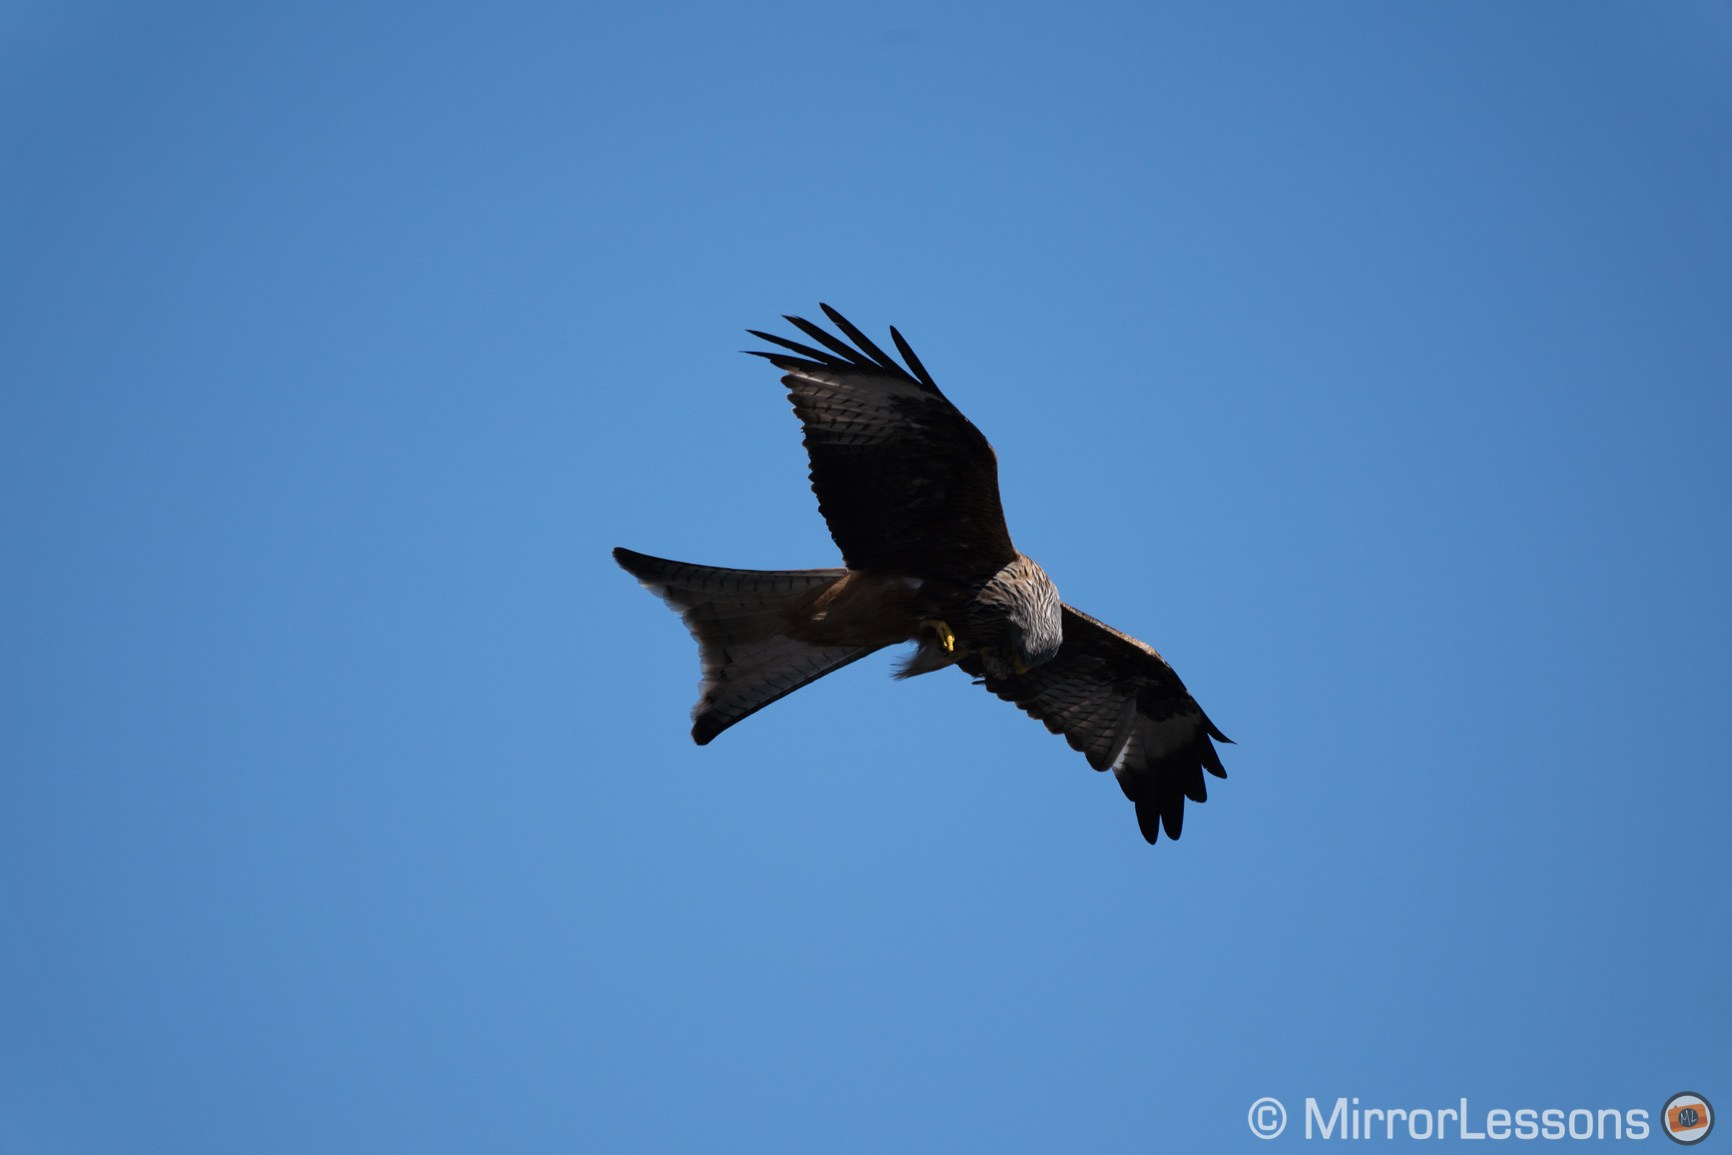
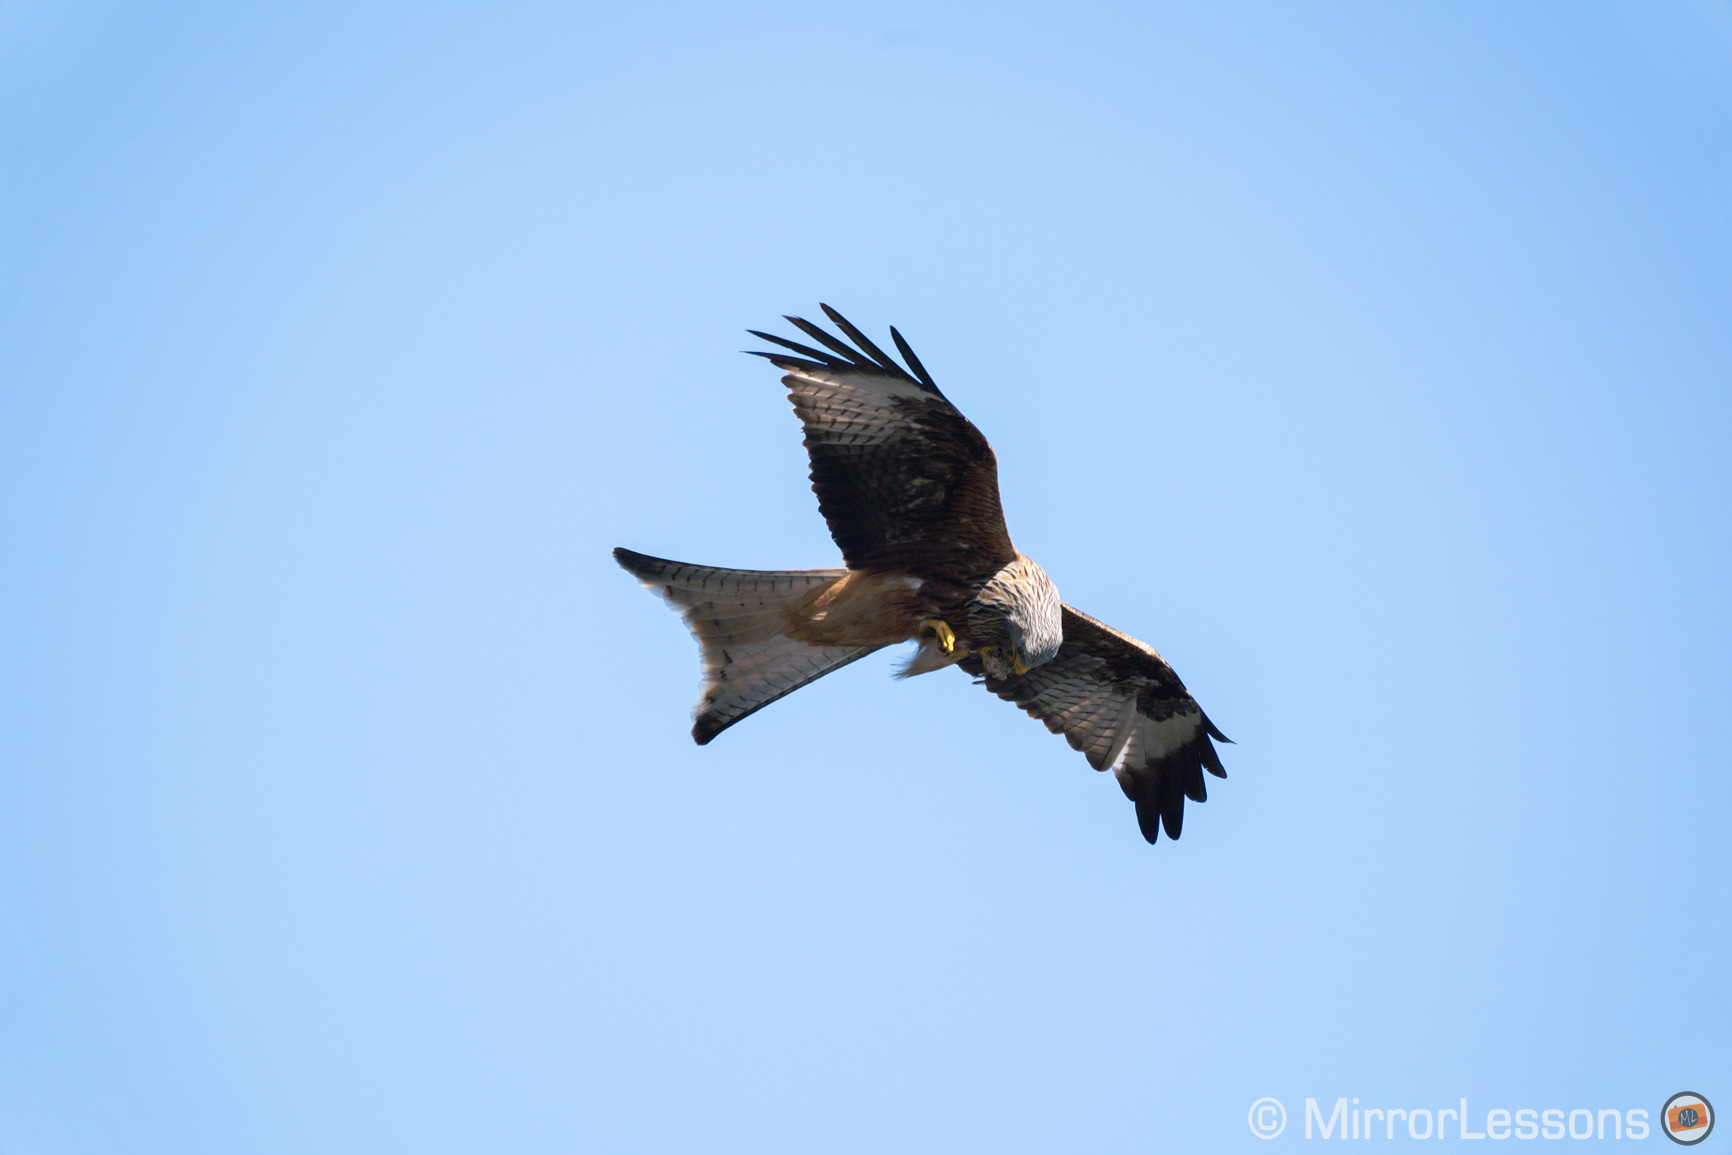
If a bird with a dark body is against a bright blue sky, the camera will most likely expose for the sky and give you a dark image. In this case, you move the dial to +1Ev or similar to counteract that. Don’t be surprised if sometimes you have to set a difference of 2 stops or more.
If the subject is against a dark background (trees in the shade), the camera can overexpose it to lighten the trees. In that case, you set -1Ev or higher to properly expose the bird.
Note: evaluating your exposure can be challenging when the animal has white parts on its body that can be easily clipped do to overexposure (meaning you won’t be able to recover all the details on its body). When in doubt, underexpose because shadows can be recovered more easily than highlights with the RAW file.
AEL with the Shutter Button
Camera Settings 1 / Exposure2 (page 10/14)
An alternative method to exposure compensation is AEL, or Auto Exposure Lock. For example when tracking birds, you can observe in which zone the camera gives you the best exposure on the animal and lock it so that it doesn’t change when the bird moves to another area.
The first method to lock the exposure is to half press or fully press the shutter button. As long as your finger stays on it, the exposure won’t change. It works well as long as you concentrate on one subject.
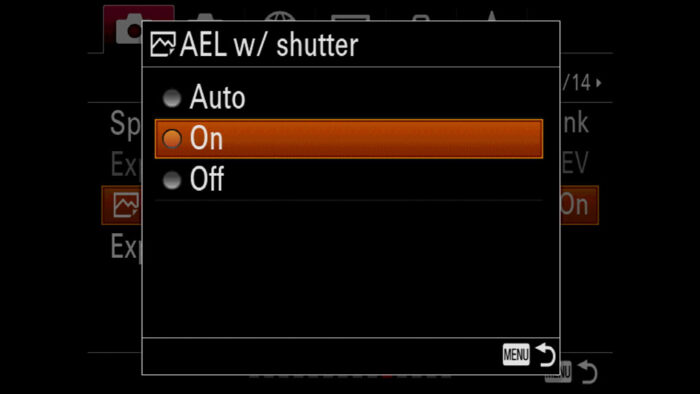
- Go to Camera Settings 1 / Exposure2 (page 10/14)
- Scroll down to AEL w/ shutter and choose On. Don’t choose Auto because otherwise the camera will keep tracking the exposure during the burst sequence.
AEL with a Custom Button
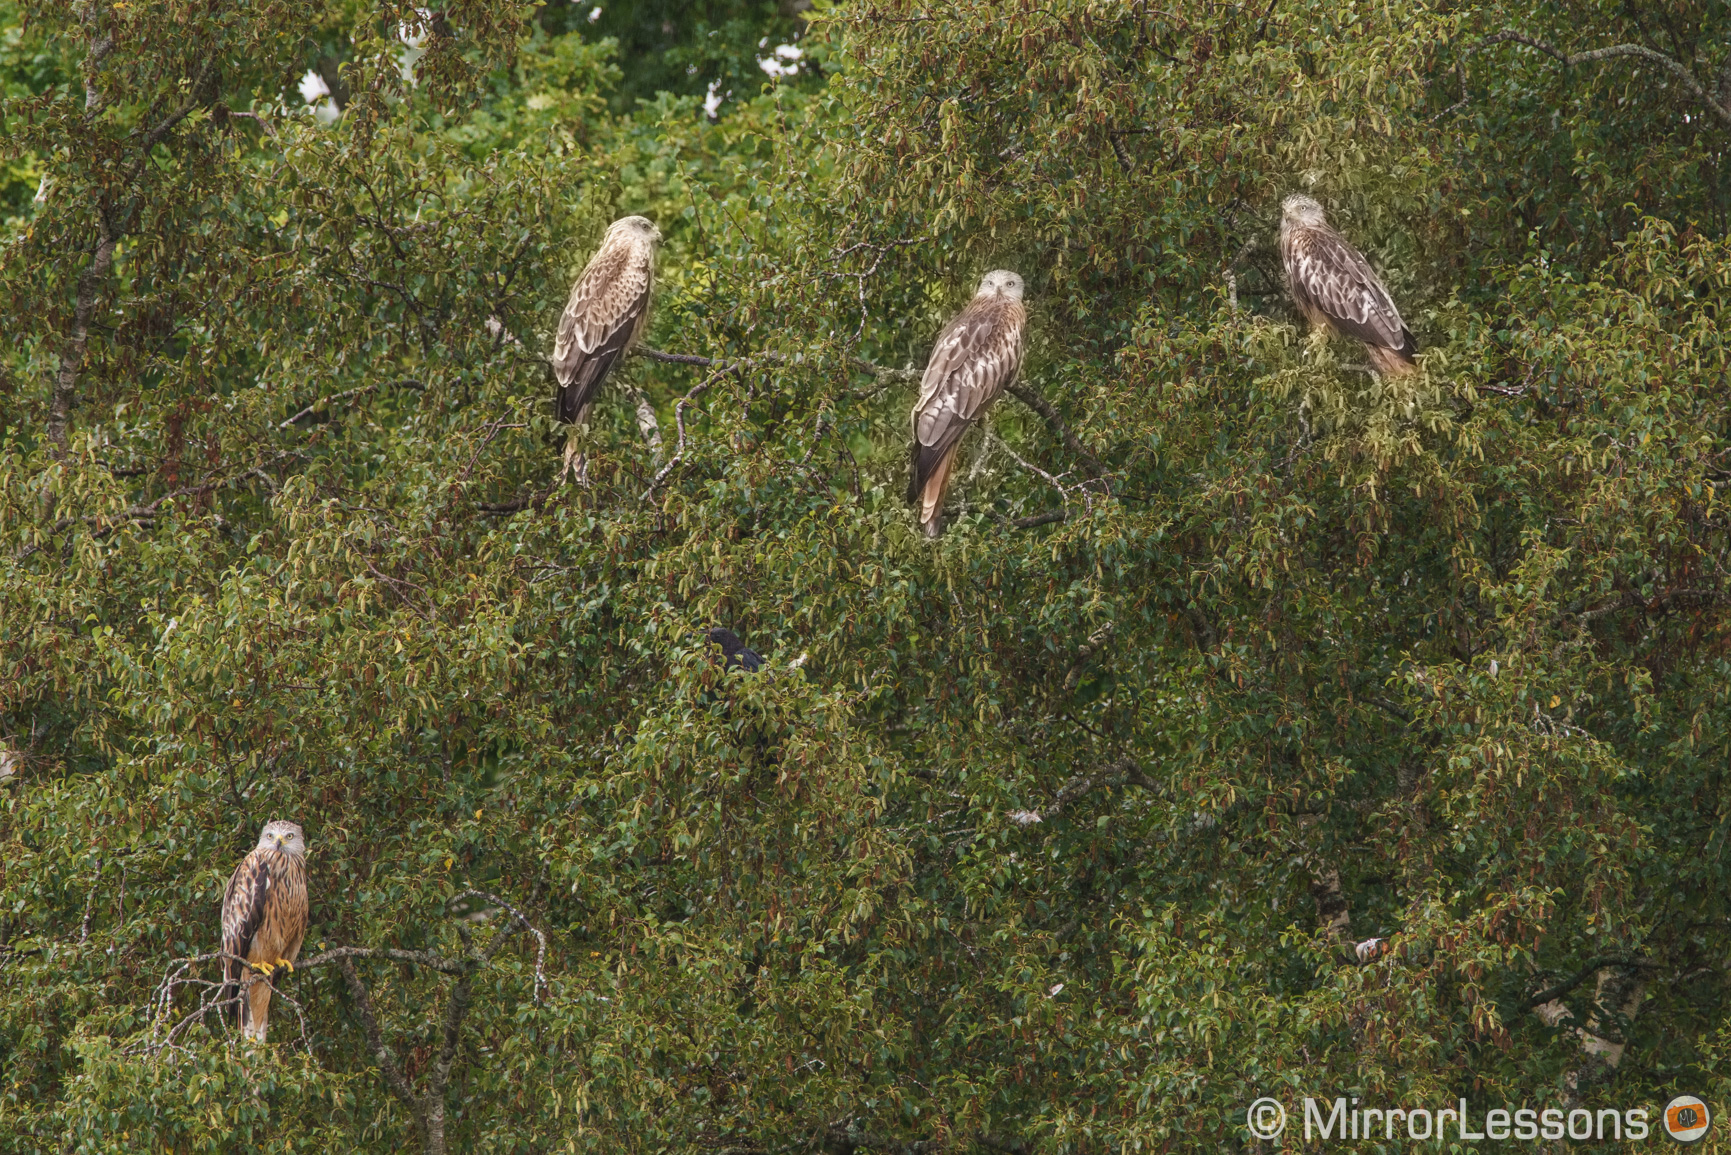
When there is a lot going on with multiple subjects moving around, you may take multiple burst sequences, some shorter and some longer. This happens to me all the time when taking pictures of red kites at the feeding station, where there are hundreds of them flying around.
In this case, you want to be able to lock the auto exposure separately from the shutter button.
- Go to Camera Settings 1 / Exposure2 (page 10/14)
- Scroll down to AEL w/ shutter and choose Off.
- Go to Camera Settings 2 / Custom Operation1 (page 8/9)
- Enter the first Custom Key option
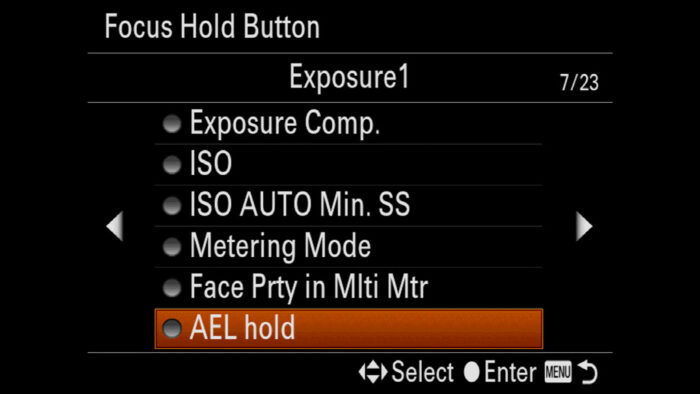
- Choose a button where to configure AEL Lock. My advice is to choose the Focus Hold Button of your Sony lens*.
- Scroll until you reach Exposure1 (page 7/23) and choose AEL hold.
- Now, every time you press and hold the button on your lens, auto exposure is locked.
- Alternatively, you can choose AEL toggle in page 8/23. This means you press one time to lock AE, and a second time to unlock it.
*Note: if you use the back button focus method (see chapter below), this solution is a bit complex because you have to operate three different buttons: AEL, Focus (back button) and shutter release. It can work better if your lens has a custom button because that way you can lock the exposure with the hand that holds the lens, rather than managing everything with the other hand on the camera. If you’re just beginning, perhaps the exposure compensation method works better.
To find out more about Metering, check our Photography Settings guide.
Sony A7 III, A7R III, A9 Settings for Birds and Wildlife: Autofocus
Autofocus is as important as having the right shutter speed. Let’s have a look at the best settings for bird photography and wildlife on your Sony A7 III or other Sony model.
Back Button Focus
The first thing I would advise you to do is set your camera with the back button focus method. This means that you don’t focus with the shutter release button, but with a button of your choice.
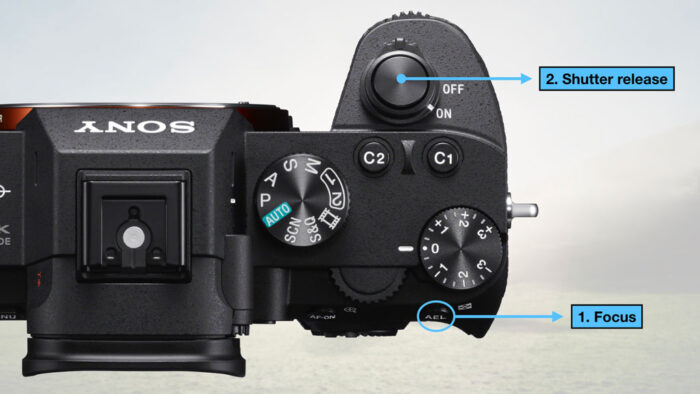
Keeping shutter and focus separate has several advantages:
- you have more control over one and the other, and the camera engages focus only when you want it to
- you avoid taking pictures inadvertently by keeping the shutter button half-pressed, especially in winter when the sensitivity of your finger is reduced because of the cold or by wearing gloves
- you get AF-S and AF-C all at once: press the back button one time to focus once, press and hold to focus continuously
- your camera won’t refocus every time you press the shutter button
Note: if you’re only taking pictures of birds in flight, perhaps the back button focus is less necessary because you’ll need to focus constantly, before and while taking pictures. That being said, I find the back button focus method more precise. Plus it gives you more control when you occasionally take pictures of something else that is not moving. In other words, once you get used to it, you rarely go back.
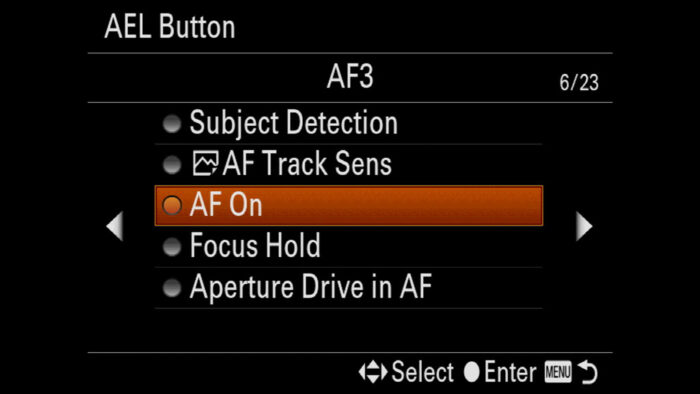
To set up the back button focus (mine is on the AEL button), follow the steps below:
- Go to Camera Settings 1 / AF2 (page 6/14)
- Select Off for AF w/shutter
- Head to Camera Settings 2 / Custom Operation1 (page 8/9)
- Select the first Custom Key setting
- Choose a custom button
- Navigate to AF3 (page 6/23) and select AF On
Focus Mode
Not a lot to say here, I always use continuous AF and you should do the same. This is where phase detection AF is triggered at all times, which provides fast and more accurate performance.
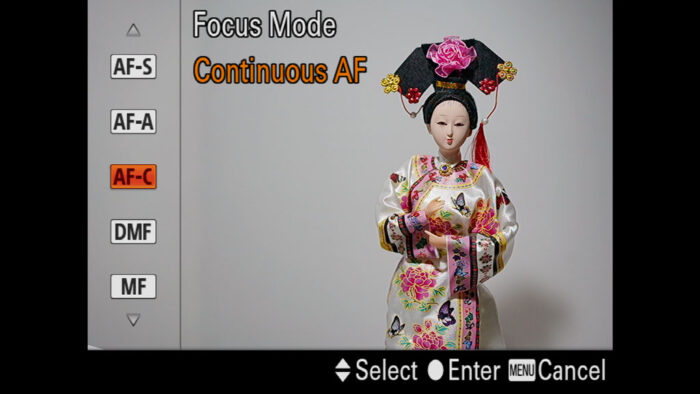
Older cameras such as the A7 I and A7 II have a slower AF performance. The A7S and A7S II use contrast detection only which doesn’t work well for wildlife and birds in flight.
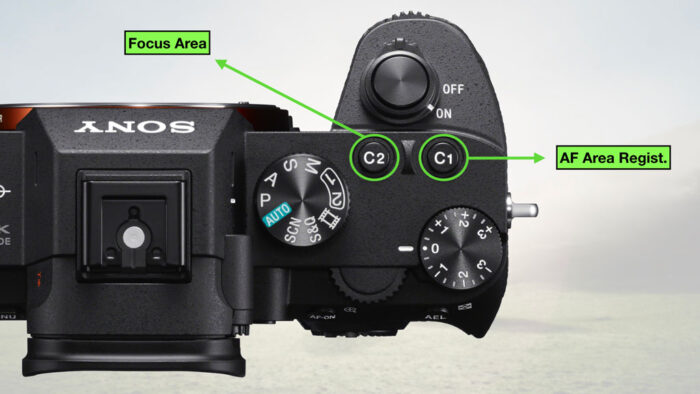
Focus Area
There are essentially two focus areas you want to look at when taking pictures of wildlife.
The first is called Expand Flexible Spot. It is a small focus area that may use adjacent points when the point in the middle is not enough. In my experience, it has proved to be one of the best focus area settings.
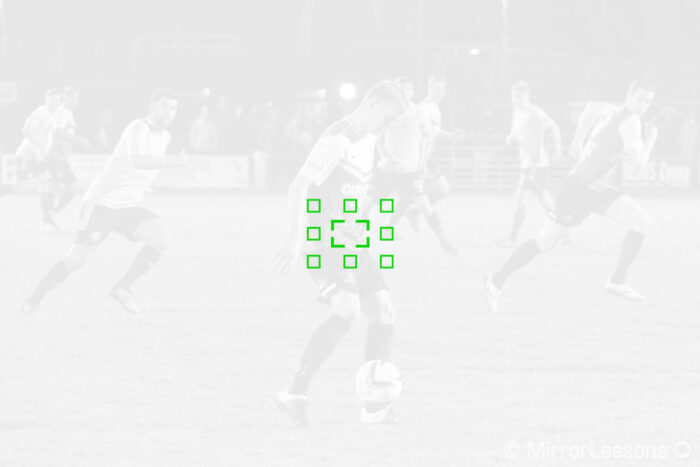
Expand Flexible Spot is not available on the A7 I series or A7 mark II model.
You can move the focus area with the joystick on the rear, or the touch screen on select cameras (Touch Pad option).
But perhaps a better way to use this focus area is to select it with the Lock-On/Tracking setting.
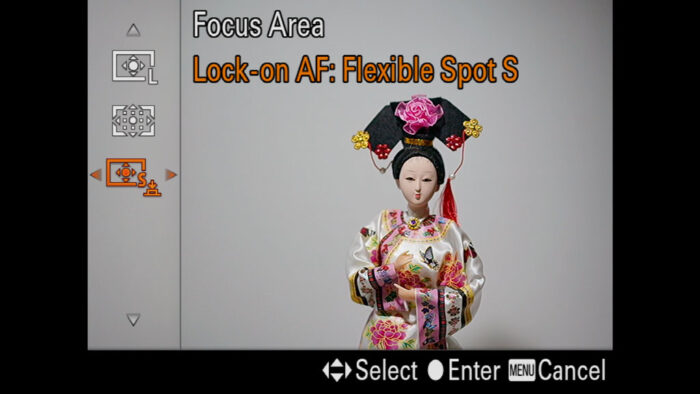
The main advantage is that once you acquire focus on the subject, the camera will track it no matter its position on the frame, so you don’t need to move the focus point manually.
If you own an A9, A9 II or A7R IV, the tracking option would be my go-to setting because it is so reliable.
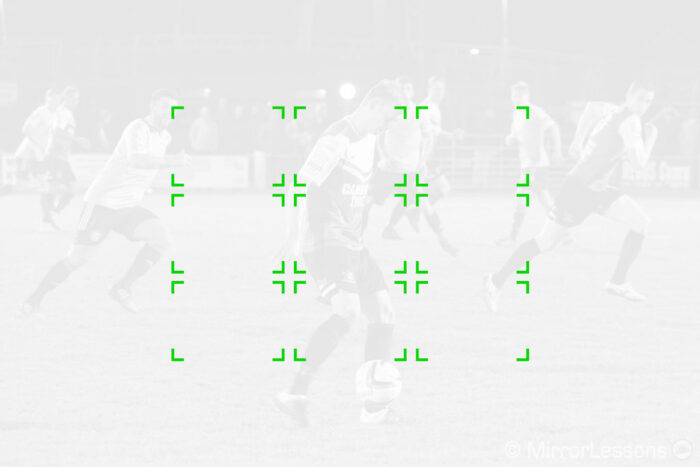
For birds in flights, or fast movements that can’t always be predicted, I use the Zone Area. I find it easier to focus onto the bird this way, whereas tracking/Lock-on can lose the subject more quickly when it flies against a busy background. Zone also allows you to track the bird without worrying about keeping it precisely at the centre of the frame.
AF Area Registration
Not available in the A7 I and A7 II series
I said earlier that the two main focus areas I use are Zone and Expand Flexible Spot. Now what if there was a quick way to switch between the two? Good news, there is!
- Go to Camera Settings 1 / AF3 (page 7/14)
- Select On for AF Area Regist.
- Go to Camera Settings 1 / AF1 (page 5/14)
- Choose Focus Area and select Zone
- Press and hold the Fn button to register the Zone area
- Go to Camera Settings 2 / Custom Operation 1 (page 8/9)
- Choose the first Custom Key entry
- Select a custom button
- Navigate to AF2 (page 5/23)
- Choose Regist. AF Area tggle
- Exit the menu, and choose the Expand Flexible Spot area
- Press the button you configured to switch to Zone, press it a second time to go back to Expand Flexible Spot
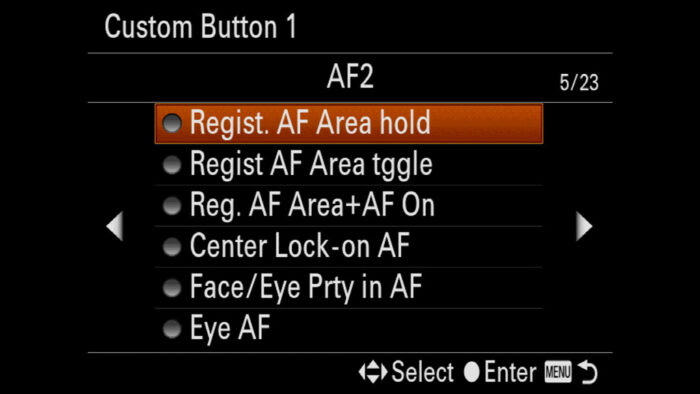
Note: you can also choose to assign the Reg. AF Area+AF ON option to the custom button. What it does is that in addition to changing the focus area, it also engages focus, effectively becoming a second back button focus. In this case, you have to press and hold it.
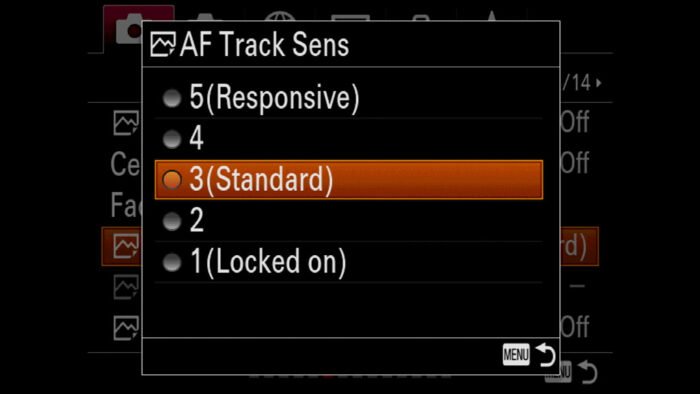
AF Tracking Sensitivity
Camera Settings 1 / AF2 (page 6/14)
Not available on the A7 I and A7 II series
AF Tracking Sensitivity regulates the responsiveness of the autofocus. Choose a low number, and the camera will stay on the subject, ignoring potential obstacles in the foreground such as tall grass, or other elements that can enter the frame and cover your subject momentarily while you’re panning.
Choose a higher number, and the autofocus becomes more responsive to various distances. It can also encourage the camera to switch subject if there are multiple targets in the frame.
For static animals, I suggest to leave it to 3, or set it to 1 if you can’t get a clear view of your subject. With birds in flight, I’ve always found level 5 to give me the best keeper rate, especially with birds that fly in an erratic manner.
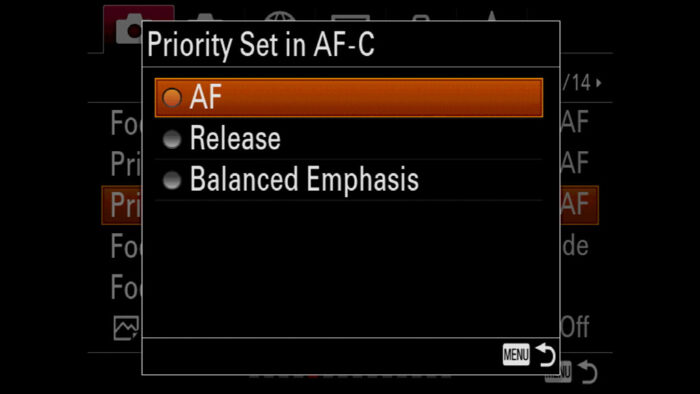
Priority Set in AF-C
Camera Settings 1 / AF1 (page 5/14)
Not available on the A7 I series or the A7 mark II model
For wildlife and birds in flight especially, I always choose AF priority. I don’t want the camera to start taking pictures if my subject is not in focus, because I can end up with an entire burst sequence out of focus.
Perhaps if you’re doing safaris or taking pictures of a unique situation where you want the camera to fire the shot as quickly as possible, then you might feel safe with Release priority. But having the camera set to AF priority has never caused me any problems.
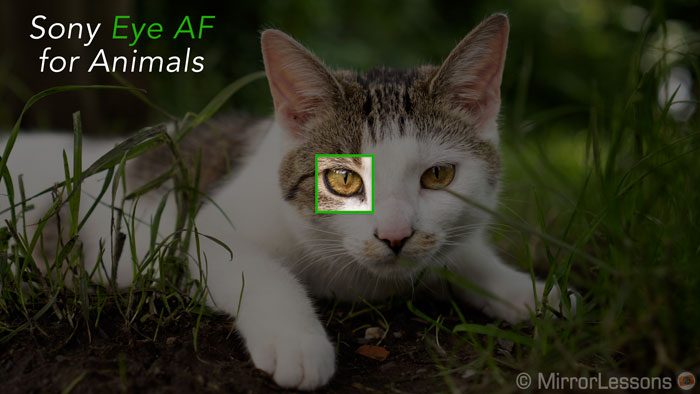
Eye AF for Animals
Sony has started to roll out firmware updates to enable Eye AF for animals, and the most recent cameras have this function by default.
Just like for people, Eye AF can help make sure that the eye of the subject is in focus, which is the most important part when taking close-ups of your subject.
For wildlife work, Eye AF can be useful when the animal is really close, or occupies a large portion of the frame, like the headshot of a lion. If the subject is too far, Eye AF might not activate, and you probably don’t need it anyway because the normal focus area will do fine and give you the whole head in focus.
To know more about Eye AF for animal, please check out our dedicated article.
In-Depth:
Sony Eye AF for Animals
Sony A7 III, A7R III, A9 Wildlife Photography: Drive Mode
When using your Sony A7 III for birds in flight, you want to reduce the chance of missing a good moment, so taking pictures in continuous mode is a must. This is valid for many situations involving wildlife or bird photography.
Continuous Shooting Speed
Sony cameras have different burst speed capabilities depending on the specific model. The fastest at the moment are the A9 and A9 II. You can see all the differences in the table below.
| Hi+ | Hi | Mid | Lo | |
|---|---|---|---|---|
| A9, A9 II (e-shutter) | – | 20fps* | 10fps | 5fps |
| A9 II | – | 10fps* | 8fps | 3fps |
| A9 | – | 5fps* | – | 2.5fps |
| A7 III, A7R III, A7R IV | 10fps* | 8fps | 6fps | 3fps |
| A7S, A7S II | – | 5fps | – | 2.5fps* |
| A7, A7 II | – | 5fps* | – | 2.5fps |
| A7R | – | 4fps | – | 1.5fps* |
*Note: the underlined numbers in bold indicate the speed at which AF and AE tracking are available.
On the A7 I and A7 II series, there are only two speeds available and they are called Cont. Shooting and Speed Priority Cont. Shooting.
You can select the continuous shooting drive mode with the pre-assigned button, which is located on the left side of the rear control wheel. Scroll left or right to change the speed.
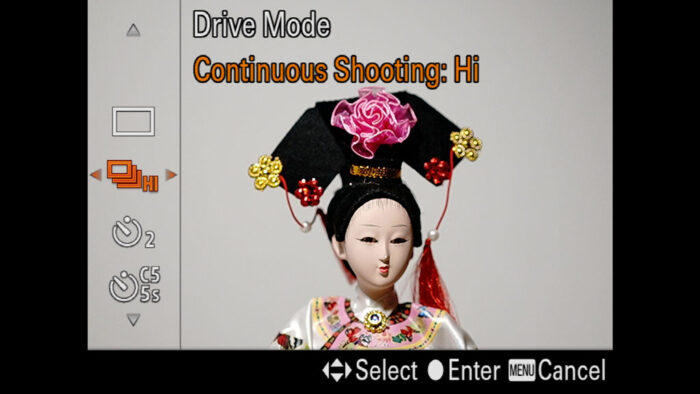
With static subjects or slow moving animals, you don’t necessarily need the fastest speed (a middle burst of around 6fps is fine). At the same time, if you have large capacity cards in your camera and don’t mind the time required to sort your images in post, you can keep a faster speed to make sure you don’t miss anything.
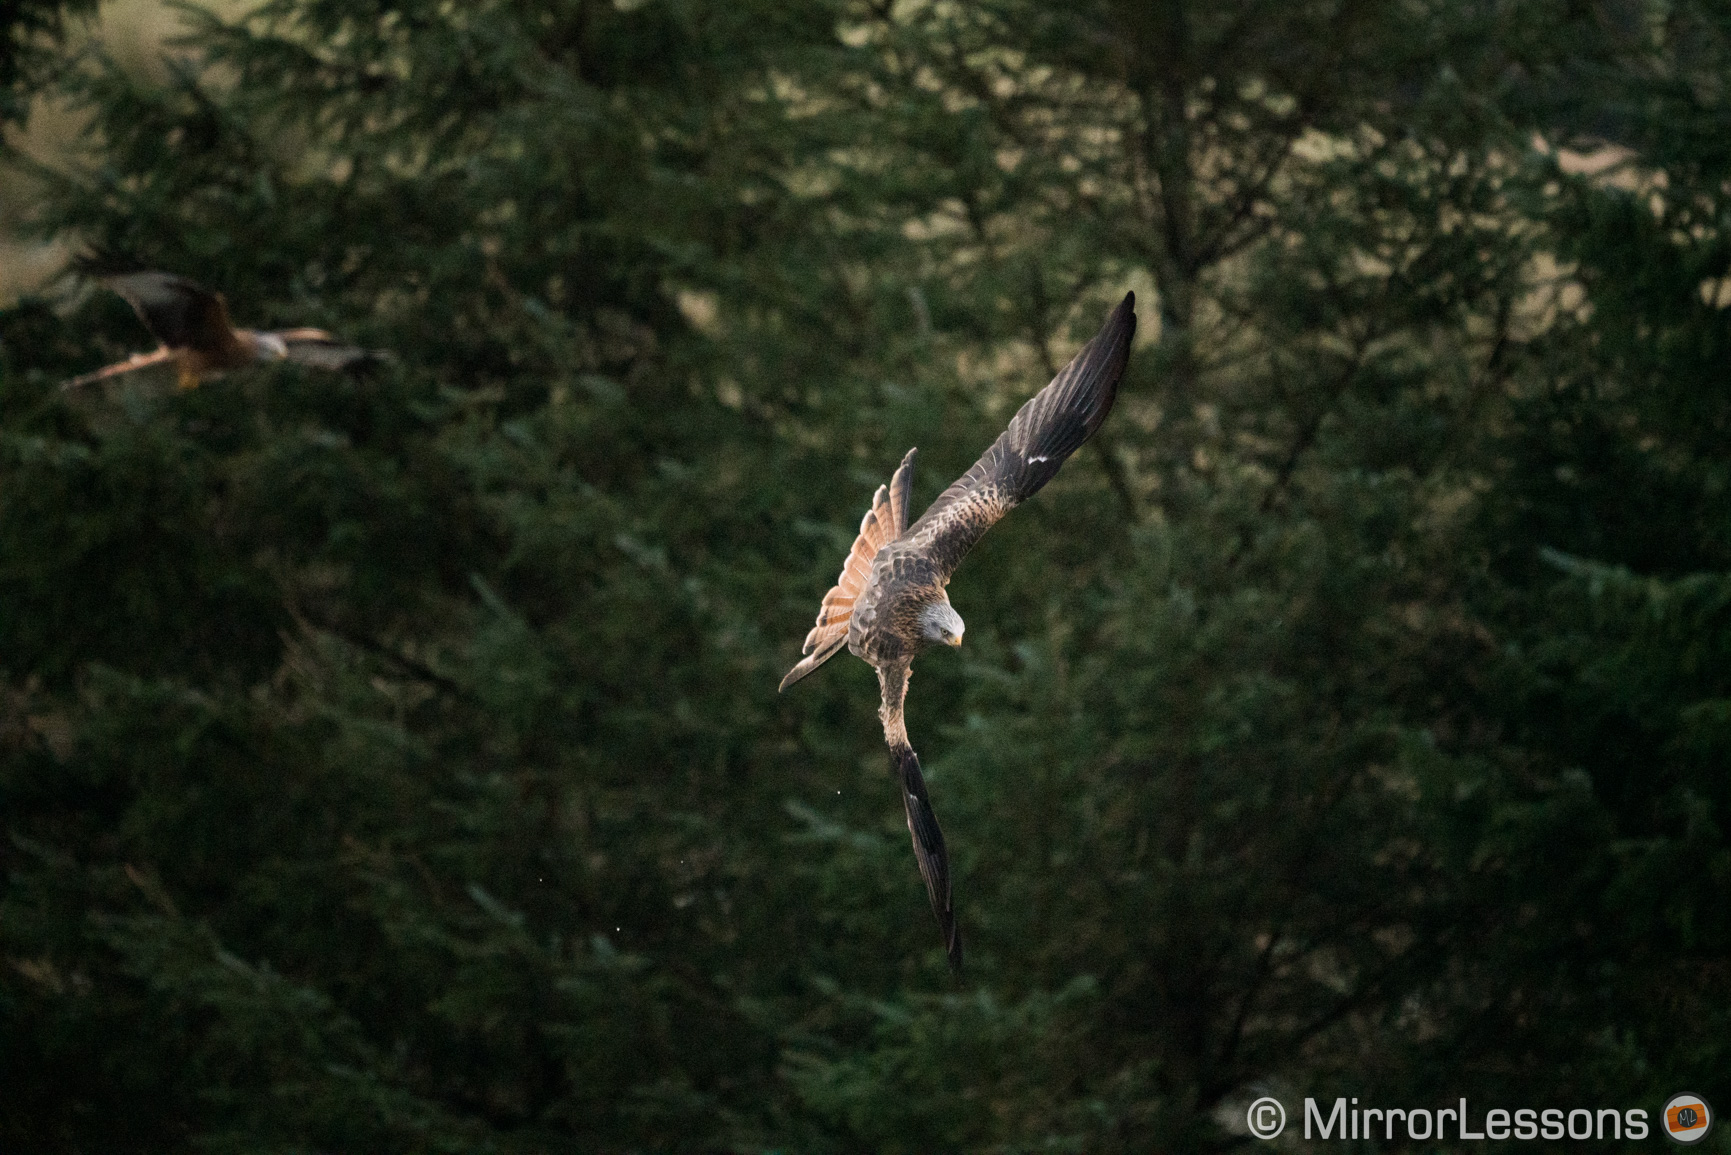
For action situations such as birds in flight, a fast continuous shooting speed is important to capture more frames of the action and increase you chance of having nice shots with the animal in beautiful poses.
However, there is one thing to keep in mind: at the fastest speed, not every Sony camera gives you a live view of your scene, and this is what we discuss below.
Continuous Shooting Speed and Live View
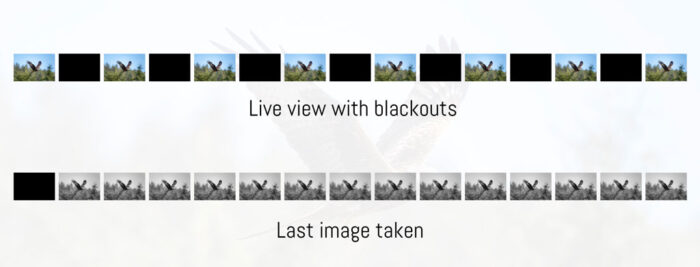
At the fastest drive speed, most Sony cameras deactivate live view, showing you the last images taken in rapid succession instead. If your subject is moving slowly or is static, this is not a problem because you’ll be able to maintain a good view of the scene.
However, if you subject is moving fast and can change direction at any moment, not having live view isn’t great because what you see has already happened.
For example, if a bird of prey suddenly dives down, you may not see it in the EVF because you’re still looking at previous images. As a result you’re going to lose it in the frame. It is a matter of seconds but with wildlife that can be a very long time.
For birds in flight, I always use the second highest continuous shooting speed on my A7 III and A7R III because live view is maintained. There are blackouts in between shots so the view is not as clear as with the fastest setting, but what I’m seeing is in real time and I can detect a change of movement quicker.
Here is a table that shows which burst speed with live view is available for each camera.
| Cont. Shooting with Live View | |
|---|---|
| A9, A9 II (e-shutter) | 20fps |
| A7 III, A7R III, A7R IV | 8fps |
| A7, A7 II, A7S, A7 II | 2.5fps |
| A7R | 1.5fps |
The exception here is the Sony A9 series because of its unique sensor, and we talk about it in the next chapter.
Sony A7 III, A7R III, A9 Bird Photography: Shutter Mode
Camera Settings 2 / Shutter SteadyShot (page 4/9)
Your Sony cameras has two to three different shutter modes. The first is the standard one that uses the mechanical curtains. Most of the time, it is the one that I advise you to go for.
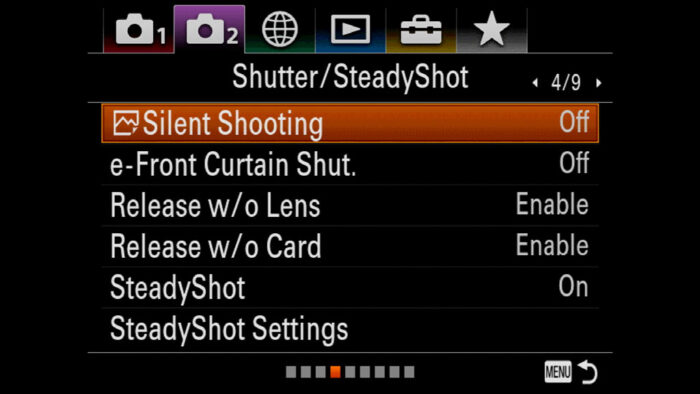
The second is called e-front curtain shutter: the exposure starts electronically and closes with the rear mechanical curtain. It is useful when using slow shutter speeds with long telephoto lenses and static subjects because it reduces the chance of micro motion blur. However make sure to deactivate it with fast shutter speeds (1/2000s and higher) because it can create an uneven exposure.
The third mode is the electronic shutter, which is called Silent Shooting on your Sony camera. As the name suggests, it can be very useful if you are in a situation where you don’t want to make any sound that might scare off an animal.
Be aware that the electronic shutter can cause some distortion when panning very quickly.
Silent Shooting is not available on the A7, A7R and A7 mark II.
Silent Shooting with the Sony A9 series
The Sony A9 stands out from the other A7 cameras because of its sensor. It has a stacked structure that includes a memory chip which allows the camera to process more data simultaneously (10 times faster than the A7 III according to Sony).
This sensor pushes the electronic shutter performance to new levels and allows the camera to do four things the others can’t:
- Shoot up to 20fps in continuous mode
- Minimise banding and distortion
- Increase the buffer memory
- Maintain live view with no blackouts
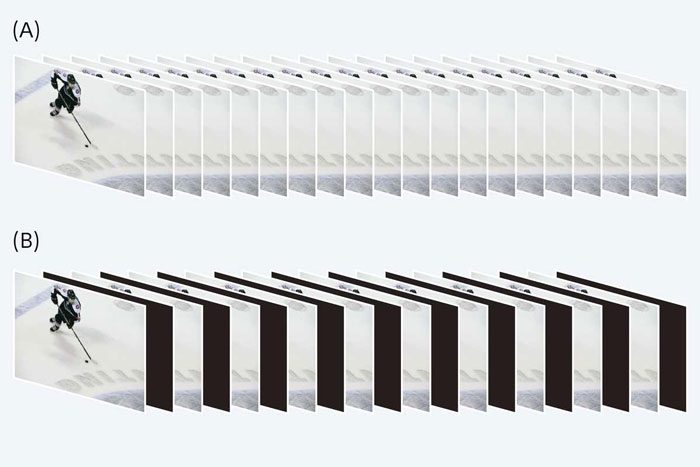
Live view with no blackouts is my favourite feature. When you take pictures while following your subject, nothing changes in the EVF: there are no blackouts (not even at the beginning) and there is no lag. It almost looks as if you aren’t taking pictures at all (and this is why there is the option to activate a fake shutter sound).
The result is a seamless live view with no interruptions whatsoever. For fast birds, it makes a huge difference.
Find out more information about the Sony A9 and the electronic shutter in the article below.
In-Depth:
Electronic Shutter Evolution
Sony A7 III, A7R III, A9 for Birds and Wildlife: Additional Settings
Memory Recalls
If you’re passionate about wildlife photography and like to visit different places and take pictures in different situations, you may be interested in knowing that you Sony camera allows you to save all the settings you want to specific custom modes, called Memory Recall.
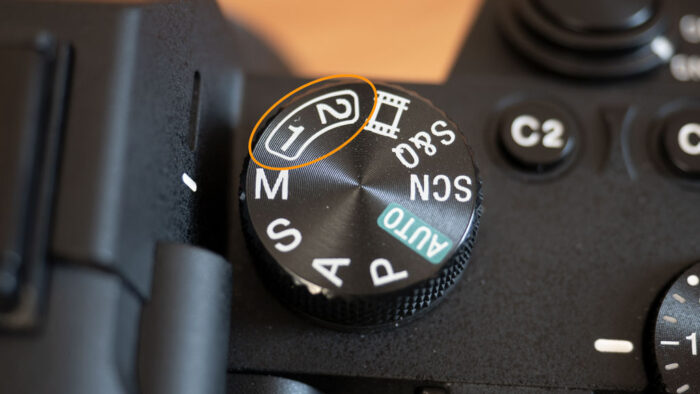
You’ll notice that there are two to three numbers on the top dial, and these are memory recalls you can activate at any moment to change a whole bunch of settings at once (including custom buttons).
It is interesting to have different configurations on your camera for different genres so that you don’t have to reconfigure everything every time.
To know more about Memory Recalls, check out our setup guide.
ISO Auto Minimum Shutter Speed
Camera Settings 1 / Exposure1 (page 9/14)
Not available on the A7 I series or the A7 mark II model.
As I said earlier on, I like to keep my shutter speed to manual, but if you prefer to work in Aperture priority, and leave the ISO to Auto, then the following setting is worth having a look at.
In Aperture priority, the camera can prioritise a slow shutter speed over a high ISO level when the image looks underexposed, and you don’t want this to happen if the animal is moving.
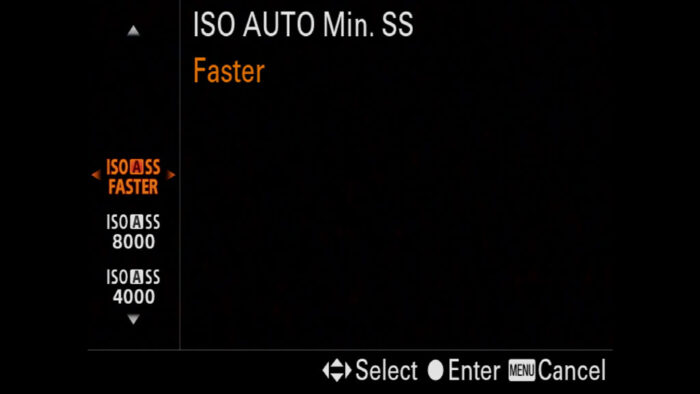
ISO AUTO Min. SS. allows you to tell the camera not to go below a certain shutter speed. For example, for birds in flight you can tell it not to go under 1/1000s. This is useful because otherwise, the camera might pick a slower shutter speed to avoid raising the ISO too high, and as result you’ll get a blurred image.
Attention: if the camera can’t get a correct exposure, it can bypass the ISO Auto Min. SS setting and choose a slower shutter speed anyway. Use it only in good light conditions.
Viewfinder Frame Rate
Camera Settings 2 / Display Auto Review 1 (page 6/9)
Not available on the A7 I, A7 II series, and the A7 III.
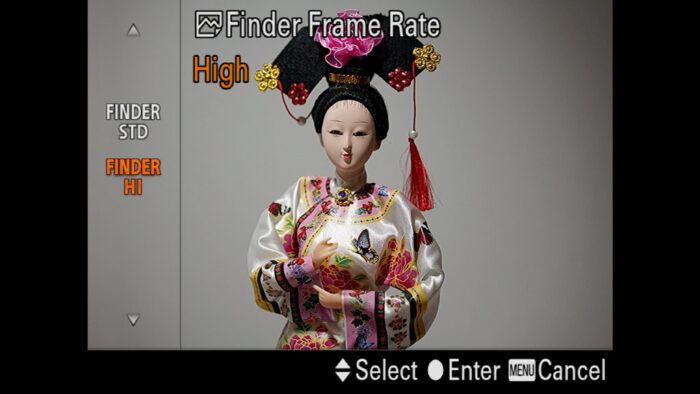
On certain models, you can increase the viewfinder frame rate from Standard (50 or 60fps) to High (100 or 120fps). When tracking fast subjects, it will give you a smoother live view.
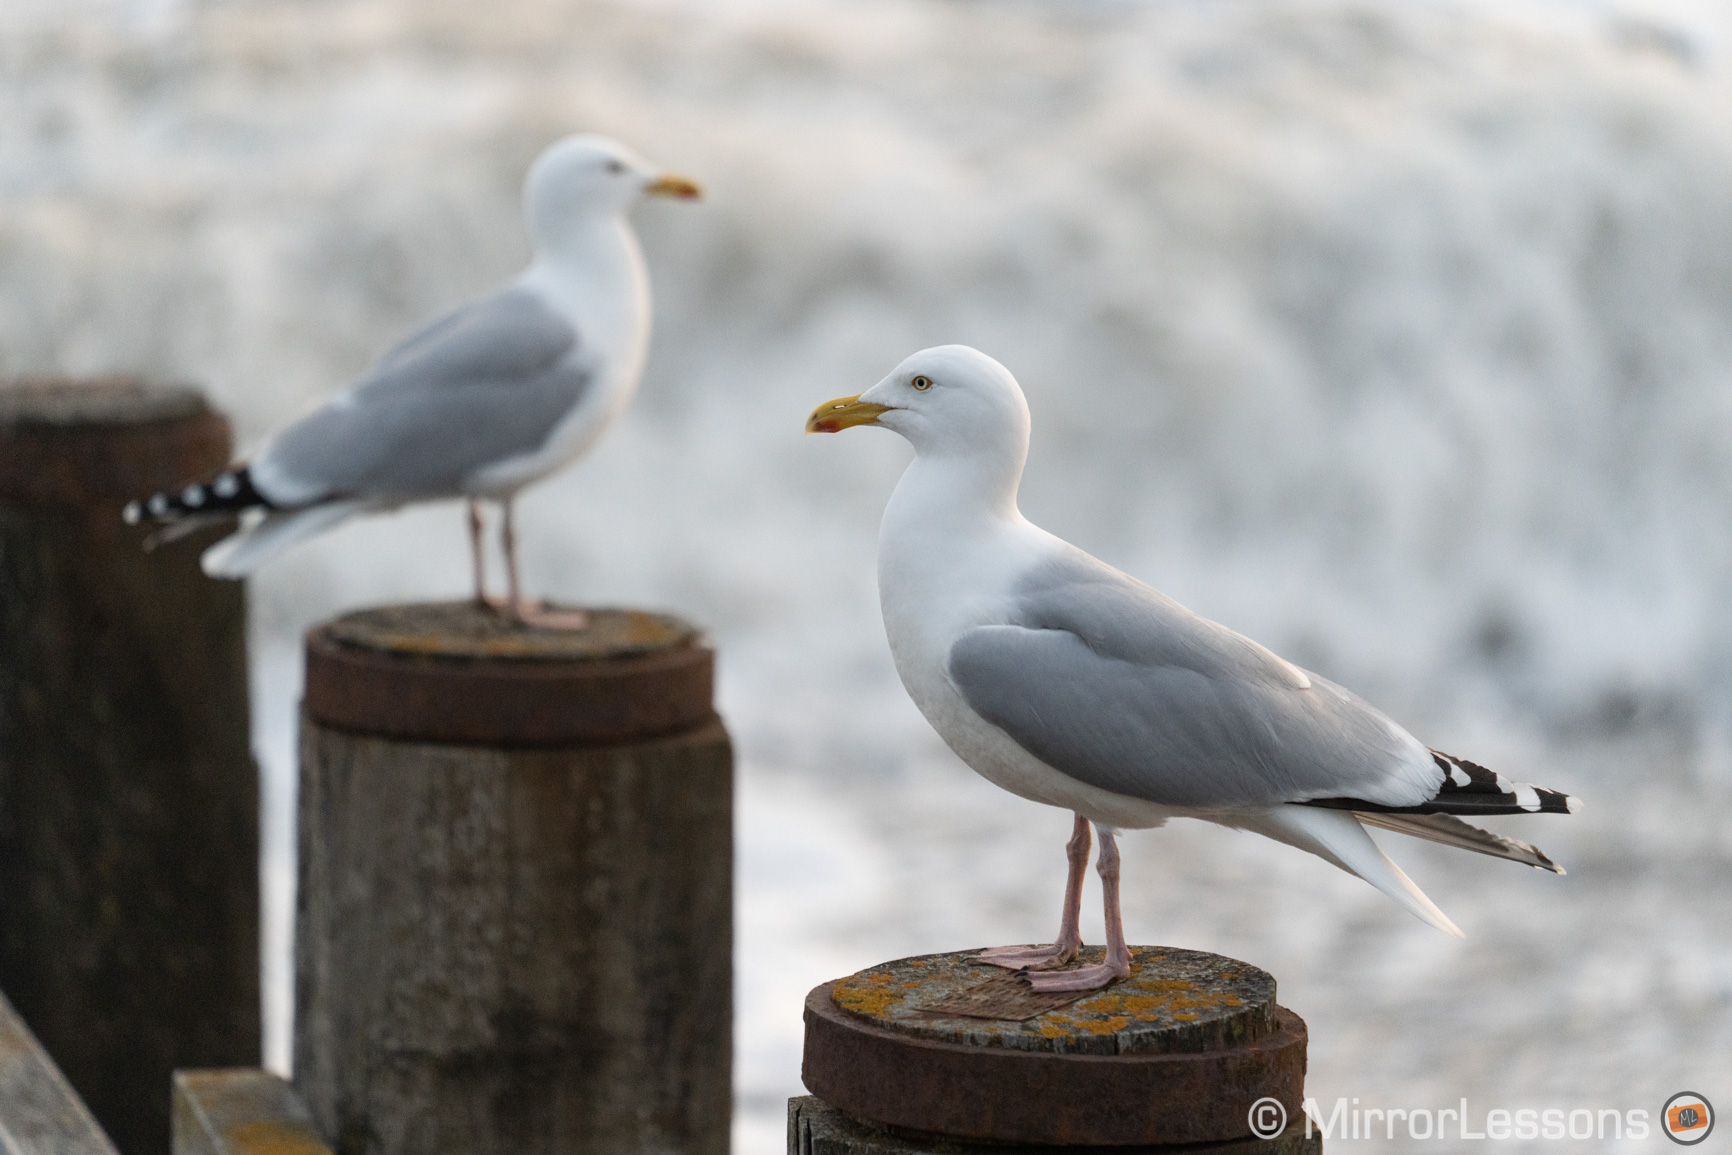
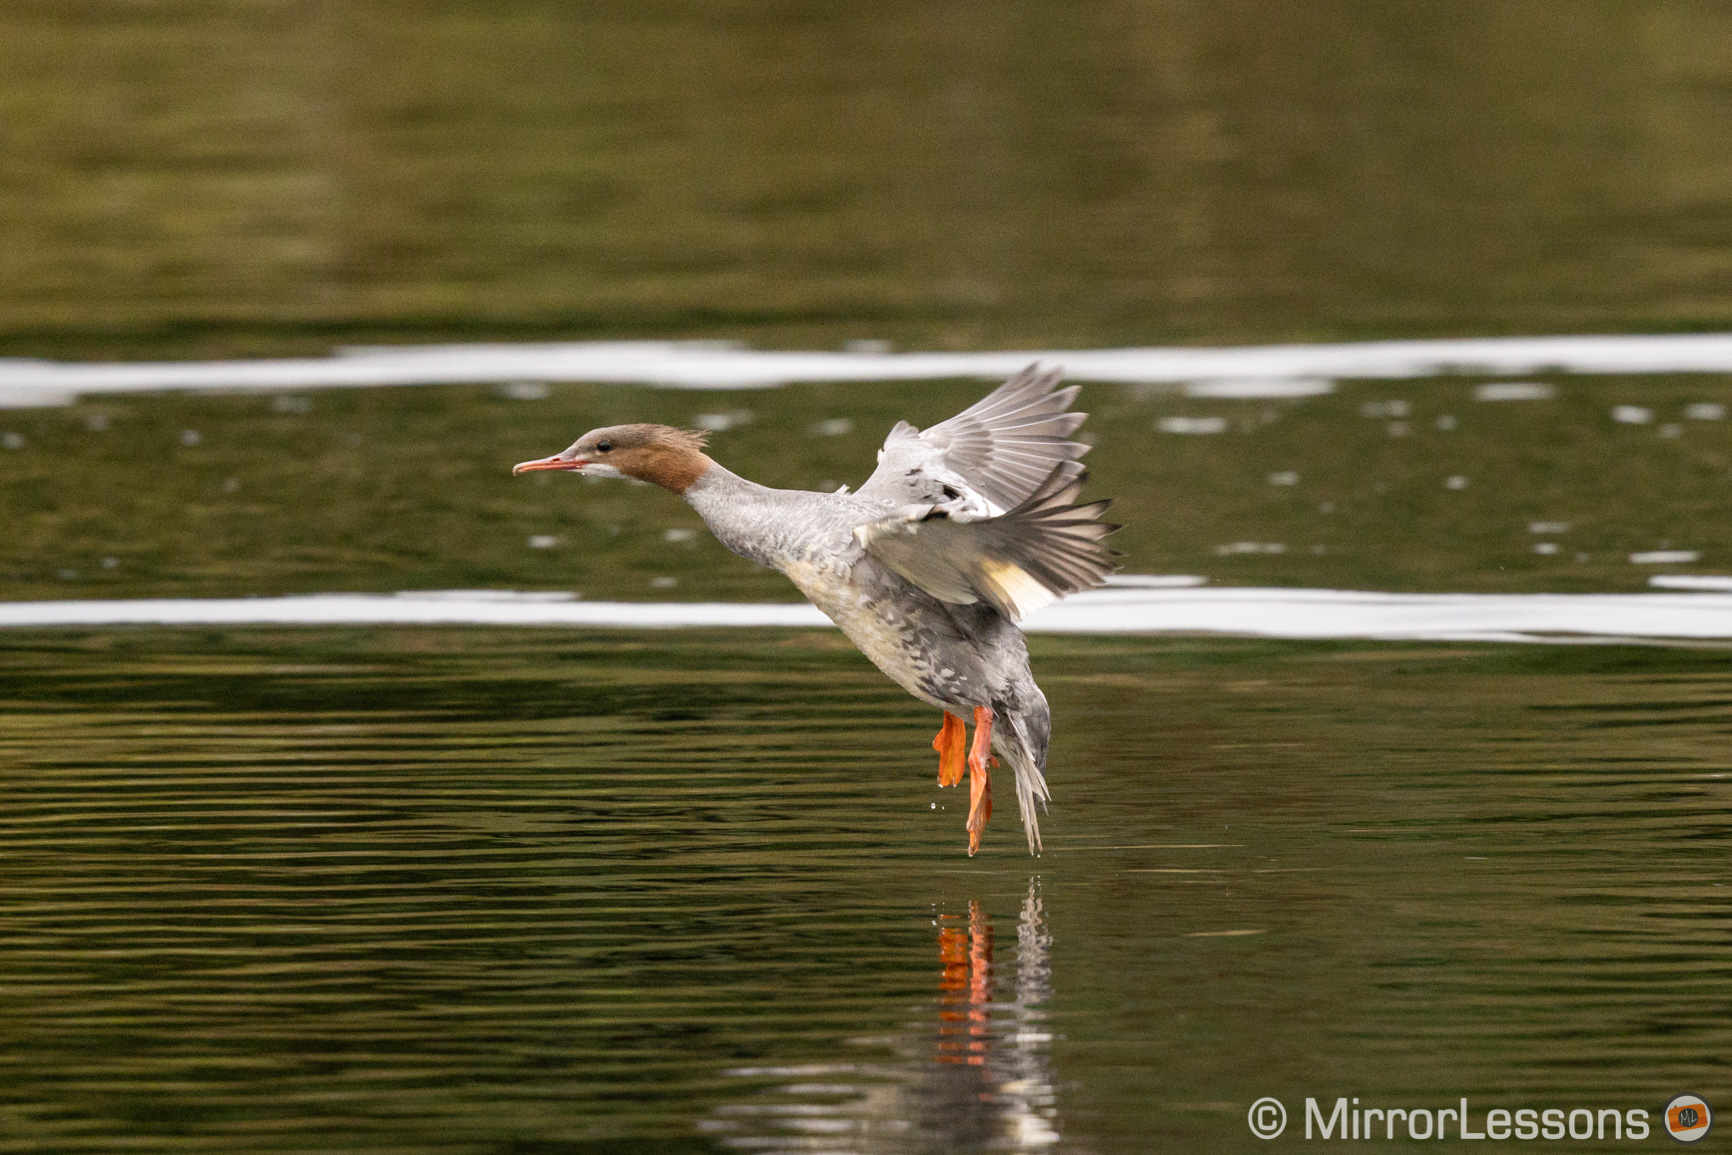
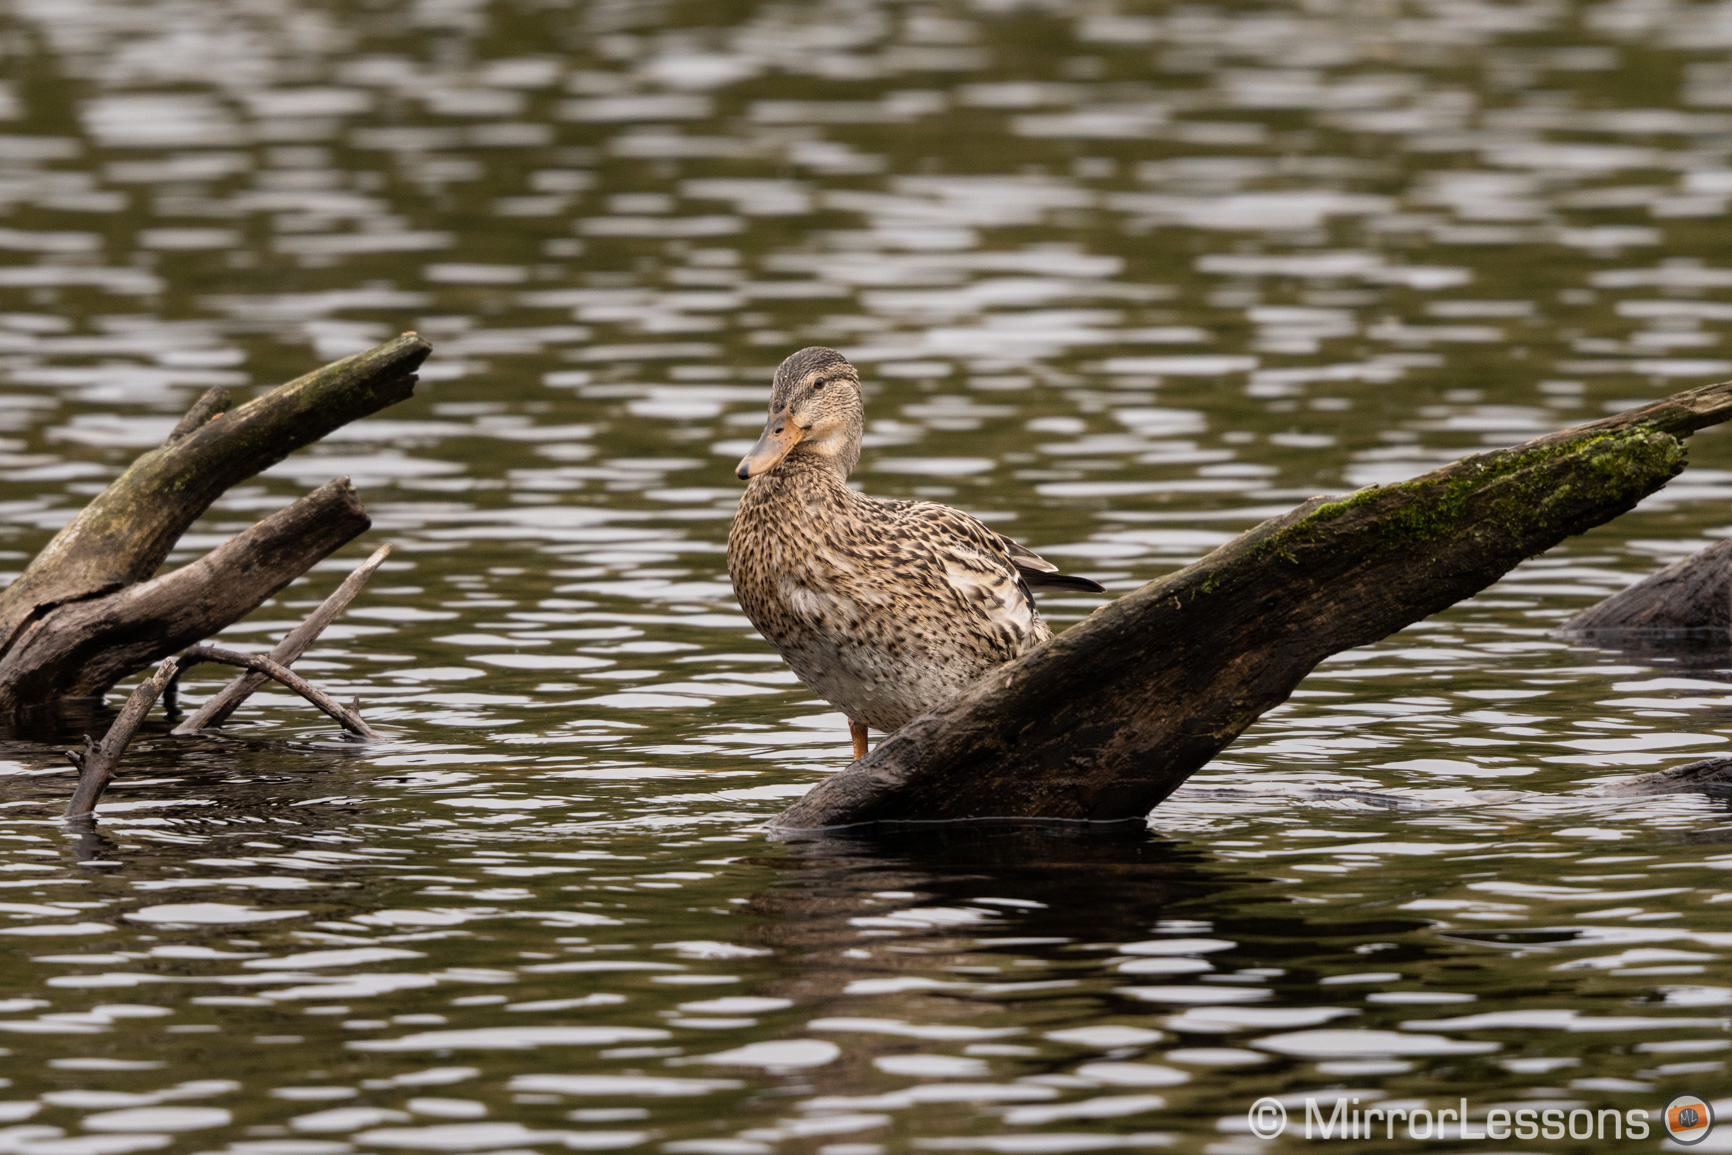
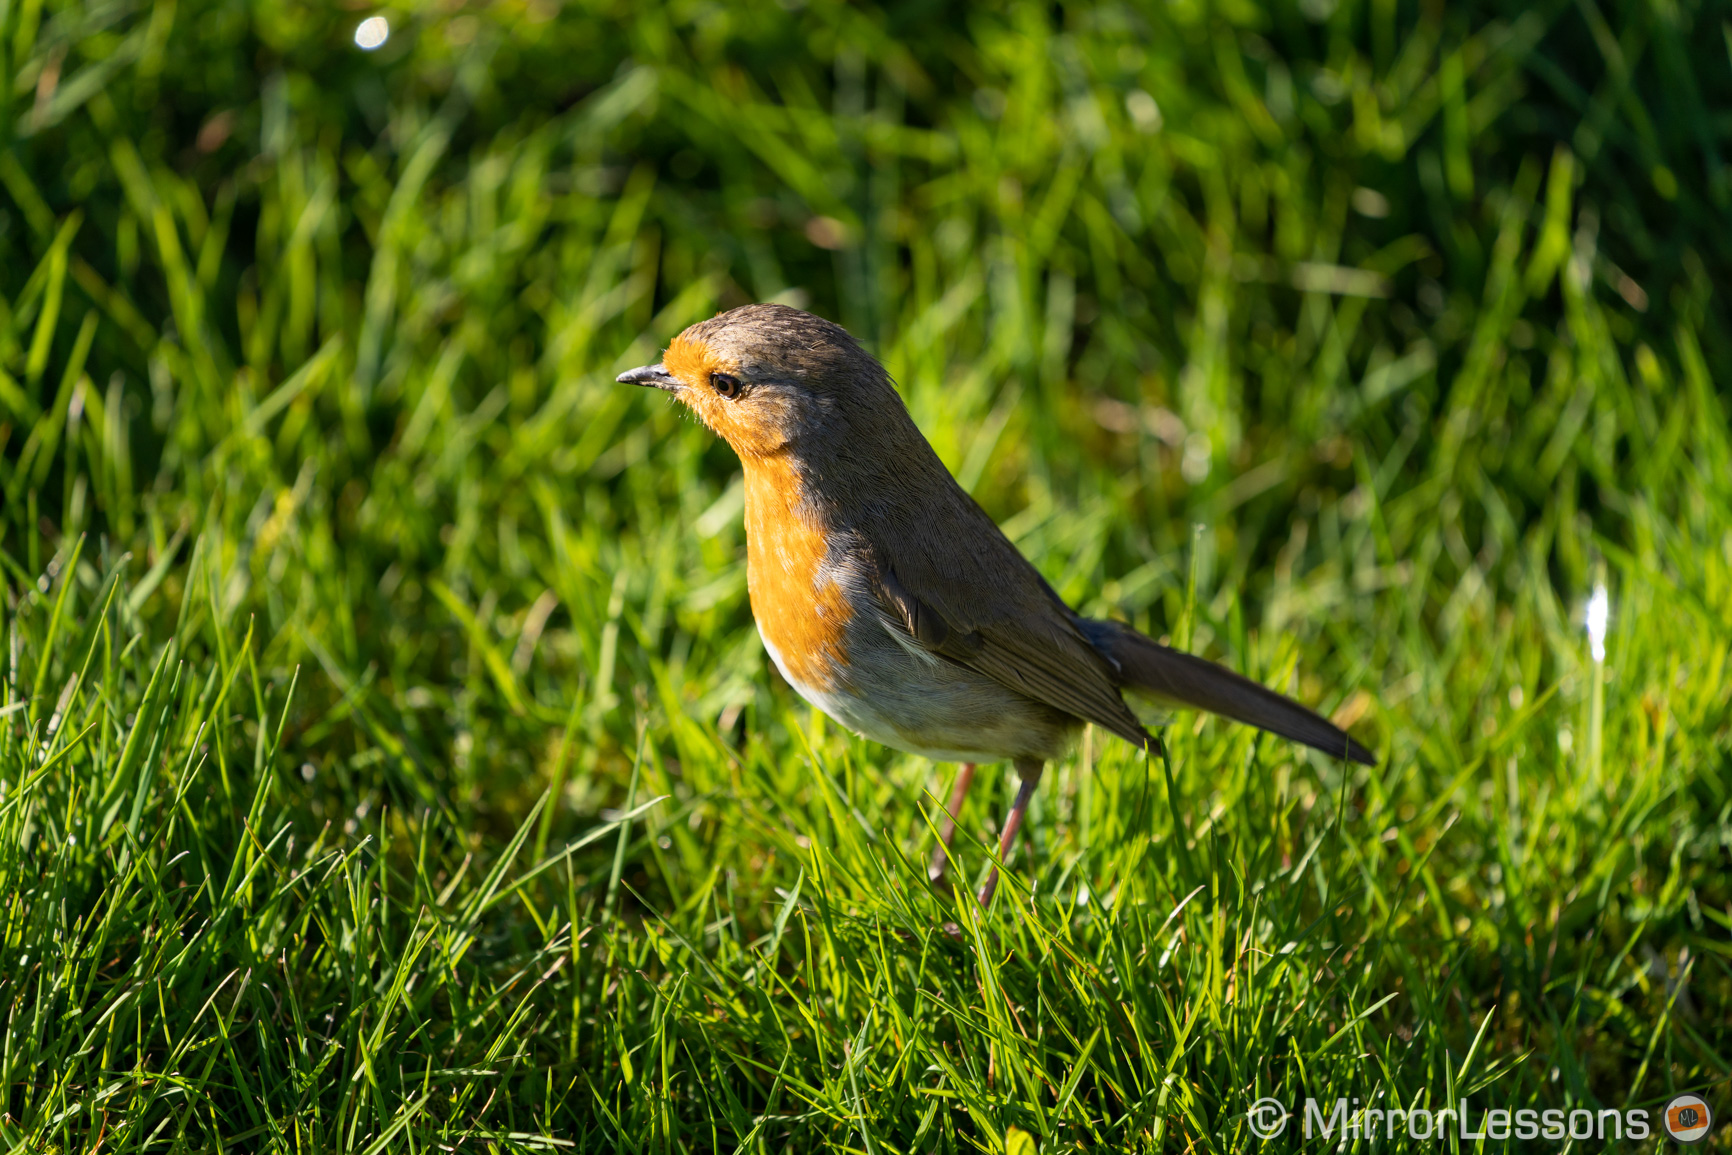
Sony A7 III, A7R III, A9: Birds in flight / Wildlife Images
Below you can see various wildlife images taken with different Sony cameras over the years.


Reminder: the links below are affiliate links. If you decided to buy something after clicking the link, we will receive a small commission.
Check price of the Sony A7 III on:
Amazon | Amazon UK | B&H Photo | eBay
Check the price of the Sony A7R III on:
Amazon | Amazon UK | B&H Photo | eBay
Check price of the Sony A7R IV on
Amazon | Amazon UK | B&H Photo | eBay
Check price of the Sony A9 on
Amazon | Amazon UK | B&H Photo | eBay
Check price of the Sony A7 II on:
Amazon | Amazon UK | B&H Photo | eBay
Check price of the Sony A7R II on:
Amazon | Amazon UK | B&H Photo | eBay
Sony A7 / A9 Mirrorless Cameras Resources on Mirrorless Comparison
We have even more tutorials for your A7 camera, as well as many comparisons. Check the list below!
Real World Comparisons
- Sony A7 III vs A7R III
- Sony A7R III vs A7R IV
- Sony A7R II vs A7R III
- Sony A7R III vs A9
- Sony A7 III vs Nikon Z6
- Sony A7R III vs Nikon Z7
- Sony A7R III vs Fujifilm GFX 50s
- Sony A7R III vs Panasonic S1R
- Sony A7 III vs Canon EOS R
- Sony A7 III vs Fujifilm X-T3
- Sony A7 II vs Canon EOS RP
Sample Photos
- Sony A7 III sample images
- Sony A7R III sample images
- Sony A7R IV sample images
- Sony A7 II sample images
- Sony A7R II sample images
- Sony A7S sample images