The most recent Sony full-frame mirrorless cameras have two memory card slots. This allows you to set up your cards in various ways. For example you can have your Sony A7 III write to both cards, or use slot 2 to record just certain types of files.
In this article, I’m going to guide you through all the settings, what they mean and how to configure the Sony A7 series dual card slot. If you want to know which cards I recommend for your A7 / A9 model, check out our dedicated article below.
A7/A9 series compatibility
This article is valid for all Alpha mirrorless cameras that have a dual slot compartment (A7 III, A7R III, A7R IV, A9 and A9 II). There may be a few differences concerning the menu pages for specific models. (For example, a setting might be on the previous or following page than the one I mention.)
Ethics statement: We own the A7 III and A7R III models and we’ve tested and compared them against many other Sony cameras. We were not asked to write anything about this product, nor were we provided with any sort of compensation. Within the article, there are affiliate links. If you buy something after clicking the link, we will receive a small commission. To know more about our ethics, you can visit our full disclosure page. Thank you!
TABLE OF CONTENTS
1. Sony SD Card Slots Info
2. Sony Dual Card Slot Setup
3.How to Format the Memory Card
4. Sony Folder Structure and File names
5. Unable to Read Memory Card
Reminder: the links below are affiliate links. If you decided to buy something after clicking the link, we will receive a small commission.
Check price of the Sony A7 III on:
Amazon | Amazon UK | B&H Photo | eBay
Check the price of the Sony A7R III on:
Amazon | Amazon UK | B&H Photo | eBay
Check price of the Sony A7R IV on
Amazon | Amazon UK | B&H Photo | eBay
Check price of the Sony A9 on
Amazon | Amazon UK | B&H Photo | eBay
Check price of the Sony A7 II on:
Amazon | Amazon UK | B&H Photo | eBay
Check price of the Sony A7R II on:
Amazon | Amazon UK | B&H Photo | eBay
Second-hand Sony gear on
MPB US | MPB UK
Sony A7 III, A7R III, A9 SD Card Slots Information
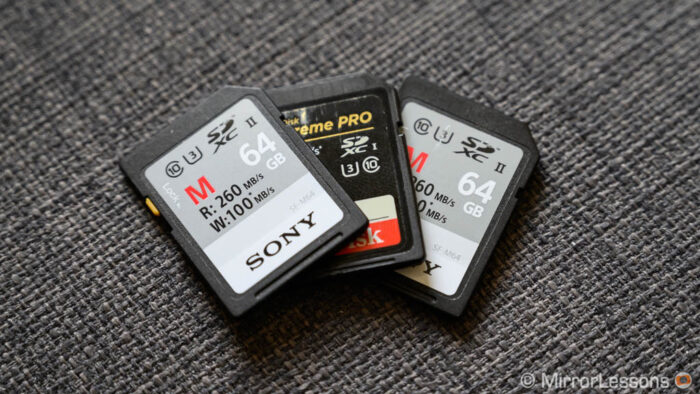
All A7/A9 cameras use the SD memory card type, where SD stands for Secure Digital. They are the most popular type of memory card you can find today, as well as being affordable in price.
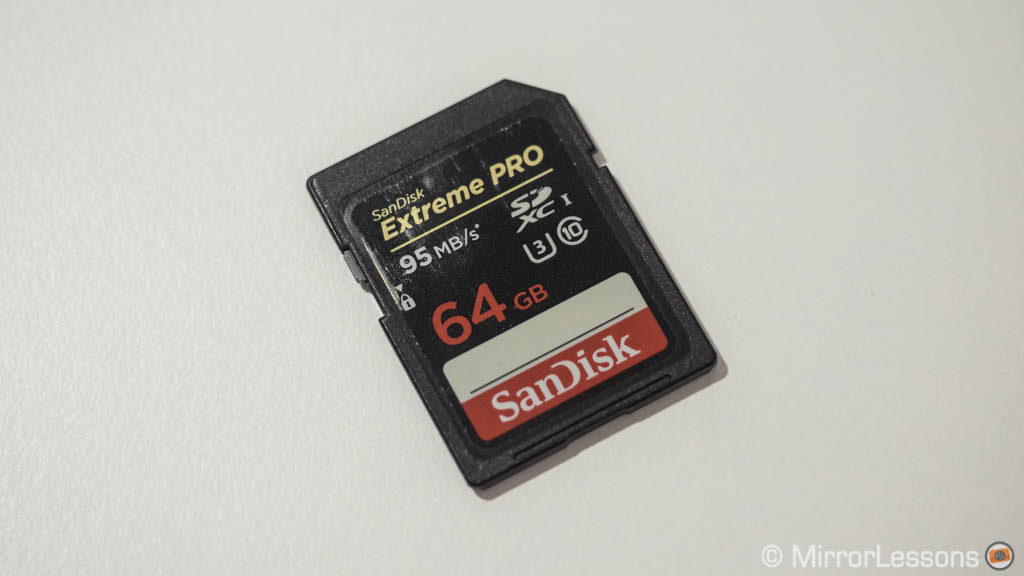
Note: you can also use Micro SD cards with an adapter, but unless you have a particular reason for doing this, I would stick with the larger SD type.
About the Sony Memory Stick Pro cards
These proprietary memory cards from Sony are also compatible. However they are not as popular as SD cards. They don’t have the same large capacity or writing speed.
There is a difference between slot 1 and 2 on Sony A7 III, A7R III and A9 cameras. The first can take UHS-II SD cards, whereas the second slot can only work with UHS-I cards.
The first slot is located at the bottom (UHS-II) and slot number 2 (UHS-I) is above slot 1.
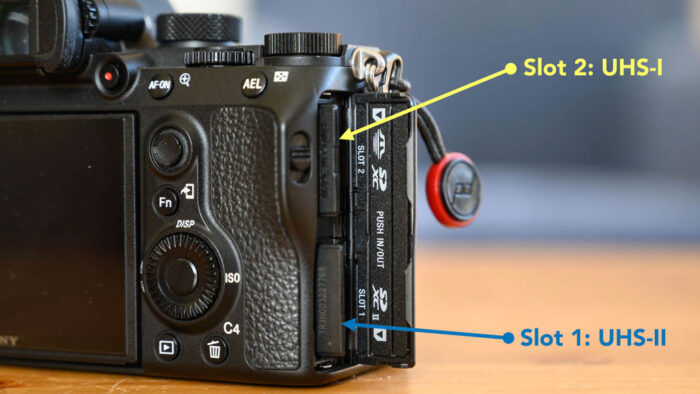
The A7R IV and A9 II memory card slots are both UHS-II compatible so there is no confusion about where to insert which card. Naturally, you can use UHS-I cards too if you wish.
UHS stands for Ultra High Speed. UHS-II cards have a faster writing speed than UHS-I cards and include more electronic pins on the back to transfer data faster.
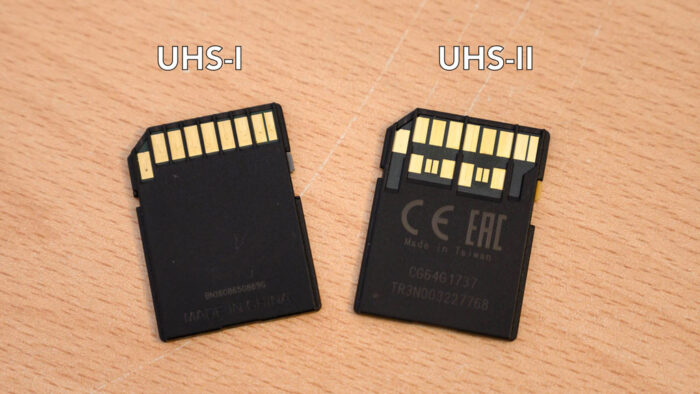
Keep in mind that the slots are cross compatible: you can insert an UHS-I card into Slot 1 or a UHS-II card in slot 2. The only difference is that the UHS-II card won’t take advantage of its faster speed capacity when used in the second slot.
Sony A7 III, A7R III, A9 Dual Card Slot Set-up
The A7 cameras allow you to set up the use of two memory cards in different ways. There are quite a few settings to go through so let’s do it together.
We’re going to work mainly in the Setup Menu, which you can identify with the toolbox icon at the top right, next to the star icon. You want to navigate to Setup 6 (page 6/7) and find the Rec. Media Settings entry.
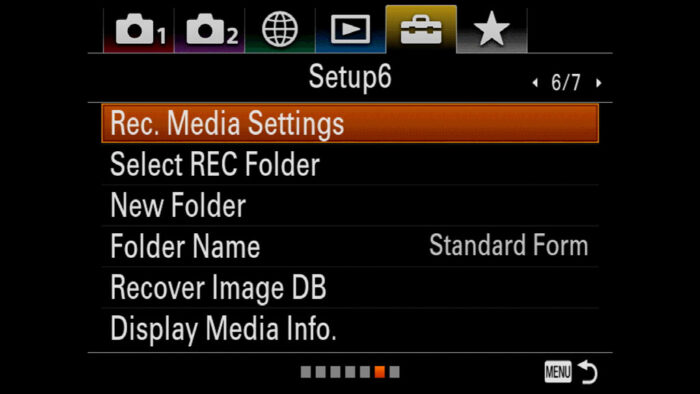
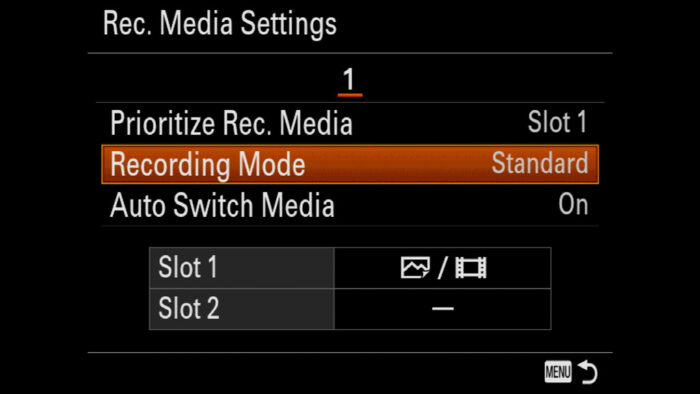
Once inside, you’ll see different options:
- Prioritise Rec. Media: this allows you to decide where the camera should record images first (slot 1 or slot 2). I usually select Slot 1 where I have my faster UHS-II card (for the A7R IV and A9, this doesn’t matter).
- Auto Switch Media: if set to On, the camera will automatically continue recording on the other slot once the first is full. If set to Off, you’ll have to switch manually.
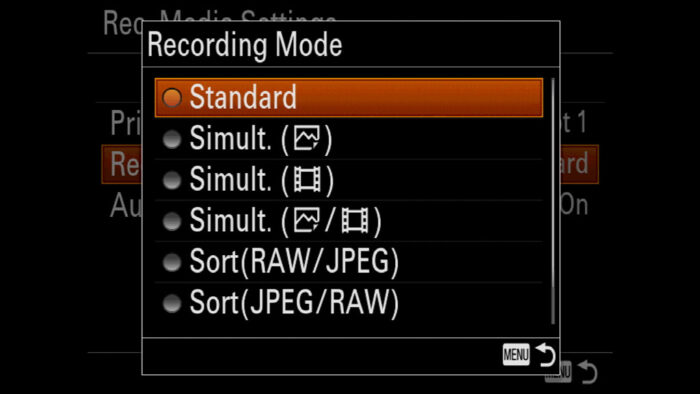
The setting in the middle, Recording Mode, presents different options:
- Standard: record to the slot you selected in Prioritise Rec. Media
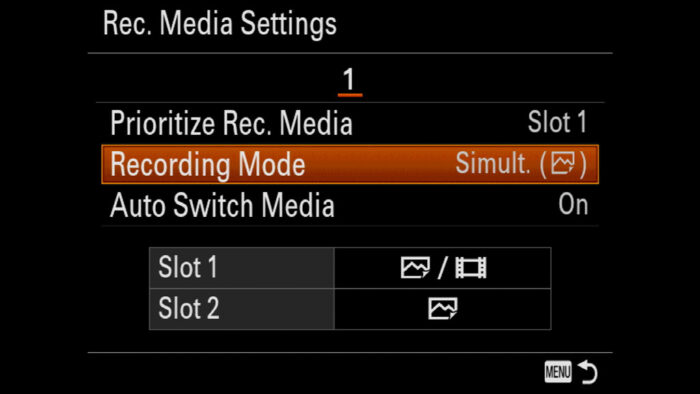
- Simult. (still icon): records image files to both memory cards simultaneously. Movie files are saved to one card only (the one selected in Prioritise Rec. Media)
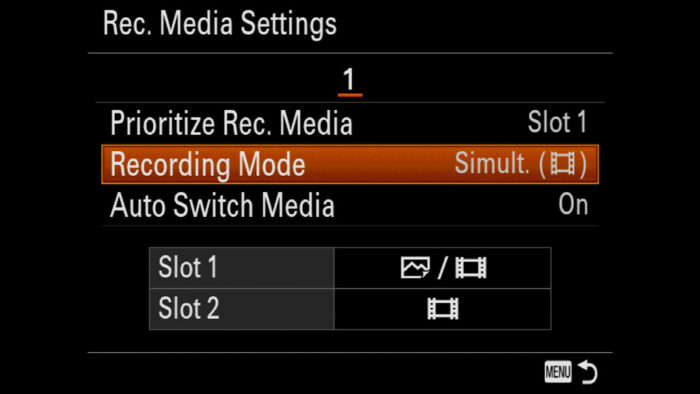
- Simult. (movie icon): records videos files to both memory cards simultaneously. Image files are saved to one card only (the one selected in Prioritise Rec. Media)
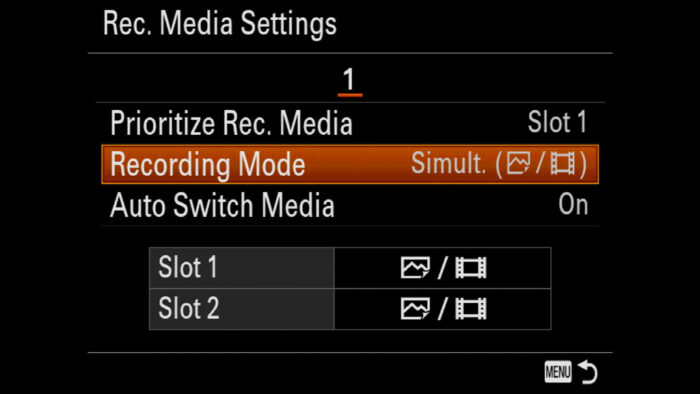
- Simult. (still / movie icons): image and video files are recorded simultaneously on both cards. The Prioritise Rec. Media setting is irrelevant.
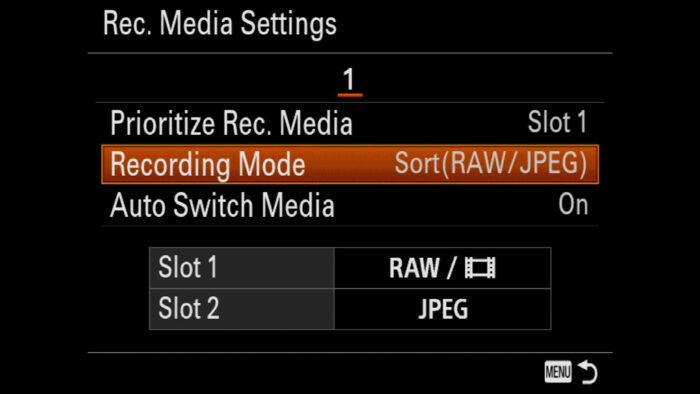
- Sort (RAW/JPEG): RAW and video files are recorded to the slot you selected in Prioritise Rec. Media, JPG files are saved to the other slot.
- Sort (JPEG/RAW): JPG and video files are recorded to the slot you selected in Prioritise Rec. Media, RAW files are saved to the other slot.
- Sort (image icon / video icon): image files (RAW and JPG) are recorded to the slot you selected in Prioritise Rec. Media, video files are saved to the other slot.
All this may sound a bit confusing, so let’s have a look at a few case studies.
You want to record as many files as possible
Choose Standard in Recording Mode, and turn On Auto Switch Media.
You want to separate JPG and RAW files
Choose Sort (RAW/JPG) in Recording Mode, then select Slot 1 in Prioritise Rec. Media. This way, the RAW files will be saved to the slot that has the faster UHS-II compatibility (assuming you have an UHS-II card inserted).
For the A7R IV and A9 II, prioritising a slot is irrelevant in terms of speed as they are both UHS-II.
You want to save photos to the two cards simultaneously
Choose Simult. (still icon) in the Recording Mode. If you occasionally record some video, choose which card they should be written to in Prioritise Rec. Media.
You want to record video files to the two cards simultaneously
Choose Simult. (movie icon) in the Recording Mode. If you occasionally record images, choose which card they should be written to in Prioritise Rec. Media.
You want to record image and video files to the two cards simultaneously
Choose Simult. (still / movie icons) in the Recording Mode. No other setting is required.
You want to separate images and video files
Choose Sort(image icon / video icon) in the Recording Mode, then select Slot 1 in Prioritise Rec. Media. The image files (RAW and JPG) will be saved to the first slot, the video files to the second slot.
Note: you don’t necessarily need a UHS-II card for video. A UHS-I card with a good writing speed is more than enough for the bitrate of Sony’s video files. Find out more in our best SD cards for A7 cameras article.

Tip: if you want to know how many still or video files are left to be recorded on one card, go to Setup 6 / Display Media Info and selected the desired slot. The camera will show you the number of images and the video length you can record based on the image quality and video settings.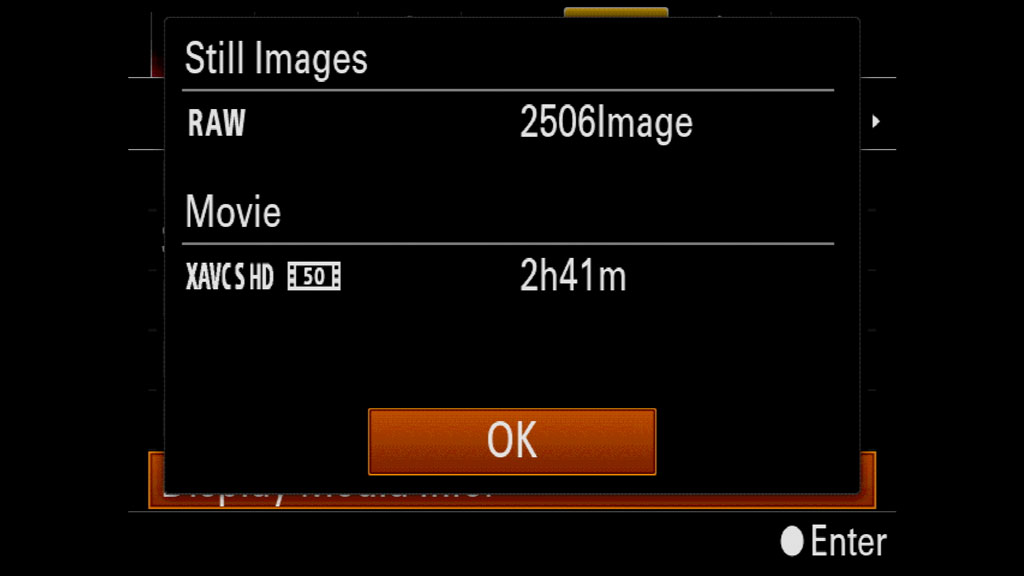
How to Format the Card on the Sony A7 III, A7R III, A9
To format the memory card on your Sony A7 III or A7/A9 model:
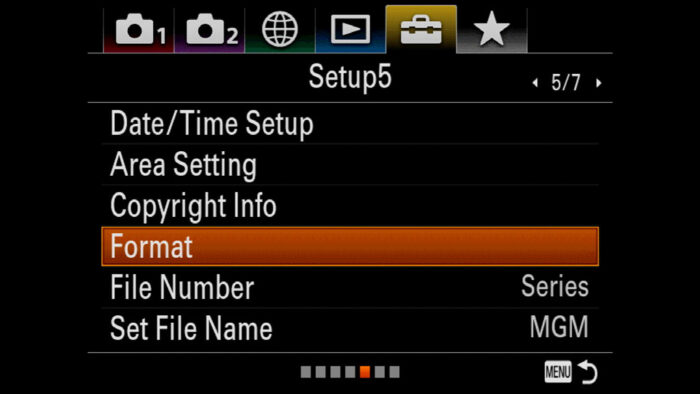
- Go to the Setup Menu (Setup 5, page 5/7)
- Scroll down and select Format
- Choose Slot 1 or Slot 2, then press OK (centre button of the rear control wheel, or press the AF Joystick)
- The camera will format the card. It usually takes a couple of seconds or slightly more if it is completely full.
- Repeat the process if you need to format the other card
Tip: to access the Format option quicker, you can add it to My Menu. Check our dedicated article to find out more.
Important: don’t format the memory card from a computer, but always from the camera to stop the card from malfunctioning.
If you don’t want to erase the entire content of your card, you can delete a single image or a group of images. To delete files one by one, the easiest way is to press the C4 button (bin icon) on the rear of your camera while scrolling through your images in Playback mode.
Tip: make sure that “Cancel” first is selected in Setup Menu 1 / Delete confirm. (page 1/7). When you press the Delete button, “Cancel” is highlighted which means you need to move upward and press OK to delete the image. This can be helpful to reduce the chances of deleting an image by mistake.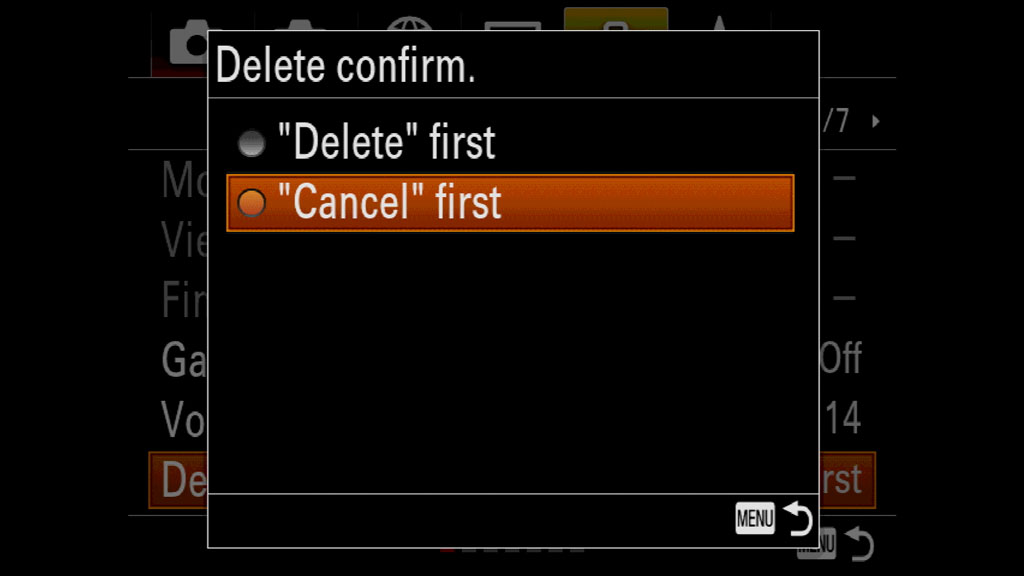
If you want to delete multiple images, you need to do it from the menu:
- Go to Playback Menu 1 (page 1/4)
- Scroll down to Delete and press OK
- Choose Multiple Img.
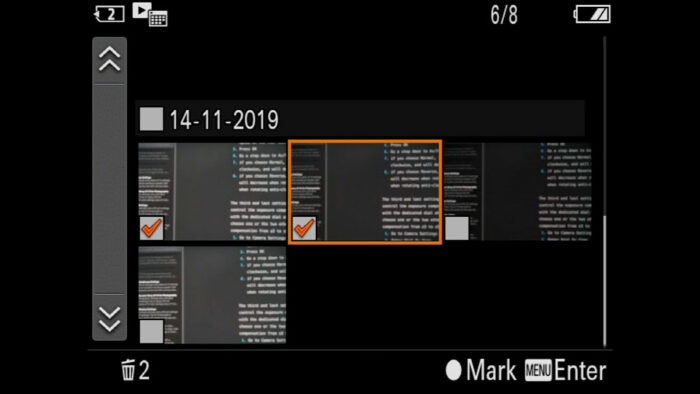
- Choose the images you want to delete and press OK to check them. If you press the AEL button, you can see more images in one screen for a faster selection. If you check a date, all images recorded on that day will be ready to be deleted.
- Once you’re ready, press the MENU button. The camera will ask confirmation, press OK or Cancel to go back.
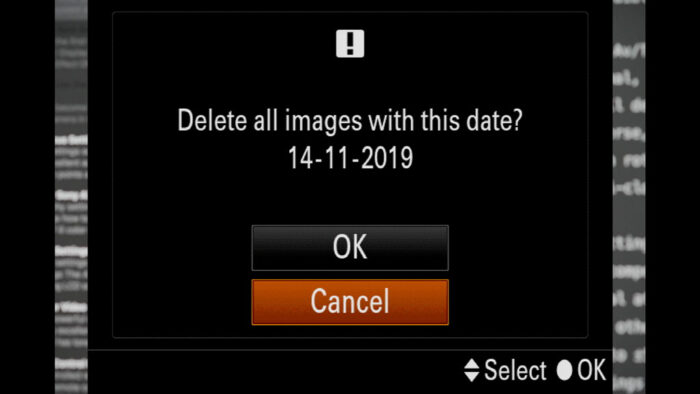
If you already know that you want to delete all images taken on a specific day:
- Press the Playback button to go into playback mode
- Scroll to an image that was taken on the date of interest
- Press the Menu button and go to Playback Menu 1 (page 1/4)
- Scroll down to Delete and press OK
- Choose All with this date and press OK
- The camera will ask confirmation, press OK or Cancel to go back.
Sony A7, A9 Folder Structure and File Names
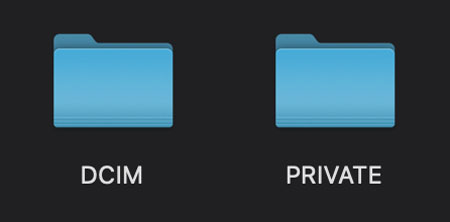
The A7 cameras create different folders inside your Sony Alpha memory card. At the root directory, you’ll see two:
- DCIM where JPG and RAW still images are saved
- PRIVATE where the Video files are stored.
The Alpha cameras give you the possibility of creating new folders to which you can save photos. This can be useful if for example you’re taking pictures of two consecutive events in one morning: once the first is finished, you can create a new folder before starting the second one. The images of the two events will be separated into two different folders.
The same thing can be done to separate the wedding ceremony from the dinner / party for example. Some of you might prefer to switch cards, but folders remain an alternative option (as long as you have a card with enough capacity).
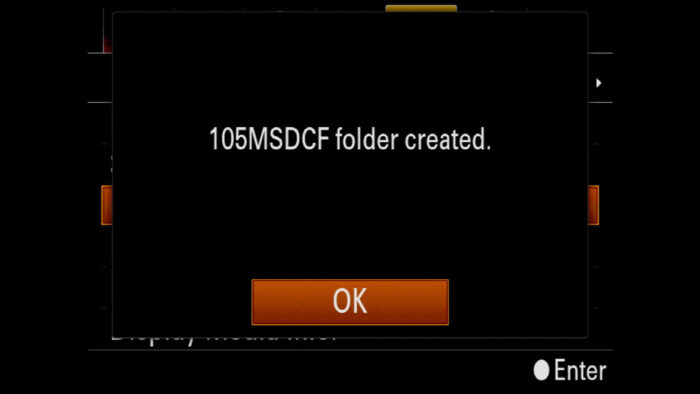
You can’t set a custom name for folders; they all follow the 100MSDCF nomenclature. So for example when creating a new folder, it will be named 101MSDCF and so on.
To create a folder on the Sony A7 III, A7R III and others, follow these steps:
- Go to Setup Menu 6 (page 6/7)
- Choose New Folder
- Press OK once the camera confirms that a new folder has been added
Note: if you reach “999” in the folder name structure (unlikely), you won’t be able to create more.
If you created multiple folders, you can choose which one to record to (Setup 6 / Select REC Folder). However since you can’t create folders with custom names, it can get confusing if you’re trying to sort your shooting day into too many folders. Personally, I would keep it simple and create a new folder at the moment you want to separate the images from the rest.
Note: depending on the settings of your two memory card slots, selecting a folder might not be possible (the option will be grayed out in the menu).
Folder names can have the Standard structure (100MSDCF) or the Date Form structure. With the latter, the date is added to the folder number with the following order:
- fourth digit of the year + month (two digits) + day (two digits).
For example a new folder created on the 12th of November 2019 (12/11/2019) will be named: 10091112 where 100 is the folder number, and 91112 is the date in the Y/MM/DD order.
Note: if you choose the Date Form, you can’t select the REC folder to record to.
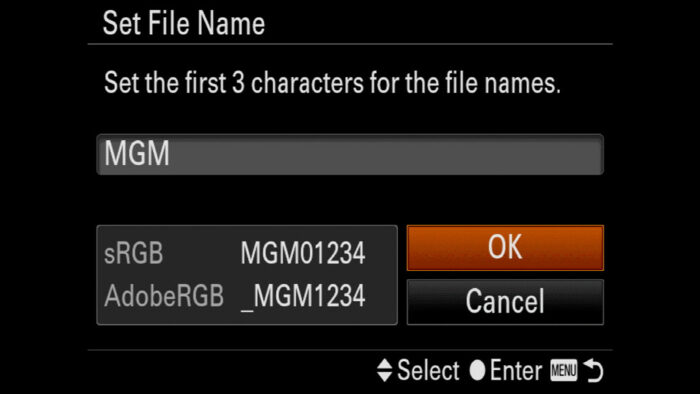
You can also customise the file names by changing the first three letters. By default, these are DSC but you can add any letters or numbers instead. To do this:
- Go to Setup Menu 5 (page 5/7)
- Scroll down to Set File Name
- Use letters, symbols or numbers to create the sequence that you want
- Press OK
If you want to reset the file numbers and start from 000 again, choose Reset in File Number (Setup 5 menu).
Sony A7 III, A7R III, A9: Unable to Read Memory Card
The camera can give you a series of memory card errors:
- Unable to use memory card. Format?
- Unable to read memory card. Reinsert memory card.
- Memory card error
- This memory card may not be capable of recording and playing normally.
The cause for these messages can be the following:
- you formatted the card from a computer which can be the source of compatibility issues. Always format from the camera.
- the card is not compatible
- formatting has failed (in this case, try again)
- the pin connectors at the back are dirty
- the card is damaged.
If the only solution the camera seems to give you is to format the card, make sure (if you can) to save its contents first.
If the camera says that the memory card is locked, it means that it is write protected. Locate the tiny switch on the side (where the word Lock is) and unlock the card.
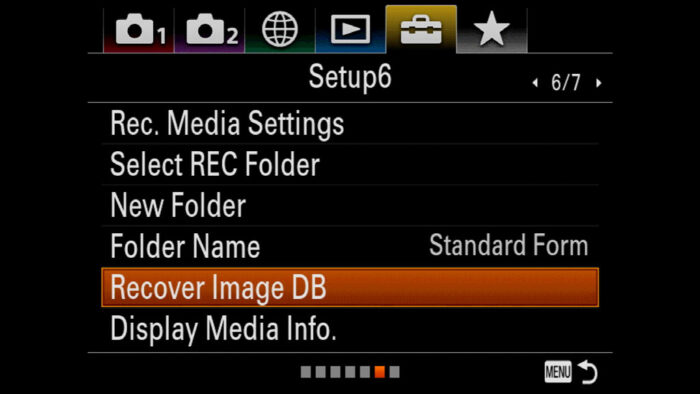
Image DataBase File error
Another warning you can get is related to the image database of video files. The camera should give you the option to Recover the database. If not, go to Setup Menu 6 / Recover Image DB, select the slot and follow the instructions.
If the recovery fails, save your video files before formatting the card.
Reminder: the links below are affiliate links. If you decided to buy something after clicking the link, we will receive a small commission.
Check price of the Sony A7 III on:
Amazon | Amazon UK | B&H Photo | eBay
Check the price of the Sony A7R III on:
Amazon | Amazon UK | B&H Photo | eBay
Check price of the Sony A7R IV on
Amazon | Amazon UK | B&H Photo | eBay
Check price of the Sony A9 on
Amazon | Amazon UK | B&H Photo | eBay
Check price of the Sony A7 II on:
Amazon | Amazon UK | B&H Photo | eBay
Check price of the Sony A7R II on:
Amazon | Amazon UK | B&H Photo | eBay
Second-hand Sony gear on
MPB US | MPB UK
Sony Alpha Mirrorless Cameras Resources on Mirrorless Comparison
Below you will find a lot of content related to the A7 III, A7R III and other Sony full frame mirrorless cameras.
Real World Comparisons
- Sony A7 III vs A7R III
- Sony A7R III vs A7R IV
- Sony A7R II vs A7R III
- Sony A7R III vs A9
- Sony A7 III vs Nikon Z6
- Sony A7R III vs Nikon Z7
- Sony A7R III vs Fujifilm GFX 50s
- Sony A7R III vs Panasonic S1R
- Sony A7 III vs Canon EOS R
- Sony A7 III vs Fujifilm X-T3
- Sony A7 II vs Canon EOS RP
Sample Photos
- Sony A7 III sample images
- Sony A7R III sample images
- Sony A7R IV sample images
- Sony A7 II sample images
- Sony A7R II sample images
- Sony A7S sample images