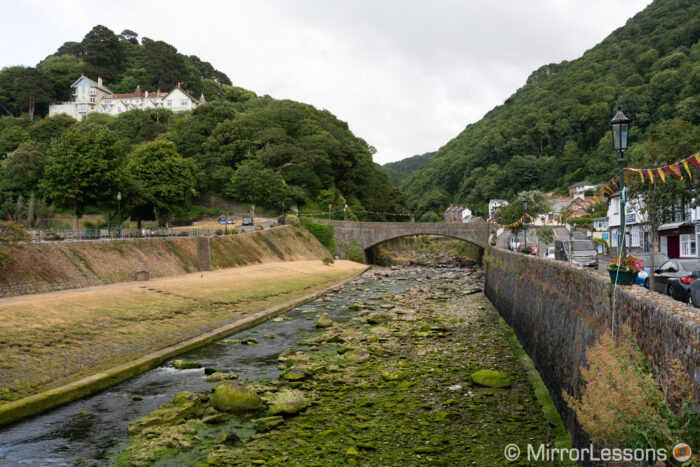
Since moving to Wales and the country side, landscape photography has become one of my favourite genre, and the dynamism of the ever changing light of this country give me plenty of opportunities.
Sony makes excellent sensors with great dynamic range, which means that cameras such as the Sony A7 III are excellent for landscape photography, and other models like the A7R III and A7R IV give you a large amount of resolution to work with.
In this article, we’re going to look at the best landscape settings for the Sony A7R III and other full frame E-mount cameras. I’ve also included various tips and sample images taken over the years with various Alpha mirrorless models.
A7/A9 series compatibility
The article is valid for all the recent full frame E-mount cameras such as the A7 III, A7R III, A7R IV, A9 and A9 II. It is also useful for owners of previous models. Whereas there is a difference with settings or features, I’ve made sure to highlight it.
Below is a picture that shows you how the recent Sony’s menu system is organised. I’ve included the location of every settings I describe in the article. Please note that some parameters can be in a slightly different page from one model to the other.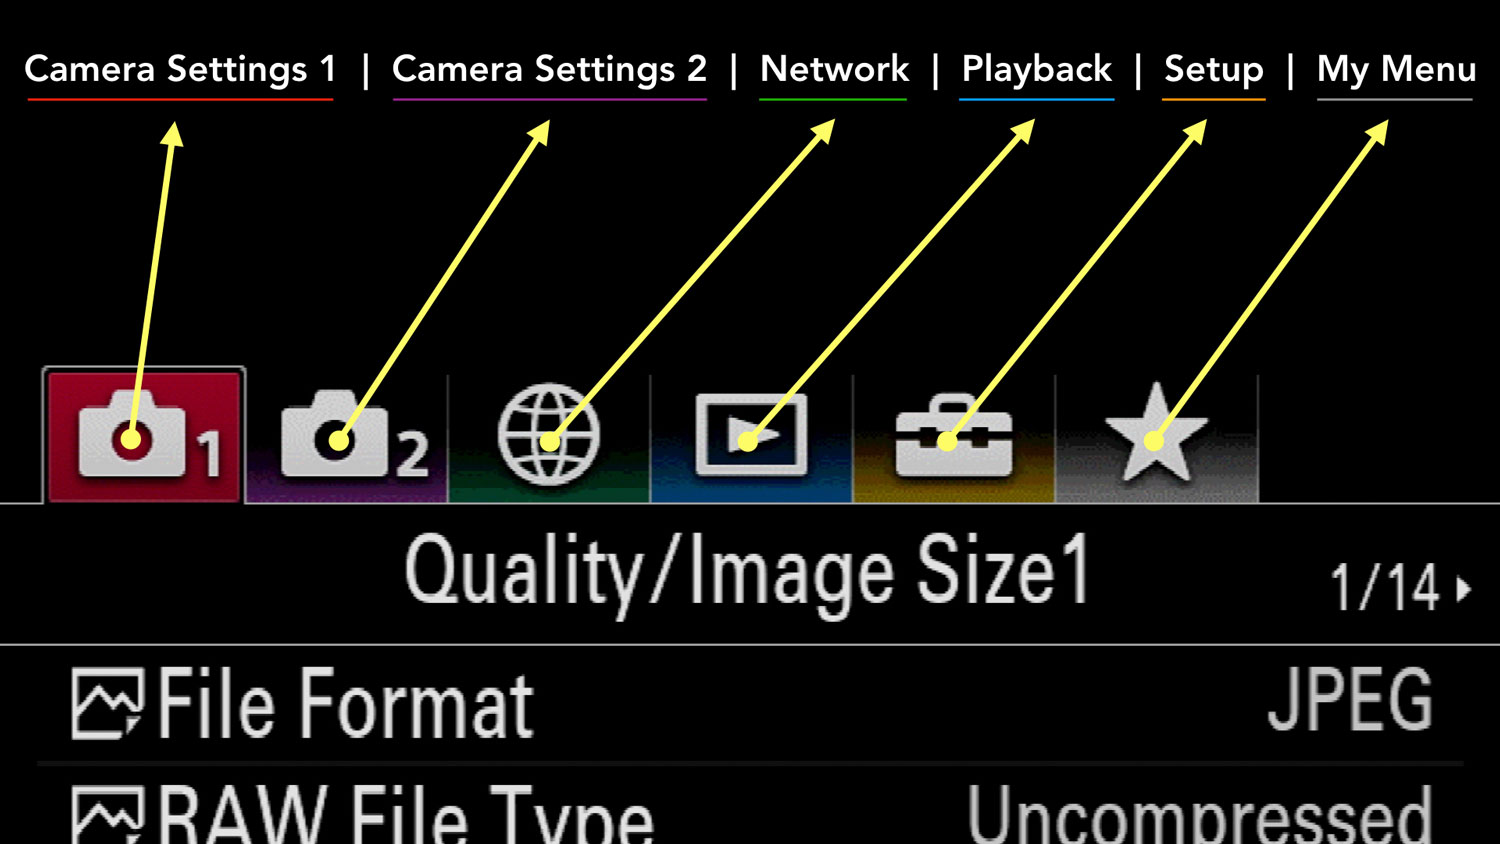
Older models (mark I and mark II A7 series) have an older menu system so there can be more difference concerning the location or availability of select settings.![]()
![]()
Ethics statement: we own the A7 III and A7R III, we bought other models before and we compared most of them. We were not asked to write anything about these products, nor were we provided with any sort of compensation. Within the article, there are affiliate links. If you buy something after clicking the link, we will receive a small commission. To know more about our ethics, you can visit our full disclosure page. Thank you!
TABLE OF CONTENTS
1. Preparing the Camera
2. Exposure Settings
3. Long Exposures
4. Bracketing and HDR
5. Panorama
6. Pixel Shift Multi Shooting (A7R III and A7R IV)
7. Which lens to choose?
8. Image Samples
9. Sony Full Frame Mirrorless Resources
Reminder: the links below are affiliate links. If you decided to buy something after clicking the link, we will receive a small commission.
Check price of the Sony A7 III on:
Amazon | Amazon UK | B&H Photo | eBay
Check the price of the Sony A7R III on:
Amazon | Amazon UK | B&H Photo | eBay
Check price of the Sony A7R IV on
Amazon | Amazon UK | B&H Photo | eBay
Check price of the Sony A9 on
Amazon | Amazon UK | B&H Photo | eBay
Check price of the Sony A7 II on:
Amazon | Amazon UK | B&H Photo | eBay
Check price of the Sony A7R II on:
Amazon | Amazon UK | B&H Photo | eBay
Second-hand Sony gear on
MPB US | MPB UK
Sony A7 III, A7R III, A9 Settings for Landscape: Preparing the Camera
Before starting to talk about composition and exposure, there are some preliminary landscape settings for your A7 III that are useful to prepare in advance, or before you take your first photograph.
Sony A7 III, A7R III, A9 for Landscape: File Format
My first recommendation is to use the RAW File Format, because you’ll have more flexibility in post when opening the shadows, recovering highlights and adjusting colours. Choose Uncompressed if you’re planning heavy post processing or simply want the absolute best quality the camera has to offer.
Uncompressed RAW is not available on the A7 I series.
To select the File Format:
- Go to Camera Settings 1 / Quality Image Size1 (page 1/14)
- Choose RAW in File Format
- Choose Uncompressed in RAW File Type
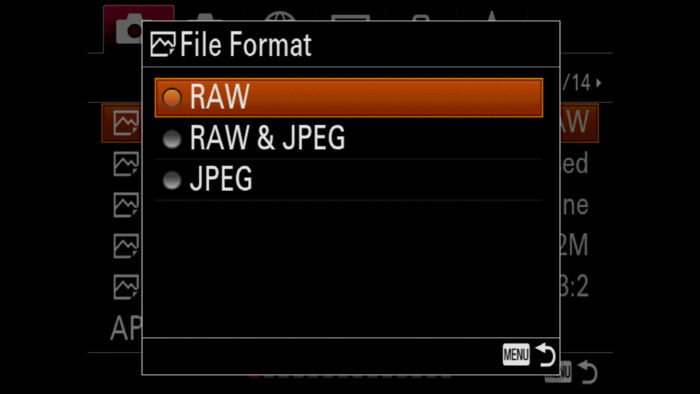
Note: if you’re ensure about post processing, or want files ready to be shared straight away, select RAW & JPG. This way the RAW file is saved in case you want to go back on your images later on.
Sony A7 III, A7R III, A9 for Landscape: Focusing
For most scenarios, a single focus area will be more than enough. I tend to use the Expand Flexible Spot setting which I found the most reliable, but a Medium or large Flexible Spot will do fine as well.
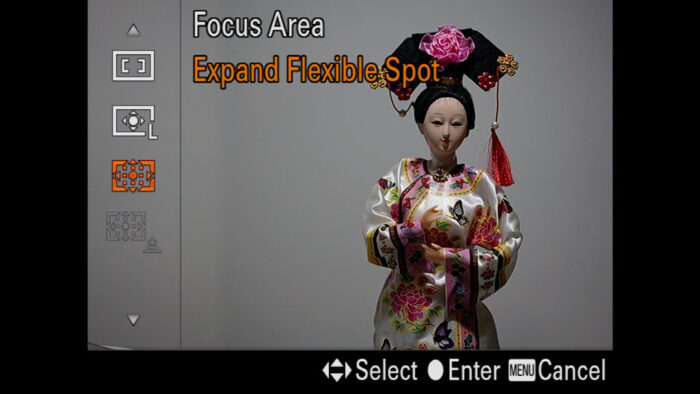
Note: Expand Flexible Spot is not available on the A7 I series and the A7 mark II model.
Another advice is to use the back button focus method to separate autofocus from the shutter release button. This will allow you to prepare your composition, focus on the desired area and then take the shot when you are ready without worrying about the camera refocusing when pressing the shutter button. Refocusing on the same area can sometimes prompt the camera to misfocus, especially in S-AF mode where contrast detection AF is prioritised.
With the back button focus method, you can also select C-AF which prioritises phase detection and results in faster and more reliable focus acquisition.
To set the back button focus:
- Go to Camera Settings 1 / AF2 (page 6/14)
- Scroll down to AF w/shutter and select Off
- Got to Camera Settings 2 / Custom Operation1 (page 8/9)
- Select Custom Key (the first one with the picture icon)
- Choose a button where to assign autofocus. By default it is assigned to the AF-ON button, but I prefer to use the AEL button.
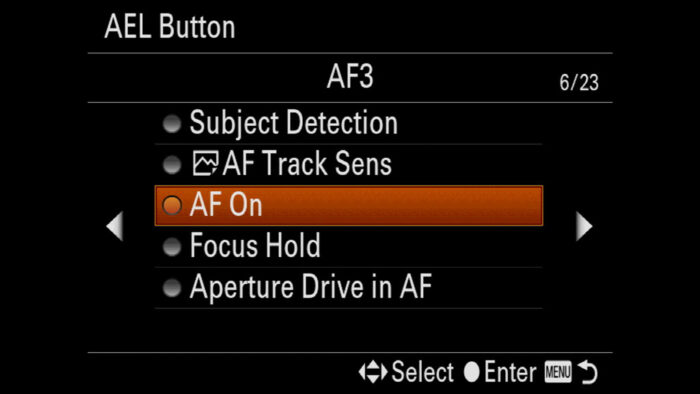
- Scroll left to AF3 (page 6/23) and choose AF On
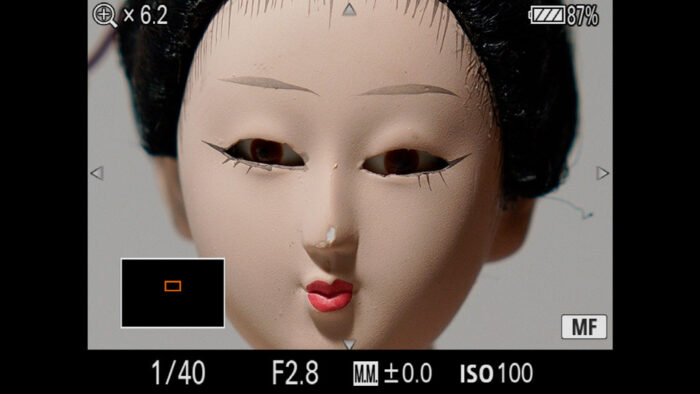
Alternatively, you can switch to manual focus, especially if you like to take your time or use the camera on a tripod. I advise you to use the Focus Magnifier assist to double check your focus point and make sure it is accurate.
There are different ways to use Focus Magnifier:
- Double tap on the LCD screen (valid for A7 III and A9 series)
- Turn On the MF Assist setting in Camera Settings 1 / Focus Assist (page 13/14). Magnification will activate automatically when you turn the focus ring (valid with electronic lenses only).
- Assign Focus Magnifier to a custom button.
Sony A7 III, A7R III, A9 for Landscape: White Balance
Once again if you’re shooting RAW, the white balance setting matters less because it is a parameter that is completely available in post production. I would recommend leave it to Auto, or setting the Sun, Shade or Cloudy preset to have an accurate preview on the screen.
If you’re shooting RAW & JPG, then make sure to select an accurate WB because you can’t change it on the JPG file.
Sony A7 III, A7R III, A9 for Landscape: Image Stabilisation
For the Sony models that feature in-body stabilisation (mark II series and above), you can decide to use it or not depending on the situation. You’ll find this in Camera Setting 2 / Shutter SteadyShot (page 4/9).
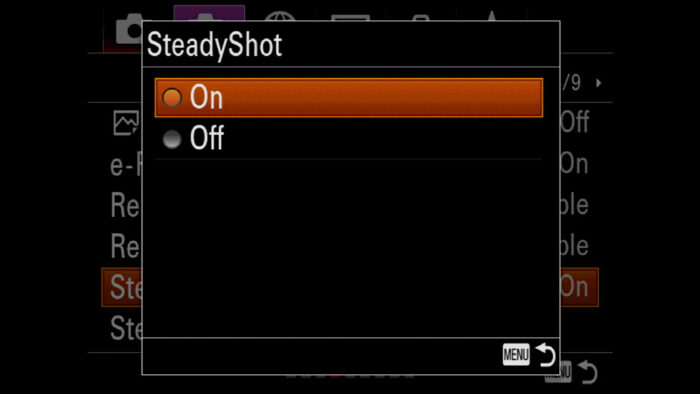
If you’re working on a tripod, disable the SteadyShot. Although it shouldn’t interfere when the camera is perfectly still, some photographers prefer to turn it off as a safety precaution, and there is nothing wrong with that thought.
If you’re taking images hand-held, my advice would be to leave SteadyShot active at all times. You may not need it with fast shutter speeds, but it doesn’t interfere with the result and it’s ready to give its contribution when you use slow shutter speed, without having to remember to enabling and disabling it all the time.
Important: for most Sony cameras, shooting hand-held below 1/20s or 1/10s can lead to mixed results. If you’re working at these speeds, always double check your image in Playback mode to make sure it is tack sharp. You can find more tips about image stabilisation in our Photography Settings article.
Sony A7 III, A7R III, A9 for Landscape: Shutter Mode
Unless there is a particular reason why you need to take pictures in complete silence, I would prioritise the use of the mechanical shutter, so leave Silent Shooting to Off in Camera Setting 2 / Shutter SteadyShot (page 4/9).
There might be moments where you want to switch to the electronic first curtain shutter however.
When using shutter speeds between 1/320 and 1/50 more or less, you can experience a bit of shutter shock caused by the vibration of the mechanical curtain going up and down. This can result in a lack of sharpness where fine details have a bit of motion blur. In some cases it can be very subtle while in others it can be more relevant.
With the electronic first curtain shutter, the camera will only use the mechanical curtain to finish the exposure, where the vibration caused by its movement won’t affect the image.
To be fair, I haven’t encounter this problem a lot when using recent Sony cameras (if was a more pressing issue with the original A7R). That being said, making extra precautions with high resolution sensors such as the A7R II, A7R III and A7R IV is not a bad idea. Plus, the electronic front curtain is useful to reduce motion blur when using slow shutter speed hand-held.
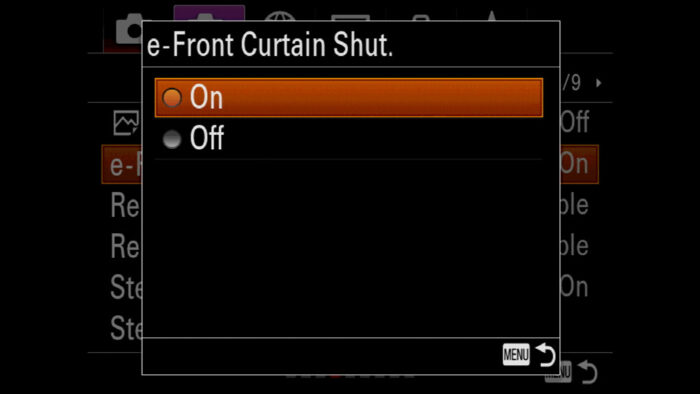
The e-Front Curtain Shut. is not available on the A7R model (1st generation).
To activate the electronic first curtain shutter:
- Go to Camera Settings 2 / Shutter SteadyShot (page 4/9)
- Select On for e-Front Curtain Shut.
Tip: because there isn’t a way to have the e-Front Curtain Shut. activate automatically, the best thing to do is to assign it to a custom button.
Important: don’t use the e-Front Curtain Shut. with shutter speeds higher than 1/500. It can make the blurry background less pleasant when using a fast aperture, or produce an uneven exposure on your image with speeds faster than 1/2000s.
Sony A7 III, A7R III, A9 for Landscape: Histogram
There are different ways to check the exposure on your camera. One that is useful for landscape photography is the histogram. It indicates the luminance distribution on your photograph and shows how many pixels there are by luminance level.
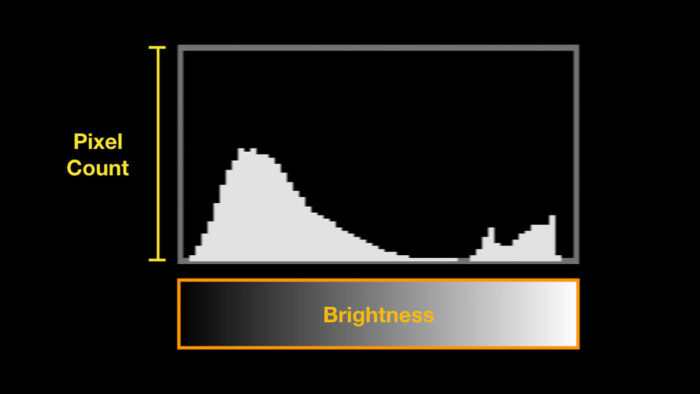
If the highest peak is too close to the left, there are areas of your image underexposed (too dark). If the peak is too close to the right, parts of your scene are overexposed (too bright).
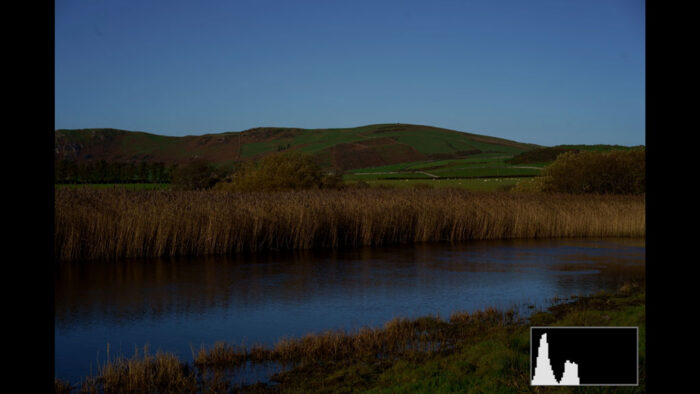
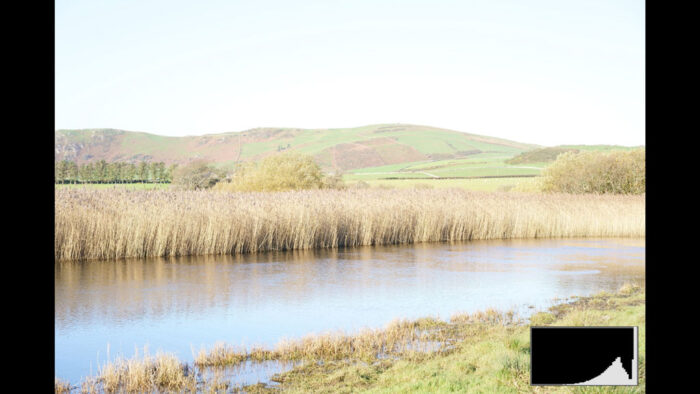
A popular exposure method for landscape (and other genres) is called ETTR, which stands for Expose To The Right.
The idea is to get the main peak on the histogram as close as the right border without touching it. That way, you’re capturing as much light as possible without overexposing the main zones of your photo. The more light you have, the more you can open the shadows in post production without bring out too much noise.
To activate the histogram, simply press the rear DISP button two times and it will show up in the bottom right corner of the screen.
Note: if the histogram doesn’t appear, make sure it is checked in Camera Settings 2 / Display Auto Review1 (page 6/9) / DISP Button / Monitor or Finder.
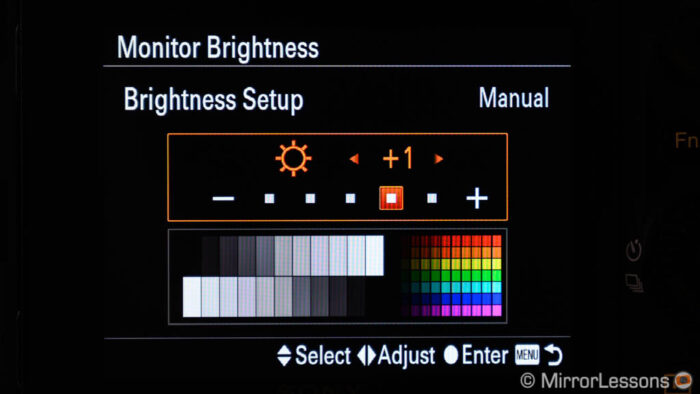
Sony A7 III, A7R III, A9 for Landscape: Monitor Brightness
When composing in daylight outside, the visibility of the rear monitor can be a bit compromised. Of course the easy alternative is to use the viewfinder, but sometimes the rear LCD is more useful to compose, like for example when the camera is on tripod.
Sony cameras have a function called Sunny Weather which boosts the brightness of the LCD, but it also makes colours look unnatural. If you can live with that, it definitely helps, but in most situations I find that raising the brightness to +2 manually is enough.
To change the LCD brightness:
- Go to Menu Setup 1 (page 1/7)
- Select Monitor Brightness
- Choose Manual in Brightness Setup, then scroll right to +2.
Sony A7 III, A7R III, A9 Settings for Landscape: Exposure
The basic rules to do landscape photography with your Sony A7 III are the same you’ll read everywhere for any type of camera:
- keep your ISO level down (ideally to 100 which is the lowest in the normal range)
- use a medium to small aperture (f/5.6 or higher) to ensure optimal sharpness and depth of field
- select the shutter speed accordingly
That is as valid today as it was years ago, but I would like to add a few extra thoughts.
Sony A7 III, A7R III, A9 Landscape Photography: Aperture
More and more modern prime and zoom lenses offer excellent performance at fast apertures. Knowing your lens optical quality and which aperture offers the best peak in sharpness can be useful. You may realise that your lens is sharper at f/4 or f/5.6 than at f/8 for example.
Of course a small aperture gives you more depth of field and this is often what you want to get both foreground and background appear in focus. But for example, if you’re using a short focal length, you may have enough depth of field at f/5.6, and that gives you more leeway in choose the optimal aperture for sharpness.
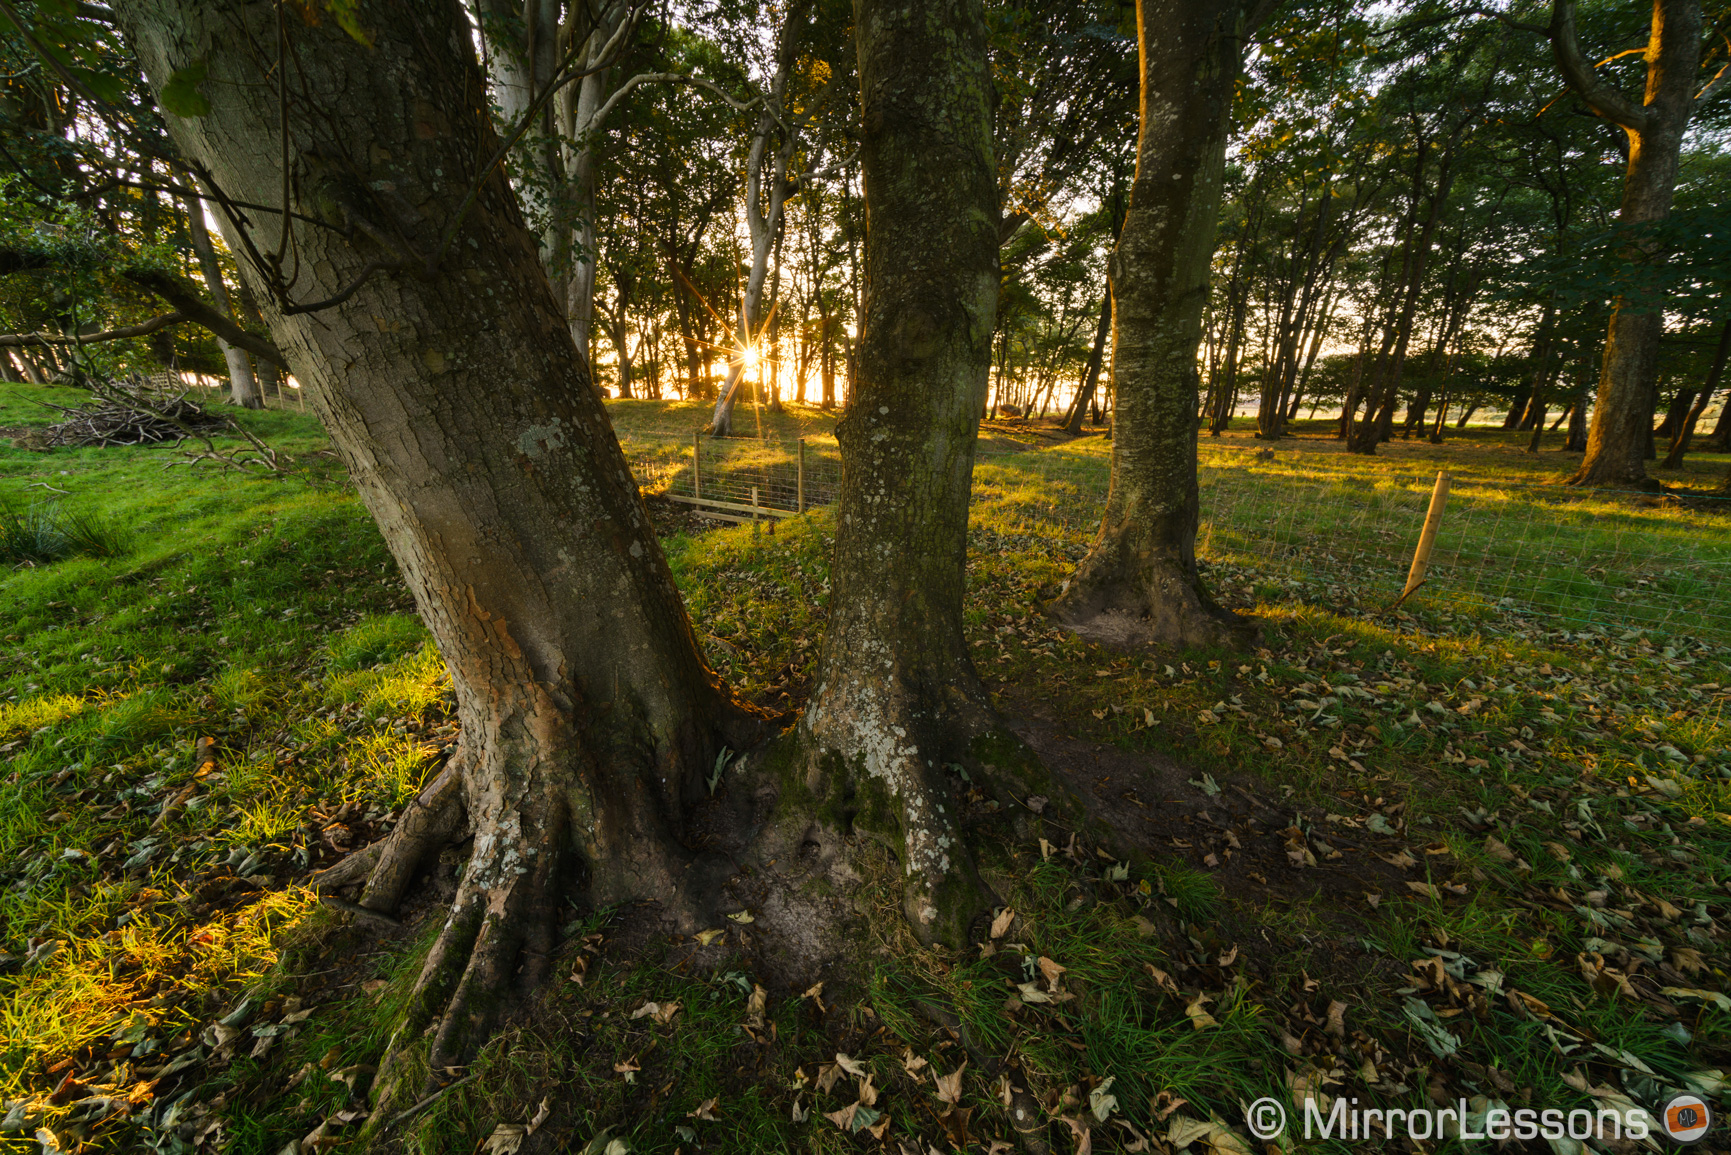
If you have a fast prime lens with you, try to use a fast aperture and play with shallow depth of field. It can lead to surprising results in landscape photography, especially if you are taking pictures in the woods.

Sony A7 III, A7R III, A9 Landscape Photography: ISO
You may find yourself in situations where there is not a lot light left (end of afternoon, perhaps in the woods). You don’t have a tripod and you have to keep a safe shutter speed. In that case, don’t hesitate to raise the ISO a little.
Modern Sony cameras handle noise very well. In fact, for the mark III, mark IV and A9 series, the sensors have a double gain architecture. One starts at ISO 100 and the other at ISO 640. This means that at 640 and above, the second gain kicks in and give you better dynamic range than ISO 500 for example. So if you need to raise the sensitivity by two stops or more, don’t hesitate to go up to 640 ISO.
Find out more about ISO in our Low Light Photography article.

Sony A7 III, A7R III, A9 for Landscape Photography: Long exposures
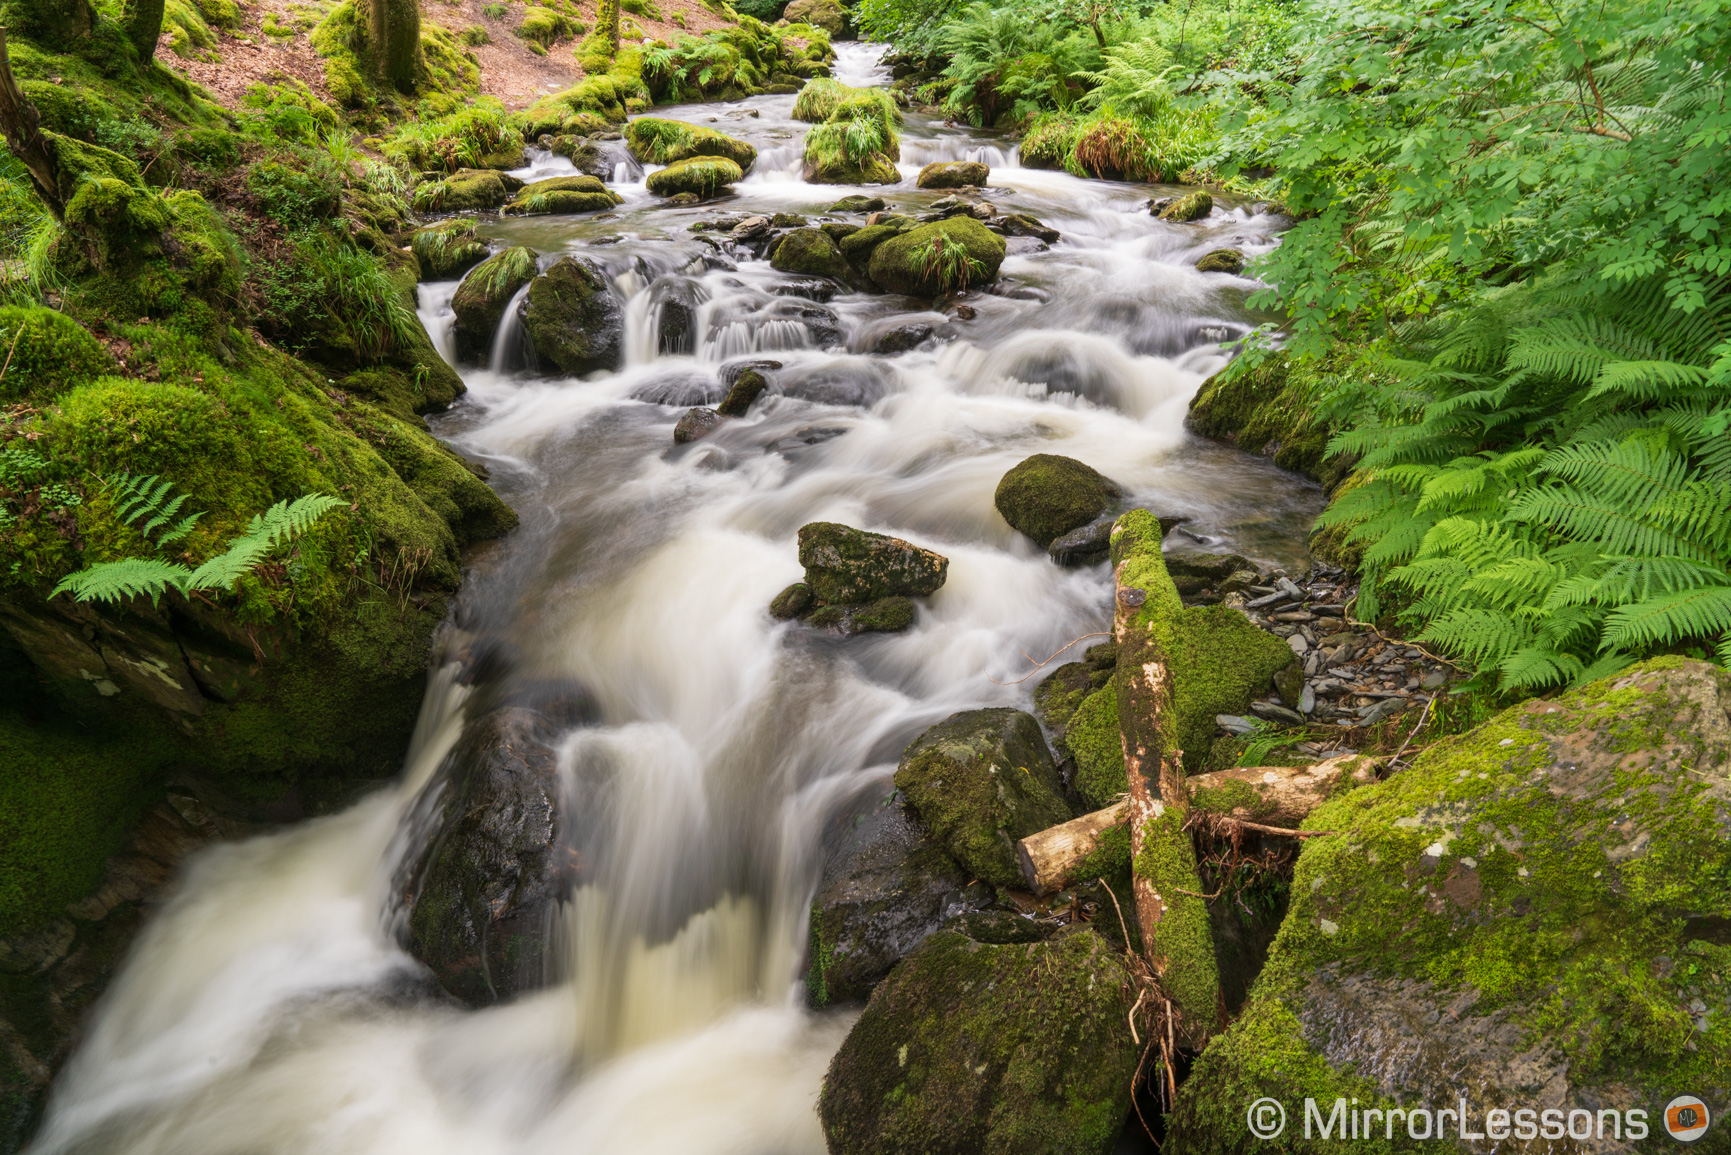
Long exposure is one of the most suggestive sub genre in landscape photography. The classic example is water of a river or waterfall that becomes smooth with a beautiful silky effect.
To take this kind of image, you need to place the camera on a tripod because you need to use slow shutter speeds of at least 1s or slower. The slower you go, the more the water becomes blurry and intensifies the effect.
In many situations, you’ll find that you can’t go slower than a few seconds, even when closing the lens aperture to the maximum and using the lowest ISO level available. Plus, using a small aperture of f14 or f22 won’t give you the best sharpness, while using the extended “pull” ISO value can decrease the dynamic range a little.
To take longer exposure and keep optimal aperture settings, you need to cut the amount of light going inside your lens, and the easiest way to do this is to use a ND filter, which is a long time favourite of landscape photographers. The stronger the filter is, the slower you can set your exposure.
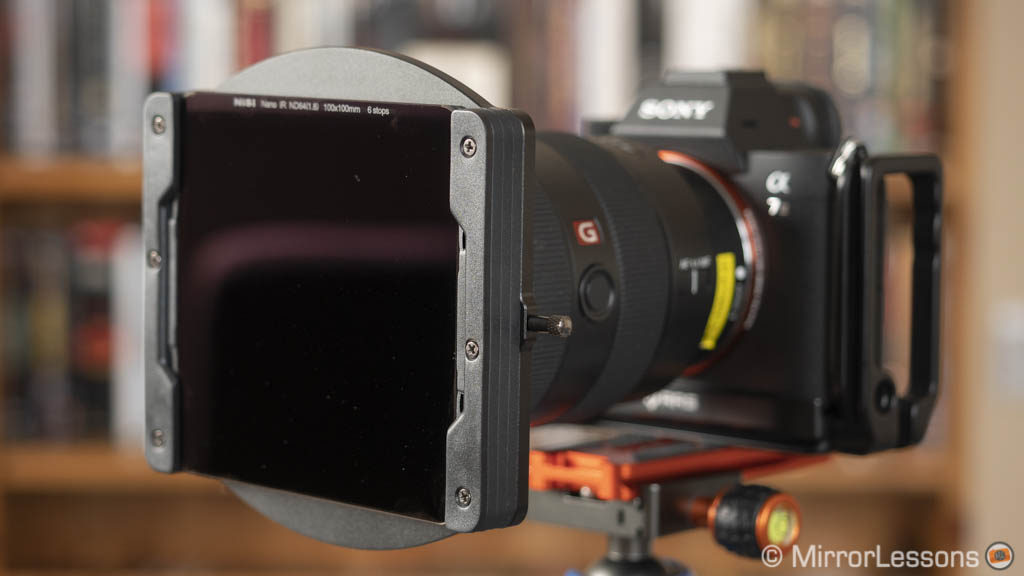
To capture exposures longer than 30 seconds, you need to rotate the shutter speed dial until you reach the BULB mode. The Setting Effects for the Live View Display will turn off automatically so that you can have an optimal brightness on the LCD screen. Also consider the use of a remote to control the shutter button without having to touch the camera.

Important: if you take very long exposures of 10 minutes or more, activate the Long Exposure NR setting to avoid thermal noise in your image. You can find it in Camera Settings 1 / Quality Image Size2 (page 2/14).
ND filters are also useful to create dynamic clouds movements in the sky. Remember however that if there are any elements in your scene such as leaves moved by the wind, they’ll sendup blurred as well. Other types such as polariser filters can be useful too.
If you don’t have a ND filter with you, you can take multiple shots and then stack them in post to recreate a similar effect on the water.
You can read our recommended filters in our accessory article.
Sony A7 III, A7R III, A9 for Landscape Photography: Bracketing and HDR
HDR is a technique where you combine multiple exposures to increase the tonal range (shades of colour) of your image, particularly in the shadows and highlights. Let’s see a practical example with one of the dynamic range test I do for our comparison articles.
Note: Sony cameras have a built-in HDR mode called Auto HDR but it only works with JPGs. To have more control and produce superior results, it is better to use the RAW files and merge them in post with a compatible software. You can read about Auto HDR in another of our articles here.
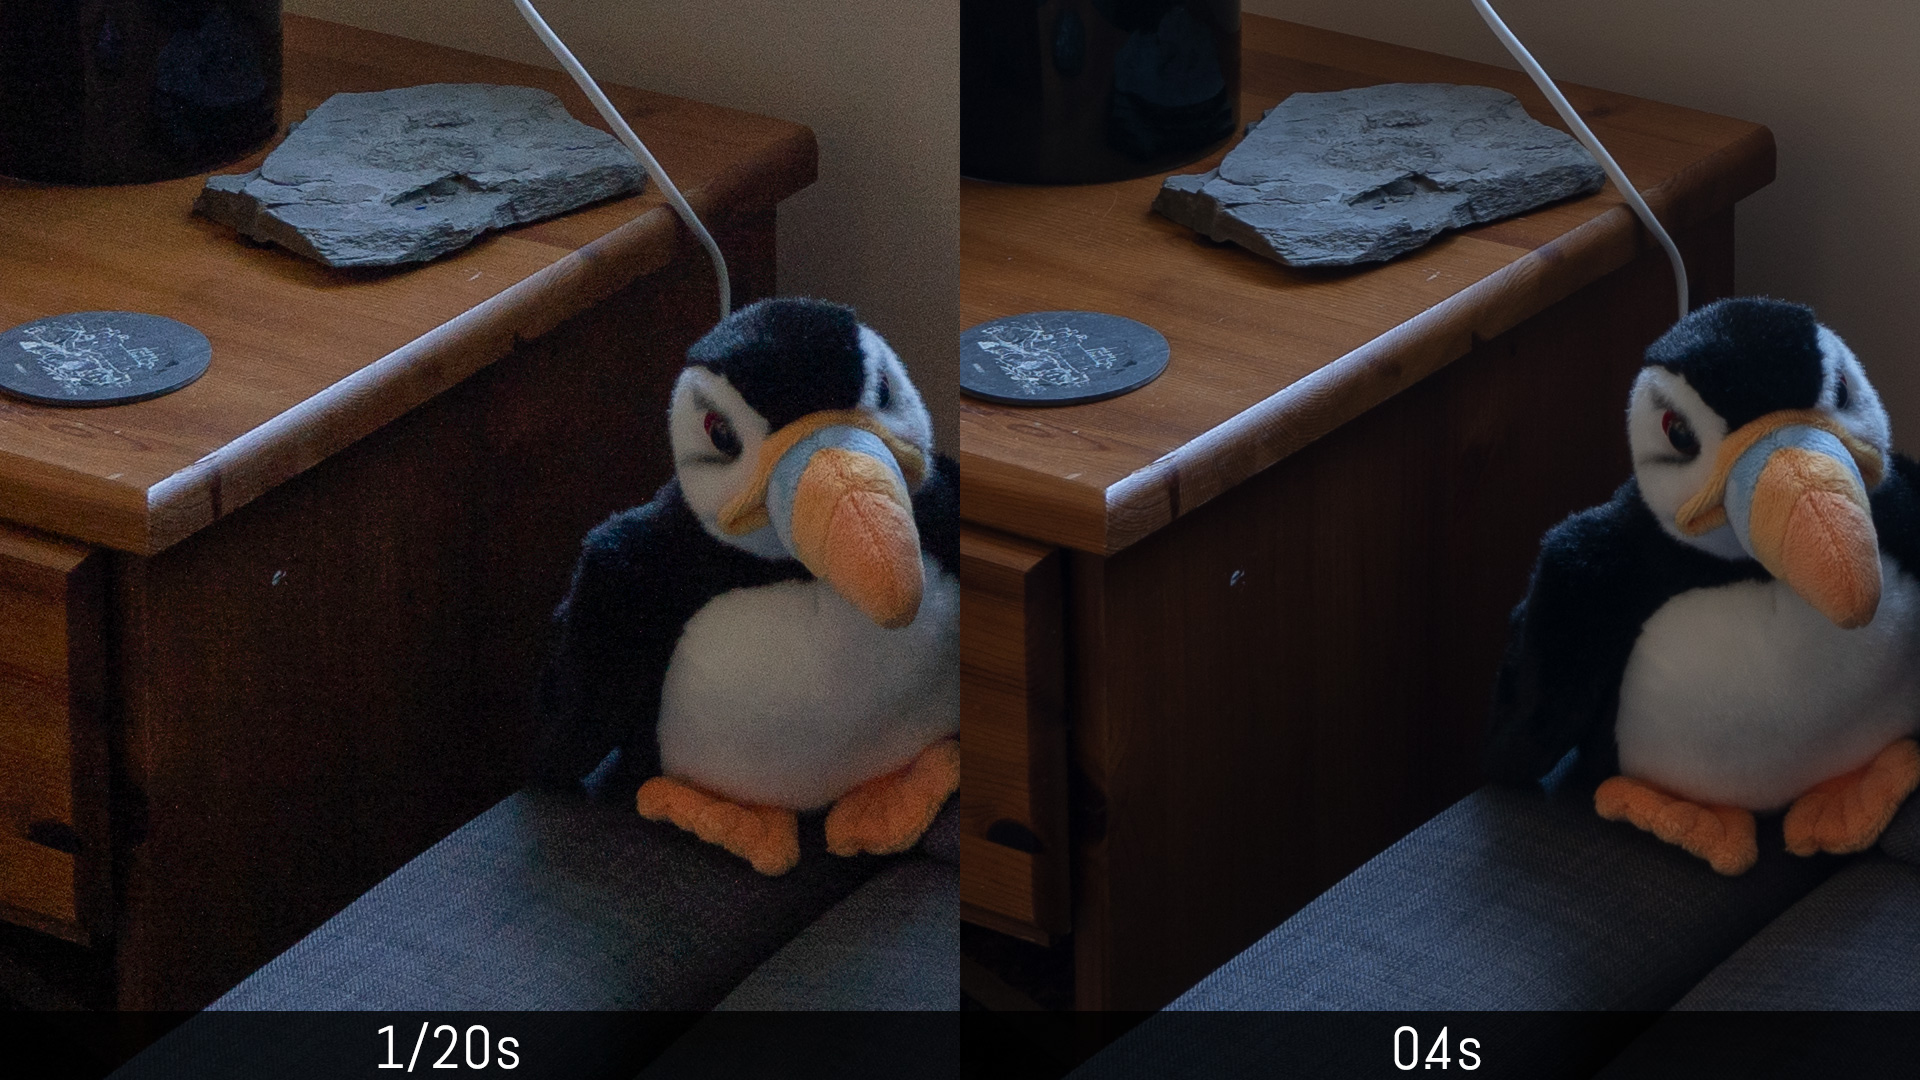
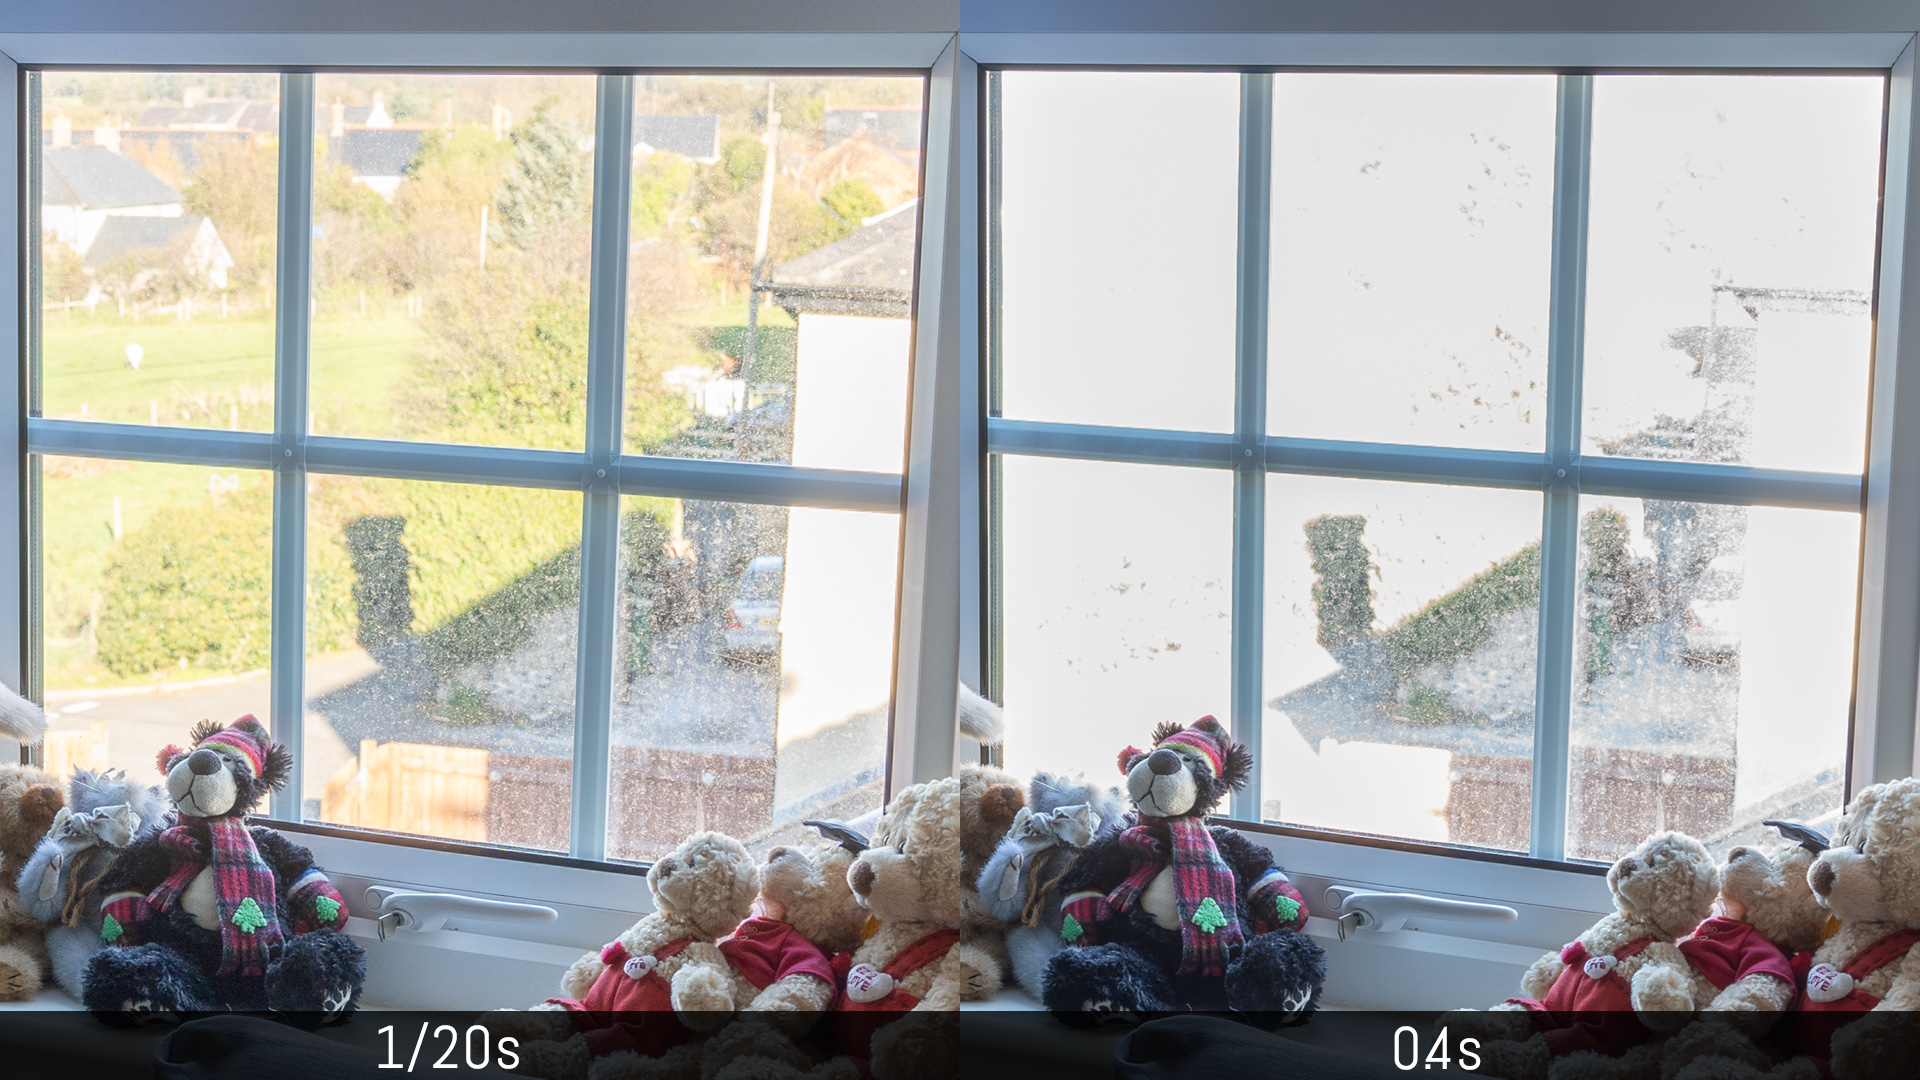
The image below, taken with the A7 III, shows a scene with high contrast between the sunlight outside the window and the dark room inside. The aperture is set at f/8 and the ISO to 100. The software used for this example is Lightroom Classic CC.
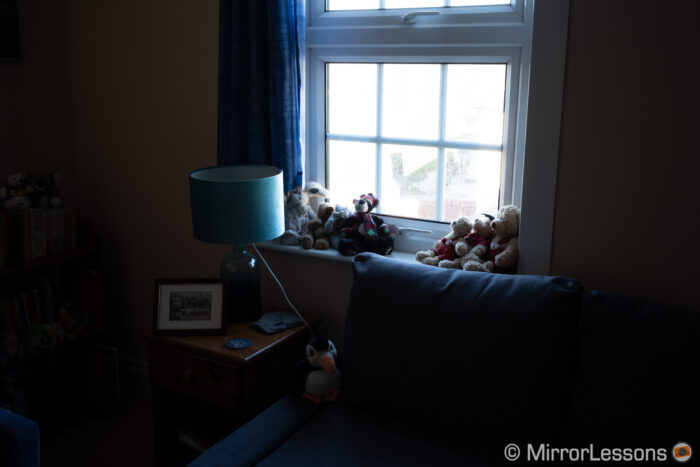
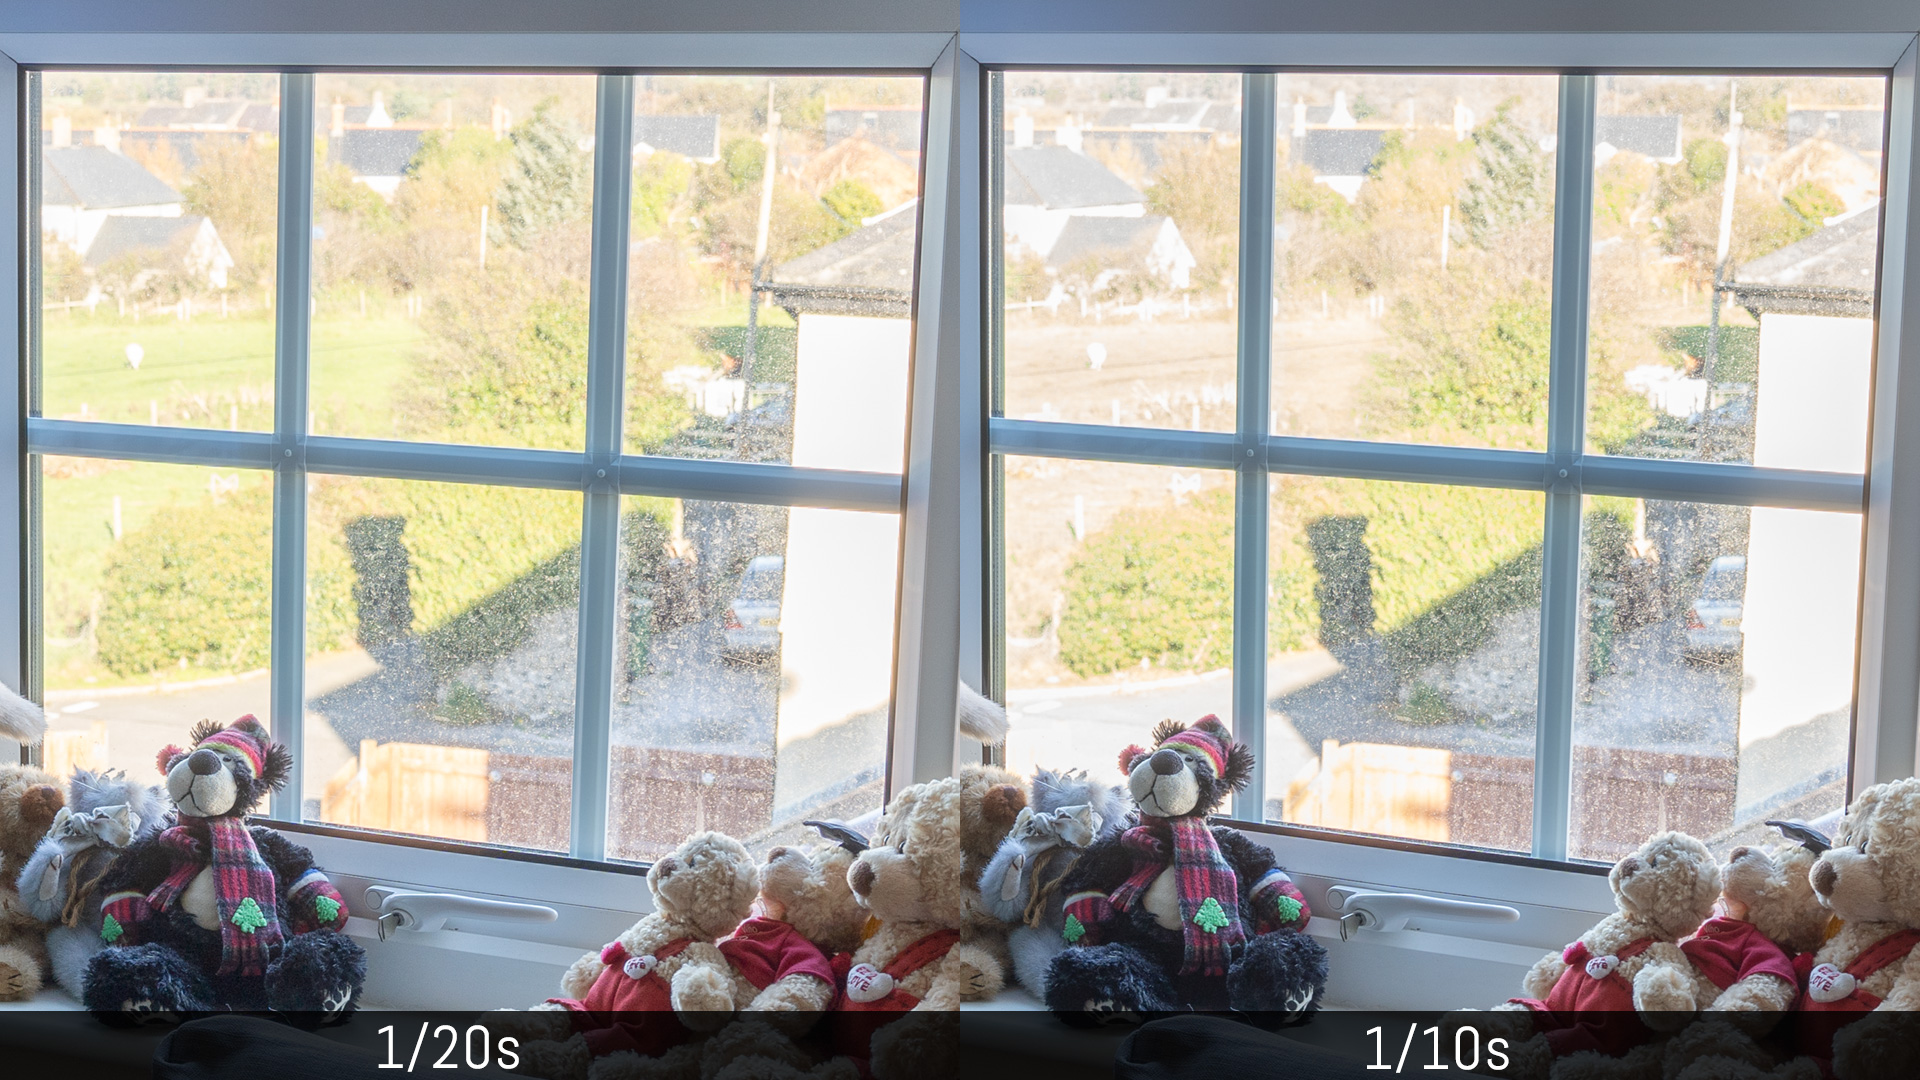
If want to preserve details outside the window with a single frame, I need to expose for the highlights. In this case it means setting my shutter speed around 1/20s. Any faster than that and I won’t be able to recover all the details. For example at 1/10s, I can’t pull back the green colour of the grass.
Then when boosting the shadows to recover the brightness inside, I inevitably end up with noise in my photo.
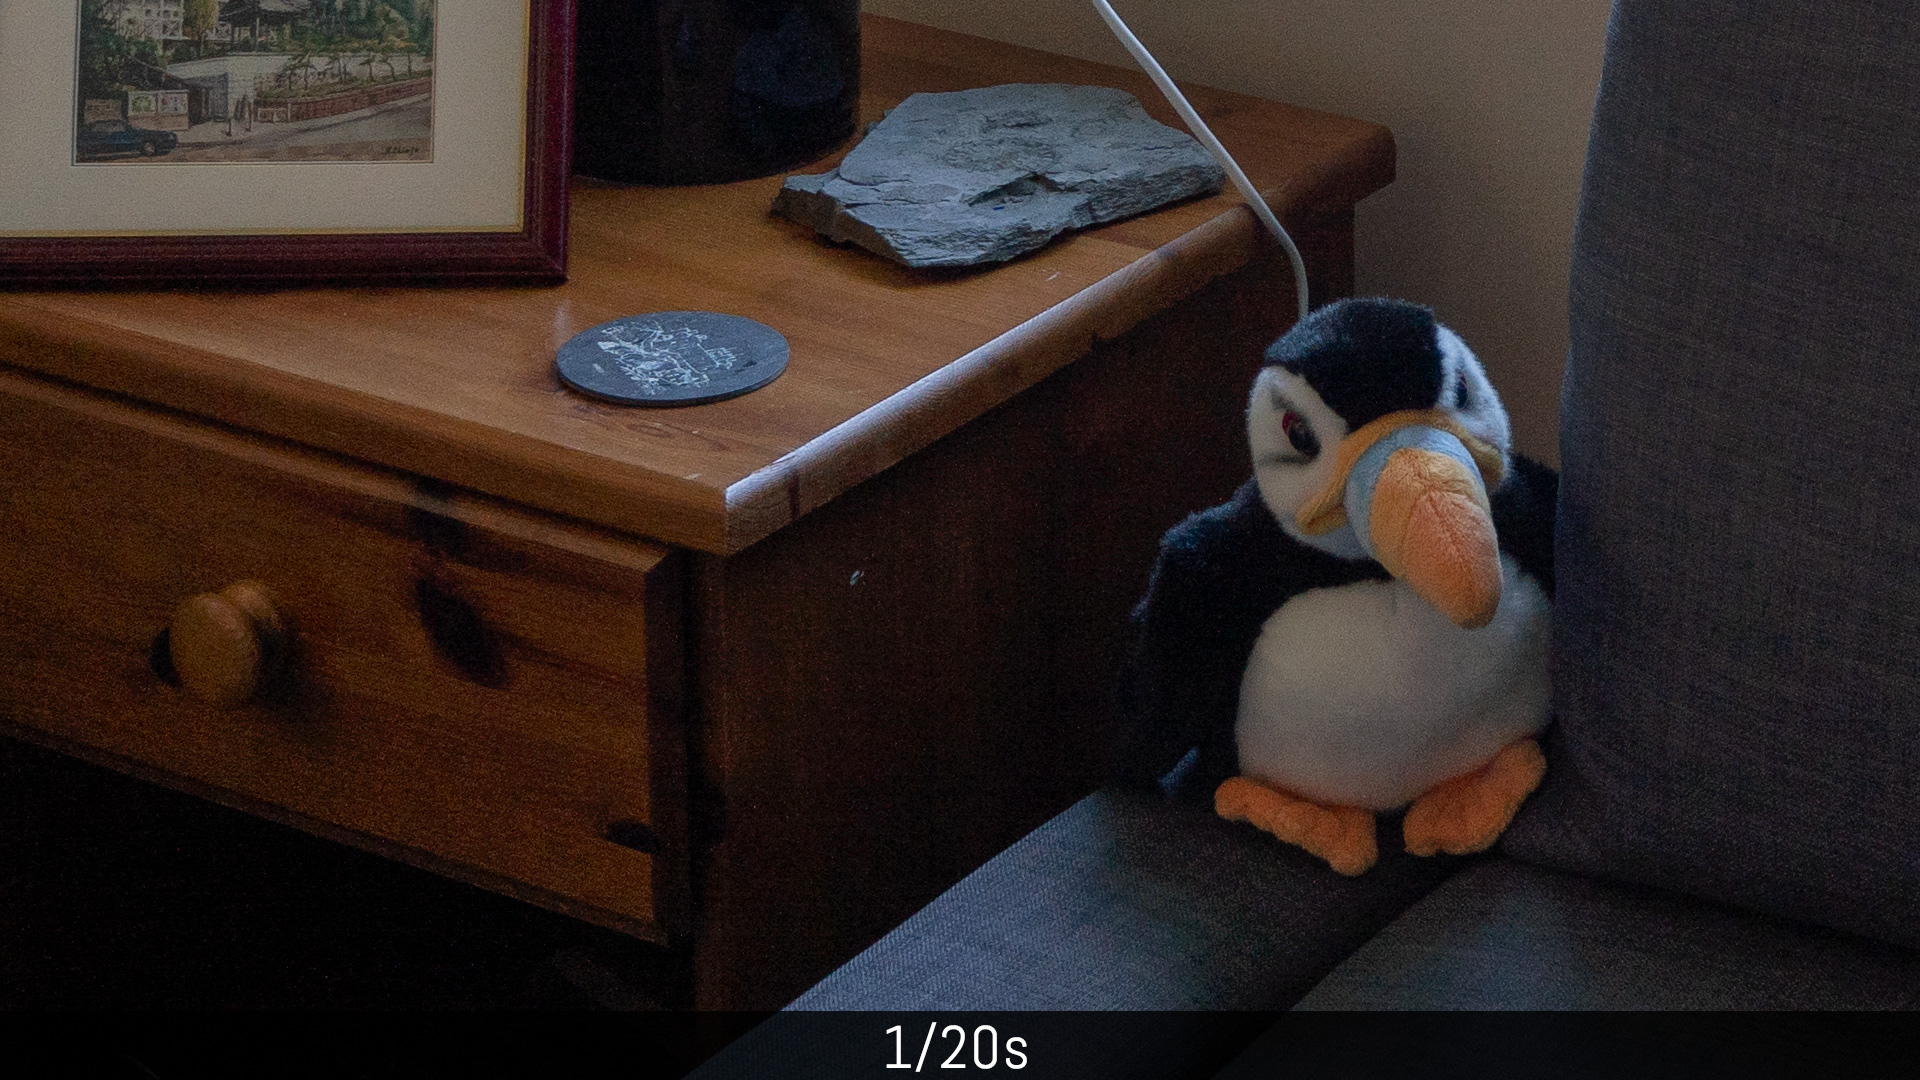
If I want better quality in the shadows, I need to expose for the inside (0.4s) but as a result, I’m loosing details on the outside.
+50 shadows on both
Now, let’s apply the HDR technique: we take five images with different exposures (from 1/40 to 0.4s) and merge them in post. This way I get a single file with more tonal range in the highlights and shadows. I can brighten the inside and tune down the outside on the same file without any loss of quality. Even better, I have more margin to brighten the dark areas further if I want to.

You can take the sequence of images manually but it’s more time consuming. Thankfully your A7 or A9 camera has an AE Bracket mode that can do it automatically for you.
- Set your Metering Mode to Multi in Camera Settings 1 / Exposure 1, (page 9/14)
- Adjust your aperture, shutter speed and ISO settings. Ideally you want something in the middle to have the most balanced exposure between shadows and highlights (with the metering indicating equal or close to 0.0).
- Press the left button on the rear control wheel, scroll down and choose Cont. Bracket (continuous). This way the camera will capture all the shots in one go when pressing and holding down the shutter release button.
- Select the number of frames and the exposure shift. 5 shots with a 1Ev of difference is usually my favourite combination.
- The camera is now indicating at the bottom of the screen your exposure range with the five shots.
- Check your focus to make sure that is set correctly (use either the back button focus as explained at the beginning, or switch to MF after focusing to avoid refocusing when pressing the shutter button)
- Press and hold the shutter button to capture the five shots.
Ideally, you want to set your camera on a tripod, but I have been successful in taking HDR images hand-held. Most softwares can align images automatically and I never encounter a problem. The important thing to keep an eye on is the shutter speed: if it goes below 1/20s, you can end up with motion blur on some of the images. So make sure to check sharpness in playback mode.
In point 2, I said to start with a balanced exposure, but of course you can decide to start with a brighter or darker image depending on the situation in front of you, or if you want to prioritises more tonal range in the shadows or highlights. In Camera Settings 1 / Shoot Mode Drive 1 (page 3/14), you can change the Bracket order as well.
With all that said, is HDR always necessary for landscape photography? Well, that depends.
The home-made example above is a bit extreme in terms of contrast but useful to show you how HDR can be improve the quality of your image. However in a real world situation for landscape, you might not find such as drastic situation. Sony sensors are really good when it comes to dynamic range. They are the best on the market in fact and there is a lot you can do with post processing a single file. Let’s see another example.
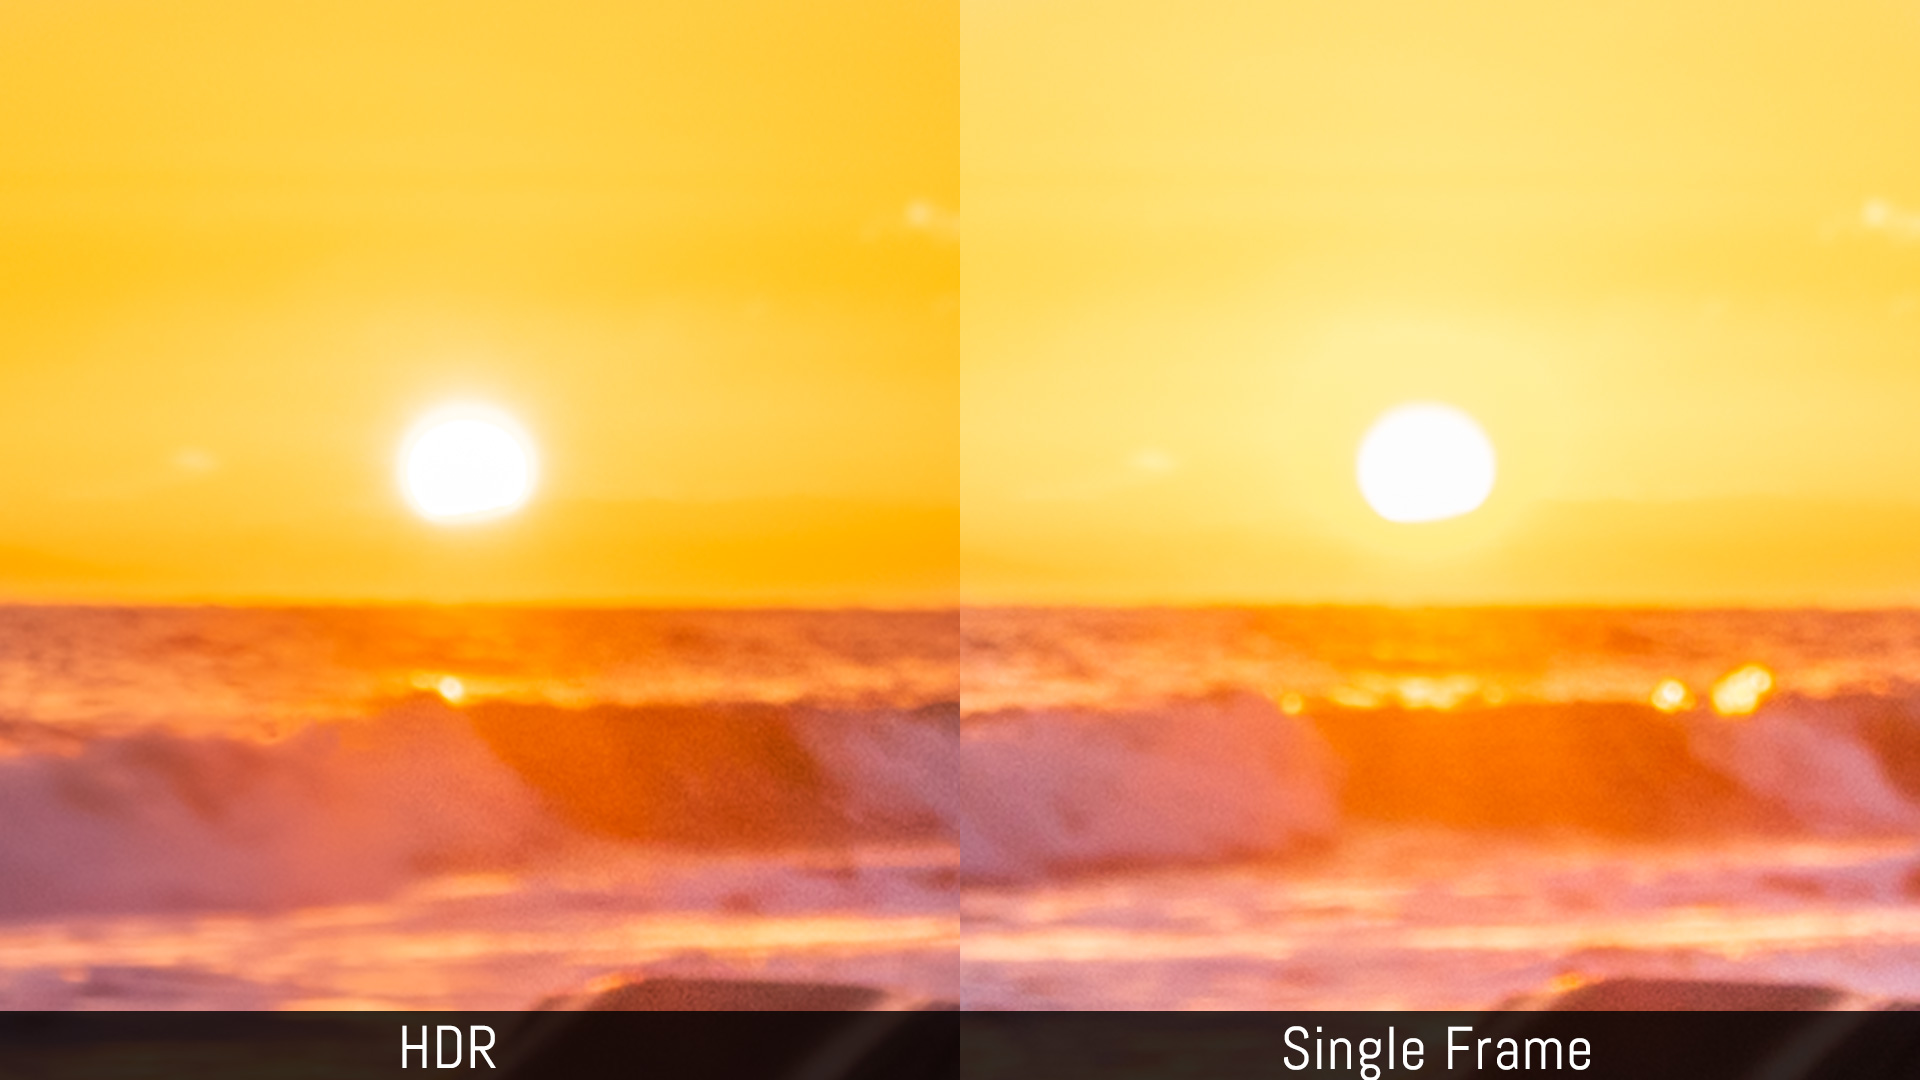
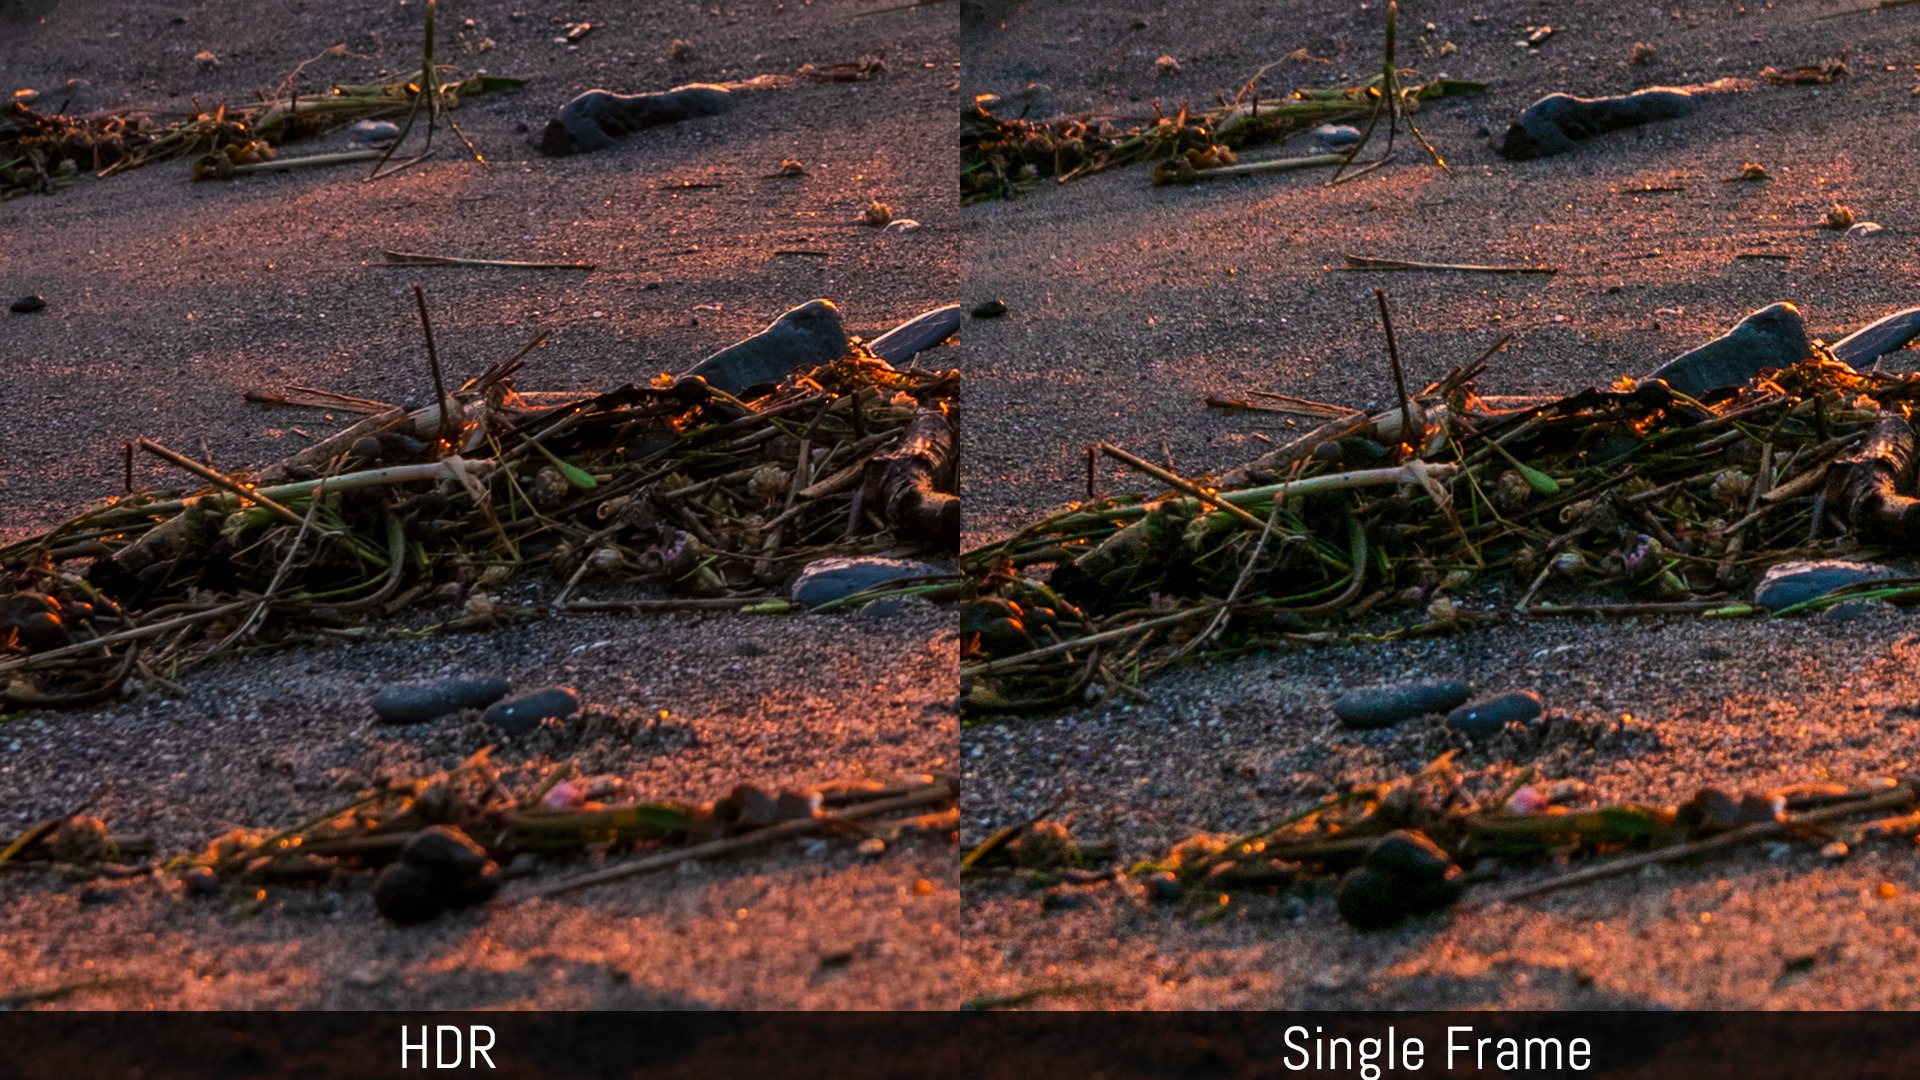
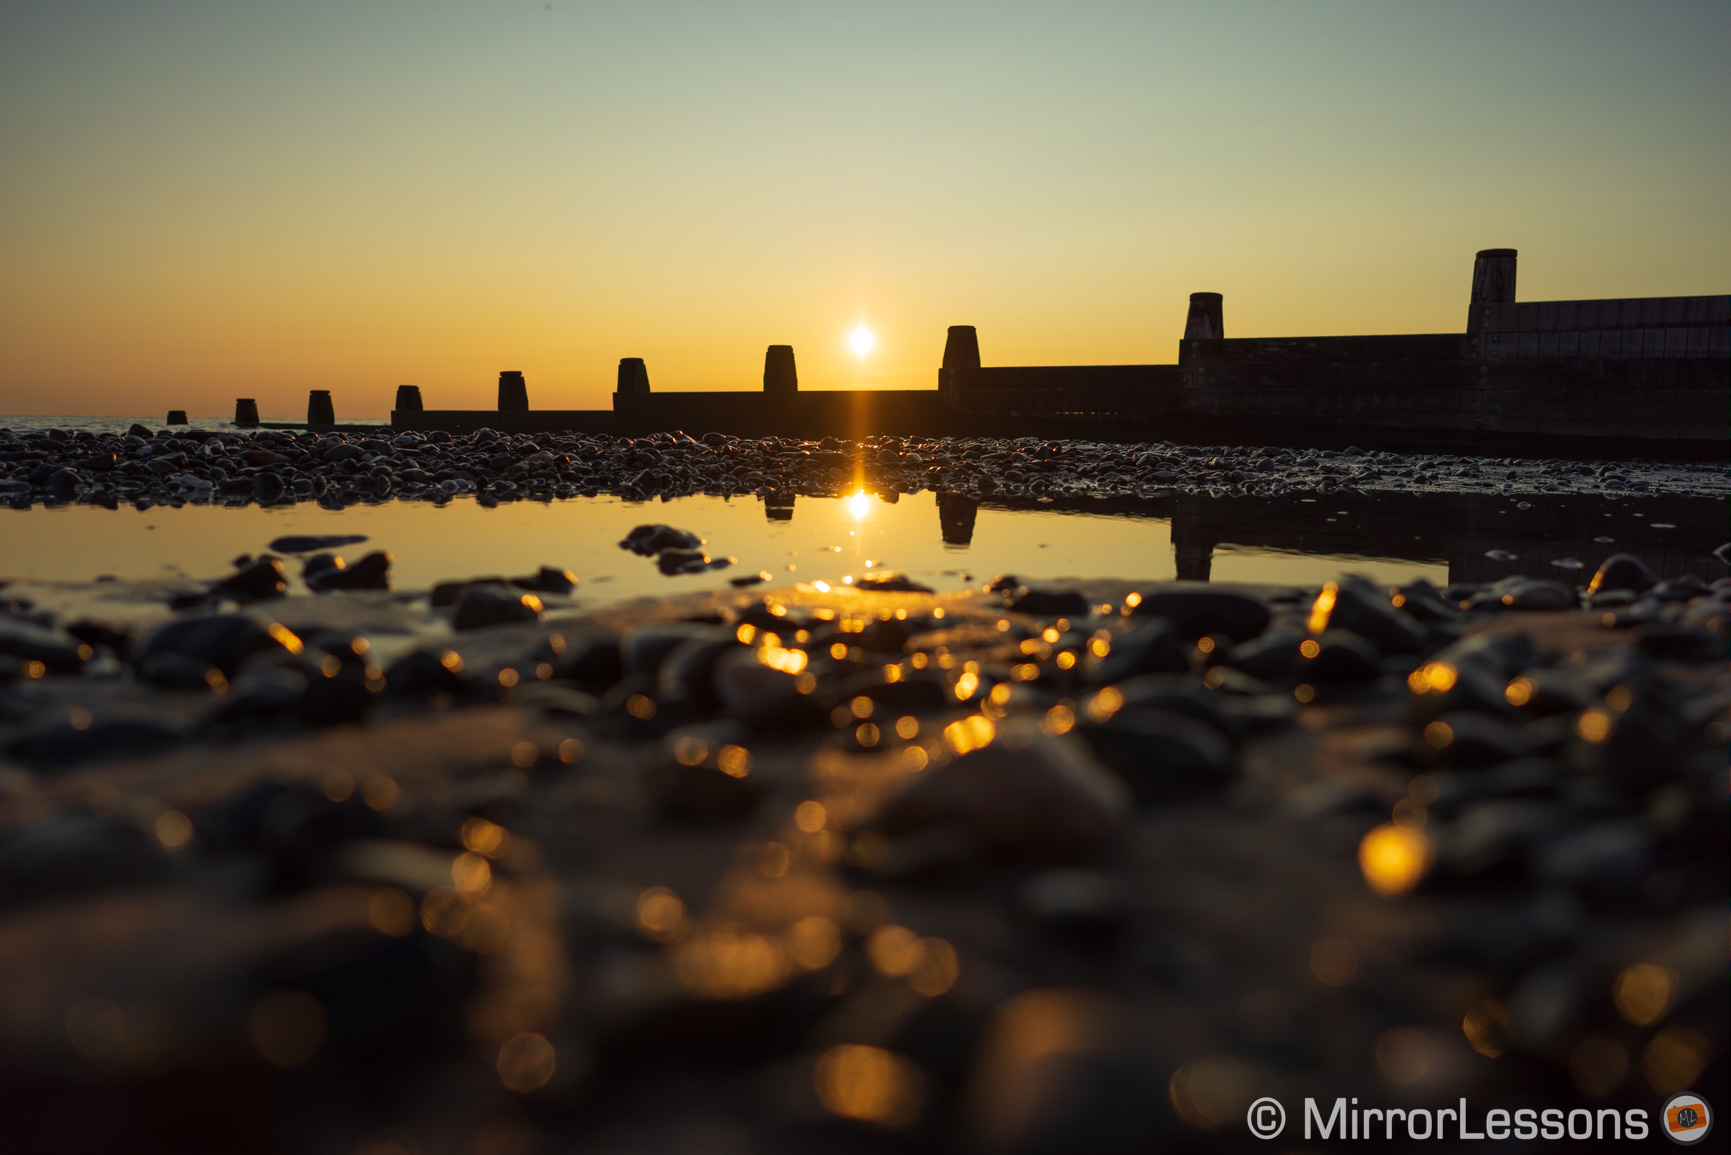
The sunset show below shows you the difference between a single frame (middle exposure in my bracket) and the HDR merge. Both were post processed in the same way and the differences are much more subtle.
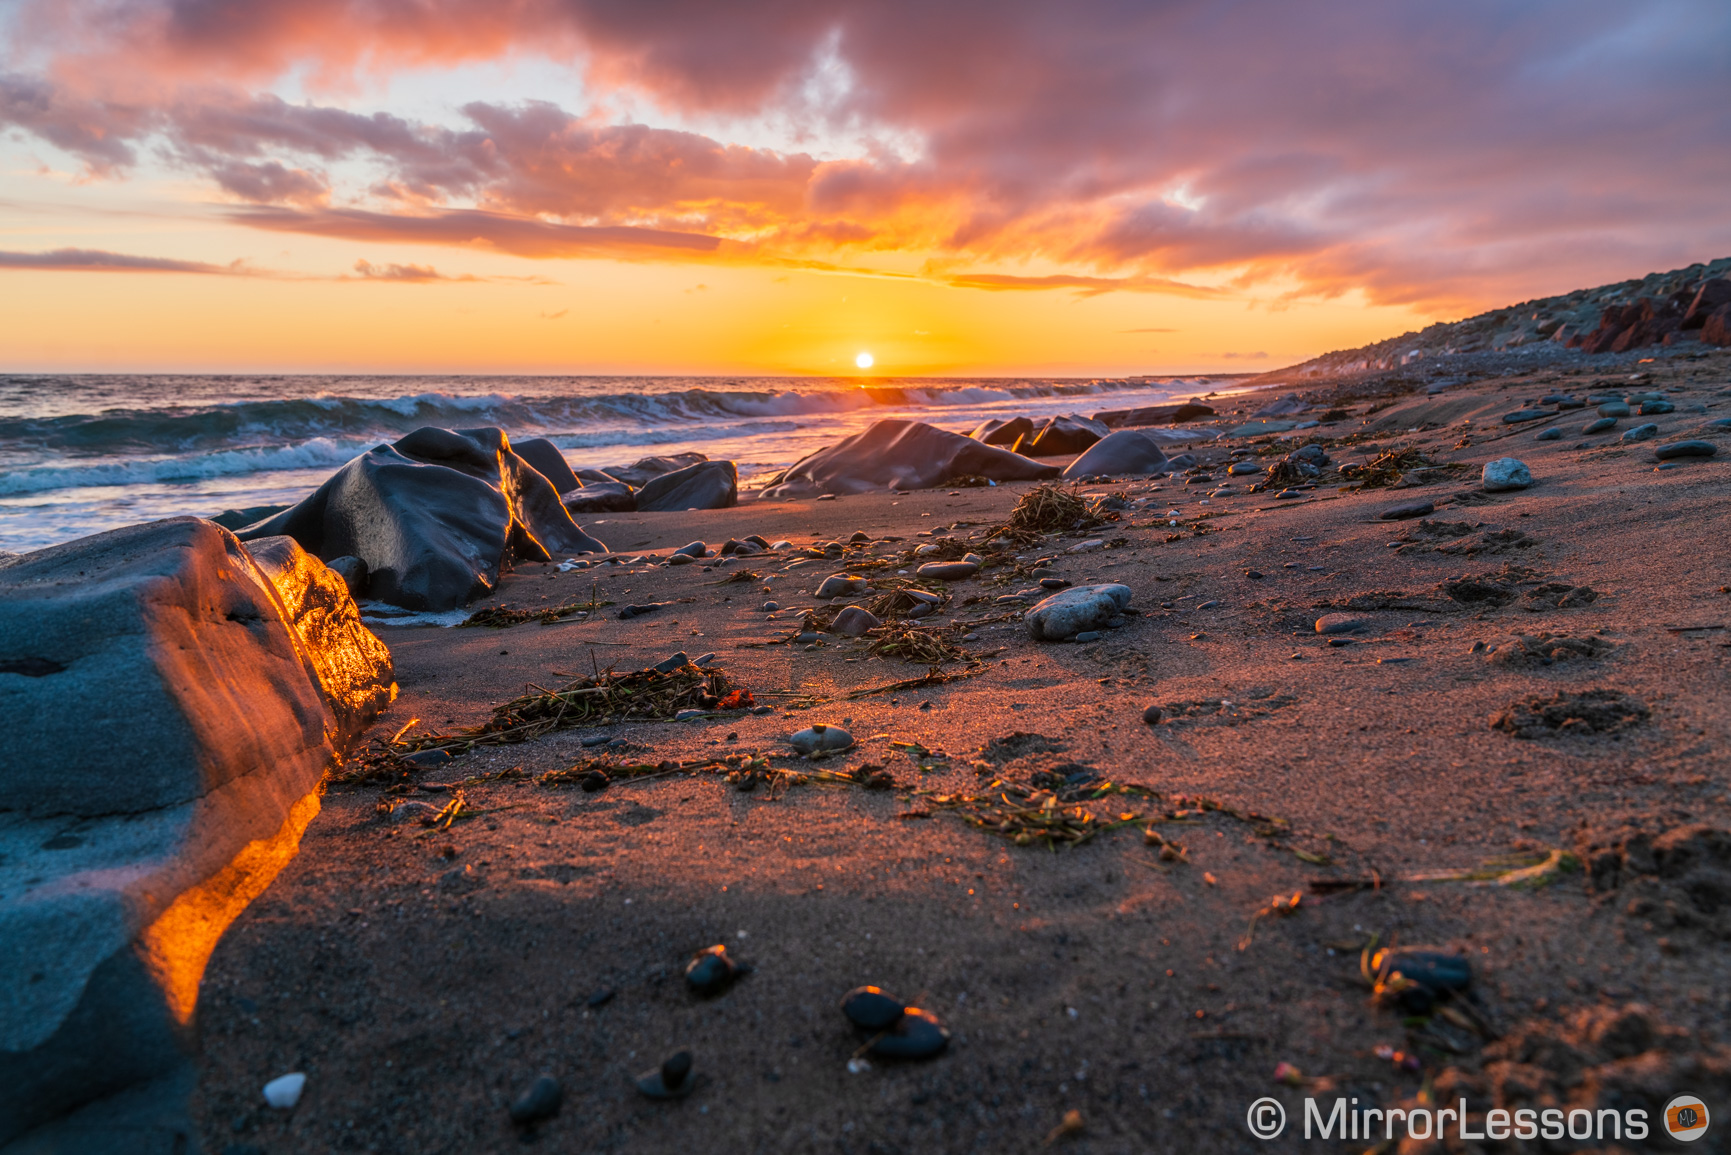
Five exposure brackets from 1/400 to 1/25s
Exposure reference / starting point: 1/100s
If we look at the highlights, the contour of the sun looks a bit more natural in the HDR image, whereas the single frame shows a bit more noise in the shadows but it is not that visible at first glance.
So deciding to go with bracketing and HDR is really up to you. Honestly, I’m often happy with a single shot. In my particular case it also helps me analyse the sensor capability of the camera I test, and I don’t mind a bit of noise in the shadows as long as the overall quality of the image remains intact.
Feel free to experiment of course, and it is also true that you can decide later in post to merge the images or just use one.
Sony A7 III, A7R III, A9 for Landscape Photography: Panorama
Panoramas are another popular technique among landscape photographers. They allow you to capture a wider view of a scene, or get a panoramic format with more resolution. Like HDR, it involves capturing multiple shots but in this case we’re going to stitch them together.
For the A7 III and IV generation, as well as the A9 series, Sony has removed the built-in Sweep Panorama function. Although not always precise and available as a JPG only, it was a cool feature to try on occasions, but unless you have an older model, you’re going to have to do this manually.
Taking images for a panorama merge involves taking a series of images from left to right (or up to down) to capture the scene. It is not a difficult thing to do and many softwares are capable of merging the shots automatically.
- Set the shooting mode to M with the top dial: you don’t want your exposure to change while panning. Alternatively, if you’re working in A mode, use the AEL function to lock the exposure before starting the pan.
- Set your desired exposure settings
- Check your focus either with AF-S or manual focus. With AF-S you want to make sure that the camera won’t refocus again. Either ruse the back button focus technique explained at the beginning, or switch to manual focus after engaging the autofocus.
- Press the DISP button until you see the level appear on the screen. It will be useful to maintain the direction and keep the camera straight
- Use the Single Shooting drive mode. You don’t want to end up with too many shots
- Optional: rotate the camera in vertical/portrait orientation. That way you’ll capture more information at the top and bottom.
- choose where to start and end your pan, and then start to take the image. Don’t capture them while moving: take the first shot, pan a little, then take the second shot etc. It doesn’t matter if part of the scene overlaps between shots, the software on your computer will cope with that.
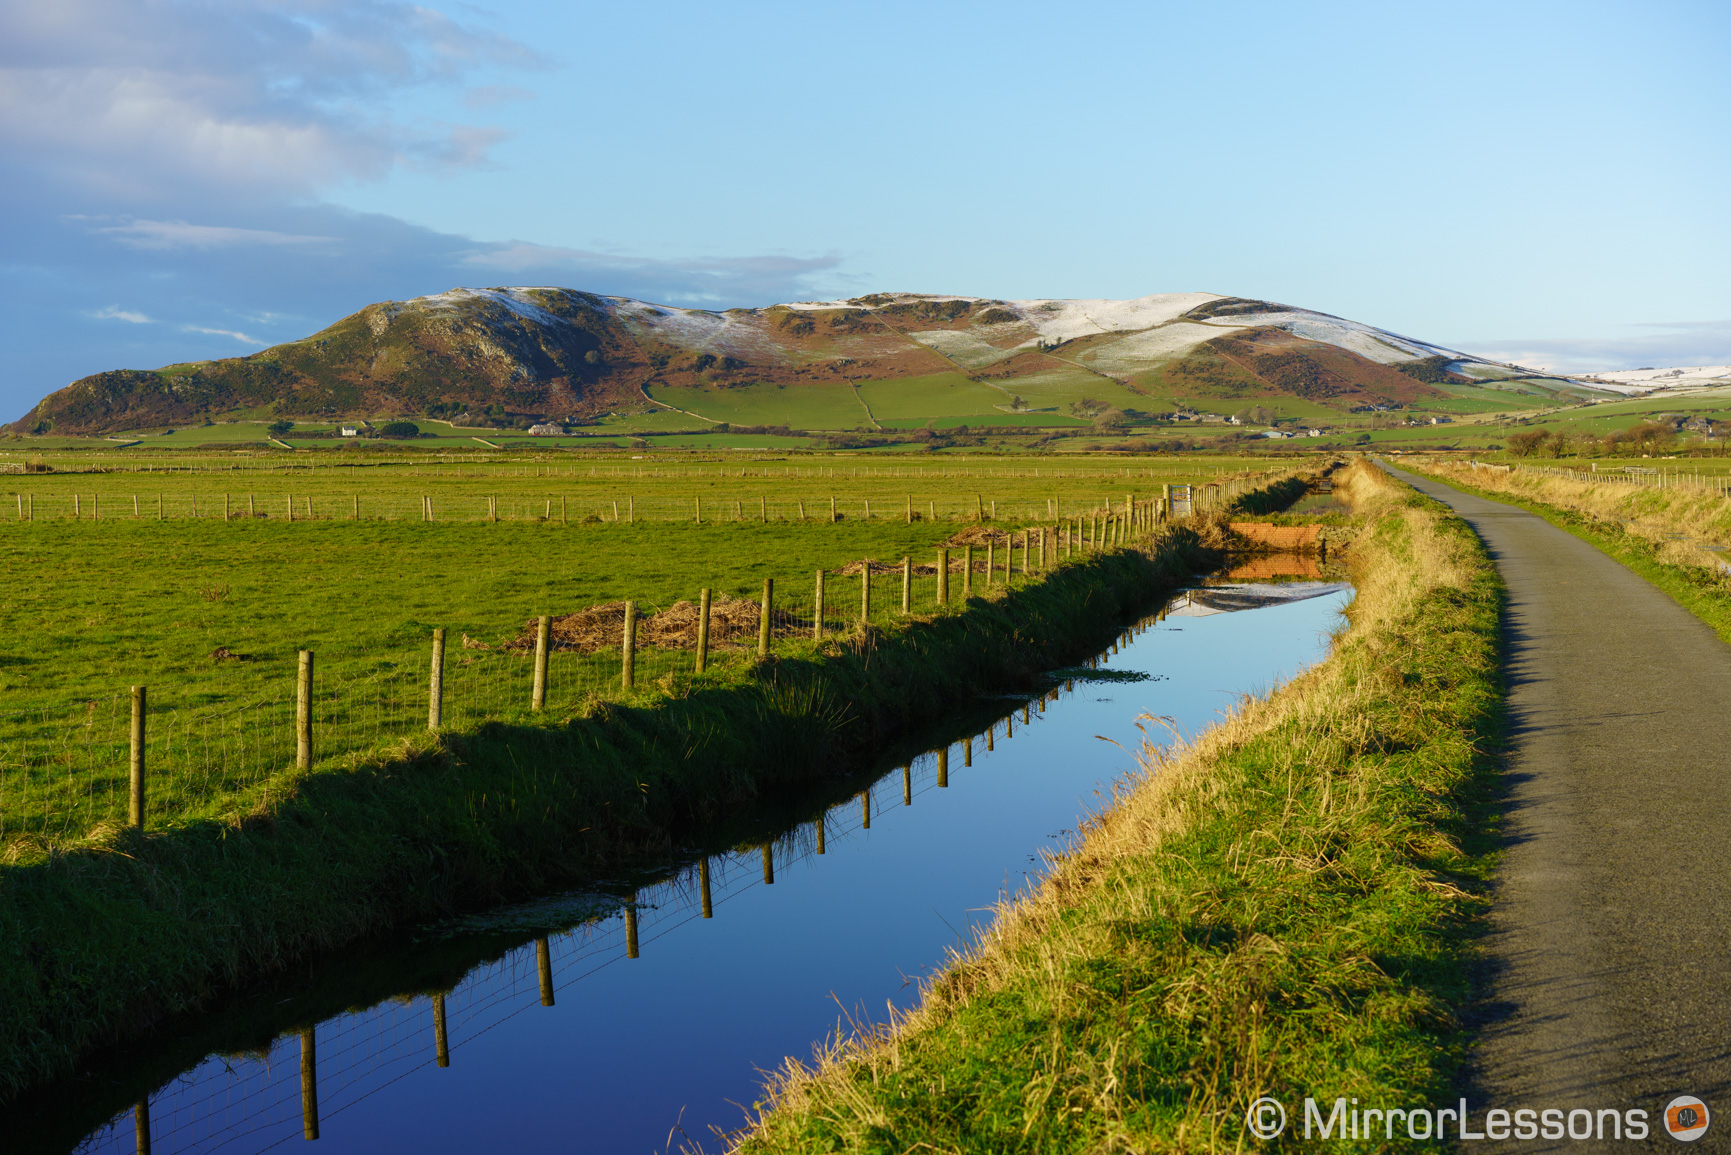
Below you can see an example where I stiched 7 vertical shots.


Original file is 83MP (after crop).
It takes a little bit of practice to guess the right composition for the individual shots. In my image above for example, I should have given the sky a bit more space: the mountain on the top left just fits. Remember that the pano stitching is going to crop your images on the edges, so you need to give some extra space to the elements you know you want to include in the final composition. Don’t hesitate to take variations on the same sequence as well.
Once the panorama is created, you can crop the portions you don’t want (I cut out a bit of heathers at the bottom to balance the image better).
Sony A7R III, A7R IV Pixel Shift Multi Shoot
For Sony A7R III and A7R IV only.
If you own an A7R mark III or A7R mark IV, you may be tempted to use a function called Px. Shift Multi Shoot. It takes multiple shot and moves the sensor by one pixel or half a pixel in between frames, allowing you to get more resolution when the files are stacked in post.
With the A7R III, four shots are created. The output remains 42MP but you get more colour resolution as a result.
With the A7R IV, you can choose between the same mode as the mark III model, or merge 16 shots and create a 280MP image!
While this may be tempting for landscape photography both in terms of colour and details, there are some limitations to be aware of:
- It doesn’t work hand-held, the camera must be on a tripod to ensure perfect stillness
- Any movement inside your frame will result in artefact and loss of detail in that particular zone. This is also valid for water on a river or leaves moved by the wind.
If you find yourself in front of a scene tat looks perfectly motionless and presents lots of details, the Pixel Shift mode can be a great tool. And in doubts, just remember that the individual files are saved so you won’t loose your shot.
To merge the images, you need to use the Sony software called Imaging Edge.
Sony A7 III, A7R III, A9: Which lens to choose for Landscape Photography?
The first type of lens that comes to mind when talking about landscape photography is a wide angle, but the truth is that there is no limit. In fact, some of my favourite landscape shots have been taken with telephoto lenses.
When choosing a lens, I would recommend the following guidelines:
- your kit lens is a good starting point to understand which angles of view you like the most, and if you feel the need for something wider straight away (kit lenses often starts from 24mm or 28mm)
- a zoom lens is versatile and helpful for beginners we may not know right away which focal lenghts is their favourite
- you don’t necessarily need a fast lens, as long as it provides good sharpness and low aberrations
- a wide lens can be useful in a forest, cave or any situations where there are different elements in the foreground and background. The short focal length can emphasise the perspective and give your shot a more dramatic look.
- However if your scene is flat with nothing interesting in the foreground, you’ll find that a standard lens or short telephoto lens (from 50mm to 85mm more or less) can help you isolate the most interesting and distant elements of your scene
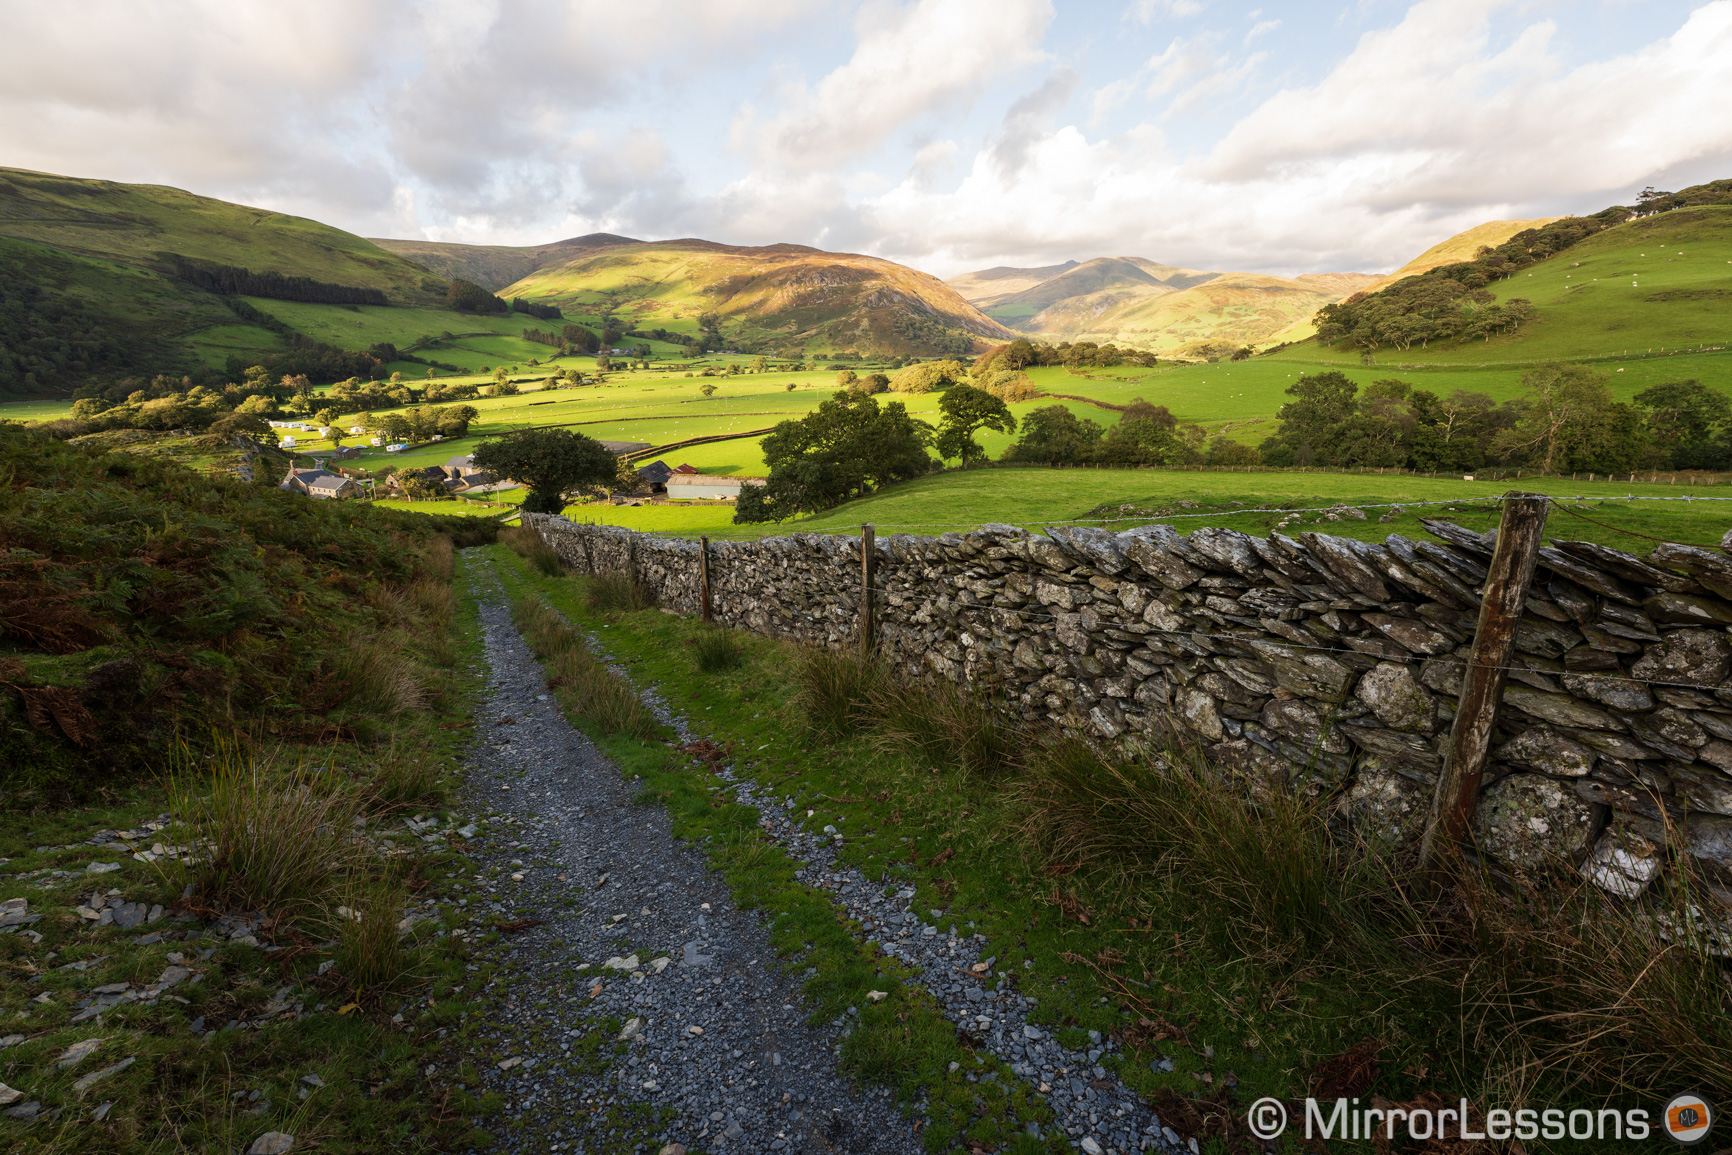
Sony A7 III, A7R III, A9: Landscape Image Samples
Below you can see a gallery of images taken with various Sony A7 cameras and different lenses in the last four years. Enjoy!
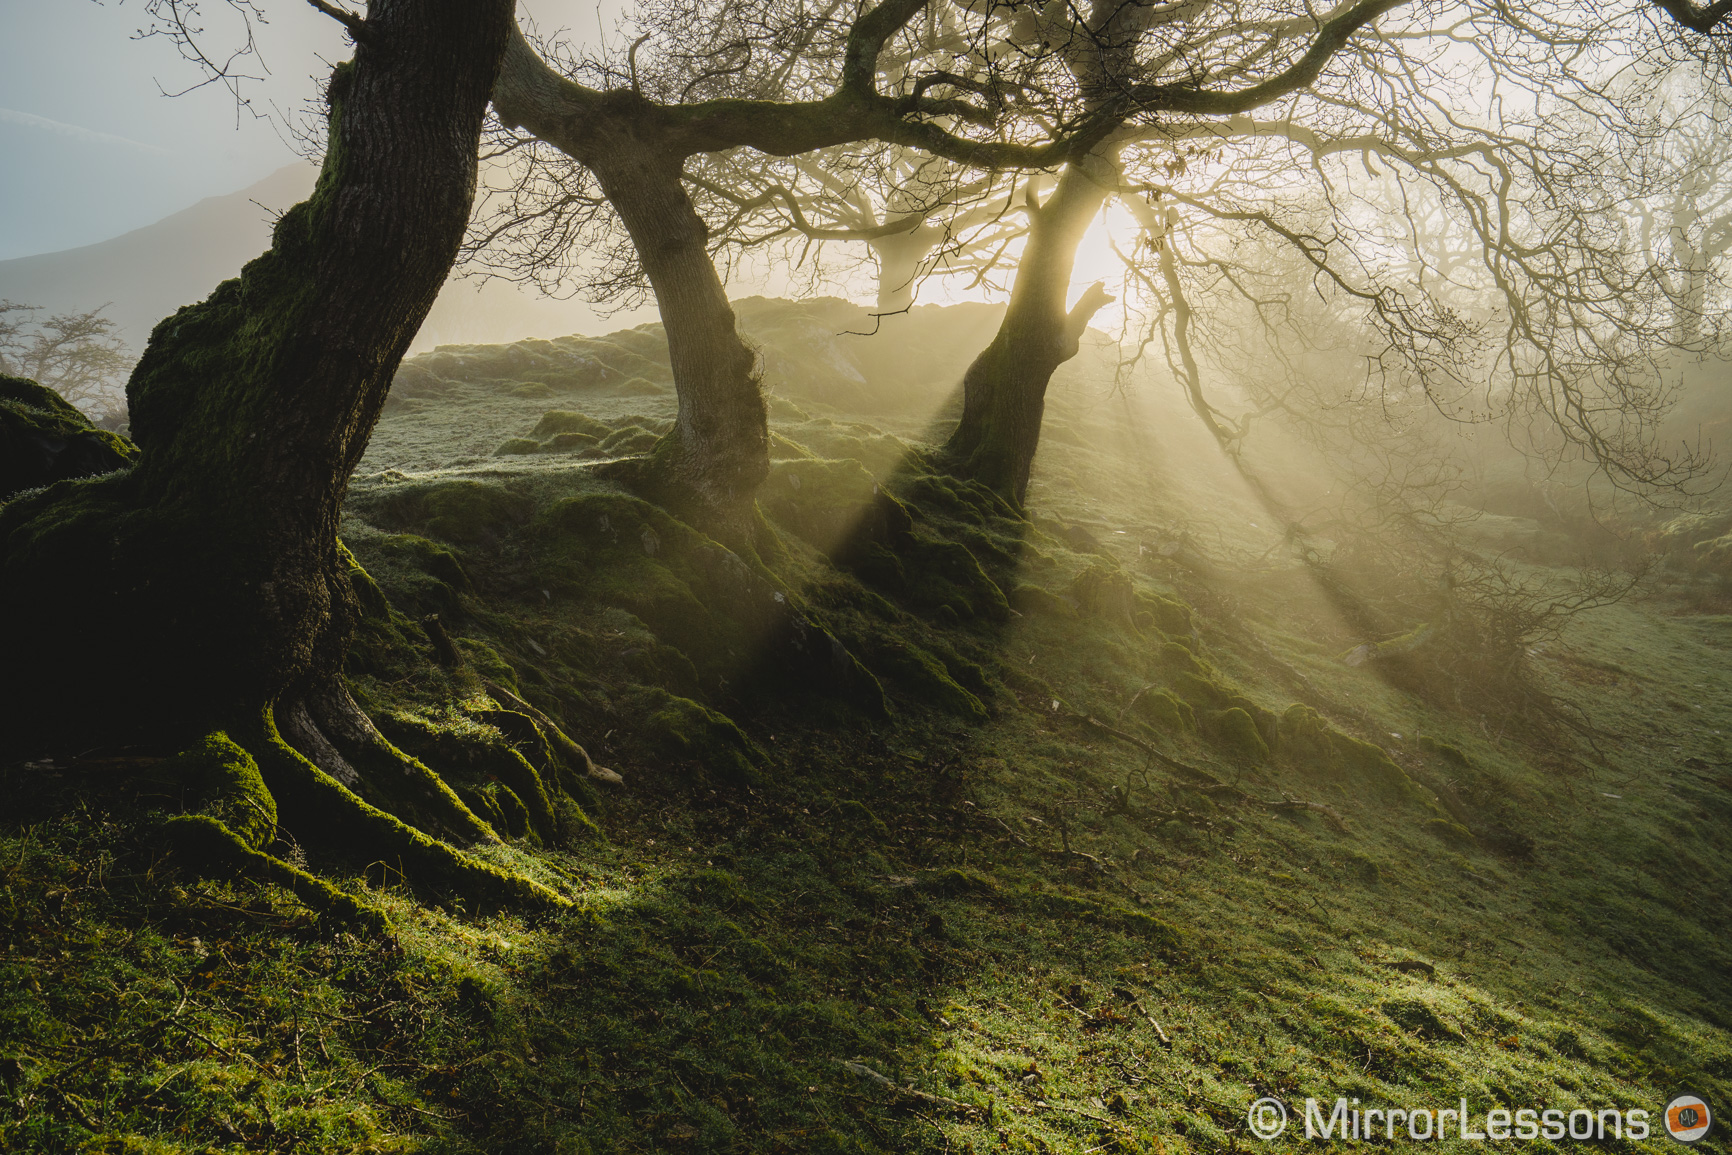
Magic fog on an early morning.
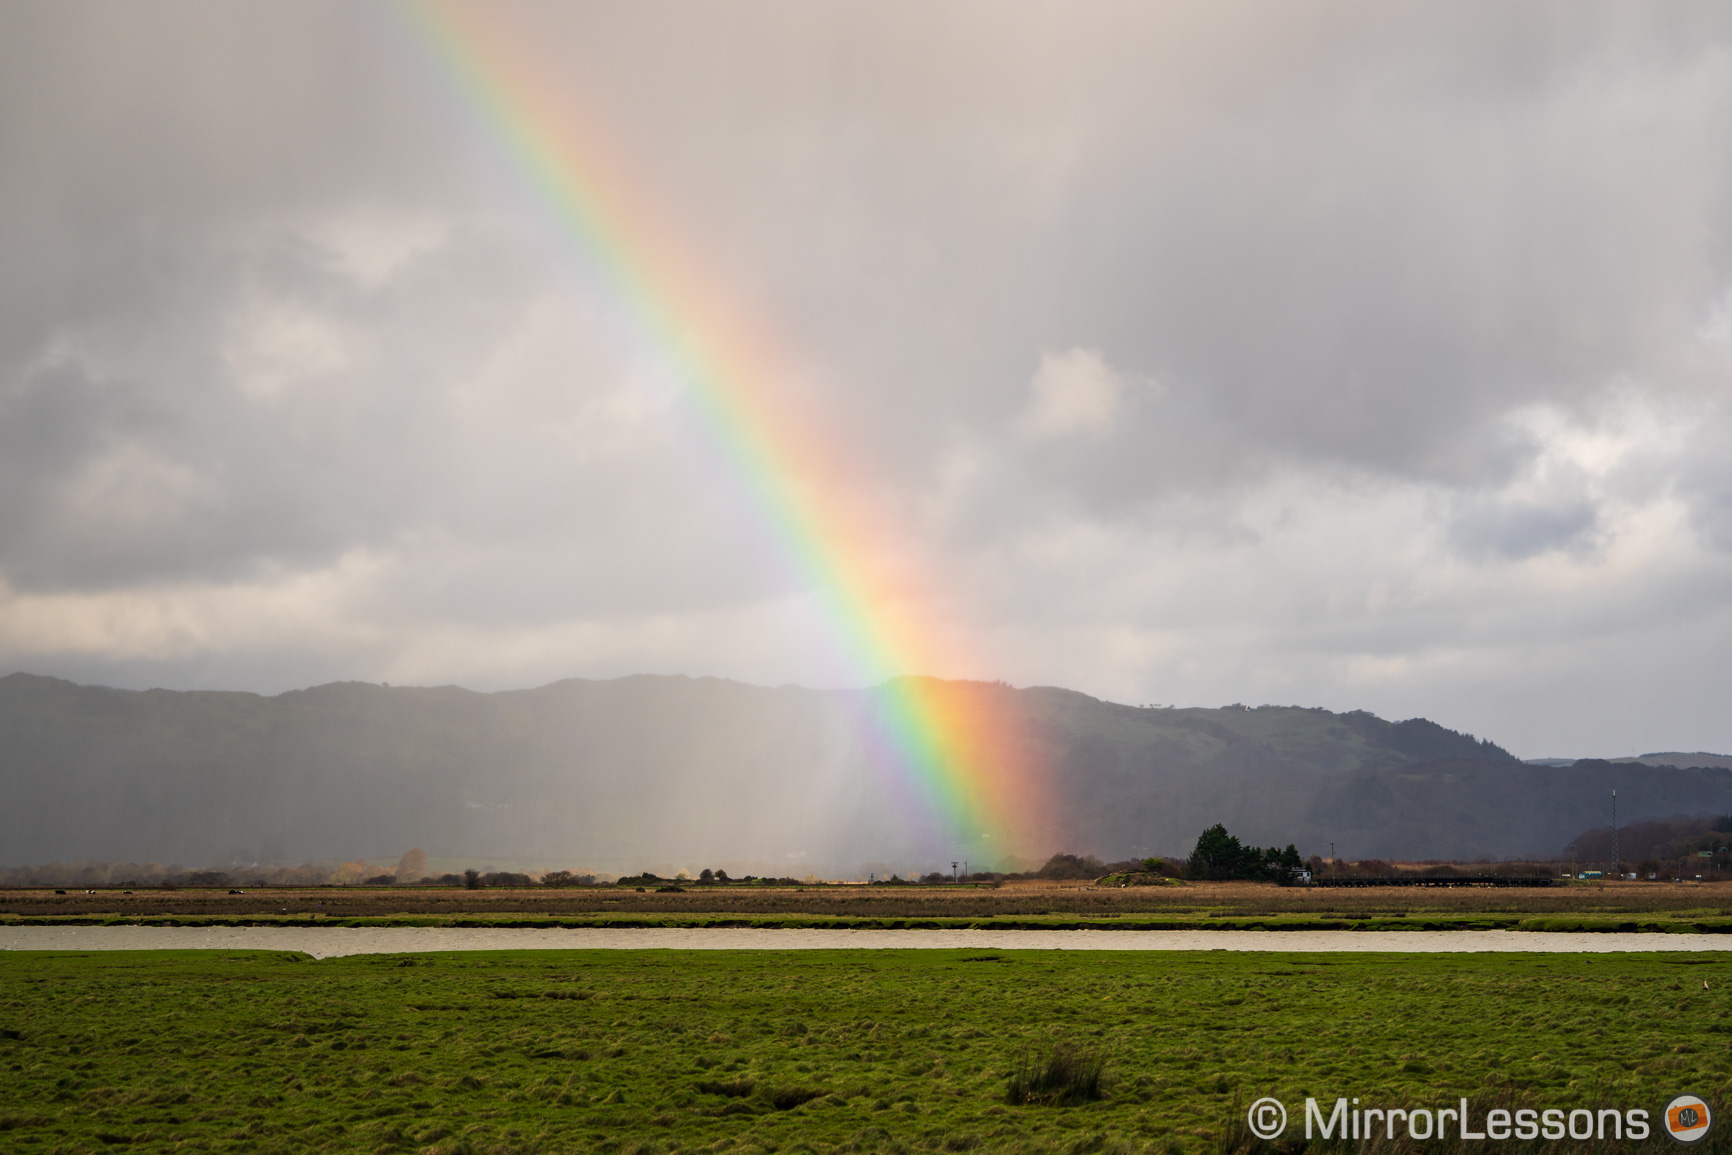
A telephoto lens can be useful at times!

HDR merge (5 shots, 1Ev)
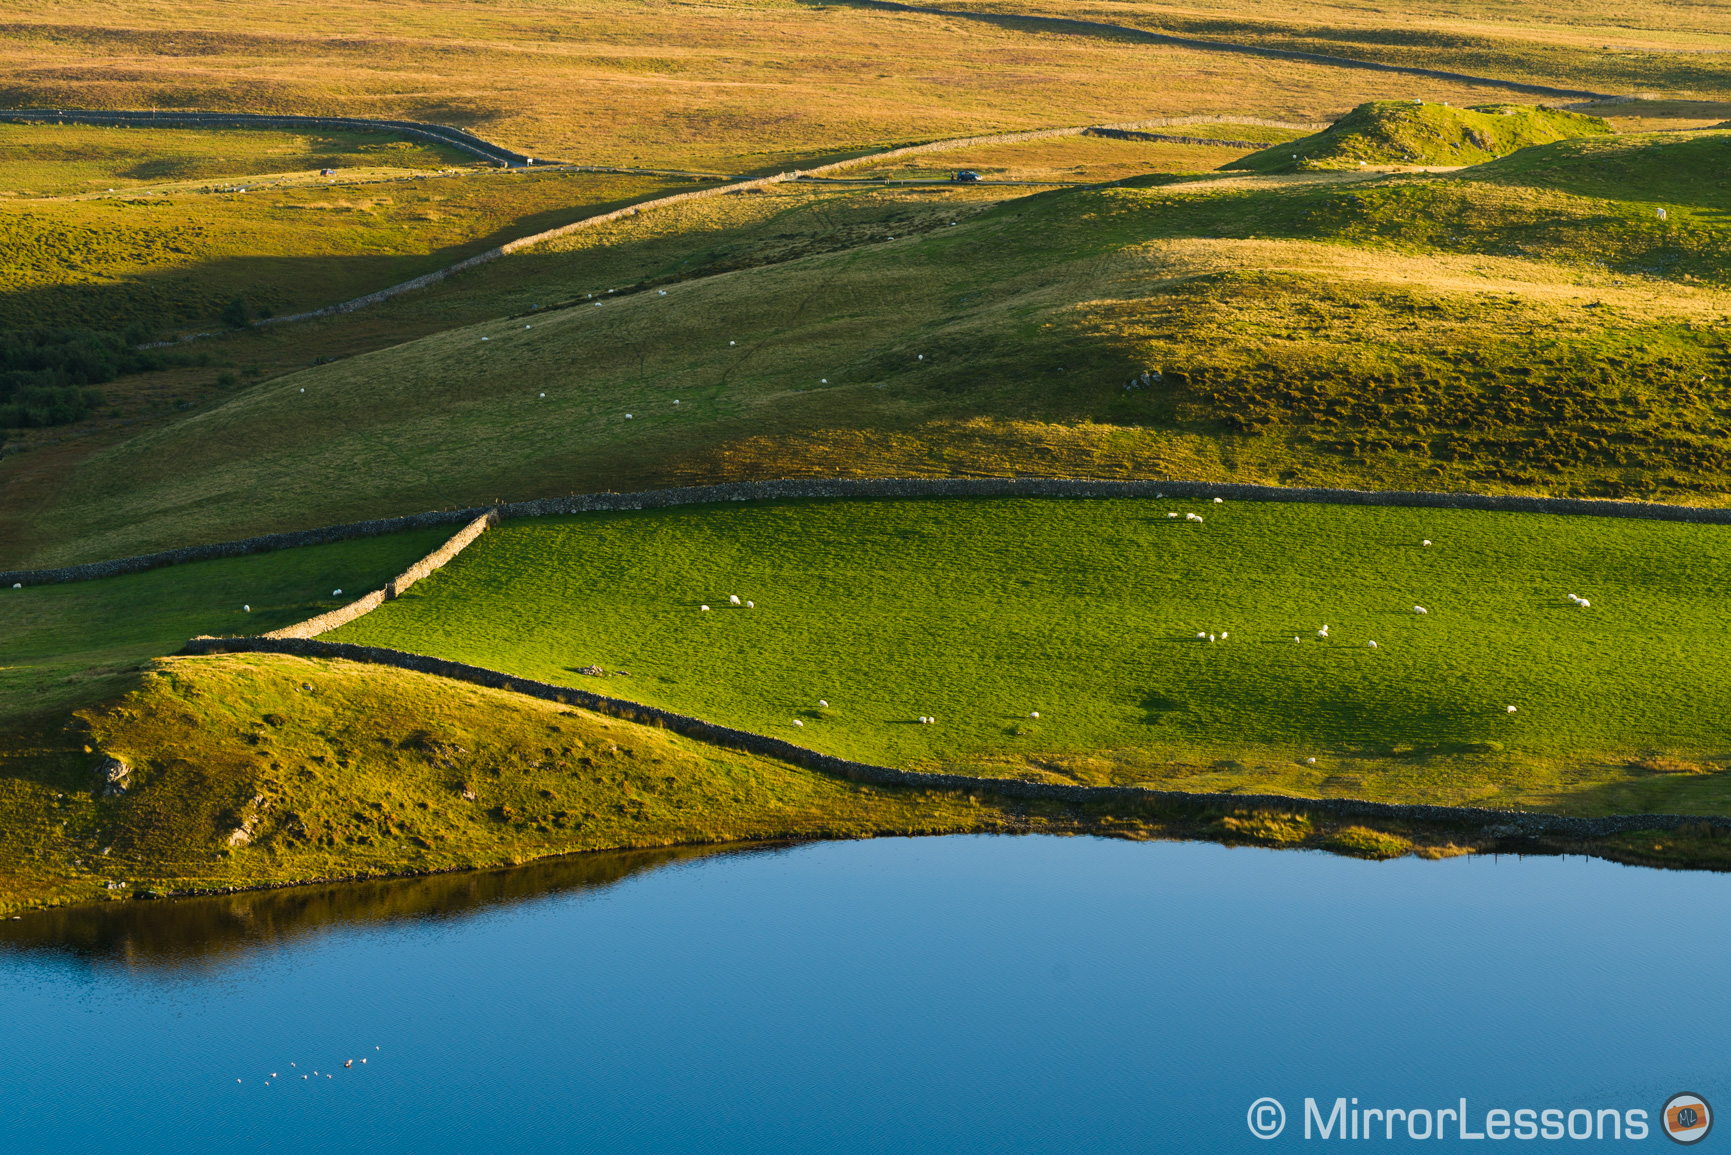
Another example of telephoto lens used for landscape photography.

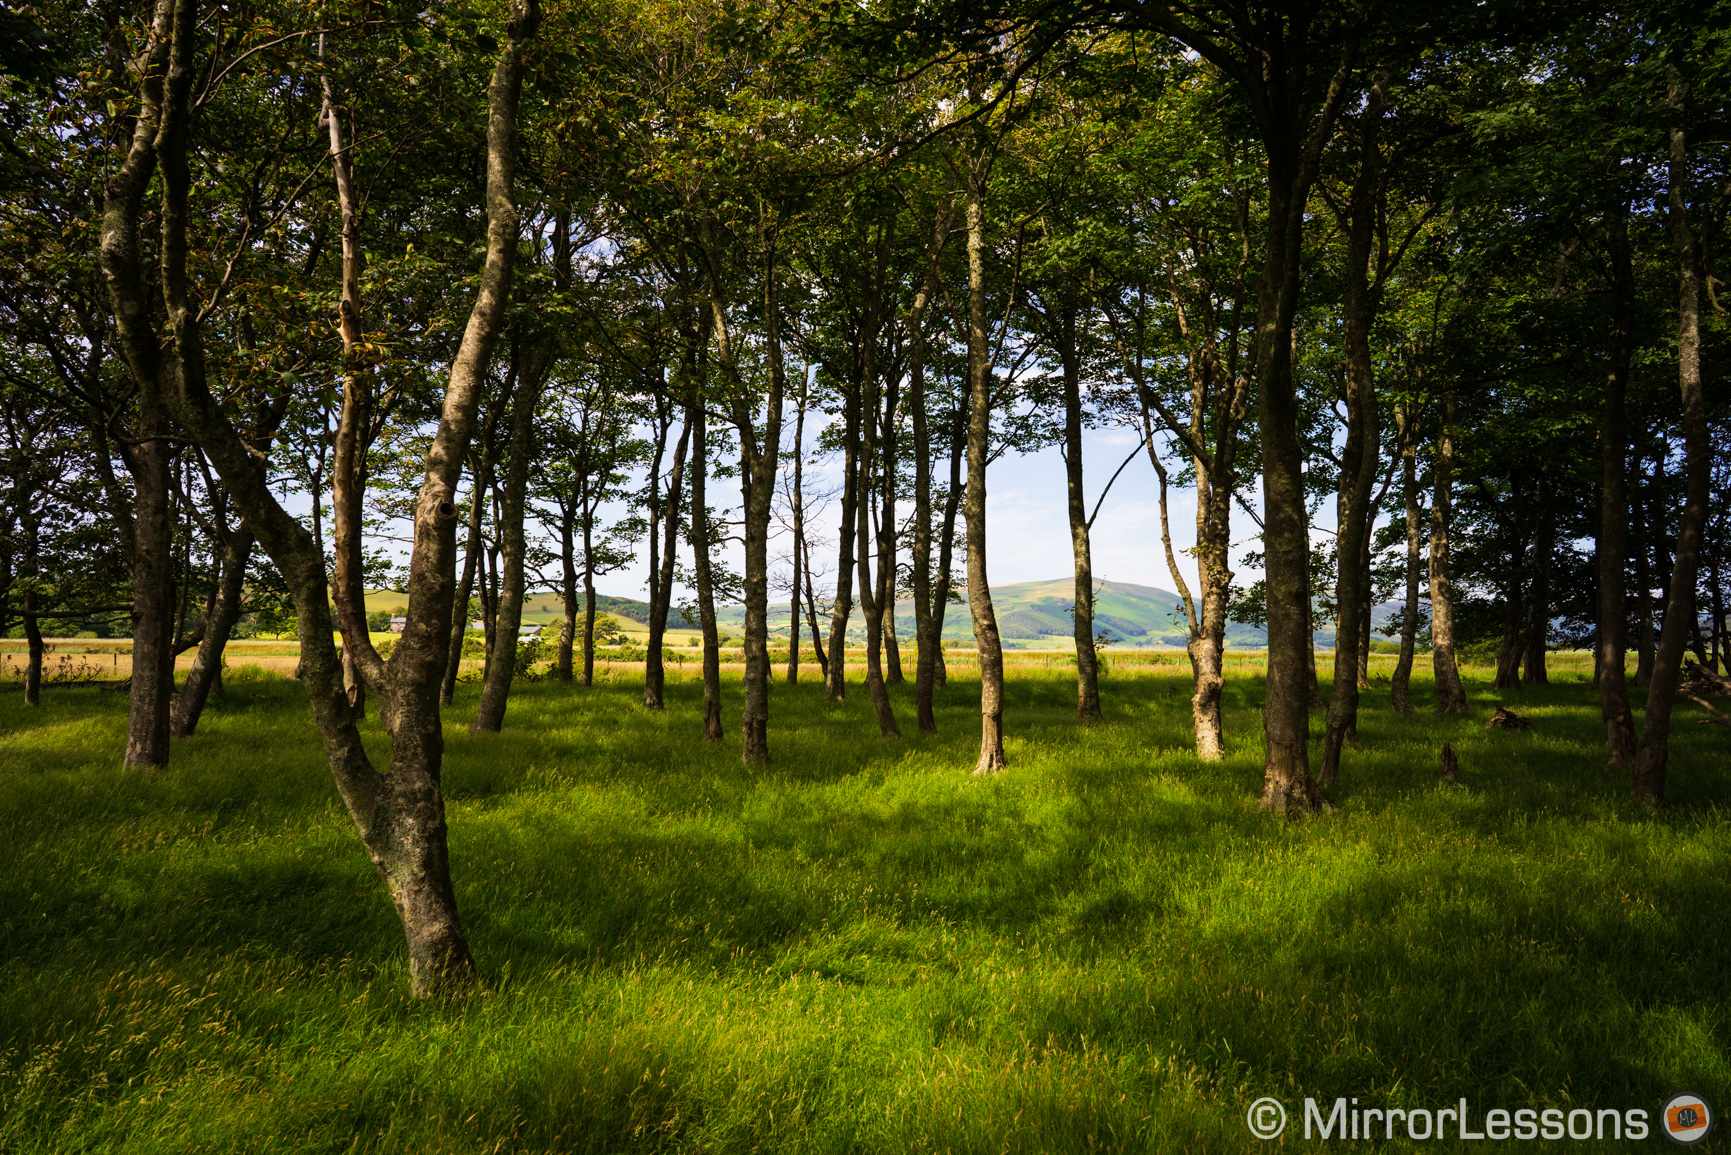
A shallow depth of field can give you a different look and create more depth.
Reminder: the links below are affiliate links. If you decided to buy something after clicking the link, we will receive a small commission.
Check price of the Sony A7 III on:
Amazon | Amazon UK | B&H Photo | eBay
Check the price of the Sony A7R III on:
Amazon | Amazon UK | B&H Photo | eBay
Check price of the Sony A7R IV on
Amazon | Amazon UK | B&H Photo | eBay
Check price of the Sony A9 on
Amazon | Amazon UK | B&H Photo | eBay
Check price of the Sony A7 II on:
Amazon | Amazon UK | B&H Photo | eBay
Check price of the Sony A7R II on:
Amazon | Amazon UK | B&H Photo | eBay
Second-hand Sony gear on
MPB US | MPB UK
Sony A7 / A9 Mirrorless Cameras Resources on Mirrorless Comparison
We have more tutorials for your A7 camera, many comparisons and much more. Check the list below!
Real World Comparisons
- Sony A7 III vs A7R III
- Sony A7R III vs A7R IV
- Sony A7R II vs A7R III
- Sony A7R III vs A9
- Sony A7 III vs Nikon Z6
- Sony A7R III vs Nikon Z7
- Sony A7R III vs Fujifilm GFX 50s
- Sony A7R III vs Panasonic S1R
- Sony A7 III vs Canon EOS R
- Sony A7 III vs Fujifilm X-T3
- Sony A7 II vs Canon EOS RP
Sample Photos
- Sony A7 III sample images
- Sony A7R III sample images
- Sony A7R IV sample images
- Sony A7 II sample images
- Sony A7R II sample images
- Sony A7S sample images