Taking pictures at night can be a fascinating exercise, and there is nothing more magical than observing, and capturing the stars and the Milky Way.
In a previous article, we talked about night photography and the best low light settings for your Sony full frame camera. Astrophotography fits into the same category but we decided to write a separate post given its unique characteristics and challenges.
If you’ve never tried to take astro-photos with your A7 III before, then you’ve come to the right place. I’ll guide you through the things you need and which settings to use.
A7/A9 series compatibility
As usual, you can consider this article valid for all the recent full frame E-mount cameras such as the A7 III, A7R III, A7R IV, A9 and A9 II. I’ve also included images taken with older models like the A7R II and the A7s because the settings and tips are the same.
Note: for each setting that I mention, I’ll specify where to find it in Sony’s menu system. I took for reference the most recent version which is organised as shown below. The position of some settings can vary slightly from one model to another.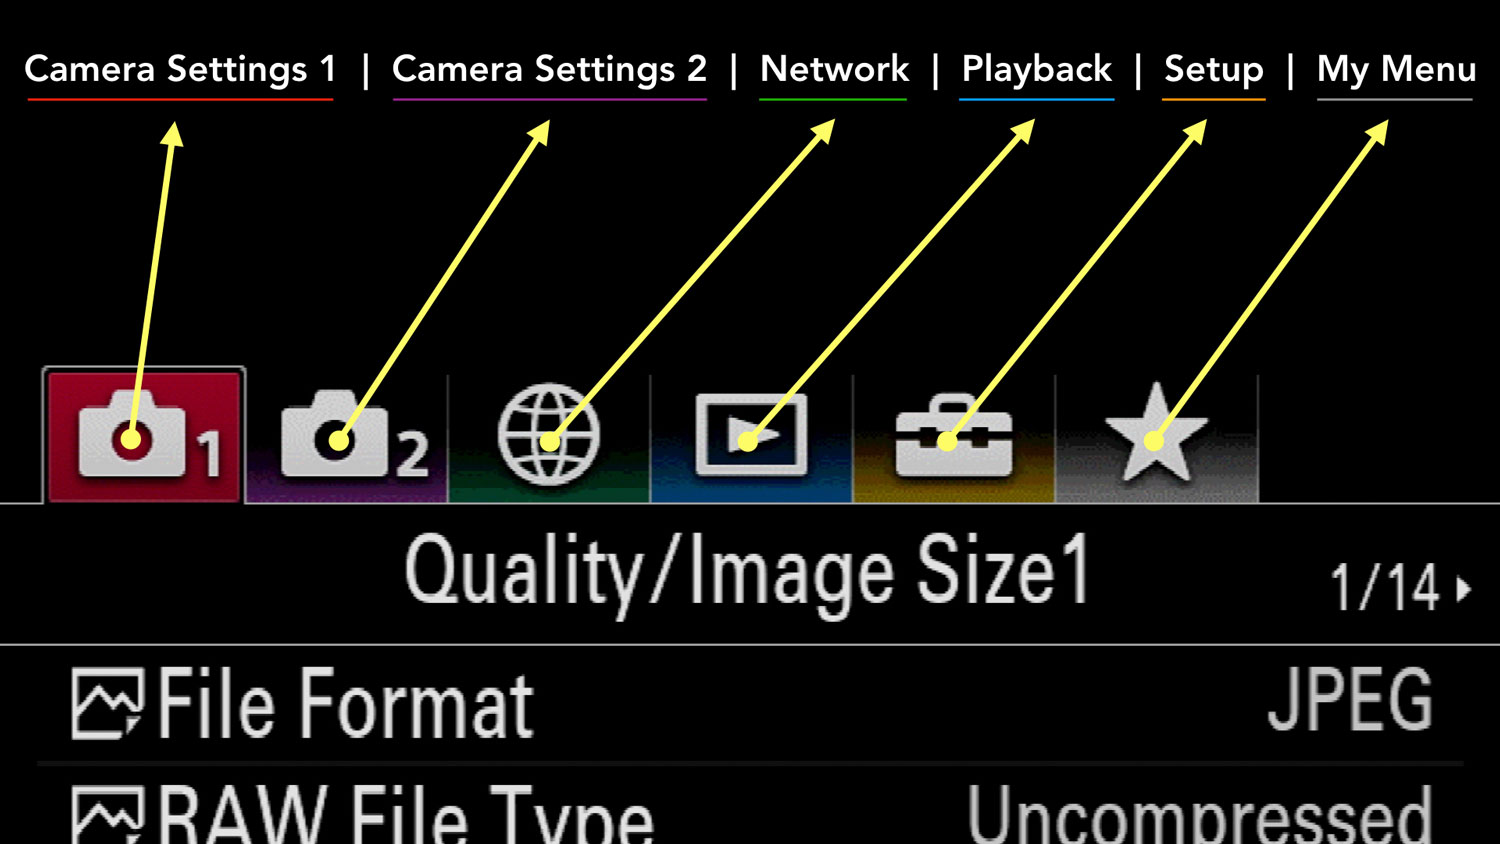
Older Sony cameras (mark II series and below) have an older menu system so there are more differences in relation to icons and the location of certain setting.![]()
![]()
Ethics statement: We own the Sony A7 III and Sony A7R III, and many of the other models we bought and tested in the past. We were not asked to write anything about these products, nor were we provided with any sort of compensation. Within the article, there are affiliate links. If you buy something after clicking the link, we will receive a small commission. To know more about our ethics, you can visit our full disclosure page. Thank you!
TABLE OF CONTENTS
1. Preamble: Star Eating Issue
2. Location
3. Choosing a Lens
4. Astrophotography Settings
5. Post Production
6. Star Trail / Time-Lapse
7. Extra Tips
8. Sony Alpha Mirrorless Resources
Reminder: the links below are affiliate links. If you decided to buy something after clicking the link, we will receive a small commission.
Check price of the Sony A7 III on:
Amazon | Amazon UK | B&H Photo | eBay
Check the price of the Sony A7R III on:
Amazon | Amazon UK | B&H Photo | eBay
Check price of the Sony A7R IV on
Amazon | Amazon UK | B&H Photo | eBay
Check price of the Sony A9 on
Amazon | Amazon UK | B&H Photo | eBay
Check price of the Sony A7 II on:
Amazon | Amazon UK | B&H Photo | eBay
Check price of the Sony A7R II on:
Amazon | Amazon UK | B&H Photo | eBay
Second-hand Sony gear on
MPB US | MPB UK
Preamble: Star Eating Issue
Since their release in 2015, Sony has made a series of firmware updates available for the A7R II and A7S II to improve or fix various issues.
What was also included in one of these updates, but not mentioned, was a new noise reduction algorithm for the RAW files (version 3.30 caused mayhem on the web, but apparently it started earlier with version 1.10).
This software tweak created a problem for astro-images because the weakest stars (the smallest and dimmest points of light in your image) were mistaken for noise and eliminated. It only used to be a problem for long exposures taken in Bulb mode, but after these updates, it also affected images of 4s or longer.
Unfortunately, this is not something you can control with the camera’s NR setting. To this day, the problem persists. Jim Kasson and Lonely Speck mention a workaround which involves shooting in continuous mode. As silly as it sounds, it looks like the aggressive noise reduction is not applied with that configuration, although the bit depth drops from 14 to 12-bit.
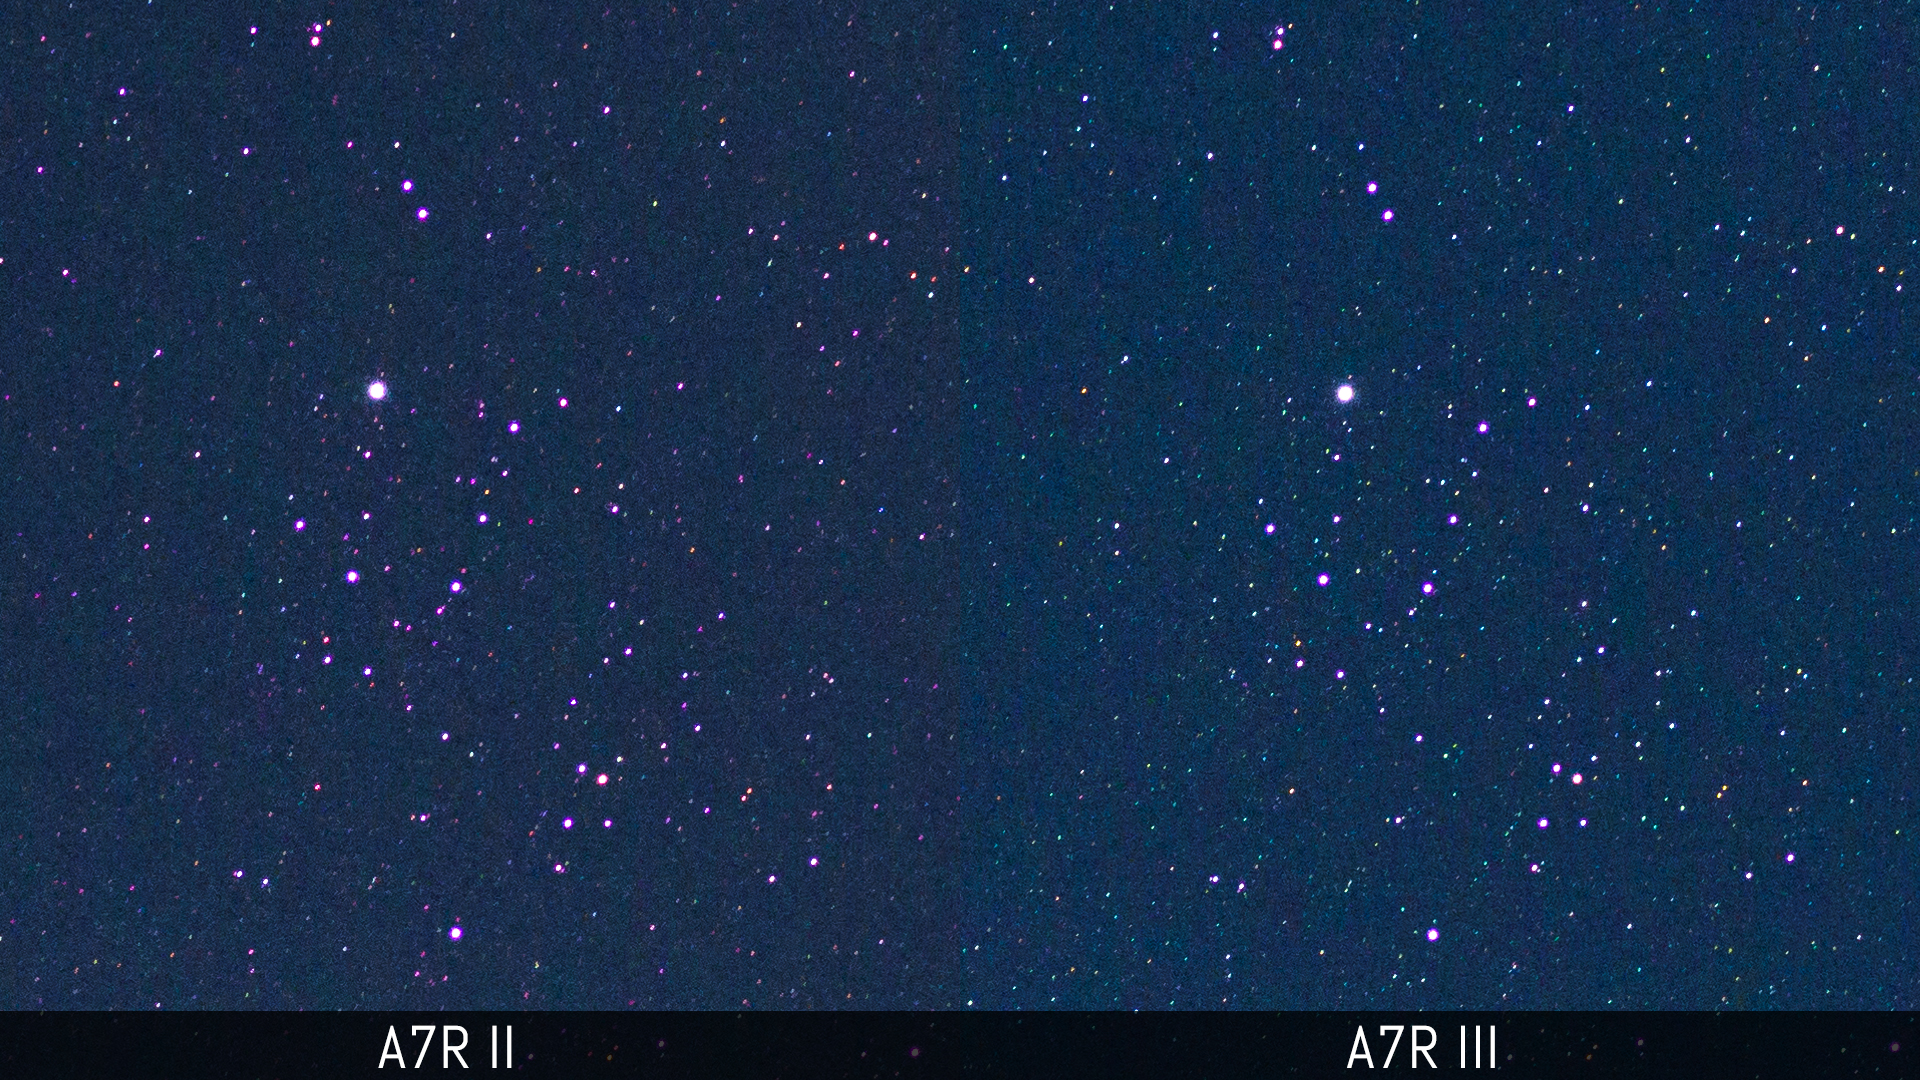
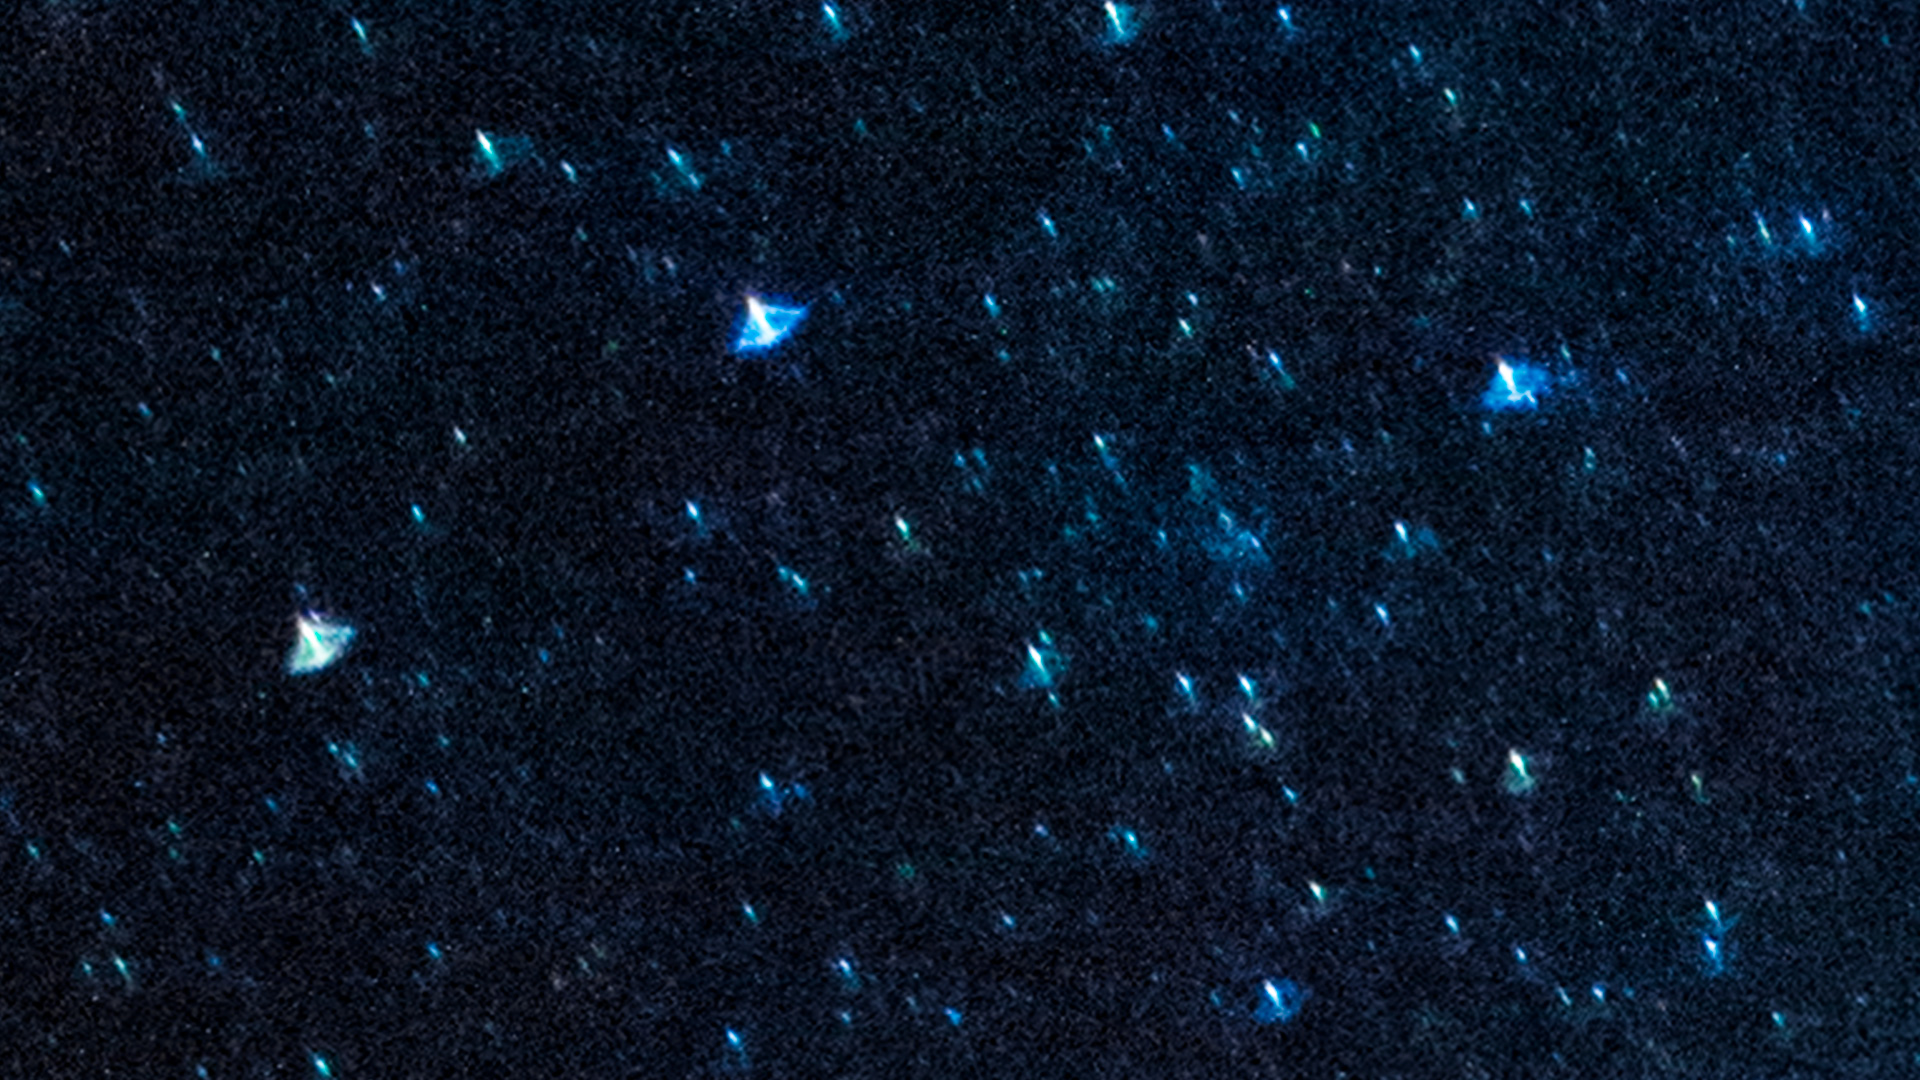
Now some more positive news: with the mark III generation, “star eating” is less apparent albeit not completely resolved. While there is still some noise reduction going on, it is not as dramatic as before. You can see an example below where we compared the A7R II and A7R III (pay attention to the small points of light).
Astrophotography with the Sony A7 III, A7R III, A9: Location
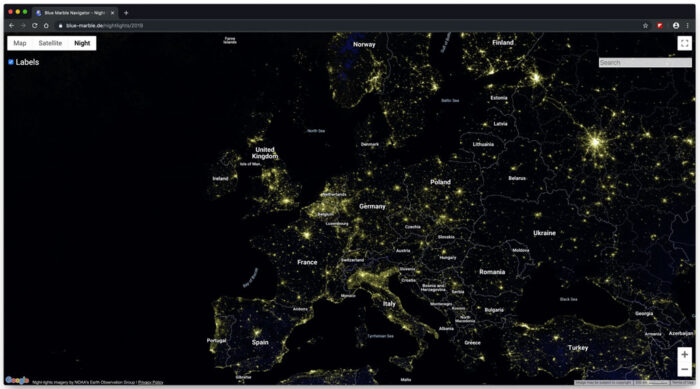
The first step required for a successful astrophotography session is to find the right location.
Ideally you want to be in a dark place, as far as possible from big cities. Large metropolises have a high level of light pollution that makes seeing and shooting stars more difficult.
I have been successful in small villages because there is less concentration of light. But keep in mind that the darker you go, the more details you can get out of the sky.
Another thing to consider is that in order to take pictures of the night sky, you need to use shutter speeds of 10 seconds or slower. This means that any foreground elements lit by street lights can be severely overexposed. (More on this further down)
Finding the right location can be hit-and-miss, and of course you also need to look for a spot where you can create a nice composition. I’ve had some very successful nights but also some where I brought home boring images. It’s perfectly normal.
Another thing to consider is the time. You want to take your images when the sky is as dark as possible, which means avoiding a full moon because it will brighten the sky too much and make the Milky Way more difficult to see. The period around the new moon, when it isn’t visible or only partially visible is the best time.
Choosing an Astrophotography Lens for your Sony A7 III, A7R III, A9
Taking pictures of the night sky means taking pictures of a very dark subject. Therefore you want to maximise the light travelling through the lens and reaching the image sensor. This means starting with a good astro lens for your Sony A7 III or other A7 camera.
If you can, choose a lens that has a fast aperture of f2.8, f2 or even f1.4. In other words: the larger the aperture, the better. It is possible to take images with an f4 lens of course, but you need to raise the ISO higher which introduces more noise to your photo. Plus the less light there is travelling to the sensor, the fewer the details you’ll capture of the night sky.
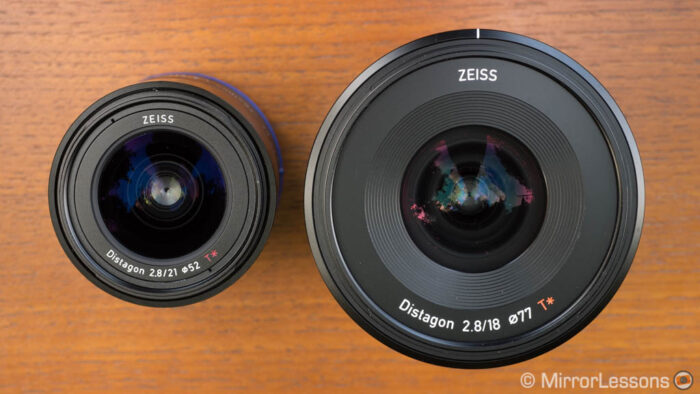
With the aperture, you also need to think about the focal length. Some lenses can be a bit too narrow to capture a large portion of the sky, especially if you’re interested in the Milky Way, or want to include elements in the foreground. An 18mm lens or wider is ideal. I’ve been successful with a 25mm lens, and some photographers also recommend 35mm primes. Anything longer can be limiting.
That being said, if you’re interested in photographing just the sky without any foreground elements, with the exception of perhaps a few mountains in the distance, you can go with a longer focal length such as 50mm.

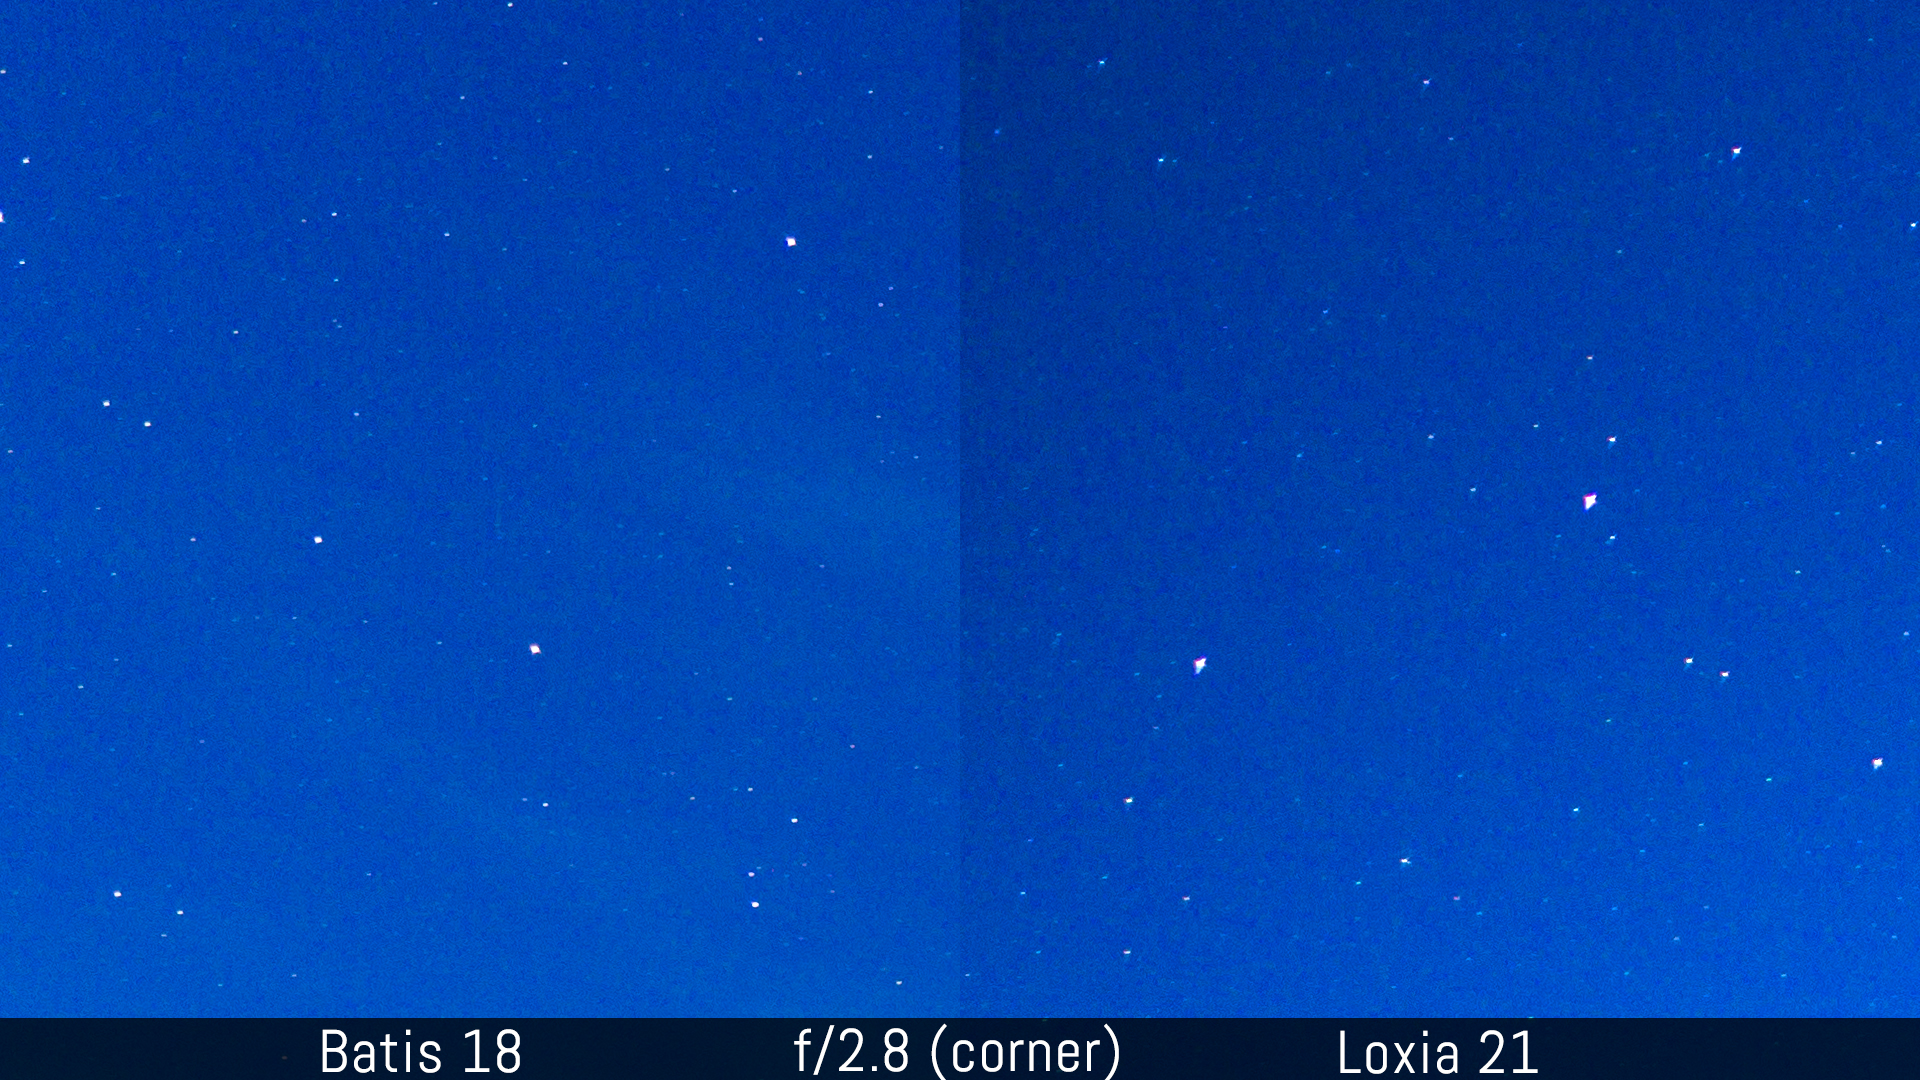
Another thing you want to check out when it comes to lenses is sharpness. There is no point investing in a 1.4 lens if it is too soft at that aperture. You should also look out for the performance in the corners to make sure there isn’t invasive any coma or a significant loss in sharpness at the edges.
Best Lens for Astrophotography with the Sony A7 III, A7R III, A9
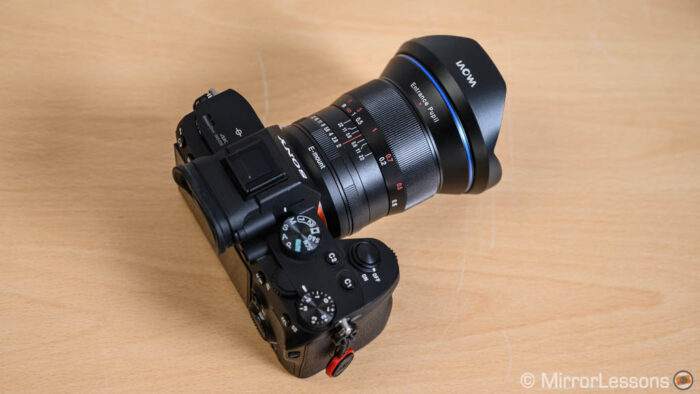
Choice 1: Laowa 15mm f2 Zero-D
I haven’t tested all the lenses out there so my list could expand in the future. Lately I had the chance to use the Laowa 15mm and I was very pleased with it.
There is a bit of coma in the extreme corners but it is only noticeable with the biggest stars. Plus it’s not something you’re really going to see unless you pixel peep. Coma disappears almost entirely from 2.8.
Sharpness across the frame is very good from f2 and of course the fast aperture is ideal for astro-photography. It is a manual focus lens, which doesn’t pose a problem in this case because you won’t be able to use autofocus on the night sky anyway. The Laowa has very little distortion and a short minimum focus distance, which means that it can be useful for other genres including landscapes and architecture.

Check price of the Laowa 15mm f2 Zero-D on:
Amazon | Amazon UK | B&H Photo | eBay
Best Astro Lens for the Sony A7 III, A7R III, A9
Choice 2: Zeiss Batis 18mm f2.8
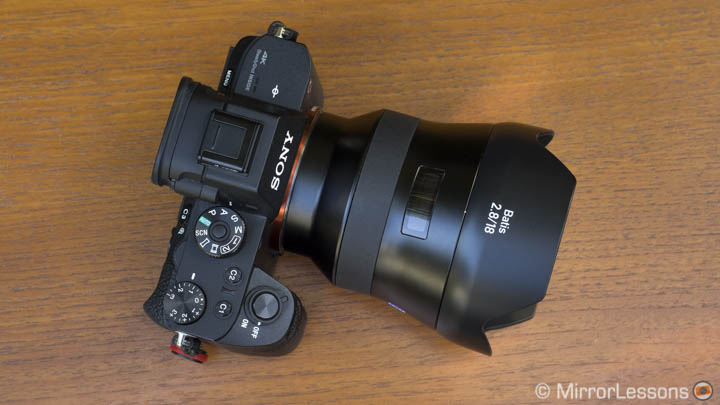
During my time testing the Batis 18mm, I didn’t get the chance to take interesting astro images because it was cloudy most of the time. I managed to do a quick coma and sharpness test and I was very impressed by the optical performance, with almost no coma at 2.8 and excellent sharpness across the frame. The lens performs really well for other situations such as landscape and architecture, has autofocus and is weather sealed. It is more expensive but I think it is a very good investment.
Check price of the Zeiss Batis 2.8/18 on:
Amazon | Amazon UK | B&H Photo | eBay
Choice 3: Zeiss Batis 25mm f2.0
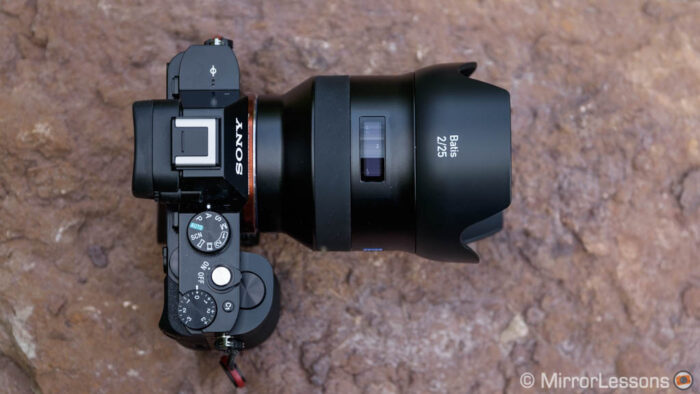
Another lens I had the chance to test, this time with more clement weather, was the Batis 25mm f2. It wouldn’t be my first choice because of the longer focal length, but once again the optical performance is really good and it has an extra aperture stop which is always welcome for astrophotography. There’s autofocus, weather-sealing and the angle of view can be very useful for other things such as landscape, street and events.
Check price of the Zeiss Batis 2/25 on:
Amazon | Amazon UK | B&H Photo | eBay
Sony A7 III, A7R III, A9 Astrophotography Settings
You have found a nice spot, you have your camera on the tripod and the main dial is set to M (Manual mode).
Before starting to work on your composition and exposure, let’s check some preliminary settings in the menu:
- Choose RAW for the File Format and select Uncompressed for the RAW File Type. This will give you the best image quality the camera has to offer. You’ll find these settings in Camera Settings 1 / Quality Image Size (page 1/14).
- Turn Off Long Exposure NR. You’re not going to capture shots much longer than 30 seconds so there is no need to apply noise reduction in camera. This will save you from waiting double the amount of time for each shot to be finalised. The parameter can be found in Camera Settings 1 / Quality Image Size2 (page 2/14).
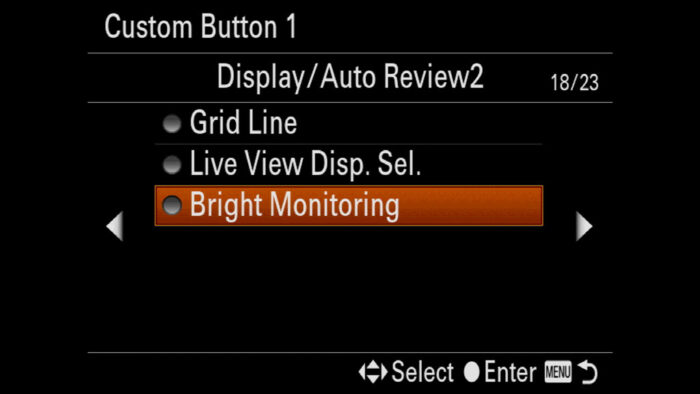
- Assign the Bright Monitoring setting to a custom button (check our setup guide to find out how to do that). Once enabled, this option reduces the refresh rate of the live view and boosts the brightness so that you can “see” in the dark. It is very useful when composing your image.
- Disable the in-body image stabilisation (SteadyShot), which is found in Camera Settings 2 / Shutter SteadyShot (page 4/9).
- Disable the viewfinder. You’re not going to use the EVF that much, so disabling the sensor will stop your hands from triggering the Eye Sensor while operating the camera. To do this, choose Monitor (manual) in FINDER/MONITOR, which is located in Camera Settings 2 / Display Auto Review1 (page 6/9).
- Optional: reduce the brightness of the LCD. If the rear screen is very bright, it can be bit distracting. Since you have the Bright Monitoring option to check your composition, I would keep the LCD brightness to 0 or even -1 or -2, but it is really up to you and what you find the most comfortable. You can find this in Menu Setup 1 (page 1/7).
Uncompressed RAW is not available on the A7 I series. Bright Monitoring is not available on the A7 I series or the A7 II.
White Balance
Since you’re using RAW files, setting the right white balance doesn’t really matter because you can change it in post. That being said, having an accurate white balance is useful to have a good preview of the colours on the screen. But it really is up to you. When in doubt, leave it to Auto.
Now that the basic setup is out of the way, you can concentrate on your image.
Sony A7 III, A7R III, A9 Astro Settings: Aperture
Set the fastest aperture you have on your lens. If you’re unsure of your lens’ performance when it comes to sharpness and coma, take different versions by stopping down a little. You can then evaluate which aperture worked best at home.
Sony A7 III, A7R III, A9 Astro Settings: Focusing
Set the camera to MF mode (Manual Focus). Autofocus is pretty useless in this situation.
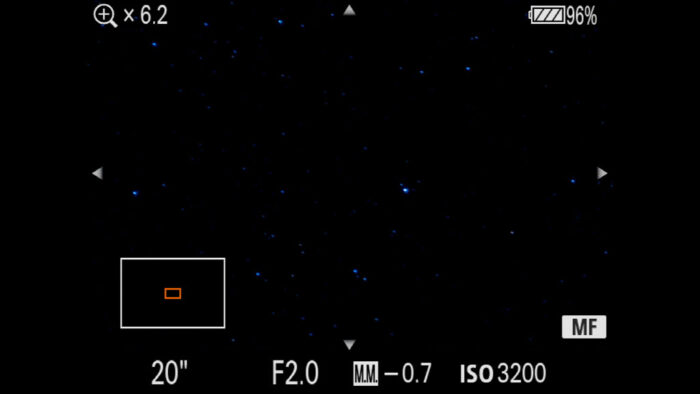
The best way to focus is to look for a big bright star in your frame. Then activate the Focus Magnifier, either by double tapping on the LCD screen if touch sensitivity is available, or pressing a custom button.
Rotate the focus ring clockwise and anti-clockwise to see the small point of light become bigger and blurrier, then smaller and sharper. Find the optimal focus distance where the point of light is as small and as sharp as possible.
Note: if you’re using a manual focus lens, it probably has a distance scale on the barrel. You would think that setting it to infinity would be the logical thing to do, but it doesn’t always correspond to the sharpest focus. Likewise with an electronic lens, you’ll see that the camera often indicates a shorter distance. Mine usually ends up between 25m and 50m.
Sony A7 III, A7R III, A9 Astro Settings: Shutter Speed
The shutter speed plays a crucial role. Because there isn’t a lot of light available, the more time you give the camera to capture that light, the better the exposure.
However you need to keep in mind that if you select a duration that is too long, the stars in your image won’t appear as sharp dots anymore, but will assume the appearance of thin lines. This is because the earth is rotating, so the position of the stars in the sky doesn’t stay the same for long.
The goal is to make the exposure as long as possible, so that we don’t need to raise the ISO too much, but without recording star trails.
There is an approximate rule to follow which is called the 500 rule: you divide 500 by the focal length used and you get an exposure time. For example, if you’re using a 18mm lens, it means you should be able to use a shutter speed of 27 or 28s (500/18). This also means that the shorter your focal length is (the wider your lens is), the longer the shutter speed can be.
Make sure to take a trial shot to review sharpness and check that your shutter speed works fine. The 500 rule may not always give you an accurate estimate.
A criticism of myself
While preparing this article and going back through my images, some of them taken 3 or 4 years ago, I realised that I was often too cautious when selecting the shutter speed, often not going further than 10 or 15s. Looking at this now, I realise I could have been a bit more adventurous!
Sony A7 III, A7R III, A9 Astro Settings: ISO
Finally we have the ISO setting. Depending on the aperture and shutter speed selected, the brightness of the sky and the location, you can try anything between 800 ISO and 3200 ISO. Sometimes you’ll have to go higher.
Again, make some tests shots and play back your photos to see how bright they are. The camera may not give you an accurate metering preview.
Once you’re satisfied, you can take the final picture, then change position and try new compositions. From there, the sky is the limit (no pun intended!).
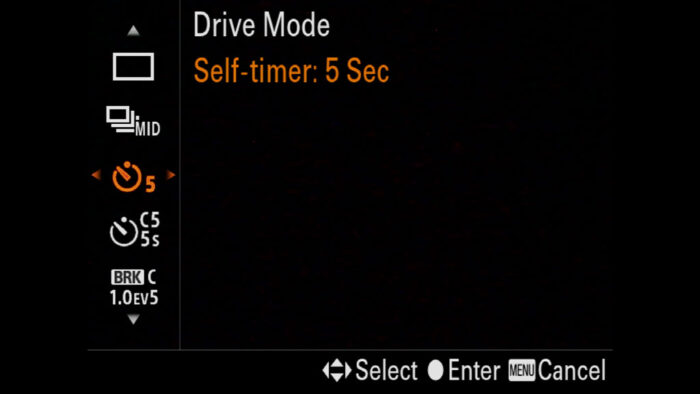
Sony A7 III, A7R III, A9 Astro Settings: Self-Timer or Remote
To avoid any micro movements on the camera when pressing the shutter release button, make sure to set the Self Timer mode to 2s or preferably 5s. You can do this by pressing the left button on the rear control wheel.
Alternatively, you can use a remote. Check out our dedicated article to learn more (coming soon).
Milky Way with the Sony A7 III, A7R III, A9: Post Production
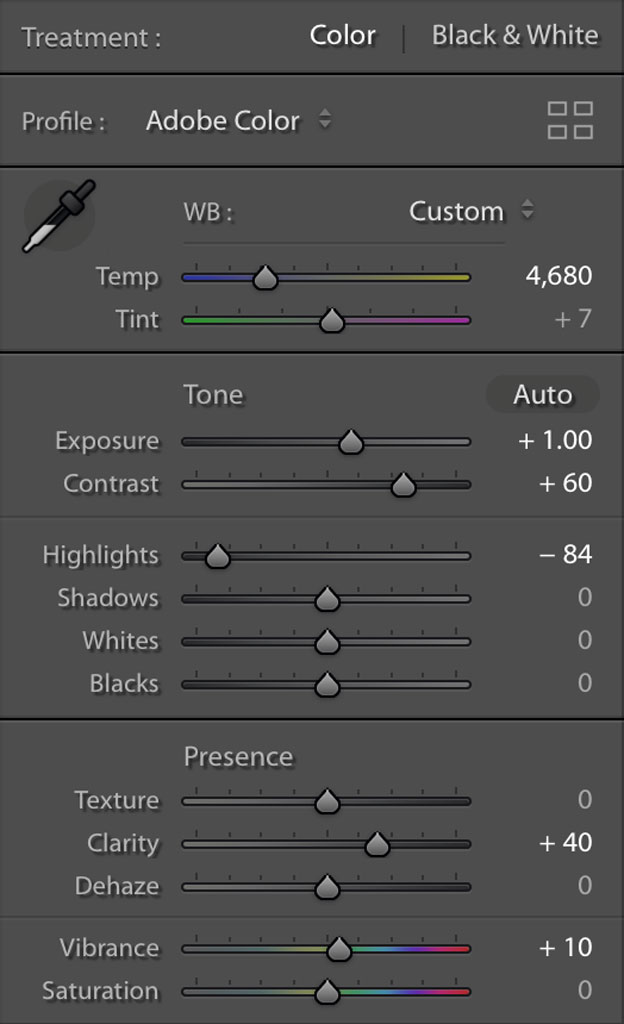
Your journey in capturing beautiful astro-photographs doesn’t stop here. Even if you’ve configured your Sony A7 III with all the best Milky Way settings, your native RAW files will look flat and the details in the sky will be faint. Post processing is necessary to pull out all the details and give your photo a more dramatic look. This is particularly true if you want to make the Milky Way stand out.
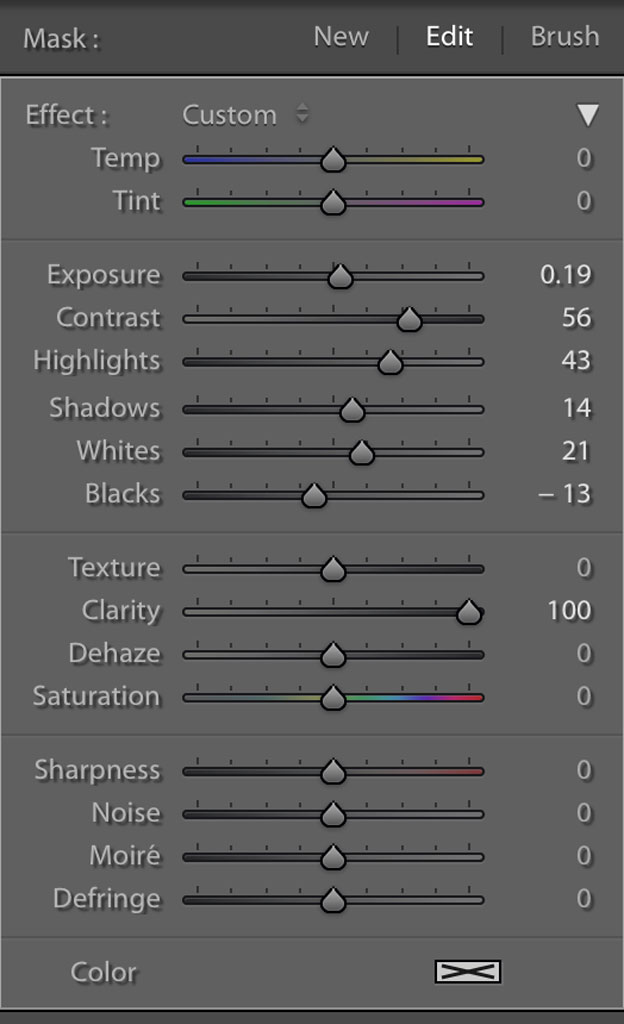
Post production is not just a question of playing with contrast, highlights, exposure, sharpness and noise reduction, but also involves creating a mask on the area where the Milky Way is to make additional localised adjustments. You’ll need a good photo editor software that allows you to play with these kinds of tools.
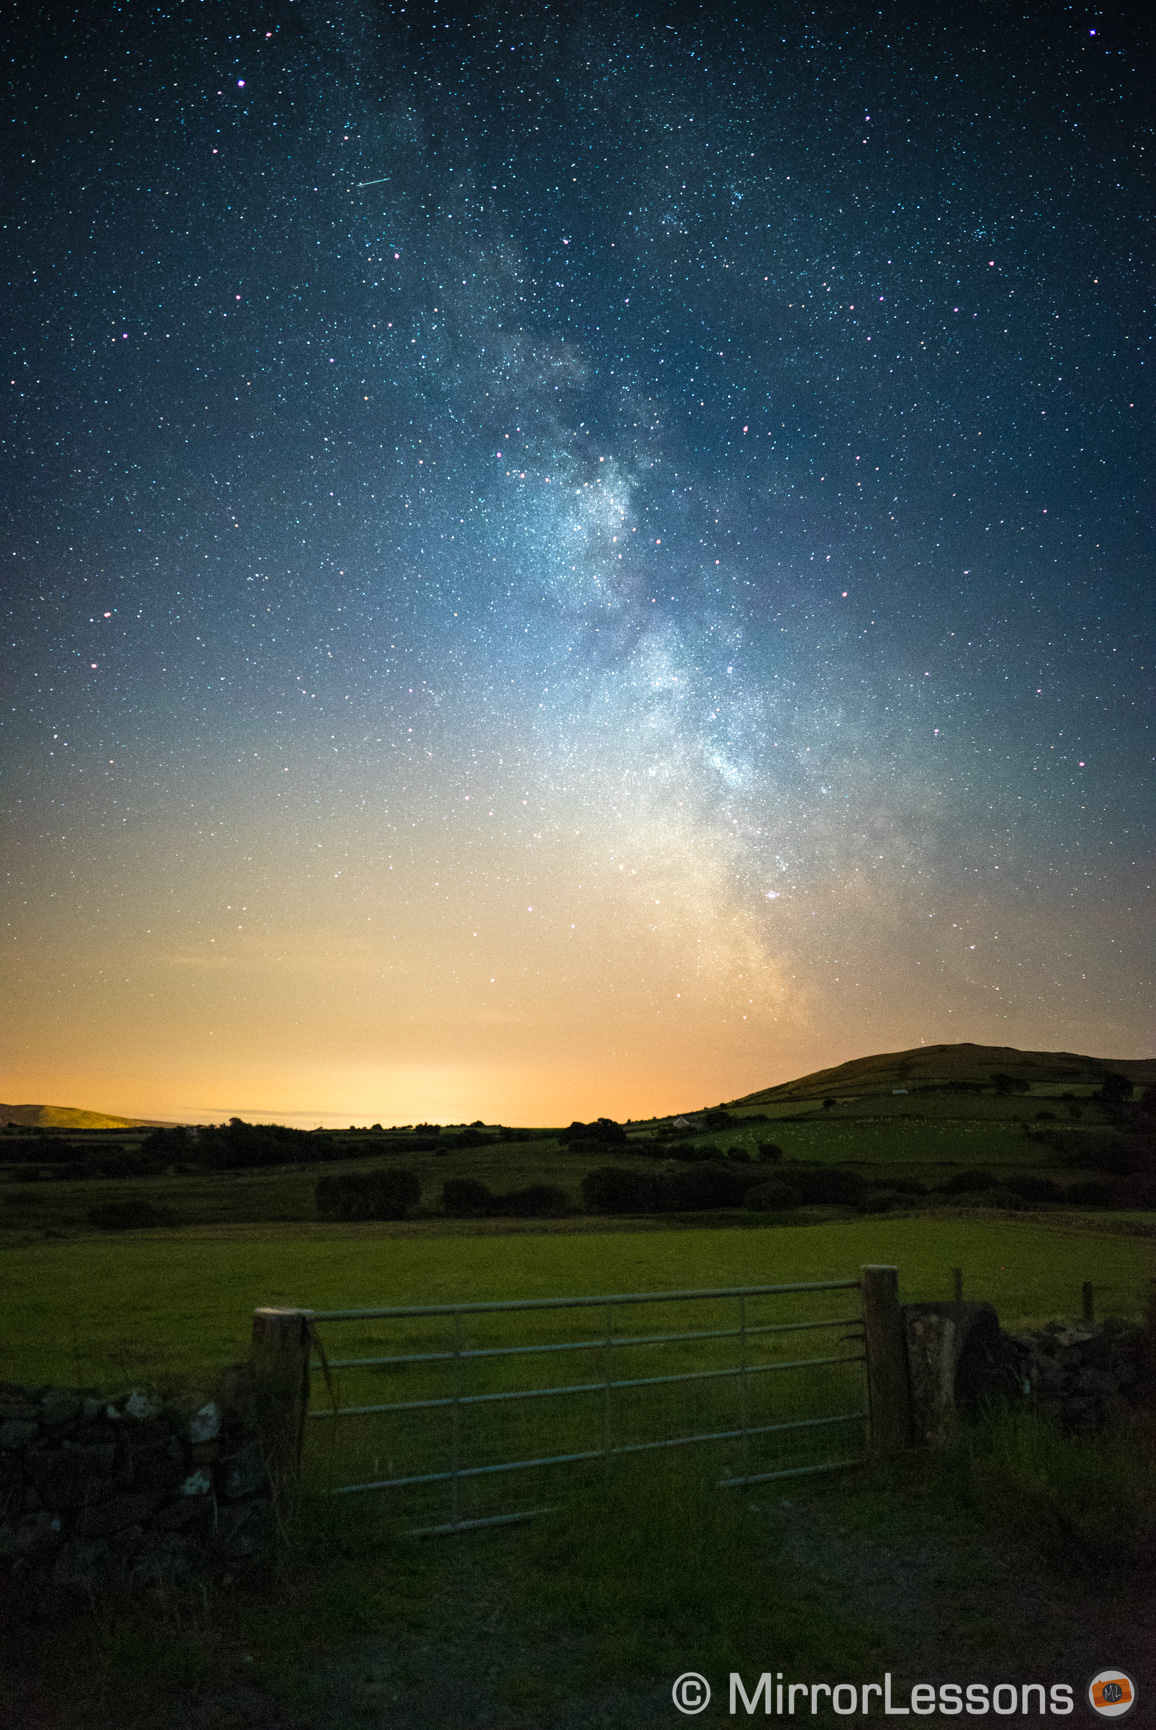
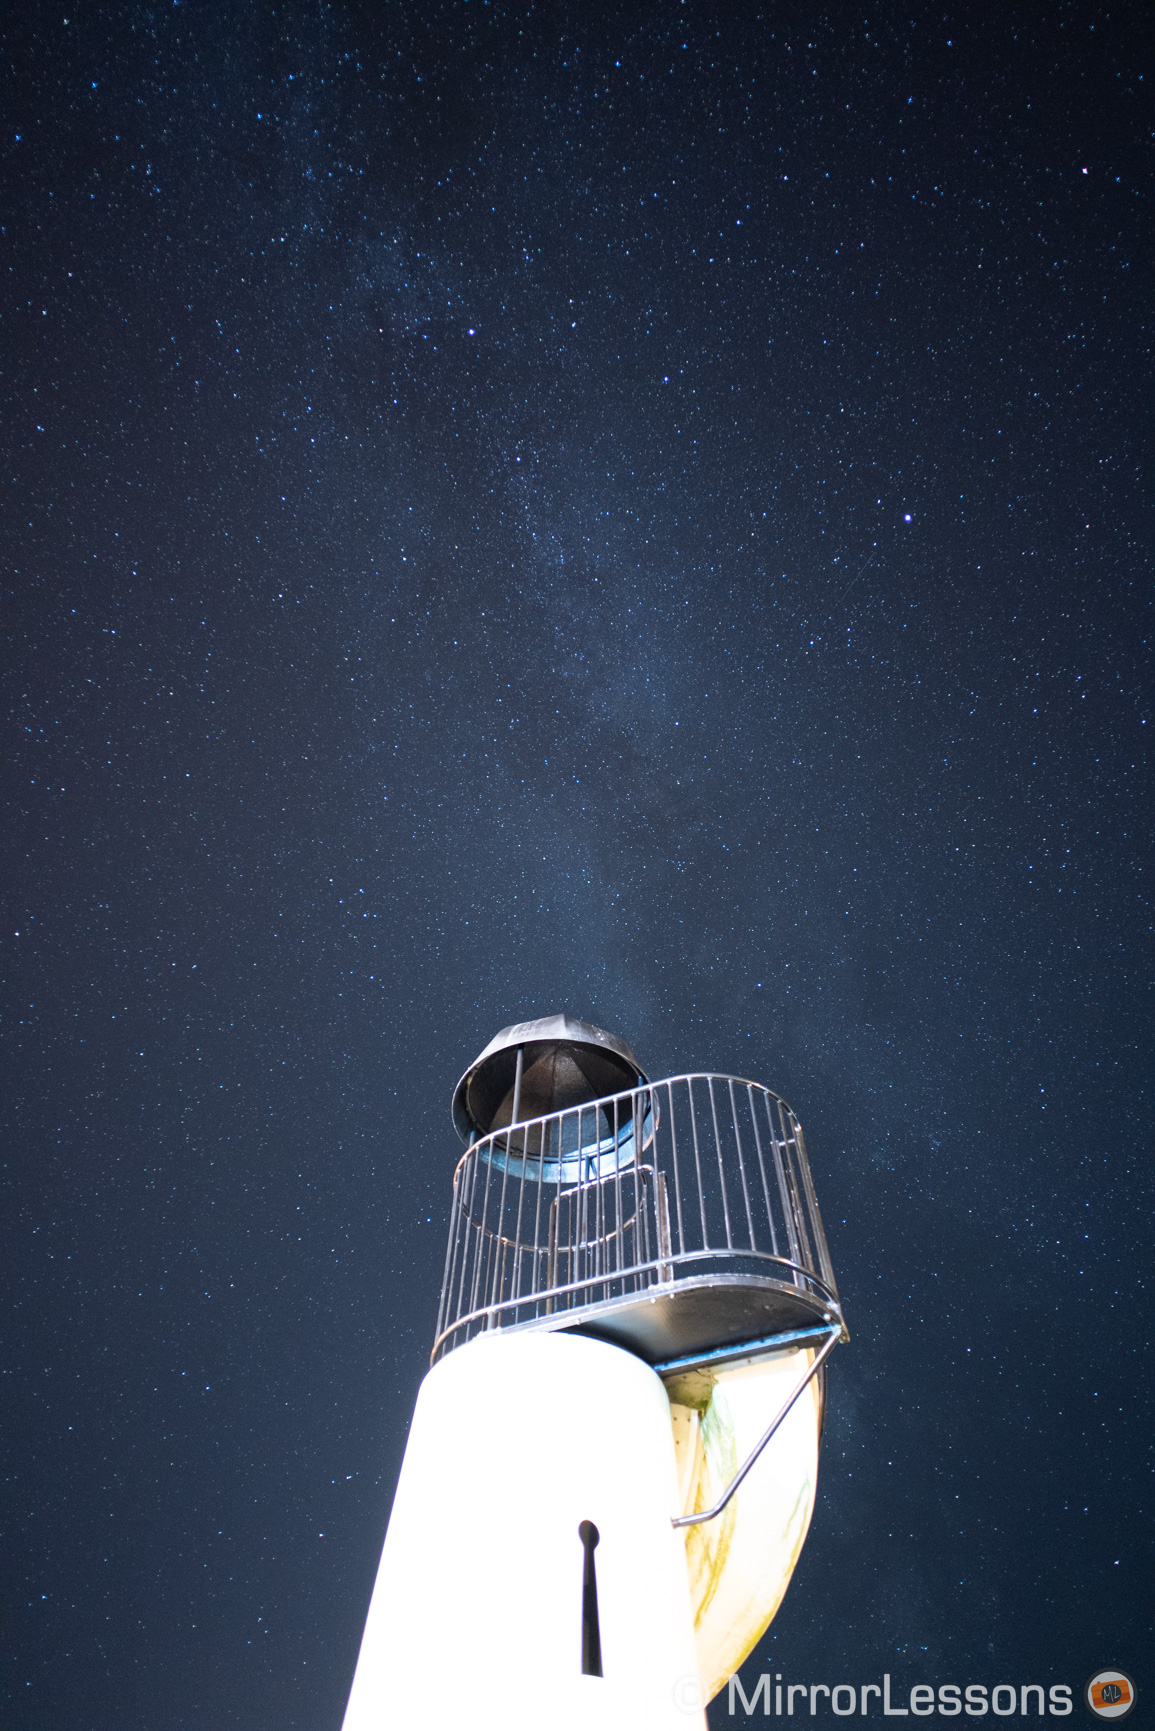
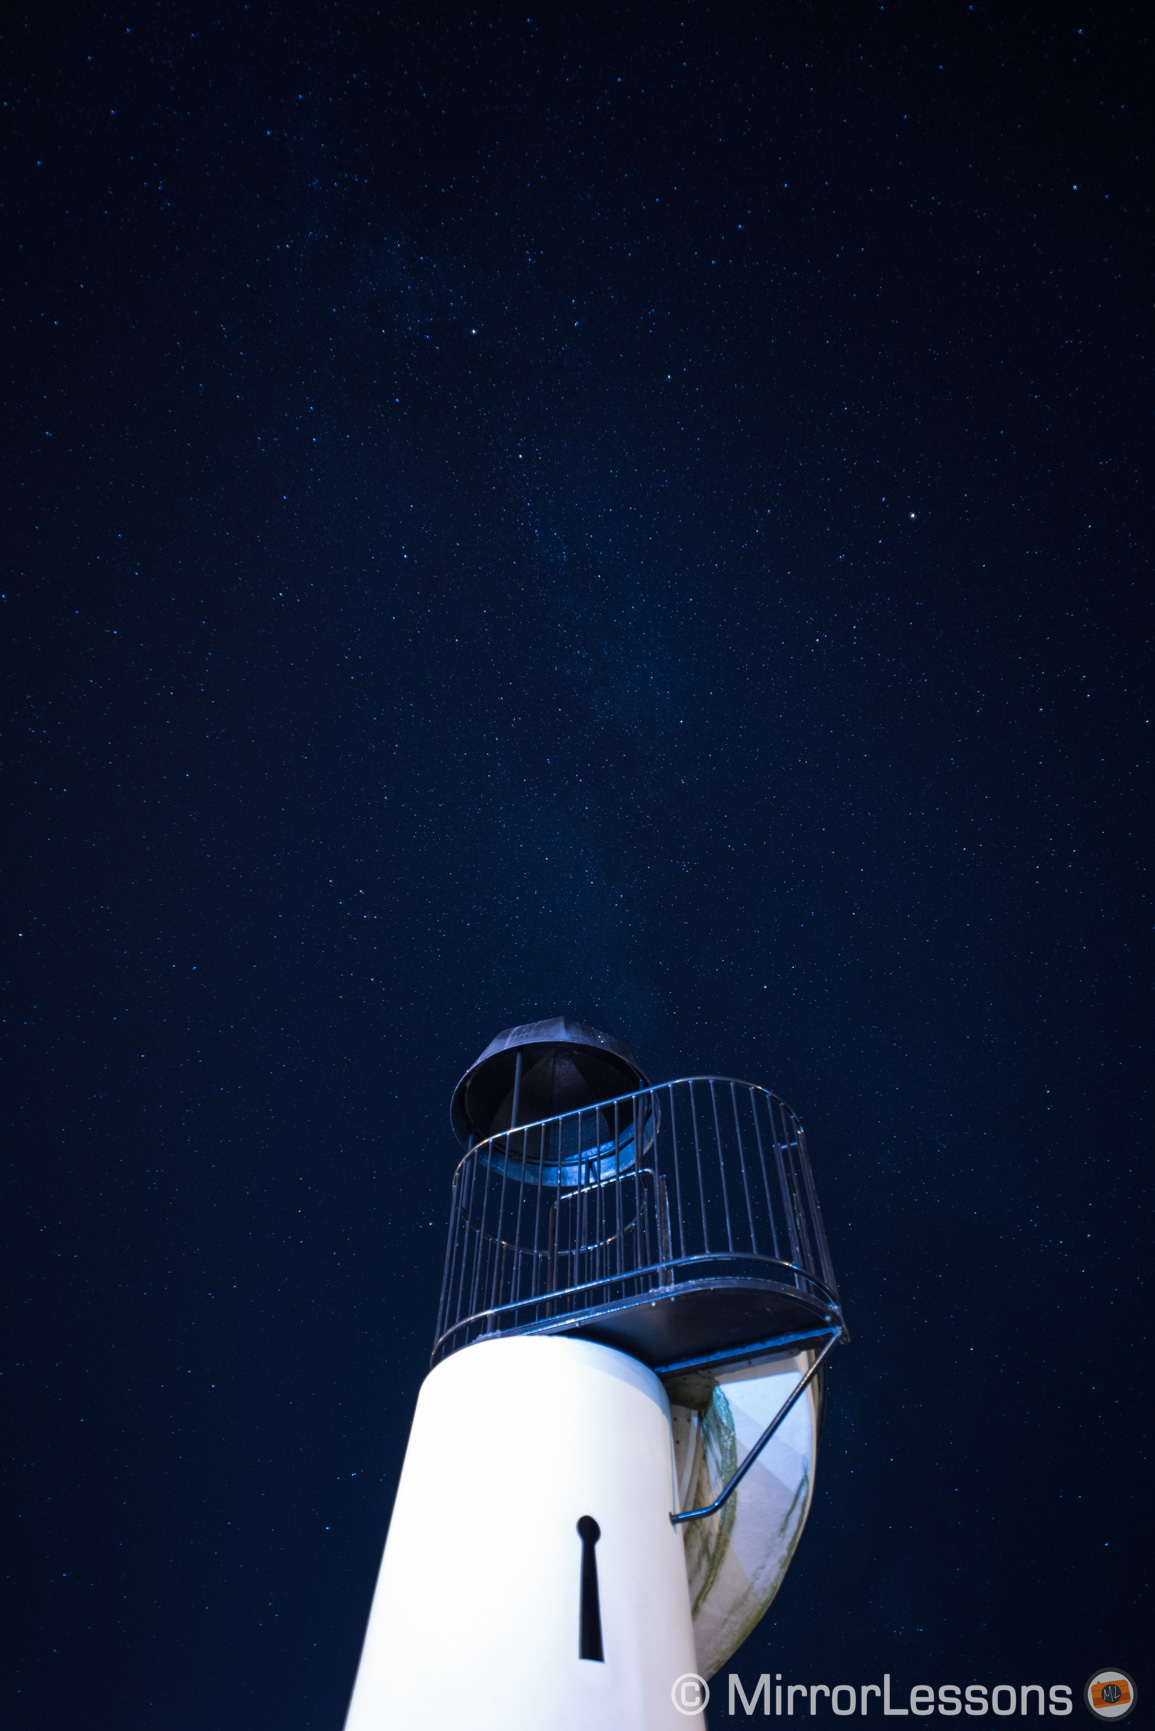
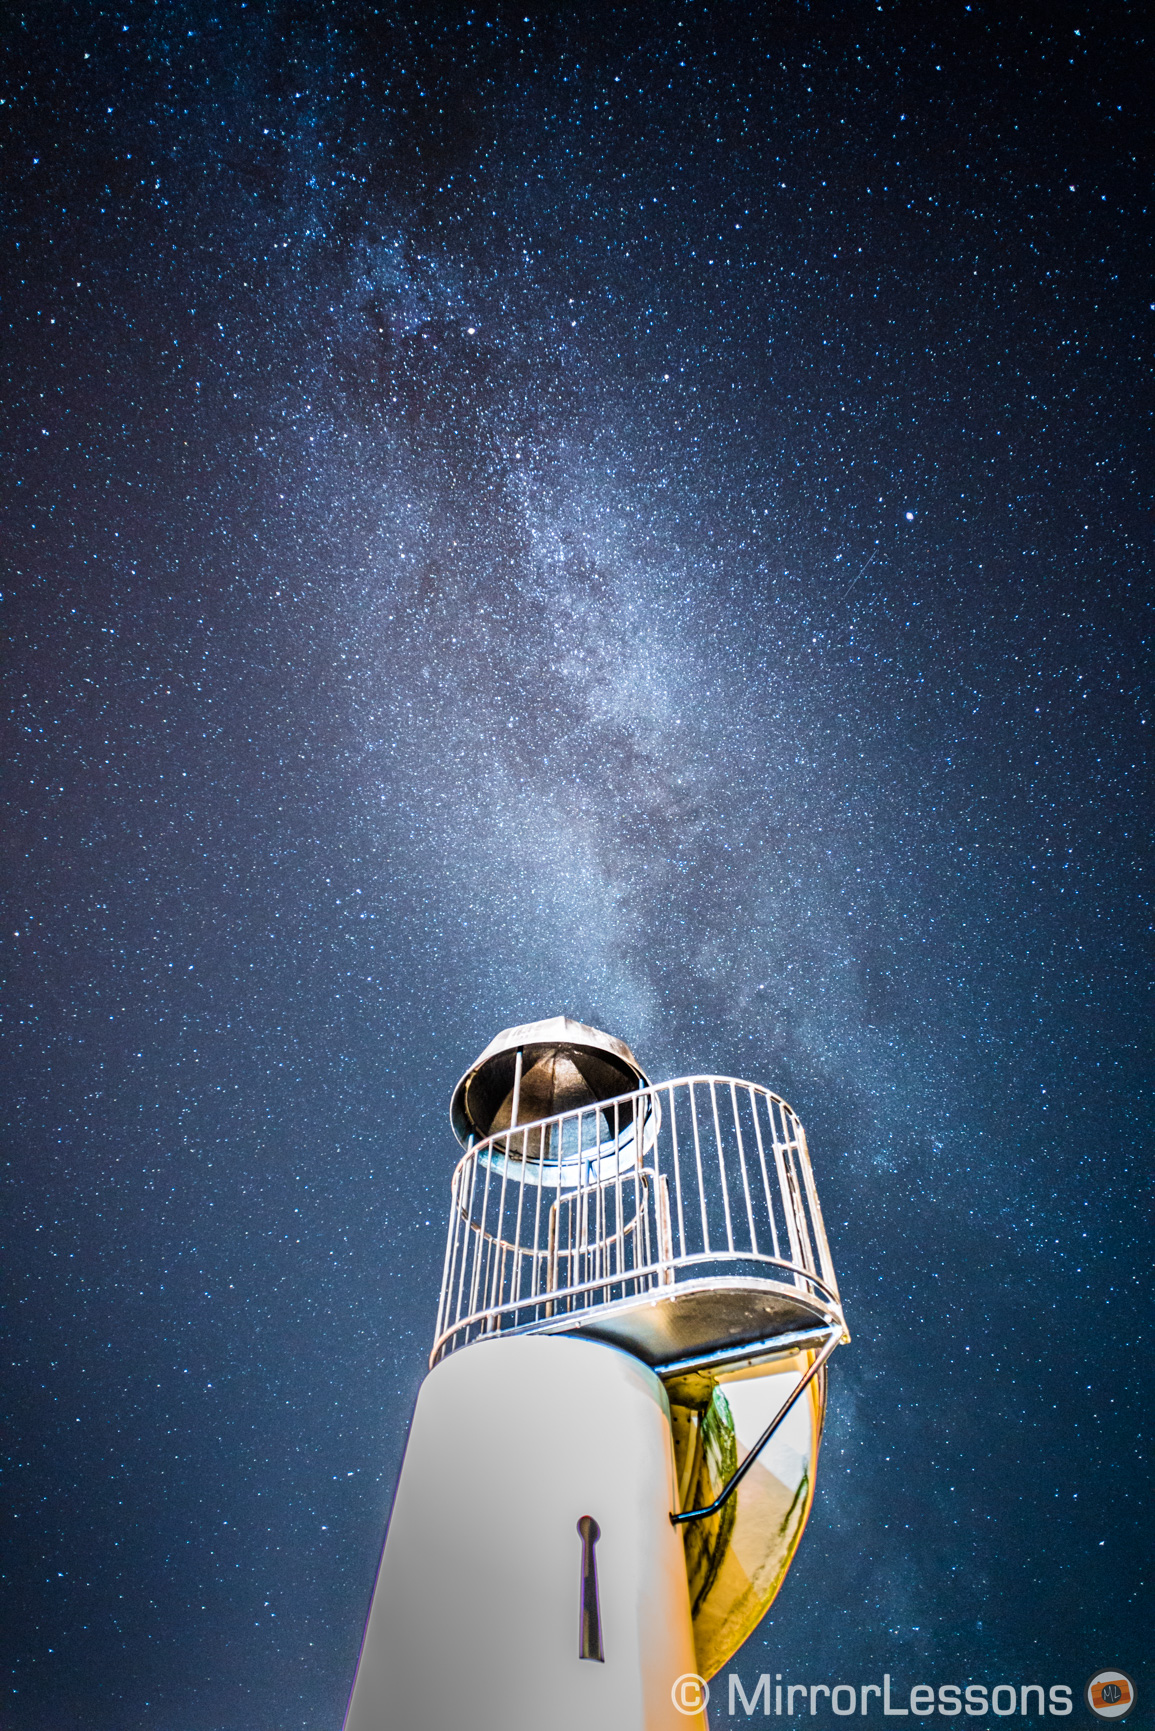
Below you can see an example that compare the original untouched RAW file with the final post processed version.
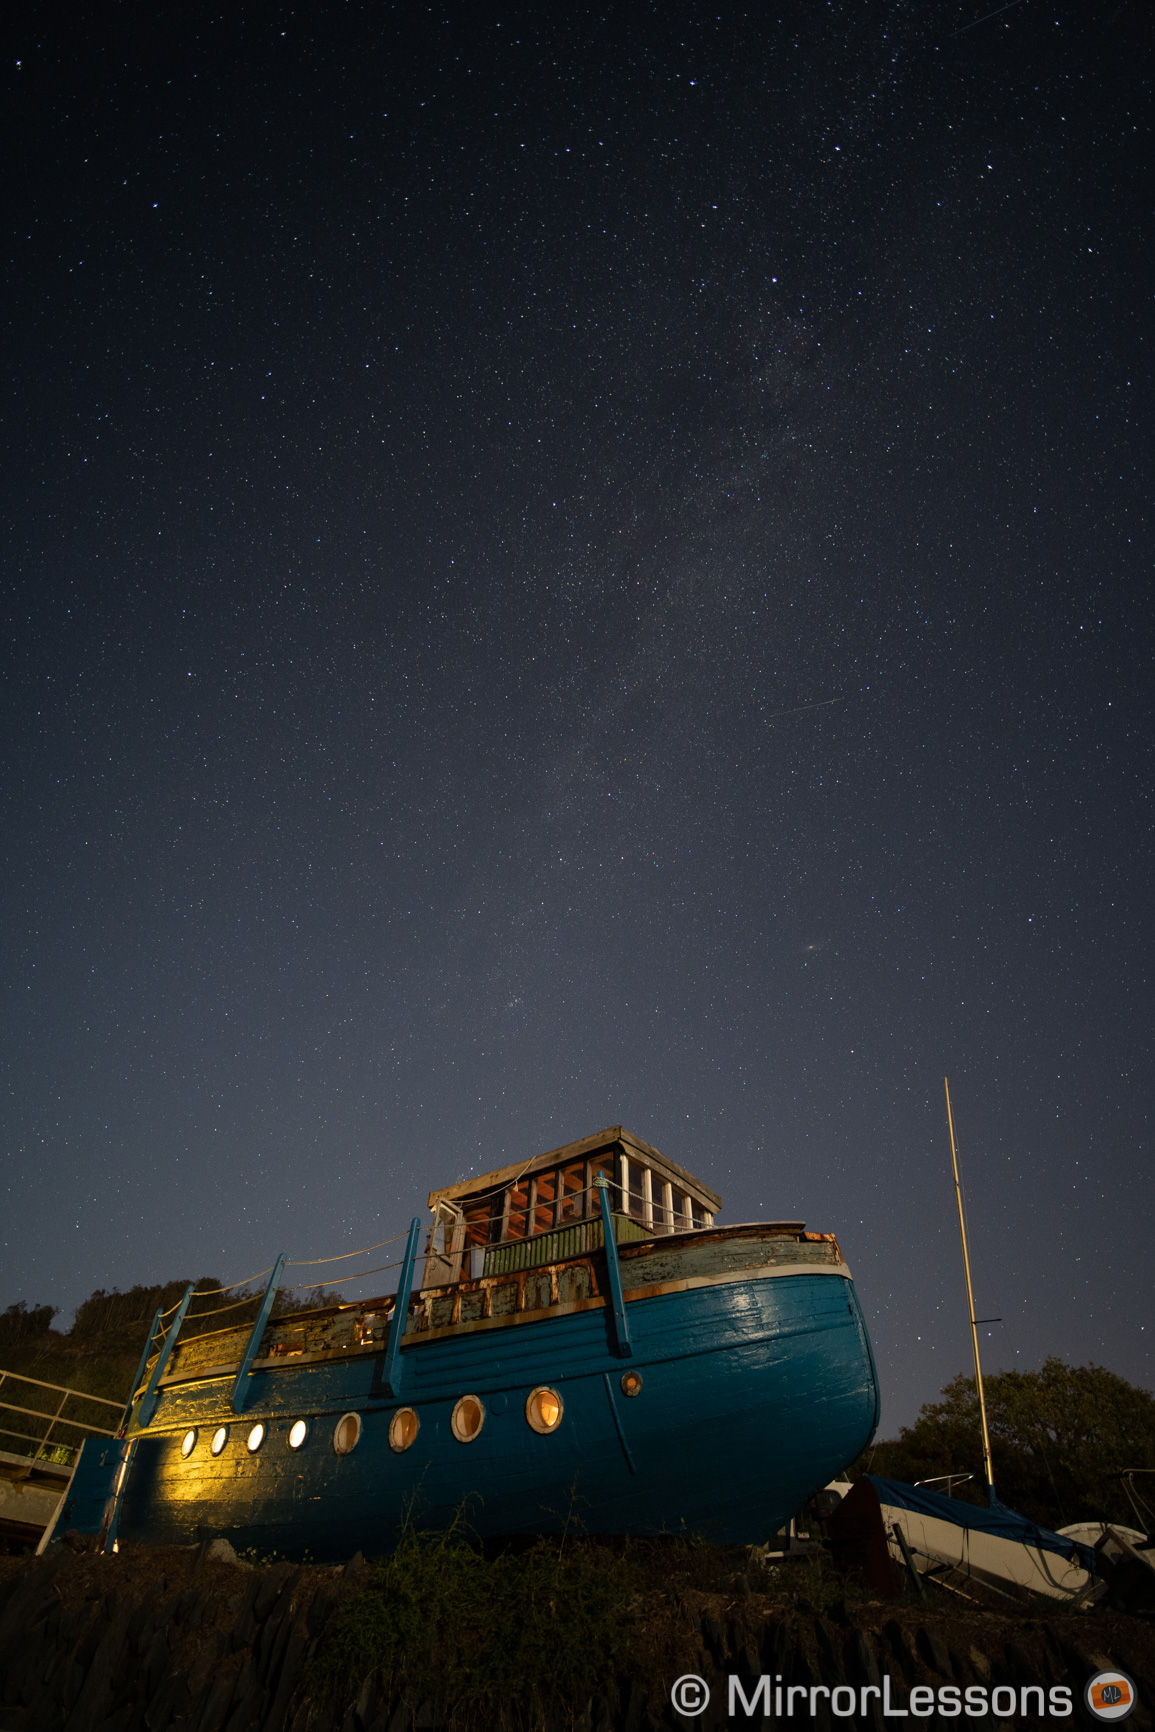
A7 III, 10s, f/2, ISO 3200 – Laowa 15mm f2 Zero-D

Earlier I mentioned the problem of taking a shot where some foreground elements are lit by artificial light sources such as street lamps illuminating a monument, or a small harbour of a fishing village. A shutter speed of 15s with an aperture of f2 and ISO up to 3200 can make any part of the urban landscape too overexposed, and you won’t be able to recover details in post.
If you want to merge an urban area with the stars and possibly the Milky Way, you need to take two different images: one exposed for the sky, and the other exposed for the urban foreground. Then you need to merge these two shots in post with a software that lets you work with layers (Photoshop, Luminar or similar).
Keep in mind that if the lens you use is a bit soft at its fastest aperture, it can smudge the contours of overexposed details, creating a small halo effect that might remain visible after the merge. This will require some manual cloning on the overexposed image to solve the problem, or even manually selecting and cropping the foreground.
Here are some examples taken with the A7R II and the Voigtländer Ultron 21mm f1.8.


Star Trails / Time-lapse with your Sony A7 III, A7R III, A9
I’ve taken star trail images with other cameras, but never with Sony cameras. There is no particular reason for this – just that I never really had the chance to do it at the right time since we review so many products. That being said, what can be done with one camera can be done with another. As for astro time-lapses, I have little experience so I’ll limit myself to sharing some basic knowledge.
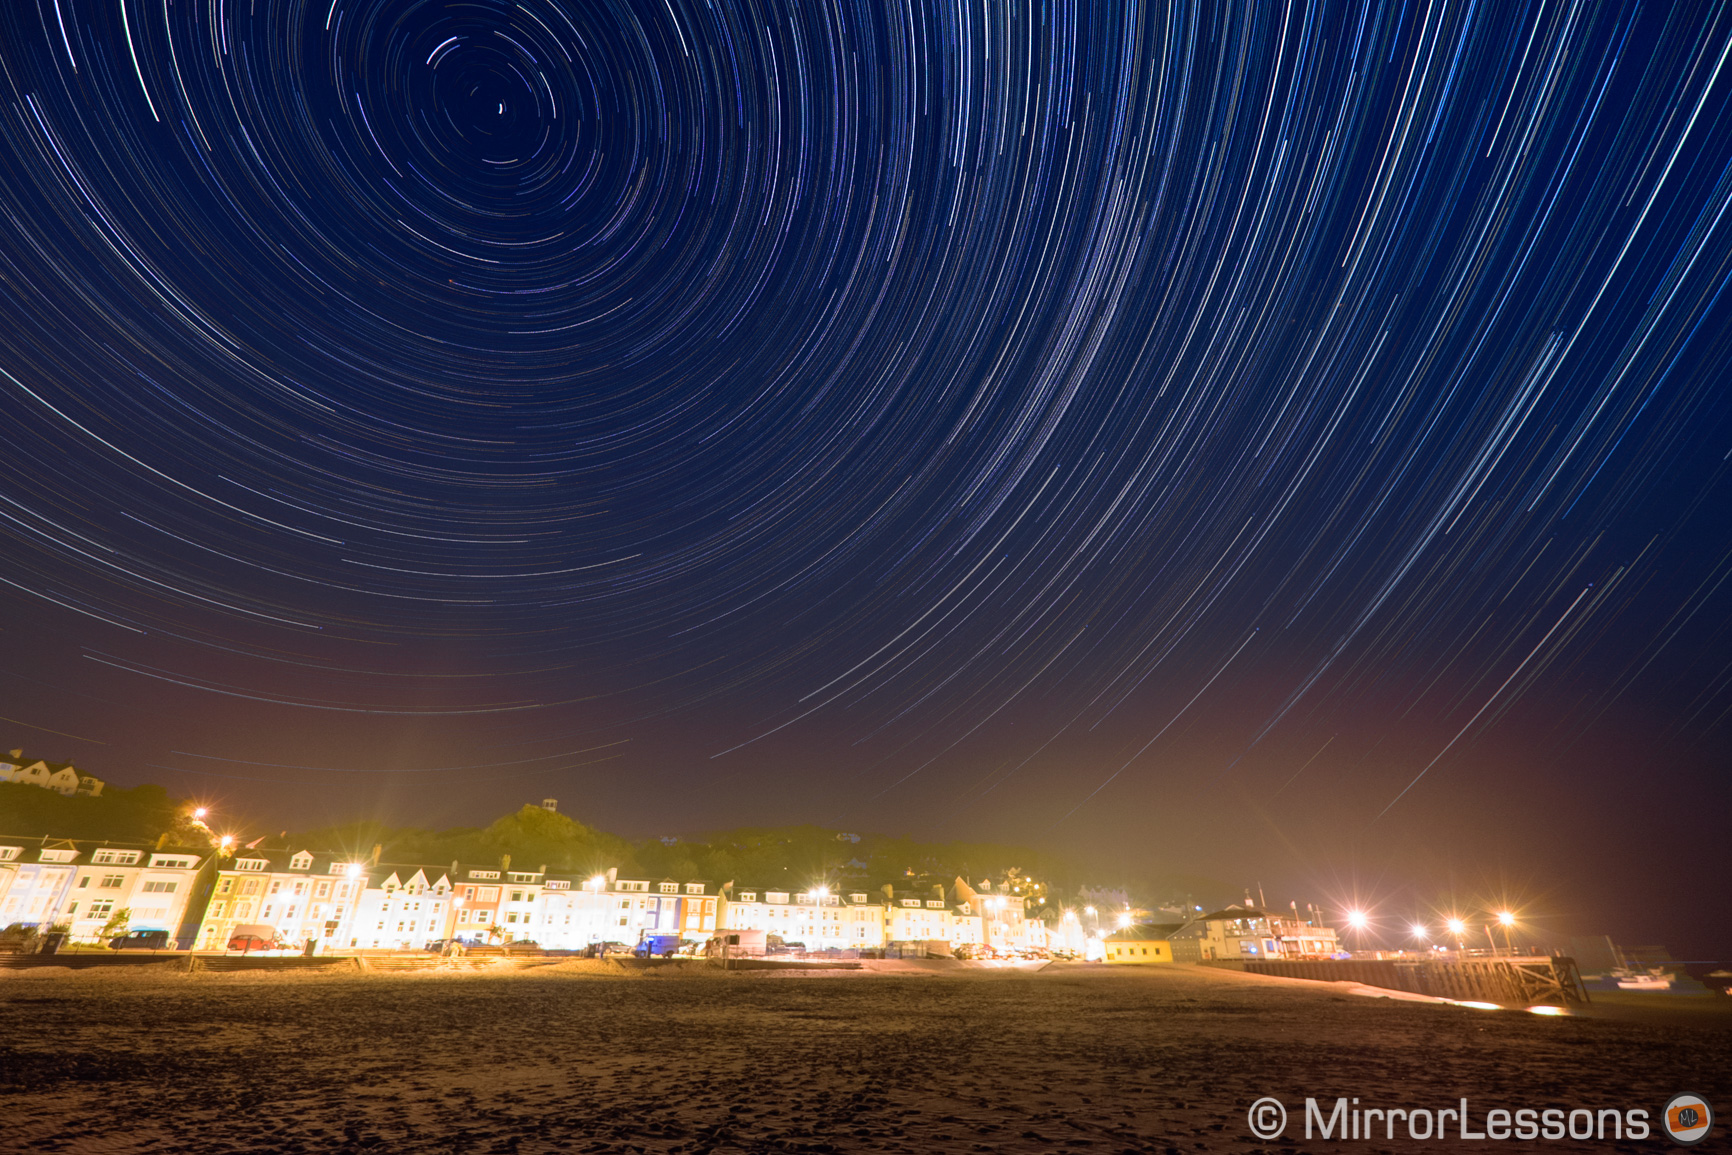
The concept behind time-lapses or star trail images is that you need to let the camera work for a long amount of time, ideally anything between half an hour and several hours. It depends on how long you want your time-lapse video to be, or how much star movement you want to see in your image.
Either way, you will have to stack your images together in post (star trails) to produce one final photo, or order them one after the other (time-lapse) to create a video. So once again, post production is involved.
If you’re using an A9, A7 III or A7 IV series, there is a time-lapse function built-in. It is called Intvl. Shoot. Func. (Interval Shooting Function) and is located in Camera Settings 1 / Shoot Mode Drive2 (page 4/14).
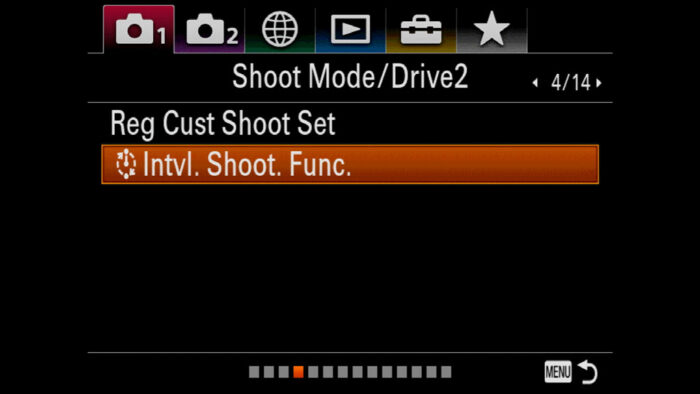
Note: you may need to update your camera to the latest firmware if you can’t find it on the A7 III, A7R III or A9.
With the A7 I and A7 II series, there isn’t a time-lapse feature built-in by default. You can buy a PlayMemories app (there is also a dedicated Star Trail app), or an external intervalometer that connects to the USB port (check our accessory article to find out more).
For star trails, you can do without an intervalometer and take different exposures of up to 5 minutes. Obviously if the camera does it automatically, you can relax while waiting and you also avoid touching it too much.
Important: don’t take exposures longer than 5 minutes because you can end up with thermal noise, which is very annoying to get rid of. The Long Exposure NR setting would solve the problem but it means that you have to wait longer for each shot to be finalised (5 minutes for the exposure + 5 minutes for NR). This is no good because you’ll end up with blanks in your trails or a lack of continuity and smoothness in your video.
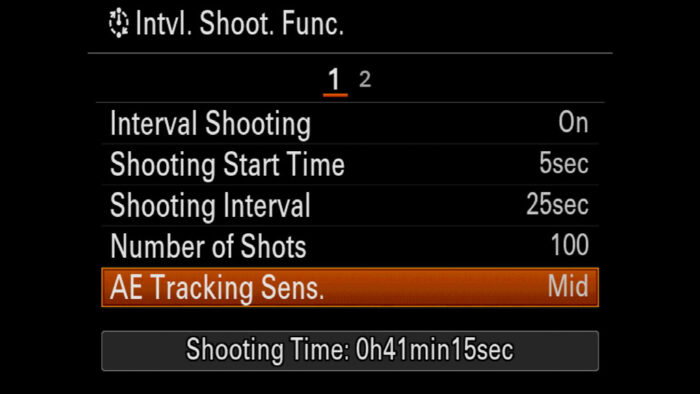
In the Intvl. Shoot. Func. you will find the following parameters. Let’s see how to configure them:
- Interval Shooting: turn it On
- Shooting Start Time: this adds a delay to the start of your time-lapse from the moment you press the shutter button. You may want to set something like 5s to make sure the camera is perfectly still after touching it, or even 30 minutes or an hour if you want to prep everything in advanced and time the camera to start at a precise moment.
- Shooting Interval: this determines the duration between the beginning of the first exposure and the beginning of the next exposure. For example if you have a shutter speed set to 20s and have Shooting Interval to 25s, there will be a 5s gap between one exposure and the next. It is important to leave this small gap so that the camera has the time to write the image on the SD card, clear the buffer and prepare for the next one. If you’re using an UHS-II card on the A9 or A7 III series, this might be less of a concern but I would still follow the rule for peace of mind.
- Number of Shots: how many frames you want to take. For time-lapse videos, think about how long you want them to be. If you want 10 seconds of video at 25fps (frames per second), you need to capture 250 exposures. For star trails, about 100 frames is a good number to start with.
- AE Tracking Sens.: if you want your time-lapse to end with the sunrise, your exposure will need to change because the light will increase towards the end. This allows you to set how smooth you want these changes to happen. Low will give you smoother transitions than High. You need to be in a semi automatic mode (S, P, or M with Auto ISO) for this to work.
- Silent Shoot. in Intel. (page 2): choose to take pictures in complete silence by using the electronic shutter.
- Shoot. Intvl. Priority (page 2): if you’re working in Program or Aperture priority, the camera might pick a longer shutter speed than the one you set, which can cause a conflict with the Shooting Interval. To avoid this, set it to On.
Once you’ve set everything, the camera will give you a preview of how long the entire shooting session will be.
Important: for time-lapses, you want to make sure that you don’t have star trails in the frames, so keep in mind the shutter speed rule we discussed previously.
After your night photography session, you’ll need to stack the images in a software such as Photoshop to create the star trail, or combine the images in a video editing software to create the motion clip.
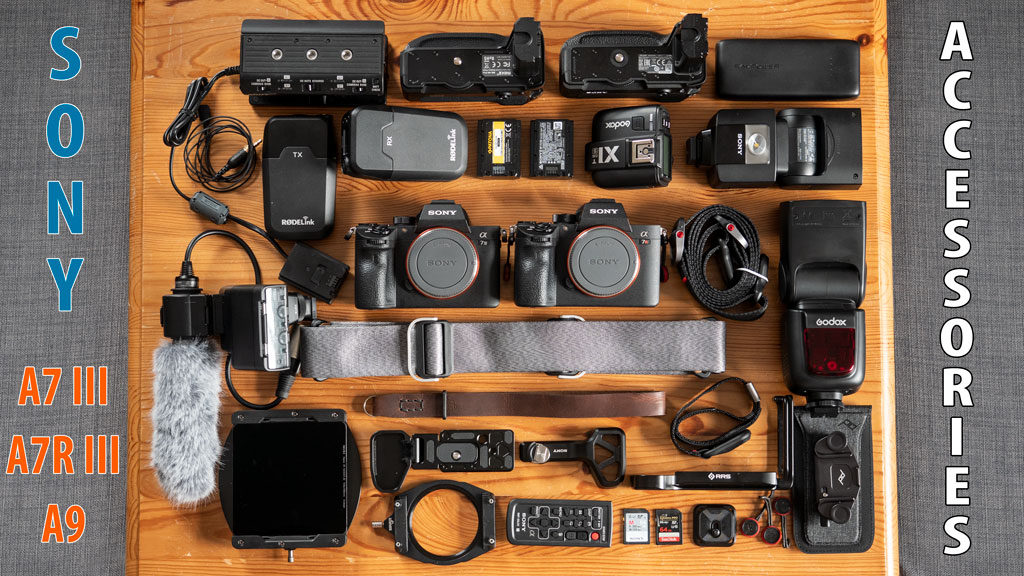
Sony A7 III, A7R III, A9 Astrophotography: extra tips
Astrophotography is a fascinating genre. I don’t consider myself an expert, and I should probably do it more often, but I’ve enjoyed every single outing I’ve been on and I’ve learned a few things along the way. So here are a few tips that you might find useful as well.
USB Power
Many Sony cameras can be charged via USB, or even powered while in operation. If you’re planning to stay out all night, this is very useful because you can plug it into a mobile power bank and ensure you never run out of juice.
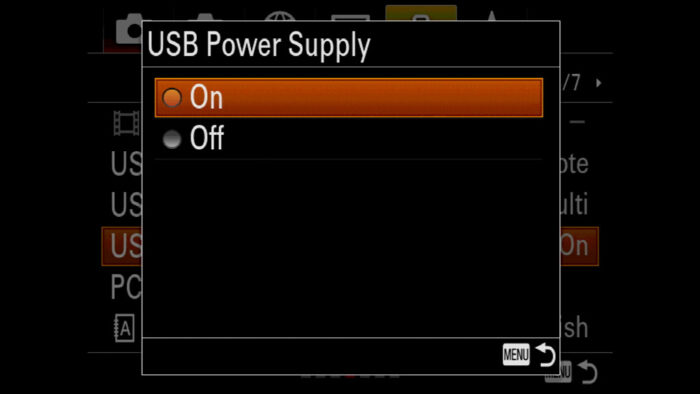
USB Power is not available on the A7 I series or the A7 II. The latter can be charged via USB but the camera must be powered off.
Check out our recommended accessory list to read about batteries and mobile chargers.
Light Painting
If you want to include a bit of foreground but there is no light around, you can use a small torch to light the area. This process is known as light painting.
Once you’ve started the exposure, move the light onto the area of interest. Don’t keep it fixed on one point but rather keep moving the light around the entire area to apply an even exposure. You won’t need to do this for the entire duration of you exposure. Review the image and see what needs to be improved: every situation is different and it’s a game of trial and error once again.
You might notice that the white balance on the area you lit with the torch is a bit off, but that is something you can fix in post with a simple mask.
To find out more, check out this guest post by Gavin Hardcastle on our original MirrorLessons website.
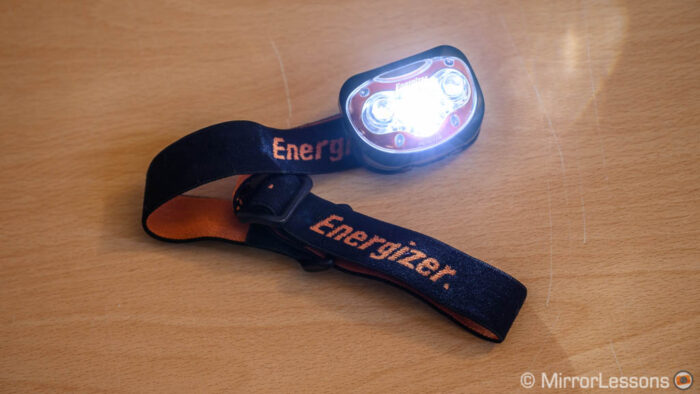
Head Torch
The A7 and A9 cameras don’t have backlit buttons, so to see what you’re doing, consider buying a small head torch. Your hands will remain free and you’ll see what you’re doing much better.
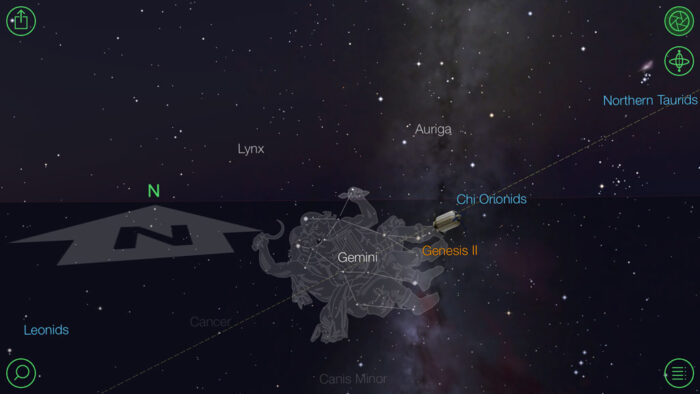
Smartphone Apps
There are a lot of apps that show you the position of stars, constellation and the Milky Way. They use GPS to give you a live virtual map of the sky around you. This can be very useful to see where the Milky Way is, or where it will be if you are location-scouting during the day. The one I’m using is called Star Walk. It is available for iOS and Android.
Resources
Finally, if you’re interested in learning more about astrophotography, we recommend the website Lonely Speck, which is dedicated to the genre and is run by passionate astro-photographers.
Reminder: the links below are affiliate links. If you decided to buy something after clicking the link, we will receive a small commission.
Check price of the Sony A7 III on:
Amazon | Amazon UK | B&H Photo | eBay
Check the price of the Sony A7R III on:
Amazon | Amazon UK | B&H Photo | eBay
Check price of the Sony A7R IV on
Amazon | Amazon UK | B&H Photo | eBay
Check price of the Sony A9 on
Amazon | Amazon UK | B&H Photo | eBay
Check price of the Sony A7 II on:
Amazon | Amazon UK | B&H Photo | eBay
Check price of the Sony A7R II on:
Amazon | Amazon UK | B&H Photo | eBay
Second-hand Sony gear on
MPB US | MPB UK
Sony A7 / A9 Mirrorless Cameras Content on Mirrorless Comparison
We have have published lots of articles dedicated to Sony cameras, with full comparisons and much more.
Real World Comparisons
- Sony A7 III vs A7R III
- Sony A7R III vs A7R IV
- Sony A7R II vs A7R III
- Sony A7R III vs A9
- Sony A7 III vs Nikon Z6
- Sony A7R III vs Nikon Z7
- Sony A7R III vs Fujifilm GFX 50s
- Sony A7R III vs Panasonic S1R
- Sony A7 III vs Canon EOS R
- Sony A7 III vs Fujifilm X-T3
- Sony A7 II vs Canon EOS RP
Sample Photos
- Sony A7 III sample images
- Sony A7R III sample images
- Sony A7R IV sample images
- Sony A7 II sample images
- Sony A7R II sample images
- Sony A7S sample images