On most A7 cameras you will find a setting called Picture Profile. Unlike the default Creative Styles, the Picture Profiles are designed for video use. They come from Sony’s extended knowledge of imagery in the broadcast and digital cinema world, and are the same kind of advanced settings you will find on the company’s professional camcorders and digital cinema cameras.
The introduction of the Picture Profiles was a good step forward for Sony A7 users, because they provide much more flexibility than the Creative Styles (which are designed for JPG stills) in terms of dynamic range, contrast and colour.
However these parameters are not beginner friendly and require some knowledge of video settings, broadcast standards and post production. This is why I’ve decided to cover them in a separate article.
A7/A9 series compatibility
The content of this post is based on the A7 II, A7 III and A7 IV series, but it can also be considered valid for other products. It is not relevant for the A7 I, A7R I, A9 and A9 II because the Picture Profiles are missing from these cameras.
This article is part of our in-depth guide on how to use the Sony A7 and A9 series. You can find out about the movie capabilities of your full frame E-mount camera here.
TABLE OF CONTENTS
1. Where to find them and why to use them
2. Picture Profile Settings
3. Log Profiles
4. HLG Settings
5. Gamma Display Assist
6. Low Light Profile
7. Final Recommendations
8. My Presets
9. Sony A7 / A9 Resources
Ethics statement: the following is based on our experience testing many A7 cameras over the years. We were not asked to write anything about these products, nor were we provided with any sort of compensation. Within the article, there are affiliate links. If you buy something after clicking the link, we will receive a small commission. To know more about our ethics, you can visit our full disclosure page. Thank you!
Reminder: the links below are affiliate links. If you decided to buy something after clicking the link, we will receive a small commission.
Check price of the Sony A7 III on:
Amazon | Amazon UK | B&H Photo | eBay
Check the price of the Sony A7R III on:
Amazon | Amazon UK | B&H Photo | eBay
Check price of the Sony A7R IV on
Amazon | Amazon UK | B&H Photo | eBay
Check price of the Sony A7 II on:
Amazon | Amazon UK | B&H Photo | eBay
Check price of the Sony A7R II on:
Amazon | Amazon UK | B&H Photo | eBay
Check price of the Sony A7S II on:
Amazon | Amazon UK | B&H Photo | eBay
Second-hand Sony gear on
MPB US | MPB UK
Sony A7 III, A7S II, A7R IV Video Profiles: Where to find them and why to use them
The Picture Profiles (or Video Profiles) are found in Camera Settings 1 in the menu, on page 12/14 (Color/WB/Img.Processing section). The exact location might vary slightly from model to model, or if you use an older A7 product.
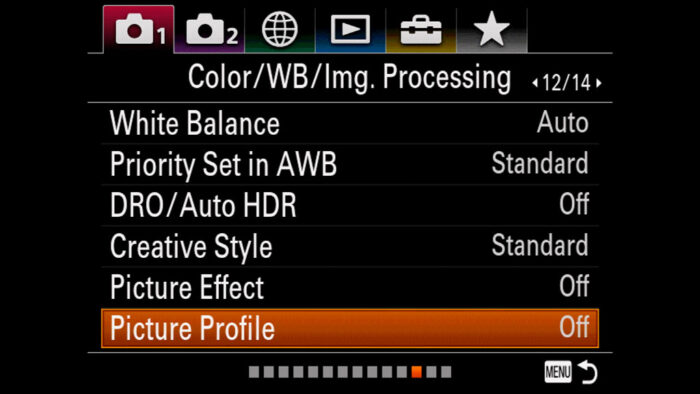
Note: you can assign the Picture Profile to a custom button, the Fn Menu or My Menu for quicker access.
By default, the Picture Profile setting is turned Off. If you click on it, you can scroll through 10 different presets (labelled PP1 to PP10). All of them are entirely customisable.
On the A7S, A7 II, A7R II, there are only 7 presets. On the A7S II, there are 9.
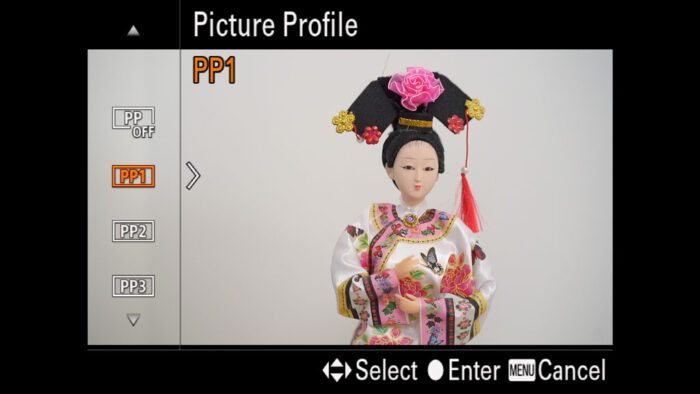
If you are completely unfamiliar with the Picture Profiles, you may wonder why you should use them instead of the Creative Styles which are more straightforward to learn. There are different answers to this question:
- you’re shooting with multiple cameras and you need to match the image of your A7 with a Sony camcorder
- you want to colour grade in post production
- you need to meet specific requirements for a client (ex. a TV broadcast company)
- you want superior quality and control over your image
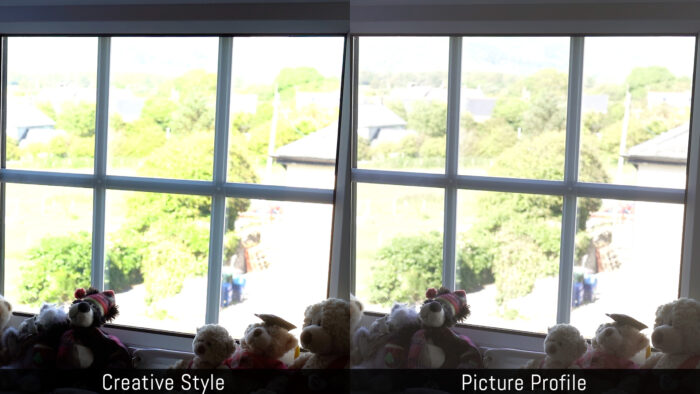
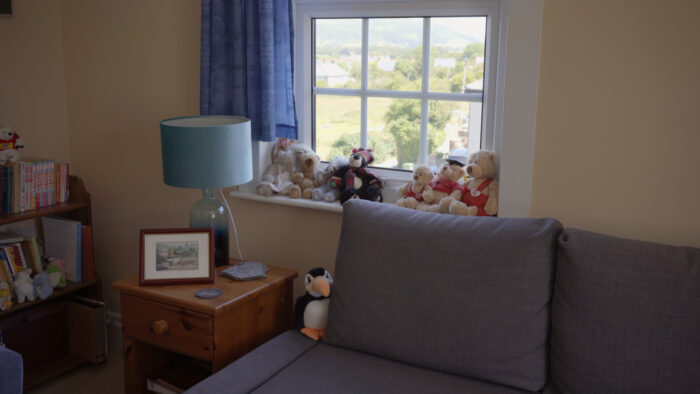
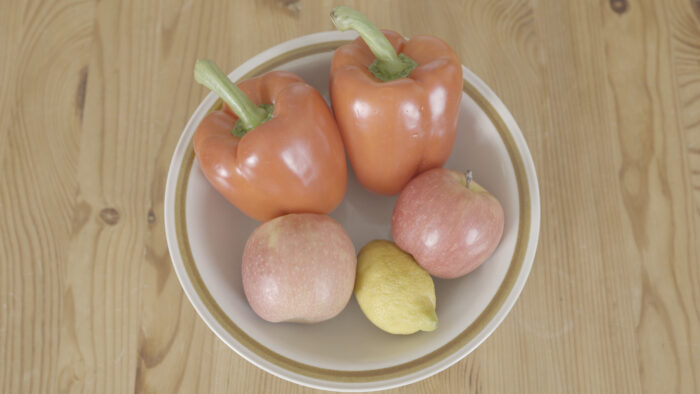
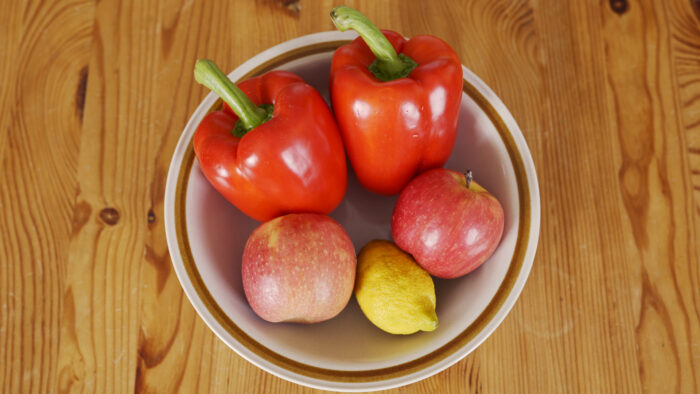
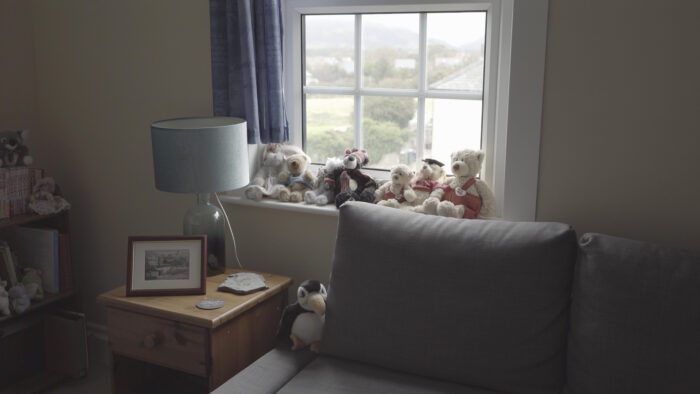
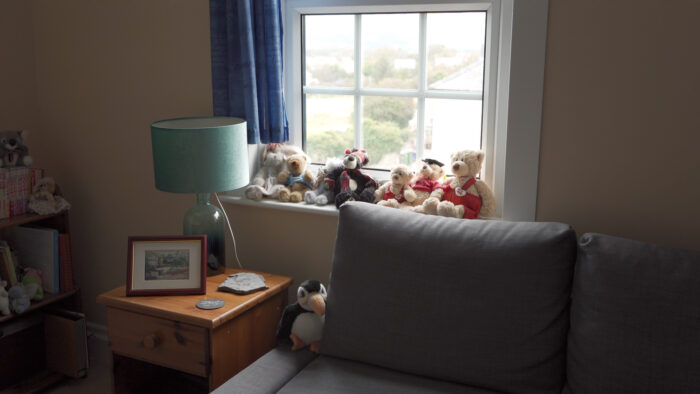
The last point is the easiest to understand. The Creative Styles can lose details in the highlights (and shadows) much more easily. Look at the two images below. One is shot with the Standard Creative Style, the second with one of my PP presets.
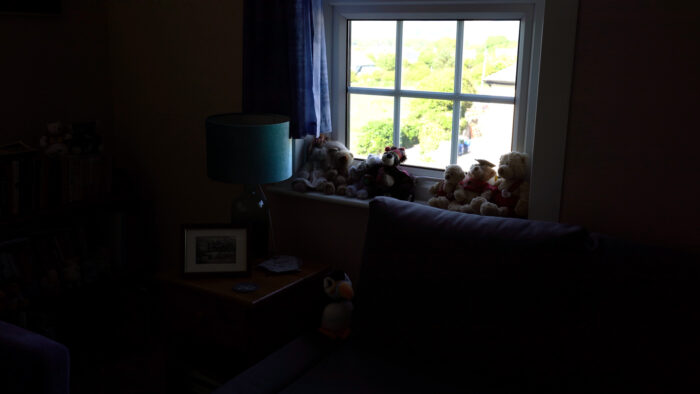
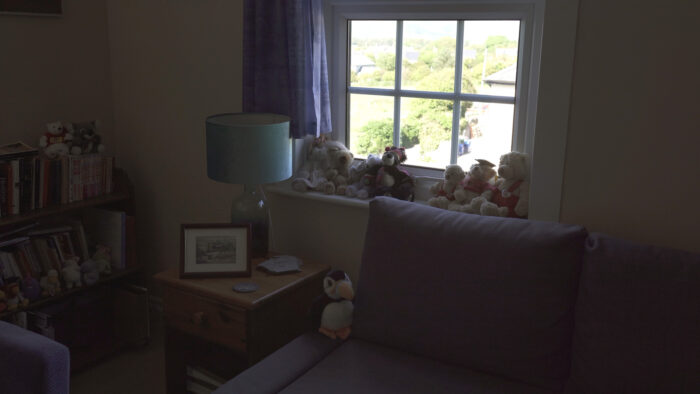
See how much more detail is preserved in the bright areas with the Picture Profile? Certainly the zone outside the window remains overexposed, but the green colours are not washed out and the transition between the different tones is more natural. More details on the houses and roofs are visible, as well some mountains in the background.
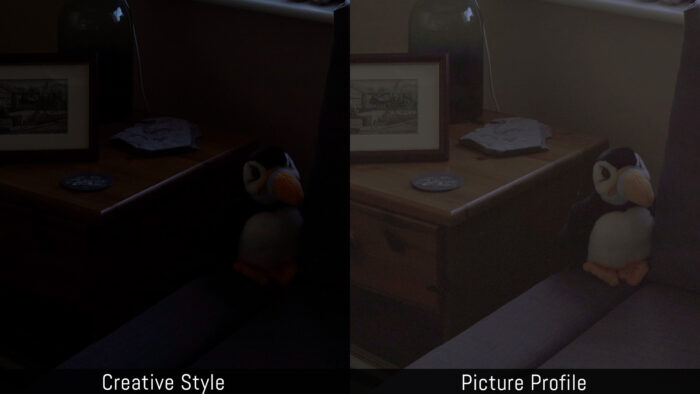
The same reasoning applies to shadows: the Picture Profile allows you to push the brightness much more (although you may get more noise as a result).
Each Picture Profile contains the following settings:
- Black Level
- Gamma
- Black Gamma
- Knee
- Color Mode
- Saturation
- Color Phase
- Color Depth
- Detail
- Copy
- Reset
Let’s have a deeper look at what each of these do.
Sony A7 III, A7S II, A7R IV Picture Profile Settings
The parameters within each of your A7 III Profile Pictures can be a bit overwhelming if you’re not an experienced video maker. Once you know what they do, you can start playing around with them and understand their potential.
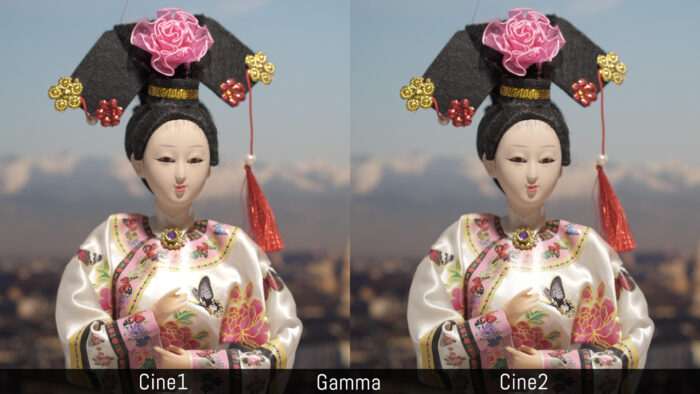
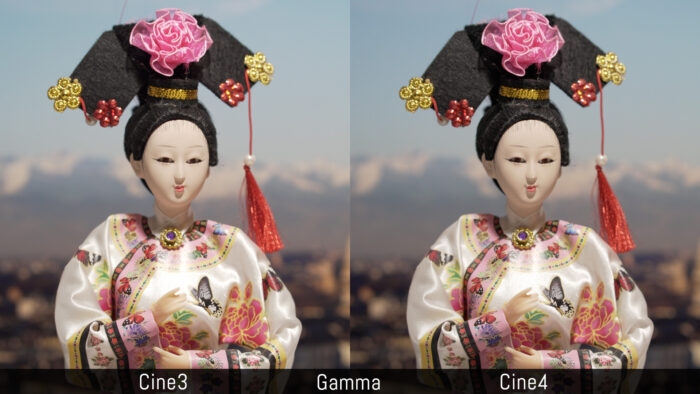
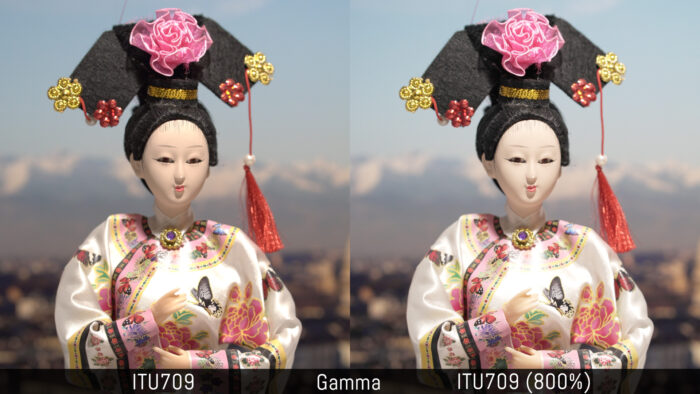
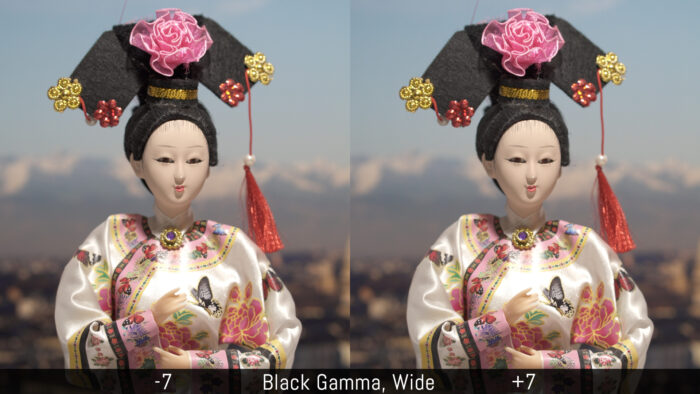
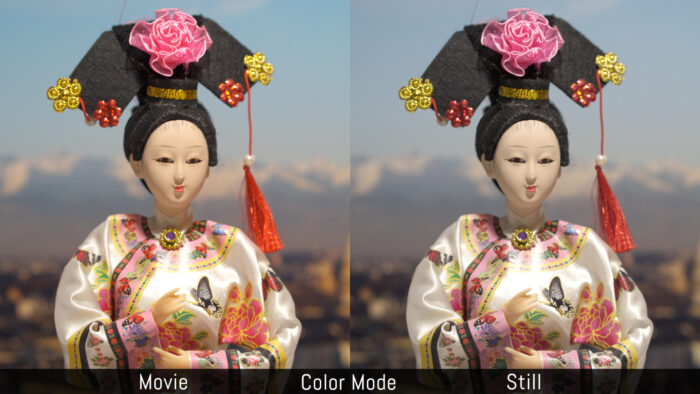
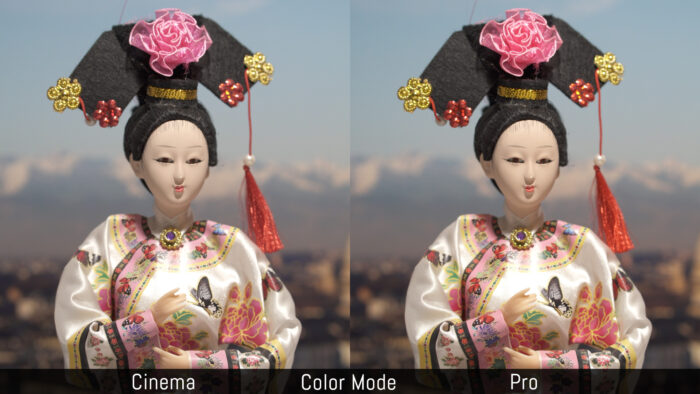
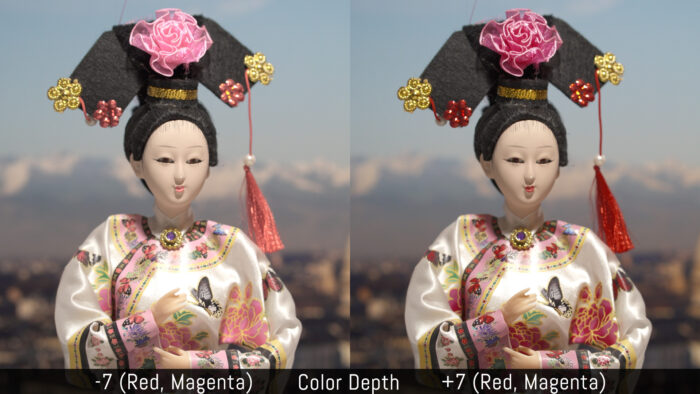
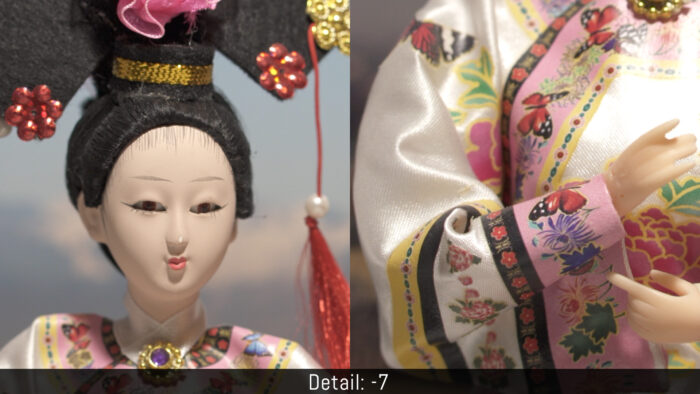
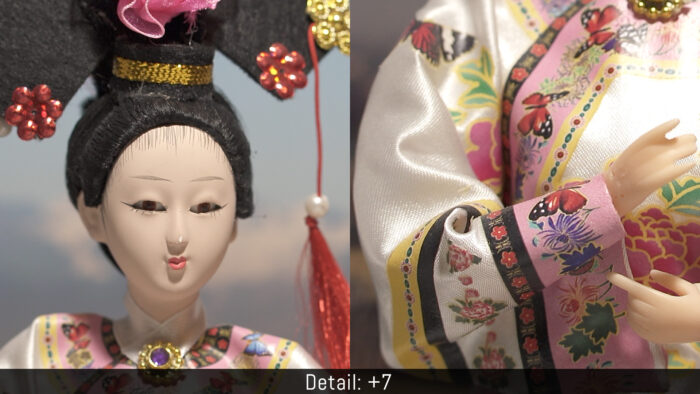
The following image of a doll is our reference to show you what each setting does. Unless otherwise specified, these frames are extracted from 4K footage recorded with Cine1 Gamma and Cinema Color mode.

Black Level
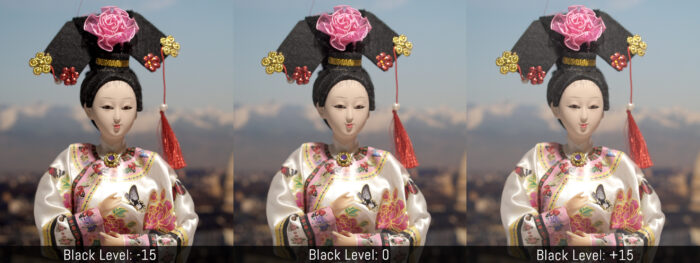
The Black Level makes the blacks of your image harder (darker) or softer (lighter). It works in ±15 steps.
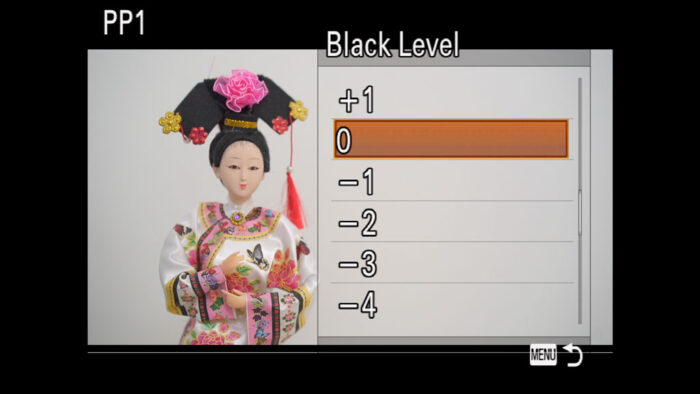
This is a good setting to give the image a bit more contrast if you use a soft gamma setting. The lowest negative and highest positive values are not too extreme so this setting gives you the possibility to fine-tune the blacks very precisely.
Gamma
A gamma curve mediates the input signal level (the original scene and the amount of light available) and the output signal level (the amount of brightness the camera can reproduce).
In other words, gamma is a curve that defines the look of the image in terms of luminance. Some curves give you more contrast and deeper blacks, others have less contrast and more highlight details, and a few are designed to give you the best dynamic range possible. If you look at the graph below, the yellow and red curves have more exposure latitude than the blue and cyan curves.
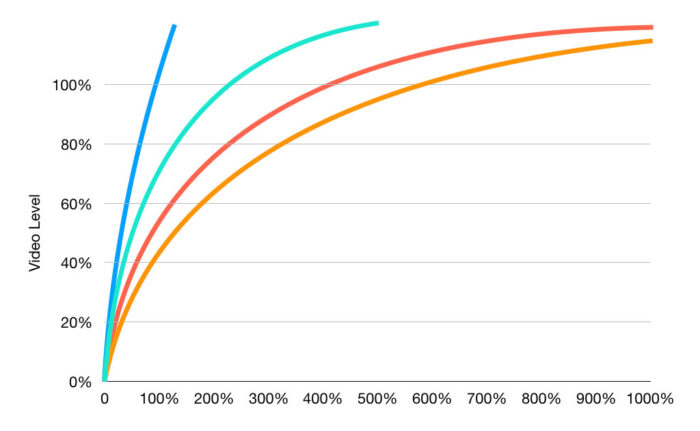
Included in this setting are S-Log2, S-Log3 and HLG that we’ll discuss further down.
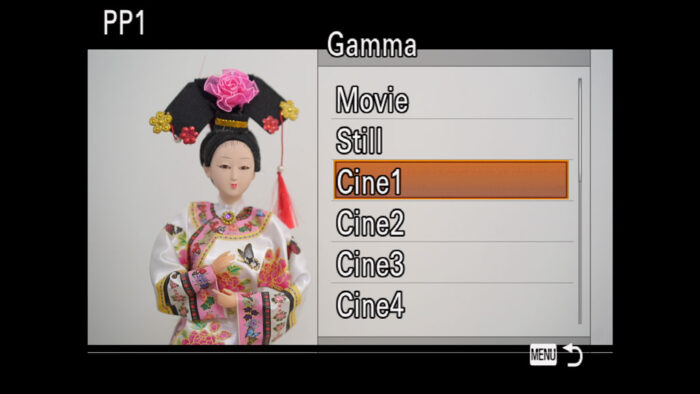
Here is the list of the Gamma setting available and what they do:
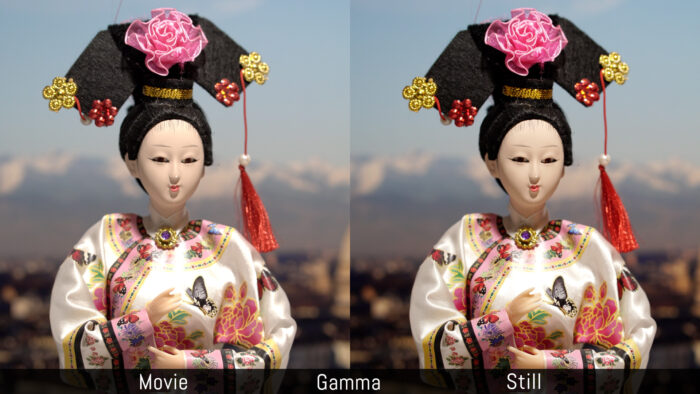
- Movie: a standard gamma curve for video with good contrast
- Still: a standard gamma curve designed for still photos. It has more contrast and deeper blacks than Movie.
- Cine1, Cine2, Cine3, Cine4: a set of curves that soften the contrast in the shadows and render more gradation details in the bright zones. The contrast is lower in comparison to Movie or Still, producing a softer, “cinematic” look. Cine3 and Cine4 have more contrast while Cine2 and Cine4 retain more highlights.
- ITU709, ITU709 (800%): a standard gamma curve for broadcast television. The 800% variant is brighter and is designed for checking the exposure of a scene you record with S-Log2 or S-Log3. It is more useful in conjunction with the Gamma Disp. Assist setting (see further down).
- S-Log2, S-Log3: these two curves are designed to give you the widest dynamic range possible so that you can better grade it in post. See our dedicated chapter further down.
- HLG, HLG1, HLG2, HLG3: four variations for the HDR broadcast standard. See the dedicated chapter further below.
Trivia: ITU709, also known as Rec.709 or BT.709, is a standard gamma curve for HDTV (High Definition Television). Its colour gamut (range of colours) is very similar to that of sRGB for stills. Although new standards exist, 709 remains one of the most common.
Black Gamma
Related to the gamma setting, black gamma allows you to change the gradation of dark areas in your image (darker or brighter).
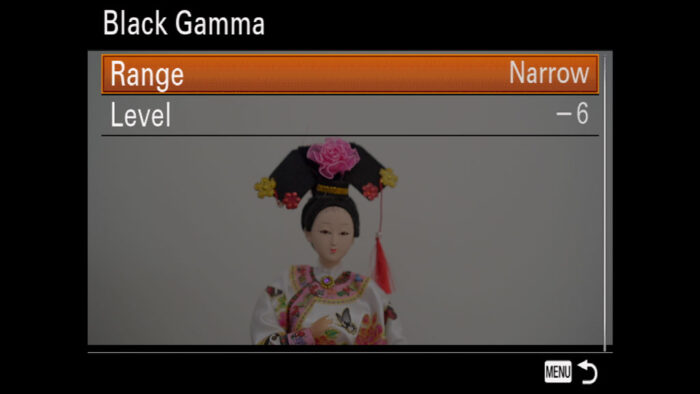
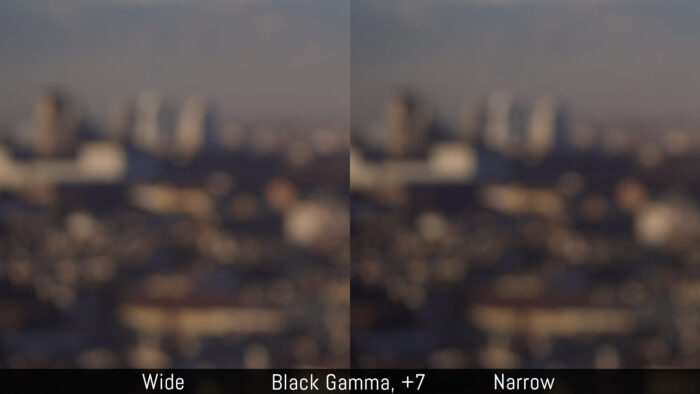
You have a range of Wide to Narrow (Wide will influence black and grey tones, Narrow will affect black only) and a level of ±7 steps. In comparison to Black Level, the effect of Black Gamma is more subtle.
Knee
Knee allows you to control the signal in high sensitivity areas to have more or fewer details in the highlight zones. You can choose between Auto and Manual.
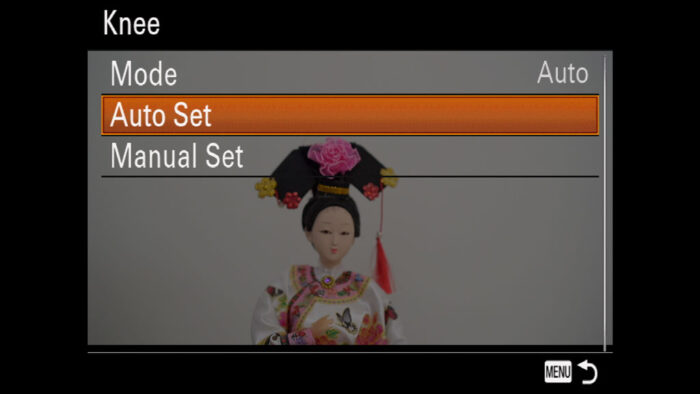
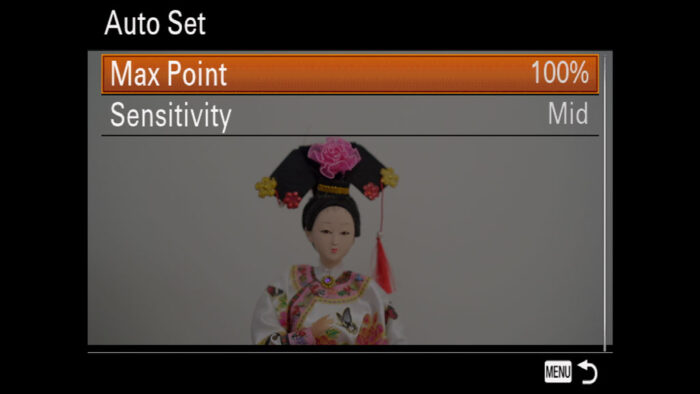
Auto is optimised for the Movie and ITU709 gamma only, and offers less precise control. You can adjust the maximum point (output level) and Sensitivity (at which level the knee adjustments starts).
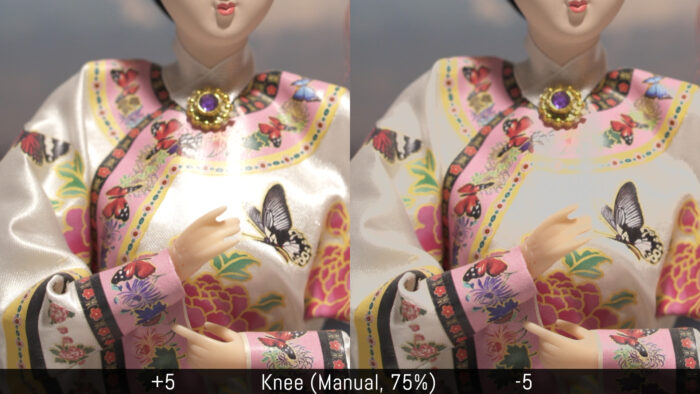
In Manual mode, there are two parameters: Point and Slope. Point determines the video signal output (white level) where to make the adjustment. Slope determines the inclination of the knee curve. A negative value will preserve more dynamic range but you may lose natural gradations. A positive value will increase the gradation but reduce the dynamic range.
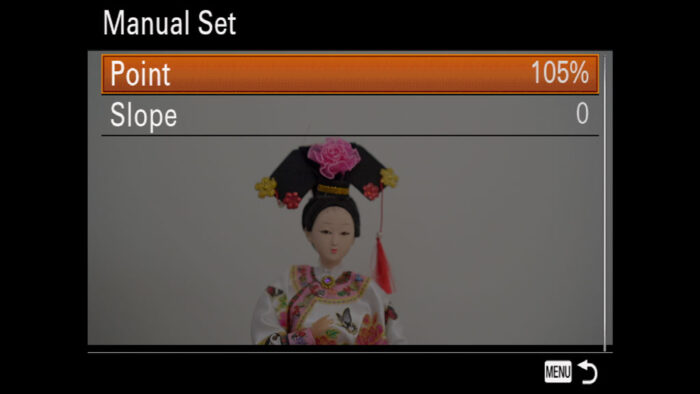
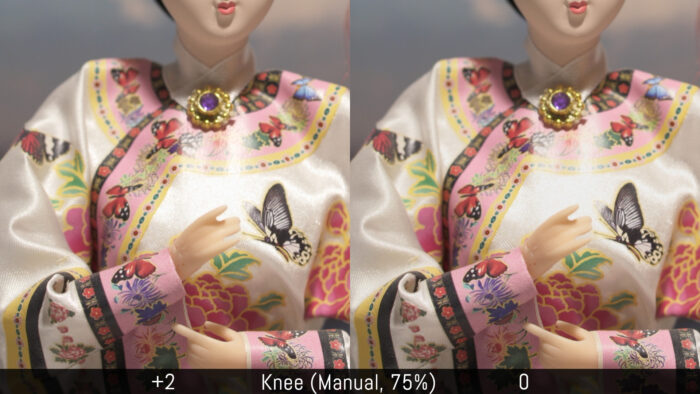
If we look at our doll example below, you can see that some of the dress at the centre is clipped (white without any detail in the dress texture). By setting the Point to 75%, I can control the amount of detail in that area.
However be careful when setting the Slope because a negative value can decrease the brightness too much. The white is replaced by grey, tone transitions are gone and the image looks unnatural. In this example, +2 is enough to preserve all the details necessary and keep the gradations intact.
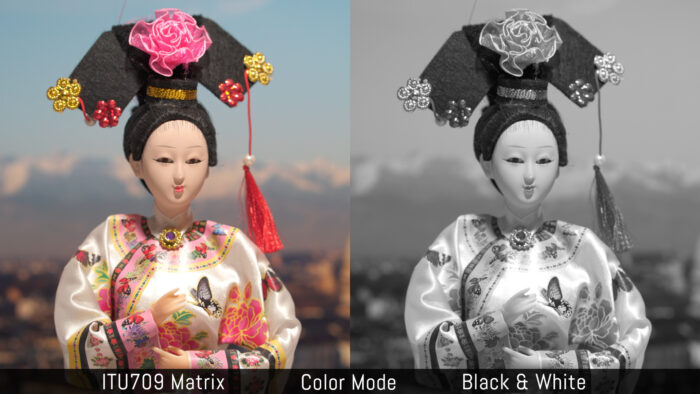
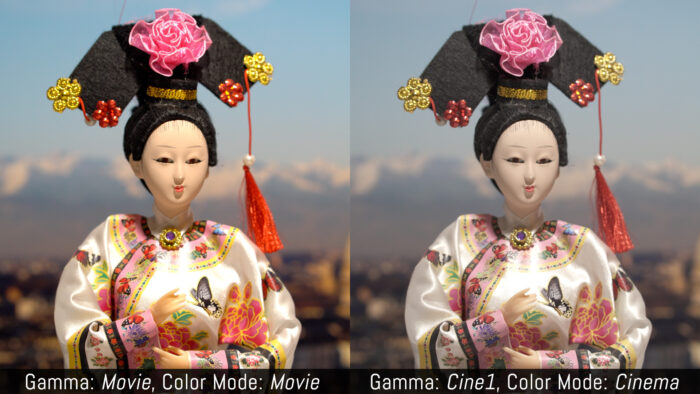
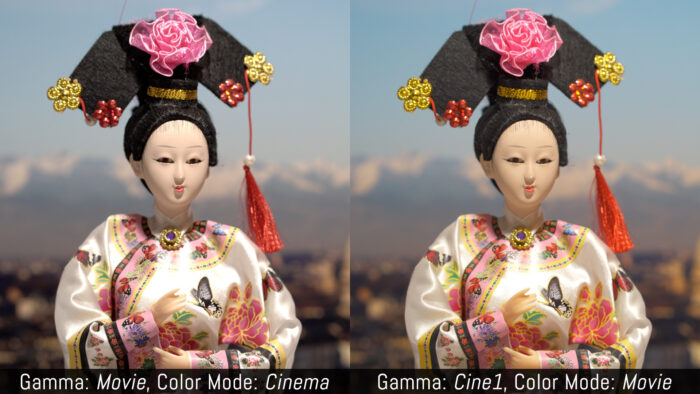
Color Mode
Here you’ll find various colour types and colour levels designed for different gamma curves.
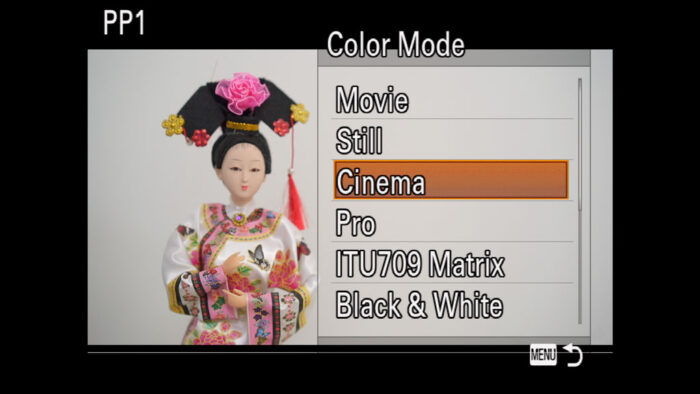
- Movie: colour tones designed for the Movie Gamma curve
- Still: colour tones designed for the Still Gamma setting
- Cinema: colour tones designed for Cine1 and Cine2
- Pro: matches the colour tones of standard Sony broadcast camcorders when the IUT709 gamma is selected
- ITU709 Matrix: colour tones for the standard IUT709 gamma
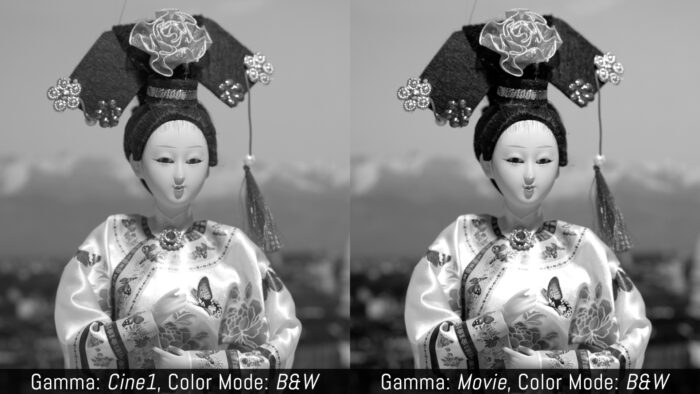
- Black and white: decreases the saturation to 0 to record monochrome images
- S-Gamut: designed to be graded in post and linked to the S-Log2 gamma setting
- S-Gamut3.cine and S-Gamut3: designed to be used with S-Log3. Check the dedicated chapter below for more information.
- BT.2020 and 709: color modes for the HLG gamma (more in the dedicated chapter).
The look of your image is also influenced by the Gamma setting seen earlier. Although many colour modes are designed for a specific gamma curve, you can experiment and try different ones to see how it affects your image. (Ignore S-Gamut, BT.2020 and 709 unless you’re using a S-Log or HLG profile).
For example, if you choose Movie gamma and Cinema color, you keep a strong contrast while losing some saturation. With Cine1 gamma and Movie color, you gain some colour vividness while maintaining a softer contrast.
The gamma setting will also influence the contrast of the Black & White mode if you’re planning to record in monochrome.
Saturation
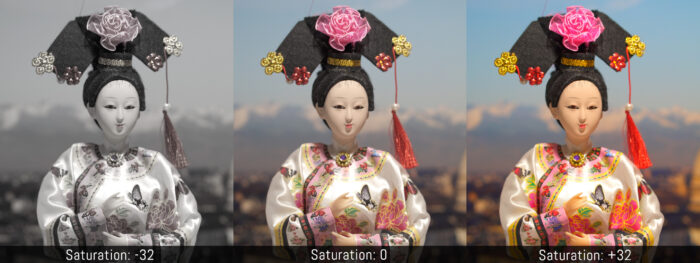
This setting allows to fine-tune colour saturation very precisely in ±32 steps, no matter which gamma or color mode you select.
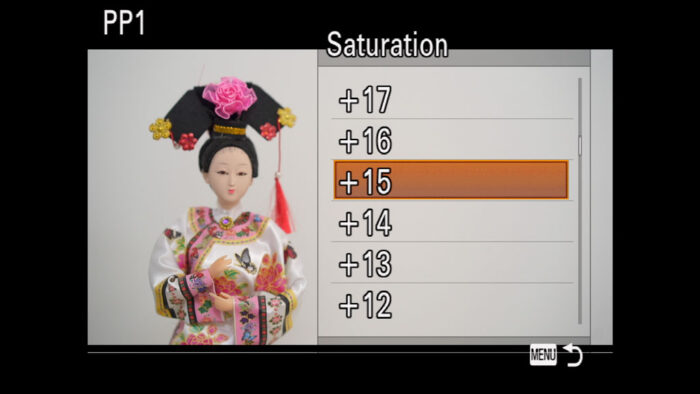
Keep in mind that it is not designed to desaturate your image entirely (-32 is not completely monochrome).
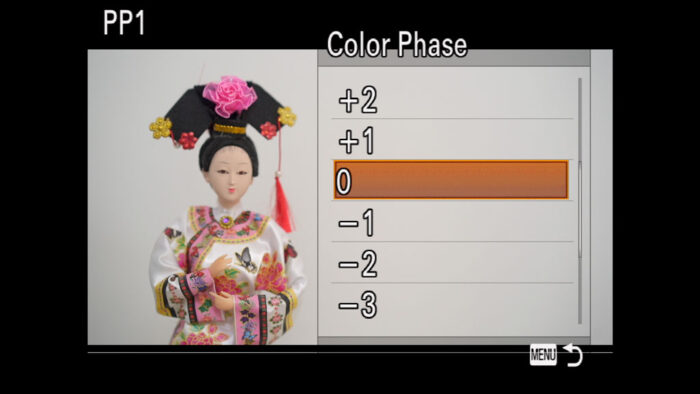
Color Phase
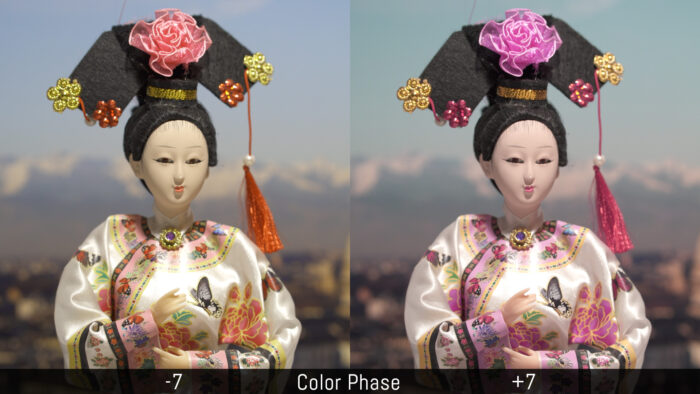
Color Phase adjusts the colour hue of your image (reddish or greenish) in ±7 levels.
Colour Depth
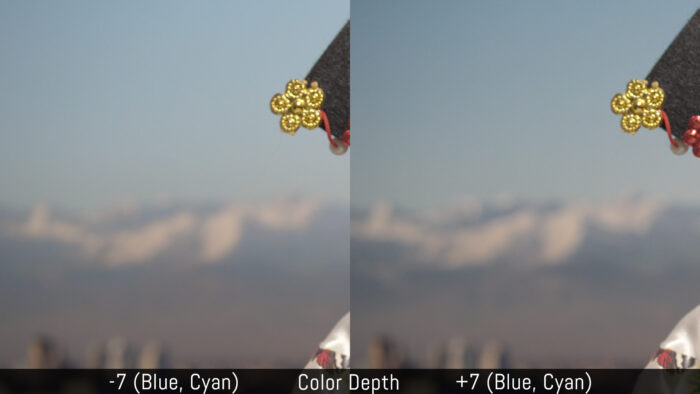
Here you can vary the luminance of the six main colour channels (Red, Green, Blue, Cyan, Magenta and Yellow). This setting allows you to fine-tune colours very precisely and I consider this an advanced level. If you want to use it, I recommend practising a little bit first.
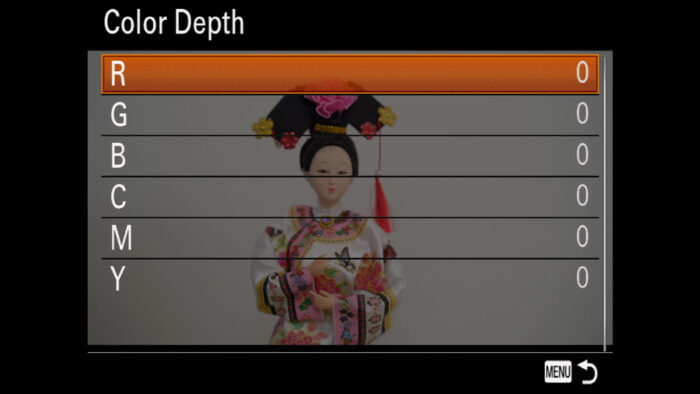
In our first example, you can see that the variations to Blue and Cyan are subtle, wheres Red and Magenta produce a more relevant difference. This setting is very precise at altering only the channels you’ve selected.
Detail
This parameter increases or decreases the strength of details in the image in ±7 levels.
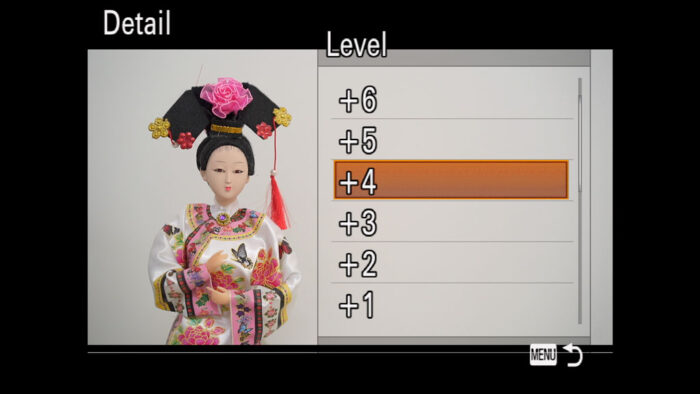
It is a very good setting because you can push it to the maximum without over-sharpening, and the image retains a natural look.
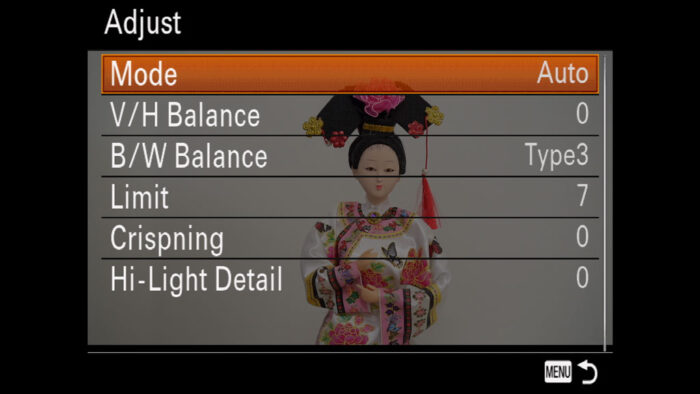
The Adjust entry lets you fine-tune other parameters such as Vertical and Horizontal details, among other things. This is really advanced stuff so I would recommend leaving Adjust to Auto.
Copy and Reset
The last two entries allow you to copy the settings of one picture profile to another, or reset one picture profile to its default values (note that you can’t reset them all at once).
Sony A7 III, A7S II, A7R IV Log profiles: S-Log2 and S-Log3
S-Log3, S-Gamut3 and S-Gamut3.cine are not available on the A7 II, A7R II and A7S.
A Log gamma curve is optimised to the dynamic range of the sensor. S-Log2 and S-Log3 on your Sony camera are designed to render the maximum amount of information possible from the dark and bright areas of your scene. In other words, they are the settings that give you the best dynamic range.
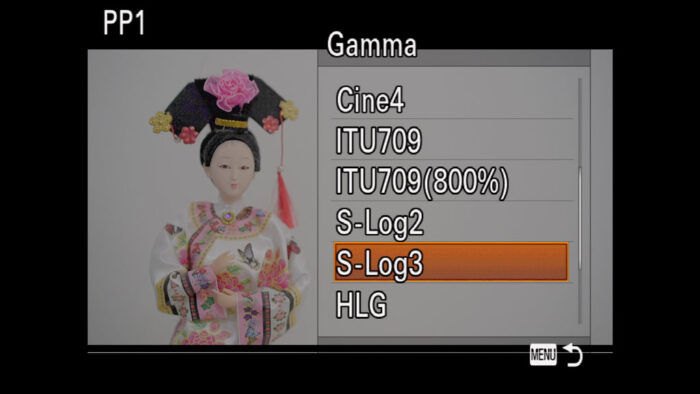
When you activate one of the two, you’ll notice that the picture looks really flat (low contrast and saturation).
Another thing you’ll notice is that the minimum ISO is higher than usual. This happens because in order to deliver the best exposure latitude, the camera uses the native ISO of the sensor, which is usually higher than the normal base level. The native ISO varies depending on the camera you’re using.
| Model | Min. ISO |
|---|---|
| A7R IV | 500 |
| A7 II, A7R II, A7 III, A7R III | 800 |
| A7S II | 1600 |
| A7S | 3200 |
The advantage of using a Log profile is that you have more flexibility in post when colour grading, can match colours between various shots more precisely, and can give your image the creative look that you want.
Log’s usefulness isn’t limited to scenes with a high contrast. The flexibility it offers is also valid for other scenes like the one below.
S-Log2 vs S-Log3
There are two Sony Log gammas you can choose. S-Log3 has a wider dynamic range than S-Log2, and its curve has been designed to be closer to that of film.
One advantage S-Log3 has over S-Log2 is that it retains more highlight details as you can see below.
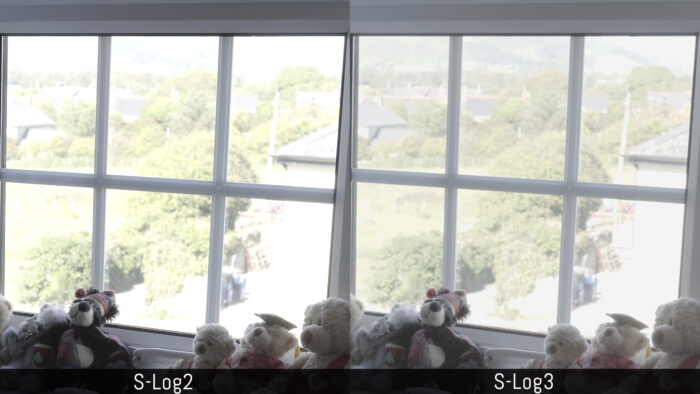
However S-Log3 can display more noise in the shadows because it brightens the dark areas further in comparison to S-log2.
If I level up the two profiles in post to have the same brightness, the result is more similar. You can recover some highlights on S-Log2 and reduce noise on S-Log3 by making the shadows a bit darker. Boosting the shadows on S-Log2 adds a bit of noise but not more than what you get with S-Log3.
You may have noticed that the colours are not exactly the same in the video above and you’d be correct. This is because I used two different colour modes, both designed for Log curves.
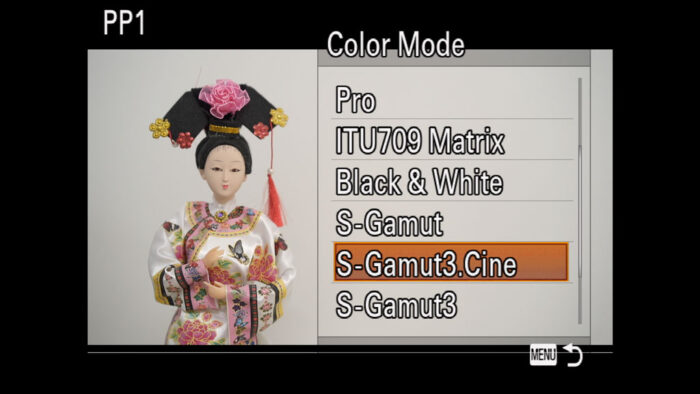
For S-Log2, I selected S-Gamut which is the one that Sony recommends. For S-Log3, there is S-Gamut3 and S-Gamut3.cine.
The “cine” version has a smaller colour gamut than the normal “3” version, which will work fine in many cases. Use S-Gamut3 if your end product needs to have a wider colour gamut (bigger than the standard BT.709).
Trivia: a colour gamut determines the amount of colour that a profile can reproduce. S-Gamut and S-Gamut3 have a wider colour gamut in comparison to other profiles such as P3 and 709.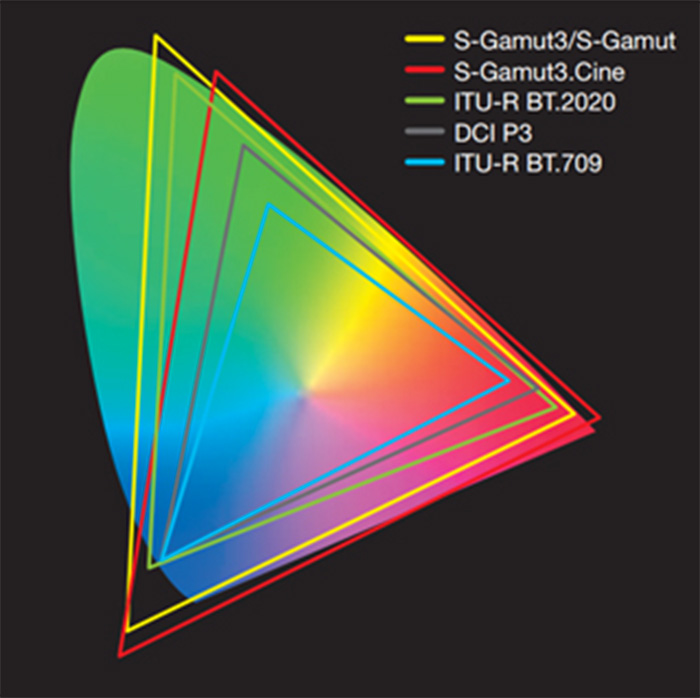
Working with S-Log
Working with Log is great, but there are some important things to take into consideration.
First, it requires a bit of knowledge of post production. In the wonderful world of the internet, you won’t have trouble finding tutorials that explain everything you need to know, but of course it requires extra work. I would also add that you need a good video editing software capable of applying precise colour adjustments. One of the best, Davinci Resolve, is free to use but not the easiest software to begin with.
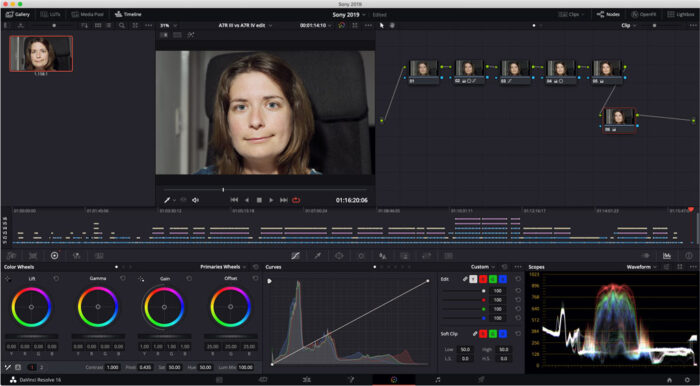
Second, you have to think about your exposure. A Log profile opens the shadows more than any other setting, which is good for grading but also makes noise more visible. Therefore, try to expose for the right as much as possible so that the dark areas of the image are as bright as possible.
Normally, you would not be inclined to do that for fear of blowing out your highlights, but thanks to the Log curve, more information in the bright zones is preserved by default, so you have more leeway for overexposing while recording. Also remember that it is easier to open the shadows while shooting, rather than doing it in post where you can have more noise to deal with.
In the video below, you can see that raising the exposure by one extra stop gives you less noise in the shadows, and the small sacrifice in the highlights is irrelevant to the overall composition.
Third, no Sony camera records in 10-bit (internal or external) as of now, and S-Log2 / S-log3 are designed to work with 10-bit footage (they were created for more expensive camcorders). This means that they may not generate sufficient gradation, especially in the dark areas, when recording 8-bit footage.
Trivia: recording in 10-bit means recording 64 times more colour depth in comparison to 8-bit.
Using an external recorder to capture more colour information (4:2:2 via HDMI rather than 4:2:0 on the SD card) and increase the bitrate (internal is max. 100Mbps) can help a little but you’re still dealing with an 8-bit signal.
This is not a big problem necessarily depending on the type of work you’re doing and where the final product goes. But for very precise colour grading, the footage from your SD card, or even from an external recorder could show some limitations.
Now that competitors have started to include 10-bit recording on their mirrorless camera, it’s time for Sony to catch up and take better advantage of its excellent sensors.
Sony A7 III, A7S II, A7R IV HLG Settings
HLG is not available on the A7 I and A7 II series.
HLG stands for Hybrid Log Gamma and is a standard developed by the BBC (UK) and NHK (Japan). It is also known as HDR video. Recording with this profile allows you to stream your movie on compatible HDR TVs and other devices with a superior brightness range in comparison to SDR (Standard Dynamic Range).
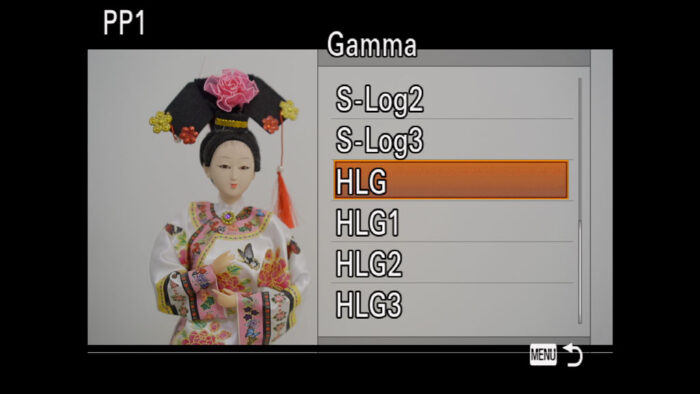
You may think that this setting is only related to the final end use, but HLG is an interesting profile because it records more dynamic range than most other gamma curves, without giving you the same flat look you get with S-Log (the image doesn’t look unnatural). You still need to colour grade a little, but the process can be as quick as adding a bit more contrast and increasing the saturation.
In the example below, you can see that HLG loses some highlights in the window, but the image has better contrast and saturation overall.
This is why HLG has become my favourite setting: I get excellent dynamic range and I spend less time in post. You can also tweak some of the parameters found in the Picture Profile we discussed earlier to try to have a decent result in-camera.
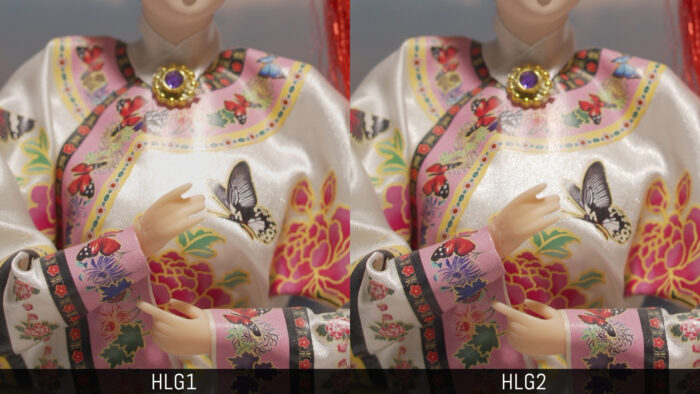
When you scroll through the gamma setting, you’ll notice that there are four HLG options. In comparison to the base HLG:
- HLG1 reduces noise but also dynamic range
- HLG2 provides a nice balance
- HLG3 increases DR but displays more noise.
Overall I like to use HLG3 because not only do I get more dynamic range, but the noise is also cleaner and more uniform than HLG and HLG2 as you can see below.
When you work with HLG, there are only two colour modes available:
- BT.2020: it corresponds to the HDR standard ITU-R BT.2100
- 709: for the standard HDTV format (BT.709). Use this one unless you’re aiming to broadcast on an HDR compatible device.
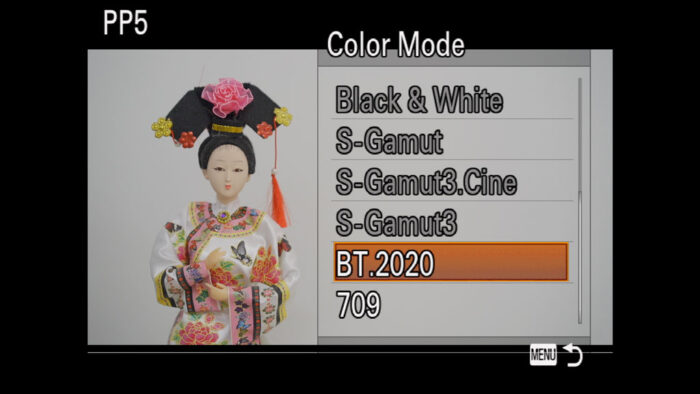
Trivia: BT.2020, also known as Rec.2020, is fundamentally the next generation of standardisation for broadcast television, specifically ultra-high definition (4K). It can work with Standard Dynamic Range and has a wider colour gamut than Rec.709. BT.2100 is compatible with High Dynamic Range, and therefore is a step above BT.2020.
The naming of Sony’s Picture Profile setting is confusing because although the color mode is called BT.2020, it is compatible with BT.2100. Sony says that it has been named this way for consistency with other cameras and functions (the whole HDR standardisation is a bit all over the place to say the least).
Gamma Display Assist on Sony A7 III, A7S II, A7R IV
Not available on the A7S, A7 II, A7R II
When you record with a Log or HLG profile, the preview on your LCD screen doesn’t reflect the final look of your video. You’ll see a desaturated image with less contrast.
If you want to have a preview with normal colours and contrast, you can use a setting on your A7 III called Gamma Display Assist:
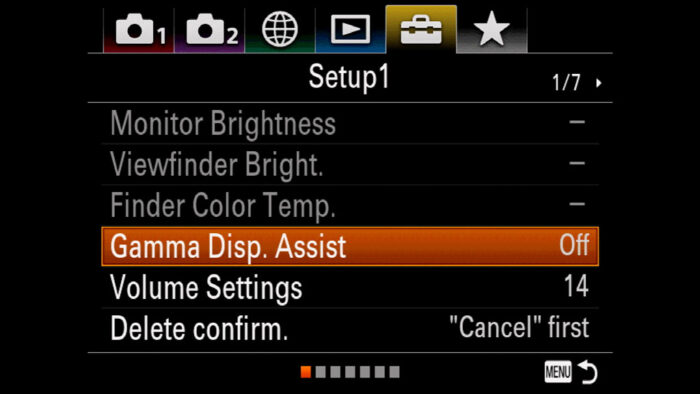
- Go to Menu Setup 1
- Scroll down to Gamma Disp. Assist and press OK
- Choose Auto or select a setting manually. If you’re using S-Log2 or S-Log3, choose the appropriate one to convert to 709 (800%).
- If you’re recording with HLG, choose the setting that converts either to 709 or BT.2020.
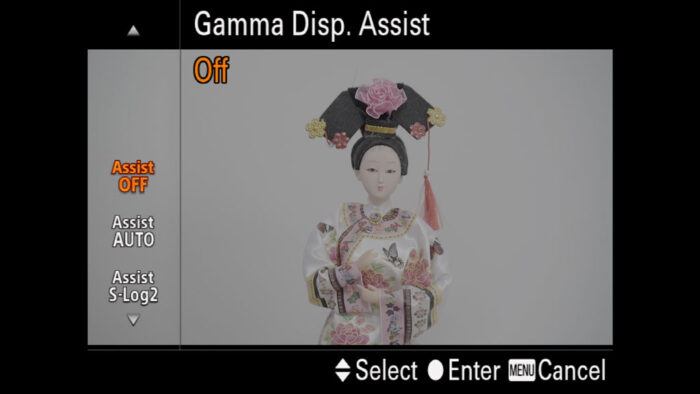
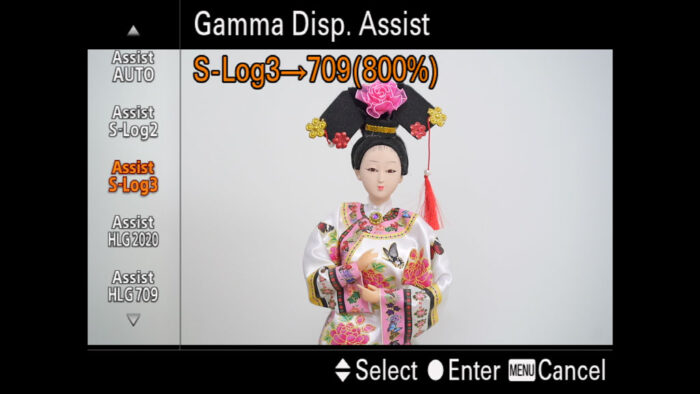
It can also be used when playing back movies on the camera’s monitor/viewfinder.
Note: Gamma Disp. Assist doesn’t work when the camera is connected to a TV or monitor. If you’re using an external recorder, it may have a similar function.
Sony A7 III, A7S II, A7R IV Low Light Profile
With so many parameters available within the Picture Profile, you may be wondering if there is a good low light or night profile for your Sony A7 III or other A7 model to keep the noise at an acceptable level when you have to raise the ISO.
The answer is difficult to give because there isn’t a noise reduction setting in the Picture Profile. This means that noise is always there, but some settings can hide it better than others.
Note: if you record with Log and colour grade, your editing software may have some tools to reduce noise.
If we look at the gamma curves, I find that Cine3 (or Cine4) give slightly better results than Cine1 or Cine2. The difference between Cine or Movie is much more difficult to assess because the main difference you see is more contrast for the Movie gamma mode.
You may be inclined to increase the blacks to “hide” the noise, but I find that choosing a level close to -7 can actually accentuate the contrast and make noise less subtle.
Finally, we can investigate the Adjust area of the Detail setting. As I said earlier, this is advanced territory and I honestly never venture here myself. That said, I found that setting -2 for the V/H Balance does decrease noise a little. Setting Crispning to 7 helps but be careful because it softens the image as a result. As for Limit, keep it to 7.

You can see some examples in the video below.
The truth is that most of the tweaks you can make are subtle, and you may spend a lot of time to ultimately obtain very little. The low light performance of your A7 camera is really tied to the performance of its sensor and the ISO sensitivity.
If you want to change some of the advanced settings, make sure to do it on a PP preset other than the one you use frequently. There are so many settings in the Picture Profile that you can easily forget what you’ve changed and realise weeks later that you’ve been shooting with wrong values.
Sony A7 III, A7S II, A7R IV Picture Profiles: Final Recommendations
As you can imagine, the number of PP versions you can create is almost limitless. It all comes down to personal taste, if you want good results straight out of camera or prefer to colour grade, and where the final video needs to be shown.
Don’t be afraid if you don’t get good results straight away, as it takes some trial and error to understand which profile works best in which situation.
If you’re a beginner, limit yourself to Black Level, Gamma, Colour Mode and Saturation. Once you’ve acquired more experience, you’ll learn how to deal with the other parameters. Remember that in addition to all this, White Balance and White Balance Adjustments play an important role and you should set these two first.
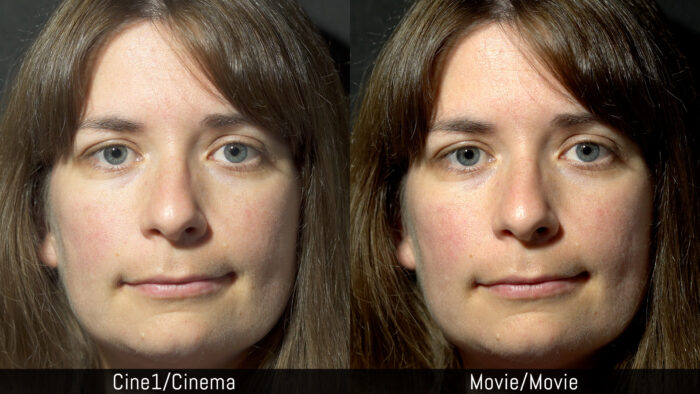
While searching for the right look in-camera, it is also important to consider skin tones when recording close-ups of people. I always like to choose a softer gradation, so a gamma like Cine1 or Cine3/Cine4 would satisfy my needs, and I can complete a few things in post. As you can see below, Movie adds more contrast and saturation, which can be fine depending on the look you’re after.
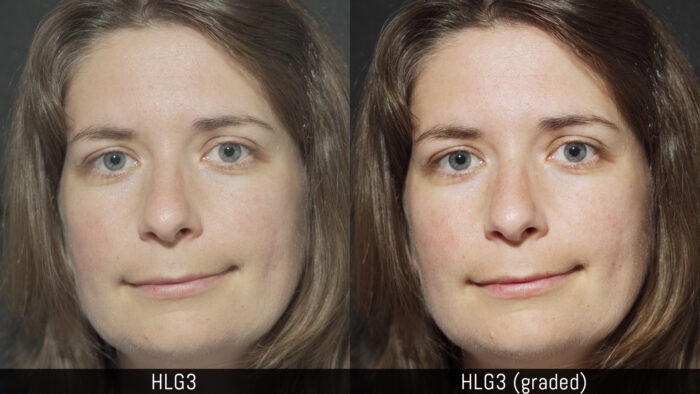
If you are interested in colour grading, start with the HLG setting, which is easier than S-Log. You can even try to adjust other parameters such as Black Level and Saturation to have a good result in camera with the best dynamic range possible. There is a lot you can do with HLG both in-camera and in post, as you can see from this second portrait example.
Once you’re feeling confident and want to go a step further with colour grading, then S-Log2 / S-Log3 is the next natural step. But at the risk of sounding repetitive, I think you’ll find HLG more than enough in many situations.
Sony A7 III Profiles for Video: My Custom Presets
To finish off, here are some of the presets I have used and tweaked on a regular basis for my reviews and comparisons. I hope they can be helpful for you as a starting point.
PP1: Soft looking image that requires small adjustments in post and pleasant with skin tones
- Black Level: -7
- Gamma: Cine1
- Black Gamma: Narrow / -6
- Knee: Manual, 75%, +2 (you many need to vary this depending on your specific light situation, if you don’t want to bother leave it to Auto)
- Color Mode: Cinema
- Saturation: +15
- Colour Phase: 0
- Colour Depth: 0 (all)
- Detail: 0
Note: you can also choose the Cine4 picture profile to have a bit more contrast and highlight retention, and keep the black level a bit higher.
PP3: more contrast and saturated colours that can work well for landscape shots or other scenes where you want vivid colours
- Black Level: -7
- Gamma: Movie
- Black Gamma: Middle / -4
- Knee: Auto (100%, Mid)
- Color Mode: Movie
- Saturation: 0
- Colour Phase: 0
- Colour Depth: 0 (all)
- Detail: +4
PP5: record more dynamic range to do some colour grading in post
- Black Level: 0
- Gamma: HLG3
- Black Gamma: Middle
- Knee: Auto (100%, Mid)
- Color Mode: 709
- Saturation: 0
- Colour Phase: 0
- Colour Depth: 0 (all)
- Detail: 0
Note: if you want to get a good result in-camera without having to grade, increase the saturation and decrease the Black Level.
PP6 / PP7: Log profile for colour grade in post
- Black Level: 0
- Gamma: S-Log2 (or S-Log3)
- Black Gamma: Middle, 0
- Knee: Auto (100%, Mid)
- Color Mode: S-Gamut (or S-Gamut3.cine)
- Saturation: 0
- Colour Phase: 0
- Colour Depth: 0 (all)
- Detail: 0
Reminder: the links below are affiliate links. If you decided to buy something after clicking the link, we will receive a small commission.
Check price of the Sony A7 III on:
Amazon | Amazon UK | B&H Photo | eBay
Check the price of the Sony A7R III on:
Amazon | Amazon UK | B&H Photo | eBay
Check price of the Sony A7R IV on
Amazon | Amazon UK | B&H Photo | eBay
Check price of the Sony A7 II on:
Amazon | Amazon UK | B&H Photo | eBay
Check price of the Sony A7R II on:
Amazon | Amazon UK | B&H Photo | eBay
Check price of the Sony A7S II on:
Amazon | Amazon UK | B&H Photo | eBay
Second-hand Sony gear on
MPB US | MPB UK
Sony A7 / A9 Resources on Mirrorless Comparison
Real World Comparisons
- Sony A7 III vs A7R III
- Sony A7R III vs A7R IV
- Sony A7R II vs A7R III
- Sony A7R III vs A9
- Sony A7 III vs Nikon Z6
- Sony A7R III vs Nikon Z7
- Sony A7R III vs Fujifilm GFX 50s
- Sony A7R III vs Panasonic S1R
- Sony A7 III vs Canon EOS R
- Sony A7 III vs Fujifilm X-T3
- Sony A7 II vs Canon EOS RP
Sample Photos
- Sony A7 III sample images
- Sony A7R III sample images
- Sony A7R IV sample images
- Sony A7 II sample images
- Sony A7R II sample images
- Sony A7S sample images

