You are now on page 2. Here you can read all my findings concerning the performance of the camera (autofocus, speed) as well as information about the movie capabilities, battery life and other features.
- Page 1: design, functionality and image quality
- Page 2: autofocus, speed, stabilisation, video, other features and conclusion
Table of Contents – Page 2
1. Autofocus system and Target areas
2. Single Autofocus, Face and Eye detection
3. Continuous Autofocus and Tracking
4. Autofocus settings
5. Shutter mechanism and options
6. Continuous shooting speed and buffer
7. Sensor shift: image stabilisation and High Res Shot
8. Video capabilities: 4K vs Full HD
9. Flash
10. Other features
11. Battery life
12. Price
13. Conclusion
14. Additional sample images
Autofocus system and Target areas
The E-M1 was the first mirrorless camera to introduce a hybrid AF system with 81 contrast detection points and 37 phase detection points. At the time it was a very important choice for Olympus because the camera marked the end of its 4/3 DSLR line-up. Phase detection allowed them to update their 4/3 to micro 4/3 adapter (MMF-3) and maintain good AF performance when using 4/3 lenses on the camera. Doing so also made it easy for 4/3 DSLR customers to transition from one system to the other, and continue using some of their favourite Zuiko lenses on the E-M1.
The E-M1 mark II becomes the second Micro Four Thirds camera with a hybrid autofocus system. It has 121 points that are all hybrid (contrast and phase) and the phase detection areas are all cross-type: this means that the points are two dimensional and can detect contrast horizontally and vertically.


The E-M1 II uses both contrast and phase detection in Single and Continuous autofocus. The E-M1 on the other hand only uses contrast detection in S-AF and phase detection in C-AF. With 4/3 lenses, phase detection is used in S-AF too.
Concerning the AF areas, both cameras have All-Target (Multi), 9-Target, Single Target and Small Single Target options. The E-M1 doesn’t have the 5-Group and 5×5-Group Target.
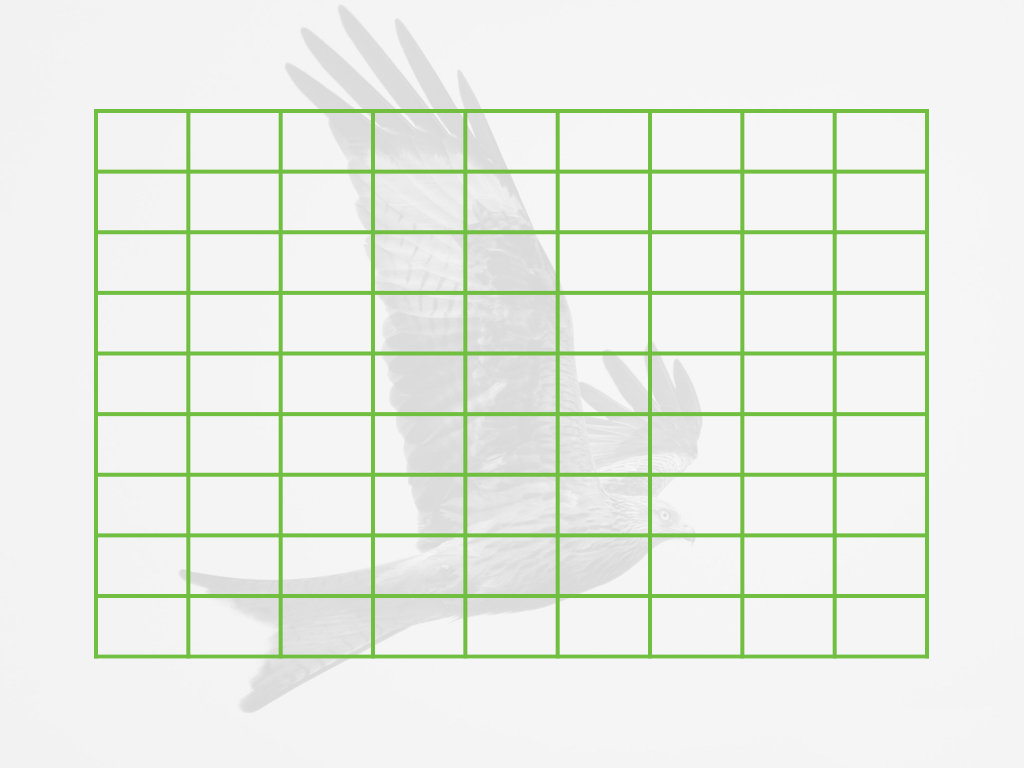
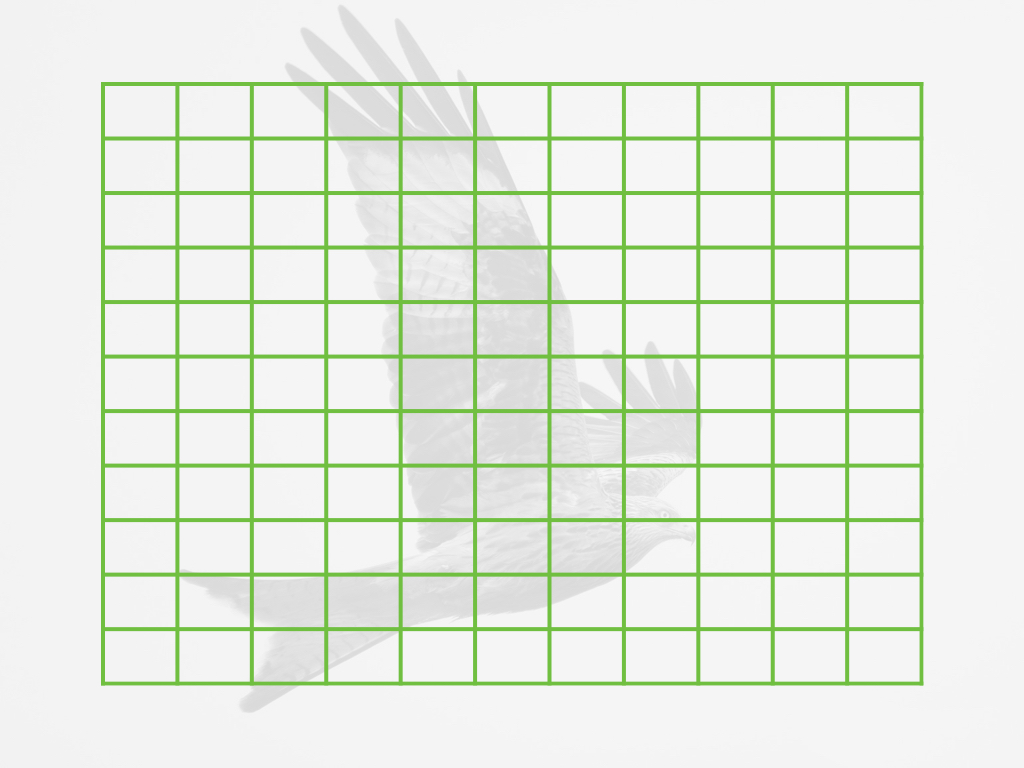
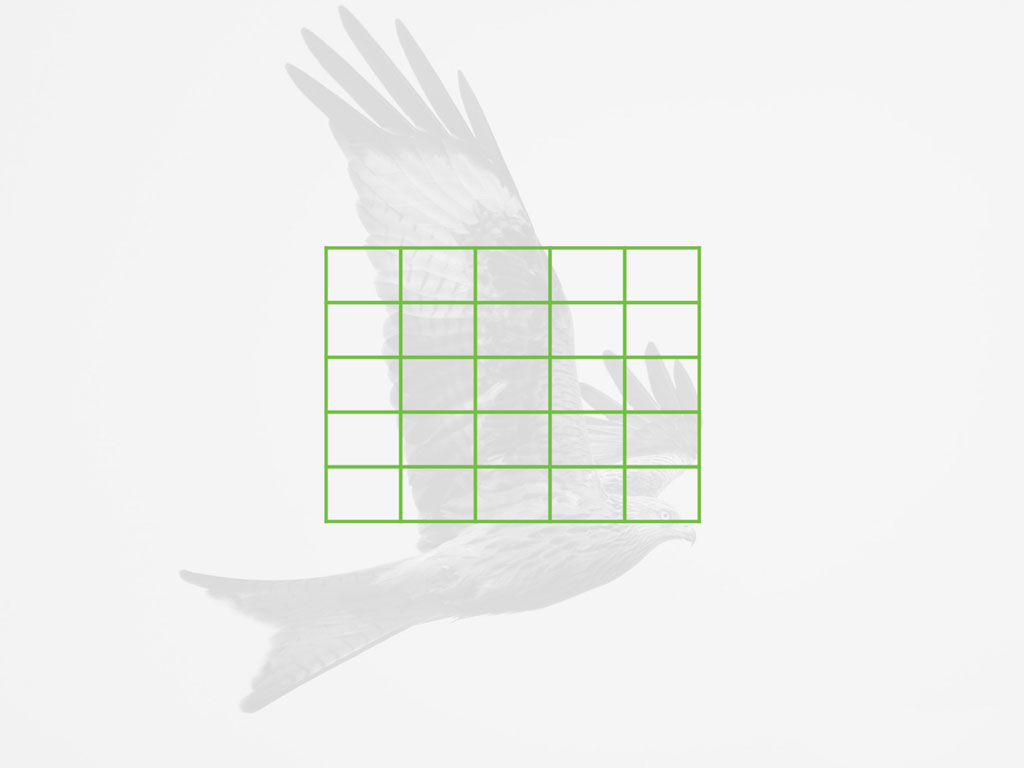
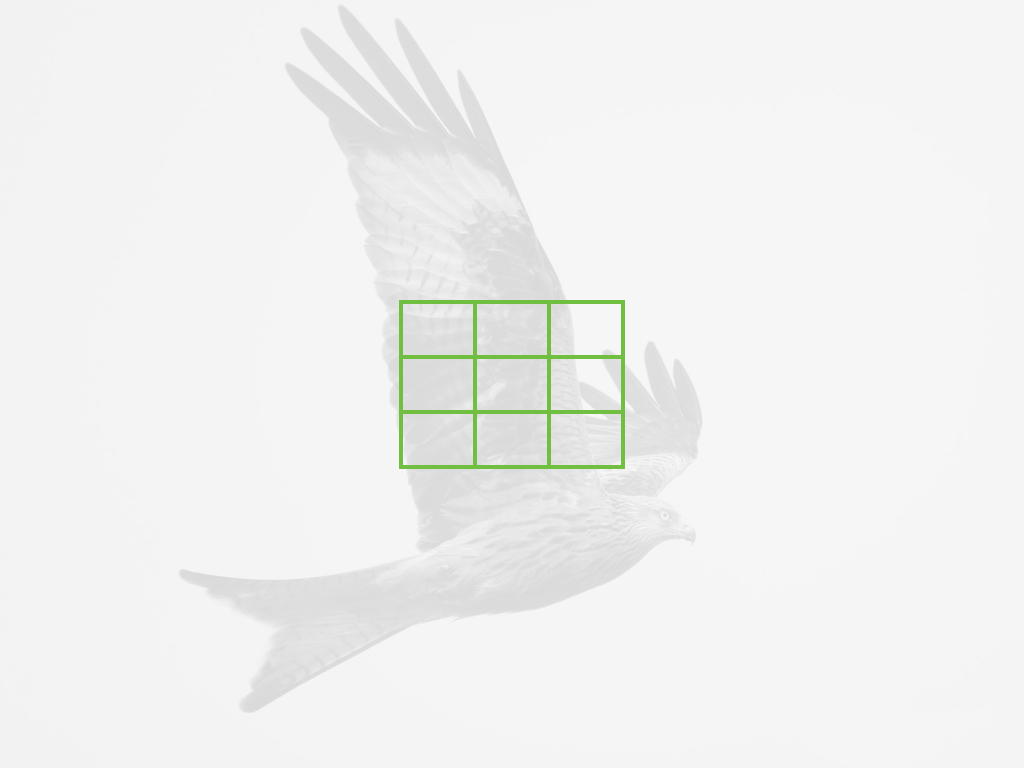


The single smallest point on the E-M1 is definitely the fastest setting when working in Single or Continuous AF. The 9 Group is good for birds and sports, while I found All-Target to be slower. On the E-M1 II, the 5-Group Target is often the optimal solution but I got similar results with the other target modes as well. The 5×5 Group (firmware 3.0) is optimal for birds in flight.
The difference becomes more substantial if you want to use a 4/3 lens. The E-M1 will only display the 37 phase points at the centre while the E-M1 II will still allow you to use the entire focus area.
Both cameras have an AF Focus Adjustment setting if you need to calibrate 4/3 lenses (front and back focus). Unfortunately I couldn’t test any Zuiko DSLR glass with the E-M1 II so my experience is limited to the E-M1 as of now. The results aren’t bad on the 3-year-old camera and Olympus has improved the performance of these lenses via firmware. I am confident that the E-M1 II is as capable, if not even better when it comes to autofocus with 4/3 lenses.

Single Autofocus, Face and Eye detection
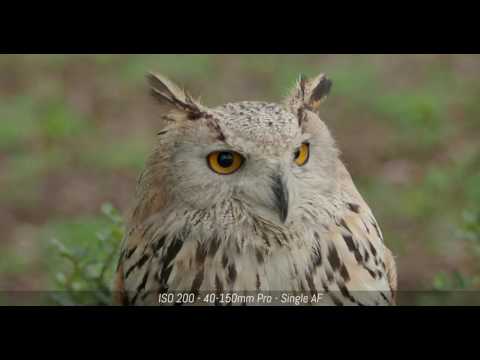
In Single AF in good light, I couldn’t spot a huge difference between the two cameras but I do find the E-M1 II to be quicker and more precise. It surprised me especially when it locked onto a small subject surrounded by confusing elements like this little bird encircled by high grass. This is a scene where the E-M1 can struggle more and produce back and forth movements.

In low-light, the E-M1 II has more sensitivity (-2 Ev vs 0 EV) and I find it locks focus faster as well. Firmware 3.0 has expanded the minimum sensitivity to -6Ev (f1.2 lens). However it can still suffer when there are specular highlights in the background or slow down in situations with poor contrast just as the E-M1 does but it happens somewhat less.


Face and Eye detection have been improved. I used it mostly with the new 25mm Pro at f/1.2 and f/1.4 and it nailed the focus point precisely for the portraits I took during the Torino Comics event. That being said, the smallest single point is still more reliable in my opinion for this type of work.


Only once did Face and Eye detection give me mixed results on the E-M1 II and that was during an afternoon spent with the family at home. I was taking pictures of my active little cousins, who are just one and four years old, and I ended up with several misfocused images. So it is an improvement but still not 100% reliable.
Continuous Autofocus and Tracking
Important note: the E-M1 II autofocus performance has been improved with firmware 3.0. The camera now has the same AF algorithm as the flagship E-M1X. This leads to several improvements including with difficult subjects such as birds in flight. You can read my full report here.
This is the most important upgrade for two reasons: first, Micro Four Thirds users were waiting for a camera with superior AF capabilities to take better advantage of all the new lenses designed for sports and wildlife photography. Second, other mirrorless competitors such as Sony and Fujifilm have made excellent improvement in the past year, so of course, people are curious to compare systems.
With the right settings, the original E-M1 isn’t a bad camera in terms of continuous autofocus performance but the E-M1 II is a relevant step forward. However it takes specific and challenging examples to really appreciate the difference.
If we analyse the simple test below with the subject running towards the camera (M.Zuiko 75mm 1.8 lens used), there isn’t a drastic difference. I used the single target on both but I had the smallest focus point on the E-M1, which has always given me more accurate results than the largest focus point.


Then Heather and I used the cameras at a football game: she was testing the 12-100mm Pro and I used the Lumix G 35-100mm f2.8. Here we got a similar keeper rate of around 70%.


Now I admit that I was expecting a little more from E-M1 II during this first field test. Often shots that looked fine on the rear monitor revealed themselves to be slightly soft or out-of-focus, even when the subject clearly stood out from the background without too much confusion around him. This happens on the E-M1 too, of course, but I was hoping to see less of this behaviour on the new camera.

It looks ok but…

Note that for every field test, I tried different settings to find the optimal configuration and I will talk about them in the next chapter. One might be tempted to blame it on the Panasonic lens but I don’t think this is the case for two reasons: I’ve always had good results with the lens on every other Olympus camera I’ve ever tested and second, I ended up with mis-focused results in other situations with Olympus lenses too.
I found the first improvement when I mounted the 300mm f/4 Pro to capture some close-ups of the players. The experience was definitely more positive than with the E-M1 and the same lens last winter (when I was reviewing the 300mm Pro). So the new camera gives more constant result with extreme telephoto lenses.

One year ago, I got some good shots but a lower keeper rate than with the new camera and the same lens.


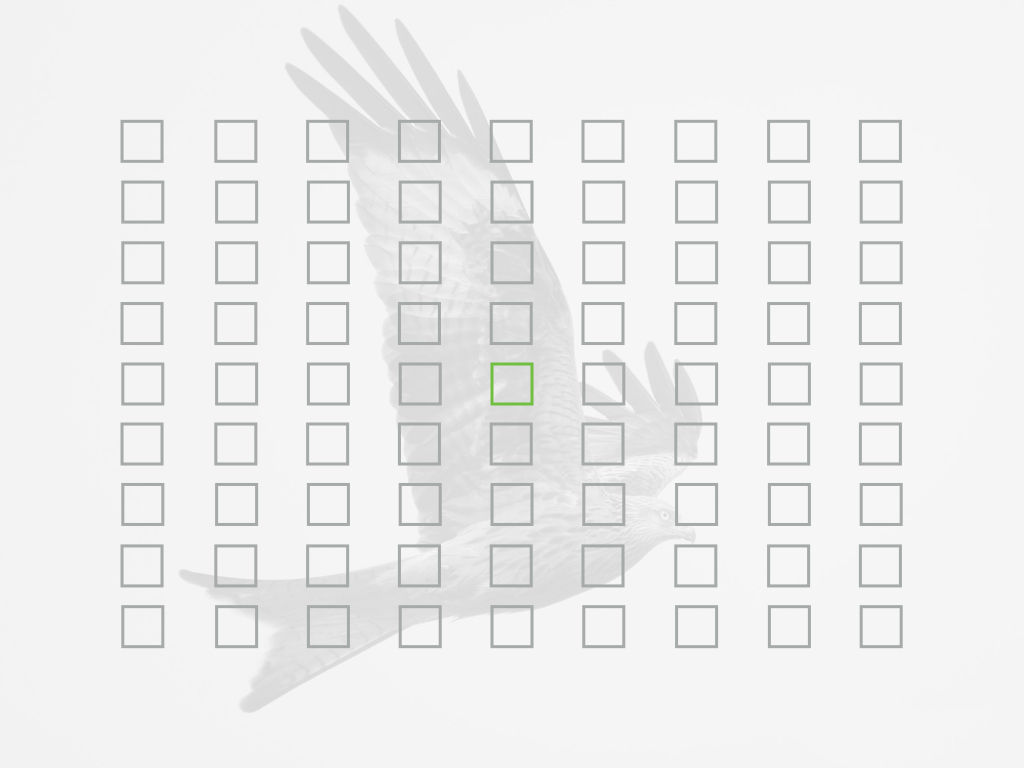
The second improvement was found during my red kite test, which I perform with every new camera I review. The E-M1 II locks faster and is definitely more reactive when correcting focus.
With the E-M1, you can more easily end up with an entire sequence that is out-of-focus due to the camera not being able to correct the focus quickly enough. On other occasions, it can simply refuse to lock onto the subject especially if the conditions are less than ideal like a cloudy or rainy day. This happens less with the E-M1 II.


The performance is not perfect, however, as the camera can still have a hard time tracking the focus quickly enough, especially if the bird decides to fly closer than expected.

An example of an out of focus shot, which happened several times with this subject. Sometimes it was my fault (I don’t always track them well) while other times it was the camera that struggled.
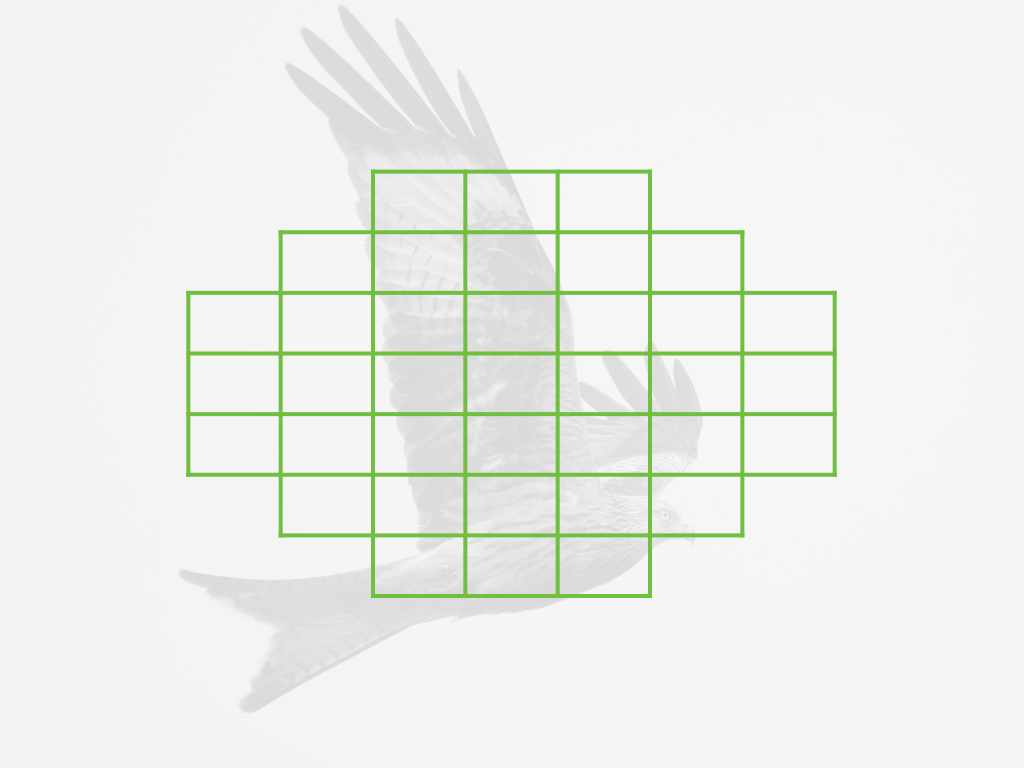
One AF mode that can be helpful for birds is AF-C + Tracking: once the camera locks onto the subject, it follows it regardless of the position it assumes within the frame. If the bird is against a clear blue sky, the hit rate is really high and the tracking is more accurate than with the E-M1. However, against a more confusing background the camera can misfocus more easily.

AF-C + Tracking is ideal for this kind of shot…

…but can also misfocus with a less uniform background.
AF-C + Tracking also proved useful for mountain bikes in critical conditions with heavy backlight like the scene below. By using the normal C-AF mode and various Target areas, the hit rate was really low. Switching to tracking increased the hit rate to the point that I was able to bring home a few good shots.

Here AF-C + Tracking helped me improve a pretty bad hit rate. But tests aside, another solution is to pre-focus and use the great burst speeds to get the perfect shot (more on this later).
Continuing with the theme of difficult light conditions, the most extreme example I have with the E-M1 is from a night marathon. The other photographers and myself were struggling, regardless of the camera used, and as such, we were all crowded around the few areas where there was some light. In this case, the keeper rate wasn’t great but the camera did better than I had originally expected: proof that the E-M1 is not bad at all.


Although I wasn’t able to attend a night marathon to make a direct comparison, the E-M1 II did give me a positive impression at the mountain bike practice in the woods once again, where the light was dim and you had to crank up your ISO to 1600 or even 3200. Overall I was satisfied with the keeper rate which was over 60%.


Autofocus settings
To keep the various chapters more organised, I decided to separate the autofocus settings from the rest. It is worth dedicating a chapter to this because there are multiple settings, some shared by the two cameras, some new to the E-M1 II. However, neither user manual gives a friendly explanation.
One setting that has disappeared from the E-M1 II is Full Time AF where the camera focuses even without half-pressing the shutter release button. Personally I never used it as it drains the battery life more quickly so I didn’t miss it on the new camera.
Then we have one of my favourite settings of all time: the Home position.
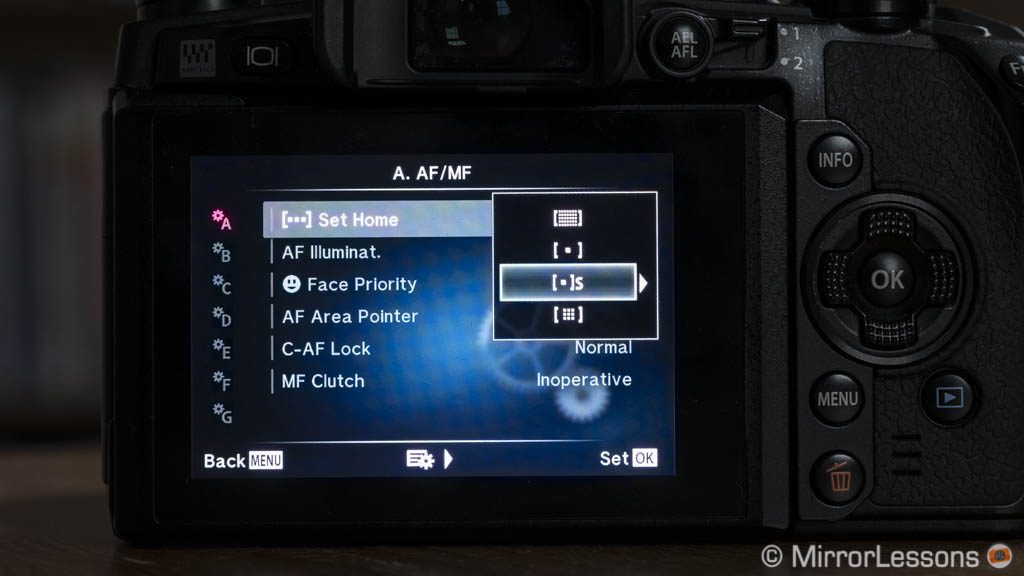
Via one of the function buttons, you can recall the AF point or group of points to a pre-defined position that you set earlier in the Menu. This allows you to do a number of useful things. Here are a few practical examples:
- you can quickly switch between two AF point positions, such as from the centre of the frame to the left or right area. This can be useful for portraits or any situation where you often centre, then de-centre your subject in the composition.
- you can switch between two Target modes like 9-Group and Single.
- on the E-M1 II you can also change the AF mode in the process, such as switching from S-AF to C-AF.
Concerning the possibilities to move the focus point, you can either use the arrow pad on the rear or the twin dials on top. The latter can become the most rapid way once you get used to it. You can then change the AF Target modes and Face/Eye detection by using either the INFO button and the arrow pad or the Super Control Panel.
On the new OM-D camera, there is a new option called Custom Settings (Custom Menu A2) that gives you even more freedom to organise which (twin dials and arrow pad) does what (focus point position, Target modes and Face/eye detection) with two sets available (one default and one customisable).
The AEL/AFL button can be configured according to the S-AF, C-AF and MF modes with same options on both cameras.
With the E-M1 II you can choose to hide certain AF Target modes and display, for example, only Single and 9-Group if you only use those two. You can also select how to display the AF points on the screen. For example, the On2 option will display the cluster mode when using All-Target in Continuous AF.
Both cameras include important settings for continuous AF but the E-M1 II has more options once again.
Let’s start with the most important called C-AF Lock that controls the tracking sensitivity. On the E-M1 you can choose to turn it Off or select between Low, Normal and High with the last being the most sensitive value. On the E-M1 II, this setting has been re-programmed and you now have 5 steps from -2 (Tight, meaning the AF is less sensitive) to +2 (Loose, meaning the AF is more reactive).
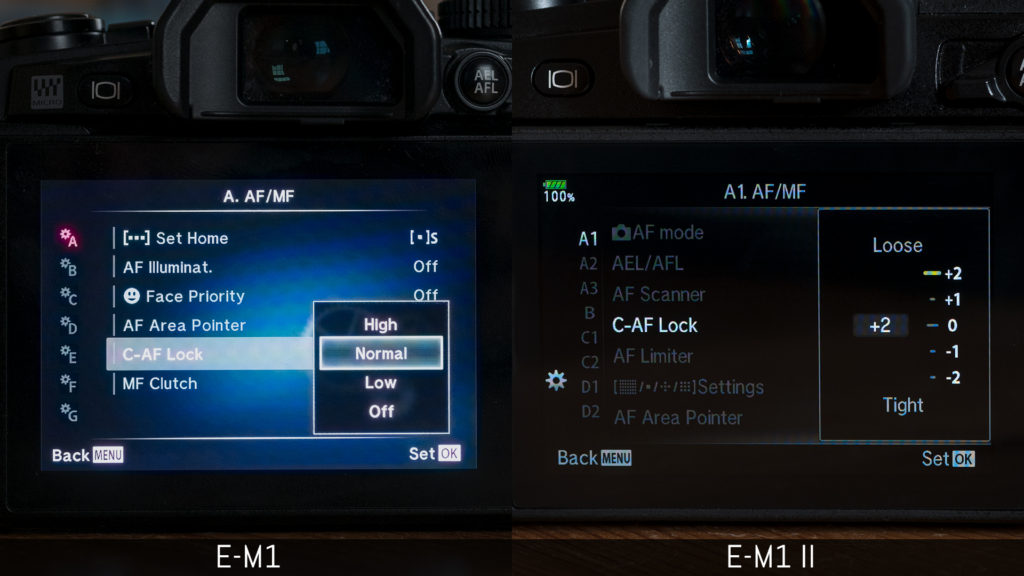
I found C-AF Lock way more efficient on the new camera. For example, I keep it at +2 for birds in flight or very fast subjects coming towards me and it makes a more significant difference than leaving it to 0. On the E-M1, I find the difference between High, Normal and Low less noticeable. The same reasoning can be applied to other values: +1 or 0 can be a good match for group sports where movements can be erratic and go in different directions. And -1 or -2 is useful if you subject moves from the left to the right and some obstacles pop up randomly between your camera and the subject: the AF is less tempted to refocus and stays on the subject instead.
Then we have a few settings that are exclusive to the E-M1 II. First we have AF Scanner: you can control the AF behaviour when the camera can’t detect the subject because the scene is either too dark or the contrast, too low.
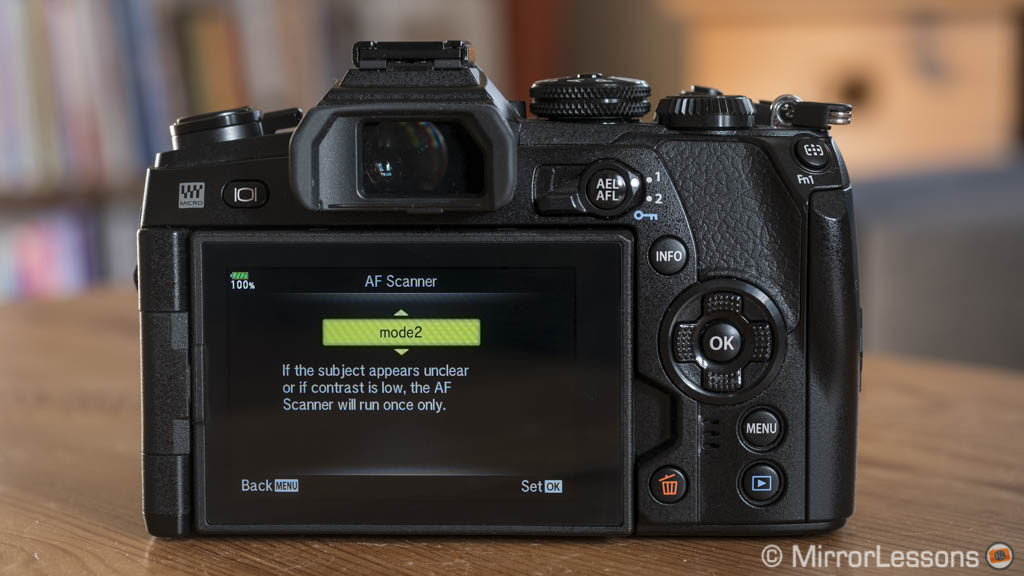
Three options are available:
- you can deactivate AF scanner meaning the camera won’t try to refocus
- you can activate it once, meaning the camera will try to refocus only one time
- you can keep it fully activated and the camera will try to refocus constantly and either succeed or give up after a few seconds.
In my tests I find AF Scanner effective mainly in C-AF or C-AF + Tracking but it really takes a pitch dark scene or a white wall with no texture to confuse the E-M1 II. So when can this setting be useful?

A low-light scene from a contemporary dance show, a good example of what can make the AF go berserk: here AF Scanner could be helpful on the new camera.
Well, I wish I had it on the original E-M1 when shooting contemporary dance in Italy. This type of dance often has moments with very poor light, or quick changes where the dancer goes from light to darkness and back to light again. AF Scanner can force the camera to stop changing the focus when the dancer goes dark so that when it comes back into a favourable light, the camera keeps tracking as if nothing has happened.
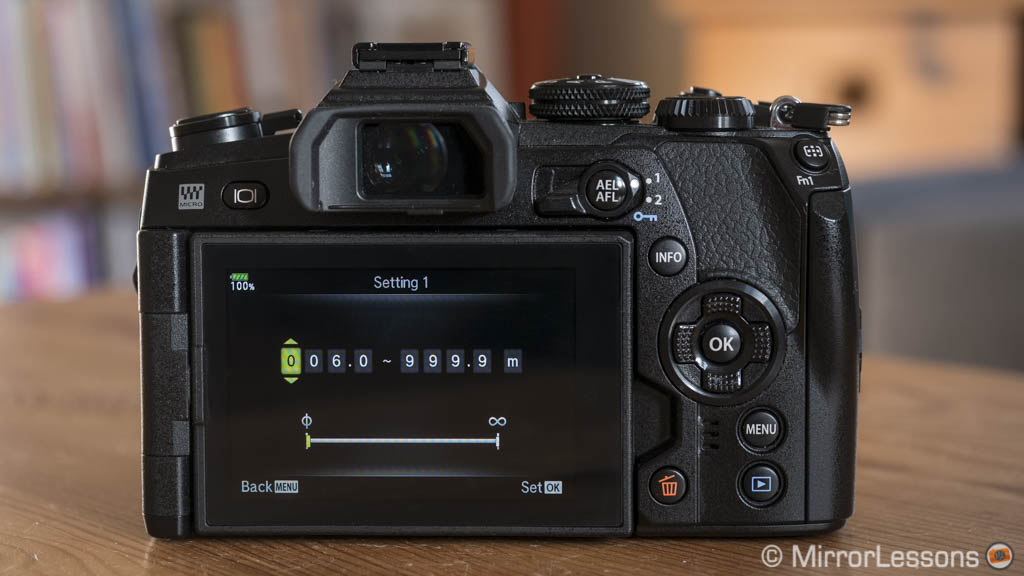
Finally we have AF Limiter, which is an extension of the physical switch you find on some telephoto lenses like the Pana-Leica 100-400mm or the Olympus 300mm f/4.

If you know the approximate distance range where your subject will pass, you can set a minmum and a maximum value. The camera will then concentrate on that specific range, minimising the risk of mis-focusing on objects that are too close or too far away. It can also help the camera avoid focusing on obstacles in the foreground.
For birds in flight, it can be useful to set a minimum if you know that the birds will never get close. However if your subject is unpredictable and decides to go outside the distance zone you defined, AF Limiter becomes the wrong setting to use.
Shutter mechanism and options
The shutter mechanism of the E-M1 II is new with an improved durability of up to 200,000 cycles.
Concerning the maximum shutter speeds, both cameras can go as high as 1/8000s with the mechanical version. With the electronic shutter, it is 1/16000s for the E-M1 and 1/32000s for the E-M1 II.
The Release Lag Time option available on the E-M1 (selecting Short will make it faster) has disappeared from the E-M1 II, meaning that it is faster by default on the new camera.
Here comes a small complaint about the new camera: the shutter release button is a little too sensitive in comparison to that of the E-M1.
It can be annoying especially if you are used to focusing by half-pressing the button. Moving AF to the AEL/AFL or a Fn button can be a good solution.
The electronic shutter allows for silent shooting on both cameras. The E-M1 II has an extra option to automatically disable sounds, AF illuminator and flash modes when choosing the electronic shutter.
Finally both cameras have a mode called Anti-Shock where you can set a delay between the press of the shutter button and the shutter being activated. If set to 0s, the camera uses the electronic first curtain. It was originally engineered to fix some shutter shock issues that occurred on various Olympus cameras. I never experienced it with the E-M1 but I know some users reported the opposite. With the E-M1 II, I didn’t encounter any problems either.
Continuous shooting speed and buffer
When it comes to speed, there is another important chapter to talk about when comparing these two cameras.
The E-M1 has excellent continuous shooting capabilities that have been improved via firmware. More precisely here is what it can do.
E-M1 – High setting (without live view, last picture taken is shown instead):
- 10fps with mechanical shutter (AF locked on first frame)
- 9fps with mechanical shutter and continuous AF
- 11fps with electronic shutter (AF locked on first frame)
E-M1 – Low setting (with live view and blackouts):
- 6.5fps with mechanical shutter and continuous AF
- 5fps with electronic shutter and continuous AF
Though these frame rates are more than decent, they pale in comparison to what the E-M1 II has to offer.
The E-M1 mark II sets a new standard when it comes to continuous shooting speeds. Only the Nikon 1 system can be compared but the sensor is smaller.
E-M1 II – High setting (without live view, last picture taken is shown instead):
- 15fps with mechanical shutter (AF locked on first frame)
- 60fps with electronic shutter (AF locked on first frame)
E-M1 II – Low setting (with live view and blackouts):
- 10fps with mechanical shutter and continuous AF
- 18fps with electronic shutter and continuous AF
Note that with both cameras, I’ve shown the maximum speed available in each mode but you can lower the frame rate if you wish.
What is interesting to note here is that both cameras have a similar speed with the mechanical shutter and continuous AF (9fps for the E-M1, 10fps for the E-M1 II). However the blackouts on the E-M1 II are faster so the the live view is better on the new camera. Now 10fps is not a bad speed at all, and just to give you an example, this is the kind of moment you can freeze easily enough:

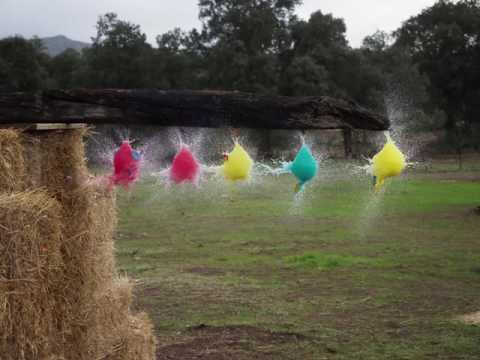
The E-M1 II really stands out for the performance of its electronic shutter. What’s more, it introduces a new mode called Pro Capture. When you half-press the shutter release button, the camera starts to load up to 35 images in the buffer memory. These images are deleted and replaced with the most recent as long as you keep the button half pressed. As soon as you fully press the shutter button, the camera writes these 35 images to the SD card. This helps you to capture the perfect moment for action shots.
Note: thanks to firmware 2.0, Pro Capture now works with Panasonic and four thirds lenses in H mode (focus locked on the first frame).
A good example is found below: Pro Capture at 60fps allowed me to capture the perfect moment when the four water balloons exploded or when the arrow entered the balloon but it hadn’t exploded yet.


I also tested the Pro Capture mode in a sports environment at 18fps with continuous AF. During the football game, my goal was to take the perfect moment when the player jumps to hit the ball with his head. Some results came close and one came out well.


The continuous AF performance is good at 18fps but rolling shutter can still be present, although it is much more contained than that of other cameras I’ve tested. The sensor readout is definitely faster than the E-M1 but in some situations you can wind up with slightly distorted vertical lines if you are panning quickly or an oval-shaped ball such as in the example below.
Note: you can read more about electronic shutter technology in our in-depth article here.

With such impressive continuous shooting speed come better buffer capabilities.
I ran various tests and the results I found all favour the E-M1 II.

If I highlight the speeds found on both cameras, we can see that the E-M1 II buffer is almost double even with a UHS-I card:
- E-M1, 10fps with RAW: 4s at full speed, then slows down to approx. 1.7fps
- E-M1 II, 10fps with RAW: 8s at full speed, then slows down to approx. 1.5fps
With the electronic shutter, the E-M1 II is superior despite the faster speed.
E-M1, electronic shutter:
- 11fps with RAW: 138 shots taken in 60s, meaning the speed slows down to 2.3 fps approximately
- 11fps with JPG: 403 shots in 60s, the speed slows down to 6.7 fps
E-M1 II, electronic shutter
- 60fps with RAW, UHS-II card: 600 frames taken in 60s so the speed slow down to 10fps
- 60fps with RAW, UHS-I card: 136 shots taken in 60s so it slows down to approx. 2.3fps
- 18fps with RAW, UHS-II card: 562 shots taken in 60s, it slows down to approx. 9fps after 8s
- 18fps with RAW, UHS-I card: 139 shots taken in 60s, it slows down after to approx. 2.3fps after 5s.
- 60fps with JPG, UHS-II card: 635 shots in 60s, the speed slows down to approx. 10.5fps
- 60fps with JPG, UHS-I card: 220 shots in 60s, the speed slows down to approx. 3.6fps
- 18fps with JPG, UHS-II card: 594 shots in 60s, it slows down to approx. 10fps after 10s
- 18fps with JPG, UHS-I card: 219 shots in 60s, it slows down to approx. 3.6fps after 8s
Note for the E-M1 II and 60fps/High option: if you leave the Frame Count Limiter to Off in the Custom C1 menu, it never stops but the speed decreases. If you set the Frame Count Limiter, it will stop after the amount you selected (max. 99 frames). This can help you avoid ending up with hundred of images.
Sensor shift: image stabilisation and High Res Shot
Both cameras feature 5-axis stabilisation and are compatible with Sync IS, which combines sensor and optical stabilisation with select lenses (12-100mm f/4 Pro and 300mm Pro f/4 as of now).
The E-M1 has a 4Ev compensation rating versus the 5.5Ev of the E-M1 II so we are talking about one and a half stops of improvement.
I did my side-by-side test by holding the camera with two hands close to my chest so that my arms were as relaxed as possible. I was able to push the E-M1 down to 2 seconds at 12mm using the 12-40mm Pro lens (sensor only). With the 12-100mm Pro (Sync IS) I got an almost-perfect shot at 8s at 12mm!
With the E-M1 II, I was able to push the exposure to 4 seconds with the 12-40mm and 8s again with the 12-100mm Pro at 12mm.


Now here the surprising result is that the performance was similar at 12mm with the 12-100mm Pro and Sync IS on both cameras.
One explanation is that the lens itself has stunning optical stabilisation (indeed, we managed a sharp shot at 4s with a old Panasonic GF5!).
Moving to the telephoto end, I got my best shot at 0.6s with the E-M1 and 75mm (sensor only) and 1s at 100mm with the 12-100mm Pro (Sync IS). On the E-M1 II, I achieved 1s with the 75mm and 2s with the 12-100mm.


During this side-by-side test, I didn’t manage to push the E-M1 II combo further but on other occasions, Sync IS gave me sharp shots at 10s and once even 20s (which I never managed to replicate!). Of course these examples are extreme and the hit rate is definitely low but I was never able to get close to these results with the E-M1.


Another thing to consider is that it is also a matter of how stable you are and how you feel at that particular moment (warm, cold, tired, etc). Leaning against a wall or anything that can help you be more stable will certainly help. This is why the results won’t always be consistent as there are many variables.
On a general note, remember that image stabilisation can affect the continuous shooting speed if you don’t choose Fps priority in the Menu (Custom C/Release section).
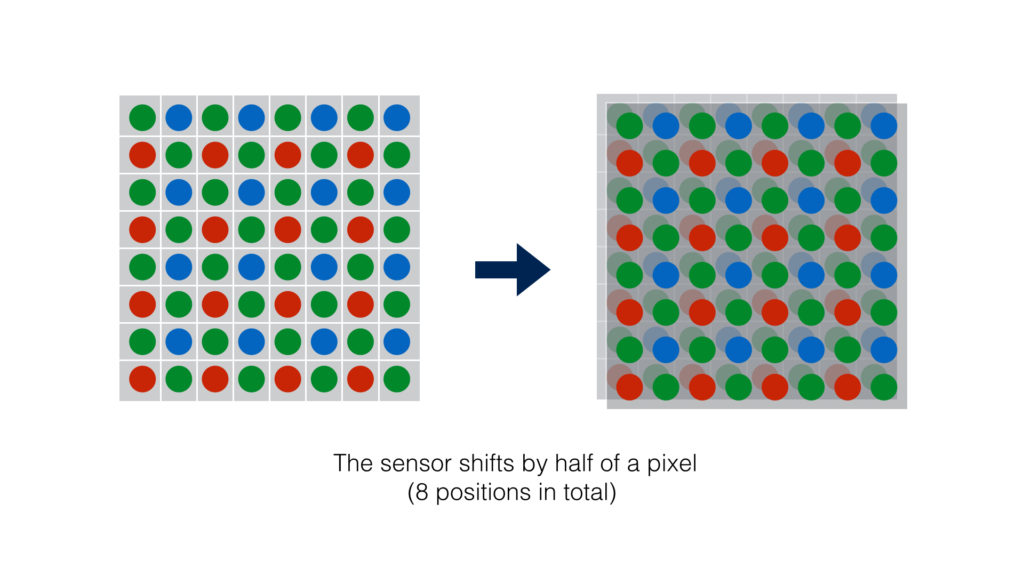
The E-M1 II uses the sensor shift technology for another feature called High Res Shot.
The sensor moves by half a pixel in-between shots, collecting details from the photosites in different positions and thus covering micro areas between pixels that would usually be skipped. It captures 8 images in total and merges them to create a 50MP (JPG) or 80MP (RAW) file.
Because the sensor shift technology of the E-M1 is older, the camera can’t benefit from it (High Res Shot was first introduced on the E-M5 II, so one year and a half later).
This mode also captures more colour information. The pixels change their position 8 times: each point on the image is captured by each of the blue, red and green pixels that comprise the standard Bayer sensor, something that doesn’t happen in normal shooting mode (it’s only one pixel per point). As a result, you have better colour rendering with the High Res Shot compared to the normal 20MP shot, although it might not always be obvious.
The current limit of this technology is that it needs to be used on a tripod and doesn’t work with moving subjects. Olympus made an improvement to moving water and other small elements that can change in the background but it doesn’t always work well and you can end up with areas of the image that lack detail.
The High Res Shot mode really shines for still life where you can take advantage of the high resolution, better colours and fine details. I advise setting a delay in the menu as any micro movements caused when pressing the shutter button or touching the rear screen can affect the result.

Click to open the 80MP version.

Video capabilities: 4K vs Full HD
The E-M1 was released at a time when Olympus wasn’t yet concentrating on video features. It has decent quality in Full HD (max. 30fps) and offers good stabilisation but there isn’t a lot more to say.
The E-M1 II is a different story: it is the first Olympus camera to record 4K video and is the most advanced mirrorless camera to date from the company when it comes to movie capabilities.
The E-M1 mark II can record in Ultra HD (3840 x 2160) at 30, 25 or 24fps and a bitrate of 102mbps. In Cinema 4K (4096 x 2160, 24fps) the bitrate goes up to 237mbps. Both formats are available without a sensor crop so the field of view of your lens doesn’t change. This is valid for 1080p as well, a characteristic shared by the E-M1 too, by the way.
The Flat Picture mode gives more dynamic range especially in the highlights. Thanks to firmware 3.0, the E-M1 II has the OM-Log400 profile for even more dynamic range, although I don’t find it to bring a substantial difference in comparison to other log curves. High ISO has been improved and there is a Noise Filter setting to control noise just like for still JPGs.
Rolling shutter is much more contained than on the E-M1. I haven’t found traces of aliasing or moiré in 4K and they are contained in 1080p.
The stabilisation is improved with less distortion and more fluid results when panning. It really is a camera you can use hand-held at all times. That being said, the E-M1 can hold its own when it comes to static shots, especially when combined with Sync IS as the video below demonstrates.

The E-M1 II can record in 1080p at a maximum frame rate of 60fps with better bitrate than the E-M1: 52mbps vs 24mbps. If you select the All-Intra compression (max 30fps), the bitrate goes up to 202mbps.
Unlike the E-M1, the new camera can use the digital teleconverter for movie mode too. The camera performs a 2x digital crop that can be used in 4K and Full HD. 4K is recommended as sharpness remains decent without invasive aliasing while in 1080p, the quality decreases significantly.
The E-M1 II is definitely faster than the E-M1 when it comes to autofocus for video. Thanks to firmware 3.0, the camera now uses phase detection during movie recording which improves the performance dramatically.
You can use the touch screen to refocus while recording on both cameras but the E-M1 II gives smoother and more precise results.
Concerning the audio interface, they both have a microphone input but the E-M1 lacks a headphone jack. Curiously, the 3.5mm port on the older camera can also be used as a line input unlike on the new camera.
Finally the E-M1 mark II has extra settings, options and customisation possibilities for video recording such as 50p or 60p HDMI output (4:2:2 8-bit), REC bit and Time code output, displaying the battery life in minutes and customising the Fn buttons for the movie mode specifically.
Flash
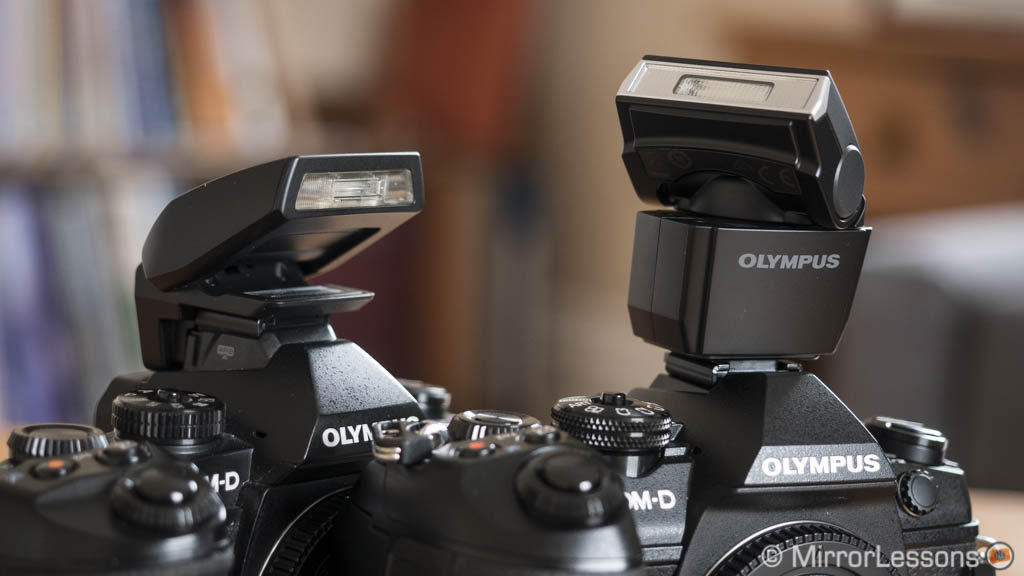
Both cameras lack a built-in flash but are supplied with a small external unit. The E-M1 II gets the newer version (FL-LM3) that has a rotating/tilting head and a slightly higher guide number (30 vs 23). Note that the E-M1 II lacks the accessory port on top below the hot-shoe so the FL-LM2 won’t work on the new camera.
Both cameras have a flash sync socket out front. The E-M1 retains a slightly faster sync at 1/320s versus the 1/250s of the E-M1 II.
The two models have complete RC capabilities (Olympus wireless flash system) that rely on optical transmission and require the supplied flash to be used with other RC compatible units.
One advantage brought to the E-M1 II via firmware update (version 1.2) is the compatibility with the Profoto Air Remote TTL-O which makes TTL and HSS available with compatible off-camera flash like the B1 or B2 series.
Other features
The E-M1 and E-M1 II come with a plethora of extra features. Here is a list of all those they share:
- Live Time and Live Bulb (preview a long exposure in real time on the screen)
- Live Composite (useful for light painting, fireworks and star trails)
- Keystone compensation
- AE, HDR, WB, Flash, ISO, ART and Focus Bracketing (with Stacking option)
- Time-lapse with video output option (4K at 5fps, Full HD at 15fps or HD at 30fps – curiously the E-M1 II doesn’t have a better frame rate here)
- Multiple exposure (2 frames)
- Art filters (same number on both)
- RAW processing
- Wifi and mobile connectivity
- Tethering
- Probably a few other things that I can’t remember.

Concerning Focus bracketing and stacking, both cameras use the electronic shutter and continuous shooting modes. With stacking, you can work with up to 8 images on the E-M1 and 15 on the E-M1 II. On the E-M1 you can’t go lower than 1/8s while the E-M1 II allows for a maximum of 60s for the shutter speed.
Note that this option is limited to select lenses only: 8mm Fisheye, 7-14mm 2.8, 12-40mm 2.8, 30mm Macro, 60mm Macro, 40-150mm 2.8 and 300mm f/4. On the E-M1 II you can also use the 12-100mm f/4 (firmware 2.0 required).


As for manual focus options, both cameras offer magnification and peaking (4 colours with highlight intensity and image brightness adj. settings).
The E-M1 II has an extra option for manual focus called Preset MF: you can set a specific distance that is automatically enabled when you switch to MF (for example infinity focus or similar for astro-photography).
Finally the new camera has a few extra features including:
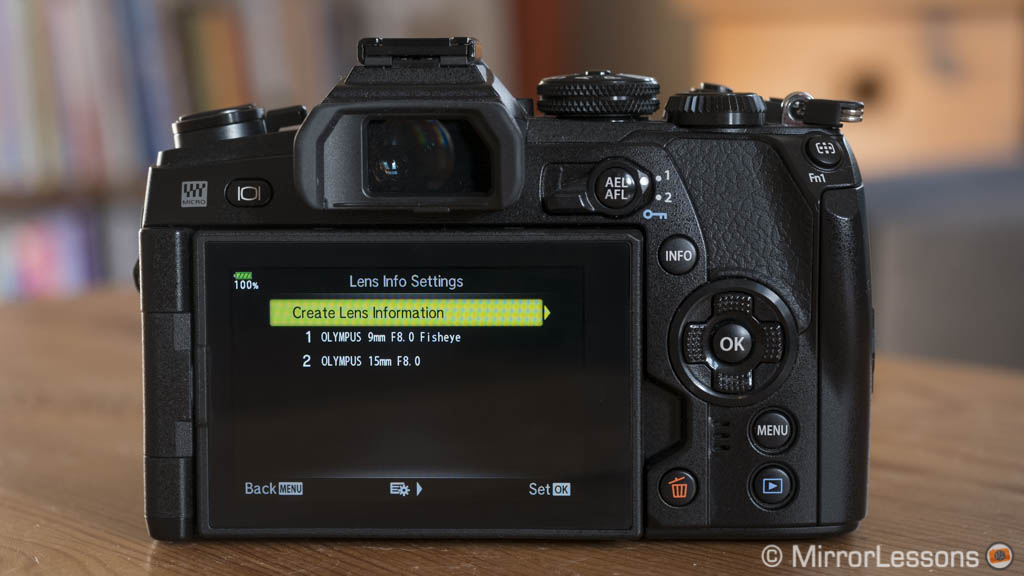
- Lens Info Settings: you can create up to 10 profiles for lenses that don’t transmit exif data, which is useful if you have a bunch of old SLR lenses to adapt
- Fisheye Compensation: use the 8mm f1.8 Fisheye as a normal wide angle lens by correcting the distortion while shooting
- Flicker Scan: when shooting a scene with LED lights using the electronic shutter, you can see the amount of flickering in the live view and change the shutter speed to reduce or eliminate the effect
Battery life
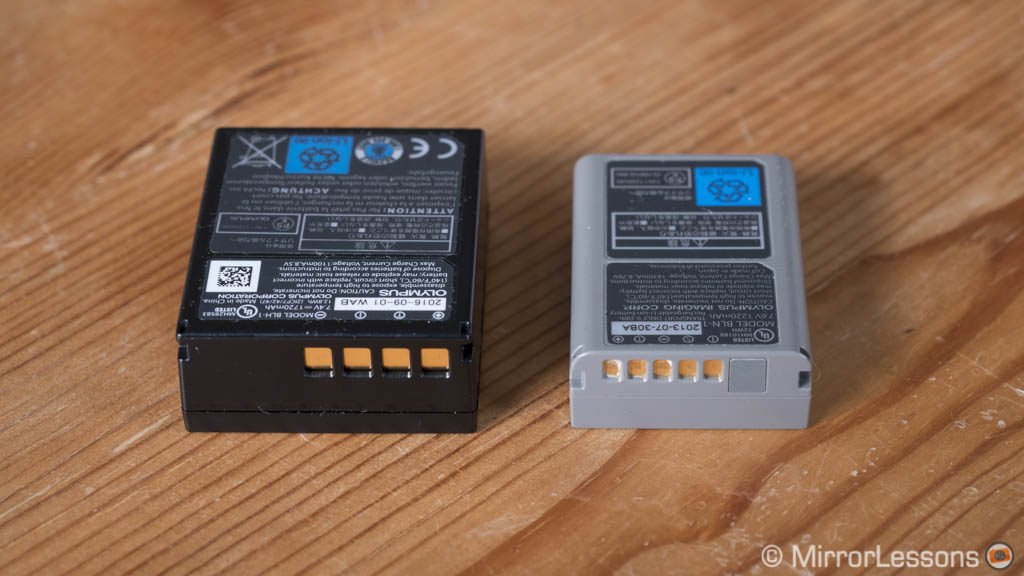
The E-M1 II has a new battery that is larger and lasts longer in comparison to the E-M1. I was able to use it for more than a day for both normal shooting and when recording 4K or shooting in continuous mode. You can easily come back with 1500 shots and still have some battery life to use up. This is definitely something I can’t do with the E-M1 and I don’t even need to turn off certain options to preserve more power.
On the older camera you can set the warning level for the battery (+2 High to -2 Low), something that is not necessary on the new E-M1 mark II since it displays the information in percentages which is far more useful. The E-M1 II also has a new Quick Sleep mode where the LCD lowers the brightness after 8s max. and the camera goes into sleep mode after 1 minute.
The E-M1 II has a specific battery status page in the menu where it lists the type, serial number, charge left, shot count and degradation (health). This information is stored in the battery itself so when you transfer it to a second body, it will display the same exact data.
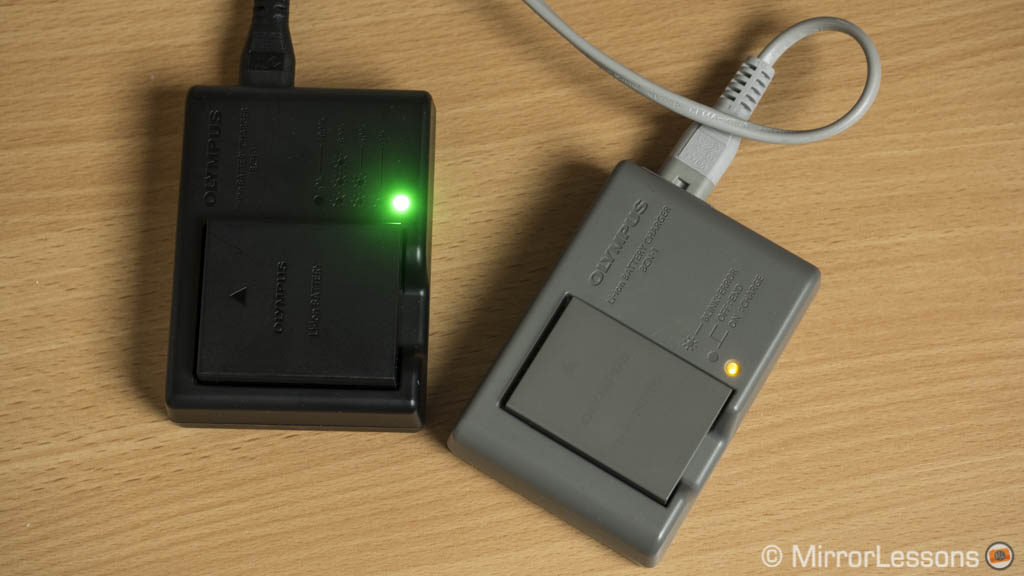
The charger of the E-M1 II (BCH-1) charges the battery in approximately two hours, which is twice as fast as the BC-1 charger of the E-M1. The new charger also gives you three different indications with the LED light to let you know how much the battery has charged:
- less than 50%
- between 50% and 80%
- between 80% and 100%
Finally, because of the larger battery, the E-M1 II has a new battery grip called HLD-9 so the old HLD-7 is not compatible with the new camera.
Price
The OM-D E-M1 was originally priced around $1400 when it was released. It is now discontinued but can be found second-hand for $500 or less.
The OM-D E-M1 II price announcement came as a shock for many: $1999 for the body alone. Today, it can be found for $1500. Discounts and cash-backs are often available so it is definitely a camera you can get for a great price today.
Conclusion
After such a long article – my most in-depth comparison so far – I’ve finally arrived at the conclusion (what a relief!) and I realise how important these final paragraphs are. I am sure that many of you will jump here first before mustering the courage to go through every single chapter (and if you do, you’ll have my deepest respect!). So I had better not mess this up and start with my gut feelings.
I really like the new camera. Spending one month and half with it allowed me to appreciate most of the new technology and features as well as all the little improvements. The OM-D E-M1 II is an excellent upgrade in comparison to its predecessor. It feels more robust and more comfortable in the hand, the amount of customisation available is impressive and the improved battery life makes a big difference.

The new autofocus system, although not perfect, is definitely more reactive and reliable when you deal with difficult conditions or very fast subjects. I am confident that in expert hands, it can perform well.
Were I to choose to get more serious about wildlife photography and birds in flight, this would be my camera of choice. The AF performance is slightly below that of the Fujifilm X-T2 or Sony a6300/a6500 in my opinion, but then it’s the entire system itself that wins me over.
Using smaller lenses and being able to rely on such stunning image stabilisation make a difference when I’m out shooting. Now that there is 4K with good quality and dynamic range, the camera becomes an attractive hybrid stills/video solution too, although C-AF in movie mode is still lacking for fast subjects.
I probably wouldn’t take advantage of the crazy continuous shooting speeds (especially 60fps). But the excellent 10fps with reduced blackouts and the good 18fps burst with the electronic shutter (and contained rolling shutter) coupled with the large buffer capabilities are a guarantee that the camera will never let you down.
Some other improvements aren’t mind-blowing but still welcome like the new sensor with its improved highlight retention, dual SD card slot and the High Res Shot.

The original E-M1 feels inferior when we compare certain specifications but it is also a product that has managed to retain its value even today, three years after its release. Not every camera can claim the same.
Certainly wildlife/sports photographers and videographers will appreciate the better performance of the mark II model but there are other genres and uses for which the OM-D E-M1 is still a relevant choice. For example, if you are a street, landscape, portrait or enthusiast photographer who doesn’t need incredible frame rates and doesn’t care about 4K video, the E-M1 has lots to offer, including a very decent AF system. And let’s not forget that it costs much less, allowing you to invest in more lenses (or simply save some money!).
My hope is that Olympus will keep the E-M1 alive with future firmware updates just as they have done over the past two years. And speaking of firmware updates, who knows what they will bring to the E-M1 II in the future. Will it be another camera capable of evolving with the times? I really hope so.
Choose the OM-D E-M1 if:
- You are on a budget or want to put aside some money for additional lenses
- Are a street, travel or landscape photographer who doesn’t need the improved speed but rather a cheaper camera that can still deliver excellent IQ, stabilisation, good AF and is weatherproof
Choose the OM-D E-M1 II if:
- Your favourite genres are wildlife or sport photography
- You want a camera capable of delivering excellent 4K video and state-of-the-art image stabilisation
- You want the best build quality and can’t live without two SD card slots
- you want battery life close to that of a DSLR
- you do lots of still life photography and can take advantage of the High Res Shot mode.
You might enjoy the following articles:
- OM-D E-M1 II vs Fujifilm X-T2 – The complete comparison
- OM-D E-M1 II vs Panasonic G9 – The complete comparison
- OM-D E-M1 II vs OM-D E-M1X – The complete comparison
- OM-D E-M1 vs OM-D E-M5 II – The complete comparison
You are on page 2.
- Page 1: design, functionality and image quality
- Page 2: autofocus, speed, stabilisation, other features and conclusion
Additional sample images
E-M1


E-M1 II


