Updated on: July 3rd, 2019
Heather and I have been long-time users of the OM-D E-M1. It was my main camera of choice for event work in Italy and Heather’s favourite tool for macro photography. Having a website like MirrorLessons not only allowed us to use the camera in various conditions, but also to test new firmware updates and lenses for the system. I can safely say that it is one of the cameras with which we’ve become the most familiar since we started reviewing photographic equipment four years ago.
As you can imagine, I was impatiently waiting for the announcement of its successor, the OM-D E-M1 mark II. A three-year gap between flagship models isn’t insignificant in today’s technological terms, so I was very curious to see what new features and improvements Olympus would bring to the new OM-D camera.
The specifications made it very clear from the start: Olympus raised the bar high with a new sensor, a new autofocus system, stunning continuous shooting speeds, 4K video, improved stabilisation and many other things to target high-end users. It is the culmination of a strategy that started with the original E-M1 and developed with the PRO lens series.
While the new E-M1 mark II can be considered the new professional tool within the Olympus range, the original E-M1 isn’t ready for retirement just yet. It is still up to the Micro Four Thirds standard despite its age, and continuous firmware updates from the company have kept the camera up-to-date.
In 2013, the E-M1 was the first mirrorless camera that seriously targeted the advanced and professional segment. Today, there is much more competition. Can the E-M1 II become a reference just like its older sibling? Let’s find out!
Ethics statement: We purchased the E-M1 three years ago for personal and professional reasons. Some of the lenses used for this comparison are our own, while both the E-M1 II body and some other lenses were loaned to us by Olympus. We were not asked to write anything about these cameras, nor were we provided any other compensation of any kind. Within the article, there are affiliate links. If you buy something after clicking the link, we will receive a small commission. To know more about our ethics, you can visit our full disclosure page. Thank you!
Given its length, this article has been divided into two parts:
- Page 1: design, functionality and image quality
- Page 2: autofocus, speed, stabilisation, video, other features and conclusion
Table of Contents – Page 1
1. Article Updates
2. Main Specs
3. Build quality and interface
4. External controls and customisation
5. Menu system
6. Viewfinder and rear monitor
7. Resolution, dynamic range and metering
8. Colours and JPG settings
9. ISO performance
Article Updates
- July 2019: price update, feedback about firmware 3.0 added (E-M1 II) – Full report available here
- March 2018: added information about firmware 2.0 for the E-M1 mark II
Main Specs
- OM-D E-M1
- Sensor: 16 MP 4/3 Live Mos
- Lens system: Micro Four Thirds
- Weatherproof: Complete (splash, dust and freeze proof -10°C)
- Stabilisation: Yes (5-axis)
- Autofocus: 81 contrast and 37 phase detection points
- Continuous shooting: 10 fps (AF-S), 9 fps (AF-C), 11fps with electronic shutter (AF-S)
- ISO Sensitivity: 200 – 25600 ISO (Pull 100)
- Shutter Speeds: 1/8000 to 60 seconds, 1/16000s with electronic shutter
- Viewfinder: 2,360K dots, approx. 100% FOV coverage and 1.48x (0.74x) magnification, 120fps
- Rear monitor: Tilting 3″ LCD monitor (1,040K dots)
- Movie recording: Full HD up to 30fps
- Built-in Flash: No but external FL-LM2 is supplied
- Extra Features: WiFi, Timelapse, HDR, Multiple exposure, Live Time, Live Composite, Focus Stacking, Keystone compensation
- Dimensions: 130.4 x 93.5 x 63.1mm
- Weight: 497g (including battery and memory card)
- Firmware: 4.6
- OM-D E-M1 mark II
- Sensor: 20 MP 4/3 Live Mos
- Lens system: Micro Four Thirds
- Weatherproof: Complete (splash, dust and freeze proof -10°C)
- Stabilisation: Yes (5-axis)
- Autofocus: 121 phase and contrast detection points
- Continuous shooting: 15fps (AF-S), 10fps (AF-C), 60fps and 18fps with electronic shutter
- ISO Sensitivity: 200 – 25600 ISO (Pull 64)
- Shutter Speeds: 1/8000 to 60 seconds, 1/32000s with electronic shutter
- Viewfinder: 2,360K dots, approx. 100% FOV coverage and 1.48x (0.74x) magnification, 120fps
- Rear monitor: Multi-Angle 3″ LCD monitor (1,040K dots)
- Movie recording: 4K 30p, C4K at 24p, Full HD 60p
- Built-in Flash: No but external FL-LM3 supplied
- Extra Features: WiFi, Timelapse, HDR, Multiple exposure, Live Time, Live Composite, Focus Stacking, Keystone compensation, High Res Shot, Pro Capture
- Dimensions: 134.1 x 90.9 x 68.9mm
- Weight: 574g (including battery and memory card)
- Firmware: 3.0
Build quality and interface
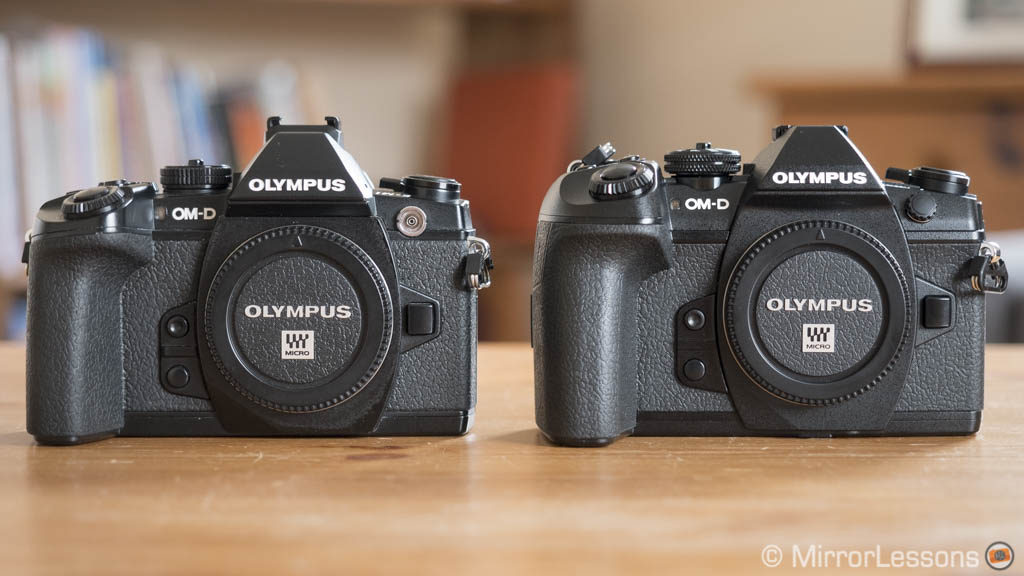
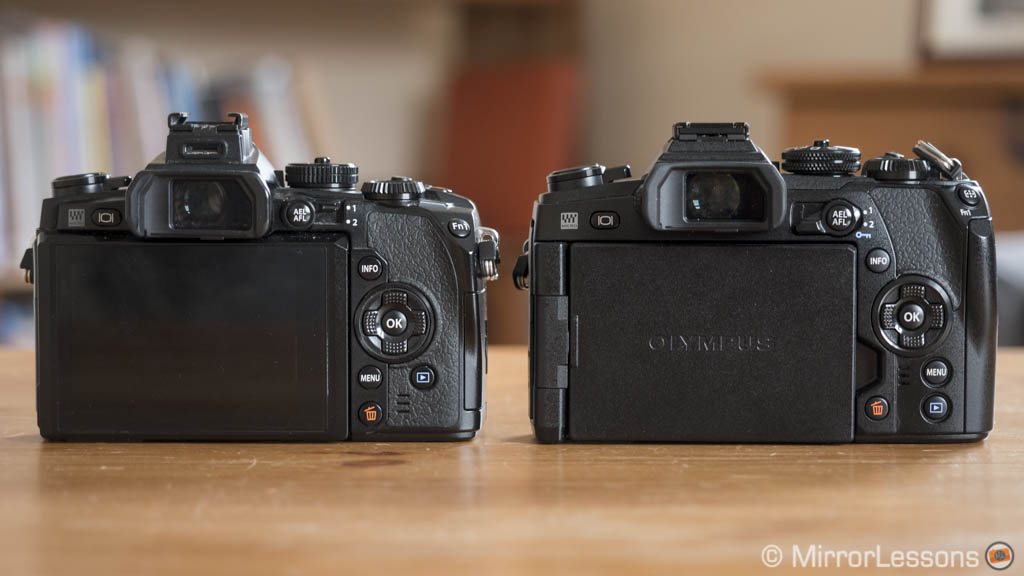
Weather-sealing has become a common feature on several OM-D cameras, not just the flagship models. Both the E-M5 and E-M1 series are completely protected against moisture, dust and cold temperatures (-10°C). Having used both the E-M1 and E-M1 II in harsh conditions, I can safely say that they stand up to rough weather very well. Note that the E-M1 is also available in silver.

When it comes to build quality, we never had any issues with the original E-M1 in our three years with the camera (except that some paint came off a few corners). However, as fate would have it, shortly after receiving the mark II model, one of the strap lugs of our original E-M1 came off. Luckily it didn’t happen while we were carrying the camera or the consequences could have been worse. The issue affecting strap lugs on the E-M1 is not unheard of, and I have seen other users report the same issue on social media and forums.
Overall the E-M1 II feels more solid but I think it comes down to the slightly larger and heavier build. I didn’t notice any weakening in the strap lugs during our month and a half with the camera but it’s hard to render a final verdict since the one on our E-M1 broke after three years. My hope is that Olympus heard about the E-M1 lug problem in time to make sure it didn’t happen on the new flagship camera.
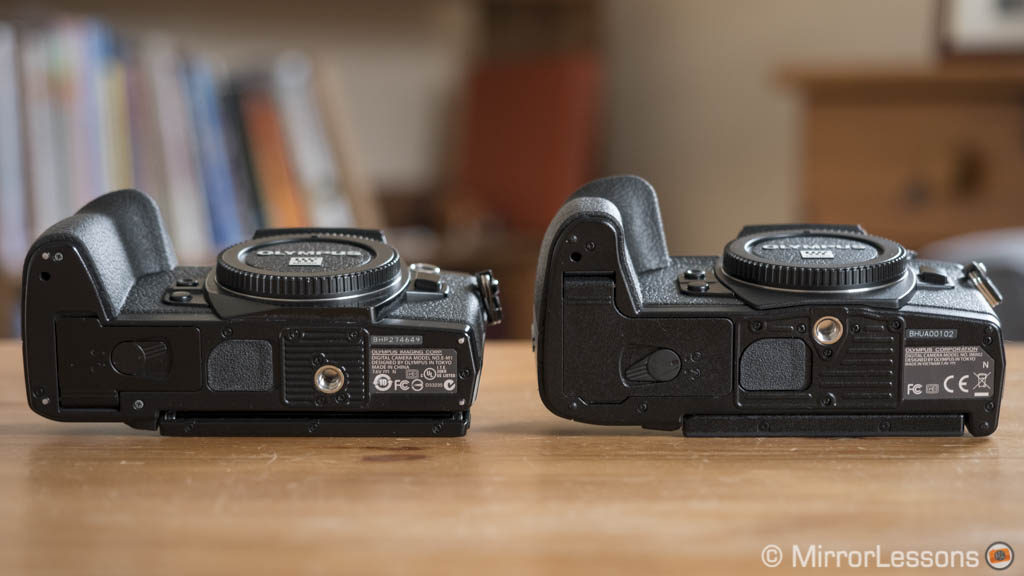
At the bottom, the tripod mount has been re-positioned on the new camera. It is now better centred with the lens axis.
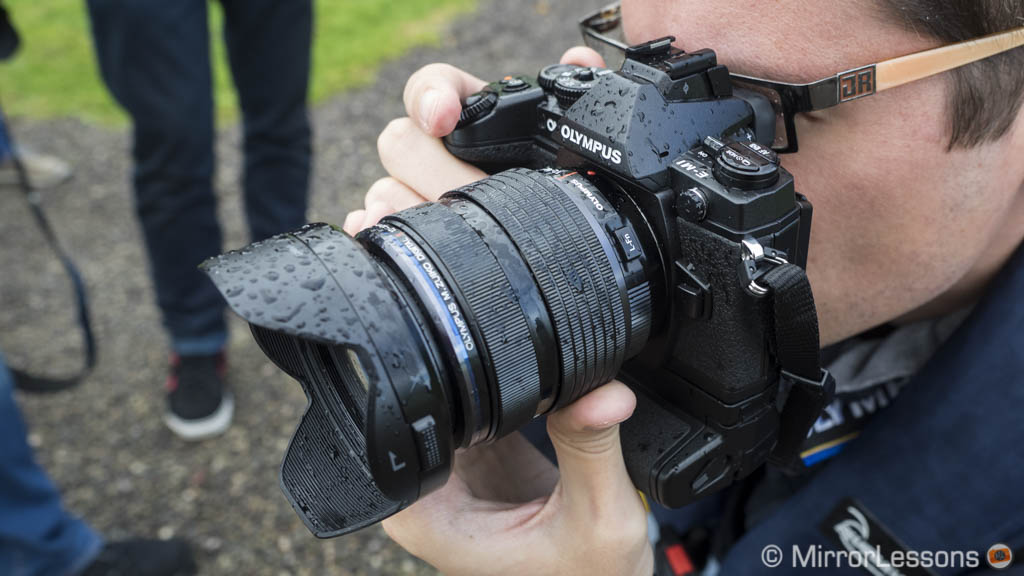
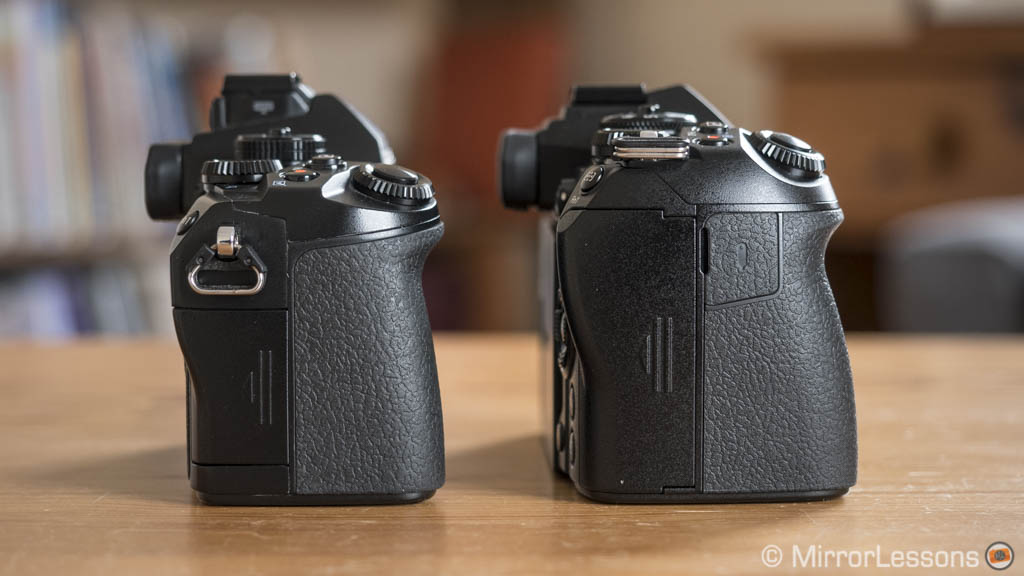
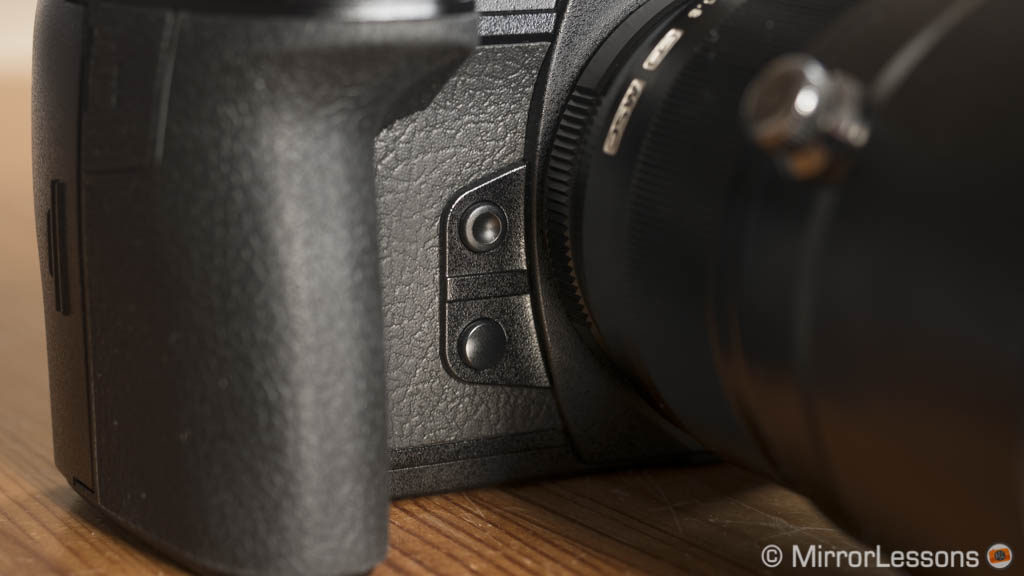
The E-M1 II is more comfortable to hold thanks to the bulkier grip out front.
It enhances the user experience especially with long lenses such as the 300mm Pro and the combination is comfortable to carry one-handed.

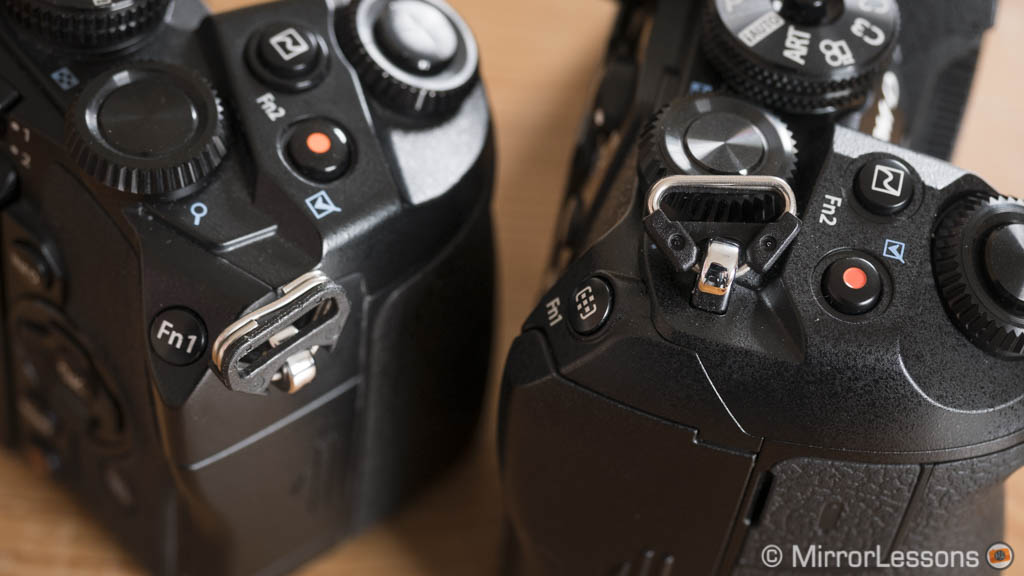
A welcome addition to the E-M1 mark II is the Dual SD card slot, a feature that is now common on most recent mirrorless flagship cameras. Slot number 1 is UHS-II compatible while slot number 2 only accepts USH-I. The original E-M1 has 1 slot with UHS-I compatibility.
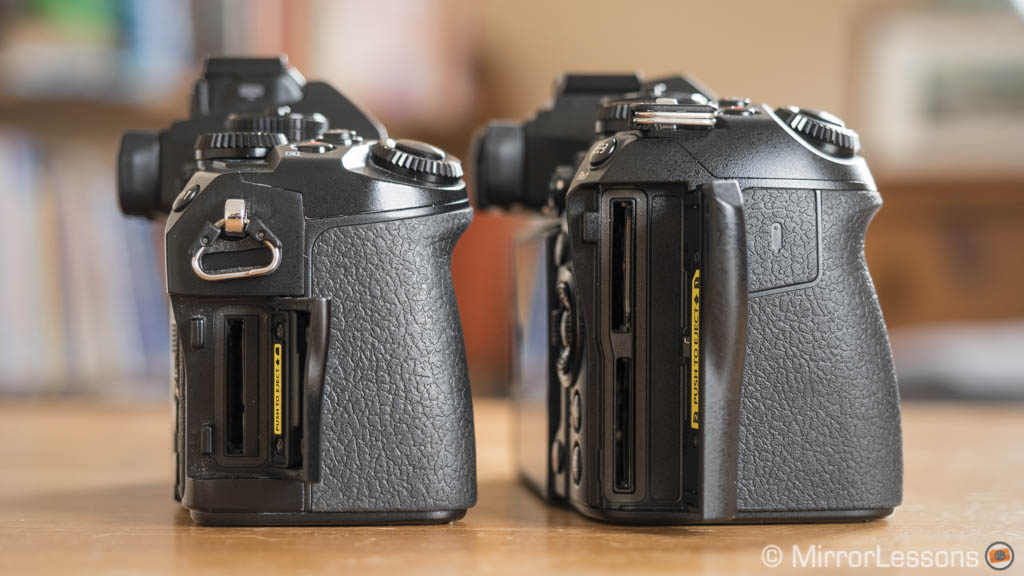
The dual slot of the E-M1 II allows you to do a number of things such as save images on both cards, record continuously on the second once the first is full, or save RAW files to one and JPG files to the other. You can also copy images and video from one slot to the other. Personally I find it useful to assign 4K video to the first slot and images to the second.
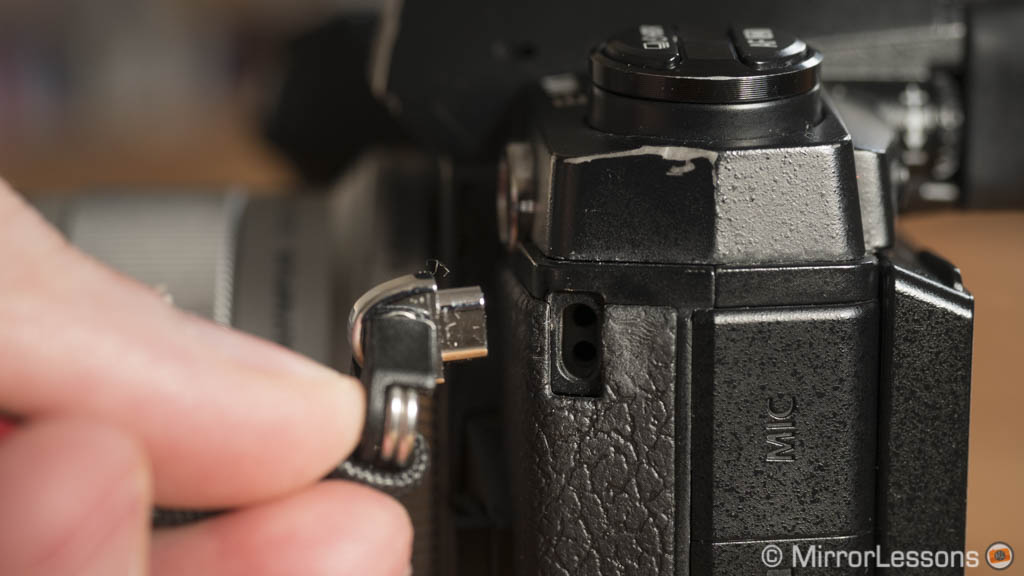
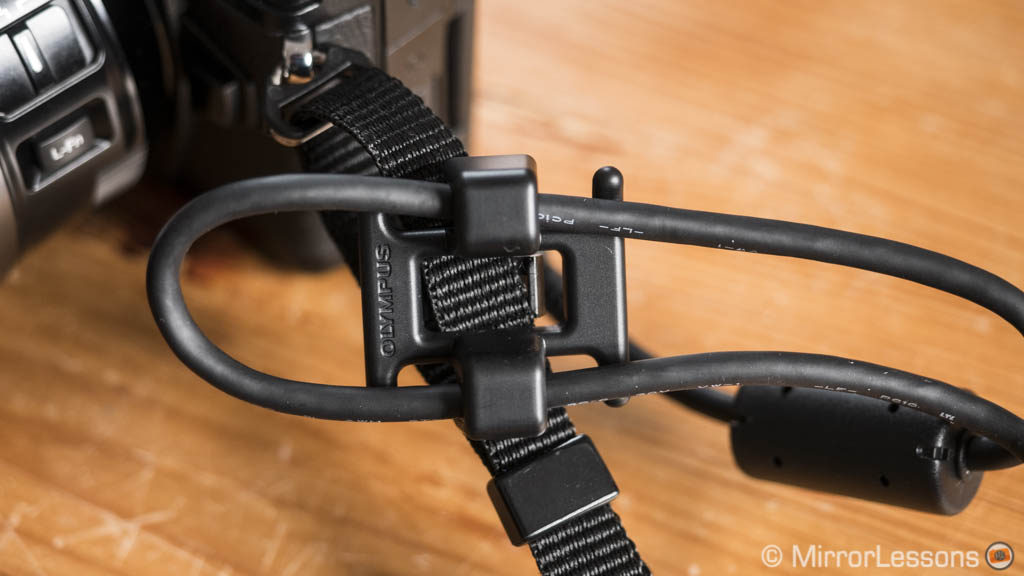
The original E-M1 has a 3.5mm microphone input, an HDMI (Type D) output and a Multi-Connector port that is useful for firmware updates, tethering or transferring files to the computer. The E-M1 II has an additional headphone output, a 2.5mm remote cable connector and a USB (Type C) port instead of the Multi-Connector.
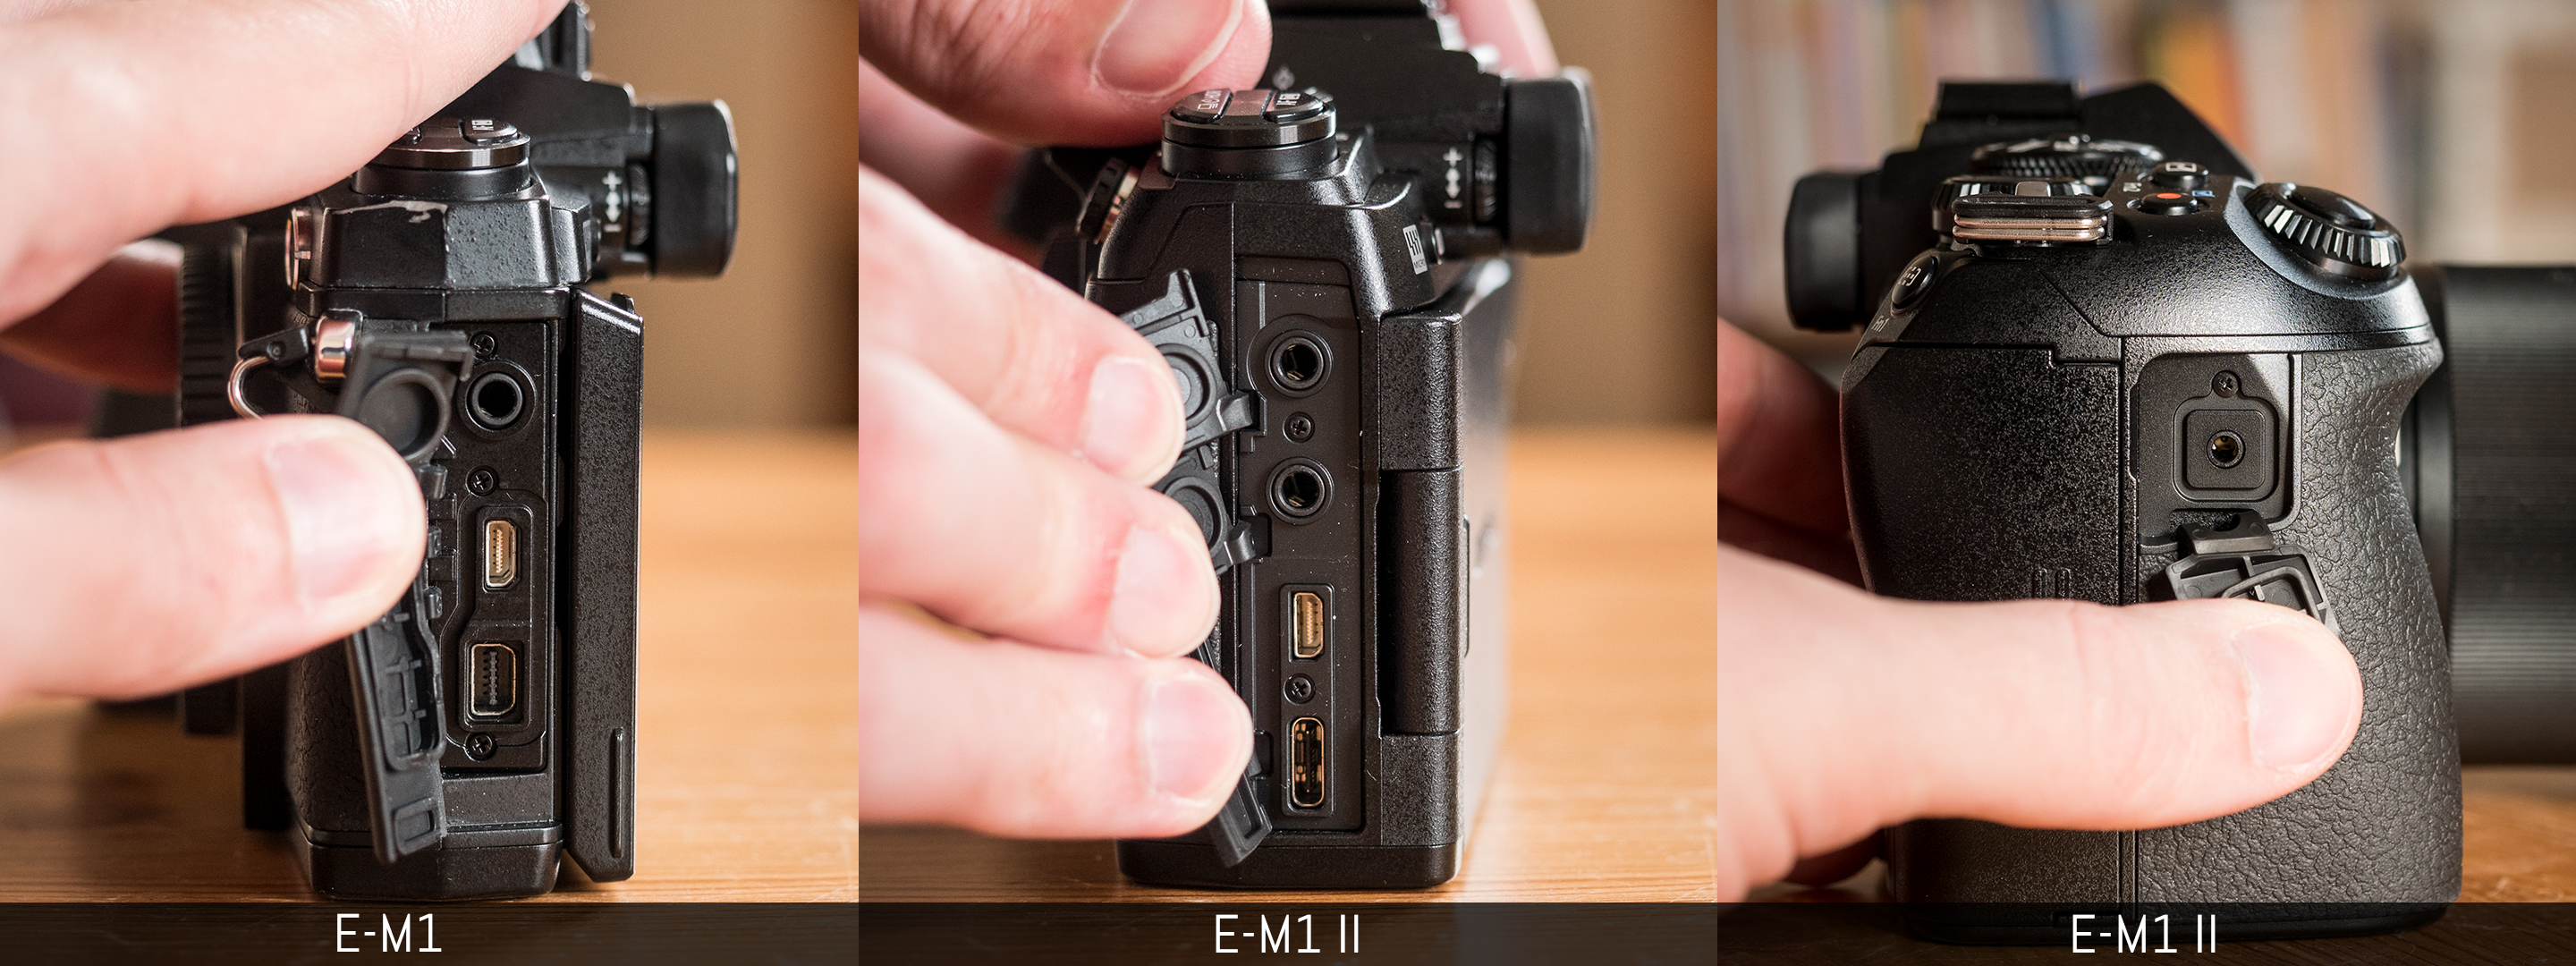
Finally, included in the box with the E-M1 II is a cable clip (CC-1) to secure the USB cable to the strap and prevent it from detaching.
External controls and customisation
The E-M1 was already generous when it comes to customisation but the E-M1 II goes a step further, offering the widest range of customisable options I’ve seen on a mirrorless camera.
It is almost overwhelming at first; so much that if you aren’t used to OM-D cameras, it can take some time to discover all the settings and find the optimal combination.
Both OM-D models include two function buttons on the front near the lens mount. These are my favourites as your fingers naturally reach them when you hold the camera. I use them to move the focus point (with the help of the twin dials) or to use the Home position (more on this later).
Concerning the function buttons, the E-M1 II has 9 which is one extra (the Monitor LV button) in comparison to the E-M1. The entries available for the Fn buttons are 26 on both cameras but the E-M1 II has four extra options because the MySet/Custom modes have been moved to the main dial on top.
Speaking of the mode dial, it is larger on the E-M1 II. The Scene and Photo Story modes have also disappeared and both have an lock/unlock button at the centre. Neither the AF and Drive buttons on top, nor the On/Off switch has changed.
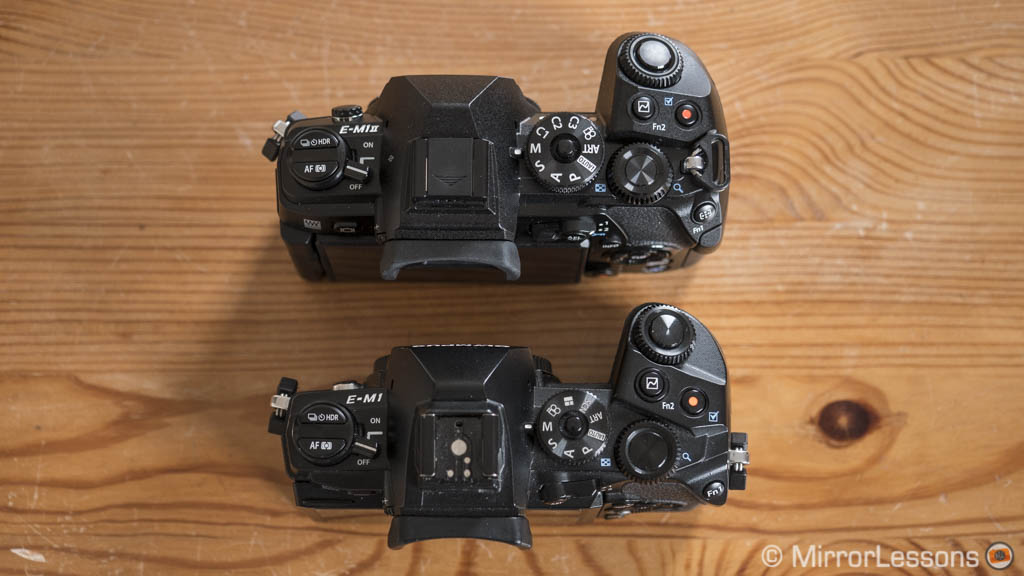
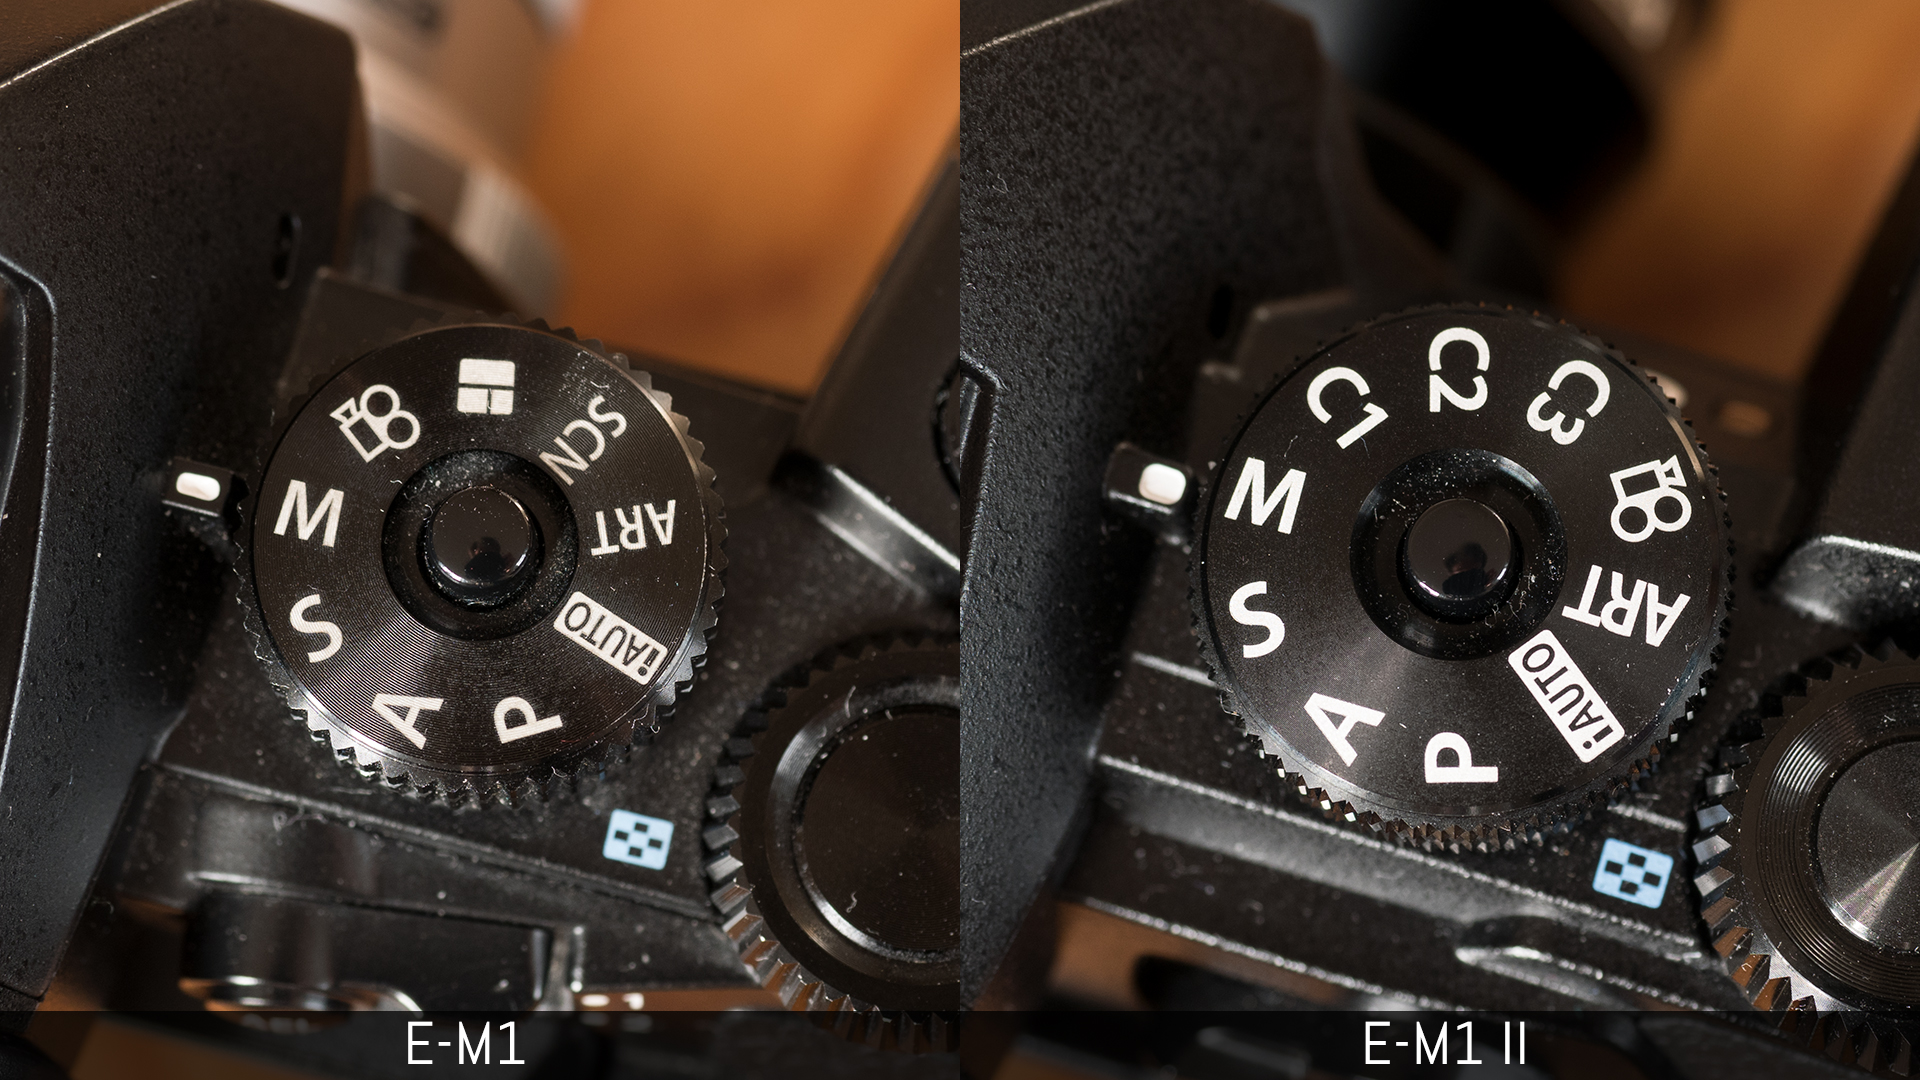
Concerning the custom modes, they are called Myset on the original E-M1 and it has four options versus the three available on the E-M1 II. These custom modes are easy to activate on the mark II model thanks to the top dial. On the E-M1, the Mysets can be assigned to some entries of the mode dial like the Art Filters for example.
On the rear, the arrow pad of both cameras can serve as either an AF pad to move the focus point or buttons for additional settings. Except for a slight repositioning of the other buttons, the only difference between the two concerns the Lever Function.
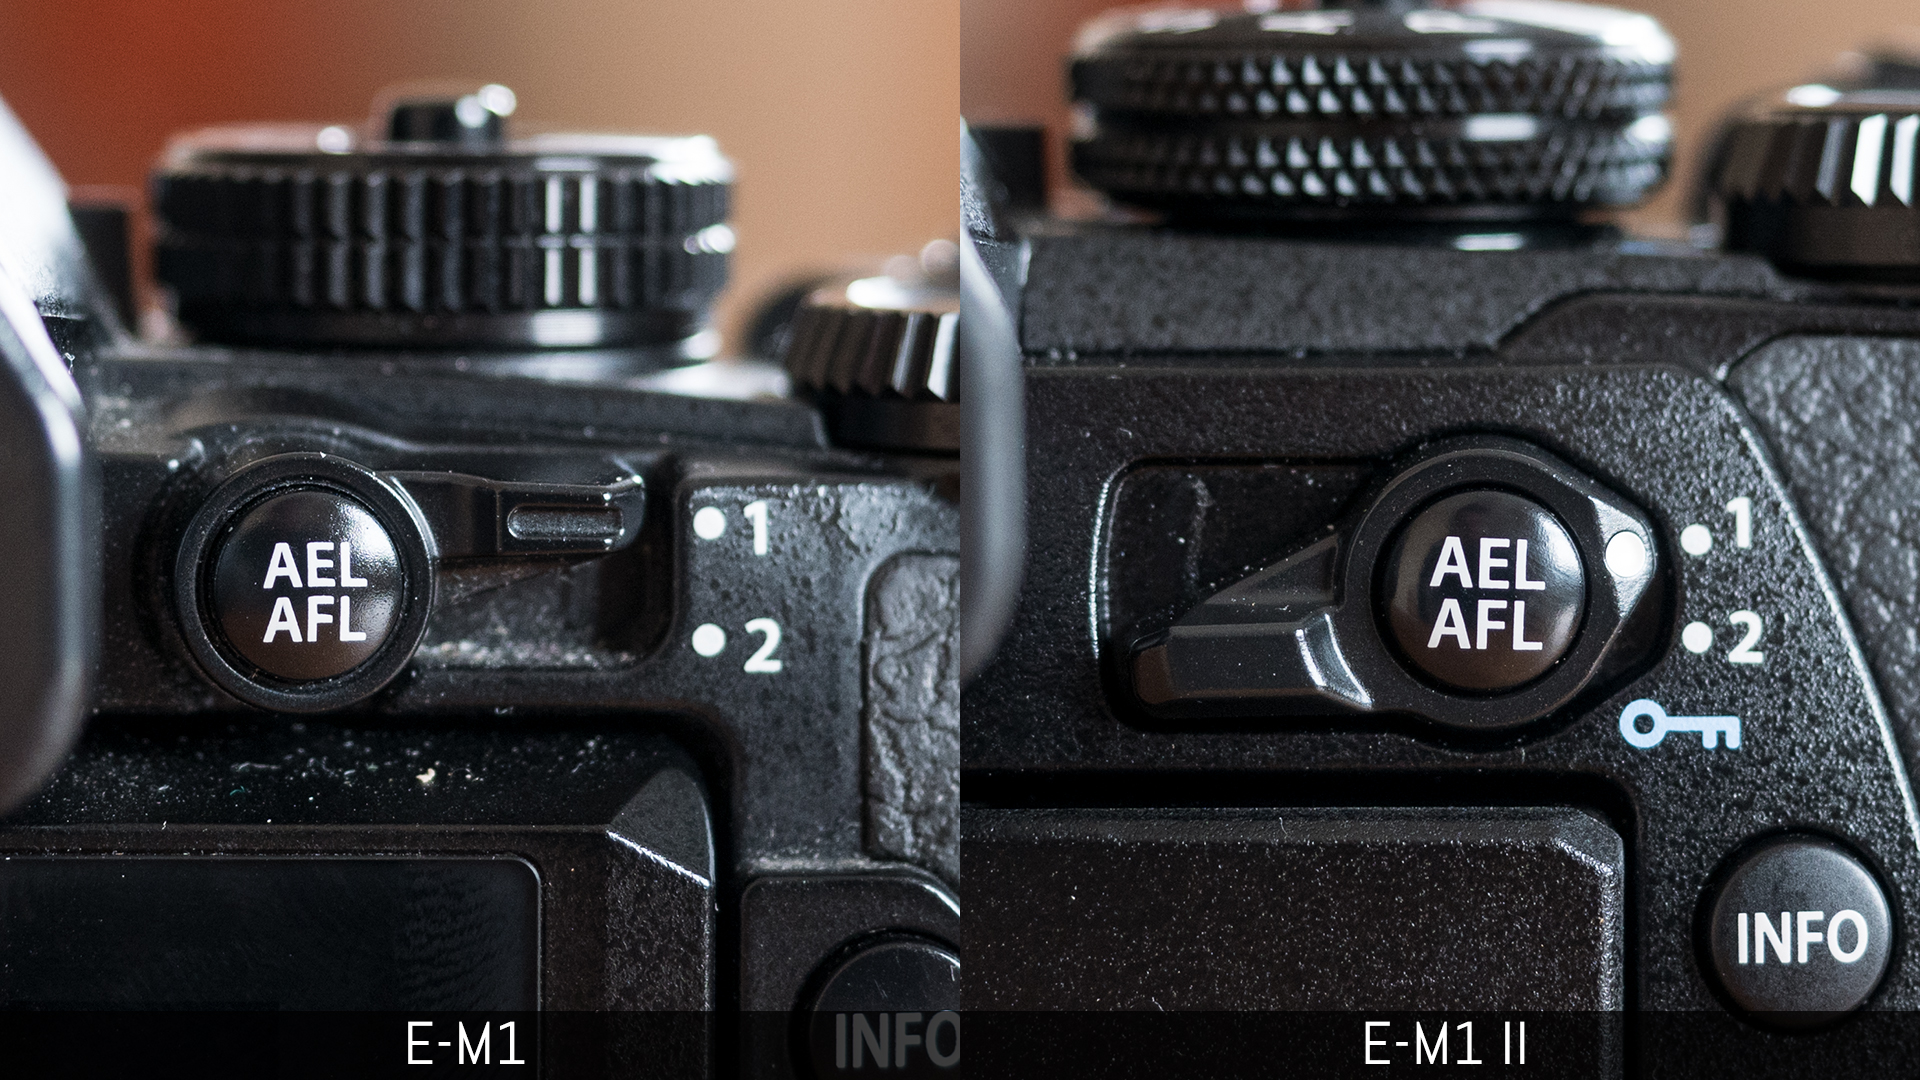
On both cameras, switching from position 1 to position 2 can do the following:
- change the dial functions (for example from aperture/shutter speed to ISO/WB which is what I use though other options are available)
- switch the function of certain buttons (Rec and Fn2)
- switch from one AF mode to the other (for example from S-AF to C-AF)
- change the function of the Drive and AF buttons (Top left)
On the E-M1 II, the Fn lever can also do the following:
- power on and off the camera (alternative to default power switch)
- switch to movie mode (alternative to the main dial on top)
The last two options on the new camera are a perfect example of how customisable the mark II model is. Note that if you choose one of these two options, you can use a Fn button to switch the dial’s functions.
If that wasn’t enough, the E-M1 II offers additional customisation options, some of which can be very useful:
- you can assign different entries for the Fn buttons when working in Movie mode
- some buttons can be pressed and held to change their function or reset some settings. (The press and hold time can also be customised!)
- you can hide certain AF Target settings
- you can hide certain sequential shooting options so that the list is shorter (note: on both cameras you can do the same with the picture profile / Art filters list)
- the grid settings can be applied individually to the monitor and EVF, they can be customised in colour and opacity
- there are other settings related to autofocus that I will describe later on
- I may have missed a few additional options!
Finally, you can back-up and restore all your E-M1 II camera settings before updating the firmware via Olympus Viewer / Digital Camera Updater (make sure to have the latest version installed). Unfortunately this is not supported on the E-M1 so every time you update a firmware, your settings are reset to factory default.
Menu system
The E-M1 II has a revamped menu system: aesthetically it looks different and some entries have been moved to make the settings quicker to access. However, the overall organisation remains similar, with two shooting, one custom, one playback and one setup menu.
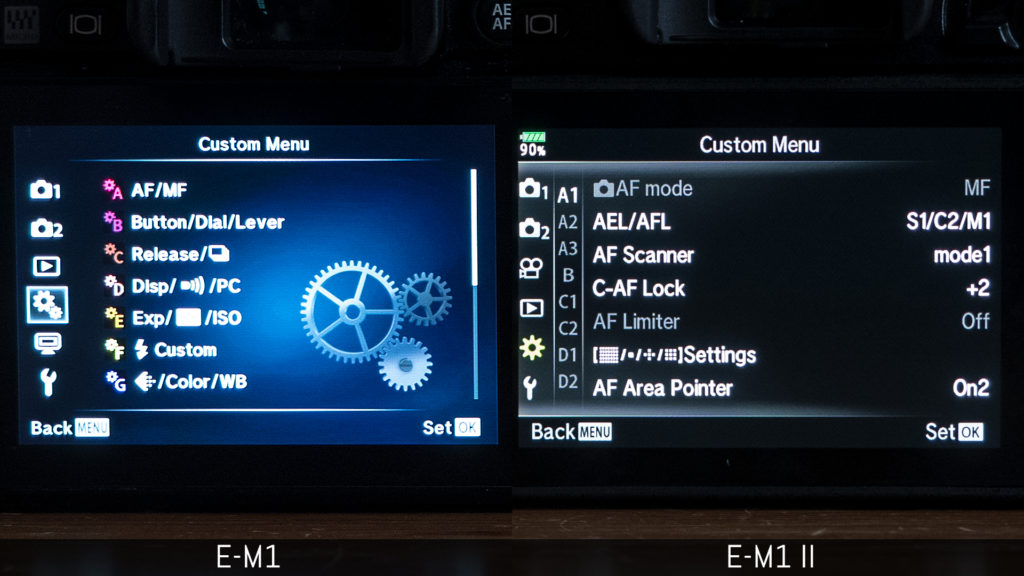
Personally I find the monochrome look of the new version less intuitive. For example, it was nice to have the various Custom menu categories differentiated by colour.
The re-organisation of the Movie menu is welcome, as it is now separate and accessible from the first level. Moreover, the pages under the various categories of the Custom menu can now be accessed directly once inside the menu, eliminating one step of navigation. That said, a few entries still remain hidden deep inside.
The Super Control Panel (Olympus version of Quick Menu) is larger on the E-M1 II and displays more options in comparison to the original E-M1. I wish that these entries could be customised however.
Viewfinder and rear monitor
The specifications for both cameras are very similar when it comes to the electronic viewfinder: same resolution (2.36 million dots), magnification (1.48x, 0.74x equivalent) and Eyepoint (21mm). Both EVFs use an LCD panel.
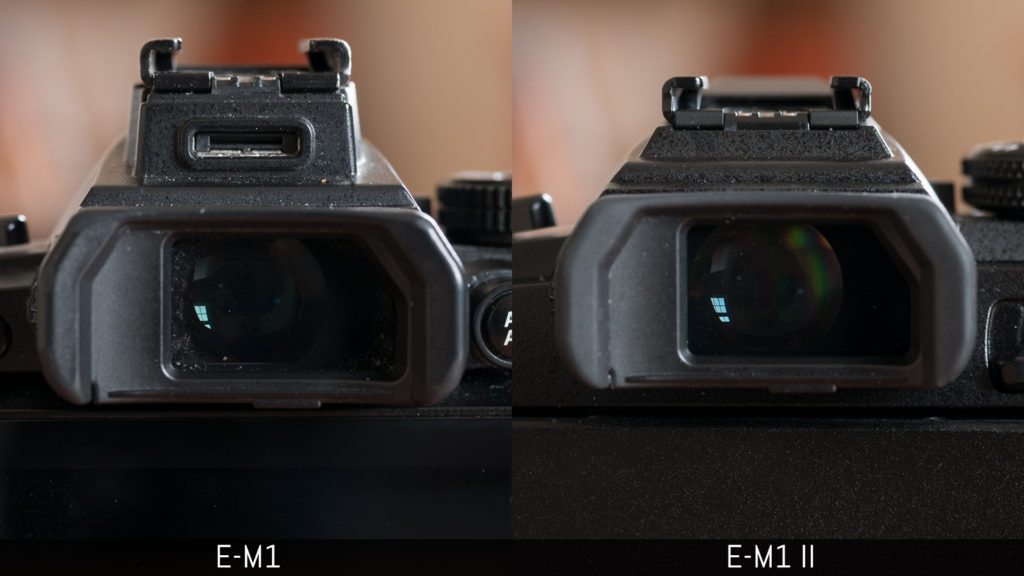
The new E-M1 II has been advertised as having an EVF refresh rate of 120fps but this is possible with the E-M1 too.
Both cameras have a Frame Rate setting in the Custom Menu D with two options – Normal and High – with the latter giving you 120fps instead of 60fps.
The difference is that with the previous camera there is a drop in resolution at 120fps while the E-M1 II maintains the native resolution of the EVF.
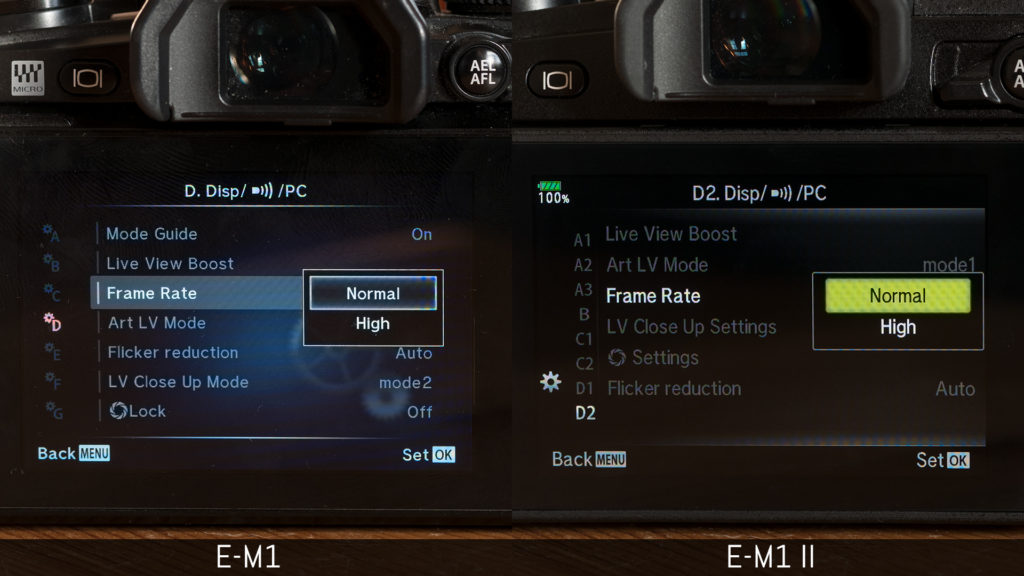
The user manual for the new camera states that the number of frames recorded in continuous mode can slightly decrease with the High setting, unlike the E-M1. The frame rate will also switch back to Normal automatically if the E-M1 II starts to overheat (something I didn’t experience during my testing period).
Both EVFs include a series of options like Auto Luminance, Boost modes and S-OVF. The last option emulates an optical viewfinder by disabling the real time exposure preview and picture settings, amongst other things.
Concerning Live View boost, which brightens the LCD/EVF regardless of the exposure settings, you have two additional options on the E-M1 II that can be especially useful in low-light:
- you can choose to activate it only when using magnification
- you can activate it when previewing the selected aperture instead of the fastest available on the lens.
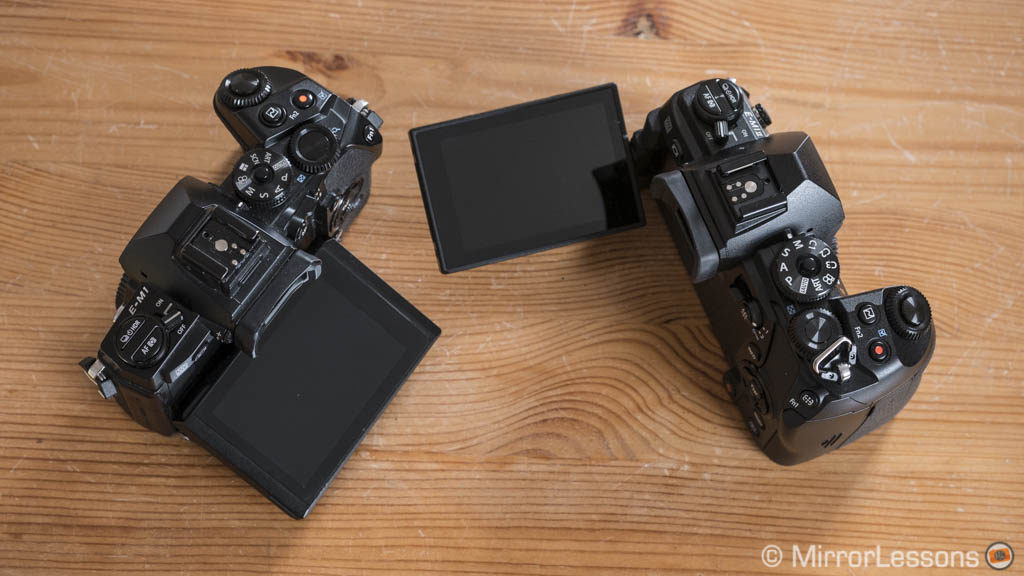
The rear monitor differs in terms of its articulating capabilities. On the E-M1 you have a tilting option (up 90°, down 45°) while the E-M1 II features a multi-angle screen that can be opened and flipped to the side. The specifications haven’t changed: they both feature a TFT touch screen with 1040k dots.
Concerning the touch capabilities, they both allow you to change the focus point for stills or during video recording, take a shot and swipe through your images in Playback mode. The E-M1 II has an additional feature called AF Targeting Pad: you can use the rear screen to move the focus point while composing with the EVF. It is precise to use but sometimes the AF point stops moving, while other times it requires multiple attempts to move it.
Personally I rarely use this option as my nose always touches the monitor and can accidentally move the AF point. You can double tap to disable or enable the function. Another solution is to use this feature while the monitor is open. To do this you need to disable the EVF Auto Switch option (Custom Menu I) and manually select the EVF with the Monitor/LV button. Otherwise the EVF won’t activate. (Thanks to Sabine for writing the tip in the comments!).
Resolution, dynamic range and metering
When comparing two Micro Four Thirds cameras, the image quality section often doesn’t present any striking differences as many sensors perform in the same way.
Now it’s true that the E-M1 II doesn’t represent a huge improvement over the E-M1 but I found more to talk about than I had originally anticipated.
The resolution is a minor upgrade. The extra 25% of the new 20MP sensor in comparison to the 16MP of the E-M1 will give you slightly more leeway if you need to crop but otherwise the level of detail and sharpness remains very similar. Neither sensor has an optical low pass filter.


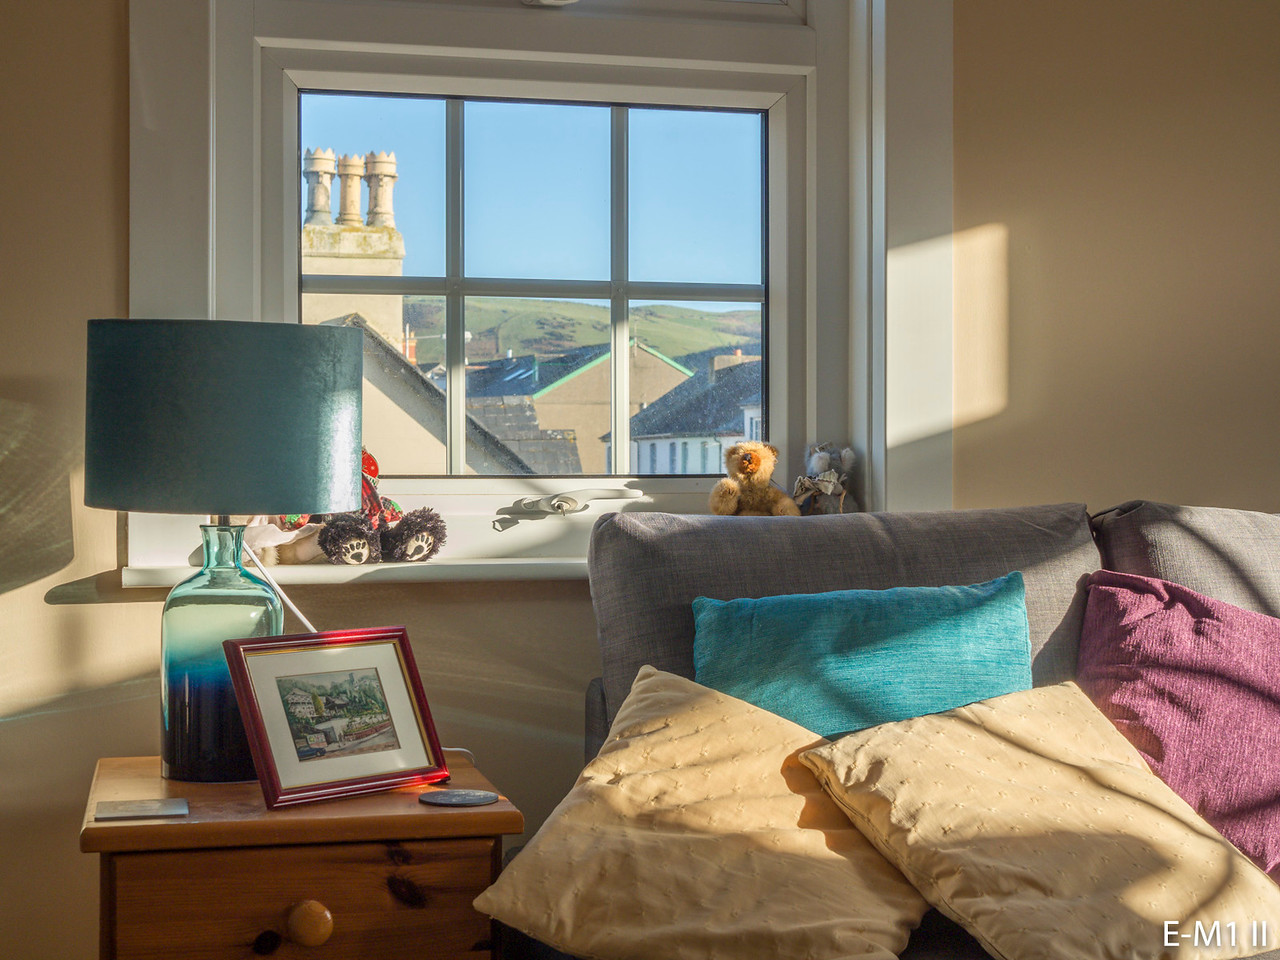
Dynamic range on the other hand was a positive surprise. The new 20MP sensor of the E-M1 II is a welcome improvement especially in the highlights where it retains more detail in comparison to the E-M1.
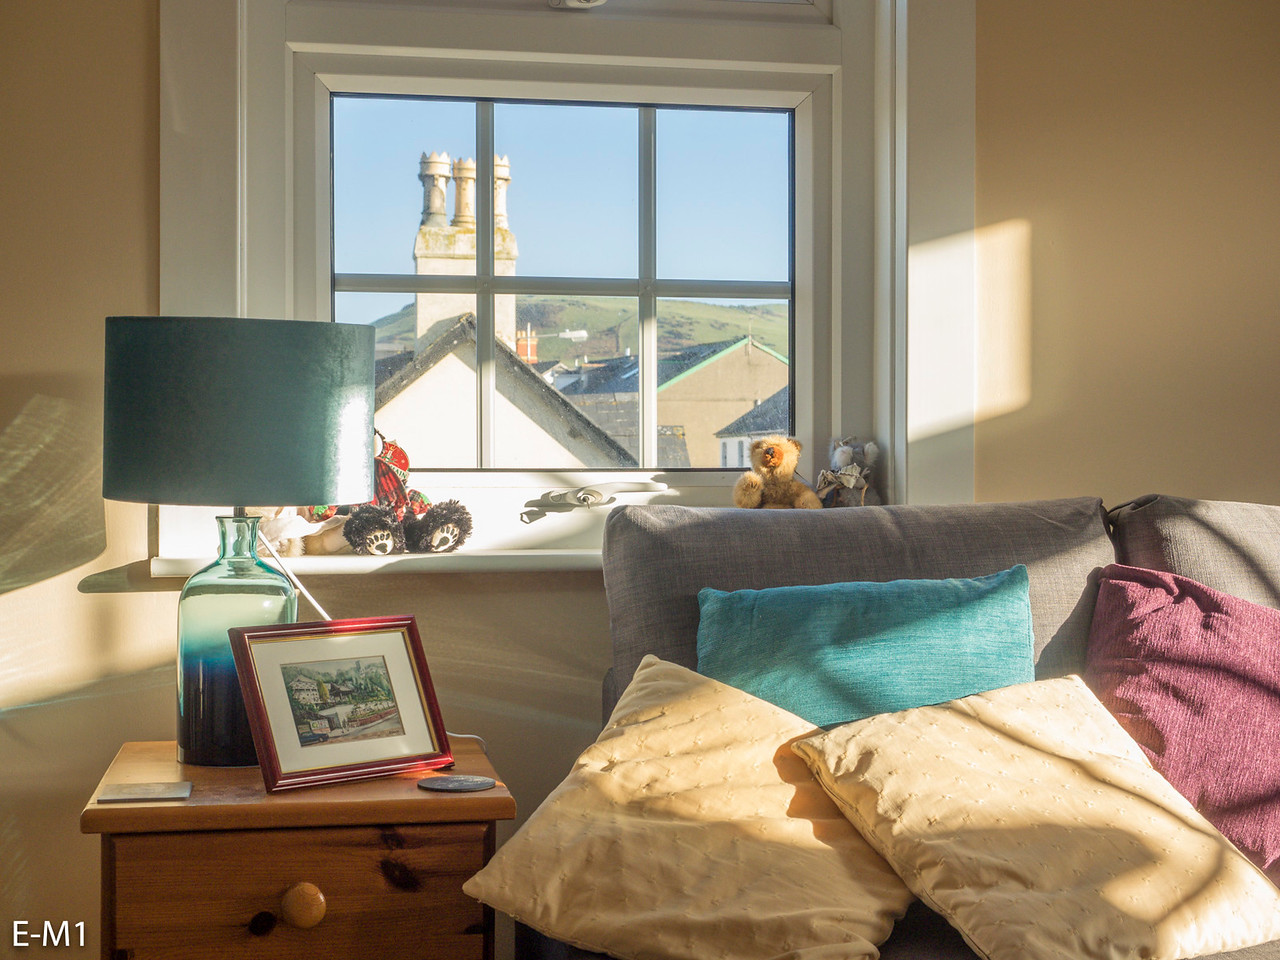
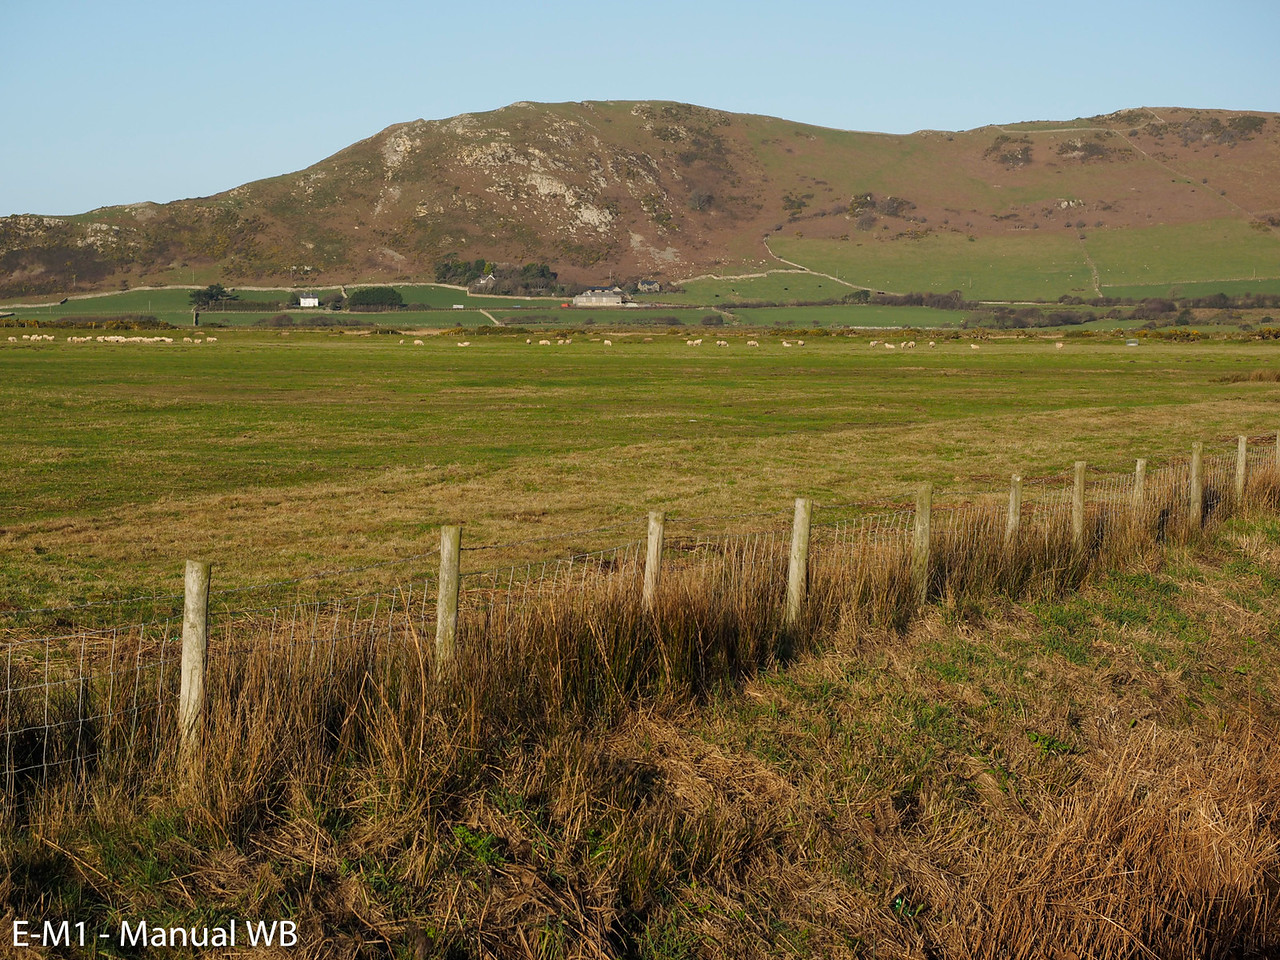
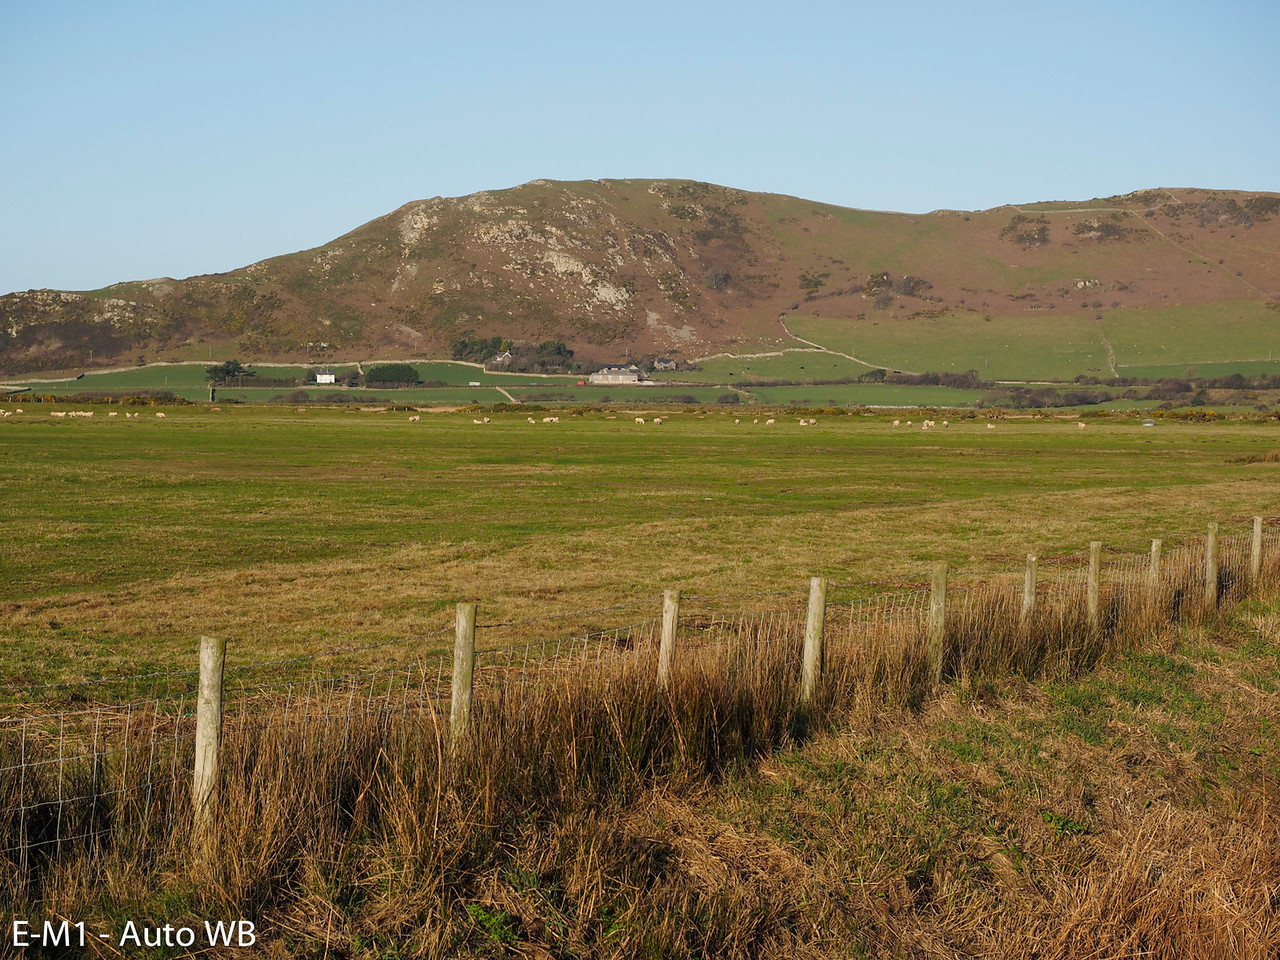
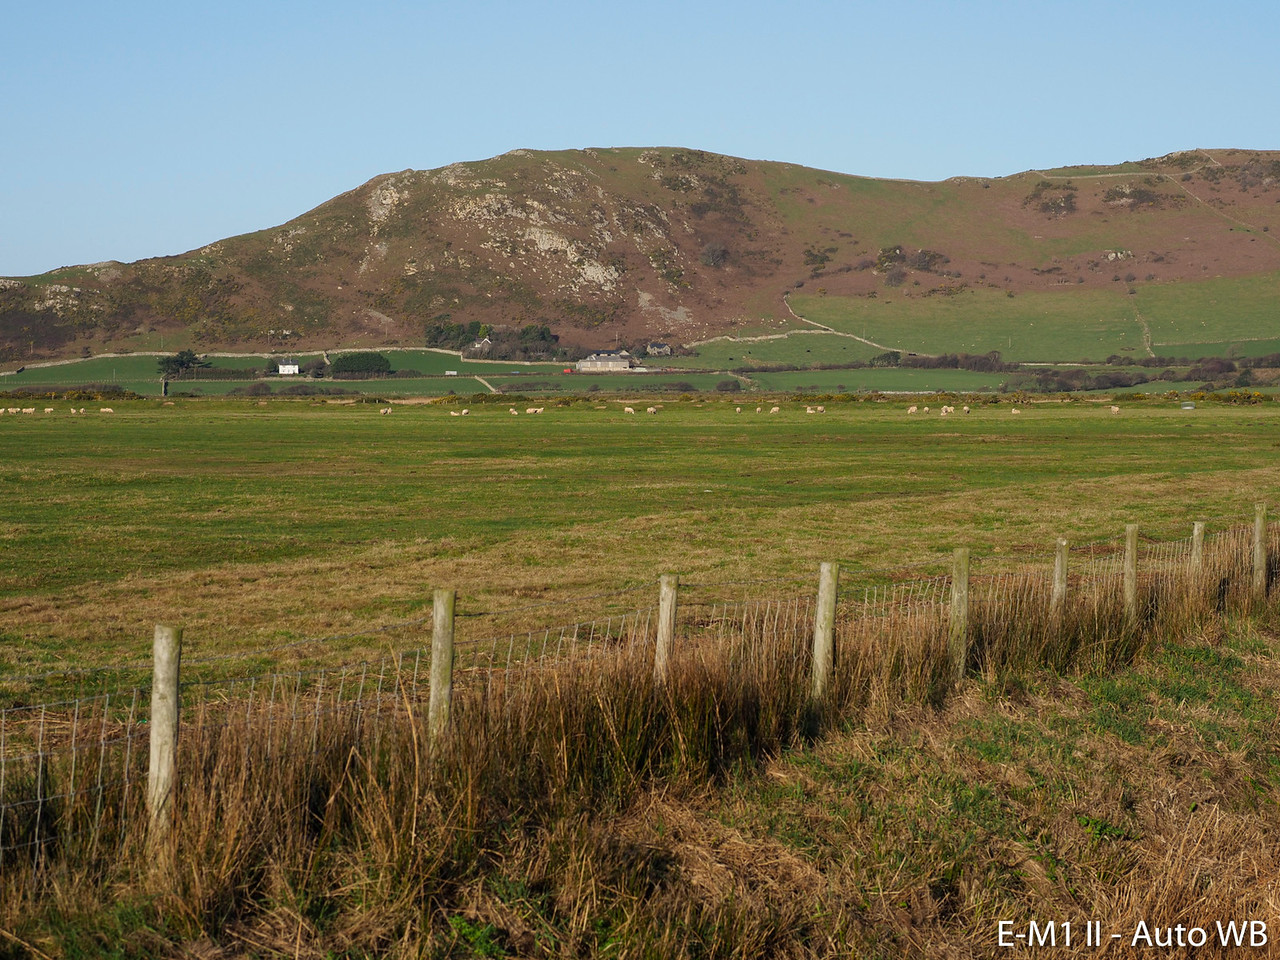
The first scene features a balanced contrast between the light inside and outside. I decreased the highlights by -100 and increased the shadows by +100. Take a look at the window, lamp and yellow cushion in the bottom right corner.
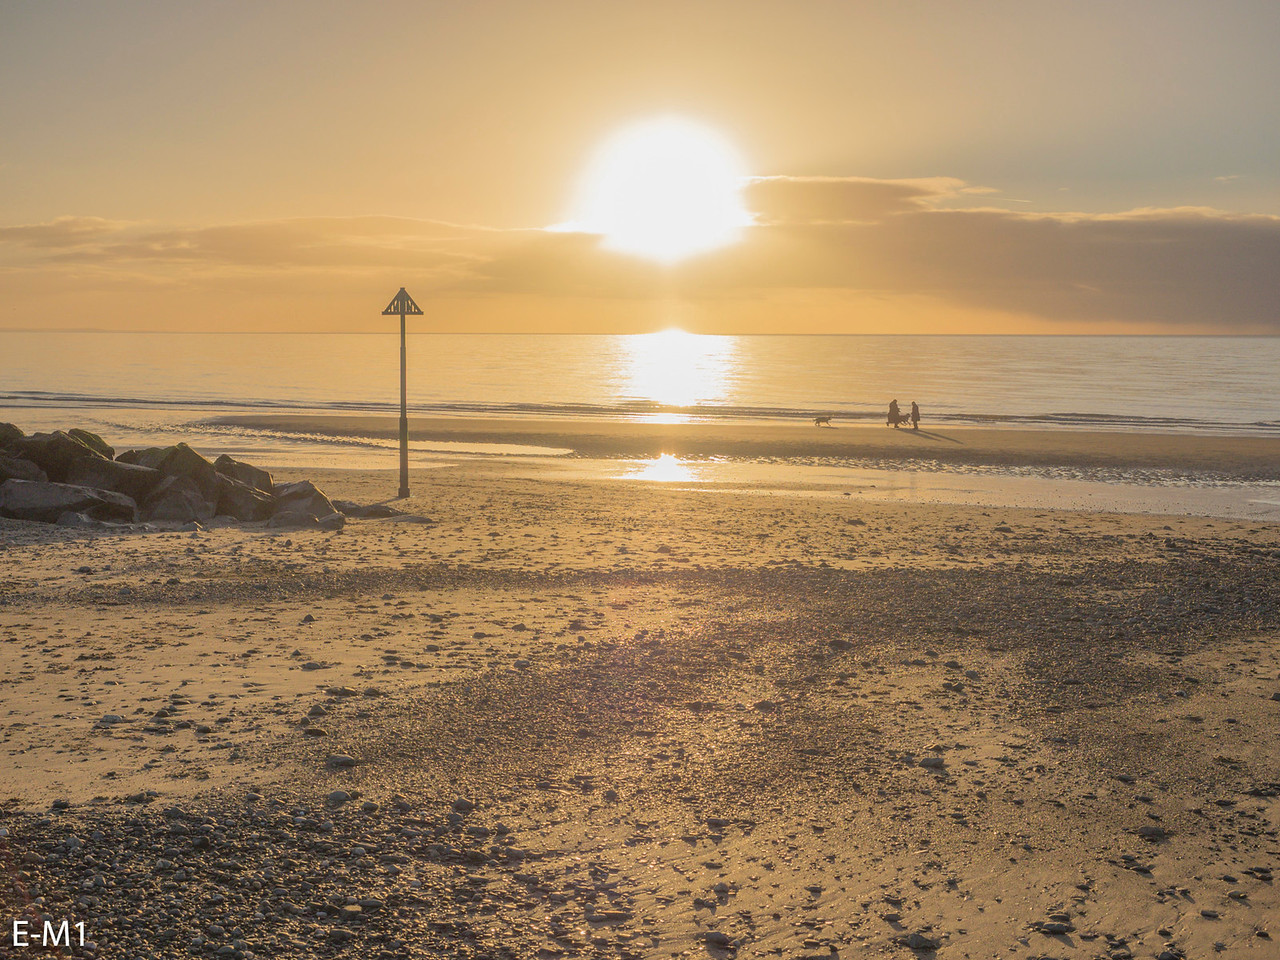
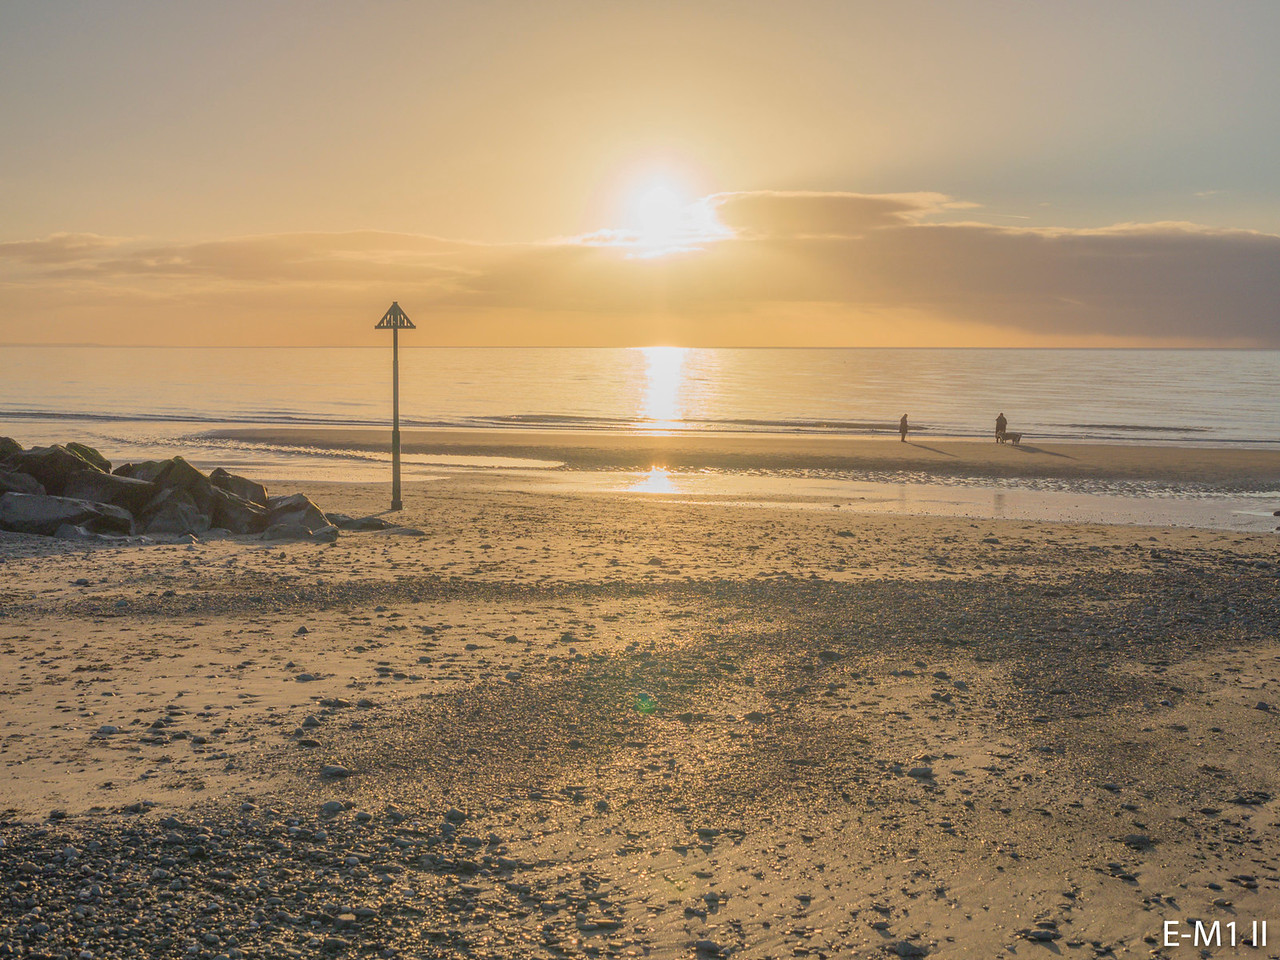
The second scene shot at sunset is even more revealing of the highlight improvements made to the E-M1 II.
In the shadows, things remain more similar. In the example below, I underexposed by 4 stops, then recovered the same amount in post. As you can notice, there is a magenta cast in the darker areas from the E-M1 II.


The second example was underexposed by 3 stops, then recovered by 4Ev. Both cameras give finer results especially after good post-processing and applying some noise reduction. With the E-M1 II, I could have underexposed by only 2 stops given its better highlight recovery and that is an advantage of the new camera.


Another welcome improvement to the E-M1 II is the major decrease in colour noise for long exposures with the in-camera Noise Reduction (dark frame) turned off. This was one major complaints about the original E-M1. As you can see below from this 5 minutes exposure test, the E-M1 II only has a few coloured dots in the darkest areas unlike the E-M1. If you turn NR On, both cameras look good.


Generally using noise reduction for long exposures is advised even if the dark frame process doubles the time for the image to be complete. If you really need to turn it off, then the E-M1 II will definitely give you better results.
Both cameras feature the same metering system with Digital ESP (meters in 324 areas across the frame), Centre-Weight, Spot, Spot HI (increases the exposure) and Spot SH (decreases the exposure).
In scenes with balanced lighting, I found that the original E-M1 tends to overexpose the reading by approximately 0.7EV in comparison to the E-M1 II, which I find more precise in most situations.
However if the centre weight or spot metering passes momentarily into a darker area, such as when you pan quickly to follow a bird flying against dark trees, the E-M1 II can overexpose more than necessary.
Remember that all the metering modes can be customised with compensation in the menu (Exposure shift metering) so if you find that the camera is over or underexposing regularly with your favourite metering mode, that setting will come in handy.
The E-M1 II has an extra option which is the possibility to link Spot, Spot HI and Spot SH to the single focus point, allowing you to skip metering the scene and re-composing.
Colours and JPG settings
I’ve always appreciated the colour output of Olympus’ JPG files.
The new sensor and image processor of the E-M1 II bring some minor changes that you may or may not appreciate depending on your personal taste.
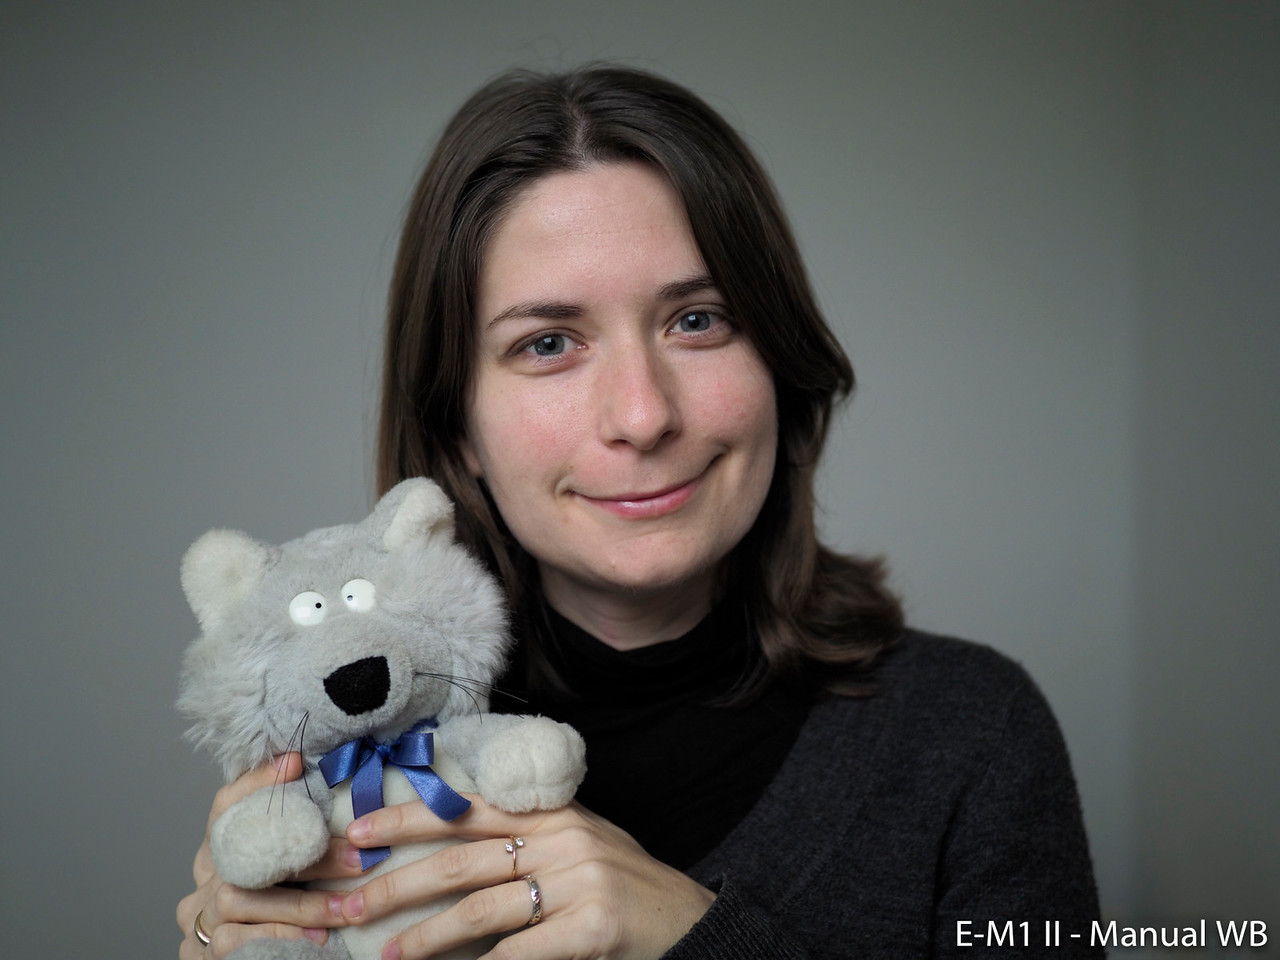
If we look at the first example below, we can see that the E-M1 retains warmer colours while the E-M1 II gives a more balanced result but feels somewhat cooler. The difference becomes more evident with the vivid profile.

If I set the two cameras to Auto white balance, the difference is still there. Note that both cameras have a “Keep warm colors” option for the AWB but in this case it didn’t make a difference. You can also compensate the white balance on the A axis (Red-Blue) and G axis (Green-Magenta) for the JPG files. These tests were done with both set to 0.
The same conclusion is found for the RAW files, although some software programs like Capture Pro 10 preview a more significant difference in comparison to Adobe Lightroom. As usual with the RAW files, colour profiles and many other colour settings can be changed so it matters less.
If we take a look at skin tones in a neutral environment with the Portrait picture mode, we can notice that the E-M1 once again retains a slight warmer look with AWB.


With manual white balance, the difference becomes more noticeable, with the skin tones appearing yellower in comparison to the E-M1 II. Once again, it is a matter of personal preference but I do find the E-M1 II result more natural here.

With the RAW files, the same conclusion applies but again the freedom to optimise skin tones and colours means it matters less.


Despite the colour differences, both cameras have a good JPG engine. The list of picture profiles available is the same (i-Enhance, Vivid, Natural, Muted and Portrait) and you can add on top of that the Monochrome options, Color Creator (saturation/tint) and the Art filters.
You can find individual settings for each profile including saturation, sharpness, curves, shadows and highlights. Adjusting the last two can be a good way to increase the dynamic range. However if you push the values too much, it can also create some noise in the darker areas of your frame.


ISO performance
Both cameras share the same native sensitivity range that starts at 200 ISO and goes up to 25600 ISO. They have an extended value called Low which means the native ISO 200 is underexposed by the image processor. It corresponds to ISO 100 for the E-M1 and ISO 64 ISO for the E-M1 II.


The high ISO performance is similar. If we pixel peep from ISO 6400, we can notice a finer grain on the E-M1 II that remains constant up to the highest sensitivity.


Both cameras handle colours well up to 12800 while 25600 ISO shows some purple cast in the shadows.

Noise reduction is also more aggressive on the mark II model. While I advise you to keep it to Off or Low on both cameras, the E-M1 II definitely softens the details more in comparison to the E-M1.

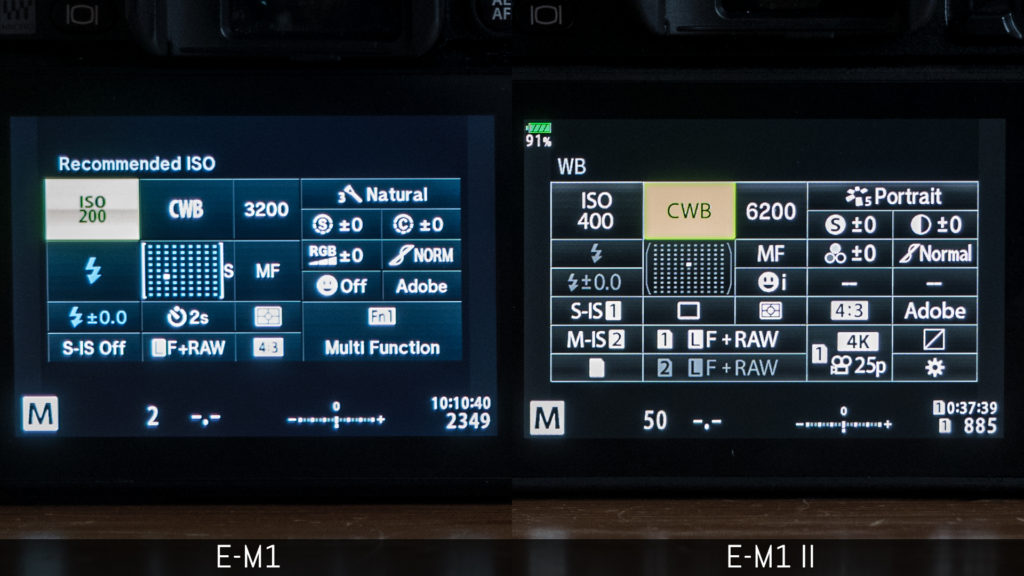
Both cameras have an Auto ISO option that can be available in All shooting modes or in Program/Aperture/Shutter priority modes only. I always choose All as I like to have Auto ISO available in Manual mode when shooting sports or birds in flight.
In M mode, the lowest value you can select on the E-M1 is 200 ISO while on the E-M1 II, you can choose the Low value as well. Curiously with the latter, the camera tends to choose between 64 and 80 ISO but never ISO 100. There isn’t the possibility to choose the Low value manually – not that this poses any problems.
On the new camera you can use exposure compensation with Auto ISO while working in manual mode. If you switch the lever function to position 2 and use the rear dial to change the ISO, you can then use the front dial to vary the exposure compensation. On the E-M1 this option is not available.
For Auto ISO the E-M1 II introduces an additional setting: Lowest S/S (Shutter Speed) which is available in Program or Aperture priority modes. Here you set the lowest shutter speed value the camera can use before the ISO sensitivity is raised. This allows you to keep a safe shutter speed if you don’t want blurry moving subjects for example.