Our full comparison between the E-M1 mark II and the Lumix G9 is one of our most popular articles to date. For the past three years, these two cameras have represented the best Micro Four Thirds has to offer along with the more video-oriented GH5 and GH5s.
Now that the E-M1 mark III is out, you may be curious to see how the new Olympus model compares to a G9 which is ageing really well thanks to various firmware updates and a reduced price.
E-M1 III comparison previews:
E-M1 II vs E-M1 III – E-M1 III vs E-M1X – E-M1 III vs G9
Ethics statement: the following is based on our personal experience with the Lumix G9, and Olympus OM-D E-M1 III. We were not asked to write anything about these products, nor were we provided with any sort of compensation. Within the article, there are affiliate links. If you buy something after clicking the link, we will receive a small commission. To know more about our ethics, you can visit our full disclosure page. Thank you!
1. Design and Functionality
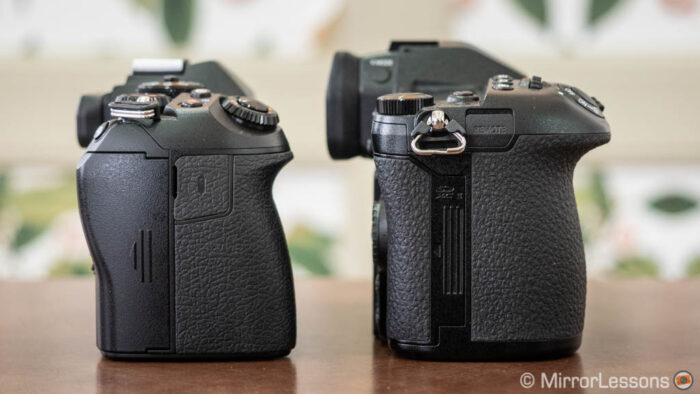
The E-M1 III and the G9 come with complete weather sealing and a magnesium alloy construction. The Lumix model is the larger and heavier of the two.
- E-M1 III: 134.1 x 90.9 x 68.9mm, 580g
- G9: 136.9 x 97.3 x 91.6mm, 658g
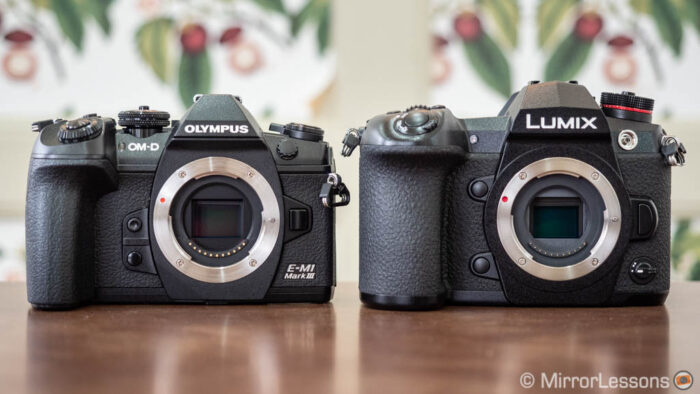
The G9 has a large front grip, and I find it to be one of the best I’ve tried. That being said, the smaller grip of the E-M1 III remains as comfortable to use thanks to its well-made design.
The larger size of the Panasonic model makes room for extra things you won’t find on the Olympus, such as the backlit top screen that displays the settings in use.
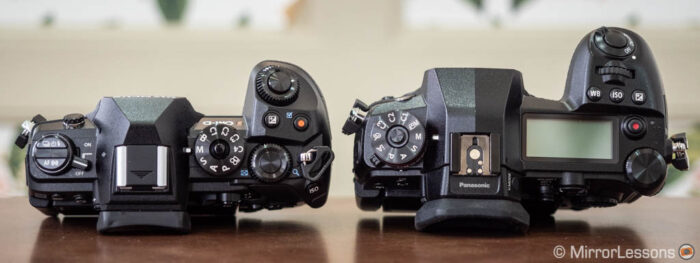
Both cameras have a vast array of controls, including an AF Joystick on the rear. The G9 feels a bit more complete and easier to use straight out of the box. I appreciate the drive dial on top (underneath the main shooting mode dial), the dedicated WB and ISO buttons, the focus mode lever on the rear and the customisable function lever at the front.
Many buttons and dials can be customised on both cameras, and you’ll also find quick menus and custom pages to save your favourite settings.
Each model features a dual card setup, but whereas the G9 can accept UHS-II SD cards in both slots, the E-M1 III can only do so with the first one (the second is UHS-I only).
External connections include a full-sized USB 3 and a full-sized HDMI output for the G9, whereas the E-M1 III uses a USB Type C and a micro HDMI port. Both include a microphone input and a headphone output (3.5mm socket), as well as a flash sync port.
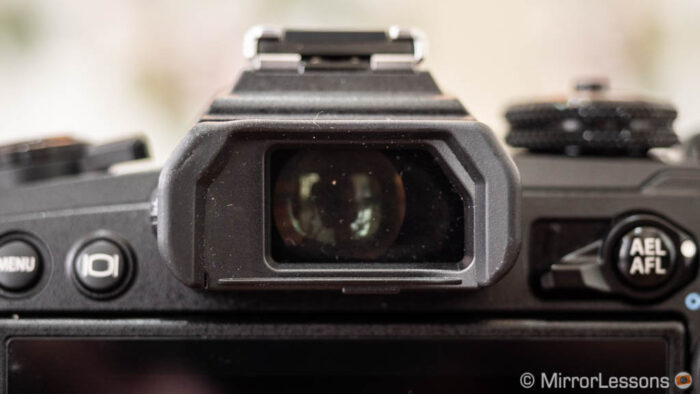
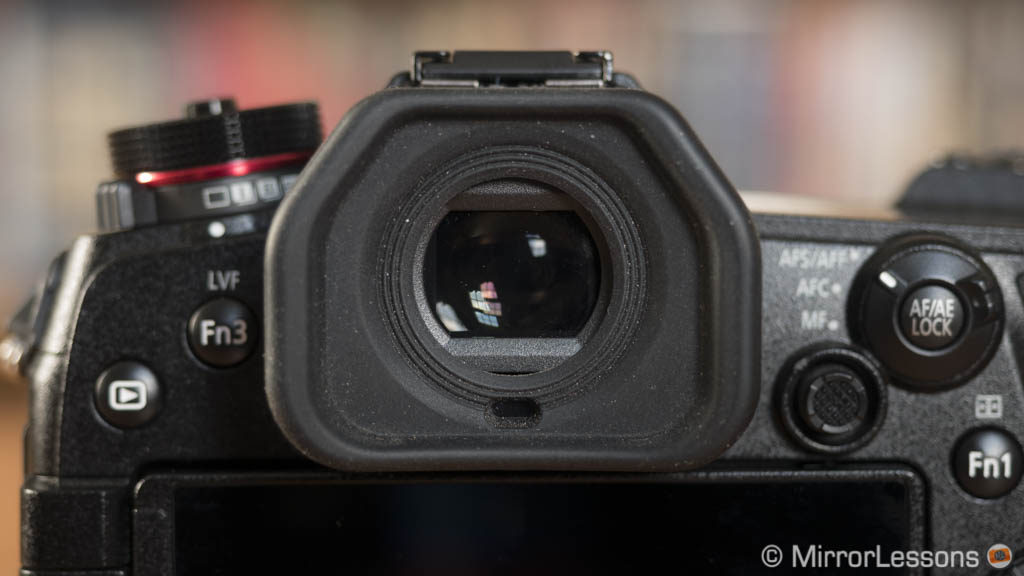
2. Electronic Viewfinder
The E-M1 III EVF remains substantially unchanged with a magnification of 0.74x, a refresh rate of 120fps and a resolution of 2.36M dots, which is a bit disappointing considering that other brands have moved to higher resolutions on their high-end models. It’s not a bad viewfinder by any means but I feel that Olympus could have made an extra effort. At least there is a sligthly shorter lag (5ms).
The G9 has a very good EVF. It goes up to 0.83x, but you can also lower it to 0.77x or 0.7x. This is very useful if you wear glasses like I do. The OLED panel has a higher resolution of 3,680k dots and the frame rate goes up to 120fps. The only negative aspect is that the viewfinder has a noticeable pincushion distortion, and you might need a bit of time to get used to it.
3. Touch Sensitivity
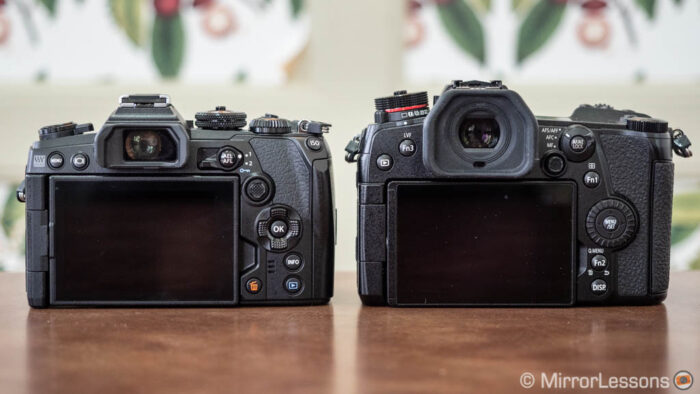
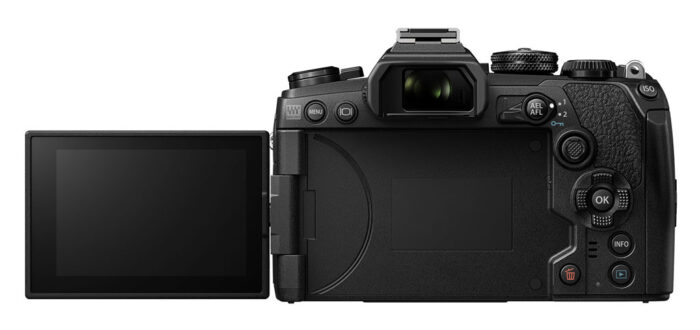
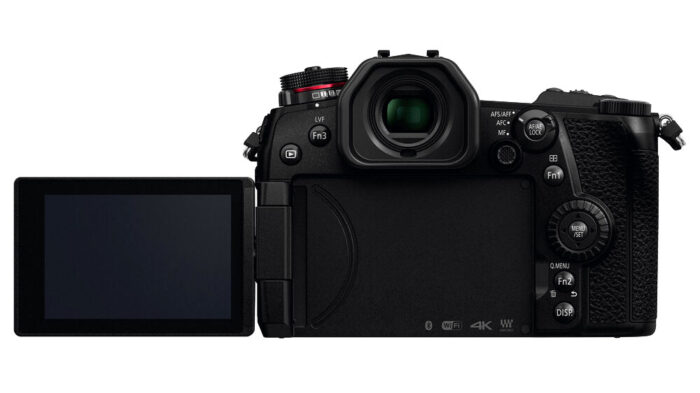
The rear LCD screens are the same in terms of their basic specifications: they are 3 inches large, have a resolution of 1.04M dots and a multi-angle mechanism that allows you to orient them at different angles and flip them 180˚ to the side.
They also feature touch capabilities but there are more things you can do on the G9. In fact, I would say there is not a lot you can’t do on the Lumix camera.
In addition to taking a picture, moving the AF point (also when composing with the EVF) and changing various settings, which are things you can also do on the Olympus, the G9 allows you to navigate the menu, create custom AF areas, move the histogram around and much more.
4. Autofocus System
This chapter has always represented one of the biggest differences between Panasonic and Olympus (or should I say between Panasonic and all the other mirrorless systems).
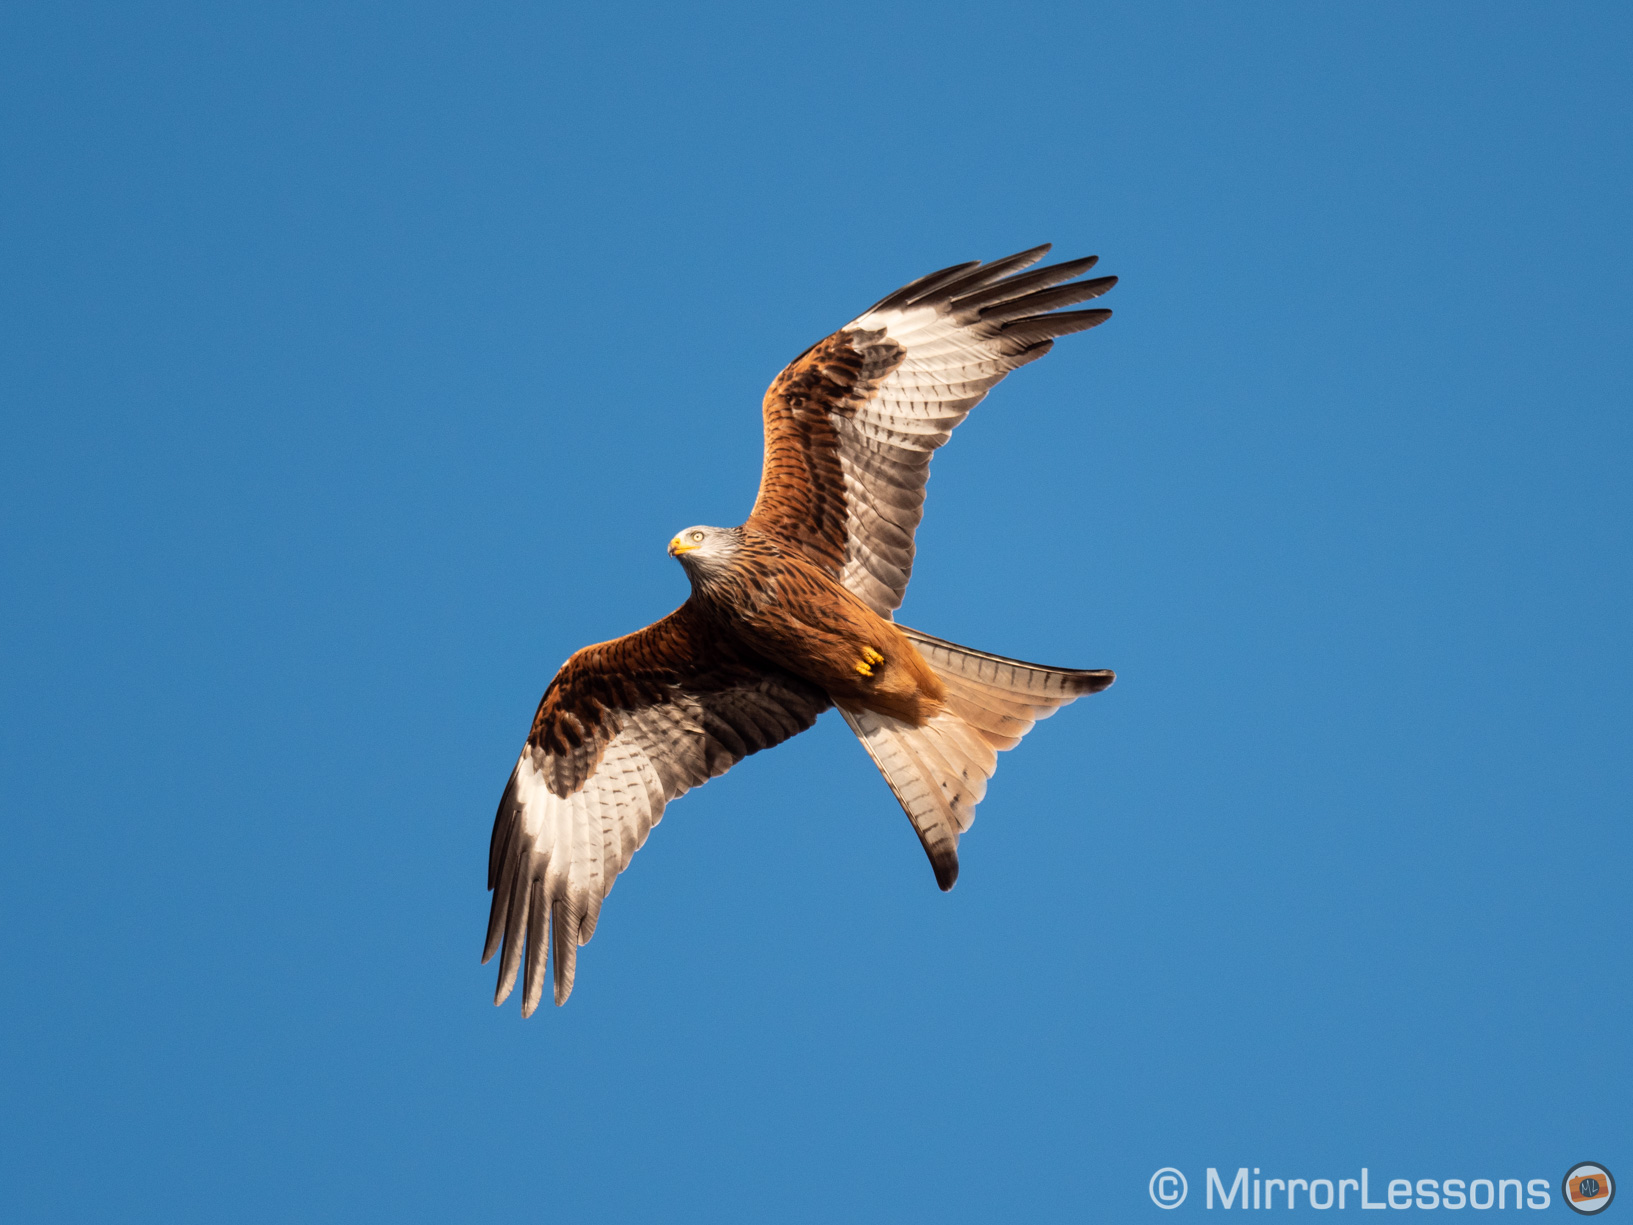
The E-M1 III features a hybrid contrast/phase detection system with 121 points. The phase detection areas are cross type, which means they detect horizontally and vertically. It features most of the latest algorithm Olympus designed for the flagship E-M1X, the best the company has released to date.
The G9 uses contrast detection, albeit a very fast version called DfD (Depth from Defocus). The camera calculates the distance to the subject by comparing two images with different depth of field. There is a maximum of 225 areas.
As I’ve always said, the G9 performs really well in most situations, including group sports such as football or motorsports. I would even go as far as to say that in some cases, I find it better than the OM-D.
However if you’re interested in wildlife, or birds in flight to be more precise, the DfD technology has its limits, particularly when the bird flies against a busy background and the camera confuses the contrast. You can read more about this in our dedicated article.

The G9 can also be less precise when using face or human body detection. It has the tendency to prioritise smaller faces in the background rather than the people in the foreground. Animal detection works well, and the number of different animals it can detect is quite surprising, but once again it can lack precision in focus acquisition.
It’s worth noting that Panasonic has made several improvements via firmware (the latest being version 2.4) but the same limitations remain, particularly for birds in flight, although the keeper rate has improved.
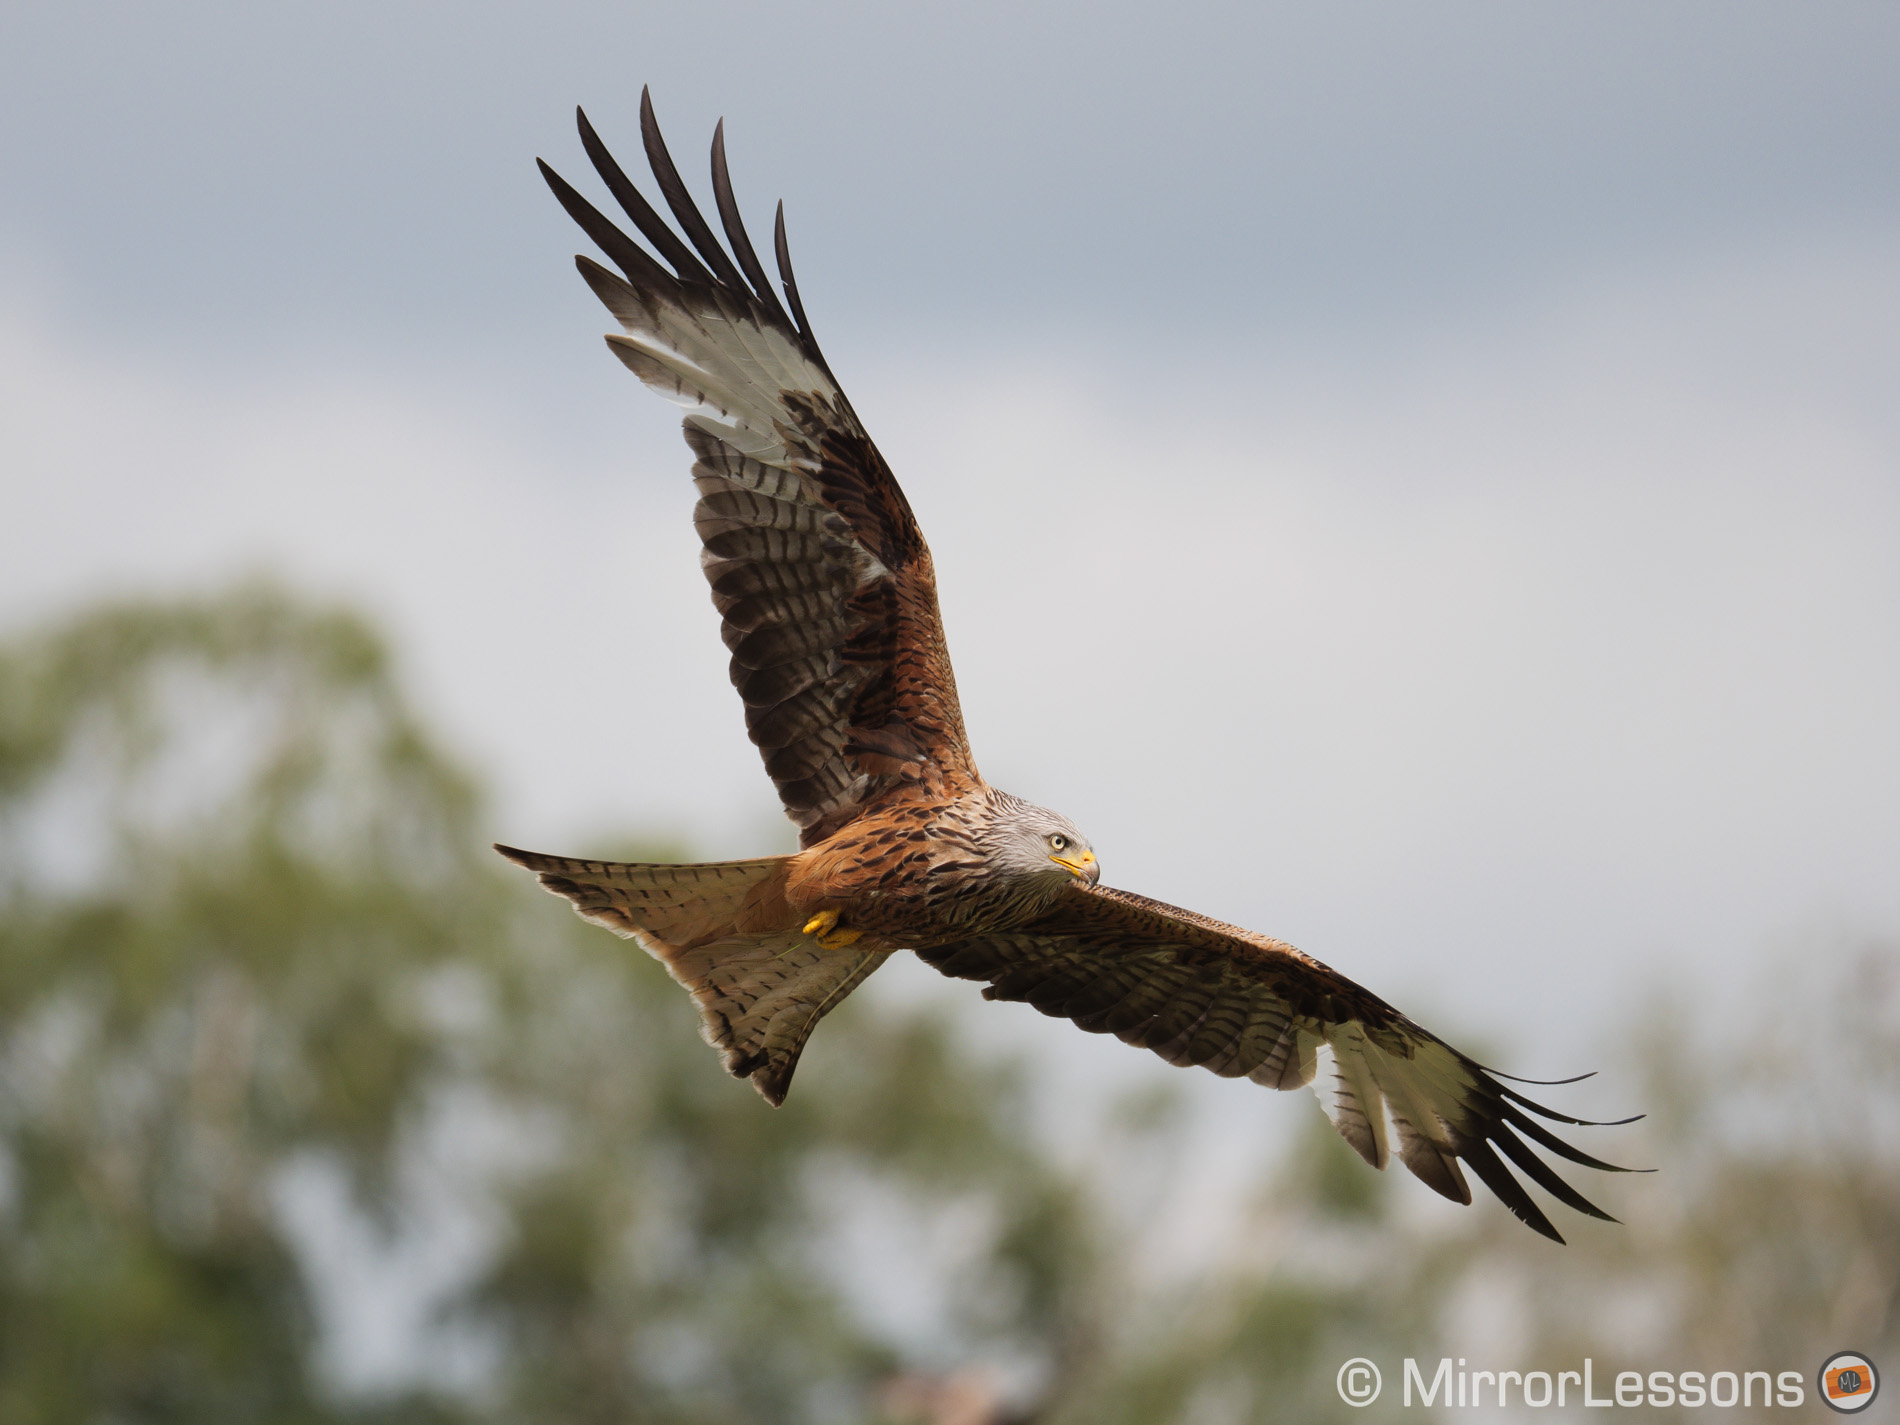
The E-M1 III doesn’t have any sort of animal detection, but face and eye detection have been improved and eye detection especially works much better. The eyes are recognised even when the subject is further away, and is more stable if the person turns their head left or right.
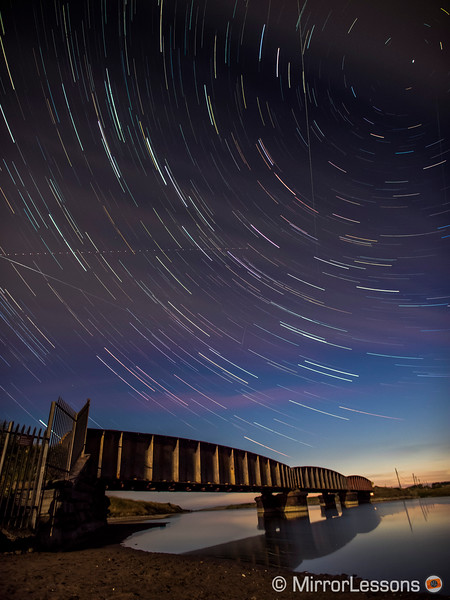
Then we have a new AF mode on the E-M1 III called Starry Sky AF. The camera can scan the night sky and focus on the stars. This sounds is a really cool function for astro-photography but it is not unheard of. Panasonic introduced Starlight AF for a similar purpose a few years ago, and the G9 has this function too.
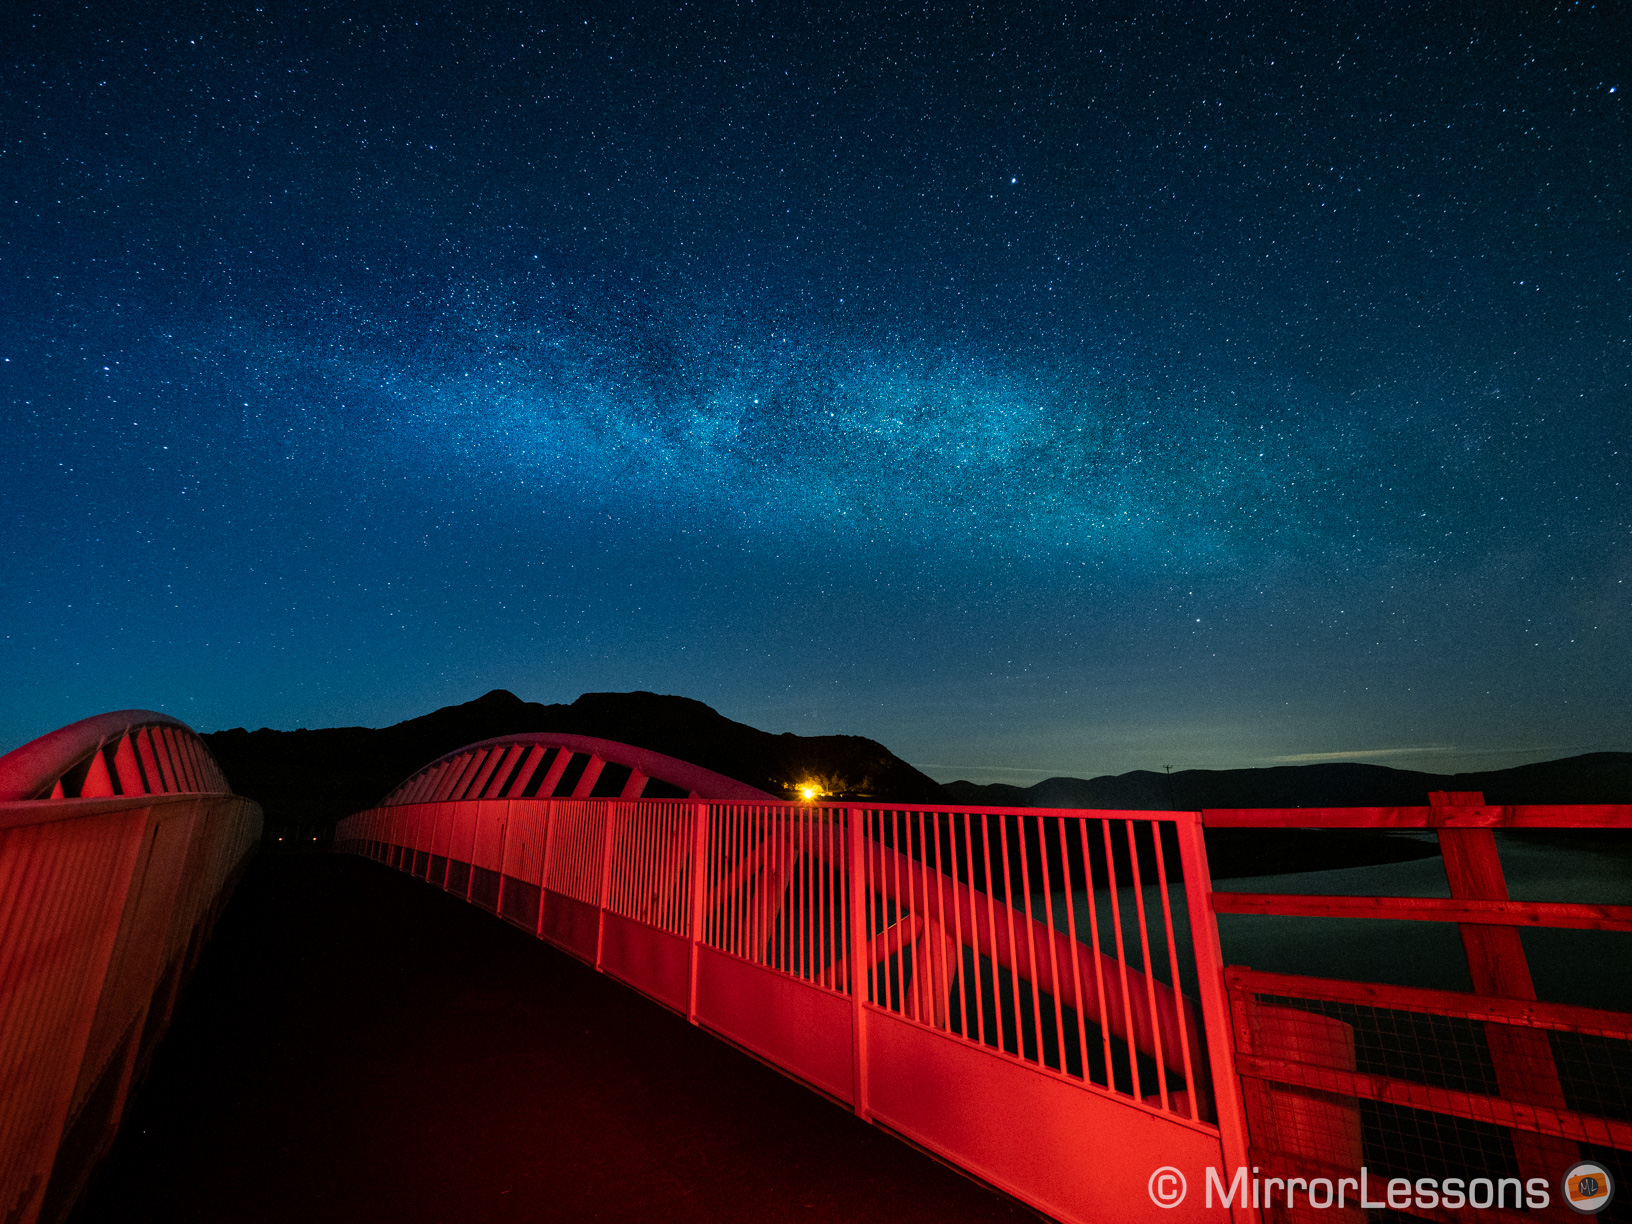
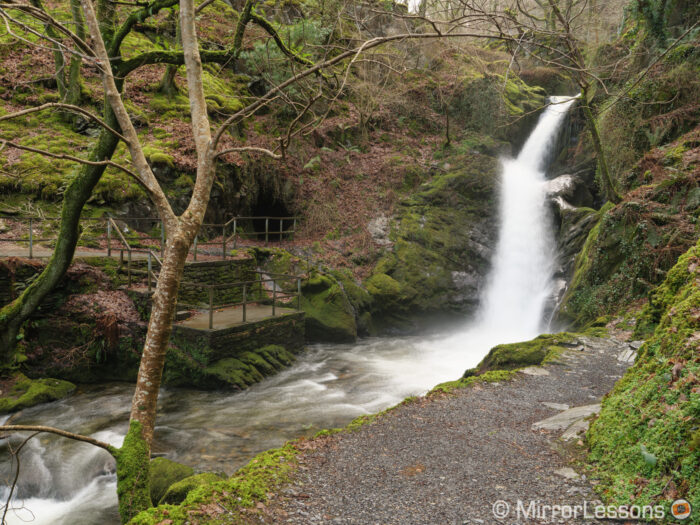
Taken with the Starry Sky AF mode
I never tested the G9 version so I don’t know how accurate or usable it is, but I did try the Olympus function and it surprised me. You can select two modes, one that will focus faster, and another that will focus slower but more accurately, and they are both accurate and reliable. You can read more about Starry Sky AF in my dedicated article.
Last but not least, phase detection is more reliable for video which gives the Olympus an advantage. In my tests the G9 didn’t do badly to be honest, but once again the limit of contrast detection can slow down the performance or make it more unstable. That said, firmware 2.4 has improved the performance on the Lumix.
5. Image Stabilisation
Both companies have drastically improved their respective 5-axis image stabilisation systems and I have no problem saying that they are two of the best when it comes to this technology (including the S series from Panasonic).

Olympus remains number one both in terms of its official rating and real world use. The E-M1 III can compensate up to 7 stops with the sensor shift alone, or up to 7.5 stops with a lens that features optical stabilisation (Sync IS). Images taken hand-held at around 10s are possible with this camera, which is quite impressive if you think about it.
The G9 may not give you the same crazy results, but it remains a solid performer nonetheless. The CIPA rating of 6.5Ev is really good and in real world use, you can certainly push it for a few seconds which is still more than you’re going to need most of the time.
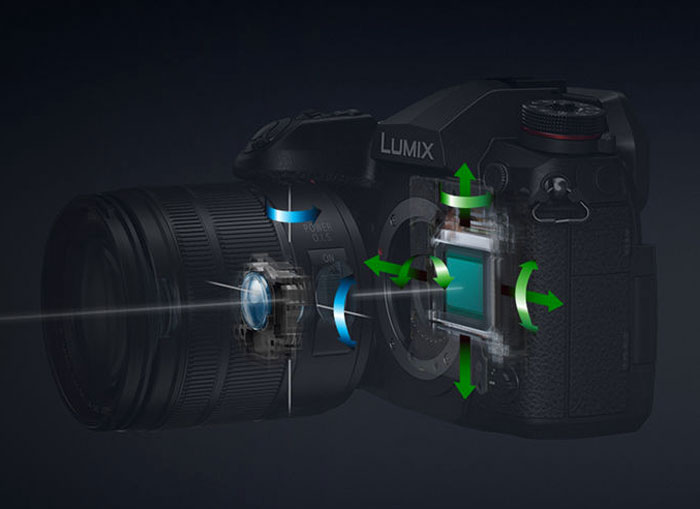
It too can combine sensor and optical stabilisation (called Dual IS). Note however that Sync IS and Dual IS are not cross compatible. That is, it won’t work with a Panasonic lens on an Olympus body and vice versa.
The technology works for video too. Once again Olympus gives you the best results, with a smoothness that can sometimes mimic the performance of a gimbal. While there can be some limitations (rolling shutter, sudden shifts), it can be useful on many occasions. At this moment, I can’t think of a better camera for hand-held video work if you don’t fancy additional accessories.
The G9 has improved thanks to firmware updates and I was quite pleased with the results I got with the Leica 200mm 2.8 while visiting Scotland. Although the performance can be less convincing than that of the Olympus when performing more complex movements, the static shots are more than usable.

Both cameras allow you to add electronic stabilisation, which crops the field of view a little but improves the result, and there are additional settings to control the amount of stabilisation needed.
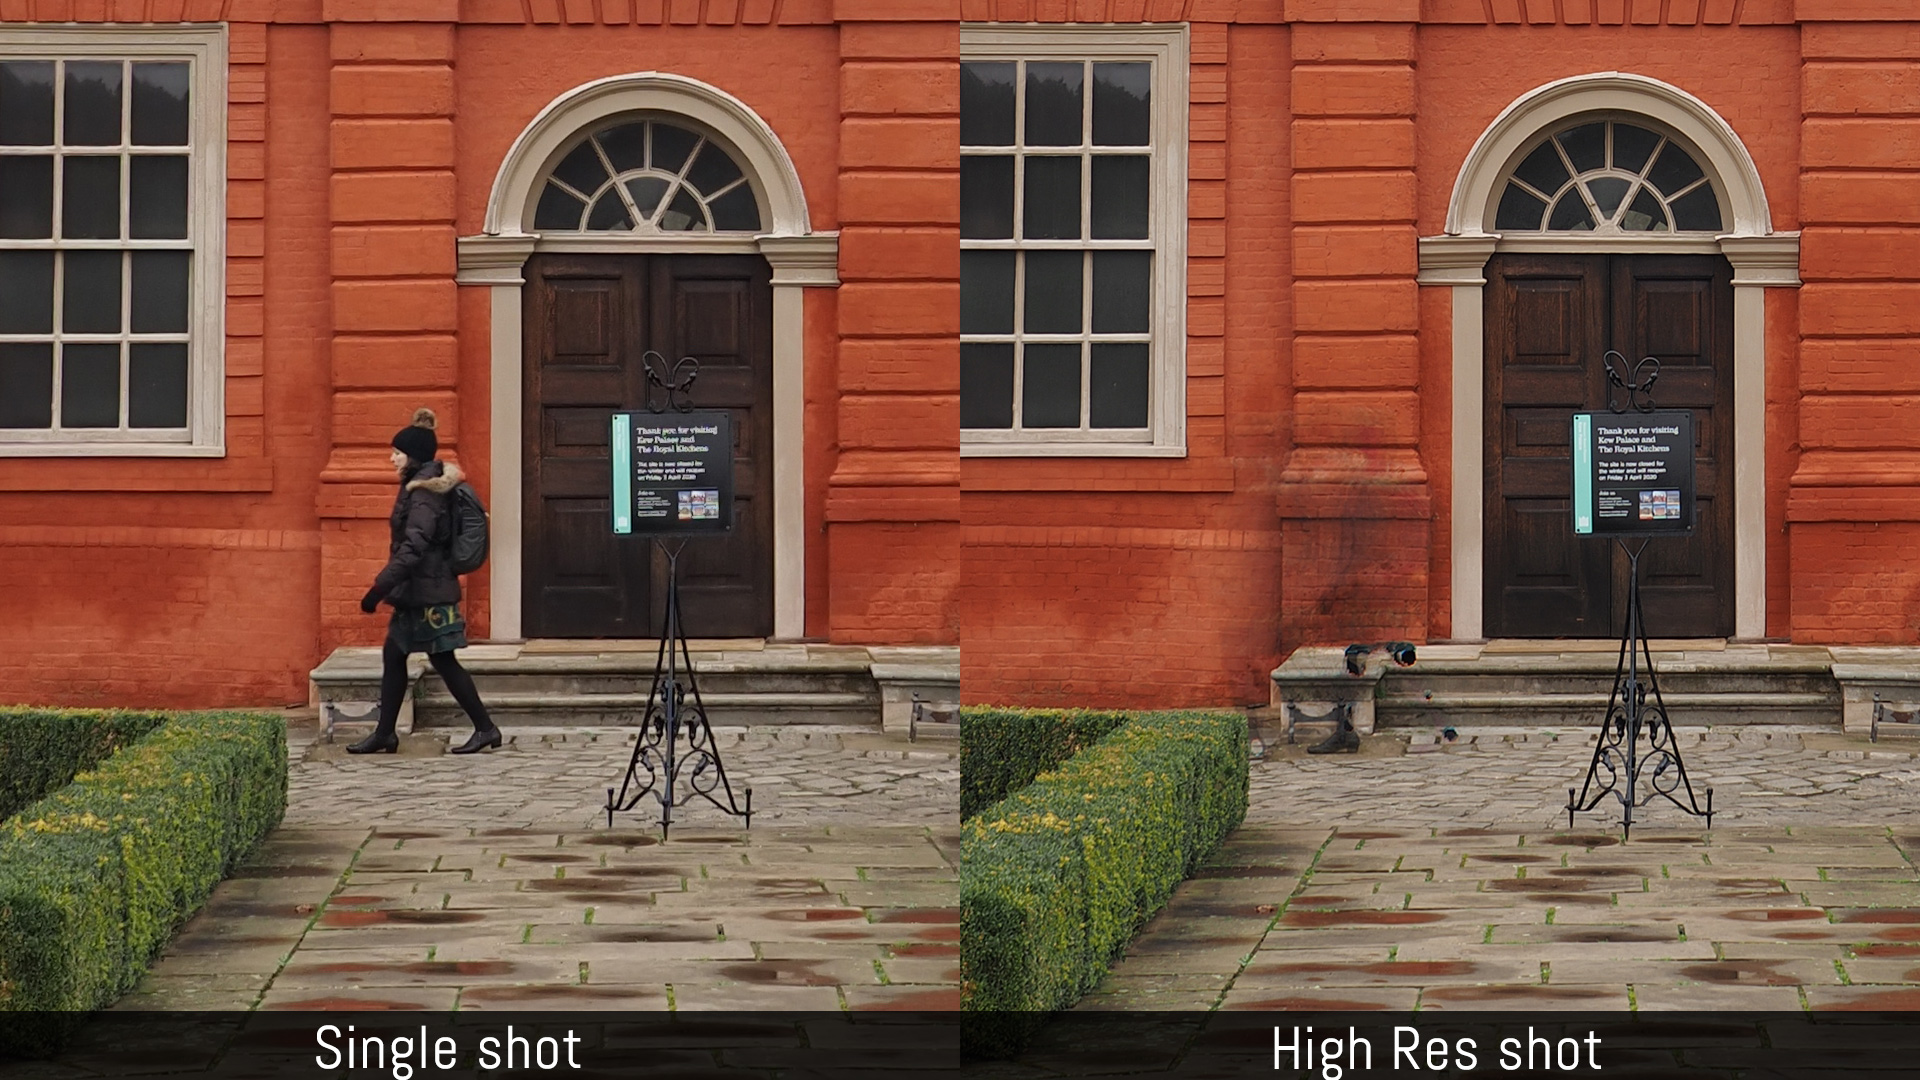
6. High Resolution Mode
The high resolution function, first seen on the Olympus OM-D E-M5 II, works by taking 8 shots in rapid succession, with the sensor moving by half a pixel between each shot (made possible thanks to the image stabilisation mechanism). The 8 images are then combined to create a final photo with more resolution. The maximum is 80MP with RAW and JPG on the G9, 80MP with RAW and 50MP with JPG on the E-M1 III.
On the G9, this mode requires a tripod because otherwise even the smallest camera movements will decrease the sharpness and create artefacts. Another thing to consider is that every movement inside your image will produce the same problem.
One interesting option for the Lumix however is that if you activate Mode 2, the camera will try to fix movements inside the image by replacing that area with a lower resolution version taken from a single shot. I have not tested this on the G9 specifically (it came with firmware 2.0) but if it is the same technology I saw on the full frame S1R, it should work really well.
The E-M1 III has a unique option you won’t find anywhere else as of now (except for the E-M1X), which is the hand-held mode. Instead of 8, the camera captures 16 shots and uses information from the stabilisation system to align the images. The output is 50MP for RAW and JPG. It works really well and makes this function more usable than ever before.

Keep in mind however that the E-M1 III is not capable of fixing all movements inside the photo, as you can see below.
7. Continuous Shooting
Both cameras feature impressive continuous shooting speeds. With the mechanical shutter, the E-M1 III has an advantage: it can shoot up to 15fps with focus locked on the first frame, or 10fps with continuous AF. The G9 does 12fps and 9fps respectively.
Activate the electronic shutter and both cameras can shoot at 60fps with AF-S, or 18fps (E-M1 III) and 20fps (G9) with AE/AF tracking. Note however that at 20fps the G9 doesn’t show you a live view in the EVF or on the LCD, but rather the last image taken. Although the succession happens rapidly, there is a delay between what’s happening and what you are seeing. At 18fps, the E-M1 III has a live view with blackouts.
Additionally, the G9 can’t work with focus priority on burst speeds faster than 7fps, and uses predictive focus instead (release priority).
The electronic shutter enables other functions too such as the silent mode, fast shutter speeds up to 1/32,000s, and another continuous shooting mode called Pro Capture (Olympus) or Pre-Burst (Lumix).
When you half-press the shutter button, the camera starts to load images to the buffer memory, constantly updating the buffer with the latest frames. Once you fully press the shutter button, the last pre-loaded images are saved to the SD card (up to 35 on the E-M1 III, 15 on the G9). This is very useful to capture moments that are difficult to predict.
If all this wasn’t enough, the G9 has an extra burst mode called 4K or 6K Photo. In this case, the camera records a 4K/60p or 6K/30p video and lets you save 8MP or 18MP JPGs. Here as well you can start to record before fully pressing the shutter button.
The advantage of this option is that you don’t have to worry about buffer filling up because the camera is recording a continuous video. If you shoot RAW or JPGs with the normal burst mode, the G9 can record approximately 50 files at 20fps before reducing the burst speed.
The E-M1 mark III doesn’t have the same option, but you can save a frame from a 4K video file. The difference is that you only get a 16:9 aspect ratio, whereas the 4K/6K mode on the G9 lets you choose different ones, including the native 4:3.
8. Video
If you’re looking for a significant difference that gives an edge to the G9, this is it. The camera already had better video quality when it was released, but firmware 2.0 added more capabilities.
The G9 can record 4K at 50 or 60fps. The maximum duration per clip is 10 minutes, but it is still a nice option and one you won’t find on the OM-D. If you’re happy with a maximum of 30fps, you can record in 10-bit 4:2:2 internally to the SD card, or via the HDMI output to an external recorder. The internal bitrate is 150Mbps.
The E-M1 III does 4K up to 30p and 102Mbps, or Cinema 4K / DCI at 24fps and 237Mbps, although bear in mind that the 237Mbps bitrate is variable (and often stays below 100). There is no 10-bit option, internally or via the HDMI output.
The G9 offers various colour profiles designed for video which include Cine-Like V, Cine-Like D, Hybrid Log Gamma and V-Log L. Unfortunately for the latter, you need to buy a license to unlock it.
The E-M1 III has the Flat Picture mode and the OM-Log400, but I personally don’t like the latter because it doesn’t give you a lot more to work with in comparison to the flat profile. The Panasonic V-Log is much more effective and of course you have the added benefit of grading 10-bit 4:2:2 footage which contains more colour data than 8-bit 4:2:0.
On a personal note, the E-M1 III can produce a pleasing and realistic colour rendering, but the colour signature of the G9 stands out (it’s one of Panasonic’s best in my opinion).
Finally, the G9 has an extra step of sensitivity at high ISOs (200-12800 vs 200-6400 on the OM-D).
9. Extra Features
Both cameras come with an impressive number of extra features. Some are similar like the time-lapse function or various bracketing modes including focus bracketing. But each camera has its own set of exclusive settings as well.
The E-M1 III comes with useful features for long exposures (live time) and artistic low light photography (live composite). There is a fisheye compensation mode that works with the 8mm 1.8 Pro and Keystone Compensation to correct perspective distortion.
The G9 has stop motion animation and a fun 4K Live Cropping mode that allows you to create digital movements and output the result in a 1080p file.
10. Price
The E-M1 III can be found for $1600, £1600 or €1640 (body only).
The G9 has experienced various price drops and is now one of the best deals you can find at around $1000, £900 or €750.
Note: prices as of early July 2021. Offers on the G9 can vary so the prices change often.
E-M1 III vs G9: What they have in common
There are a few important aspects that the cameras have in common.
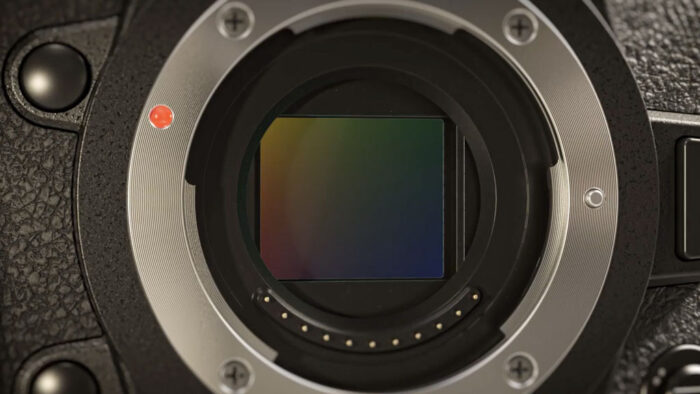
First we have the four thirds sensor with an almost identical resolution of 20MP (20.4 on the OM-D, 20.3 on the G9). The normal ISO range goes from 200 to 25600. The extended low values go down to ISO 64 on the E-M1 III and ISO 100 on the G9. Although the two sensors are not exactly the same, they deliver very similar image quality.
They two cameras share the same micro four thirds mount, so you can use Olympus lenses on the G9 and vice versa, as well as access many products from third-party brands. Note that cross-compatibility limitations might be applied to some settings when you use Panasonic lenses on Olympus bodies and vice versa.
The battery life is better on the Olympus, but both cameras have USB charging and power delivery options, as well as an optional battery grip.
Conclusion
The E-M1 III brings a number of interesting updates to the series but doesn’t feel all that different from its predecessor. Put against its rival, the G9, my conclusion remains similar to my E-M1 II vs G9 comparison.
What I like about the Olympus is the smaller size and the company’s will to push the boundaries of image stabilisation. There is a lot you can do hand-held with the E-M1 III, and this reinforces the concept of a compact system. It is also the better choice if you want a more reliable autofocus, especially for birds in flight and other difficult subjects.
The G9 now has an attractive price, and Panasonic has improved the camera via firmware. Unsurprisingly, it is the obvious choice for video, and if you’re not concerned by the contrast detection AF and don’t mind the larger size, there is hardly anything left to criticise.
Reminder: the links below are affiliate links. If you decided to buy something after clicking the link, we will receive a small commission.
Check price of the OM-D E-M1 III on
Amazon | Amazon UK | B&H Photo | eBay
Check price of the Panasonic Lumix G9 on
Amazon | Amazon UK | eBay | B&H Photo
E-M1 III comparison previews:
E-M1 II vs E-M1 III – E-M1 III vs E-M1X – E-M1 III vs G9