Many of our Micro Four Thirds readers have been asking me to test the latest firmware version of the Lumix G9 for birds in flight and I finally found the time after the holiday break.
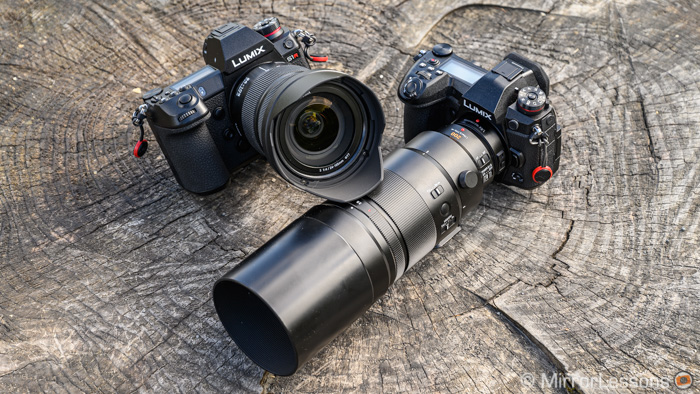
I rented the camera for a weekend, along with the Leica DG 200mm 2.8 lens and TC 1.4x teleconverter. To make sure I ended up with consistent results, I visited the same red kite feeding station where I test the autofocus of most cameras.
This is not the first time that the G9 has received AF tweaks via firmware. Version 1.2, released in October 2018, tried to minimise the camera’s tendency to shift the focus point to the background when tracking a subject in continuous AF.
Version 2.0, released in November 2019, was the biggest update to come to the G9, adding several improvements and new settings including 10-bit 4:2:2 internal recording for video. Concerning autofocus, it has added Animal Detection and new options for the AF-ON function (Near Shift and Far Shift). Does it make a difference? Let’s find out.
Important: firmware 2.4, released in June 2021, improves the performance further. Please read my new report.
Ethics statement: the following is based on our personal experience with the Lumix G9, which we have tested on numerous occasion since its release. We were not asked to write anything about this product, nor were we provided any other compensation of any kind. Within the article, there are affiliate links. If you buy something after clicking one of these links, we will receive a small commission. To know more about our ethics, you can visit our full disclosure page. Thank you!
TABLE OF CONTENTS
1. Autofocus System
2. Firmware Update
3. Autofocus Settings for Birds in Flight
4. Other Settings for Birds in Flight
5. Recommended Lenses
6. Conclusion
Panasonic G9 Autofocus System
My experience with Lumix cameras and birds in flight has always been a mixed bag. This is because Panasonic is the only company that has stuck with contrast detection autofocus rather than adopting phase detection AF like every other mirrorless brand.
The AF system, called DfD (Depth from Defocus), is actually the most advanced contrast detection AF on the market.
Traditional CDAF moves the lens elements back and forth to find the point of highest contrast and acquire focus. This movement is visible on the live view, with the focus distance getting shorter and then longer. It can be accurate but it is a slower process.
DfD on the other hand evaluates two images with different depths of field and combines them with the optical data of the lens to determine the appropriate focus distance. This process is performed by reading the sensor and scanning low resolution images at 480fps (frame per seconds). Because the characteristics of the lens are involved, DfD is compatible with Lumix G / Leica DG lenses only.
First introduced on the GH4 in 2014, this AF system saw an important improvement thanks to the second generation DfD that came out with the GH5 in 2017. The focus points were increased from 49 to 225 and the readout speed from 240fps to 480fps. The G9, based on the same AF, brought an additional improvement with a faster acquisition time of 0.04s.
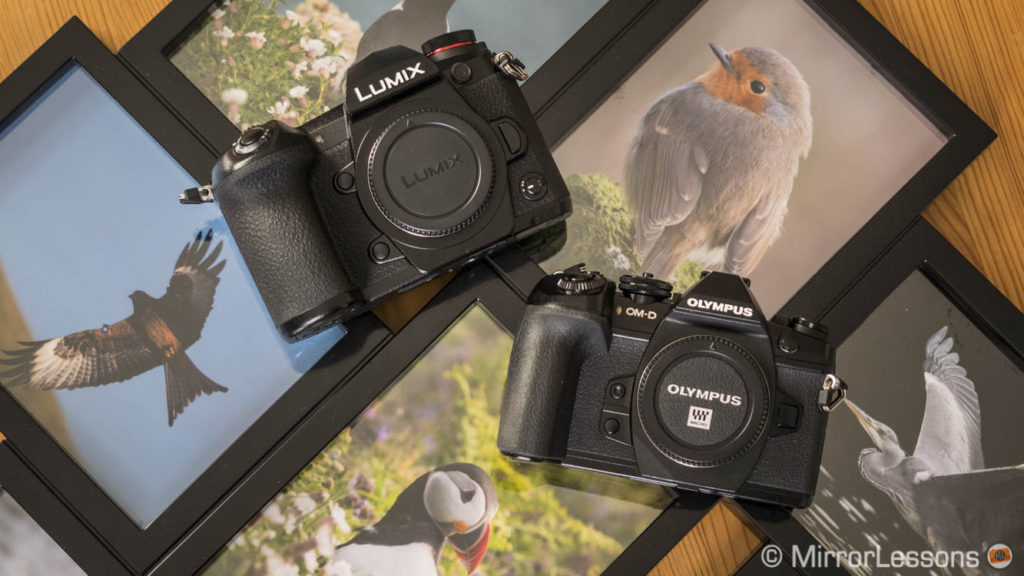
In my first encounter with the G9 and for the in-depth comparison I performed against the E-M1 II, the Lumix passed the AF tests with flying colours in many scenarios including football and motorsports, outperforming the Olympus more than once. When it came to birds in flight however, it showed all the limits of the DfD technology.
But why does DfD struggle so much with birds?
Well because, despite the advanced calculations that make it faster than traditional CDAF systems, it remains contrast detection, so ultimately contrast is what determines focus acquisition. The difference in contrast between the subject and the background can have a huge influence on the performance.
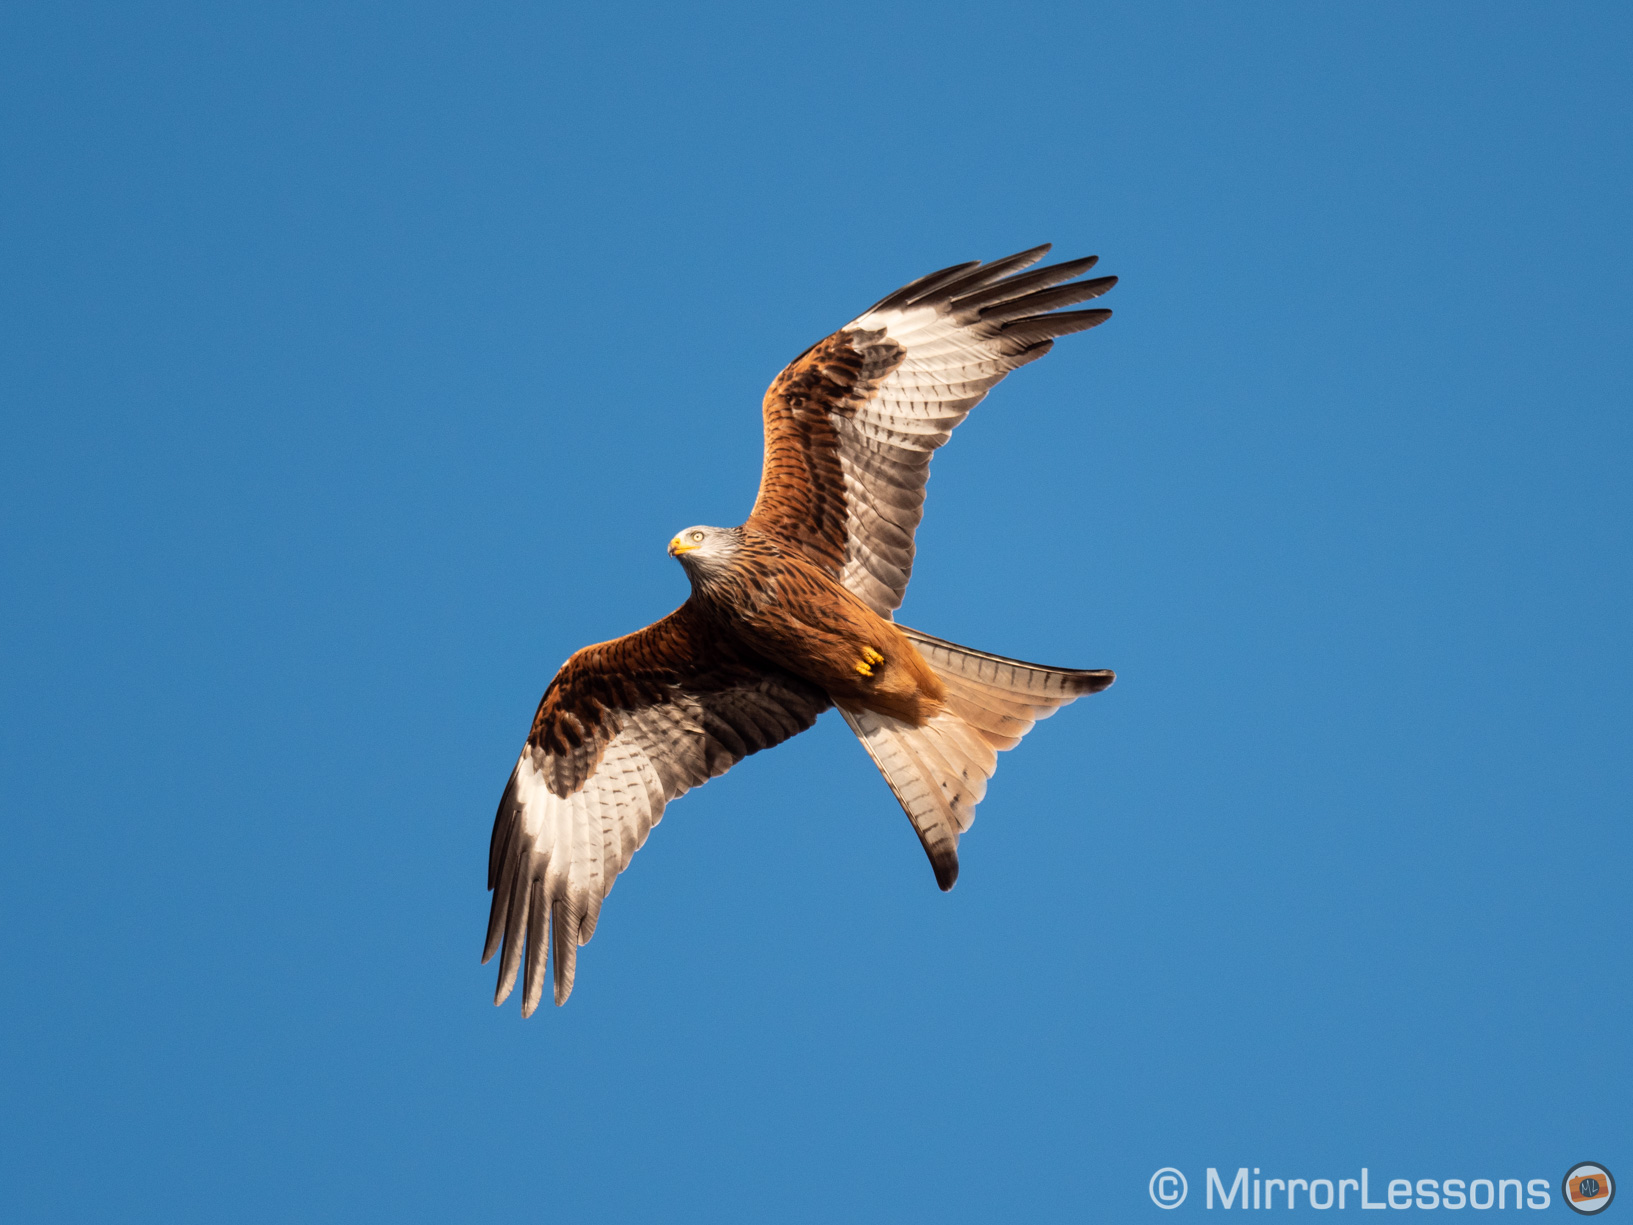
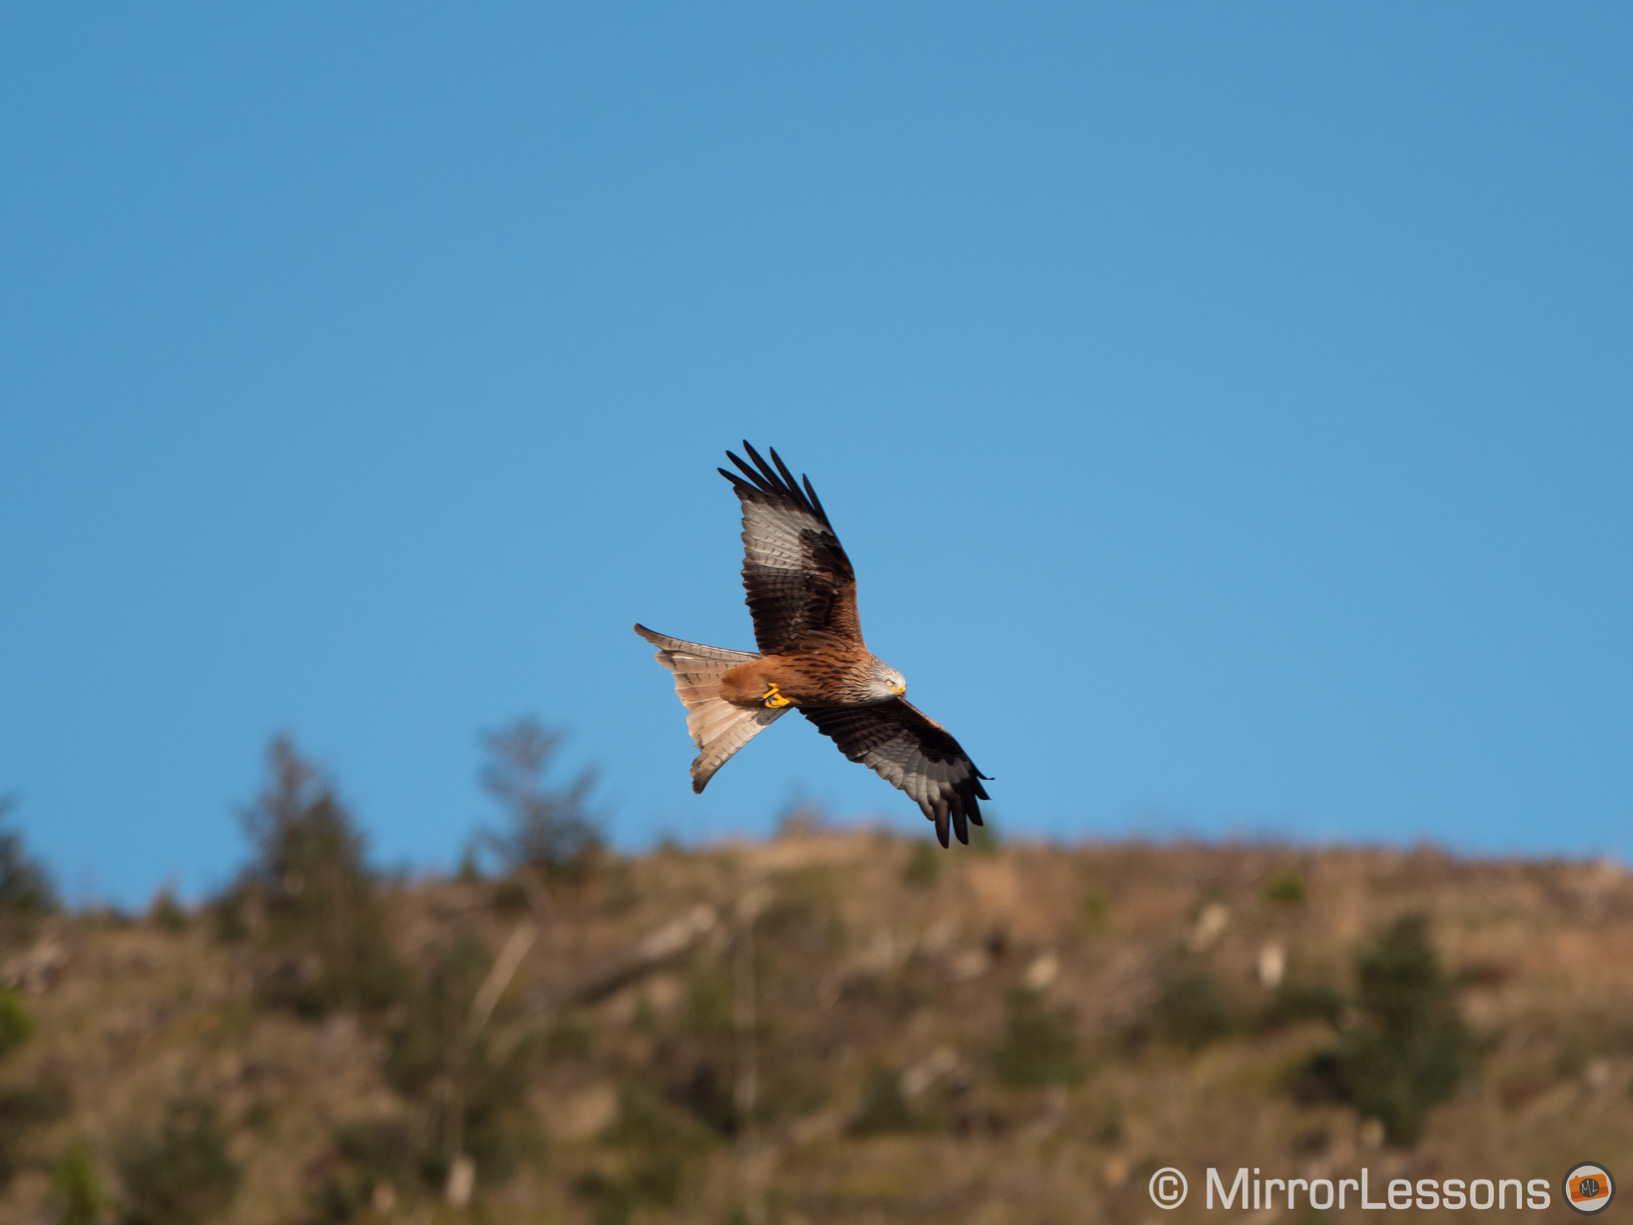
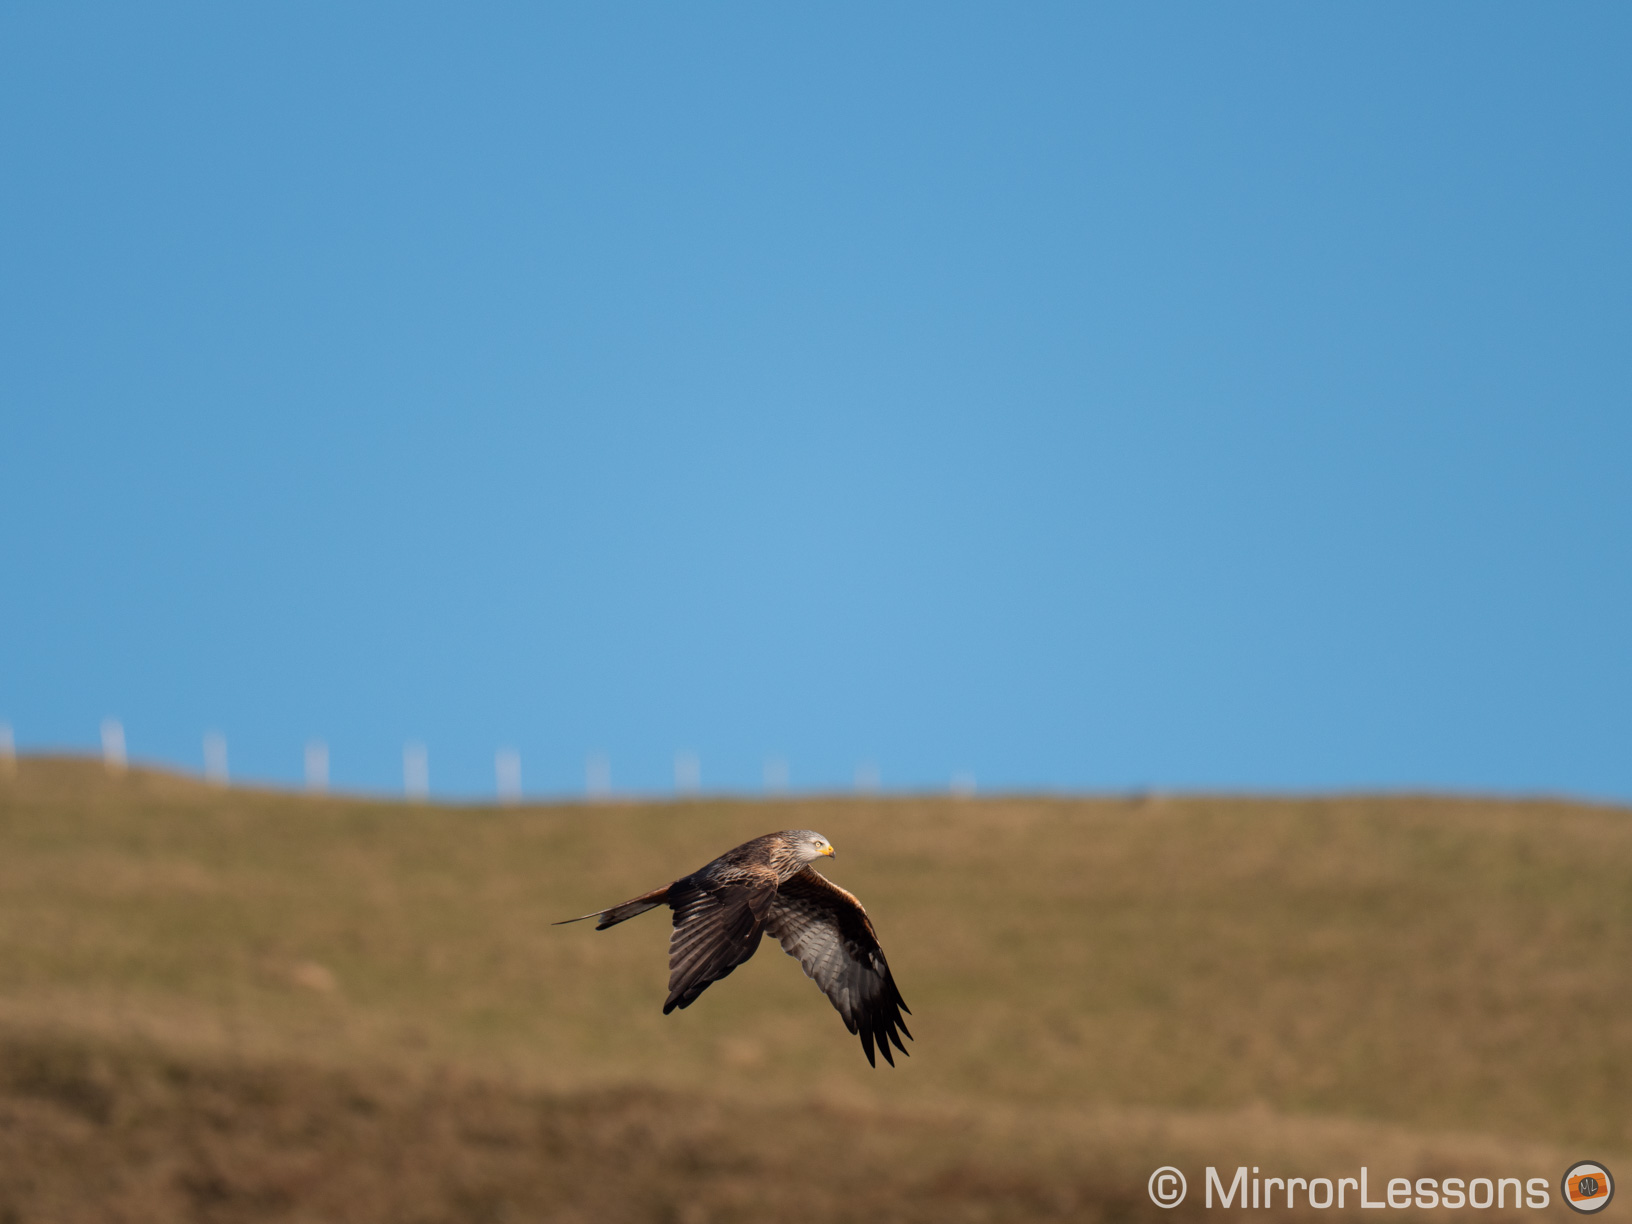
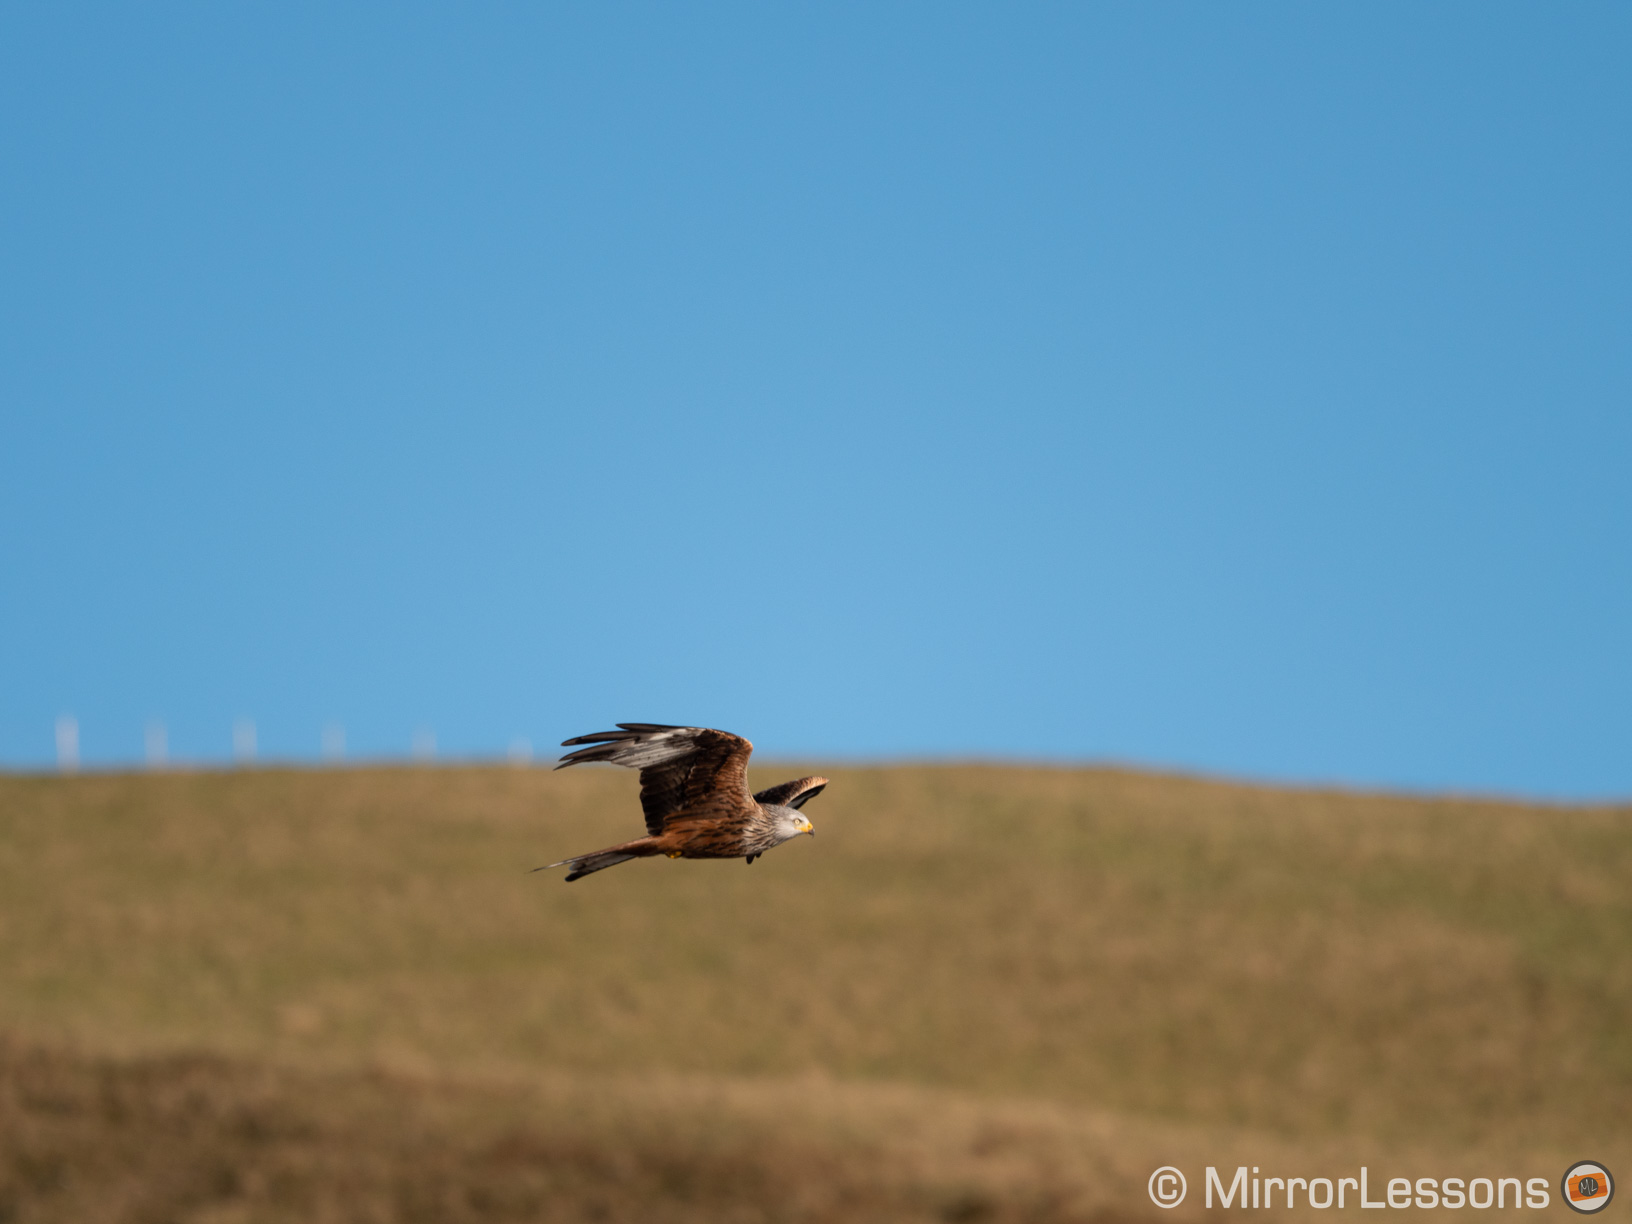
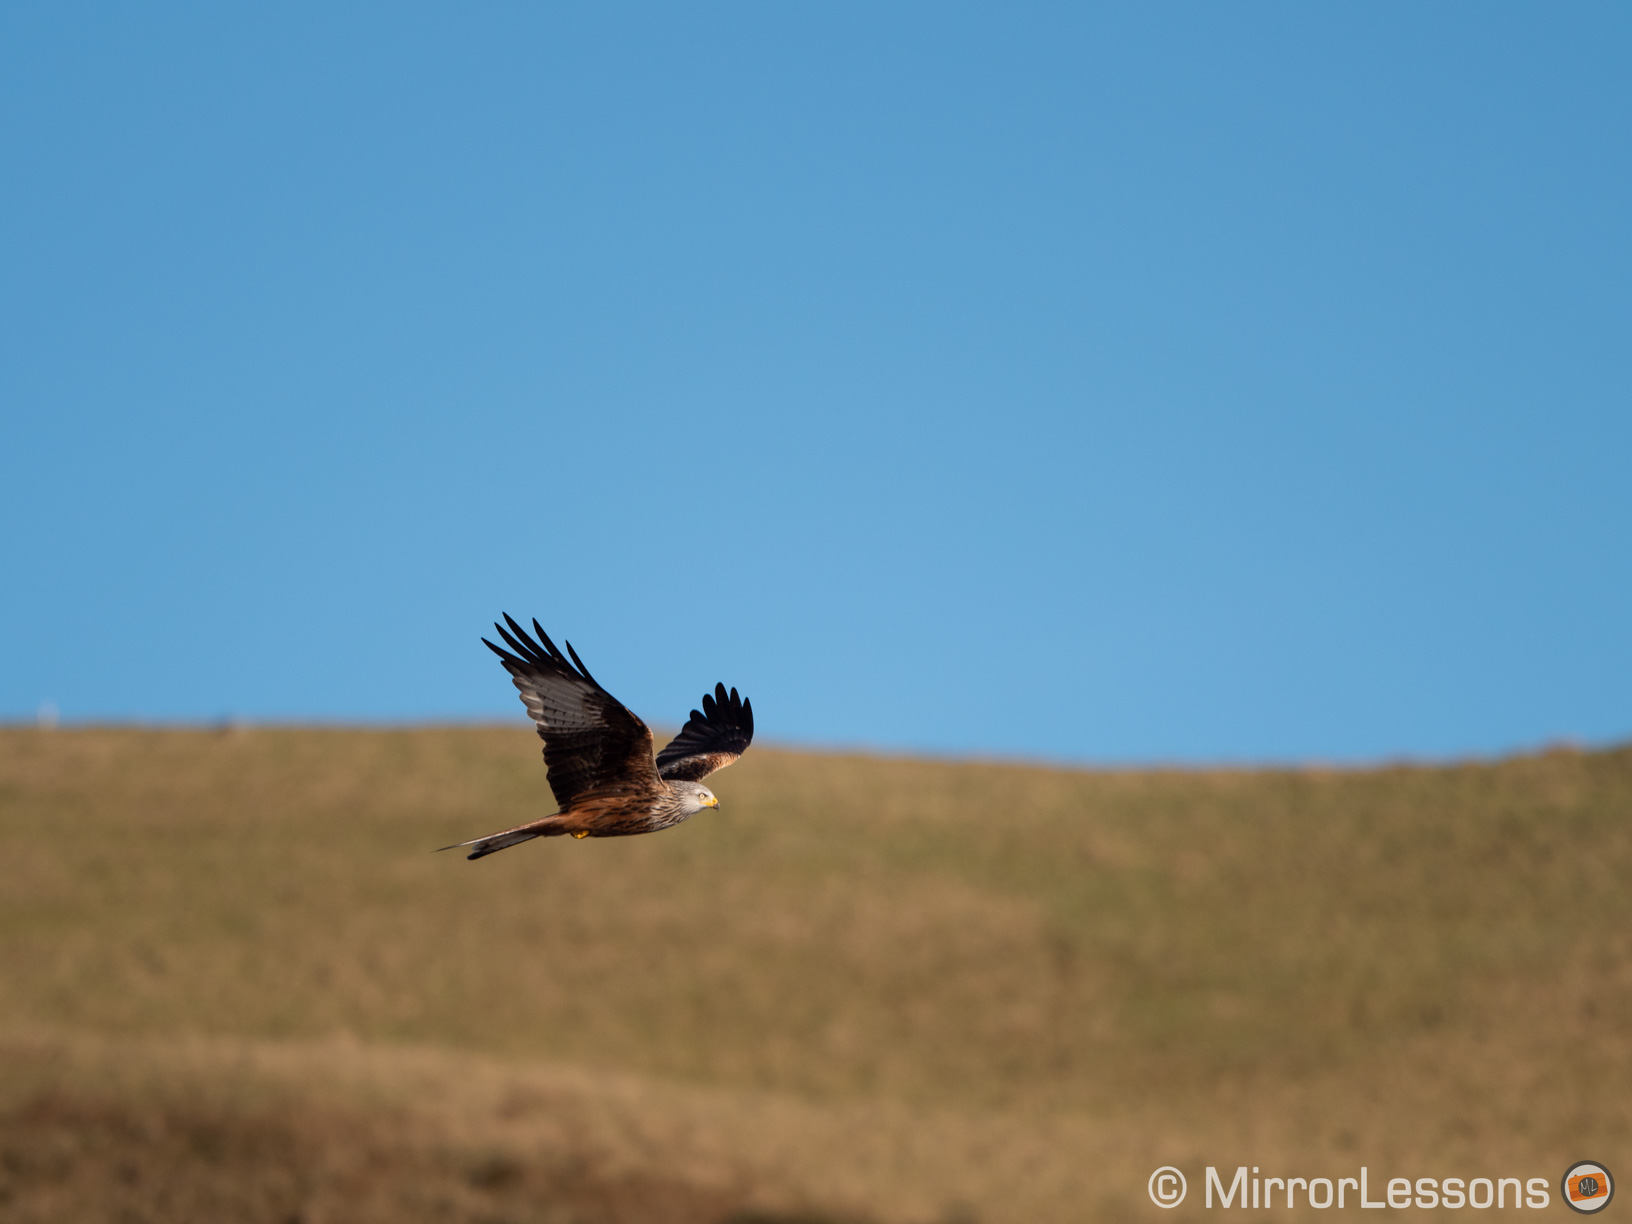
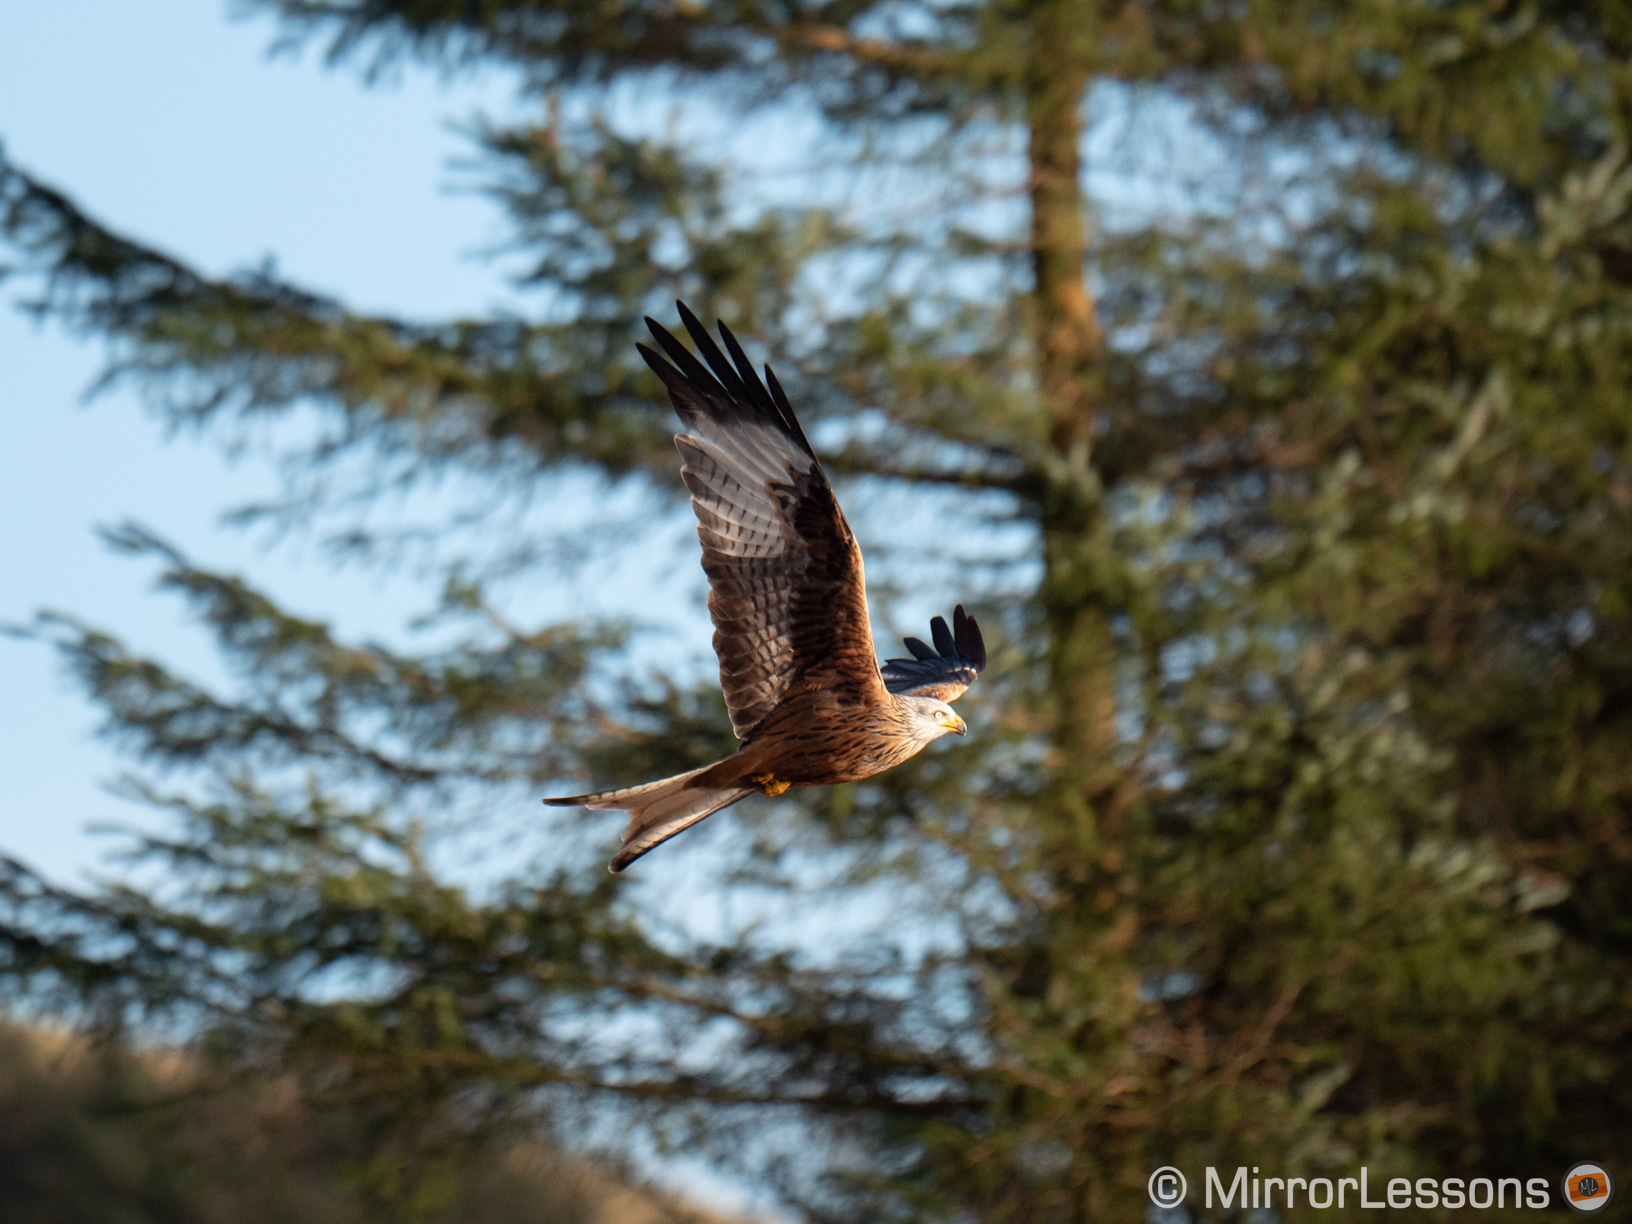
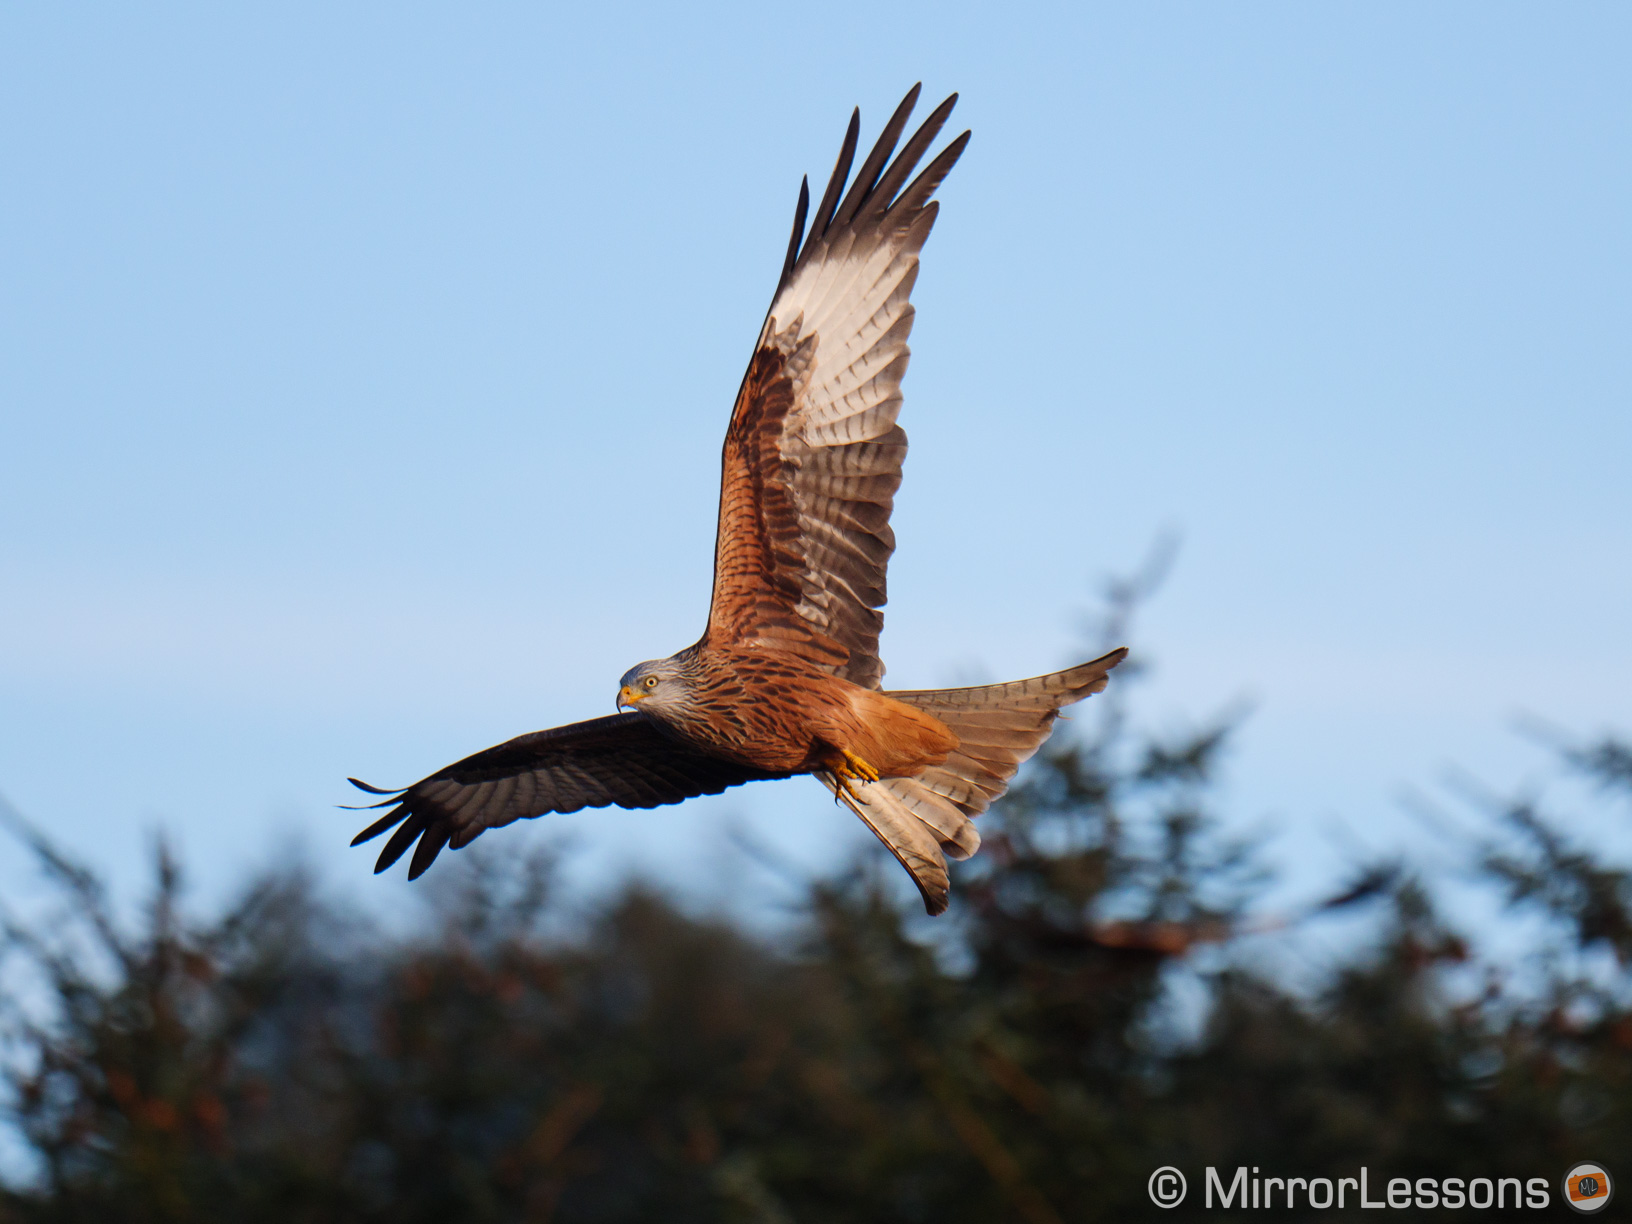
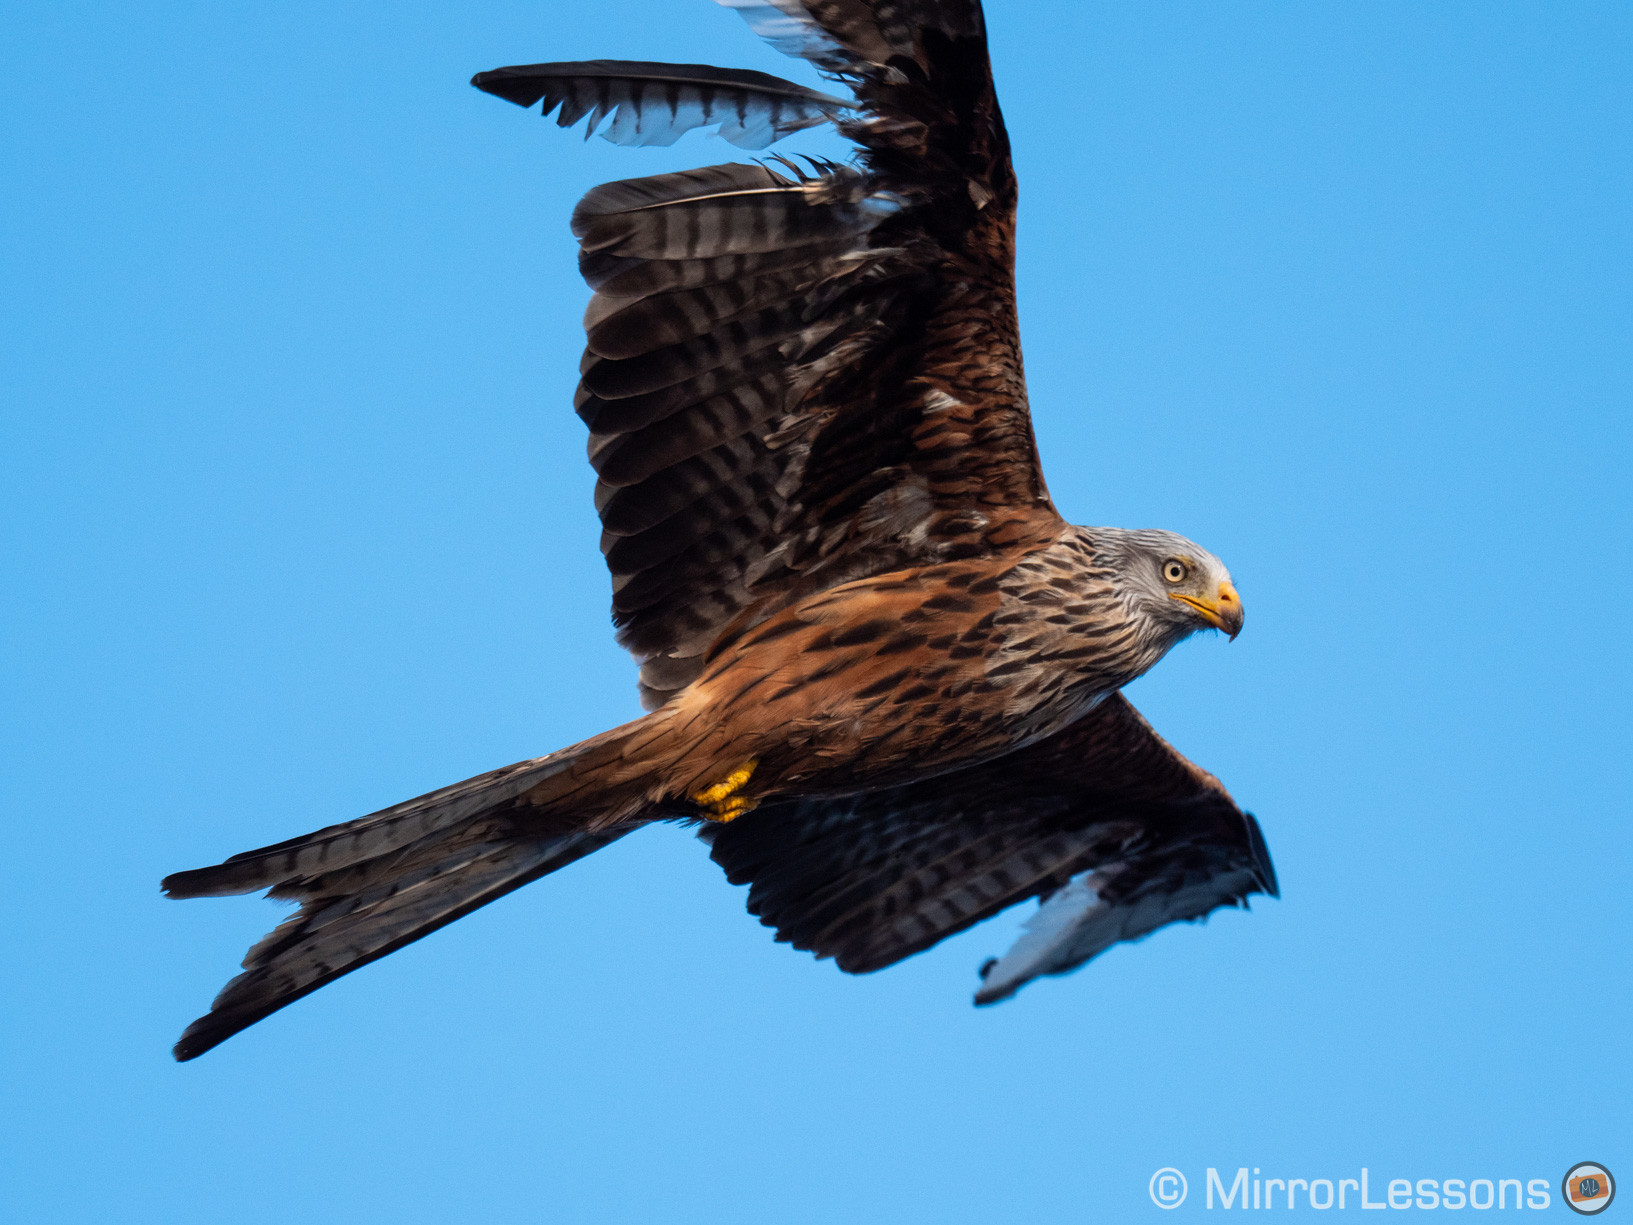
When the kite is against a clear blue sky, the G9 does rather well. I had a keeper rate close to 80% (perfect sharpness) and I didn’t need the latest firmware to achieve this. The score was already good two years ago.
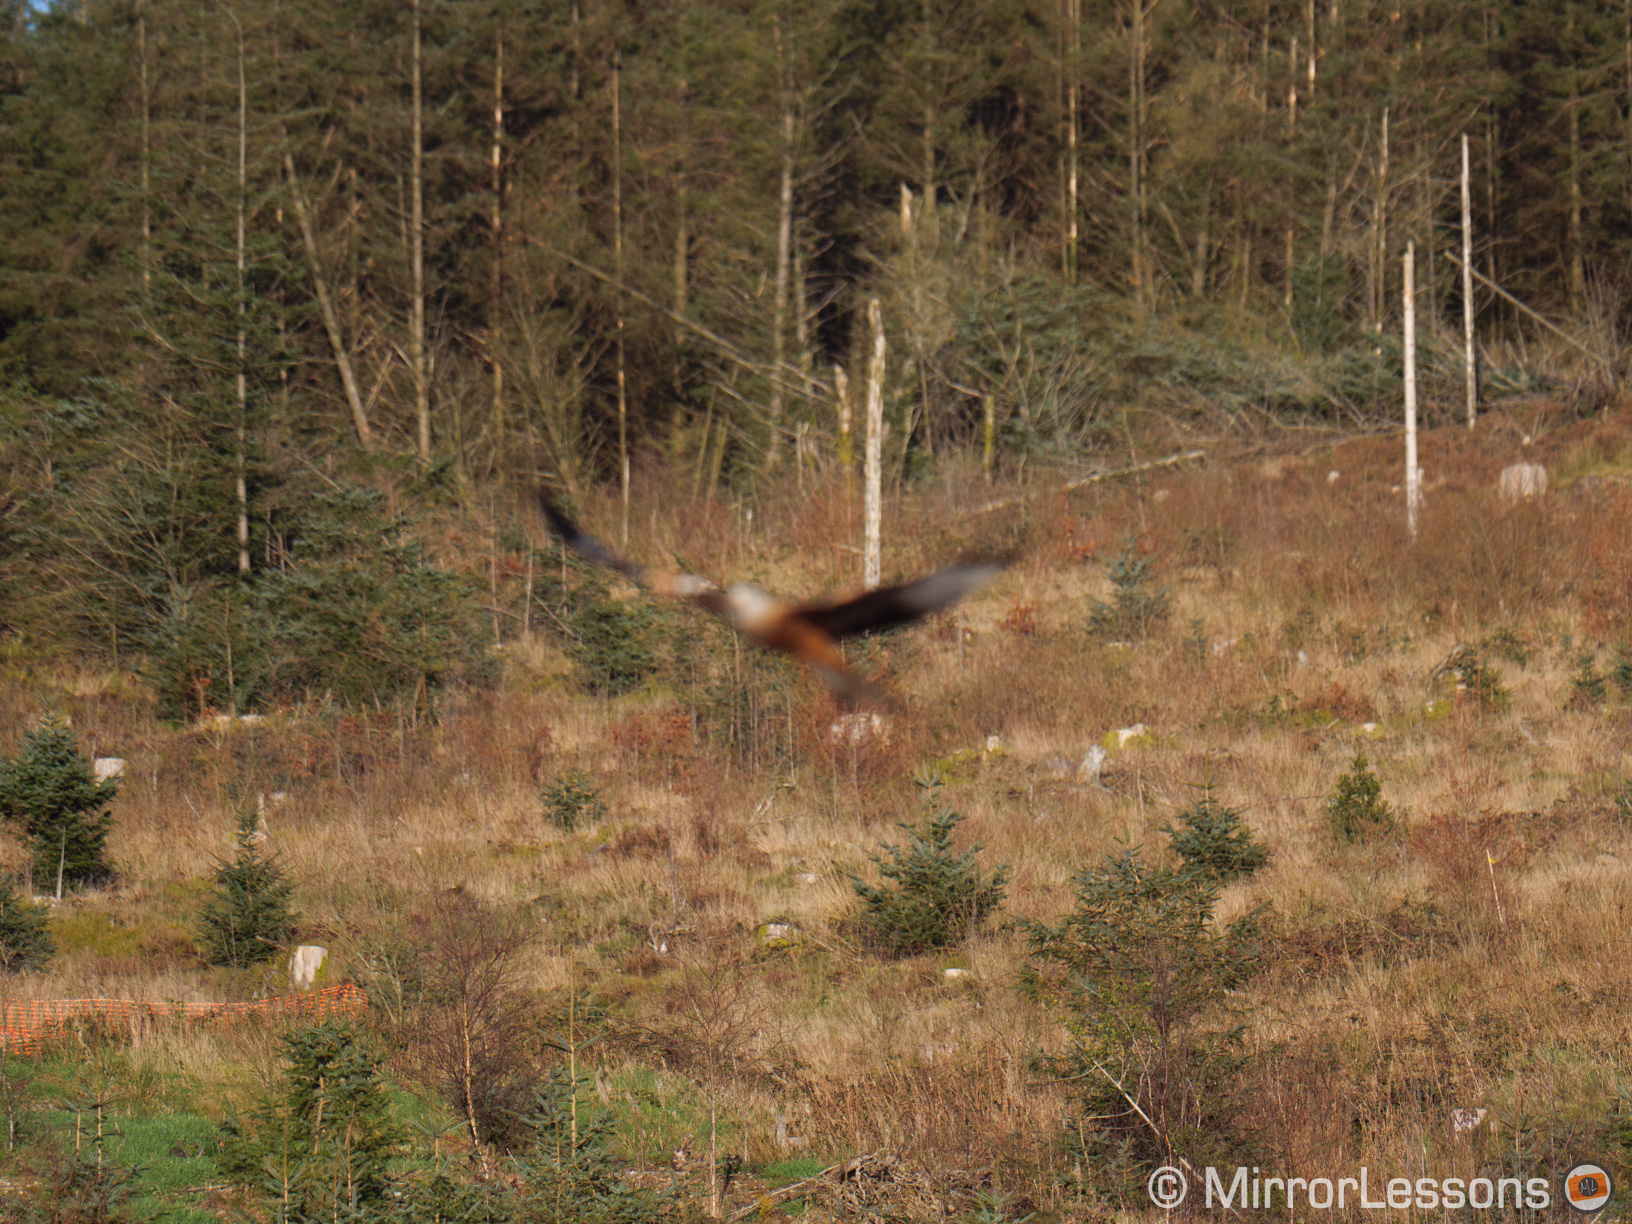
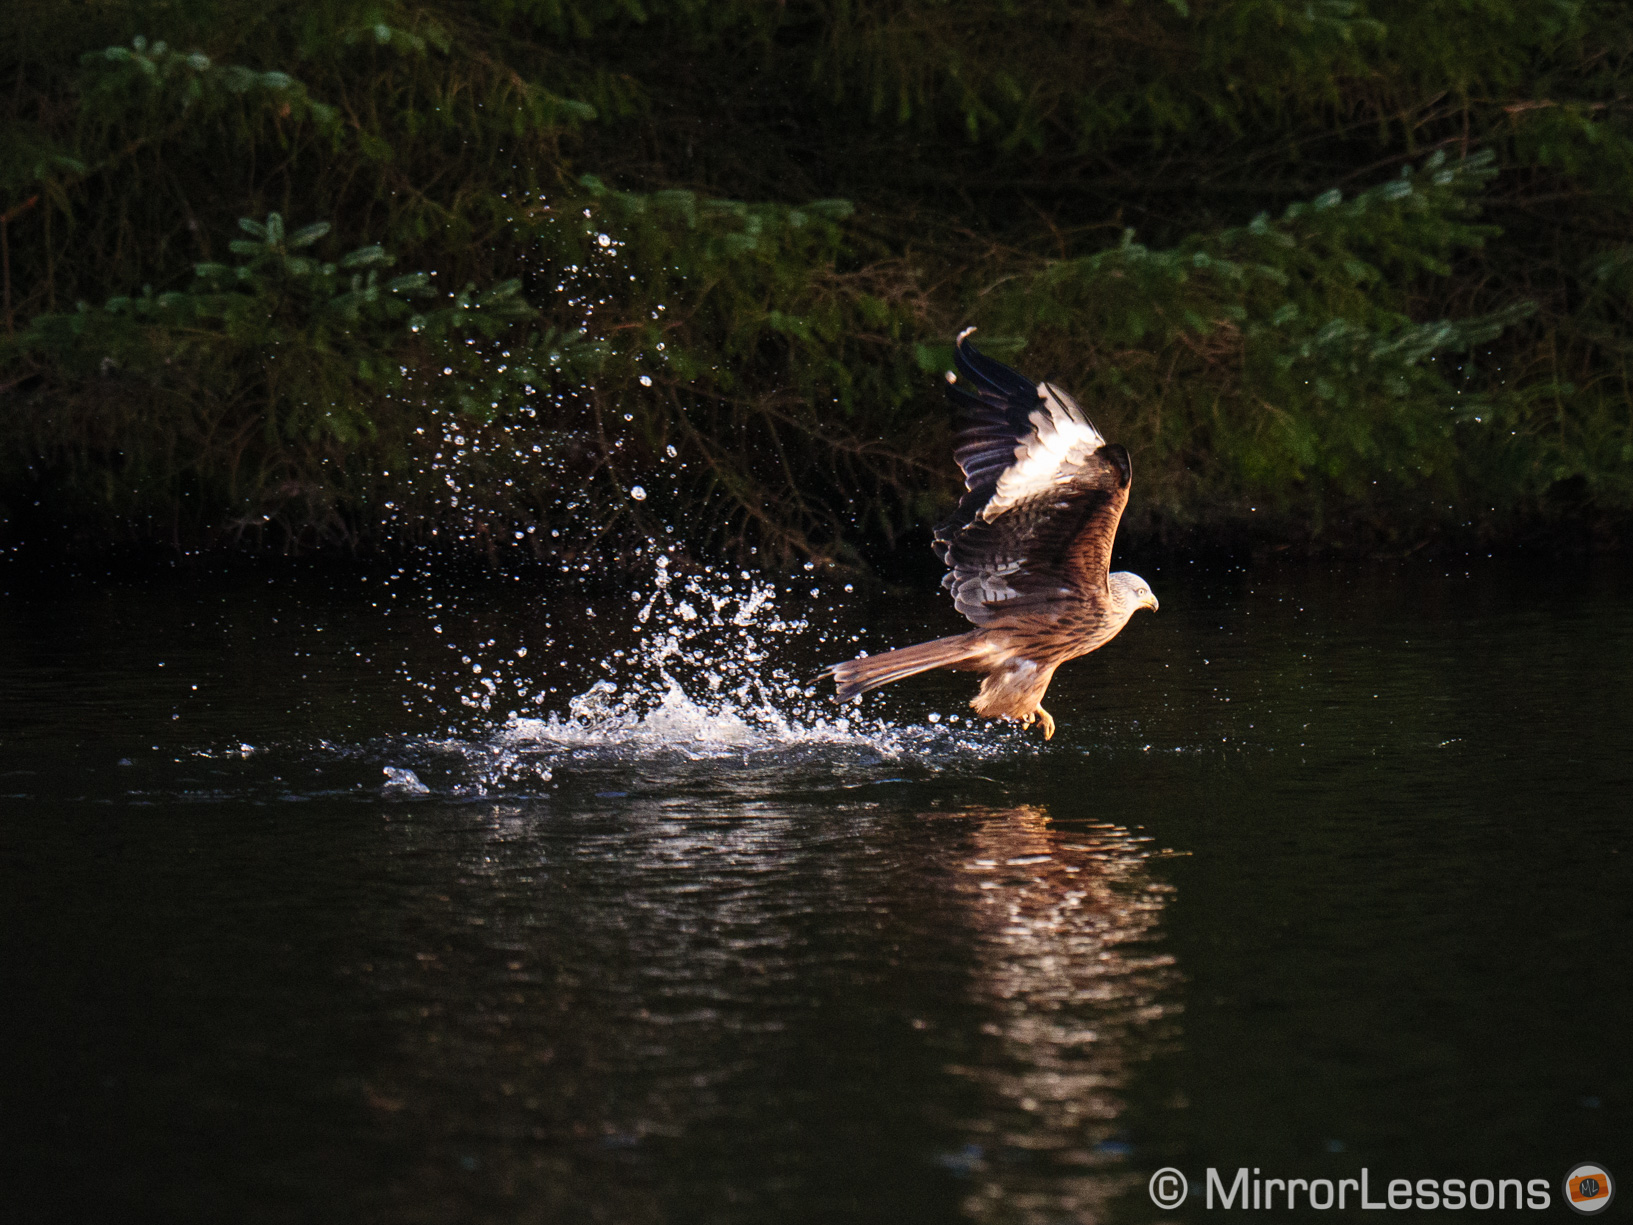
However, when the bird flies in front of trees or a hill, the performance decreases dramatically, pushing the keeper rate down as low as 35%. And it is not difficult to understand why.
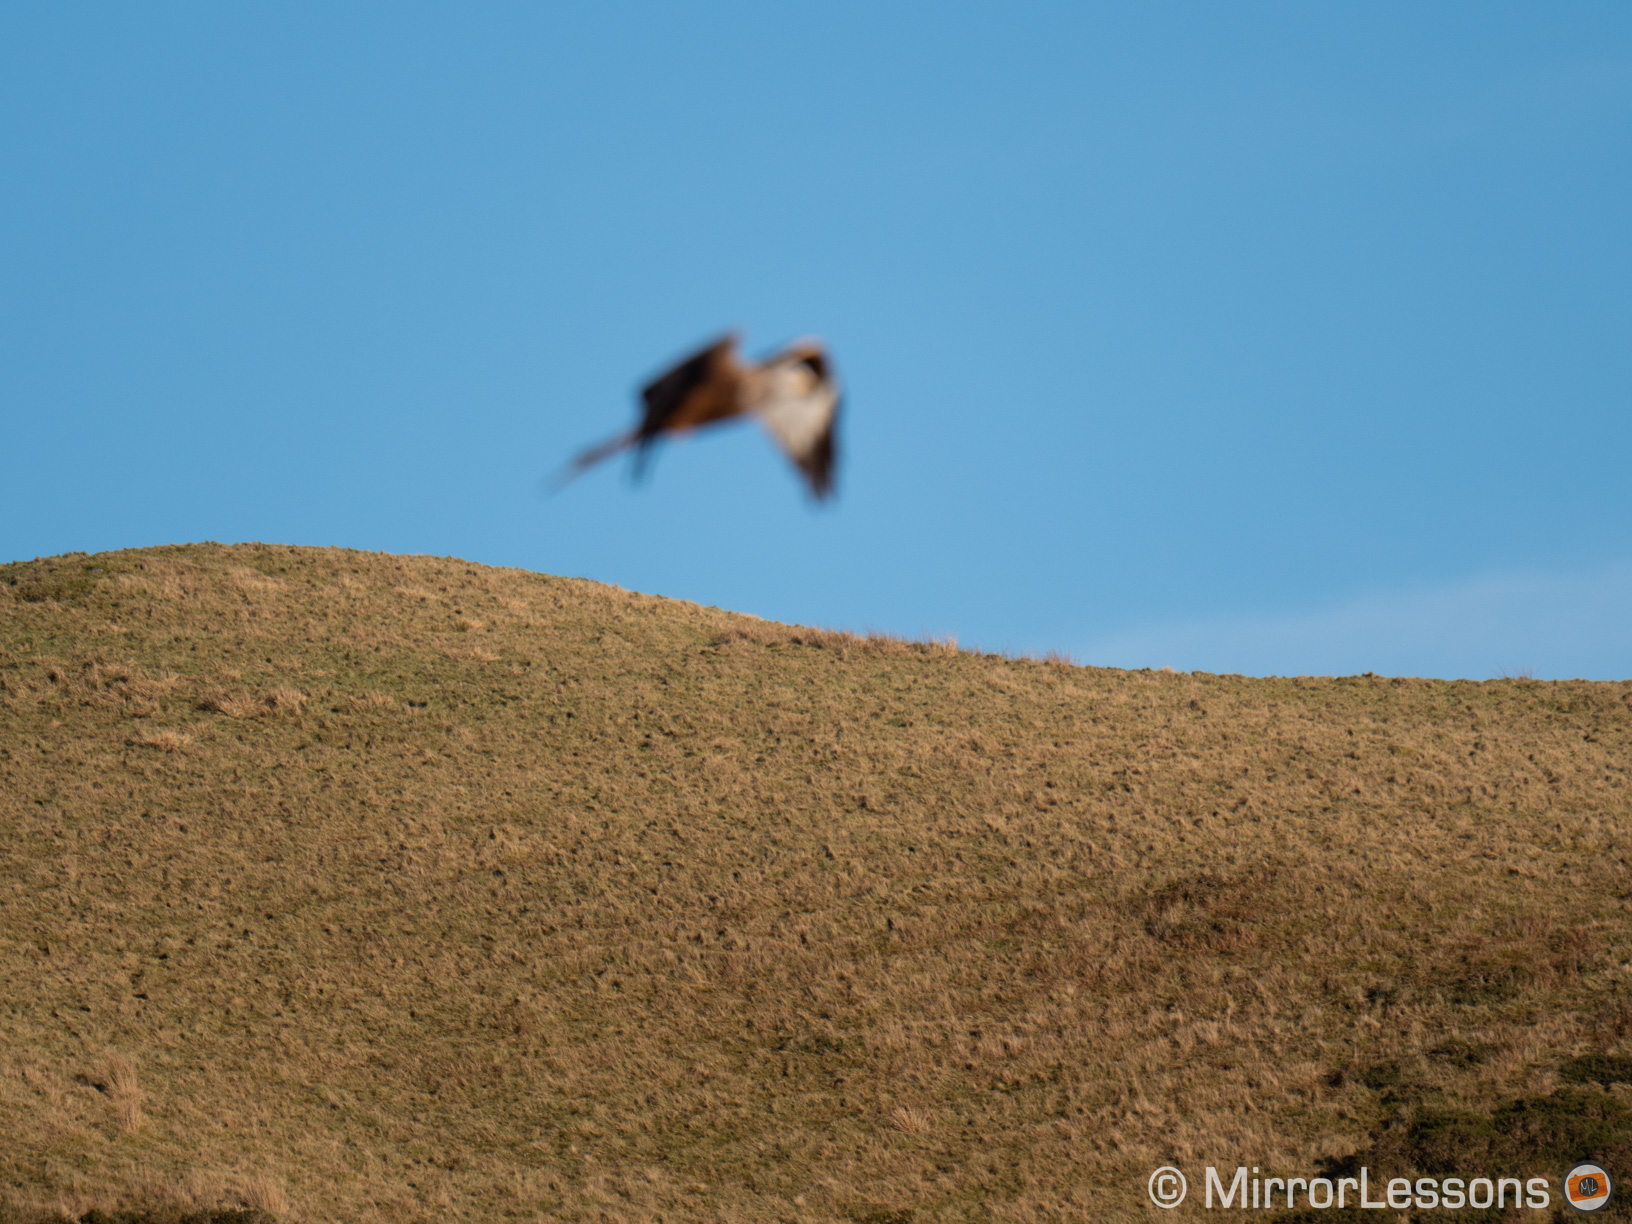
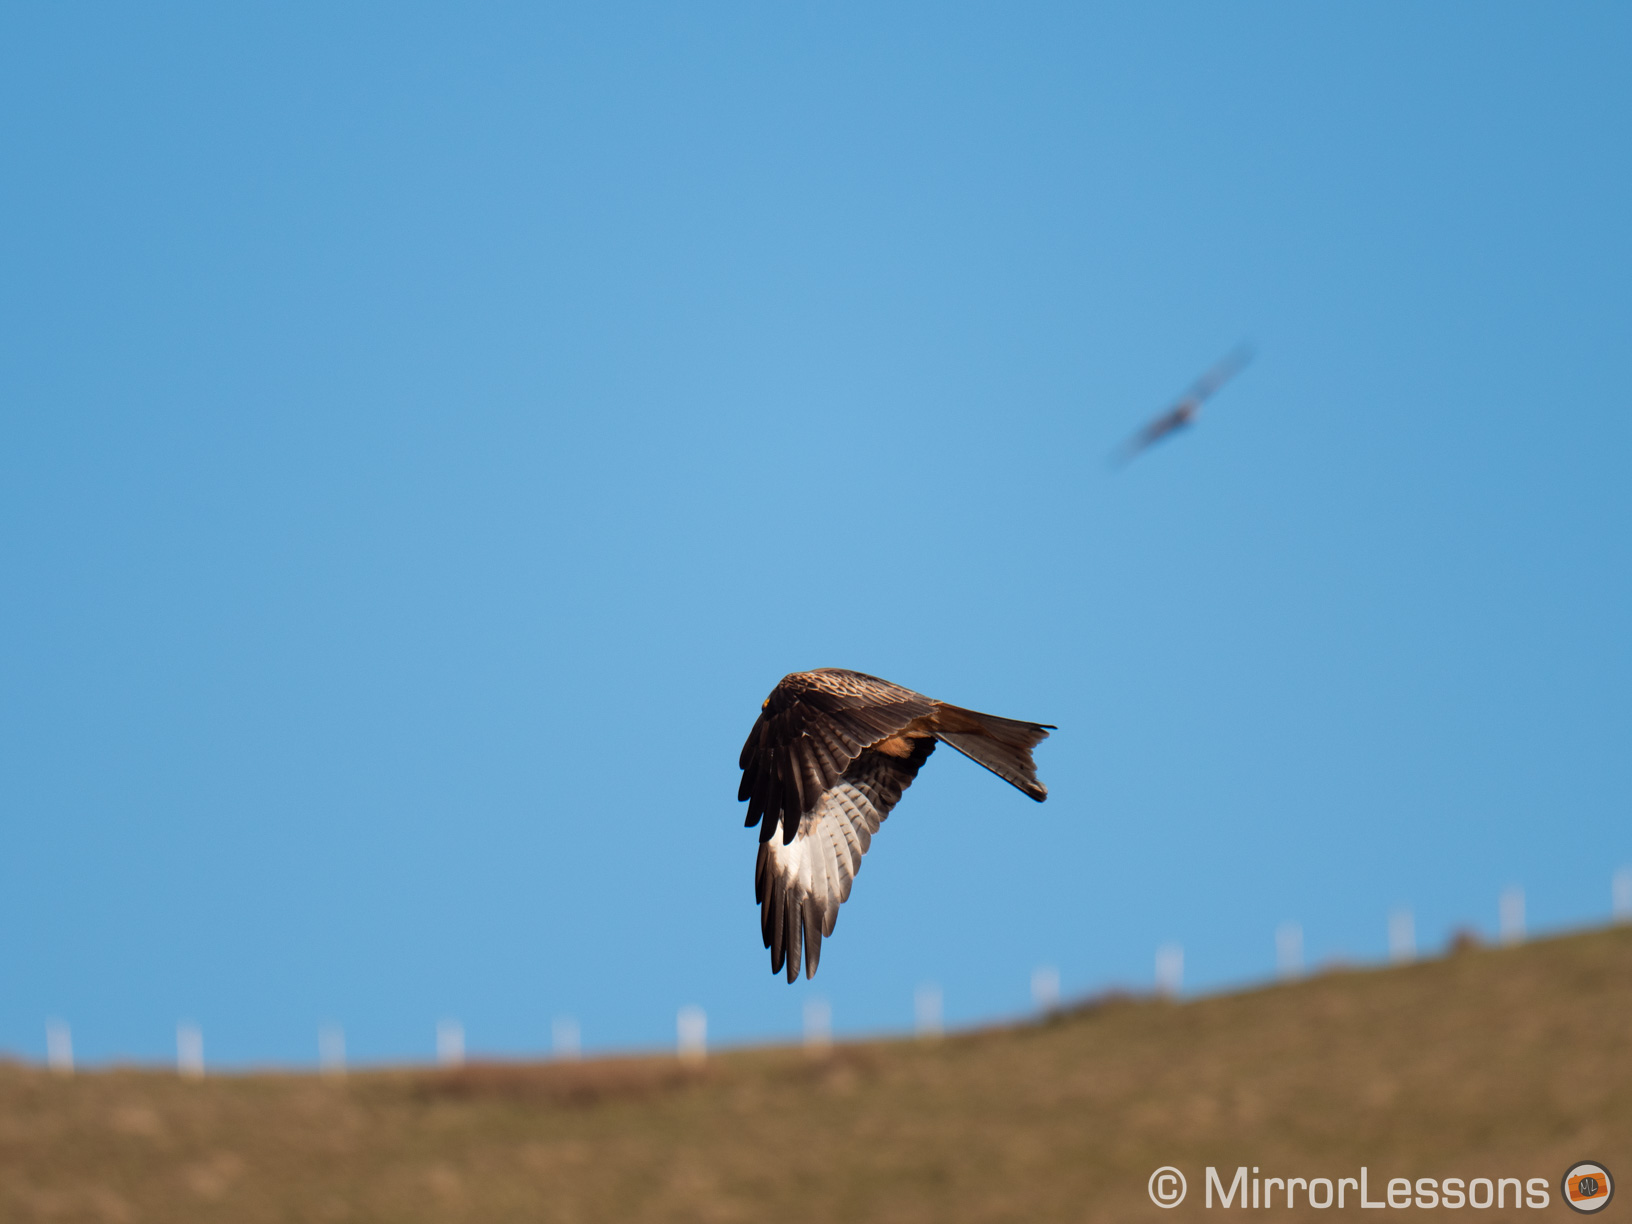
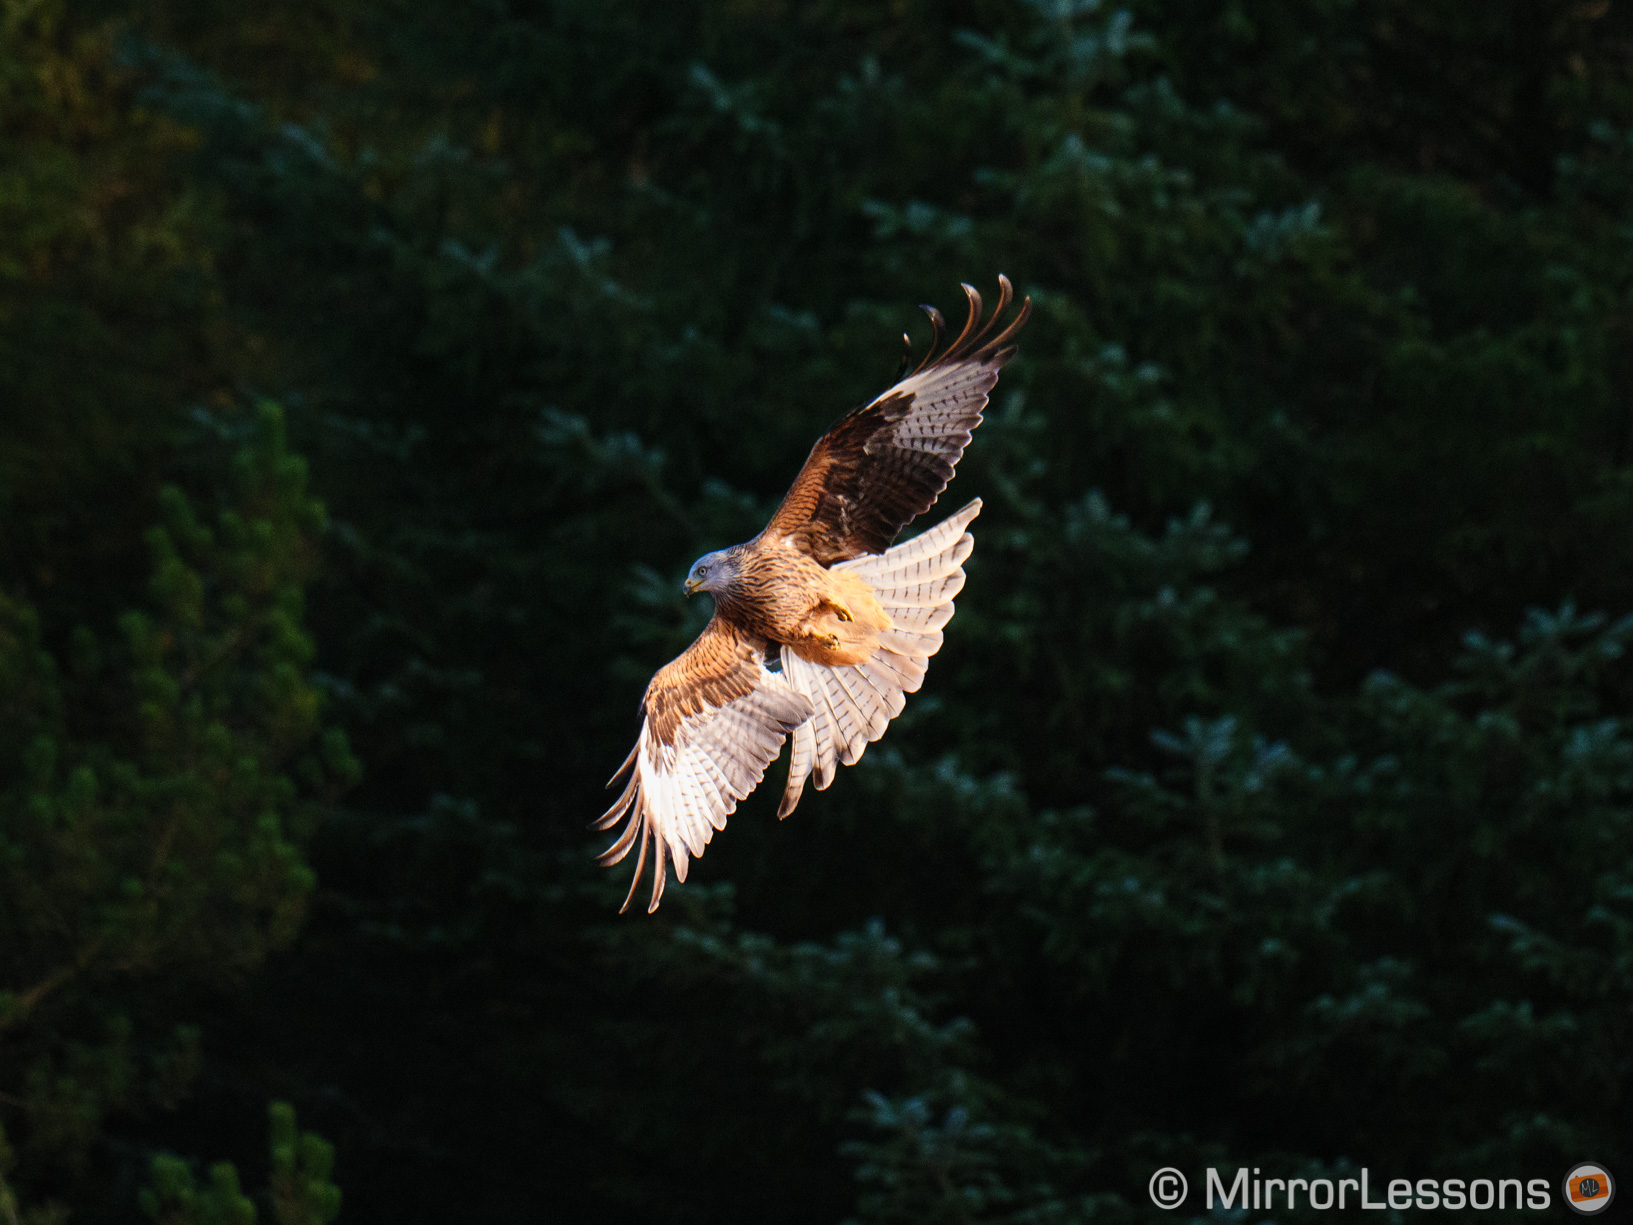
Take the example below. The G9 focused on the background and the bird is completely out of focus.
Now observe the kite’s colours and you’ll see that the background has a lot of patches that are similar to the bird. I’ve also highlighted the left wing (pink square) which almost blends in perfectly with the natural elements behind it.
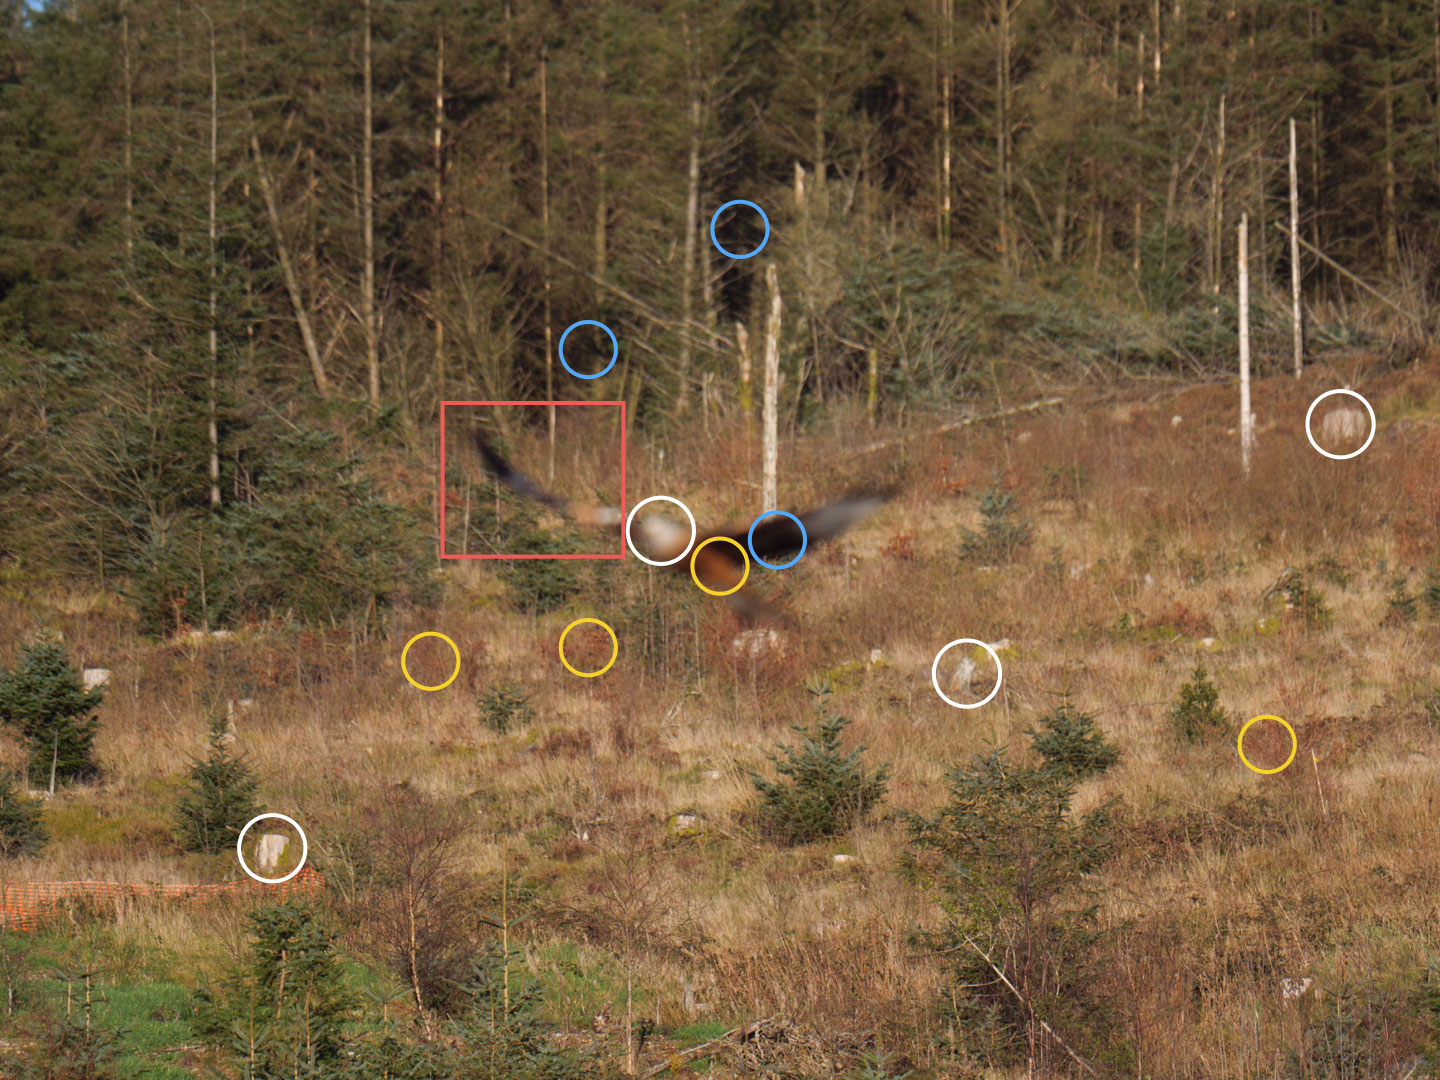
Not all the patches look exactly the same of course, but remember that while the camera scans the sensor very quickly (480fps), it does so by analysing low res images (way below 20MP, which is the native resolution of the G9 sensor).
If you add to the mix the fact that the bird flies quickly (its position versus the background is different in every shot), that its wings flap very fast and that its size can vary according to the distance and direction of its movement, you can imagine why contrast detection AF struggles so much.
There are some moments of clarity, where the G9 manages a decent sequence, but that’s makes it even more frustrating because you feel that there is potential, but you can never predict how it’s going to go. In other words, the AF is not reliable.
Panasonic G9 Firmware Update
If we go back to the the title of this article and its original intent, I can now answer the following question.
Does firmware 2.0 make the G9 any better for birds in flight?
The answer is yes, but the improvements are far from ground-breaking.
The new settings make the AF a little bit more stable, and I think that’s why I managed to raise the score above 50% for the first time with the G9, rather than the average 35/45%.
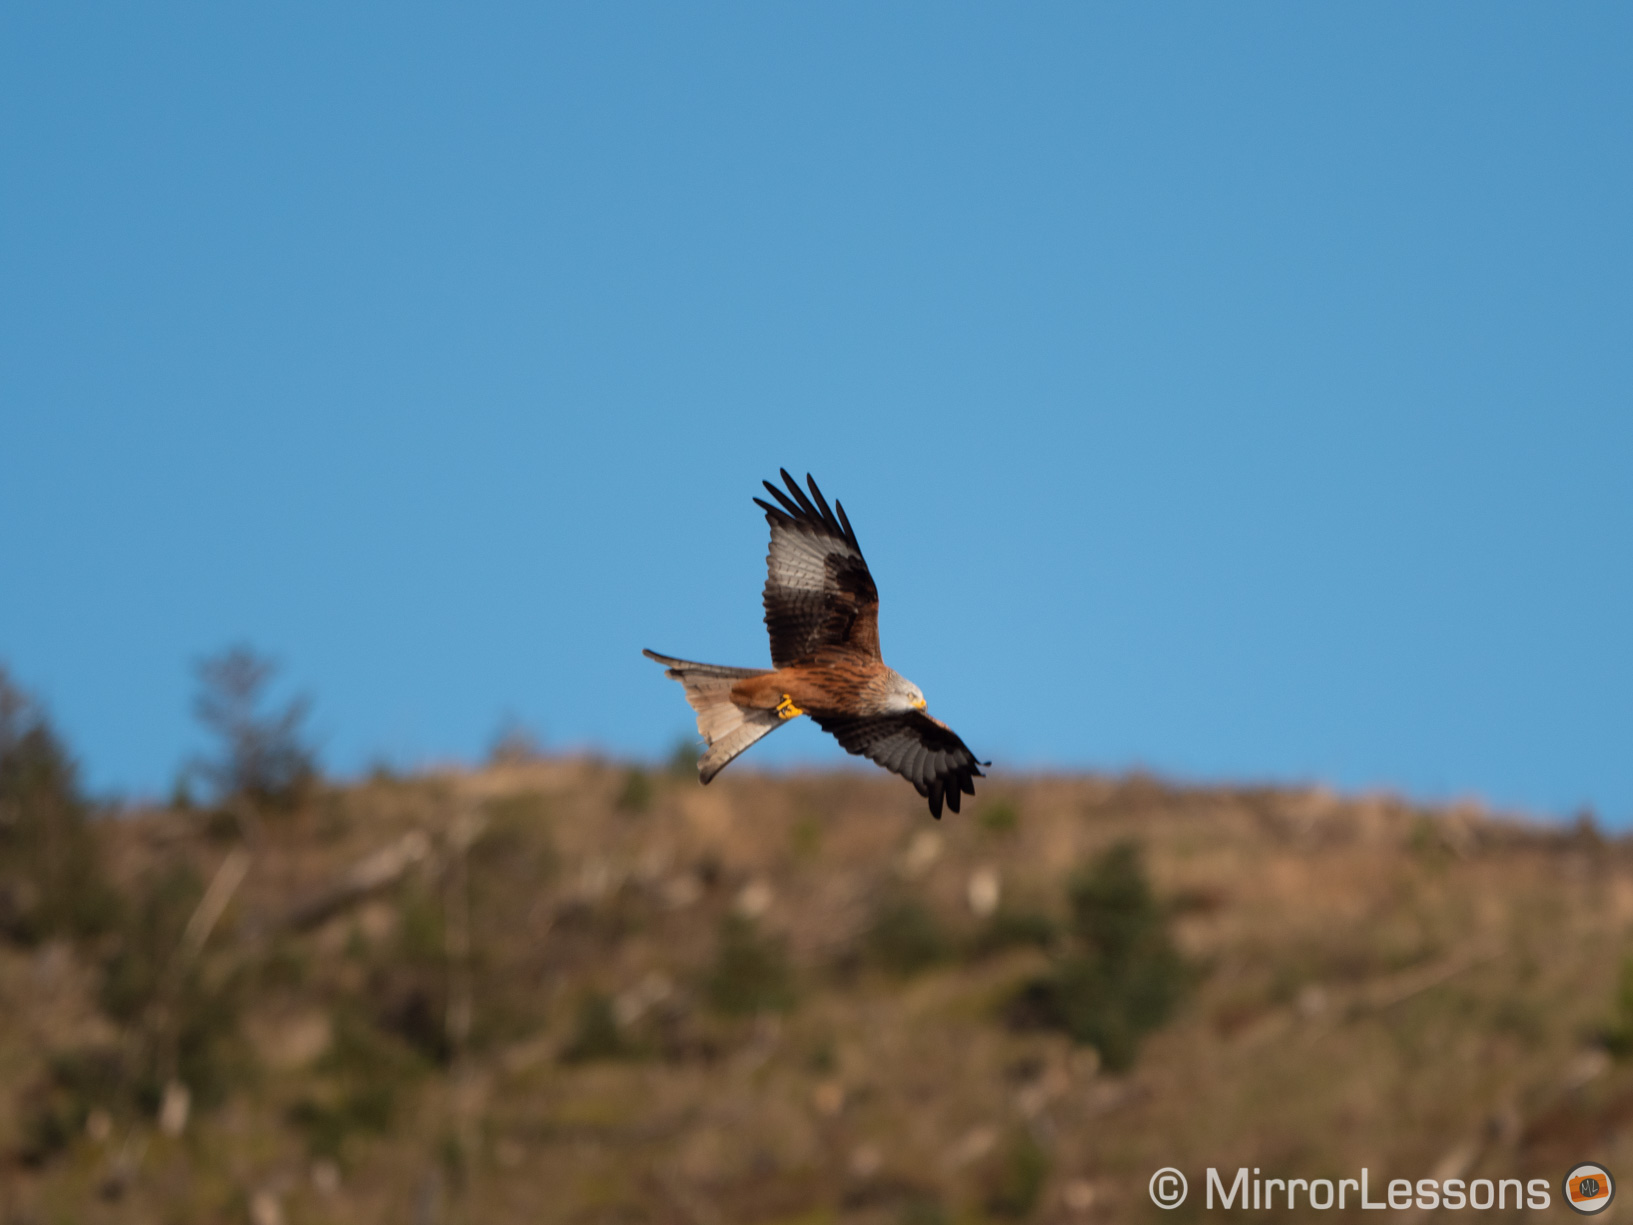
The main problem remains the same however. As soon as the bird flies against a busy background, the AF can easily get confused. The system is often slow to adjust focus, so you end up with a lot of images that are completely out of focus.
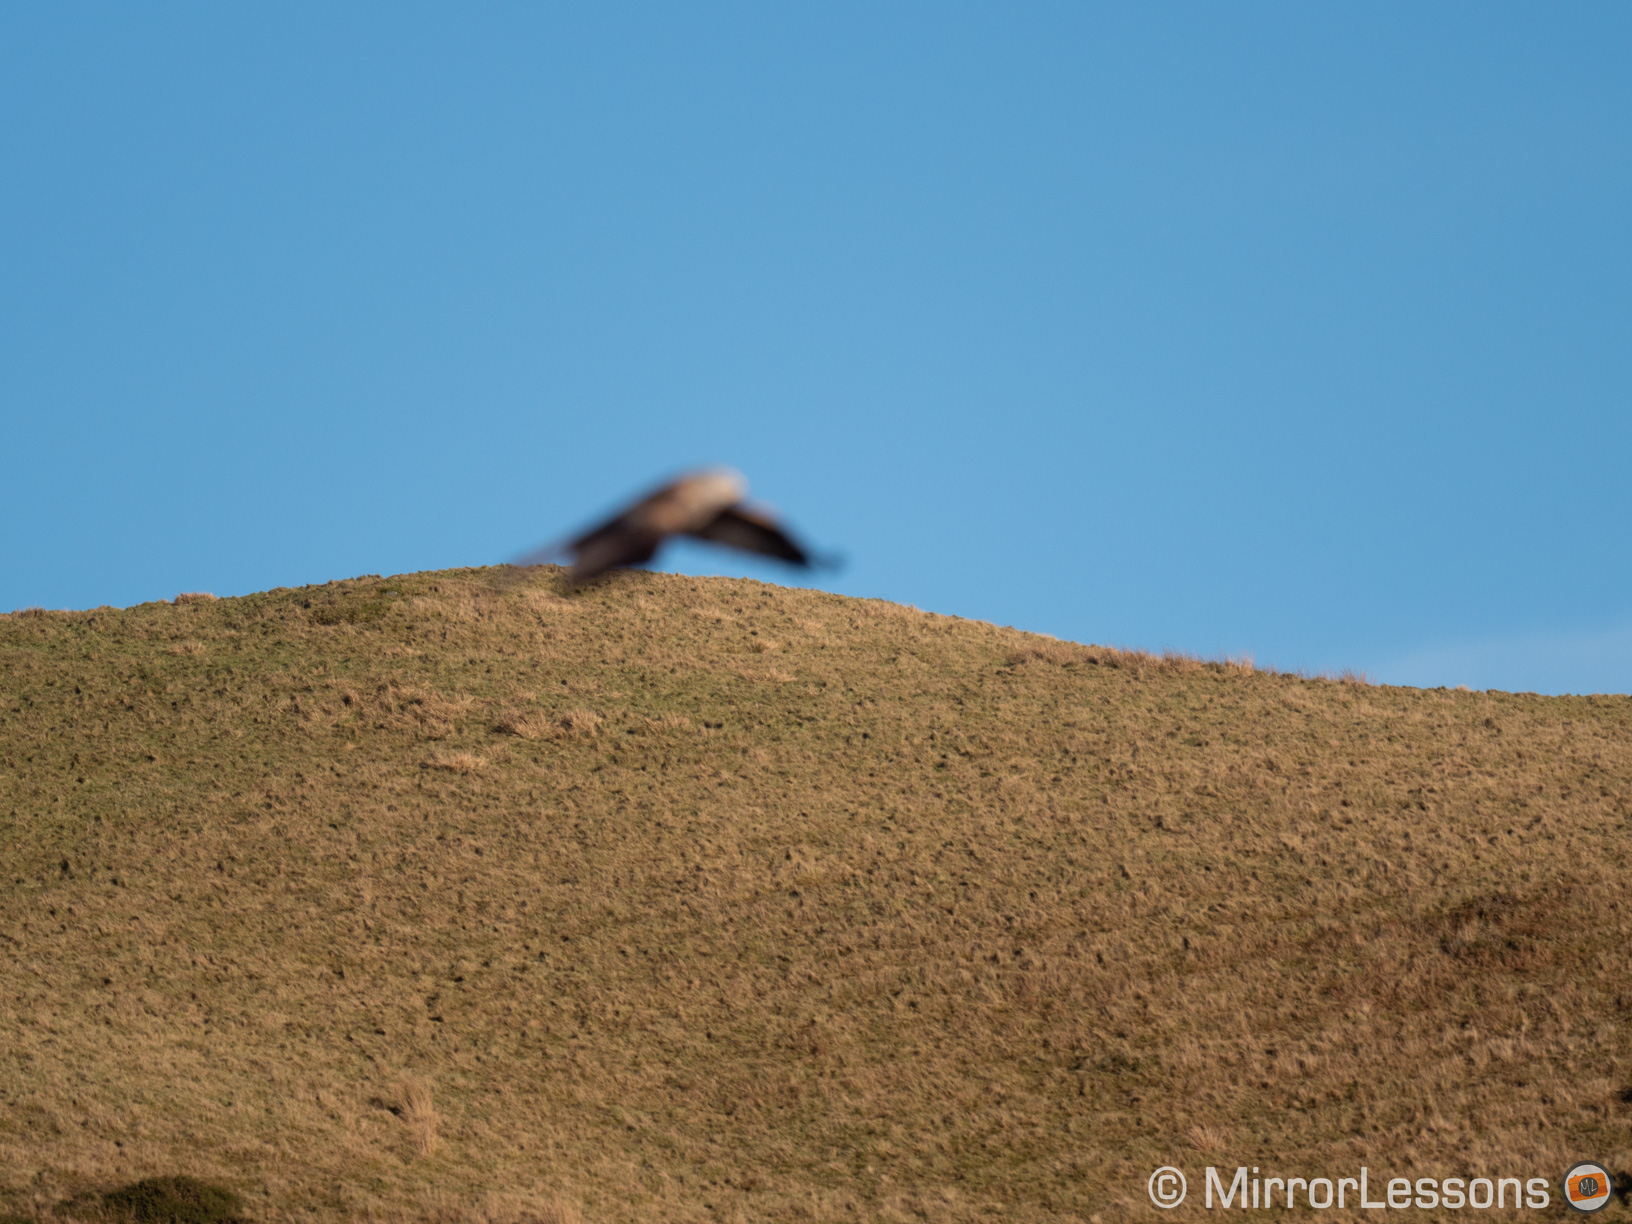
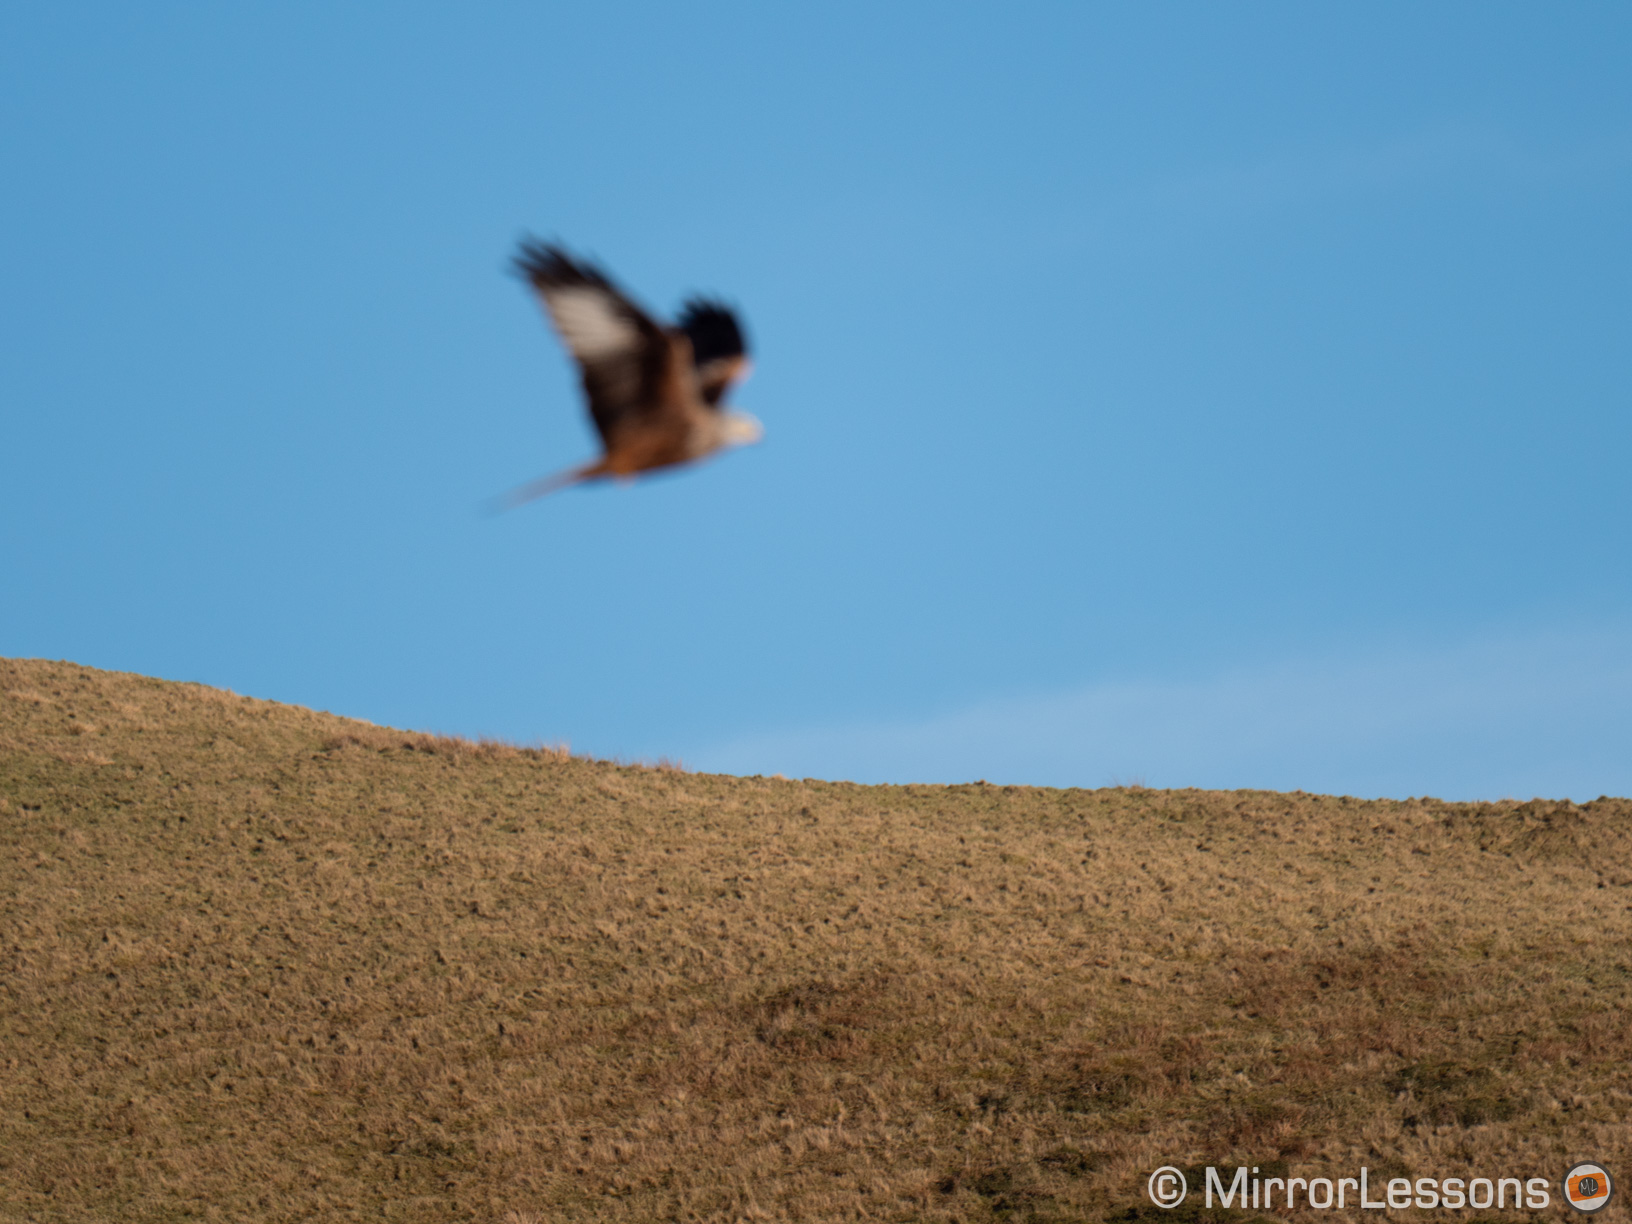
It only takes a small portion of the background to confuse the camera. If you look at the example below, the bird momentarily passing against the top of the hill is enough to throw the camera off entirely.
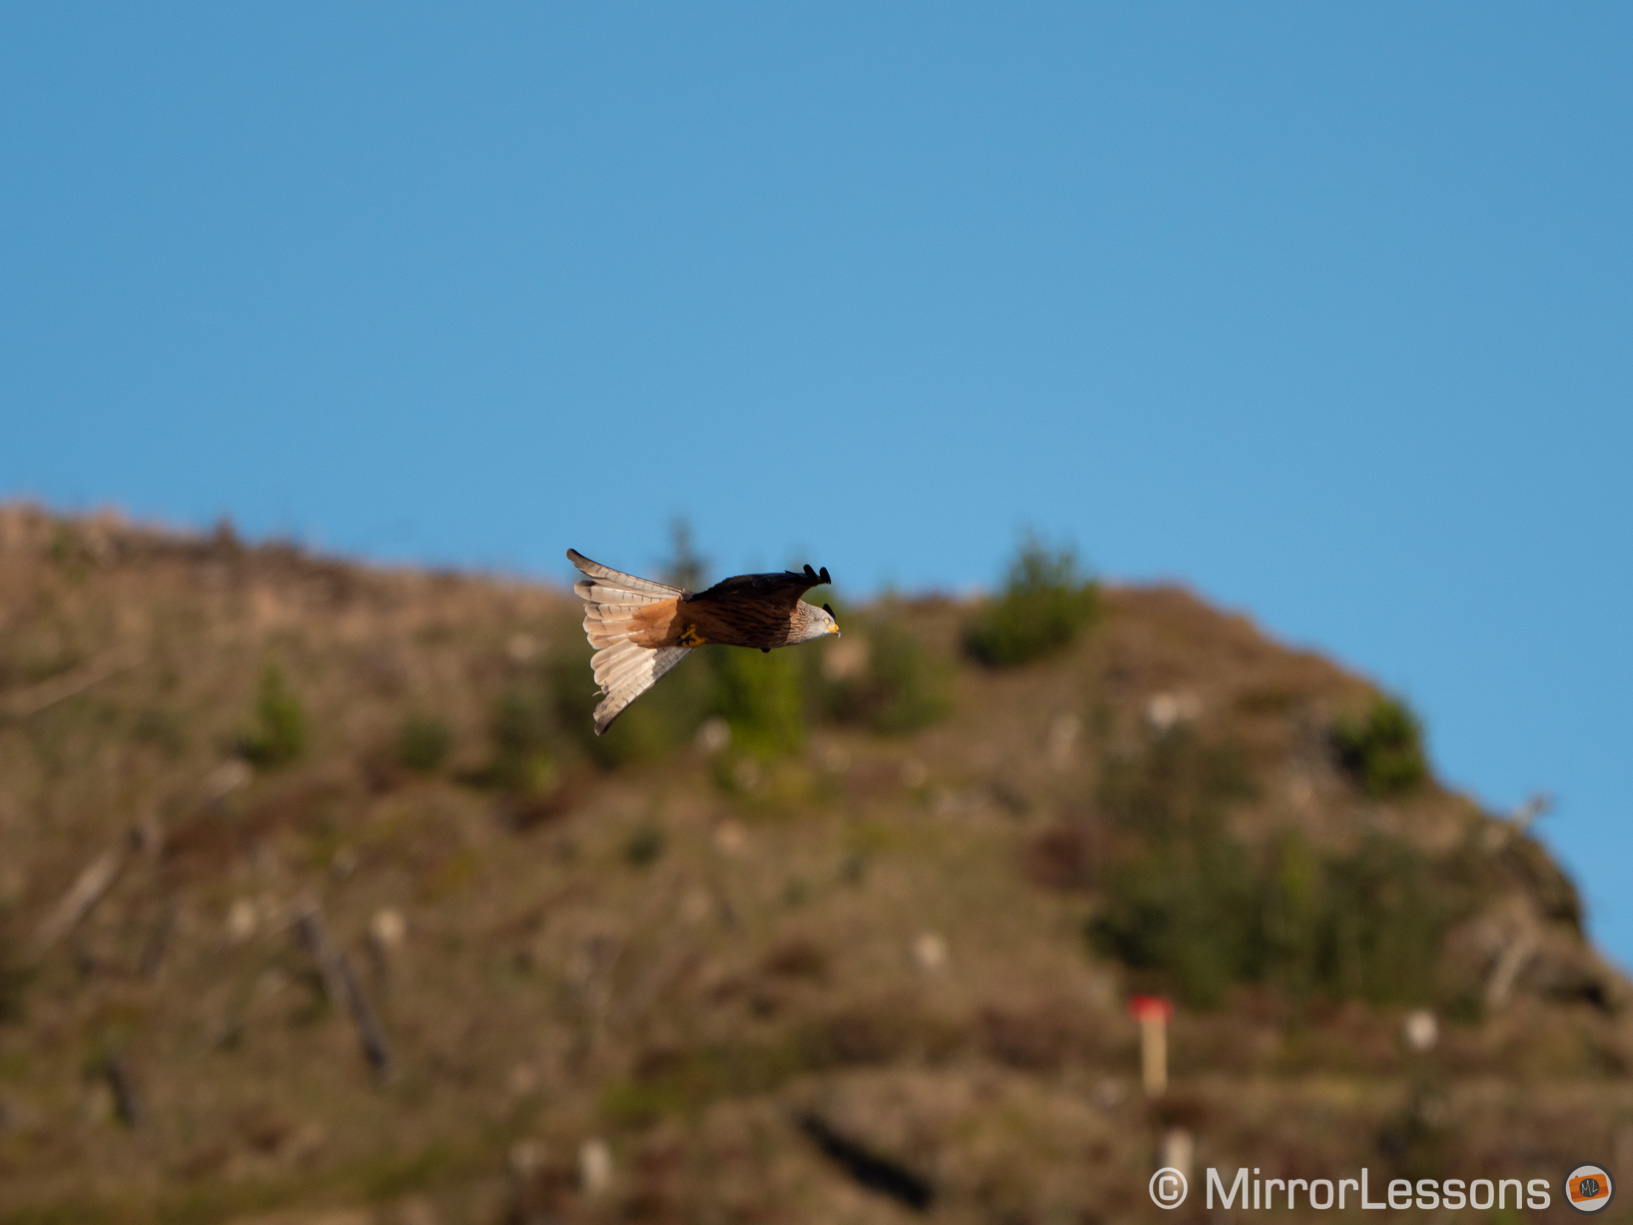

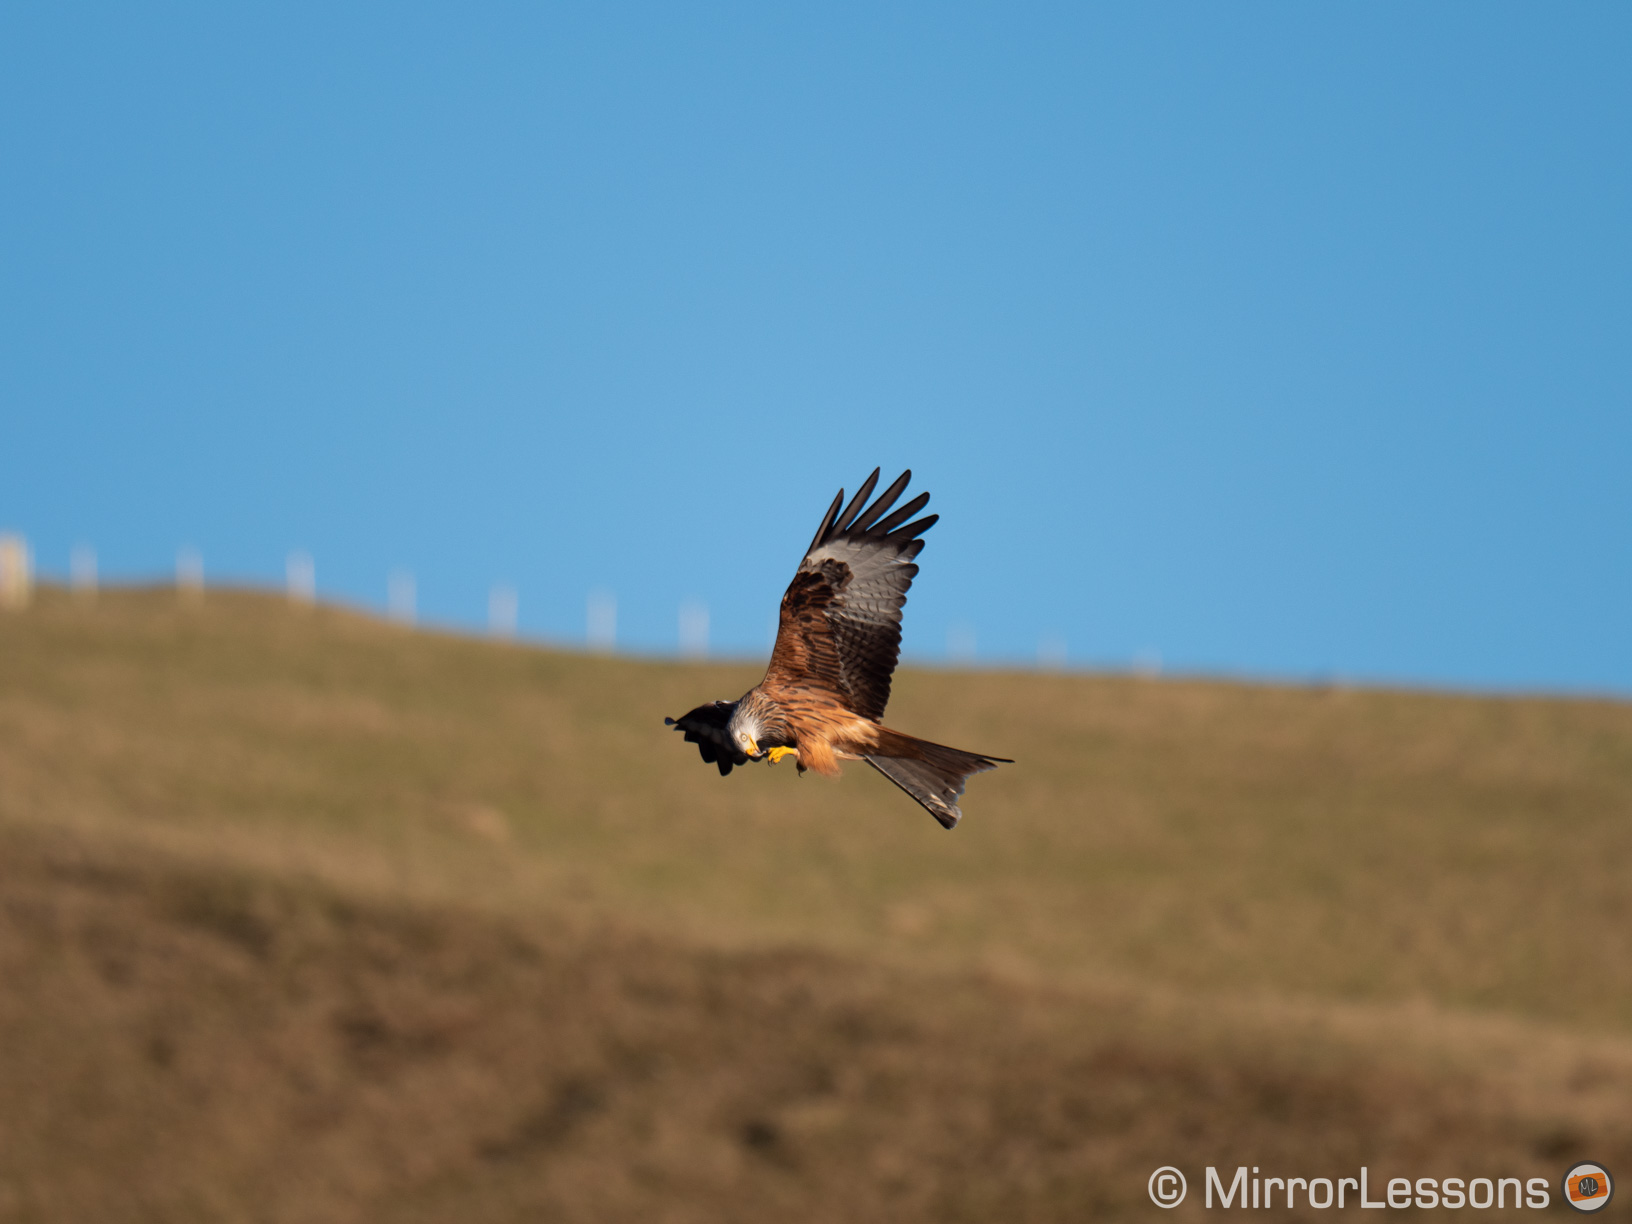
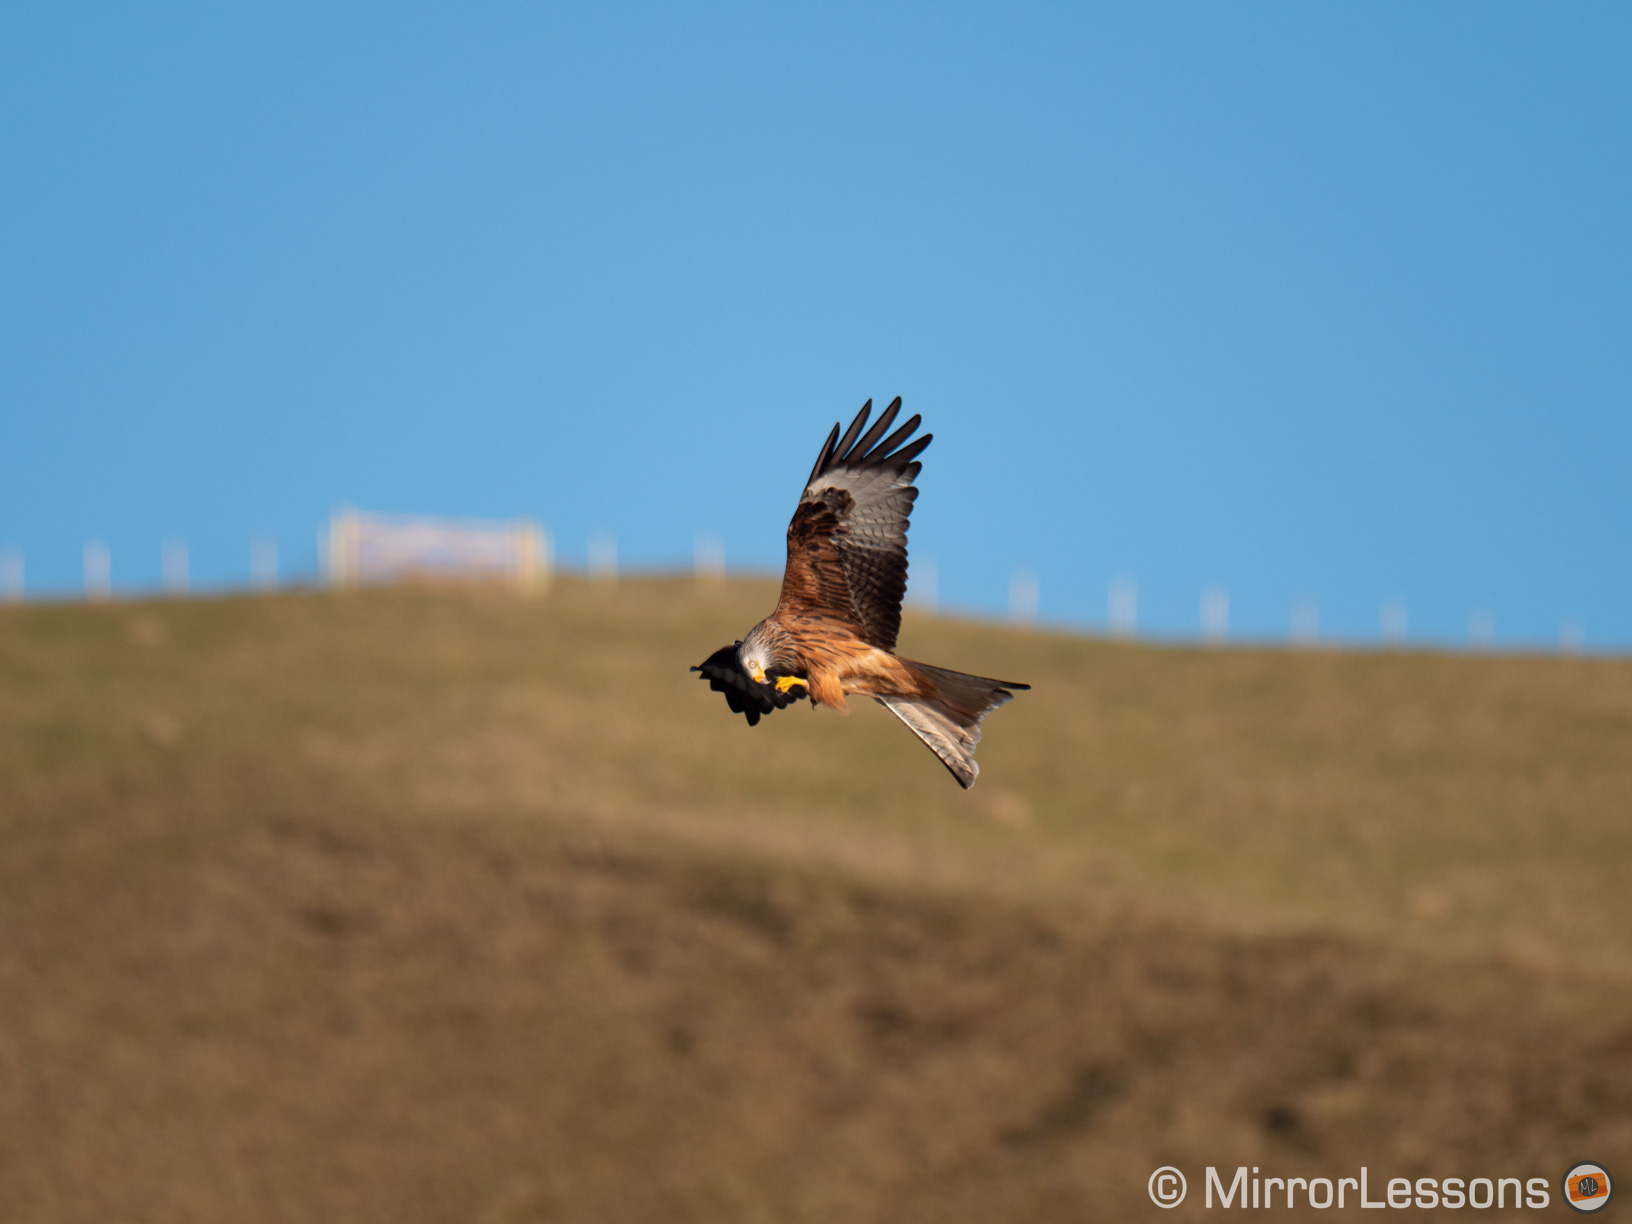
Another thing I’ve noticed is a lack of consistency in the AF behaviour. If you look at the second sequence below, the camera managed to keep the bird more or less in focus while it was below the horizon (so against the hill), but when it rises above (against the plain sky), the G9 lost focus completely. If anything, the contrary should have happened.
In our third example however, the camera managed to keep focus below and above the hill.


So how can you “fight” the autofocus of your G9 and bring it to an acceptable level when taking pictures of birds? The answer is in the camera settings.
Panasonic G9 Autofocus Settings for Birds in Flight
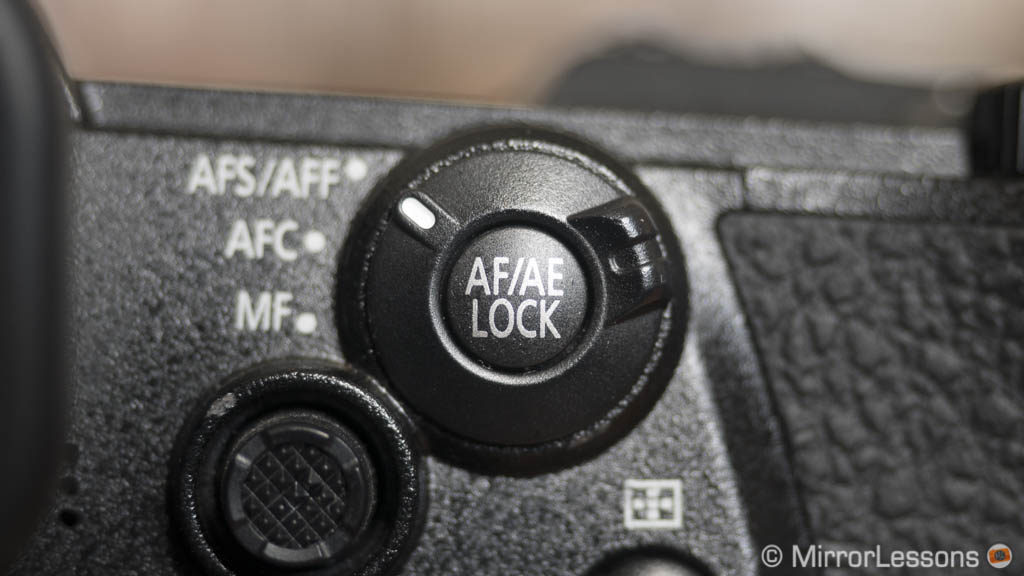
Obviously, you want to work in Continuous AF (AFC), which is easy to trigger thanks to the dedicated switch on the rear.
Then we have other important settings in the Menu system of the camera.
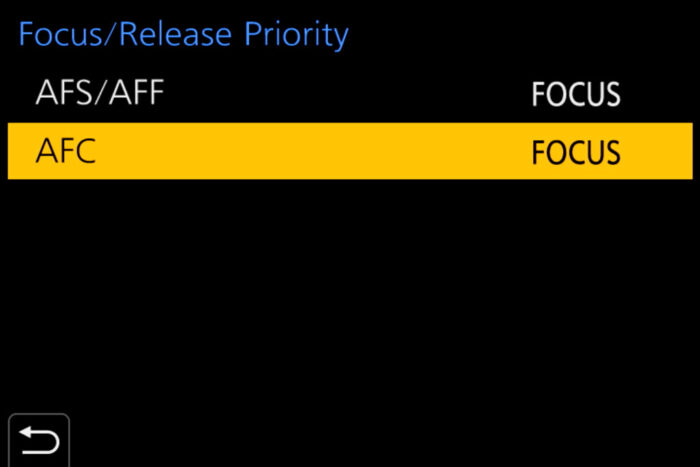
Focus / Release Priority
Custom Menu page 2/7 (Focus / Release Shutter)
This setting tells the camera if it should give priority to the shutter release (aka taking the picture), or wait until focus is acquired.
For example, Release Priority is often chosen by sports photographers because they don’t want to take any chances and miss important moments of action. As long as the AF is reliable, they shouldn’t have any issues.
The G9 is not reliable for birds straight out of the box, so you want to choose Focus Priority to avoid bringing home entire sequences of completely blurry images.
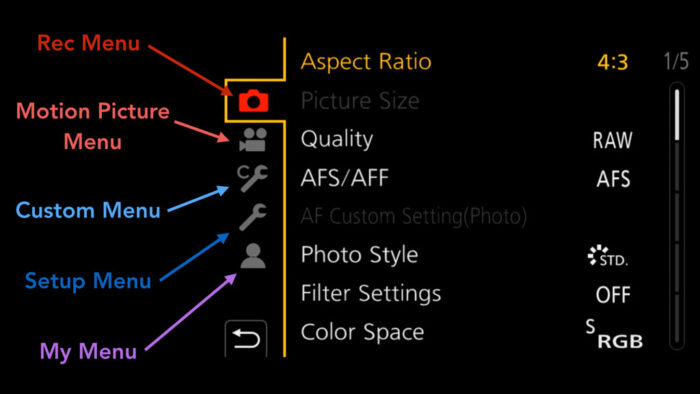
AF Custom Setting (Photo)
Rec Menu page 1/5
This setting allows you to control the responsiveness of the focus speed as well as the reactivity of the focus area. There are four presets (SET 1 to SET 4) configured by default for different situations. Each set can be customised and there are three parameters to look at.
AF Sensitivity (from -2 to +2)
A positive value will make the camera more reactive in adjusting focus when the distance to the subject changes. A negative value will make the camera wait a second or two before adjusting focus.
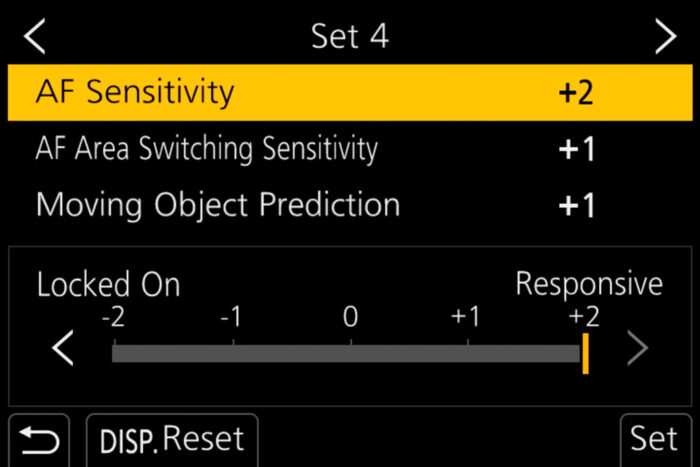
Setting 0 or a negative value is useful if momentary obstacles get between you and the subject. This can happen for group sports or motorsports for example.
For birds however, you want the autofocus to be as reactive as possible, so set it to +2.
AF Area Switching Sensitivity (from -2 to +2)
This setting determines how quickly the camera should switch the AF points if the subject goes out of the AF area. A positive value will make the camera more reactive, whereas a negative value will make the G9 slower to react.
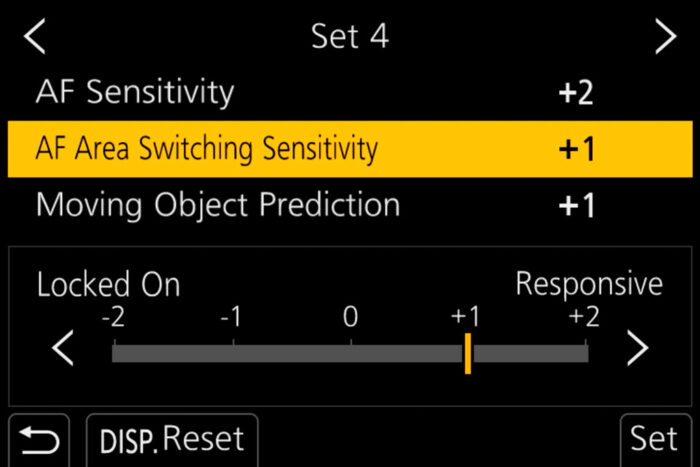
When following a bird, it is often difficult to keep it precisely at the centre of the frame, especially when it moves erratically or suddenly changes direction. You want the camera to be reactive enough to keep the AF points on your subject. I set this to +1.
Note: I’ve tried various combinations with this setting to see if I could decrease the G9’s tendency to switch focus to the background, but 0 or negative values haven’t produced any interesting results. In fact negatives values have been worse most of the time. +1 seems to be the best compromise to have enough reactivity without raising it to the maximum, where the AF points can go all over the place.
Moving Object Prediction (from 0 to +2)
This setting helps the camera understand if the subject has a constant speed, or if it can decelerate / accelerate suddenly.
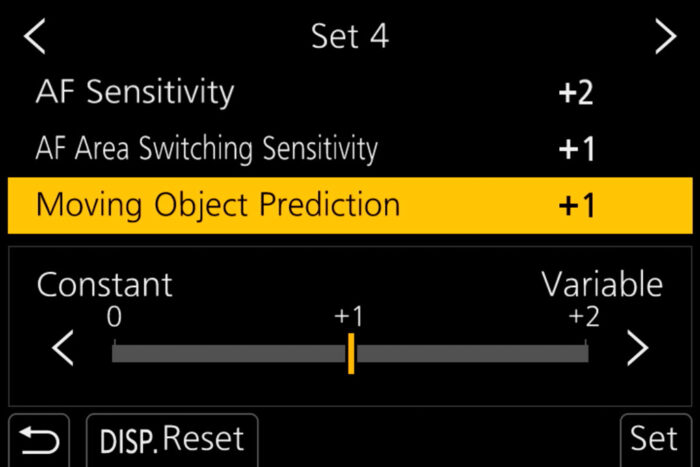
If you select 0, the camera won’t react immediately if the speed changes or if an obstacle momentarily covers the subject. With 2, the camera will be more reactive to any speed change.
With kites, you get a little bit of everything. When they’re up in the sky or more distant against the trees, the change in speed is less drastic. Other times, they can fly close to you in no time at all. I found that selecting 1 is the best compromise.
AF Mode (Focus Area)
Fn1 button
AF Mode allows you to choose the number of points the camera should use to focus on your subject. The G9 has six different options:
- Face / Eye / Body Detection
- Tracking
- 225-Area
- Custom Multi
- 1-Area
- Pinpoint
Tracking is useless with birds in flight and Pinpoint is not interesting (and not available in C-AF anyway). 1-Area gave me encouraging results but there is another way to use it. So let’s have a look at the three other modes.
225-Area and Custom Multi
The 225 area, as the name suggests, make all the points available. The camera picks the amount needed depending on the size and position of the subject.
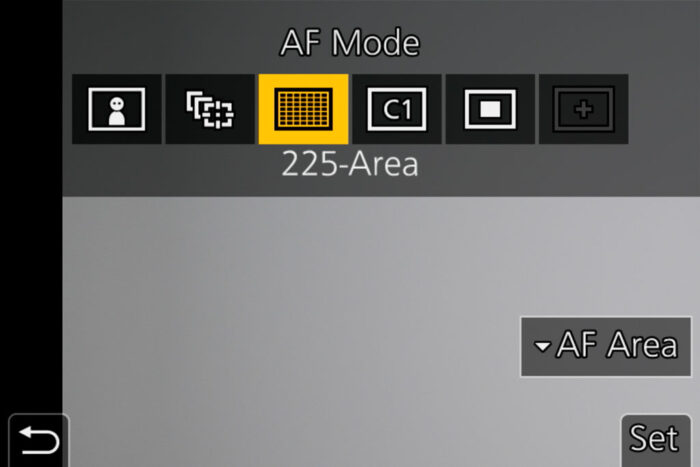
I found that having too many points increases the chance of bad focusing. Since the camera tends to focus on the background, the more points we give to it, the more it can be tempted to look for contrast elsewhere.
The goal is to reduce the number of AF points by using a smaller grid, and there are two ways to do this.
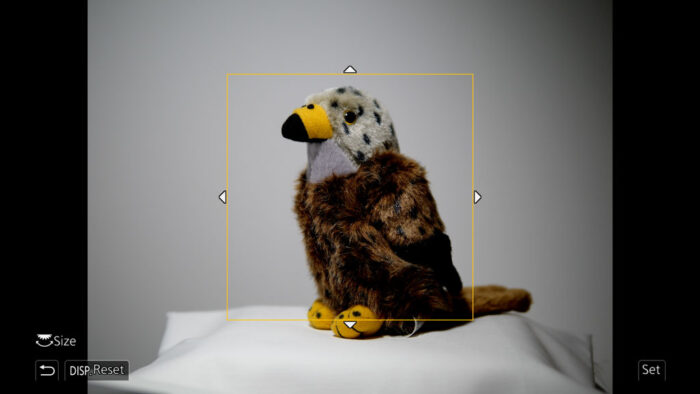
When you select the 225-Area mode, you can decrease the number of points by touching the virtual AF Area button on the screen, or pressing the down button (rear control dial).

The problem with this method is that if you go into the menu, then go back to live view, the AF points reset to 225. You have to press the Fn1 button and change the area again, which is quite annoying.
The preferable method is to choose Custom Multi. Then press the up button and scroll left until you reach Custom 1. There you can create your own pattern of points. I recommend a 11×11 or 9×9 grid to have enough leeway when you aren’t able to keep the bird precisely at the centre of the composition.
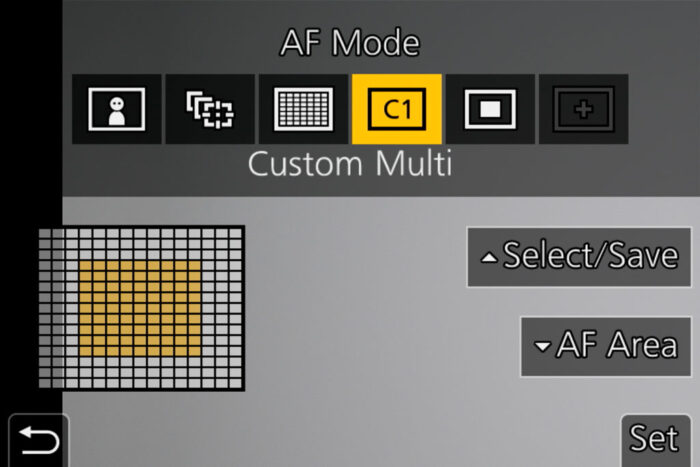
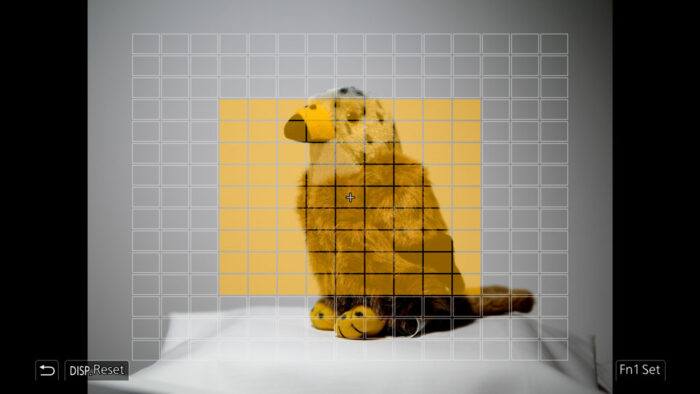
This setting gave me the best result prior to firmware 2.0, and if you mainly taking pictures of birds against the sky, it will work fine. However, I believe there is something better.
Animal Detection
When you press the Fn1 button, the first option is called Face/Eye/Body Detection. There, you also have the possibility to turn Animal Detection On. If an animal is in the scene, the G9 will place a white rectangle around it and focus on its body automatically.
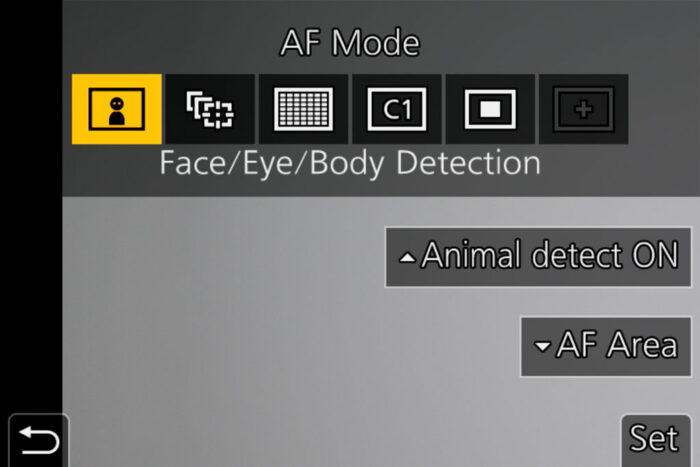
I didn’t have any expectations with this setting, but since Animal Detection works with birds, I thought I would give it a try. And I’m very glad I did.
While taking pictures at the beginning, the white rectangle around the kites appeared only a couple of times, so I though that the camera wasn’t recognising the birds. Then I realised that more images were in focus, and after evaluating all of them, the keeper rate had indeed increased.
Despite the lack of visual confirmation in the live view, it seems that the G9 understood better what my subject was and where it was. Confusion with the busy background was less of a problem.
Another important step when choosing Animal Detection is to click on AF Area. This will activate the 1-Area mode rather than using the 225 points. Make it as large as possible.
I found that the 1-Large area helps the camera to be less erratic when focusing. Even with animal detection off, the normal 1-Area mode gave me a better keeper rate than 225-Area or Custom Multi, especially when the bird was against a busy background.
Important: if you go into the menu, then back to live view, the focus area will reset to 225 points. You need to press the Fn1 button again, then click AF Area and choose the largest single point. Or, as reader Walt suggested, move the AF Joystick in any direction to reactivate the single large area. It is important to remember because if the camera reverts to the 225 points, it can be less effective. You can tell if the large 1-Area is active thanks the four little corners on the LCD/EVF.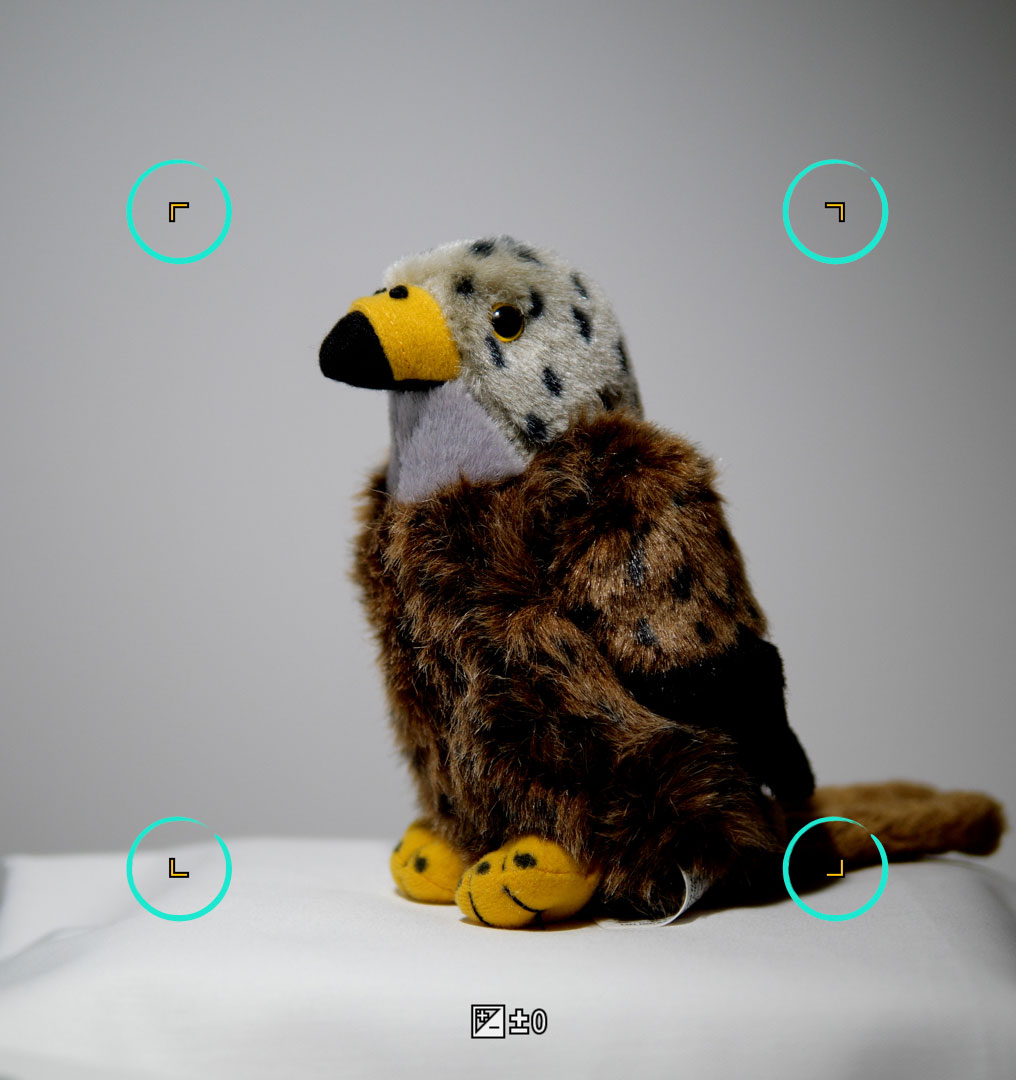
AF/AE Lock with AF-ON
Custom Menu page 1/7 (Focus / Release Shutter)
Another setting that Panasonic introduced with firmware 2.0 is call AF-ON Near Shift and AF-ON Far Shift. With the former, it gives priority to a subject that is closer to you, whereas with the latter it does the exact opposite.
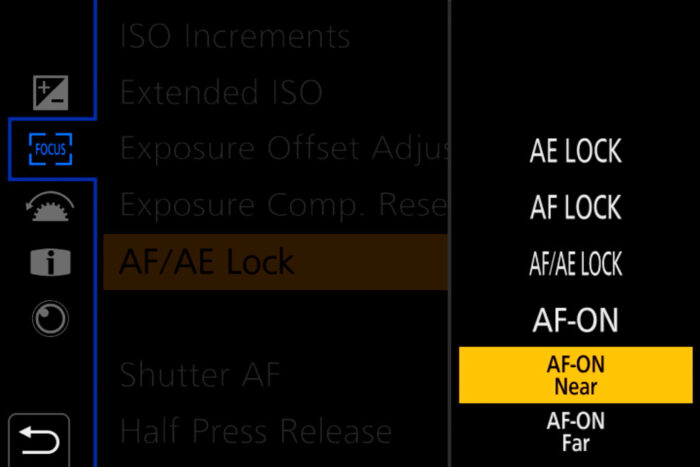
To use this setting, you need to set up the back button focus method: instead of focusing with the shutter release button, you focus with the AF/AE Lock button on the rear.
- Go to Custom Menu, then Focus / Release Shutter
- Scroll down to Shutter AF and select Off
- Go up a few steps to AF/AE Lock
- Choose AF-ON Near
With the Near Shift option, the camera was less inclined to focus on the background. Combined with Animal Detection, it helped me raise the score to 51% (perfect focus only) or 69% (including slightly soft results). This is the best performance I’ve got out of the G9 to date.
Panasonic G9 and Birds in Flight: Other Settings
There are other settings that are useful to know about when taking pictures of birds. Here is a quick summary of the ones I used.
- Quality: RAW
- ISO: Auto with 1/3Ev increments and 6400 maximum
- Metering: Centre Weighted
- Burst Mode: H (9fps in AFC). I don’t use the burst with the electronic shutter (20fps) because I find the AF performance to be worse.
- Stabiliser: active with vertical compensations only
- Shutter Type: Mechanical (if you use the electronic shutter, you lose live view and the last images taken are shown instead)
- Constant Preview: off. This disables the exposure preview on the screen, which I find better in my scenario because the red kite station can have a lot of contrasty zones. In other situations, you may want to leave this on to check your exposure.
- LVF Display Speed: 120fps
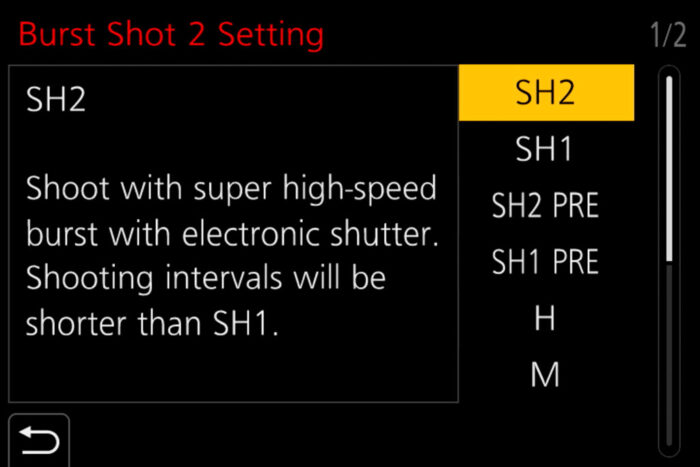
In some situations, like a bird flying off a branch, you can take advantage of the faster burst speed with the electronic shutter (60fps, or 20fps with C-AF). You can also select the SH1 PRE or SH2 PRE modes where the camera starts to load images in the buffer memory before you fully press the shutter button.
Panasonic G9 and Birds in Flight: Best Lenses
There is a good selection of Micro Four Thirds lenses when it comes to wildlife. For birds in flight specifically, I would recommend two for the Lumix G9.
Leica DG Elmarit 200mm f2.8 Power O.I.S. with DMW-TC 1.4x
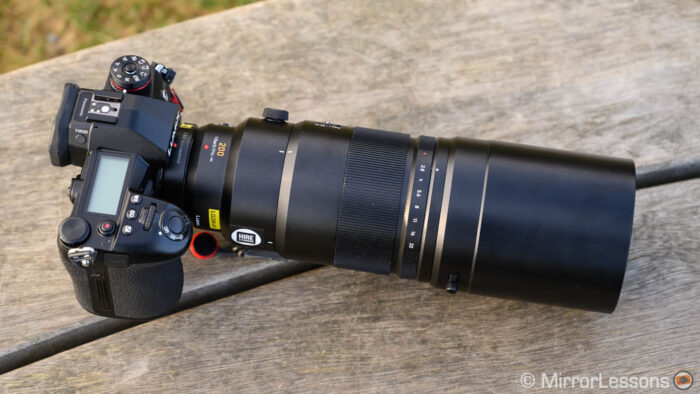
The Leica DG 200mm 2.8 is a superb telephoto lens when it comes to optical quality. The AF motor is very fast and the optical stabilisation is compatible with Dual IS. It works very well for stills and video. It is fully weatherproof, has an all-metal build and various controls on the barrel (aperture ring, focus switch, focus limiter, OSI switch and a function button).
The TC 1.4x teleconverter is included in the box. This means you can go from a 400mm equivalent to a 560mm equivalent field of view. (The latest aperture goes from 2.8 to 4 when teleconverter is on). If you’re happy to sacrifice an extra stop of light, you can buy the optional TC 2.0x and get an 800mm equivalent view at f/5.6. The downside is a high price tag and the very large hood that makes the lens look bigger than it actually is.
Check price of the Leica DG 200mm 2.8 on
Amazon | Amazon UK | B&H Photo | eBay
Leica DG Vario-Elmar 100-400mm f/4-6.3 ASPH. POWER O.I.S.
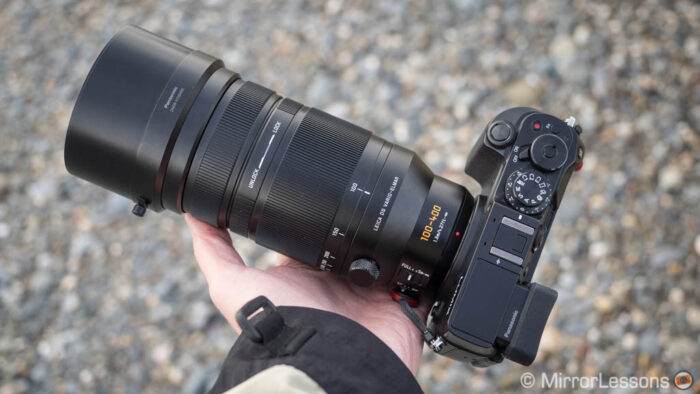
I’ve tested the Leica 100-400mm many times since its release in 2016, and it has never disappointed me when it comes to optical quality. The AF motor is fast, it is compatible with Dual IS and you obviously get the advantage of a versatile zoom range. The maximum reach of 400mm (800mm equivalent) is very interesting for birds.
On the downside, the aperture is slower so whenever the sun isn’t out in full force, you will be forced to crank the ISO up really high. Also, I’ve tested various copies and none of them had a perfectly smooth zoom ring. Other than that, the lens is weather-sealed and reasonably compact.
Reminder: the links below are affiliate links. If you decided to buy something after clicking the link, we will receive a small commission.
Check price of the Leica DG 100-400mm on
Amazon | Amazon UK | B&H Photo | eBay
Note about Olympus lenses
The G9 gave me good results with Olympus lenses for generic AF use or sports, but for birds in flight, the M.Zuiko 300mm Pro gave me a lower keeper rate. So for this specific genre, I recommend using Panasonic lenses to guarantee full compatibility with the DfD autofocus system.
Conclusion
Reminder: Panasonic has released a new firmware (version 2.4) in June 2021. I’ve tested the camera again and wrote about it in a new article.
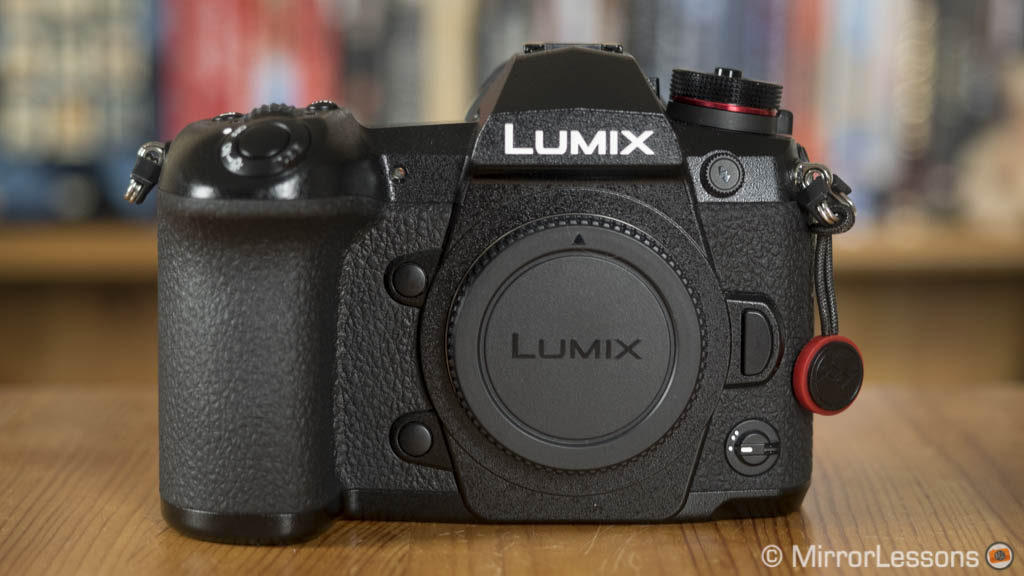
If we forget about birds in flight for a second, I could label the Panasonic G9 as a near-perfect product. The image quality is good and there are tonnes of extra features. The viewfinder is excellent and allows you to change the magnification which makes it easy to use for people who wear glasses like me.
The design is one of the best and it is not difficult to use. Thanks to firmware updates, the camera has receive many new features, especially on the video front, which makes it a very capable stills/video camera at an unbeatable price.
Unfortunately, what I said in previous articles concerning the autofocus remains true. If in many situations it does really well, in others it can let you down and birds in flight are the perfect example. Even when testing face and eye detection, and human body detection, it has the tendency to go for the smaller face in the background rather than the bigger ones in the foreground and you can’t help but wonder, why?
Of course with the right settings, perseverance and a bit of passion, you can learn to overcome the G9’s quirks and tweak the AF’s performance so that it becomes decent enough to bring home good shots. Despite all my words spent on the limitations and the keeper rate, I’ve taken some very nice photos with this camera. You just have to be aware that it is not the best choice if birds are your main interest.
Can future updates improve the AF further? Possibly. I was surprised to see that Animal Detection made a positive impact on the performance, so perhaps a more advanced iteration of A.I. and machine learning technology can help DfD go to the next level. However I’m still sceptical that it will reach the same performance as the best phase detection systems out there. But I’d love to be proven wrong!
Check price of the Panasonic Lumix G9 on
Amazon | Amazon UK | eBay | B&H Photo
Second-hand Panasonic cameras on
MPB US | MPB UK
Additional content
Below you can find more articles about the Panasonic G9 as well as our round-up of the best mirrorless cameras for Wildlife.