- Page 1: design, ease of use, image quality and high res shot
- You are on page 2: image stabilisation, autofocus, speed, video, extras and conclusion
Table of Contents – Page 2
1. Sensor shift: Image stabilisation
2. Autofocus system, Face and Eye detection
3. Continuous autofocus and tracking
4. Shutter, continuous shooting speed and buffer
5. Video capabilities
6. Flash and extra features
7. Battery life
8. Price, lens system and firmware updates
9. Conclusion
10. Sample images and additional content
Sensor shift: Image stabilisation
Now let’s talk about the main function of the sensor shift technology: image stabilisation. Olympus has pushed the performance more than any other brand and remains the leader in this field.
Both sensors can compensate for 5 axes inside the body and can combine sensor with optical stabilisation to further improve the performance (Sync IS). Note that at this time there are only three Olympus lenses that work with Sync IS: the 12-100mm f/4 IS Pro, the 300mm f/4 IS Pro and the 150-400mm f4.5 IS Pro which is under development.
Thanks to a new gyro sensor, the E-M1X has the highest rating seen to date with 7Ev body only or 7.5Ev with the 12-100mm lens. The E-M1 II retains an excellent rating of 5.5Ev or 6.5Ev with the same lens, and in the real world is better than any other camera or brand.
My personal record is a 20 second picture hand-held with the E-M1 II and 12-100mm Pro. That night I was determined to get a crazy result and I made a lot of attempts, but I never managed to replicate that achievement. With the E-M1X, I got one shot at the same speed using the same lens, but it proved as difficult to achieve as with the mark II model two years before.

Crazy attempts aside, I didn’t find that E-M1X gave a substantial advantage for stills, despite the official figures suggesting otherwise. I managed a few sharp shots at around 10s, but the keeper rate increased at around 4s. Taking images at 2s or 1s becomes fairly easy. The conclusion is more or less the same as the one I came to when testing the E-M1 II.
As always, the results can be influenced by how steady you are, how you position your body, if you’re leaning against a wall for extra stability, etc. This is important to note because you’re not guaranteed to get the same result every time.
I was curious to see if there were any hidden differences between these two cameras so I put them through a number of torture tests at home with different lenses, different focal lengths and different shutter speeds to see if one would give me more consistent results than the other.
I found confirmation of the impressions above: they behave in a very similar way. Speeds such as 10s or 8s are possible at short focal lengths with a bit of patience and various attempts, whereas both give constant results from 2s and faster. At long focal lengths of around 100mm, it is possible to get sharp results at 1s or half a second. You can even try to push it further (two seconds is not impossible).
I admit I was surprised not to see a more relevant difference given the higher rating of the E-M1X. I guess Olympus already raised the bar so high with the E-M1 II that any further improvements must be found in subtleties, which is what I’ve found with my hand-held video tests (more on the video chapter).
Autofocus system, Face and Eye detection
The autofocus system used by both cameras is the same as far as the sensor is concerned. They share 121 hybrid areas with contrast and phase detection. The latter are cross-type meaning that each phase point detects horizontally and vertically.
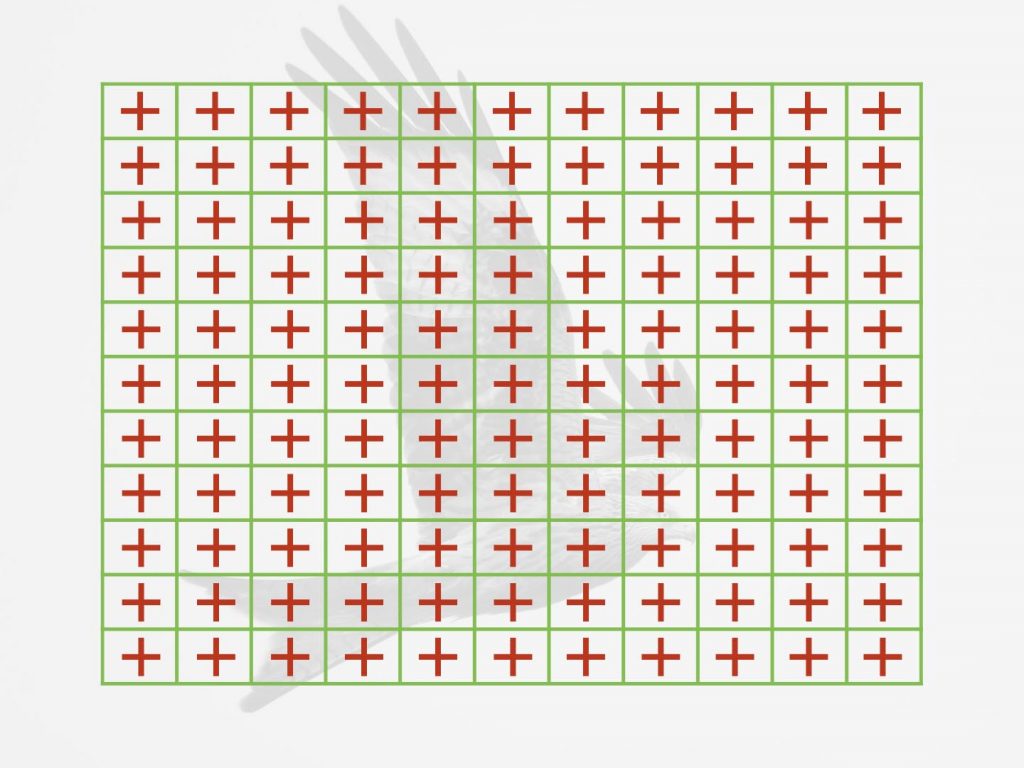
Let’s start with the focus modes. We have Single, Continuous, Continuous + Tracking and Manual. The two cameras share the most common AF areas including:
- Single Target (normal or small)
- 5-Target Group (5 points in a cross shape)
- 9-Target Group (3×3 grid)
- All-Target (11×11 grid)
The E-M1X has an additional area: 25-Target group that works on a 5×5 grid. You have the option to create your own group of points with different shapes, and you can skip points inside the area. Note that these additional modes are now available on the E-M1 II as well thanks to firmware 3.0.
More customisation for the autofocus points is a welcome improvement on the E-M1X. For example I found the 25-Target Group very helpful for birds in flight in comparison to the 5 or 9 Target mode (too small), or the All-Target area that is less reliable.
With Single AF, both cameras perform in the same way: they are fairly quick to lock on in good light. In low light the flagship focuses fast thanks to its high sensitivity of -6Ev with an f1.2 lens. Olympus has extended the performance of the E-M1 II to the same level with firmware 3.0. Both cameras can mis-focus when there are specular highlights in the background however (city lights at night for example).
You’ll find face and eye detection options on both cameras, but this is an area where I haven’t seen substantial improvements on the E-M1X (for stills at least). They both do well if the subject doesn’t move closer or further away from the camera, or only turns left or right. If the distance changes, both cameras can struggle to maintain focus until the subject stops.


Face and eye detection seem to work better with Olympus lenses and the latest Pro lenses in particular which have a faster AF motor. With old lenses such as the Leica DG 25mm f1.4 or even the recent Sigma 56mm f1.4, the performance can be less consistent even if the subject isn’t moving back and forth, so always make sure to check focus after taking a shot.
Both cameras sport additional settings to tweak the autofocus behaviour. Note that some of these settings are available to the E-M1 II with firmware 3.0:
- C-AF Sensitivity: make the autofocus more or less reactive (±2 steps)
- AF Scanner: if the camera can’t focus, it will perform a focus scan (from minimum focus distance to infinity) to acquire focus. You can disable this option, tell the camera to do it just once or continuously until it focuses correctly.
- AF Limiter: select a minimum and maximum focus distance for any lens (three presets)
- AF+MF: After focusing using autofocus, you can adjust focus manually by keeping the shutter button half pressed and rotate the focus ring.
- AF+MF with C-AF and C-AF+Tracking: same concept as the setting above, but can be used with continuous AF or C-AF + Tracking modes. Note that it only works with Olympus Pro lenses.
- C-AF Center Start: the camera focuses at the centre at the beginning, and then prioritises the surrounding points, making it easier to follow erratically moving subjects. You can specify for which AF Target mode this option is valid.
C-AF Center Priority: as opposed to the setting above, the camera prioritises the centre of the area unless it is unable to focus correctly. Here as well you can select to which AF Groups this setting applies.
The flagship E-M1X has an additional options called:
- Orientation Linked: you can set different focus modes, focus points and their positions for horizontal and vertical shooting. The camera will swap these settings automatically when it detects that the orientation has changed.
Continuous autofocus and tracking
Important note: the performance of the E-M1 II has improved thanks to firmware 3.0, which adds the same AF algorithm of the E-M1X. To find out more, read our report with birds in flight here.
The E-M1 mark II never truly impressed us when it came to continuous autofocus. It gave us good results but rapidly fell behind many mirrorless competitors. Thankfully the E-M1X brings a significant improvement.
The reason behind the improved performance is software and processor related. Olympus has re-written the AF algorithm from the ground up and the flagship, as mentioned earlier, has two TruPic VIII processors instead of one which means it can compute data much faster. For example it analyses focus not only with the live view but also on the images it just recorded. This helps the camera to make adjustments more quickly if the pictures are not in focus.
Our first basic running test doesn’t reveal a huge difference but gives a hint: the E-M1 II is a little more inaccurate when it comes to delivering tack sharp focus.
- Red: out of focus
- Yellow: slightly soft
- Normal: in focus
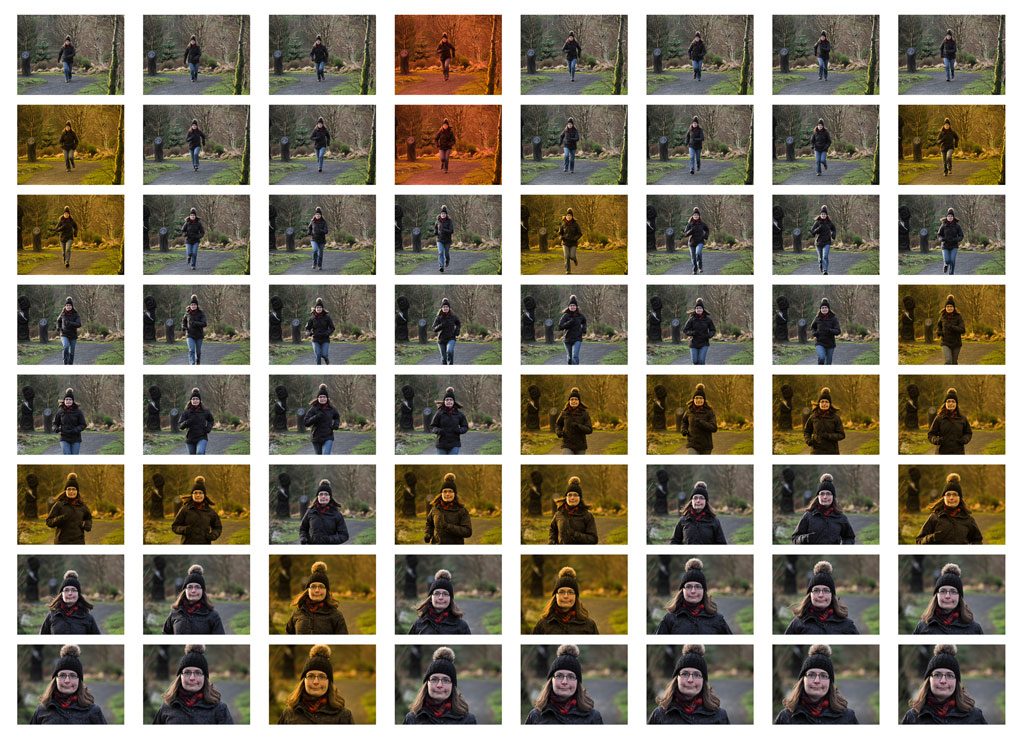
To see where and how the E-M1X outshines its sibling, we have to analyse scenes with quicker and more complex action.
Case study 1: birds in flight
- Lens used: 300mm f/4 Pro
- E-M1X keeper rate: 74% (perfectly sharp shots only), 91% (including slightly soft images)
- E-M1 II keeper rate: 50% (sharp shots only), 70% (with slightly off images)
- E-M1 II keeper rate (firmware 3.0): 62% (sharp shots only), 80% (with slightly off images)
Taking pictures of my beloved red kites was the first thing I did with the new camera. I found the E-M1X to be quicker when locking onto the bird, more capable of keeping track of it (even when it flies against a busy background), and quicker to correct focus when the preceding frames are not in focus. The keeper rate has improved significantly and the camera felt more capable of understanding what and where the subject is.
The E-M1 II gives you good performance for BIF but it is not as reactive as the flagship. It can take more time to lock onto the bird or correct focus when the sequence starts the wrong way. I’ve used it several times with different lenses (including the DG 100-400mm from Panasonic) and I’ve always ended up with the same results and keeper rate. That being said, firmware 3.0 brings the performance a bit closer to the flagship model.
Among the settings described in the previous chapter, the 25-Target mode and C-AF Center Start were the settings we used to get the best results.
On both cameras it is recommended that you set the AF-C Sensitivity to +2 to make sure the AF is as reactive as possible when correcting focus. It might prompt the camera to change focus a bit too quickly if multiple birds are in the frame, but otherwise it is essential to ensure a better keeper rate.
You can also set a focus limiter to stop the camera from focusing too close or too far, which can happen when it loses track of the subject completely.
The C-AF + Tracking mode is still unreliable for birds, unless the background is uniform and clearly distinctive like a blue sky. Even in that case, the flagship gives you a better keeper rate than the E-M1 II.
The E-M1X has a new set of options for this AF mode: you can tell the camera which kind of subject you are following so that it can focus on the most appropriate area. For example with the Motorsports setting, the camera will prioritise focus on the helmet of the pilot.
There aren’t any settings for birds yet but they might come via firmware update later on. Following the suggestion of one of our readers, I tried the Plane setting since the shape isn’t dissimilar from a bird with its wings spread out.
The camera recognised the subject as a “plane” on many occasions, even when there was more than one bird in the frame. When it failed to recognising it, it simply reverted to the normal tracking mode. I couldn’t test this specific set up for red kites, but it worked well with seagulls especially when they were gliding. It didn’t detect them when they were too far away (too small) or if they were flapping their wing a lot.
Case Study 2: Football
- Lenses used: 40-150mm Pro, Lumix 35-100mm f2.8 (E-M1 II only)
- E-M1X keeper rate: 84% (perfectly sharp shots only), 91% (including slightly soft images)
- E-M1 II keeper rate: 70% (sharp shots only), 92% (with slightly off images)
For a group sport such as football, the difference were less noticeable but the E-M1X performed better once again. It required fewer frames to correct focus, and many sequences were perfect from start to finish. I also find the C-AF Sensitivity setting more accurate: -1 proved to be optimal to maintain focus without being disturbed by players passing momentarily in front of the main subject.
I’ve shot football games on more than one occasion with the E-M1 II, both in daylight and in the evening with various lenses. The results are not far off the flagship but it can be more erratic, tending to jump from one subject to another for group shots. It can also be distracted more easily by momentary obstacles. Once again it takes more frames for the camera to correct focus and the number of slightly soft images is also higher. Firmware 3.0 most likely improves the performance and brings the camera closer to the flagship.
The 5-Target group works well for this kind of sport, but I also appreciated being able to design my own AF area (a custom 3×7 group proved very useful).
Case Study 3: Rally
- Lens used: 40-150mm Pro
- E-M1X keeper rate: 90% (perfectly sharp shots only), 95% (including slightly soft images)
- E-M1 II keeper rate: 70% (sharp shots only), 90% (with slightly off images)
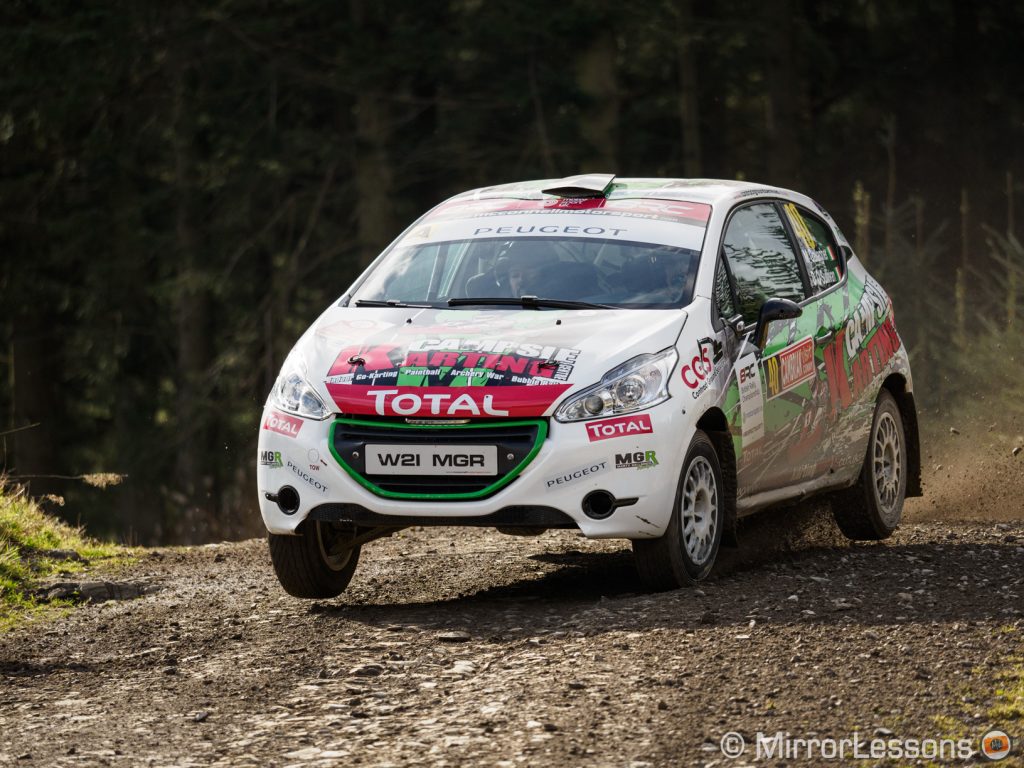
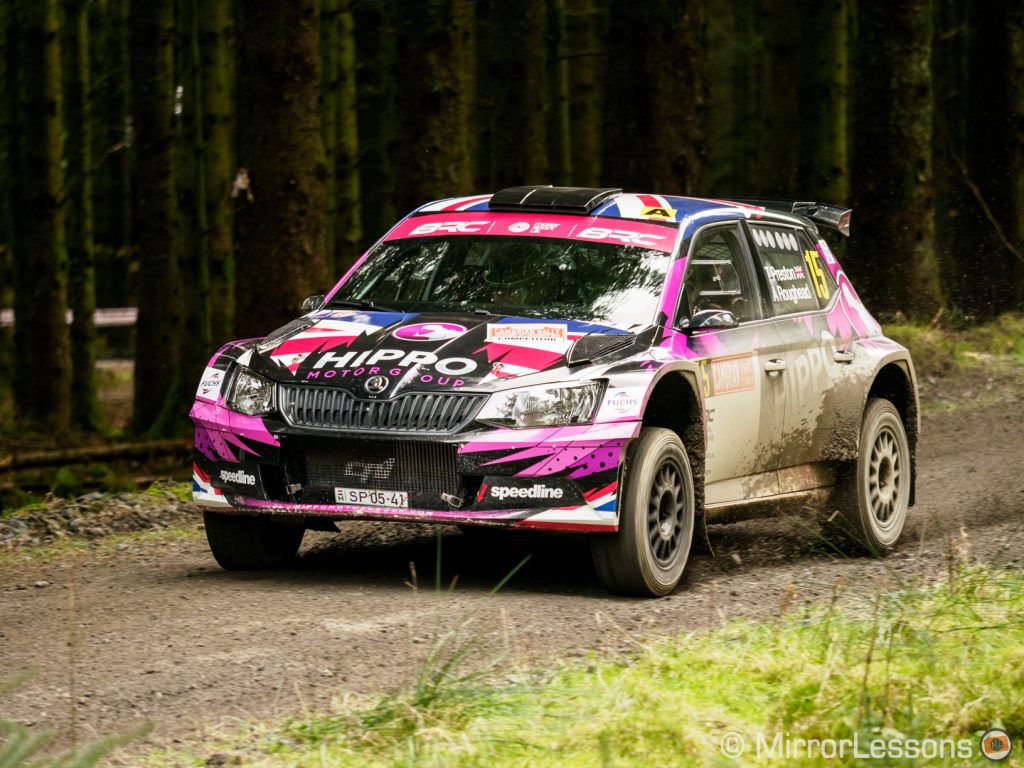
I attended the Cambrian Rally in North Wales because I wanted to test the Motorsport setting for the AF-C + Tracking mode on the E-M1X. According to Olympus, with this option enabled the camera will recognise the car and keep focus on the helmet of the pilot. Perhaps this would have been more interesting to verify with an open cockpit car or motorbike, as pilots inside a rally vehicle are more difficult to see, especially because of reflections on the windshield. (Maybe a polarising filter would have helped but I didn’t have one with me.)
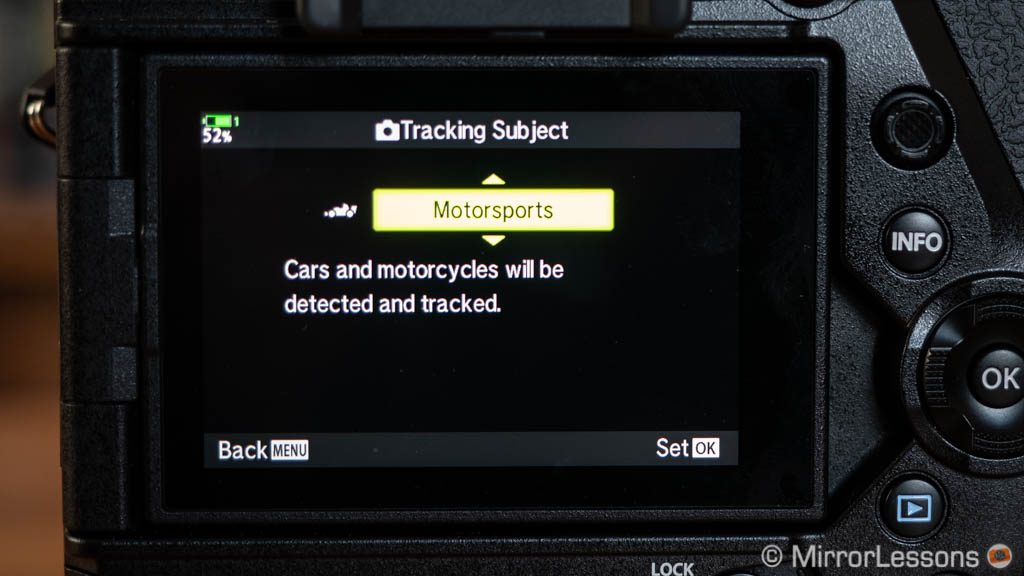
The E-M1X didn’t always recognised the subject as a car. Funnily enough, it had an easier time with older vehicles than modern ones, although it failed to recognise a nice classic red Porshe! When the subject isn’t detected, the camera reverts to the default tracking mode but that doesn’t stop it from giving you a good keeper rate of 82% / 94%.
I noticed on a few occasions that as the car was getting closer to me, the camera moved focus towards the centre of the vehicle (where the pilot is) rather than the front, but in all honesty, it seemed to happen somewhat randomly.
The truth here is that a simple 5-Target area is more than enough to track the subject. The car’s trajectory is easy enough to predict and you don’t need a re-adjust your composition when following the car. Actually, my keeper rate raised to 93% / 97% when using the 5-Group target on the E-M1X.
While I was there, I made sure to take pictures with the E-M1 II as well to see if it would be as reactive as the flagship. To my surprise, the number of out-of-focus shots was really low, but the number of slightly out-of-focus images was higher than the E-M1X. So overall the keeper rate was good (70% / 90%) but not as good as the flagship. (again firmware 3.0 might improve this aspect)
Shutter, continuous shooting speed and buffer
The E-M1X and E-M1 II share the same shutter speed capabilities. They can go as fast as 1/8000s with the mechanical curtain, or up to 1/32000s with the electronic version.
The E-M1X shutter mechanism has been tested for a durability of 400,000 cycles, which is double the rating of the E-M1 II. The flagship has a new Super Sonic Wave Filter (SSWF) with a special coating. It vibrates 30,000 times per second to reduce the amount of dust by a factor of 10.
Both models have fast continuous shooting speeds. With the mechanical shutter, they can go as fast as:
- 15fps (H mode, focus locked on first frame)
- 10fps (L mode, continuous AF available)
With the electronic shutter, these speeds increase to 60fps and 18fps respectively.
When shooting with the H mode, you don’t have live view – the last image taken is displayed instead. This gives you a blackout-free experience but what you are seeing is not in real time but what has just happened. The 60fps burst speed is so fast and smooth that it gives you the impression of being a live view.
With the L mode, you get live view with blackouts. Personally this is an area where I was expecting an improvement on the E-M1X due to its double processor. We’ve seen other cameras such as the Sony A9 and Fujifilm X-T3 taking advantage of fast reading and processing with the electronic shutter to offer live view and no blackouts. Having a real time view of your scene without any interruptions helps a lot with erratically moving subjects such as birds in flight and it would have been a perfect match for this camera.
The fast sensor readout when using the electronic shutter guarantees contained distortion. As you can see below, the two cameras perform the same and the electronic shutter can be used with animals without any issue.
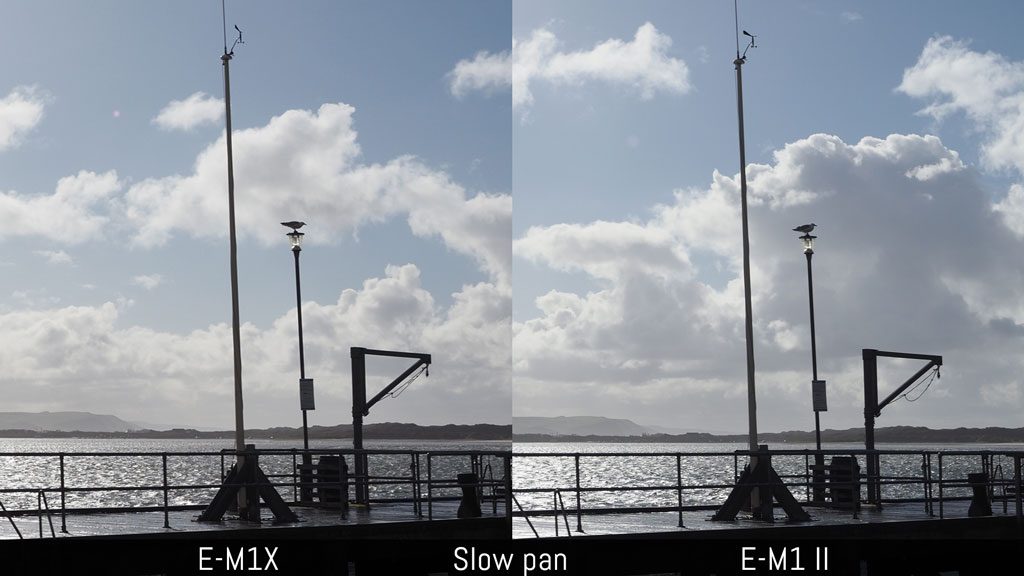
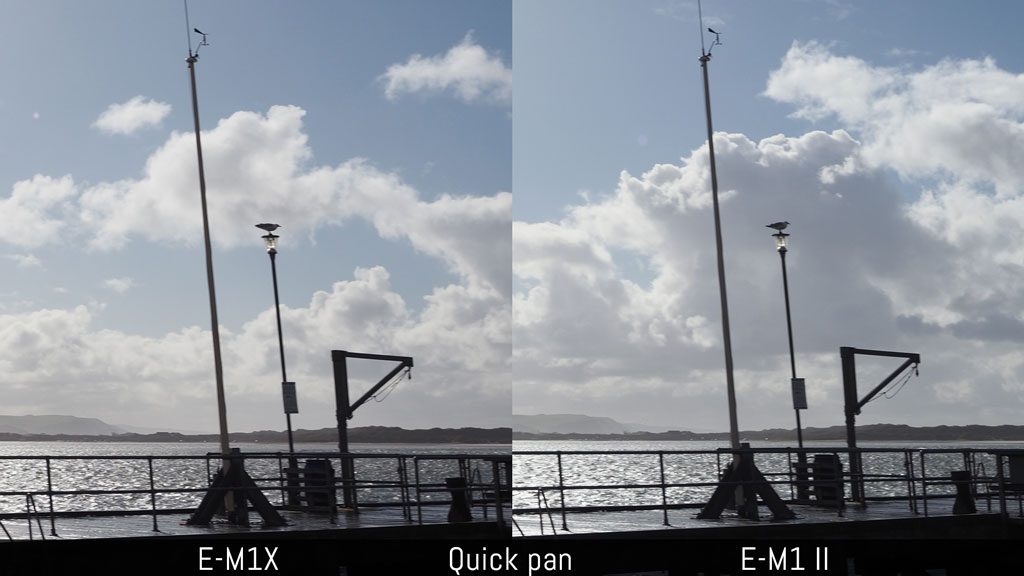
The electronic shutter and fast burst speeds can be used with an additional function called Pro Capture. When you half press the shutter button, the camera starts to load images to the buffer memory and replaces the first ones with the latest ones. Once you fully press the shutter release, it saves the last 35 images to the memory card when starting the burst. This increases your chance of capturing unpredictable or very fast moments. Note that Pro Capture L (with C-AF) only works with Olympus Micro Four Thirds lenses.
If you work under certain artificial light sources such as fluorescent light, your images can end up with different exposures in a burst or an uneven exposure in the photos themselves. This is caused by the flickering frequency of the light. On the E-M1X you can enable Anti-Flicker Shooting to prevent this from happening (the camera will time the shutter release to sync with the flicker frequency). Note that the setting can cause a lag or decrease the burst speed. It is not effective with the electronic shutter.
There is an additional setting called Flicker Scan for the LCD and EVF: it shows you how much flickering there is so that you can select an optimal shutter speed to minimise it. This is also available on the E-M1 II.
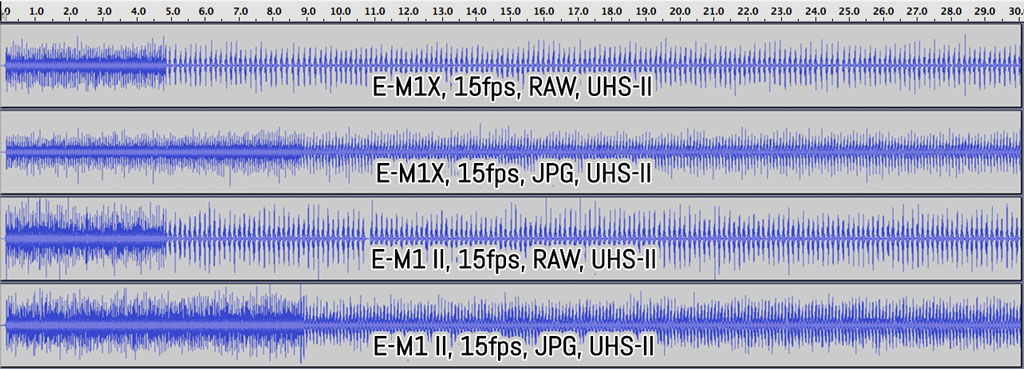
Finally, concerning the buffer capabilities, both cameras deliver the same performance. With a UHS-II card, they can shoot RAW at 15fps for about 5 seconds before dropping to 7fps. With JPG Fine, they shoot at full speed for 9s and then slow down to approximately 11fps. Unlike the E-M1 II, the X model lets you access the playback mode and settings while recording images to the card.
Video capabilities
The E-M1X and E-M1 II aren’t the most exciting products on the market for video, but there are still a few interesting things to say about them. The flagship brings a few improvements over the E-M1 II and is the most advanced camera to date from Olympus when it comes to movie capabilities.
We compared the two models side-by-side in the video below and also included an audio commentary. If you’d rather read a summary of our findings, simply scroll further down the page.
Important: firmware 3.0 enables phase detection for video on the E-M1 II, making the AF much quicker. it also adds the OM-Log 400 profile. You can check out the video below to see how the autofocus has improved on the mark II model.
Things they have in common:
- they both record 4K up to 30p and 102Mbps
- they both record in DCI/Cinema 4K at 24fps and 237Mbps, but the latter is a variable frame rate and often sits around 100Mbps if not less
- there is no sensor crop when recording 4K, DCI 4K or 1080p
- internal recording is 8-bit 4:2:0, the HDMI output is 8-bit 4:2:2
- they have a microphone input and headphone output
- same sharpness output when using the on-camera setting or applying it in post
- the OM-Log400 profile doesn’t make a substantial difference (if you adjust the highlight / shadow setting with the flat profile, you get a similar result). A view assist for Log400 is available.
- same high ISO performance and noise level (max. 6400)
- 1080p footage is much softer, but you have more compression options (All-Intra up to 30p)
- C-AF and face detection are fast and reliable
- rolling shutter is contained and pretty similar on both cameras
- the function buttons can be configured differently for the movie mode
- the battery life can be displayed in percentage or minutes
Big differences:
- the E-M1X has extra settings to control the autofocus performance (Sensitivity and Speed), and with the right combination you can make smooth transitions between two focus points in your scene by simply touching the screen
- the E-M1X can record up to 120fps in 1080p whereas the E-M1 II can only go up to 60fps. Both can produce slow motion clips in camera.
Small differences:
- colour science is very similar, although the E-M1X footage was often a bit brighter, warmer and with less of a green cast
- the Noise Filter setting produces a bit less noise with the Normal or High level on the E-M1 II
- the Picture Mode (Flat) profile preserves more shadows and highlights, the E-M1 II does slightly better at preserving the latter
- the Highlight / Shadow setting is not available with the Picture Mode on the E-M1X
- the M-IS1 setting for image stabilisation (sensor + software) is smoother on the E-M1X
- the flagship produces less abrupt endings when stopping a movement, whereas the E-M1 II can produce suddens shifts much more frequently
- the E-M1X has an extra setting called IS Level that allows you to adjust the level of correction needed (-1 works best when panning and in most other cases)
- you can keep more settings separate for stills and video on the E-M1X (ISO Auto set, WB compensation, WB Auto Warm Colours, etc.).
- The E-M1X can record to the SD card and send a clean signal to the HDMI port at the same time, however in that case the HDMI output is 4:2:0 upsampled to 4:2:2 rather than native 4:2:2.
As you can see, the improvements on the E-M1X are not all that exciting. Given the faster processing capabilities of the flagship model, it would have been nice to see a higher frame rate in 4K or even the possibility to record in 10-bit internally or at least via the HDMI output. They remain two very capable cameras for hand-held work nonetheless.
Flash and extra features
Both cameras have a maximum flash speed of 1/320s. High Speed Sync can be used with compatible speed lights. You’ll find common settings for flash such as red-eye reduction or slow sync, as well as the RC mode which is Olympus’ wireless system.
Note that the RC mode setting has been moved to the F Custom Menu on the E-M1X. None have a built-in flash and the E-M1X, unlike the mark II model, is not provided with the small FL-LM3 unit in the box.
Like all OM-D cameras, the E-M1X and E-M1 II share a lot of extra settings and functionalities including:
- Live Time: long exposure with real time preview on the LCD monitor (RAW available)
- Live Composite: create light paintings, fireworks and star trails images in camera (RAW available)
- Keystone compensation: correct geometrical distortion with live preview
- Fisheye Compensation: turn the 8mm f1.8 Pro Fisheye into a normal wide angle lens
- AE and HDR Bracketing: take multiple shots with different exposures to create an image with high dynamic range in post (7 frames and ±2Ev, or 5 frames and ±3Ev). There is also an option to create a JPG in-camera with two levels of effect (natural or more aggressive look).
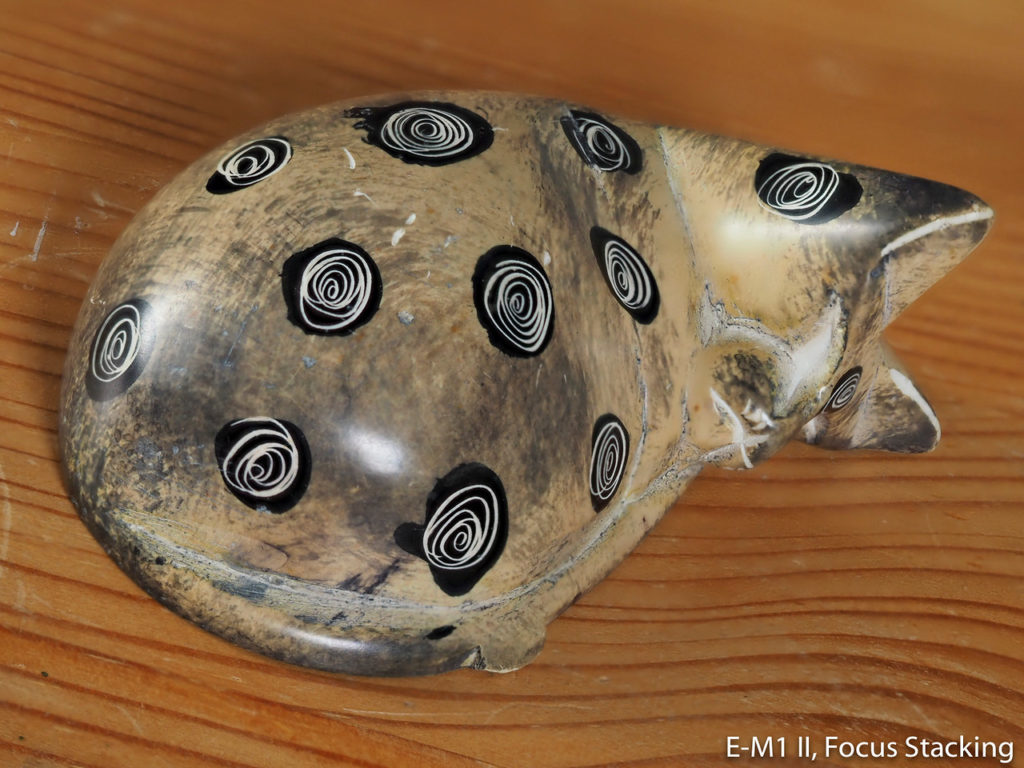
- Focus Bracketing (with Stacking option): take consecutive frames while moving the focus point in-between frames (up to 999 shots). Stacking in-camera works up to 15 shots and is limited to a selection of lenses (8mm F1.8 Fisheye, 7-14mm Pro, 12-40mm Pro, 30mm F3.5 Macro, 60mm F2.8 Macro, 40-150mm Pro, 12-100mm PRO and 300mm Pro)
- Other bracketing modes: WB, Flash, ISO and ART Filters
- Time-lapse: up to 999 frames, there is a video output option (4K at 5fps, Full HD at 15fps or HD at 30fps
- Multiple exposure: 2 frames while shooting, or three frames in playback mode
- Manual Focus Assist: magnification (max. 14x) can be also set by zoom ratio or pixel equivalence, peaking has four colours to choose from (White, black, red, yellow) and the option to decrease the brightness of the live view to see the contours better
- Art filters: 16 special effects including Bleach Bypass, Partial Colour etc. (JPG only)
- In-Movie Image Capture: extract a frame from video footage in playback mode (JPG)
- RAW processing: develop a RAW file in-camera and save it as a JPG file
- Copyright settings: adds the name of the photographer and copyright holder to the EXIF data of the images.
Now let’s have a look at a few new features brought to the E-M1X. The first is called Live ND and allows you to take long exposures images without the need for an ND filter.
You can select five different exposure levels: from ND2 (1Ev) to ND32 (5Ev). The maximum shutter speed available is 1/30s for ND2 and 1/2s for ND32. The ISO range is limited to a maximum of 800. You can have a live preview on the LCD screen and the image can be saved in RAW format. The image stabilisation can be used which means you can take long exposure shots hand-held that would equal several seconds or minutes when shot with real ND filters on a tripod!
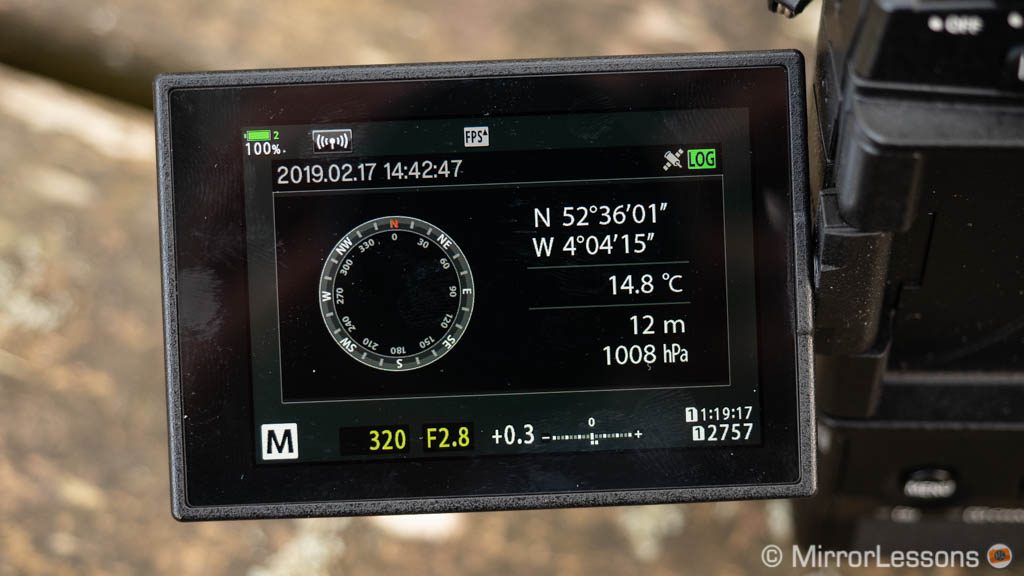
Another feature exclusive to the E-M1X is a field sensor system that includes GPS, a barometer, a compass and temperature. Unlike many other mirrorless products, you don’t need to connect the camera to your smartphone to record location information in the EXIF data. You can also save a log file to the SD card with all the locations you visited. You can prioritise GPS accuracy over battery power or vice versa.
Then we have the wireless capabilities. Both cameras feature WiFi but only the E-M1X includes Bluetooth.
Unfortunately the process of connecting the camera to your smartphone continues to be anything but simple and straightforward (at least with Apple iOS). You can pair the camera with Bluetooth but you still need to connect to Wifi whenever you want to transfer an image or remotely control the camera.
There is an option to download images automatically (by marking them first in the playback menu) when powering off the camera but I couldn’t get it to work despite several attempts. One thing on the E-M1X that I don’t recall seeing anywhere else is that you are not limited to transferring JPGs only: you can also download RAW and video files (including 4K footage).
Finally we have tethering, and while both can work via USB, the E-M1X also allows you to tether wirelessly with the Olympus Capture software.
Battery life
The E-M1X and E-M1 II use the same BLH-1 battery type which guarantees approximately 440 shots per cycle (CIPA). In my tests, they do much better, managing more than 1500 shots and the battery wasn’t even depleted (40% left).
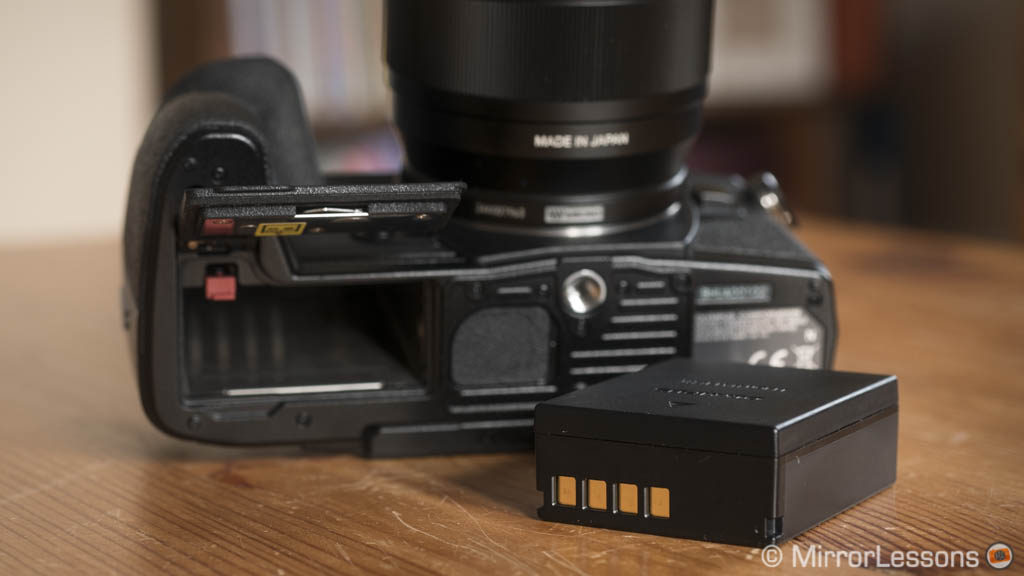
With the E-M1X, you get two batteries by default and they can be used at the same time so the battery life doubles easily. To do the same with the E-M1 II, you need to buy the optional HLD-9 battery grip.
Olympus states that by using the Quick Sleep mode, you can extend the battery life to 2580 frames on the E-M1X, or 950 shots on the E-M1 II (one battery). But to be honest, even without activating that setting, I found the battery life of both products sufficient for most uses.
One little annoyance of the E-M1X is that the camera only displays the remaining charge for one battery at the time on the LCD screen or EVF, even if you have two inside. When the first battery is about to run out, the icon starts to blink red which makes you wonder if the other battery is charged. Once the first battery is dead, the camera automatically switches to the second. The only way to see how the two batteries are doing is to go into Battery Status in the Menu (Custom J2).
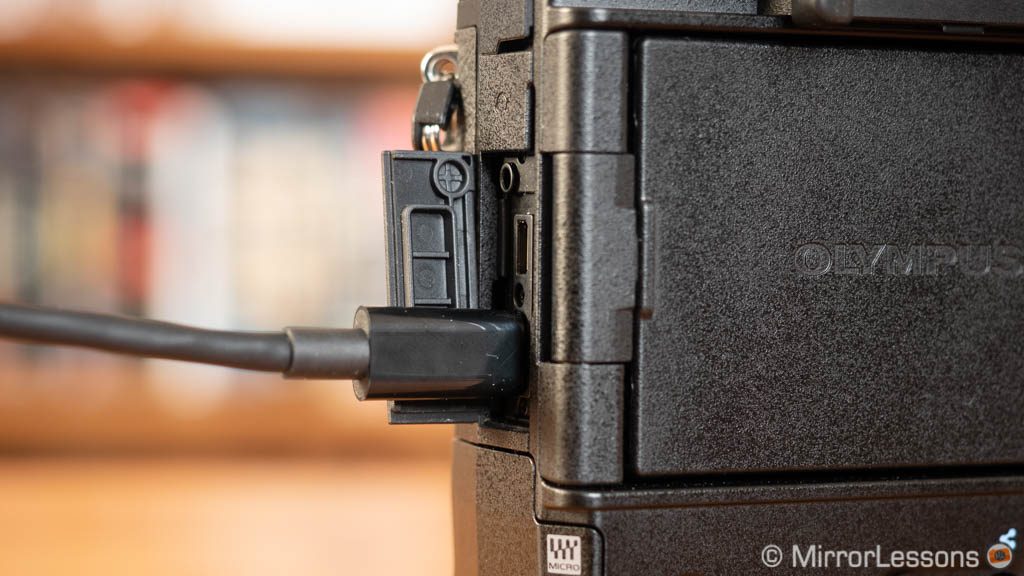
Unlike the E-M1 II, the E-M1X batteries can be charged via USB with a Powerbank or other device while the batteries are inside. The camera must be powered off in order to charge the batteries. With a 100W power source, both batteries can be charged in approximately two hours.
The E-M1X also accepts power delivery meaning that the camera can be powered by a USB Powerbank that can deliver the following output: 9V3A or 15V2A or 15V3A.
Price, lens system and firmware updates
As you can imagine, the E-M1X is the more expensive camera and can be found for $3000, £2800 or €3000.
The E-M1 II is priced at around $1700, £1400 or €1500. If you add the optional battery grip to have a similar size and battery life, you’ll still save about 1k, if not more. Special deals and instant rebates can also be found on the mark II model given that it is more than two years old.
Both cameras share the same mount and are part of the same system – micro four thirds – which has an extensive selection of lenses and accessories. You can use not only Olympus M.Zuiko lenses, but also all the Panasonic micro four thirds lenses and third-party offerings from Sigma, Tamron and other brands. It is the most complete mirrorless system as of now. Just keep in mind that some features are not always compatible with all lenses. For example Focus Stacking and Pro Capture with C-AF only work with M.Zuiko lenses.
Olympus has released important firmware updates for the E-M1 II which include new functionalities and performance tweaks (see our article about firmware 3.0 here).
Of course the E-M1X has two processors instead of one, so the performance remains superior. Other modes that rely heavily on the double processing power, like the hand-held high res shot, are unlikely to be implemented on the older models.
As for the E-M1X itself, I’m expecting some updates in the future, like for example the addition of more subject recognition types for the Continuous AF + Tracking mode.
Conclusion
The large size and high price tag of the E-M1X has inevitably raised some controversy about its rightful place in a system than many users bought into because of the reasonable cost and compact dimensions. But is the flagship camera really a fish out of water?
If we look at the evolution of the micro four thirds system, we can see that both Olympus and Panasonic have extended their reach to experienced photographers by producing larger, higher quality, and more expensive products. Olympus decided to go a step further by offering a design that is well-known by professionals. It is also a design people who use a battery grip on their cameras are well acquainted with. By unifying the body, Olympus has made the E-M1X more robust than ever before, not to mention very comfortable to hold and use.
If we further analyse the system, we can see that a lot of effort has been made to offer to travel and wildlife photographers a true alternative to DSLRs – not just camera bodies but lenses too. If you use the E-M1X with the same long telephoto lenses and PRO zooms you used to mount on the E-M1 II, you realise that the difference in weight is not so big after all.
If we look at the specifications and performance, the E-M1X brings relevant improvements, my favourite being the autofocus system which puts Olympus back on top with the best in class. There are stunning features you won’t find anywhere else such as High Res Shot hand-held and Live ND.
So the E-M1X is unique on the mirrorless market right now thanks to its design, fast performance and unique set of functionalities. I’m sure that some photographers, particularly the type this camera is designed for, are prepared to invest in it.
But of course, not everybody has the same expectations, and if what I wrote above is not enough to convince you, what follows won’t help you change your mind.
The flagship model has received many tweaks but not all of them are game changing. The updated sensor gives you better dynamic range in the shadows (albeit with a marginal loss in the highlights), but the ISO performance and the colour science have received only minor updates. The 5-axis stabilisation system improves a few things for video but don’t bring substantial differences if you already know what the E-M1 II is capable of.
The video aspect is perhaps the area where the upgrades are the least impressive. The quality remains the same, which is not bad but definitely not class leading. Olympus clearly isn’t interested in competing in this market any more than it has to. The new Log400 profile doesn’t add anything special, and filmmakers looking for 10-bit recording or higher frame rates in 4K will be disappointed.
Then we have a long list of things the two camera share including the very fast continuous shooting speeds, buffer capacity and loads of extra features.
In the end, despite all the words and images spent to compare these two cameras, I believe that the choice comes down to your specific needs and only you know what they are. Some will look at the E-M1X and know that it fits what they do; others won’t even bother to look twice because they know the E-M1 II is more than enough for their needs.
Choose the OM-D E-M1X if you:
- want a more solid body
- mainly use large lenses (Pro zooms and telephoto)
- want better autofocus performance
- want to work hand-held as much as possible (including taking long exposures or high res shots)
Choose the OM-D E-M1 II if you:
- want to spend (considerably) less
- want a smaller body
- want a camera that is good enough for a wide variety of genres, not just sports or wildlife
Reminder: the links below are affiliate links. If you decided to buy something after clicking the link, we will receive a small commission.
Check price of the OM-D E-M1X on
Check price of the OM-D E-M1 II on
Second-hand Olympus gear on
Sample images and additional content
If you want to look at more images taken with the two cameras, or download RAW and JPG samples, click on the two galleries below:
If you are interested in the E-M1 II, you can also check out the following articles:
- Panasonic G9 vs E-M1 II – The complete comparison
- Fujifilm X-T2 vs E-M1 II – The complete comparison
- E-M1 vs E-M1 II – The complete comparison


