Updated on: March 5th 2019
The X-T2 (and the X-T1 that came before it) has greatly contributed to increasing the popularity of Fujifilm’s mirrorless cameras. It is one of the best examples of the company’s overriding philosophy: an old-school, compact and functional design that packs excellent performance. The X-T line sat at the top of the range for four years, pleasing both amateurs and professional users with the right mix of specifications and features.
But in an ever-evolving market where brands are putting more and more effort into high-end products, it doesn’t come as a surprise that Fujifilm has decided to re-organise the X-series by introducing an even more advanced camera. The X-H1 inherits the role of flagship model and aims to meet the needs of the most demanding photographers.
But just how much of a difference is there between the larger and more robust X-H1 and the smaller X-T2? We give you all the answers in this comparison!
Ethics statement: We purchased the X-T2 for long-term review and comparison purposes, while the X-H1 was loaned to us for two weeks. We were not asked to write anything about these cameras, nor were we provided any other compensation of any kind. All opinions we express regarding these products are our own. Within the article, there are affiliate links. If you buy something after clicking one of these links, we will receive a small commission. To know more about our ethics, you can visit our full disclosure page. Thank you!
[toc heading_levels=”2″]
Article updates
- March 2019: updated price info and added feedback about how the Enhance Details mode works with X-Trans RAW files in Lightroom Classic CC
- January 2019: firmware 2.0 brings improvements concerning image stabilisation for the X-H1
Main Specs
X-H1
- Sensor: 24.3 MP APS-C X-Trans III CMOS
- Lens system: X-mount
- Weatherproof: Complete (Splash, dust and freeze proof)
- Internal Stabilisation: Yes (5-axis)
- Autofocus: Hybrid with up to 325 points (7×13 and 13×25 grids selectable)
- Continuous shooting: 8 fps and 5 fps, up to 11fps with optional battery grip, 14fps with electronic shutter (AF-S and AF-C)
- ISO Sensitivity: 200 – 12800 ISO (pull 100, push 25600 to 51200)
- Shutter Speeds: 1/8000s to 15min, Bulb up to 60min, 1/32000s with electronic shutter
- Viewfinder: 0.5in OLED with 3.69M dots, approx. 100% FOV coverage, 23mm eyepoint, 0.75x magnification and 100fps refresh rate
- Rear monitor: 3-ways articulated 3″ LCD (1.04M dots)
- Movie recording: 4K up to 30fps and 200Mbps, Cinema 4K at 24fps, Full HD up to 120fps
- Built-in Flash: No but EF-X8 unit is included
- Extra Features: WiFi, Bluetooth, Panorama, Timelapse, Bracketing, Multiple exposure, Advanced filters, Silent mode, Tethering
- Dimensions: 139.8 x 97.3 x 85.5mm
- Weight: 673g (including battery and memory card)
- Firmware version: 2.00
X-T2
- Sensor: 24.3 MP APS-C X-Trans III CMOS
- Lens system: X-mount
- Weatherproof: Complete (Splash dust and freeze proof)
- Internal Stabilisation: None
- Autofocus: Hybrid with up to 325 points (7×13 and 13×25 grids selectable)
- Continuous shooting: 8 fps and 5 fps, up to 11fps with optional battery grip, 14fps with electronic shutter (AF-S and AF-C)
- ISO Sensitivity: 200 – 12800 ISO (pull 100, push 25600 to 51200)
- Shutter Speeds: 1/8000s to 15min, Bulb up to 60min, 1/32000s with electronic shutter
- Viewfinder: 0.5in OLED with 2,360k dots, approx. 100% FOV coverage, 23mm eyepoint, 0.77x magnification and 100fps refresh rate
- Rear monitor: 3-ways articulated 3″ LCD (1.04M dots)
- Movie recording: 4K up to 30fps, Full HD up to 60fps
- Built-in Flash: No but EF-X8 unit is included
- Extra Features: WiFi, Panorama, Timelapse, Bracketing, Multiple exposure, Advanced filters, Silent mode, Tethering
- Dimensions: 132.5 x 91.8 x 49.2mm
- Weight: 507g (including battery and memory card)
- Firmware version: 4.10
Design, build quality and interface
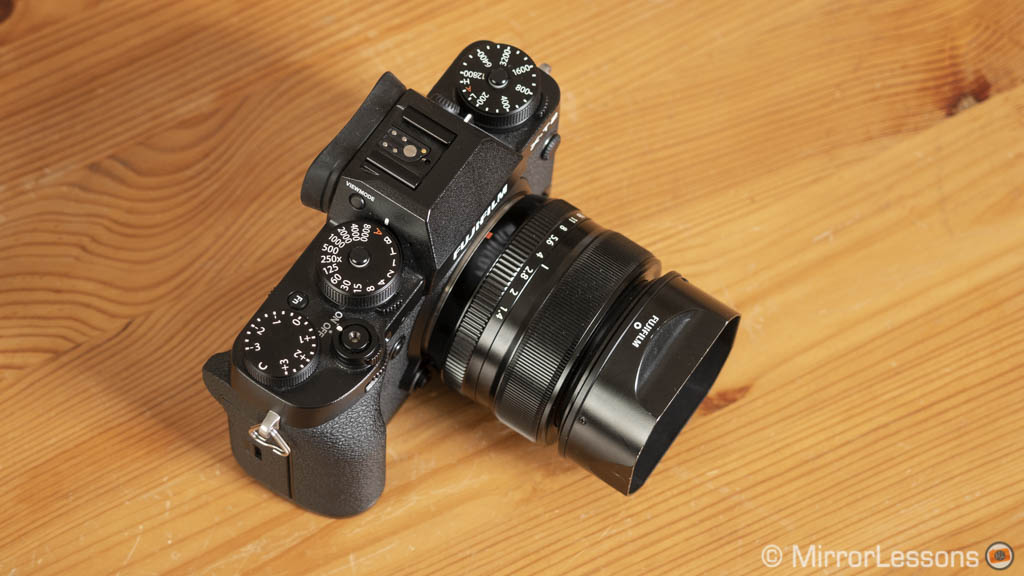
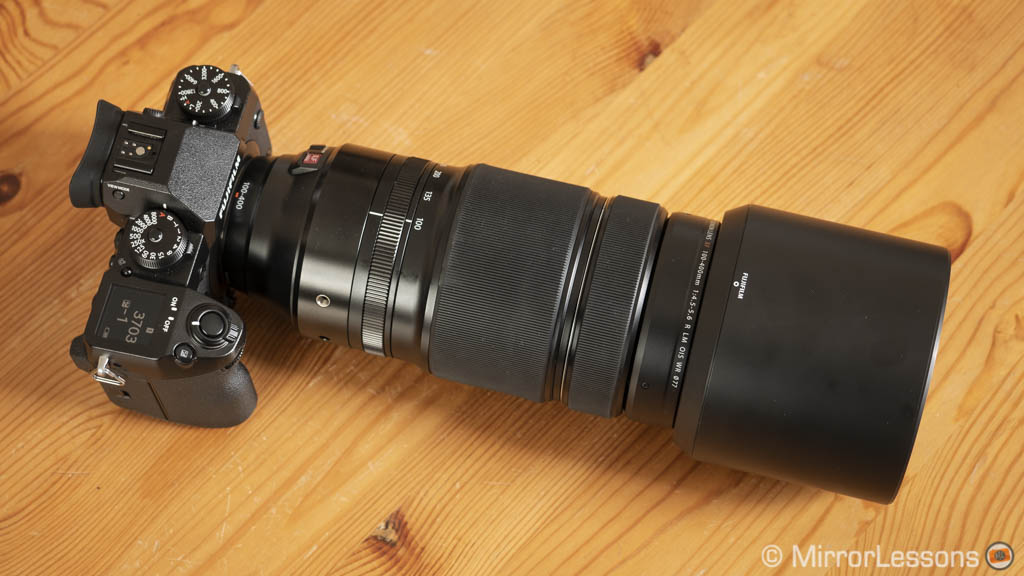
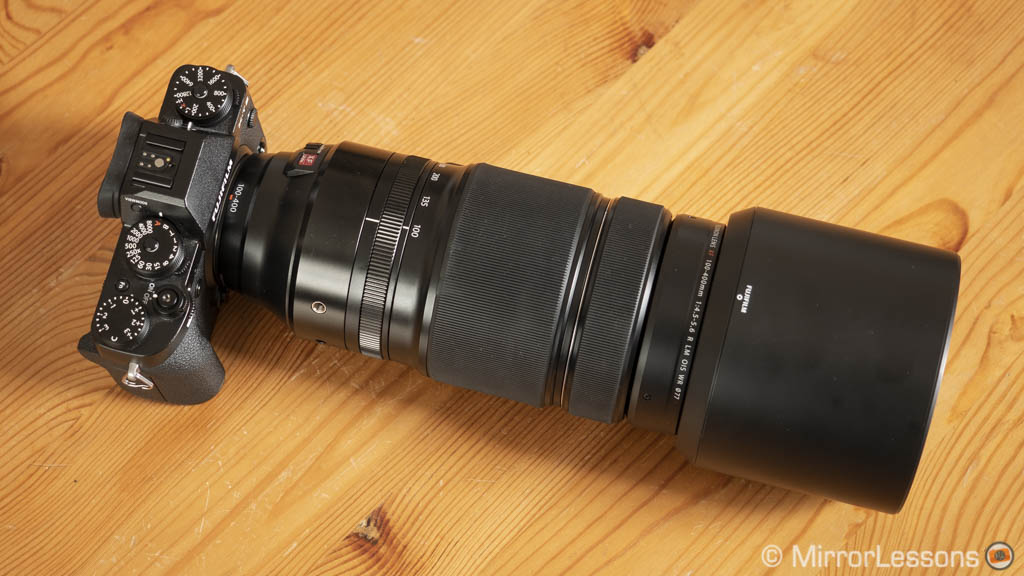
As you can see from the pictures, the X-H1 is larger. It is 7mm wider, 6mm taller and almost 4cm deeper thanks to the larger front grip. It is also 166g heavier which may not seem like a lot but it is enough to perceive a difference.
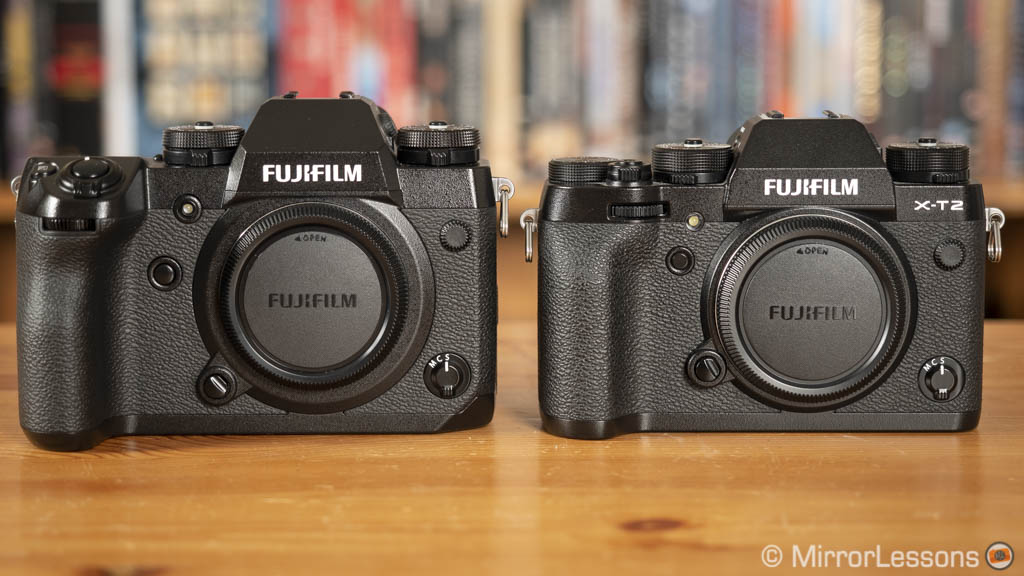
Both cameras are completely weather-sealed including freeze-proofing down to -10°C. They have a magnesium alloy chassis but the X-H1’s is said to be 25% thicker than that of the X-T2. It is harder and more resistant to scratches. The strength of the lens mount has been increased too.
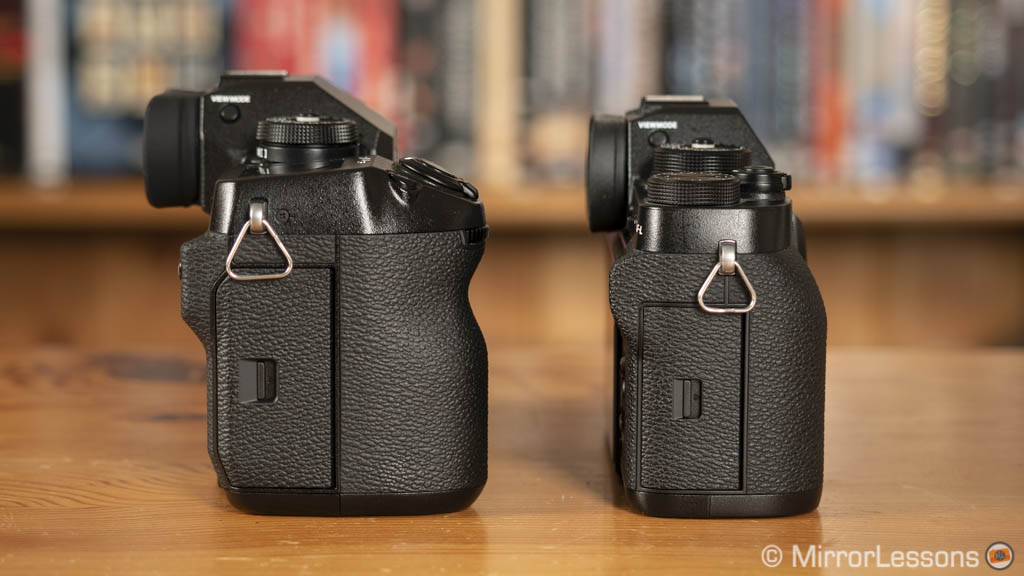
The front grip of the X-H1 is comfortable and gives you an advantage when using large and heavy lenses. Your grip on the camera feels better and more sturdy. There is a little bit more space for your fingers on the front and thumb on the rear.

That being said, I only felt a relevant difference when using the XF 100-400mm. All the other Fuji lenses are small enough to be comfortable on the X-T2 as well, including the XF 50-140mm f/2.8. You can enhance comfort on the smaller camera by adding a thumb or horizontal grip so all things considered, I still prefer the smaller form factor of the X-T2.
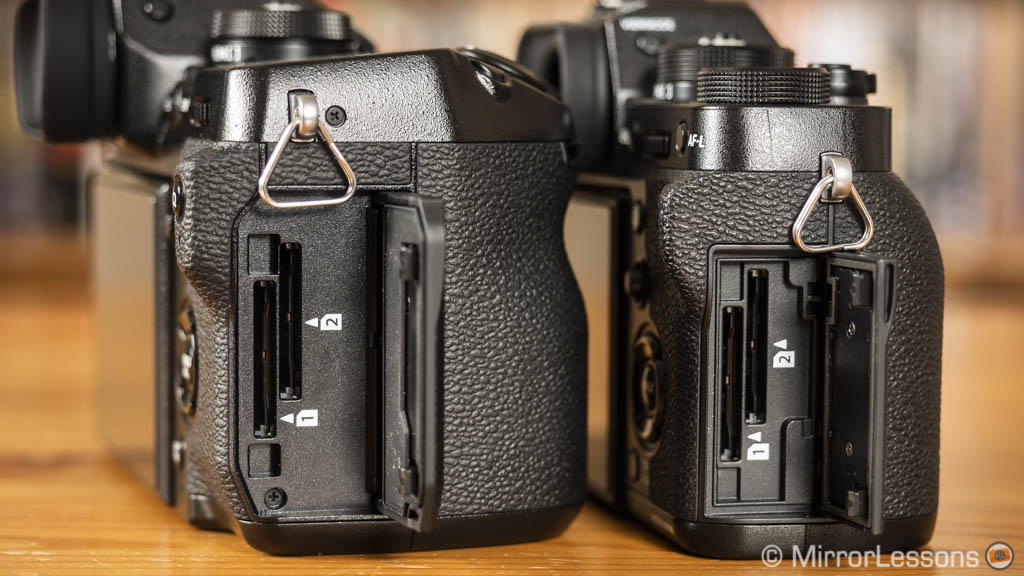
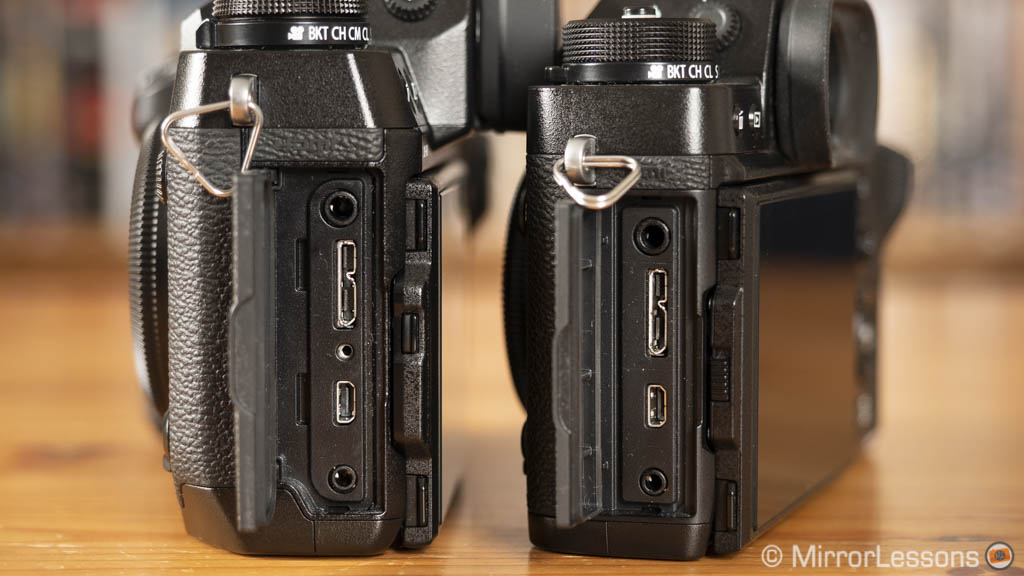
Both cameras come with two SD card slots (UHS-II compatible) and a robust cover that has an unlock button. There are a number of options to manage the two cards: you can record in sequential or back-up mode for example, as well as separate JPGs, RAW and Video files and choose or create a destination folder. Note that the sequential option (when the camera automatically switches to the second card when the first is full) is only valid for stills on the X-T2, whereas the X-H1 can use it for video as well.
Finally, you’ll find the same physical connections on the side: one full-sized USB 3.0 port, a Micro HDMi output, a 3.5mm microphone input, a 2.5mm remote input and a flash sync socket.
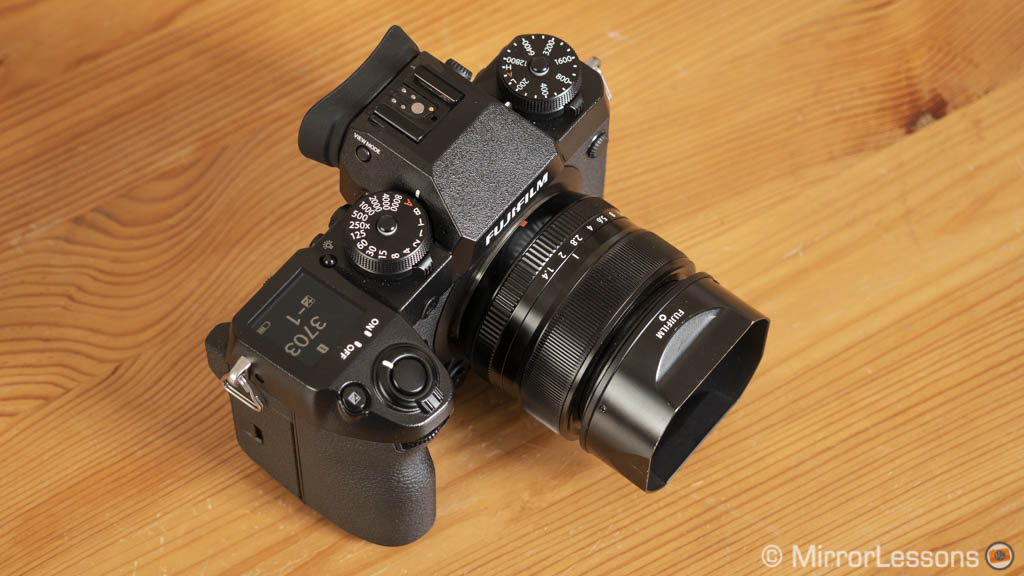
External controls and customisation
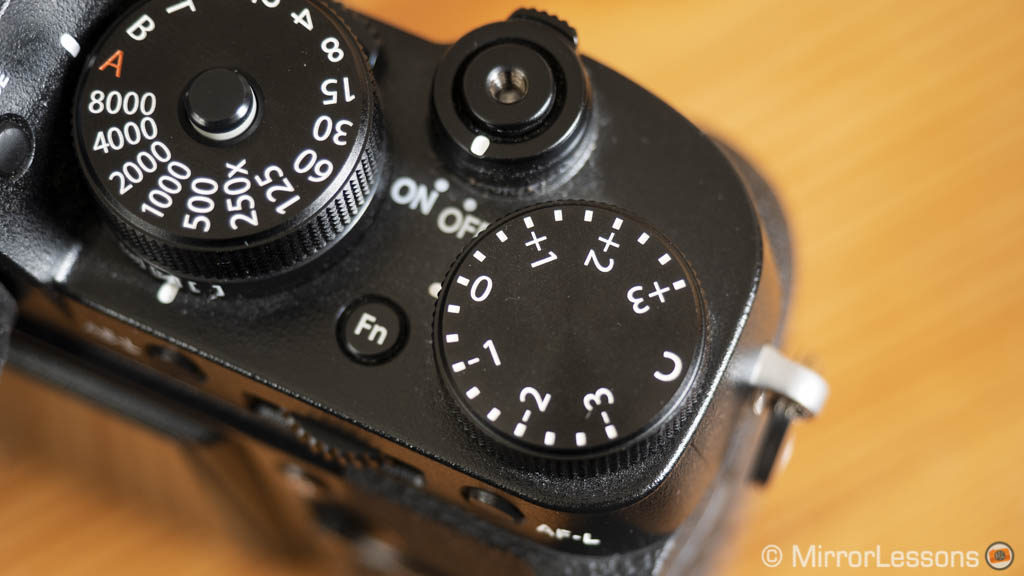
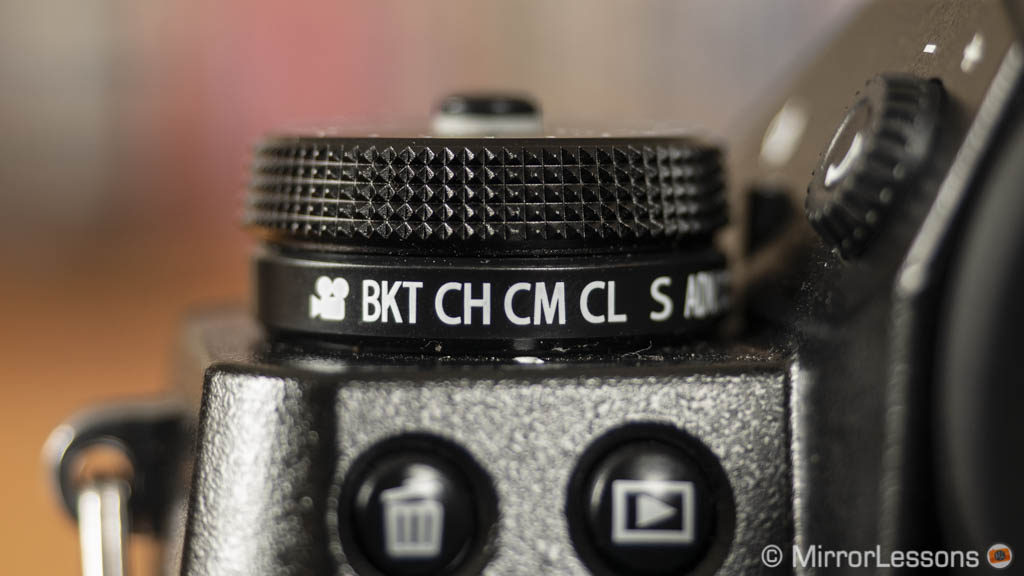
Both cameras feel very familiar when it comes to physical controls: there are dials for exposure (ISO and shutter speed) and sub-dials to select the metering or drive mode.

One dial you won’t find on the X-H1 is the exposure compensation dial. It has been ditched to make room for the top LCD screen (more on this in the next chapter). Instead there is a dedicated button that you press, hold and use in conjunction with the rear command dial.
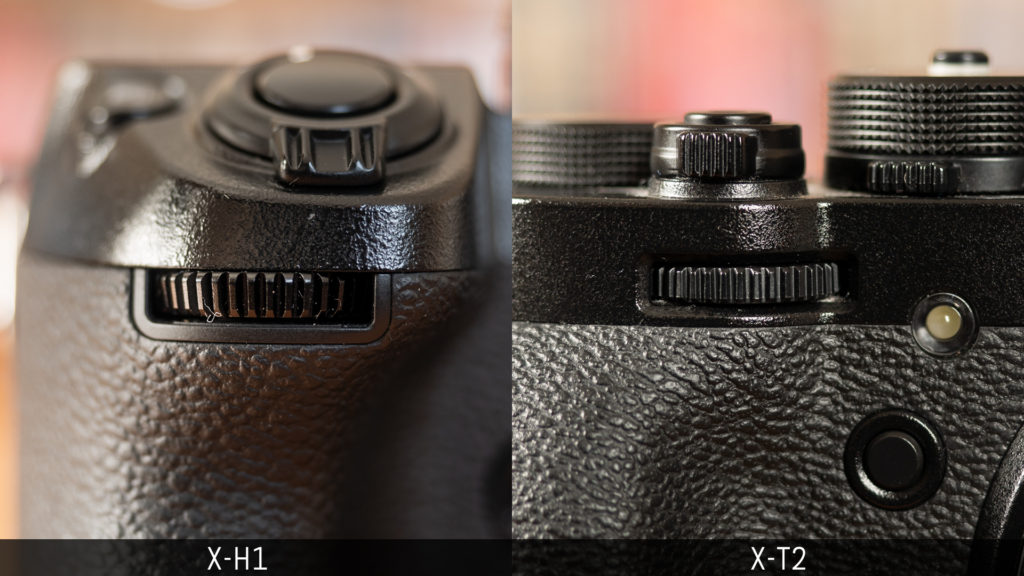
In addition to rotation, the two command dials (front and rear) can trigger different settings when pressed. They have a slightly different texture: the one on the X-T2 moves more freely, especially the one on the rear, whereas the two on the X-H1 are more sturdy.
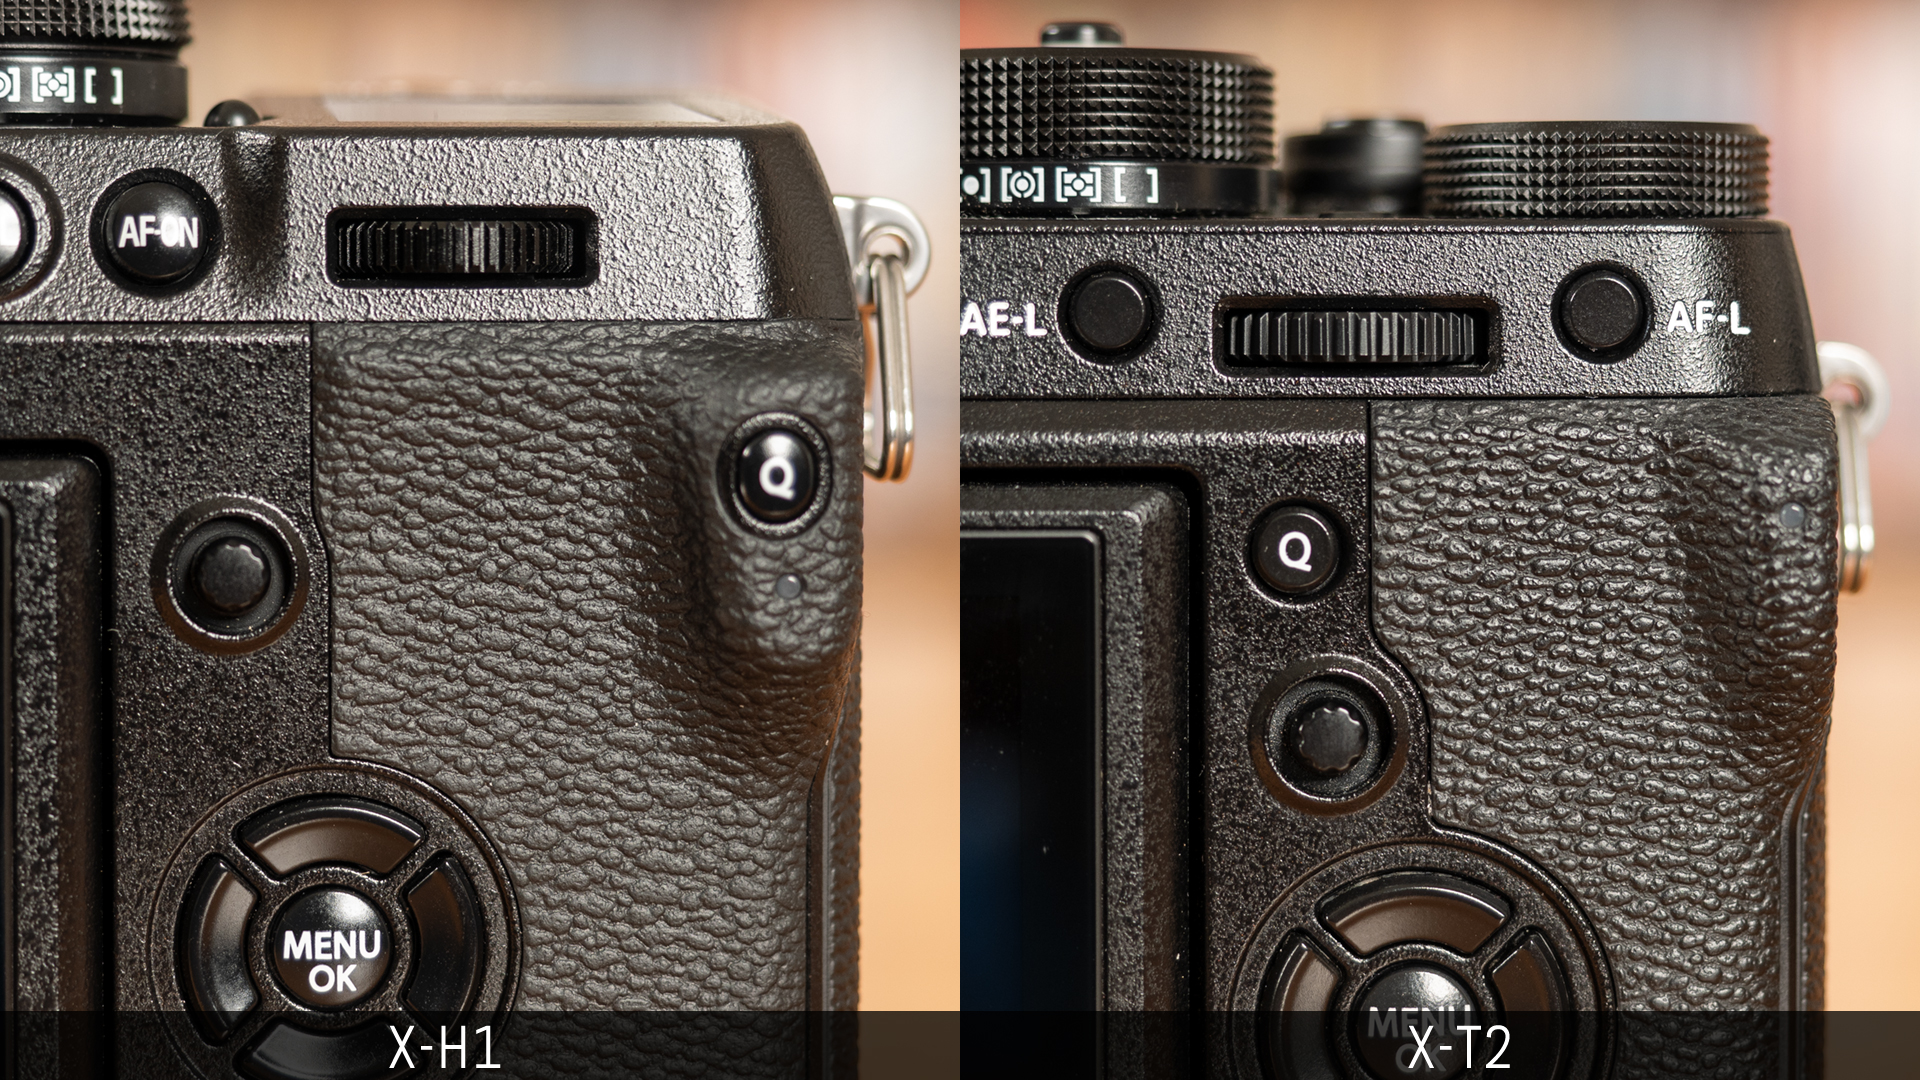
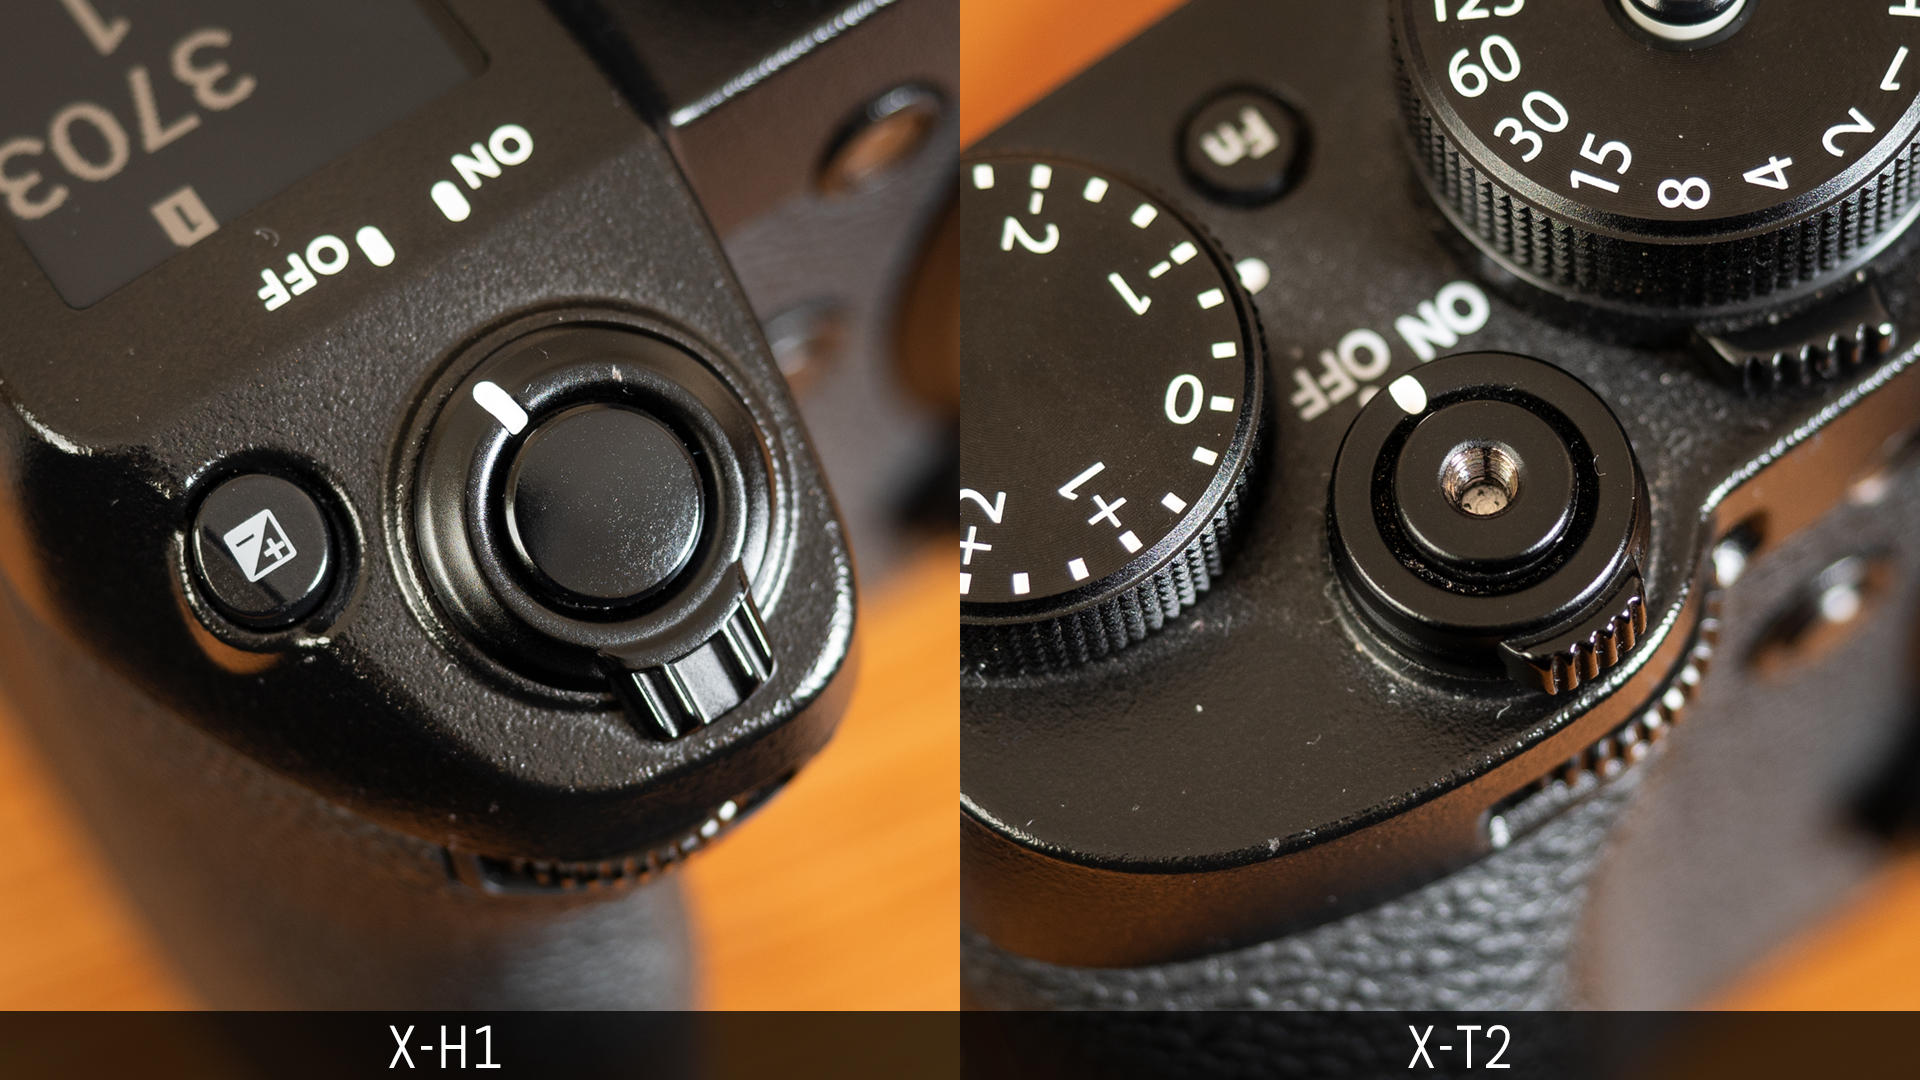
One aspect I appreciate about the X-H1 is the larger buttons since they are easier to press than on the X-T2. The shutter release button is softer and more sensitive on the flagship camera thanks to the leaf-spring mechanism, a characteristic you often find on high-end models designed for sports. The X-T2 has a thread shutter button that can accommodate a soft button which improves the tactile feeling.

There is the same focus mode lever on front and an AF Joystick on the rear. The latter is precise to use and can also serve to navigate the menu. Alternatively, it can be turned off.
On the rear the button layout it almost identical. The 4-Way pad is the same and we can notice that the AF-L button becomes an AF-ON button on the X-H1 and has moved next to the AE-L button.

You’ll find 9 customisable function buttons on both cameras, but the X-H1 has in addition four touch functions that can be used on the LCD screen by swiping in different directions. The flagship model has a slightly longer list of functionalities you can assign to each custom button (45 vs 37 on the X-T2). You can lock certain functions or all functions on both models.
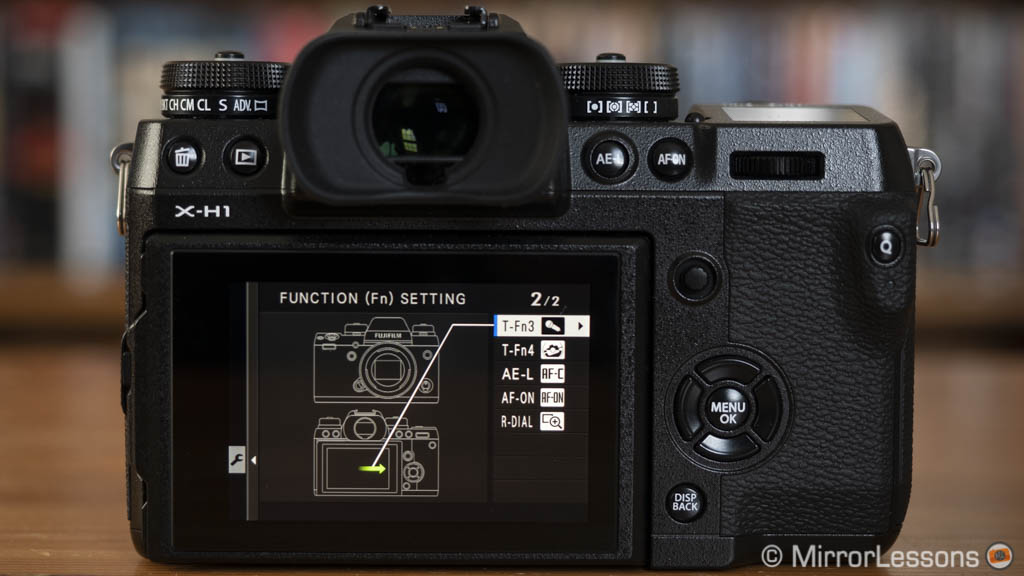
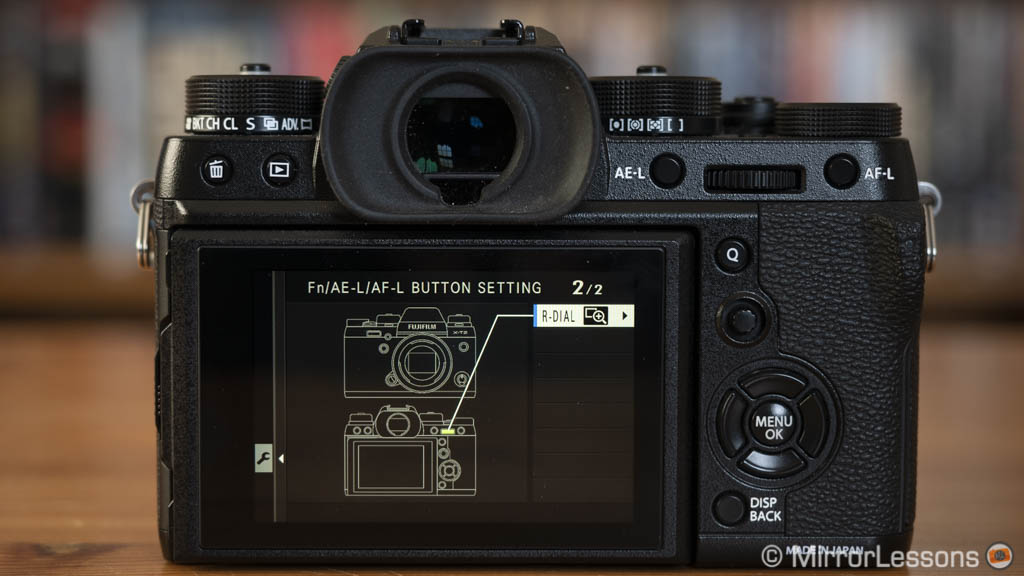
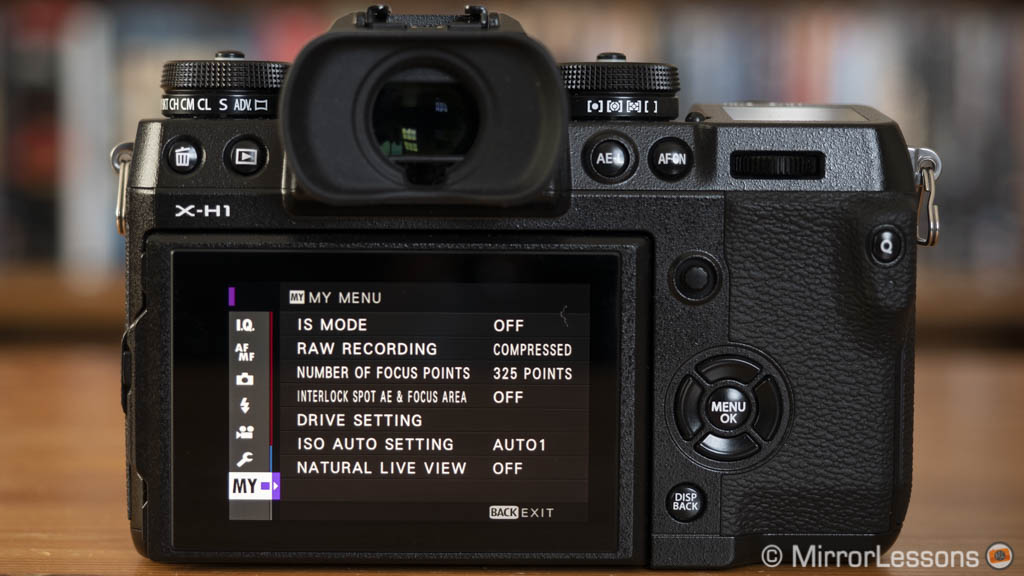
The two cameras share the same menu system which includes the My Menu page where you can shortcut your most used settings. There is also the Q menu with 16 customisable slots (28 options on the X-H1, 24 options on the X-T2). Additionally, the Custom Settings allow you to save up to seven presets concerning image quality (full simulation mode, sharpness, etc.) which affect the SOOC JPGs.
If you don’t fancy the dedicated ISO dial, you can bypass it and use the front command dial instead. On the X-H1, you can do the same for the aperture ring of select Fujinon lenses.
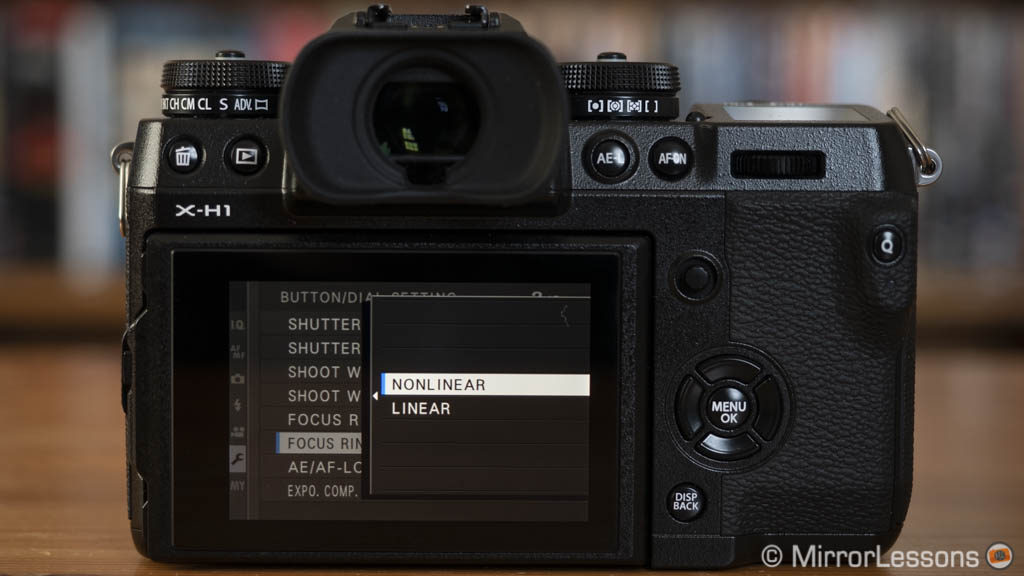
Another interesting setting added to the X-H1 is the possibility to adjust the response of the focus ring. Non Linear means that focus is adjusted at the same speed as the ring during rotation whereas with Linear, focus changes according to the amount of rotation but focusing speed is not affected by how quick you move the ring.
Finally, the flagship model loses the S.S. Operation option that allows you to disable the 1/3 steps adjustments with the command dials.
Viewfinder and monitors
The electronic viewfinder of the X-H1 has more resolution than the X-T2 (3.69M vs 2.36M dots) but to be honest, I didn’t see as much of a benefit as I was expecting. I’ve been able to appreciate the difference of other EVFs with a similar resolution (A7R III, G9) more easily. Now I’ve always thought that the viewfinder of the X-T2 was a really good one but I was surprised to see how well it compares to the more evolved EVF of the X-H1.
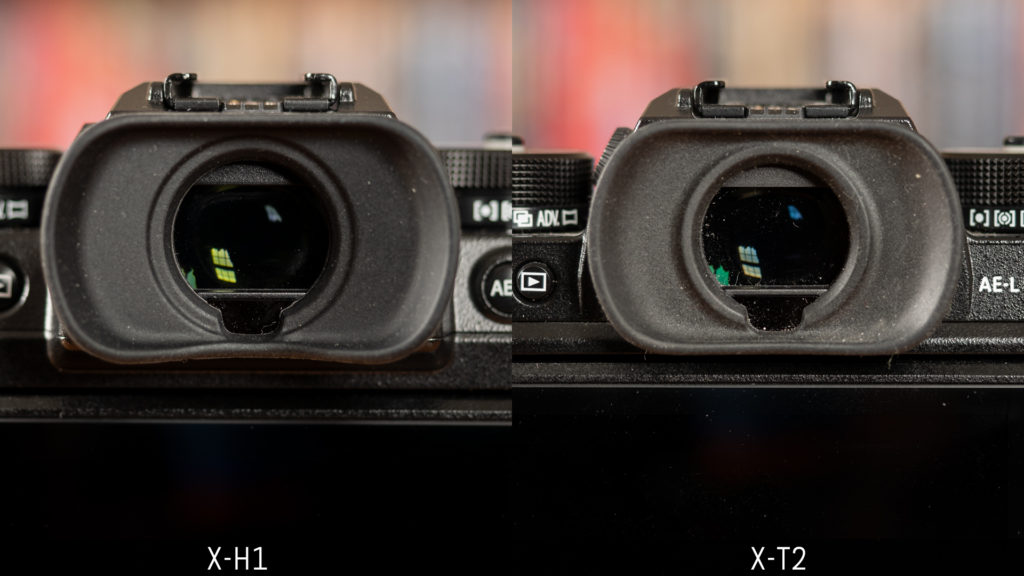
The size of the OLED panel remains the same (0.5 inch) and so does the eyepoint of 23mm and the fast refresh rate of 100fps in Boost mode. The X-T2 offers slightly more magnification (0.77x vs 0.75x) whereas the eye relief is larger on the X-H1. Note that the live view frame rate decreases if the cameras are not operated for a few seconds when the Boost mode is not selected.
The rear LCD monitor features the same 3-way tilting mechanism introduced on the X-T2, but the added benefit on the X-H1 is touch sensitivity.

The grey icon in the top right corner of the screen allows you to switch between different modes. You can take a shot, focus and move the AF point, even when composing with the EVF which becomes an alternative to the AF joystick. Personally though, I prefer using a physical control to move the AF point. The touch screen also allows you to change settings in the Quick Menu or swipe through your images in playback mode.
You can trigger up to four settings by swiping left, right, up or down. It’s an interesting option and I’ve warmed up to it since my first experience with the X-E3 which shares the same touch functionalities. However you may activate one by mistake from time to time if you’re not careful. I also wish that touch sensitivity could be more reactive at times.
Each camera has several parameters to adjust the screens. For example you can disable the effects of the picture profile, white balance and other image settings to have a more natural rendering (Natural Live View on the X-H1, Preview Pic. Effect on the X-T2). However I noticed that doing so on the X-H1 increases noise in low light conditions.
You can adjust brightness and saturation, but the X-H1 has an additional colour adjustment (red/blue) setting. The rear monitor is brighter at values between 0 and -5 and has less green dominance in comparison to the X-T2.
Finally, we have the small monochrome LCD on top on the X-H1 which is certainly a nice plus when it comes to user experience. It displays a variety of settings that you can customise, as well as letting you choose a bright or dark background with the backlit button. It can show different settings for stills and video too.
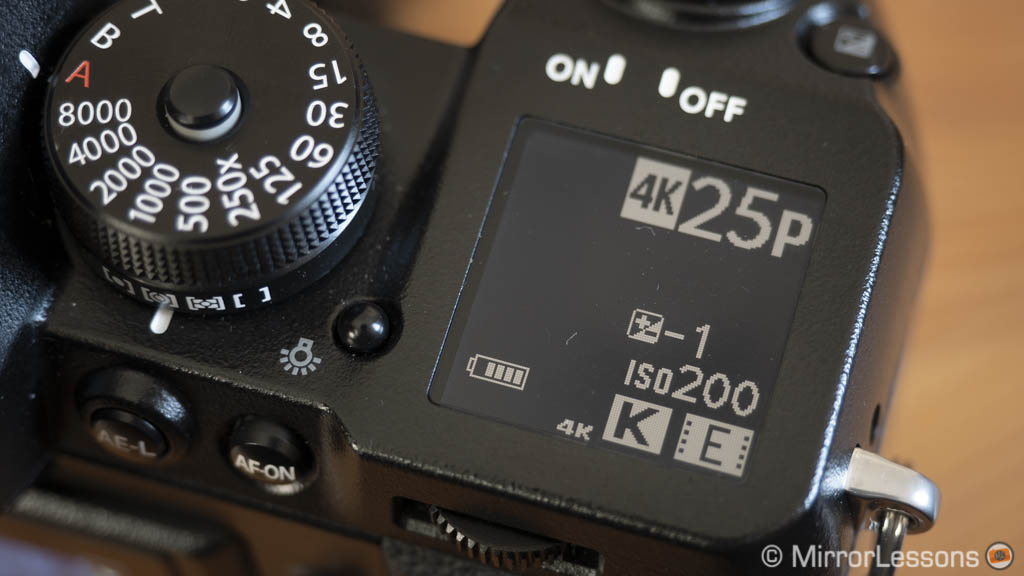

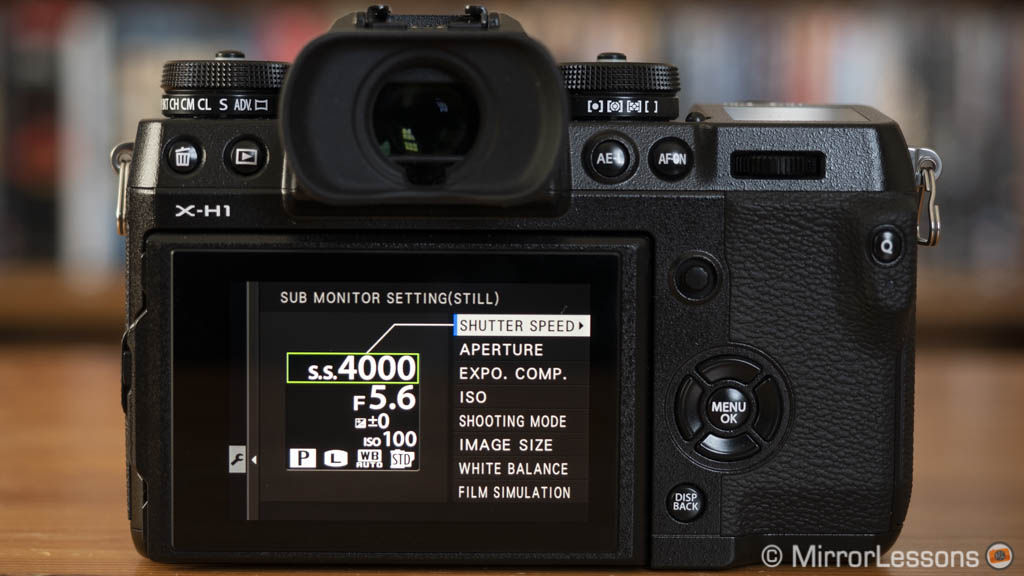
Image quality
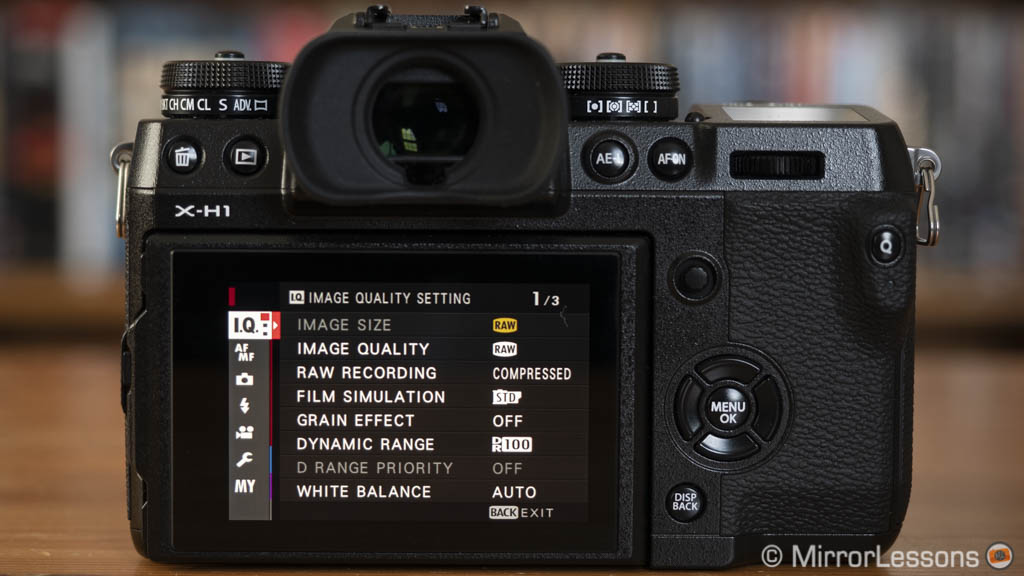
I am not going to spend more time than necessary on this chapter because there isn’t a lot to compare. The X-H1 and X-T2 have the same sensor, the 24MP X-Trans III CMOS we’ve seen inside other Fujifilm cameras. So unsurprisingly, the image quality output is the same.
You get excellent dynamic range and the 14-bit RAW file offers good versatility in post production when it comes to shadow and highlight recovery. RAW files can be set to lossless compressed or uncompressed. The main advantage is a reduced file size with the lossless option.


The sensor lacks a low pass filter but if you pixel peep, you’ll notice that sharpness varies depending on the software used: programs such as Iridient Developer or Capture One have proved more capable of rendering fine details better than Lightroom.


The 8.2 version of Lightroom Classic has a new function named Enhance Details. It uses machine learning algorithm to improve sharpness and reduce artefacts in the RAW files. As you can see below, the “watercolour” effect is no more when using this setting. The downside is that it is uses a lot of GPU power to process the image so it can take a few minutes depending on how powerful your computer is. The result is outputted in a separate DNG file.

The low light performance remains the same up to 12800 ISO, which is the last usable value and marks the end of the native sensitivity of the sensor. Colour noise is contained in the X-Trans files so you have room for adjustment.


From 25600, the cameras use the extended value which means the exposure is boosted by the image processor. Here Fujifilm has made a few minor tweaks to the X-H1. Noise at 25600 is slightly more contained than on the X-T2.

At the last value of 51200, noise is very invasive and makes the image almost unusable. One difference is that the X-T2 keeps that level underexposed by one stop for the RAW, file whereas the X-H1 maintains the correct brightness.

Concerning the SOOC JPGs, I haven’t found a visible difference when testing the various noise reduction settings. Between -4 and -2 the file maintans a good level of sharpness and noise isn’t too invasive, especially at -2. From 0 onward, the image appears softer.
The straight out of camera JPGs have various settings to customise the look of the image, starting with the Film Simulations (a.k.a. colour profiles). You can choose between 9 different modes including two monochrome variants, each with four different filters.


The X-H1 has an extra profile called Eterna that has been designed for video. It is not too dissimilar from the Pro Neg Std profile but has less saturation and contrast.

Other settings include highlights, shadows, sharpness and saturation. Then we have the DR setting.
There are two options: DR200% works from ISO 400 to ISO 12800, whereas DR400% starts from ISO 800. When selected, the camera underexposes by 1 or 2 stops to protect the bright zones, boosts the shadows to compensate and creates an image with more dynamic range.
If you look at the three images below, you can see how it affects the result. The first image is exposed at ISO 200, while the second is at ISO 800 with 2 stops of compensation (faster shutter speed) and DR 400. The scene outside the window remains perfectly exposed in the second shot. The third example shows you how this setting can give you more versatility: I compensate the exposure by one stop instead of two to have more light in the shadows, but the window still retains more information than the first image.

-2 Highlights, -2 Shadows

DR400, -2H, -2S

DR400, -2H, -2S
The X-H1 has an additional setting called D-Range which is very similar to the DR setting but is presented in a different way. You can choose between Auto, Weak (ISO 400 onward) and Strong (ISO 800 onward). The difference is that with D-Range, you can’t adjust shadows and highlights manually.


The auto white balance works well on both cameras in natural light. With artificial light they can warm up the image more than necessary. In other cases skin tones can appear a little bit too red, which something I’ve noticed with the X-H1 especially.
In Manual White Balance mode, there can be an annoying green dominance that is more or less severe depending on the light source. In this case it is important to fine-tune the result with the complementary WB Shift setting.


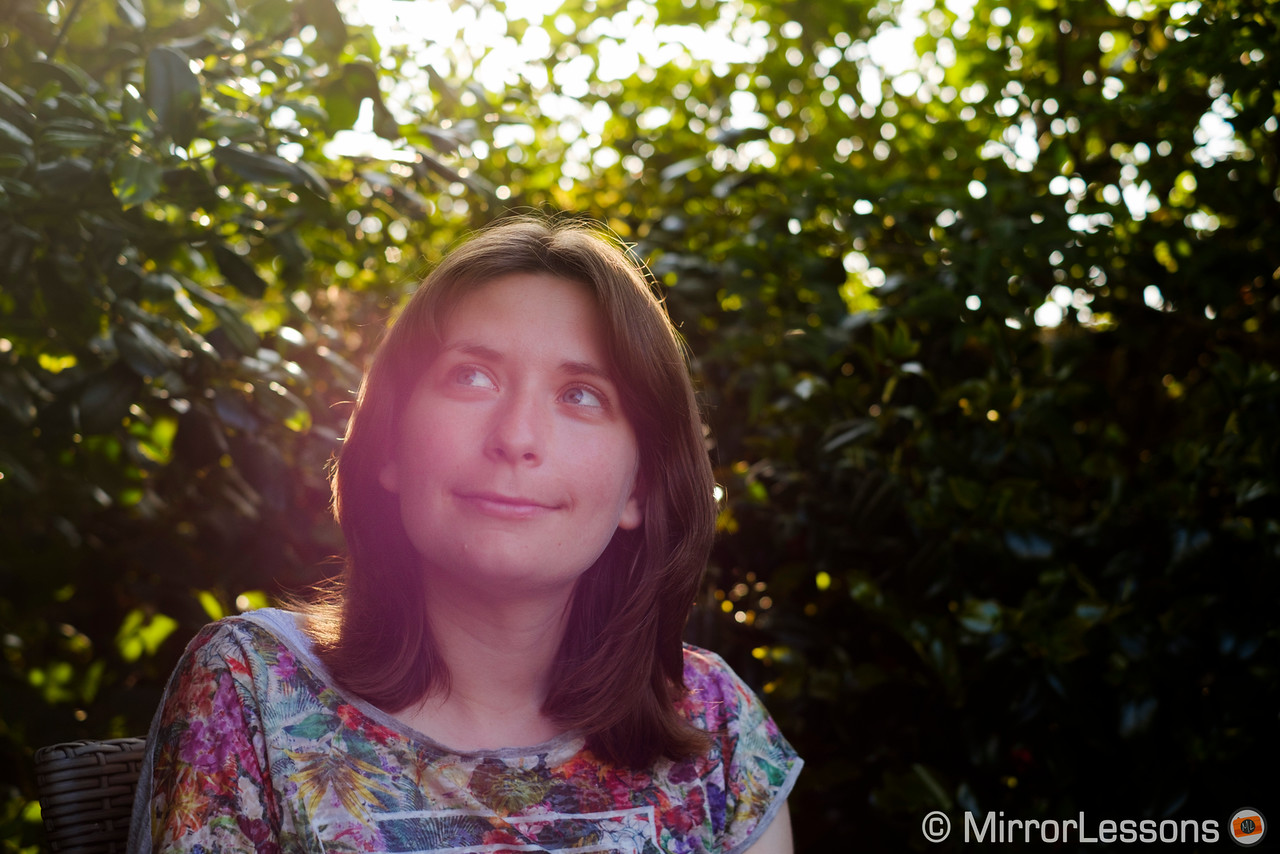
The rendering for portraits can be quite good if you choose the right profiles: Provia, Astia or Pro Neg Hi give you the right amount of smoothness on the skin and a lovely colour rendering, whereas Velvia for example has too much saturation and contrast.
Please note that most of the settings described above are valid for the SOOC JPGs. When working with the RAW files, you obviously have more versatility with colours and white balance. Some software such as Adobe Lightroom also give you the option of applying the same film simulation mode you find in camera.
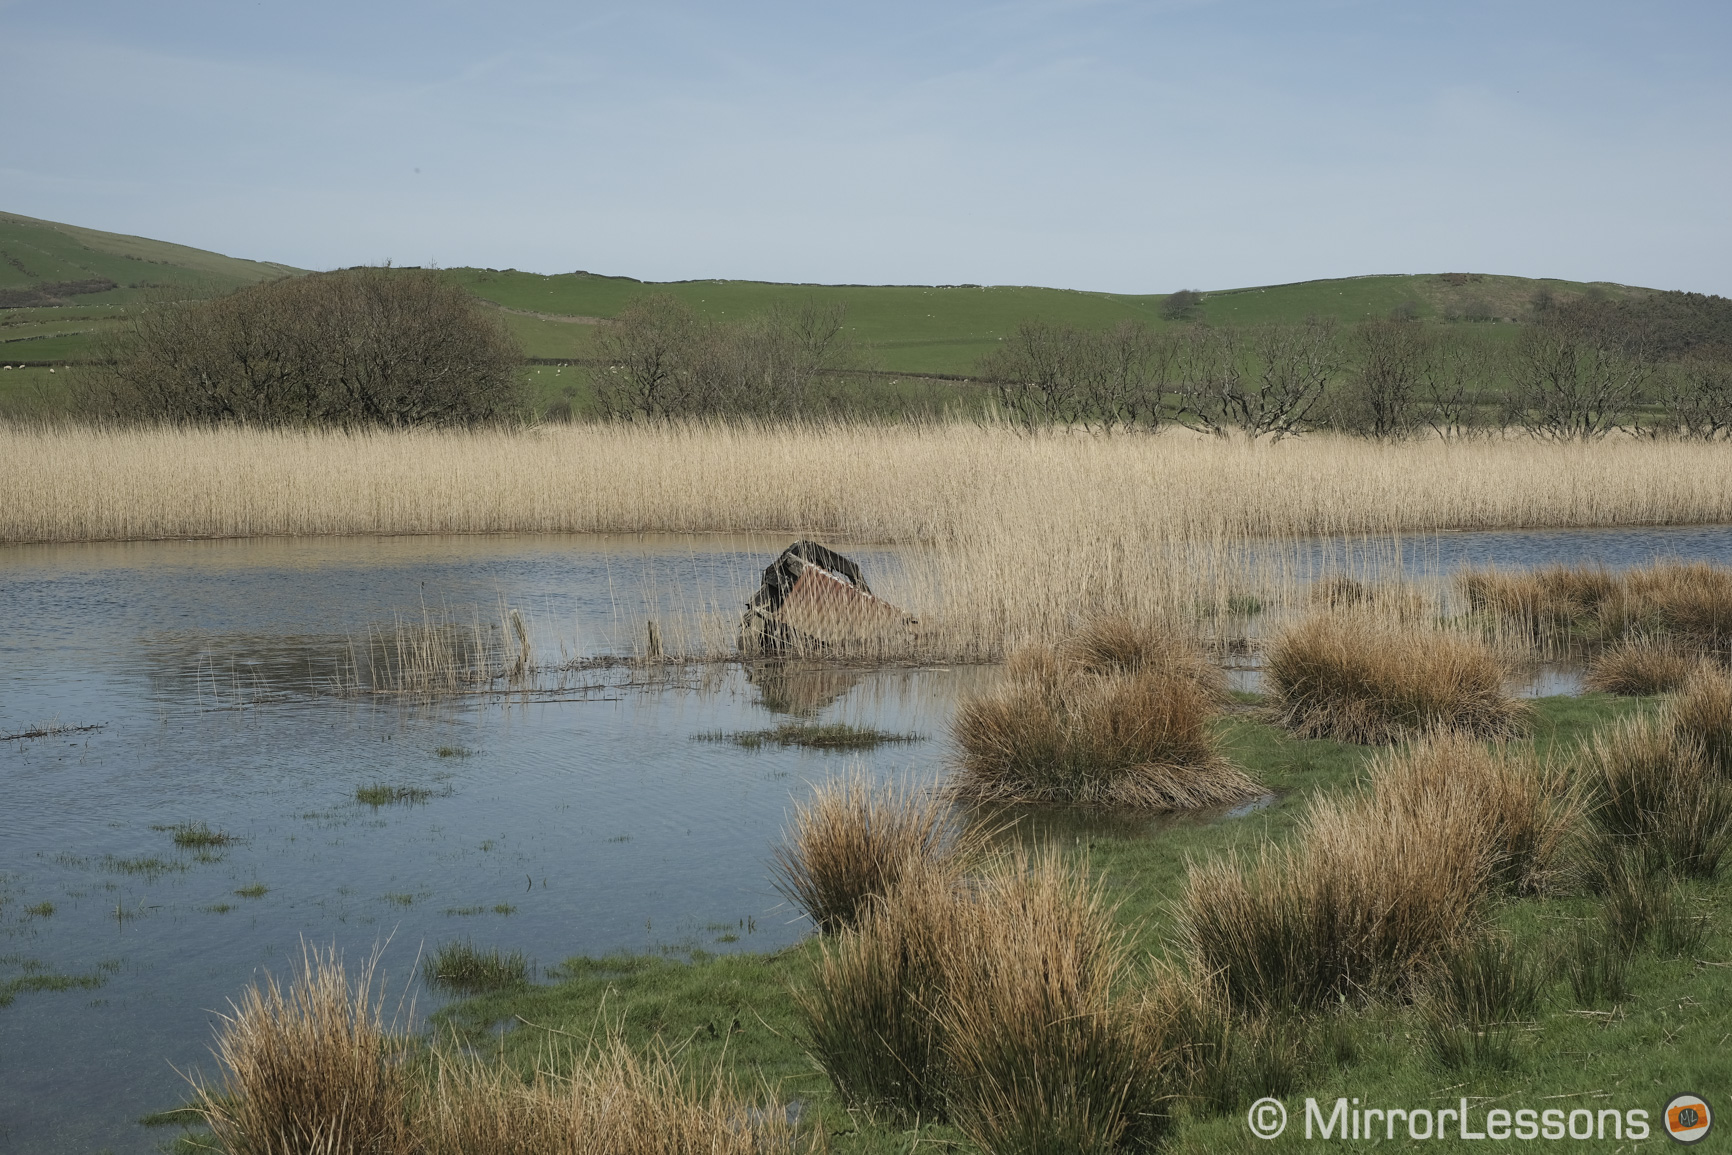
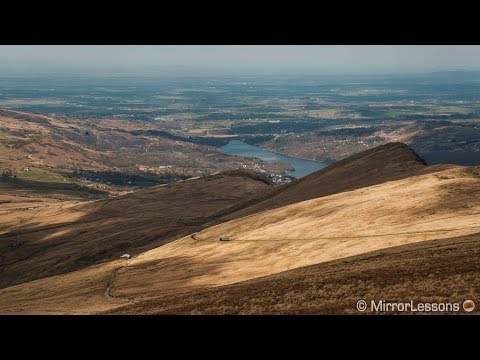
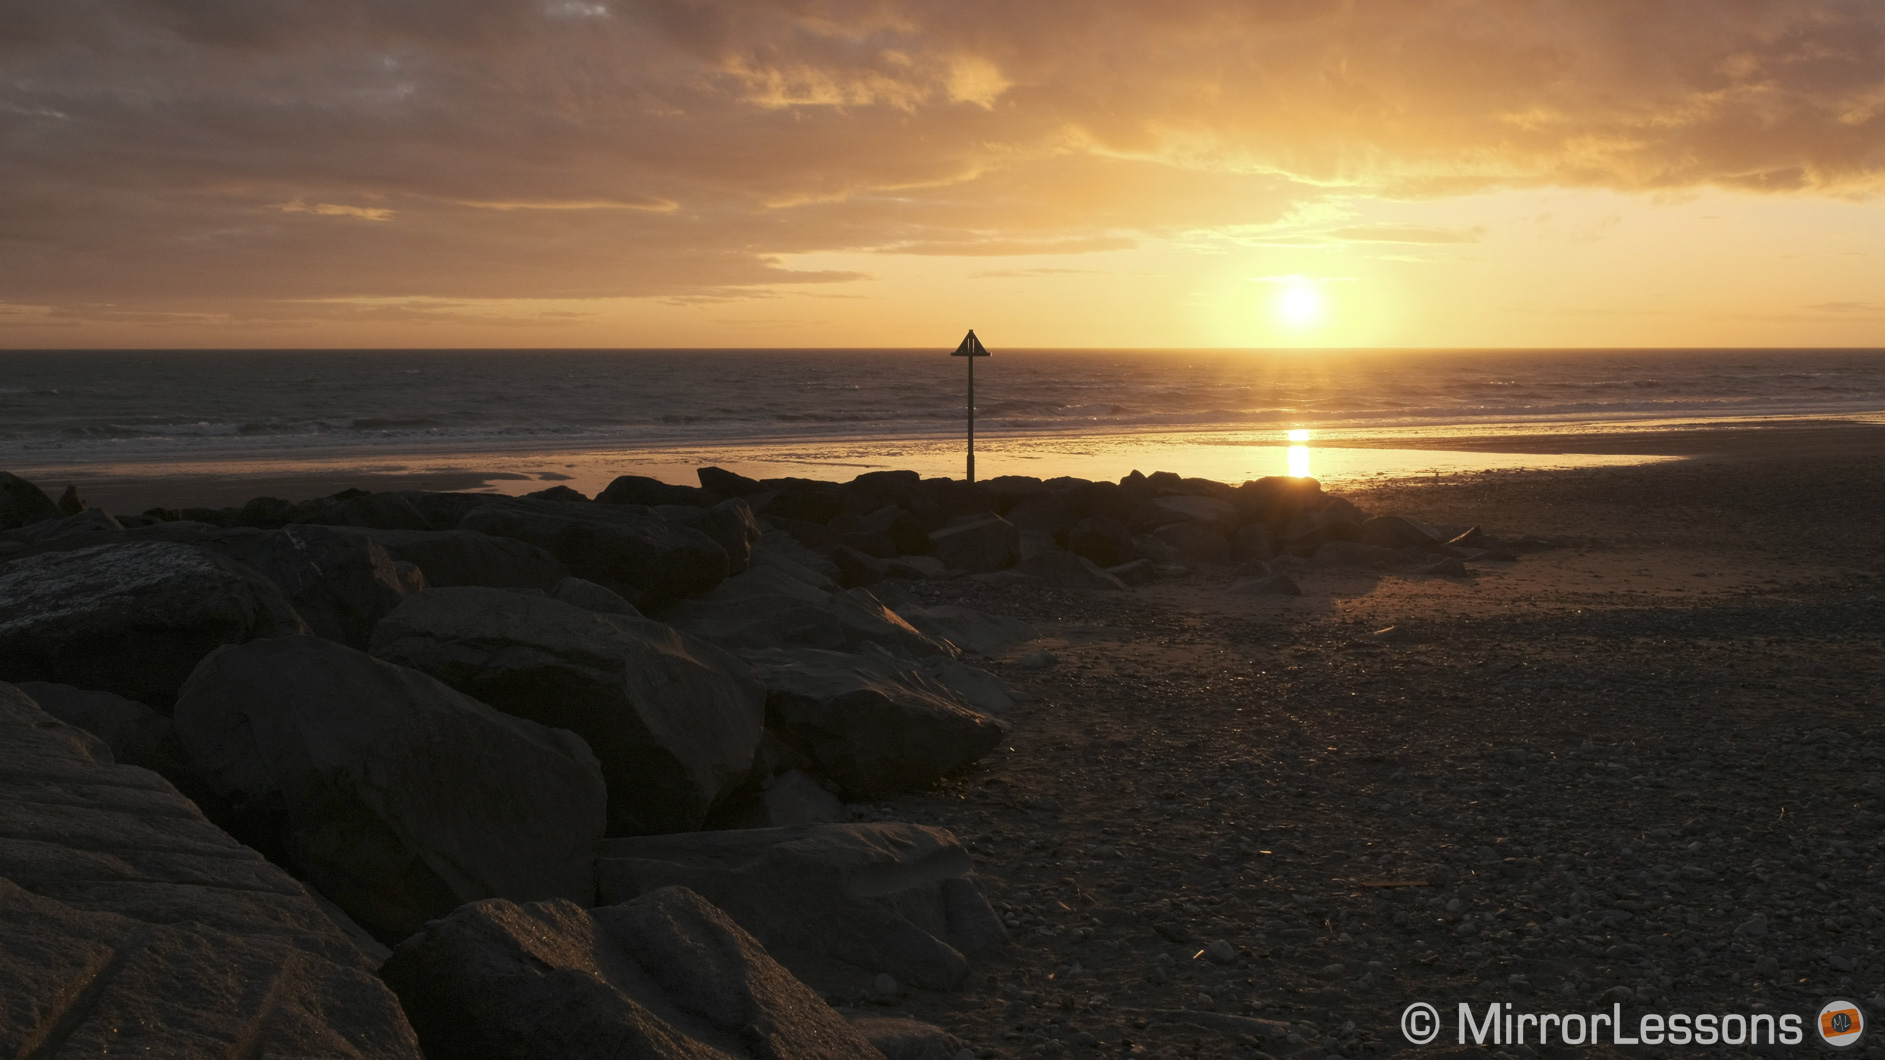
If you have read other articles about the X-T2, you may recall that we mentioned sensor flare quite a lot. Our X-T2 is part of the first batch that hit stores soon after the official release, and suffers from strong purple flare in certain backlit conditions. I first spotted this on the X-Pro2 which was released earlier than the X-T2.

Later cameras such as the X-T20 show a visible improvement and I’m happy to say that the X-H1 doesn’t suffer from this either. You may still find some traces of it but it’s much more contained. I also believe that more recent iterations of the X-T2 and X-Pro2 have been fixed as well. And as the example shows, it is often a matter of adjusting the composition ever so slightly to get rid of the flare.
Single and continuous autofocus
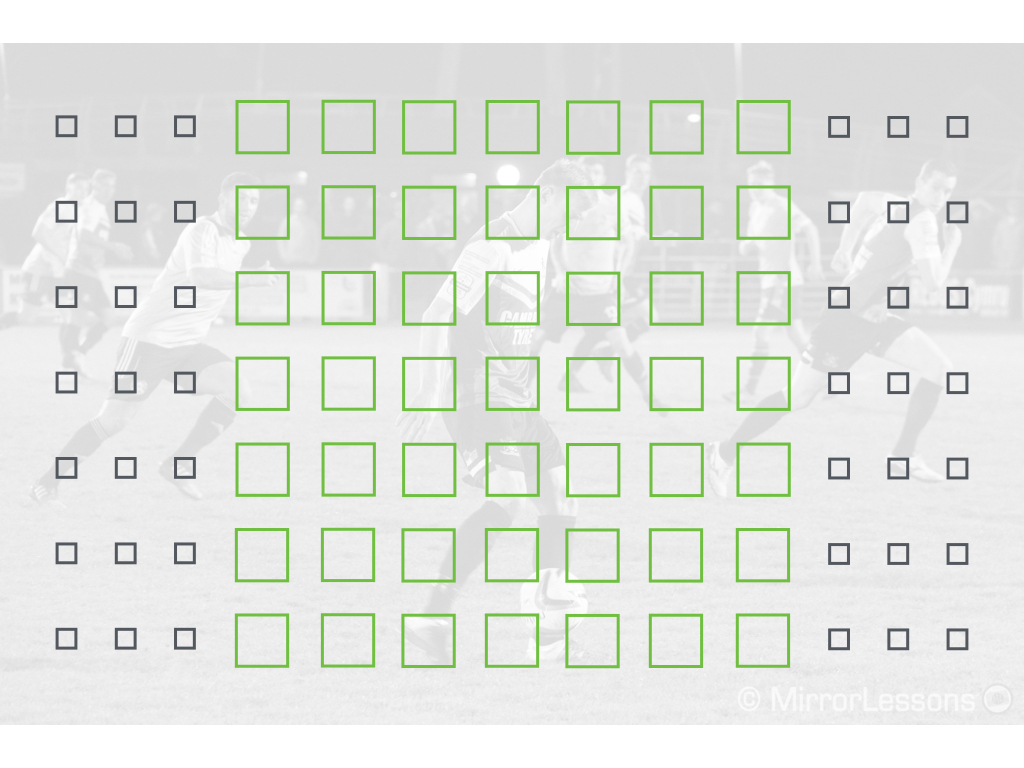
The two cameras share the same autofocus characteristics: an hybrid system with 91 points that can be subdivided into a 13×25 grid (325 points). Phase detection points are present in the central area of the sensor, something to keep in mind if your subject is on the left or right side of the image.

There are different area modes available:
- Single uses one area and can be configured in six different sizes. The X-H1 uses phase detection on all six, whereas the X-T2 uses contrast detection on the smaller area.
- Zone AF is available in a 3×3, 5×5 or 7×7 grid. It is my favourite setting for sports (3×3 or 5×5) and birds in flight (5×5 or 7×7).
- Wide/Tracking allows you to lock onto a subject and track it across the whole frame. I rarely use it but it can be interesting at times, for example when you start tracking a subject and re-compose without the need to move the AF area.
Note that with certain setting combination such as continuous AF and high burst (CH), the 325 grid is not available.
Fujifilm gave the X-H1 an updated autofocus algorithm capable of tracking difficult subjects such as animals faster and more accurately (according to Fujifilm the camera detects fine textures better). They also increased the minimum sensitivity of phase detection points to -1Ev and f/11, which allows you to use the XF 100-400mm with the TC 2.x teleconverter with faster results. Firmware 4.10 added the same improvements to the X-T2.
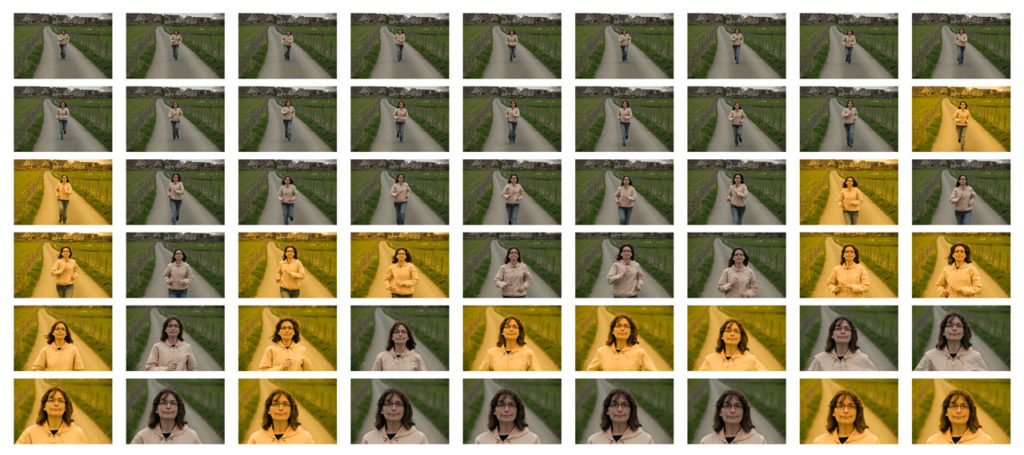
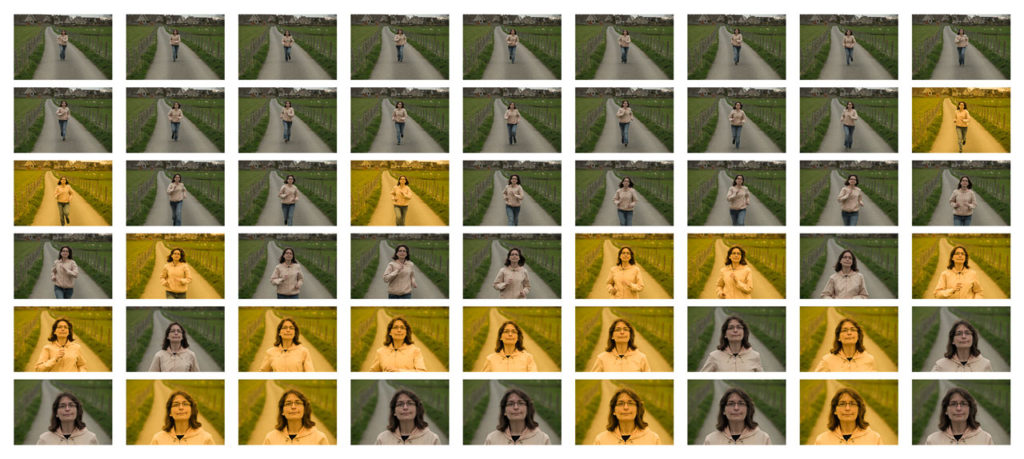
When I compared the two cameras, the latest X-T2 firmware wasn’t available yet so the X-H1 should have had an advantage. However when I tested both cameras in very similar conditions, I didn’t witness any relevant differences in speed, accuracy or my keeper rate. My basic running test below brought me to the same conclusion (yellow thumbnails are the slightly soft images).
In single AF, the performance is flawless most of the time. Occasionally you may be surprised to see the AF lock fail with the Single point in scenes that don’t present any particular challenge. Also bear in mind that speed can vary depending on the lens used. Older XF lenses have a slower non-linear motor so the performance decreases a little. In low light the autofocus remains reliable even in very challenging conditions.
Face and Eye detection can’t be trusted 100%. You can wind up with mis-focused shots when shooting static subjects in good light, and sometimes the cameras occasionally fail to detect a face even when the subject is right in front of them. When not taking pictures of people, it is better to disable it or it may detect a face where no human beings are present. It’s not unusable by any means but I wouldn’t trust it in situations where I don’t get a second chance.


An example of face detection not focusing correctly (the same can happen on the X-T2)
The continuous AF performance is where both cameras show their full potential. I’ve shot many things from rallies to football and birds in flight and I’ve always come back with good results.
At times, the cameras can be a bit slow in detecting the subject if it is really fast or its colours are similar to those of the background. Other times they can be a slow in re-adjusting focus if the burst starts with one or two out-of-focus frames. It doesn’t happen too often however and the keeper rate always remains high despite this. It might be a coincidence, but of all the red kites images I’ve taken with many cameras over the years, the X-T2 and X-H1 have delivered some of my favourites so far.


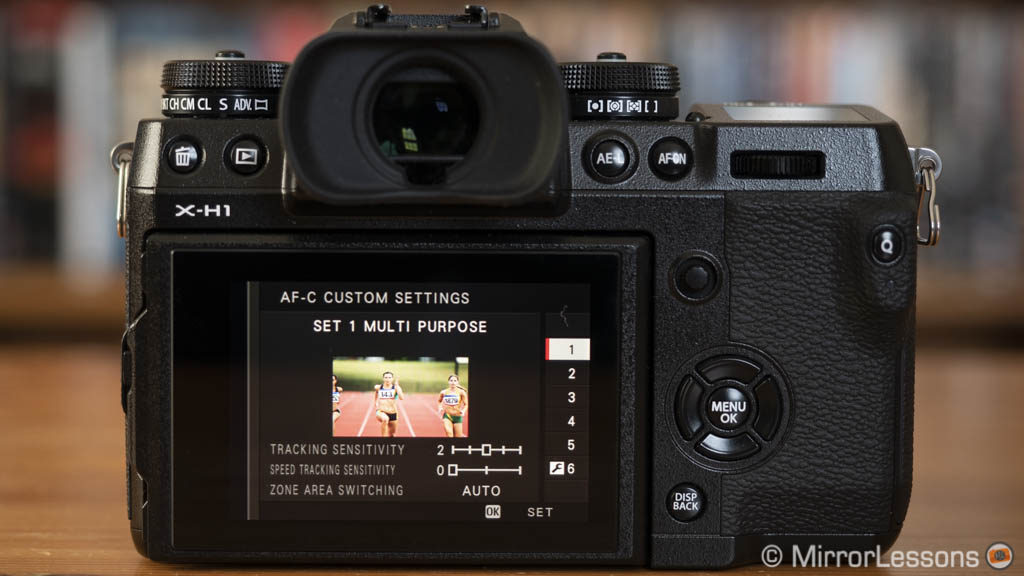
In continuous AF it is important to choose the right settings, not just concerning the AF area but also the AF-C Custom Settings.
There are five sets plus a sixth one that can be customised. The first works for many things including group sports like football. For the latter you can also choose Set 2 to reduce the risk of having the camera refocus on momentary obstacles or Set 5 when the player changes direction and speed. Set 2 and Set 3 are ideal for motorsports and I find Set 4 the best for birds in flight. Choosing the wrong setting can decrease the performance in some cases, so if you have any doubt, it’s better to start with Set 1.


Shutter, continuous shooting speed and buffer
Both cameras have a maximum speed of 1/8000s with the mechanical shutter. Switch to the electronic shutter and it increases to 1/32000s. However be aware that distortion can present itself when fast moving subjects enter the composition, and banding can occur under certain artificial light sources.
The X-H1 has an additional option, the electronic front curtain shutter which can be useful to reduce the lag between the shutter button being pressed and the start of the exposure. You can also choose multiple shutter options (for example mechanical + electronic) that change automatically depending on your settings.
The fastest continuous shooting speed is 8fps on both cameras when selecting CH on the dial. There is no live view so the last image taken is shown in rapid succession instead. With the optional battery grips (VPB-XH1 and VPB-XT2) the speed increase to 11fps. If you select the CL mode, the speed goes up to 5fps with live view and blackouts.
The X-H1 has a third middle setting called CM: the speed increase to 6fps and the electronic front curtain is automatically selected. Live view is maintained and blackout time is reduced which can be useful when shooting certain action shots where keeping better track of the subject is more important than additional speed.
When shooting sports or other types of scenes under fluorescent light sources, you can activate Flickr Reduction to avoid banding or variations in exposure between each frame. Note that the electronic shutter is disabled and speed can decrease as the camera takes more time to record the images.
Finally let’s talk about the buffer capabilities. With JPGs, neither camera slows down at 8fps regardless of the type of card used (UHS-I or II). With lossless compressed RAW files, I was surprised to see that the X-T2 did better, maintaining full speed for an extra second in comparison to the X-H1 and slowing down less afterwards. In some cases the X-H1 can pause for a second as shown in the first row below.
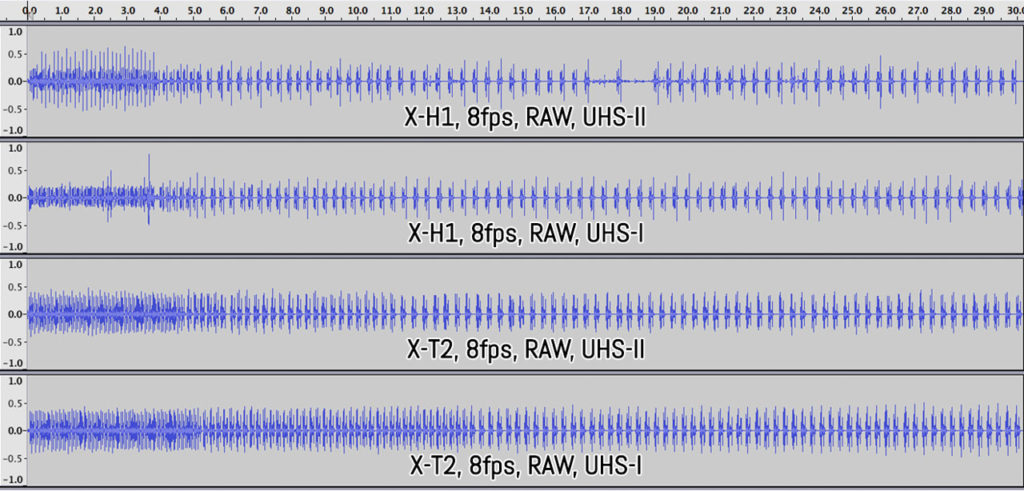
Image stabilisation
This chapter represents one of the most important, if not the most important difference between the two cameras. The X-H1 is the first Fujifilm model to feature in-body stabilisation so as you might have guessed, the X-T2 doesn’t have any.
The flagship camera uses a dual processor to analyse and calculate the necessary adjustments and according to Fujifilm, it’s the only camera on the market to use more than one processor. It features a new shutter shock absorption mechanism to minimise camera shake and enhance the image stabilisation performance.
In my comparison with the A7 III, the X-H1 indeed performs better than the Sony but its performance is nowhere near what Olympus can do with the E-M1 II. That being said, we’re talking about different systems with different sensor sizes so it’s better to leave this cross-brand analysis for another time.
The sensor shift works on 5 axes and has a maximum compensation of 5.5Ev with the XF 35mm f/1.4, the XF 10-24mm f/4 OIS and the XC16-50mm OIS II (CIPA standards). With other lenses the performance is slightly worst at 5Ev. Note that these specs take into account the X-H1 firmware 2.0 which improves the IBIS performance.
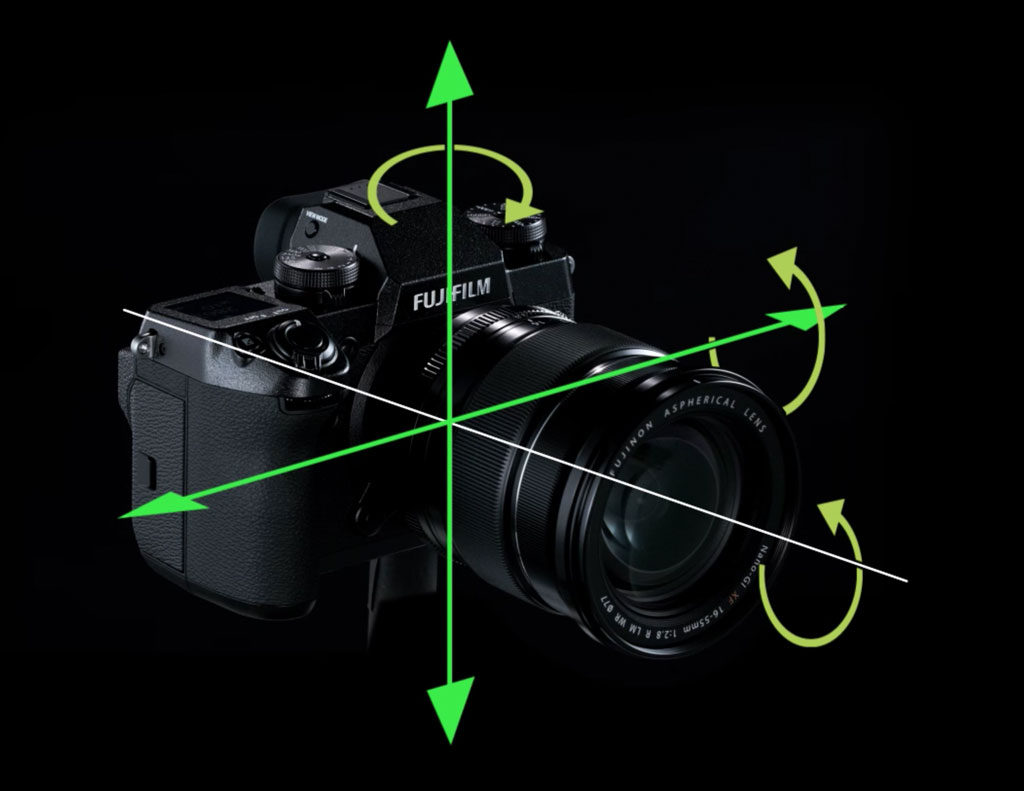
With lenses that feature OIS, the camera uses 5 axes instead of 3 on the sensor (thanks to firmware 2.0) and combines them with Pitch and Yaw on the lens. With adapted lenses or the MCEX tube extenders, only three axes are used.
The obvious advantage of the X-H1 is the fact you can use stabilisation with lenses that lack OIS. This becomes especially useful for products like the 16-55mm f/2.8 or the 90mm f/2.
Note: the tests below were done prior to the release of firmware 2.0.
With the former, I managed a sharp shot at half a second and 16mm. At 35mm, the best result was taken at 1/4s but the keeper rate increased from 1/8s. Then I mounted the XF 35mm 1.4 prime that is supposed to give you an extra advantage. Indeed I managed an almost perfect shot at 1s and the keeper rate was better from 1/2s.


Then I mounted the XF 18-135mm – which has one of the most highly rated OIS systems of all Fujinon lenses (5Ev) – to see if the sensor + optics combination of the X-H1 would give me an advantage over OIS alone on the X-T2.
At 18mm, the X-H1 gave me a good result at 1s whereas the X-T2 struggled more. That being said I did manage sharper results before with the 18-135mm lens at that speed so it is possible but the keeper rate is low.

At 35mm both cameras gave perfect results at half a second. When pushing the performance further, it’s the X-T2 that produced a slightly sharper image at 1 second. Keep in mind that these small discrepancies are not unusual when it comes to image stabilisation. But what is interesting to highlight here is that the 3 axes of the X-H1 sensor didn’t make a huge difference in comparison to OIS alone. The performance could improve with firmware 2.0 since the camera would then use 5 axes on the sensor.


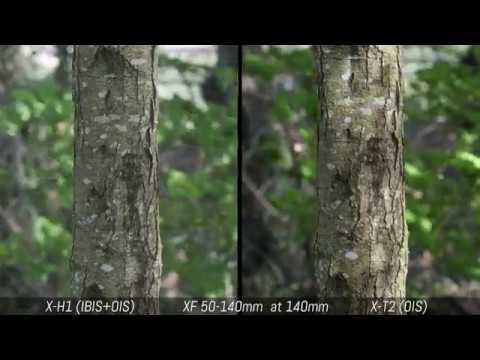
At longer focal lengths, the X-H1 does have a slight lead over the X-T2. With the XF 50-140mm f/2.8 at 140mm for example, the performance remain similar down to 1/5s, with a keeper rate of around 30% for both cameras. Further down at 0.4s, the X-H1 managed one sharp shot unlike the X-T2.


Of course the test above is extreme. If you want to play it safe and have a better keeper rate, I reckon you should always stay above 1/2s with the X-H1. A similar conclusion can be made for the X-T2 but obviously the performance is very much dependant on optical stabilisation and how advanced the OIS hardware is.
For video, the 5-axis stabilisation of the X-H1 can give you better results in comparison to OIS alone but it isn’t always consistent*. When panning the X-H1 produces less jerky movements but the footage still lacks smoothness, especially when using a long focal length. It’s a mixed bag when walking: sometimes the footage is more controlled but others times there is a lot of jerkiness which means it is no different from using OIS alone. For static shots it is more difficult to detect a difference except that there is less jittering on the X-H1.
*Note: firmware 2.0 is said to eliminate the image shake when panning slowly, but I haven’t got a chance to test it yet.
Video capabilities
The X-T2 is Fujifilm’s first serious attempt at a more competitive camera for video makers. It marks the debut of 4K in the X series, adds a few extra settings to control the image output and introduces the F-Log gamma profile. F-Log is available with both internal recording and HDMI output thanks to firmware 4.10.
The X-H1 inherits all these characteristics but offers a few advantages over the X-T2 as we’ll see below.
Both cameras can record 4K up to 30p with full pixel readout and a sensor crop of approximately 1.17x. The X-H1 also records in 17:9 which is the DCI cinema standard format. It is available for both 4K and Full HD recording. In 4K it is limited to 24p.
The footage is sharp and I haven’t come across relevant artefacts such as aliasing or moiré. The X-H1 can display fewer compression artefacts because of the higher bitrate (200Mbps vs 100Mbps on the X-T2) which is also useful when colour grading.
In 1080p, there is no sensor crop. They can record at 100Mbps and up to 60p, or up to 120p with the High Speed Rec mode (firmware 4.10 required on the X-T2). The clip is already conformed in camera so you can see the slow motion result straight away. Keep in mind that it goes up to 100p for PAL frame rates and 120p for NTSC/cinema frame rates. The quality is a little bit disappointing however. Sharpness is further reduced and aliasing is more visible.
One annoying thing that remains on both cameras is the limited recording time. The X-H1 has a duration of 15min/clip in 4K, or 20min/clip in 1080p. The X-T2 is worse at 10min in 4K and 15min in Full HD. High Speed Rec is limited to 6 minutes. To extend the duration to 30 minutes regardless of the format, you need the optional battery grip.

The X-H1 features the first film simulation mode designed for video, Eterna. It is not a flat profile but has low saturation and less contrast to give you more room for colour correction in post. It retains a distinctive look like the other Film Simulation modes and that’s what I like about it. If your colour grading isn’t too heavy, you can obtain very good results.
The other film simulation modes can give you excellent colours on both cameras. You have to be careful with manual white balance, tint dominance and excessive contrast and saturation that profiles such as Velvia produce. You can play with shadow and highlight settings but be aware that they can introduce unpleasant results for skin tones.
One of the most interesting additions to the X-H1 is the DR setting, which is the same we already analysed for the SOOC JPGs. By recording at ISO 400 or ISO 800, you preserve more details in the highlights. Darker areas have more noise as a result but I don’t find the image unpleasant. The D-Range setting is available too.

For more control over dynamic range, you can use the F-Log profile which is available on both cameras. It allows you to record with the widest latitude available and requires colour correction to obtain a natural look. The minimum sensitivity becomes ISO 800. Keep in mind that internal recording is limited to 8-bit 4:2:0 compression. You can get 4:2:2 via HDMI but it remains 8-bit.


High ISO performance is good up to 3200 and remains usable at 6400. After than noise becomes more invasive. Note that the X-T2 has a ISO sensitivity of 200-12800 for video whereas the X-H1 has an extra step at 25600, but the quality is not great. Only the X-H1 gives you the option of adjusting noise reduction for video.
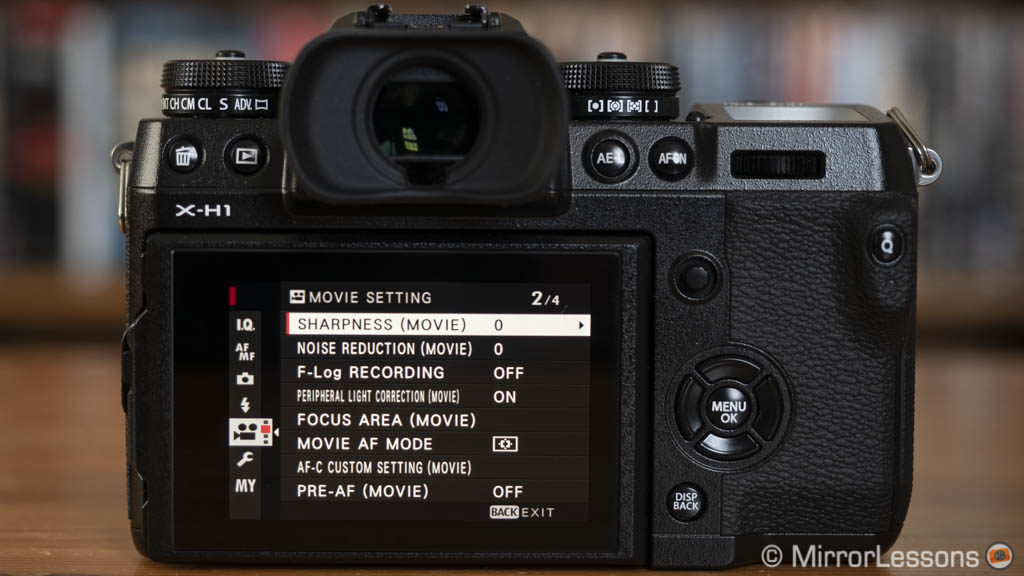
The Video menu is richer on the X-H1: many options you find on other pages are replicated there, which means that you can keep the settings for stills and video separate. In terms of ease of use, this is one of the major benefit of working with the X-H1. For example I can select Eterna in movie mode, then switch to still mode without having to change the profile again, and vice versa.
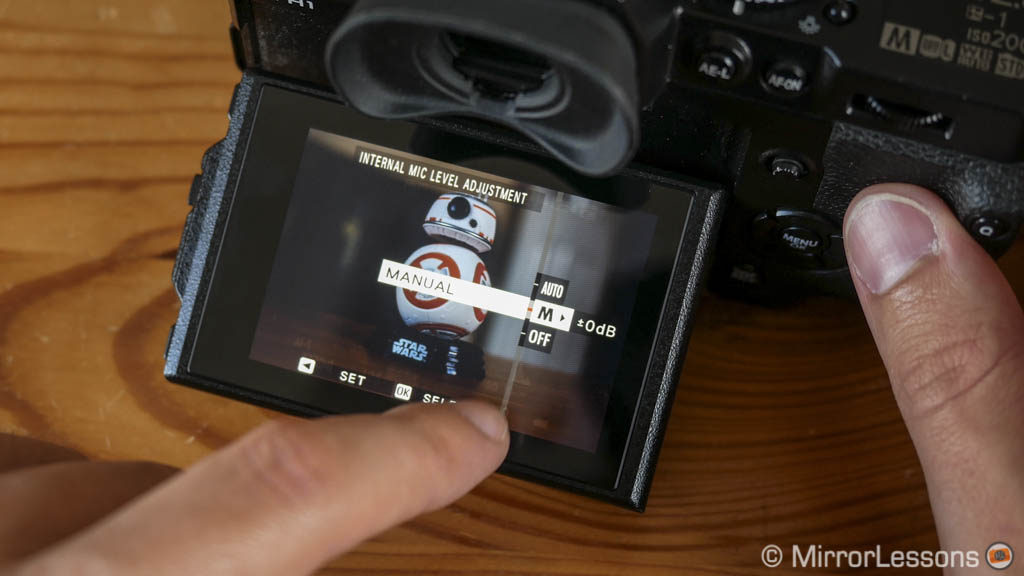
Another interesting feature on the X-H1 is the Movie Silent Control mode: it disables all the dials and buttons, and lets you select everything with the touch screen. This adds an extra layer of separate settings for video: you can select aperture, ISO and shutter speed regardless of the position of the exposure dials.
Both cameras perform well when it comes to continuous autofocus thanks to the phase detection points. They are very reactive for fast subjects or in low light, without visible hunting. On the X-H1 you can use Face Detection in 4K and it works better than for stills. On the X-T2 it is limited to 1080p.
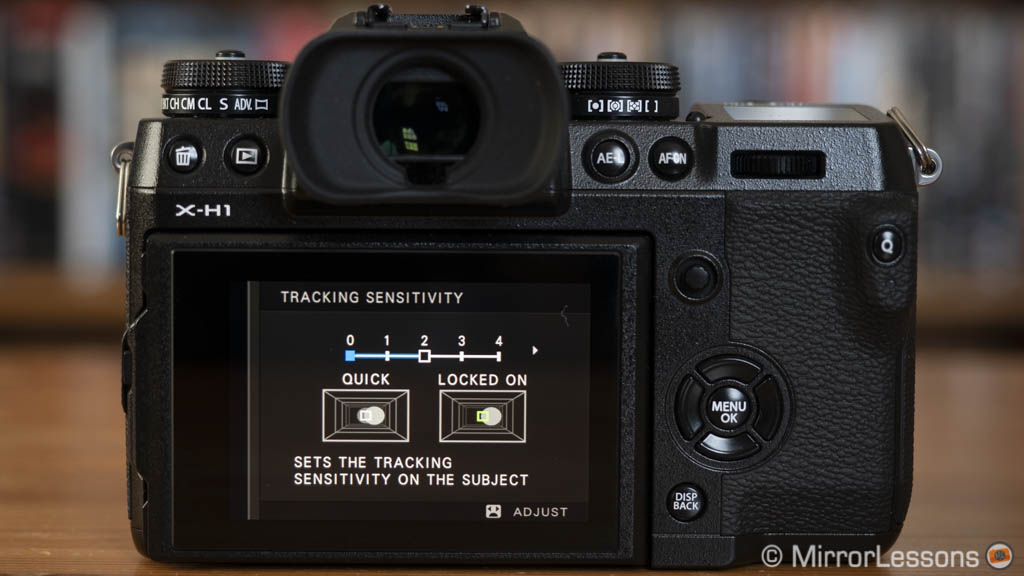
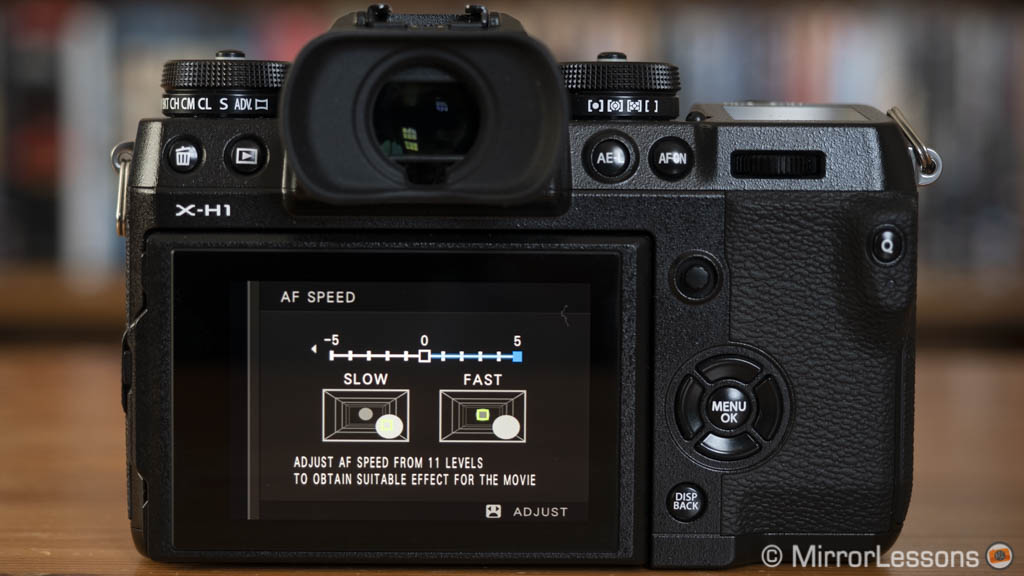
On the X-T2 you can use the same AF-C Custom Settings for stills to control the AF behaviour, but they’re not as precise as the dedicated AF-C Custom Setting you find in the X-H1. The latter allows you to fine tune the tracking sensitivity in four steps and the AF speed in 10 steps. For example I find it useful to make smooth transitions from point A to point B using the touch screen, something that is simply not possible on the X-T2.
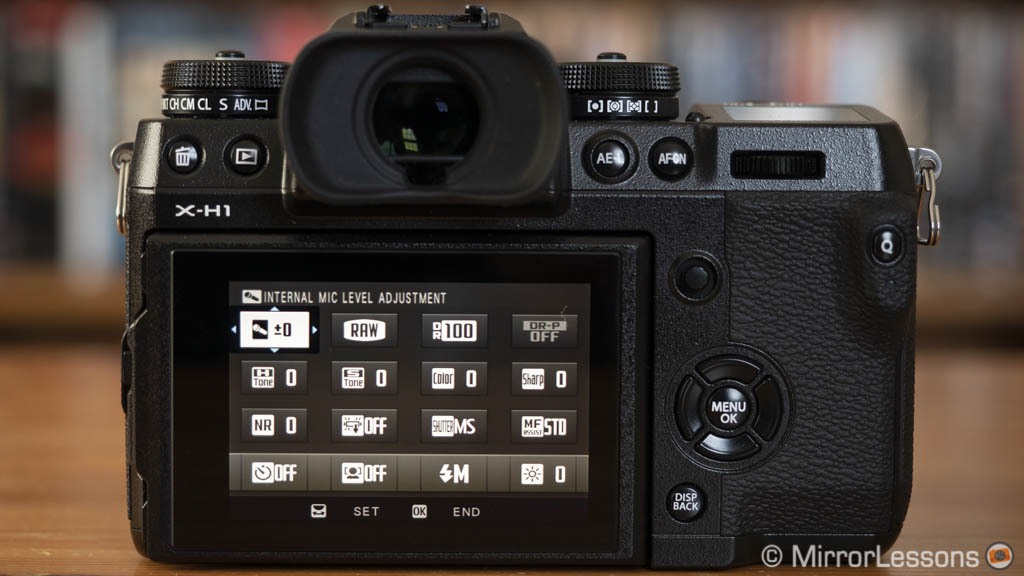
Concerning audio, both cameras feature a 3.5mm input but no headphone output. You need the optional battery grip for that. The built-in stereo microphone of the X-H1 has better audio than the one inside the X-T2. The flagship also has more options: you can control volume in dB and there are separate settings for the built-in and external microphones. There is also a mic level limiter, wind filter and low cut filter. You’ll find the headphone volume in the video menu rather than the Setup/Sound settings of the X-T2.
The X-H1 has additional features like in-depth Timecode settings and the Tally light, which allows you to set the AF illuminator on the front, rear LED indicator or both to behave like the red tally light of broadcast camcorders that turn on when the camera is recording. You can choose between intermittent or continuous light.
The X-H1 also offers shutter speeds of 1/24, 1/48, 1/96, 1/120 and 1/240s which are equivalent to the shutter angle values used in cinema (360, 180 and 90 for 24, 30 and 60p recording). They automatically become available in movie mode and can be selected with the front command dial.
Finally if you use the Fujinon MKX cinema zoom lenses on both cameras, you can display the aperture in T stops and vignetting is corrected automatically.
Flash and other features
The flash specifications are identical on both cameras. They have a maximum sync speed of 1/250s, which can be extended with compatible flash units that support HSS. They both lack a built-in flash but the small EF-X8 is included in the box.
They can work in TTL, Commander or Manual modes. You find settings such as TTL Lock, slow TTL, Front or Rear Sync curtain, compensation up to ±2Ev and Red-Eye removal options.
Fujifilm has a decent range of speedlights, the most advanced being the EF-X500 that supports optical communication and High Speed Sync. There are various third-party options available, but make sure to check their specs as some may not feature HSS or wireless shooting. There is also compatibility with select triggers and flashes, with HSS and TTL support, such as the ProFoto Air Remote for example.
When it comes to extra features, they share the same list which includes:
- Metering: Average, Spot, Centre-Weighted and Multi. I found that both cameras behave in the same way when it comes to metering.
- Manual Focus assists: magnification, peaking (3 colours with two intensities each), Digital Split Image (monochrome or colour) and Dual View (the screen is divided in two with the magnified area on the right).
- Panorama: two angles and four directions available (JPG only)
- Multiple exposure: 2 images (JPG only), it is found in the Shooting Setting menu on the X-H1, Drive dial on the X-T2
- Bracketing: ISO, Film Simulation, White Balance or Dynamic Range are available on both cameras with 3 shots each. AE bracketing can be used up to ±3 Ev and 9 shots.
- Focus Bracketing: added via firmware on both cameras, it can record up to 999 images and varies the focus distance in-between (programmable in 10 steps).

Focus Stacking (10 images stacked with Photoshop)
- Advanced Filters: 13 effects such as Soft Focus, Partial Colour, High Key, etc.
- Interval Timer Shooting: up to 999 shots (or indefinitely recording), you can also program the start to a certain time
- Wifi: control the cameras remotely with a mobile device, transfer JPGs or print using the Fujifilm Instax printer
- Pixel mapping: to map out dead pixels
- Copyright information: save your name and copyright information into the EXIF data
- Voice Memo: record an audio memo (max. 30s) for a specific picture when reviewed in Playback mode.
- RAW Conversion: develop your RAW file by adjusting the exposure, white balance and other settings to save it as a JPG file
- Fujifilm X RAW Studio: similar to the RAW conversion above, it allows you to do it from your computer by connecting the camera via USB using the X-Processor Pro engine. You can also batch process multiple files.
- Fujifilm X Acquire: the software allows you to save and restore your camera settings as well as work in tether mode via USB. Note that Tethering is also available with the Lightroom Plug-in or HS-V5 software.
The only thing the X-T2 is missing here is Bluetooth. With the X-H1 you can geotag your images and synchronise the date and time with the help of your smartphone. You can also remotely control the shutter which is an interesting alternative to Wifi as Bluetooth keeps the connection in the background and consumes less battery power. You can pair up to 7 devices. Bluetooth can also be used to connect to the Fujifilm Remote app but you will still need wireless connectivity to make it work properly.
Battery life
The cameras use the same NP-W126S battery but keep in mind that it’s likely the X-H1 will drain it faster. I noticed this especially when using the in-body stabilisation or recording 4K video at the higher bitrate of 200Mbps. The Boost mode, which raises the EVF frame rate to 100fps, can also cause more rapid consumption.

On the X-T2 you can manage to get through the day on a single charge if you don’t stress the camera with 4K recording or lots of continuous shooting. With the X-H1 it can prove a little more challenging but still possible. As soon as you use the cameras at their full potential, one if not two spare batteries are the minimum required. It’s regrettable that Fujifilm didn’t manage to increase the battery life with a new unit given the larger size of the camera.
Both cameras can be charged via USB and each has its own battery pack solution that can house two additional batteries. They can also be used to charge two batteries in approximately two hours thanks to the supplied AC-9VS AC adapter.
Price
The X-H1 has gone down in price and can be found for around $1300 / £1400 / €1300 (body only).
The X-T2 price has dropped as well now that the X-T3 is out ($1100 / £1200 / €1000). Note that prices may vary depending on the country, store or specific promotions on at the time.
You can find additional bundles with the battery grip and other accessories for both cameras.
Note: prices as of March 2019
Conclusion
The Fujifilm X-H1 is a logical evolution in the X-series. It has a more robust body, a larger grip, more complete settings for video and last but not least, 5-axis stabilisation. It’s easy to label it as the best camera Fuji has produced so far, because it is.
The X-T2 has been deprived of its flagship status but the truth is that it remains as good as the new model in many ways.
The sensor and image quality output are the same if we discard one minor improvement at the extended ISO levels, which you’ll likely never use. The autofocus performance, which we were lead to believe was better on the X-H1, is in fact more or less identical in terms of overall performance. And the video specifications are close thanks to the company re-establishing the balance by adding internal F-Log recording and HFR to the X-T2 via firmware.

I would also say that Fujifilm missed some golden opportunities with the X-H1. There still isn’t a headphone output, the battery life and continuous shooting speeds could have been improved, and the recording time for video is somewhat disappointing. Granted all this can be resolved with the optional battery grip but the same can be said for the X-T2.
The X-H1 is the more comfortable camera to work with when recording video, not just because of useful settings such as DR and Eterna, but also because the settings are more well organised and they give you additional control. But that being said, I can’t stop thinking that they could – theoretically – all come to the X-T2 via firmware.
One thing that certainly can’t be implemented on the X-T2 is 5-axis stabilisation. It’s been on our wish list for a while and now the X-H1 has it. For a first attempt, it performs well but needs a few tweaks for video recording and telephoto photography. I’ve been a big fan of this technology since the original Olympus OM-D E-M5, so I can only thank Fujifilm for catching up.

There is an elephant in the room though: will IBIS remain an X-H1 exclusive or will it be introduced on other cameras in the future, like the X-T3 for example? The latest rumours on FujiRumors are suggesting it won’t happen. Perhaps Fujifilm needs more time to make in-body stabilisation compatible with smaller bodies, but we have learned very well now that in this crazy camera world, things change very quickly.
In the end, I believe that choosing between these two cameras is a matter of feeling. Those who appreciate an extra layer of robustness and a larger grip will be happy to spend the extra money for the X-H1. Those who prefer a solid but lighter and more compact body will be delighted with the X-T2. Each gives you a great user experience, something that has always been at the heart of the Fujifilm X-series.
Check price of the Fujifilm X-H1 on
Amazon | Amazon UK | eBay | B&H Photo
Check the price of the Fujifilm X-T2 on
Amazon | Amazon UK | B&H Photo | eBay
Used Fujifim cameras on MPB US | MPB UK
Sample images and additional content
You can look at various sample images and download original files by visiting the two galleries below:
You may also be interested in the following articles: