Updated on: March 4th 2020
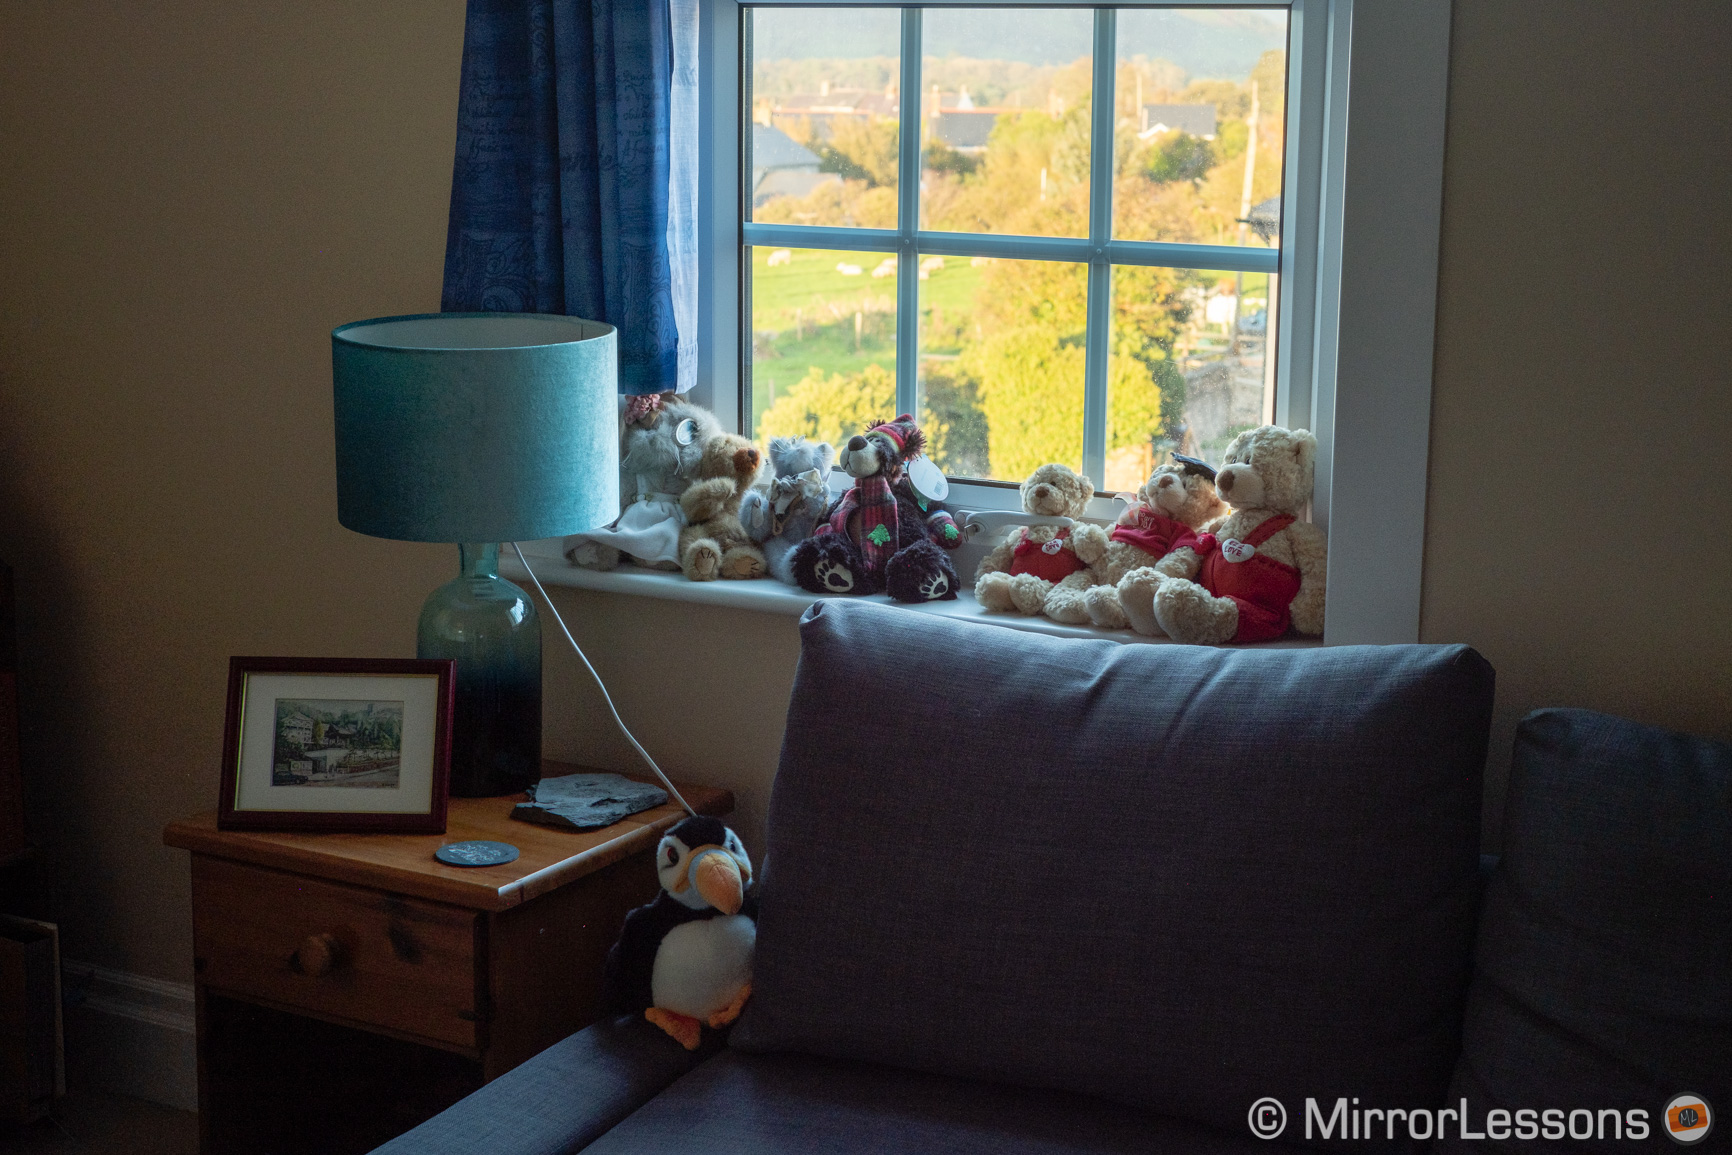
The evolution of the X-T series, the most popular line-up of Fujifilm cameras, has been an interesting one to observe. The brand has managed to narrow the gap between itself and the competition with each iteration, while preserving that unique retro design that makes these cameras so appealing in the digital era.
While the second generation X-T2 brought important updates to image quality and autofocus, the third generation X-T3 takes the series to new heights in the video department. It is definitely Fujifilm’s most advanced and complete camera to date, and I would also add that it is a “surprising” product because it ventures into territories we weren’t expecting.
As usual though, the improvements found on a new model are not necessarily a must-have for everybody. So in this comparison, we dig down deep to see how much better the new camera is than the X-T2 and how much the X-system has evolved.
Ethics statement: We purchased the X-T2 and then the X-T3 to conduct our tests. We were not asked to write anything about these products, nor were we provided any other compensation of any kind. Within the article, there are affiliate links. If you buy something after clicking one of these links, we will receive a small commission. To know more about our ethics, you can visit our full disclosure page. Thank you!
TABLE OF CONTENTS
1. Article updates
2. Main Specs
3. Design, ergonomics and ease of use
4. Viewfinder and LCD monitor
5. Image quality
6. Autofocus
7. Shutter, continuous shooting speeds and buffer
8. Video
9. Flash and other features
10. Battery life
11. Price
12. Conclusion
13. Additional images and articles
Article updates
- March 2020: info about firmware 3.20 for the X-T3, prices updated
- May 2019: feedback about firmware 3.0 for the X-T3
- March 2019: added feedback and sample crops in the Image Quality section after testing the new Enhance Details mode of Adobe Lightroom Classic CC
- January 2019: firmware 2.00 adds an HLG profile and other options for video on the X-T3
Main Specs
X-T2
- Sensor: 24.3 MP APS-C X-Trans III CMOS
- Lens system: X-mount
- Weatherproof: Complete (Splash dust and freeze proof)
- Internal Stabilisation: None
- Autofocus: Hybrid with up to 325 points (7×13 and 13×25 grids selectable)
- Continuous shooting: 8 fps and 5 fps, up to 11fps with optional battery grip, 14fps with electronic shutter (AF-S and AF-C)
- ISO Sensitivity: 200 – 12800 ISO (pull 100, push 25600 to 51200)
- Shutter Speeds: 1/8000s to 15min, Bulb up to 60min, 1/32000s with electronic shutter
- Viewfinder: 0.5in OLED with 2,360k dots, approx. 100% FOV coverage, 23mm eyepoint, 0.77x magnification and 100fps refresh rate
- Rear monitor: 3-ways articulated 3″ LCD (1.04M dots)
- Movie recording: 4K up to 30fps, Full HD up to 60fps
- Built-in Flash: No but EF-X8 unit is included
- Extra Features: WiFi, Panorama, Timelapse, Bracketing, Multiple exposure, Advanced filters, Silent mode, Tethering
- Dimensions: 132.5 x 91.8 x 49.2mm
- Weight: 507g (including battery and memory card)
- Firmware version: 4.31
X-T3
- Sensor: 26.1 MP APS-C X-Trans IV CMOS
- Lens system: X-mount
- Weatherproof: Complete (Splash dust and freeze proof)
- Internal Stabilisation: None
- Autofocus: Hybrid with up to 425 points (13×9 and 25×17 grids selectable)
- Continuous shooting: 11 fps and 5.7 fps, up to 20fps with electronic shutter, up to 30fps in crop mode (AF-S and AF-C)
- ISO Sensitivity: 160 – 12800 ISO (pull 80, push 25600 to 51200)
- Shutter Speeds: 1/8000s to 15min, Bulb up to 60min, 1/32000s with electronic shutter
- Viewfinder: 0.5in OLED with 3,690k dots, approx. 100% FOV coverage, 23mm eyepoint, 0.75x magnification and 100fps refresh rate
- Rear monitor: 3-ways articulated 3″ LCD (1.04M dots)
- Movie recording: 4K 10-bit up to 60fps, Full HD up to 120fps
- Built-in Flash: No but EF-X8 unit is included
- Extra Features: WiFi, Panorama, Timelapse, Bracketing, Multiple exposure, Advanced filters, Silent mode, Tethering
- Dimensions: 132.5 x 92.8 x 58.8mm
- Weight: 539g (including battery and memory card)
- Firmware version: 3.20
Design, ergonomics and ease of use
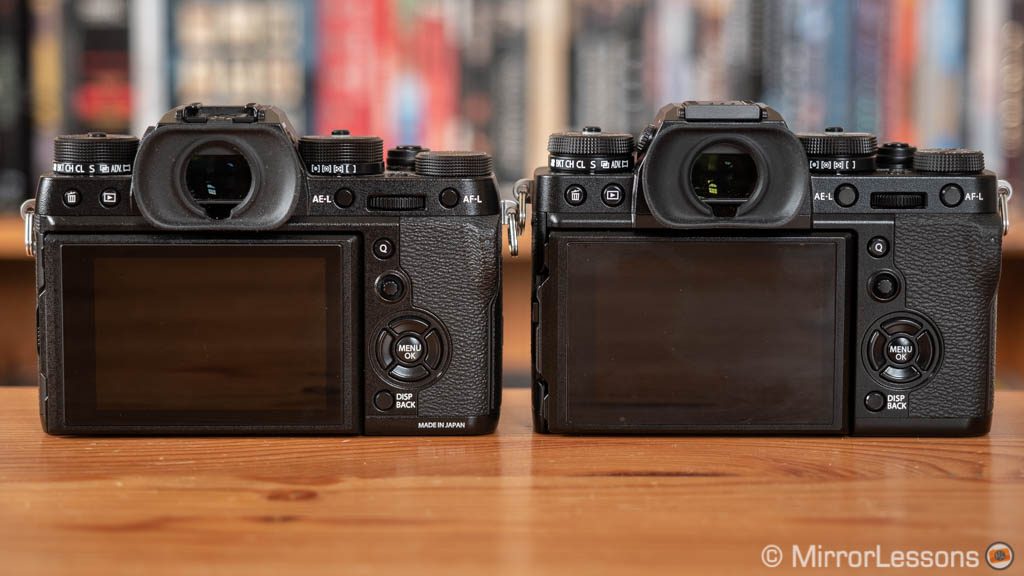
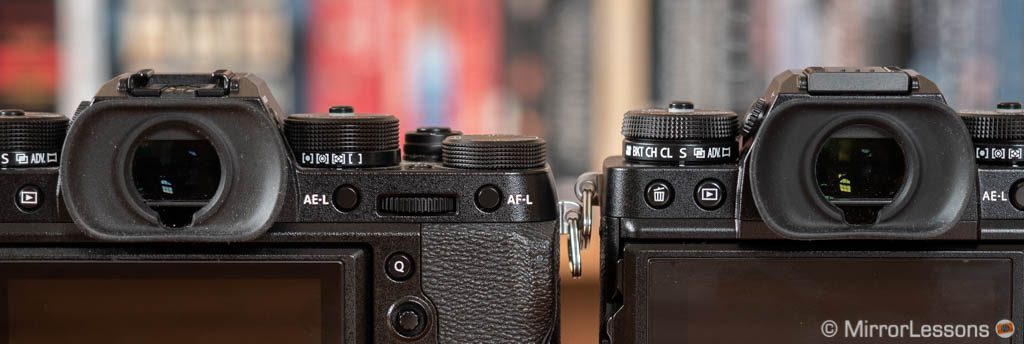
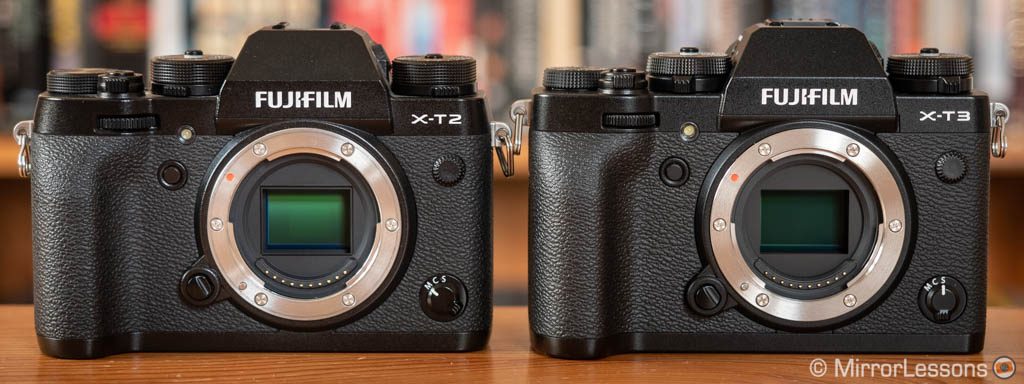
The X-T3 inherits the successful design of the X-T2, so it should come as no surprise that the two cameras look identical. If we take a closer look however, we can notice that the X-T3 body is ever so slightly deeper and heavier. The X-T2 can be purchased in black or graphite silver (more expensive), whereas the X-T3 is available in black only. They are both weather-sealed against moisture, dust and cold temperatures down to -10°C.
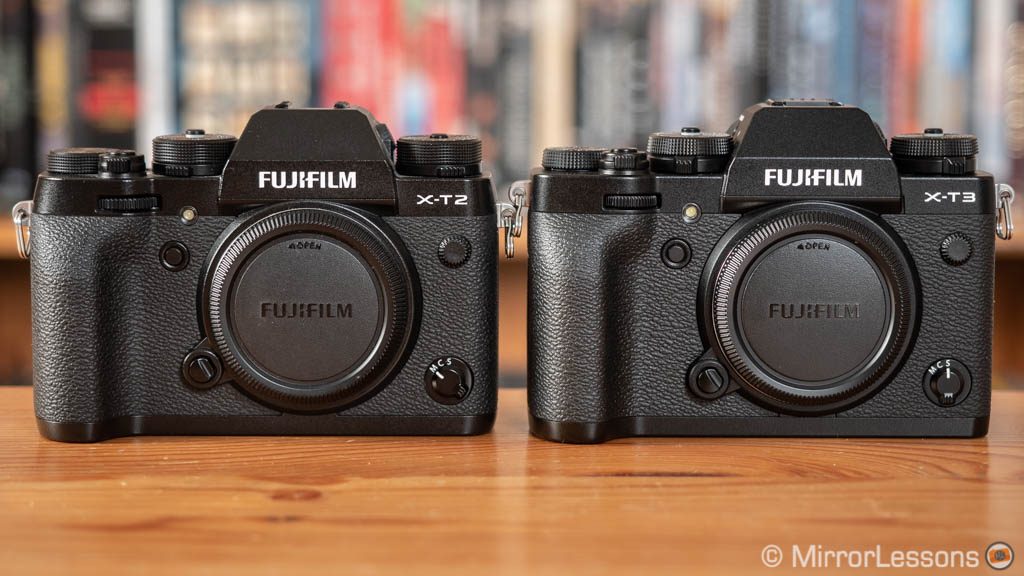
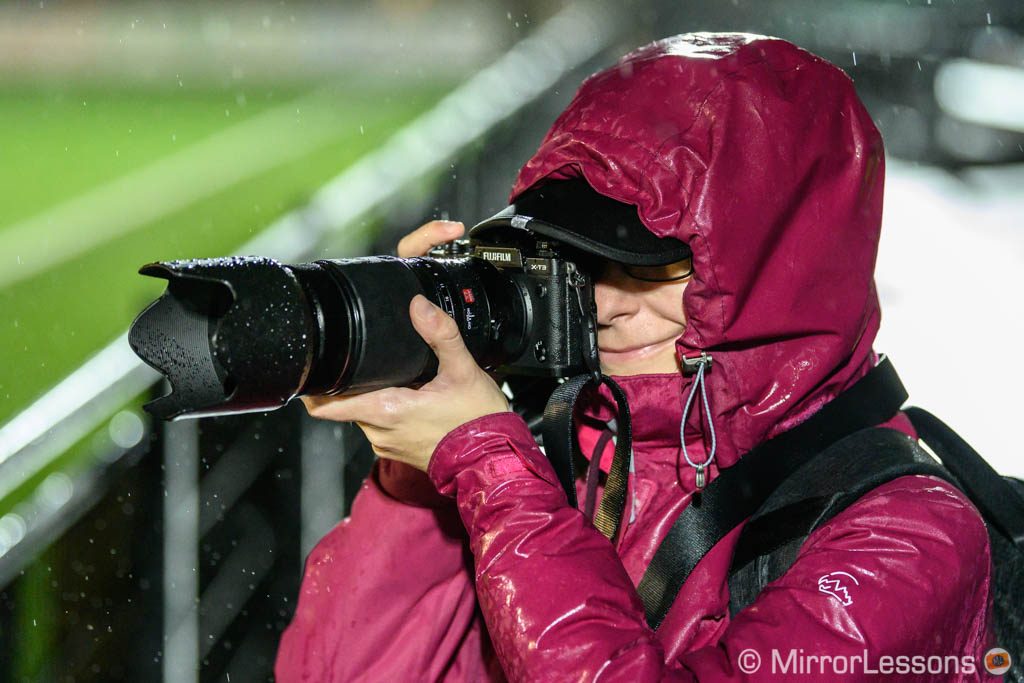
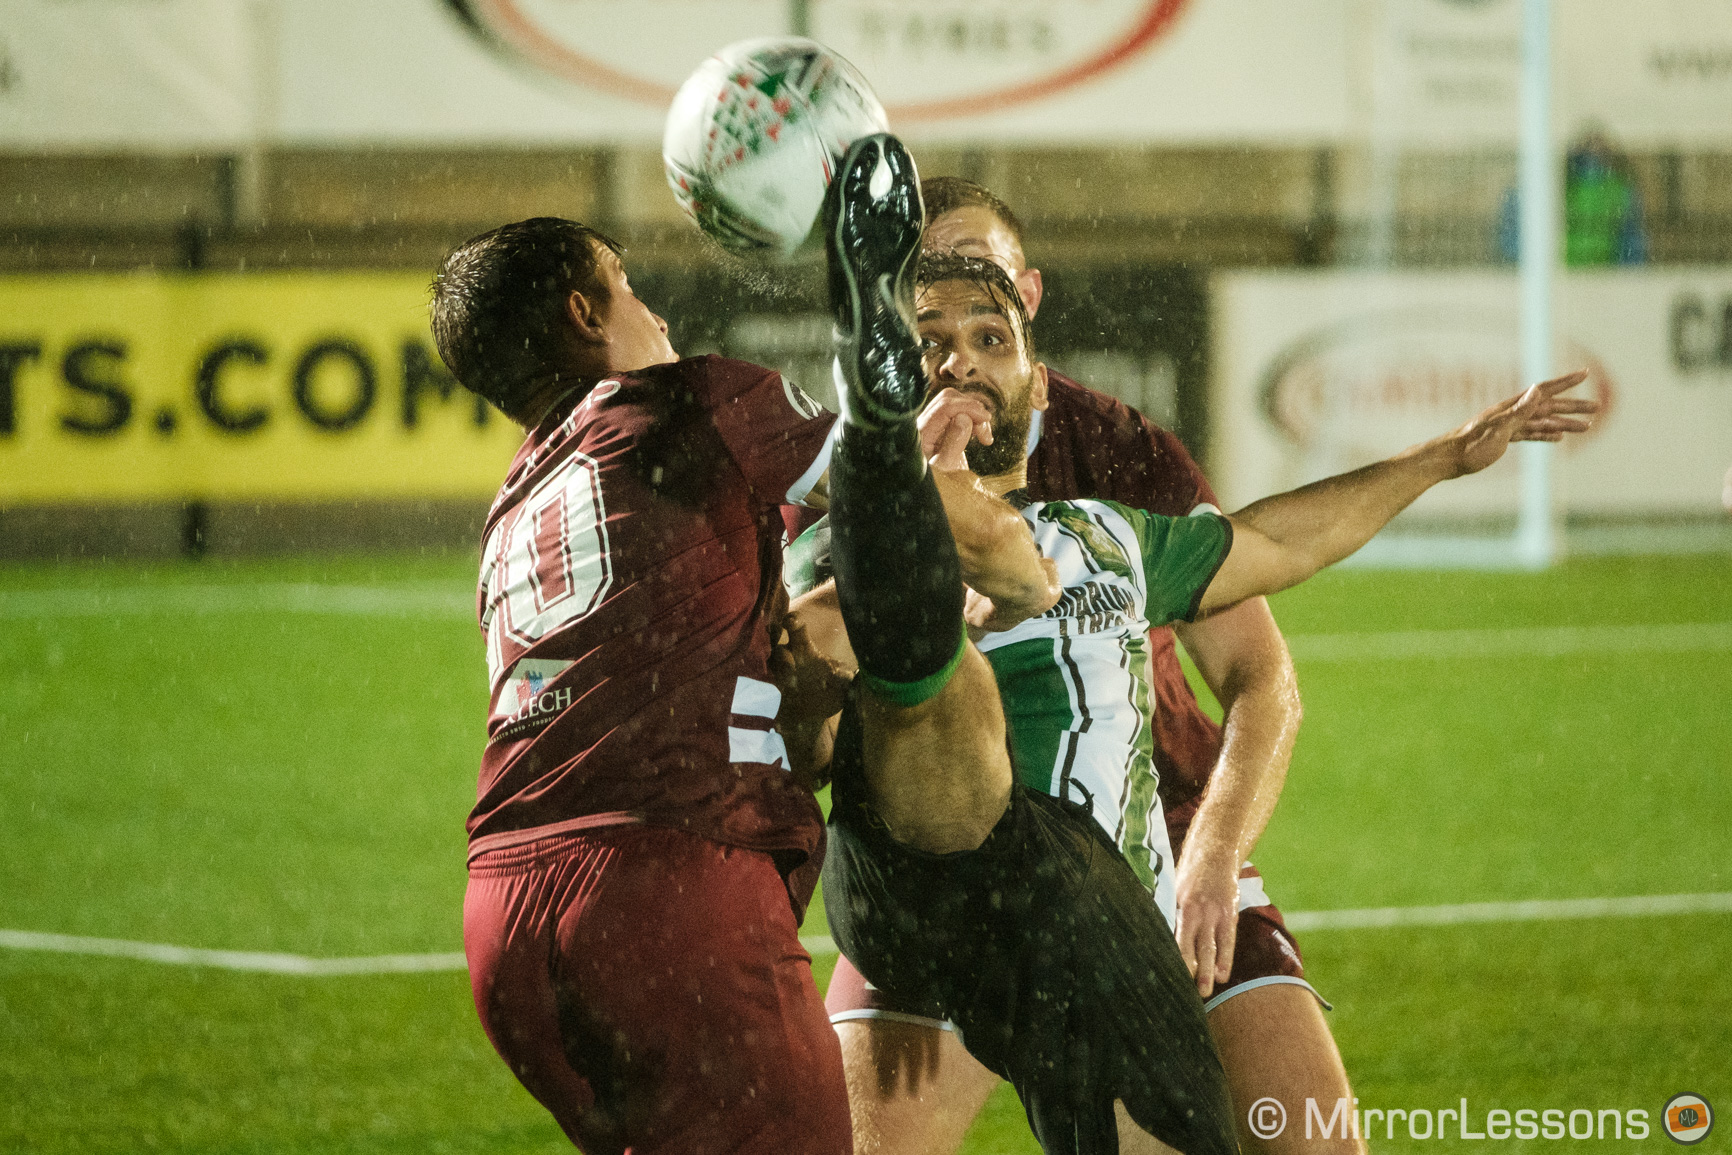
Despite the new camera being made in China rather than Japan, I didn’t notice any downgrades in the build quality. We used the X-T3 for 90 minutes in the heavy rain for a football game and it passed the weather-sealing test with flying colours.
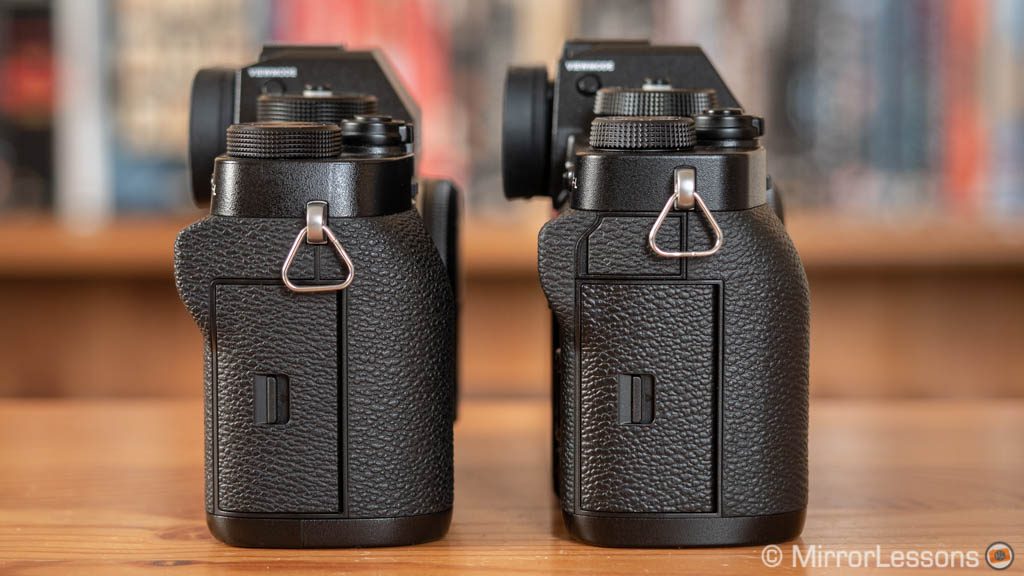
The front and rear grip remain the same and work fine with small to medium sized lenses, but if you intend to use large lenses on a regular basis, it could be worth looking into a grip extender or the optional battery pack. A thumb grip on the hot-shoe can also be helpful. During the wet football session, I found that my finger would slip quite easily from the native grip.
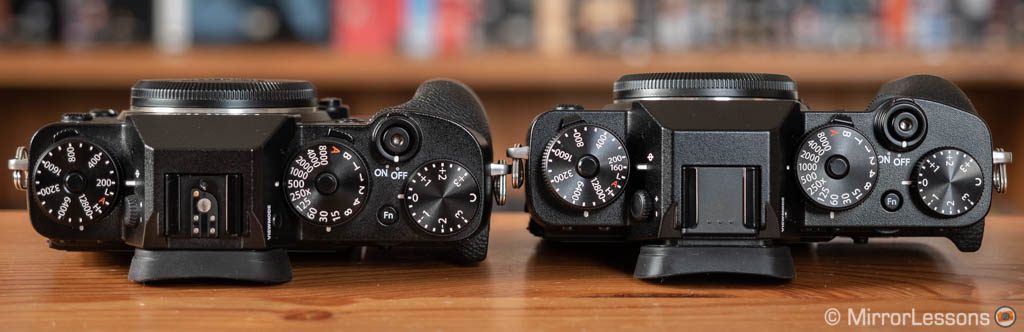
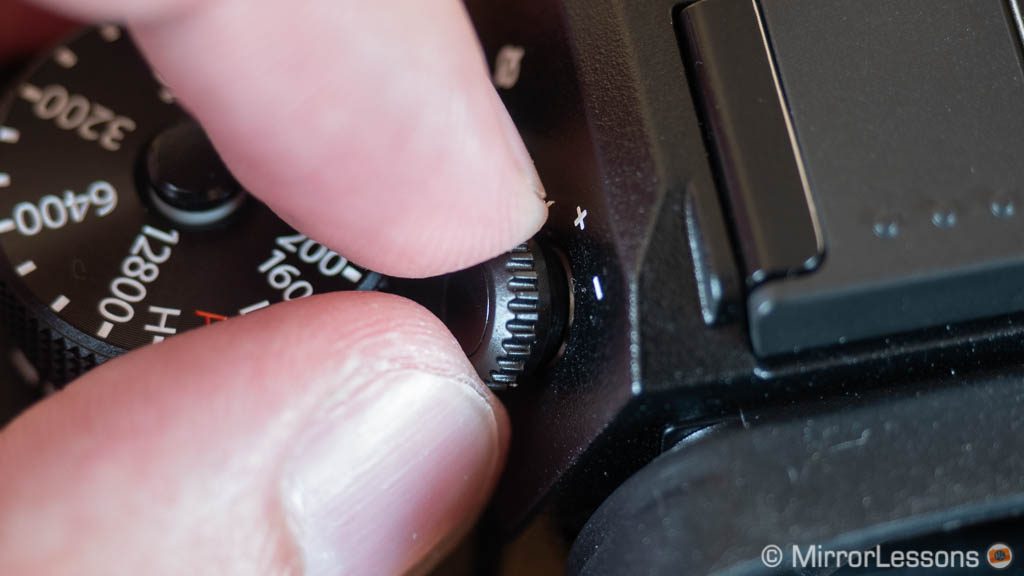
The exposure dials on top (ISO, shutter speed and exposure compensation) feel the same: they are straightforward to use and precise. The ISO and shutter speed dials can be locked. The exposure compensation dial is slightly smaller on the X-T3 but remains as easy to operate.
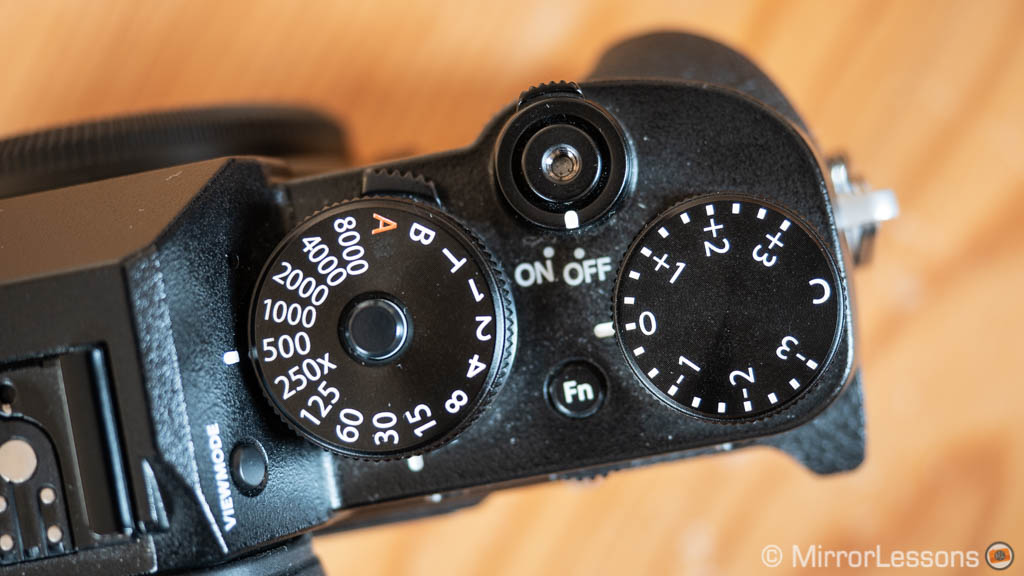
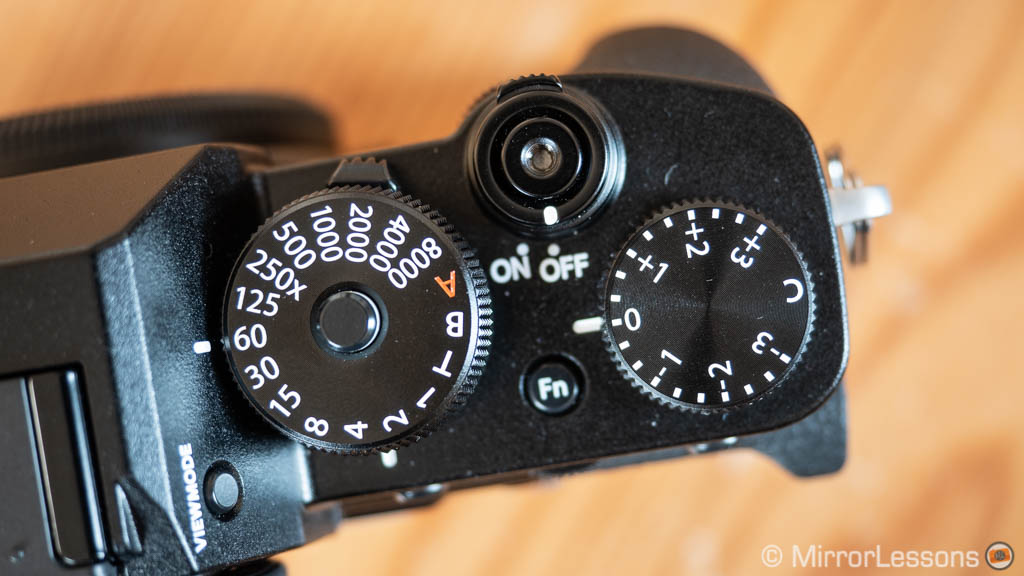
The sub-dials to change the Drive and Metering settings are slightly larger and easier to grab onto, making them less of a pain to rotate than those on the X-T2.

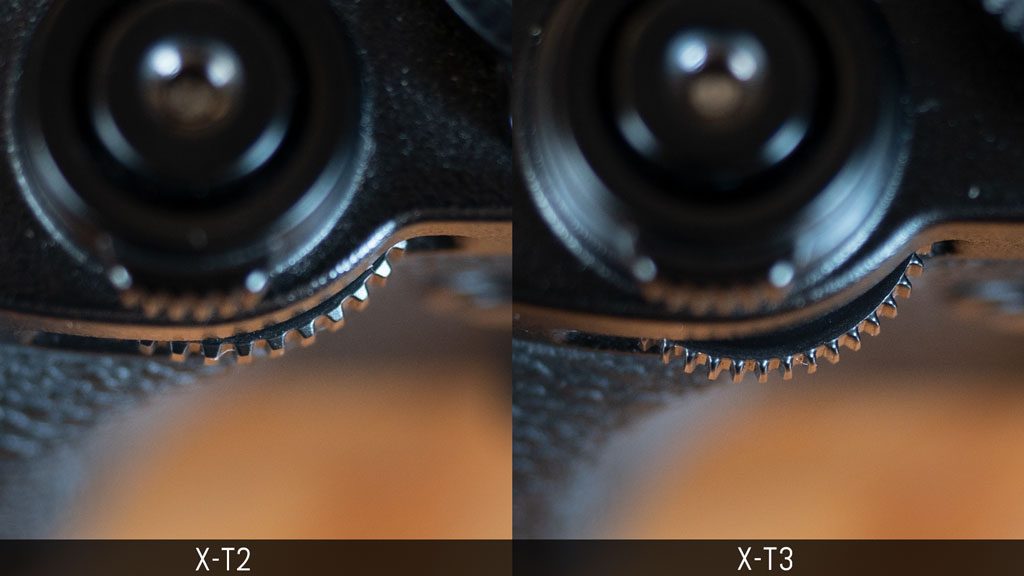
The front and rear command dials stick out more on the X-T3 which makes them more comfortable to turn. The rear command dial moves about less freely than the one on the X-T2.
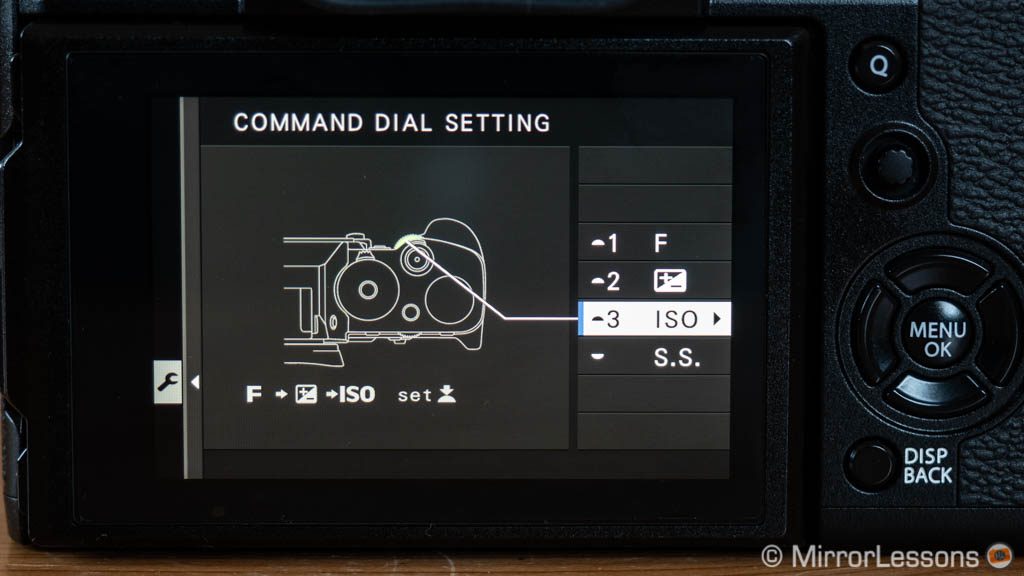
The two command dials can be used to adjust many different settings and can be an alternative to the default exposure dials. For example if you choose the option Command for the A step of the ISO dial, you can use one of the two command dial to scroll through the entire ISO range (the same can be done with the aperture ring of select Fuji lenses). With the C step on the exposure compensation dial, you can adjust exposure compensation in ±5 steps rather than ±3.
The X-T3 gives you extra options to decide which command dial does what. In addition to choosing where to assign shutter speed and aperture, you can also select which one controls the ISO and exposure compensation.
The buttons on the rear are slightly larger and deeper on the X-T3 which gives you better tactile feedback. The other buttons like the Fn button on top remain the same.
Although I find the button layout good enough on both cameras, I wish that a few buttons could be larger as this would improve the tactile feedback when taking sports or wildlife photographs. I noticed this especially while using Back-Button focus. It would be extremely useful in the winter time when wearing gloves as well.
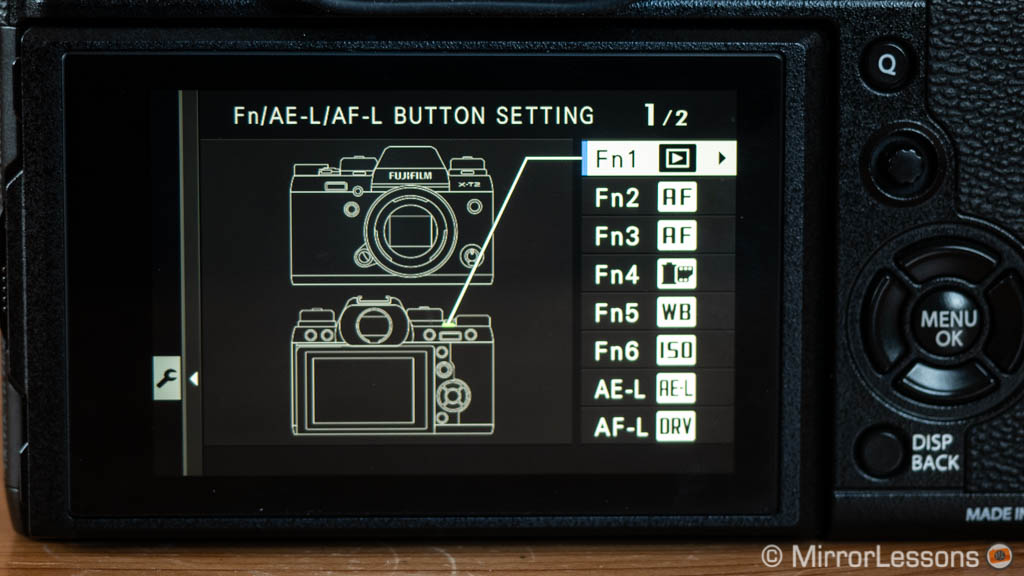
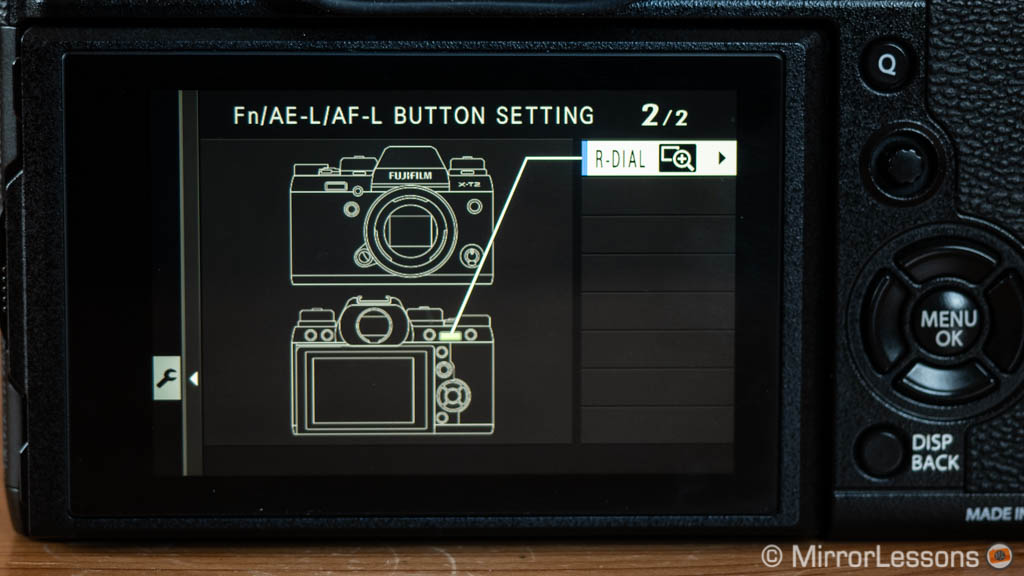
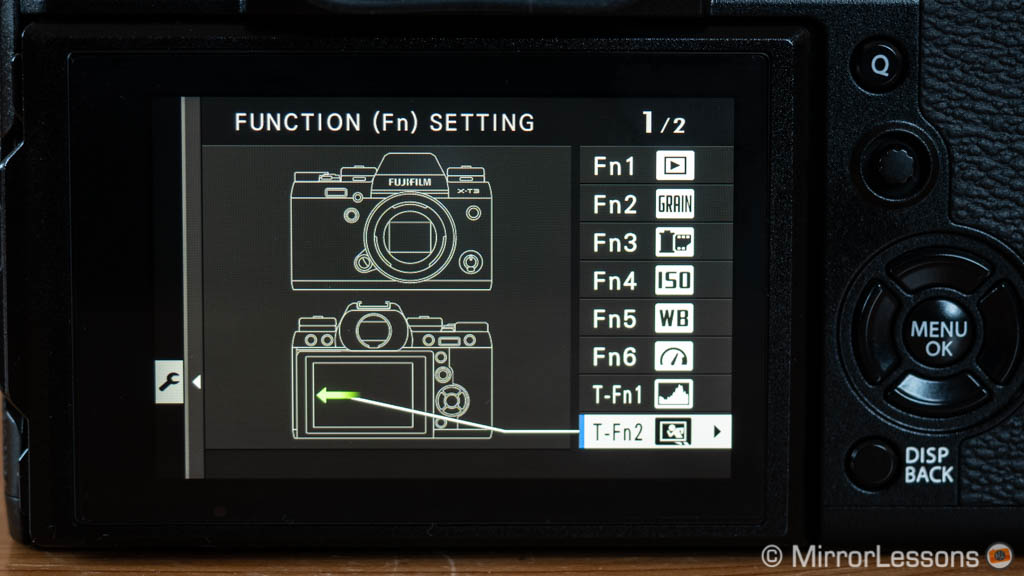
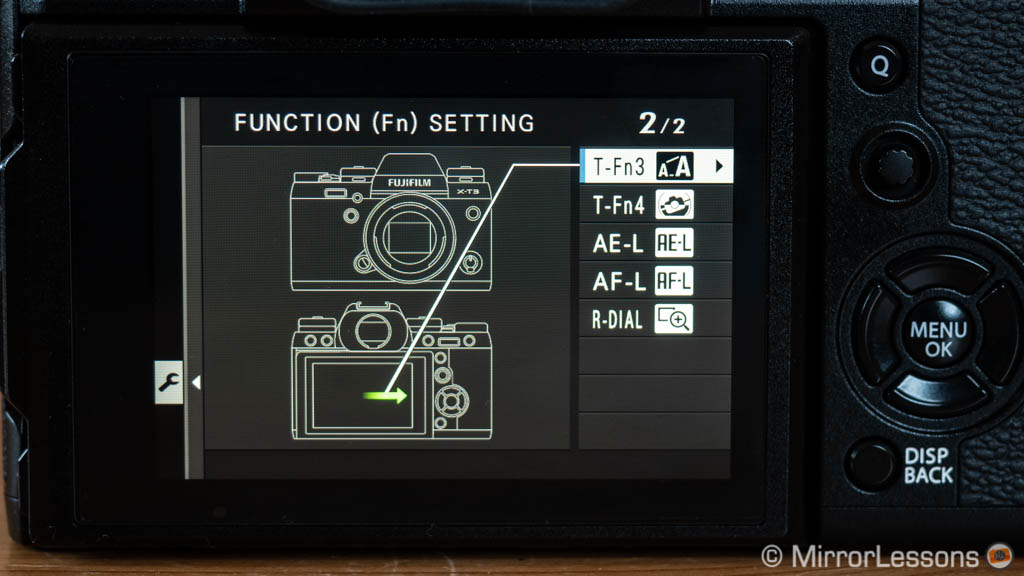
The button configuration is the same on both cameras. There are 9 function buttons but the X-T3 also offers 4 Touch Functions on the rear screen (more on this in the EVF/LCD chapter). There are more options to assign to each button on the new camera (48 vs 37).
The menu system is the same and can be personalised via the My Menu page, while the customisable Quick menu offers the possibility to access 16 settings.

If you dig down into the menu, you’ll find some additional settings for each camera:
- on the X-T3, Focus ring operation can be set to linear or non-linear (how the camera changes focus based on the movement of the focus ring)
- on the X-T2, you can disable the shutter speed adjustments in 1/3Ev with the command dial (S.S. Operation).
Both cameras feature two SD card slots with UHS-II compatibility. You can choose where to record stills and video files in addition to the usual back-up, relay or separate JPG / RAW options.
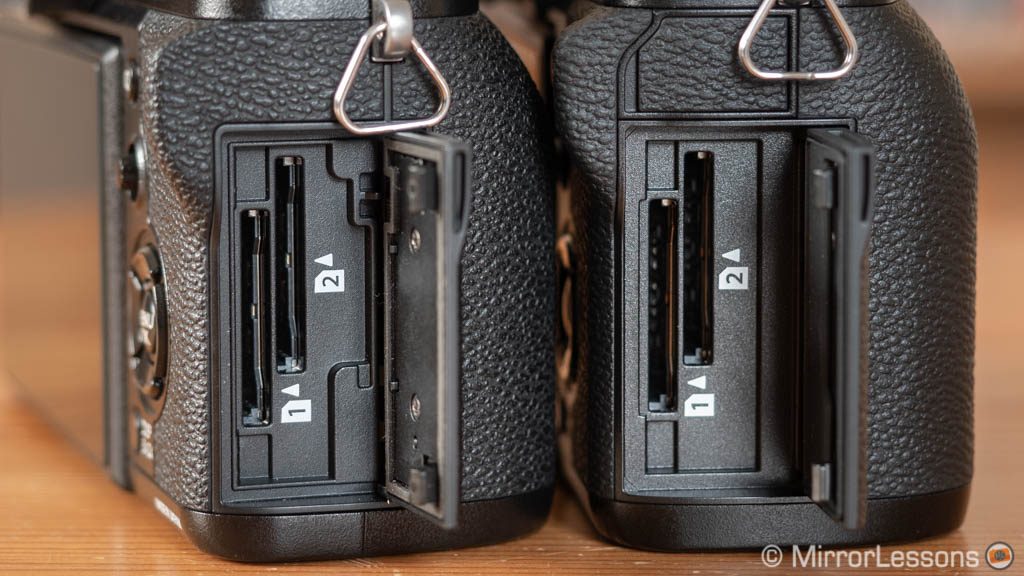
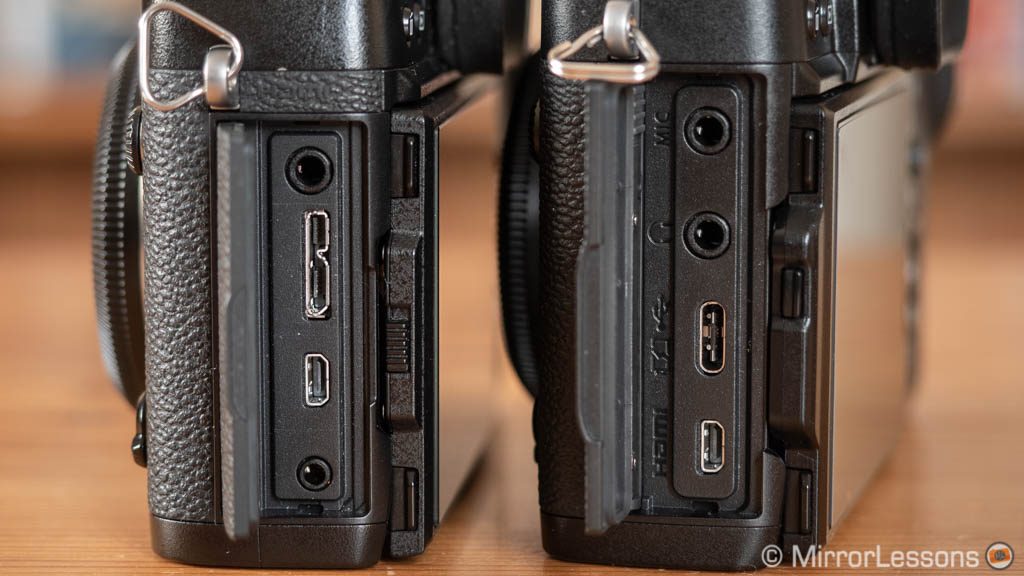
As for the physical connections, you’ll find a full-sized USB 3.0 port on the X-T2 whereas the X-T3 has a Type C connection. The new camera has a mic input and a headphone output whereas the X-T2 only has a mic input. To use headphones, you need to connect the optional battery grip. Both include a 2.5mm remote input, a Micro HDMI output and a flash sync port. The remote input on the X-T3 is located in a separate compartment above the SD cards.
Viewfinder and LCD monitor
The X-T3 features an electronic viewfinder with more resolution (3,690k vs 2,360k dots) but slightly less magnification (0.75x vs 0.77x).
Like the X-H1, which has the same EVF as the X-T3, I don’t find that the increased number of dots offers a relevant advantage, if not that the image is sharper when using the magnification assist. The refresh rate can go up to 100fps on both cameras when using the Boost mode.
One small yet welcome detail is that the small dial that adjusts the diopter on the X-T3 must be pulled out in order to be turned, which eliminates the chance of rotating it by mistake.
On the rear both cameras feature a 3.0 inch LCD screen with 1,040k dots and a 3-way mechanism. In addition to tilting it up and down, you can swing it out to the side by approximately 70° which is useful when working in vertical orientation for example.

The biggest difference here is that the X-T3 monitor is touch sensitive. You can move the AF point, focus, take a picture and browse through your images with your fingers which is very handy. You can also access four different settings of your choice by flicking left, right, up or down.
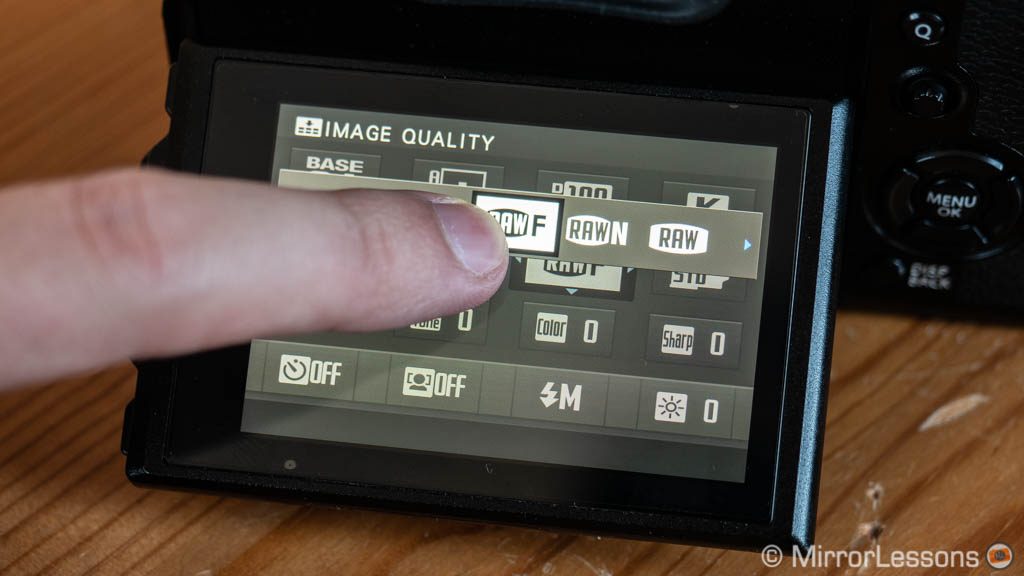
Like other touch sensitive Fuji cameras, I initially found the touch screen a bit slow and lacking responsiveness, especially when using it as an AF pad while composing with the viewfinder. Thankfully firmware 3.0 has improved the performance, making it more reactive. That being said, the AF Joystick remains my favourite option to move the AF area.
There are also a few additional things in favour of the new camera:
- you can zoom in more in playback mode to check sharpness
- EVF and LCD colour adjustment setting (Red and Blue Channels)
- Information contrast adjustment including a Dark Ambient Lighting mode
- Guidance Message displays status updates as well as possible error messages
- The selected colour temperature is displayed when working with manual white balance (firmware 2.0)
- Preview Picture effect setting is called Natural Live View on the X-T3.
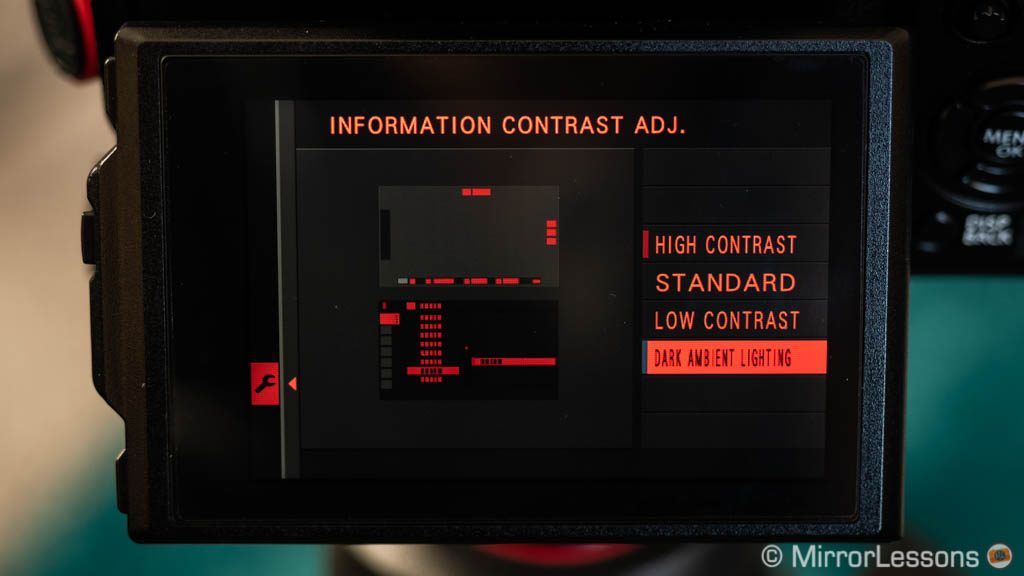
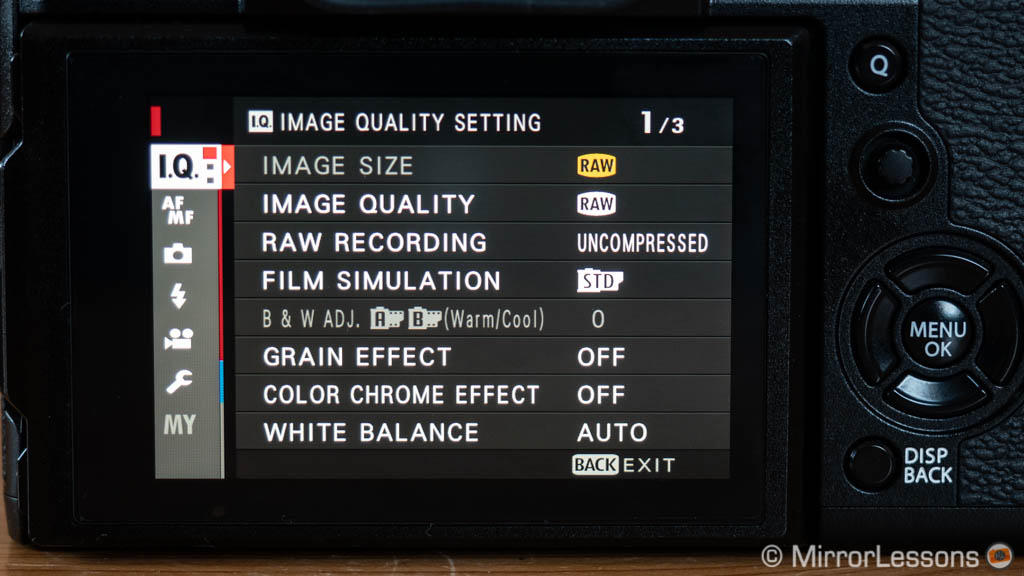
Image quality
The X-T3 introduces the fourth generation X-Trans sensor and image processor, whereas the X-T2 uses the previous version. Let’s have a look at the new specifications and changes one by one.
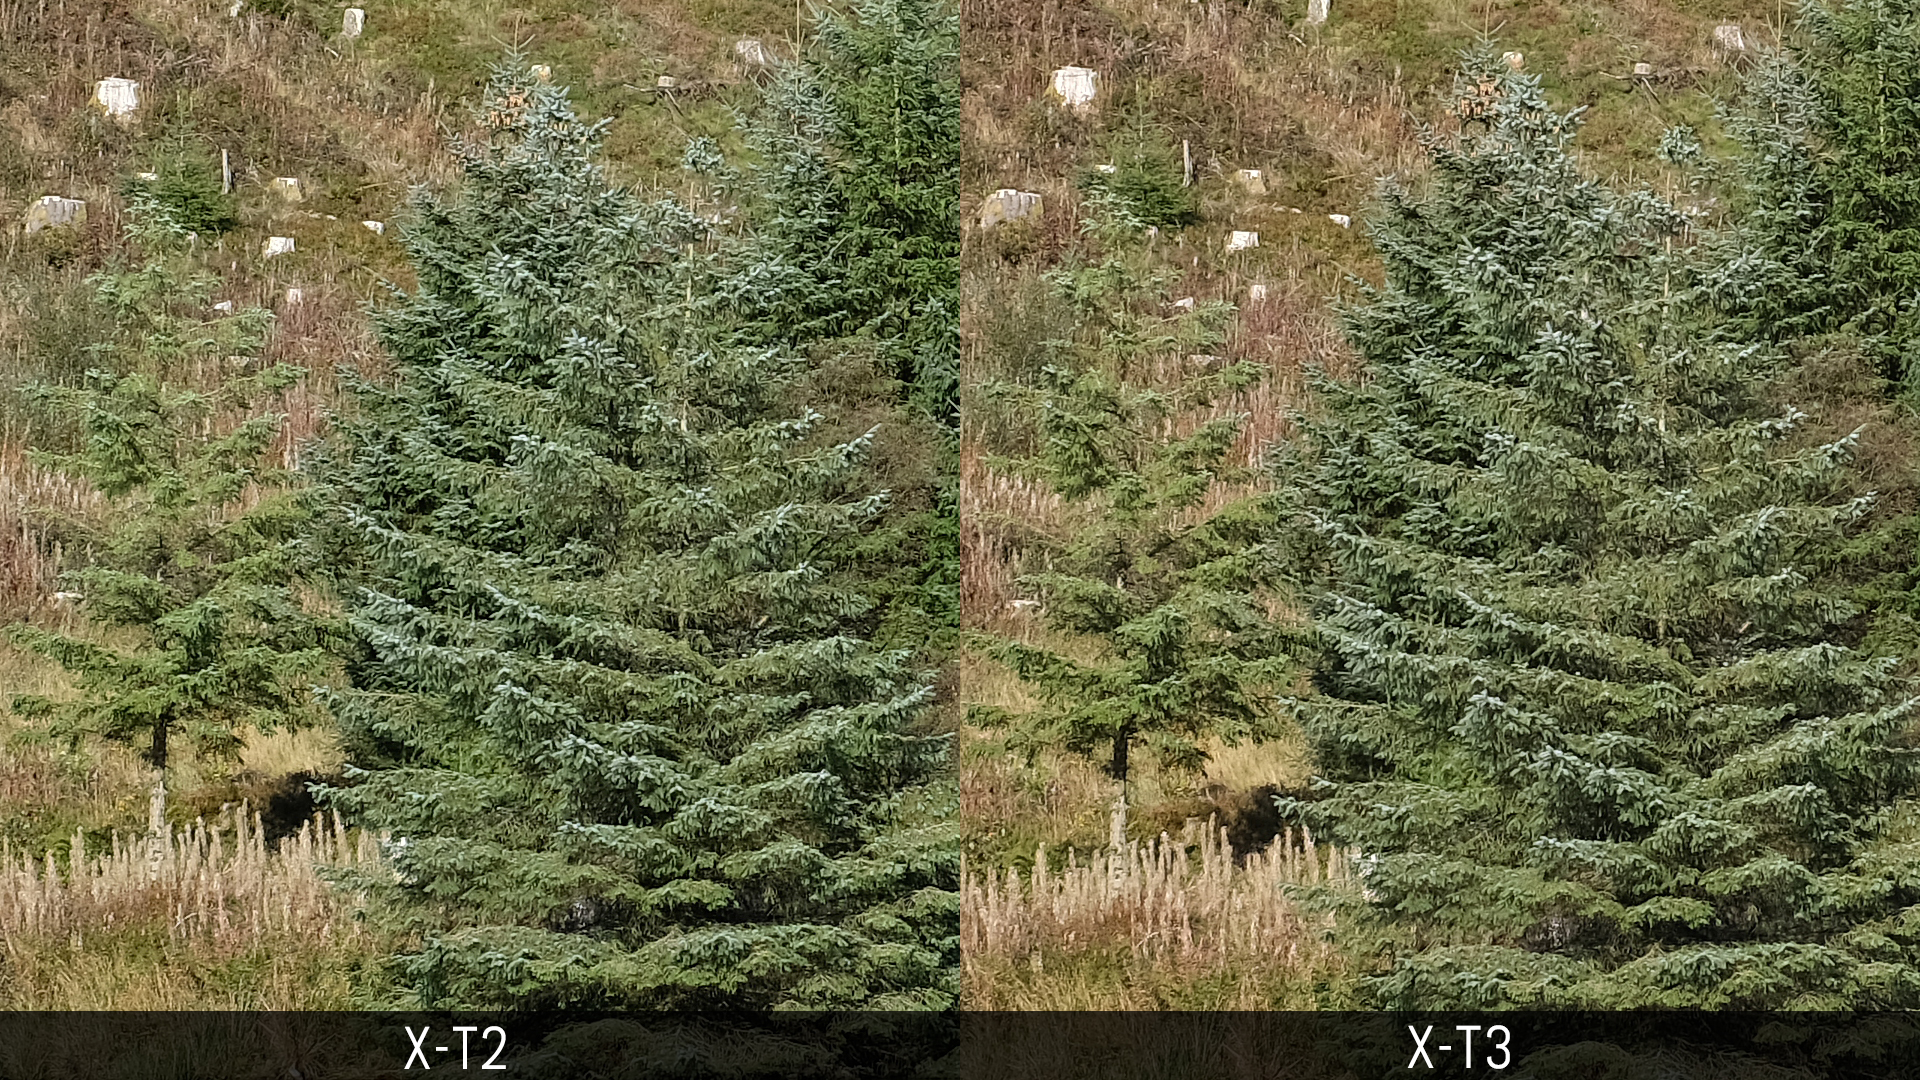
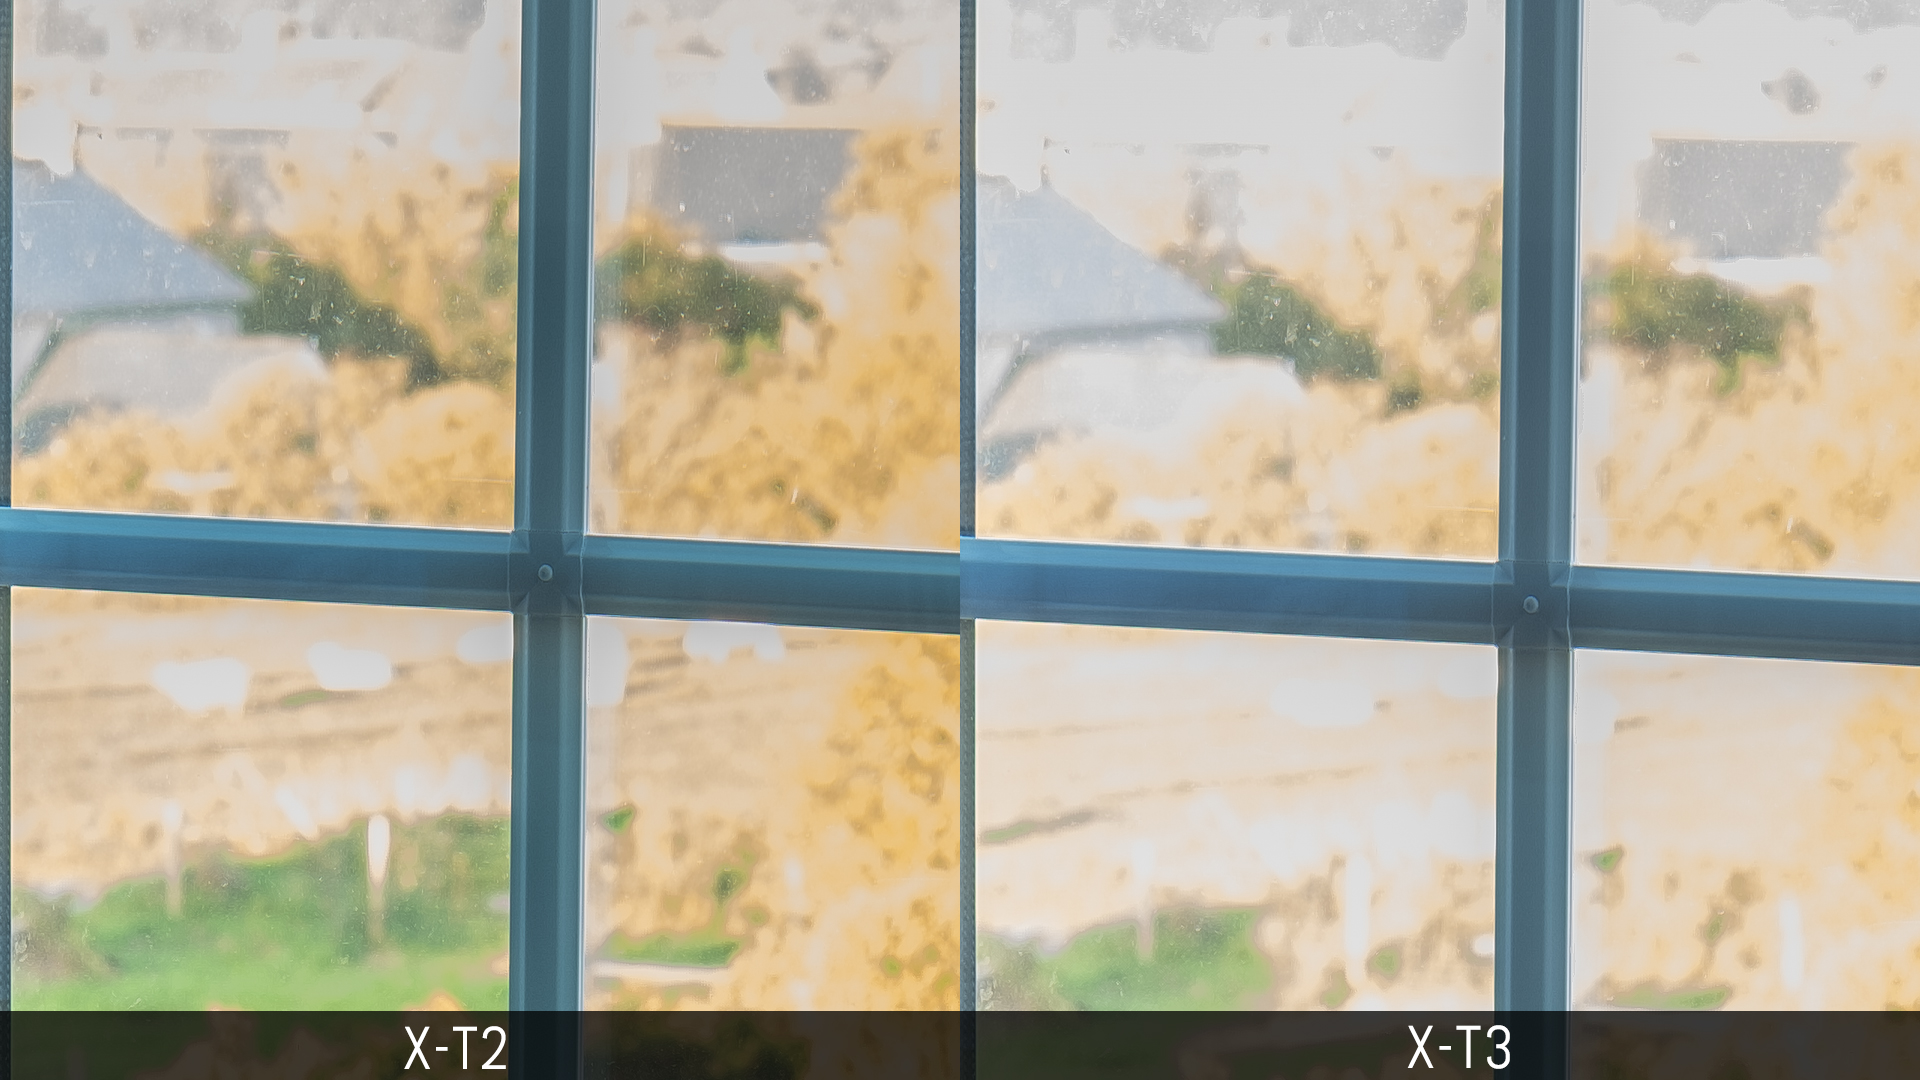
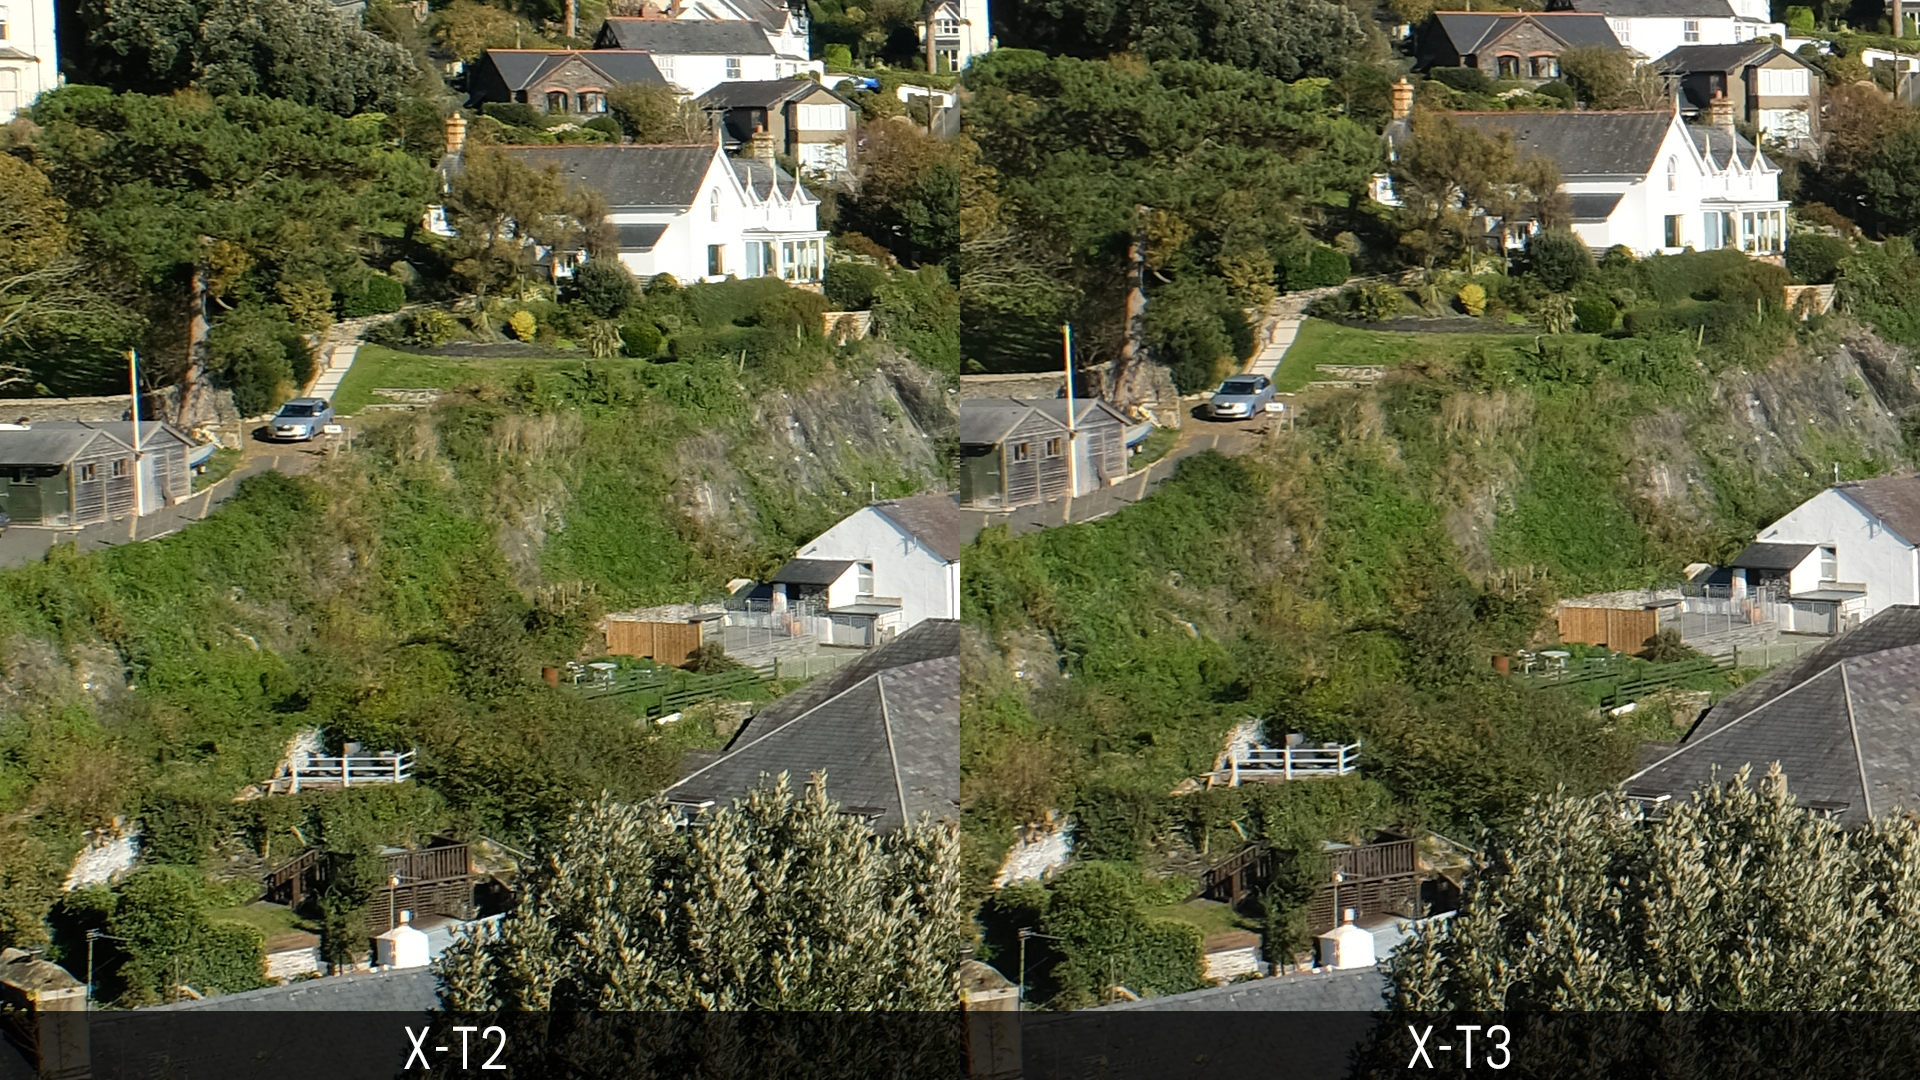
The first improvement – albeit a very small one – is an increase in resolution on the X-T3 (26.1MP vs 24.3MP) but as you can see from our first example below, sharpness and details are the same (unsurprisingly).

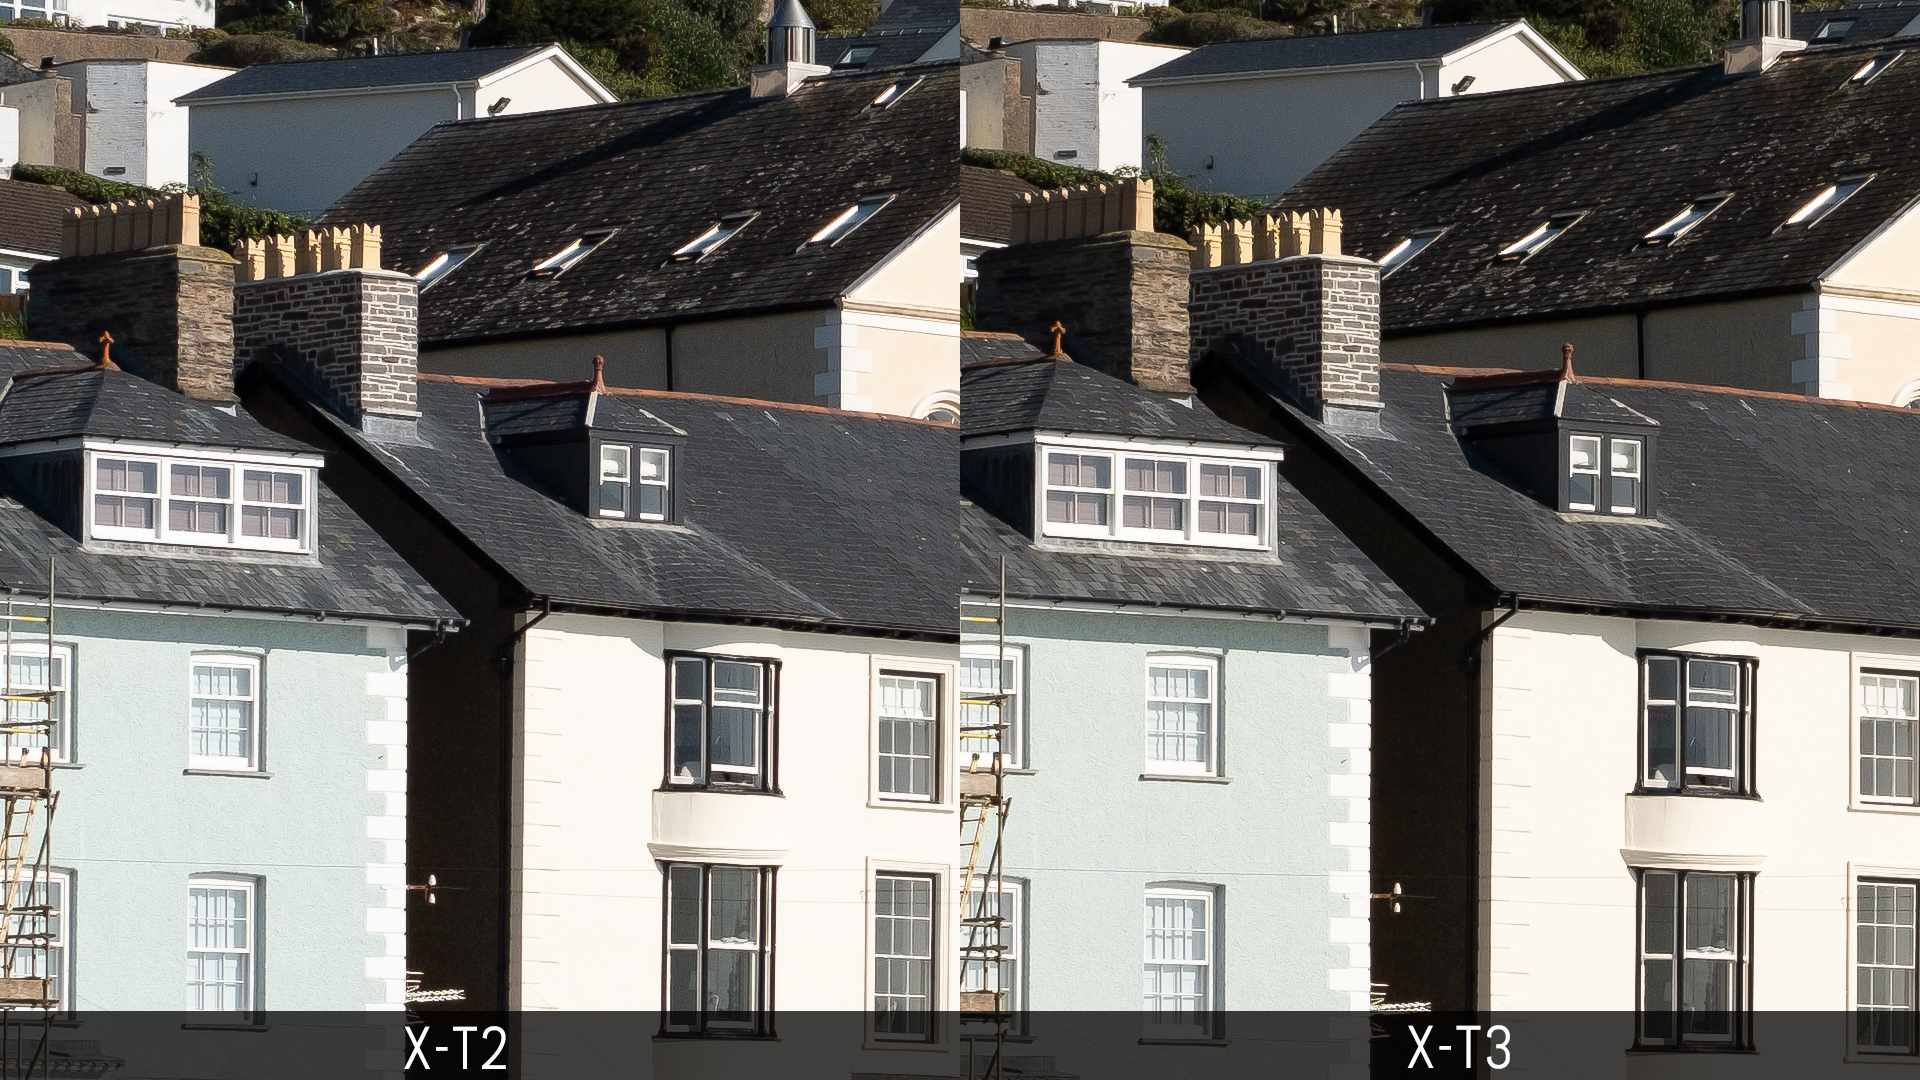
We can draw the same conclusion about the SOOC JPGs. You can vary sharpness in 9 steps (±4) and the results are good up to +2. The higher values appear a bit too aggressive to my taste.
Both sensors use the X-Trans CMOS array where each horizontal and vertical line incorporates at least one green, blue and red pixel, as opposed to the traditional Bayer sensor.
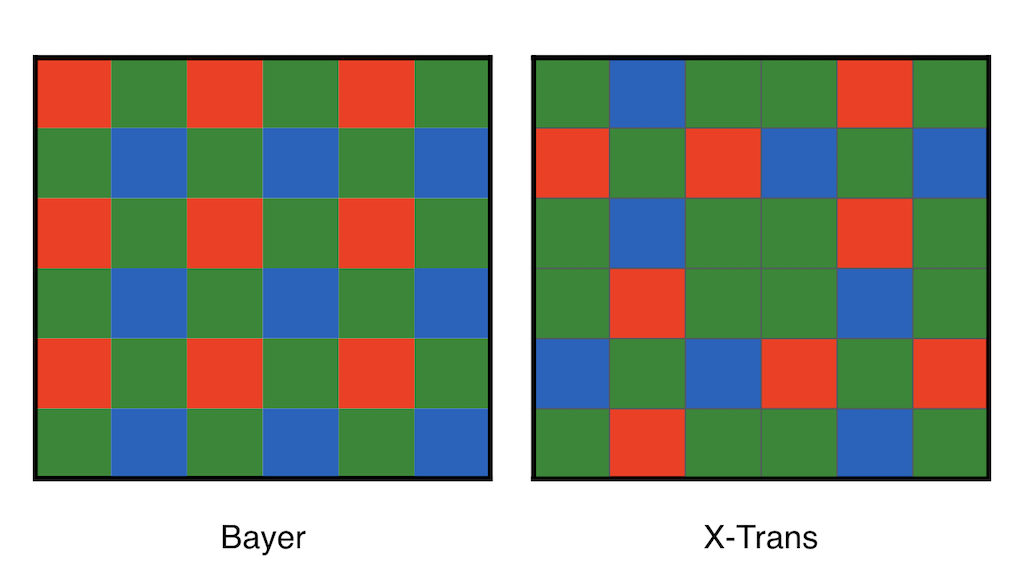
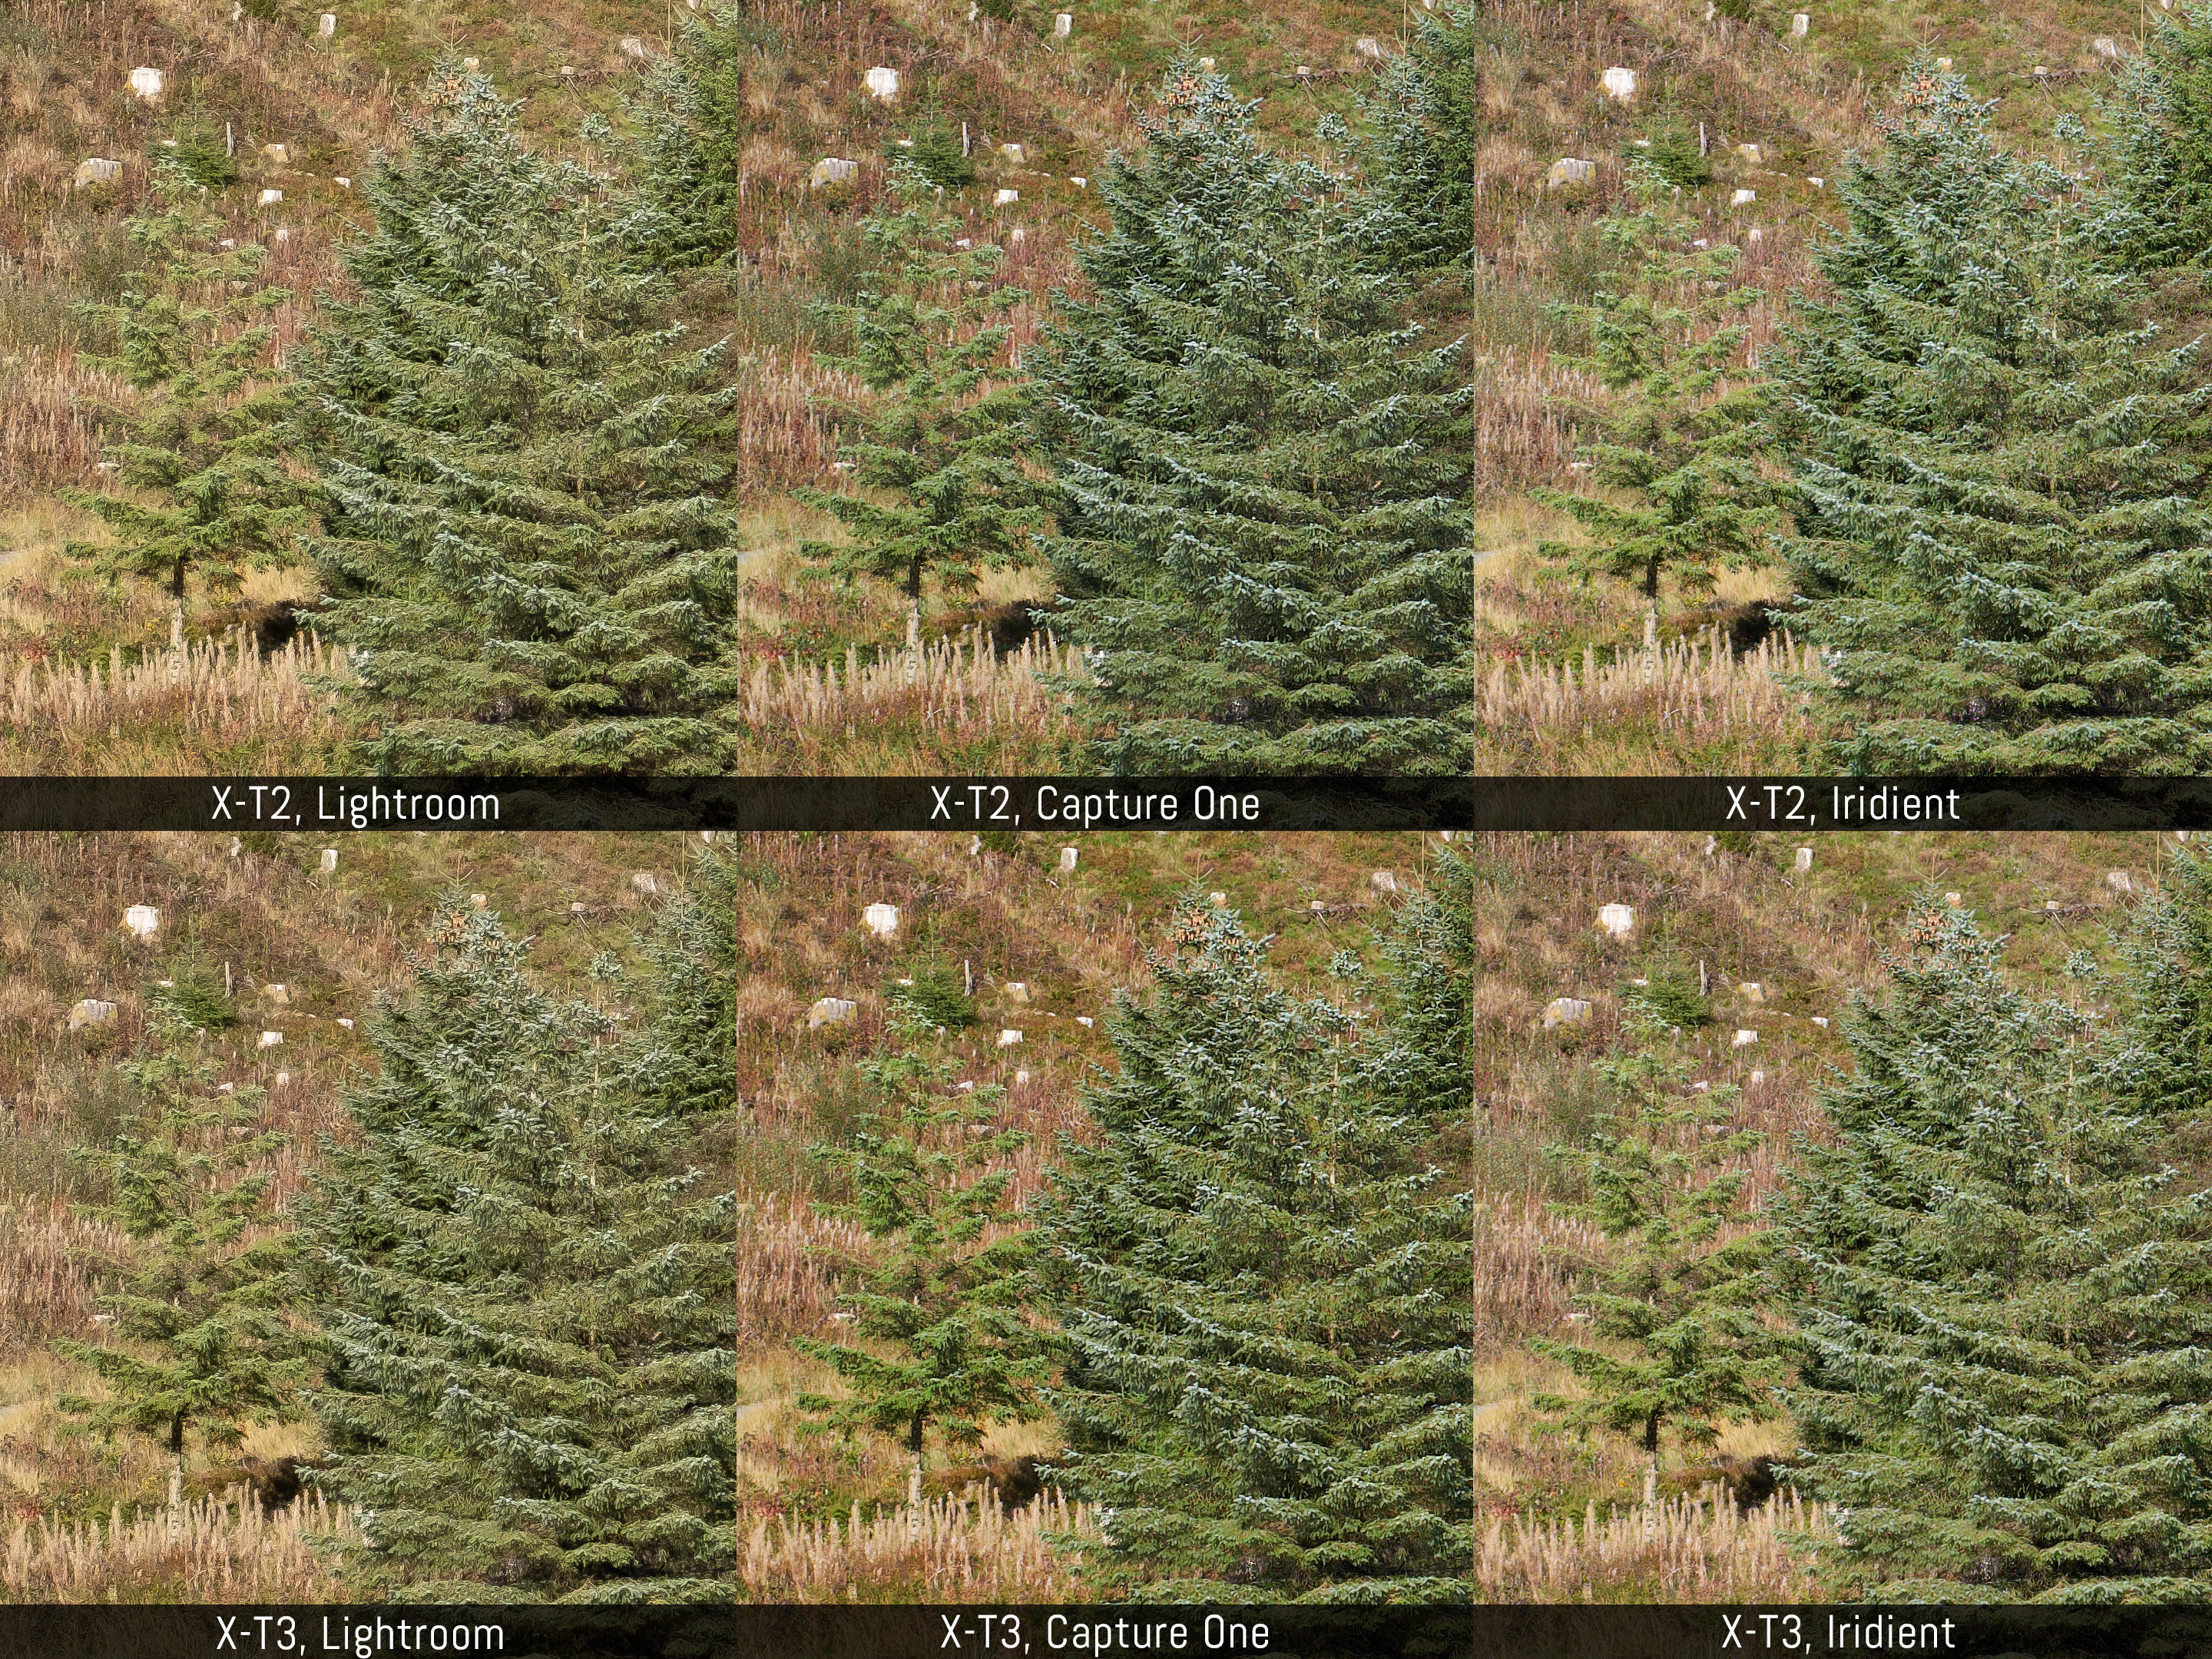
A lot of photographers have a love/hate relationship with the X-Trans pattern. One of the main criticisms is the rendering of foliage where details on the X-Trans sensor appear more washed out and less defined than with a Bayer sensor. Software applications can either improve or worsen the result, with Adobe Lightroom / Camera RAW usually being the worst.
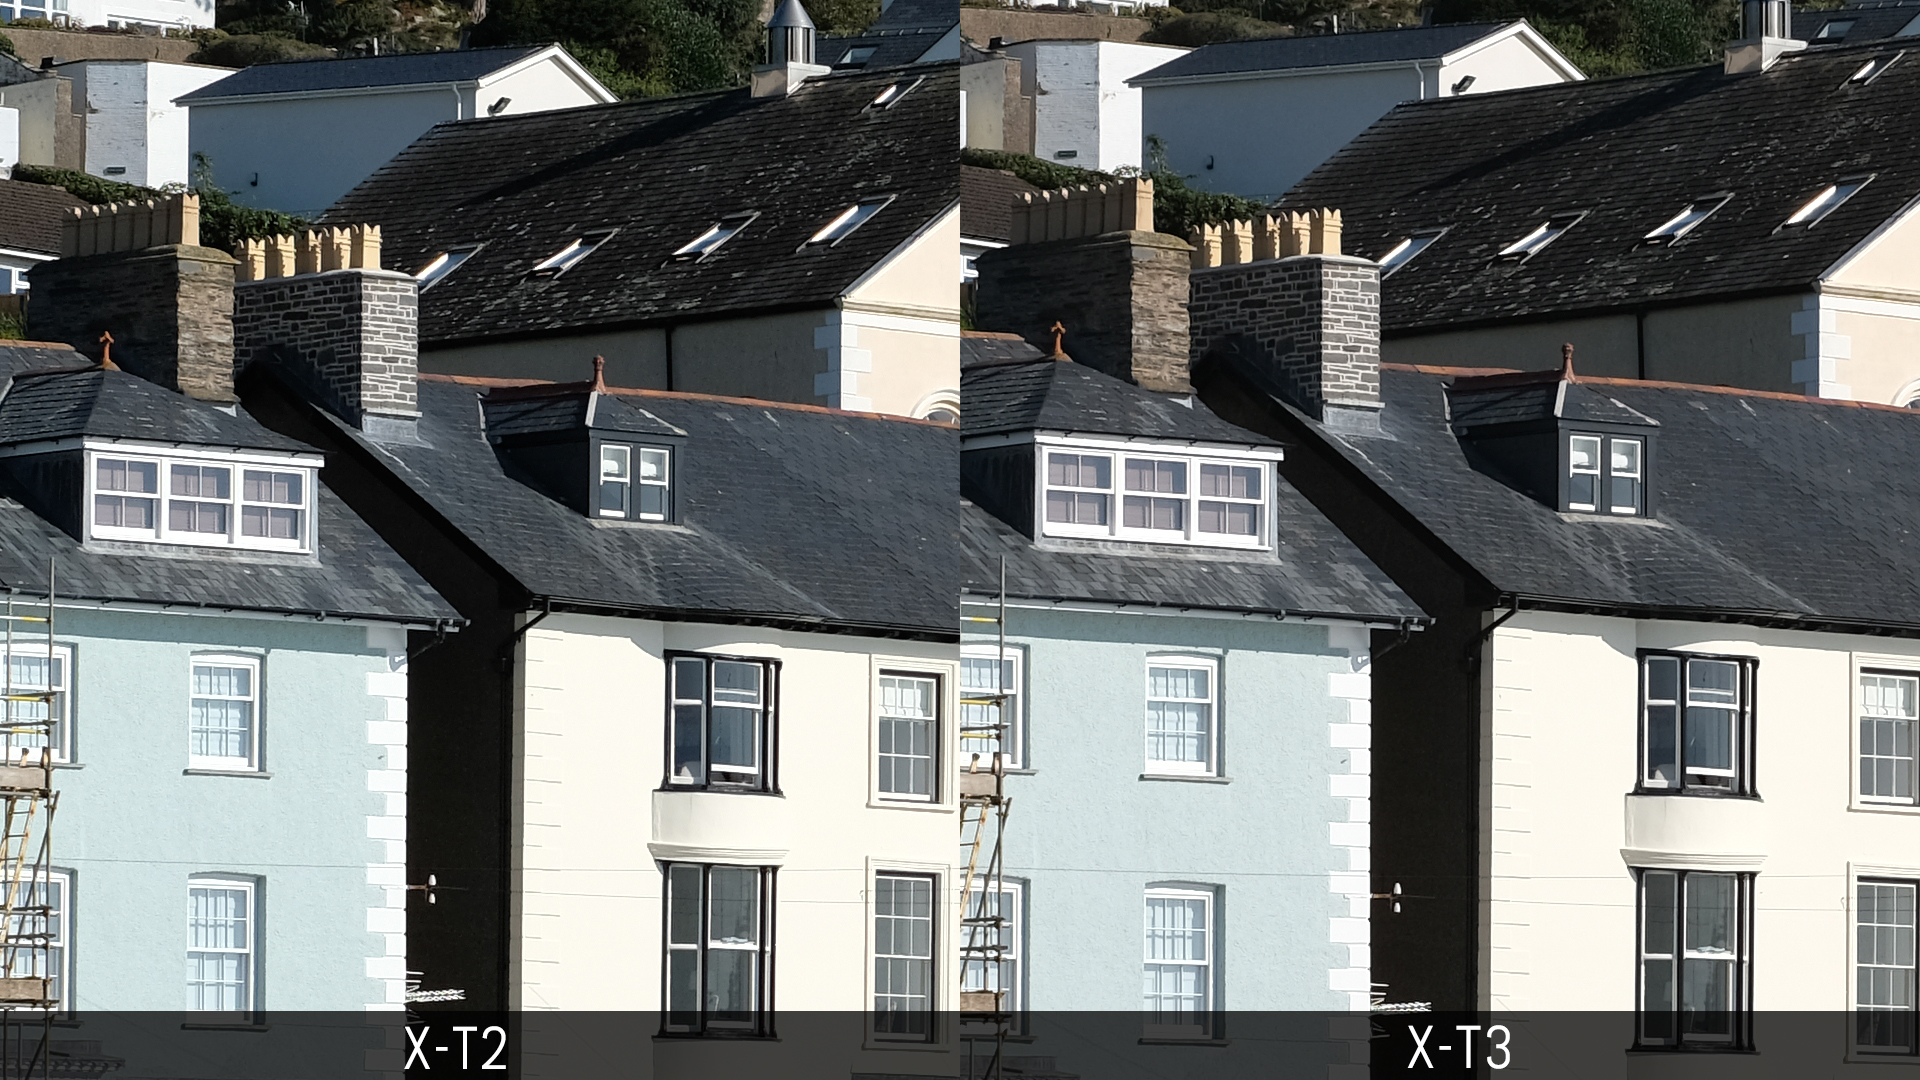
Very little if nothing has changed with the new X-T3 sensor as you can see from our second example below. Phase One – which recently released a free express version of Capture One for Fujifilm cameras – and Iridient X Transformer do a better job than Lightroom as expected.

Washed out details are also visible in the SOOC JPGs, and increasing the sharpness improves the result marginally.
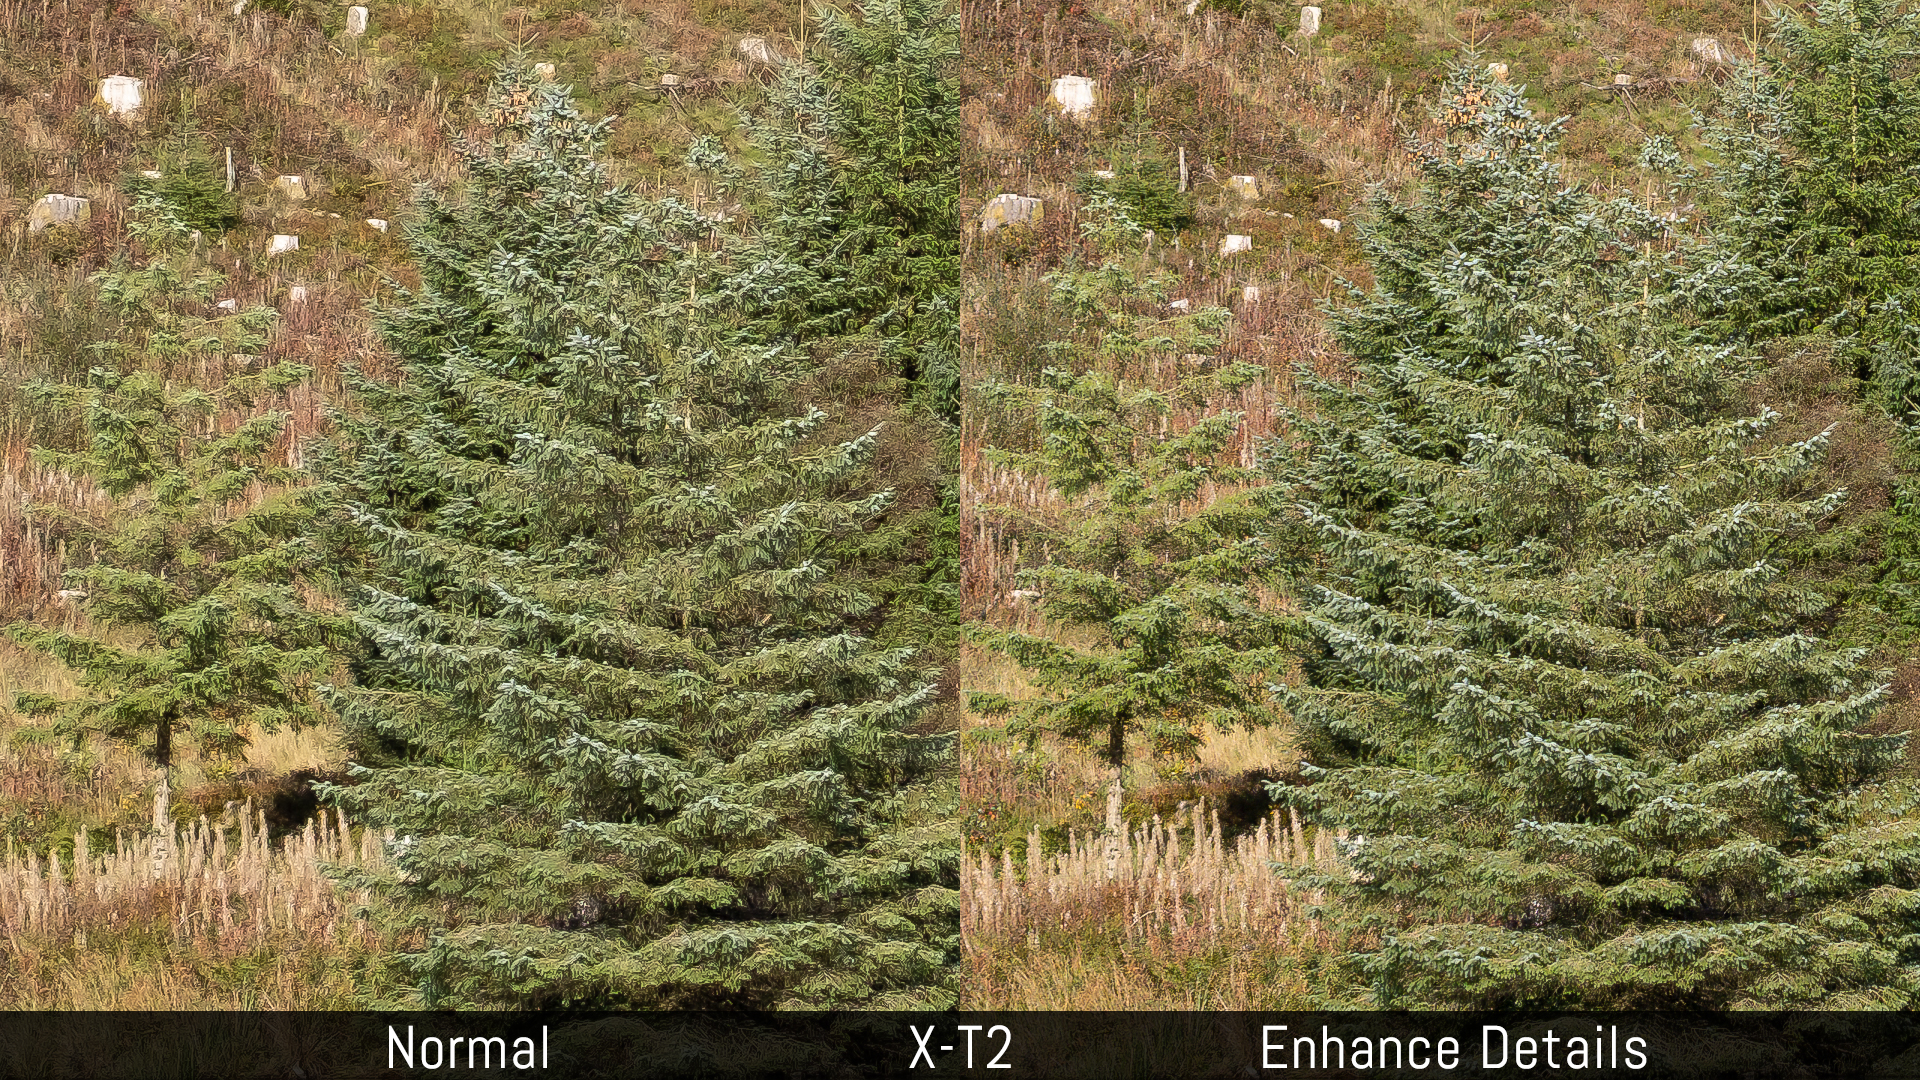
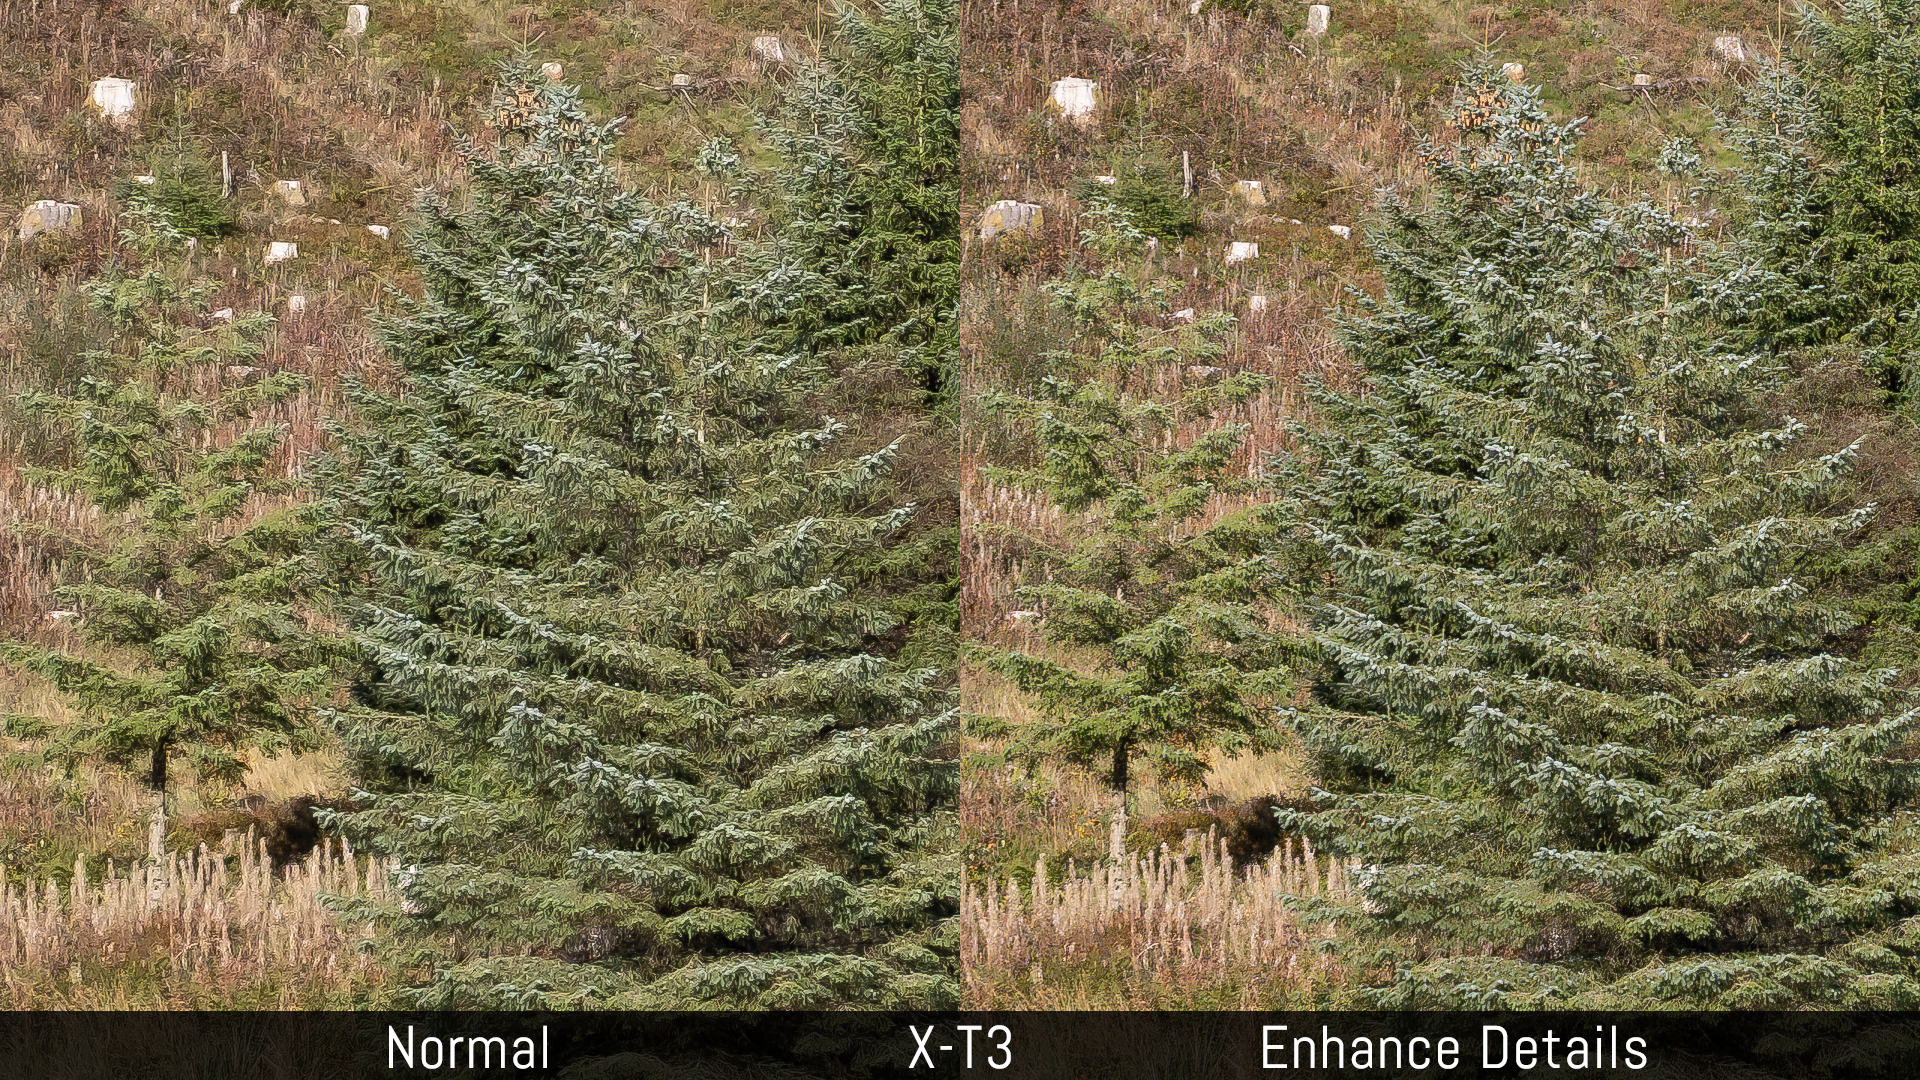
The update 8.2 for Lightroom Classic CC has introduced a new function called Enhance Details. The software uses machine learning to improve details and reduce artefacts in the RAW files. It seem to work well with the X-T2 and X-T3 files and does a good job of minimising the annoying watercolour effect. Note that it can take a few minutes for the image to be processed if you don’t have a powerful computer, and the software creates a DNG file is created as a result.
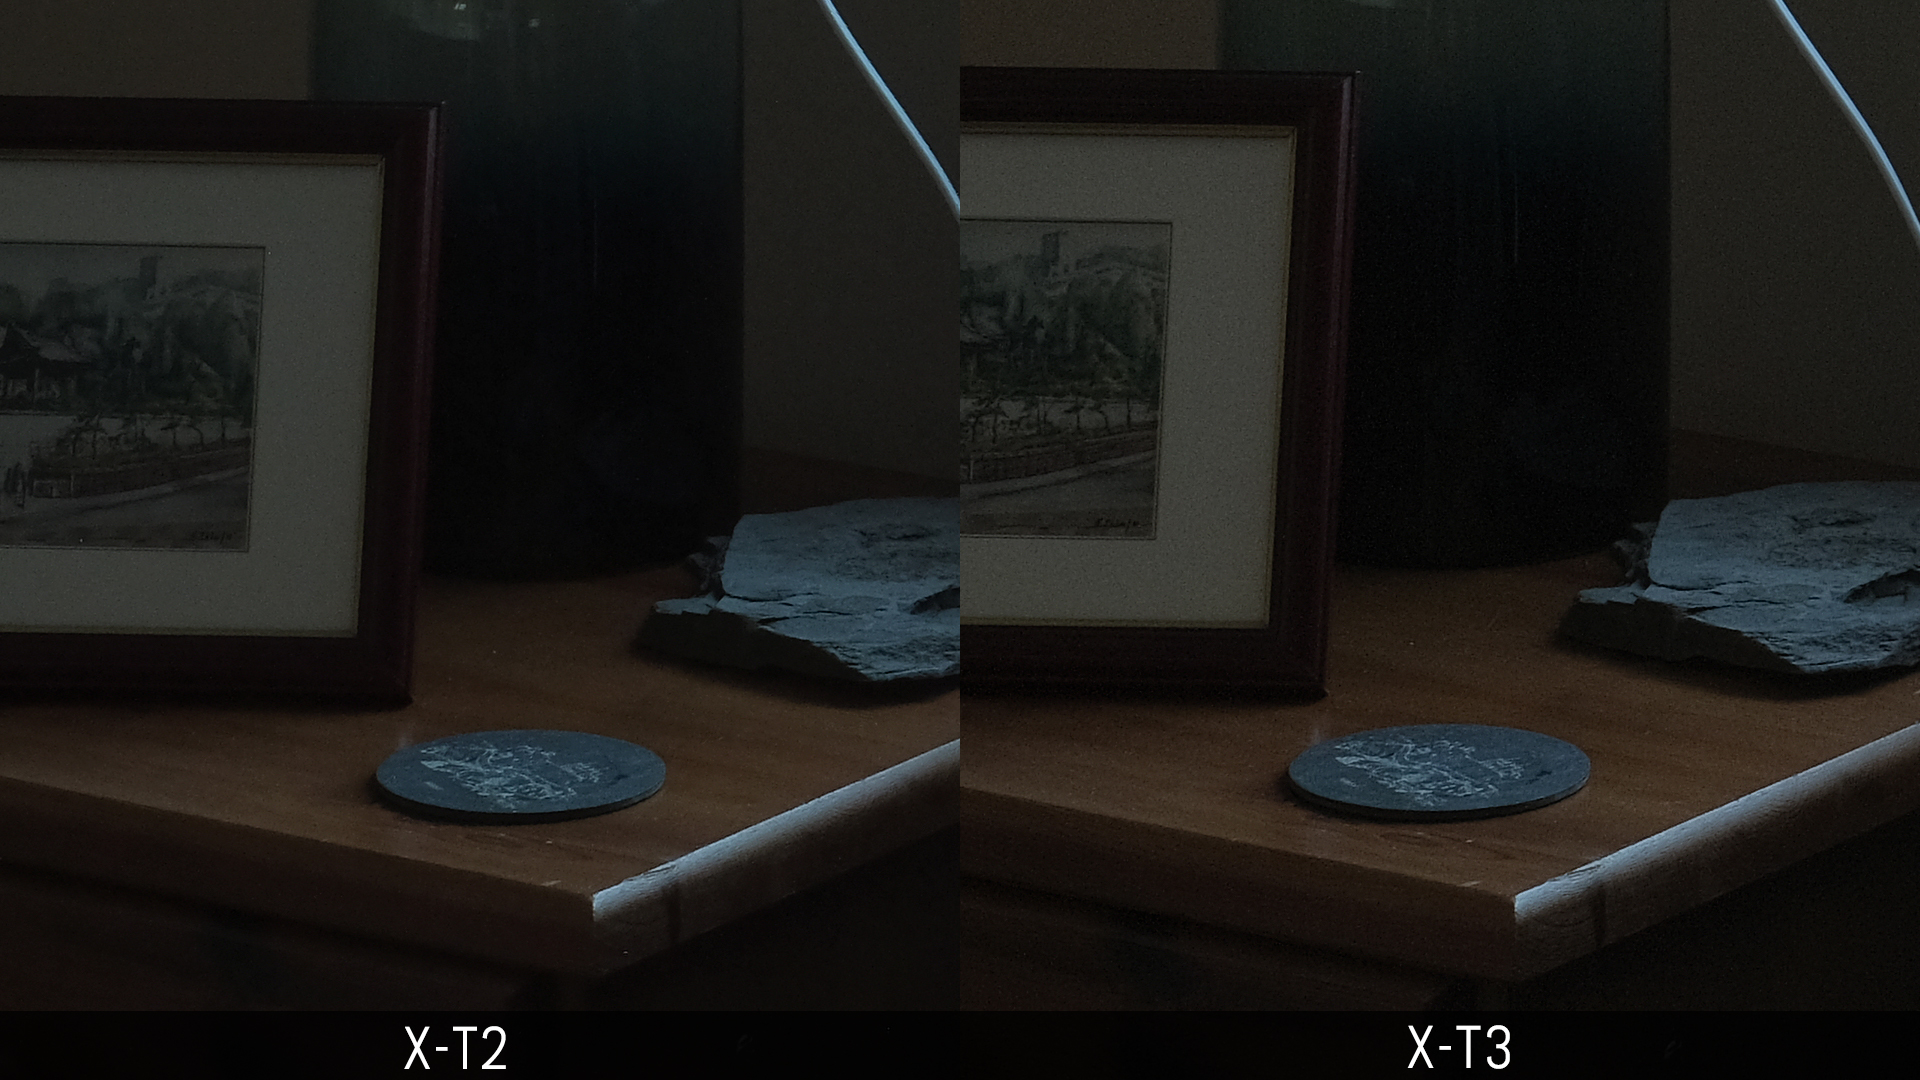
Perhaps more than the extra resolution, the most interesting upgrade on the X-T3 26MP sensor – at least on paper – is the use of a BSI structure (back-illuminated) which means that the sensor collects more light than a conventional design. This should translate into improvements in dynamic range and performance at high sensitivities. Note that the base ISO level starts at 200 on the X-T2 and 160 on the X-T3.
With strong shadow recovery, both cameras perform well but the X-T3 file has less noise. The X-T2 exhibits some red colour cast but it goes away with less extreme adjustments.


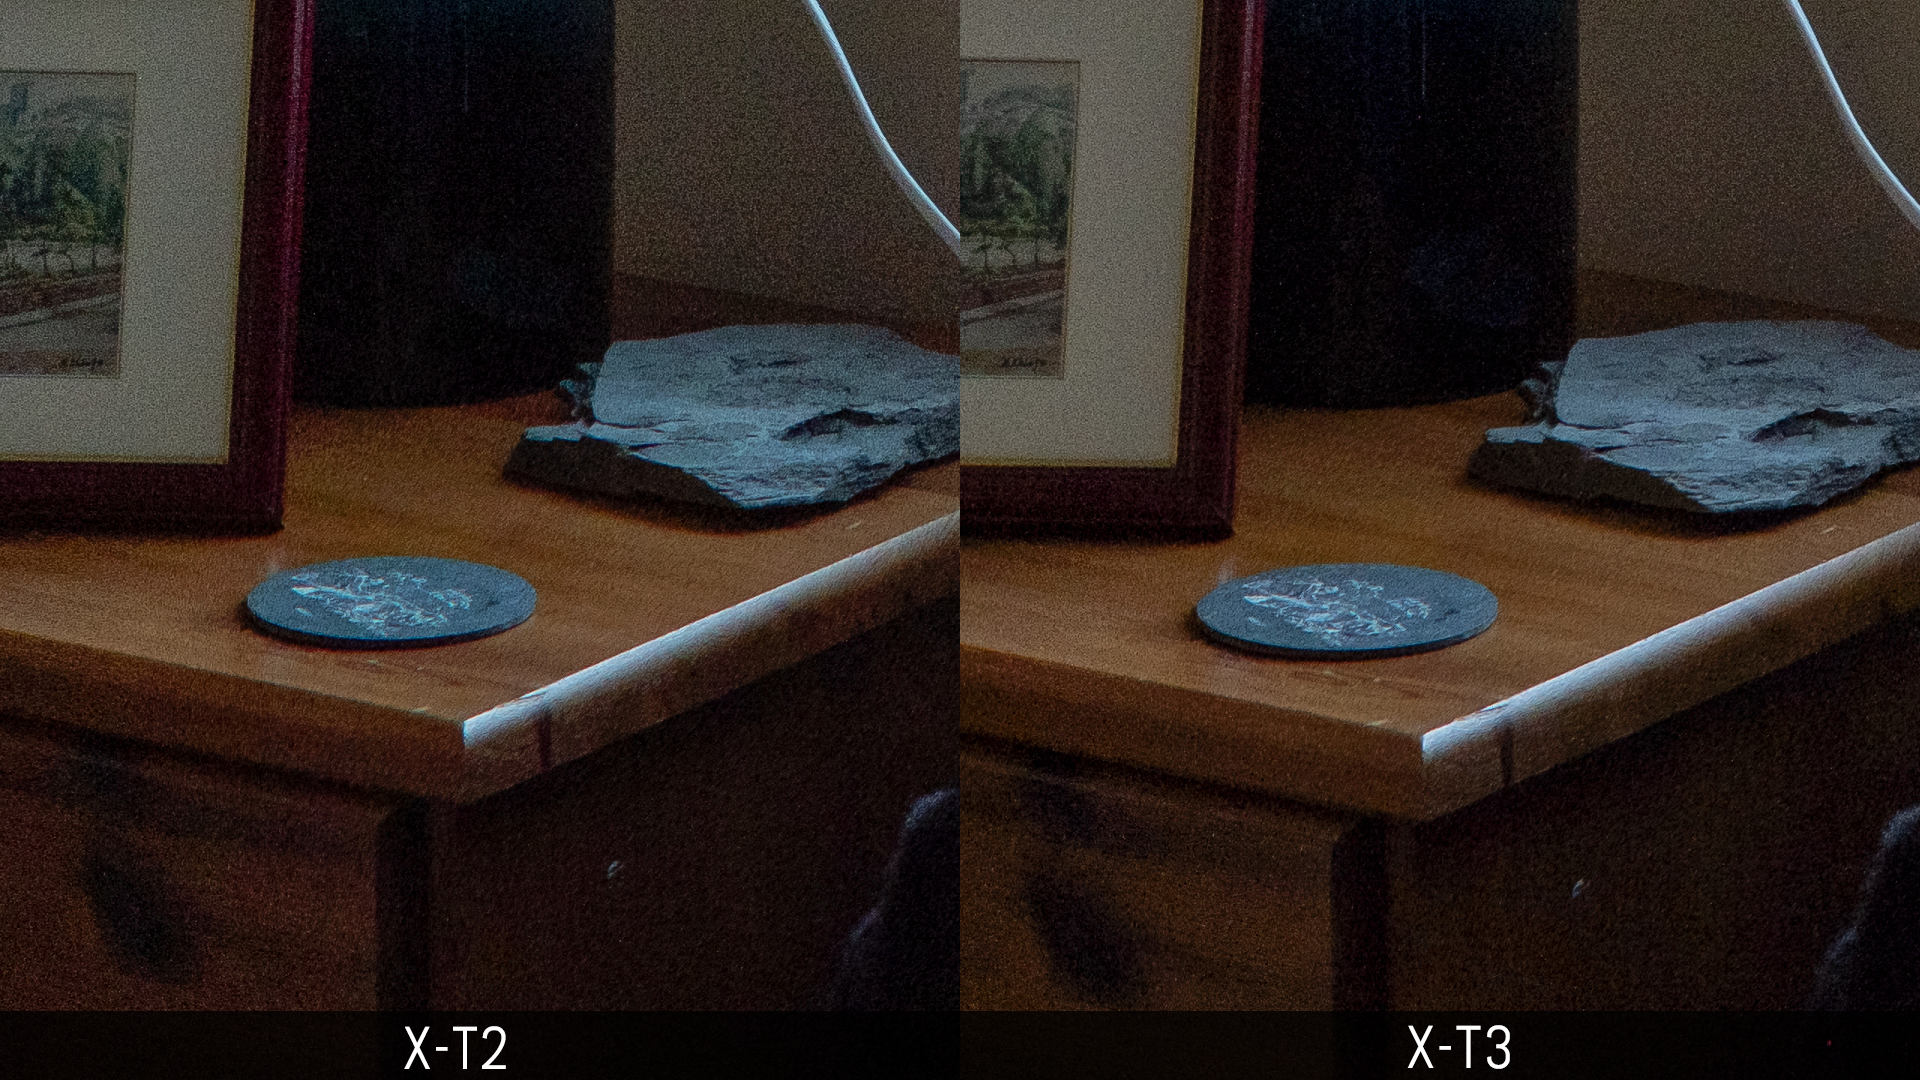
In the highlights, it is the X-T2 that surprisingly retains a little more information.

If you like to use JPGs, you can take advantage of the DR setting which offers two levels: DR200% works from ISO 400 and above (or ISO 320 and above on the X-T3) and DR400% works from ISO 800 and above (ISO 640 on the X-T3). What happens is that the camera underexposes the image to preserve more highlight information and opens the shadows to increase the dynamic range.
The X-T3 also has a D-Range Priority setting which works in a similar way but makes you choose between Weak, Strong or Auto levels and disables the highlight/shadow setting. Personally I prefer to work with the original DR option. Below you can see the effect of shooting with and without it.


The two cameras behave in a similar way including how they preserve highlights. The only small difference is that the X-T3 shows more noise in the dark areas but also more sharpness. This means there is less noise reduction applied than on the X-T2.


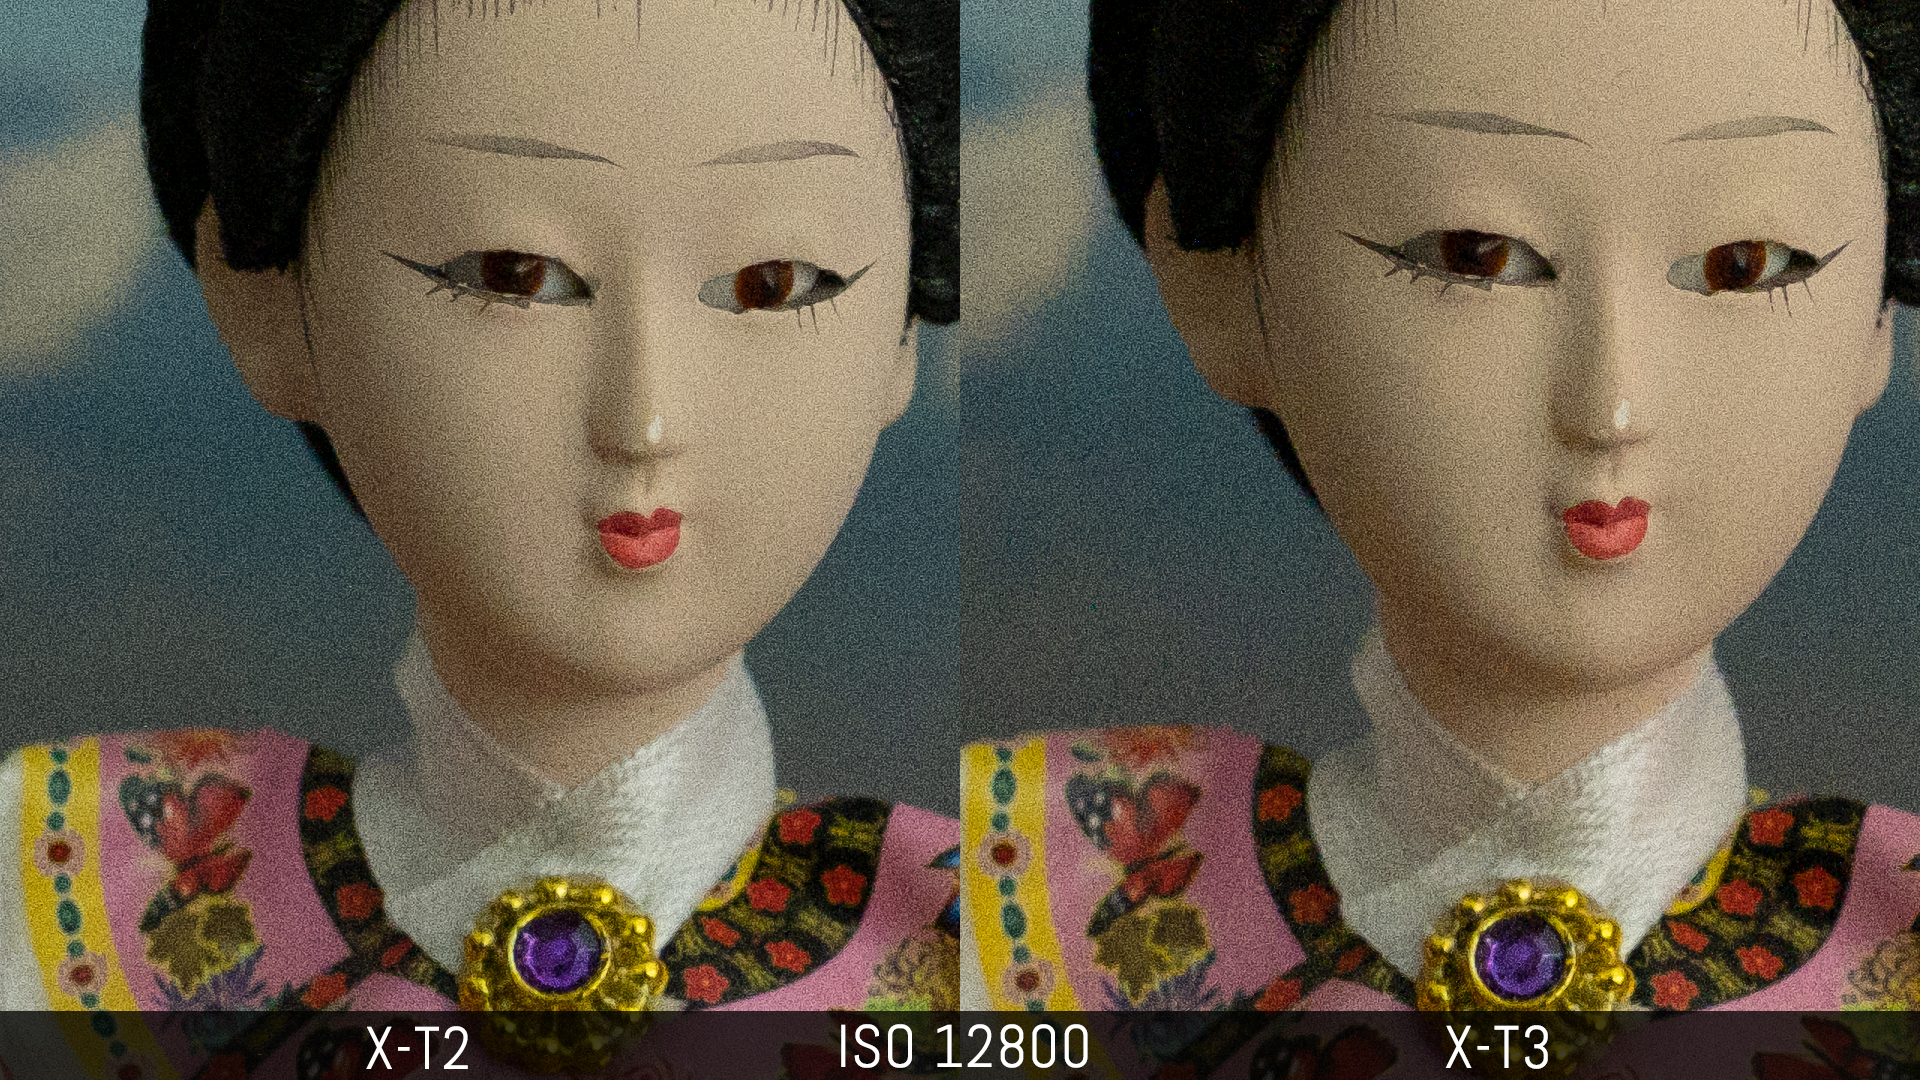
The X-T3 BSI sensor doesn’t bring an enormous advantage if we look at the examples above but what about high ISOs? Well, here as well, don’t expect any major improvements. In fact, both cameras perform the same up to 12800 ISO, with perhaps slightly more noise in the X-T3 files but you really need to pixel-peep to see it.


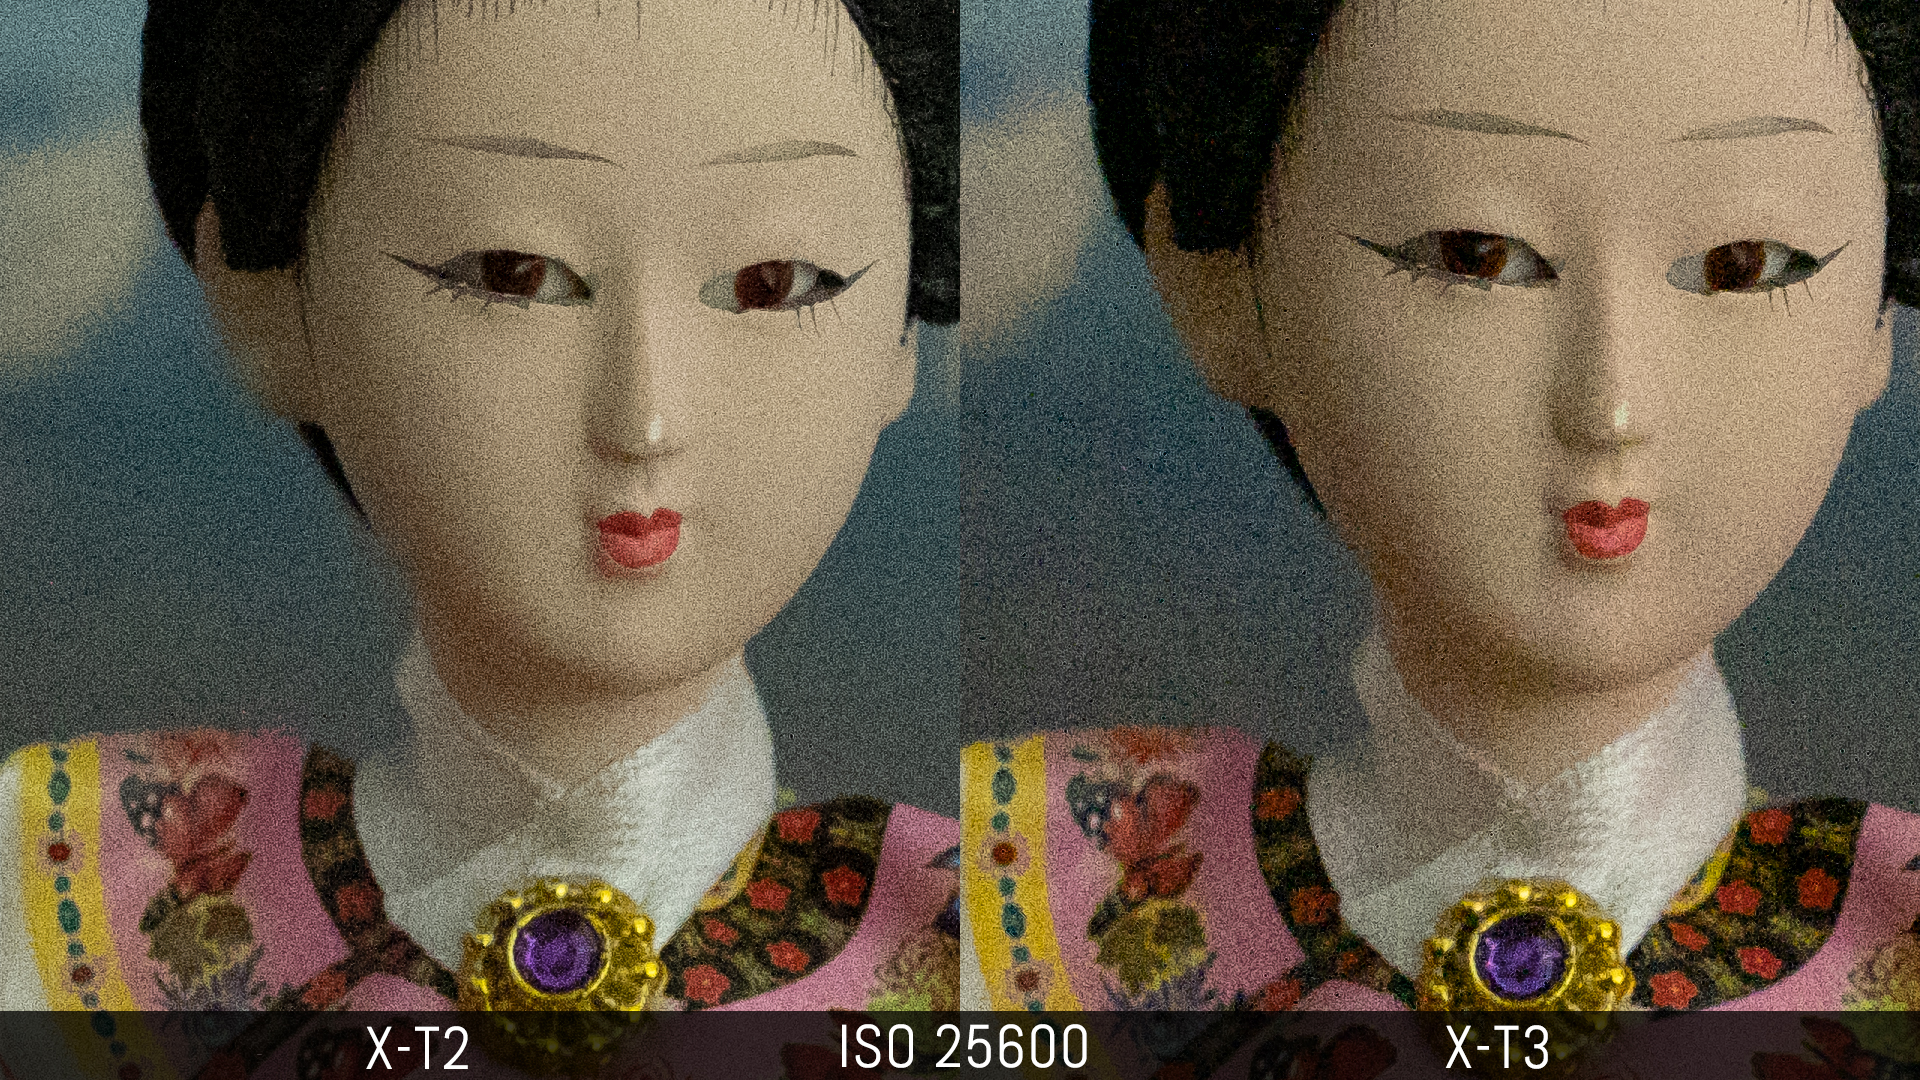
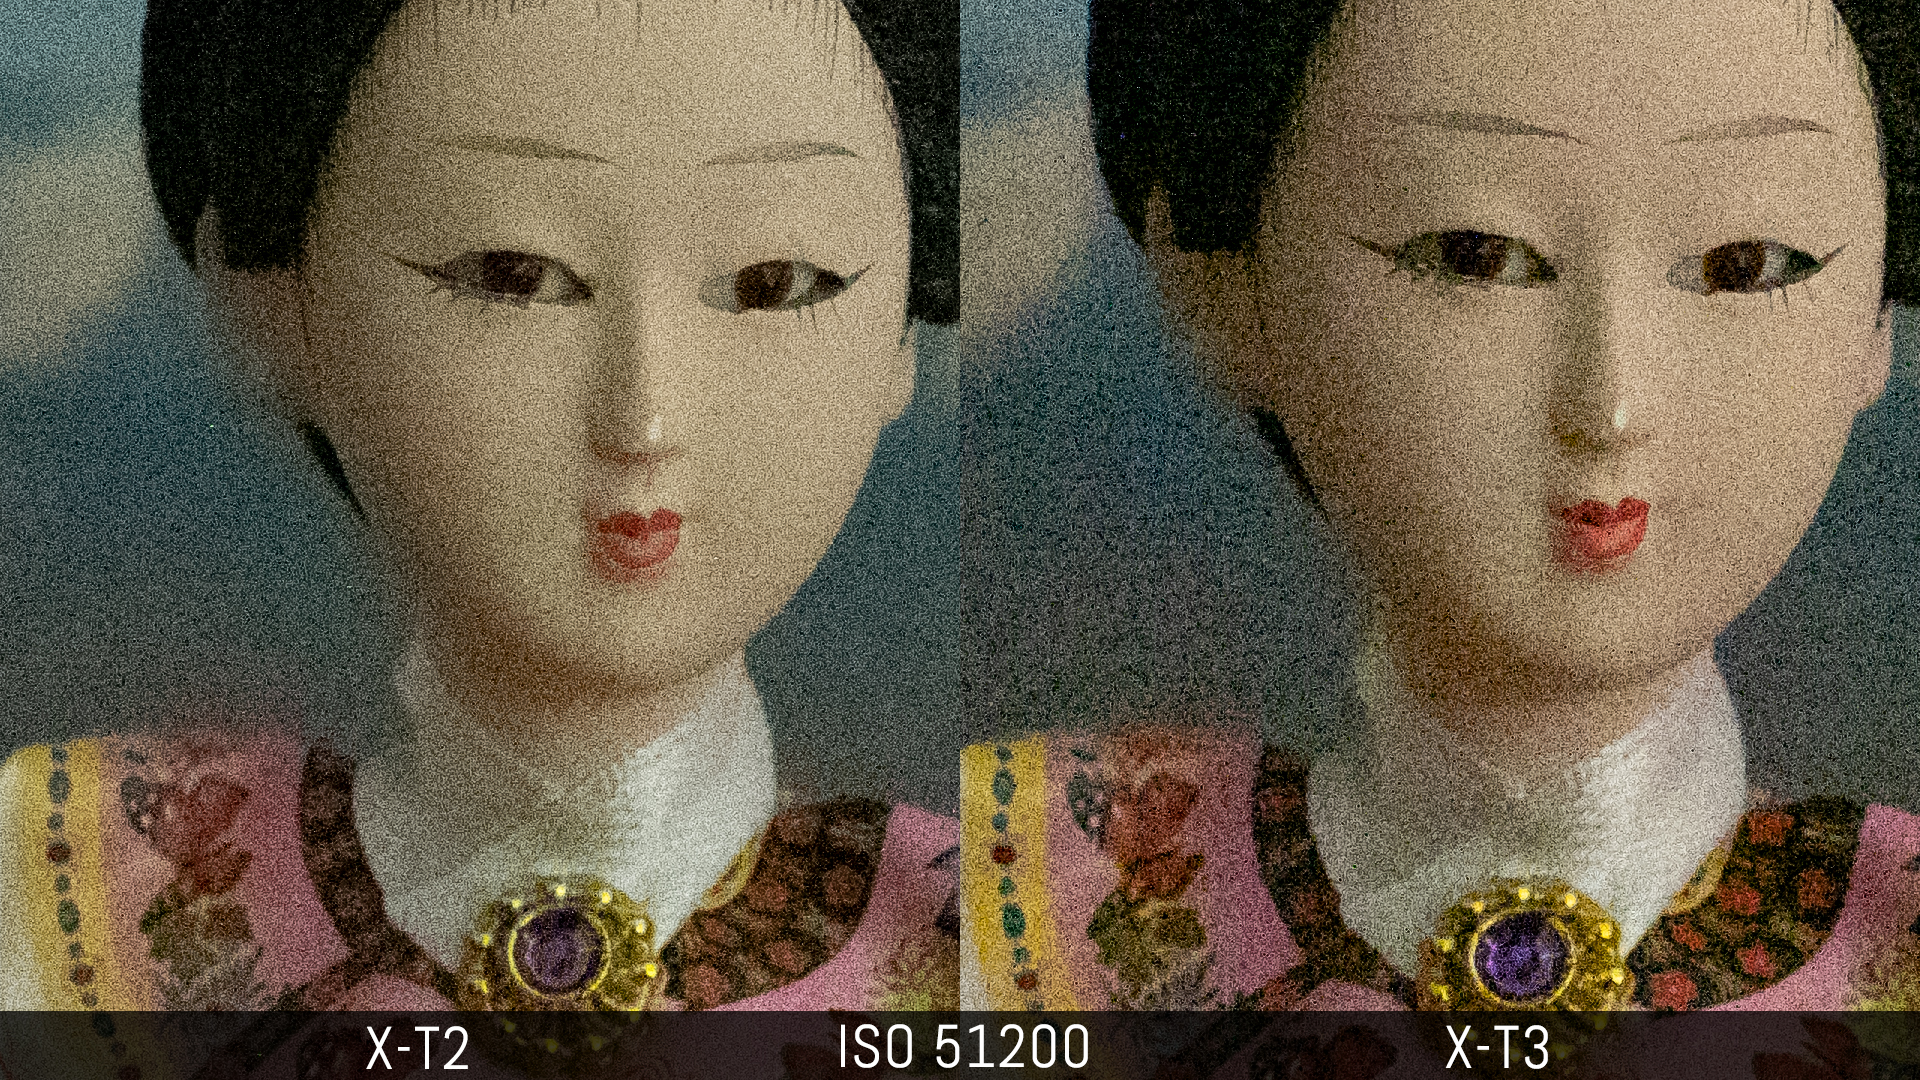
The X-T2 does better at the two highest extended sensitivities, as noise becomes more visible in the X-T3 files. The last value of 51200 is unusable on both cameras and on the X-T2, it actually doesn’t give you an extra stop of brightness with the RAW files, so I had to increase the exposure by 1Ev to match the X-T3 version.
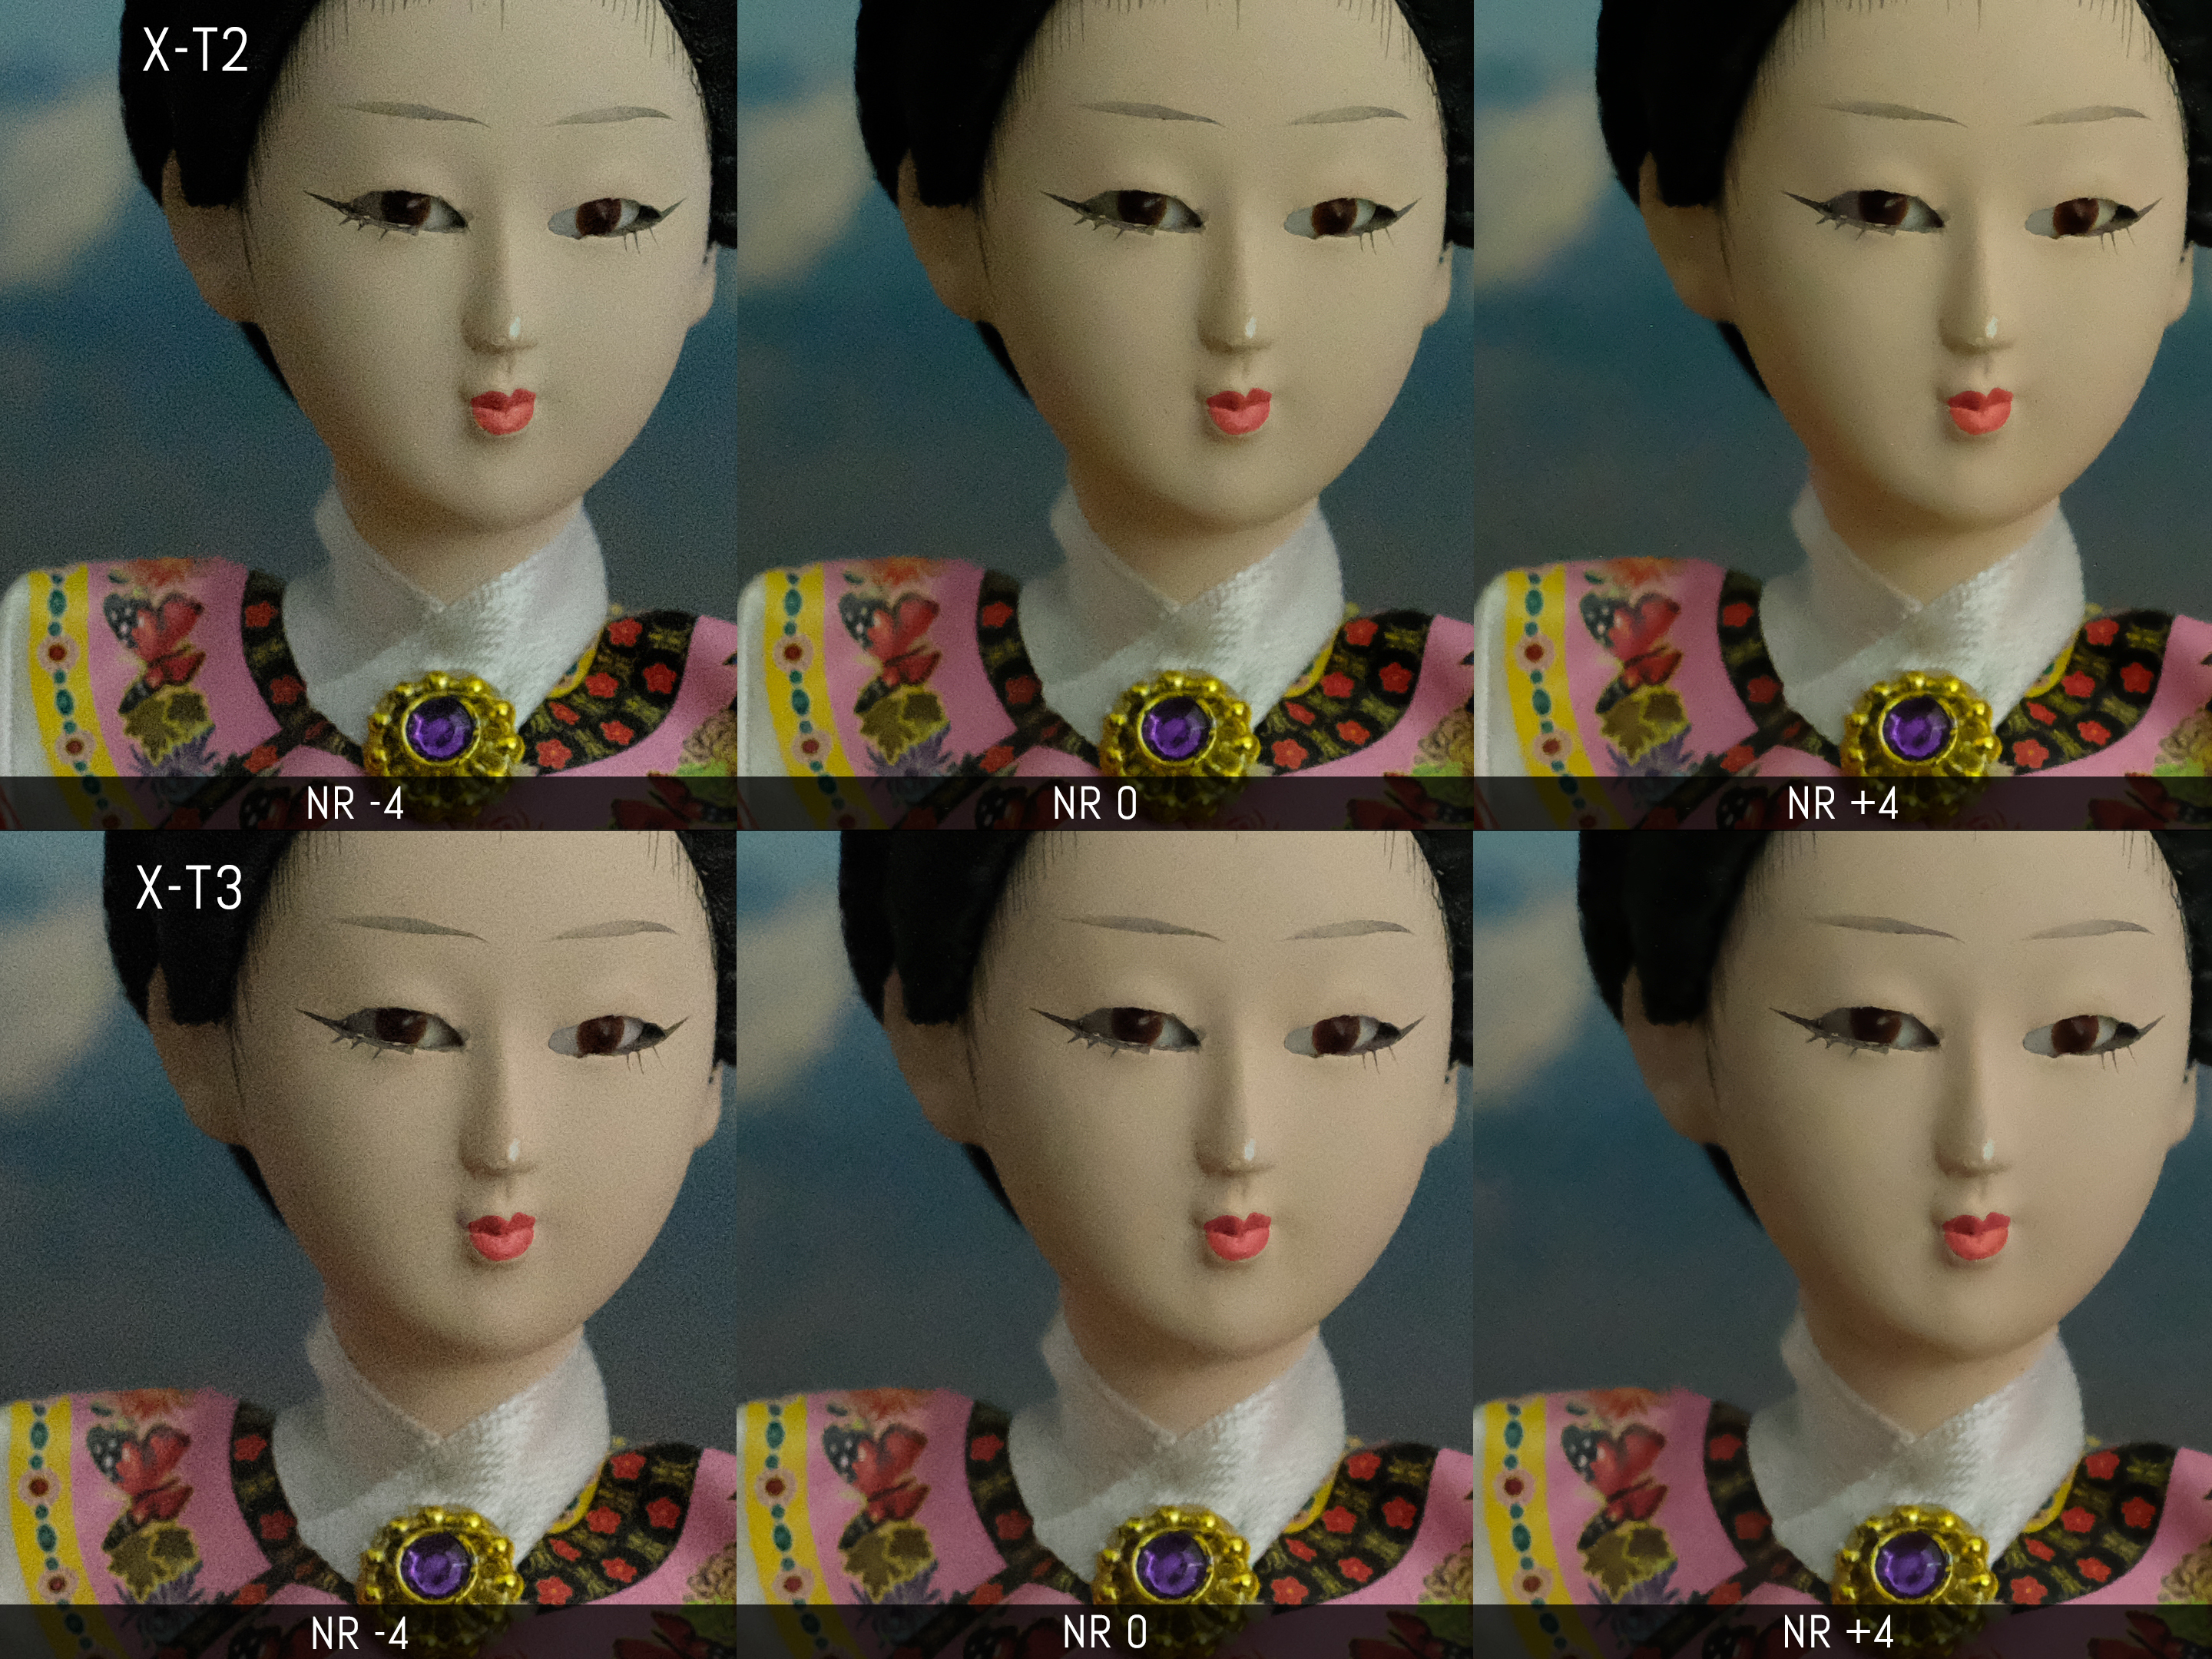
For the in-camera JPGs, you can vary the Noise Reduction setting in ±4 steps. The results are similar, with the X-T3 appearing a bit smoother overall. Also note the more pronounced colour shift on the X-T2 the more you add noise reduction.
Next we’ll have a look at colours. There is little to talk about when it comes to the RAW files, especially when analysing sunny landscape images. They look identical when opened with the same software and colour profile. The only thing I’ve noticed is that Lightroom – unlike Capture One – adds lots of magenta shift by default to the X-T3 file to display the colours correctly (+65 which is very unusual). Perhaps it is a bug that will be fixed with the next update.
Each camera offers 9 picture profiles (called Film Simulations) with three of them being monochrome (one sepia and two black and white options). They are applied to the SOOC JPGs but some software can replicate them.
Here we find subtle changes. The X-T3 image is ever so slightly cooler and less vibrant than the X-T2 image. It is true for all film simulation modes and the difference is a little more evident for profiles such as Provia or Astia.


The black and white rendering looks nearly identical. You can choose between Monochrome and Acros and the latter gives a bit more contrast. For each, you can select three different filters (Red, Yellow and Green) to deepen the shades of grey.


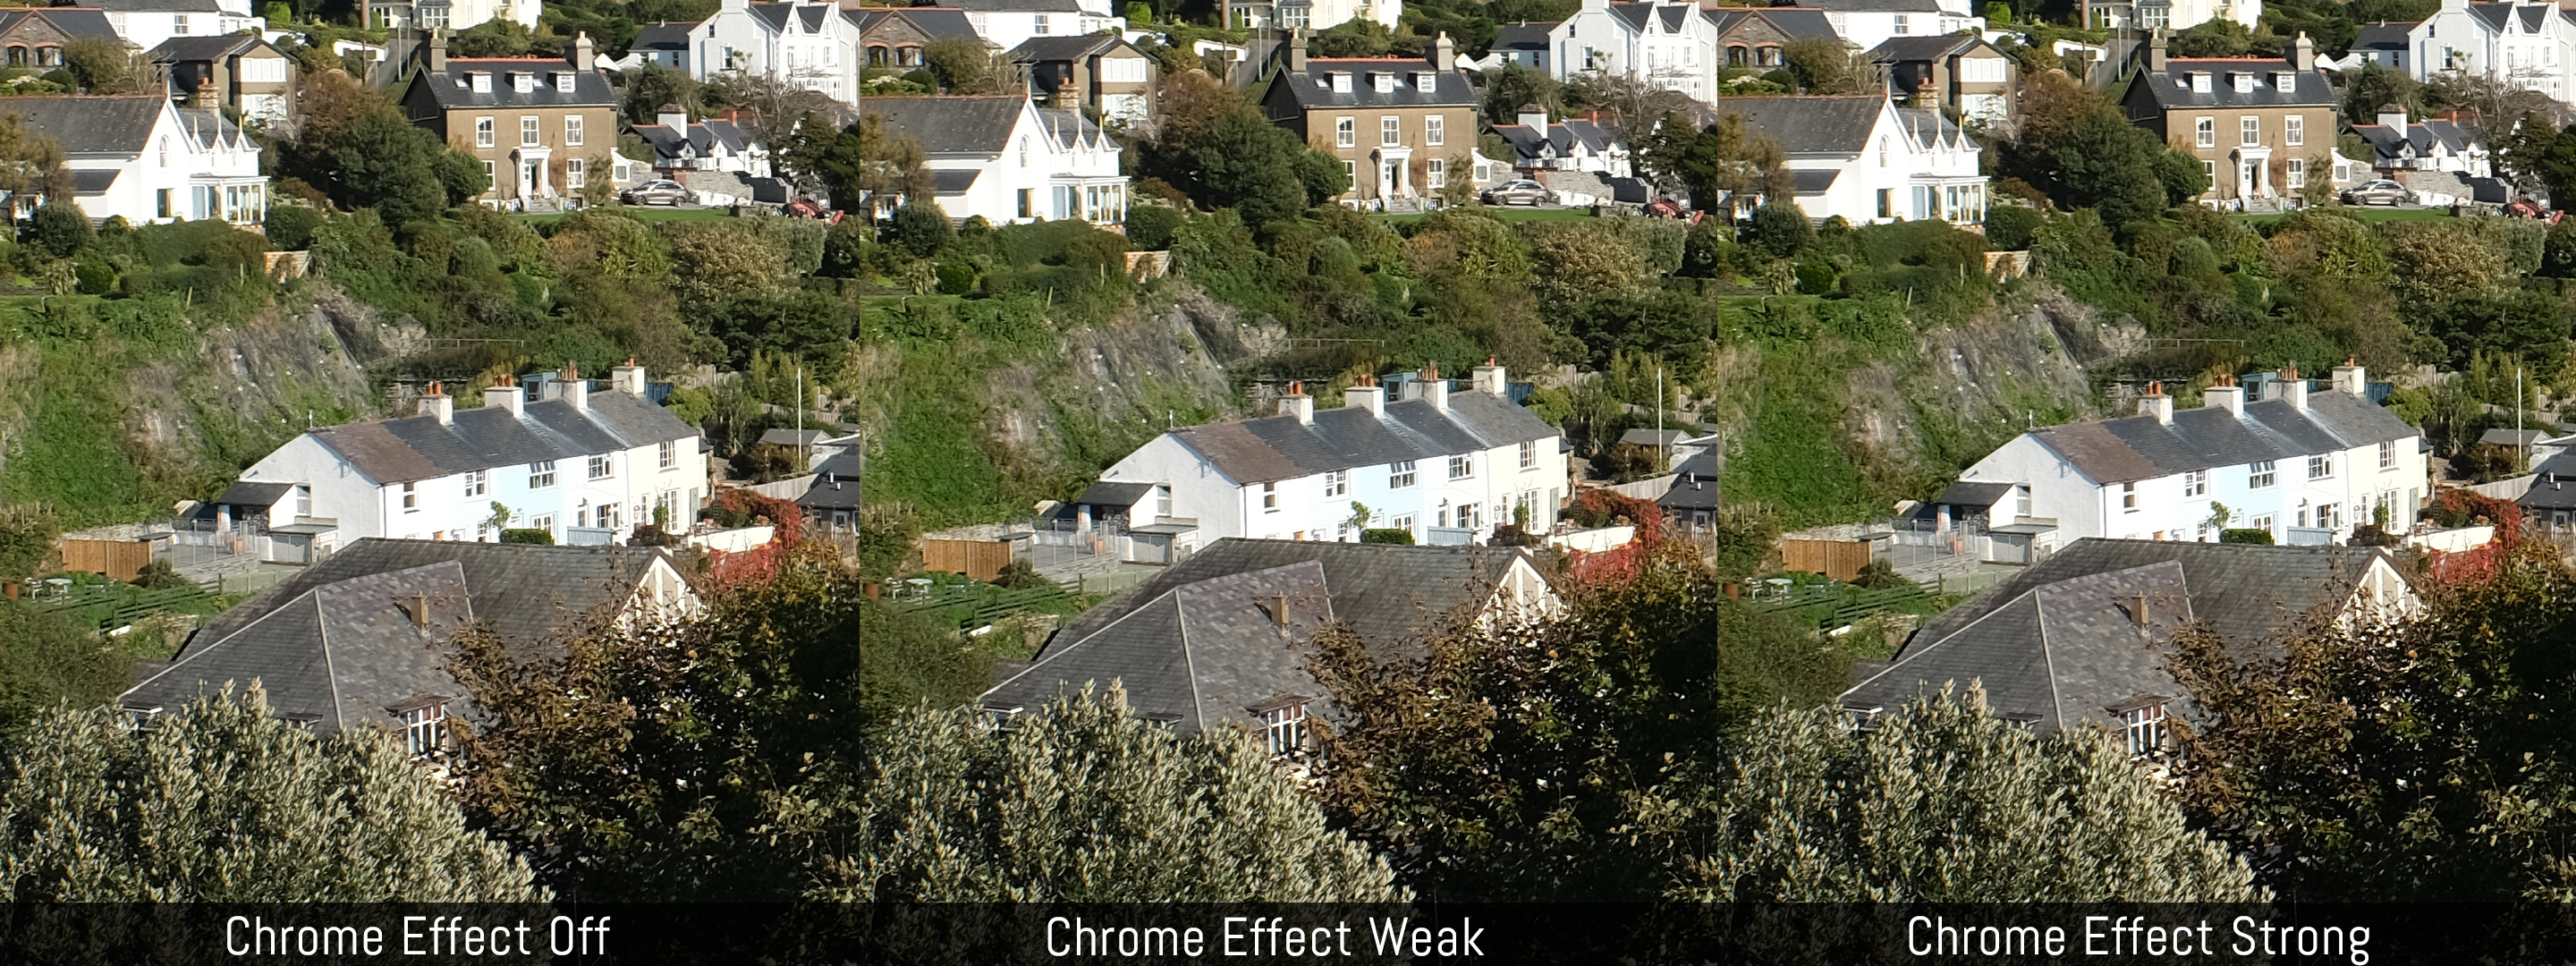
To talk about more relevant differences between the two cameras as far as colours are concerned, we need to look at the extra settings available on the X-T3. One of them is called Colour Chrome Effect, a parameter that made its debut on the GFX 50s medium format camera. It produces deeper colours and gradations and unlike the GFX, it doesn’t slow down the shooting process.
Depending on your subject, the difference may be more or less visible. Take our landscape image for example. While the greens appear a bit darker and richer, it remains a subtle change.
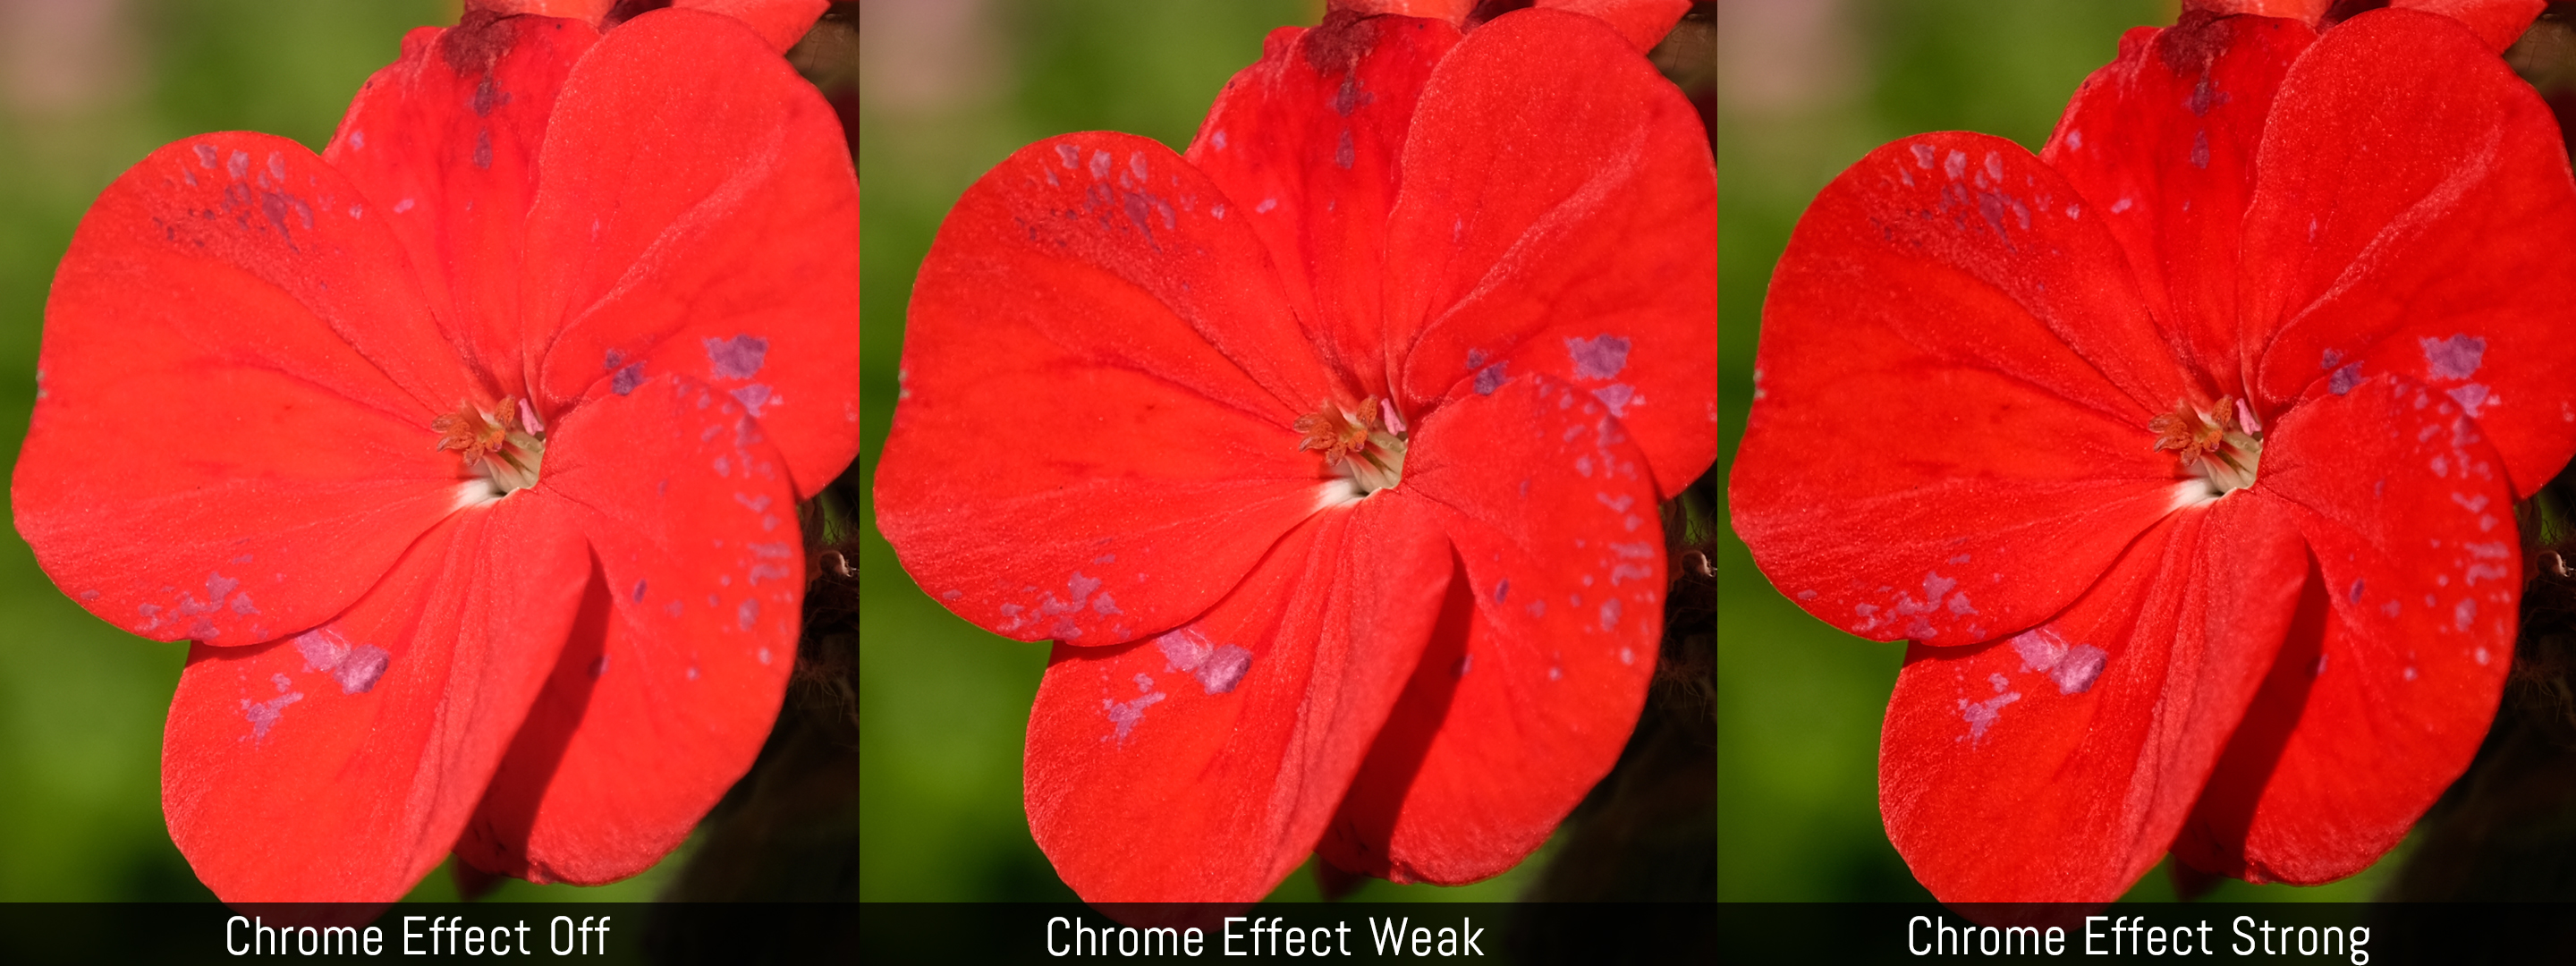
But if you take a red flower, a subject whose tones digital cameras often struggle to reproduce correctly, the benefit immediately becomes clear. See how the texture is much richer with the Chrome Effect set to Strong?

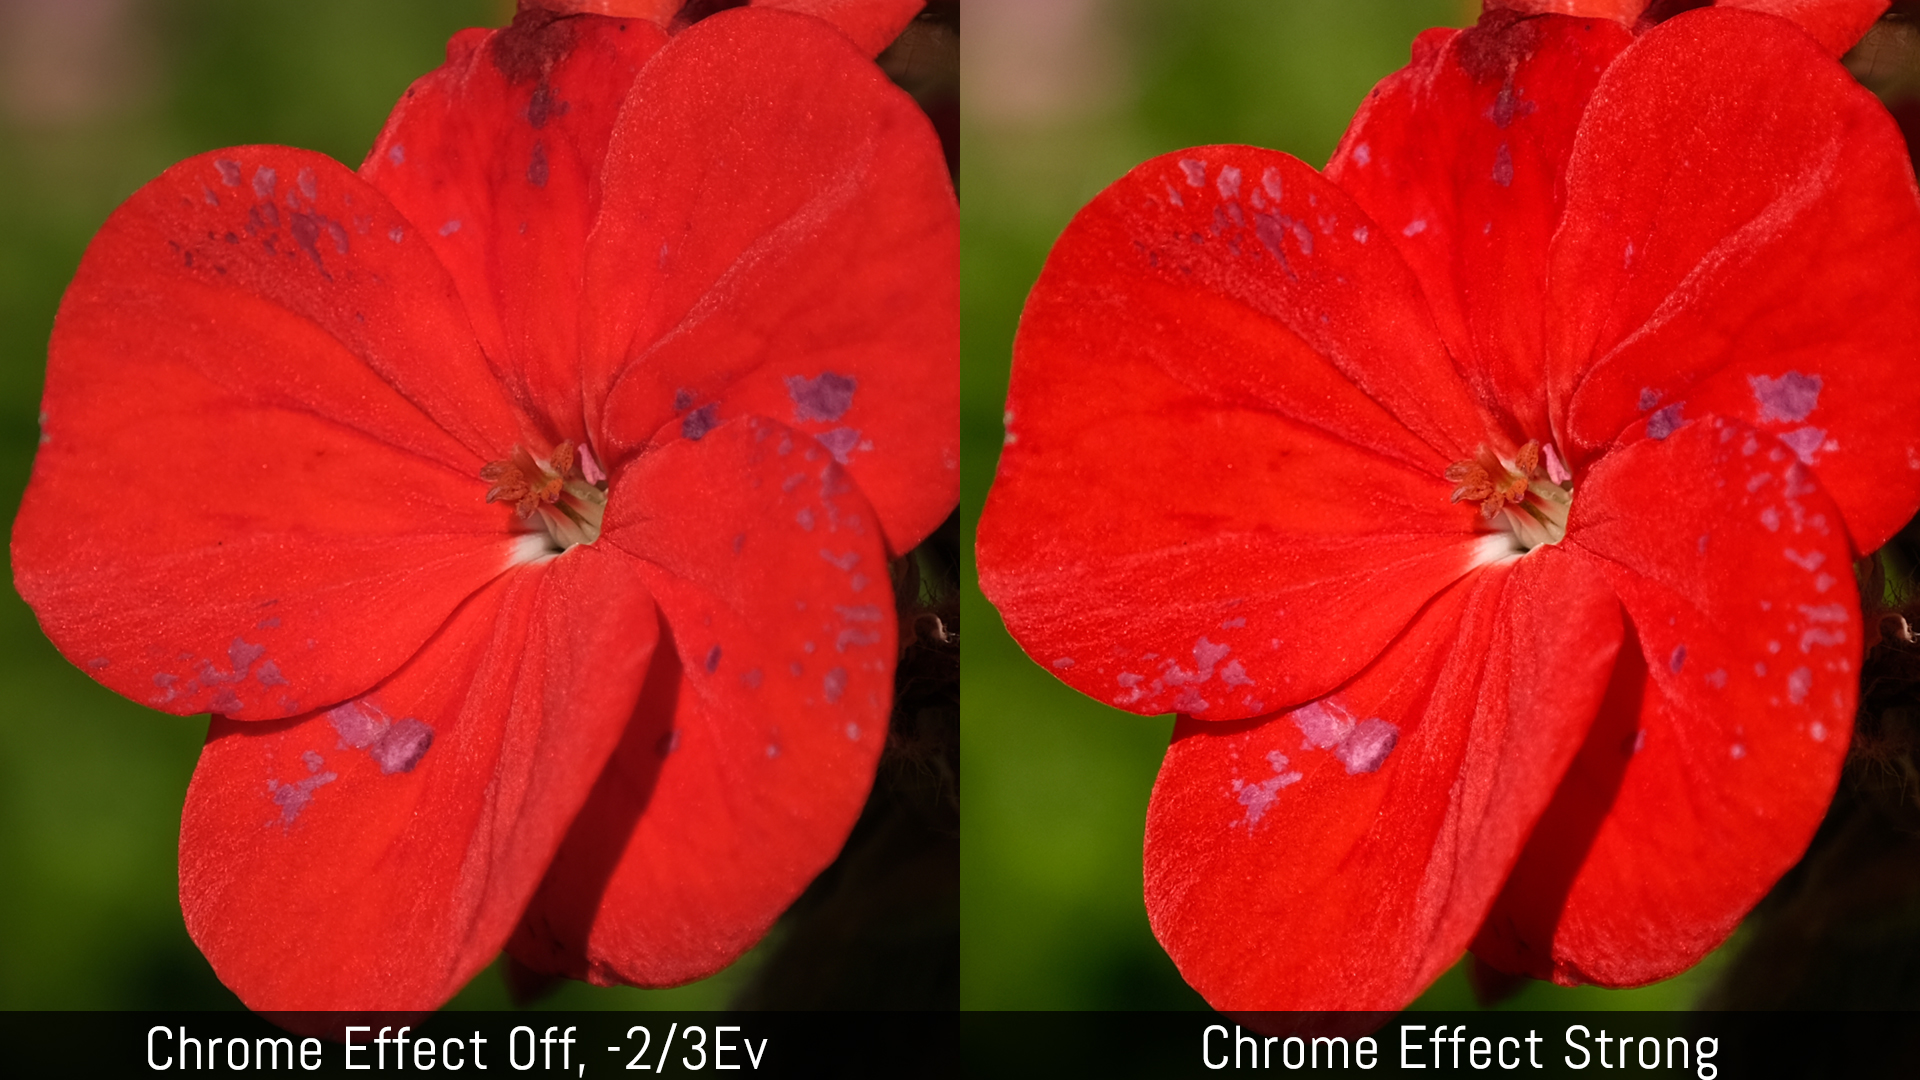
At first glance you may think that what this setting does is darken the image but if I keep it disabled and under-expose my photo, I don’t get the same precise colour rendering as you can see below.
If you like to shoot Black and White straight out of camera, the X-T3 has a new option called Monochrome Adjustment that allows you to warm or cool the tones. It works in ±9 steps depending on how subtle or punchy a result you want.


Next we look at skin tones. With the RAW files we can easily match the results once again, so we need to turn to the SOOC JPGs and the built-in camera profiles to see more differences.
With a manual kelvin temperature, both cameras shift towards a green tint but it is more contained on the X-T3.
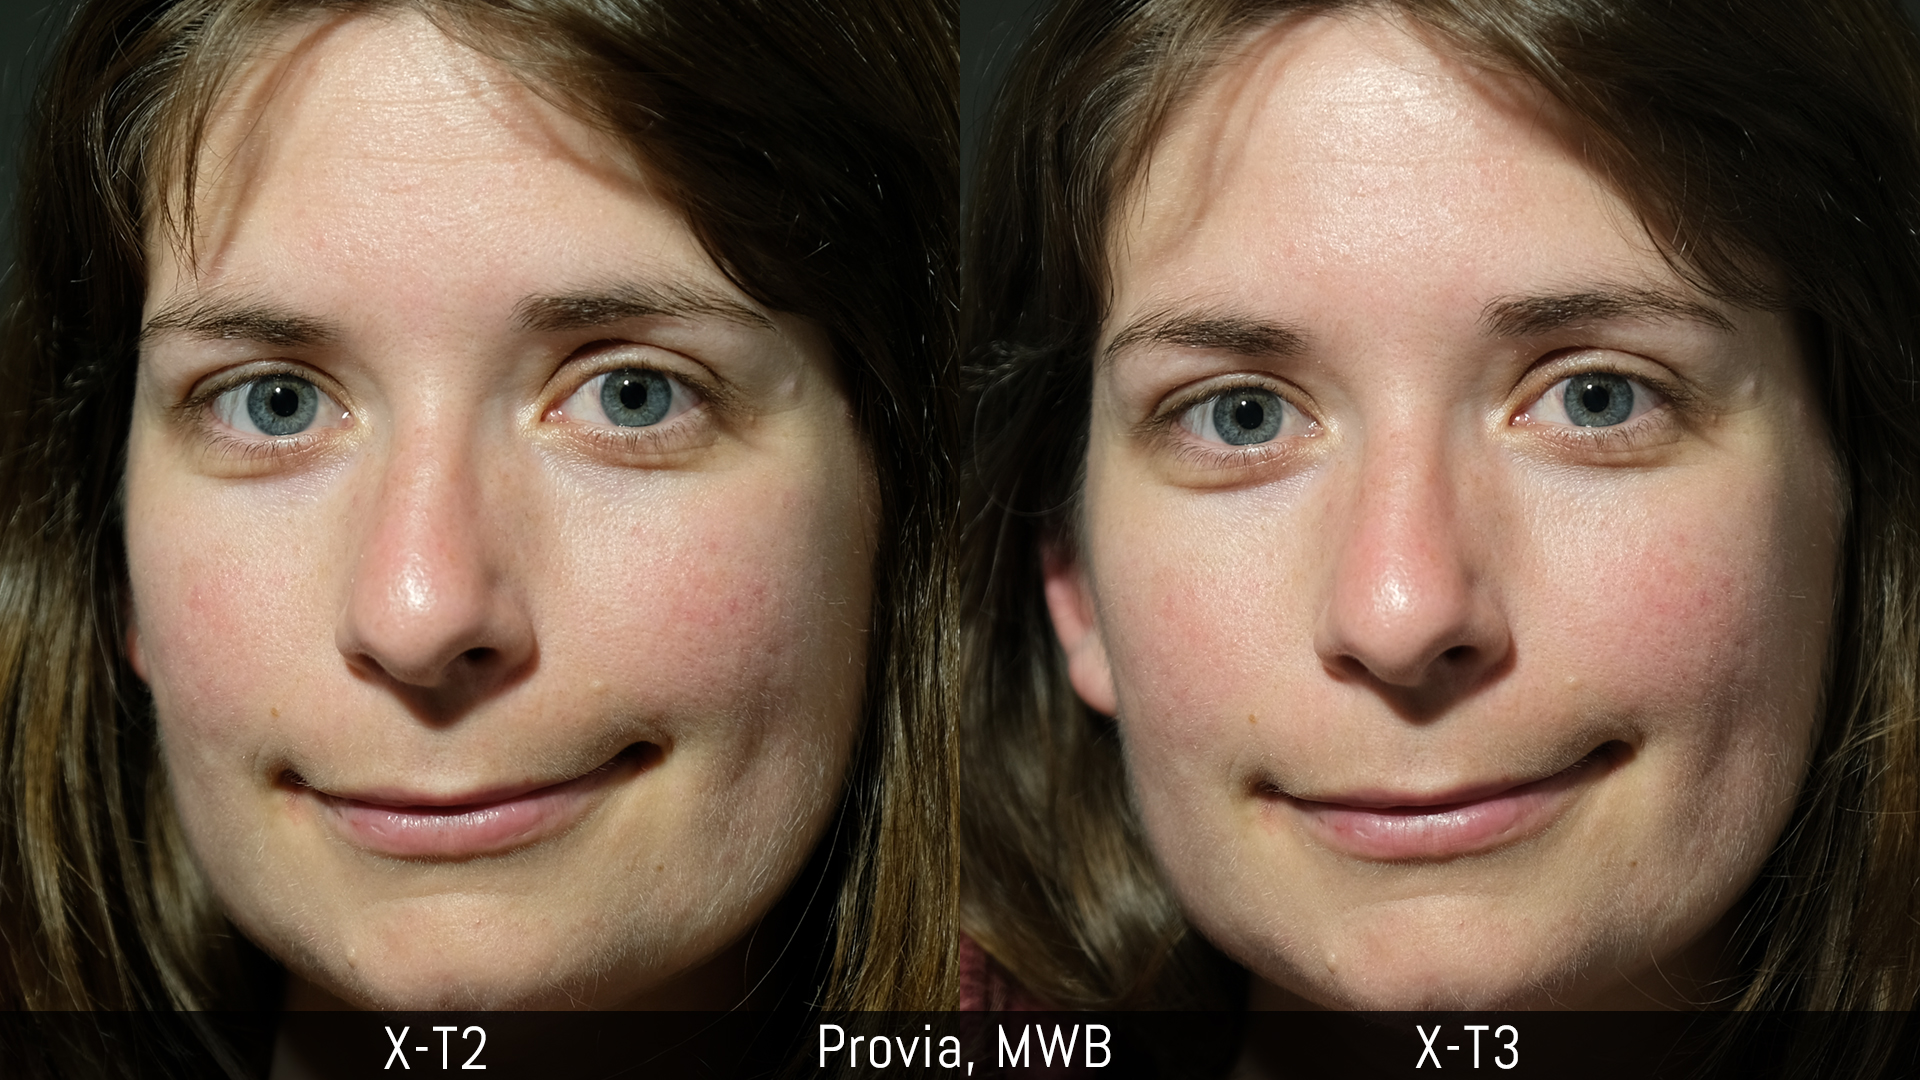
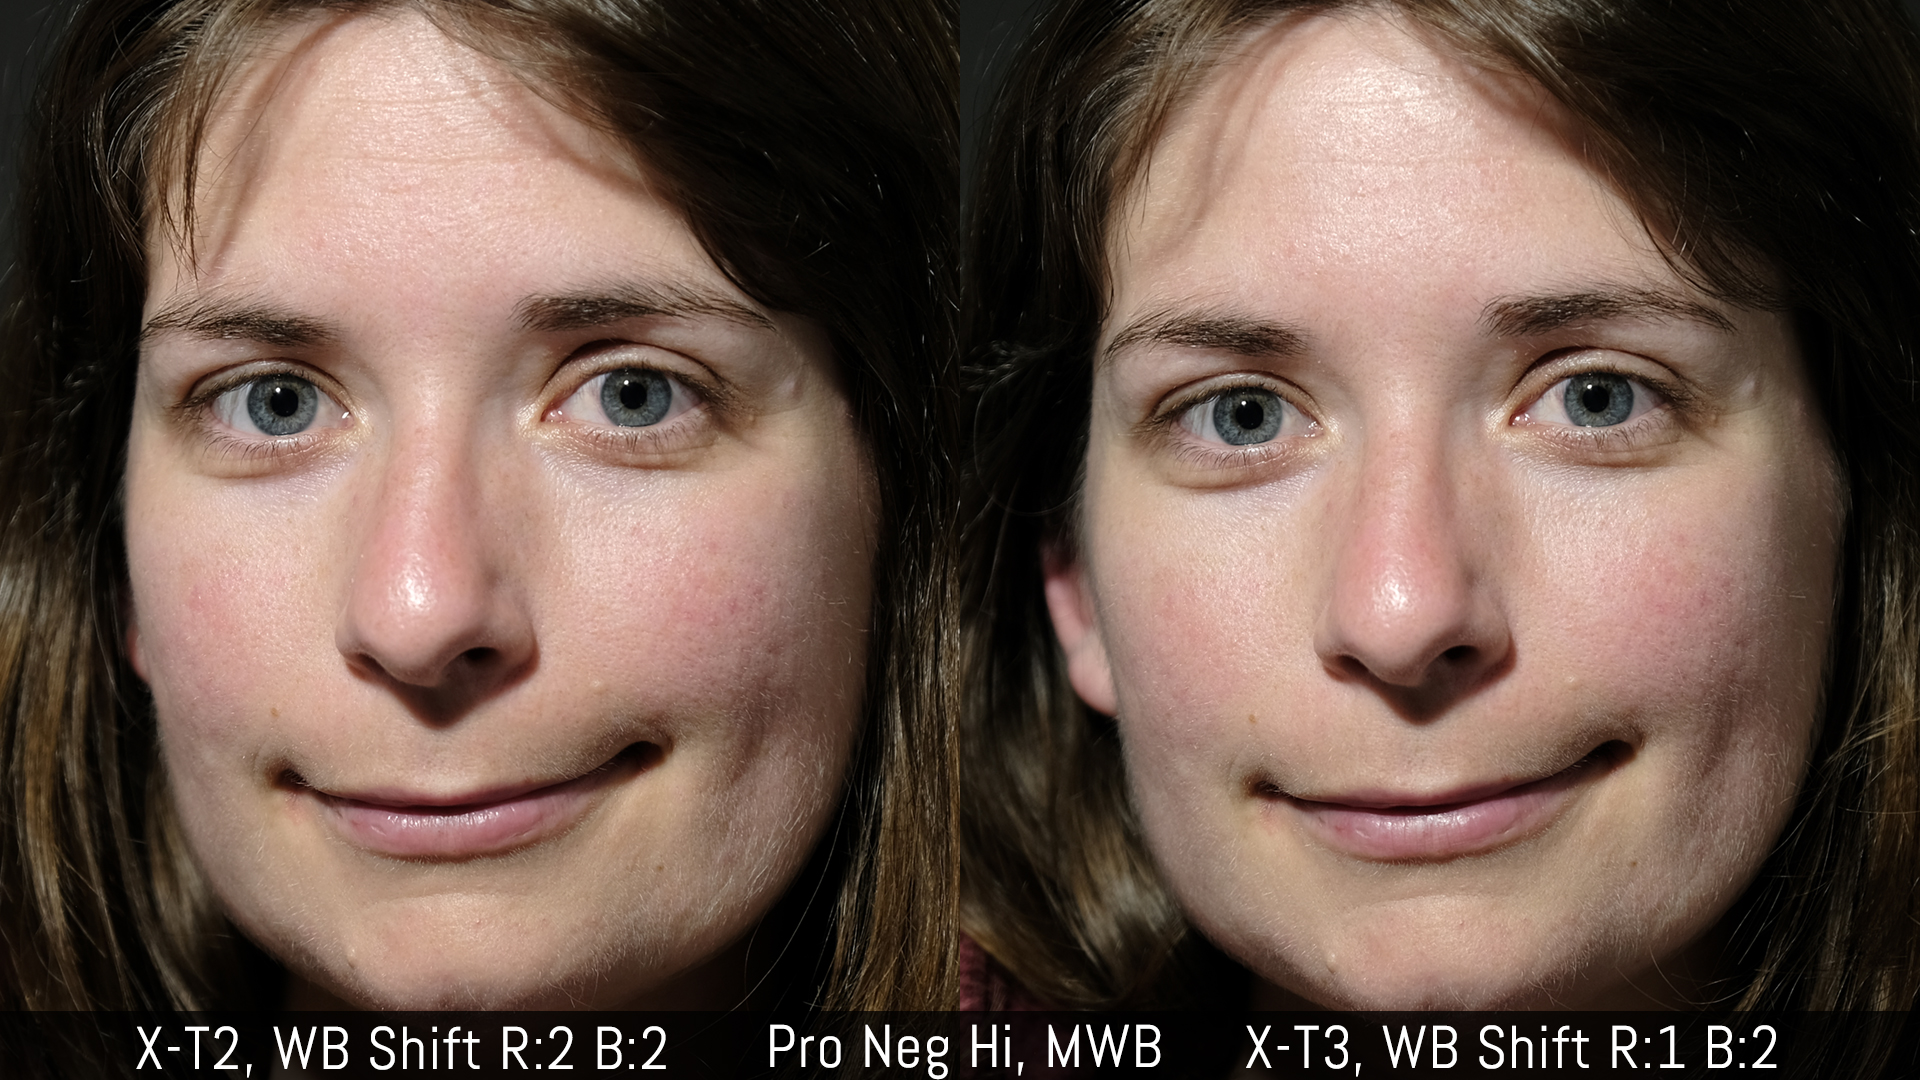
The green shift is more pronounced for profiles such as Astia and Velvia, which boost contrast and saturation, but less so for Pro Neg or Classic Chrome. If you don’t like the greenish look, it can easily be corrected with the WB Shift setting. The X-T2 needs more of a push to get similar results to the X-T3.

Some Film Simulation profiles work quite well for portraits including Astia and Pro Neg Hi. Again by tweaking the WB Shift you can obtain similar results.

Concerning the white balance, the X-T3 produces a marginally cooler result for outdoor shots. The new camera also has an AWB-Lock option that can be assigned to a function button.


For skin tones, the X-T3 has a slightly cooler rendering once again and in this case produces a stronger magenta cast.

With other artificial light sources such as tungsten, AWB tends to be warmer. If you switch to manual values, the green shift is more severe and you need to make extra adjustments to the WB Shift to obtain a natural result. This is valid for both cameras.

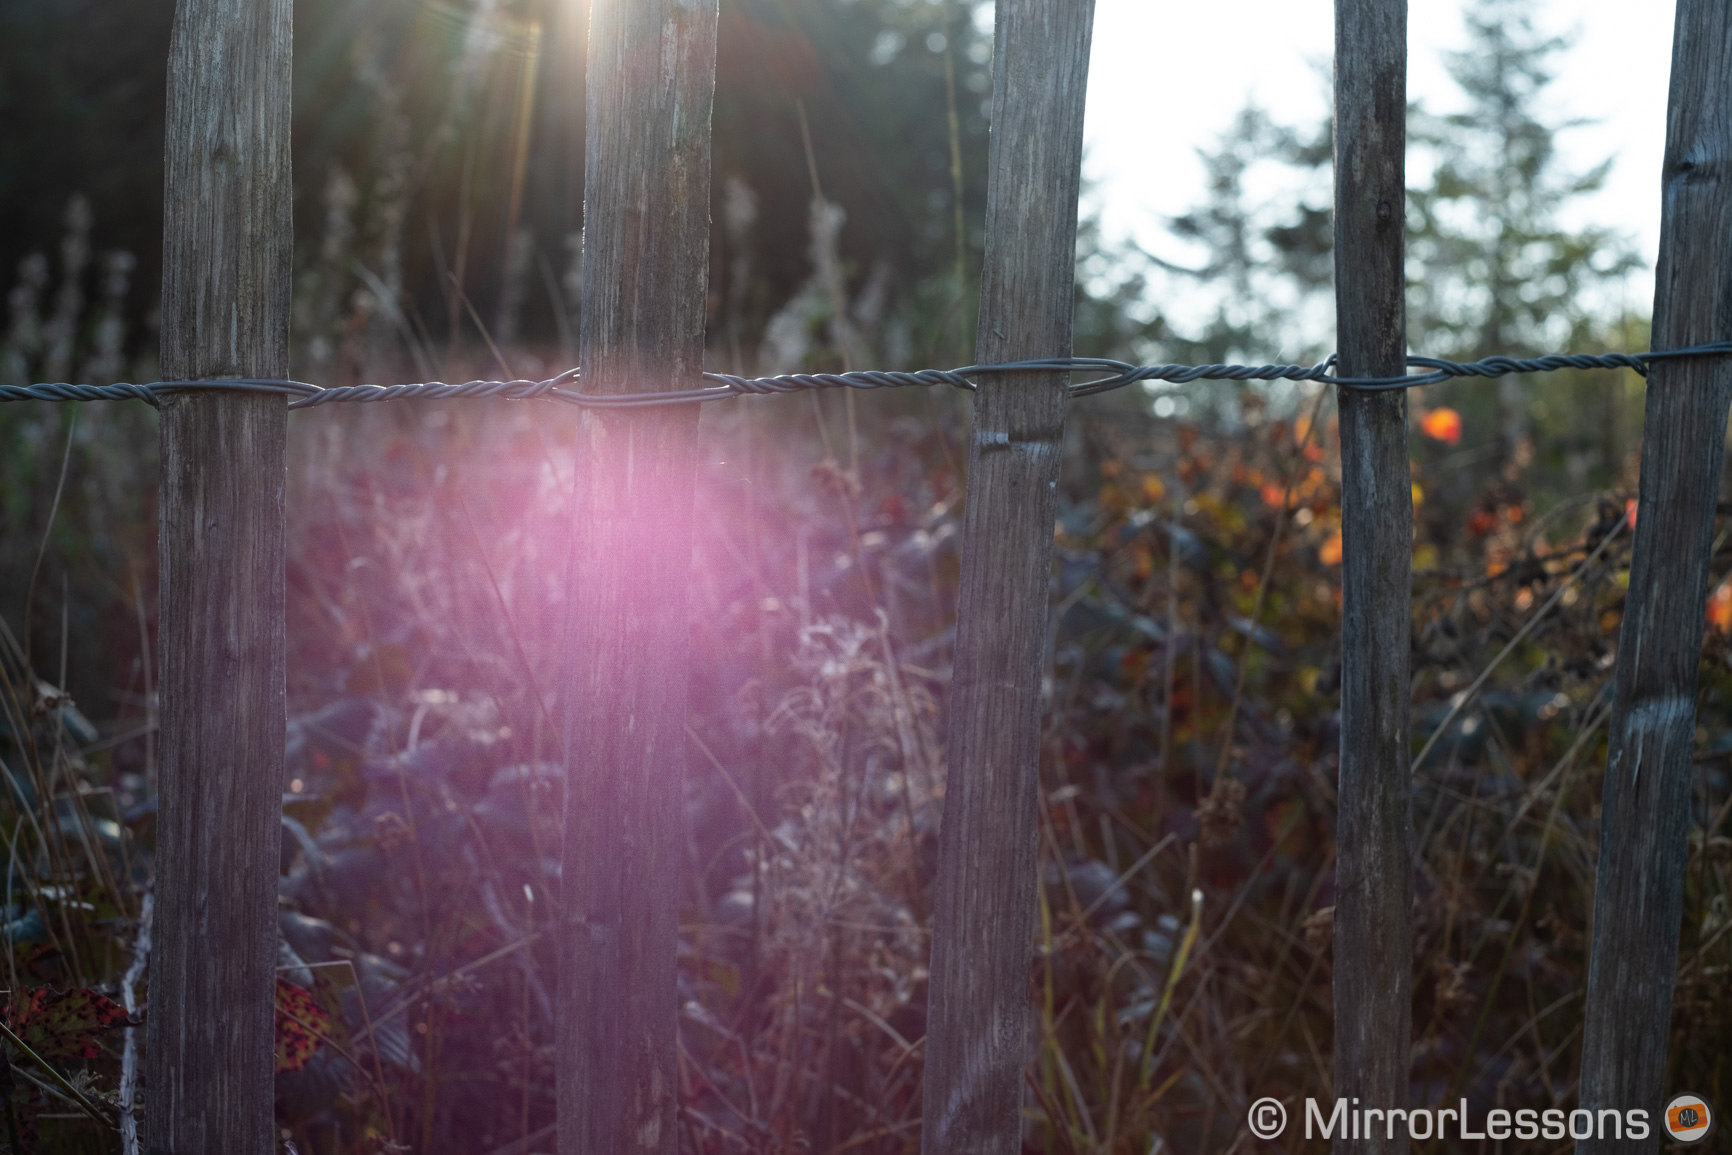
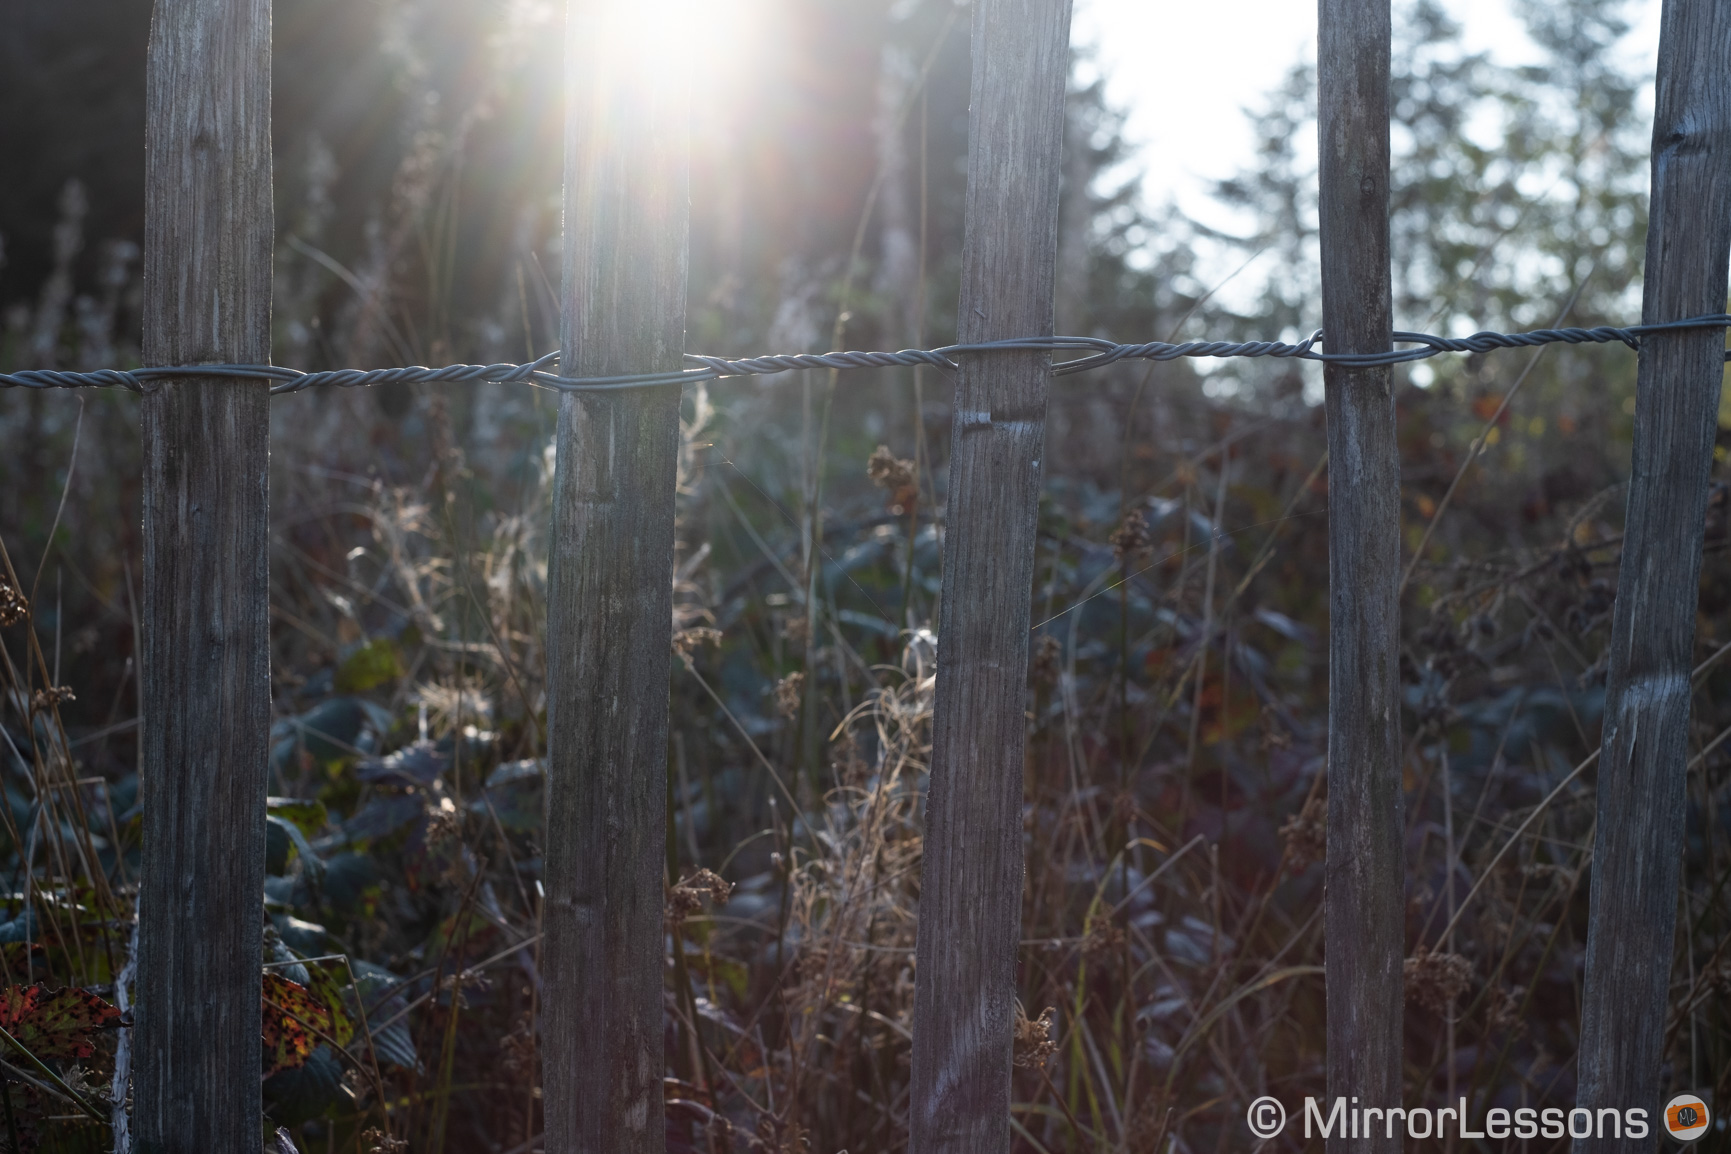
Finally, the last topic in this chapter is sensor flare. If you’re a frequent reader of this website or our original site MirrorLessons, you may recall us mentioning a sensor/purple flare issue that has affected third-generation cameras since the release of the X-Pro2.
It’s not a lens problem, as I’ve encountered it with different lenses and cameras, but rather a sensor flare which is likely caused by reflections on the micro lenses present on the surface. It is not uncommon and other mirrorless cameras suffer or have suffered from a similar problem.
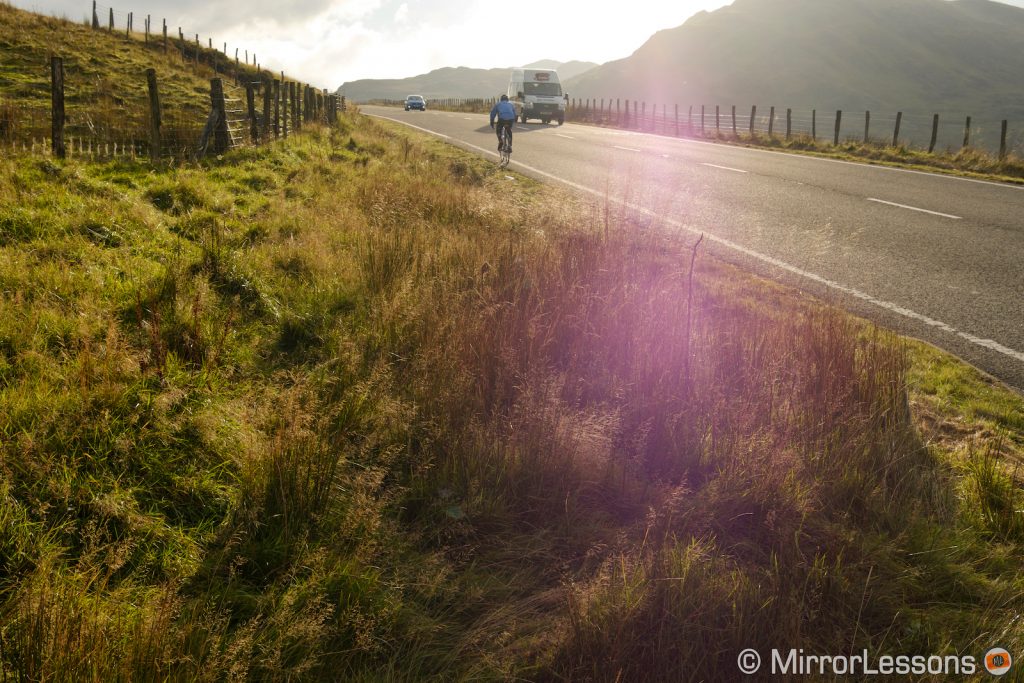
In the case of the X-series cameras, the veiling purple flare also brings out a grid artefact that is most likely related to the unique pattern of the X-trans pixel arrangement.

The purple flare is visible on the LCD or EVF. To get rid of it, all it takes is a small tilt up or down of the camera.
Fujifilm has quietly rectified the problem on more recent cameras. For example I remember comparing the X-T20 to the X-T2 when it came out and the mid-level camera didn’t suffer as much as my X-T2.
I’m happy to report that our X-T3 doesn’t suffer from the issue at all. I took several shots and tried all angles to replicate it but it never showed up, whereas with the X-T2 I found it straight away.


Autofocus
The two cameras work with a hybrid autofocus system that includes contrast and phase detection points and the X-T3 features the most advanced version to date. It has 117 points (13×9 grid) but you can also choose a 25×17 grid with 425 points. More importantly, phase detection is distributed across almost the entire sensor surface (99%).
The X-T2 on the other hand works with 91 points (13×7 grid) or 325 points (25×13 grid). The phase detection areas are only present on the central part of the sensor.


On both cameras you find four different area modes:
- Single point can be varied in six different sizes
- Zone AF works with a group of 3×3, 5×5 or 7×7 points
- Wide Tracking uses all the areas on the sensor
- ALL allows you to cycle through the three modes above with the rear command dial.
Note that when Zone AF or Wide Tracking are selected, the higher number of points (425 or 325 respectively) is not available. When working with Wide Tracking on the X-T3, the sensor area covered is slightly smaller (91% horizontal x 94.5% vertical).
In single autofocus, I find both cameras behave really well with a fast acquisition time and very few moments of hesitation. The X-T3 improves the performance with older lenses that feature a non-linear motor such as the XF 35mm f1.4. Working with this kind of lens, especially in low light, is much easier now. I admit I find it interesting how these old lenses keep getting new life breathed into them every time the AF system gets a major upgrade.
Another area where the X-T3 has received an important improvement is face and eye detection, which has become much more reliable (Fuji says it’s twice as fast on the new camera and I agree). With the X-T2 and other cameras that share the same technology such as the X-Pro2, X-T20 and X-H1, I found it hit-and-miss even in good light conditions.
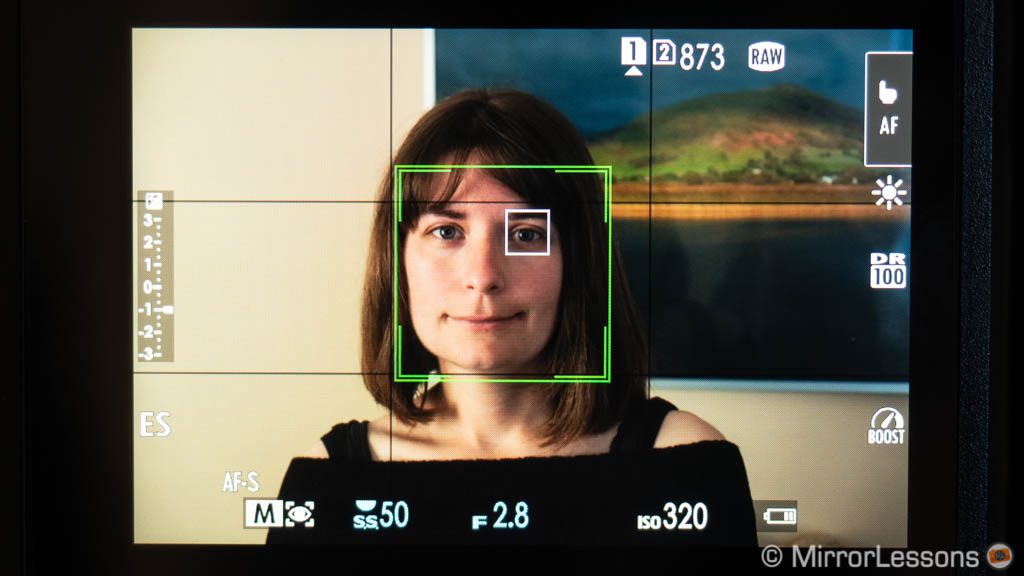

This mode is often hit or miss with the X-T2
On the new camera, face and eye detection rarely fail even in low-light environments. I would say that this mode can be trusted enough to be used for portraits or at events. If you don’t need it though, turn it off as the camera still has the odd behaviour of seeing a face where there are no humans present such as a landscape shot.
Firmware 3.0 and 3.20 improves the performance further: the X-T3 can now detect smaller faces in the scene and let’s you choose which face to prioritise if multiple persons are in the frame (you can use the touch screen or the AF joystick to select the face to track). Eye detection is more accurate and stable thanks to the updated algorithm.

Now it’s time to analyse the continuous autofocus performance at its core and determine how far you can push these cameras. Fujifilm claims that the X-T3 can refocus 1.5 times more frequently than its predecessor. For the record, I’ve always found the X-T2 to be an excellent camera for sports and action, so I was really curious to see in which areas the X-T3 would provide an advantage, excluding the already mentioned face detection mode.
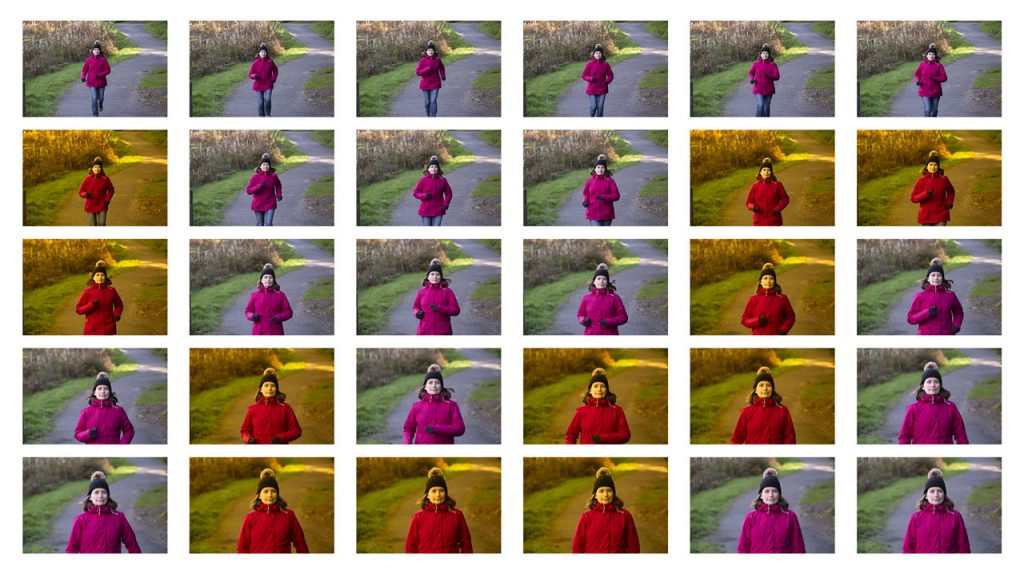
Our basic running test didn’t reveal anything special. In fact the X-T3 produced a few shots that weren’t tack sharp. However I knew from the start that such an attempt would not be enough to reveal what both cameras are capable of.
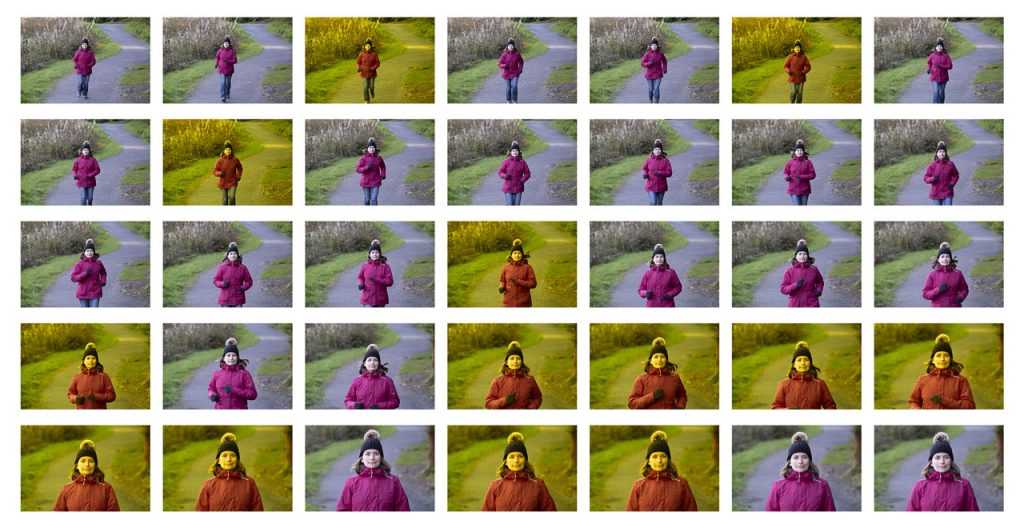
First, I conducted the same type of test but at night. The X-T3 has more sensitivity than the X-T2 (-3Ev vs -1Ev) and it managed to deliver a decent keeper rate with the subject running towards me, starting from a dark corner and then passing under a street lamp. The X-T2 on the other hand was not capable of keeping up and even when the subject stopped, it took a couple of frames for the camera to finally focus correctly.
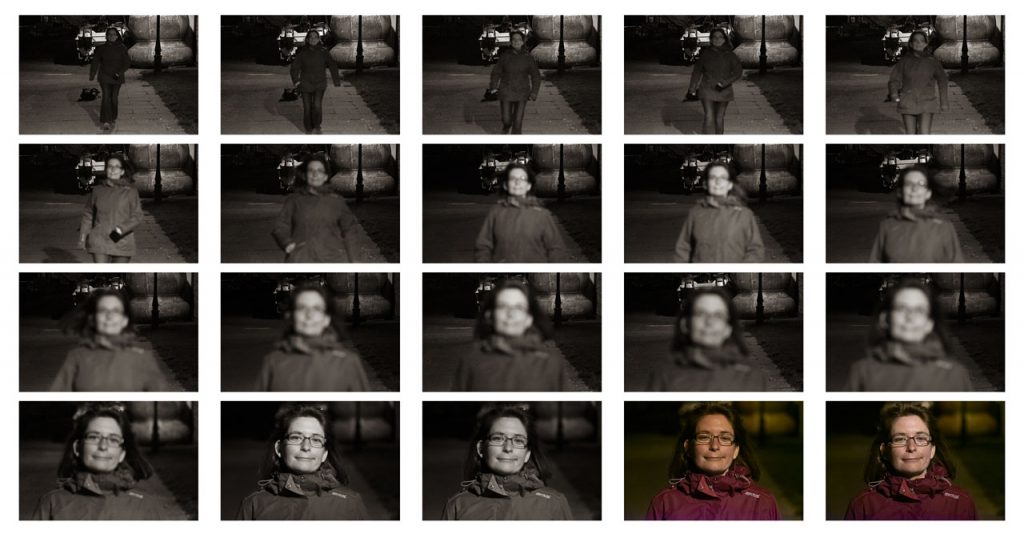
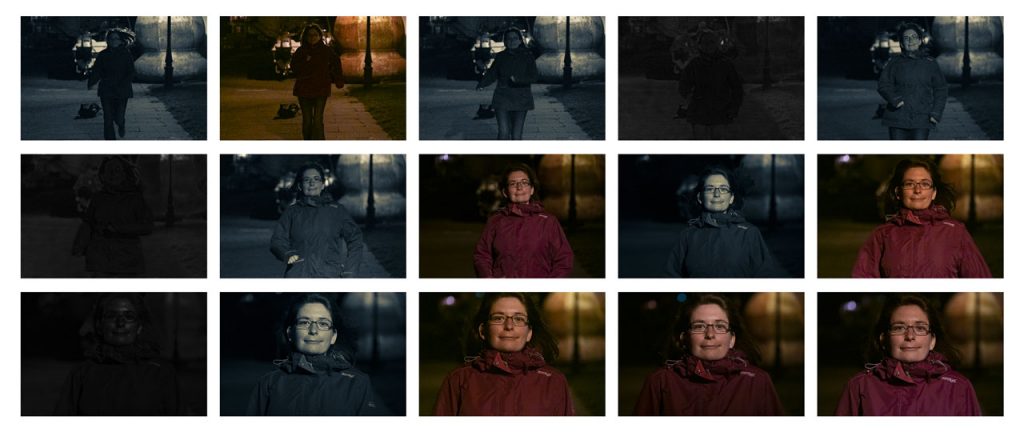
Now don’t discard the Fuji X-T2 for low-light shooting entirely. It is true that in a very poorly lit situation like the one above, the X-T3 did much better, but with a fast lens and decent contrast the older camera can still do a good job.

I’ve gathered lots of experience with the X-T2 since buying it two years ago, including rally races, football games and of course my beloved red kites. I was lucky to be able to use the X-T3 in the same situations, as I can share a more complete feedback about the new camera.
I took the X-T3 to the Wales Rally GB which takes place not far from where I live. The camera performed flawlessly with various settings and gave me an average keeper rate of 82%, or 99% if I include slightly soft results. Compared to my experience with the X-T2 two years ago, I ended up with more images in focus. It wasn’t the same event and with the X-T2 I had the chance to shoot from different angles and with different lenses, but the improvement is there. The X-T3 only delivered 3 completely out of focus shots out of more than 200.
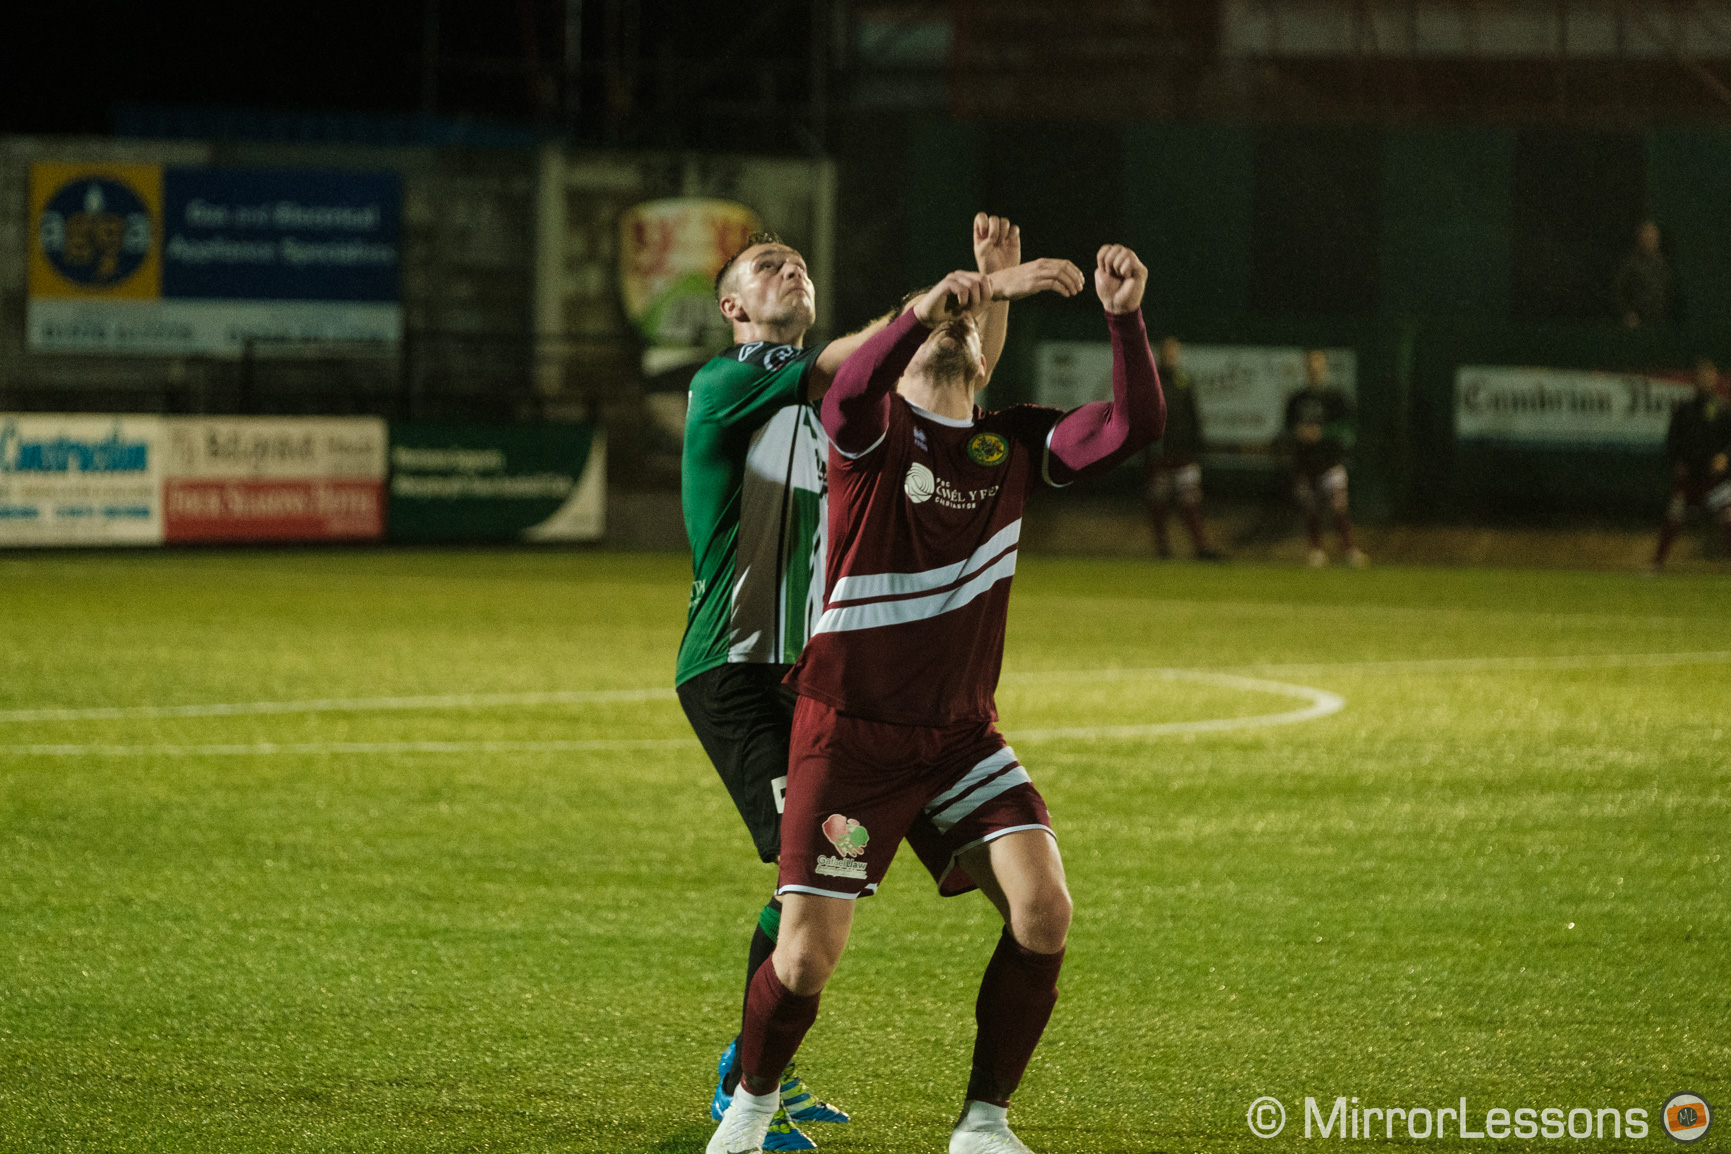
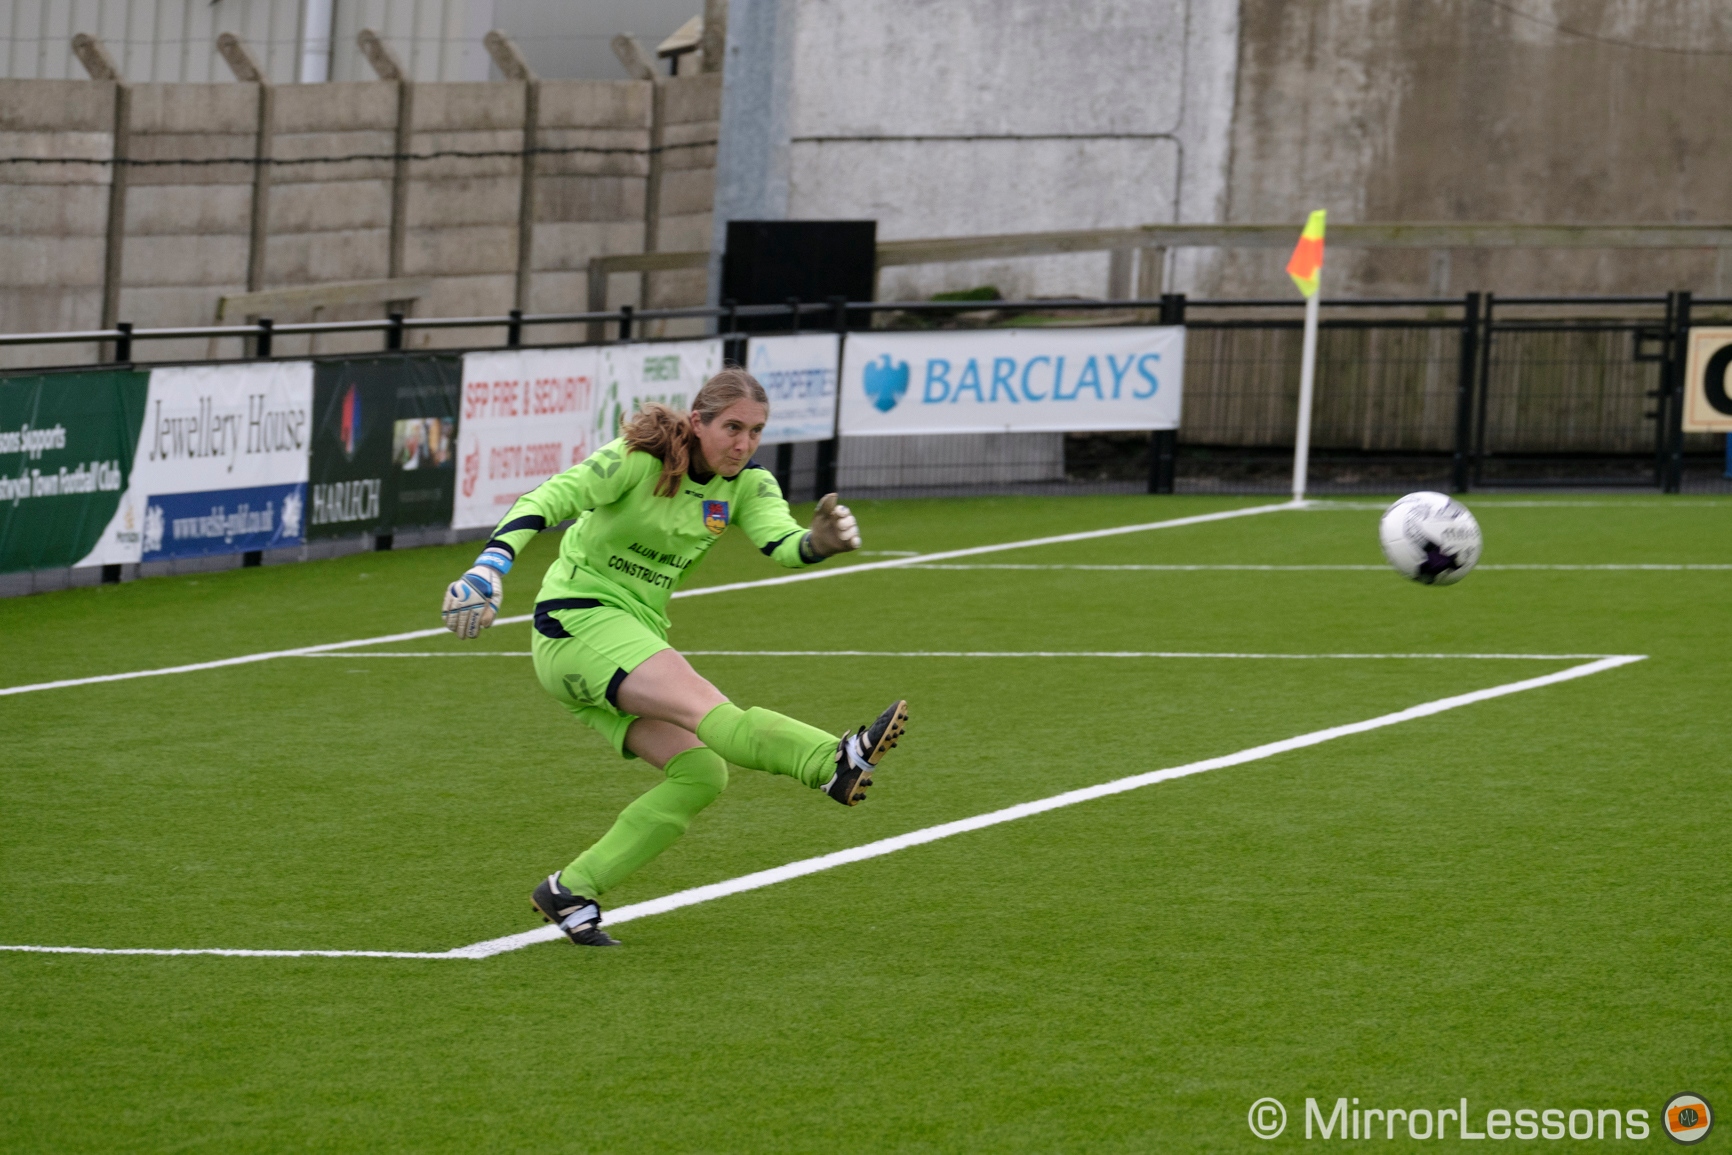
Next we have football. I’ve been to both afternoon and evening games with third generation X-cameras (X-Pro2, X-T2 and X-H1 which use the same AF), whereas with the X-T3 we’ve only been able to shoot at a night game so far. Here the X-T3 gave me similar results to the third-generation cameras. The only improvement I saw was a bit more reactivity and speed when the camera re-adjusts focus after starting the burst with the incorrect focus, which is definitely a plus but I wouldn’t say it drastically improves the performance in this scenario.


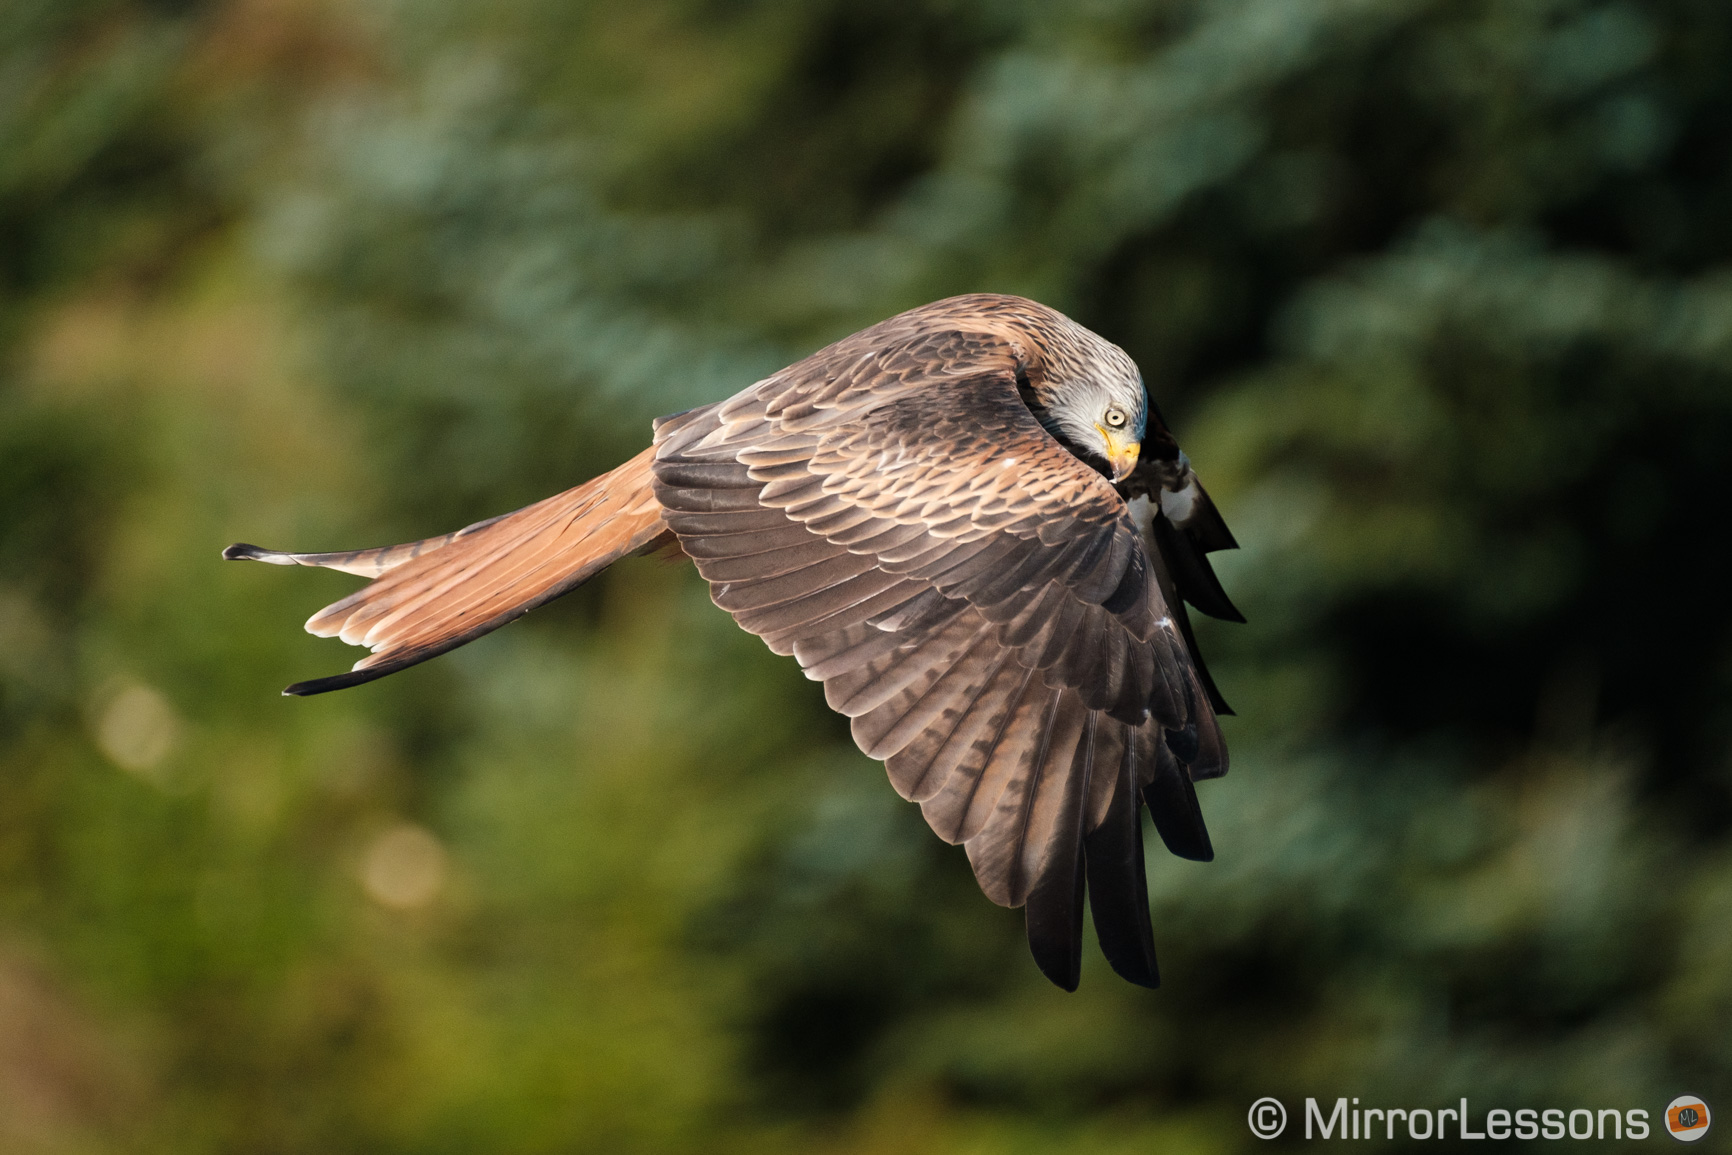
Last but not least, we have my favourite birds of prey – my ultimate AF test. In addition to the AF performance, another factor that can help increase your keeper rate on the X-T3 is the blackout-free live view with the electronic shutter, which I’ll talk about in the next chapter.
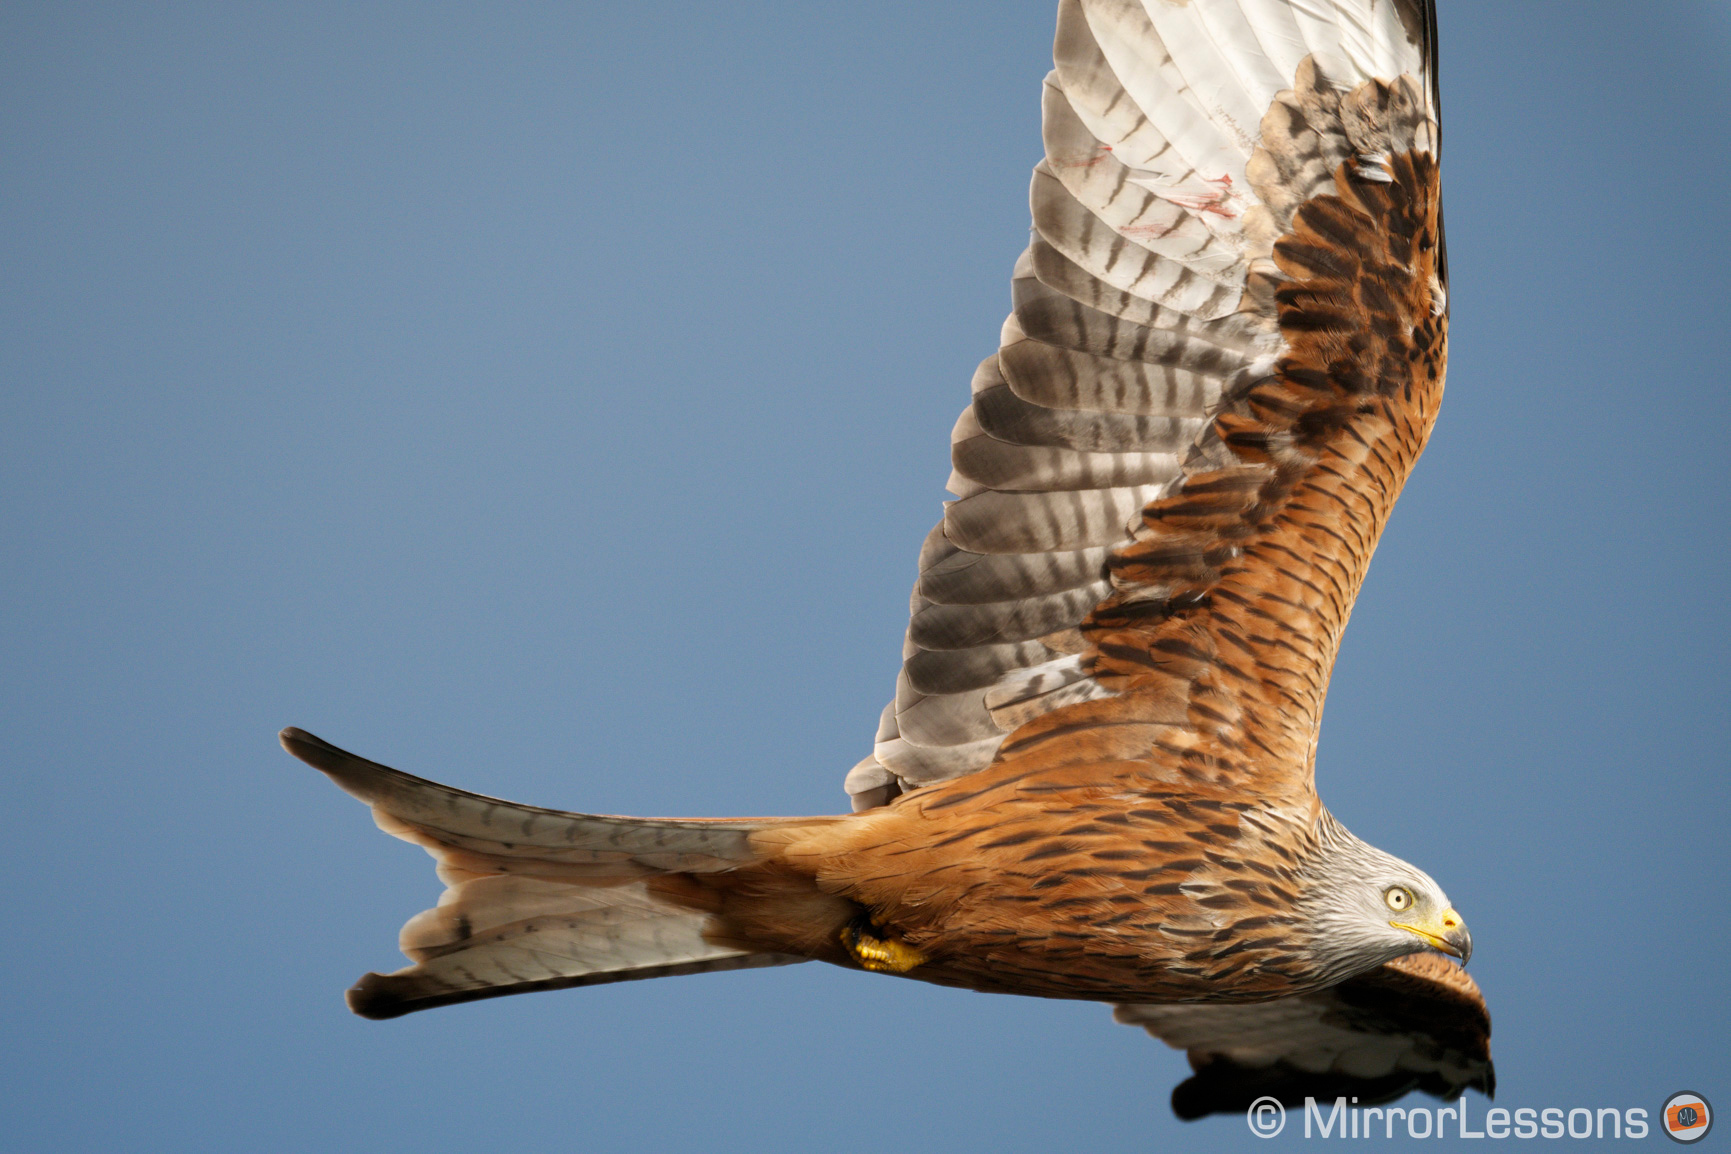
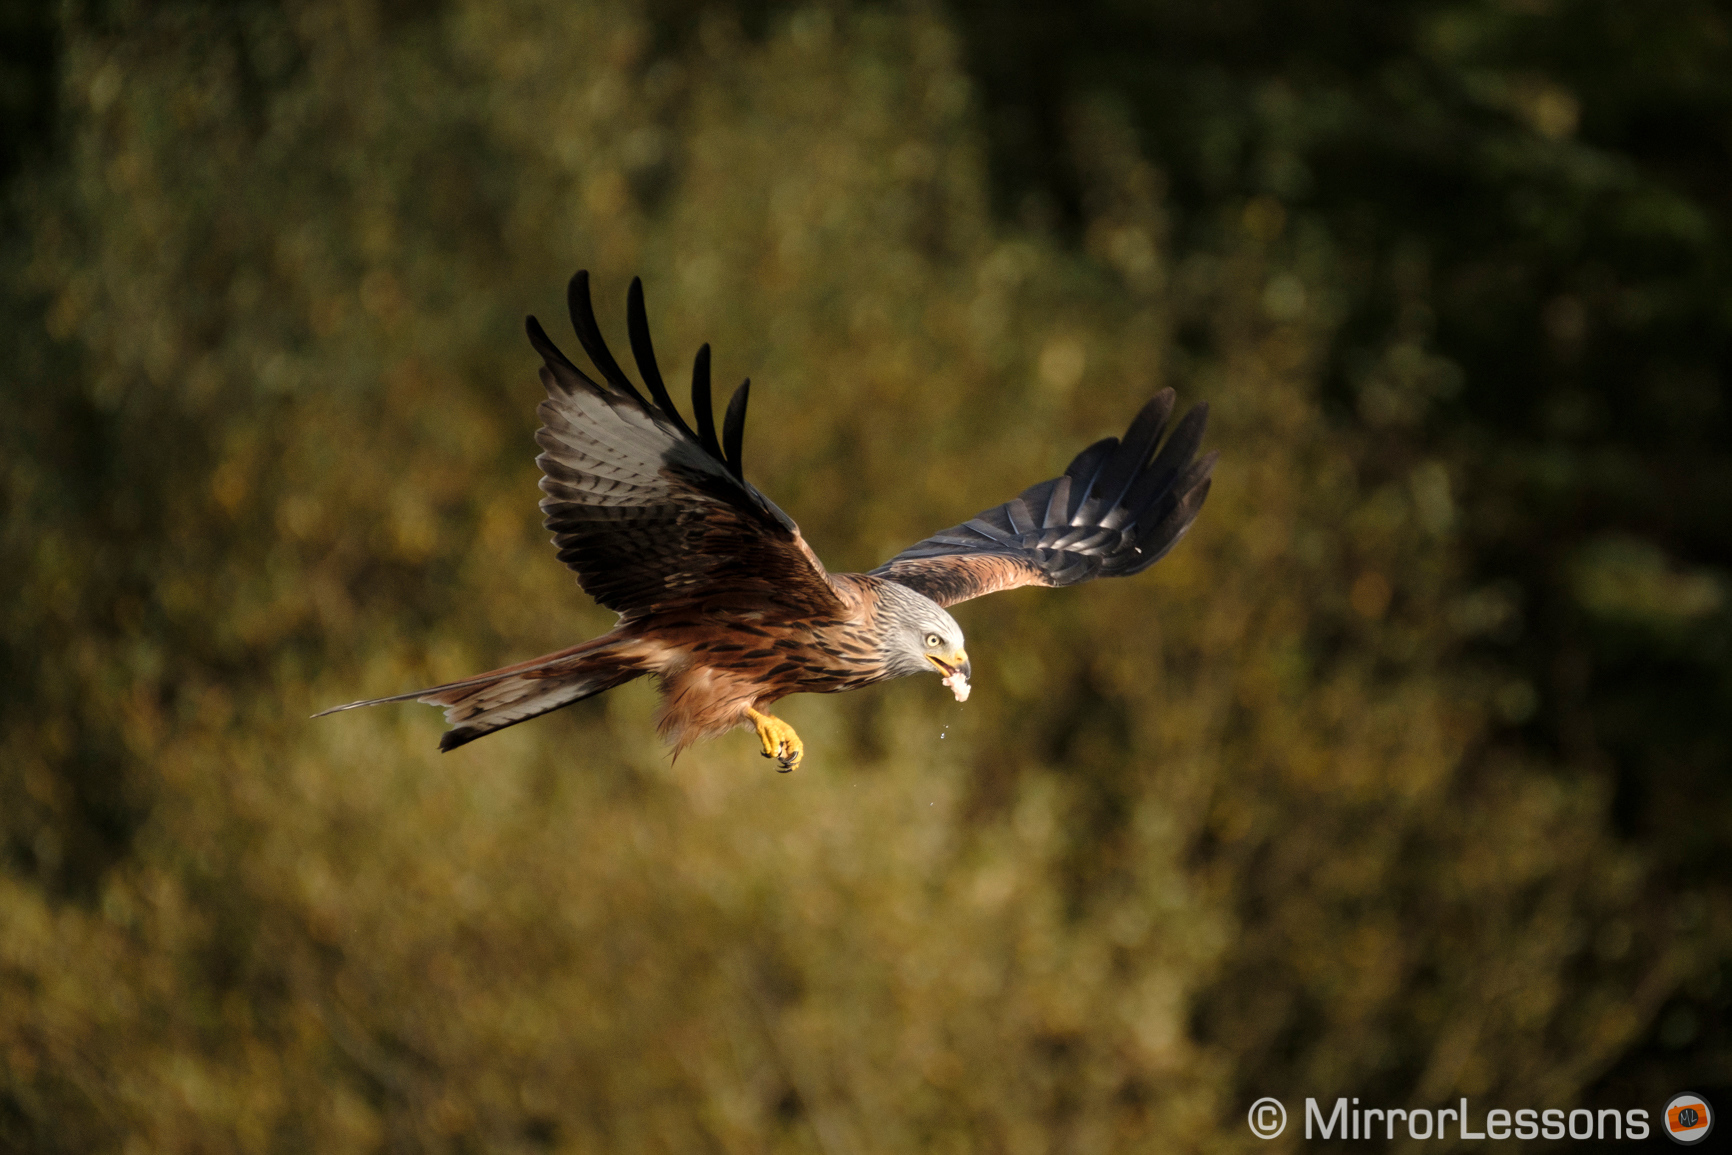
Concerning the AF performance itself, here again I didn’t witness a substantial increase in my keeper rate, which remains around 60/70%, or 85/90% if I include slightly soft results. However the added reactivity of the X-T3 is definitely more noticeable for this genre, and there is less of a chance of ending up with a large number of out of focus shots in a single burst.
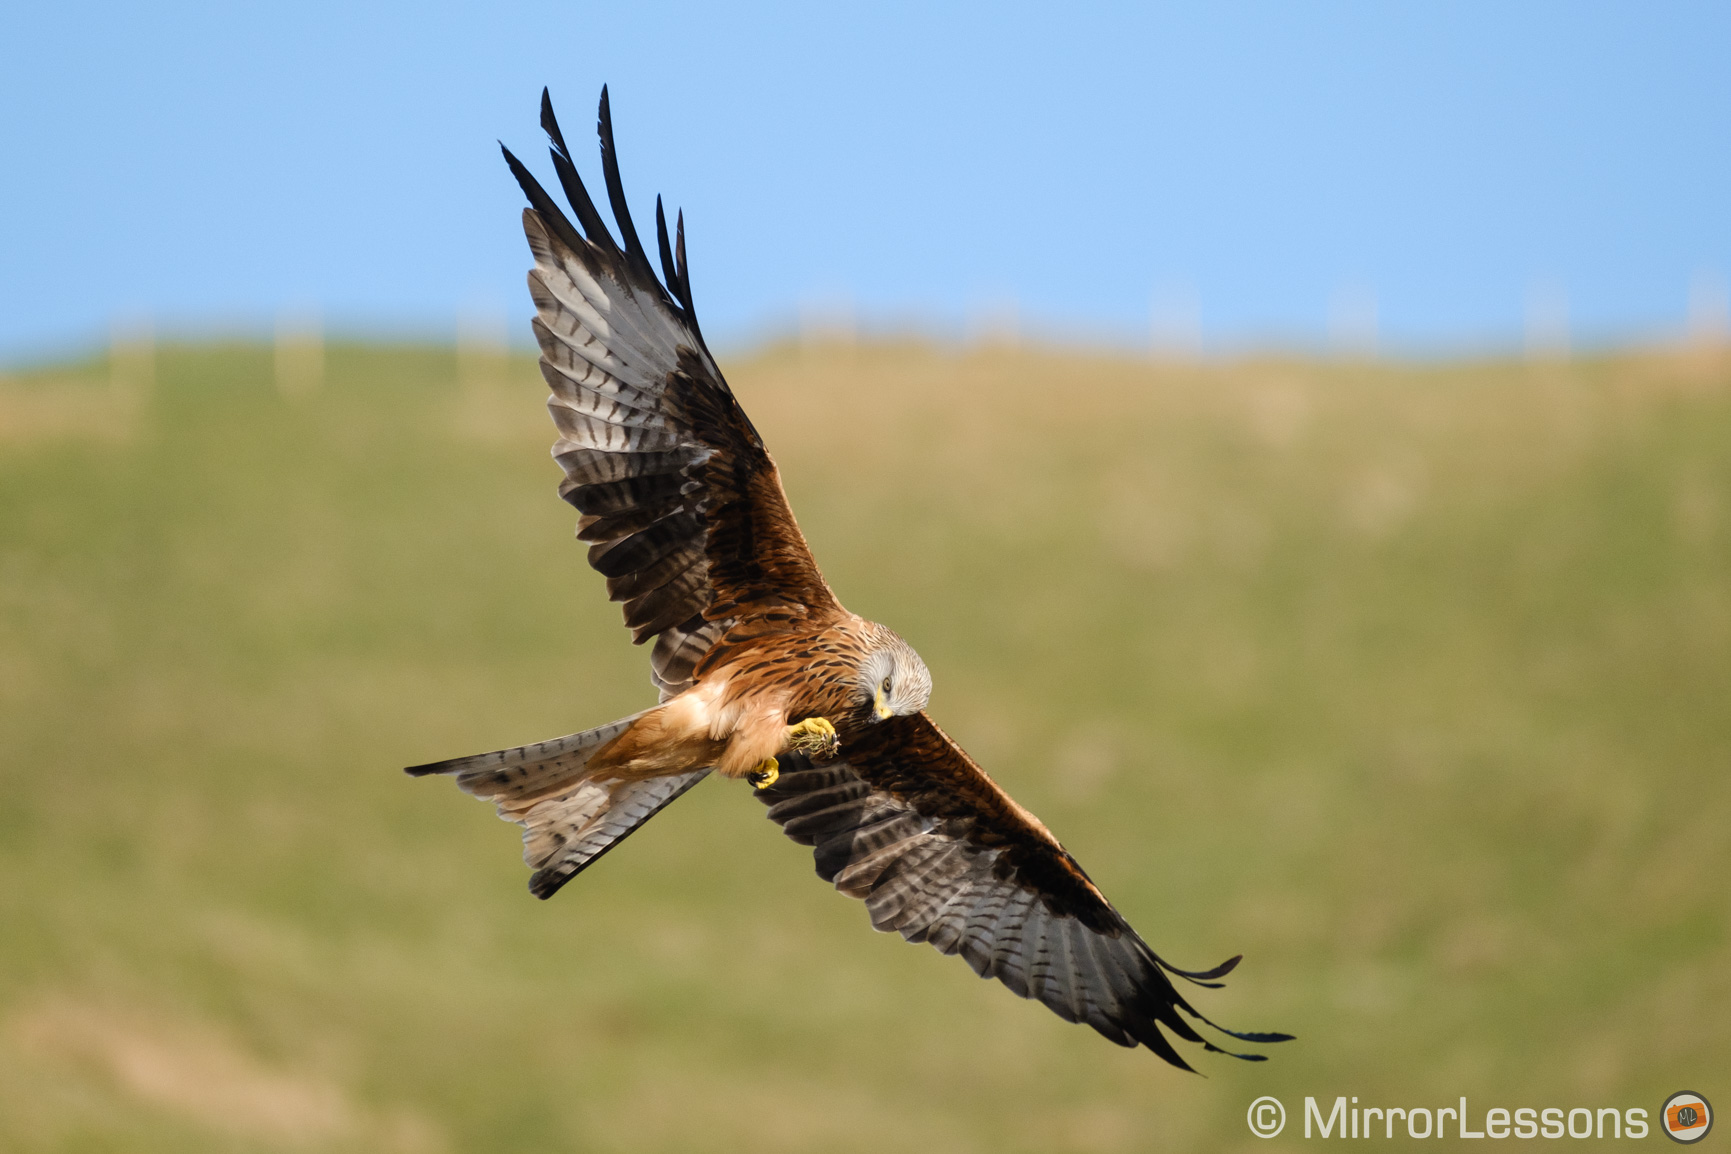
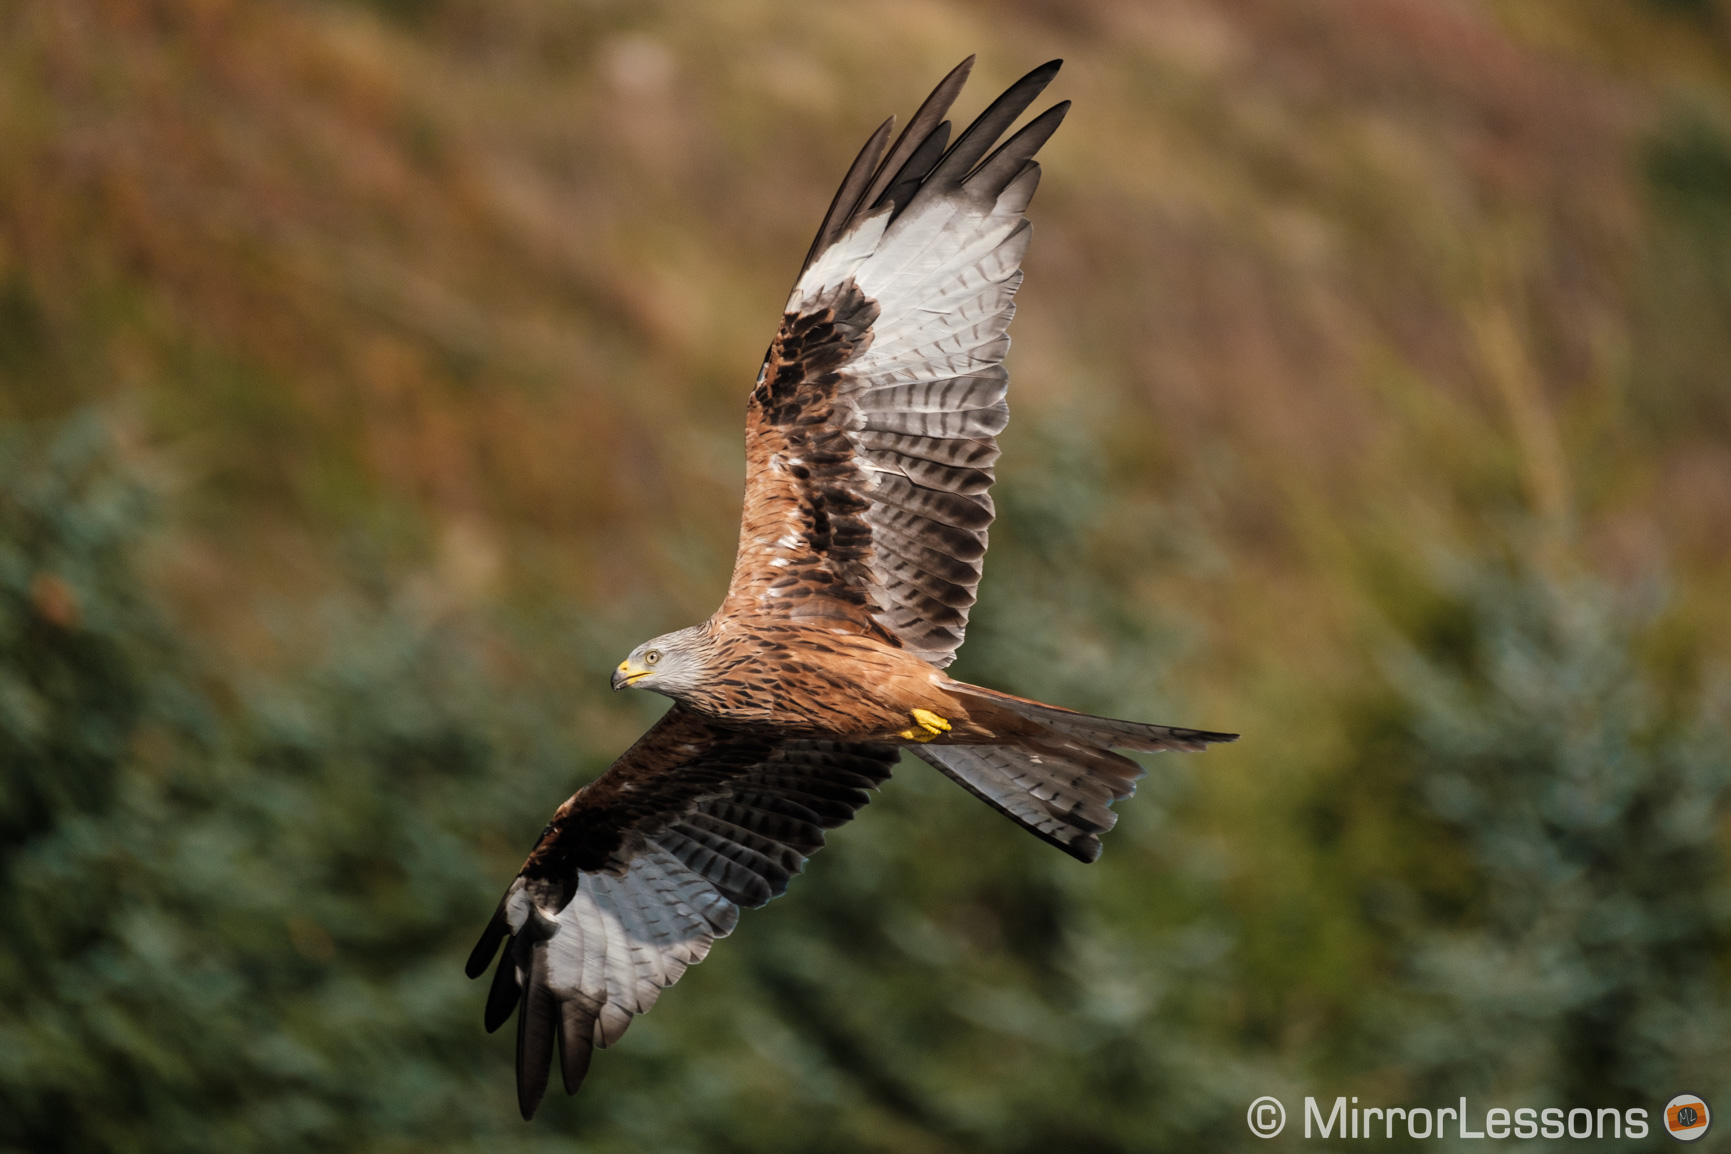
But where I witnessed the greatest improvement on the X-T3 was when the birds flew close to me. The autofocus was usually reactive enough to keep the subject in focus. Normally in this specific situation, the change in focus distance is too big and the action happens too fast for most mirrorless cameras to cope, but the X-T3 did better than most and proved to be capable of matching products such as the Sony A9 or Nikon D500.
Both cameras offer various settings to control the autofocus behaviour, including choosing between focus or release priority, as well as the AF-C Custom settings that allow you to change the performance based on three parameters:
- Tracking Sensitivity
- Speed Tracking Sensitivity
- Zone Area Switching
There are five presets that are designed for different subjects. For example Set 1 works well for multi-purpose use, whereas Set 2 will reduce the chance of the camera refocusing on a momentary obstacle in the foreground when following a subject. Set 6 is manual and can be re-arranged, although I’ve always found the first five modes to be enough for all situations.
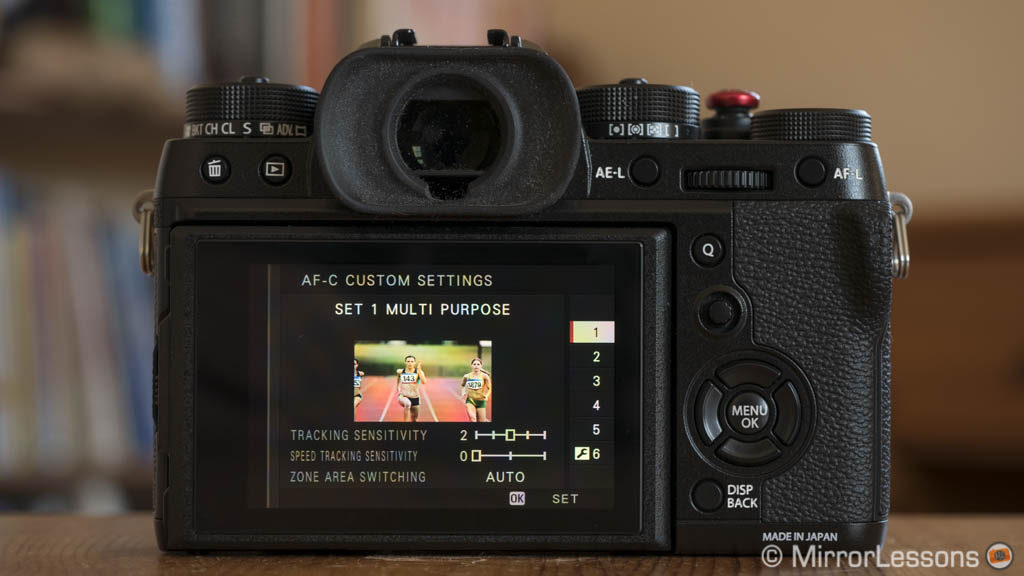
Choosing the wrong set can reduce your keeper rate so if you have any doubts, it is better to stick with Set 1. That being said, I found the X-T3 more forgiving in this regard, which is probably the result of the faster and more reactive AF. Set 4 is my go-to setting for birds, while Set 1 or Set 2 work well for football and group sports. Set 3 (accelerating/decelerating subjects) is ideal for motorsports and I find it more reliable on the X-T3 than the X-T2.
To conclude this chapter, I would say that the improvements to the autofocus have become about advanced adjustments rather than changing the AF system as a whole. These differences will matter more in some situations (face detection for example) and less so in others, but overall the new camera feels like a mature upgrade.
Note: I mention the AF performance for video in the dedicated section below.
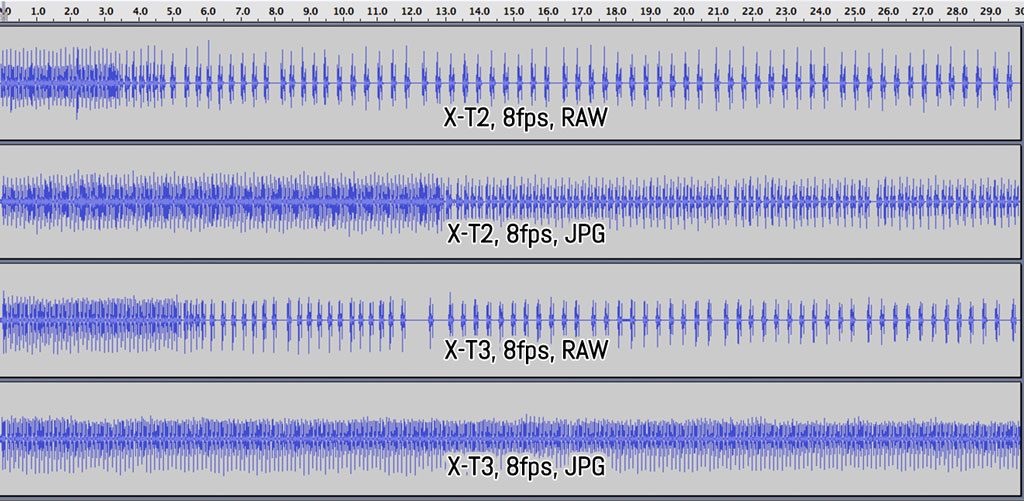
Shutter, continuous shooting speeds and buffer
The two cameras can shoot at a maximum of 1/8000s with the mechanical shutter, or 1/32000s with the electronic shutter. The X-T3 also has a middle ground: the electronic first curtain shutter which can be useful to reduce vibrations at slow shutter speeds. That being said, the camera has quiet and gentle mechanism so I don’t feel the need to switch to the e-first curtain too much.
The X-T2 can shoot up to 8fps with the mechanical shutter. You can expand the speed up to 11fps with the optional battery grip, a limitation that has finally been eliminated on the X-T3. Note however that if you use an old NP-W126 or a less powerful third-party battery, the maximum burst available remains 8fps.
With the CL (Low) setting, which offers live view with blackouts as opposed to the last image taken, the X-T3 goes up to 5.7fps which is a little faster than the 5fps speed of the X-T2.
With the mechanical shutter, you can activate a special mode called Sports Finder. It crops the sensor by about 1.25x, reducing the output resolution to 16.6MP, but keeps the native view of the sensor and displays a bright rectangle in the finder or LCD monitor to show you the edge of the cropped area. That way you can see outside your frame and catch unexpected moments more easily.
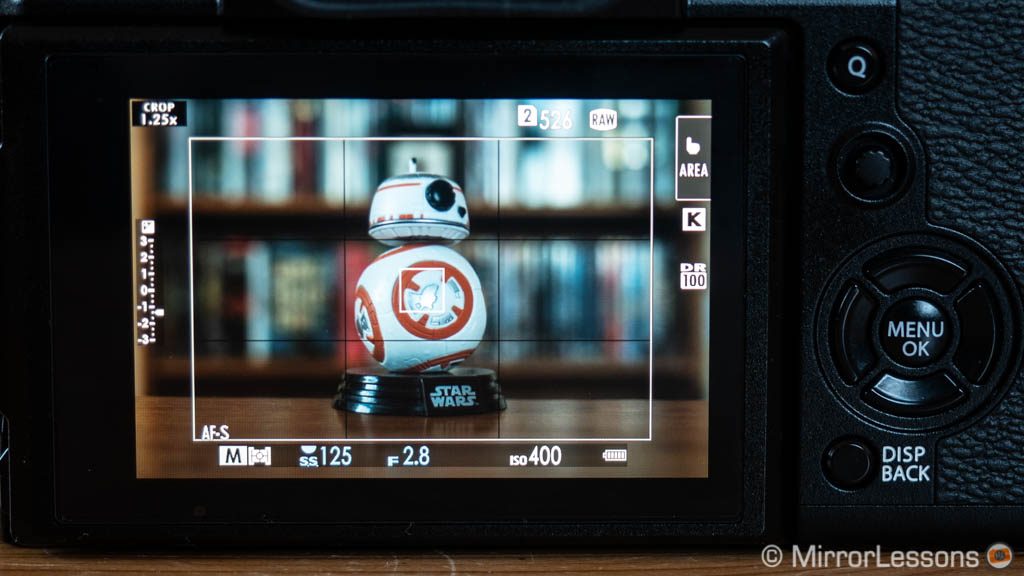
Street or sports photographers in particular may find this mode useful but I admit I didn’t find it as interesting as I thought I would, at least in my experience with the camera so far.
The X-T2 can increase the continuous shooting speed to 14fps without the need for the optional battery pack when switching to the electronic shutter, but the X-T3 is superior here as well. The new camera can record as fast as 20fps, or 30fps when using the 1.25x crop mode. Switch over to the e-shutter and the camera offers continuous live view with no blackouts, a feature that until now was only seen on the Sony A9.
There is an initial blackout when you start the burst, but then the camera shows you a live view of the scene rather than the last image taken. It makes a difference when dealing with birds in flight or other difficult subjects that require tracking. The live view works with a refresh rate of 40fps, or 60fps in crop mode.
The electronic shutter introduces unwanted side effects such as distortion when panning quickly, or banding under artificial light sources. The X-T3 minimises these effects better than the X-T2 thanks to the faster sensor readout. For sports and wildlife, I don’t notice visible issues 90% of the time.
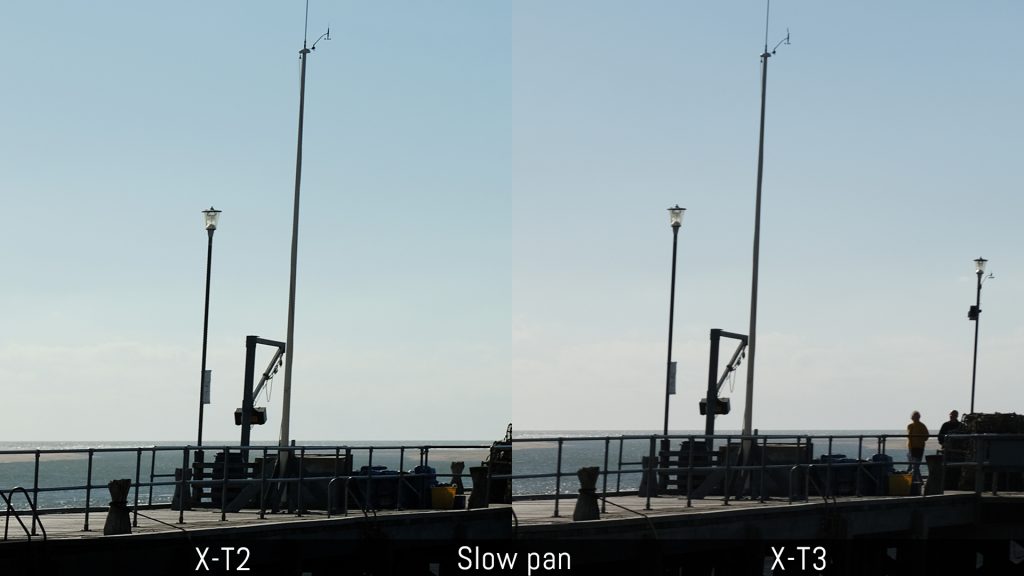
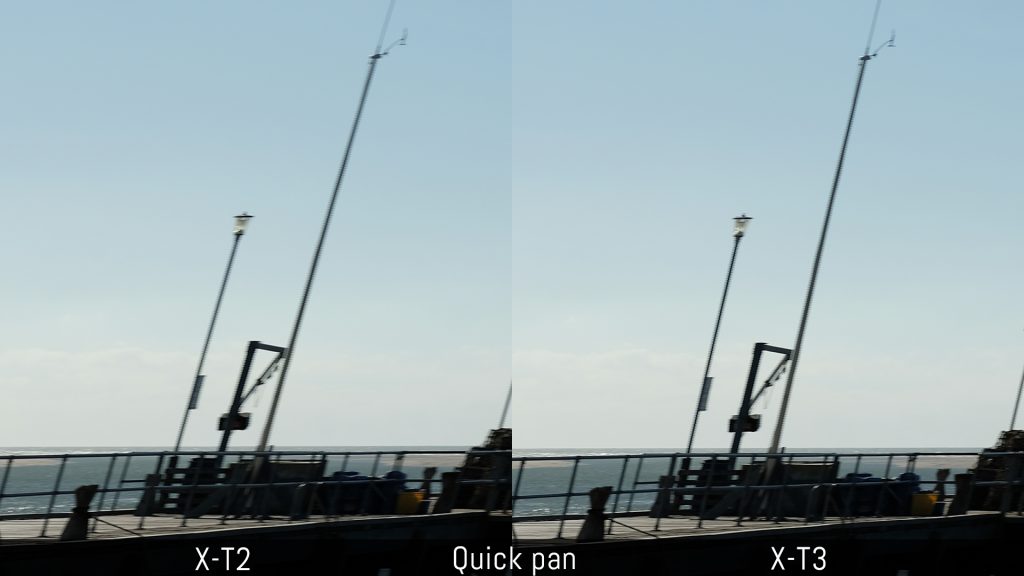
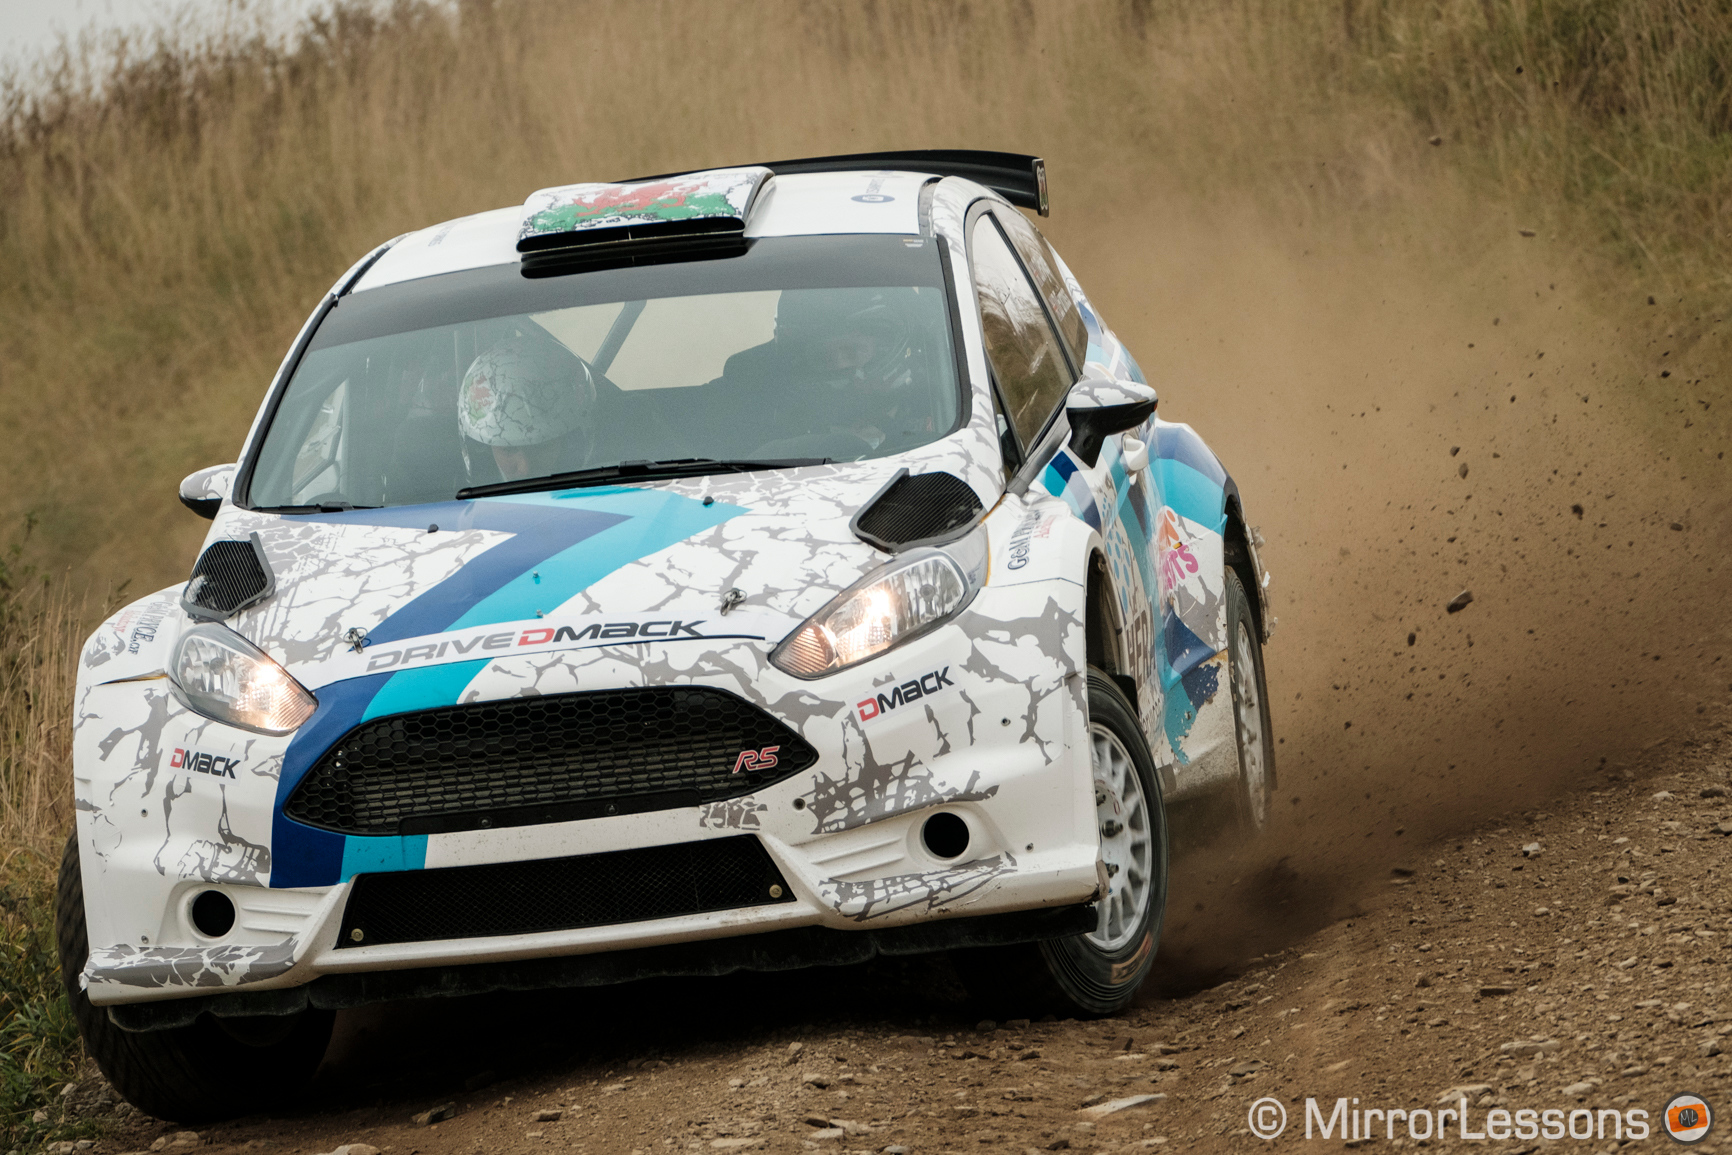
That being said, a quick pan left or right will still produce distortion. The first shot below is the first frame of my burst, but because I reacted too slowly to capture the action, I started to shoot at the end of my pan. Notice how the vertical lines in the background aren’t perfectly straight. In the second shot I was more steady and the rolling shutter effect in the background is much less visible.

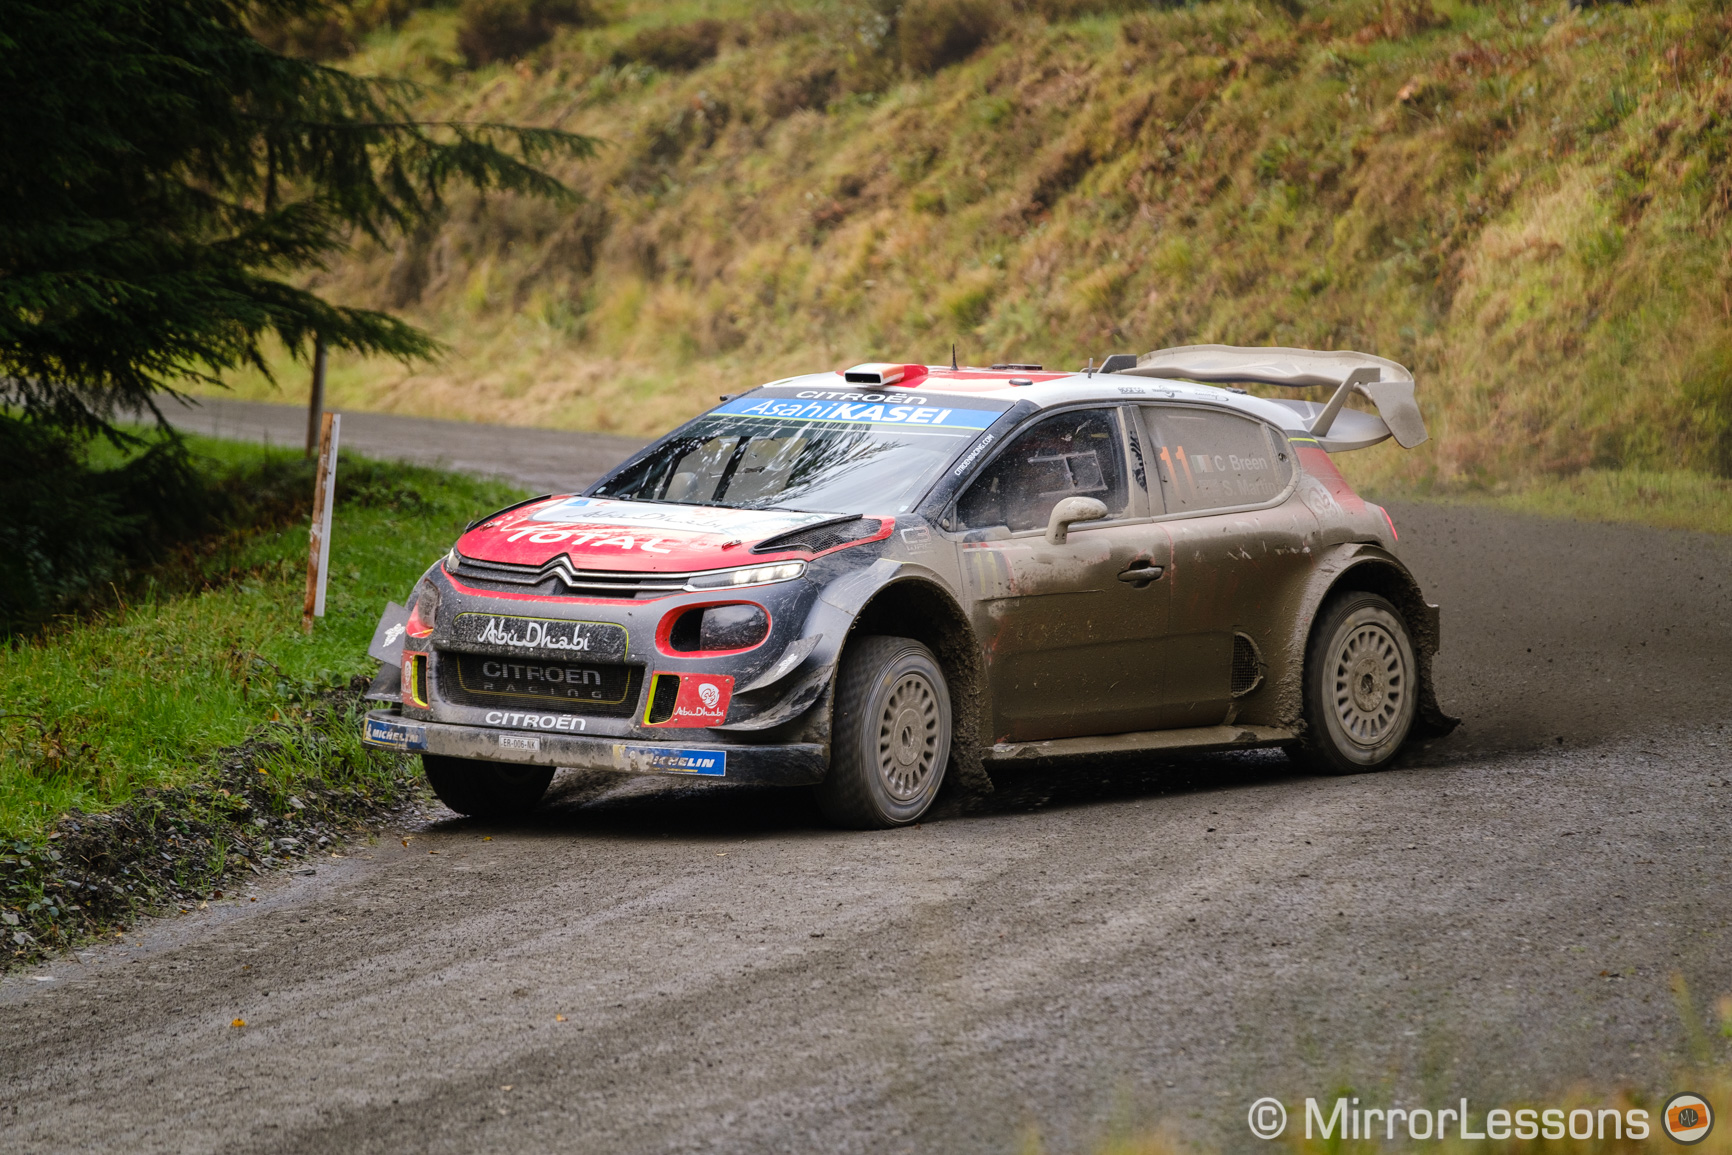
With the X-T2, rolling shutter will be more visible with the e-shutter even for slower movements like in the example below.
Example of rolling shutter at moderate panning speed
There is one important bug I found amongst all these powerful characteristics. When using the camera in crop mode (Sports Finder or electronic shutter), some RAW files are not written correctly and end up with a vertical black band, making the photo unusable. The percentage is low (around 10 shots out of more than 200) and I hope it is something Fuji can fix with a firmware update because it doesn’t happen when using the full sensor area.

Update: Fujifilm has released firmware 1.02 for the X-T3. In the notes they mention the following:
- The phenomenon is fixed that in rare cases, RAW image cannot be recorded normally under a certain conditions (Sports finder mode, continuous shooting with electronic shutter and so on)
It sounds like this 1.02 version addresses the issue I found above but I haven’t yet had the chance to confirm it for myself. This bug isn’t easy to detect and there is no guarantee that it will happen every single time. Nonetheless, it is probably best to update the camera.
The faster processing power of the X-T3 allows for another interesting option called Pre-Shot: when you half press the shutter button, the camera starts to load a certain number of frames and refresh them constantly until you fully press the button. So when you start shooting, the camera can already save the frames it was-pre-loading a moment before. Concretely speaking, the X-T3 records pictures before you start to take them which helps you catch fast or unpredictable moments such as a bird flying off a branch.
As for the buffer memory, neither camera slows down when shooting just JPGs. With RAW, the X-T2 slows down after 3 or 4 seconds to approximately 5fps, and 3fps soon after. The X-T3 does a little better by holding its full speed for more than 5 seconds, but then it too slows down to 3fps.
Video
This is where the Fujifilm X-T3 really stands out, not only in comparison to its predecessor but also all Fujifilm cameras produced to date. It has more specifications and better quality than ever before, making it one of the most interesting mirrorless cameras for video on the market, all brands considered.
As usual, you can watch our comparison video below or read further for a written analysis.
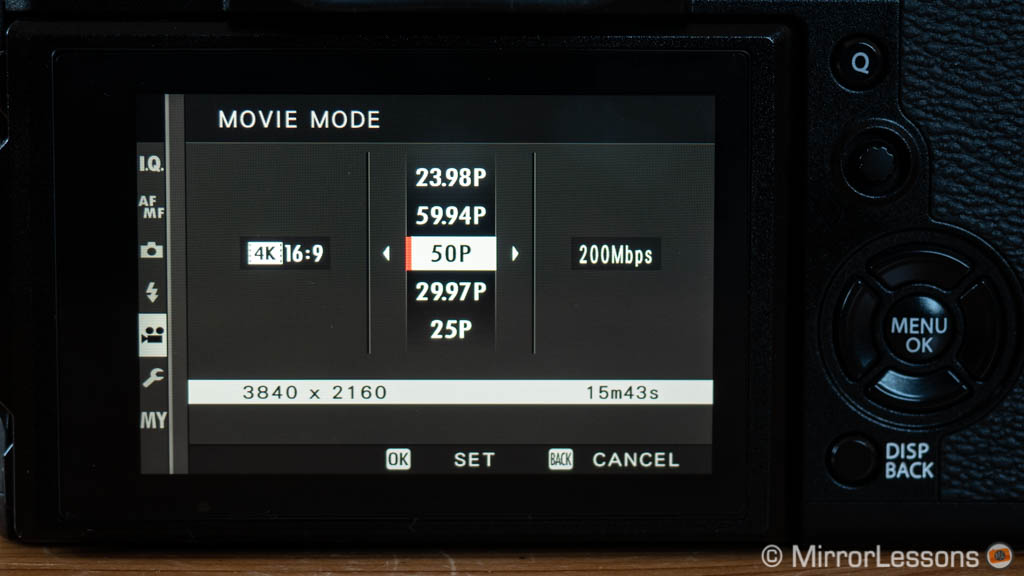
Both products can record in 4K Ultra HD (3840×2160) up to 30fps, but the X-T3 can shoot at higher frame rates of 50 and 60fps.
The X-T2 applies a 1.17x crop when recording in 4K, whereas the X-T3 can do full pixel readout with the full width of the sensor up to 30p. At 50/60p however, a 1.18x crop is applied.
The X-T2 can record internally in 8-bit (colour depth) and 4:2:0 (colour sampling) with a bitrate of 100Mbps, or 8-bit 4:2:2 via the HDMI port.
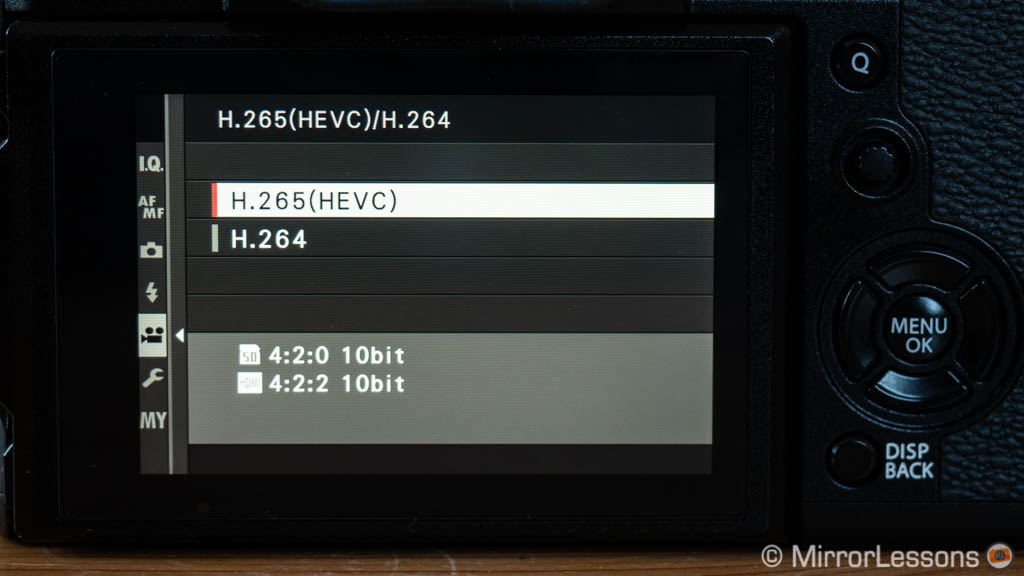
The X-T3 can do 10-bit 4:2:0 on the SD card at all frame rates and resolutions, which is a world’s first for an APS-C camera. Using an external recorder, you can obtain a 10-bit 4:2:2 signal via the HDMI output.
Concretely speaking, the difference between 8 and 10 bit means that the X-T3 can record 64 times more colour information than its predecessor. The bitrate can be selected between 100Mbps and 400Mbps.
You may not spot the differences between 8-bit and 10-bit footage right away but they are there if you do intense colour grading. I found the best examples when trying to open the shadows of a relatively dark image or when grading skin tones.
Both cameras can record with an F-Log gamma profile which gives you a flat image with the best dynamic range possible (ISO 800 on the X-T2, ISO 640 on the X-T3). When grading the X-T2 files, colour artefacts can appear in dark areas or on subtle tone transitions. On the X-T3 this doesn’t happen. The newer camera allows you to output Log and the normal Film Simulation modes via HDMI so that you can check normal contrast and colours on an external monitor while recording Log footage.
10-bit file compatibility note: I struggled a lot to open the X-T3 10-bit files. I had to update my Mac to Mojave to preview them correctly, but all efforts were in vain in Premiere Pro: the footage looked darker than it was supposed to with clipped shadows and highlights. The solution was to import them into DaVinci Resolve, do whatever I needed to do there (including grading F-Log) and then export them as Prores files. I suppose this is a H.265/HEVC compatibility issue (the 10-bit GH5 files which are H264 worked fine in the past). Hopefully Adobe will fix this with future releases.
There are other improvements on the X-T3: some of them are small but still relevant. First, Fujifilm has tweaked the colour rendering to make the image slightly warmer and less saturated, just as they did for the SOOC JPGs. It is more evident with strong profiles such as Velvia. The green shift with manual white balance is also less dominant.
The X-T3 has two additional profiles. The first is called Eterna and has less contrast and saturation to give you more leeway in post if you’d rather not use the F-Log mode. The second is a Hybrid Log Gamma mode (firmware 2.00 required) to record with the broadcast standard for HDR productions, or to be used with compatible HDR products such as recent 4K televisions.
On the new camera there are more settings that can be configured separately for video, including Noise Reduction and Dynamic Range. The latter – just like the SOOC JPGs – allows you to retain more highlight information while boosting the shadows, which gives you better results than just tweaking the Highlight and Shadow settings (your only option on the X-T2).
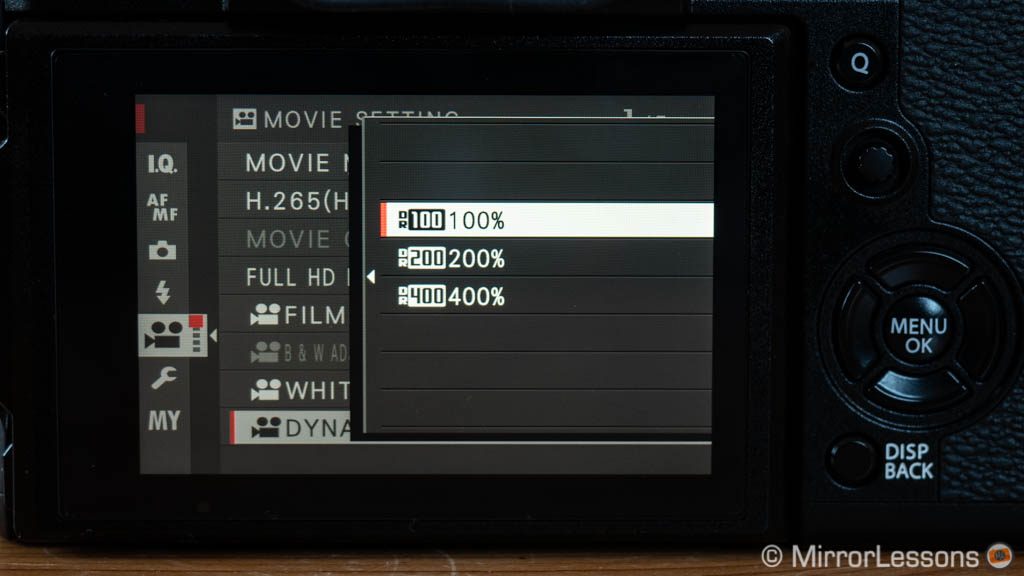
The X-T2 has an ISO range of 200-12800 for video, whereas the X-T3 starts from ISO 160 and goes up to 25600. Unlike for stills, here the X-T3’s advantage is more clear: there is less noise especially from ISO 3200. You can also vary noise reduction (not possible on the X-T2 for video) and there is an additional setting called Inter Frame NR. It is very effective but suitable only for static shots with no movements in the scene, otherwise ghosting may appear.
In Full HD, both cameras can record up to 60fps with sound and no sensor crop. Again the X-T3 has the advantage of a higher bitrate (200Mbps vs 100Mbps) and more colour information (10-bit vs 8-bit). You can also record up to 120fps if you activate the High Speed Rec mode, which conforms the slow motion result in camera. Here it is the X-T3 that adds a sensor crop of 1.29x to provide more sharpness and less aliasing, unlike the X-T2. Note that if you want to record at 120fps, both cameras offer 24p but not 25p output.
The X-T2 is limited to 10min per clip when recording 4K, or 15min when recording Full HD. To get rid of this limitation, you need to attach the optical battery grip. The X-T3 on the other hand can record 30 minutes in all formats by itself except in 4K 50/60p where it is limited to 20 minutes.
Continuous autofocus is fast on the two cameras and our side-by-side test didn’t reveal a drastic difference in good or low light conditions. Kudos to the X-T2 which has less light sensitivity as we saw for stills earlier on. There are only two focus modes for video: Multi which picks the AF point automatically, or Single Point which cannot be varied in size.
An advantage of the X-T3 is its face and eye detection, which can be used in 4K unlike on the X-T2 where it is only available in 1080p. As for stills, this mode is faster and more reliable on the new camera.
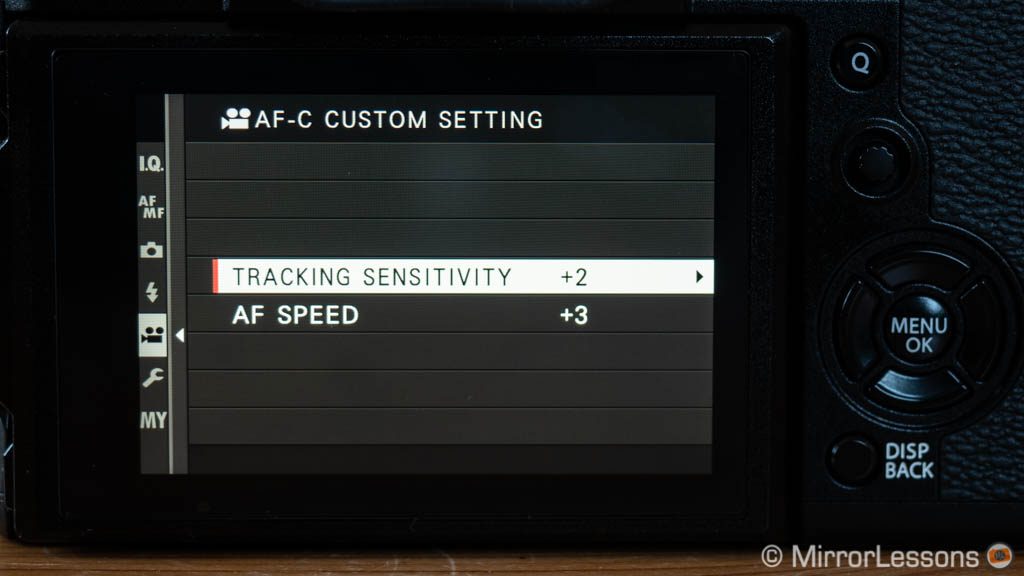
The AF-C Custom settings can be used on the X-T2 to vary the AF behaviour but the X-T3 has separate parameters for video (AF Speed and Tracking Sensitivity) which allows you to make more precise adjustments. They are also useful to make smooth transitions from point A to point B using the touch screen, although you might come across the occasional back and forth movement when locking onto the subject.
Rolling shutter is a bit more contained on the X-T3 thanks to the faster sensor readout and it is most noticeable when moving quickly with the camera.
As briefly mentioned earlier, the X-T3 allows you to configure all the settings for video separately from the ones you use for stills. So when you switch back and forth between the two modes, you don’t have to change the film simulation mode, MF assist or white balance, which makes the X-T3 much more user-friendly for video makers. The F-log profile is also a bit more straight-forward to find than on the X-T2.
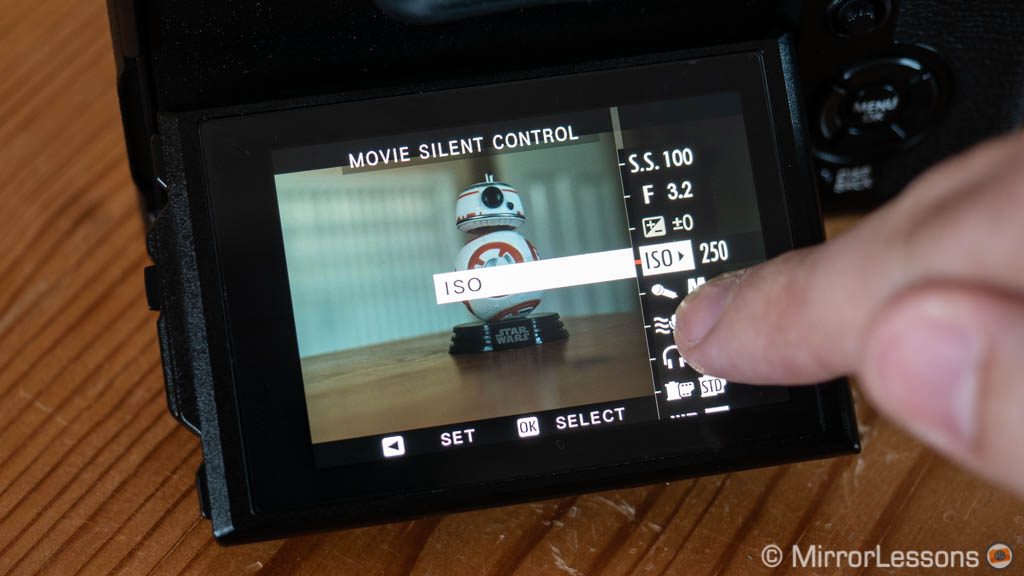
Furthermore, there is a Silent Operation option that disables all the exposure dials and allows you to control everything with the touch screen. For example, when recording video with this mode, you can set a separate aperture and shutter speed that is different from the values chosen for still shooting.
The X-T3 has other extra settings including:
- zebra patterns
- a dedicated audio sub-page with more parameters
- time code setting
- tally light with different options (AF illuminator on the front, lamp indicator on the rear).
Flash and other features
The maximum flash sync is 1/250s on both products, but with a compatible HSS flash, you can increase that speed further. There is no built-in flash but a small EF-X8 unit is provided in each box.
The cameras can work in TTL, Commander and Manual modes, and there are other settings available including TTL Lock, slow TTL, Front or Rear Sync curtain and Red-Eye removal. Flash compensation works at ±2Ev.
You’ll find a good number of extra features and additional settings on both products. Here is what they have in common:
- Metering: Average, Spot, Centre-Weighted and Multi, with very similar behaviour between the two
- Panorama: JPG only, can be activated with the drive sub-dial (under the ISO dial)
- Multiple exposure: 2 shots maximum with JPG output, accessible with the Drive sub-dial
- Bracketing: you can choose between AE, Focus, ISO, Film Simulation, White Balance or Dynamic Range bracketing. AE works up to ±3 Ev and 9 shots. Focus bracketing allows you take up to 999 frames, adjust the focus distance between shots in 10 steps and also set an interval between shots.
- Advanced Filters: 13 special effects for the JPG output including Toy Camera, Partial Colour, Low Key etc.
- Interval Timer Shooting (time-lapse): set up to 999 frames or record indefinitely
- Pixel mapping: map out dead pixels
- Copyright information: embed your name and other copyright information into the EXIF data of your still files
- Voice Memo: record an audio memo (max. 30s) for a specific picture in Playback mode. You need to activate the option in the menu, then just press and hold the front command dial. It’s very quick and intuitive.
- Select Folder: select or create separate folders to store the pictures on the SD card (this option will be added to the X-T2 via firmware later on)
- RAW Conversion: adjust RAW files in camera and save as a JPG file
- Fujifilm X RAW Studio: similar to the built-in RAW conversion, you can plug the camera into your computer so that the software can use the camera’s X Processor with the convenience of larger screen
- Fujifilm X Acquire: in addition to saving and restoring your camera settings, you can use X Acquire to work in tether mode via USB.
Although the list above is exhaustive, there are a few differences worth pointing out.
Starting with the manual focus assists, both cameras have Magnification, Peaking, Dual View and Digital Split Image but the X-T3 introduces a fifth mode called Digital Microprism. It displays a grid pattern at the centre of the frame that is more visible when the subject is out of focus.

I find it useful with clear straight lines, but if the scene is busy this system becomes quite confusing. Magnification on the X-T3 is sharper and more reliable and you can zoom in more in playback mode too.
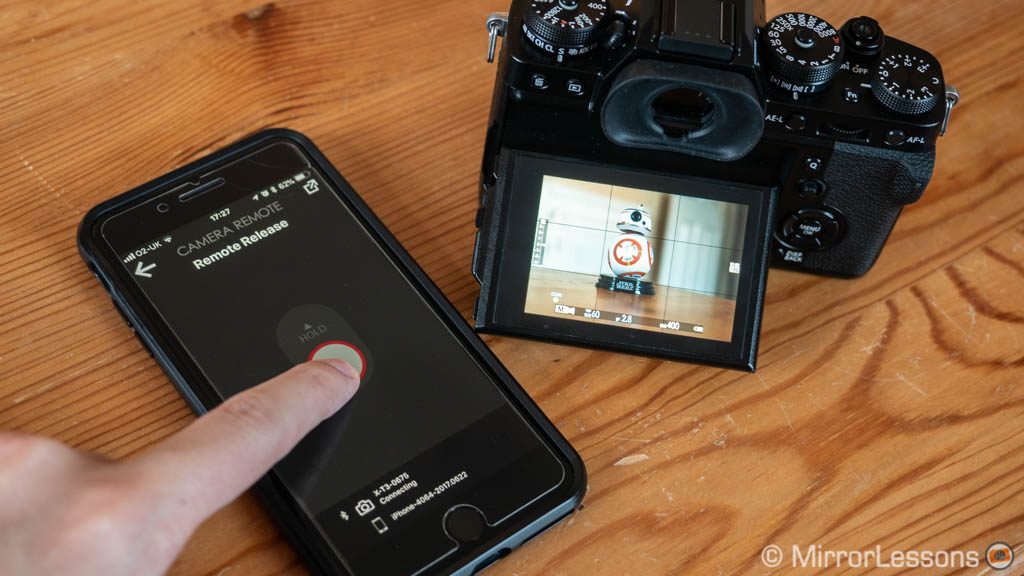
Finally we have wireless capabilities. Both cameras can use a WiFi connection to transfer images to a mobile device as well as remote control the camera with the dedicated app. You can also print from a Fujifilm Instax printer.
In addition to Wifi, the X-T3 has Bluetooth which allows you to pair the camera with a smartphone to synchronise the date, time and location, or use the smartphone as a remote shutter which is quite useful when working in Bulb mode. If you want to access more features like transferring images or remote control, you still need to connect via Wifi which makes the whole process a bit annoying.
Battery life
The two cameras use the same battery: the NP-W126 which has been upgraded to the more efficient NP-W126S type. As mentioned earlier, if you use an older battery on the X-T3 you’ll get a warning and some of the most powerful features such as 11fps shooting won’t be available.

As for the battery life, they are very similar if you mostly take stills and avoid using the most powerful settings. For a day out though I recommend one spare for peace of mind.
If you use the cameras to their full potential, then prepare to change the battery more than once. The fast bursts with the electronic shutter as well as the more advanced movie specifications make the X-T3 the more power-hungry of the two.
Each model has an optional battery pack available. Note that the one on the X-T2 also boosts the performance by adding 11fps and 30min video recording.
You can charge the battery in-camera by connecting it to a computer or mobile charger via USB. With firmware 2.0, the X-T3 displays a power supply icon when connected to the AC adapter or select Anker powerbanks (PowerCore+ 26800 PD and PowerCore Speed 20000 PD models).
Price
The X-T2 has been discontinued. You can find it second-had for about $700 / £550.
The X-T3 is still on the market and can be found for around $1300 / £1200 / €1350.
Note that the prices are as of March 2020 and may vary.
Conclusion
The Fujifilm X-T3 brings many important improvements to the table, and I wouldn’t hesitate to say that it is the best APS-C camera you can buy at this time. I don’t know how long it will maintain its hold on the throne in this ever-so dynamic market, but it has certainly raised the bar very high.
That being said, you need to reflect on what you plan to do with your new camera if you’re hesitating between the two or considering an upgrade.
If you’re mainly a stills photographer who doesn’t deal with action on a daily basis, I would choose the X-T2. There is no tangible improvement in image quality on the new model (except for the extra leeway when opening the shadows of the RAW file), the design and ease of use are the same, the high resolution viewfinder doesn’t add much of a benefit and the battery life is the same, if not slightly better on the old model.

The X-T3 can certainly give you something extra but you need to be in specific situations to really take advantage of the updated features. The autofocus system in particular was in need of some key upgrades in certain areas, and the new camera has done exactly that.
I can see portrait and wedding photographers benefitting from the faster face/eye detection, which is much more reliable now. Sports and wildlife photographers will not only appreciate the more reactive AF when their subjects challenge them, but they will also find an unexpected ally in the electronic shutter. It is not just about the 20 or 30fps speeds, but also about the possibility to shoot in continuous mode with a blackout-free live view, a feature that until recently was unique to the Sony A9. I find it to be particularly helpful for birds in flight, but it makes burst shooting easier regardless of the type of subject.
Speaking of wildlife, I would of course have no problem recommending the X-T3 but there is an elephant in the room (as is often the case with Fujifilm cameras) called the X-H2. The successor to the flagship X-H1 is still just a rumour, but it is plausible that we’ll see it sometime next year. It would combine superior ergonomics with the best performance Fujifilm has ever released, plus in-body stabilisation which for now remains exclusive to the X-H series. You can improve the grip on the X-T3 with accessories, but the X-H design just feels better out of the box. Plus it definitely needs an X-T3-like upgrade to keep its flagship status. So unless you’re impatient, are not bothered about trading in bodies on a regular basis, or want to spend less (because the X-H1 successor is likely to be more expensive), it could be worth waiting a little longer.

All this leads us to the final topic – the movie quality – which is the main reason to consider an X-T3 over the X-T2 and even other mirrorless cameras. Fujifilm has gone from offering poor video specifications a few years ago to becoming a reference on the market. The X-T3 as a video camera offers the best you can get from the brand: distinctive colour science (like it or not, it’s certainly different), excellent quality thanks to the 10-bit recording, lots of settings and excellent autofocus performance. Add to this the appealing price point, and it’s not difficult to see why this is the area where the X-T3 hits the sweet spot.
Choose the Fujifilm X-T2 if:
- you mainly take still photographs
- you don’t shoot sports or wildlife on a regular basis
- you’d prefer to spend less
Choose the Fujifilm X-T3 if:
- you want the best video quality
- you want the best autofocus system possible on an X series camera
- you want the benefits of the improved electronic shutter performance for sports and action (faster bursts, blackout-free live view)
Check price of the Fujifilm X-T2 on:
Amazon | Amazon UK | B&H Photo | eBay
Check price of the Fujifilm X-T3 on:
Amazon | Amazon UK | B&H Photo | eBay
Additional images and articles
You can check out sample images and download original RAW and JPG files by clicking on the two galleries below:
You may also be interested in:
- Fujifilm X-T3 vs X-T4 – Preview
- Fujifilm X-T3 vs Sony A7 III – 5 key points analysed
- Fujifilm X-H1 vs X-T2 – The complete comparison
- Fujifilm X-T2 vs X-Pro2 – The complete comparison
- Fujifilm X-T1 vs X-T2 – The complete comparison
- Fujifilm X-T2 vs X-T20 – The complete comparison