Updated on: March 6th, 2019
The X-T1 played a significant role in boosting the popularity of the Fujifilm X series, and so its successor, the X-T2, was naturally the most awaited camera from the brand this year. Indeed, people were more excited about its arrival than that of the X-Pro2, which gave us a sneak peek at the performance we could expect from the X-T2 since they share the same sensor and autofocus system.
Given the two-year gap between the X-T1 and X-T2, we were all hoping for many improvements and happily this is the case. With the X-T2, Fujifilm released a camera that feels and handles much better than its predecessor in many ways, though some of the differences are less obvious than you might think.
When a new product is announced, the desire to upgrade can be tempting but what we really need to ask ourselves is:
Is the X-T2 so much better than the X-T1? We’ve compiled this in-depth comparison to (hopefully) answer this question!
Ethics statement: We purchased both the X-T1 and X-T2 cameras to conduct our full reviews and comparisons. We were not asked by any of them to write anything about these cameras, nor were we provided any other compensation of any kind. Within the article, there are affiliate links. If you buy something after clicking the link, we will receive a small commission. To know more about our ethics, you can visit our full disclosure page. Thank you!
Given its length, this article has been divided into two parts:
- Page 1: design, functionality and image quality
- Page 2: autofocus, speed, video, other features and conclusion
[toc heading_levels=”2″ label=”Table of contents – Page 1″]
Article updates
- March 6th, 2019: example with the Lightroom Enhance Details function added
- July 2nd, 2018: edited with the latest information concerning the firmware 4.10 for the X-T2
- March 3rd 2018: updated with extra information concerning the latest firmware available for the X-T1 in the Other Features section
- December 13, 2017: additional information and feedback about firmware 3.0 for the X-T2
- June 6, 2017: additional information concerning the X-T2’s firmware 2.10 added
- April 6, 2017: we included information and feedback about the latest firmware available for the X-T2 (version 2.0). This firmware adds more than 20 new options and improvements to the camera.
Main specs
X-T1
- Sensor: 16 MP APS-C X-Trans II CMOS
- Lens system: X-mount
- Weatherproof: Complete (Splash dust and freeze proof)
- Internal Stabilisation: None
- Autofocus: Hybrid wth 9 phase and 40 contrast detection areas
- Continuous shooting: 8 fps and 3 fps (AF-S and AF-C)
- ISO Sensitivity: 200 – 6400 ISO (pull 100, push 12800 to 51200 in JPG only)
- Shutter Speeds: 1/4000 to 30 seconds, 1/32000s with electronic shutter
- Viewfinder: 0.5in OLED with 2,360k dots, approx. 100% FOV coverage, 23mm eyepoint, 0.77x magnification and 60fps refresh rate
- Rear monitor: tilting 3″ LCD (1040k dots)
- Movie recording: Full HD up to 60fps
- Built-in Flash: No but EF-X8 unit is included
- Extra Features: WiFi, Panorama, Timelapse, Bracketing, Multiple exposure, Advanced filters, silent mode
- Dimensions: 129.0 x 89.8 x 46.7mm
- Weight: 440g (including battery and memory card)
- Firmware version when tested: 5.40
X-T2
- Sensor: 24 MP APS-C X-Trans III CMOS
- Lens system: X-mount
- Weatherproof: Complete (Splash dust and freeze proof)
- Internal Stabilisation: None
- Autofocus: Hybrid with up to 325 points (7×13 and 13×25 grids selectable)
- Continuous shooting: 8 fps and 5 fps, up to 11fps with optional battery grip, 14fps with electronic shutter (AF-S and AF-C)
- ISO Sensitivity: 200 – 12800 ISO (pull 100, push 25600 to 51200 in RAW and JPG)
- Shutter Speeds: 1/8000 to 15 minutes (with T mode), 1/32000s with electronic shutter
- Viewfinder: 0.5in OLED with 2,360k dots, approx. 100% FOV coverage, 23mm eyepoint, 0.77x magnification and up to 100fps refresh rate
- Rear monitor: 3-ways articulated 3″ LCD (1.04M dots)
- Movie recording: 4K up to 30fps, Full HD up to 60fps
- Built-in Flash: No but EF-X8 unit is included
- Extra Features: WiFi, Panorama, Timelapse, Bracketing, Multiple exposure, Advanced filters, silent mode
- Dimensions: 132.5 x 91.8 x 49.2mm
- Weight: 507g (including battery and memory card)
- Firmware version when tested: 4.10
Design and build quality
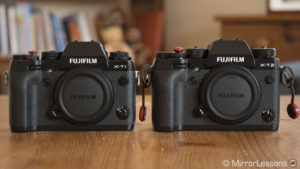
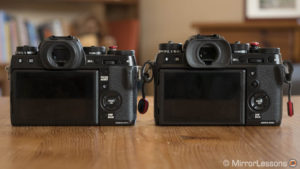
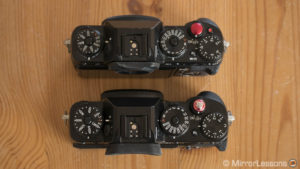
At first glance, it is almost impossible to distinguish one from the other, apart from the name printed on the front.
Fujifilm managed to keep the size and weight more or less the same as the original camera. The X-T2 doesn’t feel any larger or heavier in the hand, although the official specifications say that the X-T2 is 67g heavier and slightly larger, taller and deeper (but we’re talking about a few millimetres).
Both cameras feature a magnesium alloy body and come with complete weather-sealing: dust, splash and freeze proof down to -10°C. The X-T1 and X-T2 are also available in Graphite Silver.
The faux leather cover doesn’t feel too different, other than the fact that the cover of our X-T1 is a little more worn due to its age. (Our X-T2, on the other hand, is just one month old.) There have been complaints about the rear cover detaching from the X-T1 following intense use, so I’m hoping that the X-T2’s is more robust.
Check price of the Fujifilm X-T1 on B&H Photo.
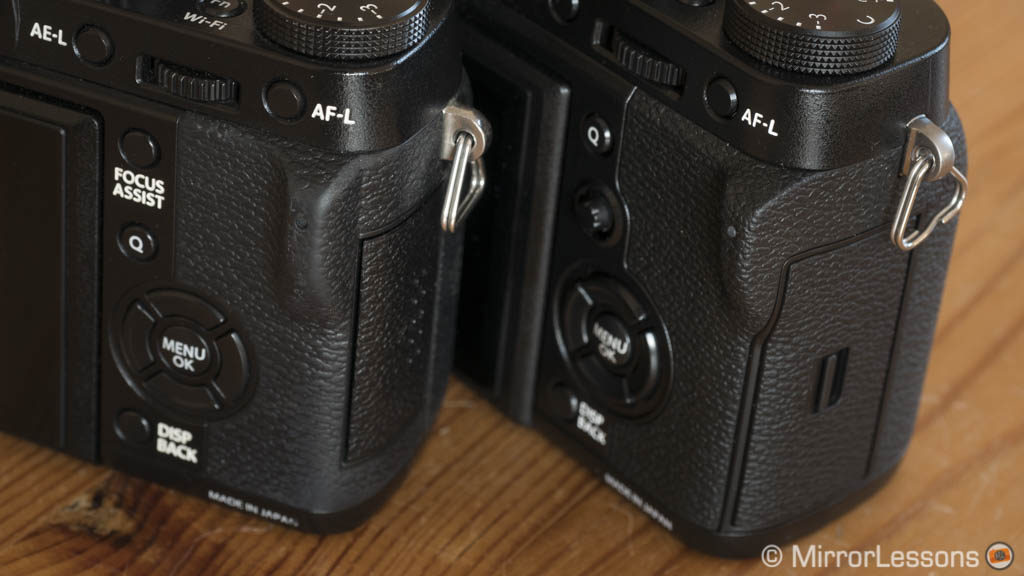
Despite their similar appearance, the X-T2 feels much more solid in many ways. This is no clearer than in the small details.
The dials have been enlarged and the buttons have been given more depth to improve the tactile experience. The four-way selector on the rear has greatly benefited from this subtle re-design, as the one on the X-T1 is much less sensitive. The front and real command dials are more comfortable to use as well: the difference in size is minimal yet perceivable.
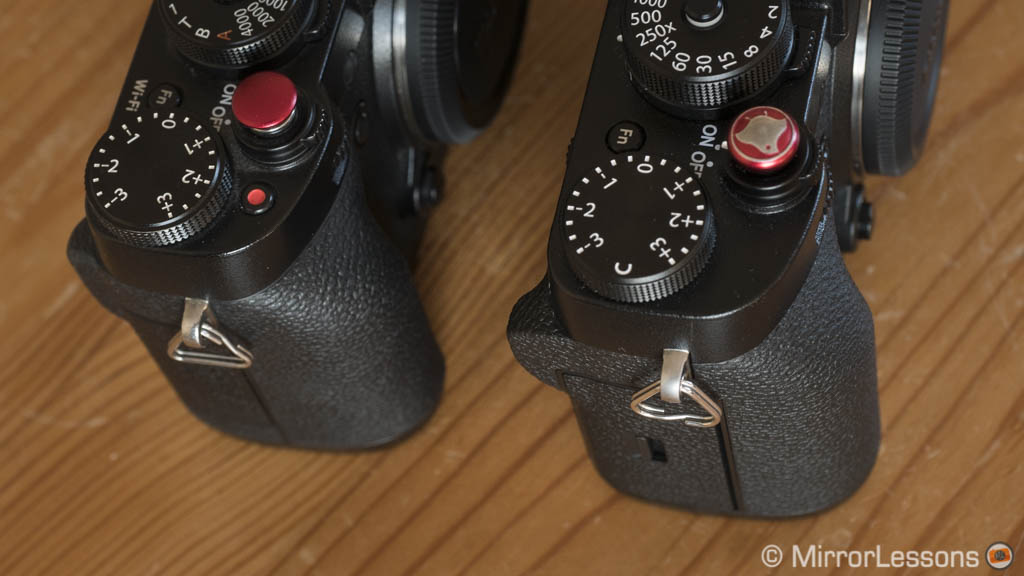
The front grip has a slightly more embossed shape but in this case the difference really is insignificant. Both cameras are comfortable to hold but an extra accessory like a Lensmate thumb rest or horizontal grip can provide additional comfort especially if you use medium-sized or large lenses.
Note about the Lensmate Thumb Rest
For our X-T cameras, we use the Lensmate Thumb Rest. The product designed for the X-T1 fits the X-T2 as well. You might find it a little harder to insert because of the larger eyecup on the X-T2 but once it is placed correctly, it fits the design of the new camera as well as it does the X-T1.
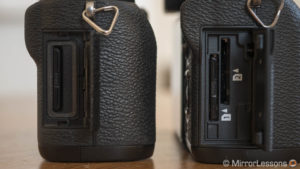
The SD card and connector doors are now more robust: they don’t feel as cheap or easy to bend as those on the X-T1. The SD card door on the X-T2 has an unlock button which adds extra security. You will also notice the dual slot on the new camera that gives you four options:
- save JPG and RAW files separately on two different cards
- back-up the files saved in slot #1 to slot #2
- increase the memory capacity by saving files to the second slot once the first is full
- choose where to save the movie files
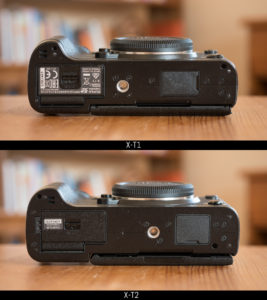
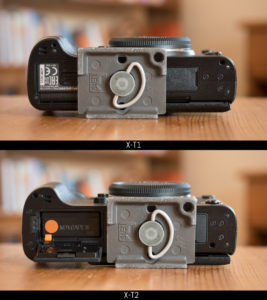
The bottom plates haven’t changed much, except that the tripod mount is now perfectly aligned with the lens/sensor axis on the X-T2. This also allows you to attach a tripod plate without obstructing the battery compartment, which is what happens with the X-T1.
External controls and customisation
On the X-T2 you will find the same dials present on the X-T1: it’s one of the characteristics that makes these cameras so nice to use because you don’t need to dig inside menus or quick menus as much as with other digital cameras.
One welcome improvement concerns the ISO and shutter speed dials: the unlock/lock button in the middle is now fully manual and works both ways. You can keep the dials locked or unlocked unlike the X-T1 where you have to keep the button pressed down on the ISO dial to rotate it, while the one on the shutter speed dial only unlocks from the A position.
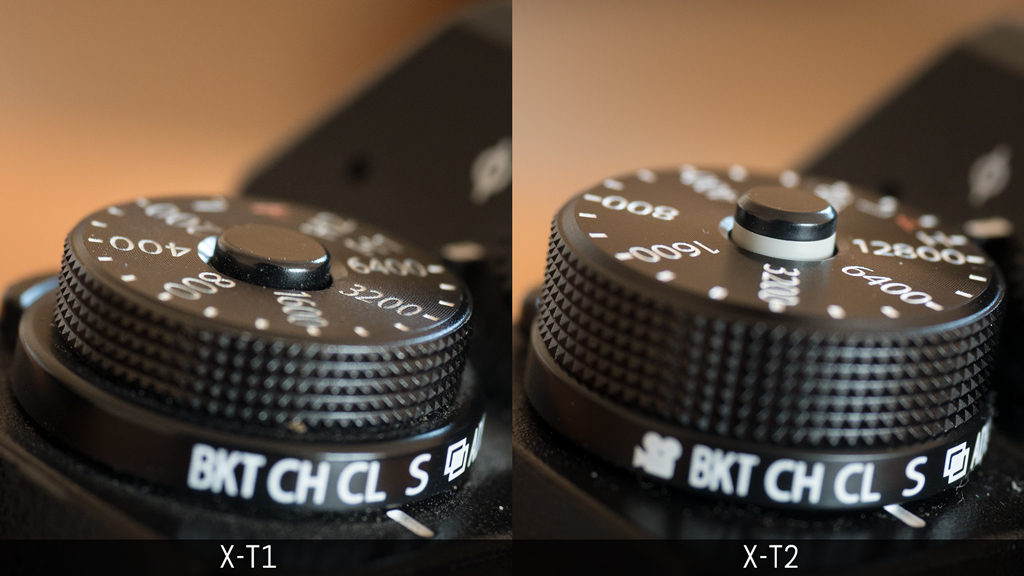
Note that on the X-T2, there is an alternative to change the ISO if you don’t like the default dial for some reason: the front command dial (firmware 2.0 required). You can scroll through the entire range and the three Auto ISO presets as well.
The sub-dials underneath the shutter speed and ISO dials have a few extra options but I still find them stiff to rotate, especially the metering dial.
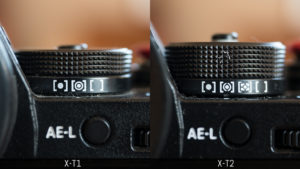
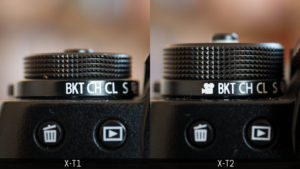
The drive dial includes an extra step for movie recording. The metering dial includes an Average mode in addition to Spot, Centre-Weight and Multi.
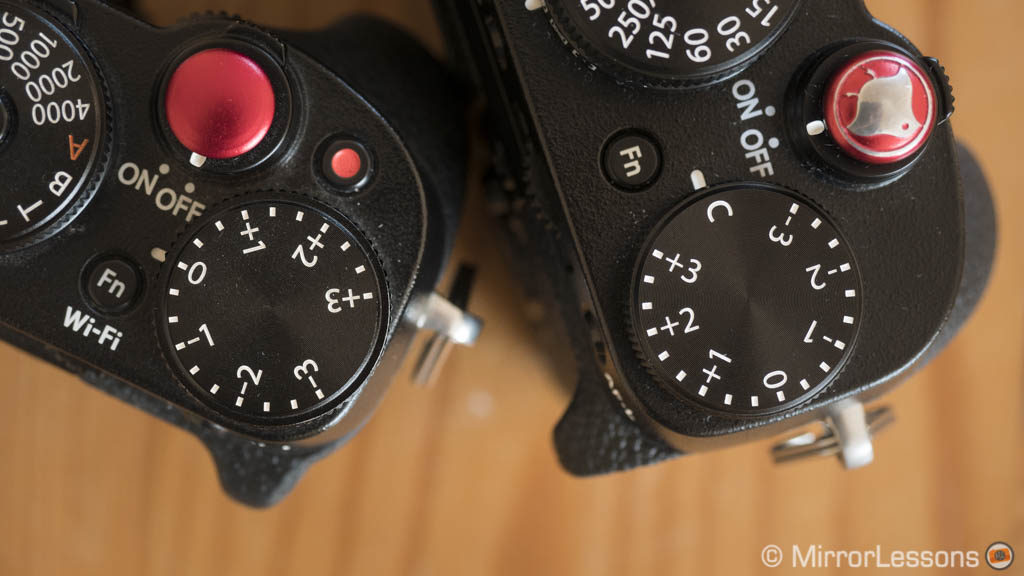
The exposure compensation dial on both cameras works in ±3 Ev but the X-T2 also has a C step that allows you to use the front command dial up to ±5 steps. By pressing the command dial, you can also lock or unlock the exposure compensation. You may also notice that the movie recording button has disappeared on the X-T2 (more on this in the video section).
On the front nothing has changed: you will find a command dial, a function button, the Flash socket and the Focus mode selector.
On the rear the most noteworthy addition is the AF Joystick that allows you to move the AF point at any time. By pressing and holding it for 2 seconds you can also change its behaviour:
- On: the focus lever works whenever you move it
- Push to unlock: you press it once, then you can move the focus point
- Off: the focus lever is disabled.
On the X-T1, the quickest way to change the focus point is to enable the four selector buttons on the rear. However by doing so you lose 4 potential function buttons.
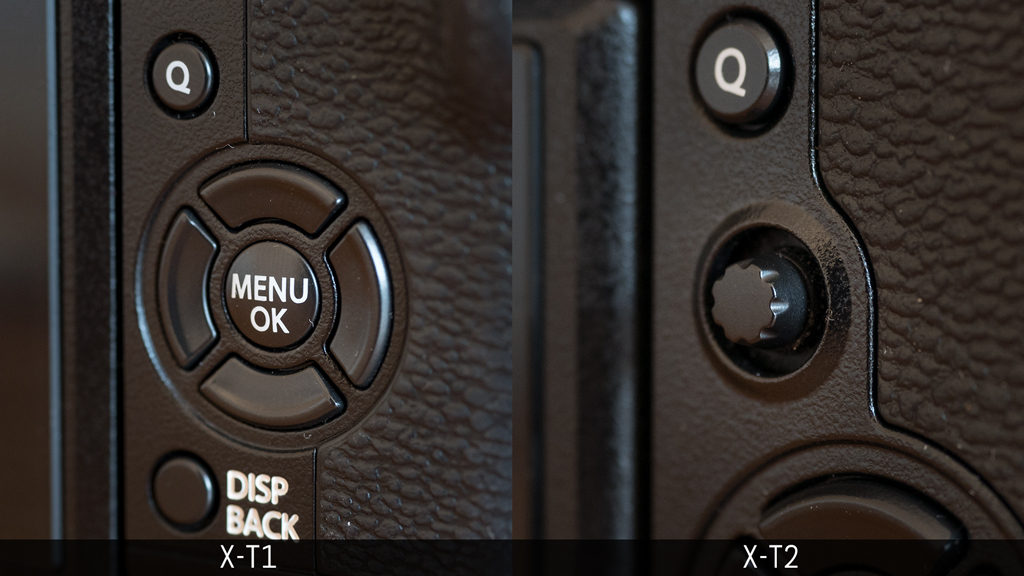
As for the rest, all the other buttons are in the same place on both cameras. The only difference left is the Focus Assist button that activates magnification. On the X-T2 you can press the rear command dial instead.
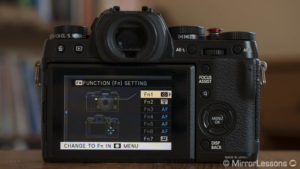
Concerning the physical function buttons, the X-T1 has 7 of them: two on top (including the movie recording button), 1 out front and 4 on the rear (the four selector buttons).
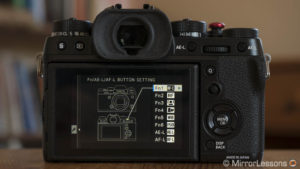
The X-T2 has 9 custom buttons including one on top, one out front, 6 on the rear (two of them are the AE-L and AF-L buttons) and the rear command dial when pressed.
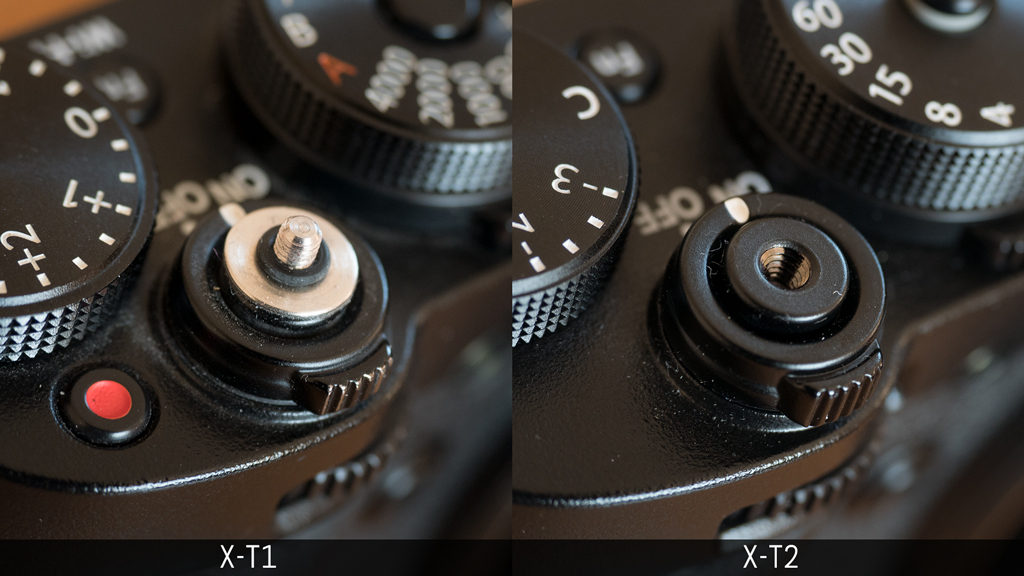
One last small upgrade on the X-T2 is the threaded shutter release button. The X-T1 doesn’t have this option and what you see on my copy is a special version designed by Lolumina that sticks to the shutter button.
Viewfinder and rear monitor
The EVFs of both cameras features an OLED panel with 2.36 million dots of resolution. They have the same magnification of 0.77x, a 23mm eyepoint, 100% field coverage and a 0.005s display lag. The digital information automatically rotates when you hold the camera in portrait/vertical mode. You have the Dual View mode when focusing manually which shows a magnified portion of your frame (where the focus point is) on the right side.
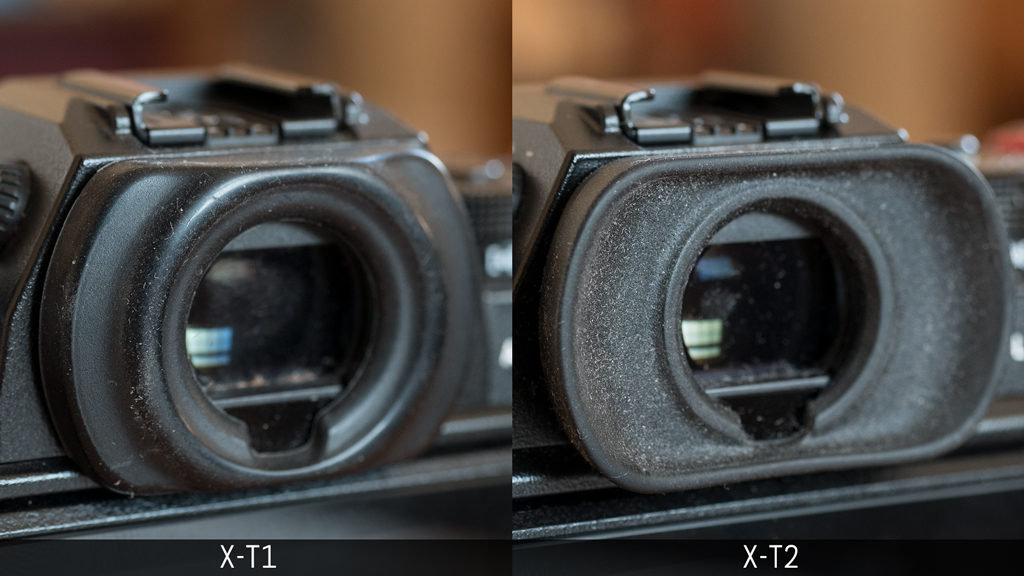
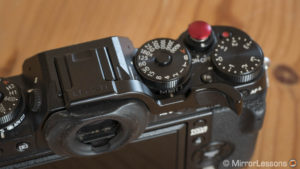
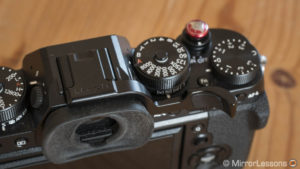
That being said, there are a couple of improvements on the X-T2. First the eyecup shape has been re-designed to be more concave: it protects the eye better from sunlight and is more comfortable to use when wearing glasses as I do. However as you may notice in the image below, the new eyecup attracts more dust.
The brightness can be set to Auto on the X-T2 and the EVF is brighter than the one on the X-T1. The contrast and colour vividness have been enhanced too. So basically one of the best EVFs on the market just got better without any fancy new specifications.
The refresh rate is 60fps for both cameras and the speed remains constant in low light, albeit with an increase in noise that is more visible on the X-T1. On the X-T2 you also have the option to increase the refresh rate to 100fps in Boost mode (found in Setup Menu / Power Management / Performance).
Usually LCD monitors tilt up/down or flip to one side (multi-angle solution). The X-T2 brings a new solution that I quite enjoy.
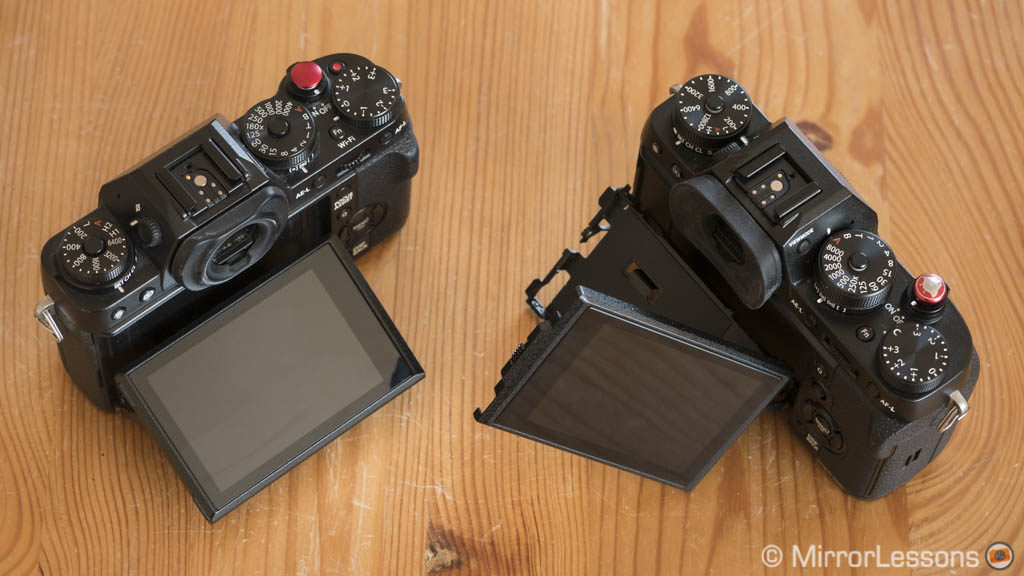
While the one on the X-T1 can only be tilted up 90° and down 45°, the X-T2 LCD screen can also be opened to the right by approximately 70°. This clever three-way tilting mechanism allows you to shoot in portrait orientation and tilt the monitor upwards. I also find it useful when composing vertical shots of landscapes or astro-photography.
A multi-angle screen that flips to the side might be more useful for filming but I found it more annoying for stills as it forces you to have the screen open on one side, which extends the width of the camera and often feels like a fragile solution. The new mechanism adopted by the X-T2 tries to combine the best of both worlds and succeeds 90% of the time. For video it can still be annoying sometimes because the LCD can only be flipped to the right side and not the left. As such, you can’t take advantage of it from all angles.
Note the the screen is not touch sensitive on either camera.
You can display custom information on both the EVF and LCD screens. The X-T2 has three additional options (for a total of 27 vs 24 on the X-T1). You can display the Boost mode logo (when it is activated), Mic level (audio meters) and the exposure compensation can be shown in Digit in addition to Scale. One thing that has been taken away from the X-T2 is the Blur warning (when using slow shutter speeds).
Finally, another little addition to the X-T2 is Framing Outline: it displays a grey border around your frame to see the limits of your composition when shooting against dark backgrounds.
Firmware 2.0 added another option on the X-T2: you can use the LCD to display the images taken while framing with the EVF so that you can check them quickly (Eye Sensor + LCD Image Display).
Firmware 3.0 added the possibility to display highlight warnings on the X-T2 when using the LCD monitor or EVF (the brighter areas of the image will blink). It’s an interesting option to use to avoid highlight clipping especially when recording a video or working with SOOC JPG.
Menu system
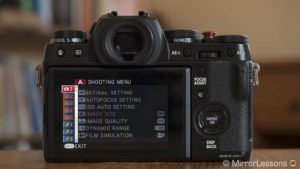
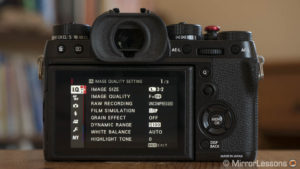
Introduced first on the X-Pro2, there is a new menu system on the X-T2. It looks much clearer and more organised than the one of the X-T1. Actually it is one of my favourite camera menu systems out there.
I only have one complaint about it: I wish you could go back to the same setting where you left off when you re-enter the menu a second time shortly after.
On the X-T1 the menu system is divided into two main sections: all the settings related to shooting in the first (red, 5 pages) and all the settings related to the camera set-up in the second (blue, 3 pages).
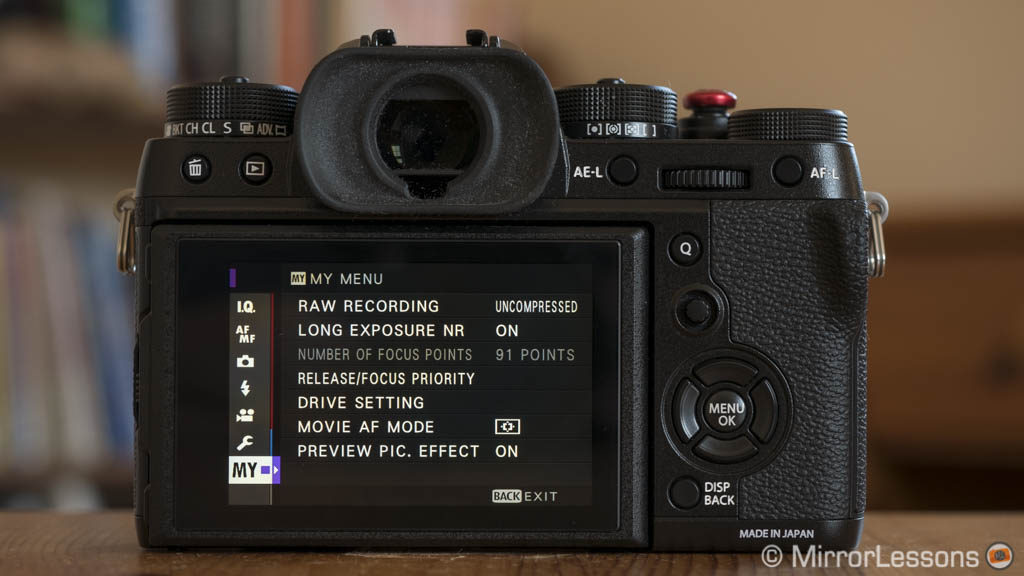
On the X-T2 things are more organised and you have 5 main menus: Image Quality, Auto and Manual Focus, Shooting, Flash, Movie and Set Up. It is easier to navigate and to quickly find the settings that you are looking for.
The X-T2 also has My Menu, which is a sixth main section that you can customise by adding shortcuts to your favourite settings. Once you start using it, My Menu will display first every time you press the menu button. Unfortunately some settings like formatting memory cards can’t be added to My Menu.
The Quick menu hasn’t really changed: you have 16 slots that are entirely customisable with 24 settings to choose for each. You can press and hold the Q button on both cameras to customise it.
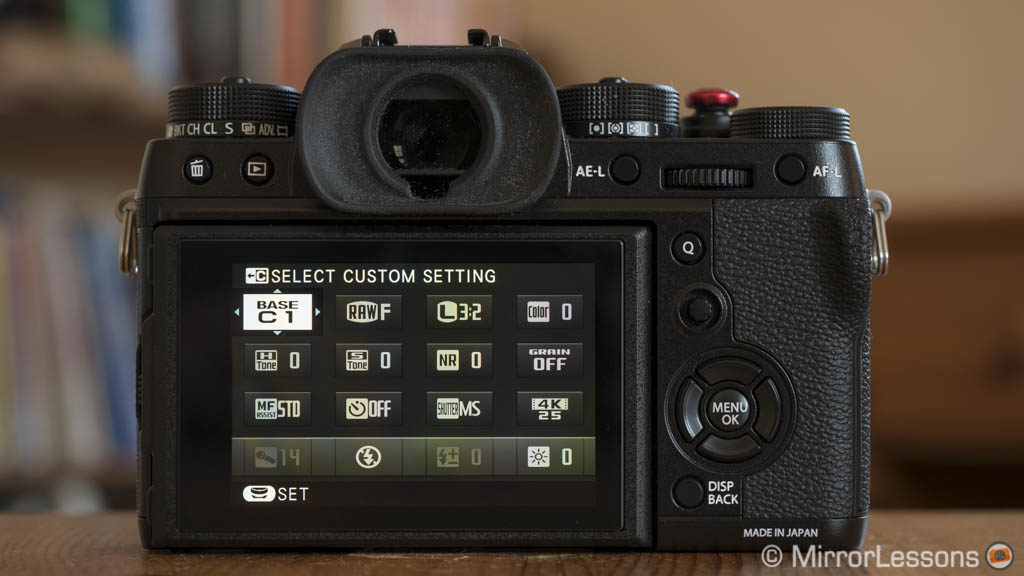
Both cameras have 7 Custom Settings which allow you to save your favourite image quality settings. On the X-T2 you can assign a custom name to them thanks to firmware 2.0. With the 4.10 version, you can also customise the location and size of the data displayed on the LCD or EVF.
Sensor, Resolution and RAW Demosaicing
The X-T2 features a new sensor in comparison to the X-T1 that brings some improvements such as:
- more resolution (24 MP vs 16 MP) with an updated version of Fuji’s proprietary X-Trans array
- a wider native ISO sensitivity range (more on this in the next chapter).
The X-T2 has a new image processor called X-Processor Pro that is four times faster than the one on the X-T1 (EXR II Processor). The sensor readout speed has also been increased to improve AF tracking, blackout time and the EVF refresh rate.
The first obvious advantage is the increase in resolution which gives you more details, more room for cropping if needed or the possibility to print on a larger scale with better detail preservation. In my personal opinion I wouldn’t consider the upgrade just for the increase in resolution since 16MP can be enough in many situations. Actually it is interesting to note that the X-T1 stands up pretty well against the X-T2 even when upscaled to 24 MP. Granted, if you decided to upscale even more, then the X-T2 would have an advantage.

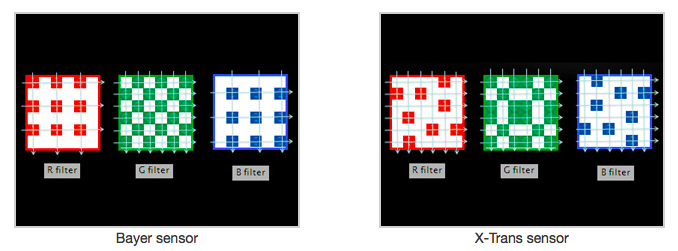
Fujifilm’s X-Trans technology has many aficionados but there are also many users who dislike it. The different arrangement of the Red, Blue and Green pixels in comparison to the traditional Bayer array eliminates the problem of moiré and the need for an Anti-Aliasing filter but it also makes the de-moisaciing process of the RAW files trickier for certain softwares.
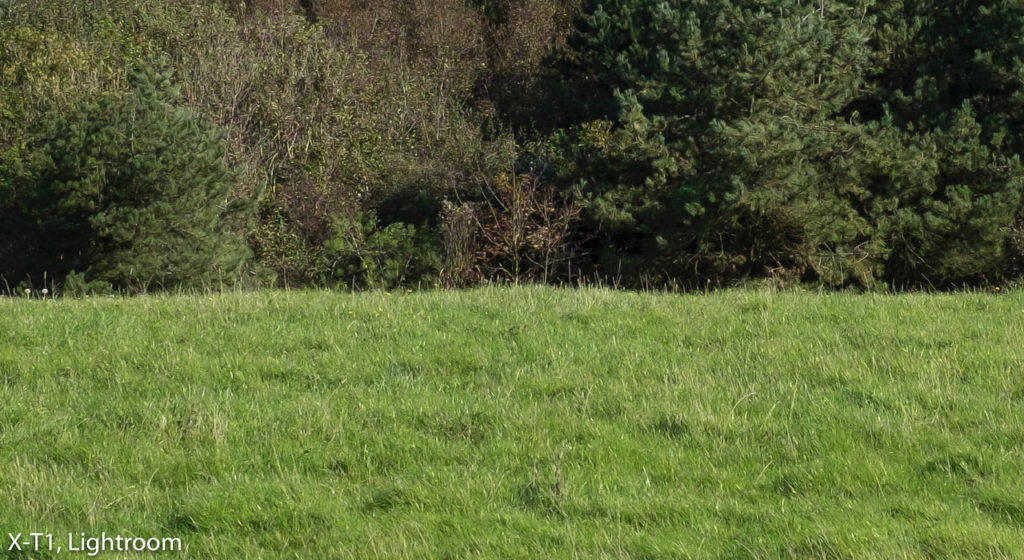
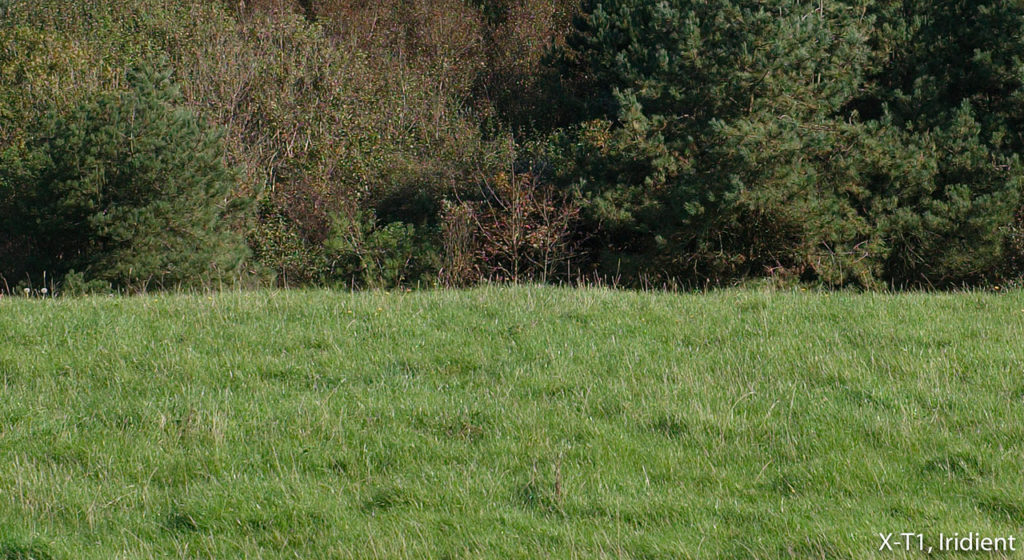
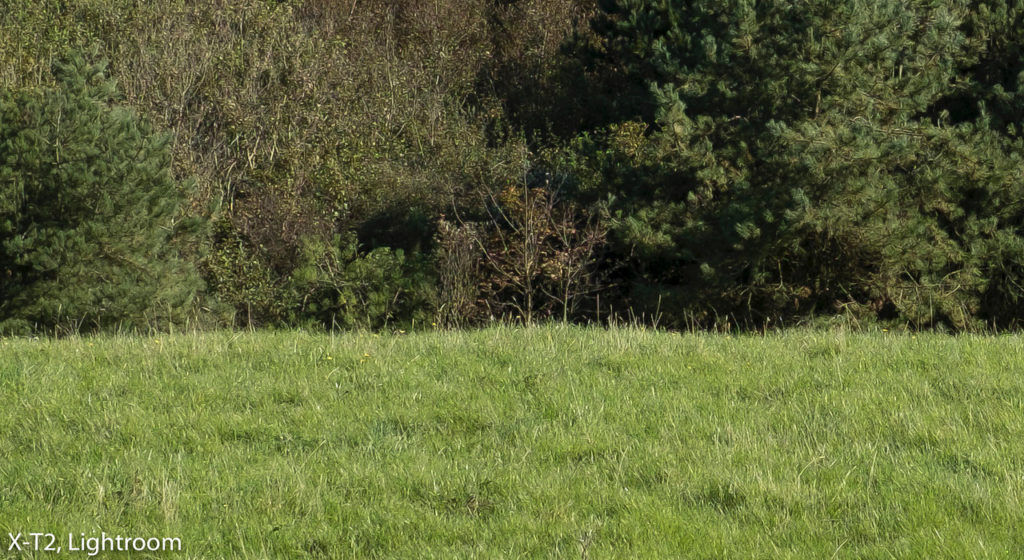
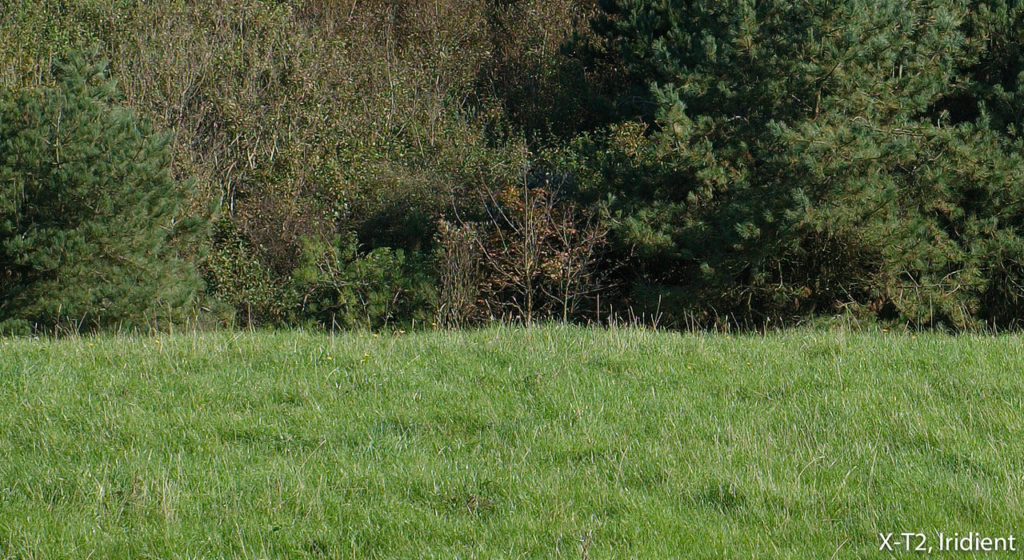
I mostly use Adobe Lightroom for convenience and I’ve rarely had issues with this but it is true that other applications like Iridient Developer do a better job of pulling out every little detail from the RAF files, especially in the grass and green foliage, which has been one of the biggest complaints expressed by users (also known as the watercolour effect).
The new sensor doesn’t solve the issue but having more resolution helps. Iridient still remains more capable of dealing with certain textures and details in comparison to Adobe Camera Raw. In the image below you can see an example: I tweaked the settings in the Detail panel of Lightroom to pull out as many details as possible without compromising the natural sharpness of the image. I then worked the two photographs in Iridient Developer following the same steps.

– X-T1 Lightroom version, Iridient version
– X-T2 Lightroom version, Iridient version
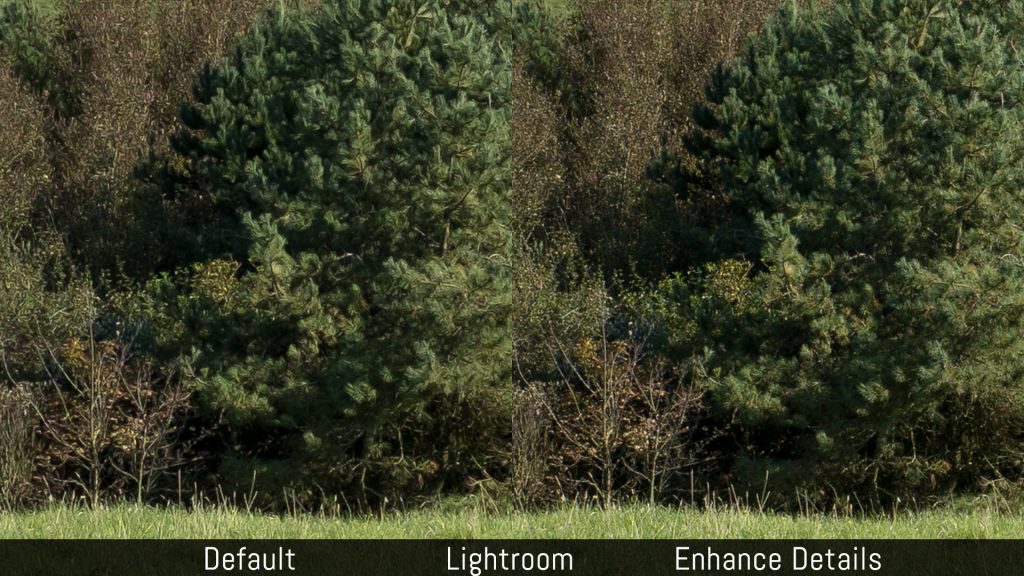
One good news for Lightroom users is that the company has added a new function in version 8.2 (Classic CC) called Enhance Details. It heavily uses GPU and creates a DNG RAW file but the details rendering improves quite a lot in comparison to the standard demosaicing process.
The RAW output is 14 bit for both cameras. You can choose between uncompressed and lossless compressed on the X-T2 while it’s uncompressed only with the X-T1. An uncompressed RAF file on the X-T2 is around 50MB while lossless compression gives you approximately 25MB. The X-T1 RAW file is around 33MB.
Given the larger number of pixels, the X-T2 gives you the possibility to choose a smaller file size which is great when you know you will bring home lots of images (wedding, events, etc). The difference between the two options is rarely noticeable even when you push your post-processing to the limit (e.g. recovering 5 stops in low light). It’s interesting to see that the X-T1 displays less noise because of the lower megapixel count.


Dynamic range and sensor flare
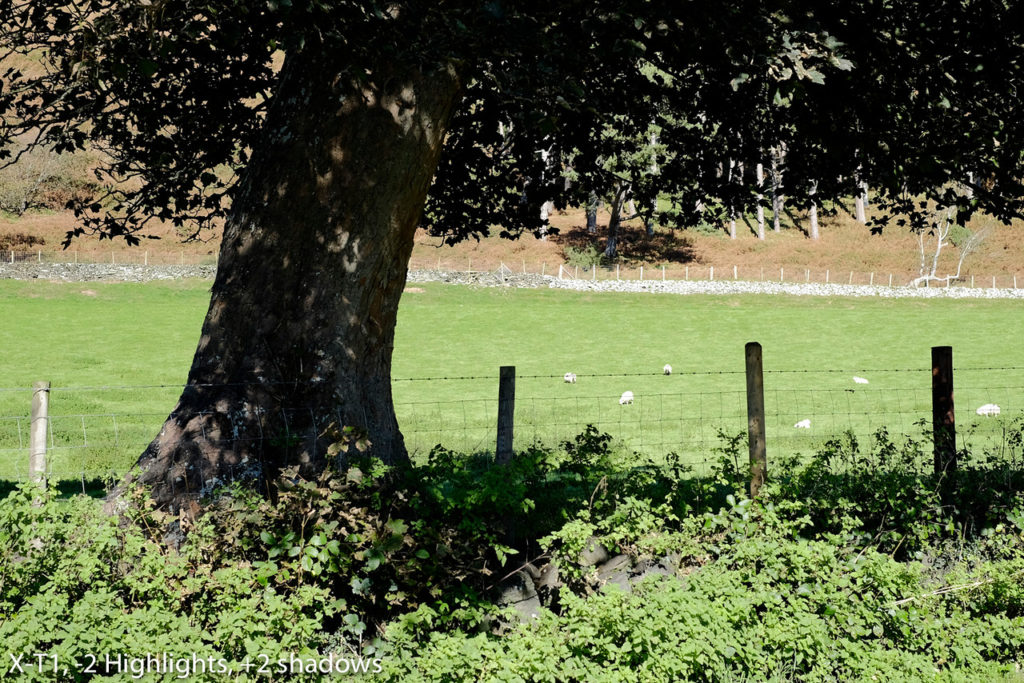
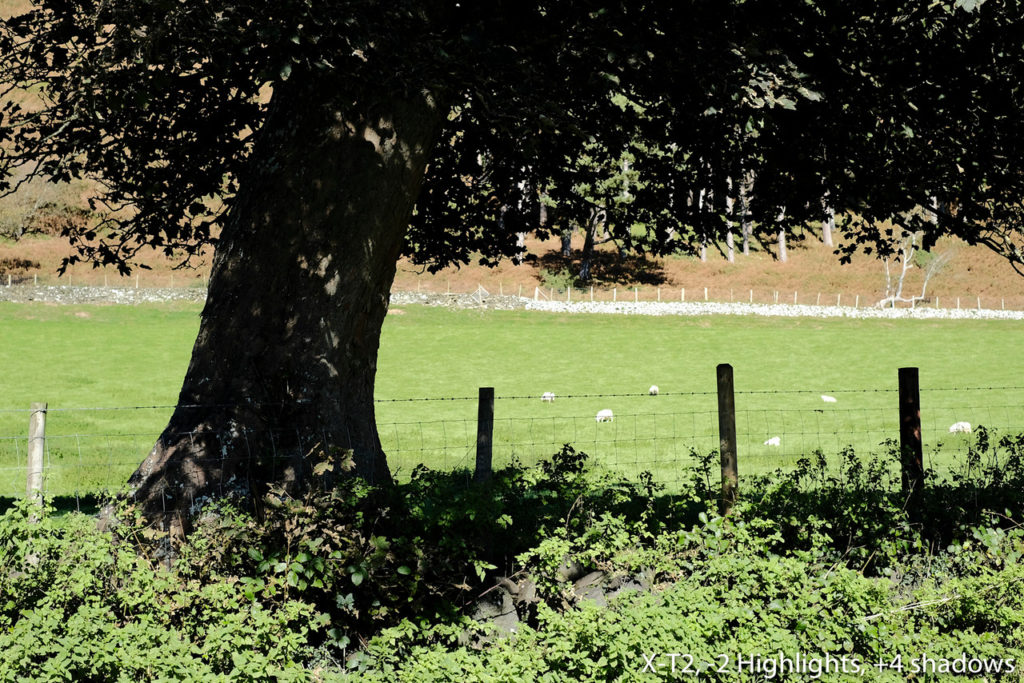
Concerning dynamic range, the new sensor of the X-T2 preserves the highlights better than that of the X-T1. Granted, the difference isn’t huge, but there is a visible improvement. In the shadows, both cameras perform in a similar manner.
In the example below, I recovered all the shadows and highlights possible and applied the same settings to both cameras. (Click here to see the full resolution versions.)
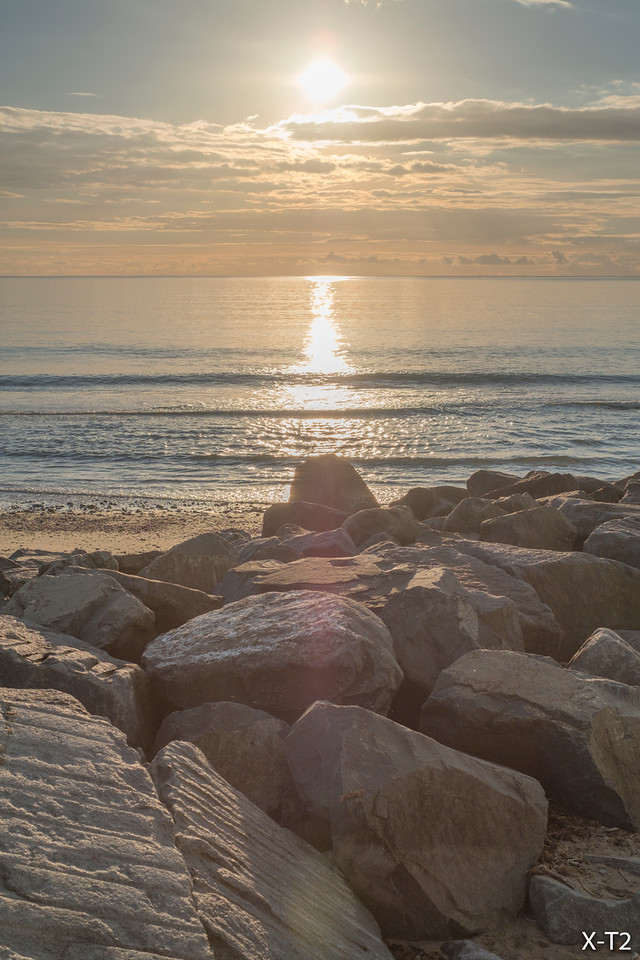
One thing I noticed with the new 24 MP sensor is purple flare and a weird grid artefact that is noticeable if you pixel peep the image. I first saw it on the X-Pro2 (after reading a few posts online about users experiencing the same thing) and found it on the X-T2 as well.


On the X-T1 it is unlikely you will even stumble upon it. I took the same shot above with the two cameras and as you can see there is only a bright streak produced by the lens (I didn’t have the hood with me).

Personally I don’t think it is a major issue: it happens only in backlit situations, when the camera is shooting at a precise angle in comparison to the light rays and the grid appears only if there is purple flare. Usefully, the purple flare can easily be detected in the EVF while shooting and sometimes even the grid will appear on screen. The solution is to simply adjust the composition ever so slightly by tilting up or down to eliminate the purple flare.
Granted, if shooting in backlight is your main style as a photographer, I can understand that it is more annoying but it can be avoided. Note that purple flare is not related to a particular lens as I came across it with various lenses.
Colours, monochrome profiles and JPG settings
Concerning the RAW files, the X-T1 and X-T2 reproduce the same colour palette with the same settings and camera profiles so there isn’t anything worth highlighting really. You may notice some very tiny variations that are more due to the RAW converter software than anything else. For example Lightroom tends to warm the X-T2 files sligthly more while Iridient gives basically identical results but you can easily file these considerations into the ‘irrelevant’ folder.
Both cameras feature Fujifilm’s film simulation modes which is another name for picture profiles. In the case of Fujifilm, the selection available is inspired by the different rolls of films the company used to produce in the past. The cameras feature the same options including Provia (Standard), Velvia (vivid), Astia, Classic Chrome, Pro Neg Standard and Pro Neg High. Note that these profiles apply to the JPG recorded in-camera but some software like Lightroom include the film simulation modes so you can easily apply the same colours to the RAW file.
Below you can see a quick selection of images taken with various profiles to show you the colour palette with both cameras. Fuji colours are among my favourite in the mirrorless camera segment.
If you use AWB (Auto White Balance) without altering the tint, you will notice a tiny difference in the JPGs, with the X-T1 tending towards a greener tint. Here as well we are talking about a minute difference.
Another difference can be seen with white balance and skin tones. If I set the temperature manually (in this example 5900K), the RAW files will produce nearly identical results but the JPG will have a complete different tint, despite having matched all the settings including colour, film simulation and contrast. As you can see, the X-T1 has a more natural rendering while the X-T2 has a greener tint.
If I set the white balance to Auto, the results are more similar but the X-T1 still renders the skin and overall colours more naturally than the X-T2.
It seems that the X-T2 requires more tweaks to get better results than the X-T1 for skin tones and white balance.
Concerning skin tones, you can tweak the sharpness setting of the JPGs to increase the detail or soften the skin tone. Personally I would stay between 0 and +2 to avoid having too much detail or an overly soft rendering.
The X-T2 offers a few more options concerning the JPG settings:
- you can adjust the shadows and highlights in +4 steps instead of +2 (still -2 on both cameras)
- sharpness and colour can be adjusted in ±4 steps instead of ±2
This offer a little more customisation but you can take advantage of it only if you are mainly a JPG shooter and want more contrast with deeper blacks.
As for the dynamic range of the SOOC JPGs, I can share the same conclusions found with the RAW files. The X-T2 retains more details in the highlights with the exact same settings as the X-T1 but in this case it also has slightly darker shadows.
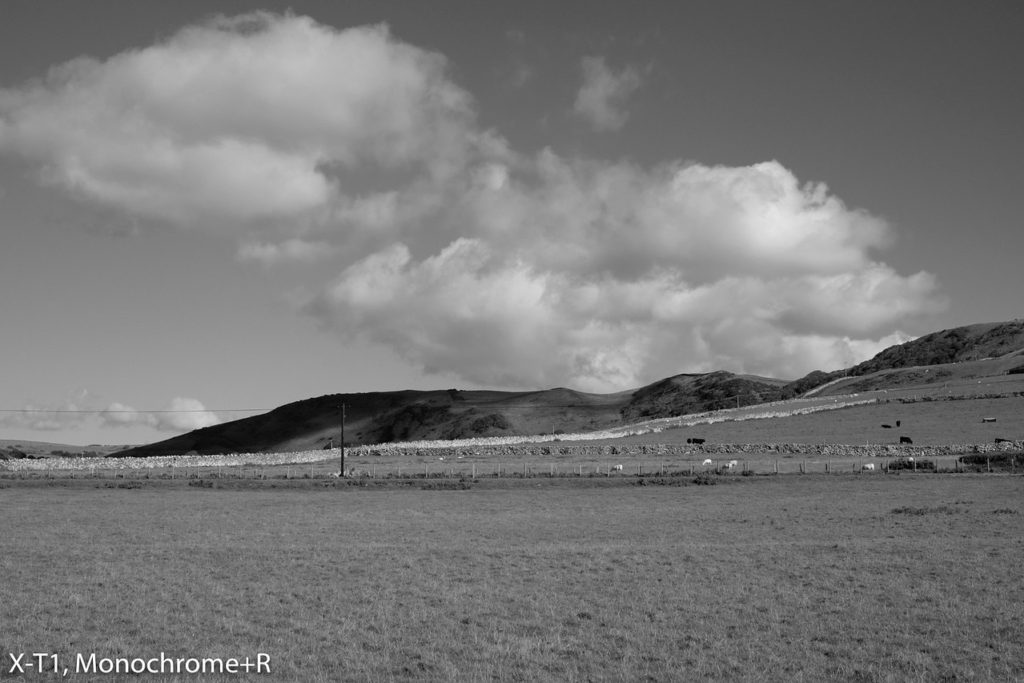
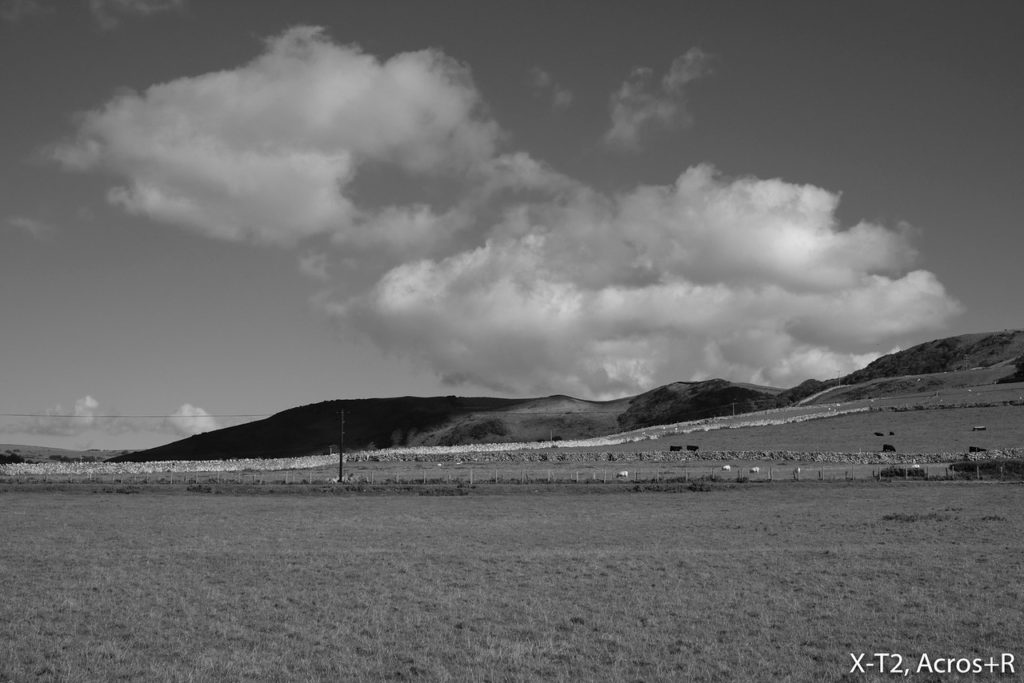
Concerning black and white, the X-T2 has an additional profile called Acros (introduced on the X-Pro2) which gives slightly more contrast and a darker tone in comparison to the normal monochrome profile. Acros has three variations just like Monochrome (Yellow, Red and Green filter).
Finally, you have the Grain setting on the X-T2 that can be applied to both colour and monochrome profiles with two options: weak and strong. Depending on the amount of light and contrast in the scene, I often find Strong to be a little too invasive but if you like grainy images, it could suit your taste. It is also true that a third party software can give you more settings to achieve the desired intensity.
ISO performance
Finally, we finish the image quality section with the low-light performance. The first relevant improvement of the X-T2 is not only the extra stop of native sensitivity (200-12800 ISO vs 200-6400 ISO on the X-T1) but also the possibility to shoot RAW at all ISO values, including the extended ones.
On the X-T1, you can shoot RAW only up to 6400 ISO. The other values (100, 12800 to 51200 ISO) are only available in JPG format which can limit the possibility of post-production at these extreme sensitivities. The X-T2 thankfully solved this and makes sensitivities like 12800 far more versatile in my opinion.
On the X-T2 you have two additional “pull” values that can be assigned to the L step of the ISO dial: ISO 125 and ISO 160 (firmware 2.0 required).
Concerning noise ratio performance, I didn’t find much of a difference with the new sensor. The amount of noise seems to be very similar despite the increased resolution of the X-T2. Note that at 51200, the X-T2 RAW version is one stop under-exposed in comparison to the other values.

With the OOC JPG, the X-T2 noise reduction seem sligthly more aggressive than the X-T1 image when value is set to 0. On the new camera however you have more room for adjustments with ±4 steps versus the ±2 steps on the X-T1.

One last difference between the two cameras is the Auto ISO settings. With the X-T2 you have three presets available where, for example, you can set the first to a maximum of 800 ISO, the second to max. 1600 and the third to max. 3200 ISO. You can also set the minimum shutter speed for each preset manually or select Auto and let the camera choose the minimum shutter speed according to the focal length. On the X-T1, only one preset is available.
The article continues on page 2.
Check the price of the Fujifilm X-T1 on:
Amazon | Amazon UK | B&H Photo | eBay
Check the price of the Fujifilm X-T2 on
Amazon | Amazon UK | B&H Photo | eBay
Second-hand Fujifilm cameras on
























While your review is extensive………..your conclusions are pedestrian, incomplete, and superficial
owner of both XT1 and XT2
I thought the conclusion summarised the essence. If you want more detail, read the whole article and do your own processing.
Perhaps you would enlighten us with a more imaginative and brilliant conclusion, yourself, owner of both? Or perhaps you “don’t have the time” to bring something useful to the table?
This review is making more and more difficult to not want the xt2
This is Angry Photographer from youtube, you can watch his 10000 videos on youtube where he concludes that XT2 has better AF than Nikon D500. Nuff said.
Once again, your assertions that the X-T2 has superior continuous AF to the D500 is laid waste. Only now, as the real results filter out, do you realize the gravity of your error, yet you are probably still too proud and stubborn to admit it.
And NO, I’m not going to show you pictures of my X-T1, X-T2, and D500, so STOP ASKING.
Well having had the X-T1 since 2 years and the X-T2 for some days, I find the conclusion spot on. Instead of just judging give some arguments. If it is true that you are the “angry photographer”, I am not surprised as your whole business seems to be to throw judgements onto everything and everybody.
Not very convincing, sir.
Is it only me, or I see X-T1 as a better imaging camera, sharper with better contrasts?
Image quality is similar on both cameras but you can get sharp and contrasty results on the X-T2 as well.
I actually prefer the images from the X-T2 regarding colour and contrast
Give us ISO 25!
What about ISO 10? 🙂
Matthew, great comparison as usual. Are you going to put the XT2 against EM1 Mark 2??? are you invited to Olympus Nov 2 Presentation?
I’ll definitely compare the two cameras when I get the chance. As for the E-M1 II, I hope to see it… soon 😉
According to the User Manual and several other reviews, the EVF 100fps boost option has nothing to do with the vertical grip. Can you confirm that?
I double checked and you are correct: they mention it the user manual and if I turn the boost mode on the refresh rate is more fluid. I’ll update the article as soon as I’m back home. Sorry for the mistake 🙂
Hey, this is by far the best review and comparision I have come across, thank you very much indeed! BTW, I resold the X-T2 a few days after having bought, the increase in IQ was not enough for my taste, seen the high price. But I don’t need also the faster modes.
Thanks for such a thorough review Mathieu. Appreciate the organization and also the photos shot with the camera are better composed and shot than those of many other reviews I’ve seen in the past (not that it should matter for sake of reviews, but I appreciate it nonetheless). I’ve heard/known about the superiority of Iridient when it comes to processing RAW files for details, but the comparison photos with the grass field/hill was very telling. As I’m just a mere amateur on a PC, it’s not worth it for me to invest in a mac to get Iridient…so hoping the guy either puts out a PC version (which I thought was supposed to be back in Spring…) or Adobe buys the guy out and incorporate into Lightroom/Photoshop 🙂 But without getting anal about the IQ, I mainly appreciate this camera for its usability. The custom buttons, large EVF, light yet still very ergonomic even for my large hands, its sense of retro style, are all the things that encourage me to pick it up every day and shoot something. I’m first one to say I’m limited by my imagination and skills than by the gear, so it’s great to have a gear that just begs to be used 🙂
Only thing I may ask you to double check is the SD card slots; I though both slots were UHS-II, not just slot 1? Thanks!
You are right, both SD cards slot are UHS-II compatible, I though that it was like the X-Pro2 but I was wrong.
Great comparison, thank you!
As for me having X-T1 there is no need to upgrade. I’ll better invest in lens and skip one body generation.
Could you explain further about AF speed of old lenses. I don’t have any problems with AF-C on XF 35 f1.4 (2m+ distances) and doubt that AF motor is a limiting factor here. Never tried XF 35 f2 but it’s widely advertised by many reviewers as a better lens (faster AF, better IQ, less weight etc) but if fact it’s a cheaper 1 stop slower lens. How do you compare XF 23 f1.4 (currently have one) IQ and AF speed to XF 23 f2?
Older lenses like the XF 35mm f/1.4 have a slower AF motor. The new f/2 generation is way faster and that mainly results in less “breathing” when focusing. I found the X-T2 sligthly faster with older lenses but it’s not a huge difference.
I’m currently testing the new 23mm f/2, it’s a good lens with good optical quality and very fast AF. It’s faster than the 1.4 version but when it comes to optical quality I am not sure yet: I should have the lenses side by side to see where the difference lie. But somehow I wouldn’t see myself trading a 1.4 lens for a f2 lens unless I never use it at 1.4 and want something smaller and lighter.
I enter this discussion just 3 weeks later. First thanks to this extensive und well presented comparison.
My point – and it makes we wondering it does not receives more attention:
The out of camera JPEG rendering of skin tones from the XT2 has lost the fascinating quality which I appreciated so much with XE1/XE2/XT1 cameras of previous generation.
I tested myself now the XT2 (with Provia) and watched the recent “Great JPEG Shootout” of the TheCameraStore TV. The findings are the same: The XT2 JPEGs have lost VERY MUCH the “magic” of the known Fuji color skin tones – at least when comparing Provia Filmsimulation.
Your review is also showing this difference very clear.
I find this is a disappointing draw back and reduces my joy of using the new XT2 considerably.
Shooting people with excellent out of camera JPEG quality – saving a lot of time in post processing!!! – has been for me always a major “pro” argument for using Fuji over other systems.
It seems that they re-calibrated the color temperature for some reasons and you often get a green dominance. You can fix it by customising the manual white balance value. It just needs more tweaking than the previous 16MP sensor.
The Average metering mode is not new on the X-T2. It was present on the X-T1. The new metering mode on the X-T2 is the Center-Weighted mode. The X-T1 did not have Center-Weighted. This is not immediately apparent, because the meaning of the symbols has changed. On the X-T1’s symbol for Multi has been re-purposed to stand for Center-Weighted on the X-T2. And the X-T2 gets a new symbol for Multi. So the new metering mode (Center-Weighted) inherits the old symbol, and the old metering mode (Multi) gets a new symbol. The change is confusing, but the end result is likely better.