Updated on: July 20th, 2018
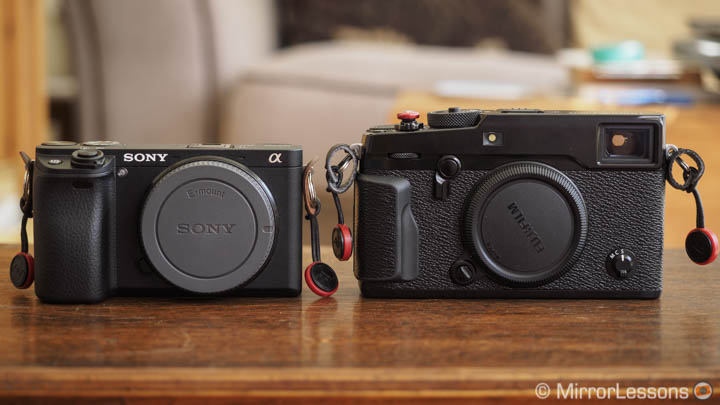
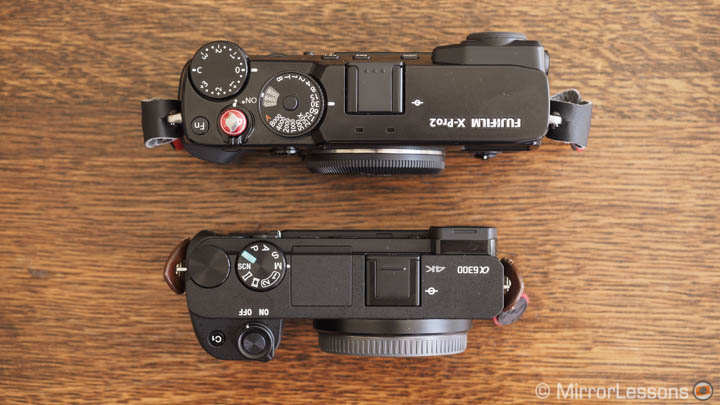
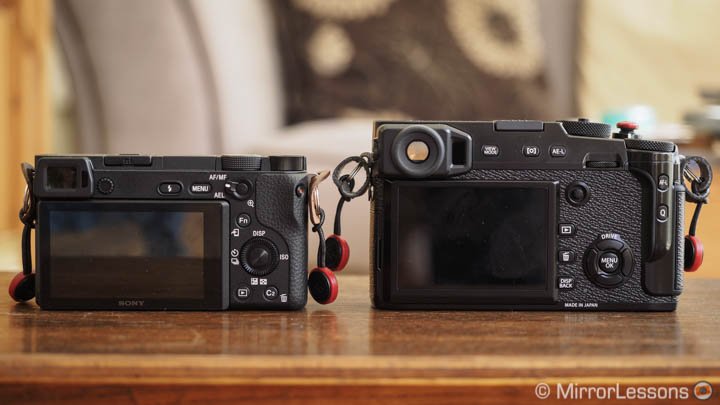
There are many differences between the Sony a6300 and the Fujifilm X-Pro2 but two of the most important characteristics – image quality and autofocus – actually behave in a similar manner. Both cameras inaugurated the two most recent APS-C sensors that have since been implemented on other products such as the X-T20, X-T2 and a6500 respectively, and their autofocus systems are among the best I’ve had the chance to use. So even though the price, build quality, additional features and target users are all different, there is actually a valid reason to compare these two cameras!
The X-Pro2 was the first of a new generation of X series cameras with the X-Trans III 24MP sensor and X Processor Pro. The Sony camera, on the other hand, quickly became one of the most attractive options on the market thanks to its excellent features and reasonable price.
In this article, I’ll be sharing an in-depth comparison between the image quality and autofocus performance. I’ve also included a summary to highlight the most important differences between these two flagship APS-C cameras following several months of use.
Ethics statement: This article was originally published in 2016 on MirrorLessons, our camera review website. We then moved it over when its comparison section was upgraded to the very website you are visiting right now. We purchased the a6300 and X-Pro2 for review and comparison purposes. We were not asked to write anything about these cameras, nor were we provided any compensation of any kind. Within the article, there are affiliate links. If you buy something after clicking the link, we will receive a small commission. To know more about our ethics, you can visit our full disclosure page. Thank you!
[toc heading_levels=”2″]
Article updates
- July 20th: quick mention of firmware 5.0 for the X-Pro2 added in the autofocus section
- January 5, 2018: added information concerning the latest firmware updates available for each camera
- April 3, 2017: the article has been updated to include information and feedback about the latest firmware available for the X-Pro2 (version 3.0).
Main Specs
a6300
- Sensor: 24.3 MP APS-C Exmor CMOS
- Lens system: E-mount
- Weatherproof: Dust and moisture resistant
- Image Stabilisation: None (Optical steadyshot with compatible lenses)
- Autofocus: Hybrid AF with 425 phase and 169 contrast detection points
- Continuous shooting: up to 11 fps (AF-S and AF-C)
- ISO Sensitivity: 100 – 25600 ISO (push 51200)
- Shutter Speeds: 1/4000 to 30 seconds
- Viewfinder: 0.39inch XGA OLED electronic viewfinder with 2,359k dots and 0.70x magnification
- LCD Screen: tilting 3″ LCD monitor (921k dots)
- Movie recording: XAVC S 4K up to 30fps, Full HD up to 120fps
- Built-in Flash: Yes
- Extra Features: WiFi, NFC, Panorama
- Dimensions: 120 x 66.9 x 48.8mm
- Weight: 404g (including battery and memory card)
- Firmware version: 2.01
X-Pro2
- Sensor: 24.2 MP APS-C X-Trans III CMOS
- Lens system: X-mount
- Weatherproof: Yes (splash, dust and freeze proof)
- Image Stabilisation: None (OIS with compatible lenses)
- Autofocus: Hybrid AF with max. 91 phase and 325 contrast detection points
- Continuous shooting: 8 fps (AF-S and AF-C)
- ISO Sensitivity: 200 – 12800 ISO (pull 100, push up to 51200)
- Shutter Speeds: 1/8000 to 30 seconds
- Viewfinder: 0.48inch TFT electronic viewfinder with 2,36k dots and 0.59x magnification / Reverse Galilean optical viewfinder with 92% field coverage and 0.36/0.60x magnification
- LCD Screen: Fixed 3″ LCD monitor (1,62k dots)
- Movie recording: Full HD up to 60fps
- Built-in Flash: No
- Extra Features: WiFi, Time-lapse
- Dimensions: 140.5 x 82.8 x 45.9mm
- Weight: 495g (including battery and memory card)
- Firmware version: 5.00
Sensor technology
Let’s start by sharing some numbers and specifications. I know, it’s less exciting than a nice set of images but it is helpful to understand the technology behind these two products.
The two cameras share approximately the same number of megapixels (24.3 million for the X-Pro2 and 24.2 million for the a6300). However the technology of their respective image sensors is different.
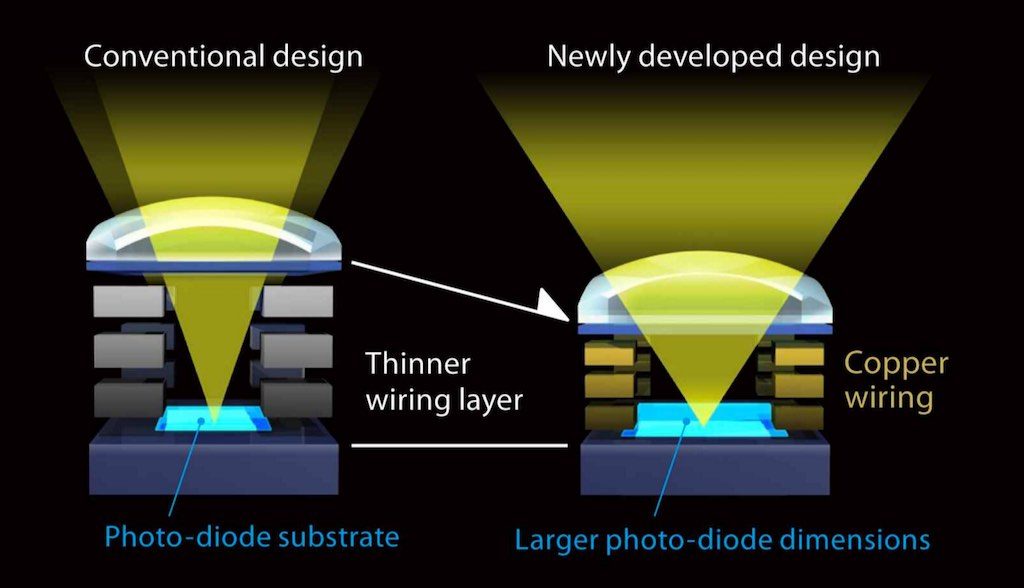
The Sony a6300 has an Exmor CMOS chip with a lower copper wiring layer and processing circuitry. This allows it to gather more light and use it more efficiently thanks to the High-speed BIONZ X image processor.
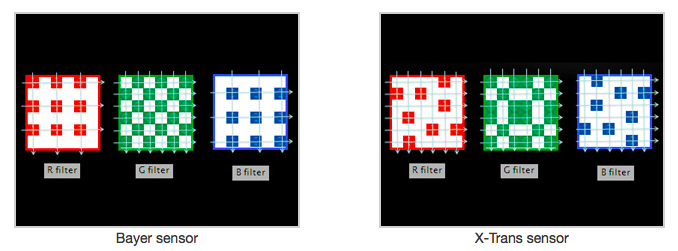
The Fujifilm X-Pro2 has a new X Processor Pro engine and a new X-Trans CMOS III sensor. It includes a thinner copper wiring as well but has a different distribution of pixels. Unlike traditional Bayer sensors, it has an irregular pattern that guarantees the presence of at least one Red, Green and Blue pixel in each horizontal and vertical line. This ensures more sharpness while eliminating the need for an Anti-Aliasing filter.
Resolution and detail
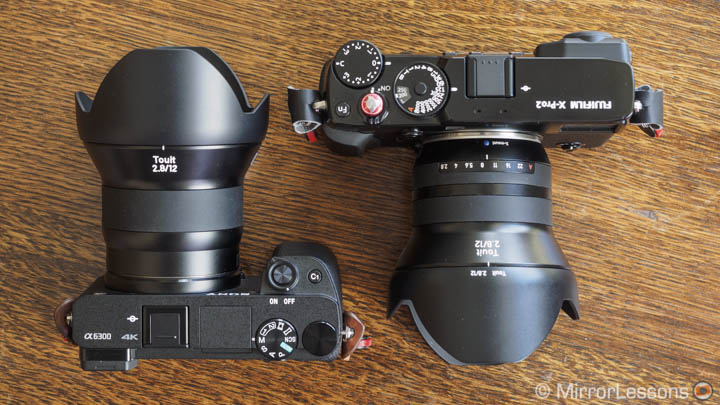
Our first test will compare the resolution of the two cameras to see how well they capture fine details. To avoid any negative or positive influences, we used the same lens for both products: the Zeiss Touit 12mm is available in both E and X mounts and is the perfect choice to conduct this comparison.
Let’s have a look at the JPGs first to see how the image processors of the two cameras handle sharpness. In the first example, the settings for both the a6300 and X-Pro2 were left to 0. The results are very similar but the crops for each photo show that the a6300 JPG is a little crisper.
Note: you can notice differences concerning contrast and sharpness which is due to the different colour profiles of the two cameras (more about this later on).


If we increase the sharpness to the maximum on both cameras (+3 for the a6300, +4 for the X-Pro2), we find similar results. Once again the a6300 version is crisper while the details on the X-Pro2 version are more washed out. To double check, I also took two images using a different scene. You can notice more details in the boat’s writing and on the tyre in the a6300 version.


Now let’s have a look at the RAW files. Here I saved crops from both Adobe Lightroom and Iridient Developer. The latter is more capable in demosaicing the Fuji X-Trans files and rendering sharper results so it was fair to run the test twice.
With Lightroom, the results are similar to the JPG comparison: the a6300 details are slightly crisper as you can see in the second example especially but we are talking about a tiny difference. I tweaked the settings somewhat differently in the Detail panel to get optimal results for both files. The Fuji file requires higher values to pull out the details.


If we turn to Iridient Developer, the results are much more similar between the two cameras. Any small differences are more difficult to detect.


I ran a third test on green foliage and grass. Since the introduction of the first X-Trans sensor, there have been complaints about the lack of fine details in foliage (also referred to as the “watercolour effect”) when demosaicing the RAW files with certain popular softwares such as Adobe Camera Raw. Let’s see how the new 24MP chip behaves against the a6300 sensor.
With Lightroom, we can notice that the Fuji results are basically identical to the Sony’s in the first example where there is more foliage. However, in the second example where the details in the grass are much finer, we can detect some of that watercolour effect in the X-Pro2 crop.


With Iridient, the X-Pro2 files gain more detail and they are much closer to the results from the a6300. This shows how this particular software is still the best way to get the most out of the X-Trans RAF files in specific situations.


Dynamic range
Sony claims that the a6300 sensor is capable of gathering light more efficiently. This can help not only in low-light situations but also for dynamic range. The X-Pro2 has the option of shooting uncompressed 14 bit RAW so it can record more information in comparison to the compressed 14 bit file of the a6300. Let’s see where the differences lie exactly.
I shot the two scenes below into the sun. The backlit situation gave a stronger contrast to work with. Then I recovered the highlights, whites, shadows and blacks entirely (-100 and +100) to see how much detail was retained without increasing colour noise. I kept noise reduction in Lightroom to 0.

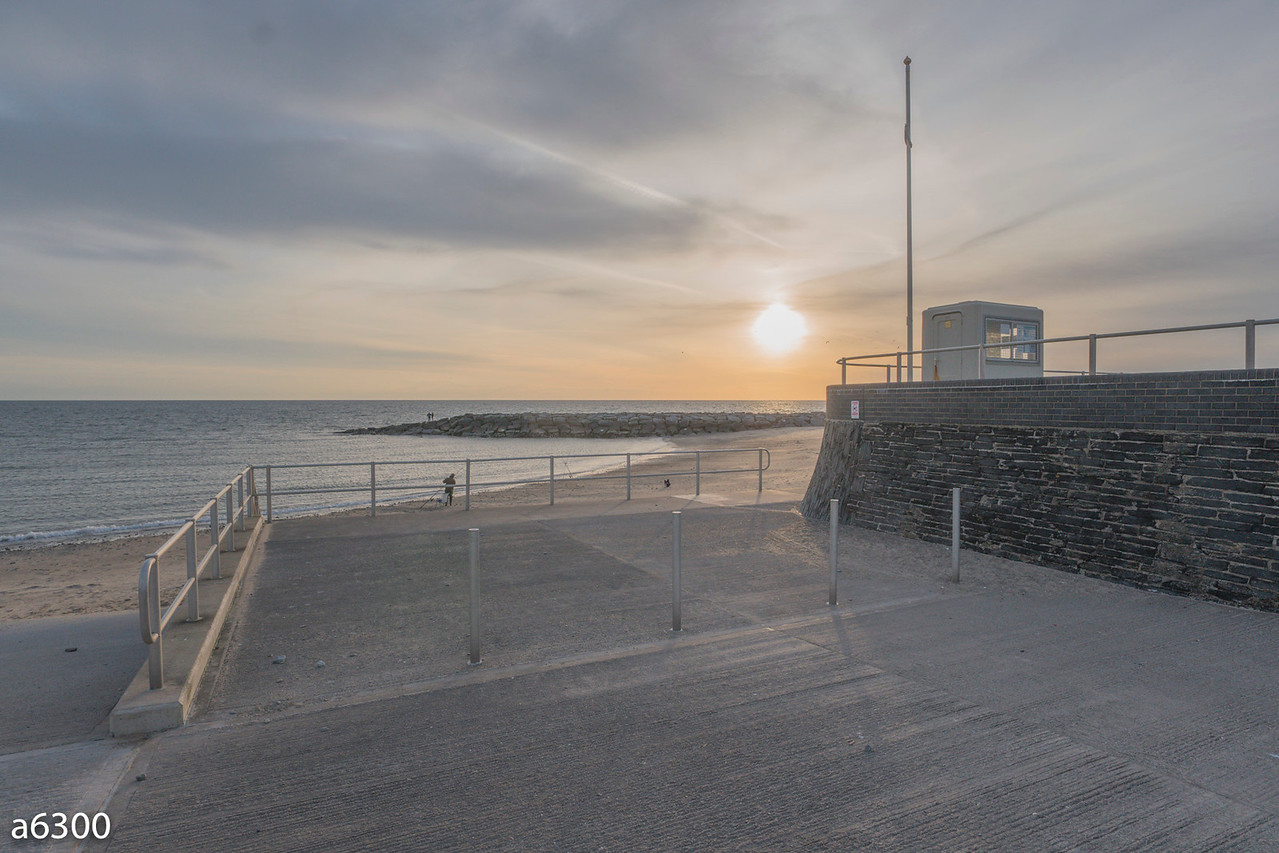
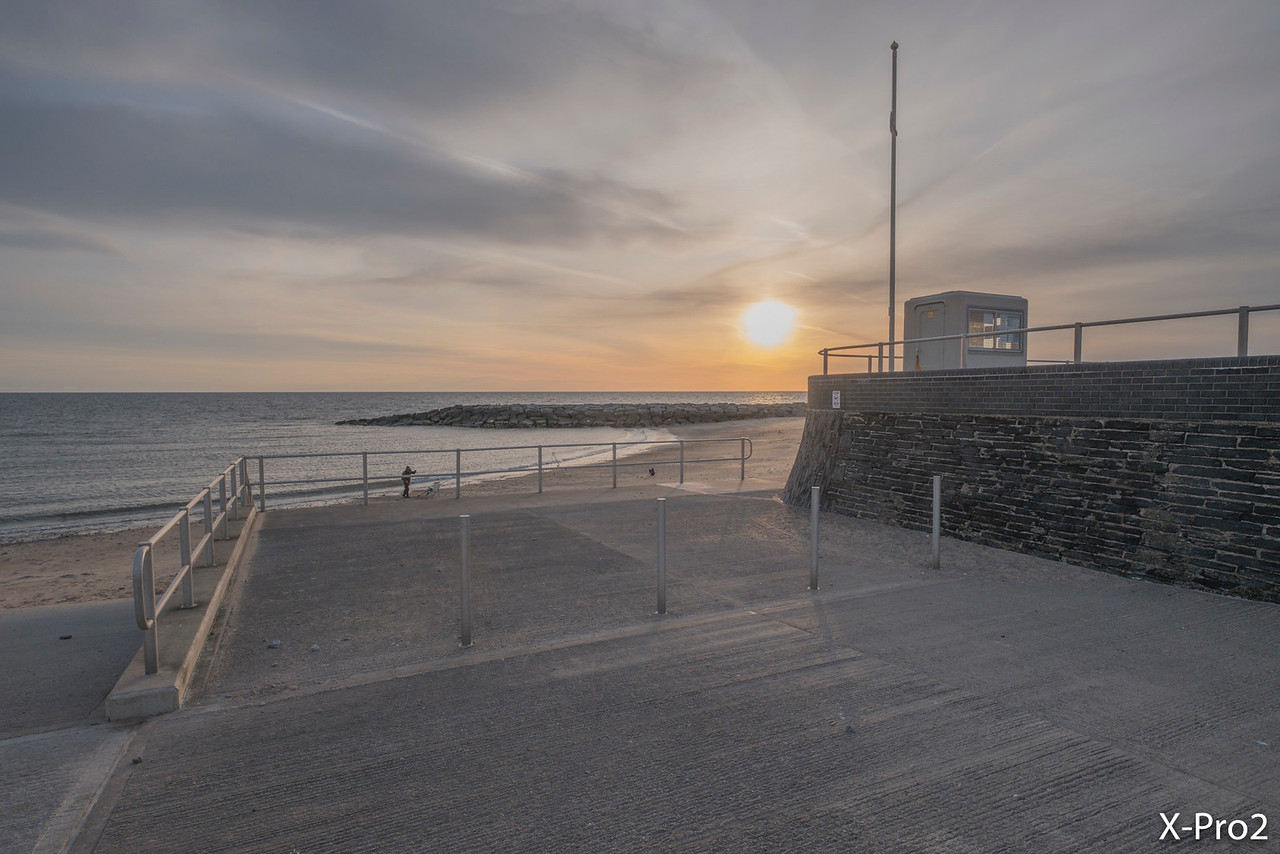
We can easily see that both cameras have similar capabilities. However when looking at the 100% crops, the compressed RAW files of the a6300 produce more colour noise in comparison to the uncompressed RAF version of the X-Pro2.

If I increase the noise reduction in Lightroom to get rid of colour noise, +20 works fine for the a6300 while I only need +5 for the X-Pro2 (and the difference from the crop above is minimal).

Below you can see another example.


Because some people like to shoot “isoless” (keeping your ISO lower and increasing the exposure in post-production), I also ran an additional test by underexposing the image in a low-light situation to use the lowest native ISO available for each camera (100 for the a6300, 200 for the X-Pro2). Then I brought back the exposure in Lightroom and opened the shadows. Here again we can notice more noise from the a6300 file.


Click on the image to open the full res version.

Click on the image to open the full res version.
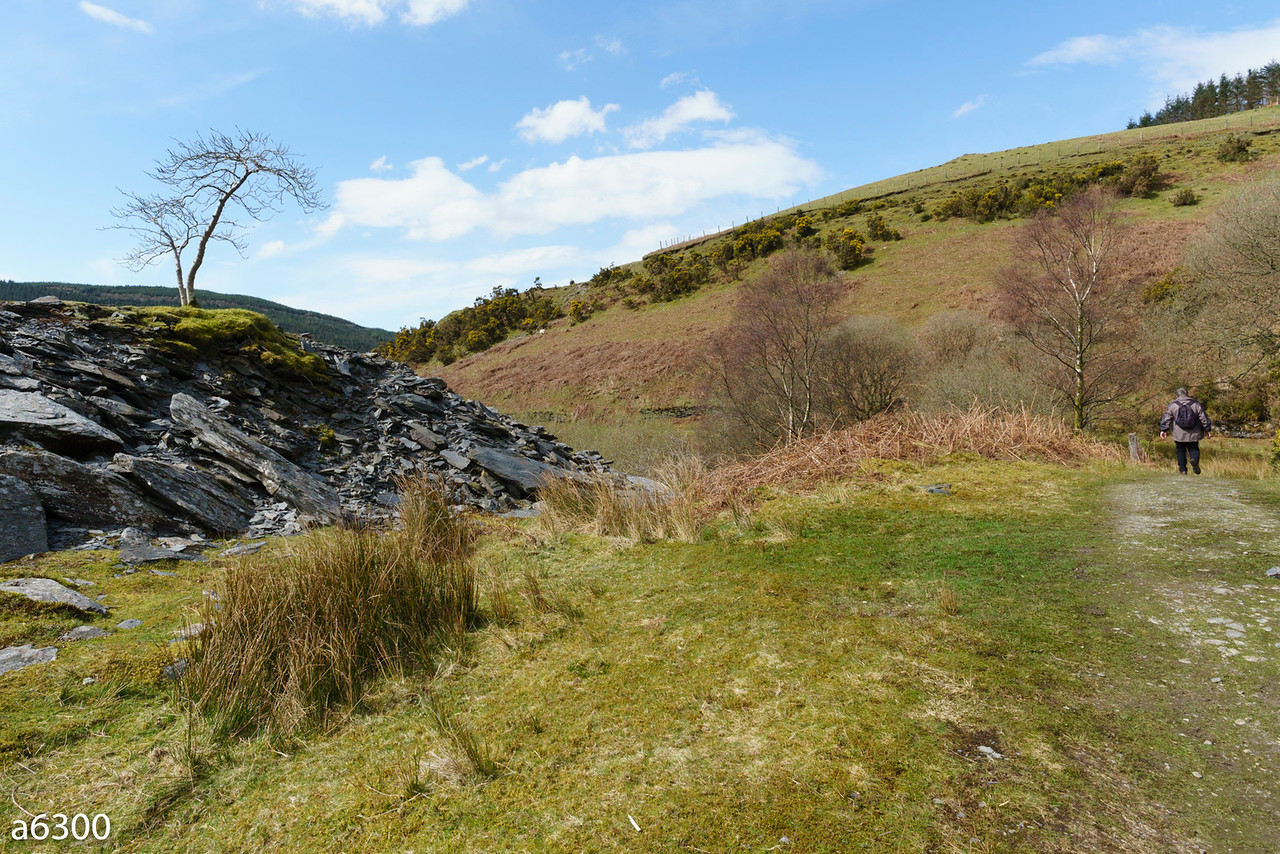
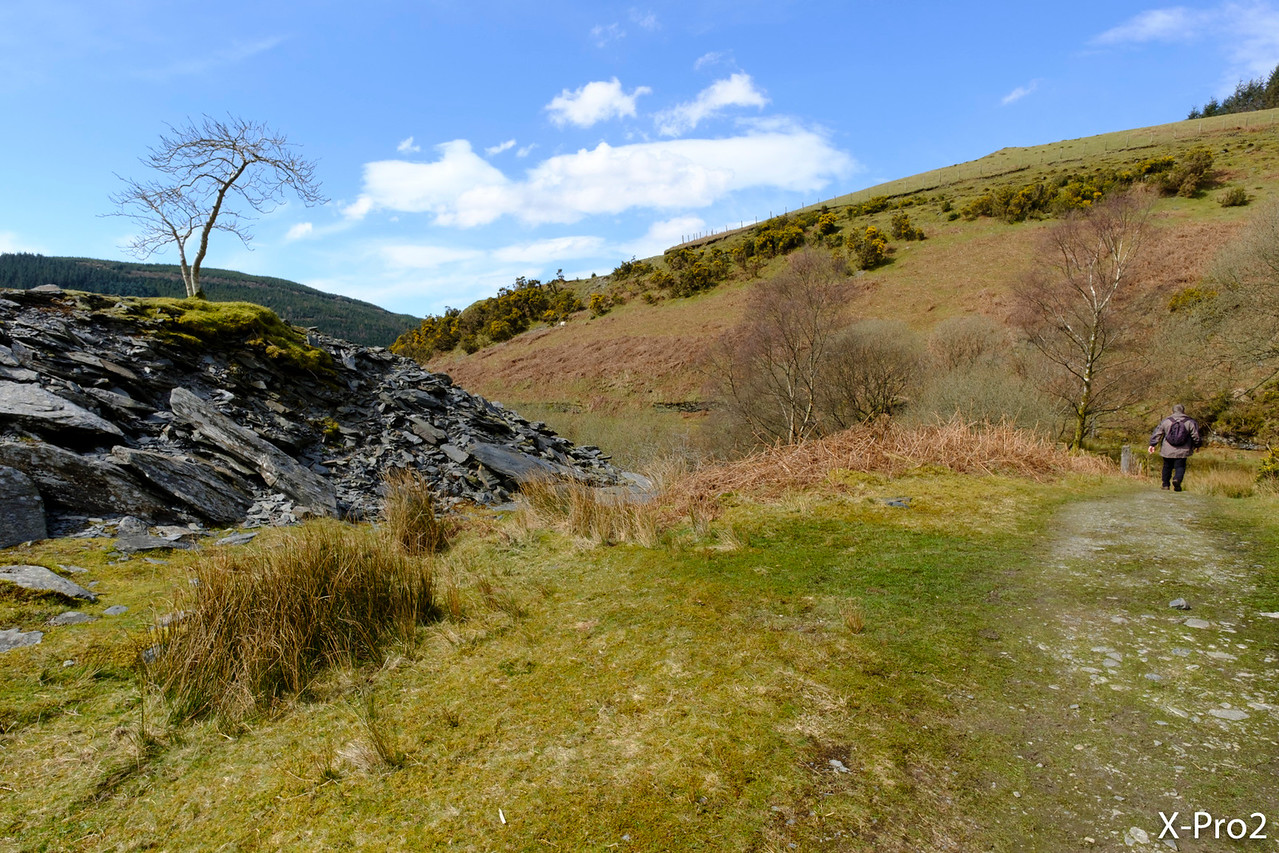
If we have a look at the JPG performance, the Sony a6300 has the DRO (Dynamic Range Optimiser) option that can be set in five different levels (LV5 being the one that gives the vastest range). With the X-Pro2, you can decrease the shadows and highlights to -2. I used the standard profile on both cameras.
The a6300 image has more range in the shadows while the X-Pro2 keeps more information in the highlights.

Click on the image to open the full res version.

Click on the image to open the full res version.
One thing I noticed on multiple occasions with the new 24 MP sensor (X-Pro2 but also X-T2) is purple flare and a weird grid artefact that is noticeable if you pixel peep the image. It happens with different types of lenses (primes and zooms).


The solution is not difficult however: you just need to tilt the camera up or down slightly to get rid of the problem.


High ISO performance
The Sony camera has an ISO sensitivity range of 100 to 25600 with an expandable option of 51200. The X-Pro2 ISO range goes from 200 to 12800 with expandable options of 100, 125, 160, 25600 and 51200 ISO.
Here I ran a side-by-side image comparison by using the new Sigma 30mm 1.4 DN on the a6300 and the XF 35mm f/1.4 on the X-Pro2 starting from ISO 800.
The first thing we notice is a difference in brightness between the two cameras: the X-Pro2 files are a little bit darker (0.5 Ev).


Some would say that Fuji cheats with its ISO settings but I can’t confirm this because using two different lenses means that their light transmittance can be slightly different. I could also conclude that the a6300 sensor optimises the light better as the official press release suggests.
I did run a test with the two Touit lenses earlier but I made a mistake and had to run the test again. However I noticed a difference there as well so it is safe to assume that the a6300 gives you brighter results by approximately 0.5 Ev.
To simplify the comparison, I raised the exposure by 0.5 Ev in Lightroom so that the Fuji files would match the a6300 images. This could imply I am giving an advantage to the Sony camera but actually the X-Pro2 keeps the colour noise ratio lower than the a6300. However the a6300 retains slightly more detail. Note that I kept the NR in Lightroom to 0 to analyse the noise better.


From 25600 the noise starts to become really invasive but because we are still within the native range for the a6300, the results are better from the Sony camera.

At 51200, the X-Pro2 image is 1.5 Ev darker which means that the brightness is boosted for the JPG only.

I also double checked the results in Iridient and my findings were the same with the exception that the software renders the details better with the X-Pro2 files (but also adds more luminance noise).
Keep in mind that with a few adjustments you can make the images from both cameras look better. Below you can see the ISO 12800 example with NR applied in Lightroom. Also remember that different cameras produce different RAW files, and as such, they might need to be processed differently to get the best results.

Note: you can check out the entire set in full resolution here.
If we have a look at the JPGs and the in-camera noise reduction performance, the a6300 is more capable once again. Even with the NR set to standard (the most aggressive option in the Sony’s menu), the amount of details preserved is more than acceptable. If I set NR to +4 on the X-Pro2, there are fewer details and the image looks more washed out. With the NR set to ‘off’ and -4, the X-Pro2 has less colour noise but the a6300 preserves more details once again.

Of course when used separately for a real world shoot, both cameras are capable of great results. Heather and I shot an evening football game with both cameras and we got very usable images up to 12800 ISO and that’s the most important thing.


Colours
Because of the different architecture of the sensors, we also find a difference in colour reproduction. If you work with the RAW files and match the white balance and tint without applying the camera profiles (in my case I kept the Adobe Standard profile in Lightroom), the difference is very subtle. The Sony file tends toward a slight magenta tint while the Fuji file tends more toward a green tint but it is hardly noticeable.
RAW (Adobe Standard profile)


The real difference is evident in the colour profiles designed by the two brands so let’s have a look at the JPGs. If we compare both vidid profiles (also called Velvia on the X-Pro2), we can see that the Fuji produces a warmer, more saturated result. Note that most of these colour profiles can be selected in Lightroom as well.
a6300 (Vivid), X-Pro (Velvia)


The a6300 can also render a cooler/magenta tint in certain situations (such as images with backlight for example) when the white balance is set to Auto or a specific preset. With RAW it can be fixed easily while with SOOC JPGs it can be more annoying.


The a6300 has a set of 13 colour profiles (called creative styles) including one B&W and Sepia profile. The X-Pro2 has 9 film simulation modes including two monochrome profiles with 4 versions each. One of our favourites is Classic Chrome and the closest profile for the a6300 is the Clear style.
a6300 (Deep), X-Pro2 (Classic Chrome)

When it comes to portraits, the RAW files from both cameras have a pretty similar skin tone rendition. Now, let’s analyse two of the picture profiles. The a6300 default portrait profile tends to give an overall yellow tint to the image and that happens with the X-Pro2 Astia profile as well.
a6300 (Portrait), X-Pro2 (Astia)


If I apply the Neutral profile to the a6300 and the Pro Neg standard to the X-Pro2, they both give a more natural result with less saturation. The Sony version has a slightly reddish rendering while the Fuji camera is slightly greener.
a6300 (Natural), X-Pro2 (Pro Neg Std)


Another thing I noticed is that with artificial lights and the same manual white balance, the colours tend to be quite different. The a6300 goes for a warmer orange tint while the X-Pro2 prefers a yellowish tint.


Autofocus
At the time of writing this article (2016), the a6300 and the X-Pro2 were the best mirrorless cameras I’d tried in terms of autofocus performance. They weren’t perfect by any means but the keeper rate as well as the accuracy and overall performance was definitely the best I’d seen so far. Today they are not alone: the a6500 and the X-T2 use the same AF system so their performance is comparable to that of the two cameras we are talking about in this article.
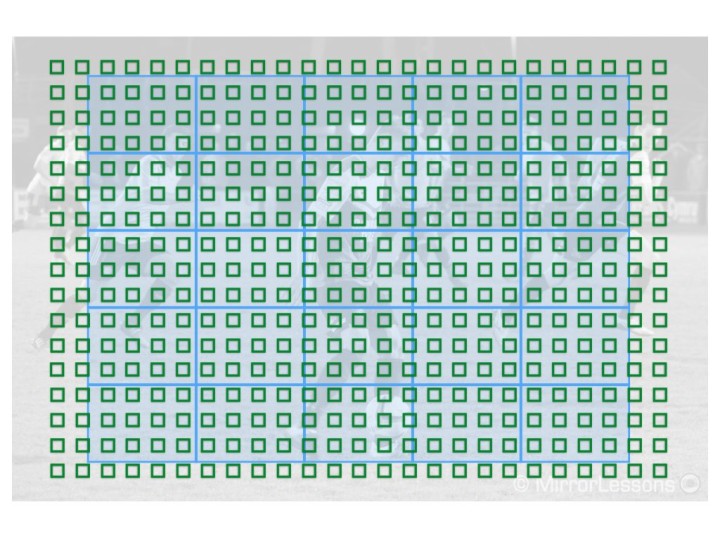
The a6300 has a hybrid autofocus system with 425 phase detection (the highest ever on a mirrorless camera) and 163 contrast detection points. Basically its phase detection points cover almost the entire surface of the sensor.
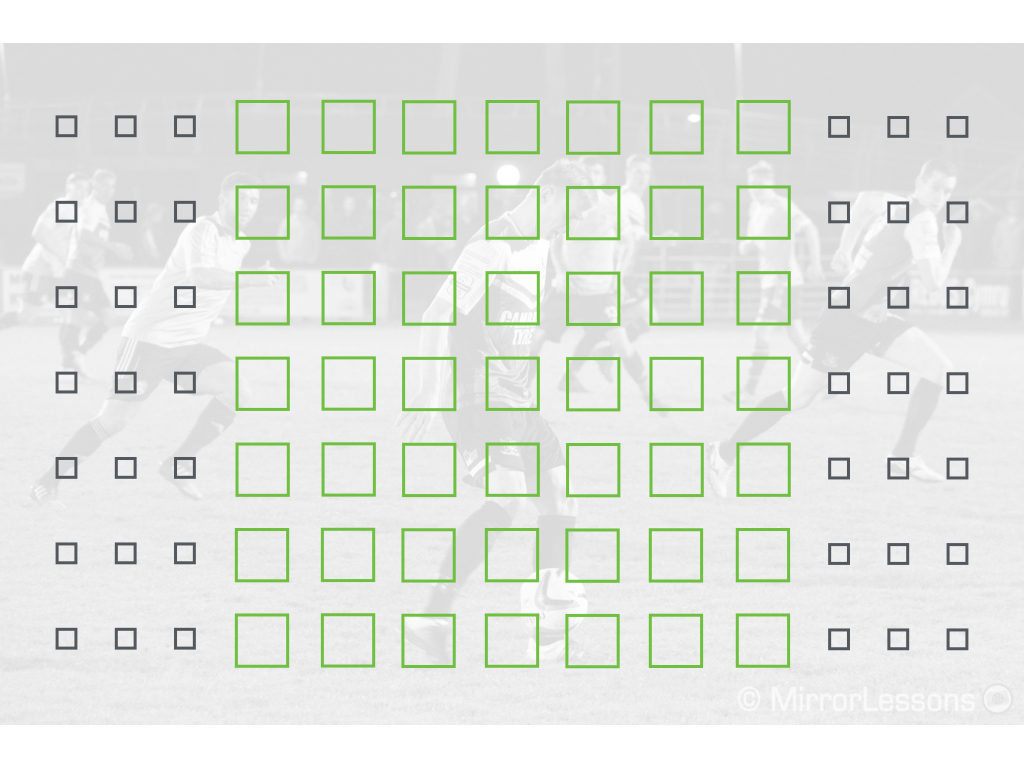
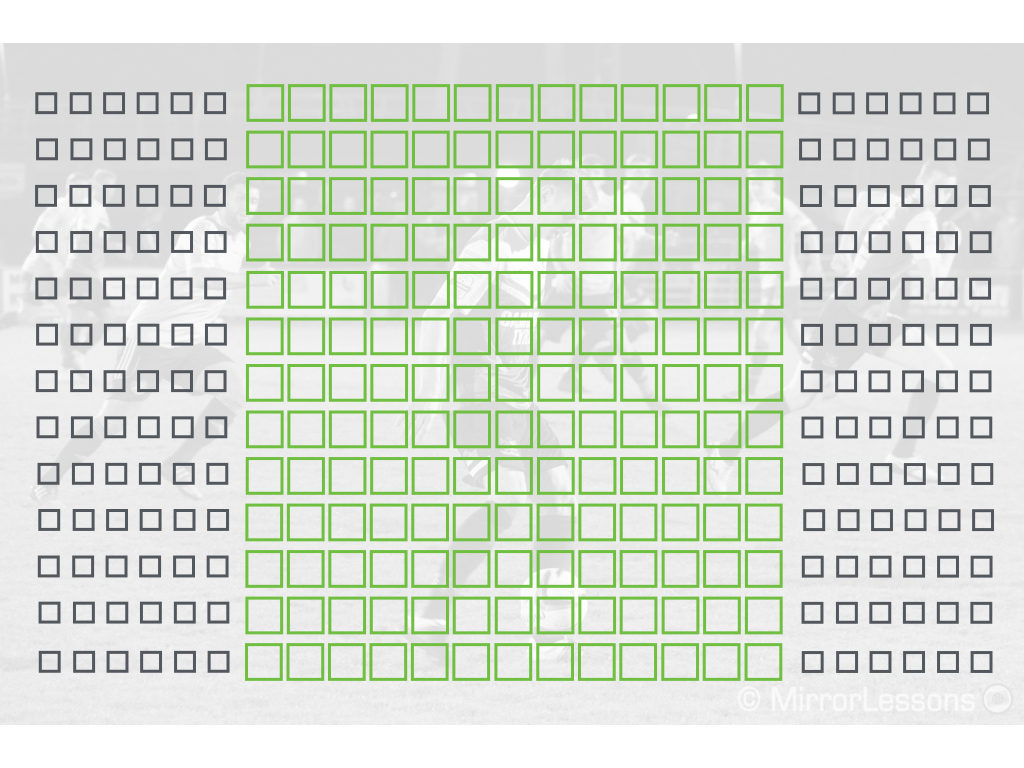
The X-Pro2 also has a hybrid autofocus system and you can choose between 325 points (13×25 grid) or 91 points (7×13 grid). With some AF areas (Zone, Wide/Tracking), only the 7×13 grid is available. The central points are phase detection areas and they cover 40% of the sensor’s surface. When using Zone AF or Wide/Tracking combined with CH burst, only the 49 native phase detection points are available.
In Single AF, both cameras work really well and I can count on one hand the number of times they struggled or refused to focus. Of course their performance can vary depending on the lens being used. Fuji’s latest lenses have a faster AF motor while some earlier products like the XF 35mm f/1.4 will slow down the speed (but it still remains more than decent). The a6300 doesn’t seem to struggle with older lenses as long as they are compatible with phase detection.
The Sony camera can shoot up to 11fps in continuous AF but you can also select slower speeds including 8fps, 6fps and 3fps. With the exception of 11fps, the LCD and EVF give you are real time “live view” of the burst sequence. The blackouts are transparent most of the time which allows you to see the action better. In some cases however it can be annoying because the brightness in the EVF or LCD changes constantly. The EVF can be set with a frame rate of 100fps or 120fps to get a more fluid live view.
The X-Pro2 can shoot up to 8fps in C-AF (CH mode). With those settings, only the 49 central phase detection points are used. At 3fps, you can also use the other AF points. The EVF has a refresh rate of 85fps which is really excellent. There are no blackouts but as a result the action is less fluid and the lag time is slightly higher than with the a6300.
I performed a side-by-side test just to see if I would find a concrete difference in performance but as expected it wasn’t the case. I had the 18-105mm f/4 on the a6300 (set at 90mm) and the XF 90mm on the X-Pro2. The latter is a prime lens but has a very fast AF motor designed for action and fast moving subjects.
I ran the test twice. Out of 47 shots, the a6300 got 40 perfectly sharp and 7 slightly out of focus. That means that the shot is still usable but if you view it at 100% you will notice that it is a little soft. This gives us a keeper rate of more or less 85%.


Out of 43 shots, the X-Pro2 got 34 razor sharp and 9 slightly soft which gives a keeper rate of approximately 80%.


Of course this is just a basic test but the results are perfectly in line with the experience of both Heather and myself while using these cameras for sports and other action situations. The a6300 has something more because of the extra phase detection points and the High Density AF that concentrates as many of the points as possible around the subject.
The X-Pro2’s best AF setting is without a doubt Zone AF that can be selected with three different sizes. It is a more flexible solution because the Zone Area of the a6300 doesn’t allow you to increase or decrease the number of points used.
Also note that Fujifilm has improved the AF Algorithm on the X-Pro2 via firmware update (4.0 then 5.0), making the camera able to track a subject twice as fast and 50% smaller than before, as well as improving the low light sensitivity of phase detection points.

Both cameras offer different AF area settings and there are various options to enhance the performance as well.
The firmware 3.0 added the AF-C Custom Settings to the X-Pro2, which are the same found on the X-T2 and X-T20. They allow you to control different behaviours of the AF system. There are five presets designed for different types of situations.
Set 1 works as the default setting for multi purpose situations. It corresponds to the same performance the camera had before the update. Other options like Set 2 will reduce the chance of the camera misfocusing when the subject passes behind an obstacle momentarily. Set 3 will take into account the acceleration or deceleration of the subject so you get a precise idea of when to use them. They can be very effective in specific situations. For example Set 4 is useful for birds in flight, Set 2 and Set 3 for car races, etc.
What the a6300 does better in my opinion is Eye AF. Like the Eye AF function of the Sony A7r II, it just works. It rarely focuses on something else other than the left or right eye and is very reliable when combined with C-AF. On the X-Pro2, it is often unreliable even when the person’s face fills the entire frame. The camera will think there is a third eye hidden under the hair or will lock onto the nose instead.
I also prefer the 3D Tracking of the Sony camera (called Lock-On AF). You can use it in all AF modes and it works across the entire frame even at the fastest burst speed. On the X-Pro2, if you select 8fps it will only work in the central area of the frame where the phase detection points are.
Another thing worth mentioning is that the a6300 has good AF capabilities with A-mount and DSLR lenses if you use the right adapter. There are advantages and disadvantages to using those lenses but it is definitely something that the X-Pro2 can’t do.

A final word goes to the buffer capabilities. These are the results I found when using the same SD card (SanDisk 64GB SDXC Class 10 U3 95MB/S) on both cameras. Note that the X-Pro2 is also compatible with the UHS-II standard (slot 1) so it can use cards with a faster writing speed.
a6300, Hi+ burst (11fps)
- RAW+JPG: lasts for 2s, then slows down but doesn’t stop
- JPG (X.fine): last for 5s, then slows down but doesn’t stop
a6300, Hi burst (8fps)
- RAW+JPG: last for 5s, then slows down considerably but doesn’t stop
- JPG (X.fine): last for 12s, then slows down but doesn’t stop
X-Pro2, 8fps
- RAW+JPG: last for 3s then slows down but doesn’t stop
- JPG: last for 18s then slow down a little but keeps shooting
The X-Pro2 has better buffer capabilities if we look at the JPG results. The results are worse with the RAW files but let’s not forget that its lossless compressed files are heavier than the a6300 AWR files (30MB vs 25MB approx.).
Pro vs Semi-Pro: a round-up of the other major differences
As I said at the beginning, I won’t go in-depth about every single aspect of these two cameras. However I’ll give you an overview of what I like and what I don’t like about each product and why certain aspects make one model superior to the other.
What the a6300 does better
- Size and weight
- Video
The a6300 is smaller and lighter but has a better handling thanks to the prominent grip on the front. With small primes and zooms, it is really nice to use. With heavier lenses, the combo can be front heavy because the camera is so light but as long as you use it with native E-mount lenses, including some full-frame lenses like the FE 70-200mm f/4, the balance remains excellent.
Its main strength over the Fuji camera is without a doubt the video capabilities. The a6300 can shoot 4K with full pixel readout at a native resolution of 6K (the footage is down-sampled in the process). It can do Full HD up to 120fps (slow motion capabilities). It has advanced video options, and picture profiles designed specifically for video including S-log2 and S-log3 to enhance dynamic range. The X-Pro2 Full HD video quality has been improved over the previous generation and 4K was added via firmware update, but the settings are more limited.
Just for fun, below you can watch a comparison video between the Full HD capabilities of both cameras. Surprisingly, the X-Pro2 does quite well in continuous AF.

What the X-Pro2 does better
- Ease of use
- Pro build
The Fujifilm X-Pro2 is one of the most straightforward mirrorless cameras I’ve ever used. It’s only Achilles heel is the ISO dial, which can be very frustrating to turn, and the lack of a tilting screen. Apart from these two complaints, the camera is a pure joy to use.
Changing the AF area is more intuitive thanks to the AF joystick (every flagship mirrorless camera should have it). The grip is good, and all the buttons are in the right place. The dual SD card slot is a big plus for professional and sports photographers. The hybrid viewfinder might not appeal to everyone but it can be an unexpected ally in some situations (including birds in flight!). Not to mention that the camera is completely weather-sealed.
Finally, the re-designed menu system is living proof that it is possible to enhance the user experience with an intuitive and easy-to-navigate interface. If there is one thing that the X-Pro2 can teach Sony, this is it!
The usability of the a6300 leaves me with mixed feelings. An amateur or enthusiast might complain about a few things, but the camera remains a good product overall. However, if you are planning to use it for intense work, you will find some flaws and it soon becomes a question of compromise.
Some issues have been inherited from previous Sony cameras, the menu system being the first. It lacks a faster, more intuitive interface, as well as more buttons and dials. I understand that compactness requires some sacrifice but for example, I would have replaced the built-in flash with an extra dial. I would have also made the camera slightly larger to make it more suitable for demanding photographers. Even an optional battery grip to increase battery life might have been a good idea.
My impression of Sony remains the same as it always has. They give priority to technology, impressive numbers and specifications (and this strategy works, I’ll give you that). The a6300 is one of the best mirrorless cameras for sports photography today but the brand needs to put more effort into the user experience, perhaps by consulting photographers and taking their suggestions into account. Shooting with these two cameras so much over the last two months has made me realise just how superior the X-Pro2 is in that way.
Conclusion
The last thing to mention is of course the price. With the Sony a6300 being almost $700 cheaper, there is no doubt that the two products target different markets. This is why it doesn’t seem entirely fair to mention it as a negative or positive point.
The Fujifilm X-Pro2 is a professional camera. It doesn’t have the most impressive numbers if we purely consider specifications, but when it comes to substance, it is one of the best on the market.
The a6300 is more enthusiast oriented. It has a more attractive price and its performance is the same, if not slightly better than the X-Pro2, especially concerning its video capabilities. If you can cope with some flaws in the user experience, there’s no doubt it is one of the best mirrorless cameras you can find right now when it comes to quality/price.
Check price of Fujifilm X-Pro2 on
Amazon | Amazon UK | eBay | B&H Photo
Check price of the Sony a6300 on
You may also like: