The Sony A7 mark III has turned lots of heads since its announcement and for good reason. It has a state-of-the-art image sensor, stellar autofocus performance, excellent video quality, in-body stabilisation, an improved battery life and many other features thrown in at a reasonable price.
Of course, no camera is perfect. The ergonomics of the A7 III could definitely be improved for example. And even if you’re satisfied with the camera as it is, you may want to invest in a few accessories to expand your creative horizons and improve the camera’s usability.
This is why we spent weeks testing and selecting a variety of products that suit the camera well. So regardless of whether you’re looking for a strap, flash, spare battery or something else, we hope this list can be of use to you.
Before beginning, please take a moment to check out the following:
- Suggestions: as you can imagine, there is an immense number of accessories available for the A7 III and it’s impossible to try them all. If you’ve used a particular accessory and think it deserves a mention, don’t hesitate to leave a comment at the end of this article.
- A7 and A9 series compatibility: most of the items on this list were tested on the A7 III or A7R III unless otherwise stated. Since the A7 III has much in common with its sibling (both past and present generations), we included compatibility information for all the Sony full-frame E-mount cameras where applicable.
- Updates: if we come across other products worth adding, we will update the article. We may also replace items if we find a more suitable product.
Ethics statement: Some of the following A7 series accessories were purchased for the purpose of this article whereas others were loaned to us for a limited period of time. We also tested a few of them in the past on similar cameras. We were not asked to write anything about any of these products, nor were we provided with any sort of compensation. Within the article, there are affiliate links. If you buy something after clicking the link, we will receive a small commission. To know more about our ethics, you can visit our full disclosure page. Thank you!
Table of Contents
1. Article updates
2. Grip extensions and quick release/L-plates
3. Battery grips
4. Battery charger
5. Spare batteries
6. Screen shields
7. Neck straps
8. Wrist straps
9. Carrying clips
10. Flash units
11. Filters
12. Remote control
13. Lens adapters
14. Shotgun microphones
15. Lavalier microphones
16. SD cards
Article updates
- October 2018: added important information about third party batteries and firmware 2.0 for the A7 III and A7R III. Please read the Spare Batteries section carefully.
Better ergonomics: grip extensions and quick release/L-plates
I would have normally separated grip extensions and L-brackets into two separate chapters, but in this case I’ve come across products that can fit both purposes so I decided to combine the two chapters.
A grip extension can be useful because the native grip of the A7 series is small and doesn’t provide enough comfort with large lenses.
L-plates are a welcome addition if you often work with a tripod, especially if your tripod uses the arca swiss quick-release mechanism. They also increase the height of the camera and improve the grip to a certain extent.
Lennon Gecco LB3 Quick Release Plate Hand Grip
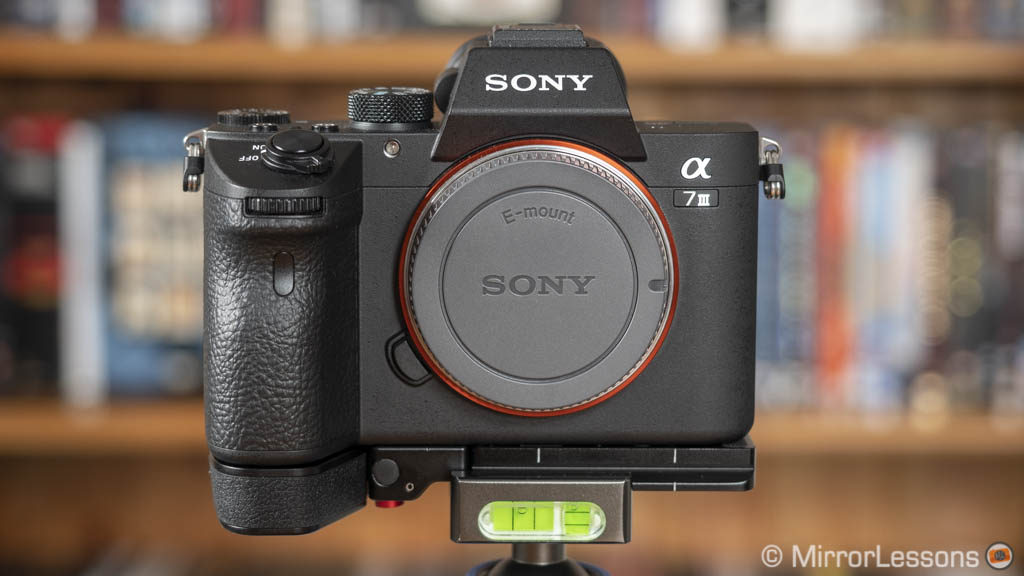
The Gecco LB3 combines an extension grip with the base of a traditional arca swiss plate. The result is a rather original product.
You attach it to the camera’s tripod socket at the bottom. The aluminium alloy arca swiss plate is long enough to attach easily and securely to the tripod. At the bottom you’ll find 1/4” and 3/8” thread holes and two extra 1/4″ threads on the side to connect a vertical plate.
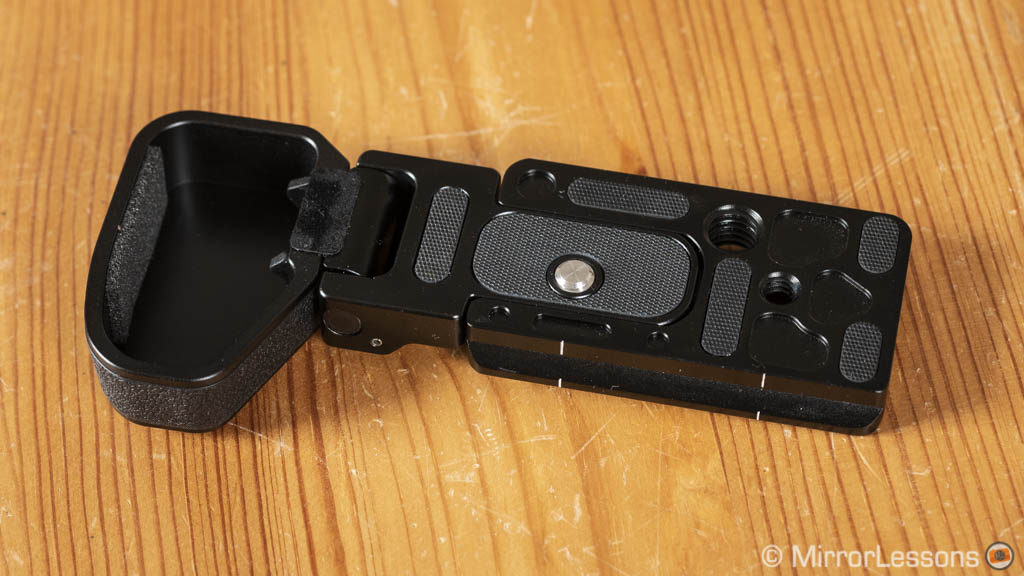
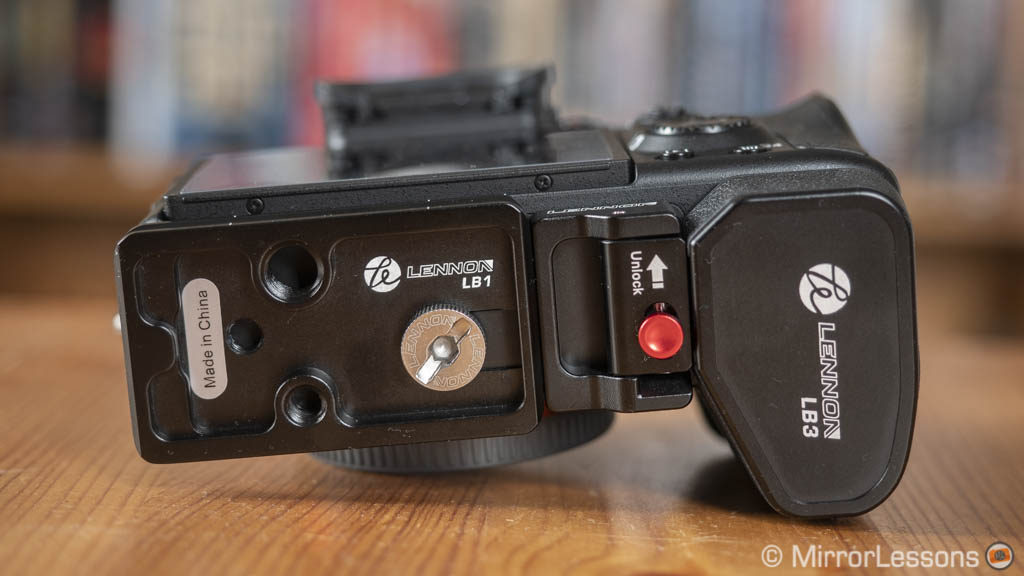
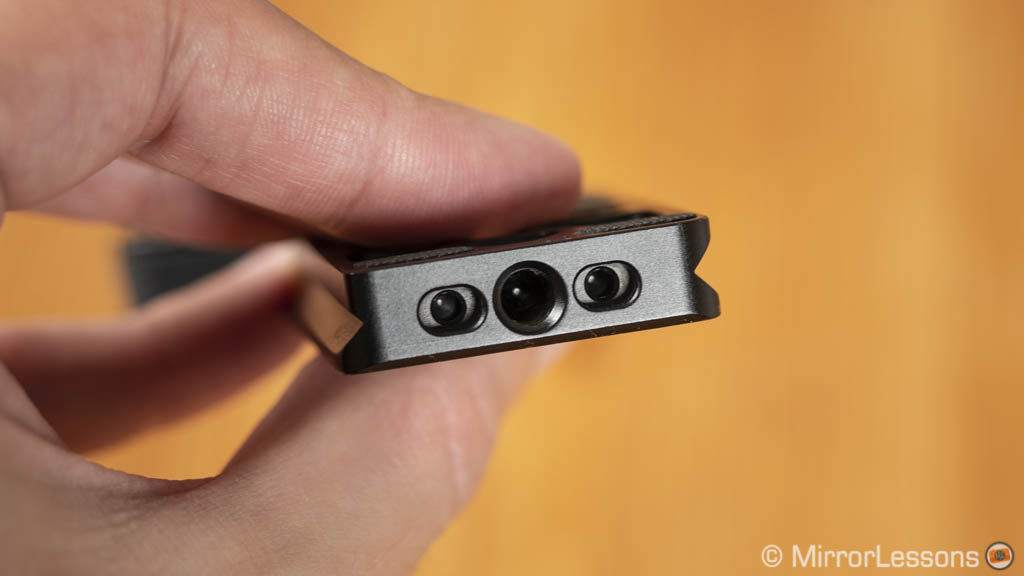
The extension grip provides good comfort. It’s not as comfortable as the Sony GP-X1EM mentioned below but it comes close. To remove the battery, simply pull the red unlock button and lift the extension. The mechanism feels solid and is very easy to engage. The extension is made of plastic but doesn’t feel cheap and the rubber on the outside improves its “grippiness”.
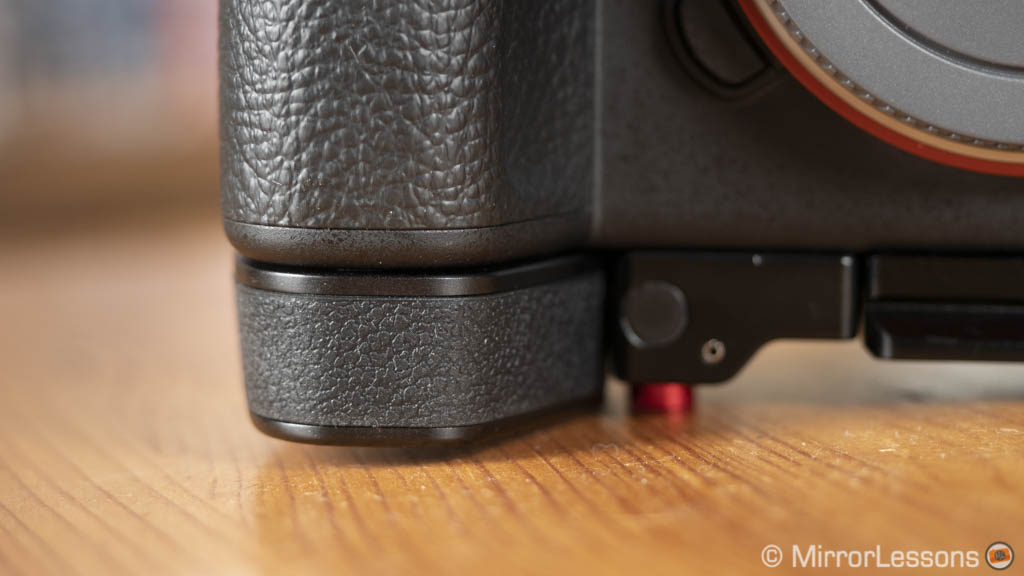
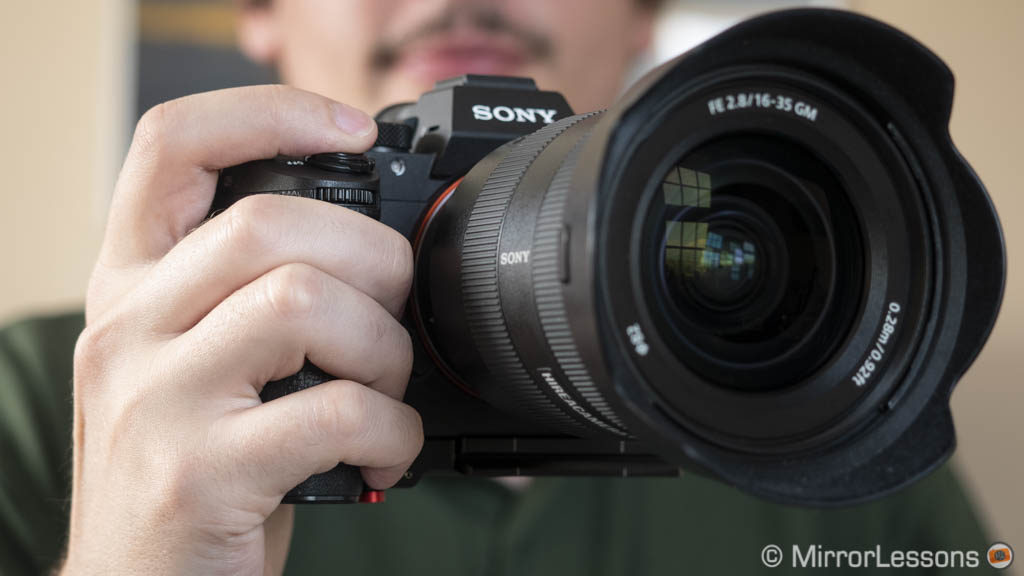
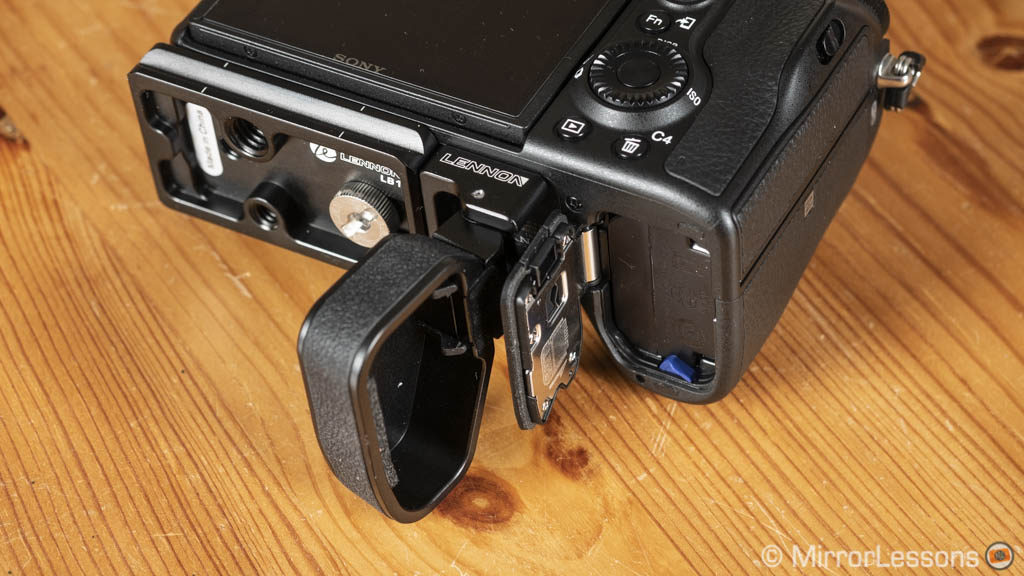
The price is also quite attractive. The only disappointment is that the L-part (LB2) needs to be purchased separately. Unfortunately it wasn’t available at the time I tested it so I couldn’t verify how accessible the connectors remain (the distance between it and the camera can’t be adjusted).
- Good: arca swiss plate and extension grip in one product, improves the camera grip, good build quality, battery easily accessible
- To consider: L-bracket is sold separately
- Compatible with: A9, A7 III, A7R III, A7 II, A7R II, A7S II
Check Lennon Gecco LB3 on Amazon, Amazon UK and eBay
Really Right Stuff L-Bracket (BA9)
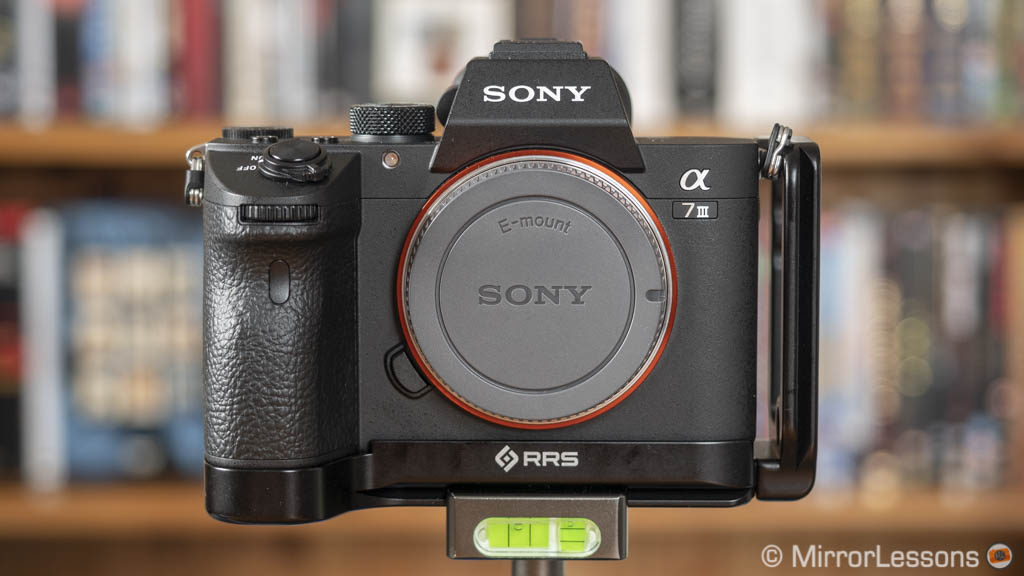
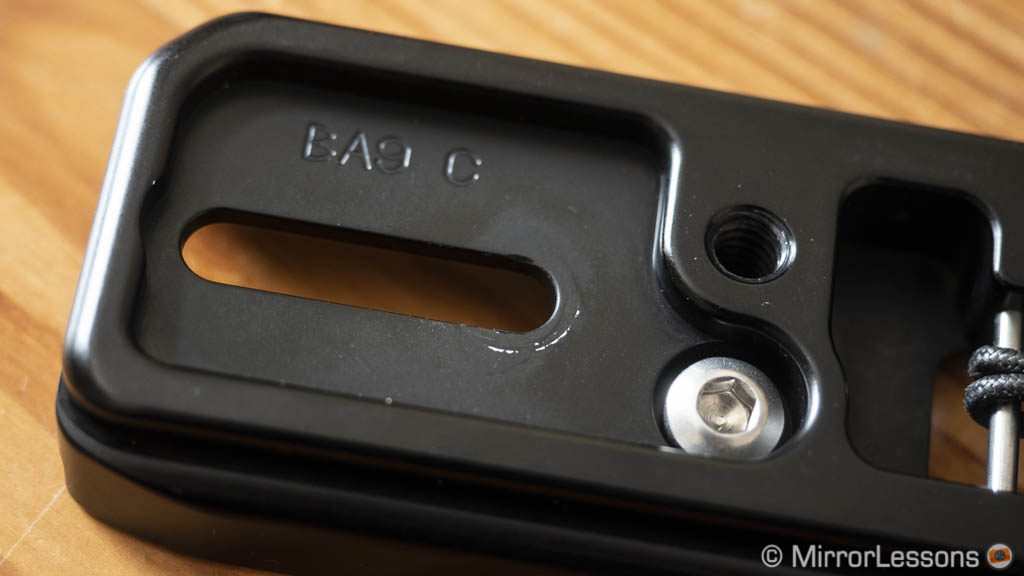
The RRS L-Plate was designed with extreme precision and fits the A7 III body perfectly. It is made of anodised aluminium so it’s both solid and light. With prolonged use however, some of the black paint may wear off (see where you tighten the screws in the pictures below).
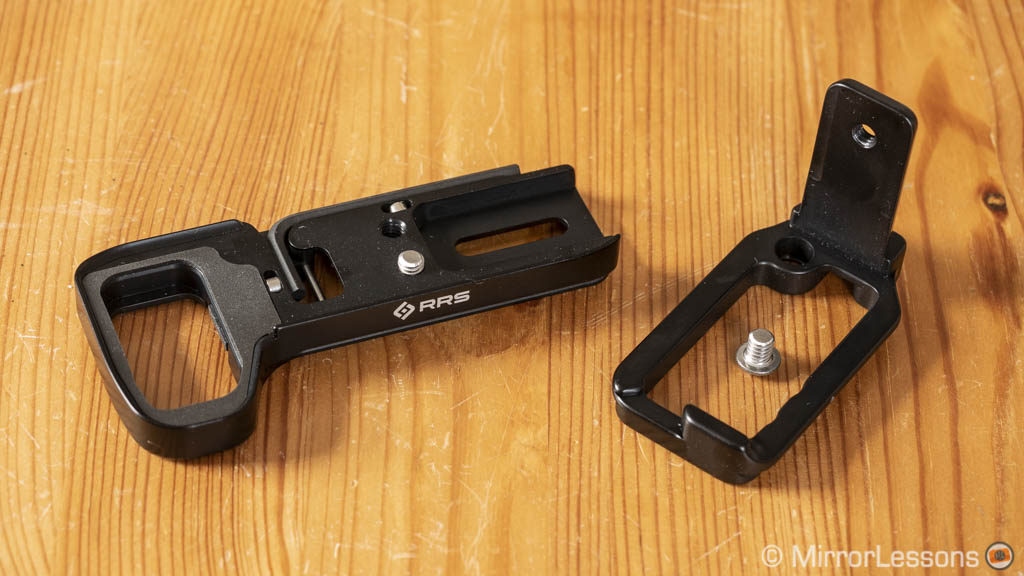
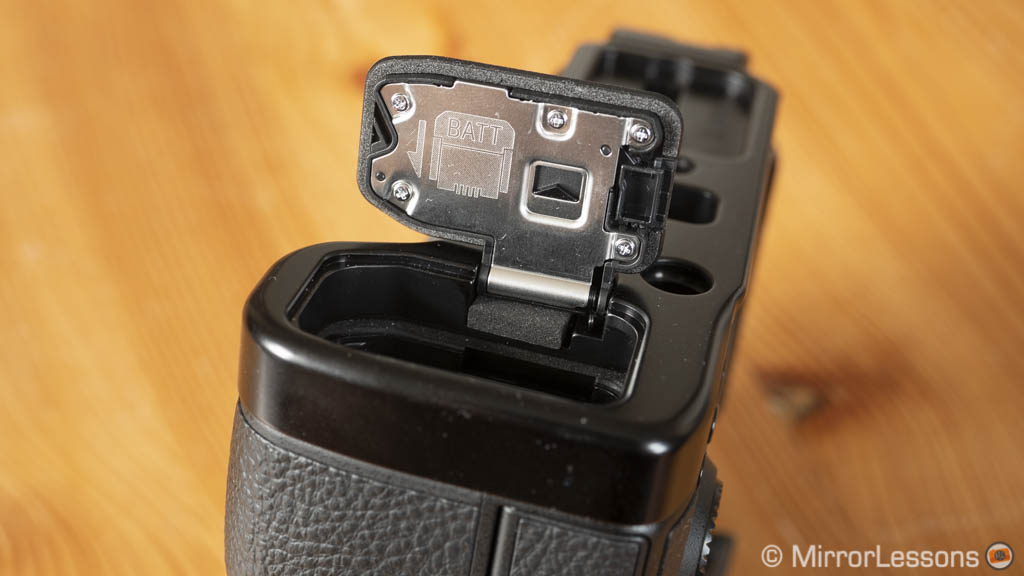
You can transfer the battery cover to the plate to access the battery without having to remove the plate first. There is gasket material where the cover is attached and where the plate comes in contact with the camera to maintain weather sealing. I performed a quick test by dropping a little bit of water onto it and although the battery stayed dry, a few drops did manage to get between the gasket and the bottom of the camera. This may suggest a limitation in more severe weather conditions.
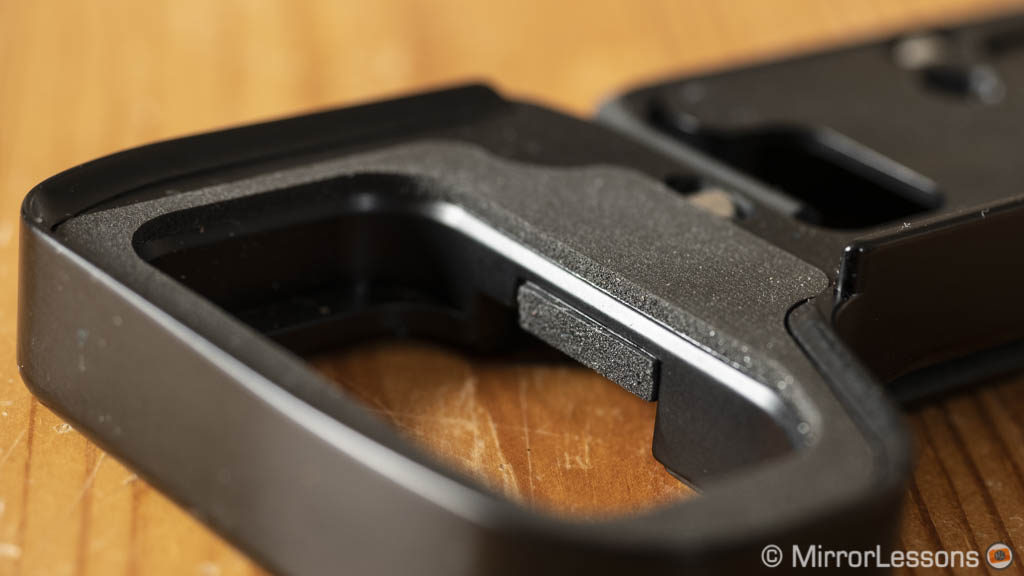
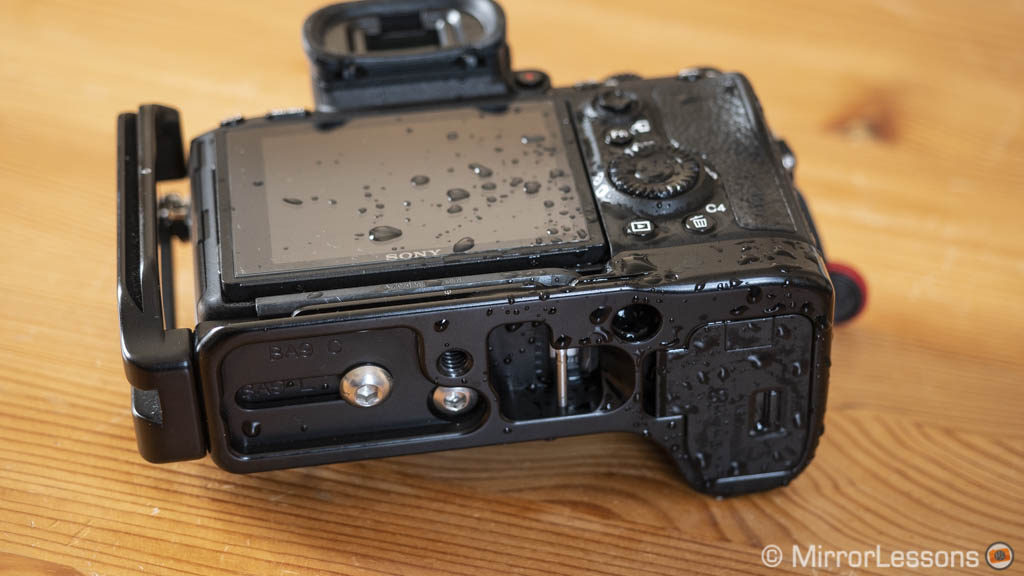
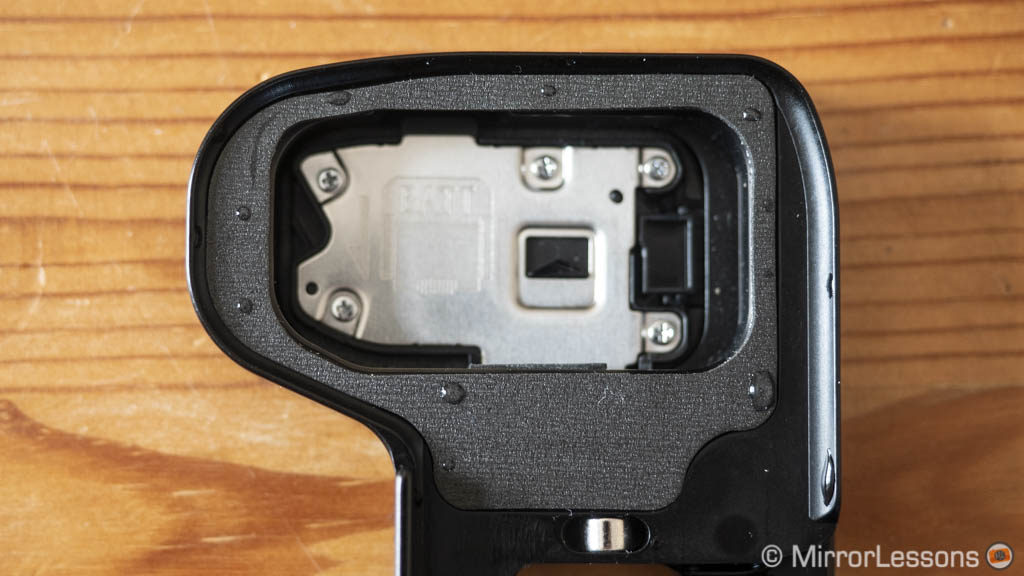
The connection ports remain accessible and you can distance the L part from the body. Alternatively it can be removed. There is a built-in magnet space to store the hexagonal key, a strap attachment, a 1/4”-20 threaded mount and two QD socket to attach the RRS QD strap. The plate itself is designed to fit arca swiss tripod heads directly. As for the grip, it doesn’t provide the same level of comfort as the other two products mentioned in this section, but it definitely gives your pinky finger more space to rest on.
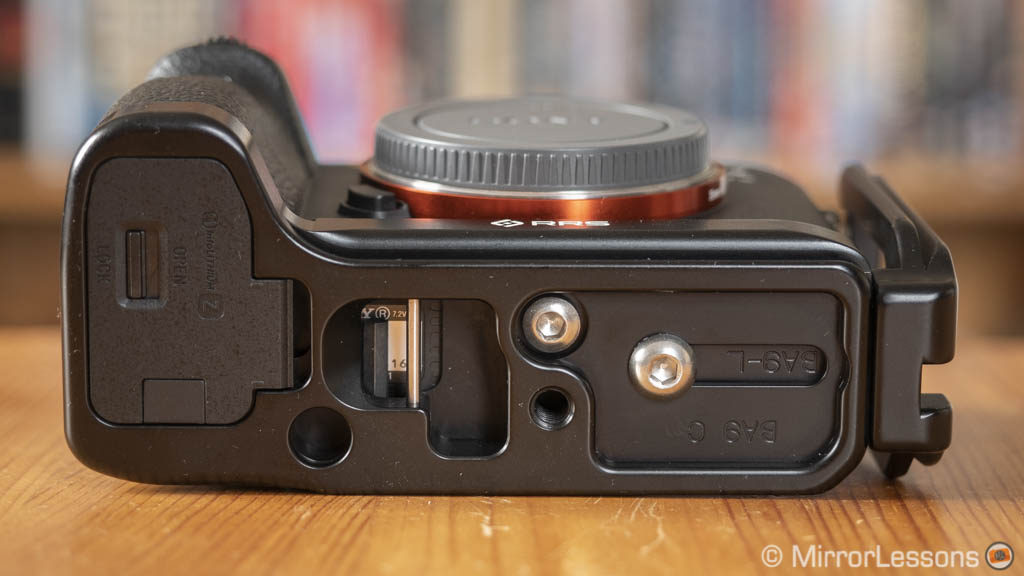
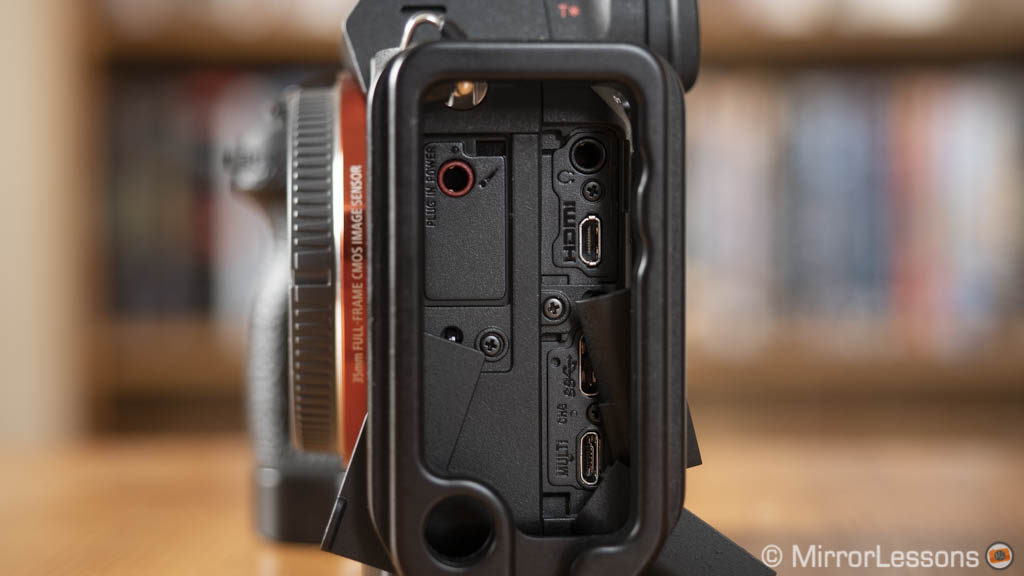
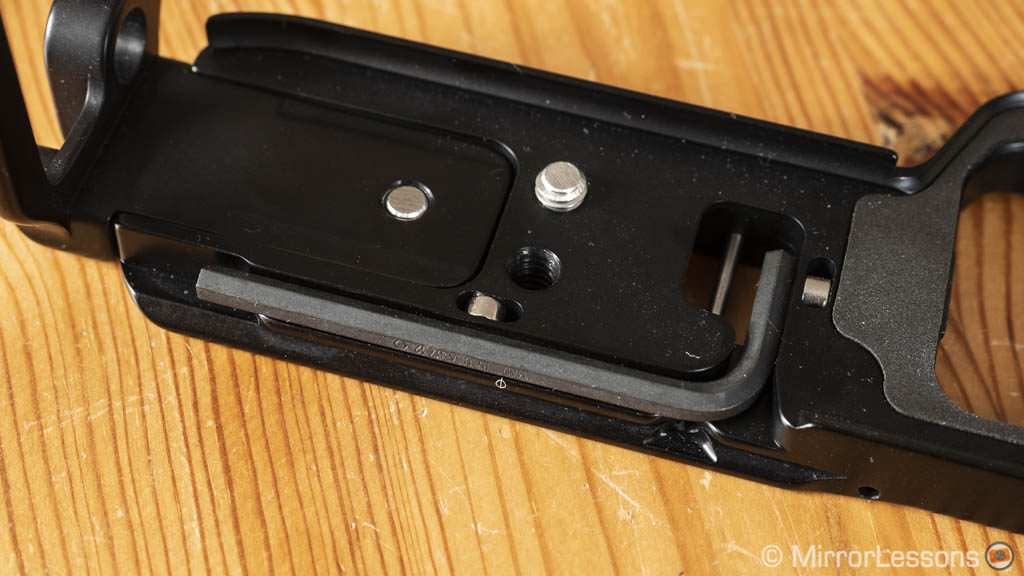
The RRS L-Bracket is expensive and there is no question you can find cheaper alternatives in this segment. If you appreciate quality and precise craftsmanship however, you’ll appreciate how well this L-plate is made. Note that it can be purchased without the L-part, or as a special edition that supports the camera and the battery grip attached.
- Good: solid build, lightweight, clever features, connectors and battery remain accessible
- To consider: expensive, weather-sealing is maintained when you move the battery cover to the plate but might not stand up to harsh weather conditions
- Compatible with: A9, A7 III, A7R III
Check Really Right Stuff L-Plate on B&H Photo
Sony GP-X1EM Grip Extension
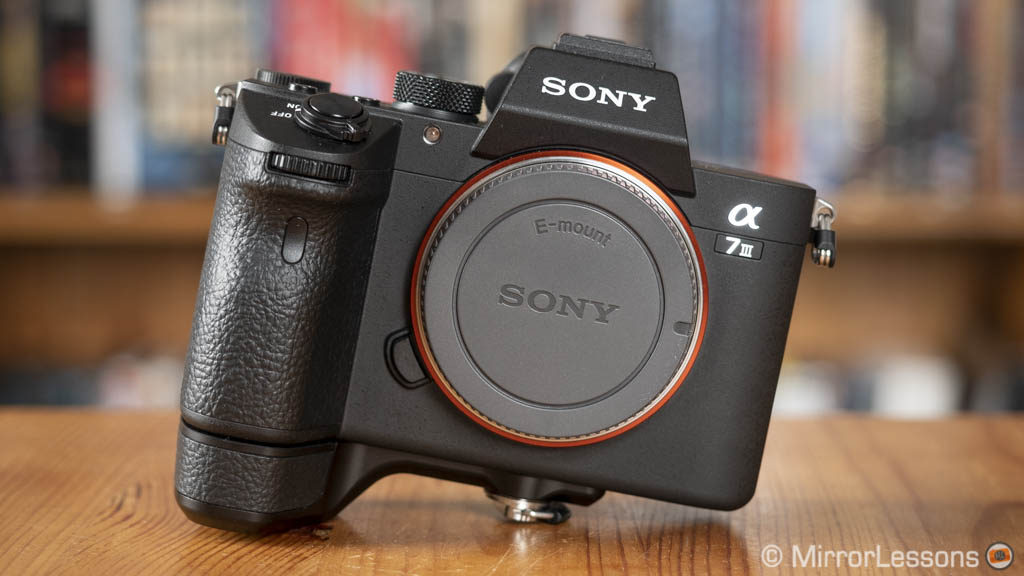
The GP-X1EM increases the height of the camera’s built-in grip and allows you to rest all your fingers. You can apply pressure more homogeneously rather than having your middle finger take most of the weight. While I would mainly recommend it if you use medium to large lenses, it is so comfortable that I’ve enjoyed using it with small primes too.
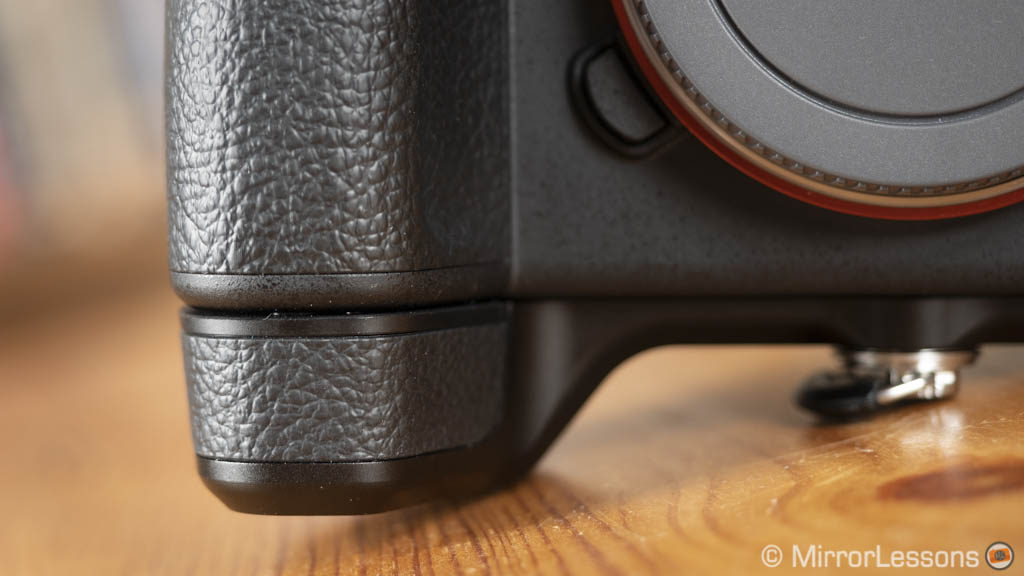
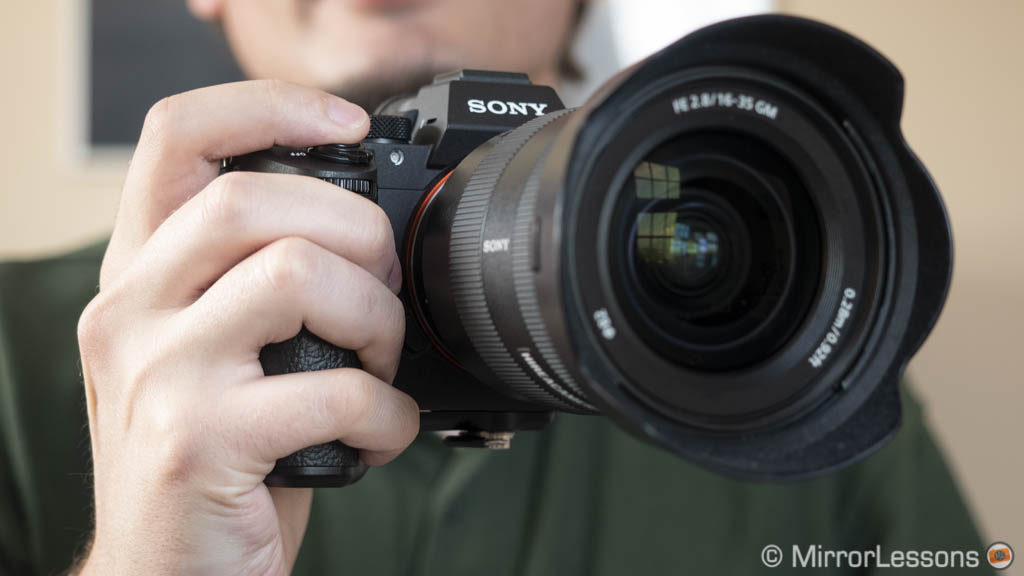
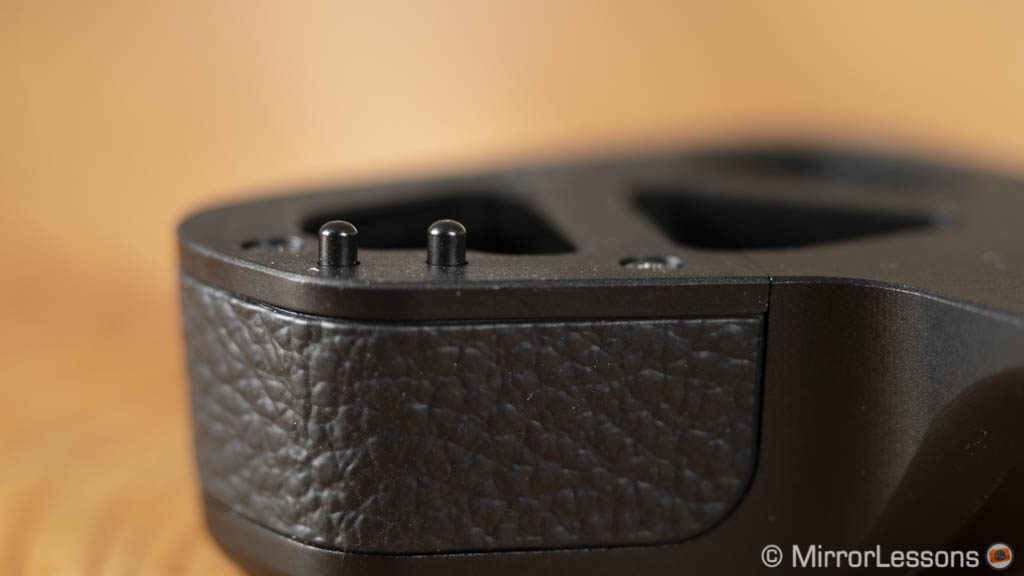
The grip is made of aluminium with some rubber matching the same texture found on the camera. It is light and very easy to attach thanks to the fixing screw. You will notice two small collapsable protrusions at the edge. When you align the grip with the camera, one of the protrusions falls into a tiny hole found at the bottom of the camera to make sure it doesn’t move.
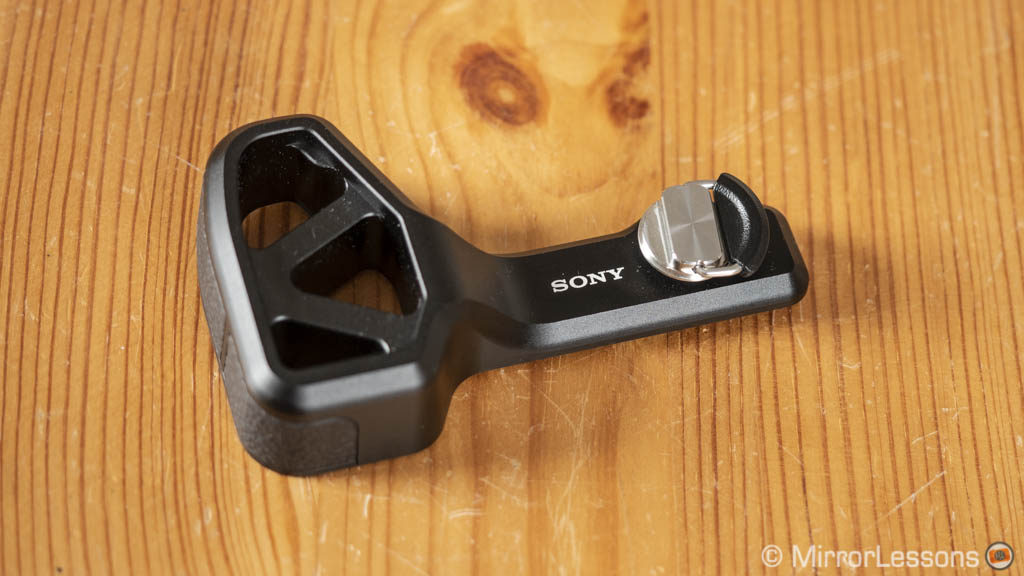
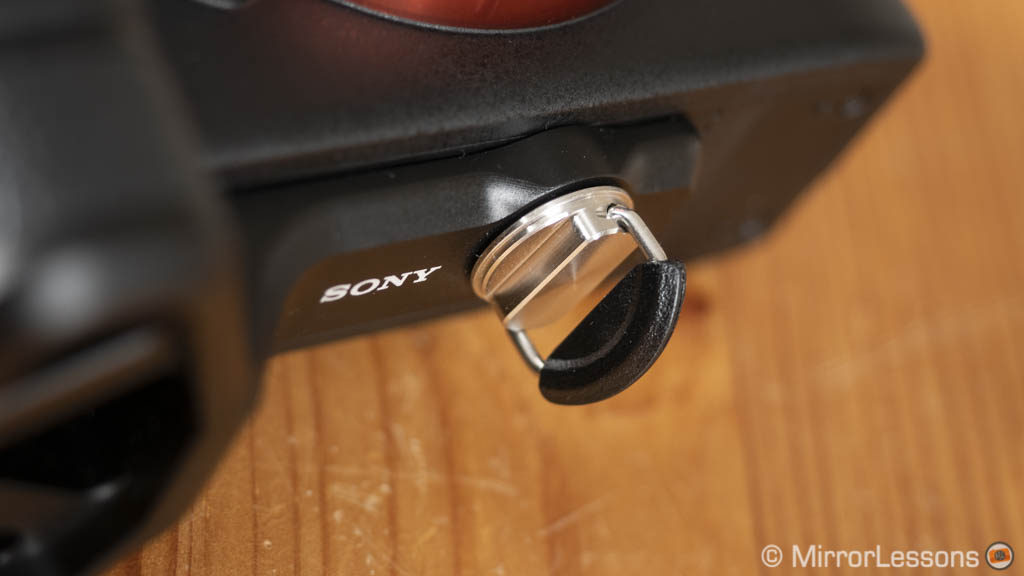
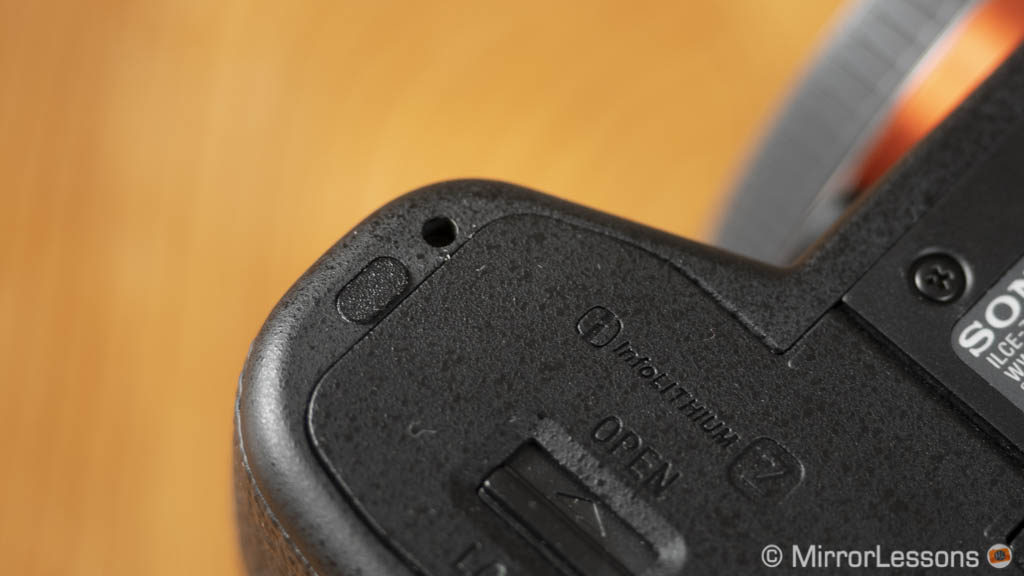
There a few limitations however. First, it doesn’t give you the option to attach a tripod plate – nor does it include a built-in arca swiss plate – so if you often switch between hand held work and tripods, it’s not the best solution for you. And because of its design, it sits on a diagonal if you rest the camera on a flat surface, resulting in less stability (but that’s a minor issue for me).
Second it blocks the battery compartment. That being said, all you need to do is loosen the fixing screw by approximately a half-turn to slide the grip away and access the battery without having to remove it entirely. Since the new NP-FZ100 battery lasts for a long time, I personally didn’t find this solution too inconvenient.
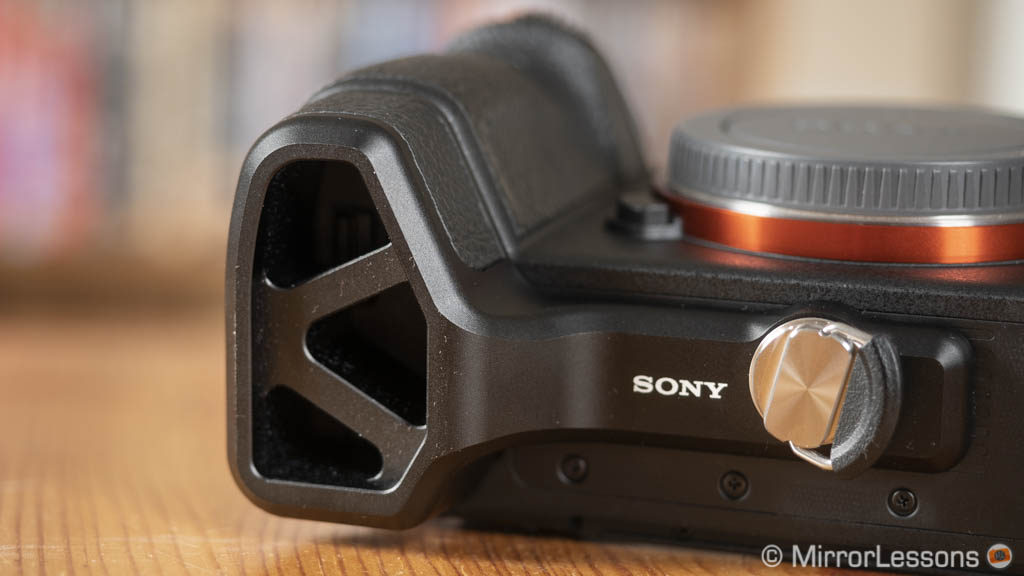
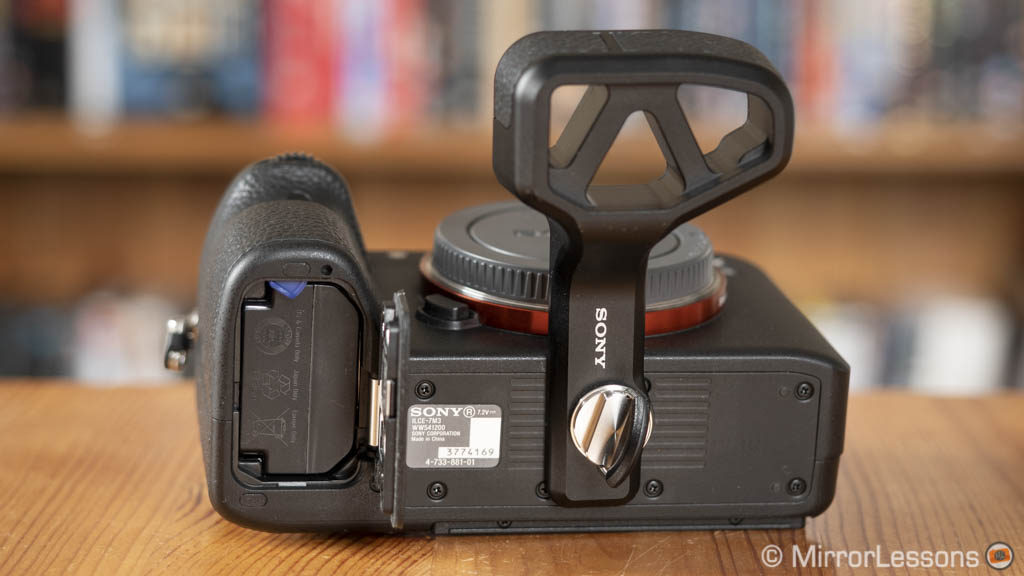
Third there is the price. At around $100, you are certainly going to think twice before buying it. Is it worth it? Well, if you mainly work hand-held and shoot every day, I personally wouldn’t hesitate to get one because it adds so much comfort.
- Good: makes the camera’s grip much better, robust, easy to attach and remove
- To consider: expensive, no tripod compatibility, you need to loosen the fixing screw and slide the grip to one side to access the battery
- Compatible with: A9, A7 III, A7R III, A7 II, A7R II, A7S II
Check the Sony GP-X1EM price on B&H Photo
More power: battery grips
Personally I wouldn’t put a vertical grip at the top of my buying list given how much the battery life on the A7 III (and its more recent siblings) has improved.
That being said, a battery grip can be interesting for extensive shooting and needless to say, it improves the ergonomics, particularly when shooting in vertical/portrait orientation.
Sony VG-C3EM Battery Grip
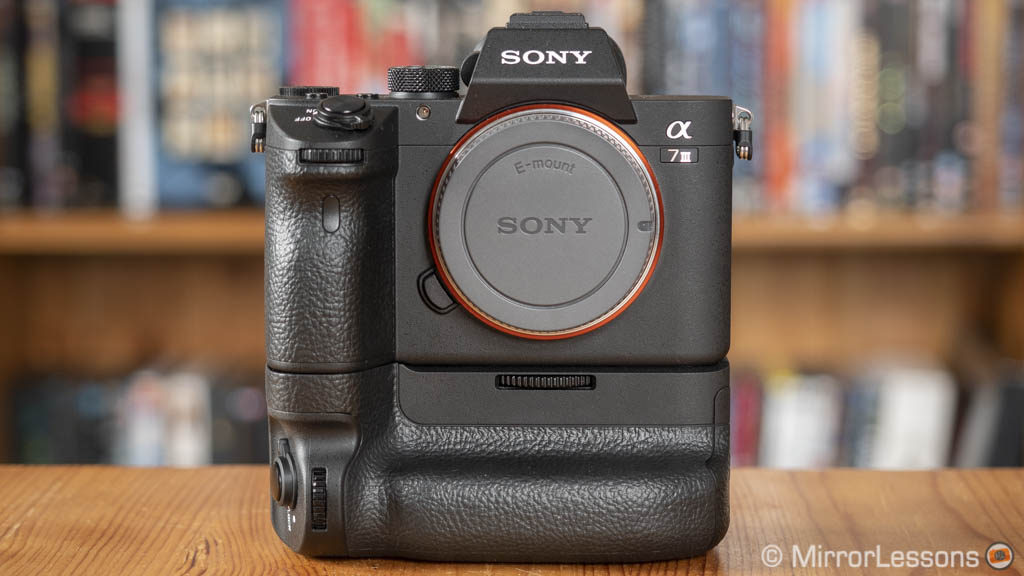
The Sony solution uses the same materials as the camera (including magnesium alloy) and is sealed against dust and moisture. The design is not perfect however. The plastic tray that houses the two batteries feels cheap. When attached, a tiny gap between the camera and the grip remains which means that water easily trickle inside. However it is very unlikely that small droplets can penetrate the battery compartment, also thanks to the extra sealing around the base of the column.
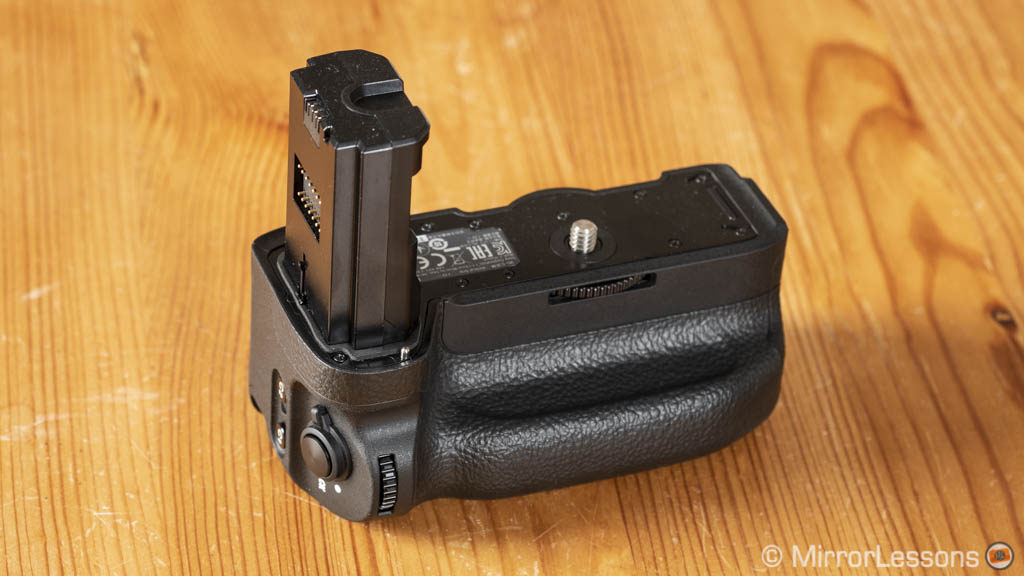
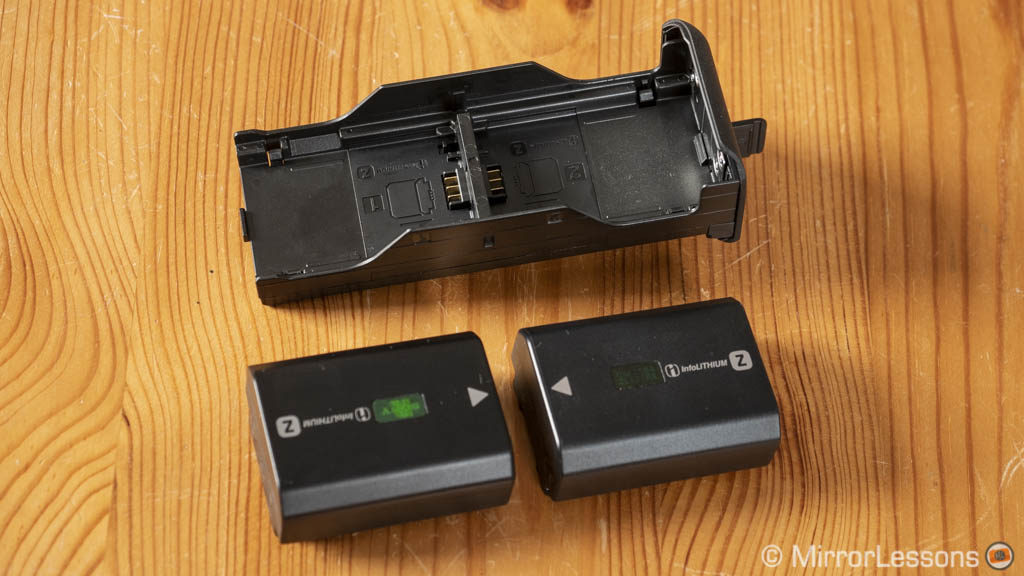
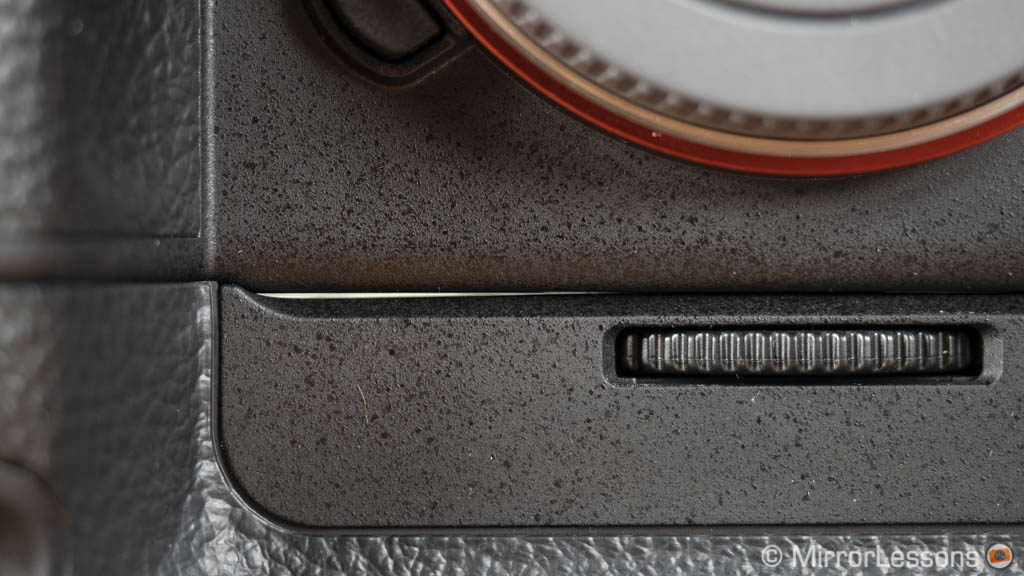
The button layout includes four custom buttons that respond to the same commands set for the equivalents on the A7 III. They are easy to access and placed in the same order as on the camera. I like the front and rear dials better than the ones on the camera actually because of their added size and tactile feel. The AF joystick has the same precision as the native one.
The shutter release button offers the same sensitivity and is surrounded by a lock dial. The latter is important when using the camera in horizontal mode because the palm of your hand can accidentally push down on the AEL button of the grip, or in some cases even the shutter release.
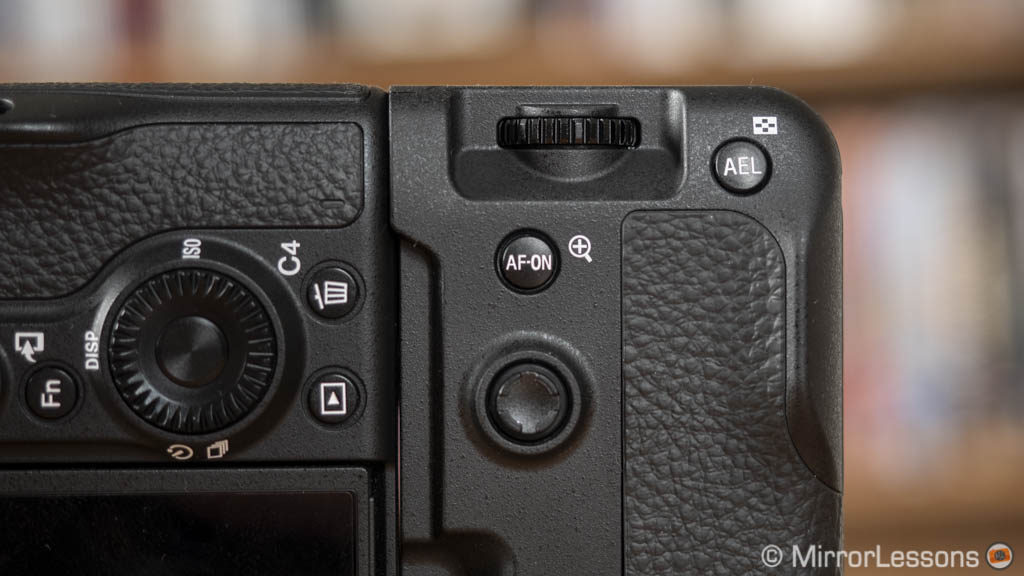
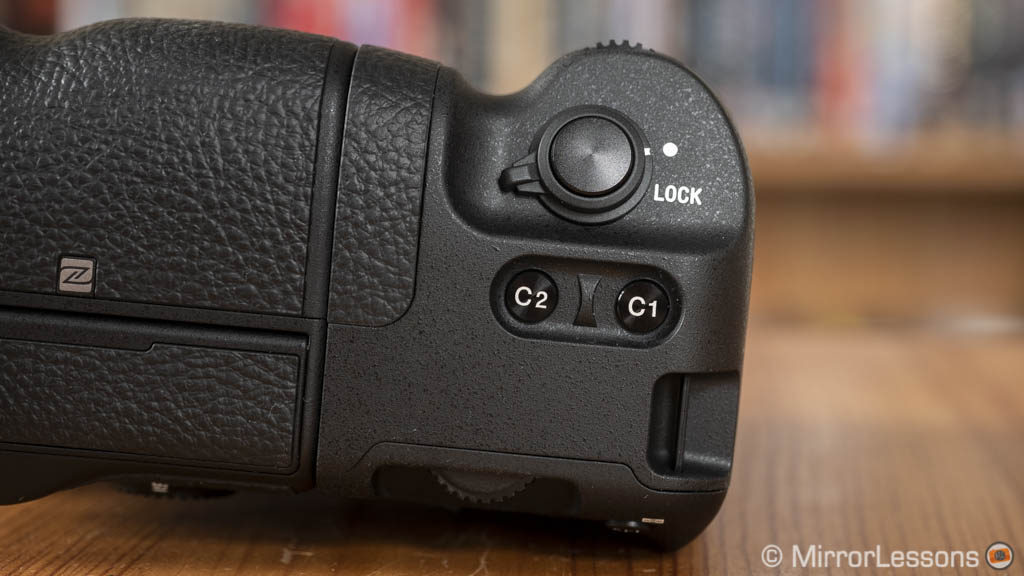
The grip is comfortable when shooting in vertical mode: there is lots of space for all your fingers and enough bulkiness to apply the right pressure. It wouldn’t have hurt had they made it slightly larger though. In horizontal mode, the left rear corner (where the AEL button is) applies some pressure to the palm of your hand and may become annoying after long hours of shooting. Another thing – which is not the battery grip’s fault per se – is that there is no possibility to rotate the info displayed on the LCD/EVF when shooting in vertical mode.
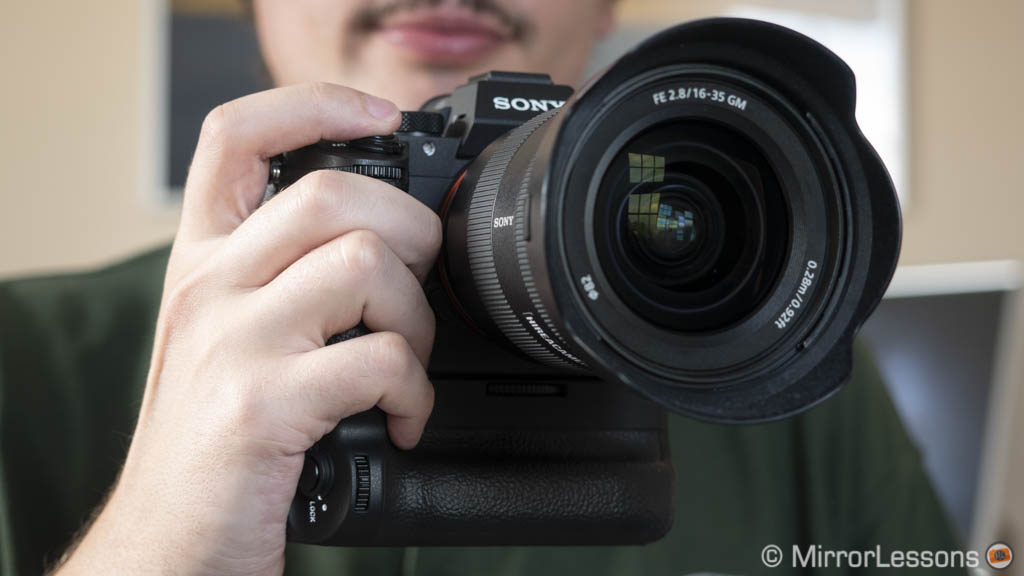
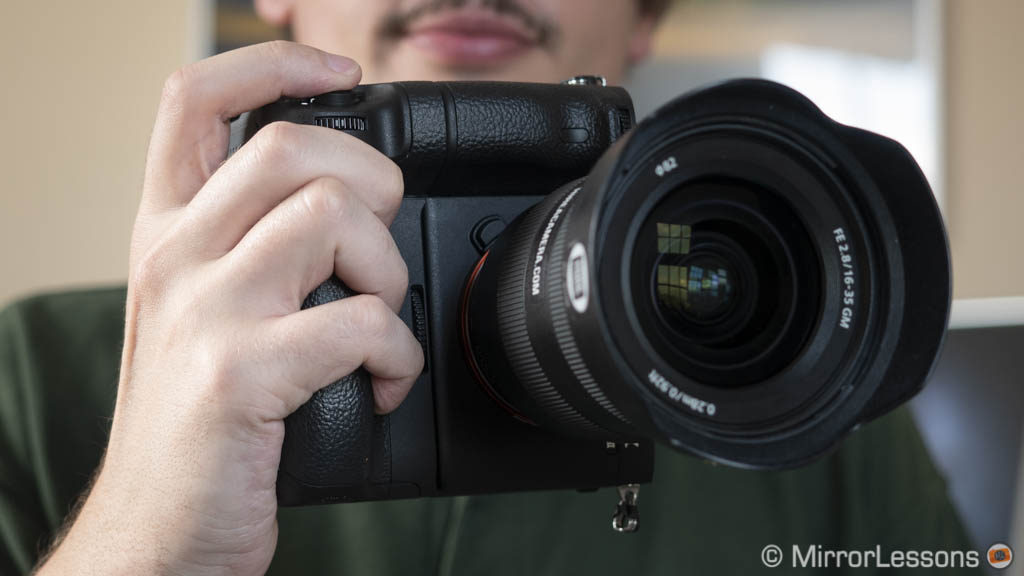
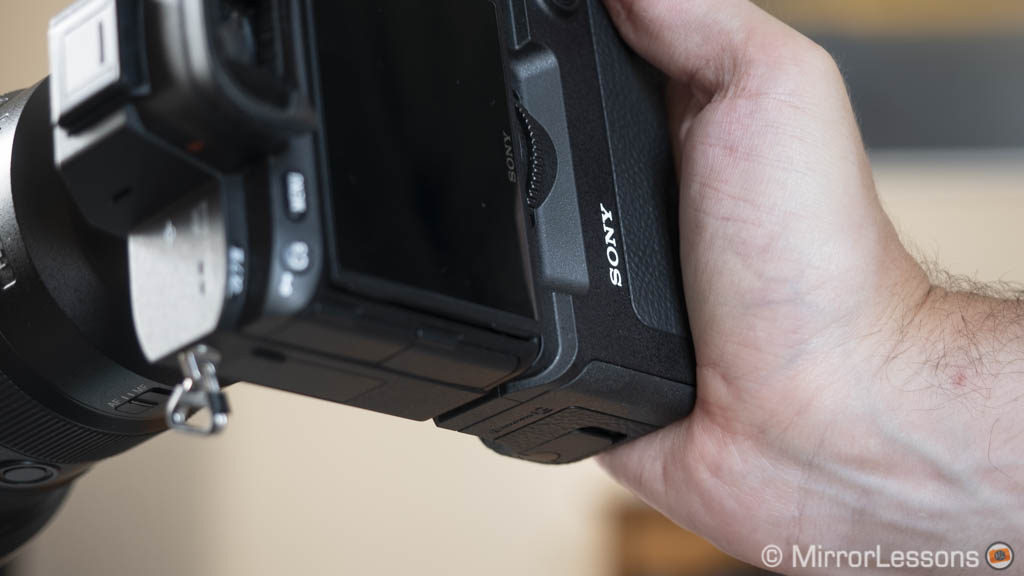
To attach the grip you need to remove the battery cover. You can store it on the column that goes inside the battery compartment to keep it safe. Note that there is a dedicated switch to remove the battery cover so you don’t need to force it off.
The grip houses two NP-FZ100 batteries which doubles the battery life. The camera displays two icons and starts with the one that has less power. The percentage refers to the battery in use. When the first runs out, the camera automatically switches to the second battery.
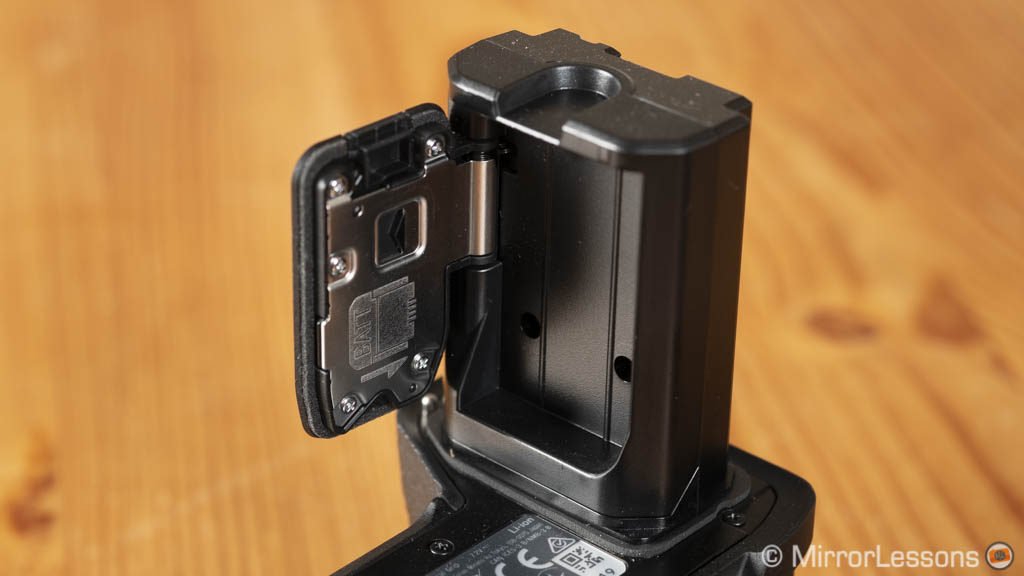
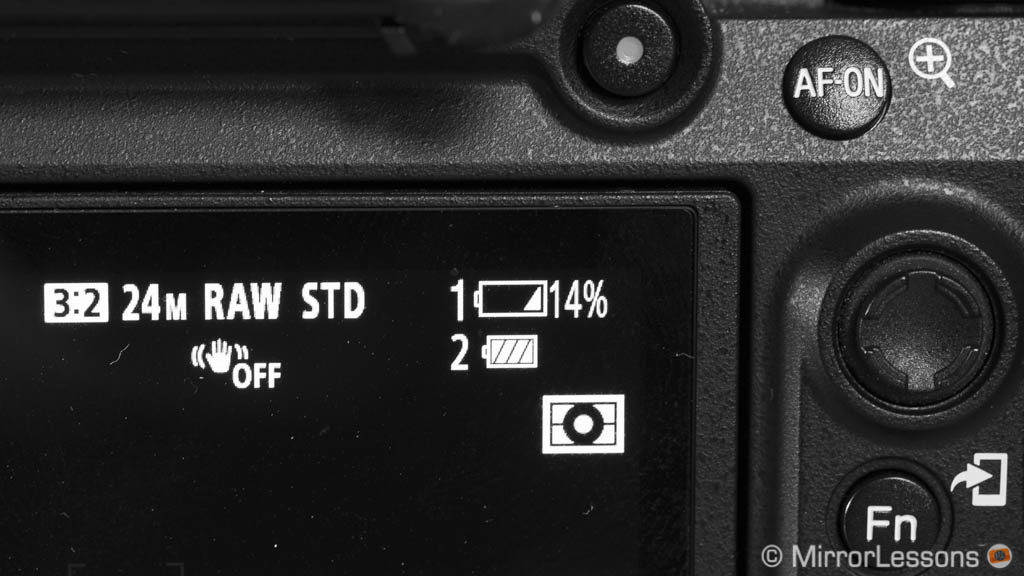
You can recharge the two batteries with the grip attached by using the USB port of the camera. Just one battery at a time will be charged, starting with the weakest. Note that the charging time can be over four hours per battery via USB depending on the source.
- Good: doubles the battery life, responsive AF joystick and buttons, lock possibility
- To consider: expensive, battery tray feels cheap, some minor design flaws
- Compatible with: A9, A7 III, A7R III
Check the Sony VG-C3EM price on B&H Photo
Meike MK A9 Battery Grip
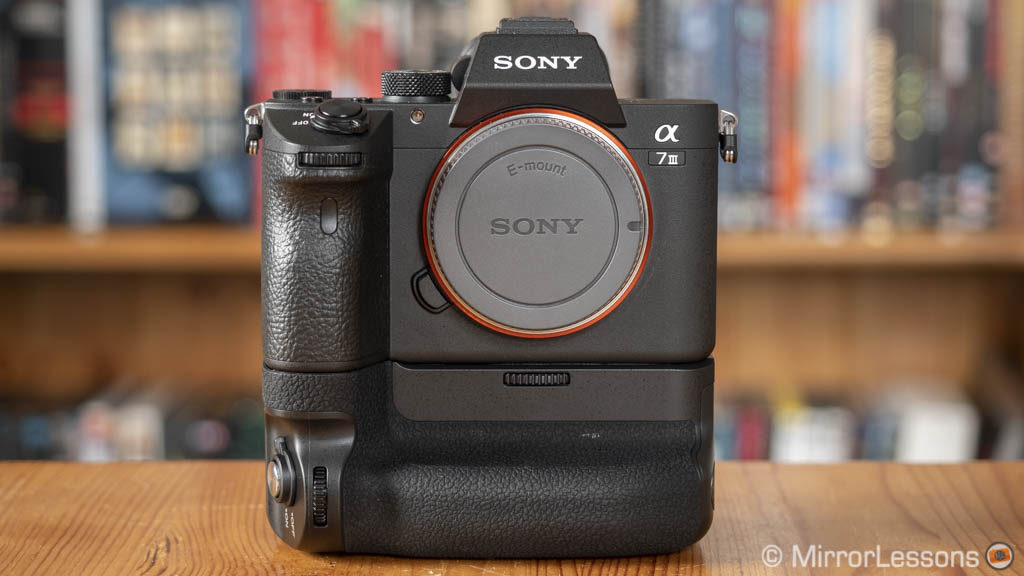
If the official version is too expensive, you can turn to Meike which is the same company that provides the battery grip solution for the a6300/a6500.
The design is very similar to the original, so much that the only difference you’ll notice at first is the use of rubber rather than faux leather on the surface. The thin gap between the camera and grip remains too. However the build quality doesn’t feel as robust (it’s plastic) and there is no weather sealing.
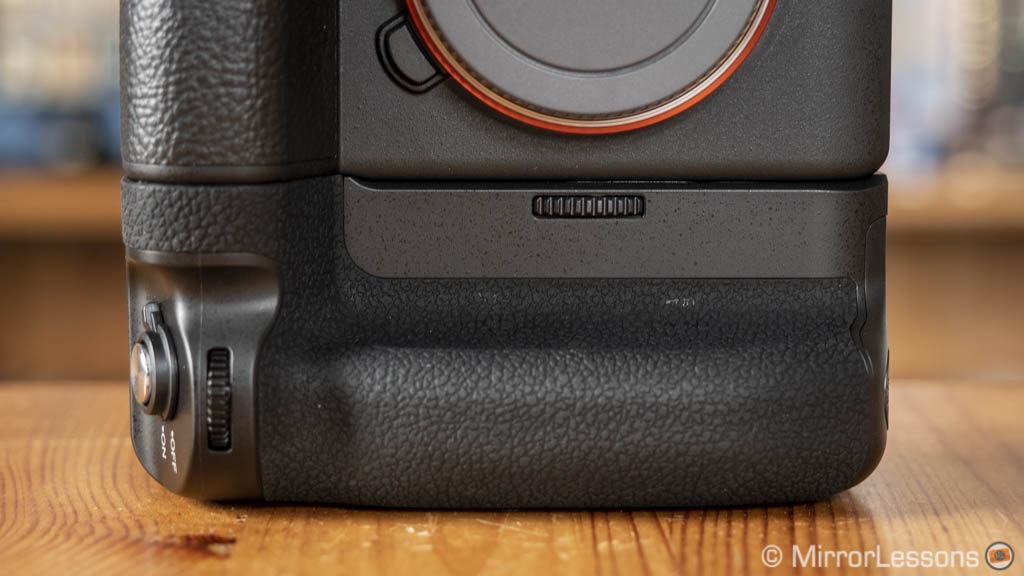
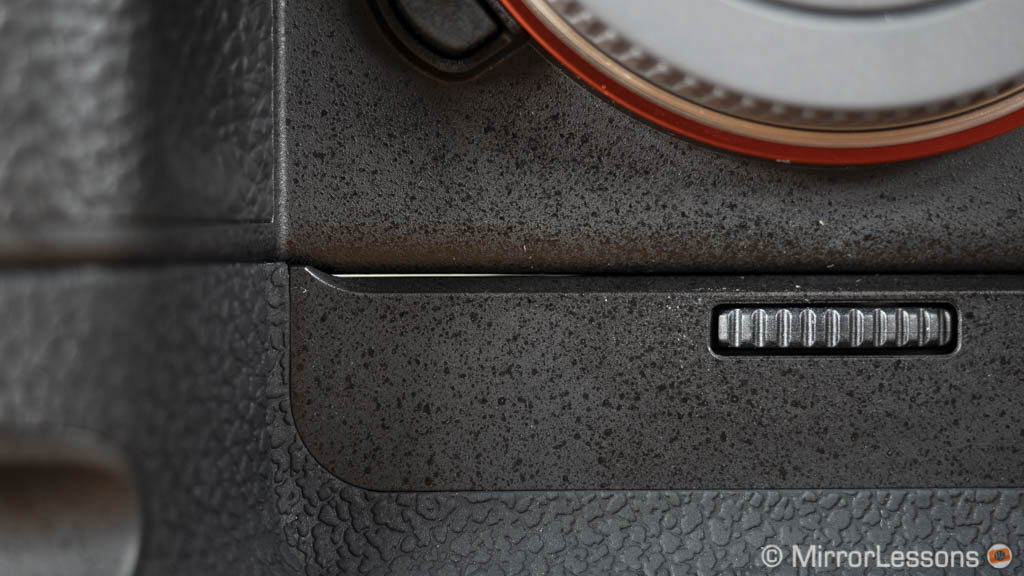
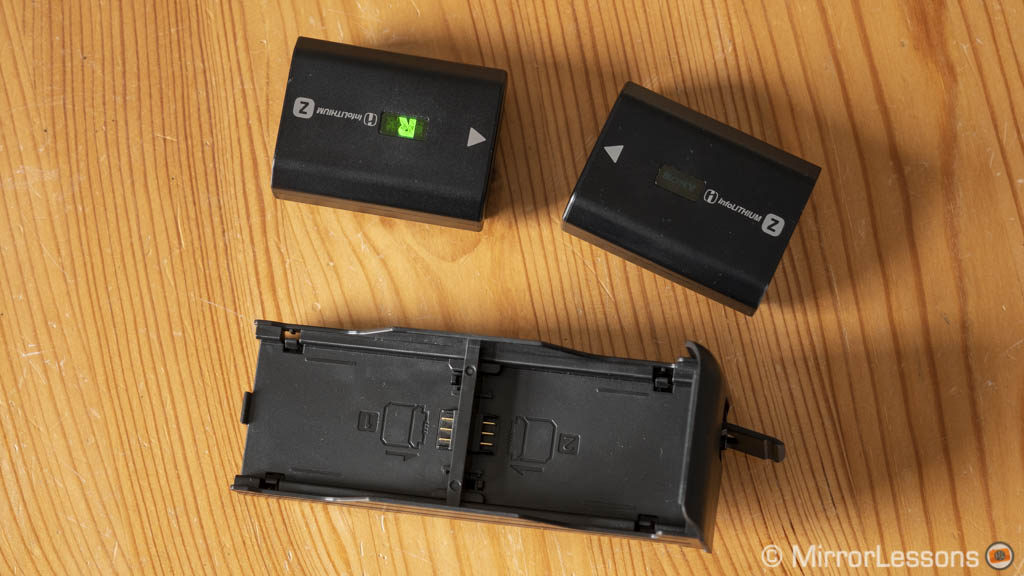
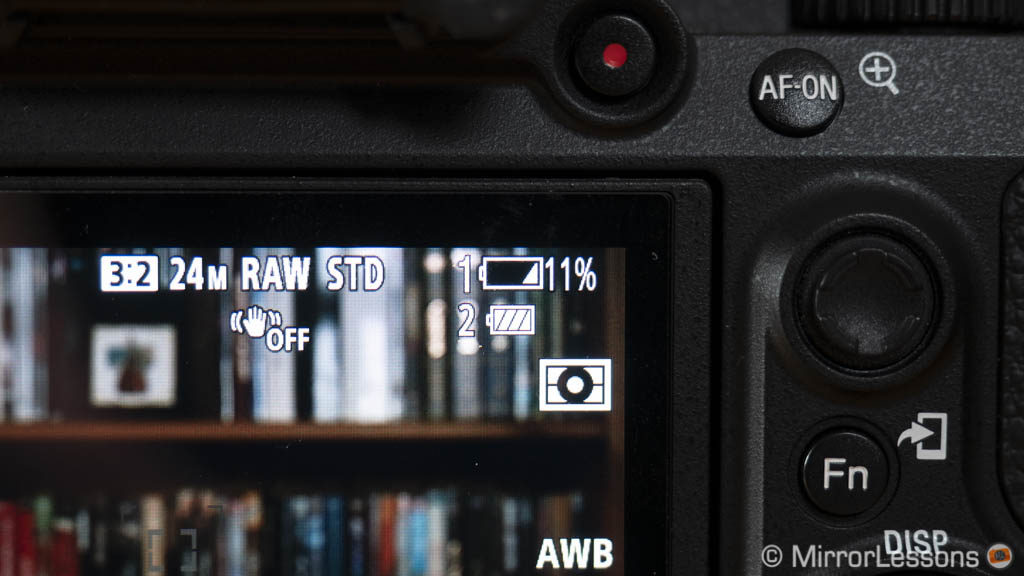
The button layout is the same as the Sony but the shutter button isn’t as smooth to press. The other buttons feel a bit cheaper as well but the tactile feel remains positive. The AF joystick is looser in comparison to the one on the camera but reactivity and precision are not affected. The front/rear dials are precise and easy to turn.
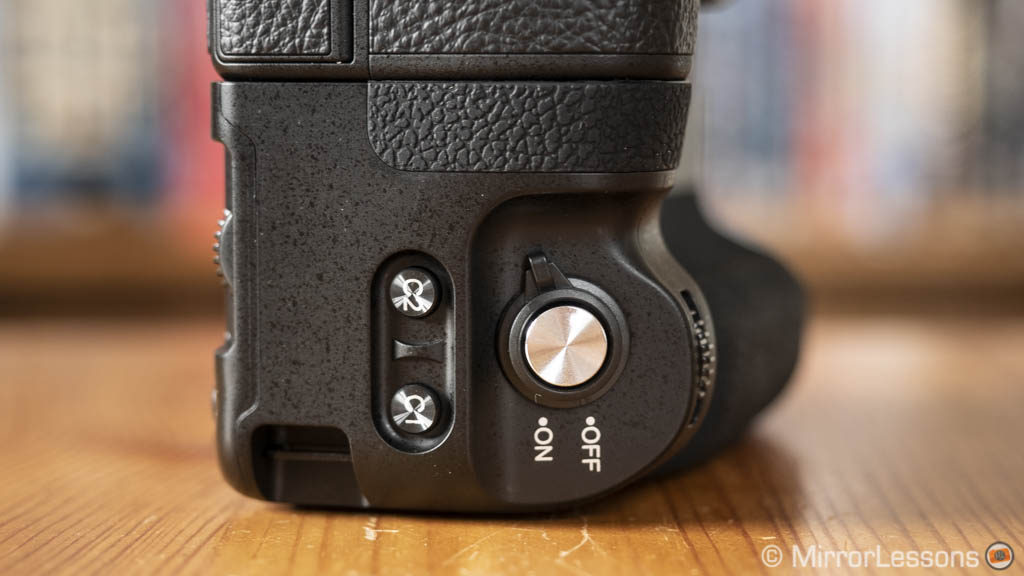
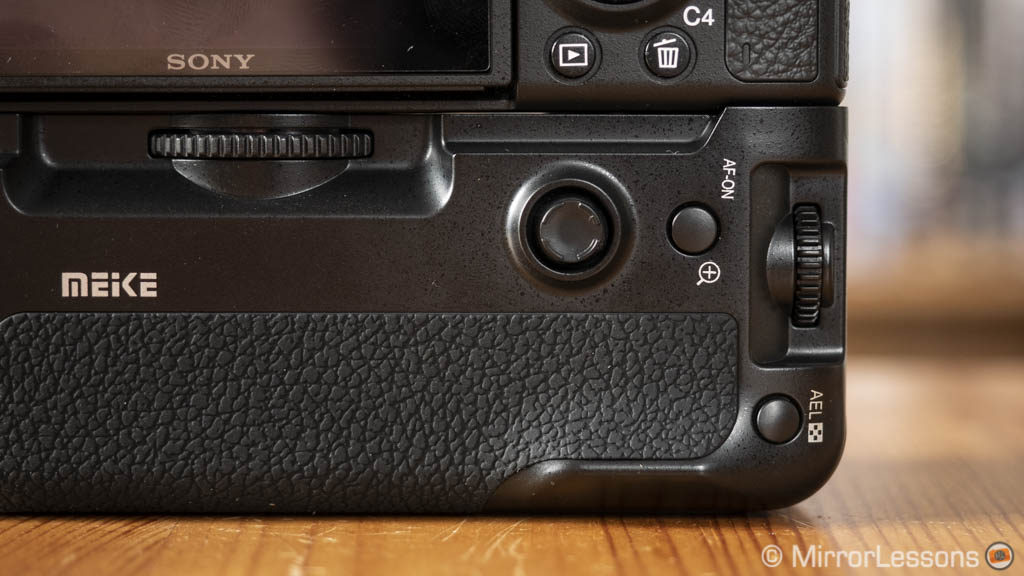
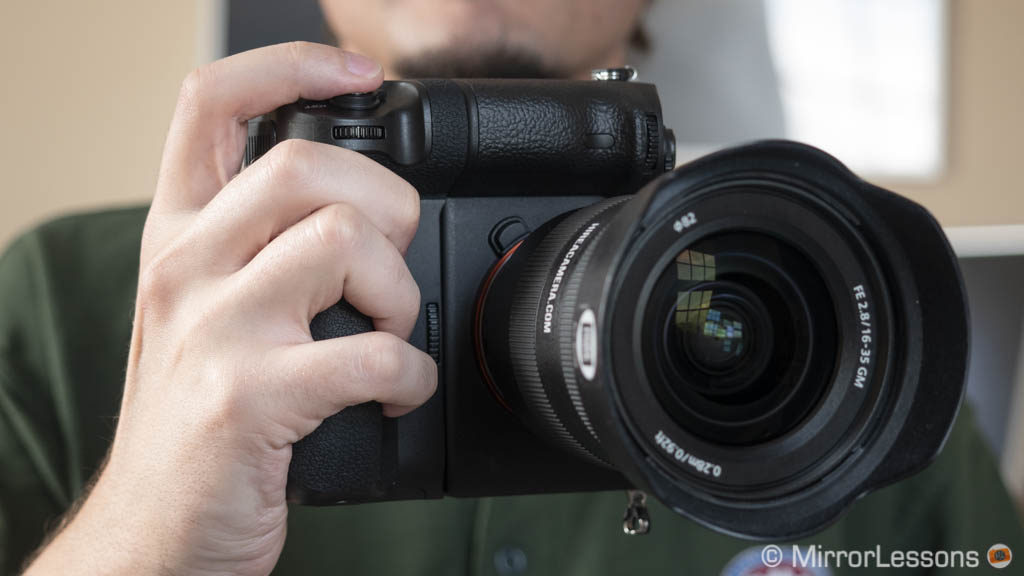
The grip is comfortable to use in both vertical and horizontal modes. One annoying thing about the MK-A9 is the missing lock dial around the shutter button: you have to be careful not to press buttons inadvertently in horizontal mode. There is an On/Off switch and you need to turn it on in order to use the grip. It doesn’t override the On/Off lever on the camera so both need to be on in order for the combo to work. You can charge the batteries via USB when it is attached to the camera (turn the camera off, leave the grip on and use the USB connection on the camera).
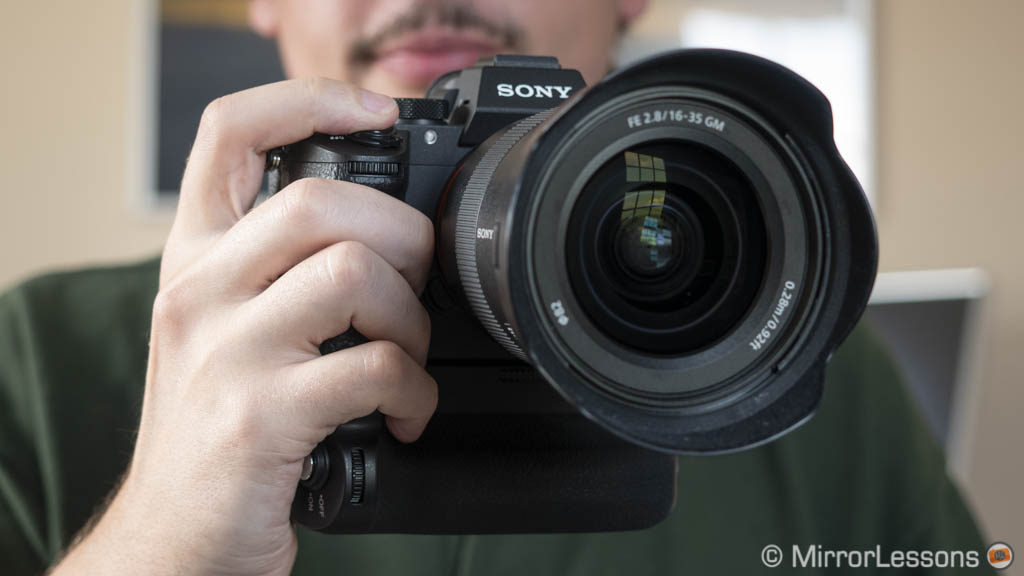
One thing that Meike provides and Sony doesn’t is a remote control that works up to 100 meters with a 2.4Ghz wireless transmission. You can use it to control the shutter in Bulb mode or set interval time shooting (time-lapse). It’s basic but certainly a welcome addition!
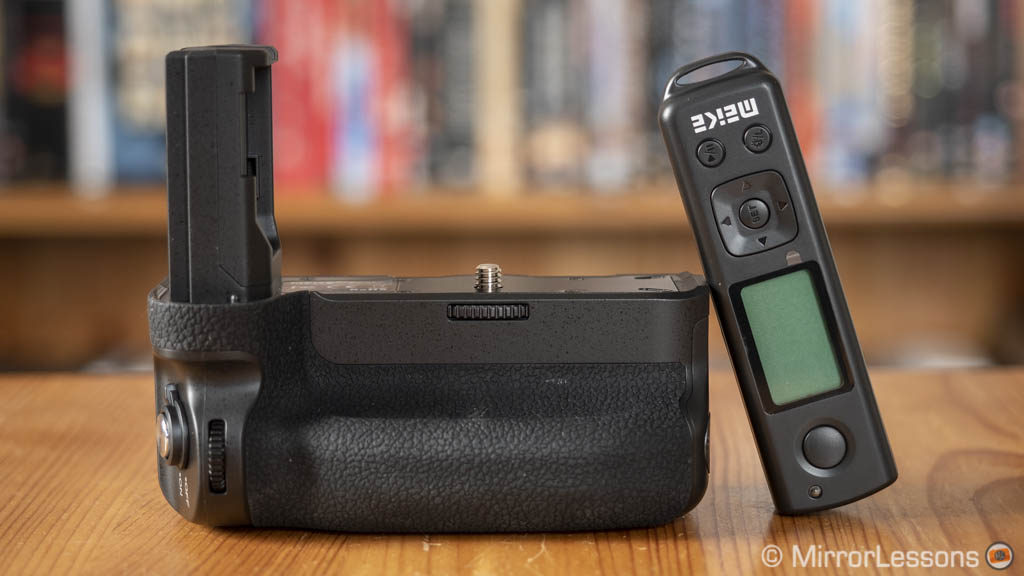
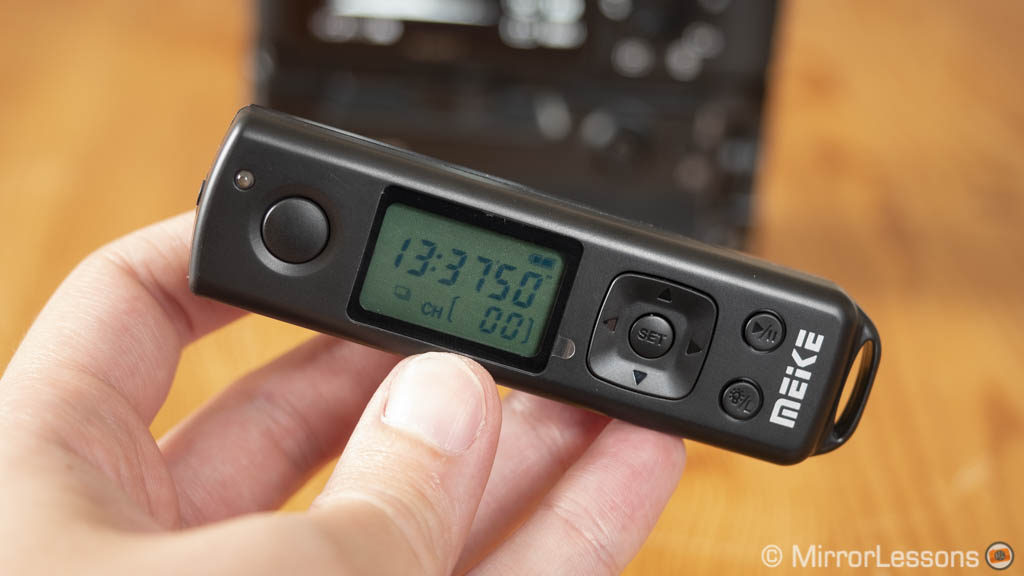
- Good: doubles the battery life, AF joystick and custom buttons, wireless remote included
- To consider: cheaper build quality, no weather sealing, no button-lock option
- Compatible with: A9, A7 III, A7R III
Check the Meike MK A9 price on Amazon, Amazon UK and eBay
More power: battery charger
Not every A7 camera comes with a charger, and even if there is one, it is usually the basic single slot version. If you deal with multiple batteries, you may be interested in something more versatile.
Sony BC-QZ1 charger
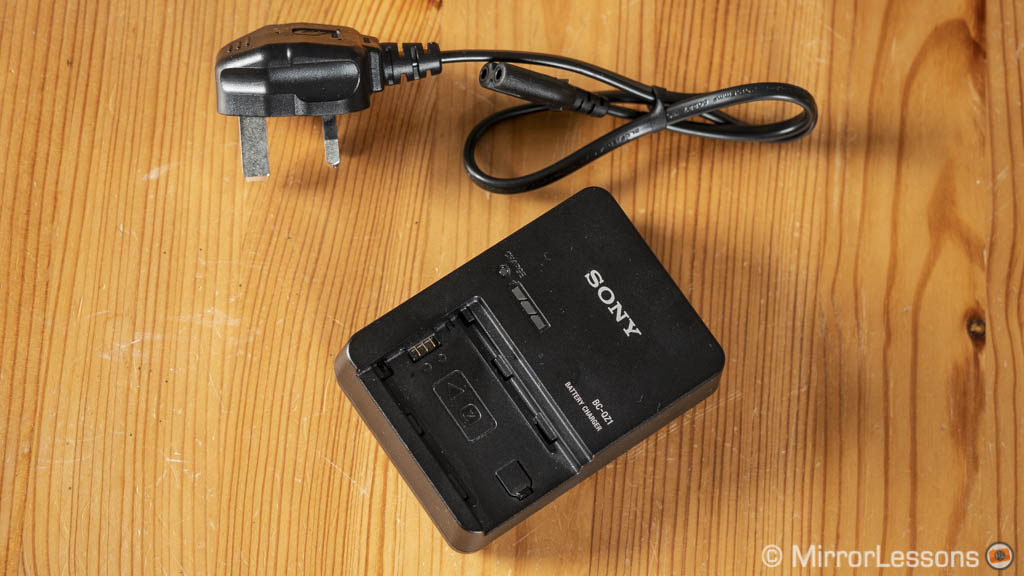
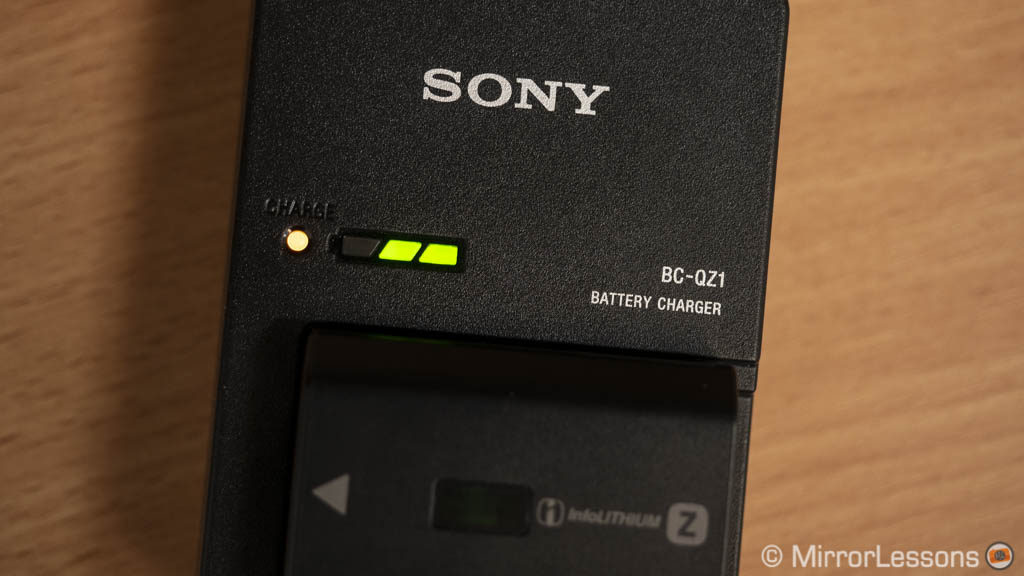
If you own an A7R III or A9, this charger is included in the box. If you have purchased the A7 III, you don’t get anything apart from the Micro USB cable and the wall socket adapter.
The official BC-QZ1 does the job if you mainly deal with one battery. It charges twice as fast as the camera via USB (2.5 versus almost 5 hours).
It’s a Sony accessory, so as you might have guessed, it’s not cheap. If you want to spend less, you can look at third party solutions such as Patona (Europe) or Wasabi (US).
- Good: charges the battery faster than in camera via USB
- To consider: more expensive than third party solutions
- Compatible with: A9, A7 III, A7R III
Check Sony BC-QZ1 charger price on Amazon, Amazon UK, B&H Photo and eBay
Hahnel Pro Cube2
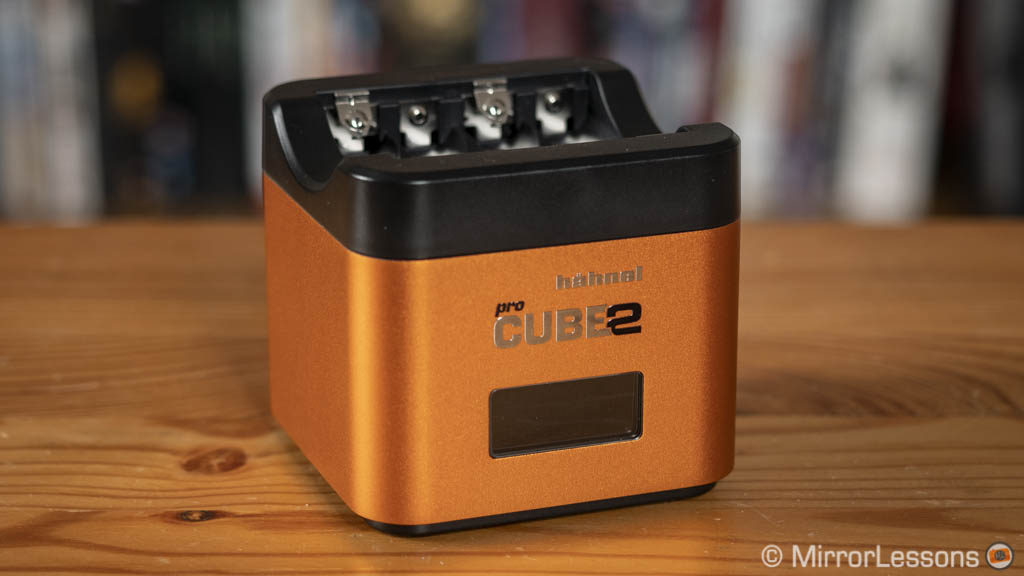
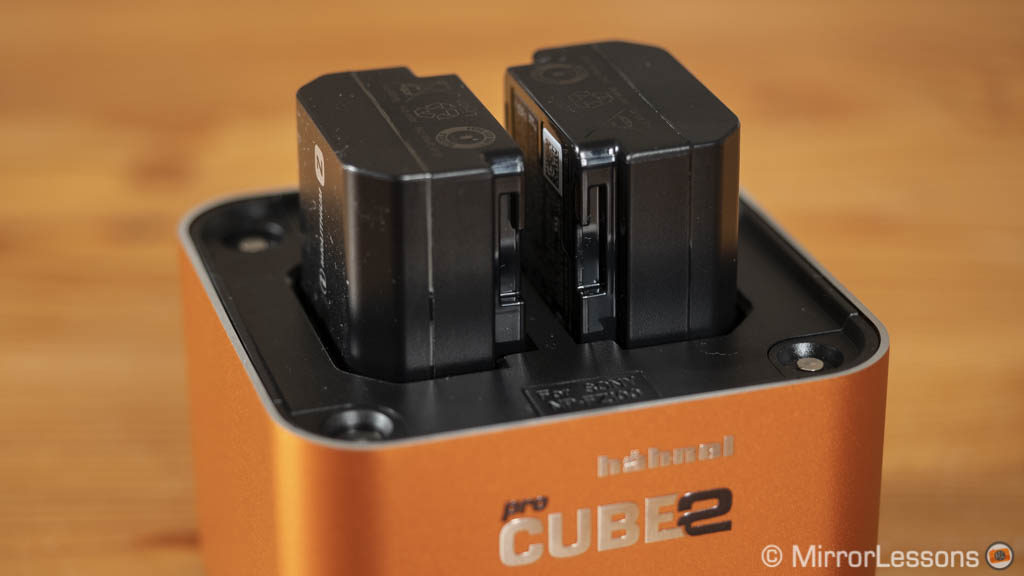
If you’re looking for a dual charger, look no further than the Pro Cube2. It will charge two NP-FZ100 batteries at the same time from 0% to 100% in less than three hours. It comes with additional plates to charge NP-FW50 and NP-BX1 batteries. So if you own other A7 cameras, an a6000 or RX100 model, the Cube2 will charge them all.
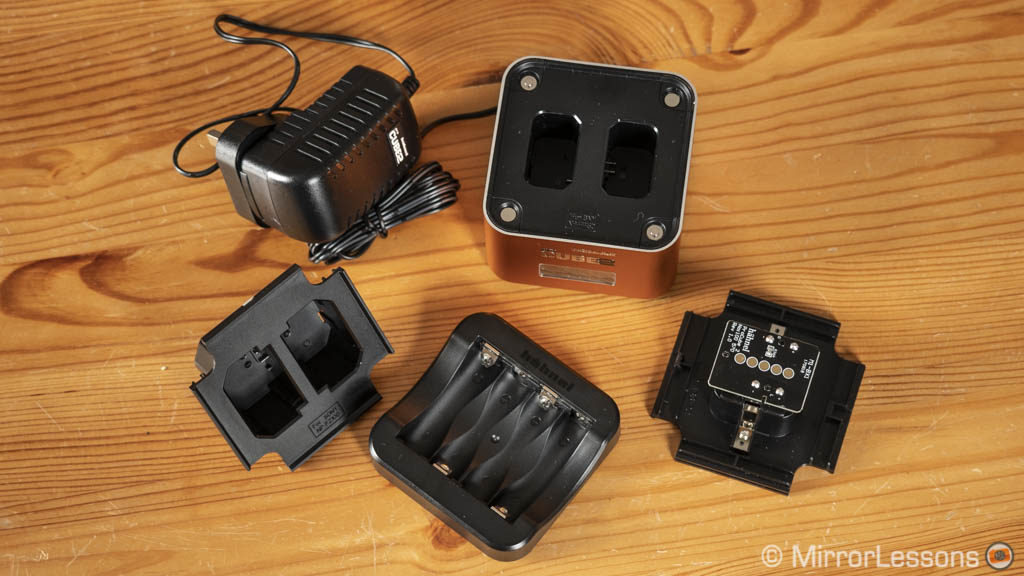
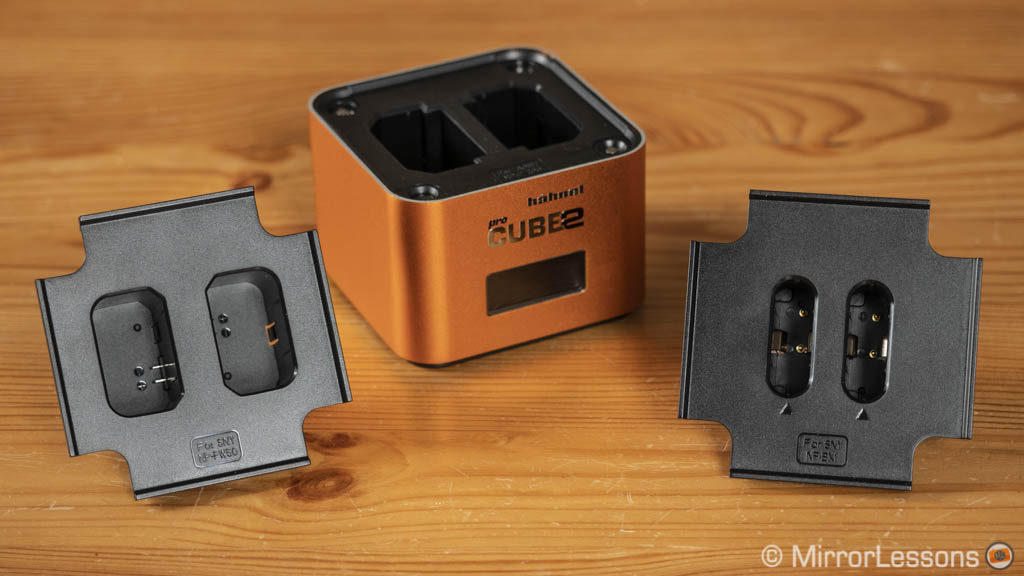
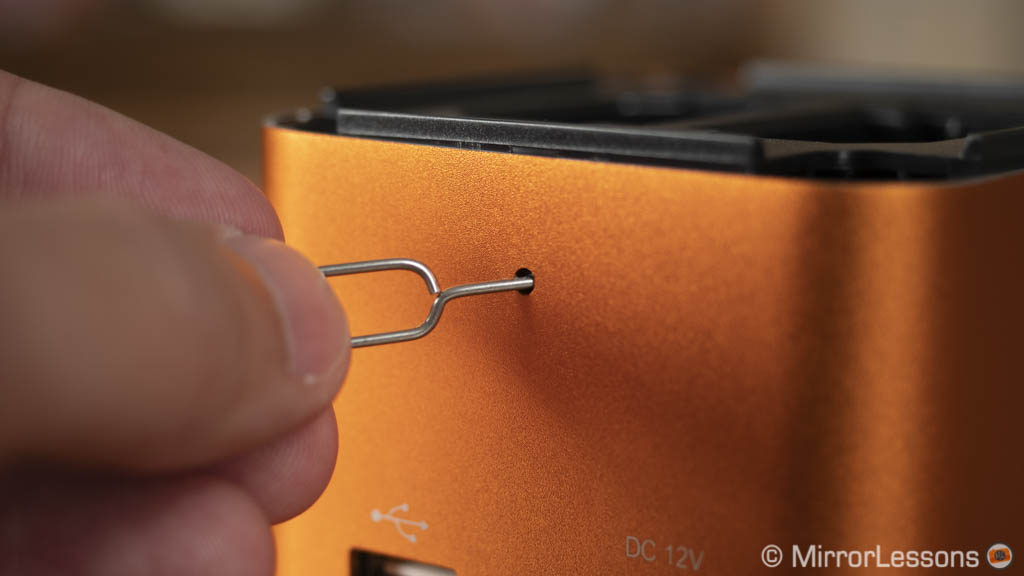
The battery plate can be unlocked with the provided eject tool which is very similar to the one you get with your smartphone (to replace the Sim card). It’s easy to do but if you carry the extra plates with you, make sure to protect the electric contacts. There is also a third plate to charge four AA batteries (useful for your external flash). It locks with magnets on top of the ProCube but it can’t be used at the same time as the other battery trays.
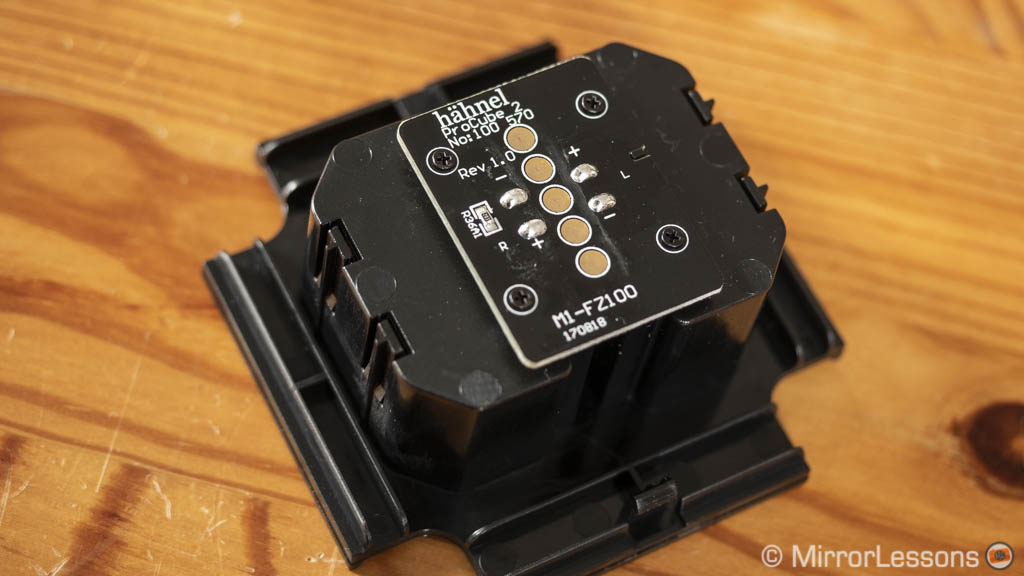
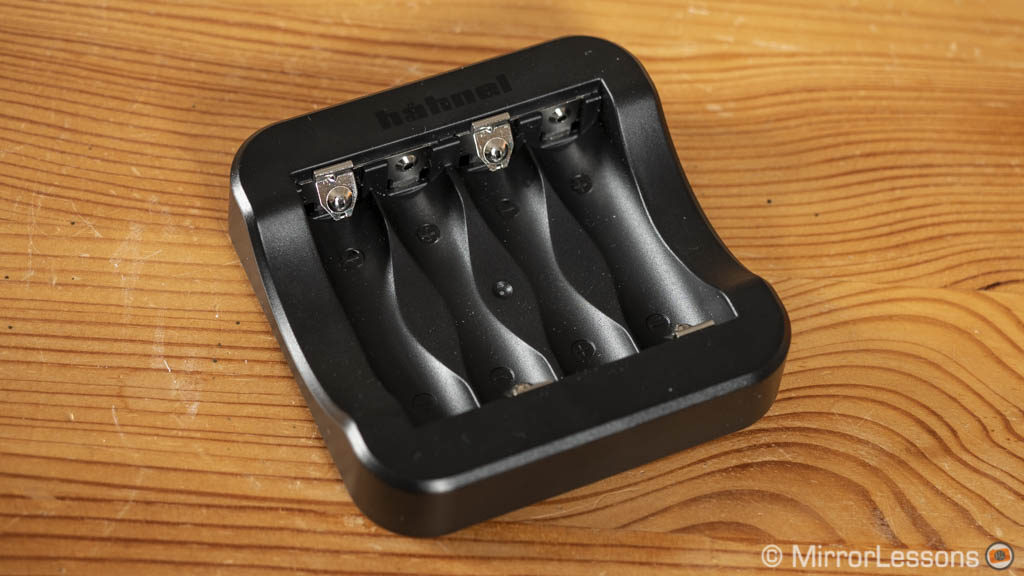
The design is really nice: it is quite compact and the build quality is first class. The digital display tells you how much juice the batteries have recovered. However the percentage indication isn’t precise at the beginning: it grows too rapidly in the first hour. It’s better to stick with the mAh data instead. Once the percentage indication hits 70%, it freezes until the batteries are really 70% charged. Then the percentage data resumes and shows the correct information.
There is a full size USB socket on the rear to charge your mobile device but unfortunately the port is disabled when two batteries are charging. It won’t reactivate when the batteries are 100% full which is a shame. However it works when there is one battery only on the tray.
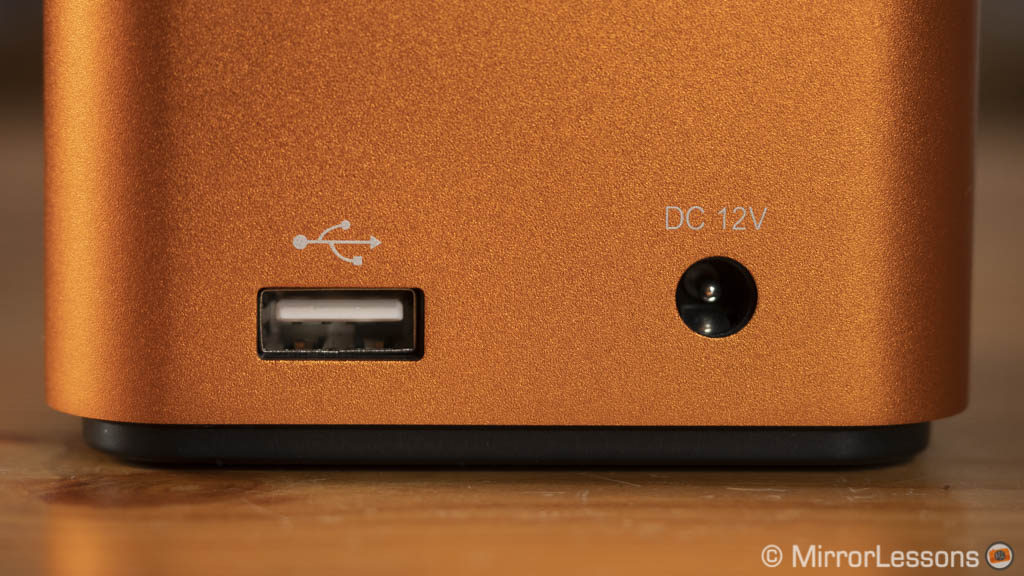
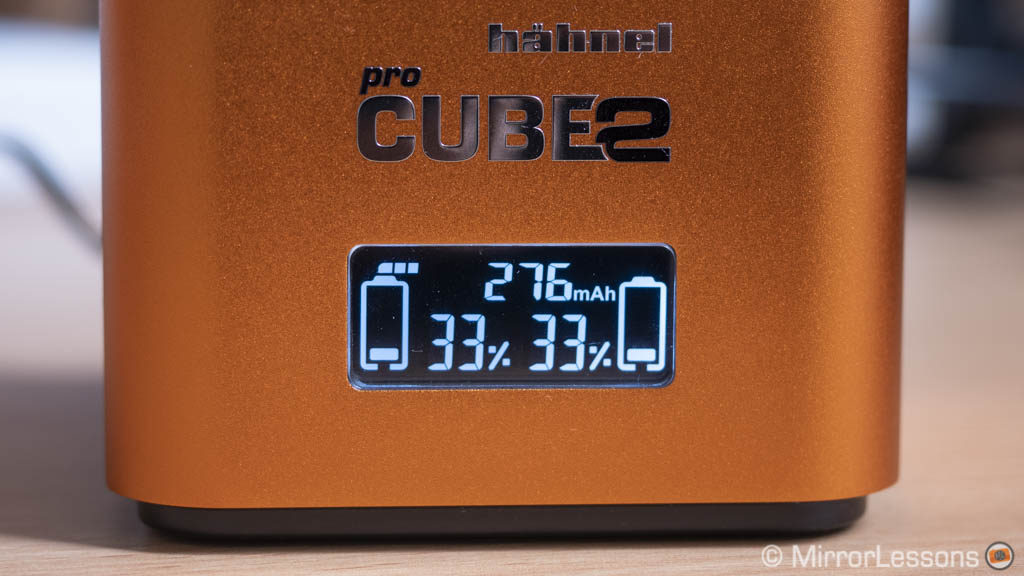
- Good: well priced, lovely design and premium build, digital display, charges two batteries at the same time, additional trays to charge four AA batteries, two NP-FW50 or two NP-BX1 batteries, USB port to charge mobile devices
- To consider: the percentage data displayed is inaccurate up to 70%, the AA batteries and USB device can’t charge at the same time as the camera batteries
- Compatible with: A9, A7 III, A7R III, A7 II, A7R II, A7S II, A7, A7R, A7S
Check Hahnel Pro Cube2 charger price on Amazon, Amazon UK, B&H Photo and eBay
Sony NPA-MQZ1K Multi Battery Adaptor Kit
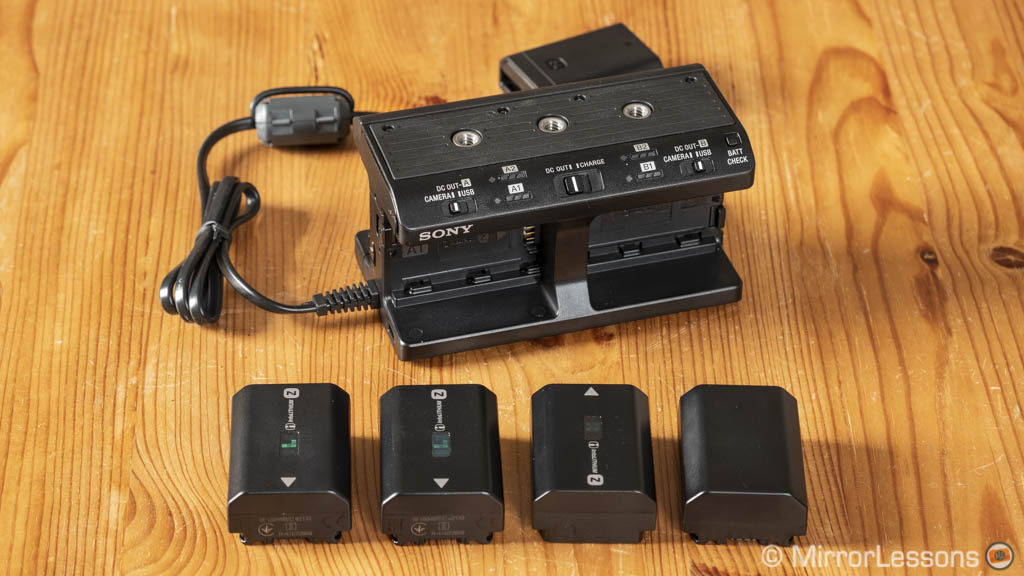
This multi battery kit is an interesting addition to your gear if you use your A7 camera for extensive 4K video sessions or long nights of time-lapse recording, where the need for extra power can’t be underestimated.
It can charge four batteries (NP-FZ100 type) up to 90% in approximately 480 minutes. It doesn’t charge simultaneously however: it starts with the least powered sample and charges them one after the other. Give it an extra 160 minutes after the four batteries reach 90% (the charge lamp goes off) and they are 100% charged. One single battery is said to charge in approximately 2 hours, but I found that 90 minutes were enough which makes it faster than the single BC-QZ1 charger. There is also a 5V Micro USB input but the charging time may be longer depending on how powerful your source is.
Once the four batteries are full, they can be used to power the camera and two USB devices at the same time. The camera is powered with the plugin plate that you insert into the battery compartment. Note that if you remove the external case, that plugin plate can be connected to Sony models that use the older NP-FW50 batteries like the a6500 or A7S II.
The camera displays the remaining power of the most charged battery rather than combining the percentage of the four batteries. For more precise information, it is better to look at the unit directly with the help of the Check button.
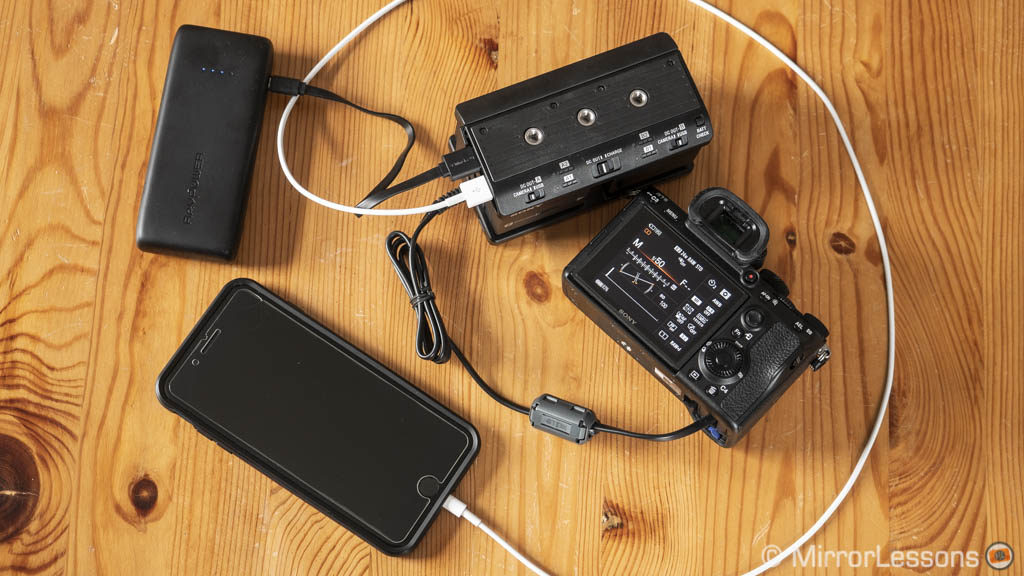
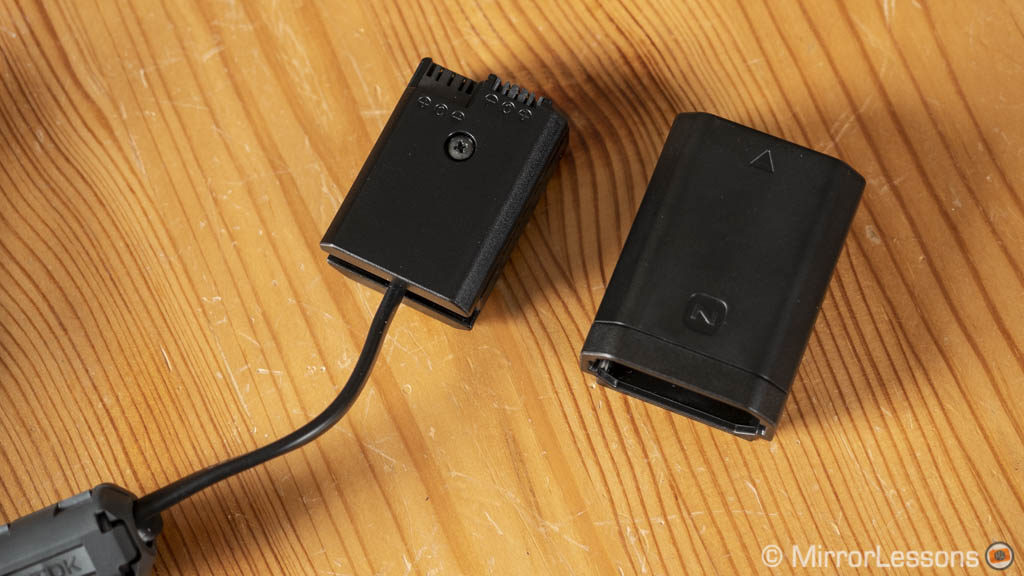
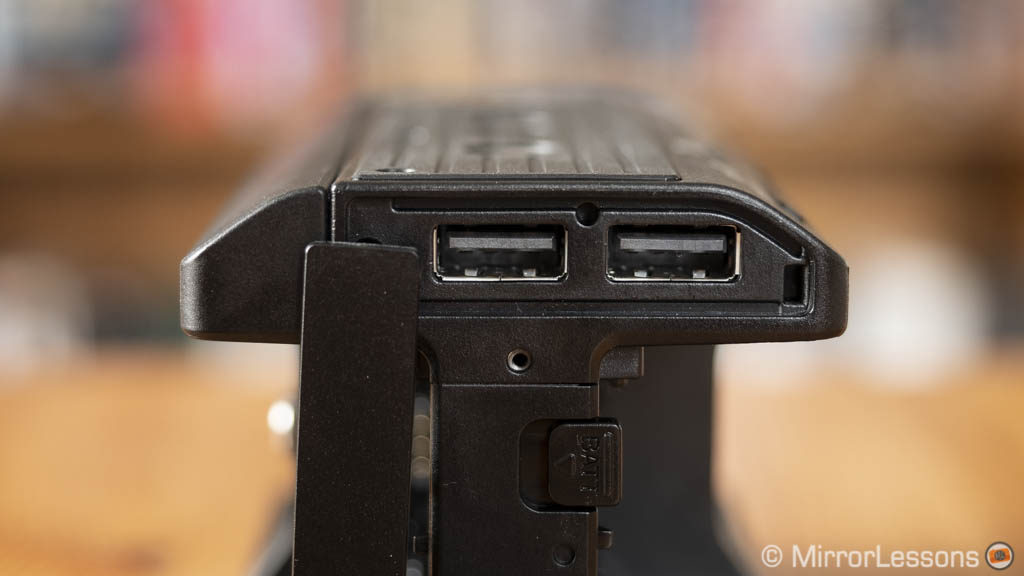
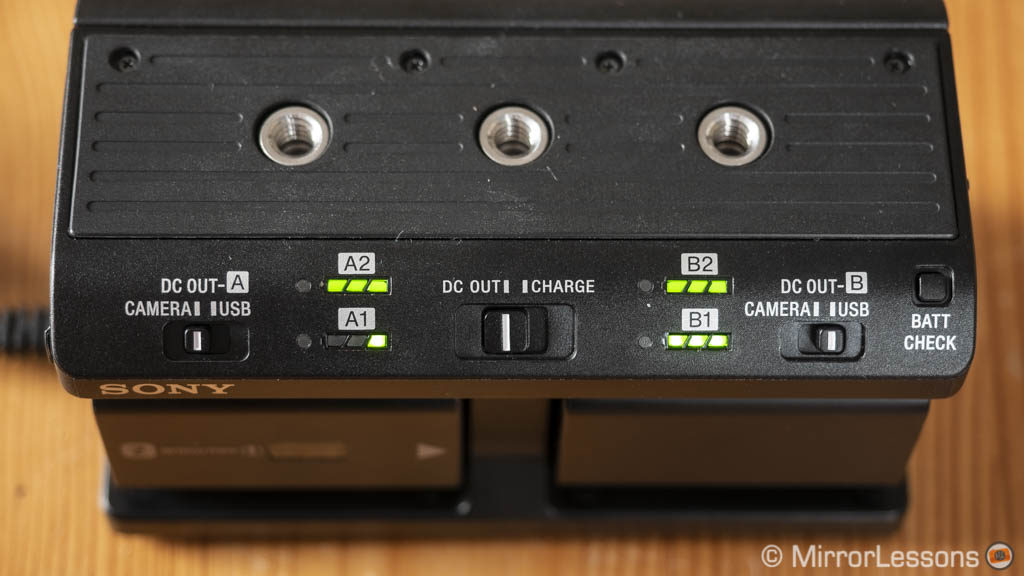
In addition to the camera, you can power USB devices like a smartphone or tablet thanks to the two full sized USB ports. The four batteries are divided into 2 groups (A and B) and you can decide which group powers the camera and which powers the USB output. Although it may prove tedious from a organisational point of view, the USB ports can also be used to power another A7 camera compatible with USB charging (but it needs to have a battery inside).
Among the other positive things, the NPA-MQZ1K comes with two NP-FZ100 batteries, a cable protector and a mounting plate. It features six mount screw holes (1/4-20″ type) that together with the mounting plate can be attached to a cage or similar support systems. There is even the possibly to make it thinner by using two batteries instead of four. (it doesn’t make a huge difference to be honest, but why not).
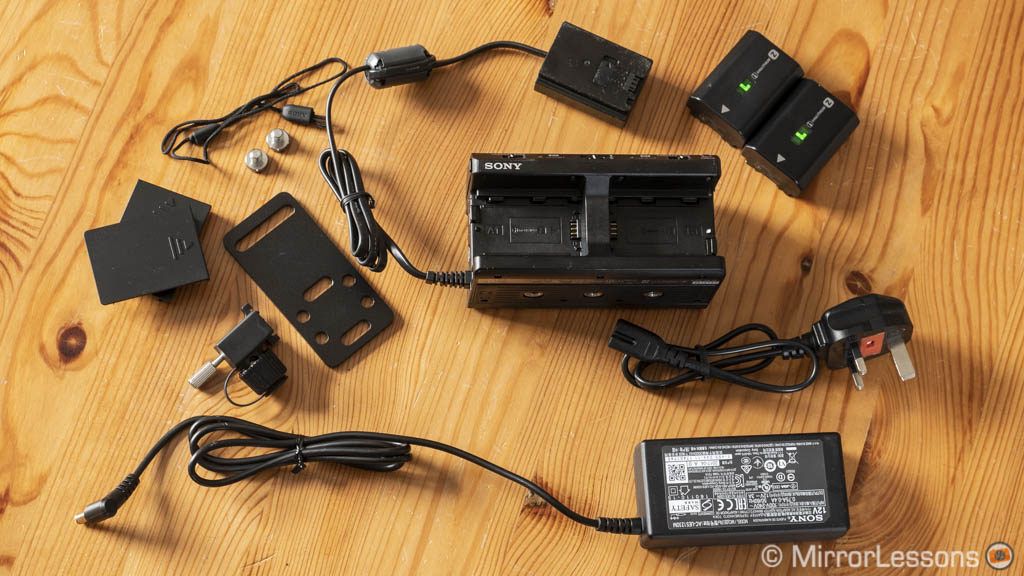
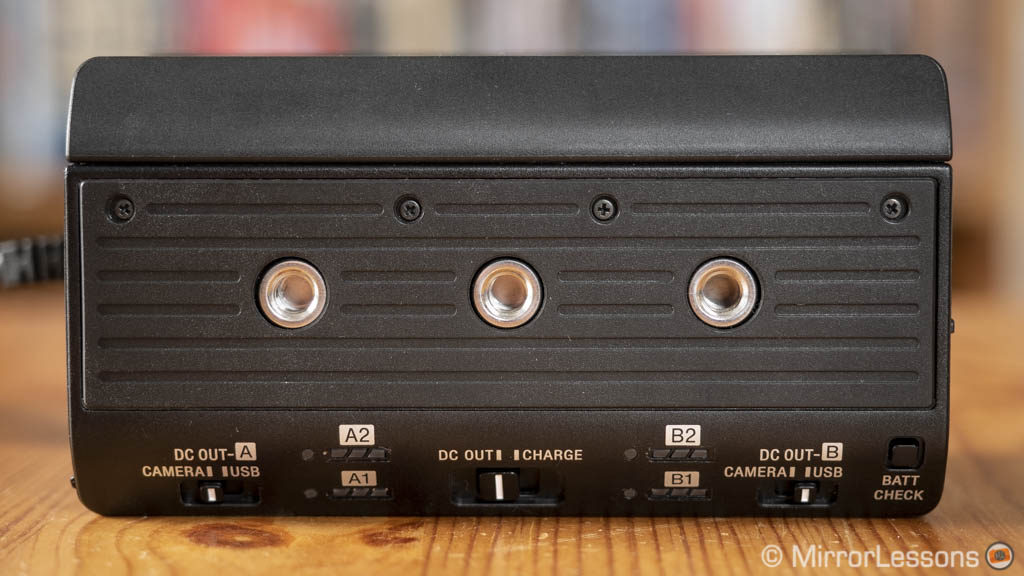
There are a couple of things that annoy me about the NPA-MQZ1K. First, it cannot be used to power the camera from a wall outlet, and consequentially it can’t power the camera while also charging the batteries. Second the dummy battery can’t be detached, which is sometimes annoying. Third and as I mentioned already, it doesn’t charge batteries simultaneously.
So is it worth it? Well, undeniably it can be useful because four NP-FZ100 batteries give you a lot of juice for long shooting sessions. Whether you need a multi-battery charger, or a unit capable of powering multiple devices at the same time, the NPA-MQZ1K is a good all-in one solution. It is expensive but at least it comes with two batteries. I think it is worth the investment if your camera consumes a lot of power every day and you work in a professional environment.
- Good: charge up to four batteries, can power the camera and two USB devices, solid build, various mounting options, comes with two NP-FZ100 batteries
- To consider: expensive, doesn’t charge batteries at the same time, can’t power the camera via a wall outlet
- Compatible with: A9, A7 III, A7R III, it can also power any Sony camera that uses the NP-FW50 battery but those older versions can’t be charged with the NPA-MQZ1K directly.
Check Sony NPA-MQZ1K price on B&H Photo
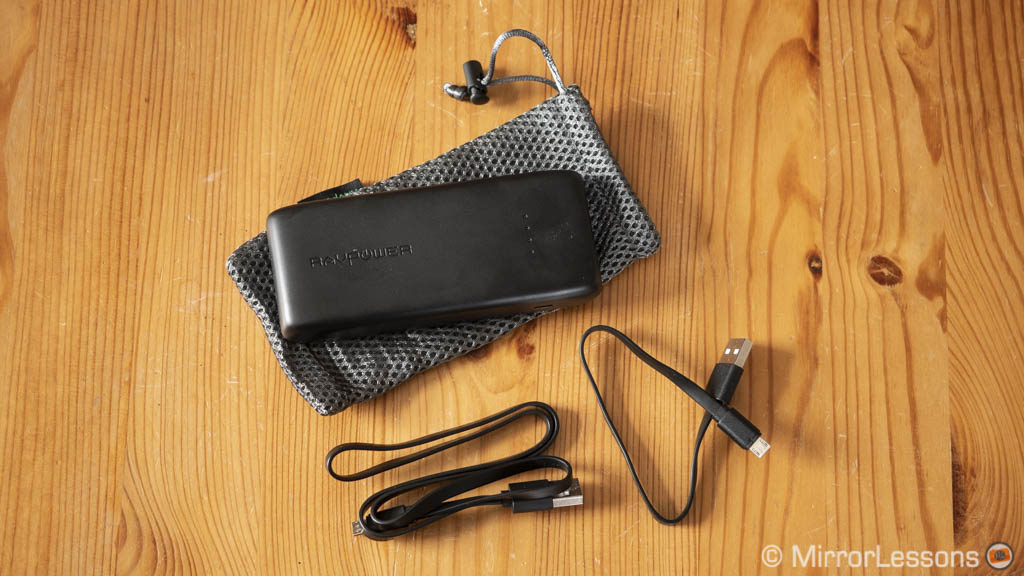
RAVPower 12000mAh Portable Charger
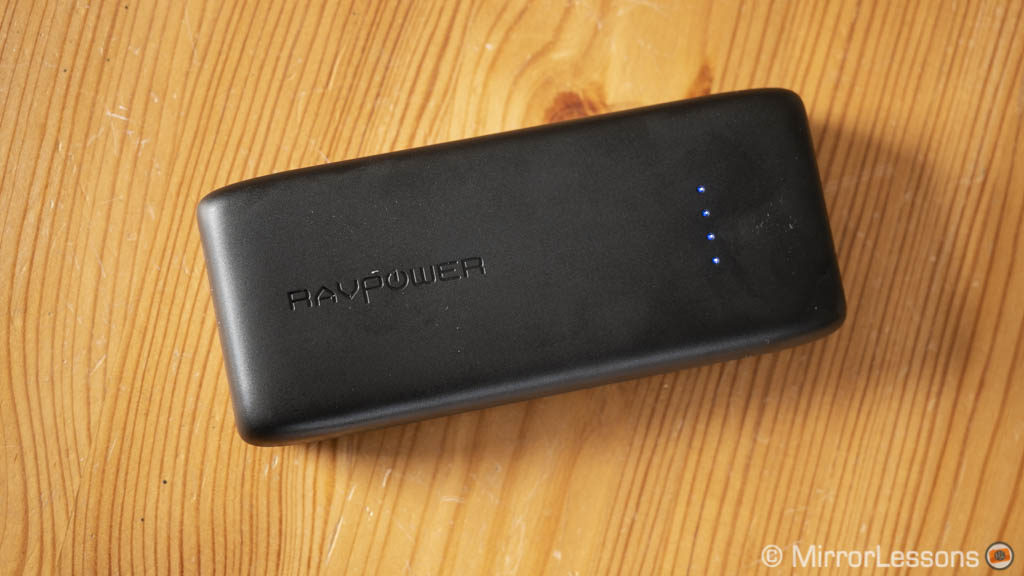
There is a simpler, less expensive solution to give your camera that extra boost of power: a USB portable charger. Usually designed for smartphone and tablets, they can be found at a reasonable price and can provide enough juice to sustain multiple charges, as long as you pick the right version.
This time I selected the RAVPower 12000 that – as the name code suggests – has a capability of 12000 mAh. The official NP-FZ100 is 2280mAh, so the unit can re-charge it approximately four/five times. Keep in mind that charging over USB takes more time than with a wall charger. In one hour it gave me a 30% boost (from 20 to 50%) but it took more than three hours to recharge one from 0% to full.
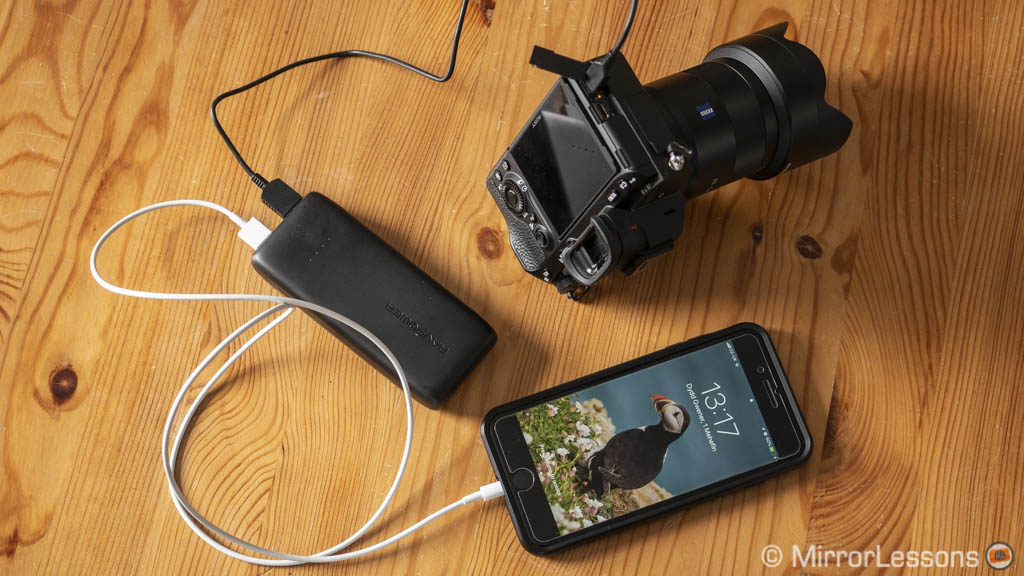
Perhaps more than re-charging, the unit becomes interesting to power the camera while in use. You can take advantage of the Type-C port and keep the Micro USB 2.0 connection free for other accessories such as an intervalometer for example. With the mobile charger full, it can power the camera for several hours.
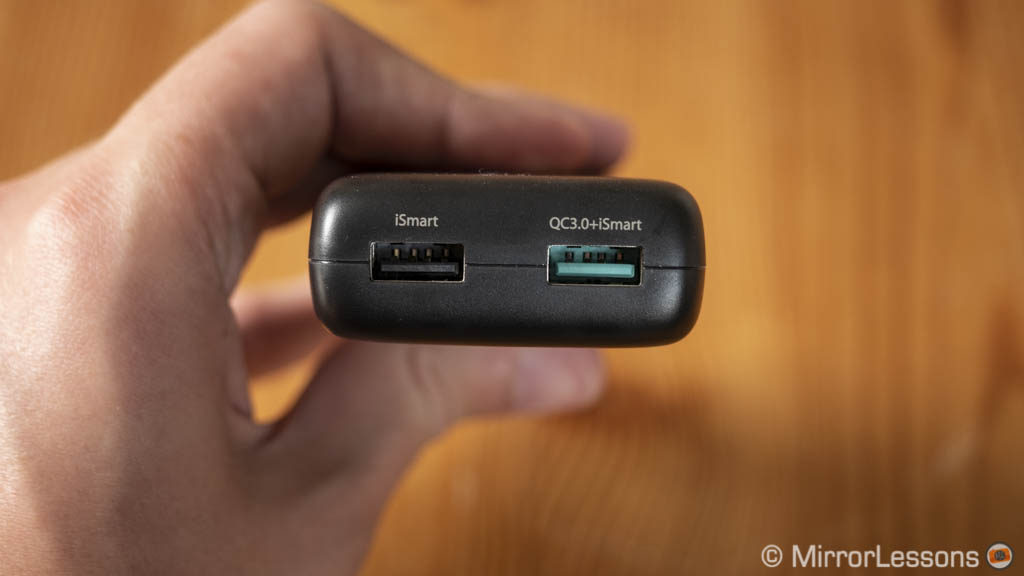
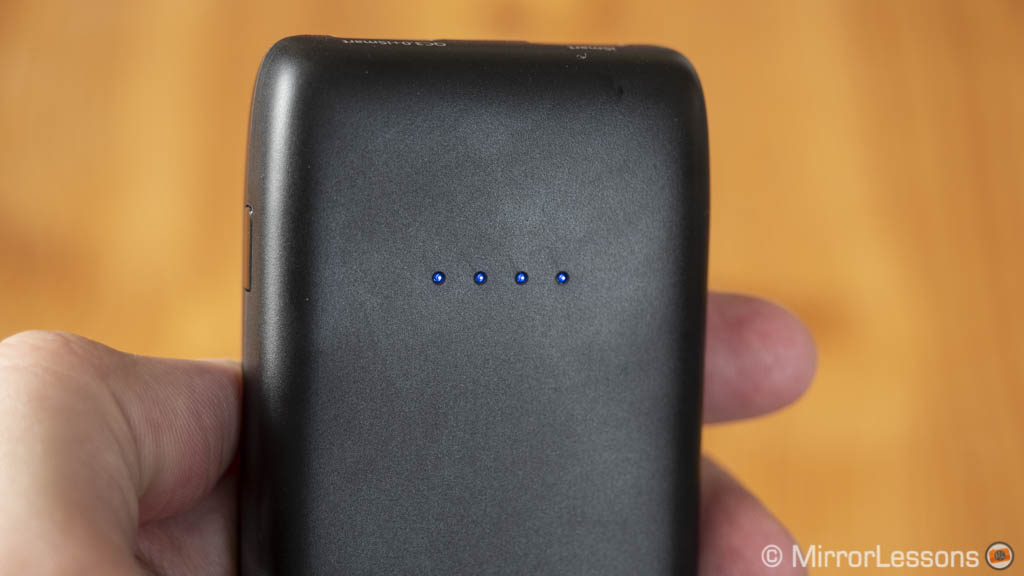
You can use it to charge a second device such as a smartphone since the RAVPower 120000 features two full sized USB 3.0 ports, one of which is Qualcomm 3.0 rapid charging compatible if you have a device with the technology. Two USB outputs also means you can power an A7 III and A7R III at the same time! Four blue LED lights tell you how much charge is left and it comes with two USB cables with different lengths.
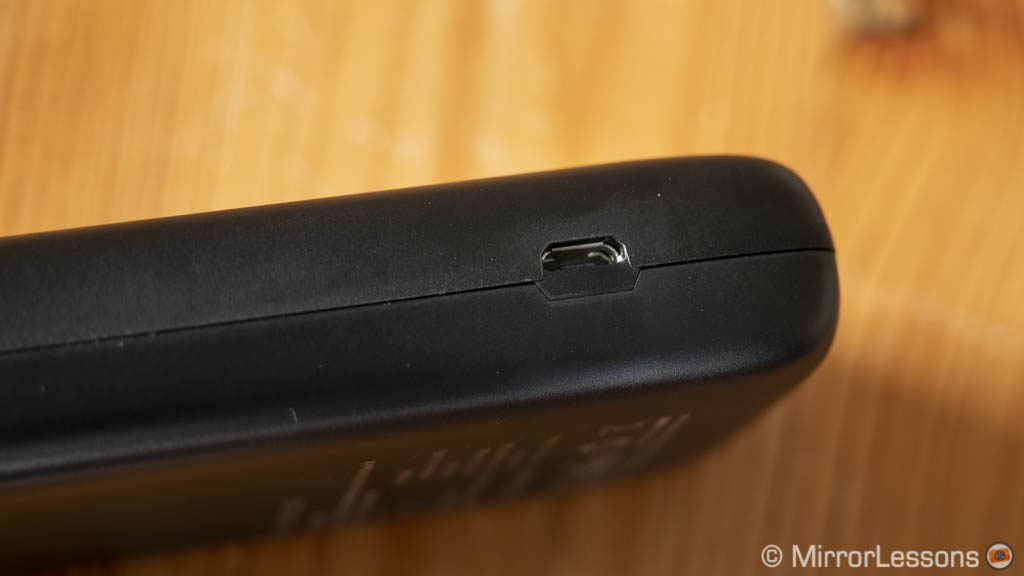
- Good: affordable, can re-charge the battery or power the camera via USB, can power two devices at the same time
- To consider: battery charging via USB takes a long time
- Compatible with: A9, A7 III, A7R III, A7R II, A7S II (for the A7 II, charging will work but the camera won’t be powered while turned on)
Check RAVPower 12000 price on Amazon, B&H Photo and eBay
More power: spare batteries
Sony NP-FZ100
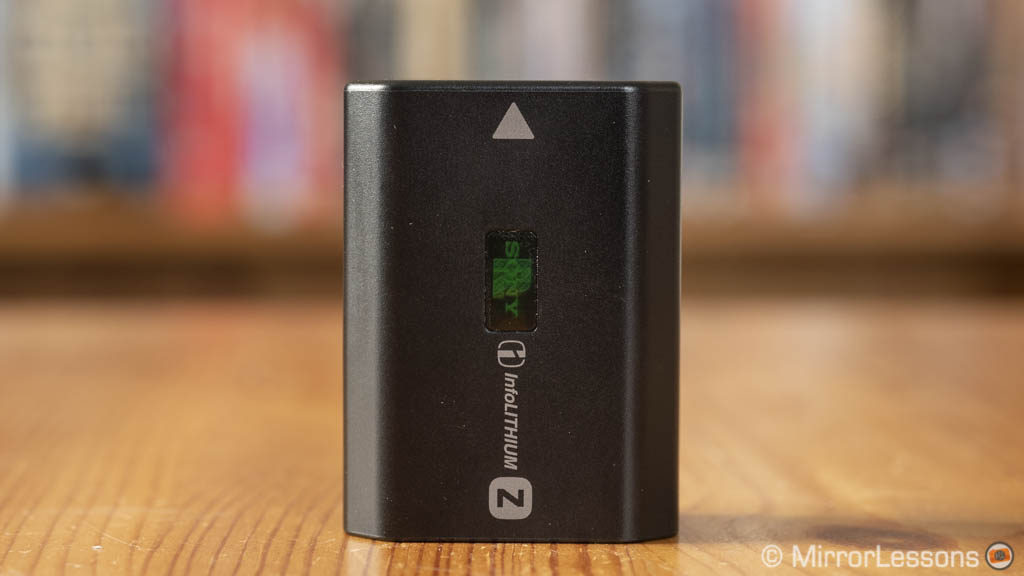
The original Sony battery definitely deserves a spot on the list as it is the best yet designed for mirrorless cameras. With 2280mAh, it has more than double the performance of the previous NP-FW50 and despite being larger, Sony managed to keep the dimensions of the new camera the same as its predecessors.
Being the official battery, it is unsurprisingly expensive, but it comes with the best power and endurance so it’s worth the money if you’re looking for zero compromises.
- Good: long battery life
- To consider: more expensive than third party options
- Compatible with: A9, A7 III, A7R III
Check Sony NP-FZ100 price on Amazon, Amazon UK, B&H Photo and eBay
Patona NP-FZ100 (Europe)
Important! Read first!
If you update the firmware to version 2.0 or higher on the A7 III or A7R III, both cameras will give you a warning that the operation and safety of this battery cannot be guaranteed. I updated our own copy of the A7 III and subsequently tested the two Patona batteries below and the message came up after a few minutes of use. After pressing OK, the percentage indication next to the battery icon disappears but the camera still functions properly. Other users have reported similar warnings with other third party batteries (you can read more about it on Sonyalpharumors).
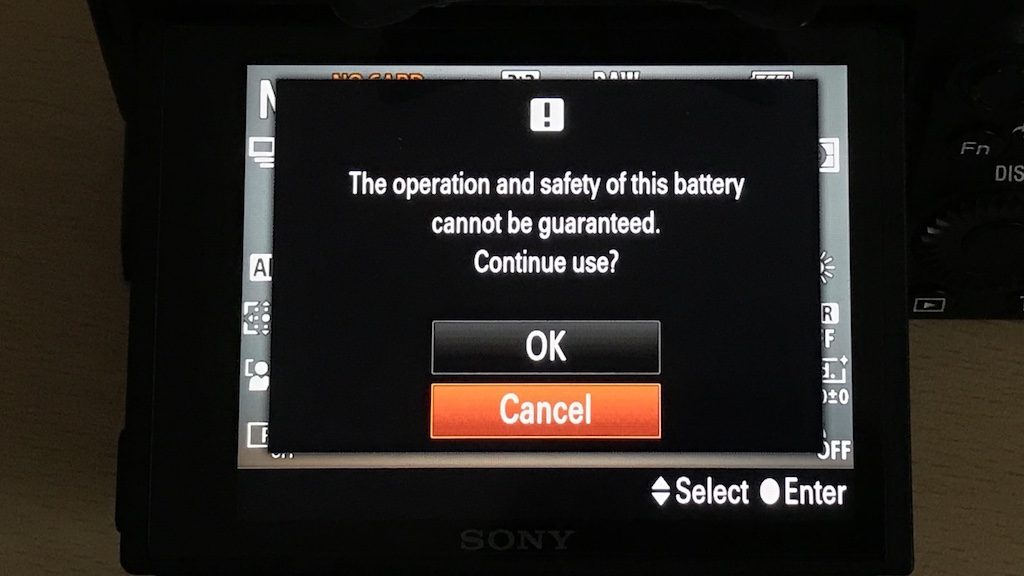
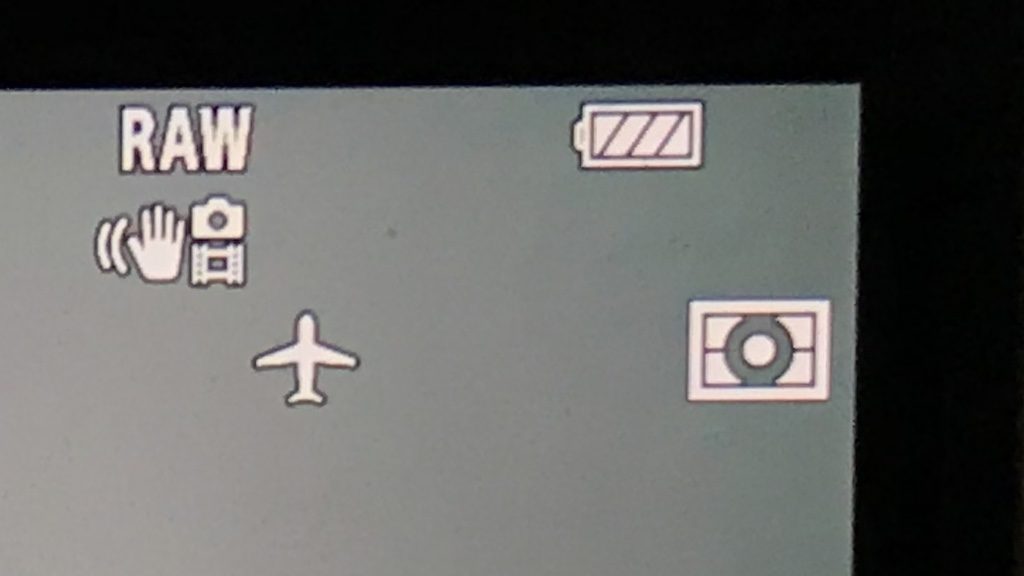
We’re not sure if this is a bug caused by firmware 2.0 or a move from Sony to encourage its customers to use original Sony batteries, perhaps following their warning on counterfeit NP-FZ100 battery packs (you can read more about it here). We hope that a firmware fix will come out because we’ve been using these Patona batteries on our A7 III and A7R III for months without any issues. I won’t get rid of the following description about their performance for now but until this problem is resolved, I suggest that you stick with the official Sony batteries.
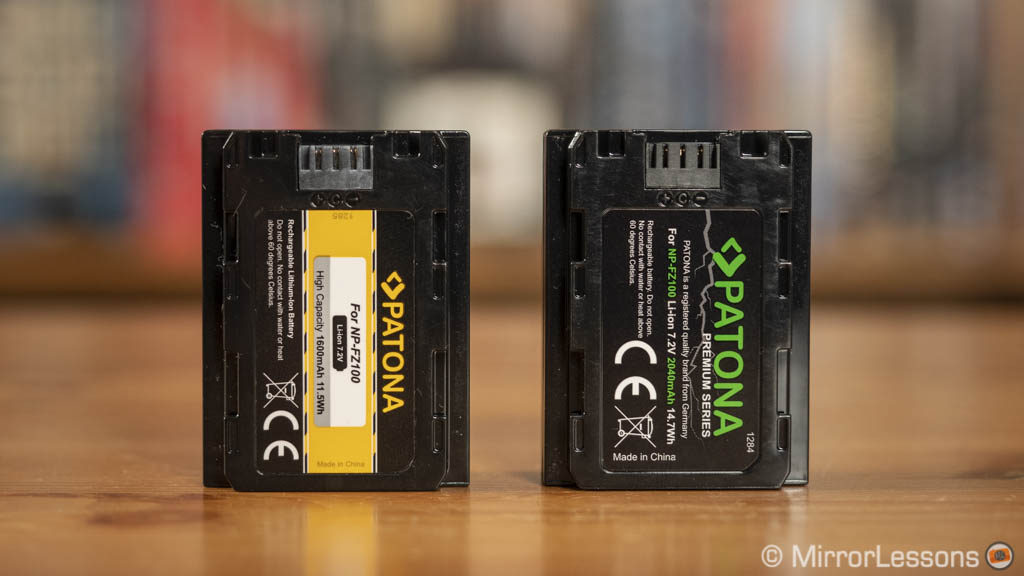
Patona offers two versions of the NP-FZ100 battery: the normal one (yellow) and the premium one (green). The former has 1600mAh which means it doesn’t have the same capacity as the original. To give you a quick example, it drops from 100% to 30% after recording two 30min 4K clips, whereas the official battery has still 65% left. Why is it interesting then? Well, because it’s cheap so if you’re just looking for extra juice as a precaution, this once certainly fits the bill.
If you want more power, the premium version comes with 2040mAh and comes closer to the performance of the original Sony battery. Given that the difference in price is not huge (1/4 extra), I would say go for the premium: it still remains half the price of the original NP-FZ100.
- Good: two versions to choose from, costs less than the official battery, premium type performance is close to the original
- To consider: difficult to find outside Europe, the 1600mAh version has less performance
- Compatible with: A9, A7 III, A7R III (compatibility issues with firmware 2.0 on A7 III and A7R III, see text above)
Extra protection: screen shields
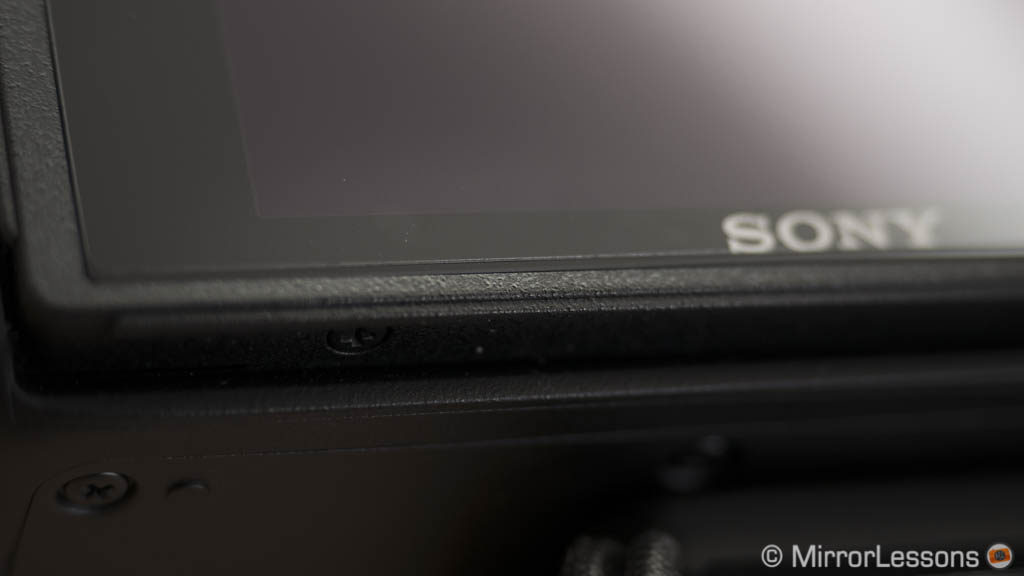
Protecting the rear LCD screen against scratches and small impacts is never a bad idea considering that it requires a minimal investment. For Sony cameras, it is helps to stop the coating from wearing off over time, which is what happened on my old A7R II. It is possible that the new generation of cameras has received a stronger treatment on their rear screens but I prefer to play it safe.
Useful notes:
- make sure to wipe the rear screen with a cloth and double check that there aren’t any tiny particles of dust left on it
- when applying the screen protector, don’t rush: make sure you align it correctly, and spread it carefully from the centre towards the edges or from one side to the other. If some bubbles appear, drag them toward the outside immediately.
Expert Shield screen protector
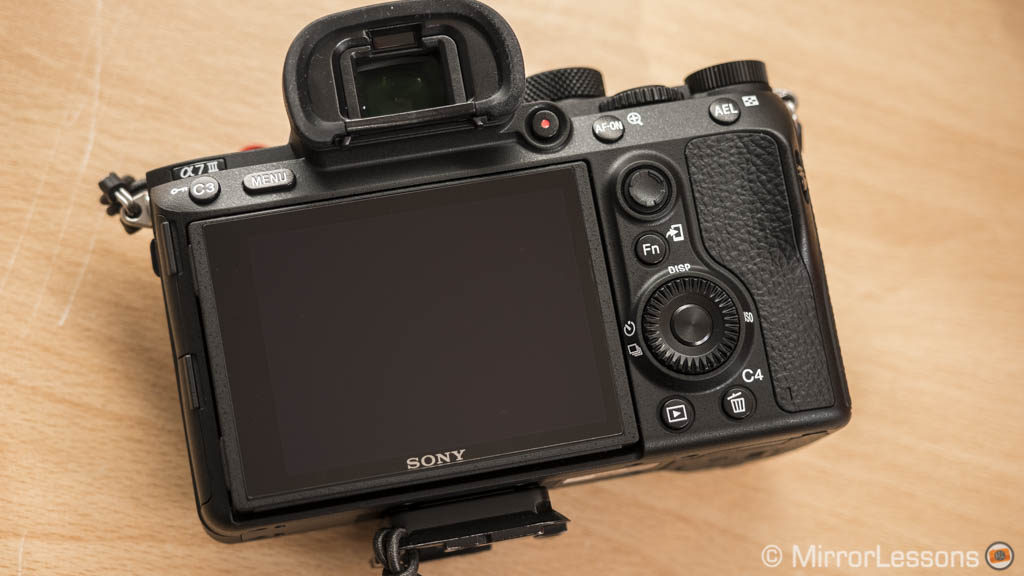
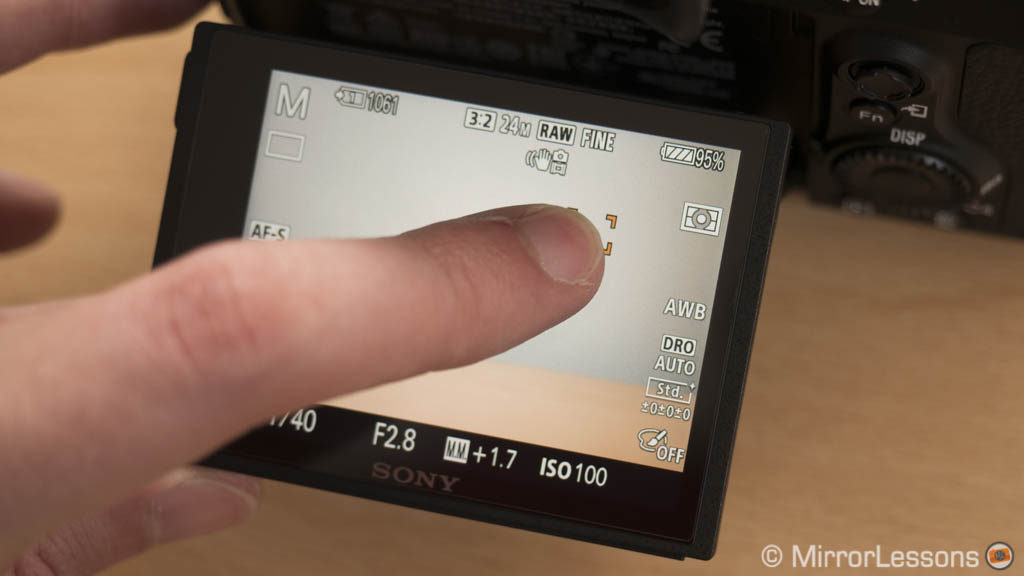
This is the one I currently have on my A7 III and A7R III. I’ve used them on other cameras as well and never found anything to complain about. Touch gestures remain perfectly functional and precise. I’ve never had any trouble installing them and they come with a lint cleaning cloth.
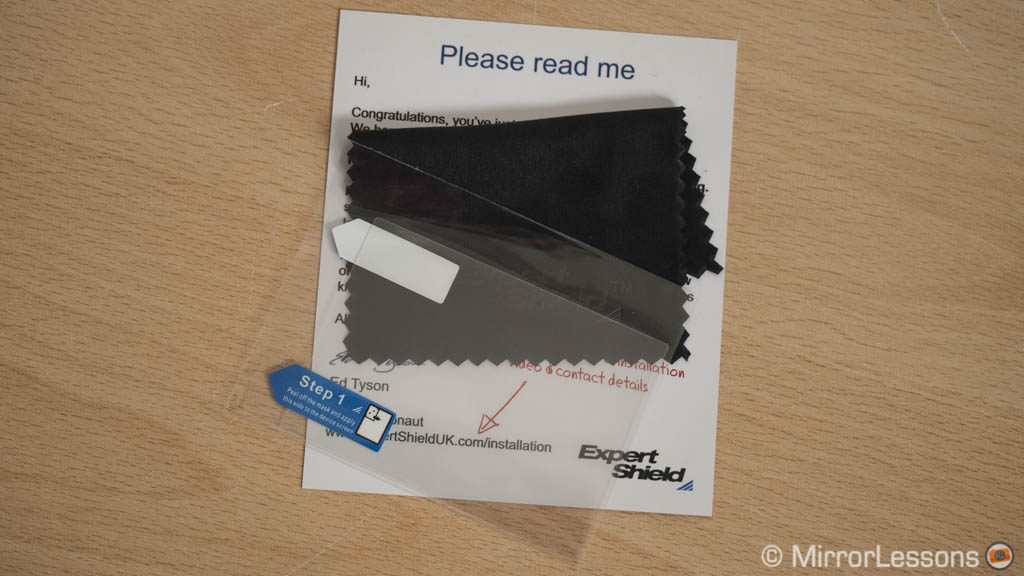
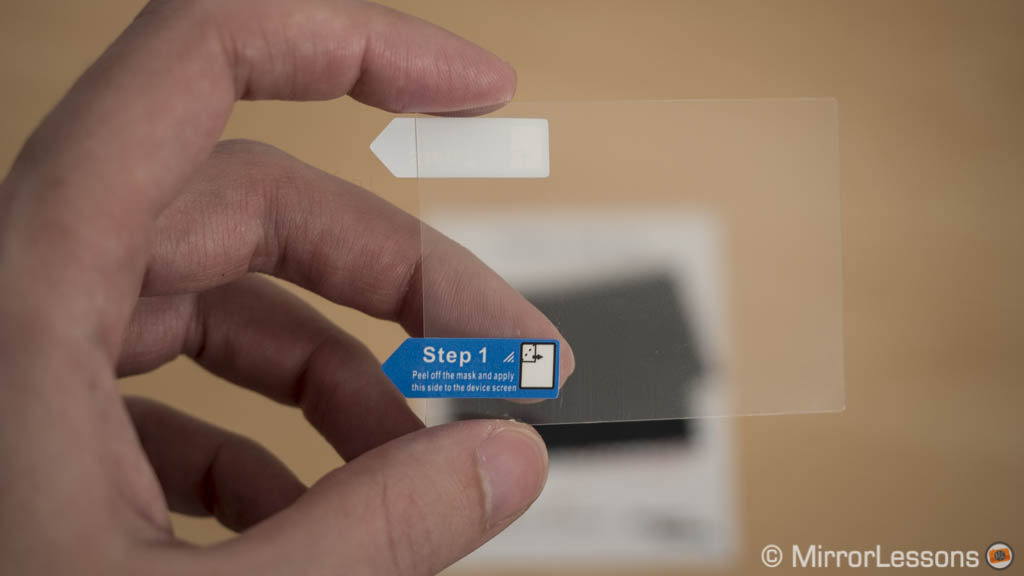
There are three types to choose from: Anti-Glare which comes with a special matte finish to reduce reflections, Glass which is 0.28mm thicker and Crystal Clear which is thinner (0.15mm). Glass is stronger but can break more easily on impact. For my A7 cameras I currently use the Crystal Clear version.
- Good: inexpensive, three versions to choose from, easy to apply
- To consider: there are lots of other options of course, I recommend this one simply because I’ve been using them on various cameras for several years now
- Compatible with: A9, A7 III, A7R III, A7 II, A7R II, A7S II (for A7, A7R and A7s, make sure to get the right version as the corners of the screen are more rounded)
Check Expert Shield Screen Protector price on Amazon, Amazon UK, B&H Photo and eBay
Carrying solutions: neck straps
There is nothing wrong with the original straps supplied with the camera if you’re happy with something basic. But if you’re after more style, comfort or ease of use, you need to look elsewhere. Here are two of our favourites.
Peak Design Slide / Slide Lite
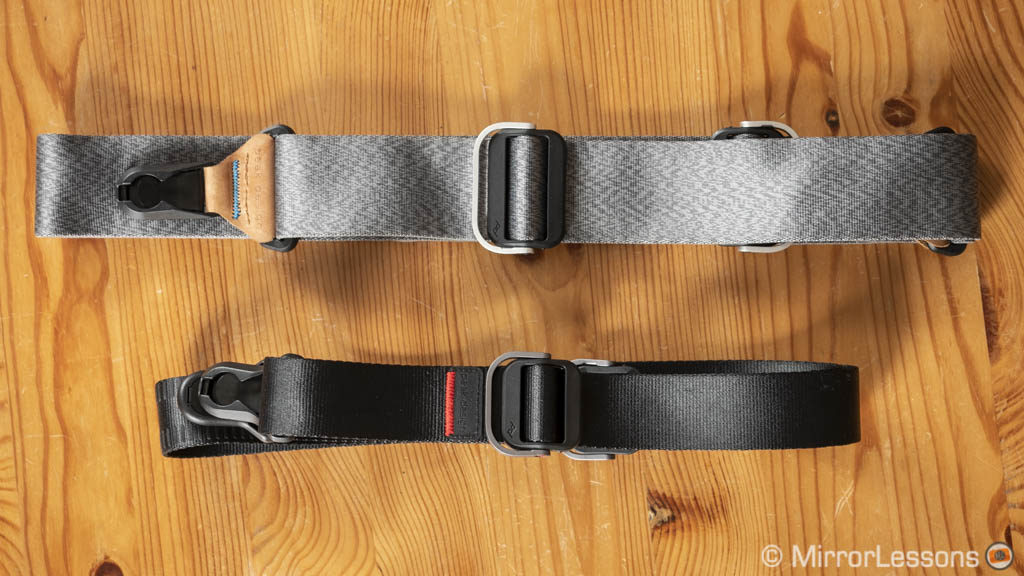
Over the years, we’ve grown fond of Peak Design straps for various reasons: they are robust, comfortable, easy to shorten and lengthen, and super quick to attach and remove.
They are made of seatbelt material and thus are both robust and flexible. One side is partially padded with silicon so all you need to do is reverse it to make it more grippy. The two quick adjusters are easy to use even when wearing the strap with the camera attached. You can put it around your neck or – as I often do – over the shoulder.
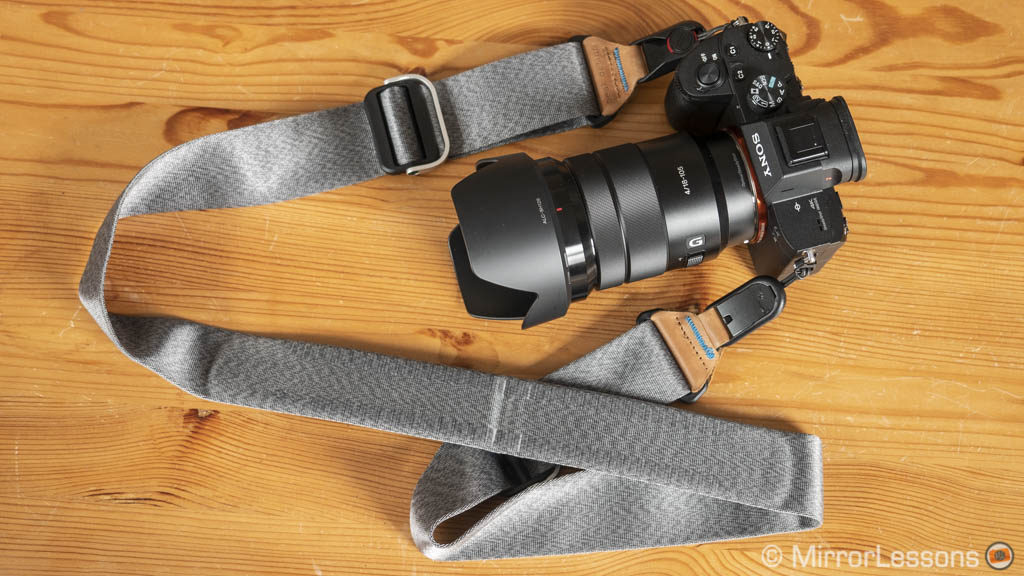
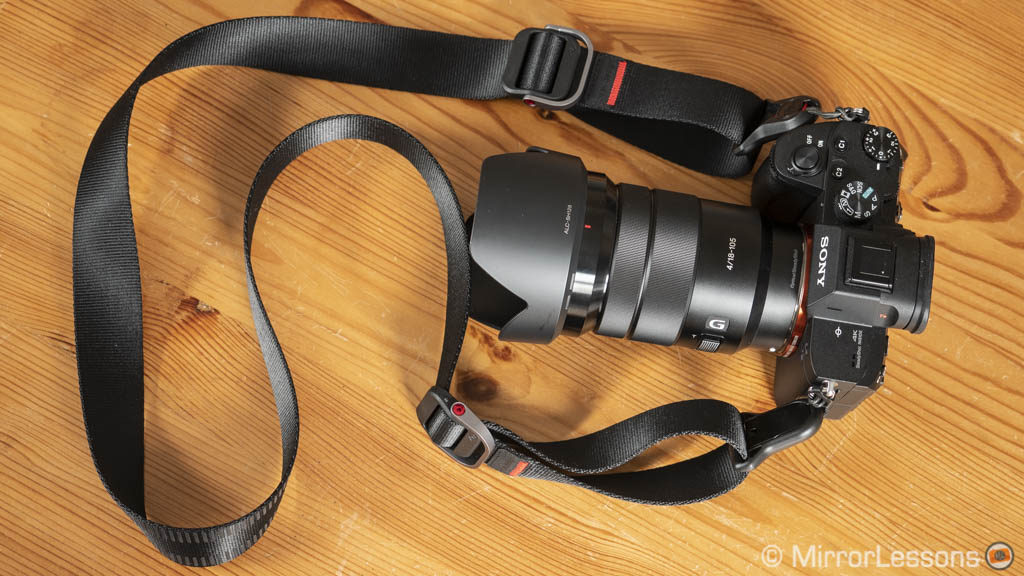
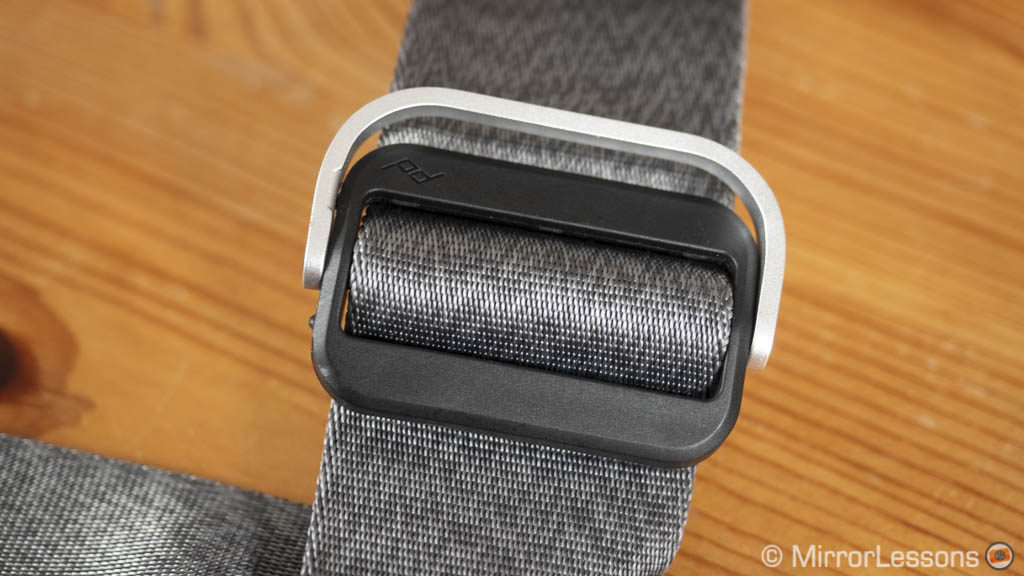
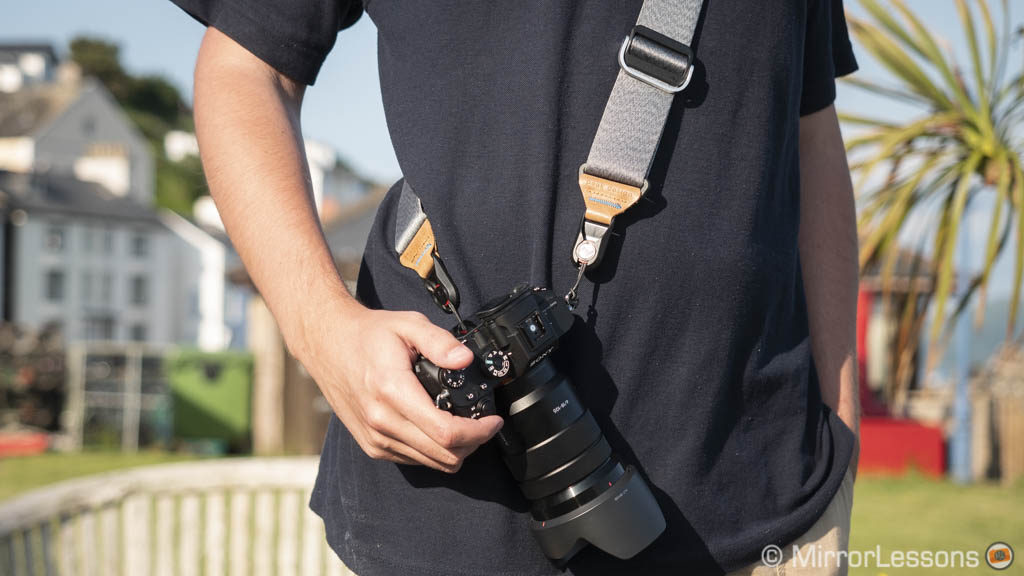
The regular Slide is the largest and I recommend it when working with big and heavy lenses as it provides more comfort. It also has more refinements like the hypalon/leather accents at each end. The Lite version is better with small to medium lenses. They both come in black or ash.
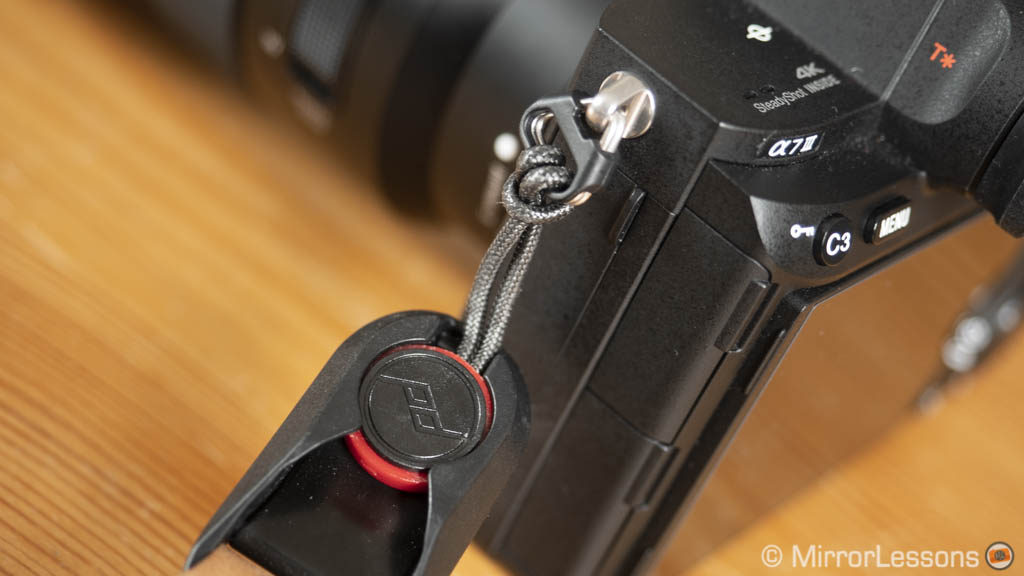
My favourite part of the strap is the anchor link system, which makes it very quick to attach or remove. You can attach them to the camera strap eyelets, the provided plate or even some third party tripod plates and L-brackets. All this explains why Peak Design has been our favourite strap brand for a couple of years now.
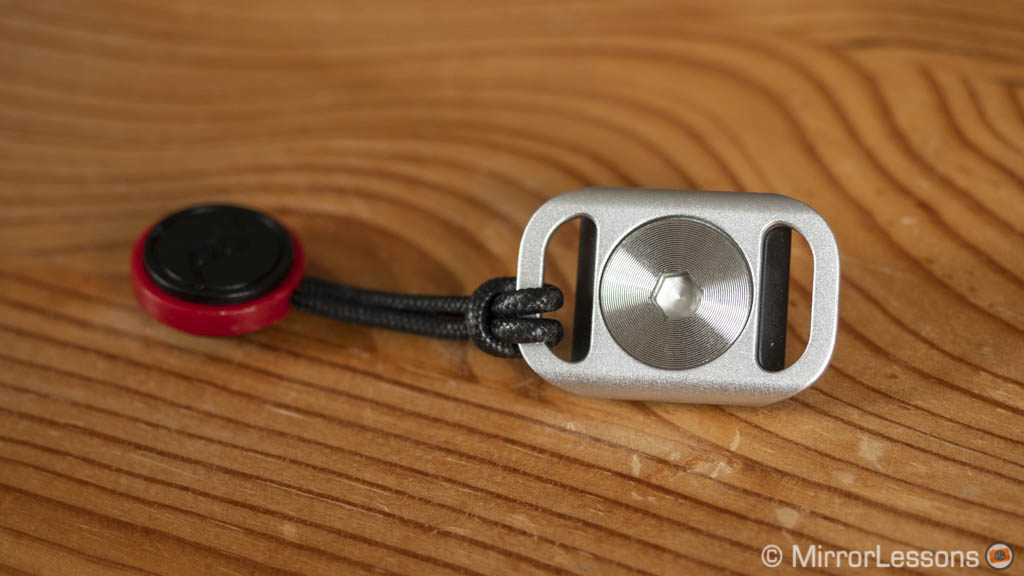
- Good: versatile design, resistant, flexible and comfortable strap, easy to adjust length, refined materials, anchor mechanism is easy and quick to use
- To consider: the Lite version is more suitable for the camera when using small to medium lenses, make sure to buy it with the new anchor link version (V4 – see note above)
- Compatible with: all
Check Peak Design Slide on the official Peak Design website
Additional read:
Black Rapid Sport
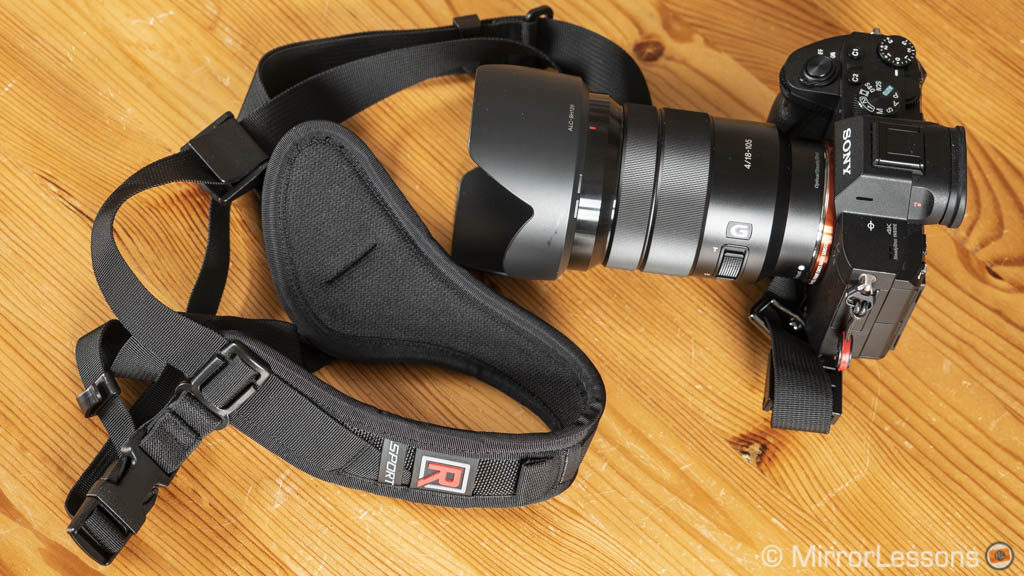
Unless I’m working with a small camera and compact lenses, I prefer to carry my equipment with the strap across the body rather than around my neck. If that is your favourite method too, you may want to look at the products Black Rapid has to offer. The Sport strap is a good example.
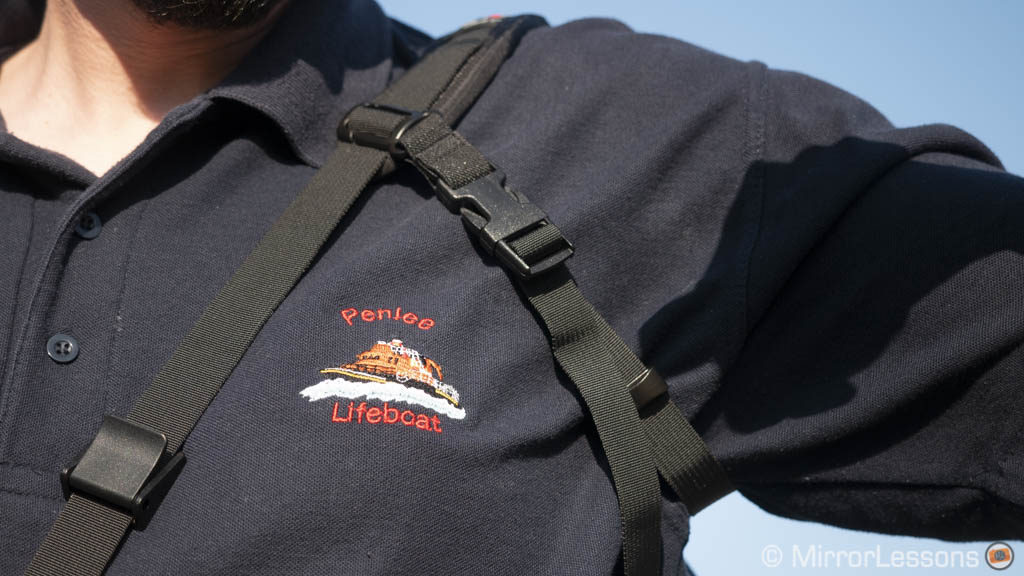
It is made of ballistic fabric which provides very good strength. The shoulder pad is comfortable thanks to its thickness and soft material on the inner side. Once you’re wearing it, you can secure a secondary smaller strap under your arm to prevent the shoulder strap from moving. The underarm strap can be adjusted in length. It is very effective but can take a little while to get used to.
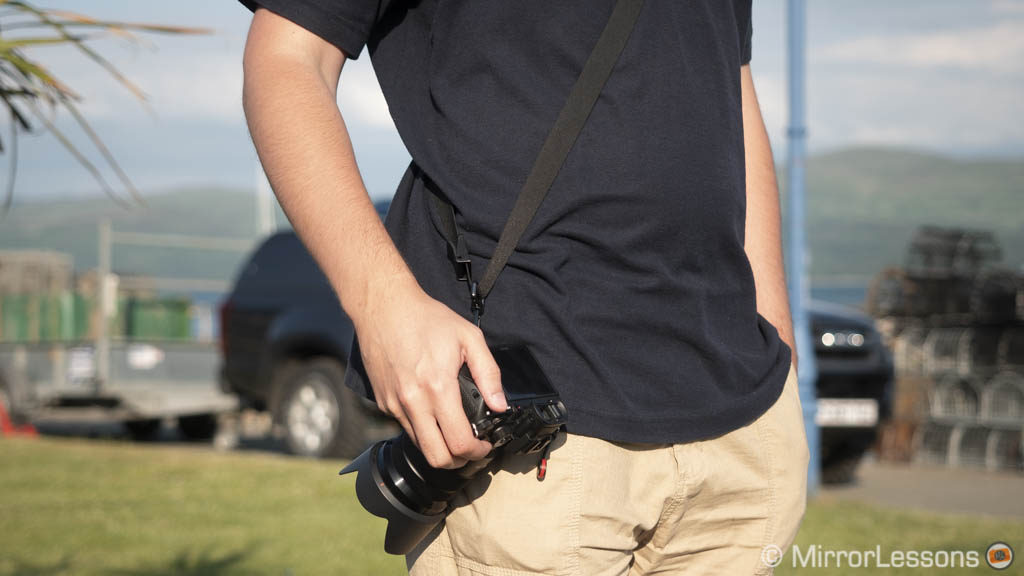
You attach the camera by screwing the fastener to the tripod socket at the bottom of your camera, and then connecting the carabiner. The latter can be locked and a lock cover is provided for an extra layer of security. The carabiner makes it easy to attach and detach the strap at any time.
All that’s left to do is set a shooting and resting position to have the optimal length and stop the camera traveling up and down the strap more than necessary. The carabiner and hook mechanism naturally slide along the strap when you raise the camera to eye level, so the strap never changes position on your body. This makes the whole operation really smooth and comfortable.
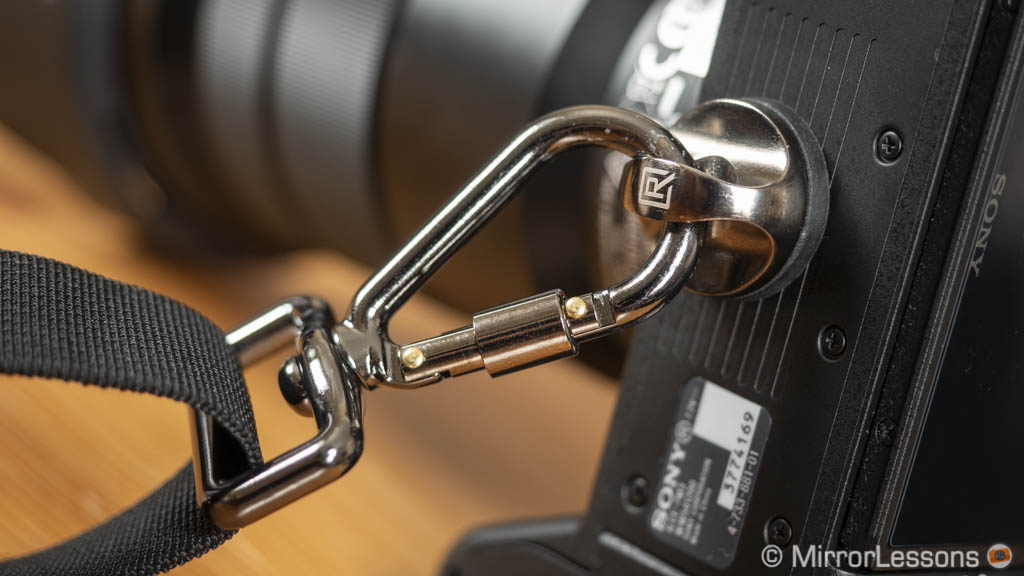
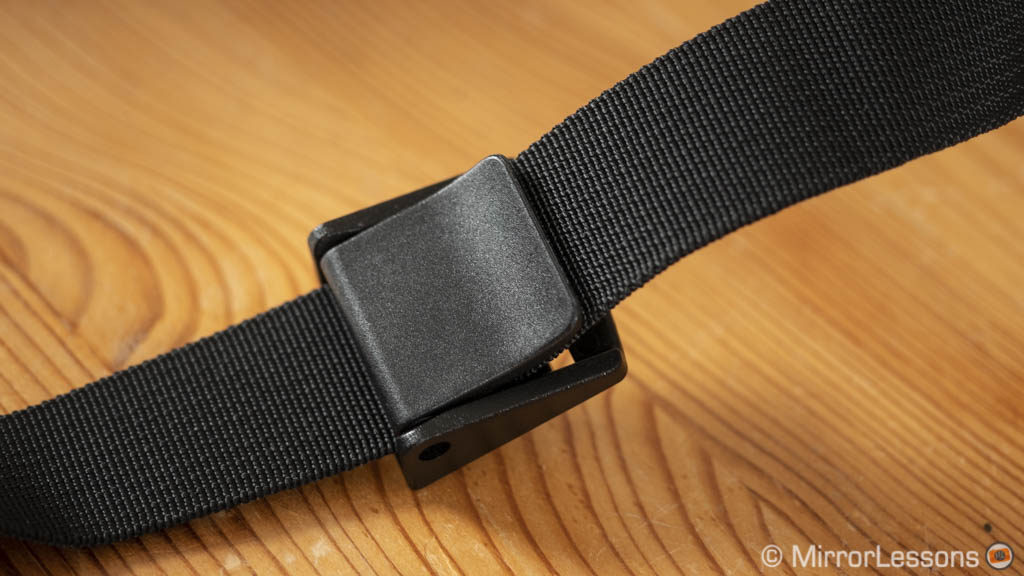
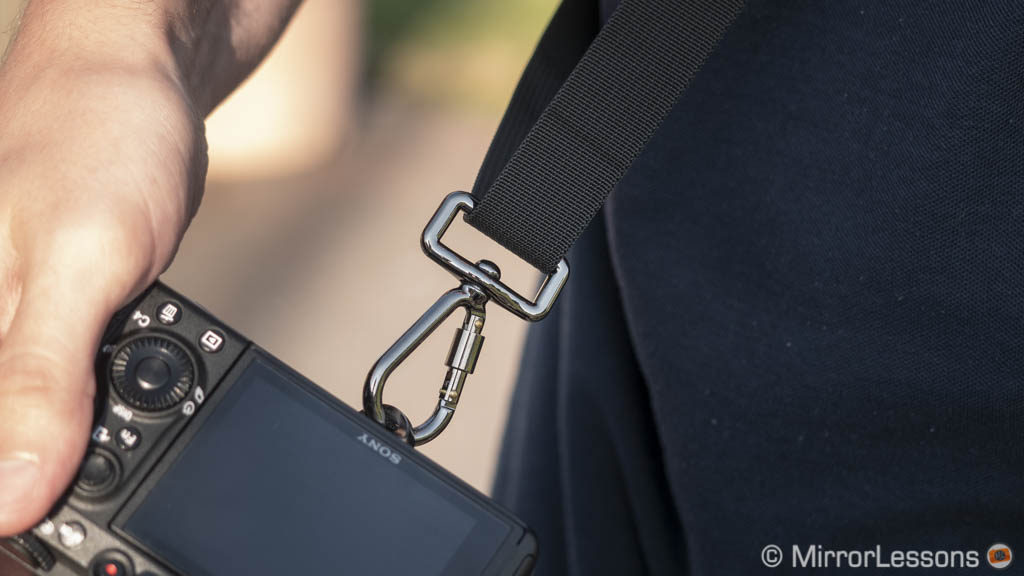
Note: the version you see in these pictures is the old Sport Slim, which has now been replaced with the Sport Breath. The latter features upgraded materials for the shoulder pad and a new hook mechanism to remove or attach the underarm stabiliser.
- Good: comfortable, well built, makes it really smooth to raise the camera up and down
- To consider: a right handed version is available, the underarm strap may require some getting used to, but you can always remove it if you don’t like it
- Compatible with: all
Check Black Rapid Sport on Amazon, Amazon UK, B&H Photo and eBay
Carrying solutions: wrist straps
If you like to use your A7 III with small prime lenses (native or adapted) to keep things as compact as possible, you may like the idea of a more discreet wrist strap.
Peak Design Cuff II
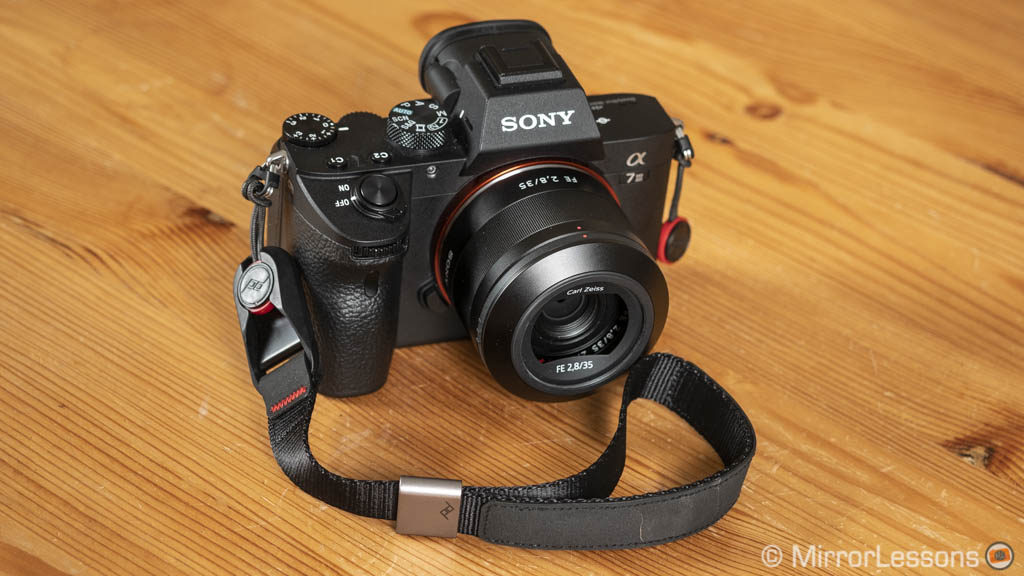
The Cuff version 2 comes in two different colours (Black or Ash) and is made of seatbelt material with a hypalon finish (leather on the Ash version). It is soft and comfortable yet very resistant. The adjuster is made of aluminium.
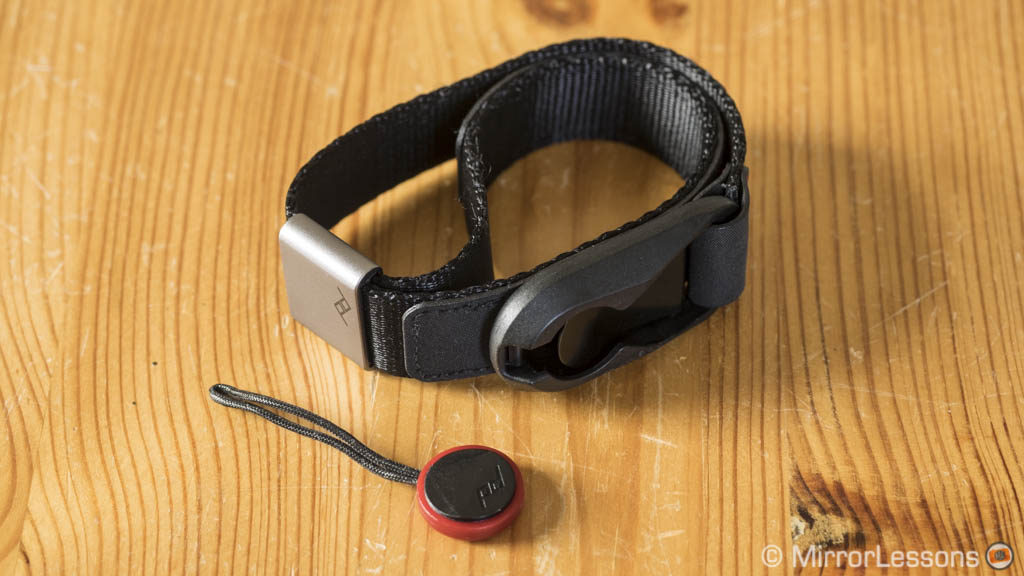
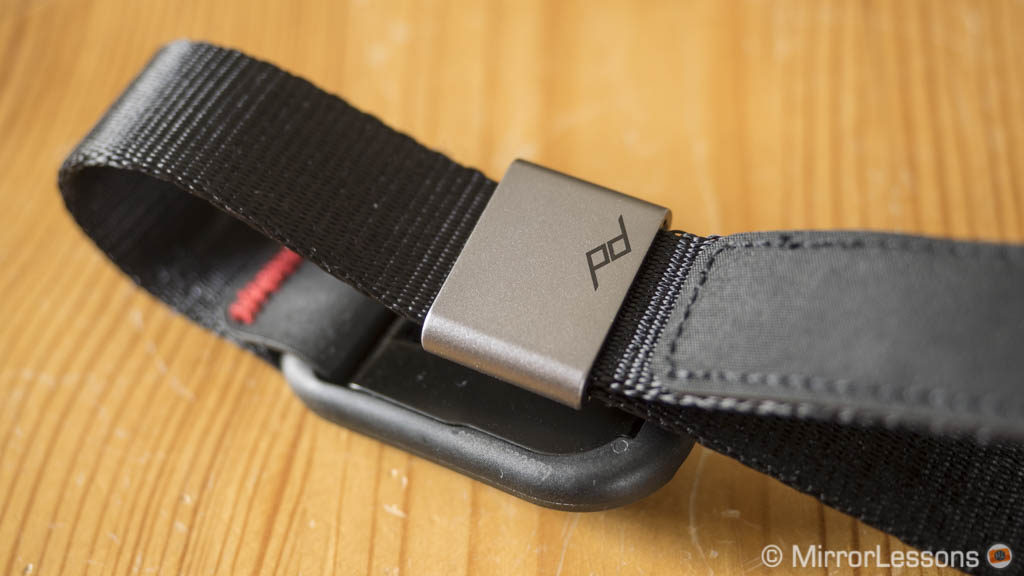
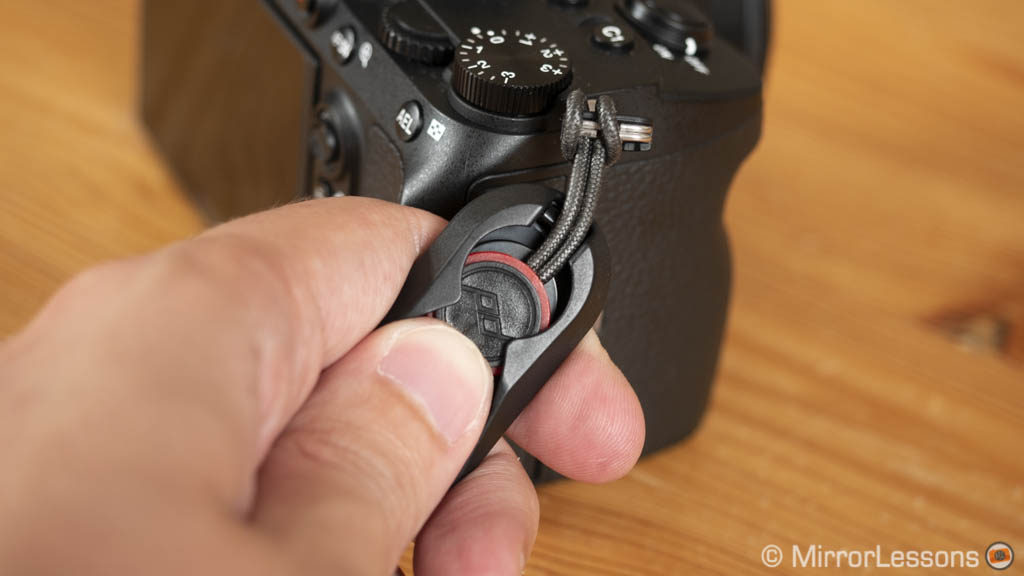
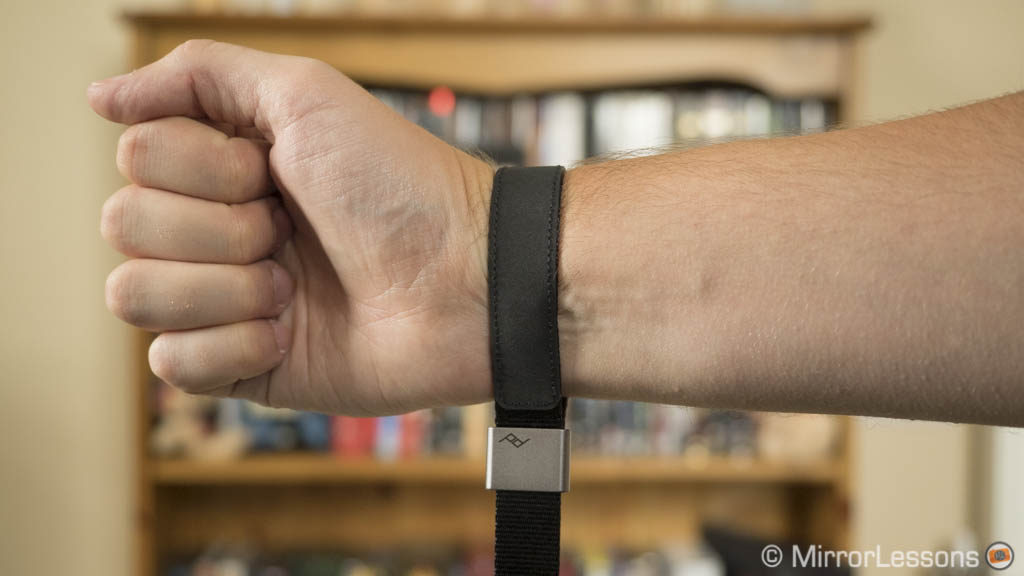
It features a one-handed mechanism: you just tug or pull the strap to adjust it. When not connected to a camera, you can keep it on your wrist and use it as a bracelet thanks to the inner magnet. To be honest though, the magnet is a little weak. Like the neck strap, the Cuff connects with the Anchor links and therefore is very easy to attach or remove.
- Good: excellent design, 1-handed adjustment mechanism, can be kept as a bracelet when not attached to a camera
- To consider: when worn as a bracelet, the magnet is not strong enough so it can detach and it doesn’t fold well around small wrists.
- Compatible with: All
Check Peak Design Cuff on the Peak Design website
J.B. Camera Designs Leather Simple Wrist Strap
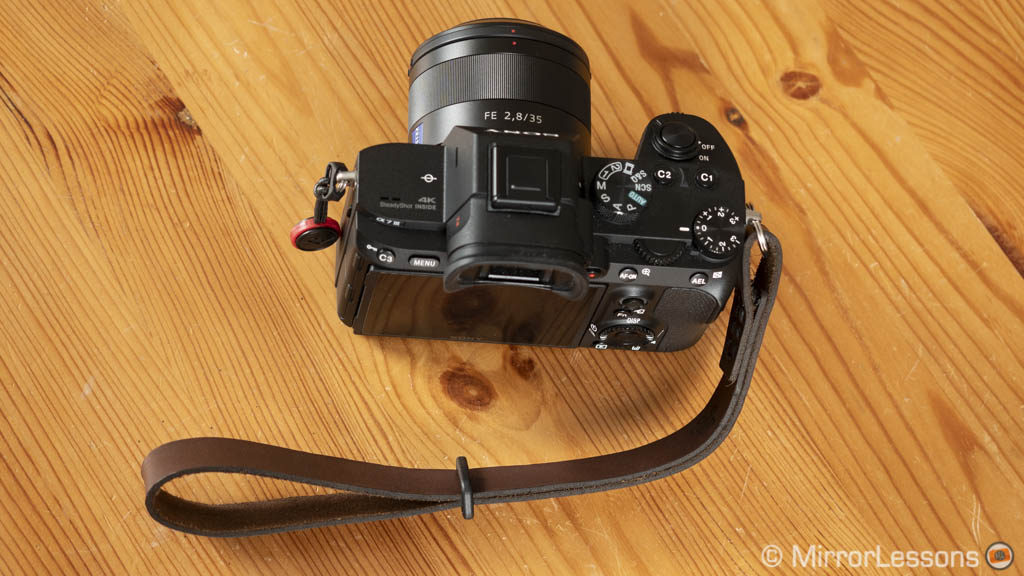
The leather wrist strap from J.B. is elegant and comfortable. Available in four different colours, it is hand-stitched and made of soft premium leather. You can easily tighten or loosen the strap around your wrist thanks to the slide loop. Thanks to its softness, it’s easy to fold around the camera or store inside a bag.
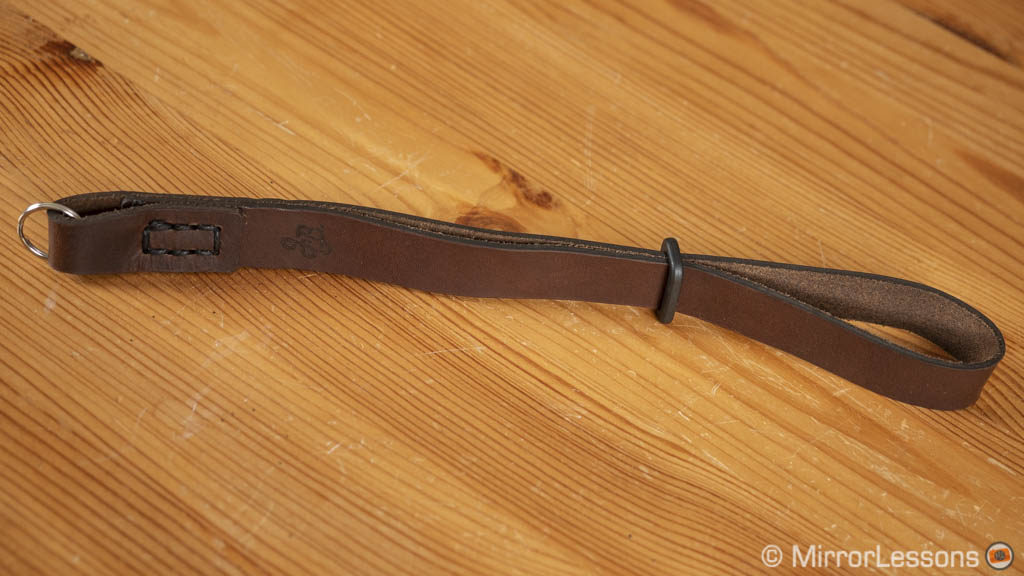
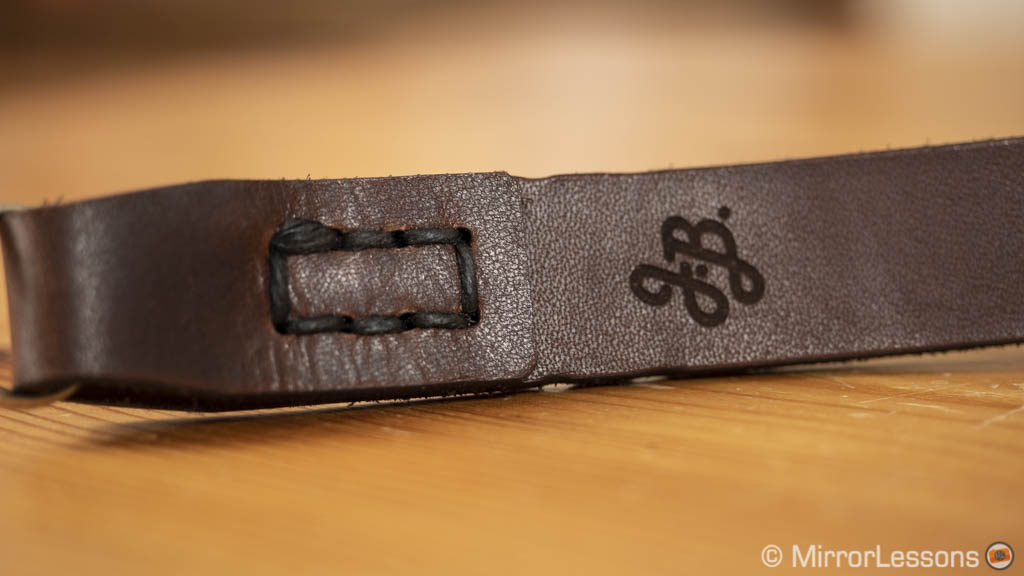
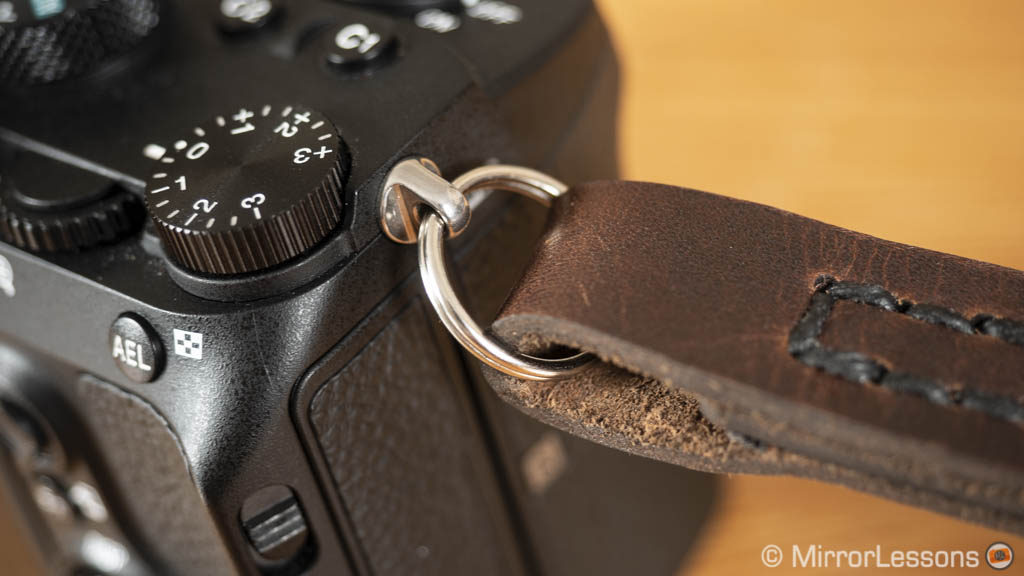
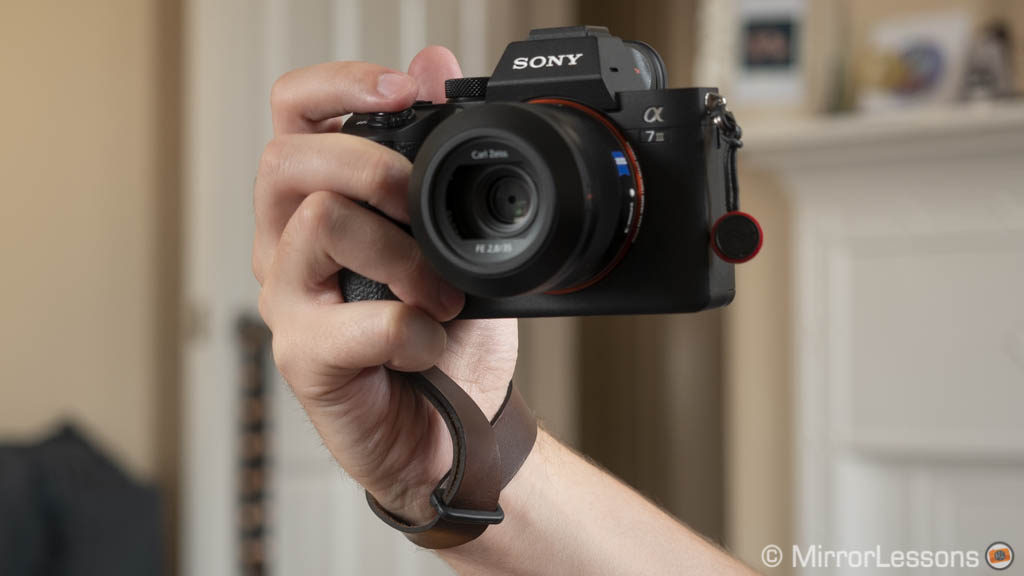
Recently the company launched a new series of the Simple strap with a chevron design that is more stylish and less minimalistic than the one shown here.
- Good: premium build and feel, easy to adjust, soft and flexible
- To consider: if you prefer a more stylish design, you can have a look at the new Chevron design
- Compatible with: all
Check JB leather strap on Amazon, Amazon UK and eBay
Carrying solutions: carrying clips
What if you’re looking for an alternative way to carry your camera, something that provides more freedom of movement, security and immediate access? Here are the two best options I’ve tested so far.
Peak Design Capture Camera Clip
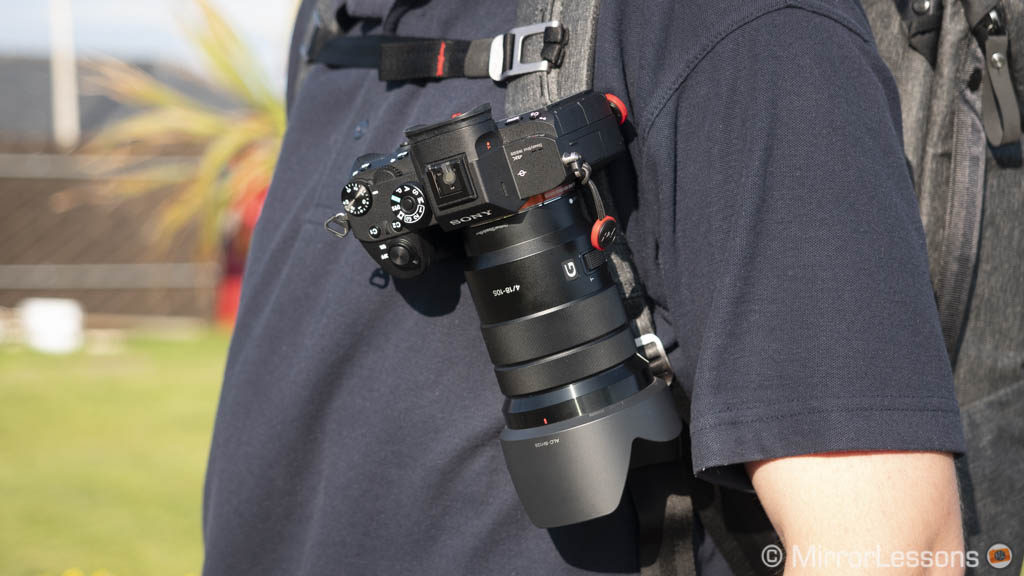
The Capture Camera Clip can be attached to the shoulder strap of a backpack or even to your belt, as long as it has a maximum width of 6.4cm and thickness of 2.2cm. It features an all metal build of aluminium alloy and stainless steel. The new version (V3) is smaller and is said to be more resistant in comparison to its predecessor (max. 90kg).
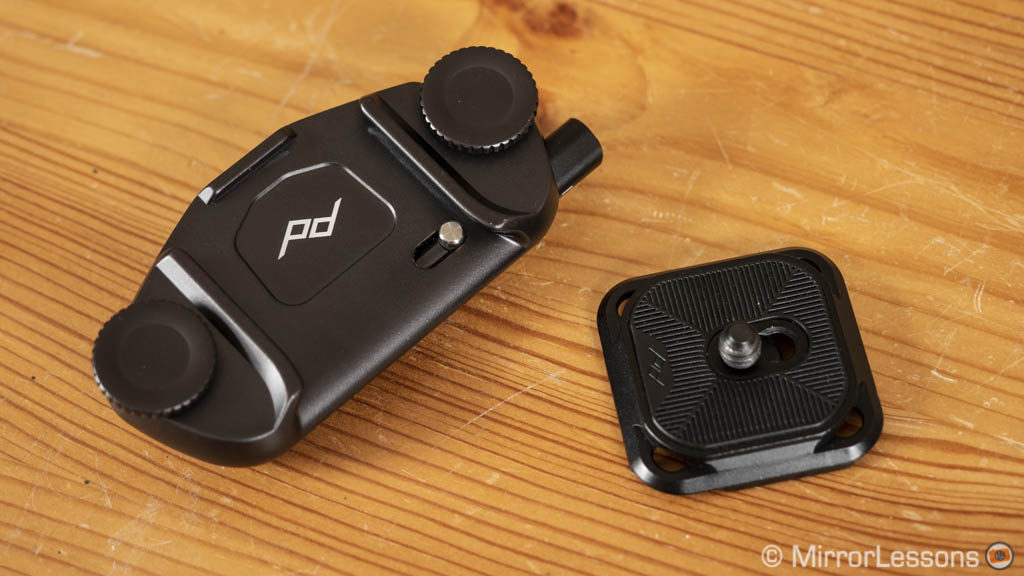
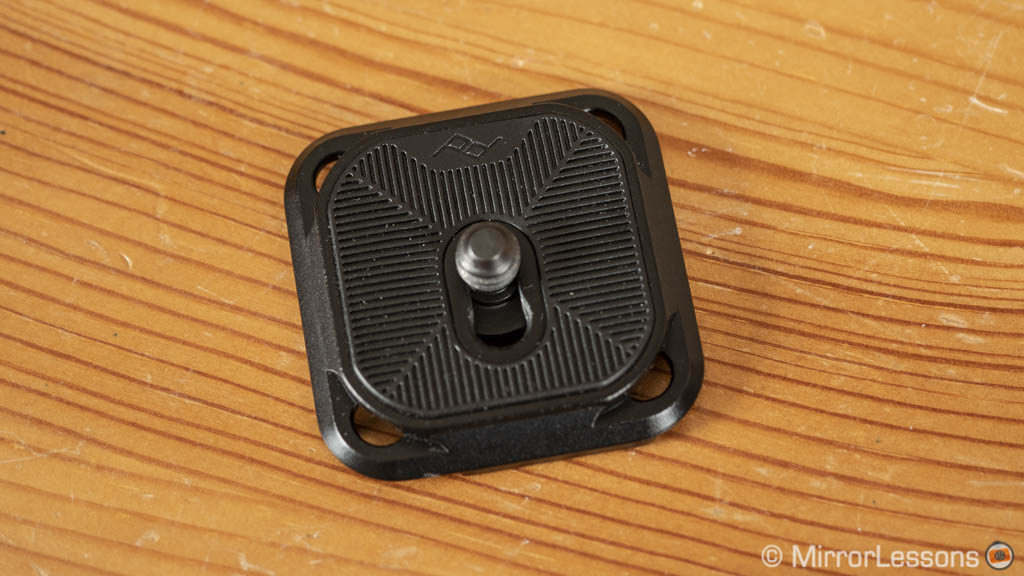
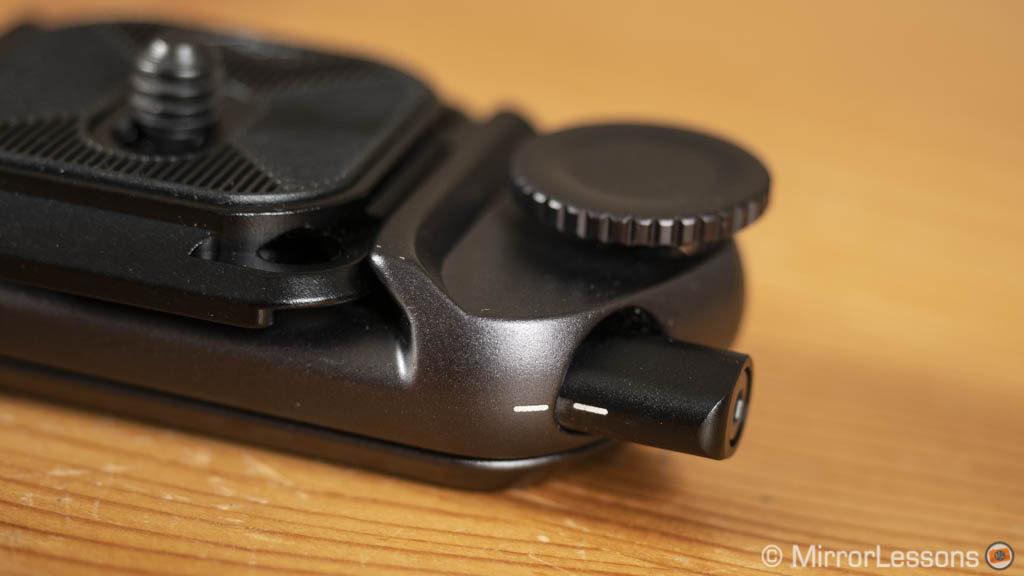
Attaching the Capture Clip to thick objects can prove a bit tedious but the two screws are long enough to keep it secure. It is much easier to secure to a belt although you may want to consider the optional Pro Pad that allows you to place the capture in a more comfortable position.
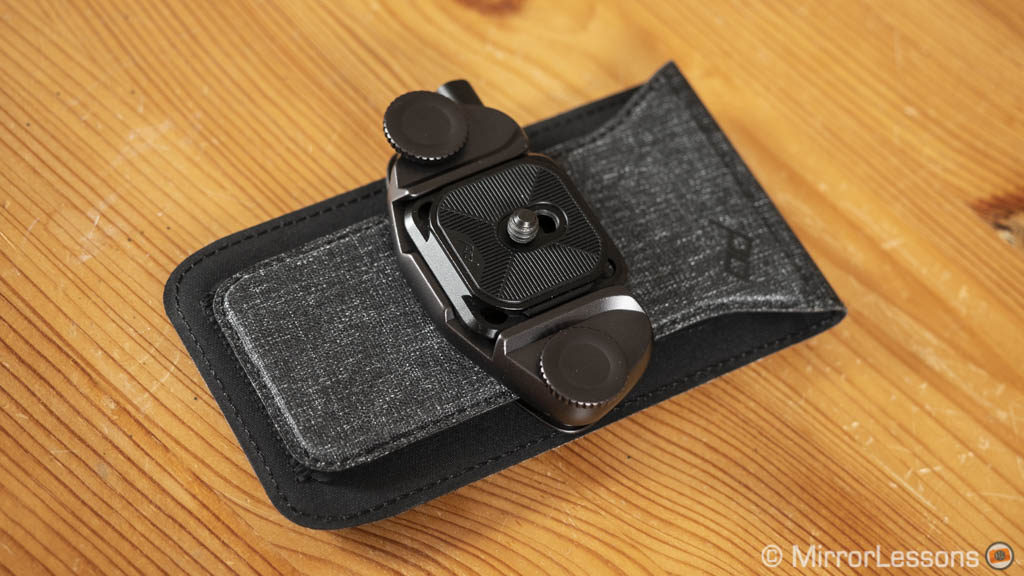
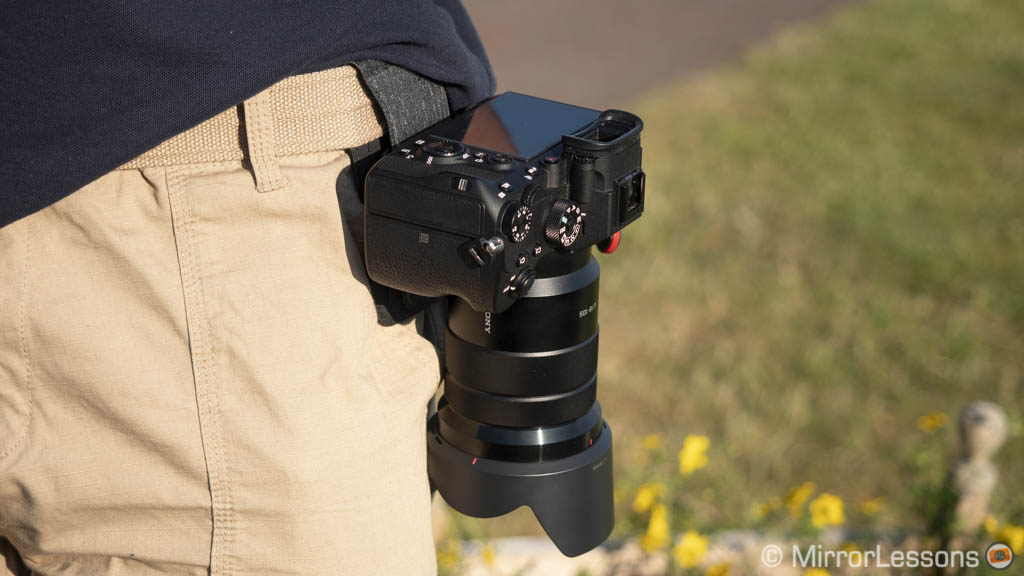
You can quickly and easily slide the camera in and out thanks to the arca swiss plate. Also useful is the option to attach it in four directions, which is handy when changing lenses. The quick release button can be locked for extra security. It works well with small or large lenses attached. For example I find it extremely comfortable when walking with the A7 III and 16-35mm f/2.8 mounted. If you use Manfrotto RC2 tripod heads, you can buy the Capture Clip and Dual Plate separately.
- Good: build quality, secure release mechanism, fits various straps and belts, useful to change lenses as well
- To consider: if you want to use it on your trouser belt, consider the optional Pro Pad for added comfort
- Compatible with: All
Check Peak Design Capture Clip on Amazon, Amazon UK, B&H Photo and eBay
CP Tech B-Grip Uno
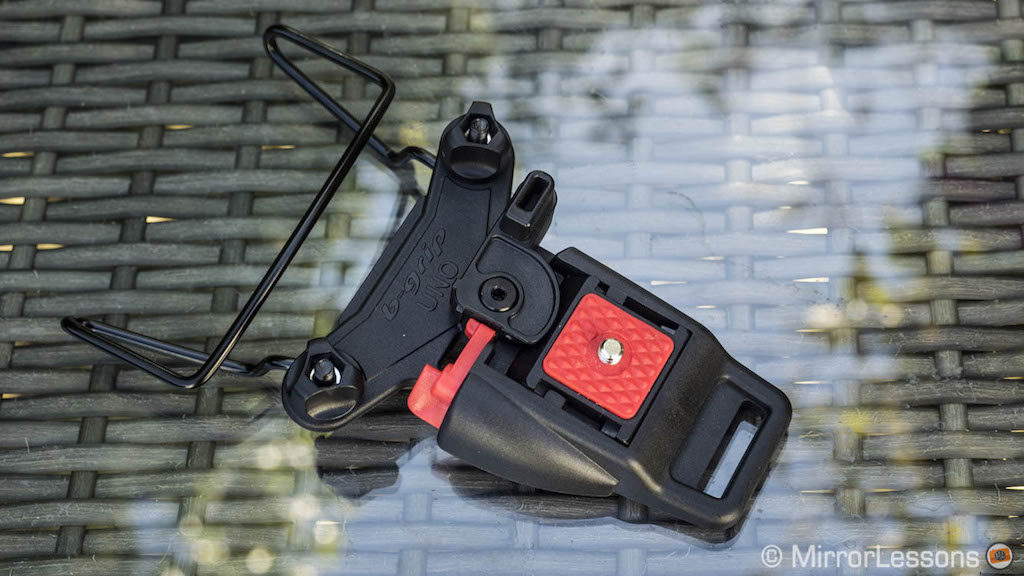
The Uno is an interesting alternative to the Capture Pro. I couldn’t test in on the newer A7 III but I’ve reviewed it in the past with similar camera and lens combinations. What might surprise you at first is the choice of plastic rather than metal, but it doesn’t feel cheap at all (the materials are classified as HPM – High Performance Material).
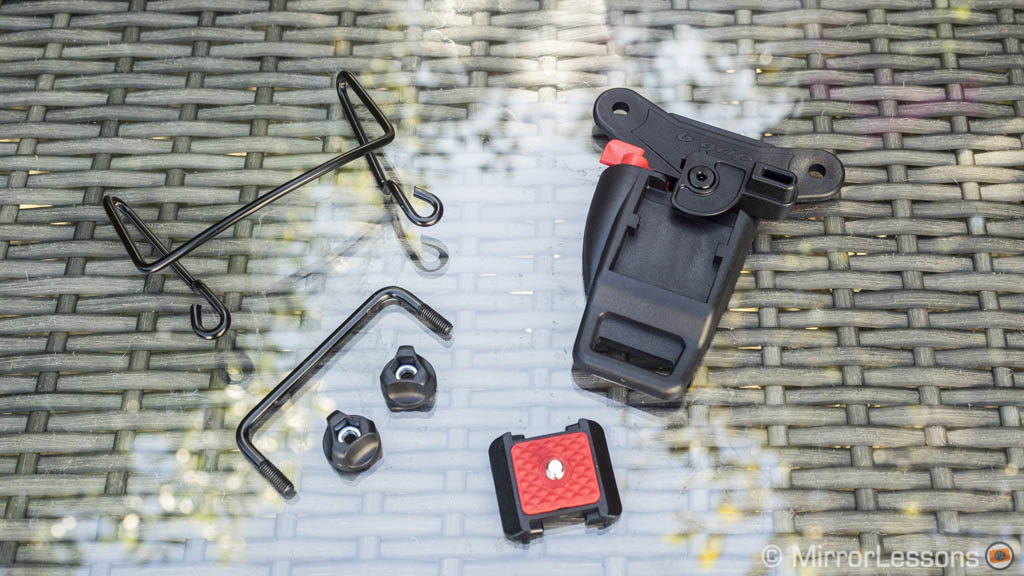
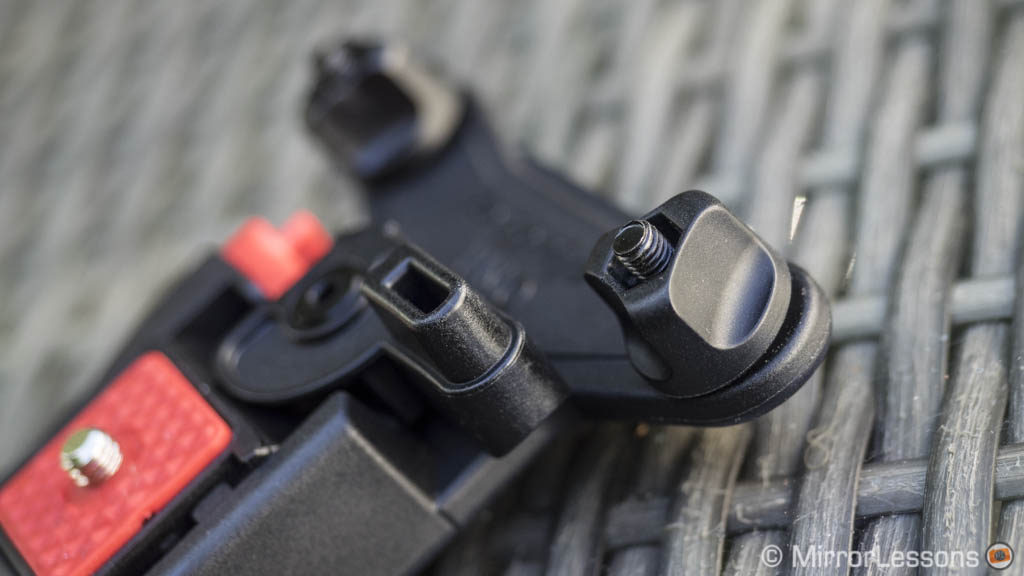
Like the Peak Design product, the plate is arca swiss compatible. You unlock it with two levers: the main black one and a smaller secondary one (red) that locks the former for extra security. The two-step process becomes very intuitive after the first attempt.
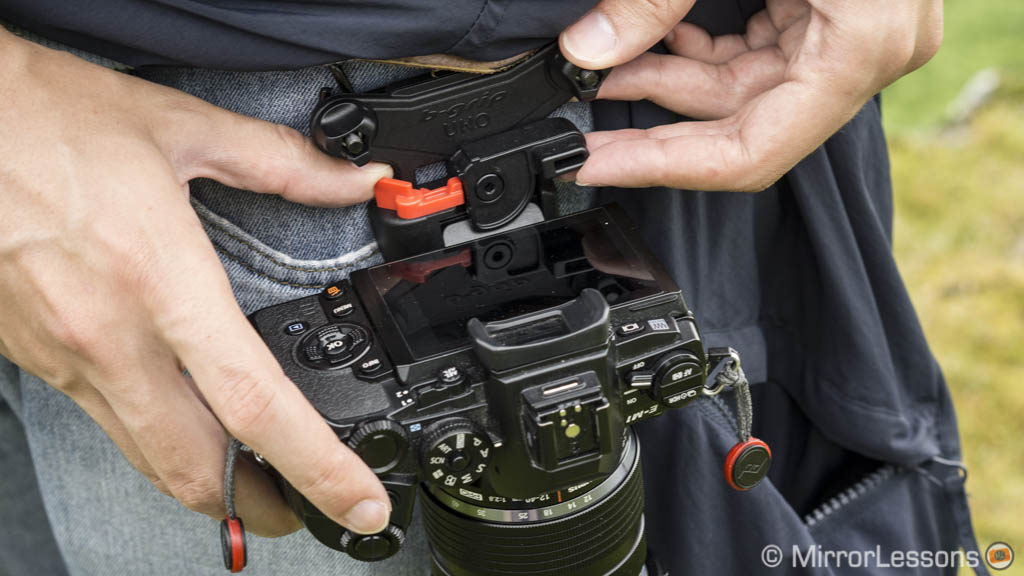
The holster is easier to attach to a thick strap thanks to the U bolt and you don’t need to tighten the bolts too much. You can even attach it while wearing a backpack which proves how easy it is. The Uno has an intestine design that allows the camera to remain vertical and not tilt inward, which improves comfort with long lenses.
If you want to attach the B-Grip to your waist belt, you can use the supplied shaped steel bolt that can be slid onto your belt. It keeps the holster further down and is more comfortable when wearing a jacket for example.
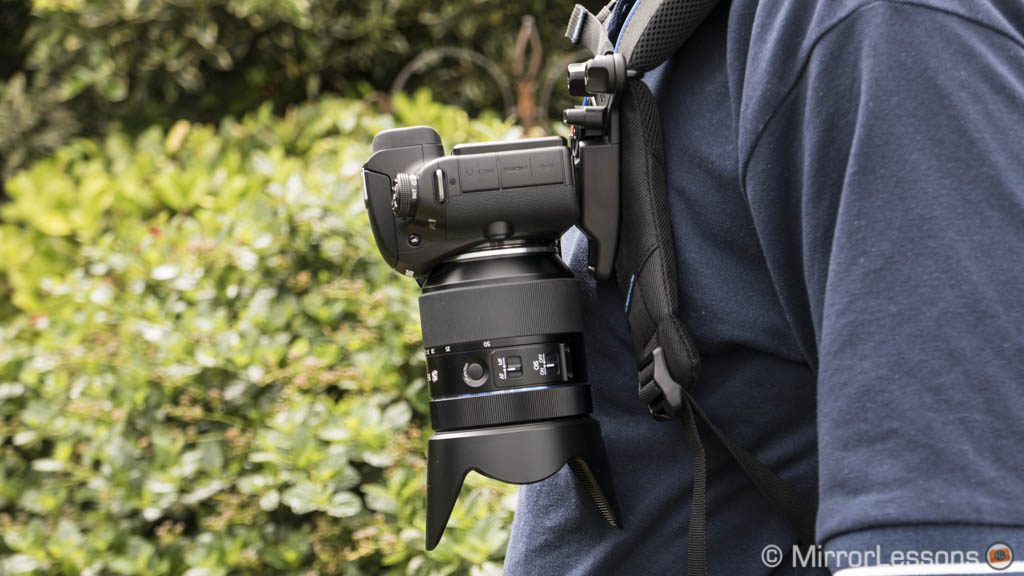
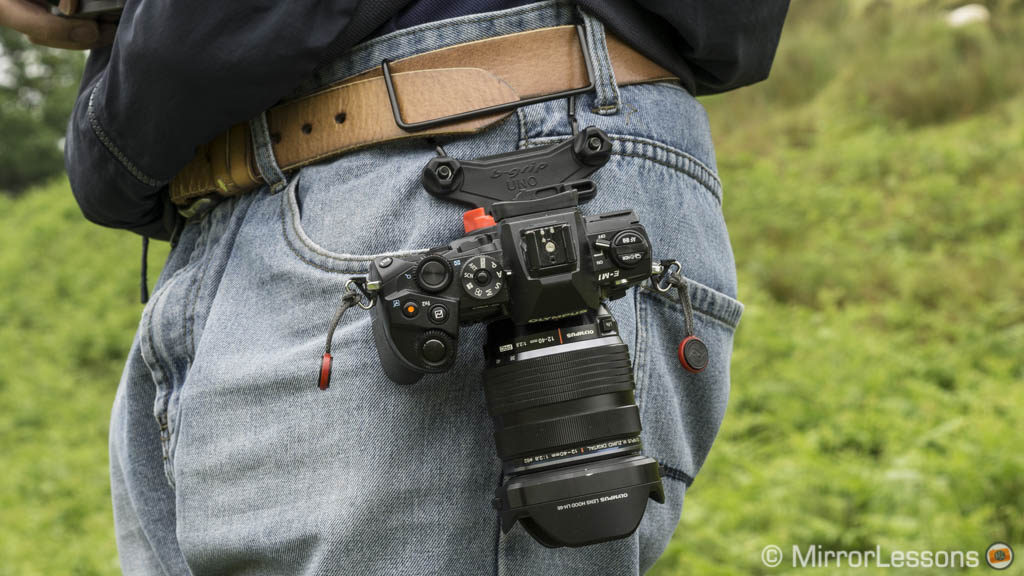
The maximum weight is 5kg, which is way less than what the PD Capture can take, but let’s be honest, you wouldn’t want to carry around too much weight with a solution like this anyway. That being said, if you’re planning to use it with the heaviest telephoto lenses from Sony, the Capture might be a safer choice.
- Good: well designed, easy to attach to a thick strap, great stability when walking, comfortable to carry on a waist belt too
- To consider: maximum weight is 5Kg, it is made of plastic but the materials are high quality
- Compatible with: All
Check B-Grip Uno on Amazon, Amazon UK and eBay
More light: flash units
Speedlights are useful accessories that require no introduction. The question is which one to choose given the vast selection out there. Here I present two interesting offers from Sony and Godox.
Sony HVL-F45RM
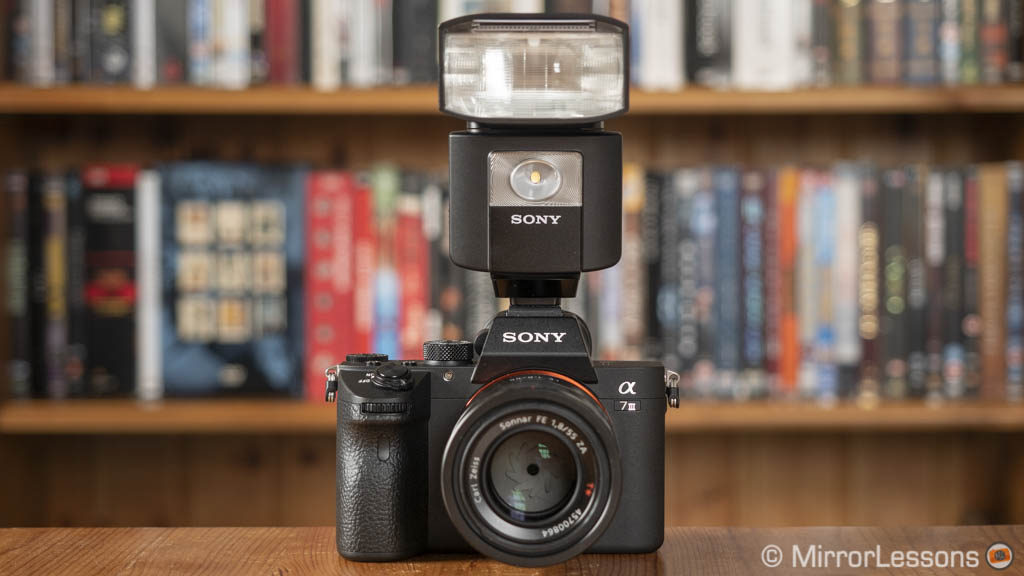
The F45RM is a compact flash packed with lots of features. It is light, has a good quality construction and is dust/moisture resistant.
The head can be rotated 180° and tilted up to 120° in seven steps for more precise bouncing light adjustments. You can even tilt it down slightly if you’re shooting objects at a close distance. However I don’t like how hard it is to rotate the head from its default position. At first I was afraid to break it. You can pull out a bounce card and wide diffuser but no dome diffuser is included unfortunately.
On the rear there is a small monochrome LCD panel that provides good brightness even when shooting outdoors. The button interface is intuitive enough and you can customise the entire control wheel at the centre (6 options in total including the centre button and the wheel rotation). You can also save frequently used settings to two memory recalls just as you can on your Sony camera. The On/Off switch has a middle step to lock all the settings.
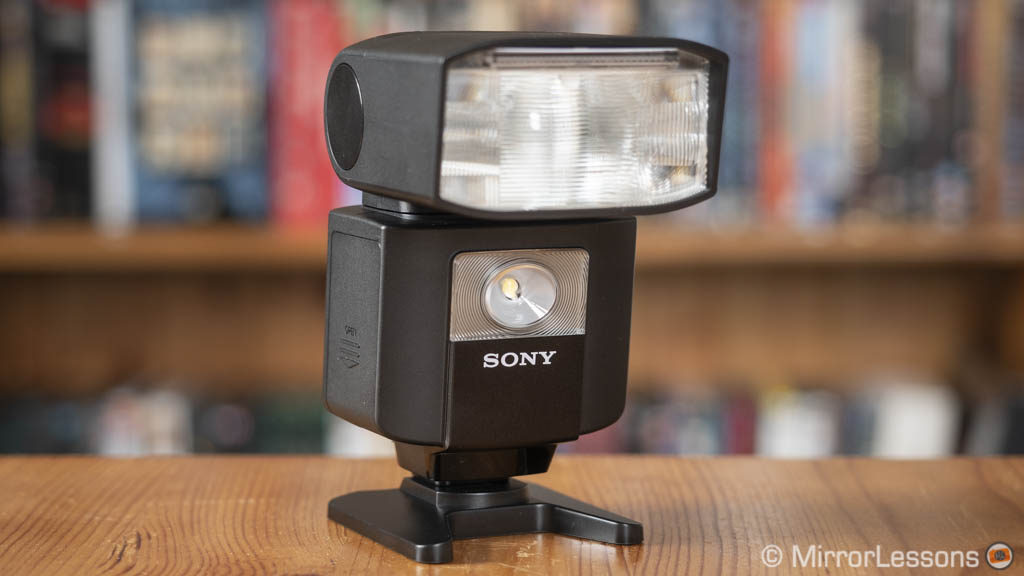
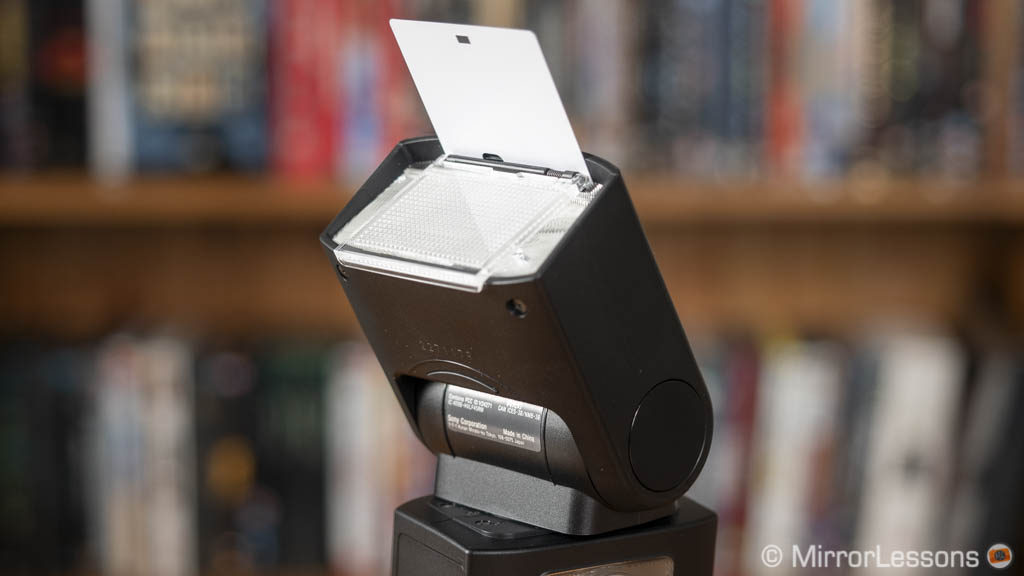
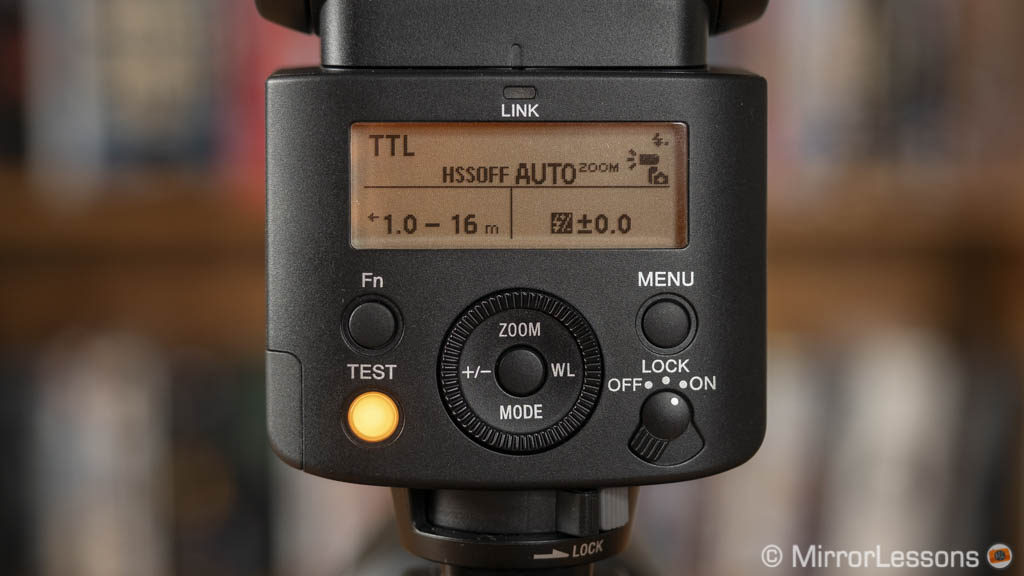
The Flash offers good power with a guide number of 45m/148’ (ISO 100) and a range of 24mm to 105mm. Lamp recycling times vary from 0.1s to 2.5s (or 2s if you use Nickel Hybrid batteries) depending on the power and frequency. In my testing I found these numbers to be accurate although like many flashes, when the batteries get low the recycling time increases. TTL metering is accurate all the time.
Outdoor you can increase the shutter speed beyond the default maximum sync of 1/250s by enabling HSS. Be aware that the power output decreases significantly (about 2.8x less) so you need to stay close to your subject. In situations with strong contrast or backlight, it is a little bit weak.
The HVL-F45RM can work remotely with either optical or radio transmission. With the former you can use other Sony and third party flashes in remote or slave mode. The latter is the best option as it allows you to work at greater distances (30 meters max.) and radio communication doesn’t require constant visual between the units. Note that the radio wireless mode only works with other compatible Sony flashes.
Among other interesting features you can find a Multi mode that allows the flash to fire multiple times while the shutter is open. The Front LED light can be used for video and the brightness can be adjusted in 8 steps. It is bright enough as long as your subject is at a close distance. It can also be used as an AF assist beam and two levels of intensity can be selected in the menu. Note that the AF Beam only works in S-AF.
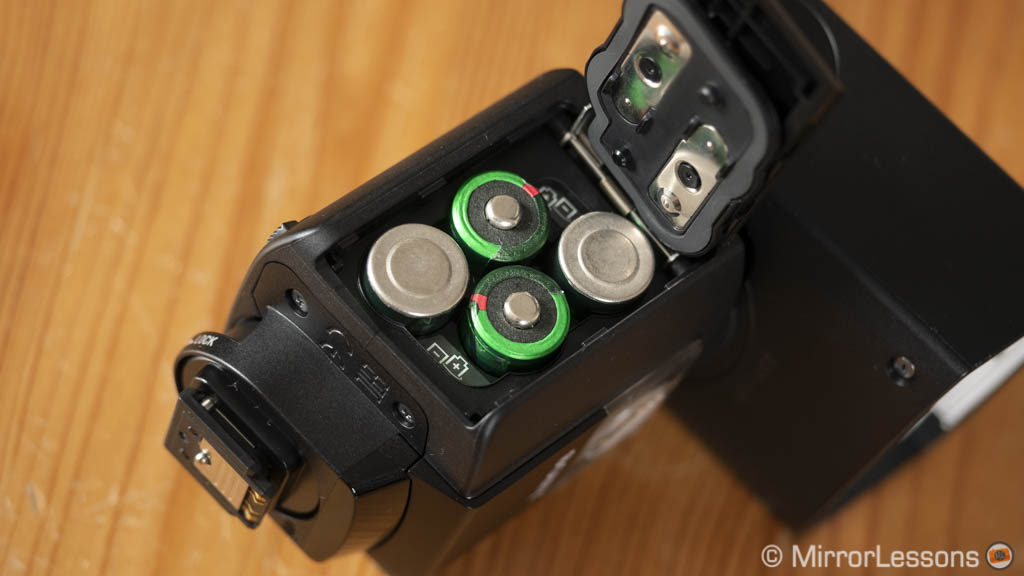
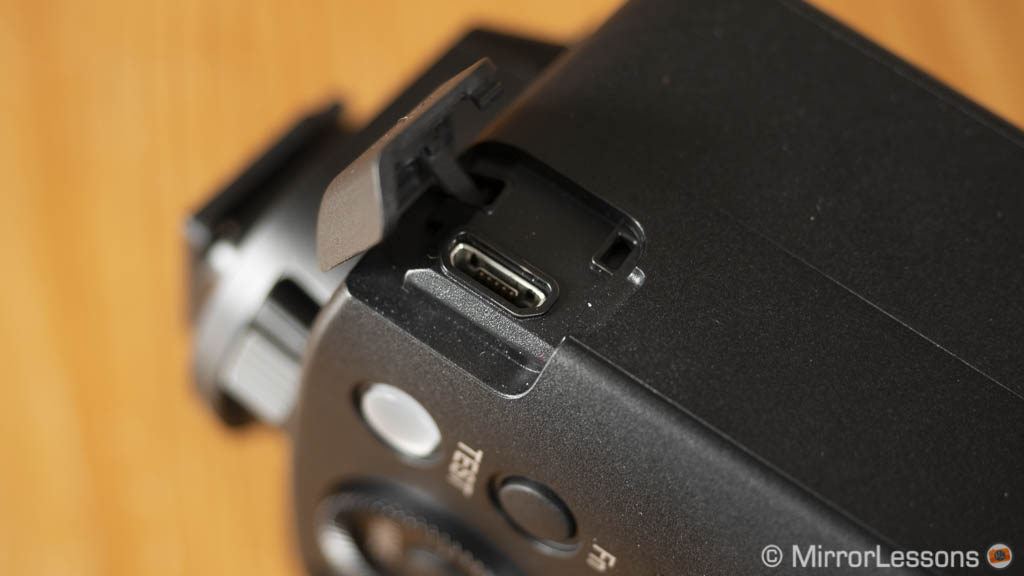
The battery life is rated at 210 repetitions but this can vary depending on the type used. For example it can go up to 270 with Nickel Hybrid type. There is also a USB port to receive firmware updates.
- Good: weather sealed, compact, good power, HSS and Multi mode, custom buttons and memory recalls, radio wirless transmission, AF assist beam
- To consider: a bit expensive, lacks some power in HSS mode
- Compatible with: A9, A7 III, A7R III, A7 II, A7R II, A7S II, A7, A7R, A7S
Check Sony HVL-F45RM price on B&H Photo
Godox V860IIS
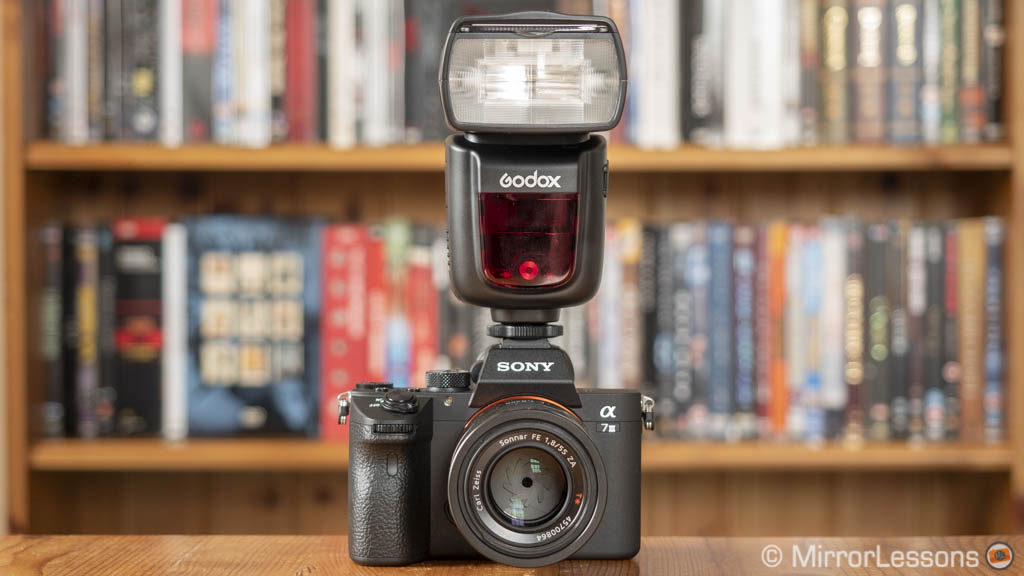
As always, we need to turn to third-party manufactures to find cheaper alternatives and Godox is once again present in our list.
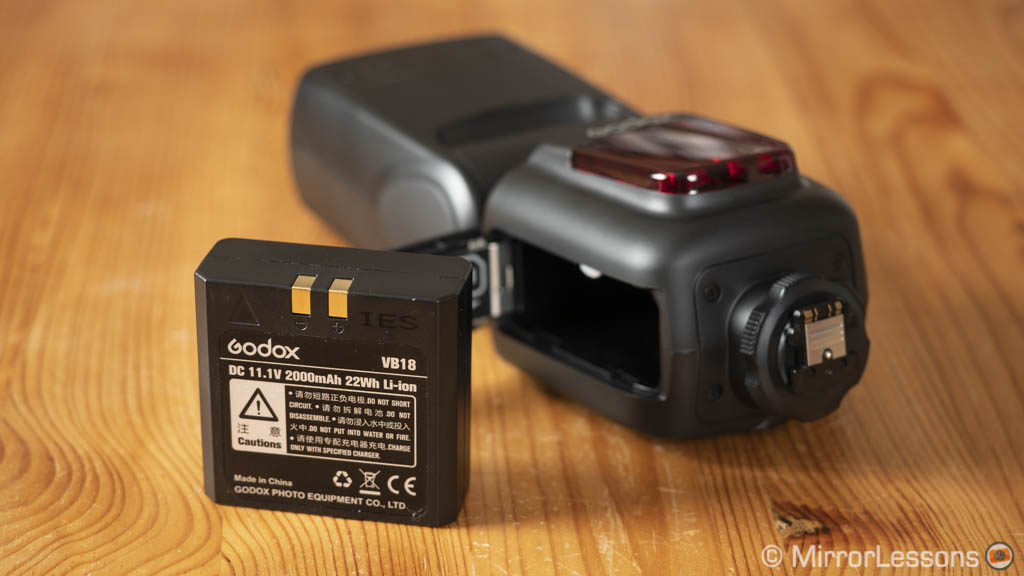
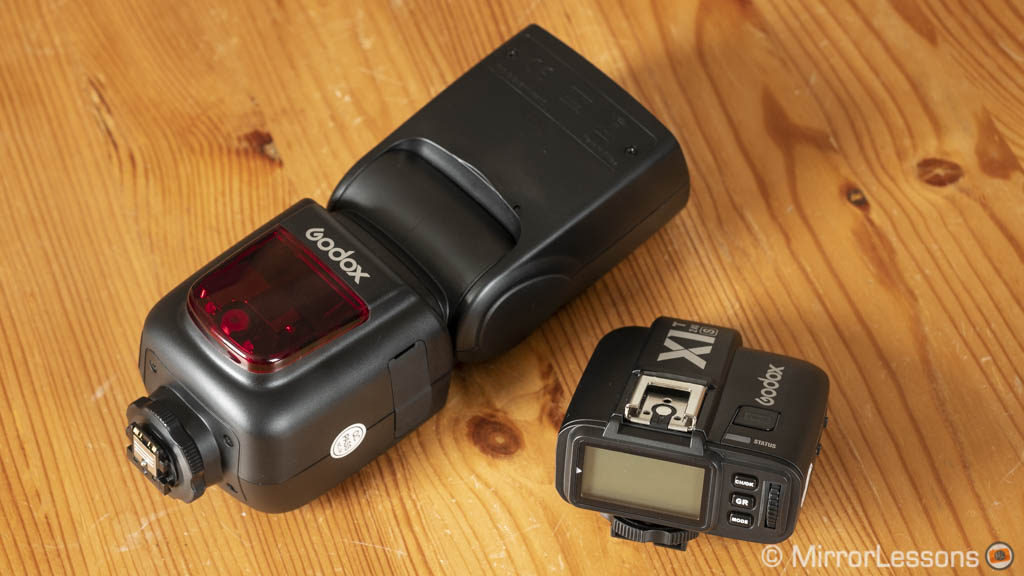
The V860II is larger than the F45RM but brings a few interesting features to the table. First of all, it has a proprietary battery that you can re-charge. I’ve always wondered why it took so long for speedlight manufacturers to come up with this solution. The result? You get a better battery life with an average of 500 charging and discharging cycles (by comparison the Sony does approximately 200 or 270 depending on the type of battery).
The build quality is good but the flash isn’t weather-sealed. The head can be tilted from -7 to 90° up, or rotated 180°. The rotation is a bit stiff. The monitor on the rear is larger and while the interface is more confusing at first, you get used to it quickly enough.
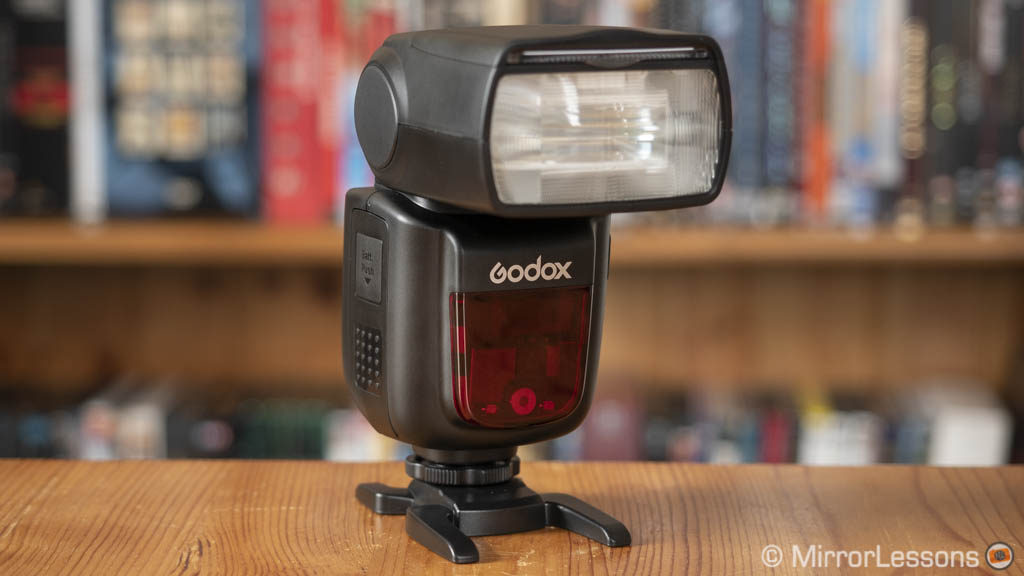
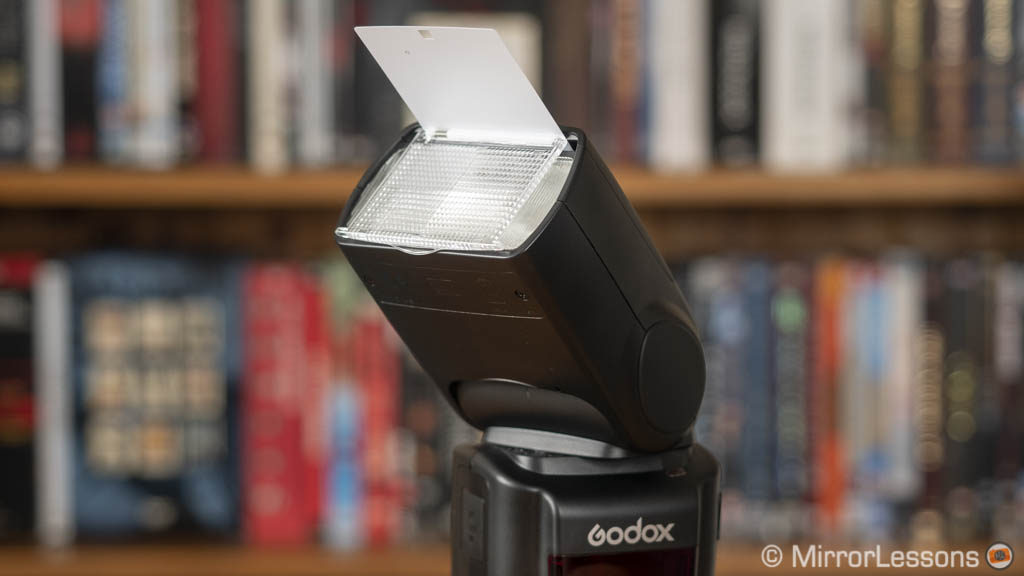
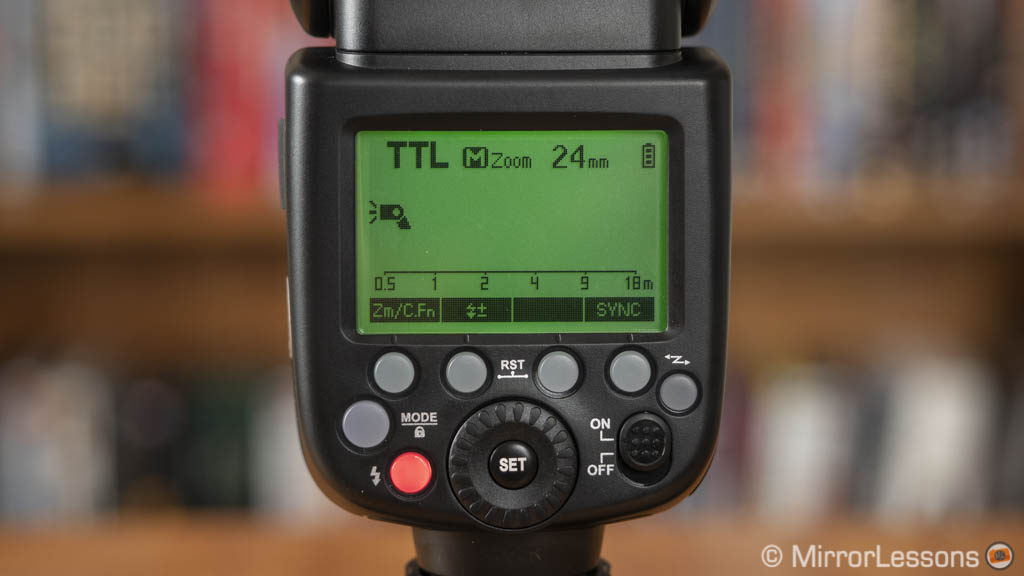
The V860II is more powerful with a guide number of 60m/190feet (ISO 100) and a larger zoom range of 20 to 200mm (14mm with wide panel). Needless to say, if you require more power and versatility, the Godox is the better choice. The lamp recycling time is slower than the Sony at times. With High Speed Sync, the power decreases but remains more than decent.
There is optical and radio transmission as well. With the former, you can control other Godox and Sony flashes or put it in Slave mode. However it didn’t work with the F45RM as a slave and I couldn’t update to the latest firmware to double check the compatibility (more on this below). With radio transmission, it works with Godox flashes only but here as well provides more versatility with up to 32 channels available and a maximum range of 100 meteres.
What I also like is that for $50/80 extra bucks you can buy the Godox X1T-S TTL or X-ProS transmitter and do some off-camera work with one or multiple units. By comparison, the Sony transmitter solution is much more expensive.
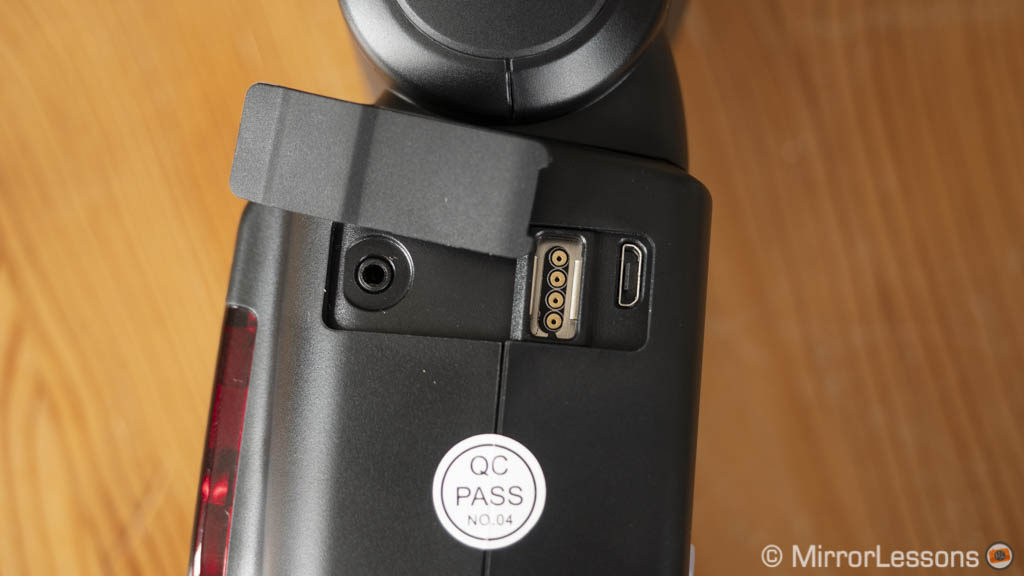
Other interesting options include the Stroboscopic mode, a sync cord port and the possibility to receive firmware updates via USB. It’s a shame however that you need a Windows computer as the software is not available for Mac. Even when I managed to find a PC to try the update, the software gave me an error and I couldn’t complete the procedure. I think Godox needs to make some improvements in this department. It doesn’t feature a LED light and the AF assist beam only works with DSLR/DSLTs.
- Good: powerful flash, proprietary rechargeable battery, HSS and radio wireless available, well priced
- To consider: larger, less customisation, firmware update needs improvement, no Mac compatibility, no AF assist light
- Compatible with: A9, A7 III, A7R III, A7 II, A7R II, A7S II, A7, A7R, A7S
Check Godox V860IIS price on B&H Photo
More artistic control: filters
Filters can become inseparable companions if you like landscapes and long exposures. Two of the most respected companies are Nisi and Lee – here are the products we selected!
Nisi V5 Pro kit or Individual filters
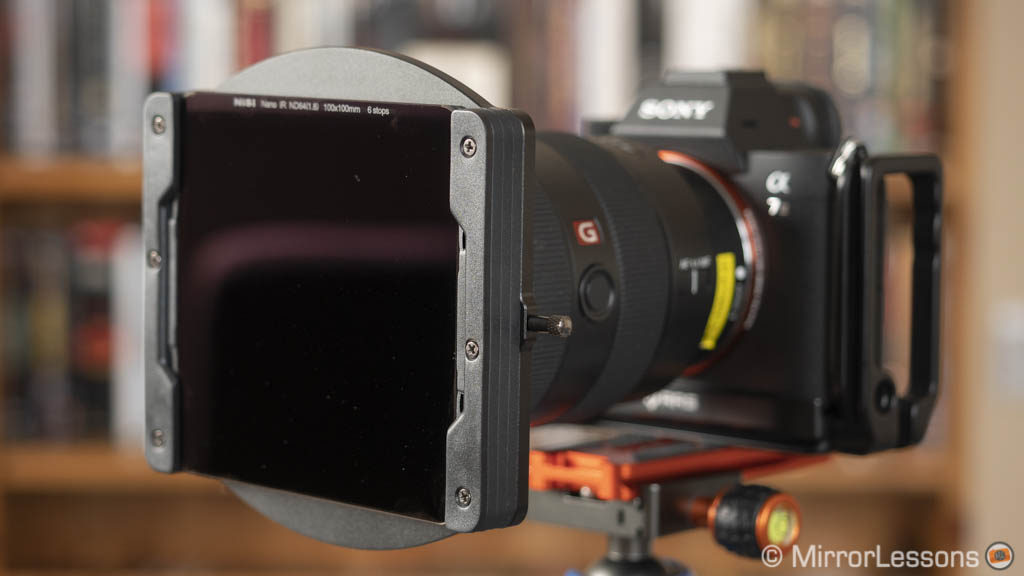
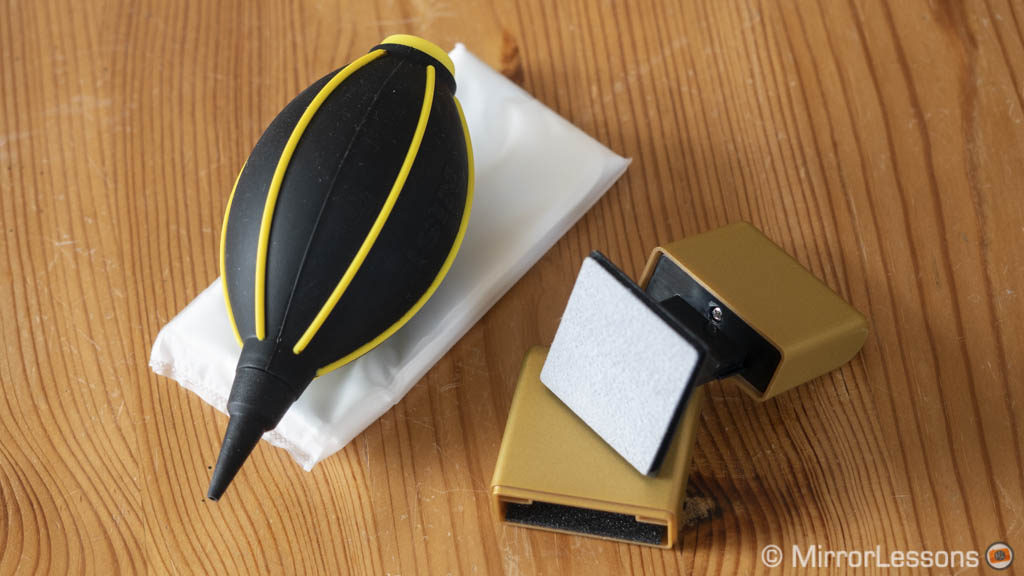
I’ve been wanting to test Nisi filters for some time and I finally got the chance while compiling this article. The V5 Pro kit was the perfect bundle to become familiar with what the brand has to offer: it includes two ND filters (ND64 and ND1000), one soft gradual filter (GND0.9), one circular polarising filter (Pro CPL), and one filter holder with three slots and four ring adapters. The kit comes with cleaning tools such an air blower, cleaning cloth and cleaning eraser. There is an all-in-once leather case complete with a carrying strap.
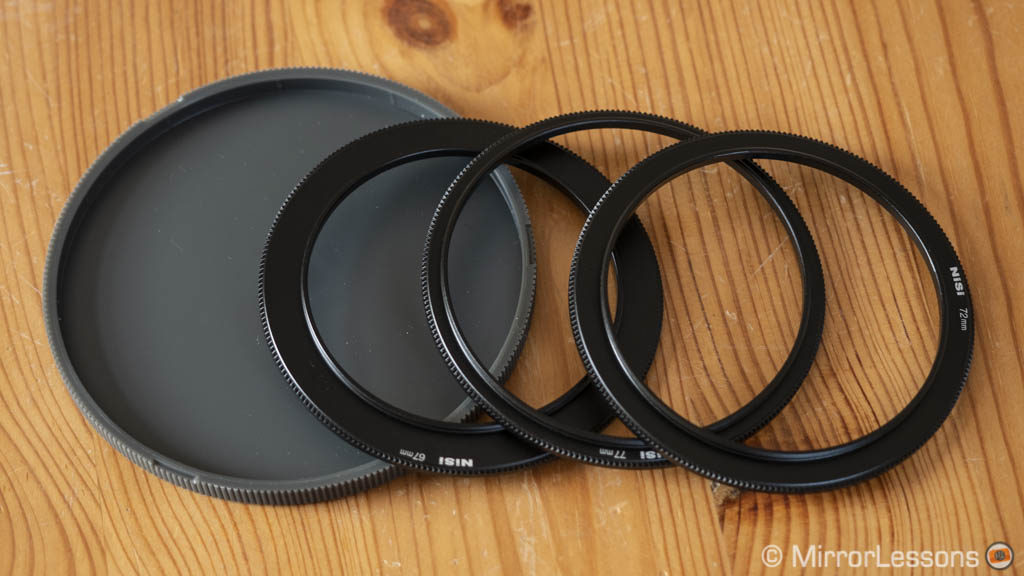
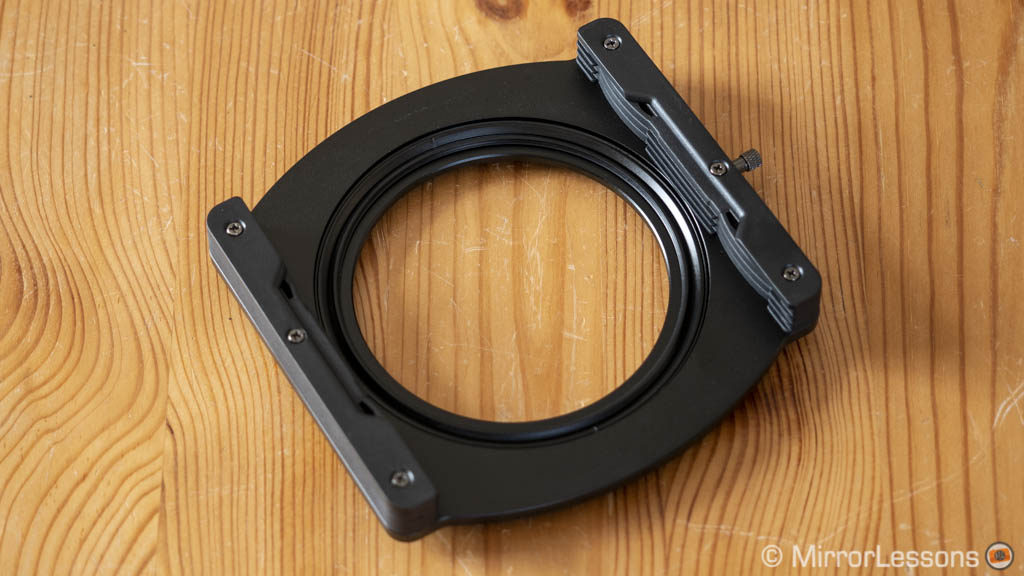
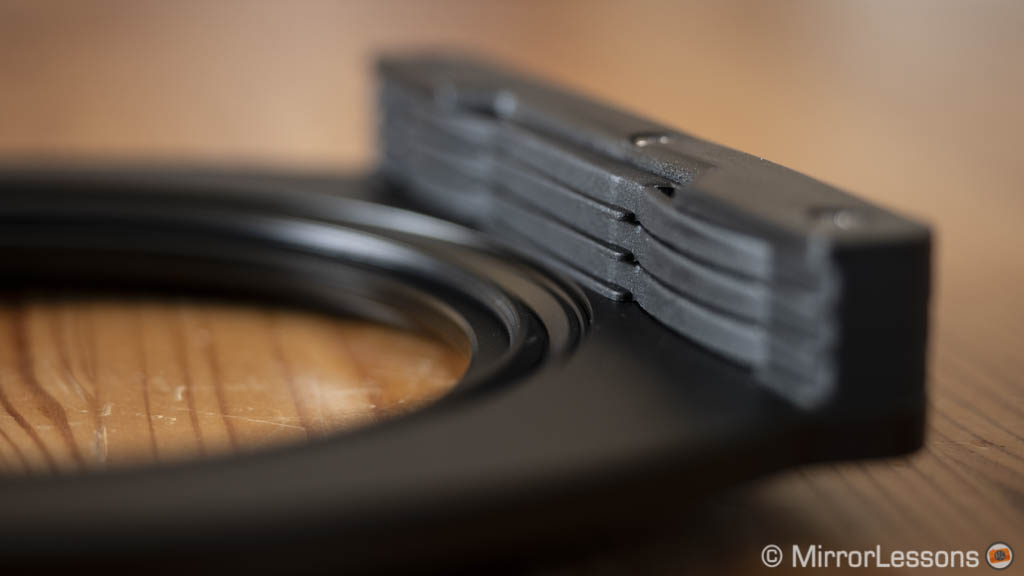
The first thing that impressed me straight away was the build quality. Everything feels premium including the holder which is made of aviation-grade aluminium with anti-corrosion coating. It can hold three square filters plus the circular polarising filter. The square filters can be inserted easily and hang tight thanks to the pressed clips. Two small rotary wheels on the main adapter ring allow you to rotate the polarising filter. The adapter rings are easy to attach and everything feels precisely designed. The holder can be mounted and unmounted quickly from the lens thanks to the pull knob.
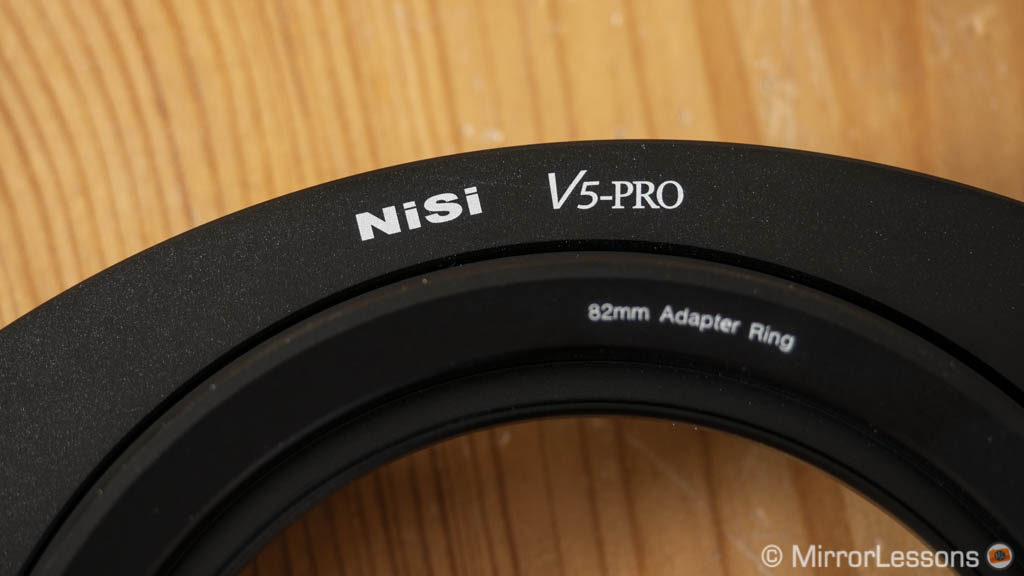
In addition to the adapter rings, polarising filter and filter holder, the case can house up to eight 100mm x 150mm filters. Inside there is foam material and precise slots for each item. However, the filter slot lacks soft material so you can hear the filters clicking around while walking. Sadly there is no room for the air blower or square cleaner.
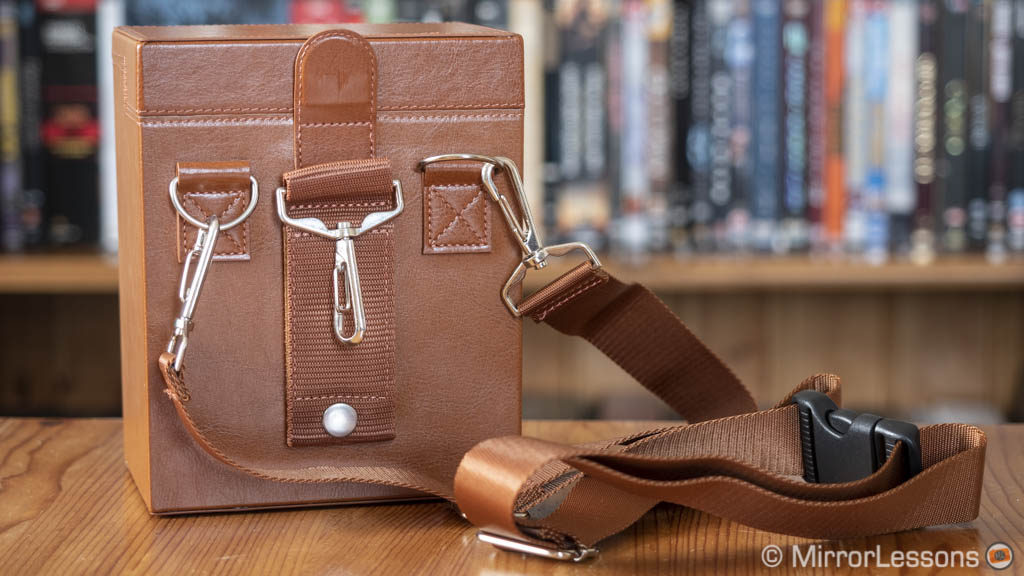
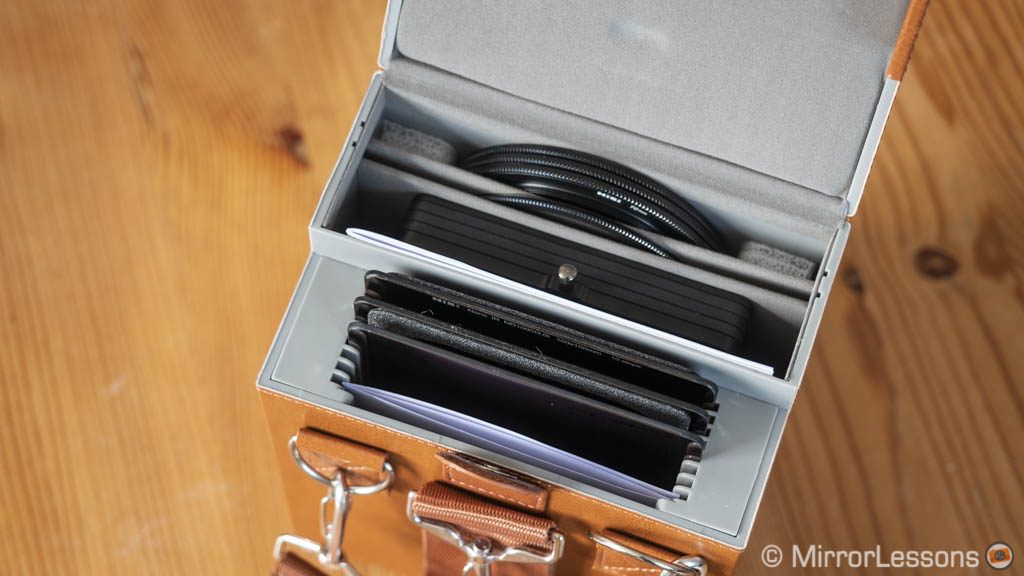
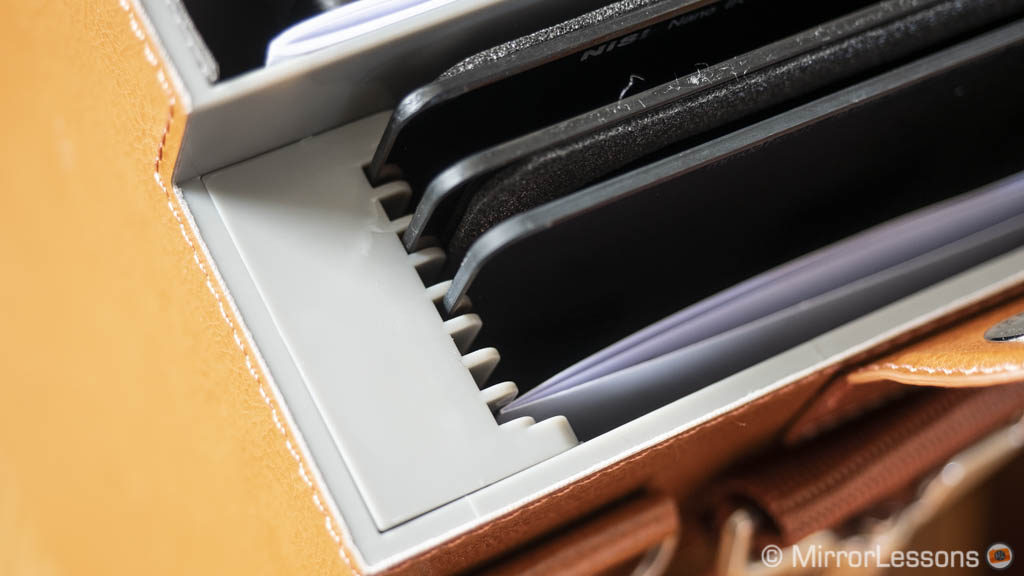
The filters are very high quality. There don’t produce visible colour cast or vignetting even when shooting as wide as 16mm. The ND1000 provides 10 stops of compensation whereas the ND64 gives you 6 stops. Combine them together and you can get interesting results in daylight conditions. The polarising filter can be an interesting addition to control reflections whereas the graduated ND filters allow you to fine-tune contrast for scenes like a sunset. They can all fit inside the holder at the same time.
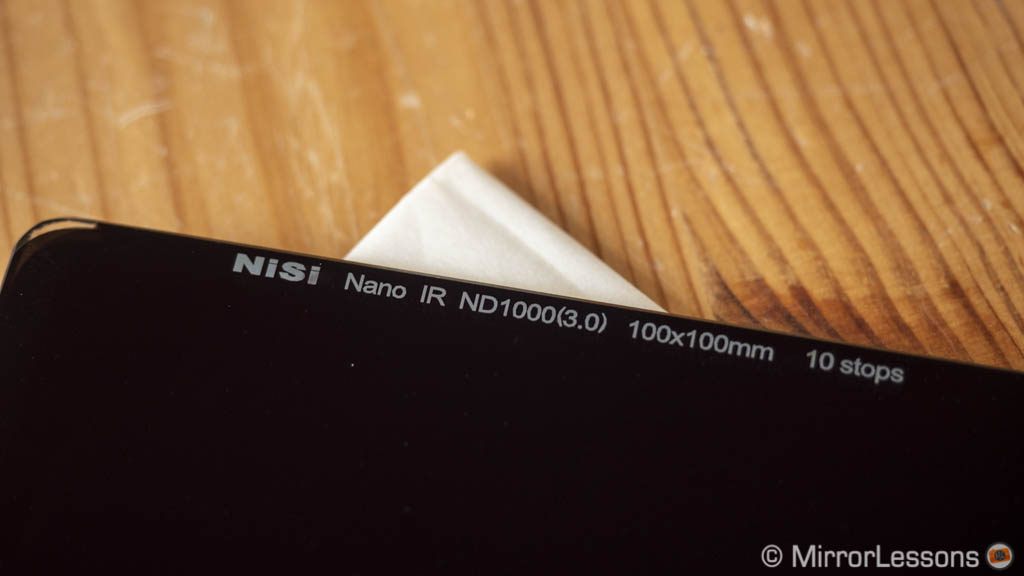
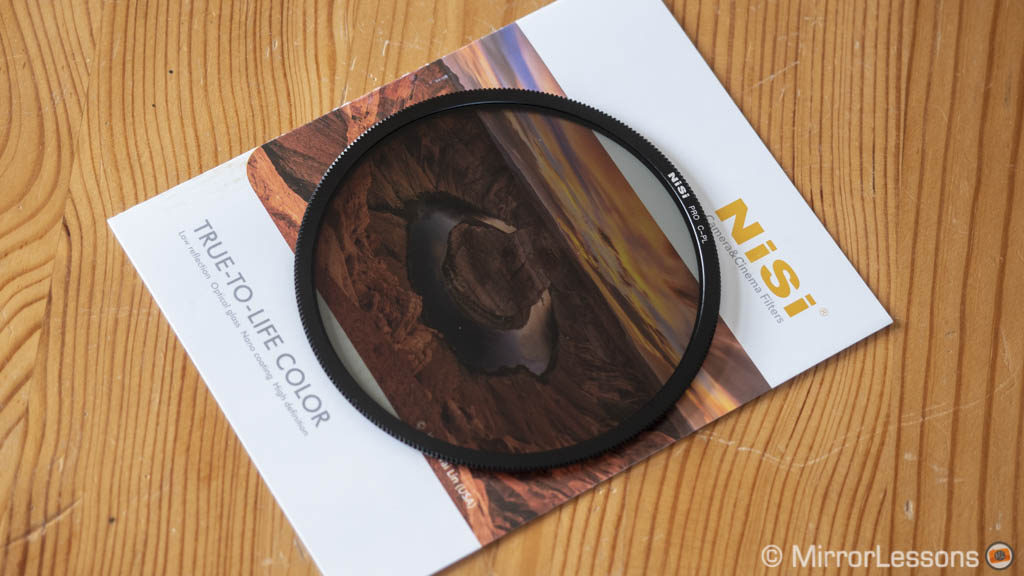
Despite being labelled a starter kit, the price is high and can easily put you off if you’re a beginner. Buying the V5 Pro Holder kit (which also includes the polarising filter) and the ND1.8 filter separately will cost about half the price. If you want more on the other hand, there are advanced, professional and signature kits available.
- Good: precise design, premium feel, excellent filter quality
- To consider: bundle kits are more expensive if you don’t need more than 2 filters
- Compatible with: A9, A7 III, A7R III, A7 II, A7R II, A7S II, A7, A7R, A7S (100mm filters are compatible up to 82mm diameter)
Check Nisi V5 Pro Starter kit price on B&H Photo
Check Nisi V5 Pro holder price on B&H Photo
Check Nisi ND 1.8 filter price on B&H Photo
Check Nisi ND 3.0 filter price on B&H Photo
Lee Seven5 system
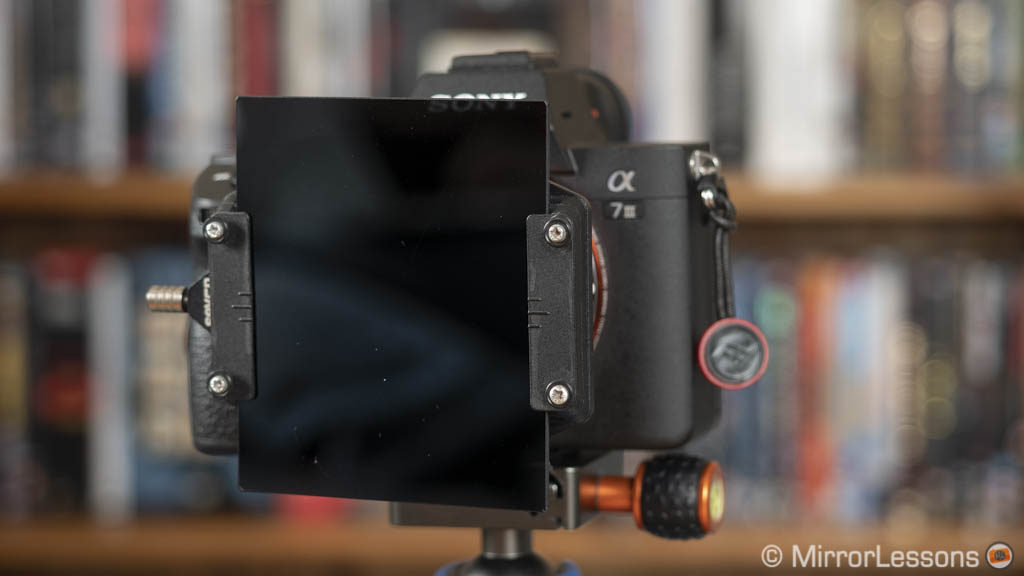
The Seven5 is the smaller system made by Lee (75x90mm) and is designed especially for mirrorless cameras. It can work on your A7 camera as long as you use lenses that don’t have larger filter thread than 72mm. This of course excludes important zoom and primes lenses, but if you mostly prefer to use small primes such as the Zeiss Loxia series, the Voigtlander E-mount series or other adapted manual focus lenses, then it can be an interesting solution.
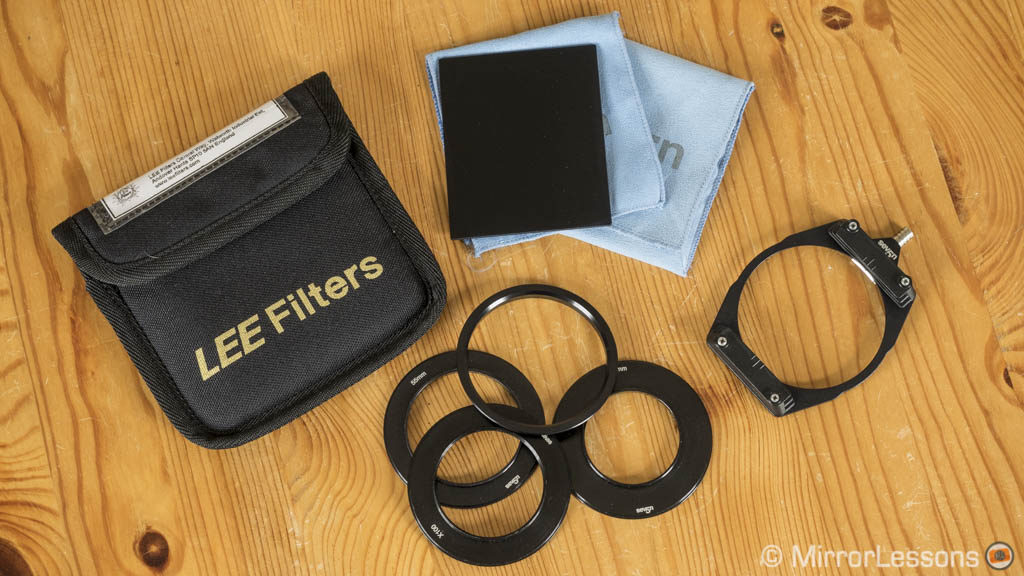
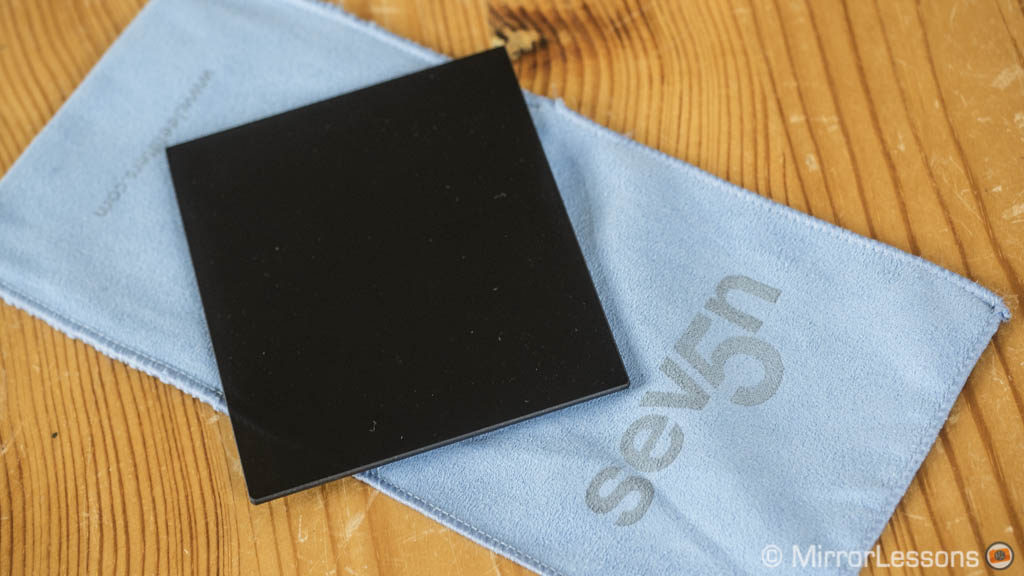
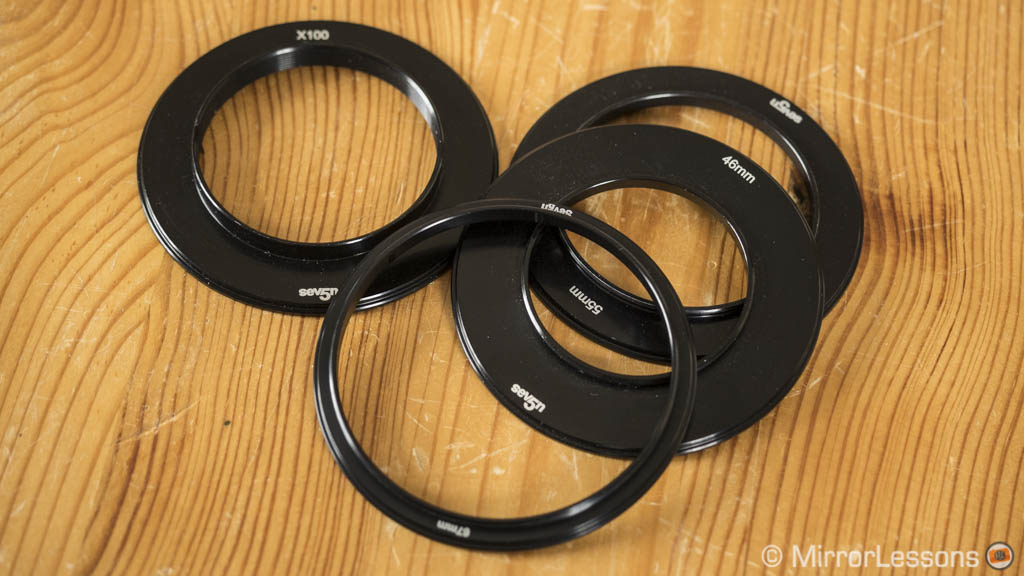
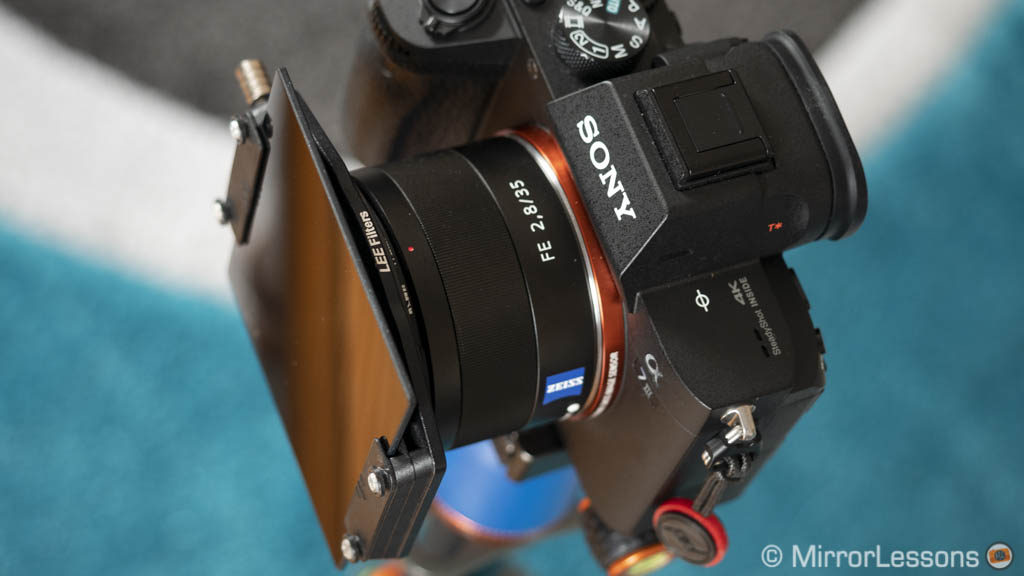
I’ve used the system several times with different cameras and the quality always matched my expectations. The holder can house two filters and there is a polarising filter designed for the Seven5 that can be mounted in addition to the two square filters.
There are several filters available, as well as various kits. The starter kit only includes a 0.6ND so you may want to add an ND filter like the Little Stopper. One annoying thing is that adapter rings must be purchased separately. Of course Lee has a 100mm system as well if you want more compatibility with all lenses.
- Good: compact system, high quality, good selection of filters, different bundles available
- To consider: works best with small prime lenses, adapter rings must be purchased separately
- Compatible with: A9, A7 III, A7R III, A7 II, A7R II, A7S II, A7, A7R, A7S (diameter limited to 72mm)
Check Lee Seven5 price on Amazon, Amazon UK, B&H Photo and eBay
Remote control
Controlling the camera remotely can be useful in a number of situations, especially when dealing with long exposures. The Bulb mode on the A7 series is pretty limited and you have to keep your finger pressed down on the shutter button the whole time. Sony has also ditched the PlayMemories apps on the latest generation of A7 cameras. Note that firmware 3.0 or later added a time-lapse function.
Sony RMT-DSLR2 Wireless Remote Commander
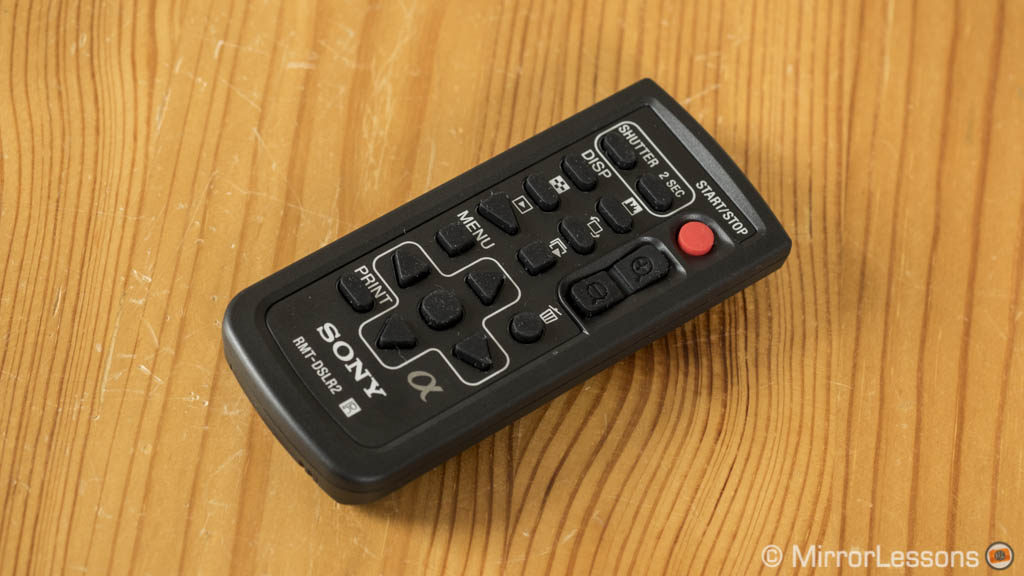
If all you want is a simple remote control, the Sony RMT-DSLR2 is a good solution. You press once to initiate the exposure in Bulb mode and a second time to end it. You can start video recording and navigate in the menu to change settings. Unfortunately you can’t trigger all the custom buttons but the 4-way arrows work as programmed on the control wheel of the camera. It works with infrared communication and is generally reliable regardless of how the camera is positioned, but it works best from the right side.
- Good: can control Bulb mode better, can trigger, video recording, can navigate the menu and activate certain custom buttons
- To consider: if you want time-lapse, it’s not the right tool
- Compatible with: A9, A7 III, A7R III, A7 II, A7R II, A7S II, A7, A7R, A7S
Check Sony RMT-DSLR2 price on Amazon, Amazon UK, B&H Photo and eBay
Pixel
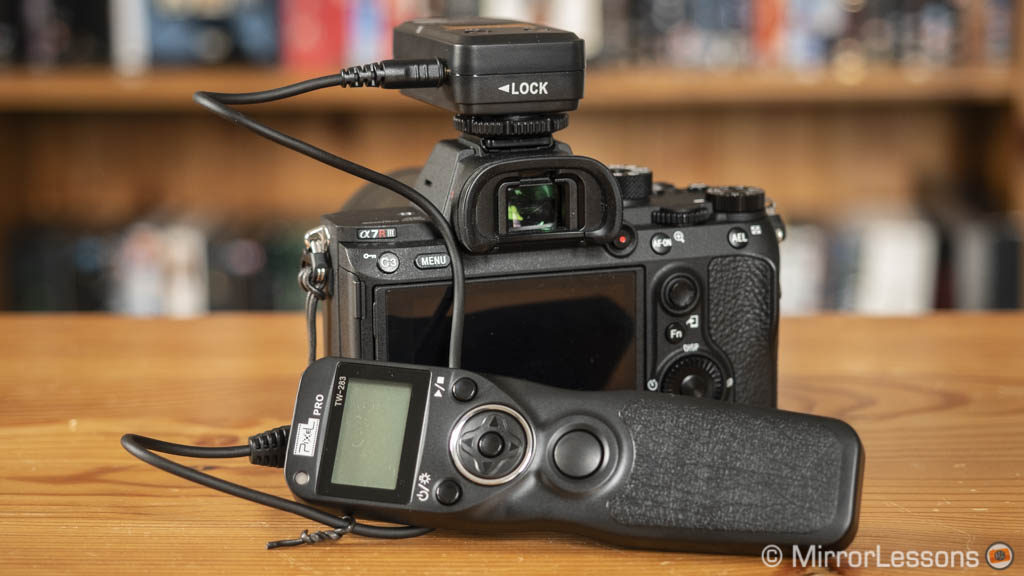
The Pixel TW-283 is certainly the most interesting solution here. It eases your work when shooting in Bulb mode by displaying the timer on the remote – something so basic, yet the camera doesn’t do it on its own LCD screen. It has a complete intervalometer mode where you can select the initial delay, the exposure duration (leave it to zero to use the shutter speed selected in camera), the interval time, the number of shots to take, the interval repeat time and the number of cycles. It’s pretty straightforward to set up. You can also use the remote for single, continuous shooting or self-timer.
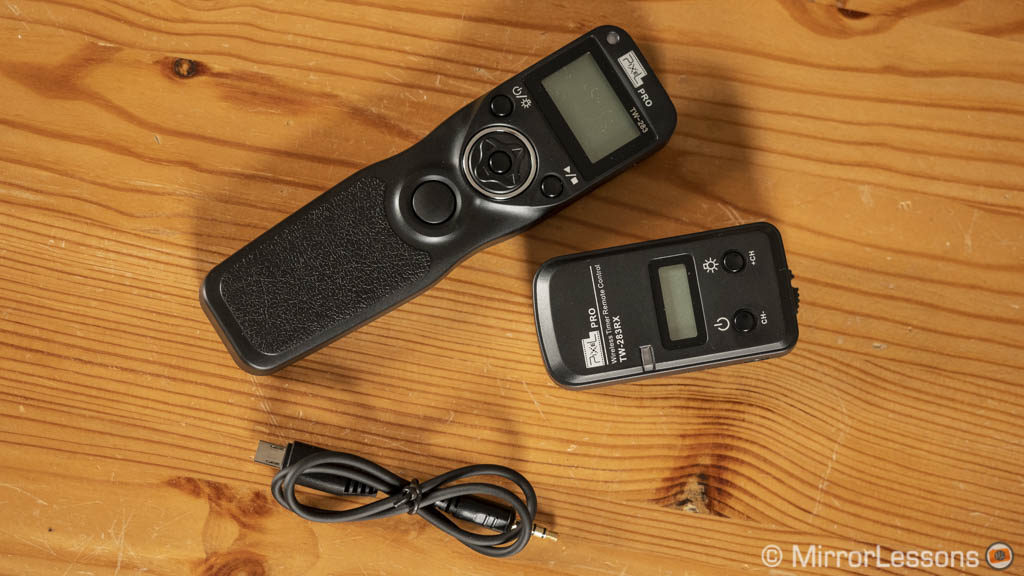
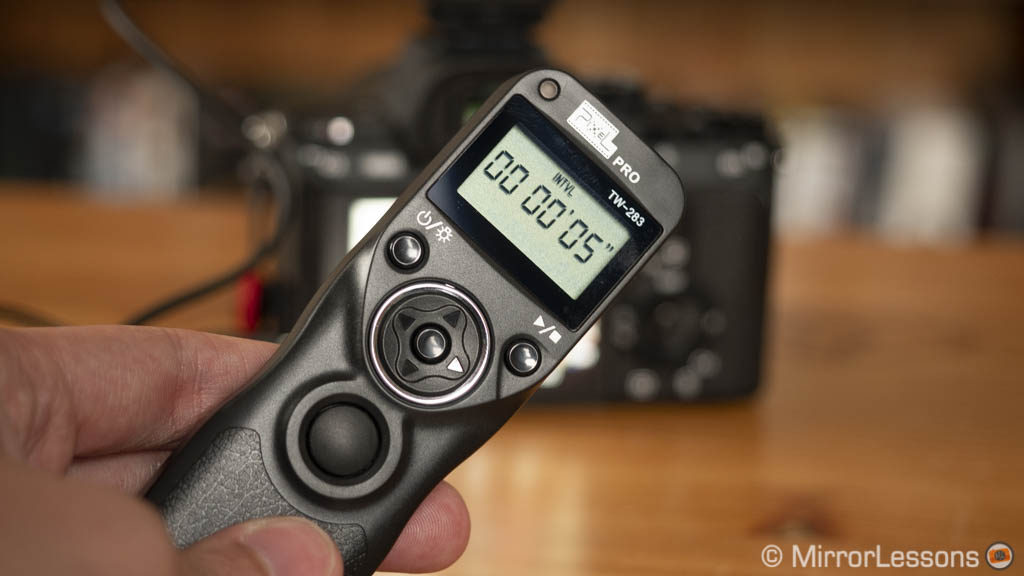
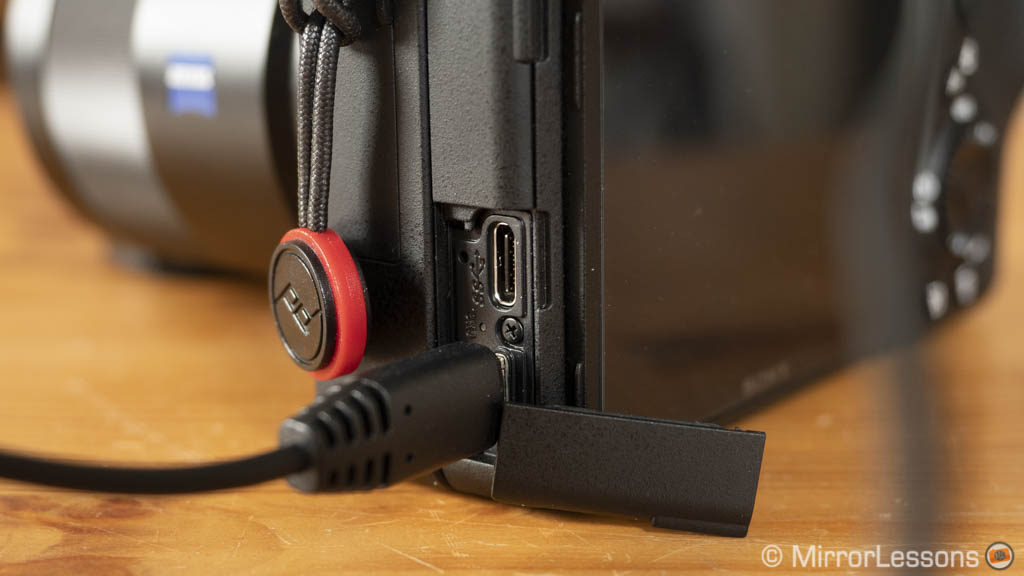
The Pixel TW-283 is composed of two units, one remote and one receiver. The latter can be attached to the hot-shoe and connects with the provided Mini Jack to Micro USB cable. The two devices work with 2.4Ghz radio transmission (30 channels available) and up to 80 metres approximately. The connection is very stable and the delay when pressing the shutter button isn’t too long.
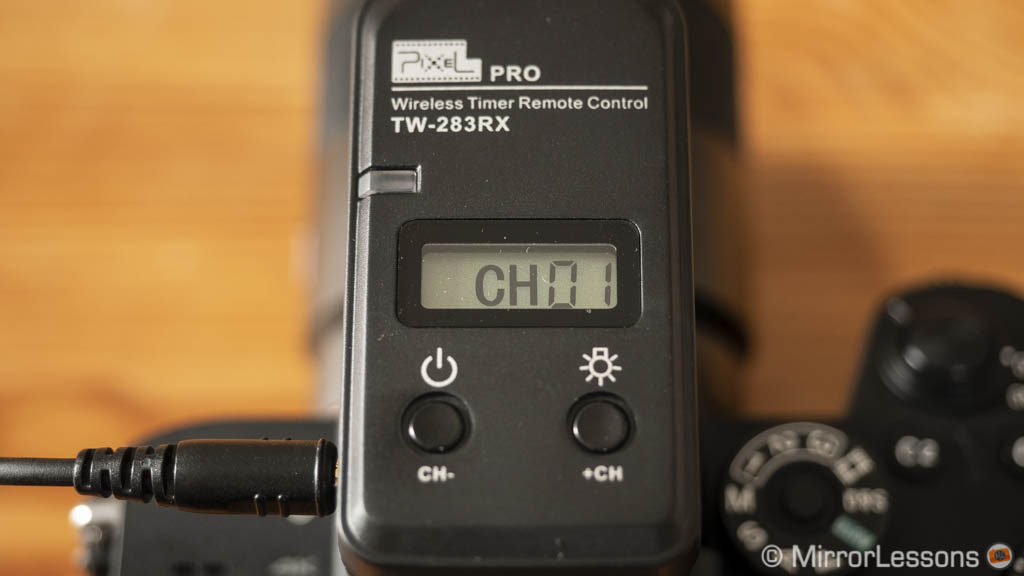
The build quality feels plasticky and the buttons are a bit cheap but you get used to them. The LCD panels have a backlit button but the orange light is weak. But given the low price, it’s a good investment.
- Good: inexpensive, radio control, all the features you need including intervalometer
- To consider: batteries for remote and receiver not included, LCD backlight is weak
- Compatible with: A9, A7 III, A7R III, A7 II, A7R II, A7S II, A7, A7R, A7S
Check Pixel TW-283 for Sony price on Amazon, Amazon UK, B&H Photo and eBay
Lens adapters
The advantage of a full frame (35mm) mirrorless system is that you can adapt many third party lenses. Some of the cameras with phase detection also retain autofocus with good performance.
Sigma MC-11 (EF-mount)
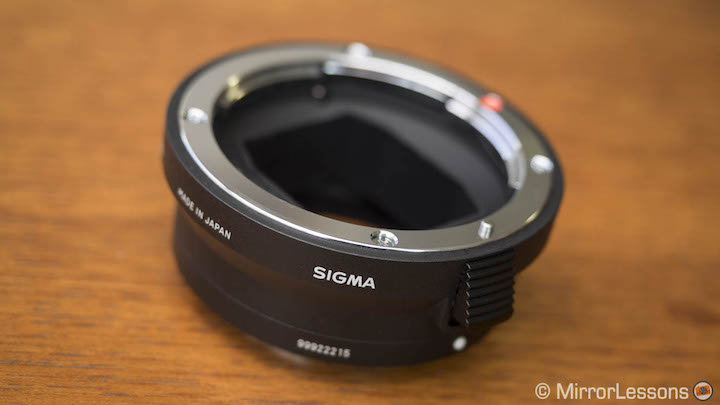
Now that Sigma is starting to release lenses with the native E-mount, you may think that the MC-11 adapter’s days are numbered but it will still serve a purpose for the many photographers who own Sony and Canon gear. Plus it’s one of the best adapters around and is reasonably priced. I had the chance to test it last year on the A7R II.
It is compatible with recent prime and zoom lenses from Sigma (see the full list here) and although Sigma doesn’t state it officially, many users have reported good performance with Canon lenses as well. However keep in mind that performance can vary from lens to lens and some might not be compatible (especially older versions).
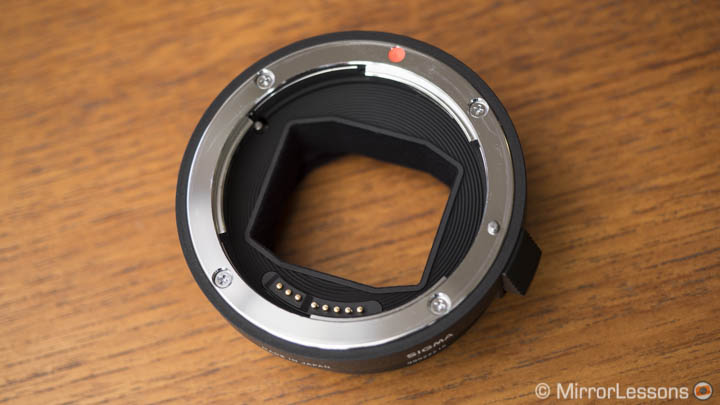
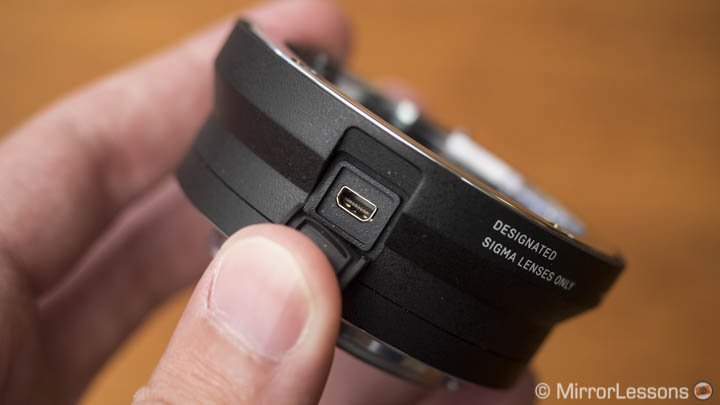
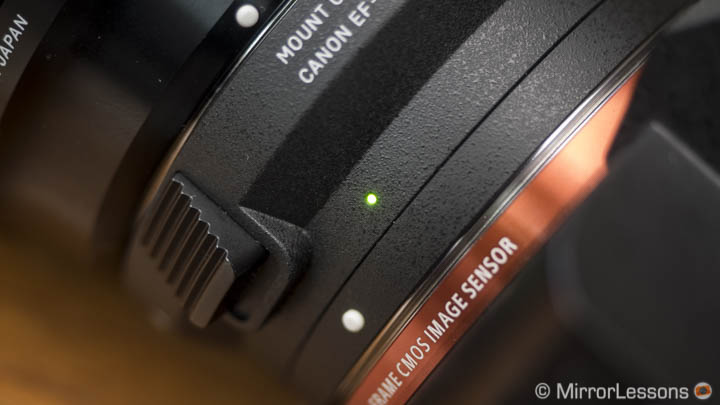
The build quality is excellent and a handy LED light warns you about the Sigma lens compatibility or the need for a firmware update for the lens. The adapter can take firmware updates too thanks to its USB port.
The MC-11 works with most autofocus settings found on your A7 camera, including Zone, Lock-On and EyeAF. In Single AF the performance can sometimes be slower than expected but in C-AF it is fast and reliable. It won’t be as fast as with native lenses but the keeper rate is more than decent. Autofocus works for video but the performance is slower.
- Good: well priced, all the AF settings are available, good performance in continuous AF
- To consider: slow performance in movie mode, not every EF-mount lens is compatible
- Compatible with: A9, A7 III, A7R III, A7 II, A7R II
Check Sigma MC-11 price on Amazon, Amazon UK, B&H Photo and eBay
Techart Pro
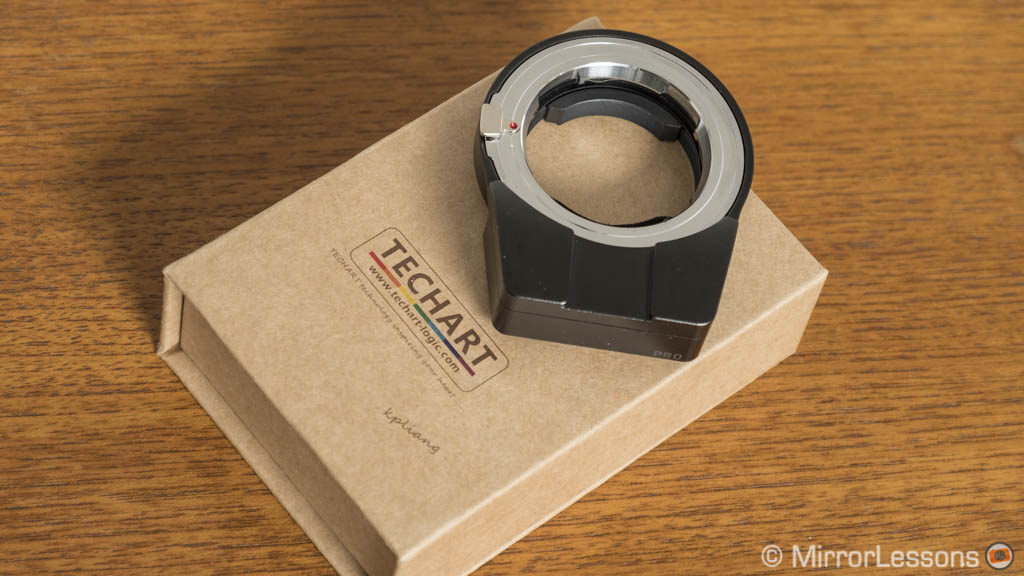
The Techart Pro is a unique adapter as it gives autofocus capabilities to Leica M-mount lenses, which are manual focus by default. The trick is that it has an internal motor that varies the distance of the lens from the sensor. It works with all M-mount lenses (Leica and third parties) but also other lenses such as Canon FD or Minolta MD if you add a second adapter. The build quality is excellent but keep in mind that the maximum weight can’t exceed 700g, otherwise the motor won’t work correctly and may become damaged.
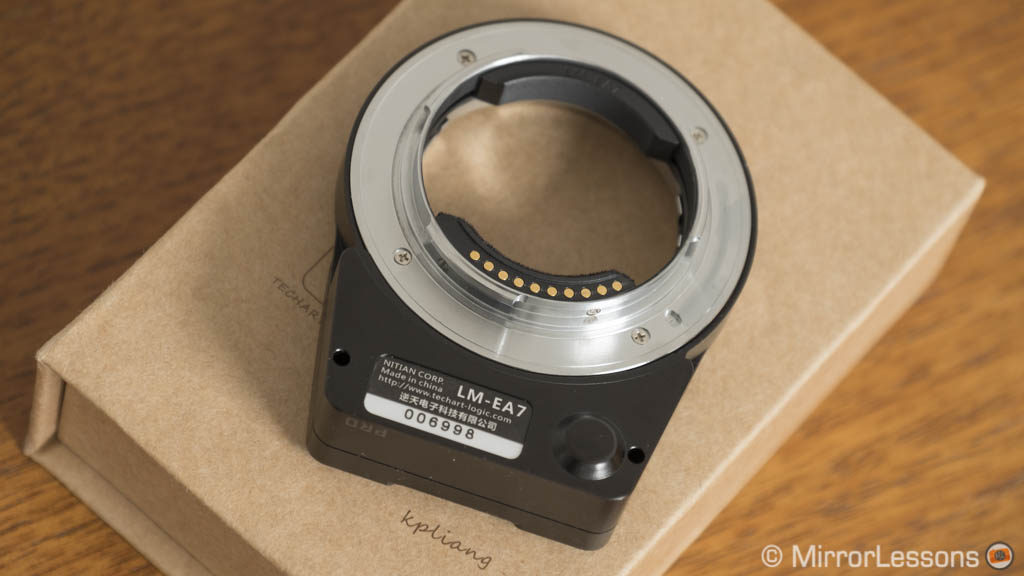
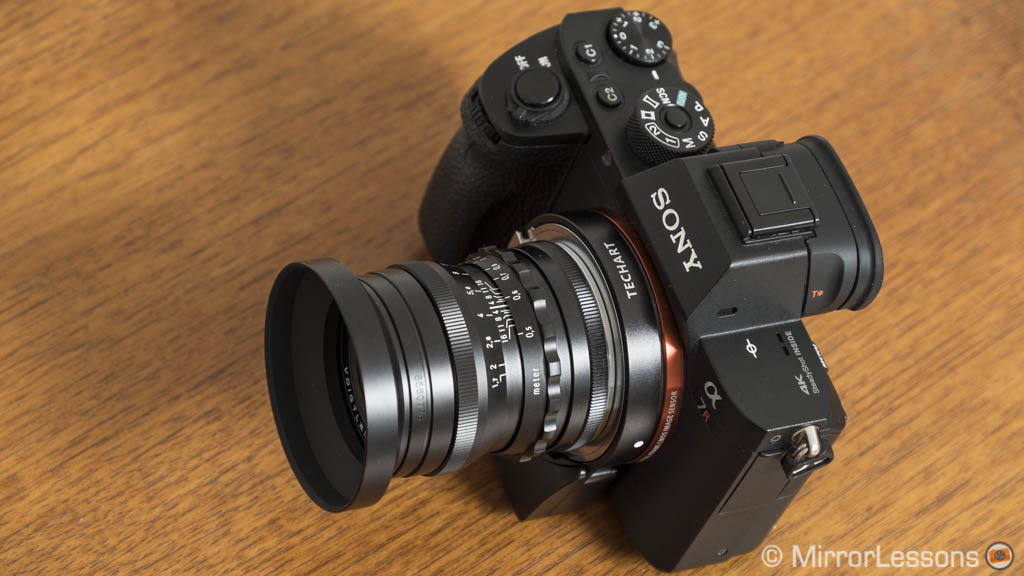
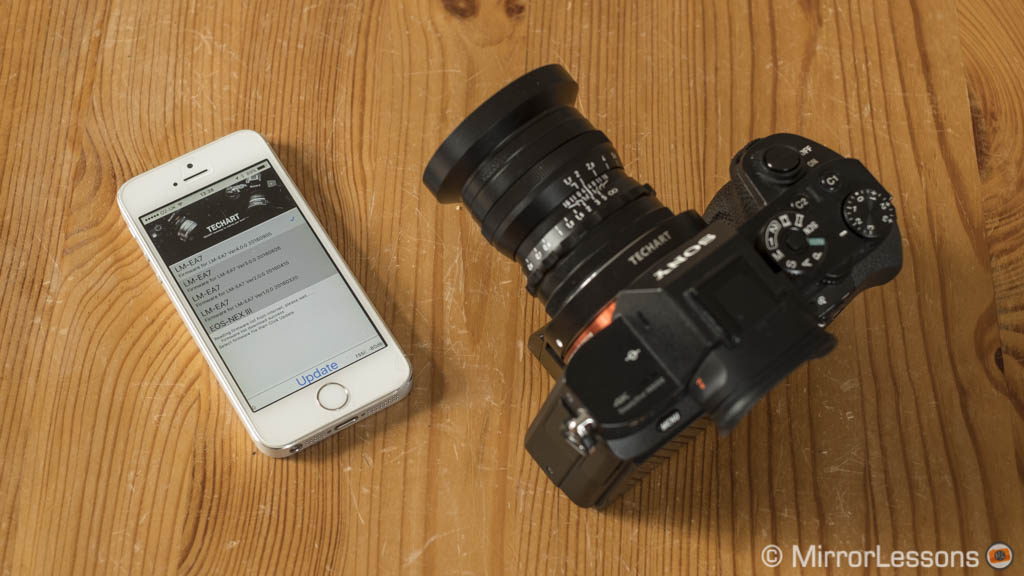
The adapter gives you single and continuous autofocus but won’t work in video mode. The performance is fast and reliable in good light and at close focus distances, but it is slower in continuous AF with moving subjects, or in low light. Because the adapter moves the lens further away from the sensor, it can also shorten the minimum focus distance of a specific lens.
At the time of testing it (late 2016, A7R II), Eye AF and other settings weren’t available but users have reported that it now works with the latest firmware (v6.0). It may be a good idea to double check though and ask users who own the adapter just how well it works with the camera you have.
The Techart Pro is compatible with sensor stabilisation but only works on three axes. Exif data is not precise unless you follow a few tricks but they are a bit complicated and limited to certain apertures (more on this in our video review).
Considering that this adapter is unique as of now, I have to praise the team for creating a product that actually works. I find it particularly useful with telephoto lenses. With wide angle lenses, zone focusing can be enough in some situations.
- Good: build quality, fast performance in S-AF, gives autofocus to manual focus lenses
- To consider: the lens or second adapter+lens should not weigh more than 700g, slow performance in C-AF, not compatible with video mode, compatibility with A7 III should be fine with firmware 6.0 but it’s wise to double check with owners
- Compatible with: A9, A7 III, A7R III, A7 II, A7R II
Check Techart Pro price on Amazon, Amazon UK and eBay
Shotgun microphones
If you like making videos, it’s not going to take long before you decide to invest in a better microphone than the built-in stereo mic found inside your camera. A shotgun can deliver better quality when recording a subject in front of you while minimising the sound around him or her.
Rode VideoMic Pro
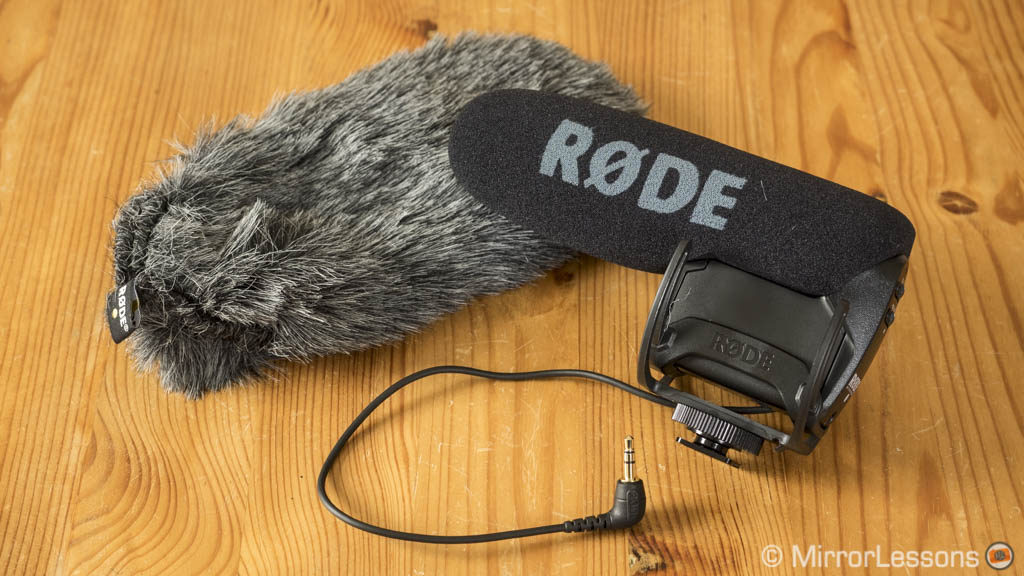
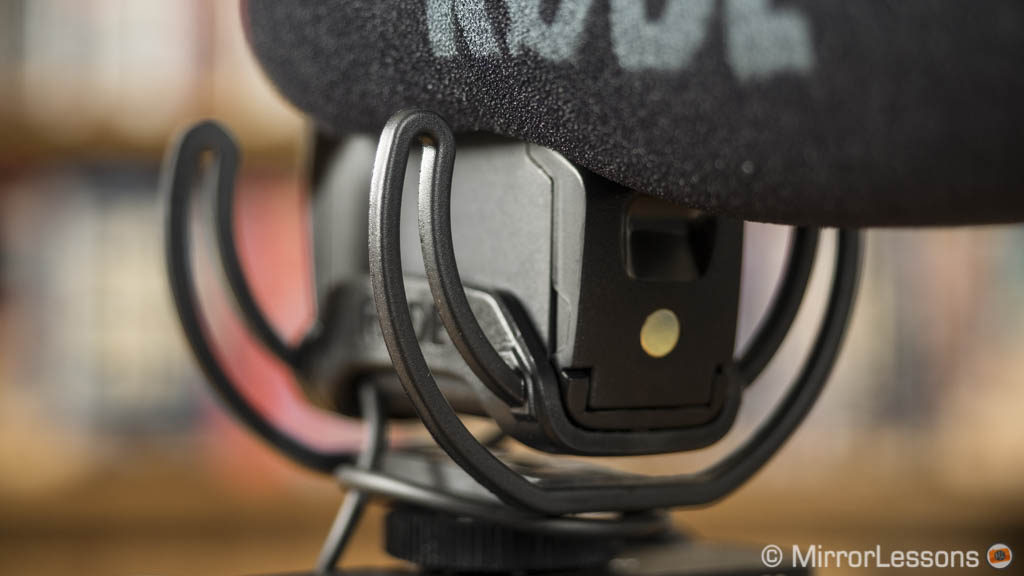
The VideoMic Pro is a condenser microphone with a super cardioid pattern. It is light and comes with a shock-mount to block vibrations or rumbling when operating the camera. The shock mount feels fragile however so I would exercise some caution when mounting or unmounting the microphone.
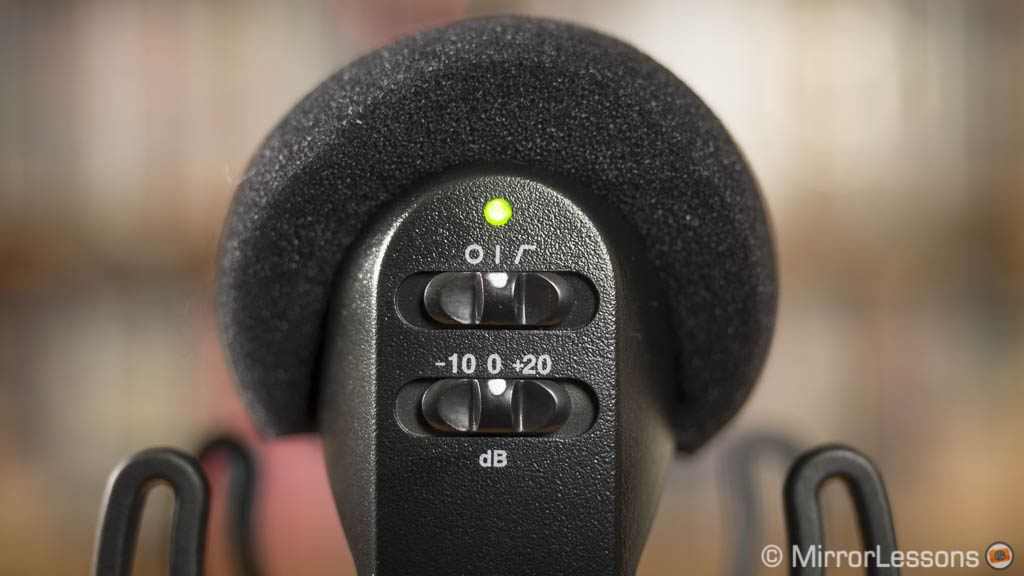
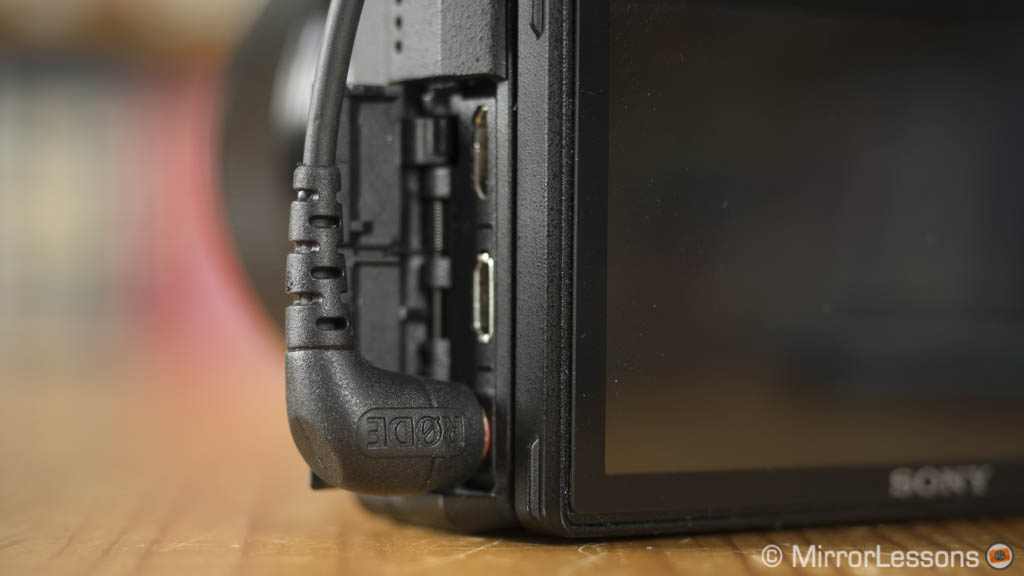
It connects to the camera directly thanks to the 3.5mm input and provides a dual mono signal. You can select a high pass filter (80Hz) to reduce background noise, decrease the input level (-10db) when the scene is very loud (music concert for example), or boost the signal by +20db.
The quality of the audio is deep and clear and it does a decent job at separating voices from background noise as long as the latter isn’t too loud. However placing the 9V batteries inside the microphone is a rather annoying experience as the battery cover is difficult to reach and open. The price is reasonable and you can find a bundle with a DeadCat wind shield included.
- Good: excellent audio quality, high pass filter and recording level options, comes with a shock-mount
- To consider: the shock-mount feels fragile
- Compatible with: A9, A7 III, A7R III, A7 II, A7R II, A7S II, A7R, A7, A7S
Check Rode VideoMic Pro on B&H Photo
Sony XLR-K2M XLR Adapter Kit with Microphone
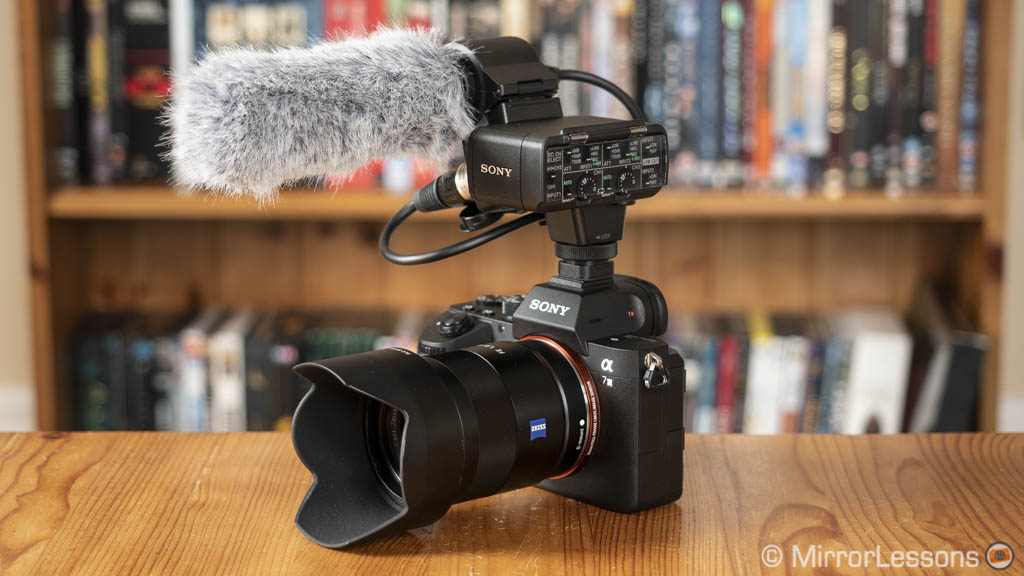
The XLR-K2M Kit is a serious investment to consider for many reasons.
First of all, it connects to the Multi-Interface hot shoe of your A7 camera which means you don’t need to connect it to the mic-in port. This means there aren’t any extra wires to deal with. It is powered by the camera battery itself. In the case of the A9/A7 III/A7R III it’s not a problem because the new battery lasts a long time. For previous Sony E-mount cameras however, expect the already not-so-great battery life to decrease even more rapidly.
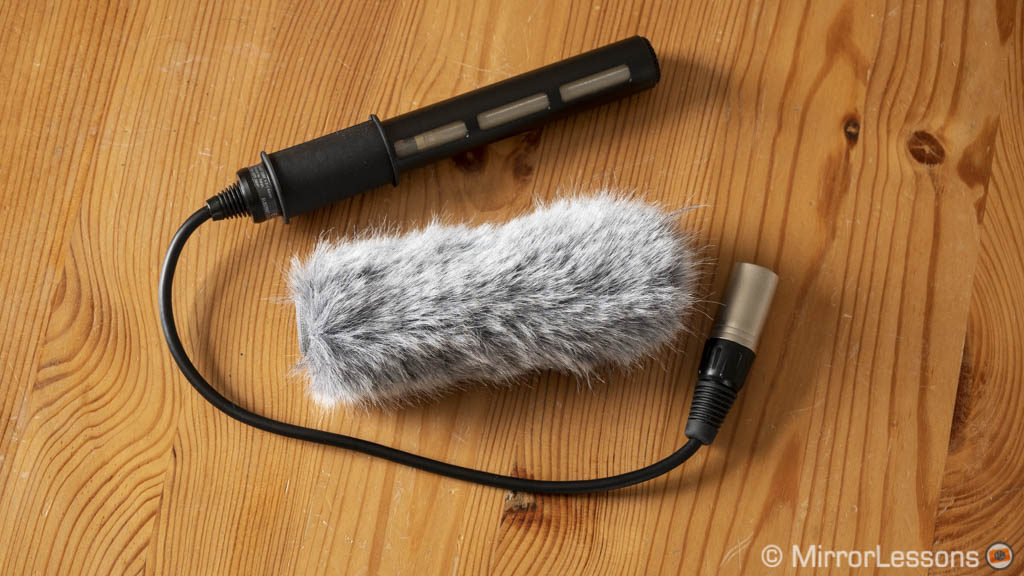
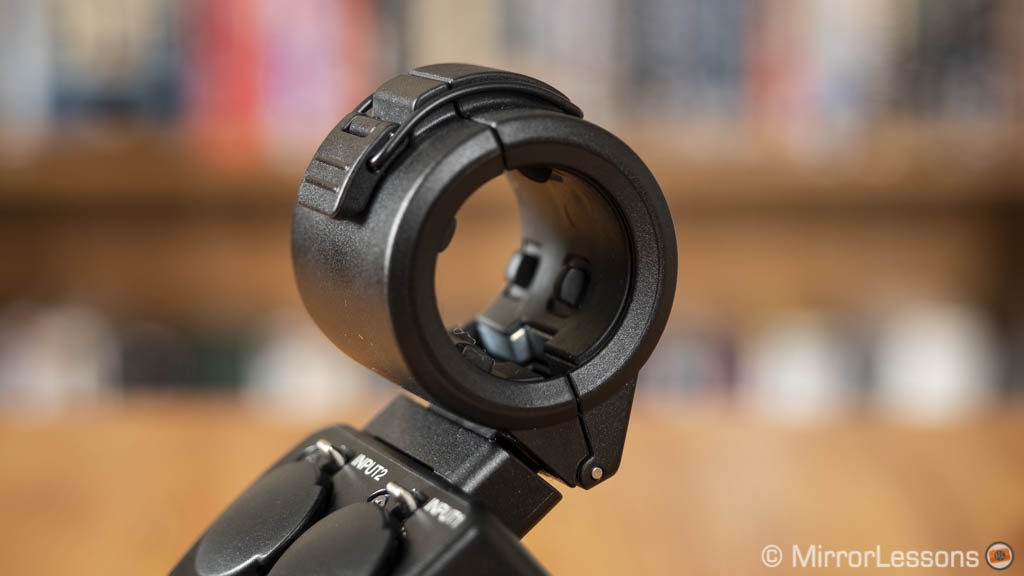
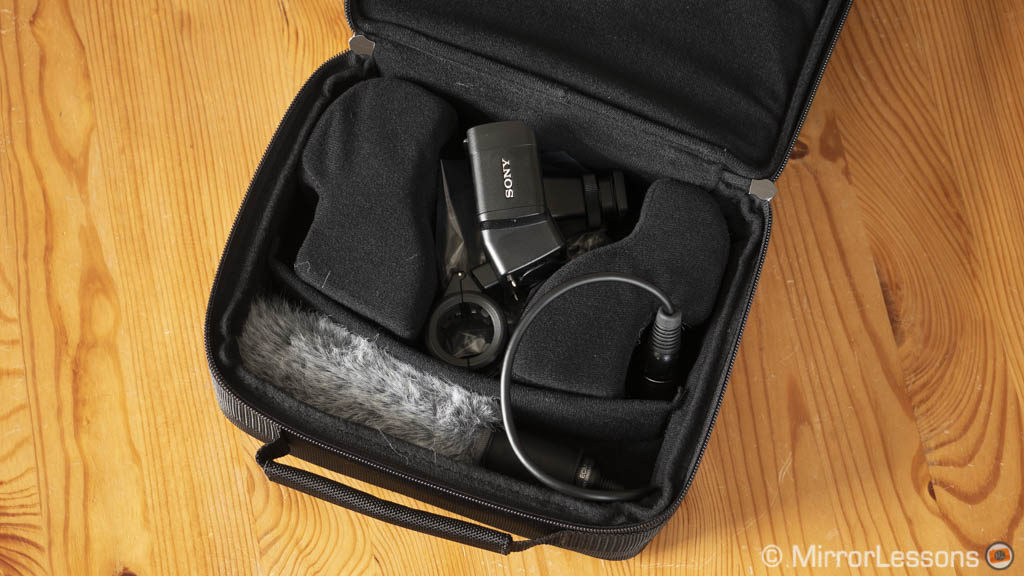
Second it features two XLR inputs, which is the standard used by professionals. The pre-amps are bigger and provide a cleaner signal while XLR provides compatibility with lots of broadcast equipment. Of course having two inputs means you can use two sources at the same time, like for example a generic ambient mic on one channel, and a lavallier or shotgun for interviews on the second channel.
Third, you can adjust and control your audio more easily thanks to the physical dials and buttons found on the side. You can adjust input volume manually, select the input level and choose to record on one or two channels. You can use microphones with phantom power (48V) or record from a line source.
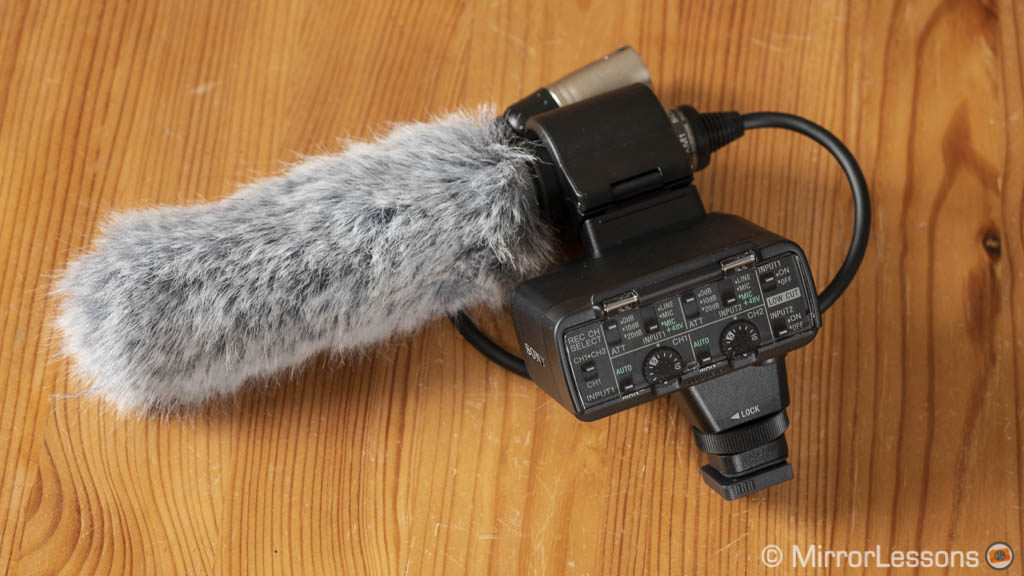
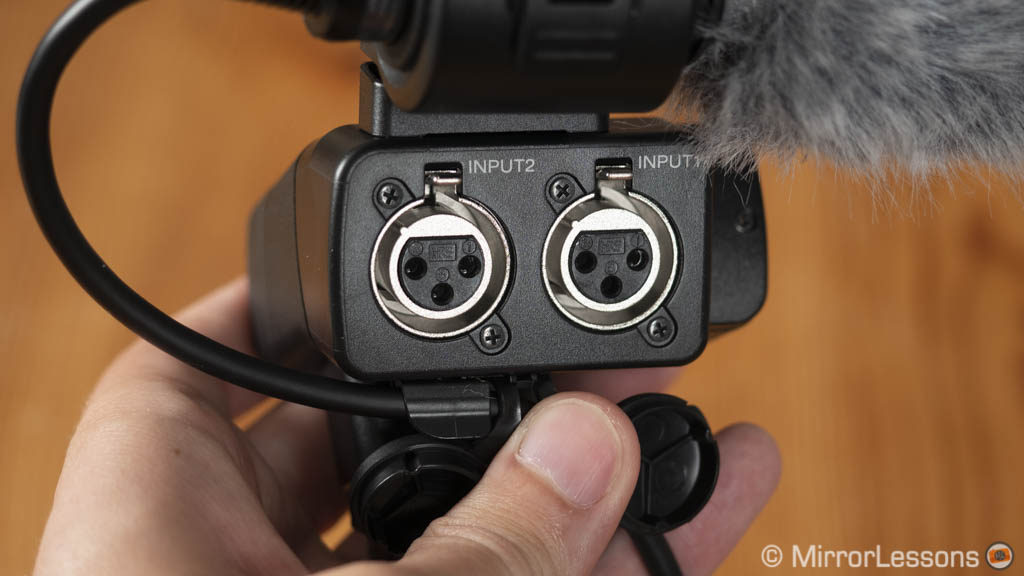
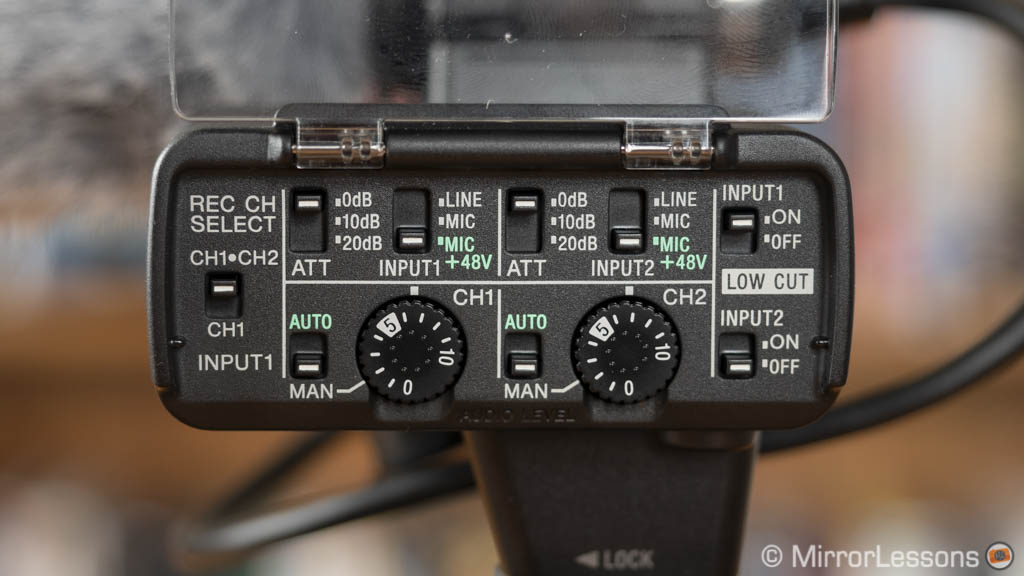
Is everything positive? Well, for certain it isn’t cheap. It comes with an ECM-XM1 shotgun microphone which provides good sound quality but is a bit too sensitive to the wind (even with the provided wind screen). It is also worth noting that if you use rig cages or any other accessories, they may interfere with the correct mounting on the microphone.
The XLR-K2M kit adds flexibility and convenience. It immediately felt familiar because the layout is the same one I used to use on my old camcorders back in the day. For run and gun work or every assignments when you need to set up quickly, I highly recommend it.
- Good: two XLR inputs, lots of physical manual controls, doesn’t require an extra battery, connects with the multi-interface hot-shoe (no need to use the 3.5mm mic input on the camera)
- To consider: on the expensive side, the provided microphone is average, it may drain the battery faster on older cameras that use the NP-FW50 type, could prove problematic if you want to use a rig cage that obstructs the connection to the hot-shoe
- Compatible with: A9, A7 III, A7R III, A7 II, A7R II
Check Sony XLR-K2M price on B&H Photo
Lavalier microphones
If you’re doing lots of interviews or v-logs, you may want to consider a lavalier microphone. They allow you to put the mic much closer to the person (clipped on the clothes), the subject has more freedom to move in the scene and you don’t have to worry about losing sound as the microphone is attached to the subject.
Rode RodeLink Wireless Filmmaker kit
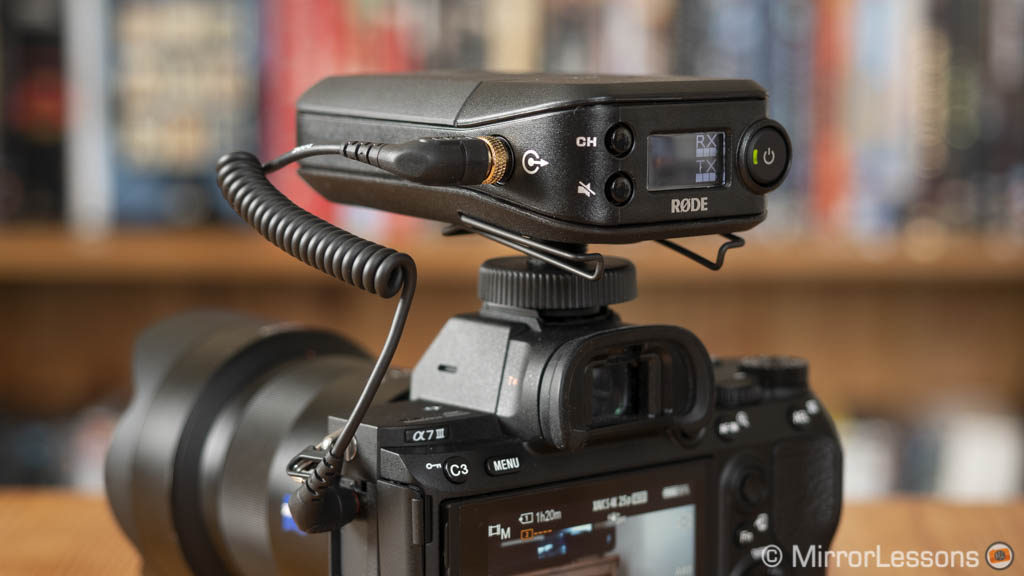
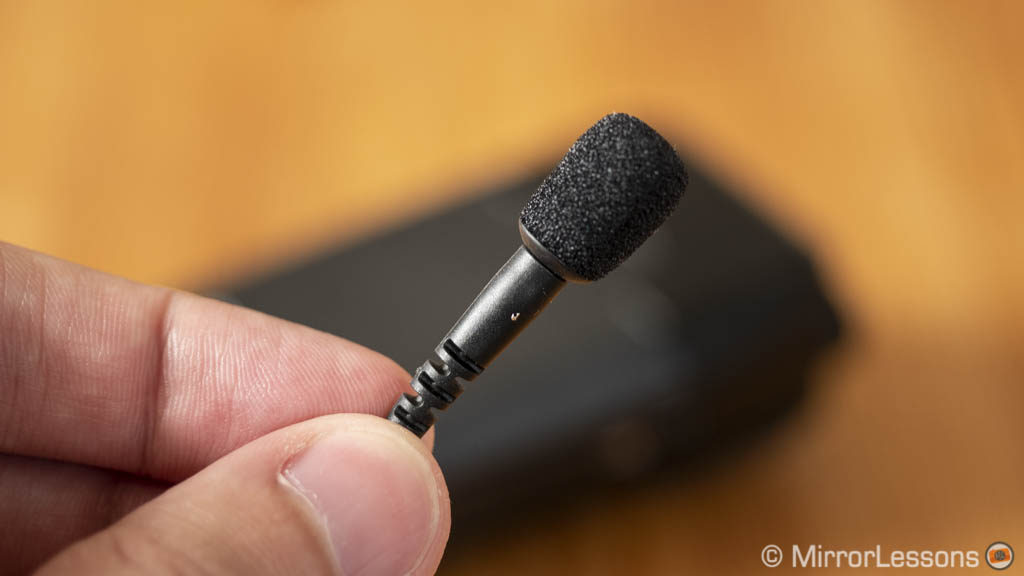
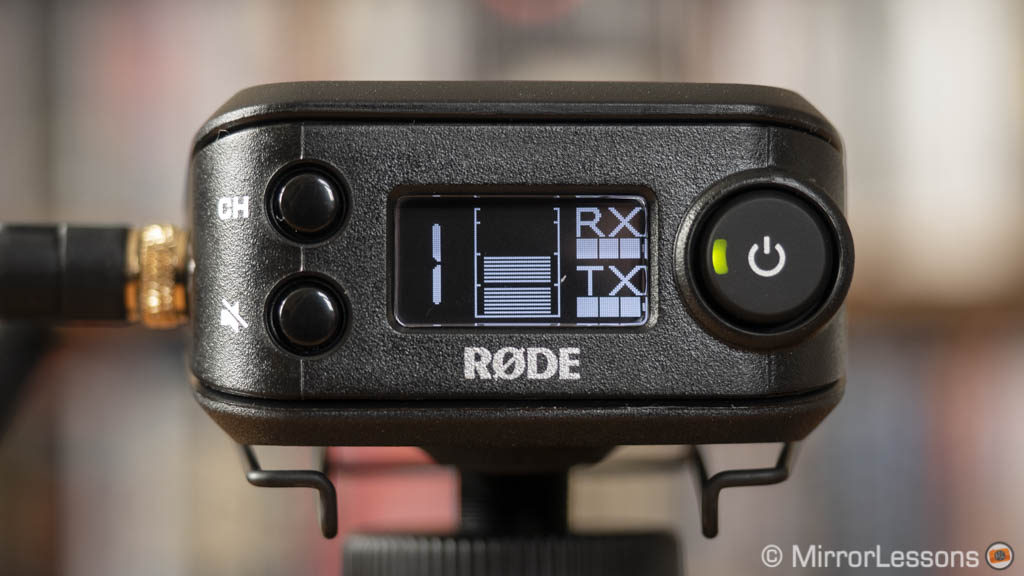
The RodeLink kits consist of one lavalier type microphone, one transmitter and one receiver. The main advantage of this set up is ease of use: pairing the transmitter and receiver is a no brainer, and there is not much else to do once the microphone and camera are connected. It’s a shame that the buttons to control the level are hidden inside the battery compartment and therefore are not easy to access however.
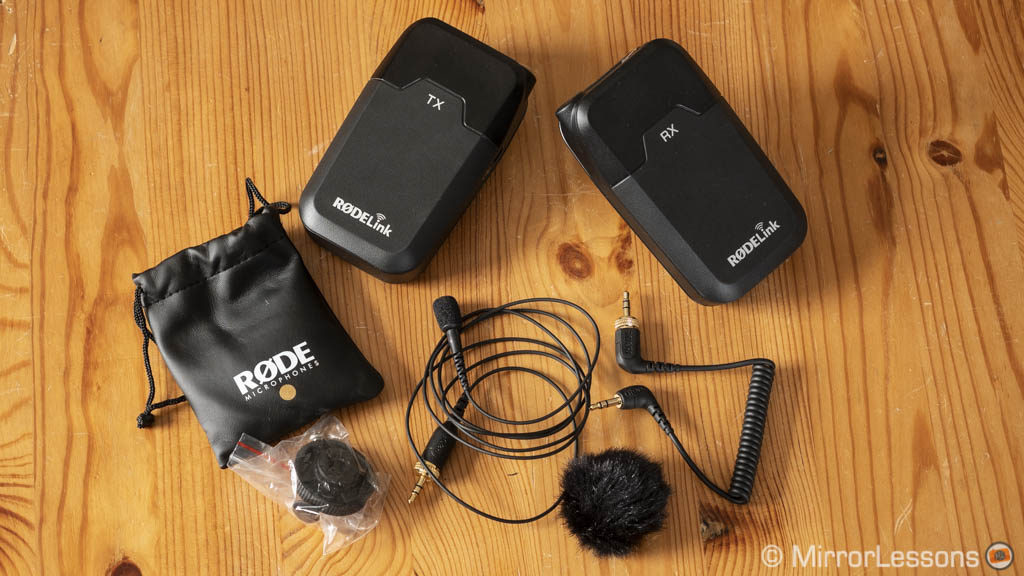
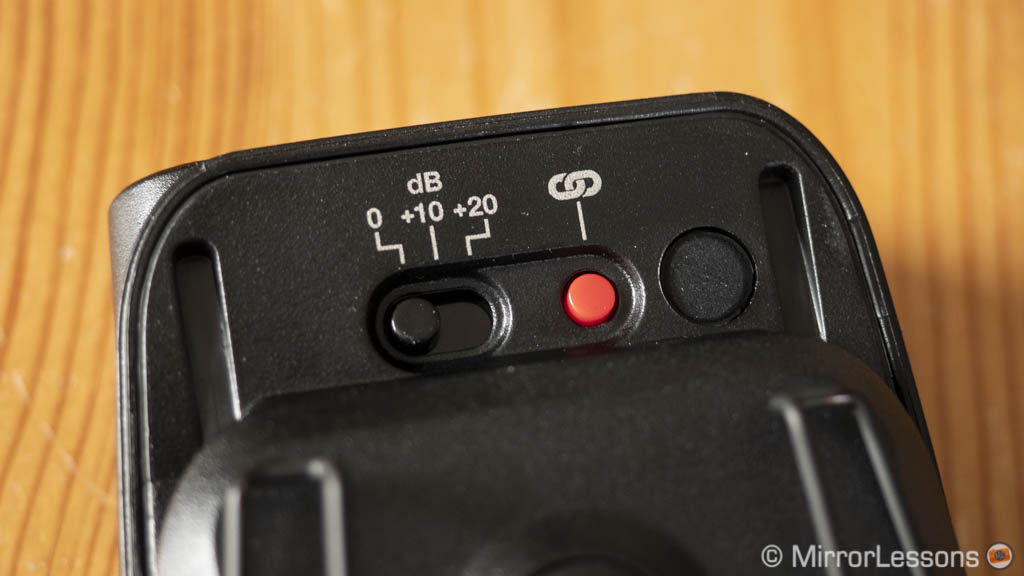
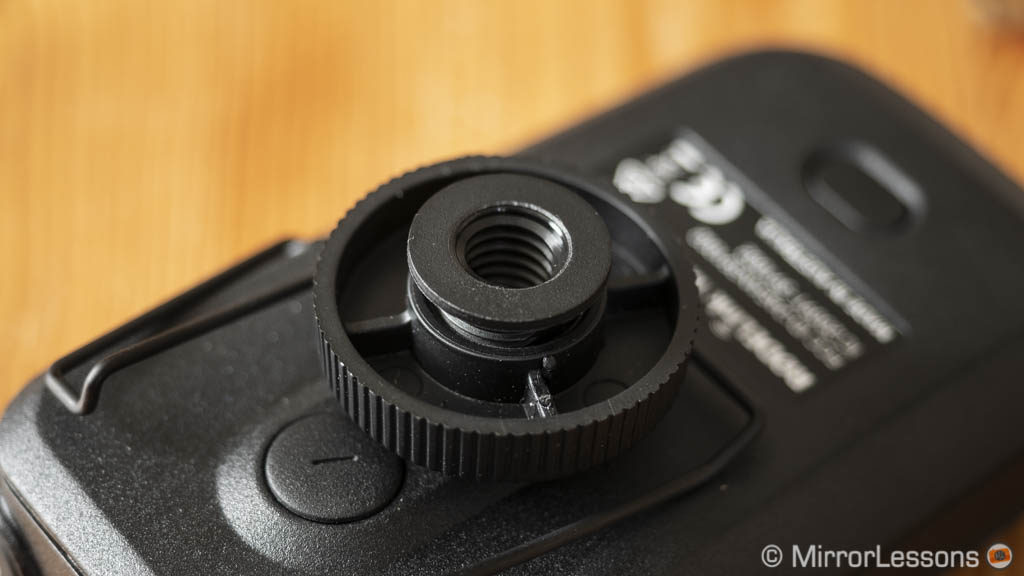
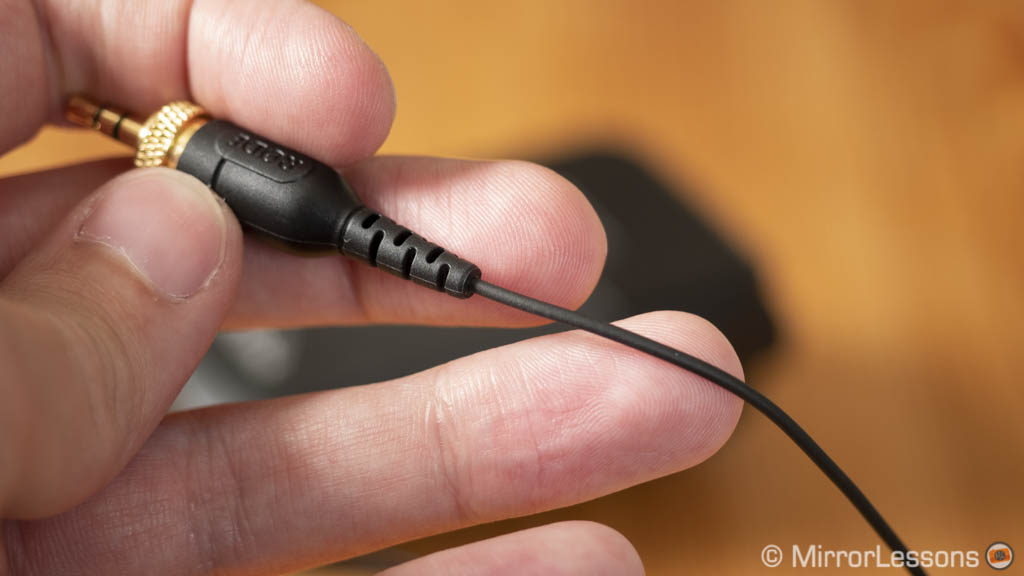
The packs are a bit larger than you might like but that didn’t bother me too much, and the antenna is built-in so you don’t have to deal with a fragile external wire. The build quality doesn’t feel 100% reliable though. For example the knob used to attach the receiver to the camera’s hot-shoe is made of cheap plastic and is rounded rather than square, so the unit may rotate during use. The small fluffy wind shield sheds easily as well. I’ve also ready many complaints about the mic wire breaking after a while. I haven’t had the chance to use this product for an extensive time, but I agree it feels weak. So overall I would advise extra care when using the kit.
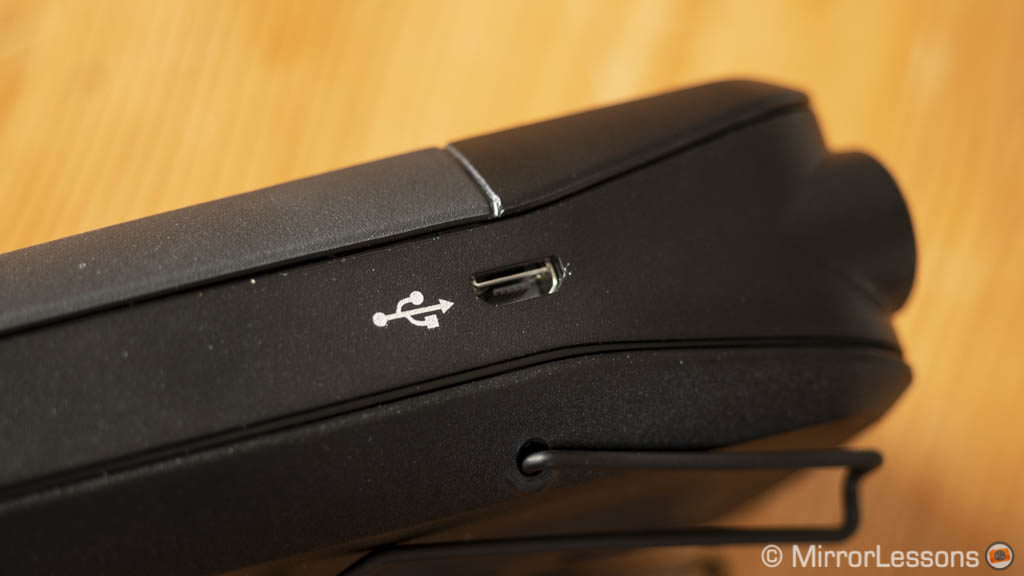
The pair uses a 2.4GhZ digital signal with a 24-bit 44.1kHz lossless transmission. With the provided lavalier mic, I found the voice clear but also lacking some depth and warmth. The signal remains solid even if you walk into another room (maximum distance is around 100m) but the level display on the receiver is not precise. Both transmitter and receiver use two AA type batteries each and the battery life is very good overall. You can also power them via USB.
- Good: easy to use, keeps strong signal at a distance, good audio quality
- To consider: build quality is lacking in some areas, voice lacks a bit of warmth with provided microphone, no 48kHz
- Compatible with: A9, A7 III, A7R III, A7 II, A7R II, A7S II, A7, A7R, A7S
Check RodeLink kit price on B&H Photo
Rode SmartLav+
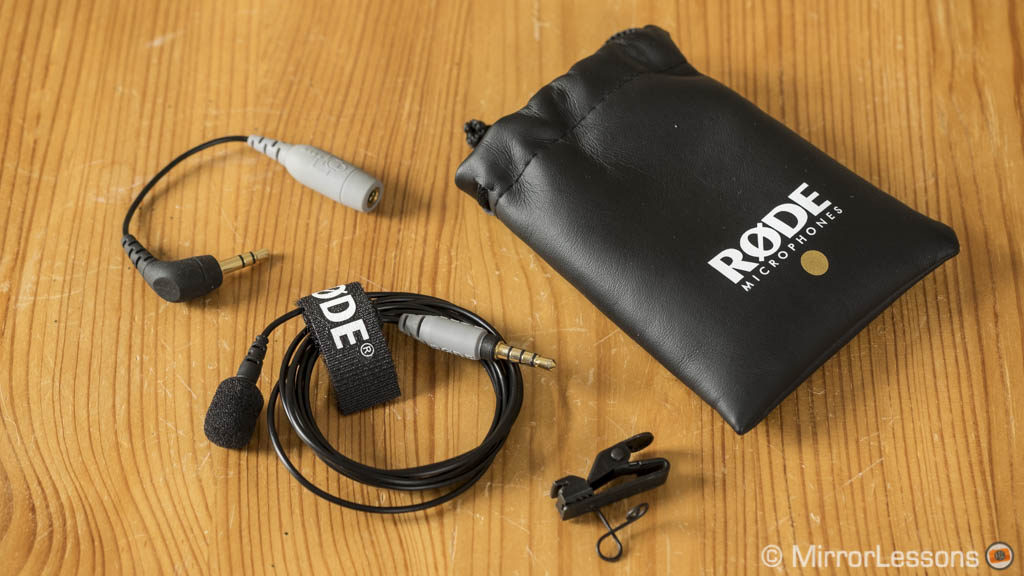
A cheaper solution for interviews or v-logs with a lavalier microphone is the Rode SmartLav+. Instead of dealing with a transmitter and receiver, you connect the mic to your mobile phone which serves as an external recorder with the Rode Rec app (or third party). It’s the solution we were using for our YouTube channel until recently.
The Rode app has lots of settings for quality, metadata and other markers but you can also use a third party app. The sound quality is excellent and it’s a great kit to start with. The only thing you need to keep in mind is that audio and video will need to be synced in post since they’re not recorded on the same device. A quick and loud clap of your hands after hitting the record button on both devices will be enough.
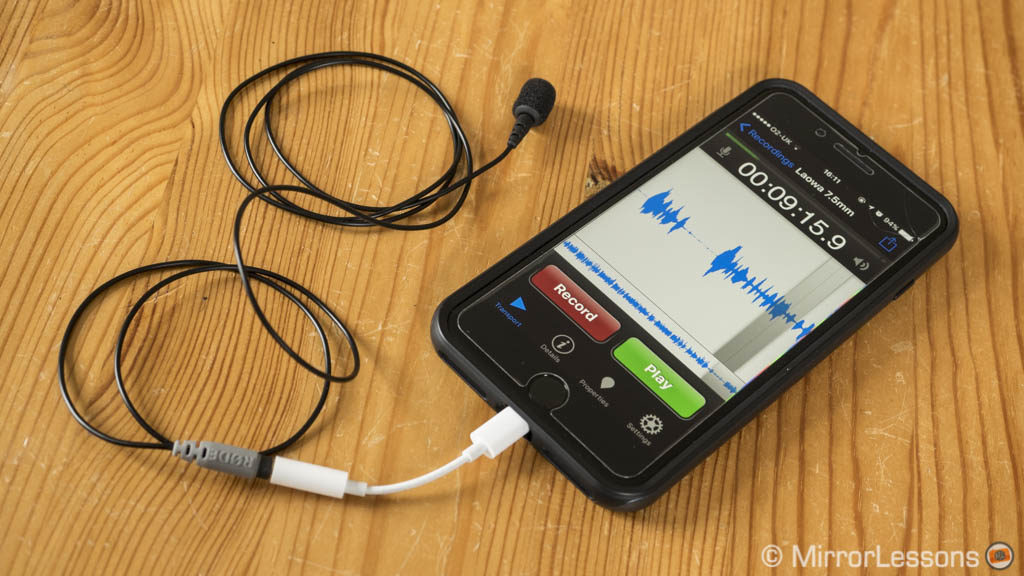
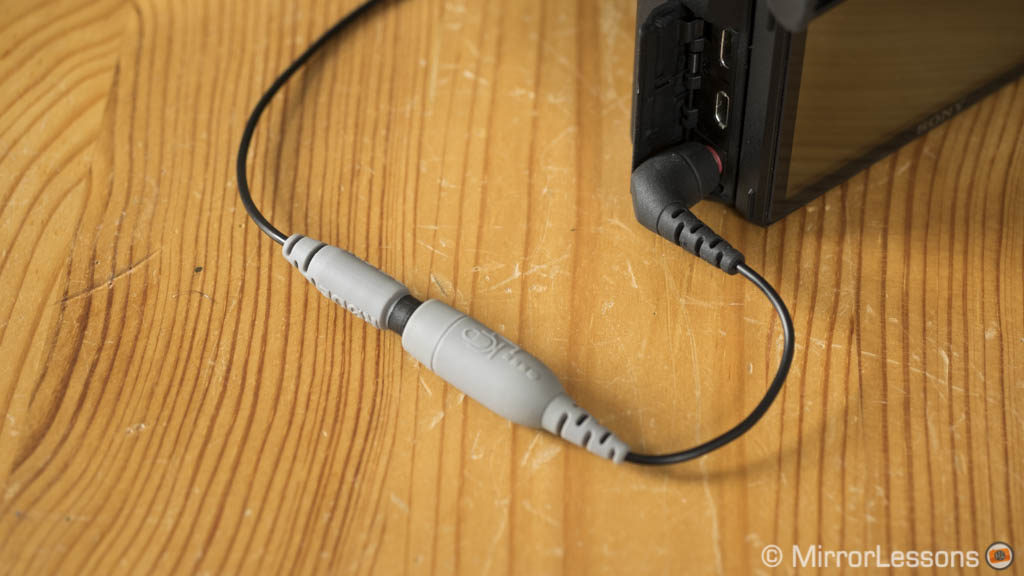
You can also connect the smartLav to the camera directly with the optional SC3 adapter (TRRS to TRS). However the wire is not long enough to be comfortable with that set-up.
- Good: affordable, excellent sound quality, can be used with your mobile device
- To consider: video and sound need to be synced in post, to record in camera directly you need the SC3 adapter
- Compatible with: A9, A7 III, A7R III, A7 II, A7R II, A7S II, A7, A7R, A7S
Check Rode SmartLav+ price on Amazon, B&H Photo and eBay
SD cards
We’ve saved them for the end but not because they are less important than the other accessories mentioned here. Quite the contrary, SD cards are the most vital accessory you can buy since their job is to store all your images and video files. There are many brands and many specifications to consider but in my experience it doesn’t make sense to buy the most powerful ones on the market. Rather I go for those that give me everything I need without being too expensive.
Sony SDXC 64GB UHS-II U3 Class 10
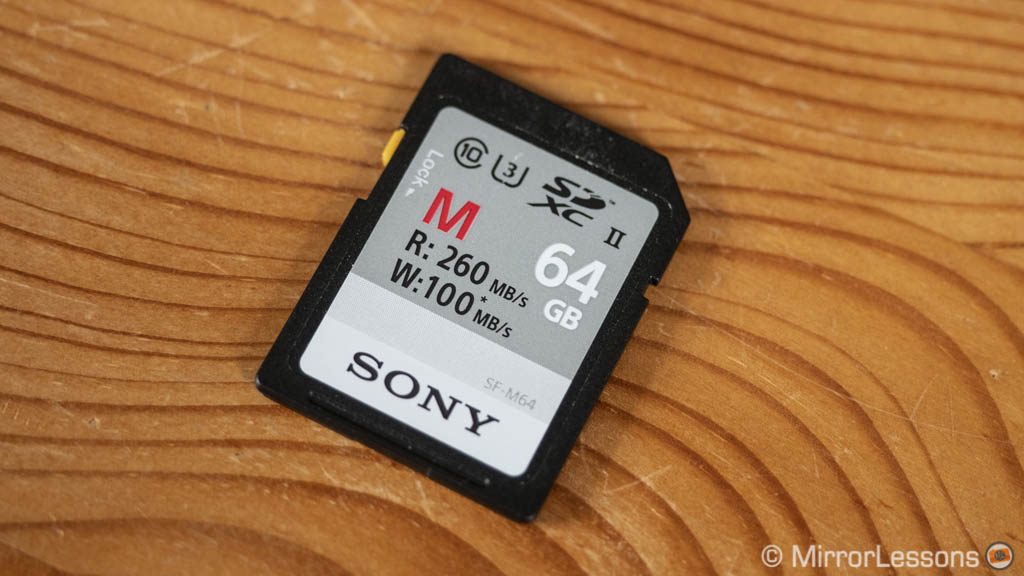
This Sony card is well priced and has proven extremely reliable when shooting RAW in continuous mode or 4K video with the A7 III and A7R III. It has a maximum writing speed of 100MB/s, which is more than enough for 4K video, which has a data rate of 100Mbps (aka 12MB/s). The read up speed is of 260MB/s so playback is always smooth and quick. It is available in 32GB and 128GB sizes as well.
- Compatible with: A9, A7 III, A7R III (it can still work on older A7 models but speed might decrease as they’re not UHS-II compatible)
Check Sony 64GB UHS-II price on Amazon, Amazon UK, B&H Photo and eBay
Sandisk Extreme Pro SDXC 64GB UHS-I U3 Class 10
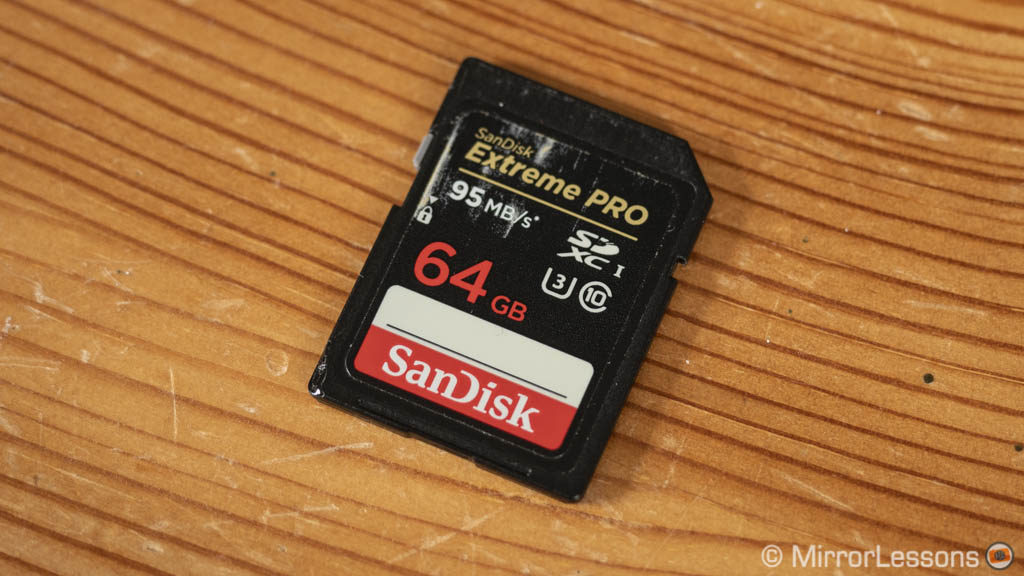
I’ve been using this SD card for years and it’s probably the most reliable I’ve ever owned. It’s fast enough to record 4K video (95 MB/s) and the perfect fit for the second slot of your A7 III camera which is not UHS-II compatible.
- Compatible with: A9, A7 III, A7R III, A7 II, A7R II, A7S II, A7, A7R, A7S
Check Sandisk 64GB price on Amazon, Amazon UK, B&H Photo and eBay
Do you have any other accessories to suggest for the Sony A7 III or other cameras in the full-frame series? Tell us about them in the comments below!


