Updated on: March 6th, 2019
A few weeks ago we shared our in-depth comparison between the Fujifilm X-T1 and X-T2, but if you are interested in Fujifilm’s latest flagship, there is another contender worth talking about: the X-Pro2.
Released in January 2016, the X-Pro2 warmed the dancefloor by showing off a new sensor, relevant improvements to autofocus performance, a more robust build quality and enhanced functionalities. The X-T2 came later in July to refine that new technology, and even went a step further by adding more advanced video capabilities that brought it to the same level as the competition.
I tested both products in-depth this year and while the choice for me is now clear, I admit it took more time than I expected to come to my conclusion. Let’s see why.
Ethics statement: We purchased the X-Pro2, then exchanged it for the X-T2 to conduct our full reviews and comparisons. We were not asked to write anything about these cameras, nor were we provided any other compensation of any kind. Within the article, there are affiliate links. If you decided to buy something after clicking the link, we will receive a small commission. To know more about our ethics, you can visit our full disclosure page. Thank you!
[toc heading_levels=”2″]
Article updates
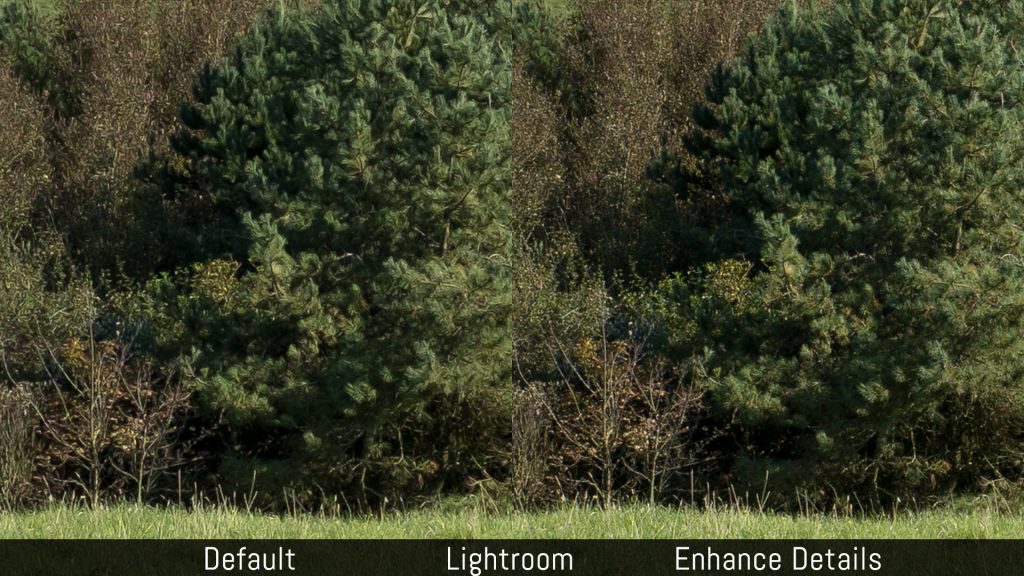
- March 6th, 2019: added example with the Enhance Details function of Lightroom Classic CC
- July 20th, 2018: edits related to the X-Pro2 firmware 5.0
- July 2nd, 2018: new information on the firmware 4.10 for the X-T2
- January 5, 2018: added information about firmware 4.0 for the X-Pro2 and firmware 3.0 for the X-T2
- June 6, 2017: a few extra information added concerning firmware 2.10 for the X-T2 and 3.10 for the X-Pro2
- April 3, 2017: the article has been updated to include information and feedback about the latest firmware available for the X-T2 (version 2.0) and X-Pro2 (version 3.0). These updates add more than 20 options and improvements to the two cameras.
Main Specs
X-T2
- Sensor: 24 MP APS-C X-Trans III CMOS
- Lens system: X-mount
- Weatherproof: Complete (Splash, dust and freeze proof)
- Internal Stabilisation: None
- Autofocus: Hybrid with up to 325 points (7×13 and 13×25 grids selectable)
- Continuous shooting: 8 fps and 5 fps, up to 11fps with optional battery grip, 14fps with electronic shutter (AF-S and AF-C)
- ISO Sensitivity: 200 – 12800 ISO (pull 100, push 25600 to 51200 in RAW and JPG)
- Shutter Speeds: 1/8000 to 30 seconds, 1/32000s with electronic shutter
- Viewfinder: 0.5in OLED with 2,360k dots, approx. 100% FOV coverage, 23mm eyepoint, 0.77x magnification and 60fps refresh rate (100fps with optional battery grip)
- Rear monitor: 3-ways articulated 3″ LCD (1.62M dots)
- Movie recording: 4K up to 30fps, Full HD up to 60fps
- Built-in Flash: No but EF-X8 unit is included
- Extra Features: WiFi, Panorama, Timelapse, Bracketing, Multiple exposure, Advanced filters, silent mode
- Dimensions: 132.5 x 91.8 x 49.2mm
- Weight: 507g (including battery and memory card)
- Firmware version: 4.20
X-Pro2
- Sensor: 24 MP APS-C X-Trans III CMOS
- Lens system: X-mount
- Weatherproof: Complete (Splash, dust and freeze proof)
- Internal Stabilisation: None
- Autofocus: Hybrid with up to 325 points (7×13 and 13×25 grids selectable) with firmware 2.0
- Continuous shooting: 8 fps and 3 fps
- ISO Sensitivity: 200 – 12800 ISO (pull 100, push 25600 to 51200 in RAW and JPG)
- Shutter Speeds: 1/8000 to 30 seconds, 1/32000s with electronic shutter
- Viewfinder: Hybrid with 0.48-in TFT electronic viewfinder (2,359k dots, 0.59x magnification) and reverse galilean optical viewfinder (92% field coverage, 0.36x/0.6x magnification)
- Rear monitor: Fixed 3″ LCD (1.62M dots)
- Movie recording: Full HD up to 60fps
- Built-in Flash: No
- Extra Features: WiFi, Panorama, Timelapse, Bracketing, Multiple exposure, Advanced filters, Silent mode
- Dimensions: 140.5 x 82.8 x 45.9mm
- Weight: 495g (including battery and memory card)
- Firmware version: 5.00
Design and build quality
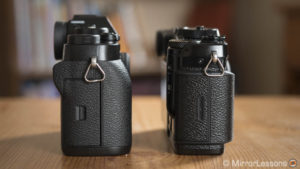
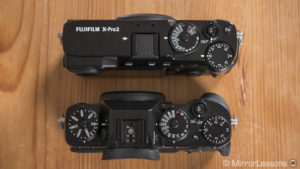
Both cameras feature a robust build with a magnesium alloy chassis and metal finish. They both feel very solid and during my individual testing period with each camera, I never felt for a moment that I had to take extra care to keep them safe (although I admit I usually treat my cameras gently!). The weight is approximately the same and the X-Pro2 is slightly larger but not as tall.
The X-T2 and X-Pro2 feature complete weather sealing and are freeze-proof down to – 10°C. In fact, I involuntary put the X-Pro2 to a more serious test when I found myself caught in the middle of a hail storm. The camera, with the XF 100-400mm and TC 1.4x attached, weathered the storm, though by the time I finally reached a dry location, two tiny drops had almost made their way into the SD card compartment. I used the X-T2 in more clement conditions that still involved some rain and the camera resisted very well.
Obviously the main design difference regards the placement of the viewfinder and I’ll talk about this more in the dedicated chapter. Concerning size and compactness, the X-T2, being taller because of its SLR design and centrally-placed viewfinder, can be a little more difficult to squeeze into tights spaces such as inside a camera bag, but I wouldn’t consider this a decisive factor when choosing between the two.
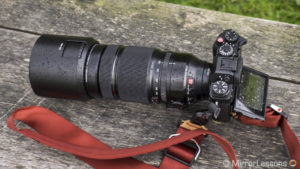
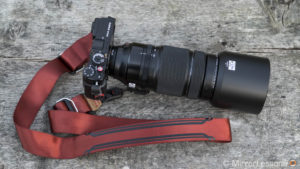
The X-T2 has a more prominent grip than the X-Pro2 but I find both cameras comfortable to use with prime lenses. The X-T2 handles better with longer lenses such as the XF 100-400mm.
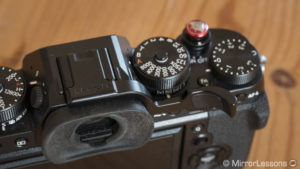
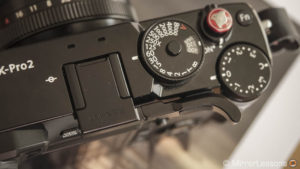
As I already stated on different occasions, I like to add a thumb rest to the hotshoe to make the grip more comfortable. The ones built into the cameras are okay but a larger thumb rest, such as those from Lensmate, gives me more confidence. (You can find Lensmate thumb rests on Amazon.) If I had to recommend a thumb rest for just one camera, it would be the X-Pro2, especially with longer lenses.
Alternatively there are landscape grip options from Fujifilm and third party manufactuers. The X-T2 can also benefit from a battery grip (VPB-XT2) but so far I haven’t really felt the need for it (more on this in the Battery Life chapter).
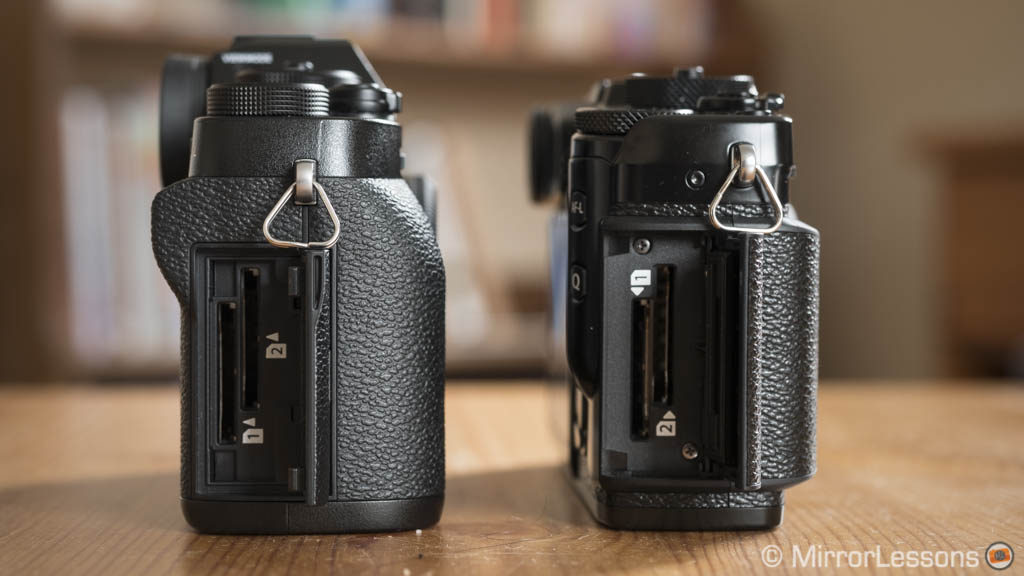
Both cameras come with a dual SD card slot. While both slots are UHS-II compatible on the X-T2, only the first one on the X-Pro2 offers the same compatibility. They both feel robust, even though the opening mechanism is different: you simply slide it towards you on the X-Pro2 while on the X-T2, there is a safe release button to press.
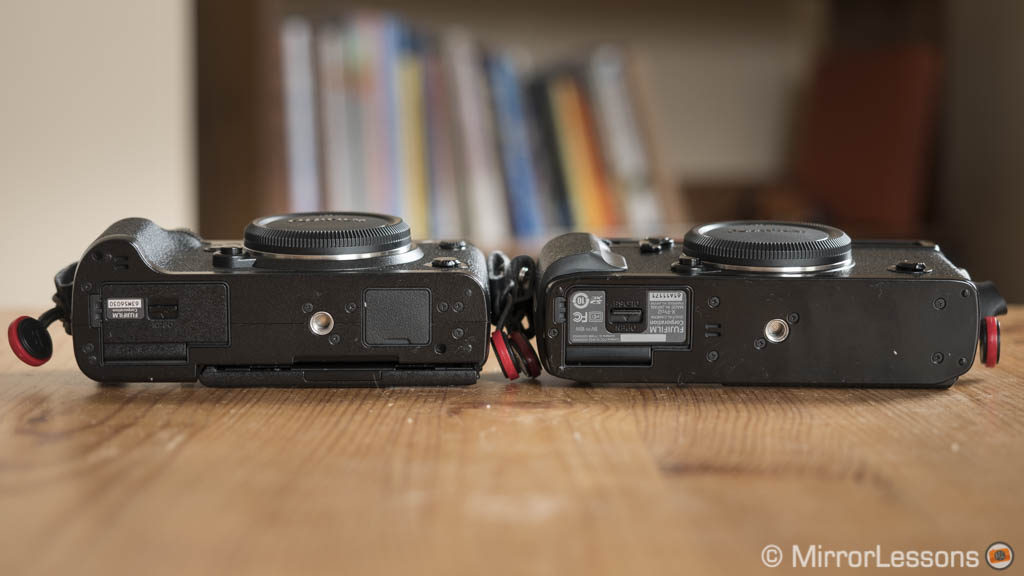
At the bottom, both cameras have a tripod mount centred with the lens axis which leaves the battery compartment free to be opened when a tripod plate is attached.
Check price of the X-Pro2 on B&H Photo.
Viewfinder
The viewfinder is the main difference between these two cameras; it isn’t just about its position but also about the technology employed, the philosophy behind their use and how photographers choose one or the other according to their style of shooting. But let’s have a look at the specifications first.
The electronic viewfinder of the X-T2 is larger, has a higher magnification (0.77x) and with the Boost mode, its refresh rate goes up to 100fps. The brightness and contrast of the OLED panel are stunning.
I personally feel that the X-T2 camera has the best EVF on the market right now.
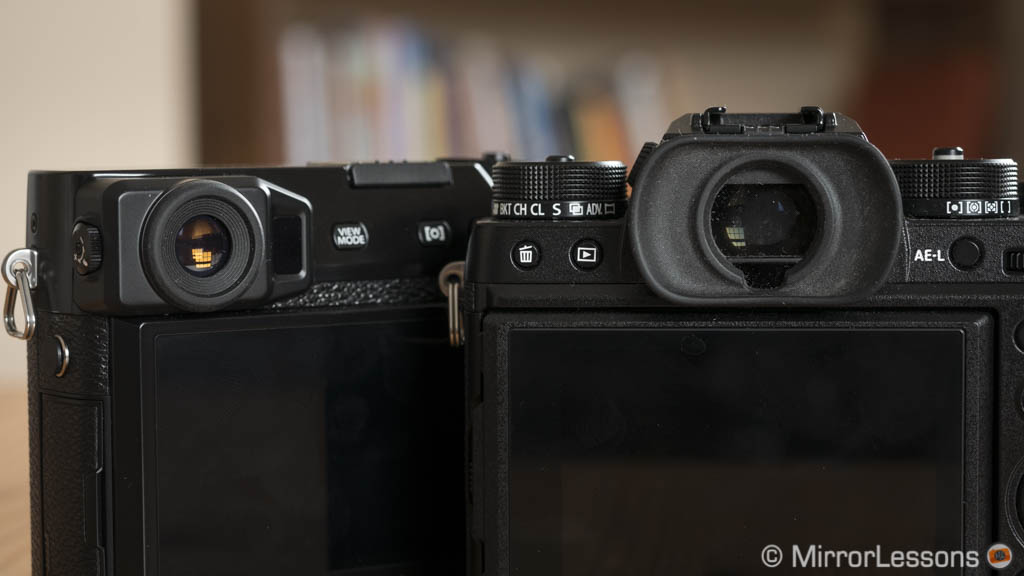
The X-Pro2 defends itself well but the magnification of its EVF is lower (0.59x). In High Performance mode, the refresh rate goes up to 85fps which is not too far behind the X-T2 for real world use. These high frame rates within the EVF are especially helpful in low light or when following very fast subjects. The X-Pro2 has an Auto Brightness mode like the X-T2 but the panel used is TFT and not OLED and it does feel less vibrant than the X-T2’s EVF.
Note: recently added via firmware update for both cameras, the “Eye Sensor + LCD Image Display” option gives you the choice to use the rear monitor to quickly check the pictures taken while composing with the EVF.
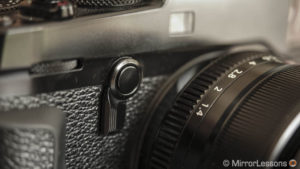
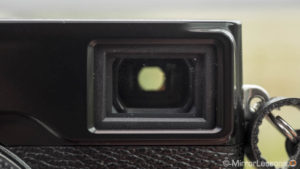
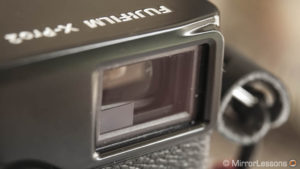
The X-Pro2’s real strength is its hybrid viewfinder: with the dedicated lever out front, you can switch from an electronic to an optical viewfinder or activate the electronic rangefinder.
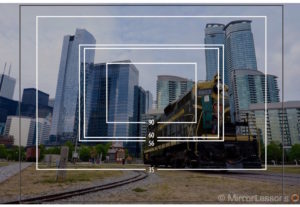
The OVF is a reversed galilean type with a field of view of approximately 24mm (35mm format reference, which would correspond to 16mm for the Fuji APS-C system) and covers 92% of the frame. If you use prime lenses longer than 24mm, you can see outside of your frame and this is one of the main reasons street photographers like this solution. It’s a similar concept to Leica M rangefinder cameras.
However the OVF on the X-Pro2 has a few modern tricks up its sleeve: it displays the AF point and white frame with real time parallax correction. Since what you see through the OVF is separated from what the camera sees through the lens, you also get a clear, real-time view without any lag or blackouts when you take a shot. One small drawback however is that a large lens can partially cover the OVF view. It’s best to use it with small primes.
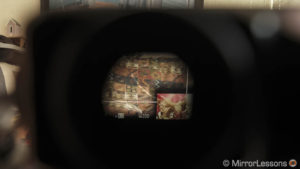
The ERF (Electronic Rangefinder) is an additional small electronic screen that you can activate in the bottom right corner of the OVF. It can display a magnified portion of your frame (where the single AF point is) or you can use it in combination with MF assist such as Digital Split image.
It’s a nice concept but, just as with the X100T that has the same technology, I admit I rarely use the ERF because it becomes too much information to check while composing. Probably wearing glasses doesn’t help either.
The philosophy behind the two viewfinders can be a decisive factor for many. Some portrait photographers will also argue that the advantage of not having the camera covering your face is that it allows for better eye contact with your subject.
I can safely say that I am not much of a rangefinder shooter. My biggest problem is that I can only close my right eye which means I have to compose with my left eye and I don’t get to take advantage of the viewfinder’s position on the left. I also admit I prefer electronic viewfinders for the real-time preview of your exposure and colour profiles. They are useful when shooting in monochrome too.
Classic “pro and con” arguments aside, I found an unusual way to take advantage of the X-Pro2 and its OVF for birds in flight. As crazy at it sounds, it works surprisingly well.
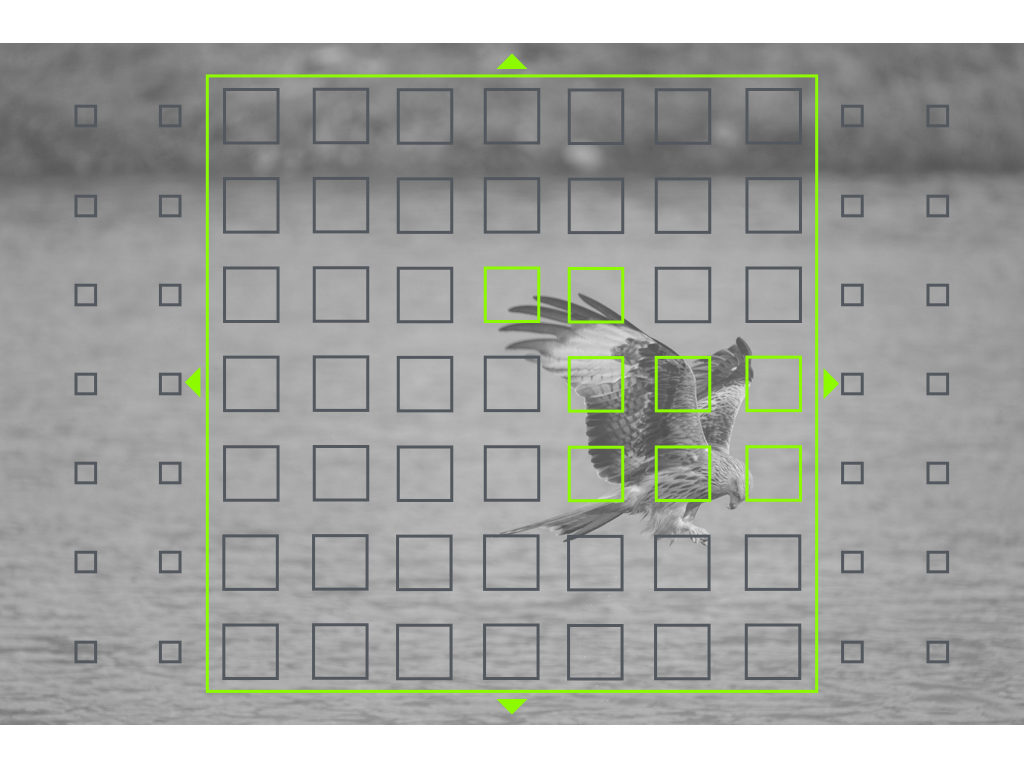
You may think that the parallax issue would be a problem but since we’re dealing with long focal lengths and long focus distances, it is less of a concern. The trick is to use the Zone AF mode, which displays as a white frame inside the OVF, and keep the bird within the frame. My test was successful: the results are not perfect but I was impressed by the high keeper rate.
Keep in mind that a lens such as the XF 100-400mm will partially cover the OVF view and it is better to use it without the hood. The central frame will remain visible regardless of the lens you use.
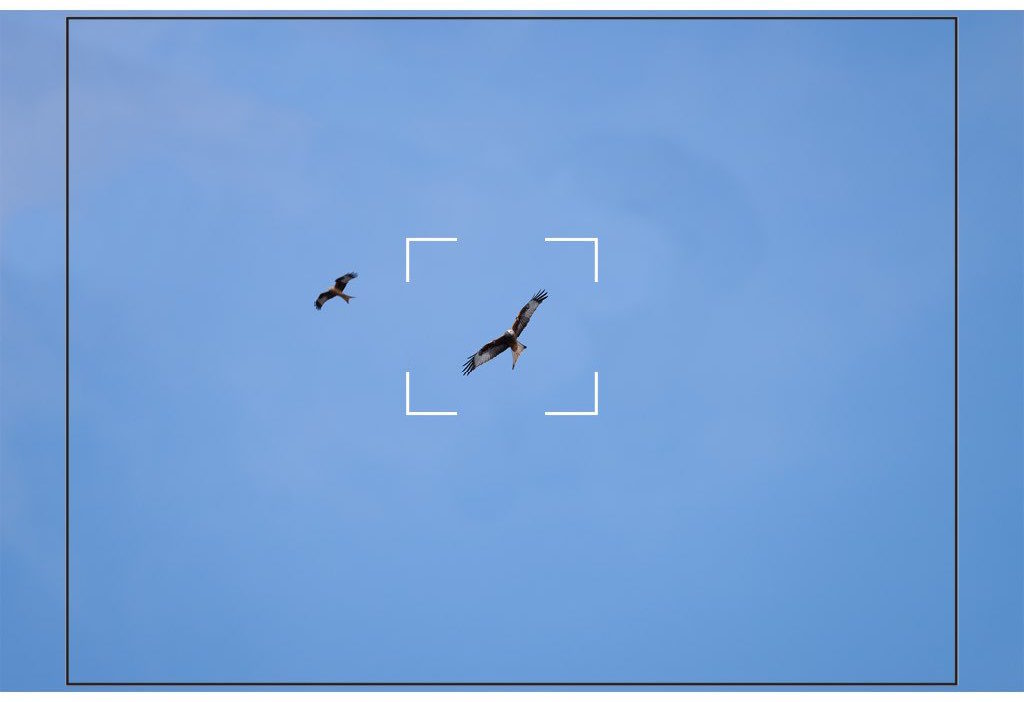
The Zone AF white frame helps to track the red kite.


You can also use the OVF for action with short to mid prime lenses if you are at a reasonable distance. The camera has a Corrected AF frame option to include parallax correction when displaying the AF point. But Zone AF will again give you more versatility and the camera’s excellent AF performance will do the rest. For example X-Photographer Simone Raso explains how he uses the X-Pro2 with the 35mm f/2 for basketball games when he is positioned just under the basket since the distance and the field of view of the 35mm lens are just perfect for his needs.
Rear monitor
Both viewfinders, however different they may be in terms of design and function, are excellent, so choosing between one or the other is a mostly a matter of personal preference. In the case of the rear monitor, a clear winner emerges.
They both use an LCD panel and the one on the X-Pro2 has more resolution (1.62 vs 1.04 million dots) but when it comes to ease of use, the X-T2 wins hands-down.
You can tilt it up 90°, down 45° or flip it to the right side by approximately 70°. Being able to do this is useful when composing in vertical orientation and I took advantage of it many times for astrophotography.
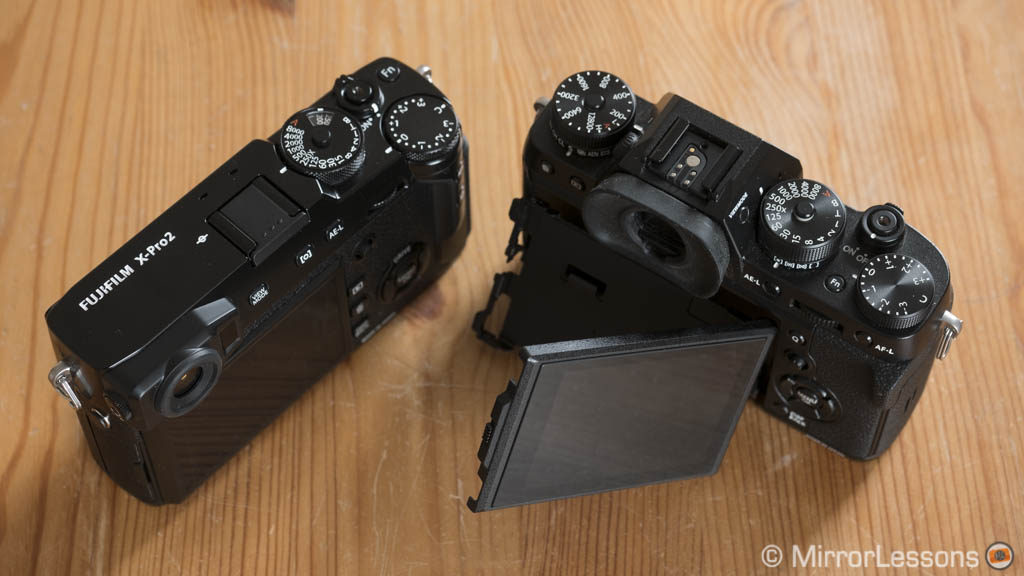
Tilting or fully articulated screens are now a default characteristic of most mirrorless cameras and it’s now more newsworthy when they are not included than when they are. I use them a lot not only on the X-T2 but on most mirrorless cameras I review and that’s the main thing I missed from the X-Pro2 whose rear screen is fixed. Granted, you learn to deal with it and that’s what I did during the several months I spent with the camera. Using Wifi and the remote control app on my smartphone was a good alternative in some situations.

The camera is very low to the ground. It was a little more annoying to compose the shot but still doable.
However the reason I’m dwelling on this point is because I can’t see a real reason for a tilting screen to be missing from the X-Pro2. I first heard that it was a question of build quality, but that would imply that the X-T2 is less solid, which doesn’t seem to be the case. Yes, a tilting screen is more likely to break than a fixed one, but it all comes down to how careful (or careless) you are.
Then I heard stories about photographers who are so against tilting screens that they would not consider buying the camera because of it. However, to me, the solution is fairly simple: simply leave the screen in its default position.
Perhaps a final (and more plausible) explanation could be that Fujifilm felt the need to differentiate the two flagship cameras since they already have so much in common.
External controls, customisation and menu system
Both cameras feature manual exposure dials for shutter speed, ISO and exposure compensation. The main difference is that the X-T2 has separate dials for the three settings while the X-Pro2 features a twin dial that combines shutter speed and ISO. You turn it to change the former, you lift it and turn to change the latter.
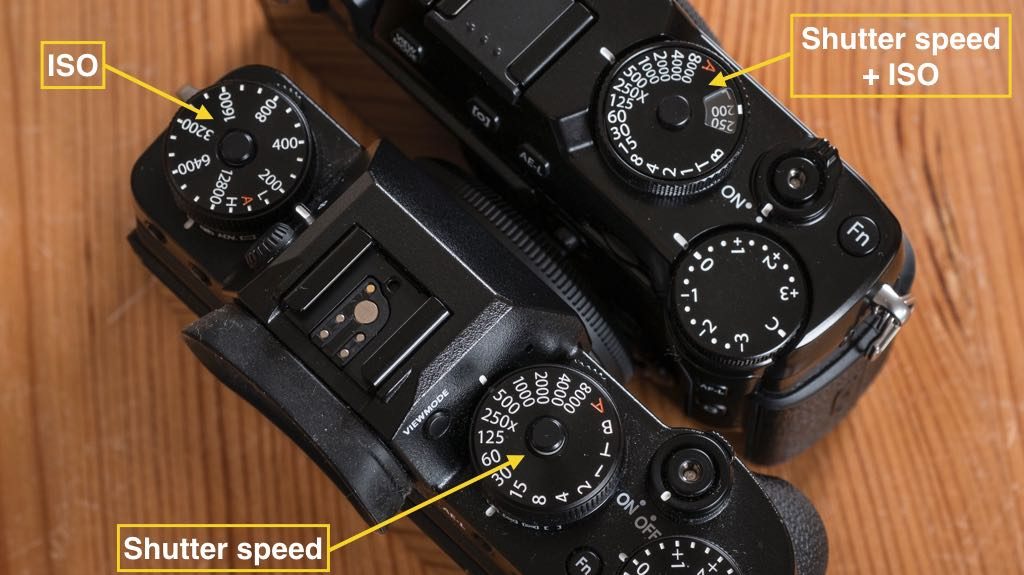
At first I didn’t like this solution and I often found myself changing the shutter speed instead of the ISO because I hadn’t lifted the dial high enough. Depending on the shutter speed you choose, the ISO markings can end up upside down which can be uncomfortable too. Still, after a few months, I started to get use to it. It was only when I started to shoot with the X-T2, however, that I realised that operating the ISO dial separately just makes for an easier and more intuitive experience. Plus the two dials on the X-T2 can be locked or unlocked manually which is a nice option.
Firmware 2.0 on the X-T2 adds another way to adjust the ISO range: set dial to “A” and change the values with the front command dial instead (the option needs to be activated in the menu first). You can scroll through the entire sensitivity range and the three Auto ISO modes. You can press the command dial to switch between shutter speed (1/3 Ev steps) and ISO. For some reason, the same thing hasn’t been given to the X-Pro2 which perhaps would have benefited more from it.
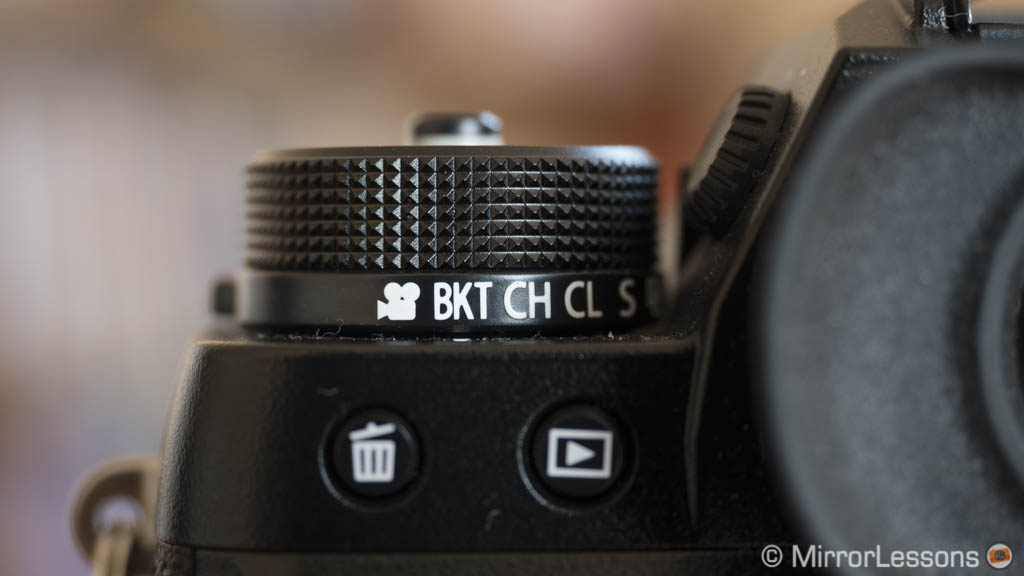
The X-T2 has additional sub-dials to control metering or select the Drive modes.
Both cameras feature an AF Joystick to move the AF point which is a great addition and I hope to see it on more mirrorless cameras in the future.
The button placement varies somewhat between the two cameras. My only concern with the X-Pro2 is the Q button that I often pressed by mistake with the palm of my hand.
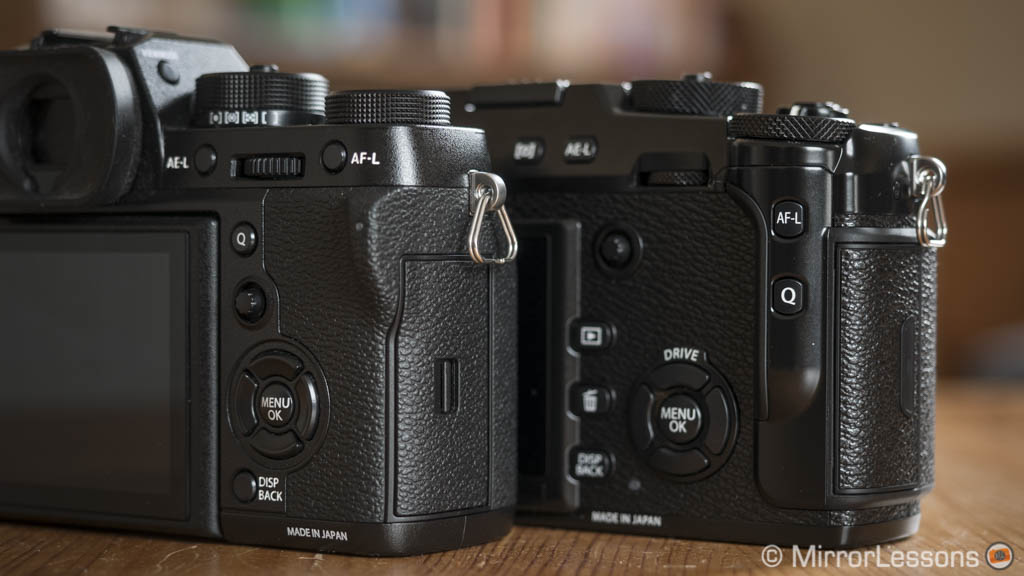
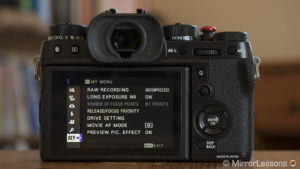
Concerning customisation, the X-T2 has more function buttons: 9 versus the 7 found on the X-Pro2 (including the rear command dial). Both cameras feature the same menu system, which is newly designed in comparison to the previous models. It is currently one of my favourites as far as mirrorless camera menus are concerned. The My Menu mode lets you save shortcuts to your favourite settings for quicker access.
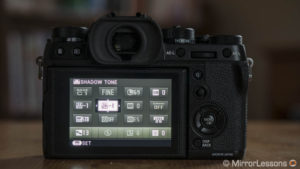
You will find the Q Menu which displays 16 slots that you can customise with your favorite settings.
You can save up to 7 Custom Settings with your favourite image quality values (sharpness, film simulation, etc). You can also assign a custom name to each one.
The latest firmwares added extra possibilities for the X-T2 and X-Pro2. You can customise the information displayed on the rear screen and EVF, and select or create a folder where to save the files on the memory card.
Image Quality
I won’t go too in-depth in this chapter because the two cameras share the same exact 24MP X-Trans III CMOS sensor and X-Processor Pro engine. I took some side-by-side images for the sake of double checking and long story short, the quality output is the same from both products.
Dynamic range is among the best in its class. The native ISO sensitivity starts at 200 and is usable up to 12800. RAW format is available through the entire ISO range including the extended values (100, 125, 160, 25600 and 51200).
Note: you can check out an ISO sequence taken with the X-Pro2 between 800 and 51200 ISO here.
You can select Auto ISO with three presets and manually choose the minimum shutter speed or leave it to Auto. With the latter the camera will choose the correct minimum speed based on the focal length used.
You get the film simulation modes and their lovely colour rendering, as well as the Monochrome and Acros profiles for black and white.
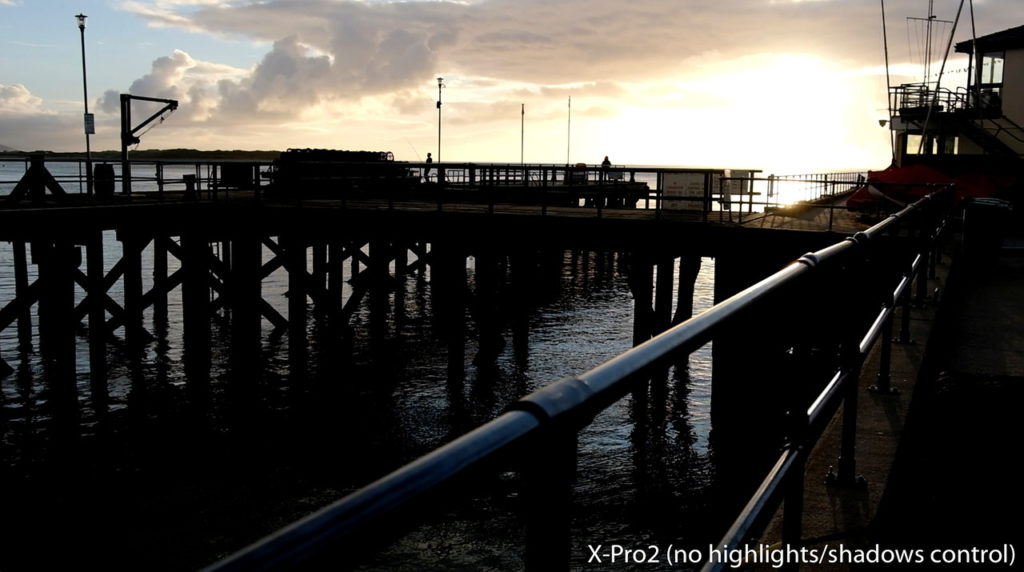
The JPG output is excellent with various settings to extend the dynamic range, and reduce or increase shadows/highlights. You can increase sharpness as well but I wouldn’t go past +1 for portraits. Noise Reduction can be aggressive if set to more than +1.


One thing that I noticed on the X-T2 and X-Pro2 is a difference in colour temperature configuration in comparison to the previous 16MP sensor. Natural rendering can be more difficult to achieve especially for skin tones. Even by selecting a manual Kelvin value, you still need to tweak it to remove the dominant green tint.
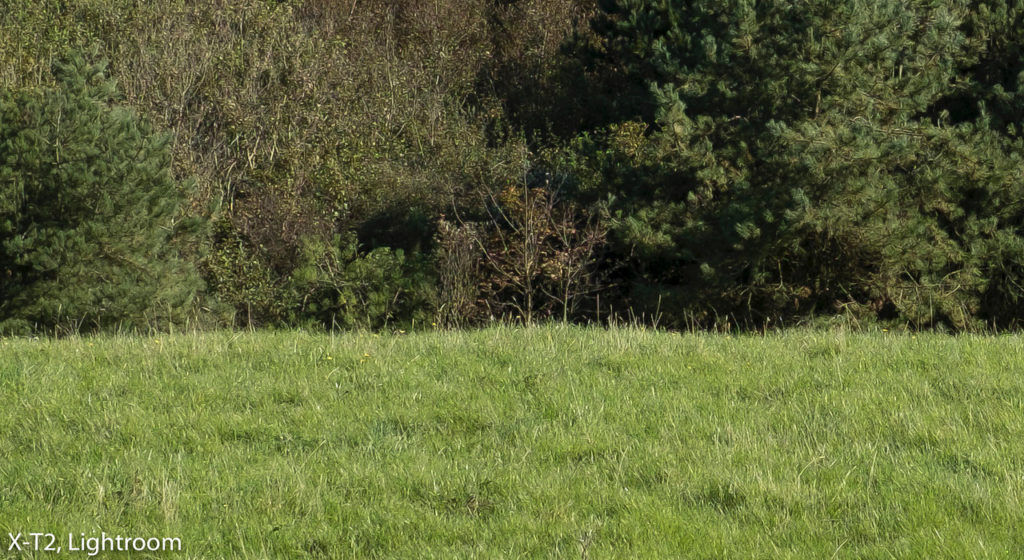
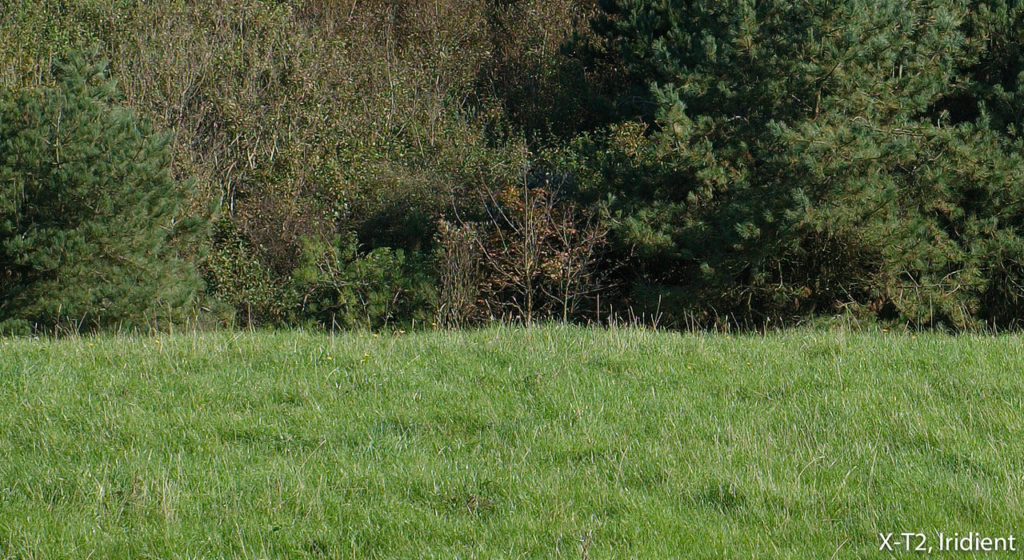
For those who care about sharpness and want the best output possible, it is worth highlighting that some software programs handle Fujifilm RAW files better than others and Adobe Camera Raw/Lightroom is not at the top of the list*. It is up to you to decided if that is going to be a problem or not. I personally use Lightroom most of the time and I am very pleased with the results but I don’t have a problem admitting that Iridient Developer does a better job especially with green foliage.

*It is worth noting however that the recent update brought to Lightroom (Classic CC 8.2) has a new function called Enhance Details that improves details and minimise the “watercolour” effect with the RAF files.
Then we have the purple flare issue that affects both cameras but you may not notice it if you don’t shoot a lot into backlight. The purple flare can generate grid artefacts in the coloured zone. I wrote an in-depth article about this on MirrorLessons but to me, it is non-issue because the purple flare is visible in the EVF, so it’s just a matter of slightly adjusting your composition (a few millimetres really) to make it go away. However if you use the OVF on the X-Pro2, you won’t notice it until you play back the image.


Single and Continuous Autofocus
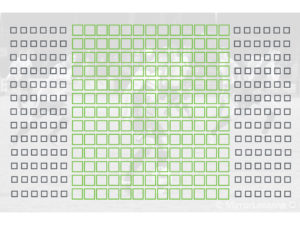
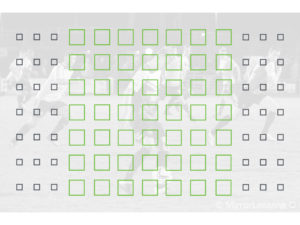
Thanks to the recent release of firmware 2.0 for the X-Pro2, both cameras now share the same AF system and algorithm. The AF points can be subdivided into a 13×25 grid (325 points) or 7×13 grid (91 points). The central points are phase detection areas but when using Zone AF, Wide/Tracking and CH burst, only the 49 native phase detection points are available.
I found that both cameras focus really fast and accurately in Single AF mode, in low light or with face and eye detection. Eye detection in particular is a good improvement in comparison to the previous generation of cameras but still isn’t perfect: the cameras can sometimes misfocus on the nose or other parts of the person’s face. Face detection has been improved with the latest firmware update: the cameras now use phase detection, and are faster and more accurate.
Both cameras handle older XF lenses well even though they have a slower motor but the best performance is found with more recent lenses.


The various options and AF area modes are exactly the same with single point (6 sizes available), Zone AF (3×3, 5×5 and 7×7 grid options) and Wide/Tracking. Zone AF is the mode I use all the time when action is involved and I select the most appropriate grid based on the type of subject. I rarely find the need to use Wide/Tracking which has the camera track the subject across the entire frame. The X-T2 has an additional AF mode called “ALL” that allows you to scroll through all the focus area modes by using the Command Dial.
With firmware 2.0, the X-T2 has an additional option: you can use different focus points and focus modes depending on the orientation of the camera (horizontal or vertical).
Then we have the AF-C Custom Settings that allow you to fine-tune the AF behaviour according to the speed and movements of the subject you need to capture. They were originally released with the X-T2 but they were implemented on the X-Pro2 later on with firmware 3.0.
These additional setting can provide concrete benefits for difficult subjects such as birds in flight or other fast moving elements. This mode includes 5 presets and a sixth option that you can set manually. Note that for some reason, the 6th set is not available on the X-Pro2. The first 5 presets can’t be changed and are designed as follows:
- Set 1: Multi Purpose, this is also the setting that matches the capabilities of the X-Pro2.
- Set 2: Ignore obstacle and continue to track subjects (useful if there are trees or poles in the way or for group sports such as football)
- Set 3: For accelerating/decelerating subjects (cars or motorbikes on a race track for example)
- Set 4: For suddenly appearing subjects (useful if an athlete suddenly appears from behind a hill, which you often see in mountain bike races or skiing competitions)
- Set 5: For erratically moving and accelerating/decelerating subject (a tennis player for example).
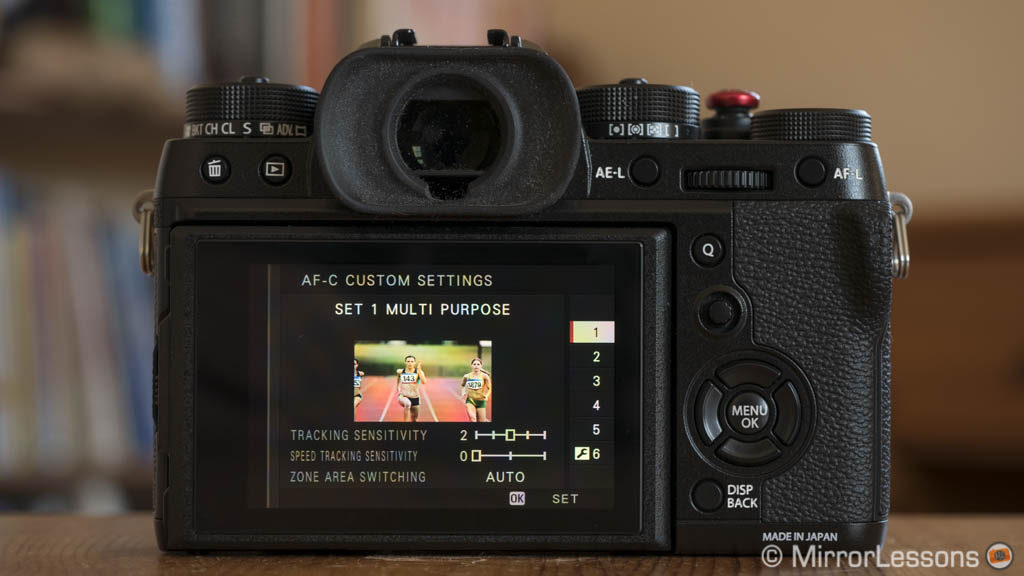
Each preset is based on 3 settings:
- Tracking sensitivity: it sets the interval of time in which the AF continues to predict the subject movement. If set to 0, there is no prediction. If set to 4, it will predict for 1.3s. Basically it means that the camera will assume for 1.3s that there is no change in movement.
- Speed tracking sensitivity: helpful if the subject is moving at a constant speed or if he’s accelerating or decelerating. This way you make sure that the camera searches for the AF point either more or less frequently according to the value entered.
- Zone Area Switching: you can prioritise the centre or the front in Zone AF. Centre means that the camera prioritises what is at the centre of the Zone AF grid. Front means it prioritises the closest subject within the Zone area. The third option, Auto, searches the entire Zone area.
Let’s start with a basic side-by-side test in continuous AF using the XF 18-135mm at 100mm with Set 1, which was also how the AF of the X-Pro2 behaved by default before the firmware update. As you can see the X-Pro2 delivered a slightly worse keeper rate. But my conclusions don’t end there.


I tested both cameras on different subjects such as football players, birds in flight and motorsports. What I found with the X-T2 is that these AF-C Custom Settings can indeed increase your keeper rate and chance of success. The best example I have is with birds in flight: at the beginning I was quite surprised by my low keeper rate (around 50%). Then I finally found the optimal settings by tweaking Set 6 as follows and my keeper rate increased to around 70%:
- Tracking Sensitivity: 1
- Speed Tracking Sensitivity: 1
- Zone Area Switching: Front
With the X-Pro2, my results for BIF before firmware 3.0 were around 60% overall so I have no doubt that the AF-C Custom settings can bring that keeper rate close to that of the X-T2. Since Set 6 is not available on the X-Pro2, the best you can select for birds in flight is Set 4 (0,1,Front).


However, in other situations, these exclusive settings didn’t make as much of a difference as I would have expected. For example, for the soccer game, I got pretty good results with Set 1 and Set 5 (80%) but that’s no different from the results I got with the X-Pro2 before firmware 3.0 where my keeper rate was also around 80%. Actually that particular game was in the evening in low light, so the conditions were even more challenging.


For motorsports, I wasn’t able to photograph the same discipline (rally race with the X-T2 and motorbikes with the X-Pro2) but once again I found similar results. With the X-T2 and the rally I got the best performance using Set 2.
Overall the X-Pro2 is as capable as the X-T2 when it comes to autofocus performance, especially now that it has inherited the same AF-C Custom Settings.
They can make a difference in specific situations but your subject needs to carry out the same exact behaviour over and over again for it to work. If the subject behaves more erratically, your hit rate can decrease significantly if you have the wrong Set selected. Changing constantly between one set and another is not always ideal as you can’t always predict the precise kind of action that is going to happen next. The best example that made me realise this was the football game where you can have groups of different players moving together, obstacles in front of your subject, erratic movements, acceleration and deceleration, and more, all during one game.


Additional note: Fujifilm has improved the AF Algorithm on both cameras via firmware update. They are able to track a subject twice as fast and 50% smaller in comparison to the previous version. The phase detection points are now sensitive down to -1Ev and f/11. Further improvements have been been made when zooming and the accuracy when tracking birds or other animals has increased.
Continuous shooting speed, shutter options and buffer
Both cameras have a maximum mechanical shutter speed of 1/8000s. They can handle fast continuous shooting speeds but the X-T2 has a few extra options. The T position of the shutter speed dial can be set up to 15 minutes for long exposures thanks to the latest firmware update.
First there is the way you access the drive settings: on the X-Pro2 you have the Drive button located on top of the arrow pad that will let you choose between CH and CL speeds, bracketing modes or advanced filters. On the X-T2, I set my Drive options in My Menu and while I have the same options as the X-Pro2, the interface is different and allows me to choose different speeds for the CH and CL modes.
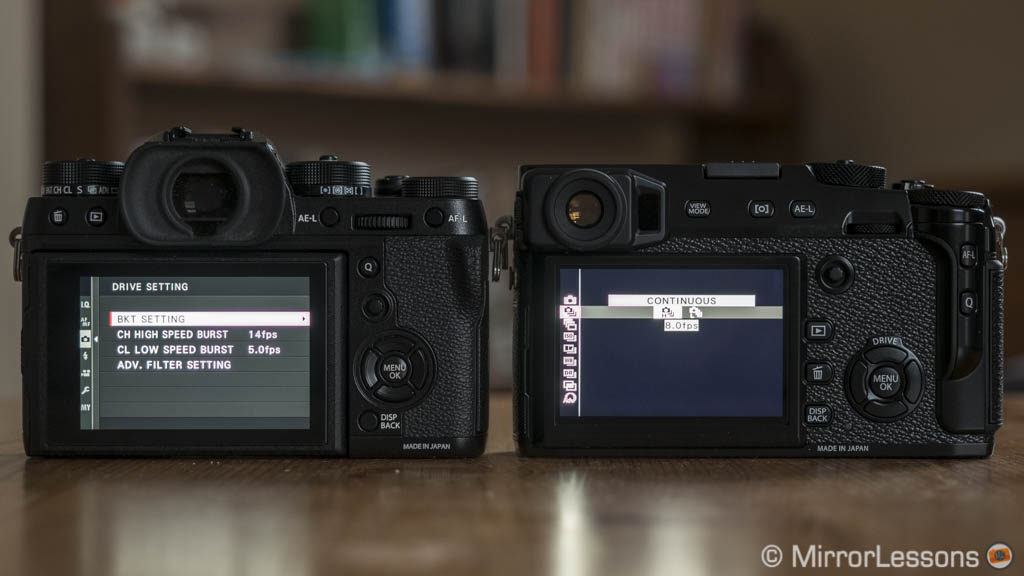
The X-Pro2 can record at 8fps (CH) without live view and 3fps (CL) with live view and blackouts. The X-T2 does better in CL mode with a maximum speed of 5fps, which is a decent speed to track subjects and keep a constant live view of the subject’s movements rather than just seeing the last picture taken in the EVF. If you add the battery grip, the X-T2 can boost the speed up to 11fps. Note that all these speeds mentioned for both cameras are valid in both Single and Continuous AF.
Both cameras have an electronic shutter and can be used for burst in continuous AF but only the X-T2 can go as high as 14fps. The rolling shutter is contained but it can be visible with fast action like in the picture below. A Flick Reduction mode has been added via firmware.

Using the electronic shutter, rolling shutter becomes visible when you start panning (distorted vertical lines and the ball isn’t perfectly rounded).
When it comes to buffer capabilities, the results are very similar. At 8fps with RAW files, both cameras can shoot at full speed for approximately 4s before slowing down to around 3fps. With JPGs only, they last around 18s before dropping to around 5fps.
Video capabilities
If I had to choose one feature that impressed me more than any other on the X-T2, it would be 4K video and for two reasons: the film simulation modes, whose beautiful colours reduce the need for colour grading, and the Continuous AF for video, which is without a doubt the most impressive feature of this camera.
Given that they have the same sensor and processor, the X-Pro2 should technically be as capable, but it lacks some settings and options. However thanks to the firmware 4.0, it can now record in 4K up to 30p as well.
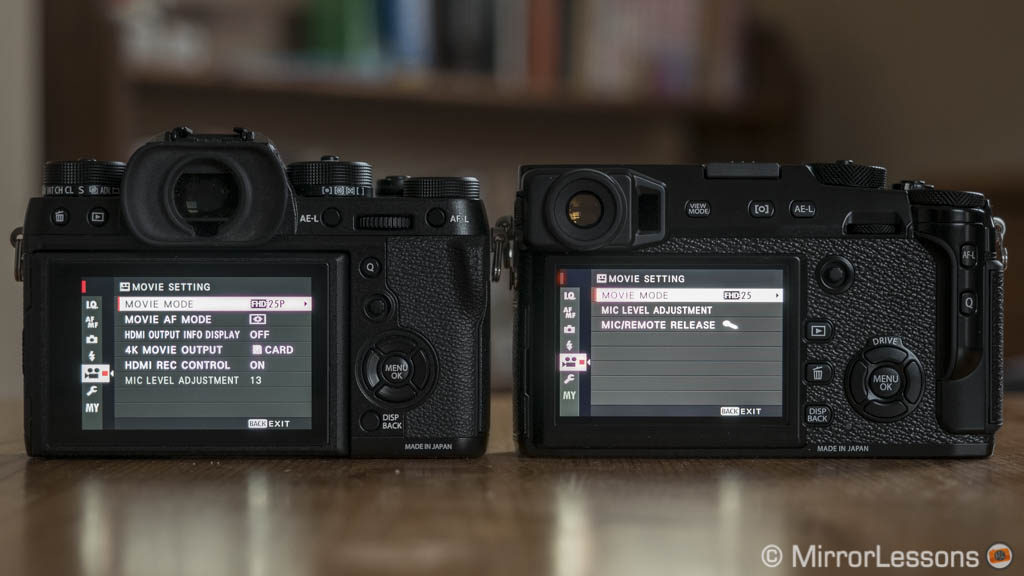
The first difference is the sensor crop. The X-Pro2 uses the entire width of the sensor but sub-samples, whereas the X-T2 shoots 4K with a small crop (1.17x) to have full pixel readout. The footage is crispier with less aliasing and less noise at the highest ISO levels.
Below you can watch a 4K comparison between the X-T2 and X-T20. Since the latter works the same way as the X-Pro2 does, it gives you a good idea of how the two can compare.
Both cameras take advantage of the film simulation modes, so as far as colour and monochrome rendition is concerned, both products perform well.
The highlight and shadow settings work for video. Using -2 for both will give you more information in the shadows and will preserve highlight details better. It doesn’t come close to a true Log curve, of course, but I found it enough in most situations. It is better not to use more than -1 when shooting people, otherwise you could end up with an unnatural skin tone rendering.
Concerning the autofocus performance, if once again I put the two cameras side-by-side, we can see they behave in a similar way but the X-T2 is slightly more precise. I admit I recorded more videos with the X-T2 than with the X-Pro2 partially because of the 4K and highlight/shadow options.
I was really impressed by the continuous AF capabilities of the X-T2, even in low light conditions. Just take look at the video below. To me this performance looks as good as Canon Dual Pixel AF technology.
If I compare rolling shutter, both cameras suffer from the same amount which is still less than most competitors. Unless you are dealing with very fast camera movements, you won’t be bothered too much by it.
The X-T2 has additional benefits for more serious shooting. Some of them are software related once again: you can control the audio recording volume in 20 steps instead of only 4 on the X-Pro2. You can also choose which card slot you want to record the movie files to, which is a useful feature if you want to record stills to one card and video to the other. ISO values can be changed during the recording unlike the X-Pro2.
The X-T2 has a microphone input and there is a headphone output on the optional battery grip. The latter also extends the recording time from 10min to 29min in 4K or from 15min to 29min in 1080p.
The X-Pro2 has a 2.5mm mini-connector that can be used for a microphone via an adapter. There are no headphone options and the recording time is limited to 10min in 4K or 14min in Full HD per clip. You can only record video to slot number 1.
Finally the most recent firmware gave the X-T2 the F-log gamma curve (now available with internal recording and not just via HDMI) as well as the HFR mode (120fps in 1080p). The X-Pro2 can record Full HD up to 60p and doesn’t have a clean HDMI output.
Flash and other features
Both cameras share the same flash capabilities including the maximum sync speed of 1/250s. The X-T2 however is supplied with the little EF-X8 unit while the X-Pro2 doesn’t have any flash option out of the box.
The X-Pro2 and X-T2 can work in TTL, Commander or Manual modes with the options of slow TTL, Front or Rear Sync curtain. Flash compensation goes up to ±2Ev and you have three Red-Eye removal options. The TTL-Lock mode allows you to lock TTL metering according to the last image taken.
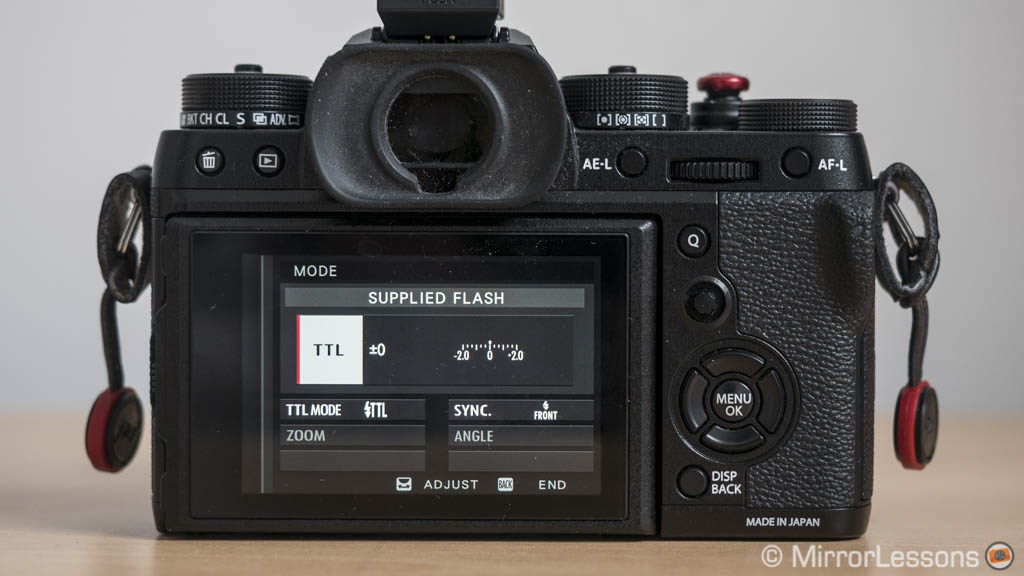
Both cameras are compatible with the new EF-X500 that will also provide wireless shooting and High Speed Sync. You can also find TTL compatible flashes from third party manufacturers.
Note about the Nissin i40 and i60A flashes: a firmware update is required and it can’t be done by the customer directly. If you plan to buy one, make sure that the flash has the latest firmware installed first.
Concerning extra features, both cameras share the same options including:
- Metering: four options including Average, Spot, Centre-Weighted and Multi. Average is designed to give you a consistent exposure when shooting multiple shots or working in situations where the light remains the same.
- Manual Focus assist: magnification, peaking (3 colours with two intensities each) and Digital Split Image (monochrome or color) are available on both cameras. I found peaking more reliable or magnification for extra precision. On the X-T2 you can also use Dual View where the screen is divided into two section with the magnification showed on the right.
- Bracketing: ISO, Film Simulation, White Balance or Dynamic Range on both cameras with 3 shots maximum. AE bracketing can be used up to ±3 Ev and 9 shots.
- Panorama mode: JPG only, two angles available, four direction options
- Multiple exposure: 2 shots (JPG only)
- Advanced Filters: 13 filter effects each including Toy Camera, partial colour etc.
- Interval Timer Shooting: same settings on both cameras (max 999 shots) and you can decide to start shooting at a certain time.
- Wifi: cameras can be remotely controlled from a mobile device with the Fuji Camera Remote app (Android and iOS). You can also transfer JPG images (full size or reduced size) and use the Fujifilm Instax printer.
- RAW Conversion: available on both cameras
- Pixel mapping: to map out dead pixels.
- Copyright information: you can save the name of the photographer and copyright holder for the EXIF data thanks to the latest firmware updates.
- Voice Memo: you can assign a voice memo for up to 30-seconds to an image in Playback mode
- Tethering: available via USB or Wifi with the Fujifilm X Acquire software or third party plugins
- Fujifilm X RAW Studio: connect the camera to your computer, and the software will use the X-Processor Pro to convert RAW files to JPG, just like you can do in camera
- Backup/Restore: the X Acquire software allows you to save and restore your camera’s settings.
The X-T2 has received a Focus Bracketing mode via firmware update (4.10). I don’t see any reason why the X-Pro2 should receive it as well (fingers crossed).
Battery life
Battery life, as usual, will depend on how much you stress the camera.
With the X-Pro2, I used three batteries during a 90 minute soccer game, shooting in Continuous AF at 8fps with Power Management set to High Performance. However that was with the old NP-W126 battery. The new NP-W126S (compatible with both cameras) has better endurance (I would say around 25% more capacity).
With the X-T2, battery life can be worse if you shoot 4K video. You can easily drain it in less than an hour. For normal shooting with either camera, you can get through an entire day without changing the battery, especially if you turn the camera off when not shooting and keep the Power Management to standard (no boost mode or high refresh rate for the EVF).
Either way, a spare battery is advised for both products.
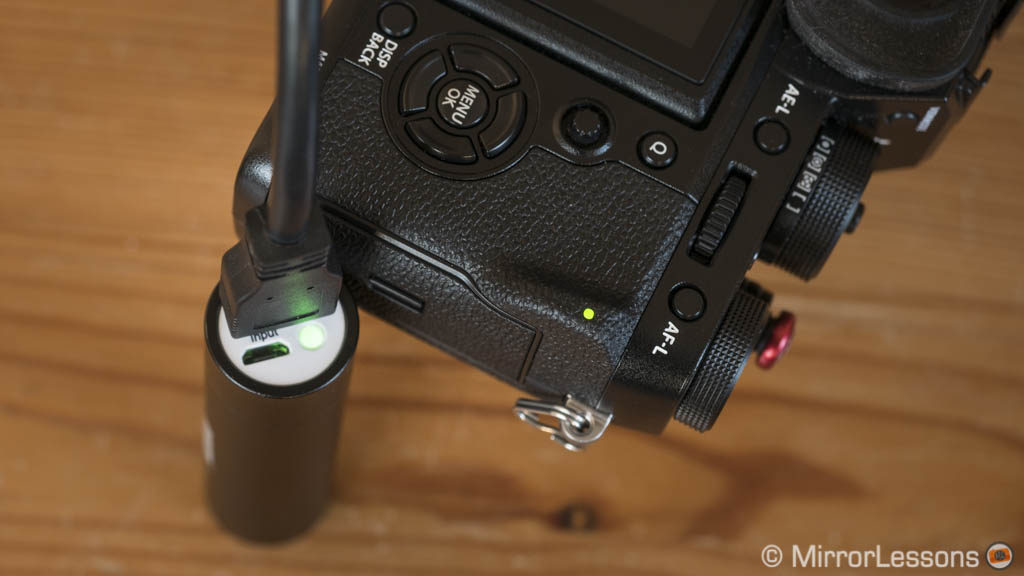
The X-T2 has a few advantages here as well. It can be charged via USB (it has a USB 3 port) and has the option of the VPB-XT2 battery pack. The latter can house two batteries, and can be used as a double battery charger with the included AC-9VS AC adapter. As I already explained earlier, it also boosts the burst speed of the camera (up to 11fps) and extends the recording time in video mode.
Price
The retail price suggests that the X-Pro2 is $100 more expensive than the X-T2 but you may start to find some small deals or discounts now that the camera is 10 months old.
Neither camera is cheap but I believe the price is fair given the pleasure of use, image quality and AF performance you get. The AF, in particular, is among the best you can find today on a mirrorless camera.
Conclusion
If I had to choose between the two, I would pick the X-T2 for three main reasons: I really like the 4K video quality, the EVF is larger which is helpful since I wear glasses all the time, and I find the 3-way tilting screen very handy.
That said, there is a lot to love about the X-Pro2, starting with the optical viewfinder. In addition to traditional genres like street and documentary, the OVF can also be useful for action and wildlife. What’s more, the image quality is identical to the X-T2, the AF performance is more or less the same, and the camera is just as satisfying to use thanks to its good ergonomics, friendly menu system and intuitive external controls.
Last but not least, important features that were missing from the X-Pro2 such as the AF-C Custom Settings, 4K video and tethering have been implemented via firmware update. As always, Fujifilm doesn’t disappoint in these regards.
Choose the Fujifilm X-T2 if:
- you want beautiful colours and impressive C-AF in 4K
- you prefer a larger EVF and a tilting screen
- the optional battery grip is a must-have accessory for you.
Choose the Fujifilm X-Pro2 if:
- you like its rangefinder design and hybrid viewfinder
- you could find the OVF’s advanced technology useful for action too
- the dual ISO/shutter speed dial doesn’t bother you
Check price of Fujifilm X-Pro2 on
Amazon | Amazon UK | eBay | B&H Photo
Check the price of the Fujifilm X-T2 on
Amazon | Amazon UK | B&H Photo | eBay
Second-hand Fujifilm cameras on
Interested in other Fujifilm cameras? Then you might enjoy the following comparison!
Additional images
X-T2


X-Pro2













Once again, great comparisons between 2 highly popular Fuji models.
Yeah, I have to agree. I can’t understand why Fuji can’t or won’t include the custom AF-C settings you can get in the X-T2 with the X-Pro2? It’s not like it’s an extra feature which requires the battery grip and it’s added benefits to be able to fine tune AF-C settings.
If possible, and I don’t see why it would not be, it would be great if Fuji would reconsider omitting custom AF-C settings from the X-Pro2 by including it in a future firmware update.
The same thought could be applied to what you said about tethering.. no reason why both flagship cameras cannot enjoy tethering options for studio work.
Fuji’s already semi cursed themselves by naming the X-Pro2 with “Pro” in the name and holding out on a lot of “pro” features..such as the before mentioned custom AF-C and tethering options… which has appeared in their secondary flagship line, the X-T2. They should do all they can to keep it as “Pro” as possible because it has been a thing of ridicule because of the irony even within the Fuji community. I’d add 4k should be in the X-Pro2 as well, but I’m not entirely convinced it is not truly possible.. even a short ability might be better than none… if you think about it, I think most people will piece together short snippets of video to make a complete video than using one long 29 minute continuous shot as their main video to process and upload and use. Anyways…
Also, on the included topic of tethering.. I really wished they would have made this a free added feature instead of paying for it.. you even get tethering options with Olympus for free.
One last thing I though you wrote that wasn’t quite write as soon as I read it: “Pixel mapping: to map out dead pixels, only available on the X-T2.”
This is not true. I just checked my X-Pro2 and see it DOES have Pixel Mapping.
Pixel Mapping is in the I.Q. Settings on page 2/3 in the menu.
Funny thing, I actually remember looking in the X-Pro2 menu and seeing the Pixel mapping setting but then I completely forgot to correct that sentence 🙂
Thanks for pointing it out!
No problem. All of your work is great info and read for the mirrorless camera industry.
This is an outstanding comparison of the fuji flagship mirrorless cameras; excellently written and very informative. What totally amazed me is the quality of the accompanying photos, most of which I think are top notch. Thank you for taking the time to write this post. Kind regards, Nick
Thank you Nick, glad you enjoyed it!
Great great reviews Mathieu. Do you know if the image quality of the xpro2 or xt2 is very different from a xt1?
and where do i put the a6300 in this perspective pure based on image quality alone. similar to xt1 or like xt2? (i own the a6000, fuju x100x and xe2 and im looking for one system ugrade.)
There isn’t a huge difference between the X-T1 and X-T2/X-Pro2 when it comes to image quality. It is more about versatility: for example on the X-T1 you are limited to max 6400 ISO if you want to shoot RAW while on the X-T2/X-Pro2 RAW is available on the entire sensitivity range (including the pull/push values). Dynamic range is slightly better on the new cameras especially for highlights recovery. The X-T1 however has more natural skin tone rendering. You can see some example in our X-T1 vs X-T2 complete comparison:
https://mirrorlesscomparison.com/fujifilm-vs-fujifilm/x-t1-vs-x-t2/
As for the a6300, I put it on the same level of the X-T2/X-Pro2.
Now this is called COMPLETE guide!
Thanks for the article, Mathieu, definitely need to share this.
Thanks!
An excellent comparison, really one of the best I have found. The photos are great, and that means that I can trust the review because you obviously know how to use these cameras to their fullest capabilities. The only thing missing from the review is a note at the end about lenses and which camera to prefer: with the XPro 2 (or XPro 1) a longer lens, or one feature a larger front element such as the 58, will impinge quite a big on the optical v/f, thus somewhat negating its usefulness. A good lower right chunk will be lens. For the smaller primes it is perfect. Really, if one were wishing for a Leica M-series (or, like me, had once had one), this is a non-issue since we tend to use lenses in the 21-90mm (35mm equiv) range. If you work with longer lenses, I would imagine you would prefer the XT-2. I am in a quandary: I dont know which to get! But I want to sell my hefty Nikon D800E and some lenses and get ONE of these Fuji models…
I’ve used long lenses with both cameras and the X-T2 has a better grip straight out of the box. However if you invest in a few accessory for the X-Pro2 (additional landscape grip, thumbrest) then it becomes much better. Yes larger lenses will cover the OVF but you can always revert to the electronic viewfinder. Of course if you want to take full advantage of the OVF, you need small primes like the f2 lineup.
Outstanding comparison. Thanks. I guess the only feature in the XT2 vs Xpro2 is the inability to tether the Xpro2. It makes no sense as photographers who are shooting in studio for either portrait or product photography with an Xpro2 could certainly utilize the tethering feature. For some reason Fuji is incorrectly assuming that a form factor like the Xpro2 would never be used for such photography and want to treat the xpro2 as a street camera only. Their assumptions are truly flawed and disappointing.
I am not sure why the X-Pro2 doesn’t include tethering but I agree it’s disappointing. I guess it is the problem of having two flagship cameras, they have to differentiate them somehow.