Updated on: March 6th, 2019
I was tempted to begin this comparison by calling it “the ultimate mirrorless APS-C camera battle” but there is an expiry date on the validity of such a statement in this dynamic market. Rumours (via FujiRumors) about a high-end APS-C model from Fujifilm abound, while with Sony – well, with Sony we can’t never be sure of anything, can’t we? But future products, news and rumours aside, I am sure that the X-T2 and a6500 will remain near the top of the food chain for quite some time to come.
Comparing Sony and Fujifilm products is always interesting because the two brands have opposite approaches to design and functionality. The a6500 and X-T2 are no different, yet their performance when it comes to autofocus and image quality is very similar. Has your curiosity been piqued? Well, then let’s find out more about two of the most attractive mirrorless cameras on the market today!
Ethics statement: We purchased the a6500 and X-T2 for review and comparison purposes. We were not asked to write anything about these cameras, nor were we provided any other compensation of any kind. All opinions we express regarding these products are our own. Within the article, there are affiliate links. If you buy something after clicking one of these links, we will receive a small commission. To know more about our ethics, you can visit our full disclosure page. Thank you!
This article is divided in two parts to facilitate navigation:
- You are on page 1: design, functionality and image quality
- Page 2: autofocus, speed, video, other features and conclusion
[toc heading_levels=”2″ label=”Table of contents – Page 1″]
Article updates
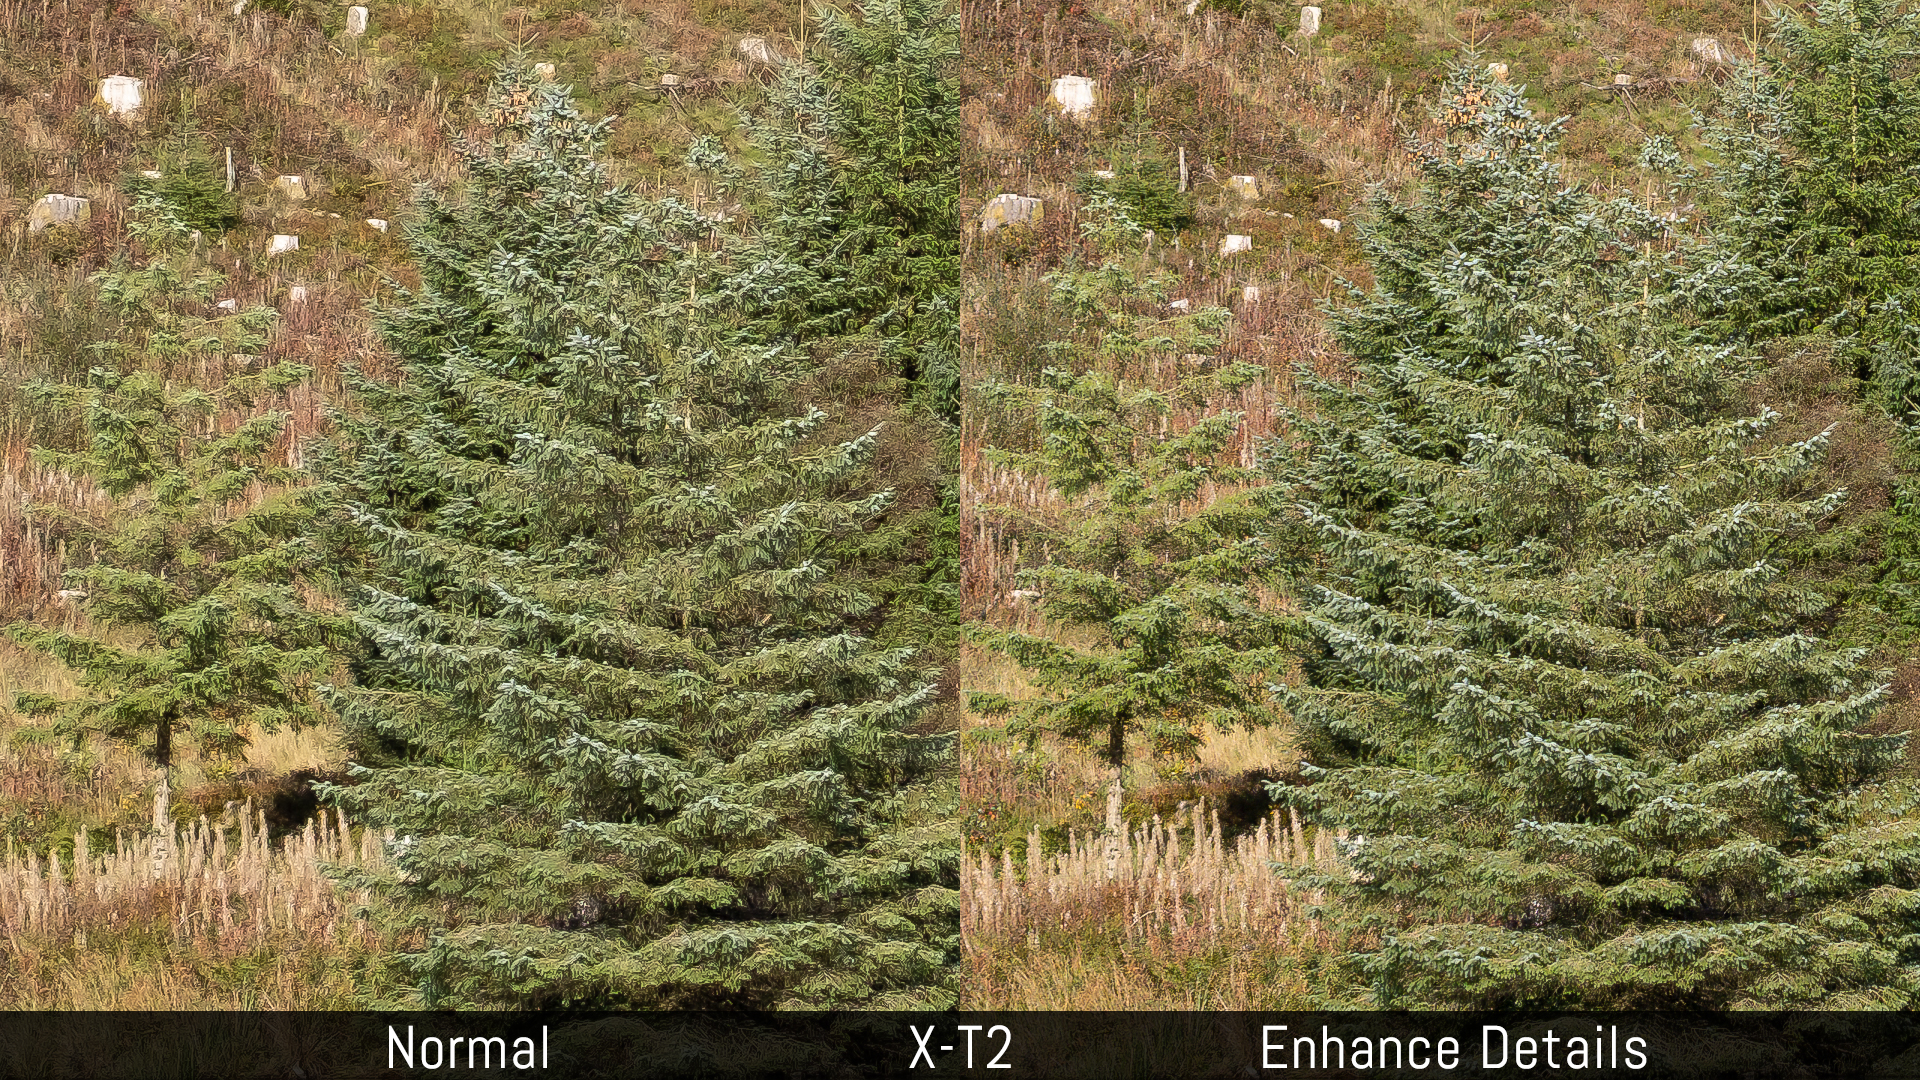
- March 6th, 2019: info on the latest Lightroom update and its new Enhance Details function
- July 1st, 2018: various edits concerning the X-T2 latest firmware (4.10)
- December 13, 2017: information and feedback concerning the X-T2’s firmware 3.0
- August 23, 2017: information added concerning the a6500 firmware 1.4 that is supposed to improve the image stabilisation for video
- June 6, 2017: we included additional information concerning the X-T2’s firmware 2.00 and 2.10 that add several new options and improvements to the camera.
Main Specs
a6500
- Sensor: 24 MP APS-C Exmor CMOS
- Lens system: e-mount
- Weatherproof: Dust and moisture
- Image Stabilisation: Yes (5-axis sensor shift)
- Autofocus: Hybrid with 425 phase and 169 contrast detection points
- Continuous shooting: 11fps to 3fps (S-AF and C-AF)
- ISO Sensitivity: 100 – 25600 ISO (push 51200)
- Shutter Speeds: 1/4000 to 30 seconds
- Viewfinder: OLED with 2,359k dots, approx. 100% FOV, 23mm eyepoint, max. 120fps and 0.70x magnification
- Rear monitor: tilting touch sensitive 3″ LCD monitor (921k dots)
- Movie recording: XAVC S 4K at 100mbps and up to 30fps, Full HD up to 120fps
- Built-in Flash: Yes
- Extra Features: WiFi, NFC, Bluetooth, Panorama
- Dimensions: 120 x 66.9 x 53.3mm
- Weight: 453g (including battery and memory card)
- Firmware version: 1.05
X-T2
- Sensor: 24 MP APS-C X-Trans III CMOS
- Lens system: X-mount
- Weatherproof: Complete (Splash dust and freeze proof)
- Internal Stabilisation: None
- Autofocus: Hybrid with up to 325 points (7×13 and 13×25 grids selectable)
- Continuous shooting: 8 fps and 5 fps, up to 11fps with optional battery grip, 14fps with electronic shutter (AF-S and AF-C)
- ISO Sensitivity: 200 – 12800 ISO (pull 100, 125, 160, push 25600 to 51200)
- Shutter Speeds: 1/8000 to 15min (with T mode), 1/32000s with electronic shutter
- Viewfinder: 0.5in OLED with 2,360k dots, approx. 100% FOV coverage, 23mm eyepoint, 0.77x magnification and 100fps refresh rate
- Rear monitor: 3-ways articulated 3″ LCD (1.04M dots)
- Movie recording: 4K up to 30fps, Full HD up to 60fps
- Built-in Flash: No but EF-X8 unit is included
- Extra Features: WiFi, Panorama, Timelapse, Bracketing, Multiple exposure
- Dimensions: 132.5 x 91.8 x 49.2mm
- Weight: 507g (including battery and memory card)
- Firmware version: 4.10
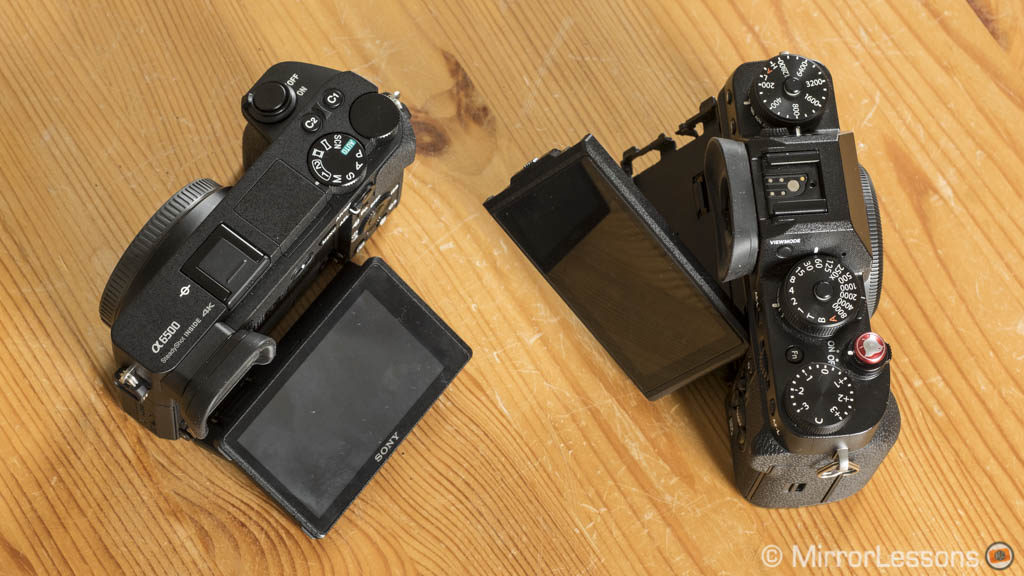
Design, build quality and interface
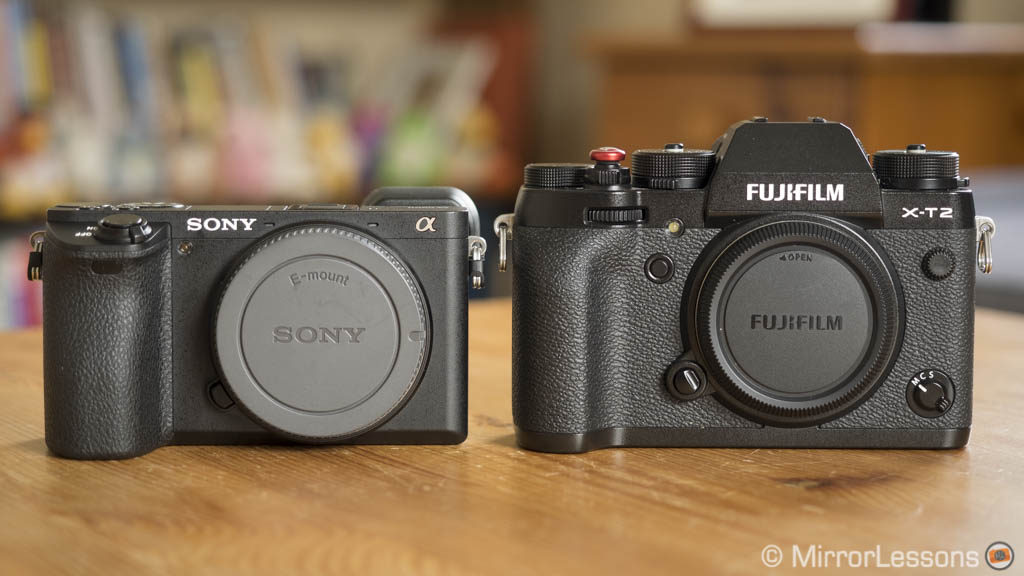
Let’s start with the build quality: they both feel robust, well-made and are weather-sealed against dust and moisture. I have used both in rainy conditions and didn’t notice anything unusual. The X-T2 offers more complete weather-sealing because it is freeze-proof down to -10°C.
The X-T2 is available in two colours: graphite silver or black, unlike the a6500 which can only be found in black.
Check price for the Fujifilm X-T2 on B&H Photo.
The Fujifilm camera is slightly larger and definitely taller than the Sony, a characteristic also emphasised by the fake pentaprism at the centre that houses the viewfinder. When it comes to weight, there is only a 54g difference in favour of the lighter Sony model.
The a6500 feels more compact overall thanks to its smaller viewfinder positioned on the left and its modern rangefinder design.
The grip of the X-T2 is taller (because the camera is taller) but the one found on the a6500 is more prominent which makes it a little more comfortable with larger lenses.

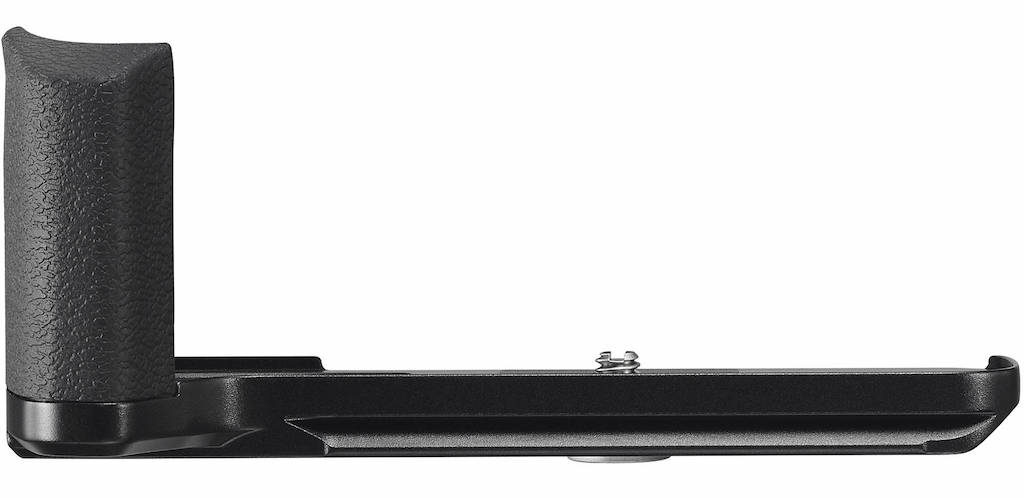
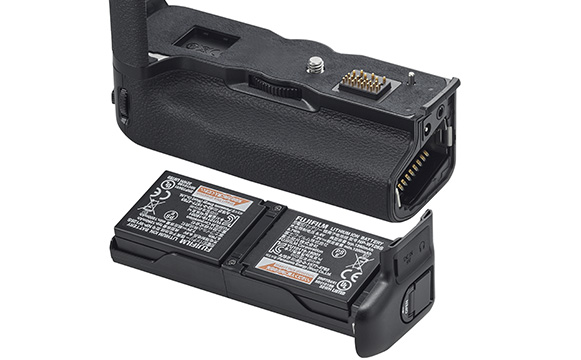
I have used thumb rests from Lensmate with both bodies and I always find them a nice complement if you don’t need the hot-shoe for other accessories. There are official landscape and vertical grips available for the X-T2 while for the Sony camera, you must rely on third-party accessories.
Check price on Amazon.
Another important difference is found in the memory card slots: not only does the X-T2 support the UHS-II standard but it can also house two SD cards at the same time as opposed to the single UHS-I slot found on the a6500. The way you access the memory compartment also differs: it is at the bottom on the Sony (beside the battery) and on the side of the X-T2 inside a dedicated SD compartment.
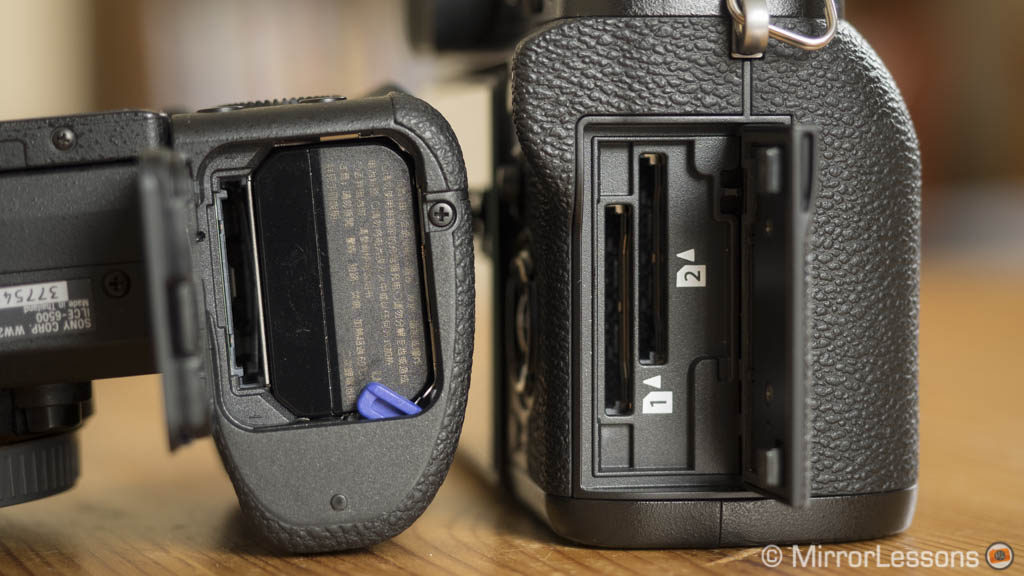
The dual SD slot of the Fuji camera allows for a couple of options that are obviously not available on the a6500: back-up to the second card, and the separation of JPG and RAW files or stills/movies onto two different cards.
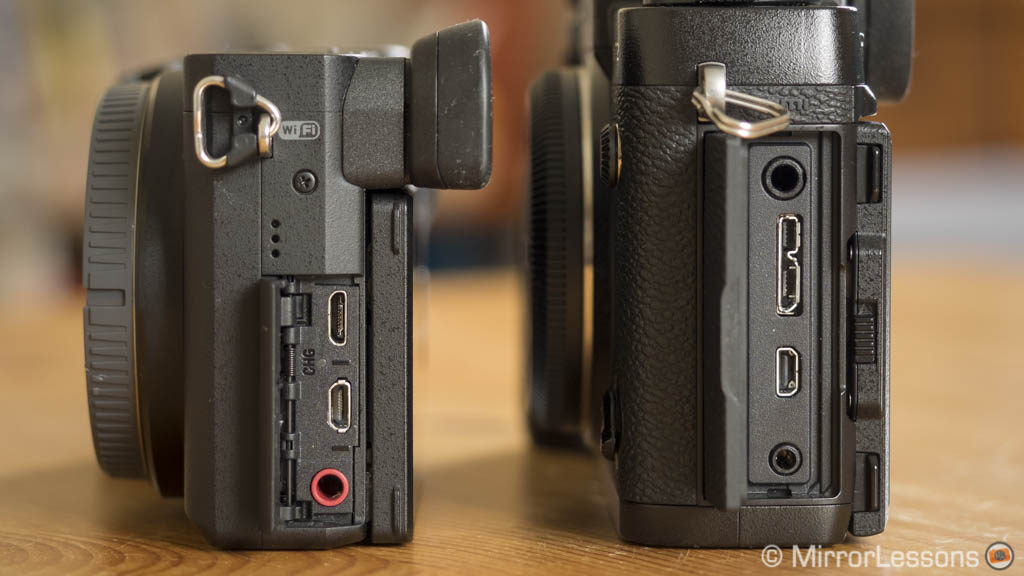
Concerning the connection options, we find a 3.5mm Mic input and a Micro HDMI Type D output (with clean 4:2:2 8-bit signal) on both cameras. The X-T2 has a USB 3.0 port, an additional 2.5mm remote input and a Flash Sync socket on the front of the camera. The a6500 has a proprietary USB/Multi-Port connection.
External controls and configuration
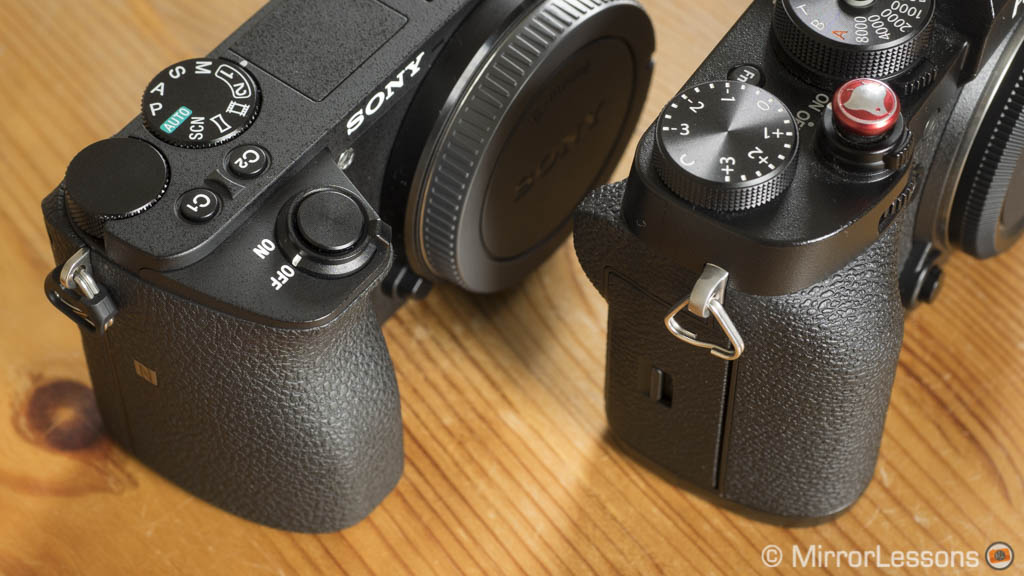
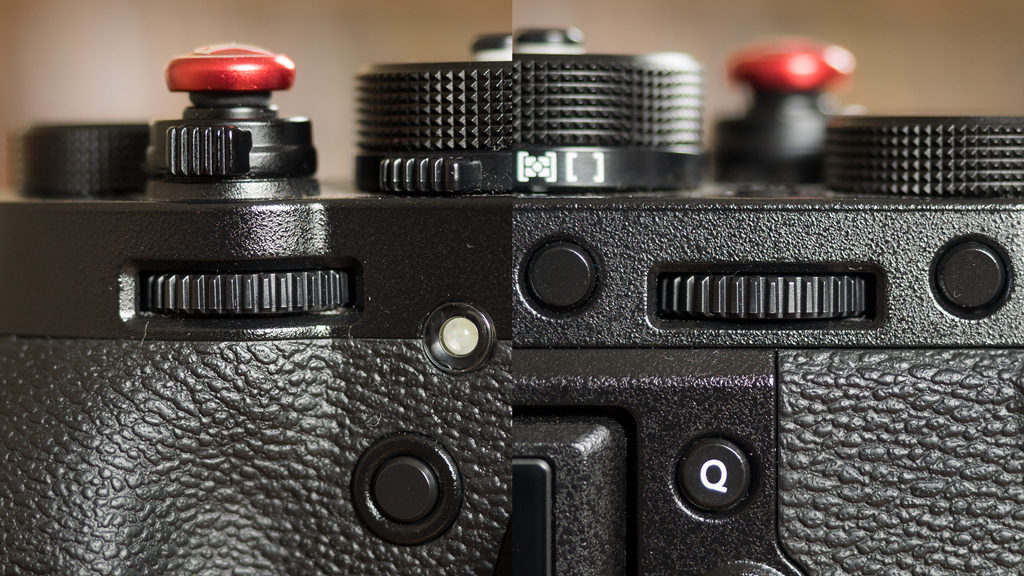
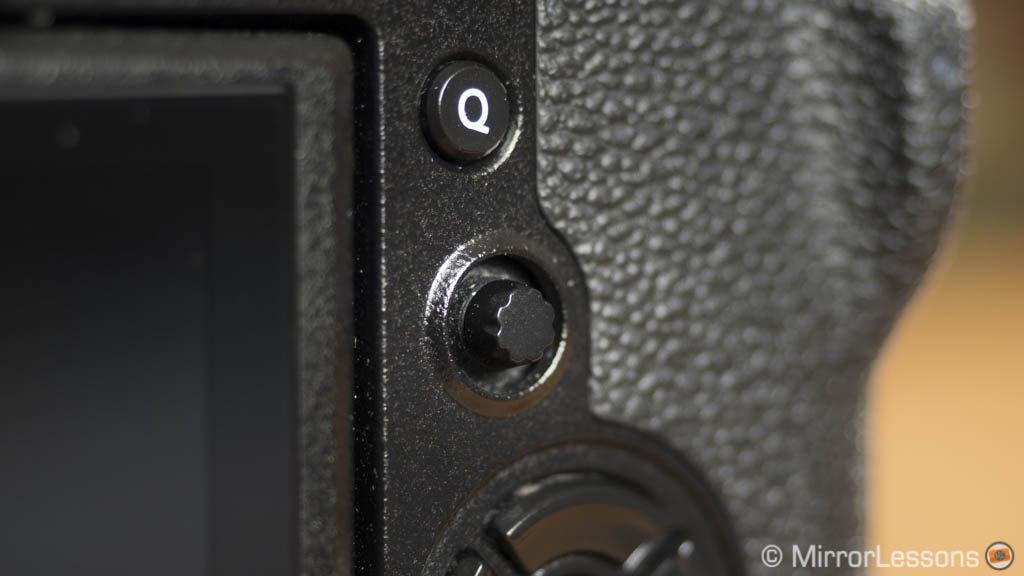
I mentioned the opposing design philosophies of the two brands in the introduction and there is no better chapter than this one to explain them. A small detail we can start with is the threaded shutter button on the X-T2: perhaps not an essential feature but it shows Fujifilm’s attention to detail.
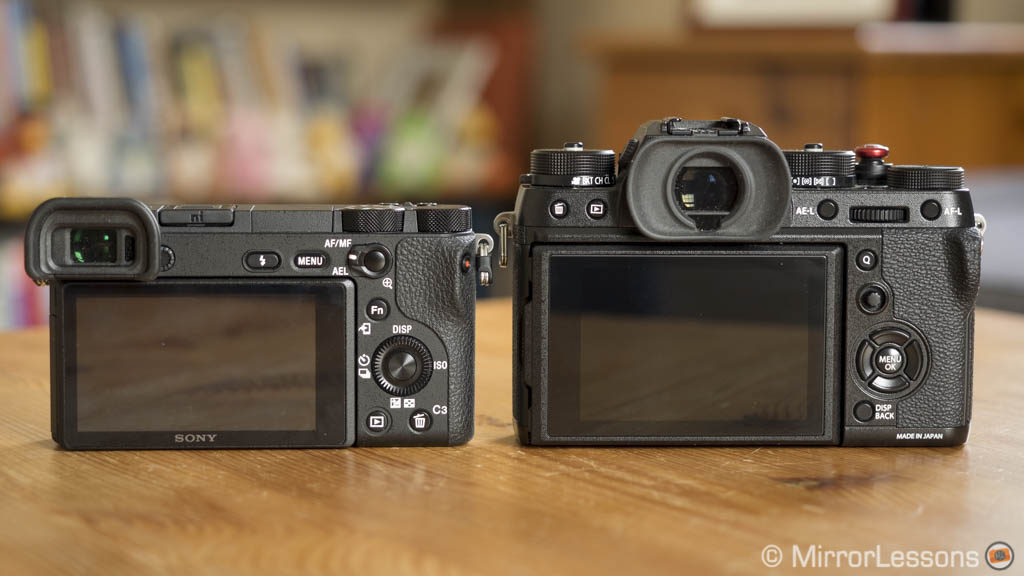
The Sony a6500 feels more modern but offers fewer physical controls. The Fuji X-T2 has a more traditional feel thanks to the various dials that recall the days of analog SLRs.
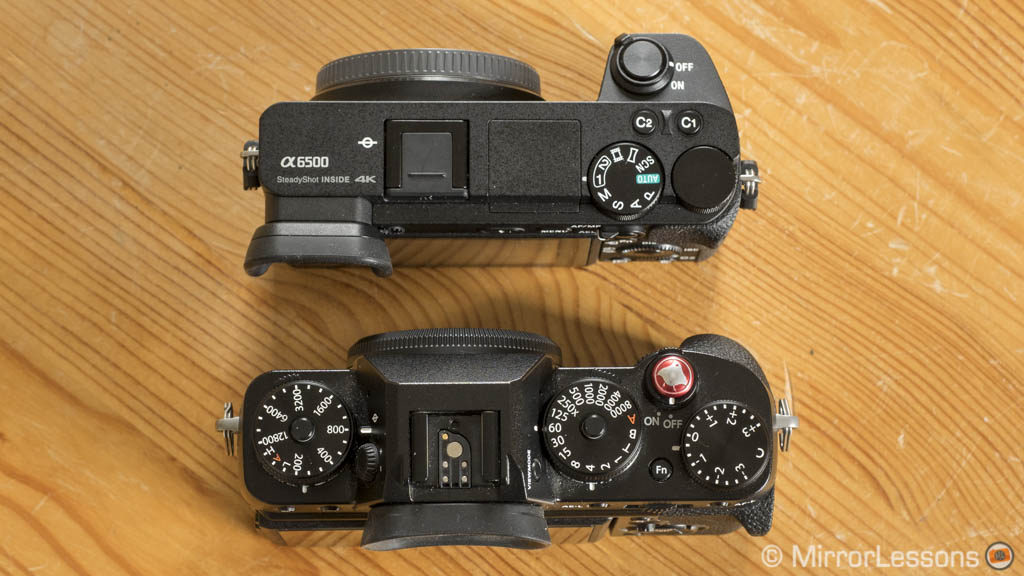
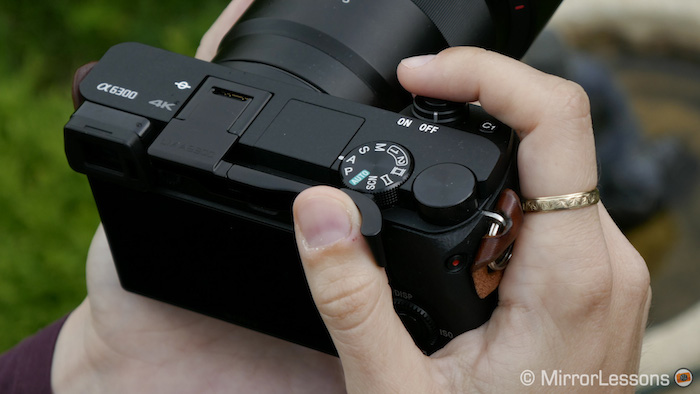
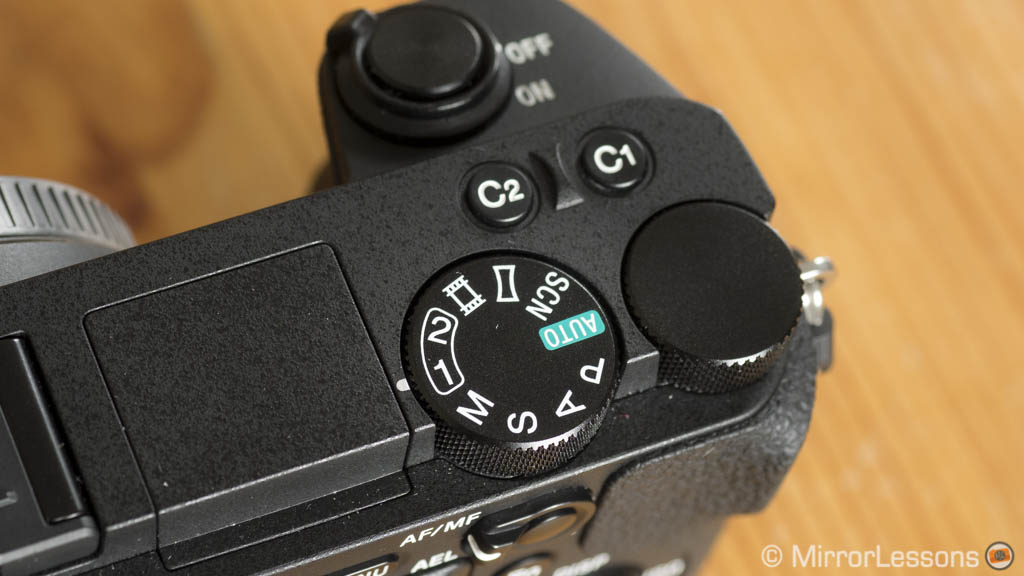
The a6500 has a standard shooting mode dial on top. The exposure settings can be controlled with two dials. The first is the one on top next to the shooting mode dial and the second is the rotating control wheel on the rear. They can be used for aperture, shutter speed or exposure compensation. Which dial does what depends on the options selected in Menu/Custom Operation 1.
The rear wheel is something I’ve never enjoyed on any of the Sony cameras. I find it moves about too freely and I often go one or two steps too far when trying to select the correct value.
Unlike the X-T2, I miss at least one front command dial on the a6500 (it could be positioned on the front grip for example).

When it comes to ease of use, it only takes 5 minutes to appreciate how much better the experience is with the X-T2.
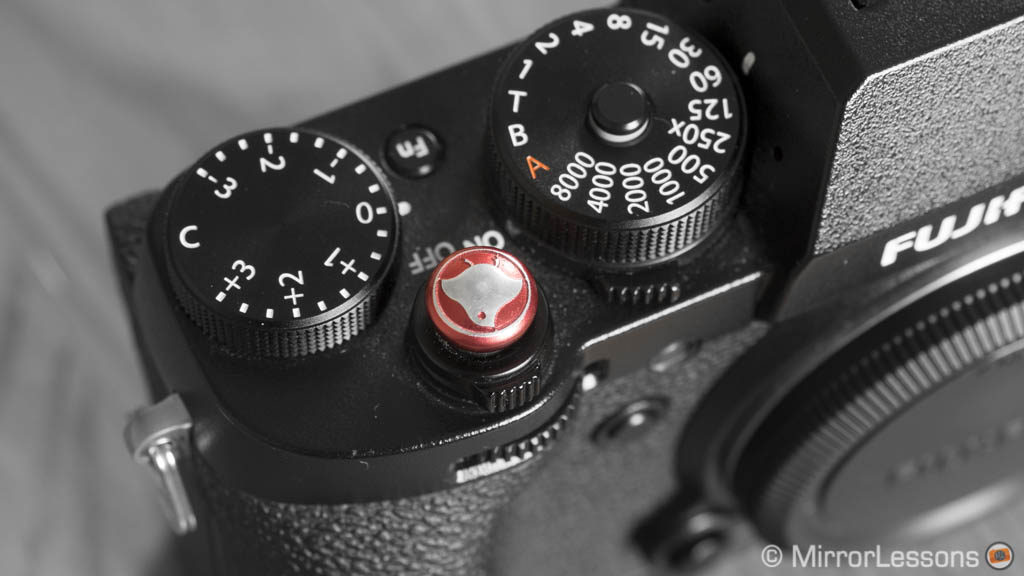
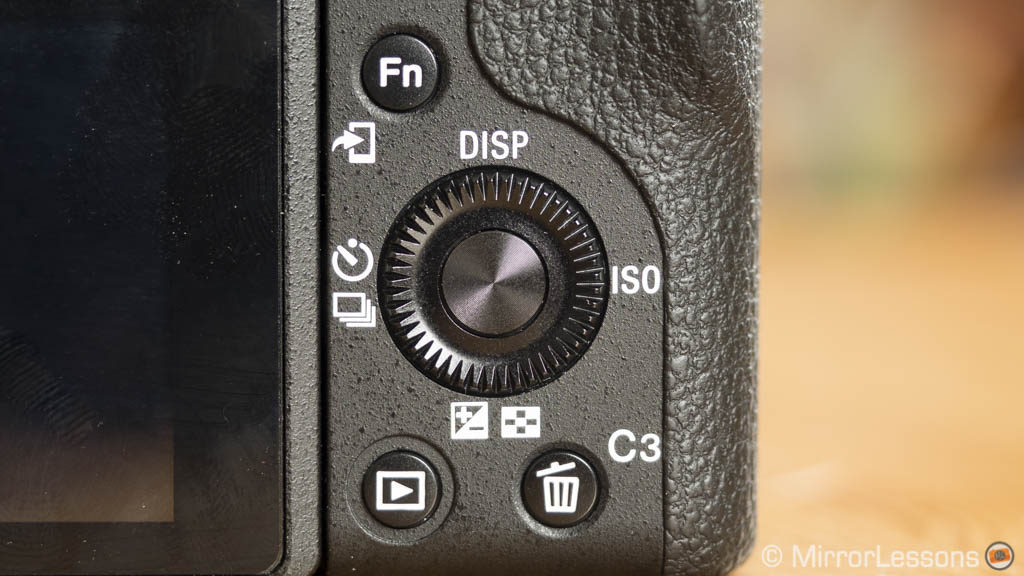
Exposure is controlled with individual dials for shutter speed, ISO and exposure compensation. The latter works in ±3 steps but the C position extends it to ±5 when coupled with the front dial (above the grip). The ISO and Shutter Speed dials can be locked or unlocked with the centre button and there are sub-dials for drive mode and metering.
On the X-T2 you even get an alternative way to change the ISO if you don’t like the default dial for some reason: you can scroll through the entire range and the three Auto ISO presets with the front command dial.
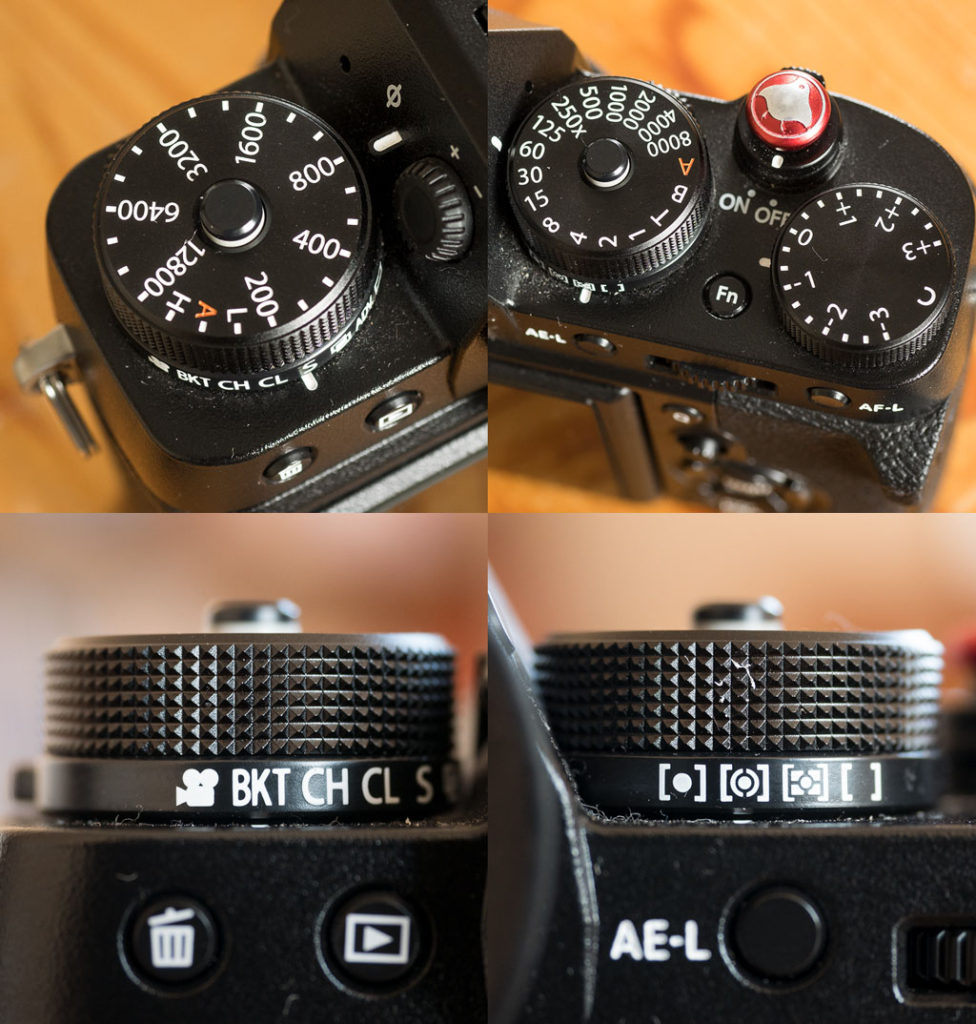
ISO dial, shutter speed and exposure compensation dials, drive sub-dial and metering sub-dial.
Many Fujinon lenses have an aperture ring on the barrel. If there isn’t one, you can control the aperture with the front or rear command dials. These two also serve to fine-tune the shutter speed (1/3 steps) or control the entire ISO range if you’d rather not use the ISO dial (firmware 2.0 required). Both front and rear dials can be pressed to activate different functions such as focus magnification.
More dials on the X-T2 means that you have more control over different settings without the need to deal with quick menus. It couldn’t be more straightforward.
Another detail I appreciate on the Fuji is the AF Joystick which allows you to precisely and rapidly move the AF point. The Joystick has three settings: you can choose to move the AF point right away, push to unlock first or disable it. While moving the focus point, one press will re-centre it.
On the a6500, the best way to move the focus point is to set the control wheel centre button to Standard. Then all you have to do is press that centre button and use the four buttons of the wheel to move the point. Pressing the C3 button allows you to re-centre the focus area quickly. Although I prefer the Fuji solution, I have to admit that I have now gotten sufficiently used to this method on the Sony to not consider it a huge disadvantage. And the Sony camera has another ace up its sleeve: Touch AF that I will explain in the EVF/Monitor chapter.
Finally when it comes to customisation, the X-T2 has an extra function/custom button (9 vs 8) to which you can assign 68 different settings on the a6500 versus the 30 options available on the X-T2. What I like about the X-T2 is that one of them is located at the front, a position I alway find comfortable.
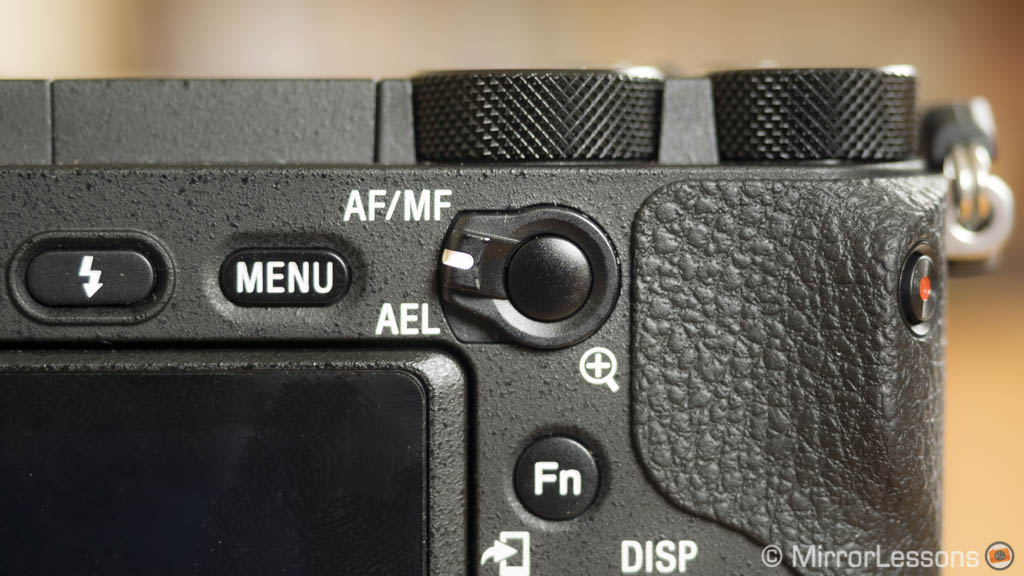
On the Sony I appreciate the AEL-AF/MF lever on the rear that allows you to quickly switch between two functions assigned to the button found nestled inside the lever.
Custom modes and menu system
Something I’ve become quite fond of on the a6500 are the Memory recalls.
Because they are positioned on the main mode dial, I can quickly switch between two completely different sets of settings in a heartbeat. (I just wish I didn’t have to confirm every time.) For example during the Comic Con event in Birmingham, I used MR1 for stills and MR2 for video settings (with a different shutter speed, ISO value and picture profile for example). So the only thing I had to do to switch from stills to movie mode was go from position 1 to position 2. You can also save these settings onto a memory card and recall them on another camera.
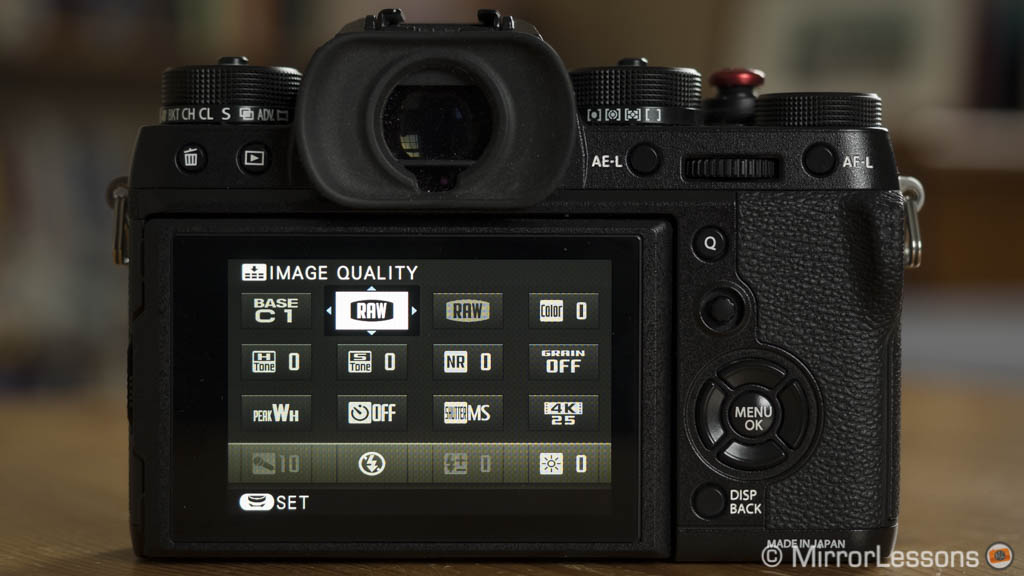
The X-T2 has 7 custom modes accessible from the Quick Menu but you can only use them to save some image quality settings such as colour profiles and sharpness. You can re-name them, however, which can be useful if you configure them for different genres (you can call them landscape, portrait, portrait B&W, etc.).

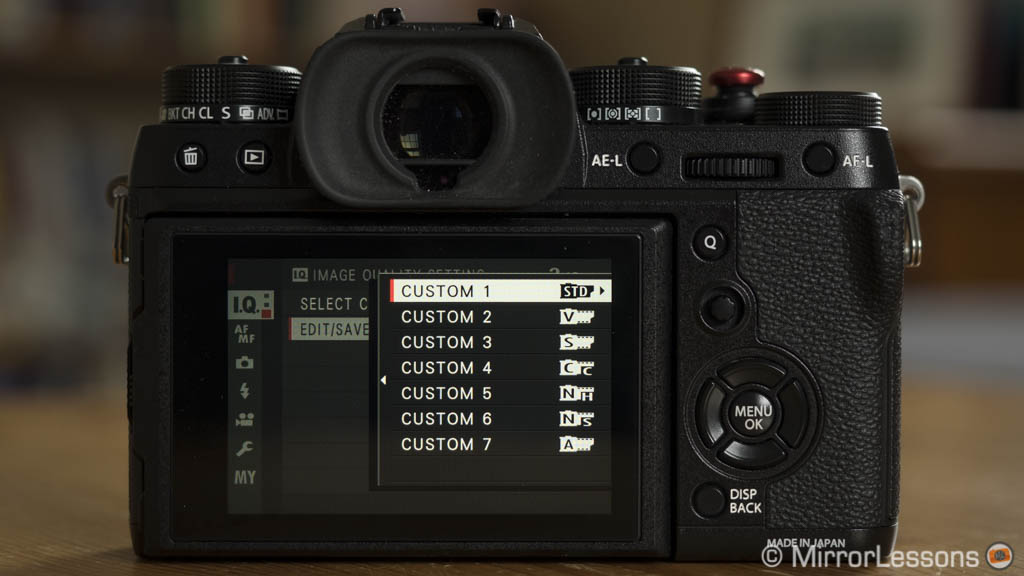
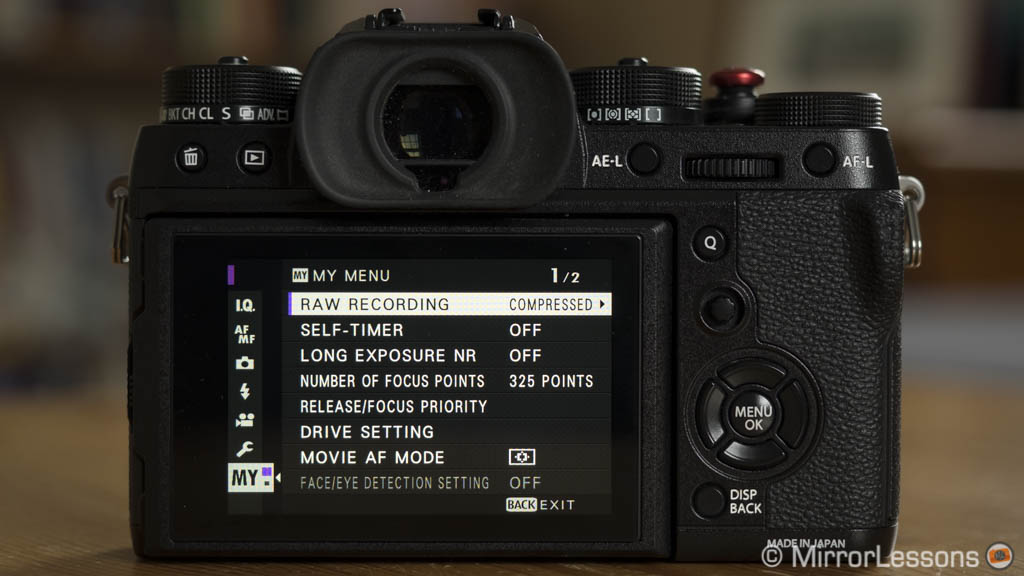
Speaking of quick menus, on the Fuji you’ll find 16 customisable blocks with 24 different options. Then there is the useful My Menu, a personal page within the main Menu where you can save shortcuts to your favourite settings.
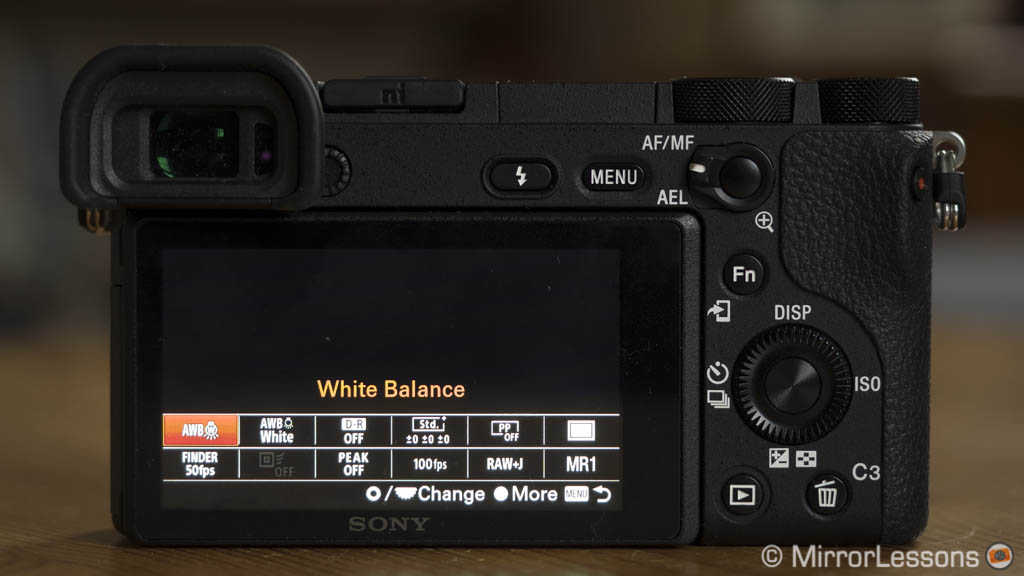
The a6500 has a similar quick menu called Fn menu with 12 blocks and 39 options available for each block.
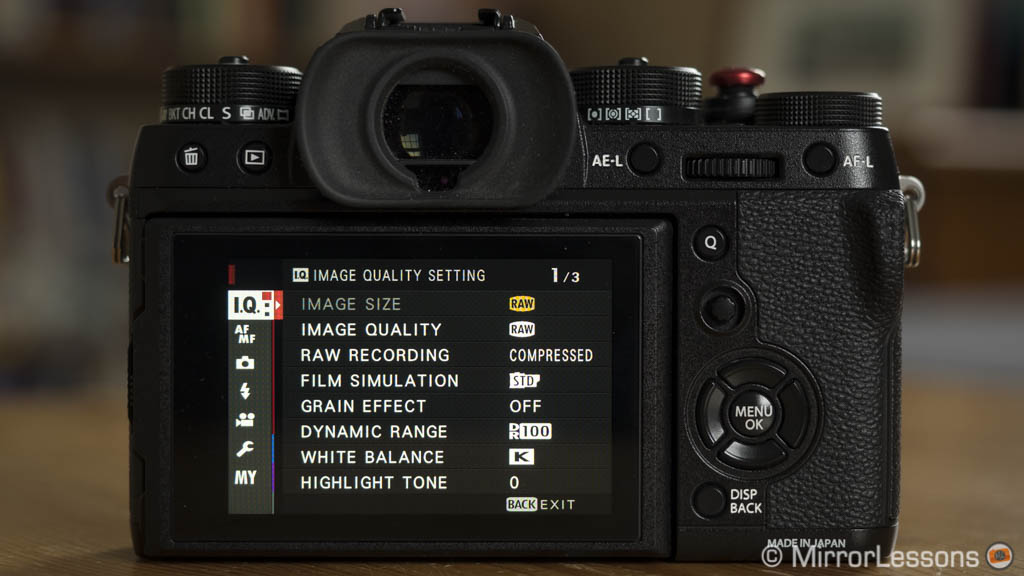
Finally we have the main menu system of the two cameras. Here once again my personal preference goes to the X-T2: it is well-organised, easy to navigate and I rarely have to go back and forth to find the setting I am looking for.
Sony made some small improvements to the a6500 but I still find it a little confusing and more time-consuming. Some options aren’t in a logical place and therefore aren’t easy to find even after using the camera for more than a month.

Viewfinder and rear monitor
Both electronic viewfinders have a 2.36 million-dot OLED panel that gives you a bright view with good contrast and clarity. However there are some important differences.
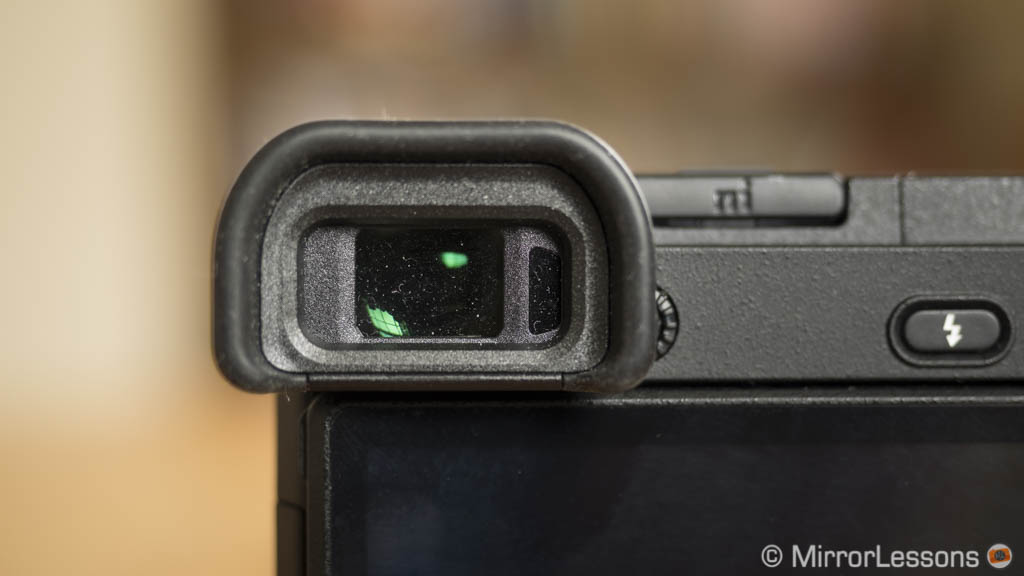
The viewfinder of the a6500 is smaller (0.39 inches) and has a lower magnification factor (0.7x). However the refresh rate can go up to 100fps (PAL mode) or 120fps (NTSC). The display lag is not specified but I find it to be quite short.
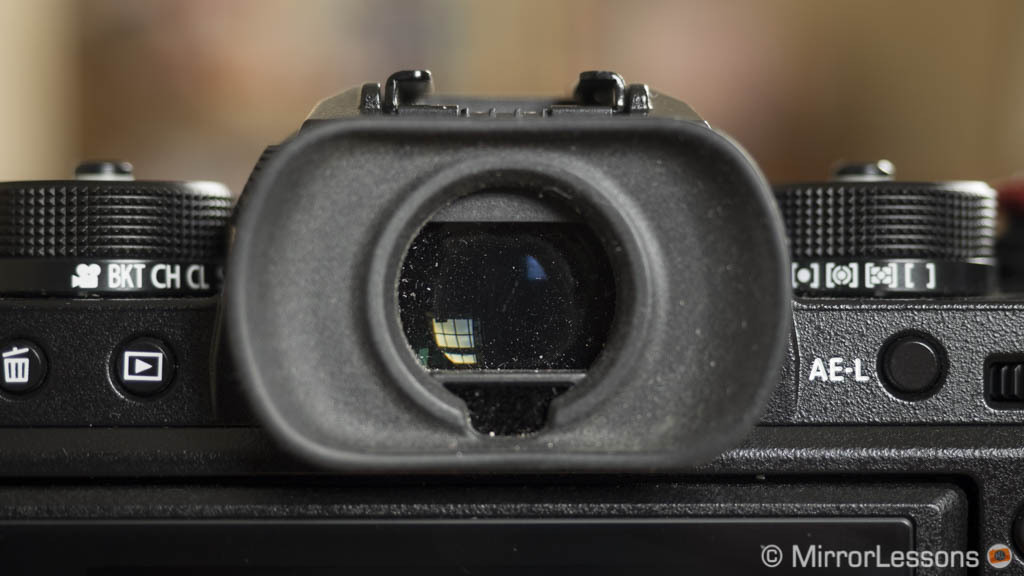
The X-T2 EVF is larger (0.5 inches) with 0.77x magnification, a time lag of 5ms and a frame rate that goes up to 100fps in Boost mode. In the end, I find it more comfortable to use the X-T2 simply because the EVF is larger. This becomes even more important when manual focusing and the camera has a nice options for that including Dual View (more on this in the Extra Features chapter).
Moving on to the rear screen, the a6500 wins some important points. Unlike the X-T2, it is touch sensitive and allows you to move the focus point for both stills and video when composing with the LCD or EVF.
Sony designed the Touch AF in a clever way: you can decide to use half or a quarter of the right-hand side of the screen which reduces the chance of mis-focusing due to your nose touching the screen. You can decided to use it with the LCD monitor alone, with the EVF or both, and you can disable or enable it when composing in vertical mode.
Touch AF is precise and reliable for both stills and video. For the latter it makes quite a difference when you want to change the focus point from one object to another thanks to the various speeds you can set in-camera. You can see how it works in the video below:

The X-T2 rear screen isn’t touch sensitive but can be tilted in three directions: up 90°, down 45° and right 70°. The extra axes on the Fuji camera are welcome when shooting in vertical mode but you don’t have a screen that flips to the side like other cameras (usually a preferred solution for video). Personally I like it and it gives more versatility in comparison to the basic tilting LCD of the Sony camera.
One nice implementation brought to the X-T2 via firmware is “Eye Sensor + LCD Image Display”: the last image taken will display automatically on the rear monitor while you are shooting with the EVF, allowing you to quickly check the result without going into playback mode. Firmware 3.0 also added the possibility of displaying highlights warning with live view. The A6500 has a similar solution with Zebra pattern. Finally, firmware 4.10 for the X-T2 adds another interesting option: to customise how the data is shown (location and size) on the EVF and LCD monitor.
Sensor, resolution and flare
The two cameras have the same sensor size and practically the same number of megapixels (24.3 million for Fuji and 24.2 million for Sony) but their sensor technology differs.
The Sony a6500 features an Exmor CMOS sensor with a lower copper wiring layer and processing circuitry which enables the camera to capture more light. The image processor is Sony’s High-speed BIONZ X.
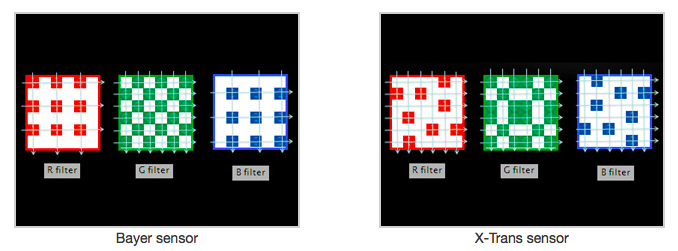
The Fuji X-T2 uses the X Processor Pro engine and an X-Trans CMOS III sensor that features a thinner copper wiring as well. The most important difference lies in how the RGB pixels are distributed. Unlike Bayer sensors (like the one found on the a6500), the X-T2 chip features an irregular pattern with one Red, Green and Blue pixel for every horizontal and vertical line.
Note: I performed an in-depth comparison between these two sensors and image processors while testing the a6300 and X-Pro2. Because the technology found on the a6500 and X-T2 is the same, I am going to use some of those findings for this article.
Given the difference in technology of these two sensors, you would expect to find a significant gap in the results but most of the time, this is not the case.
Let’s start with sharpness and detail. While comparing the a6300 against the X-Pro2, I had the chance to use the very same lens: the Zeiss Touit 12mm f/2.8 that is available for both E and X mounts.
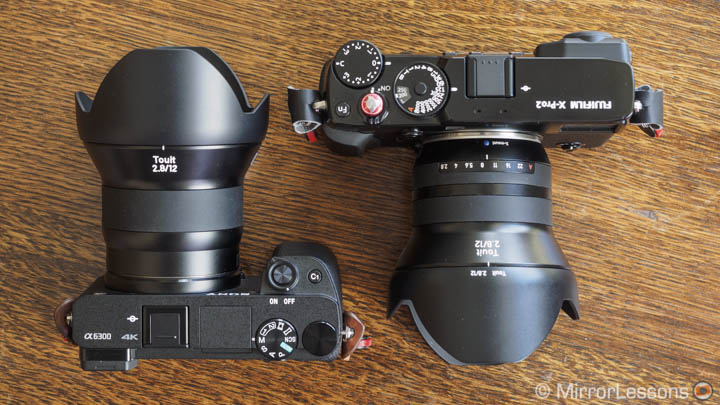
This gave me the possibility to see the resolving power of these sensors without any influence from the lens. The comparison showed that the Sony sensor retained a tiny advantage when using Adobe Lightroom. With Iridient Developer, which is more capable of pulling out fine details from Fuji’s RAF files, the results are pretty much identical.


As usual when talking about Fujifilm cameras, we have to mention the difference in RAW demosaicing. The a6500 files work well with most softwares while Fuji files can require a more capable program in specific situations if you want to render the sharpest details. Iridient Developer is one of the best out there.
The difference is more noticeable when there is highly detailed green vegetation in the background or foreground like the short grass below. The X-T2 files present less of a “watercolour” effect thanks to the Iridient software.


As I’ve repeated many times, I don’t necessarily consider the difference above a disadvantage for the X-T2. It all comes down to specific needs – and let’s not forget that there is a solution. Granted you might find using a second software annoying, but it is better than nothing.
Note: there are other software programs capable of handling Fuji files better than Lightroom for certain situations like the example above. I haven’t tested them all but you can find lots of feedback online. Also the recent version 8.2 of Lightroom Classic CC has improved the rendering with Fuji RAF files.
One annoyance related to Fujifilm’s 24MP sensor is purple flare. I discovered it on the X-Pro2 first but it is present on the X-T2 as well. It happens in certain backlit situations when the light rays enter the lens at a specific angle. When purple flare is recorded, you can notice a gird artefact in the magenta area of the image.


Here as well the purple flare is not something that bothers me too much on a personal level. To tell you the truth, I have various examples in my archive because I specifically look for it when testing or comparing the camera. When shooting normally I rarely had to deal with the problem. Even more importantly, the purple flare is often visible in the EVF or LCD so you can avoid it by simply tilting the camera up or down a few millimetres. That being said, I don’t shoot in backlit conditions all the time so for someone who does, the flare can be more annoying.
Picture Profiles, White Balance and JPG Settings
When it comes to colour, it is always important to distinguish the difference between RAW and JPG formats.
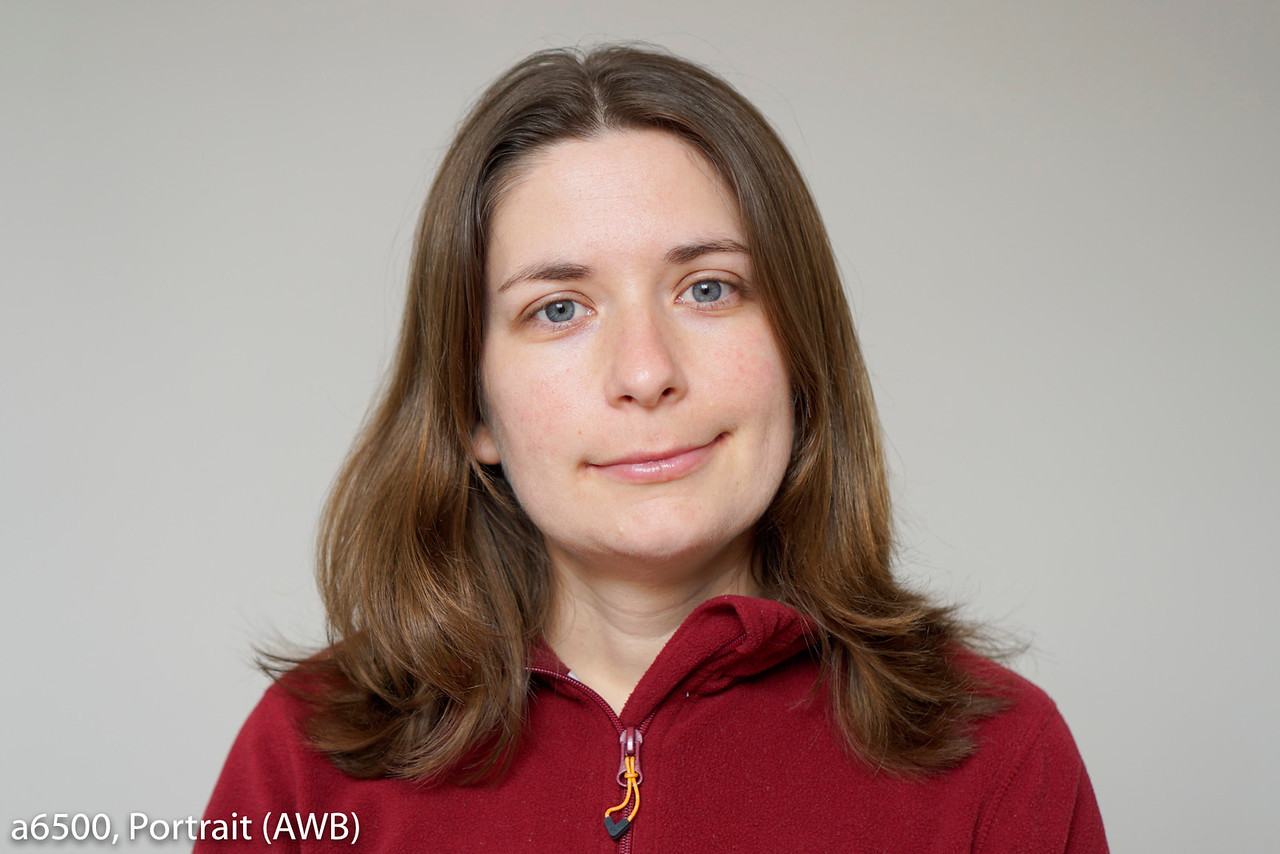
If we start with SOOC (Straight Out Of Camera) JPGs, colours are influenced by the white balance (a.k.a. colour temperature) and the picture profiles you choose in-camera. These profiles are called Creative Styles on the a6500 and Film Simulations on the X-T2 and they also influence the contrast and brightness of the image.
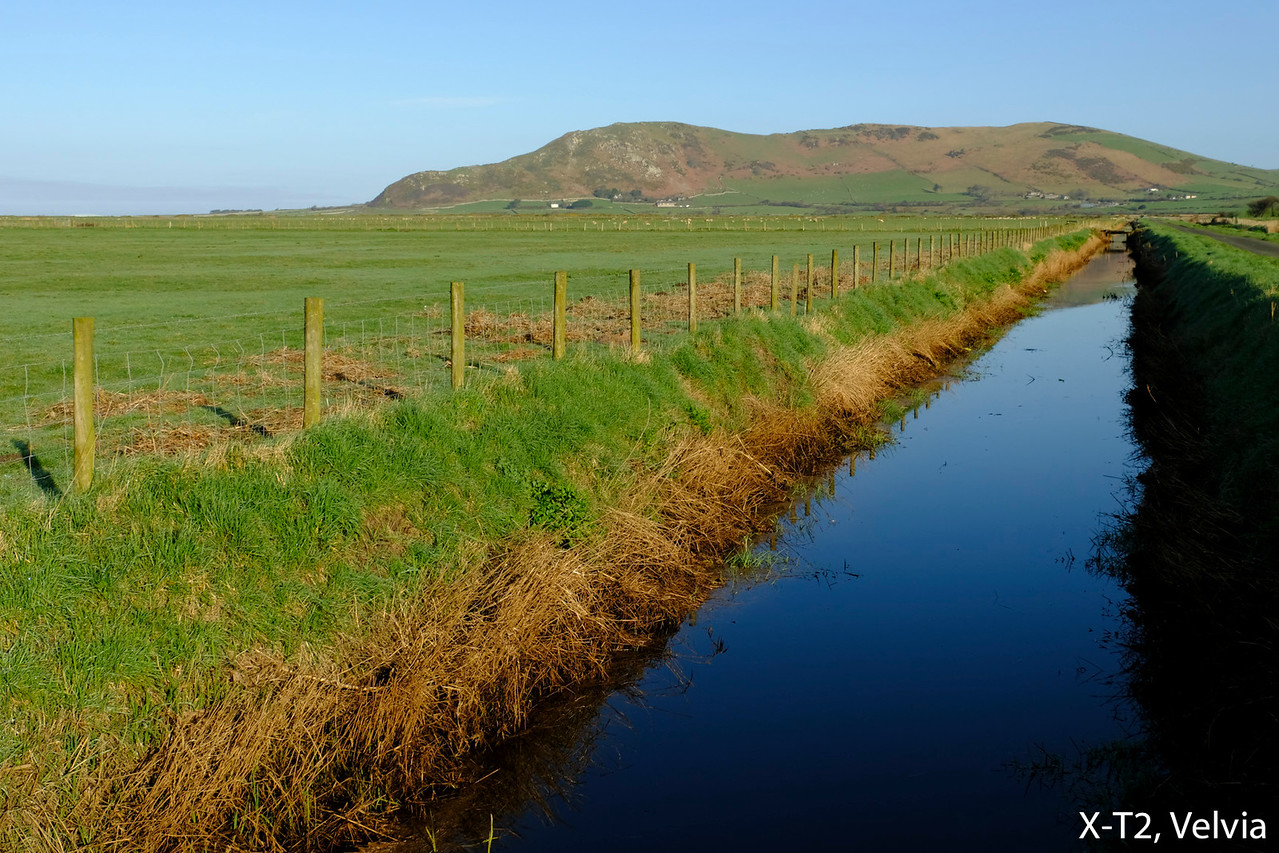
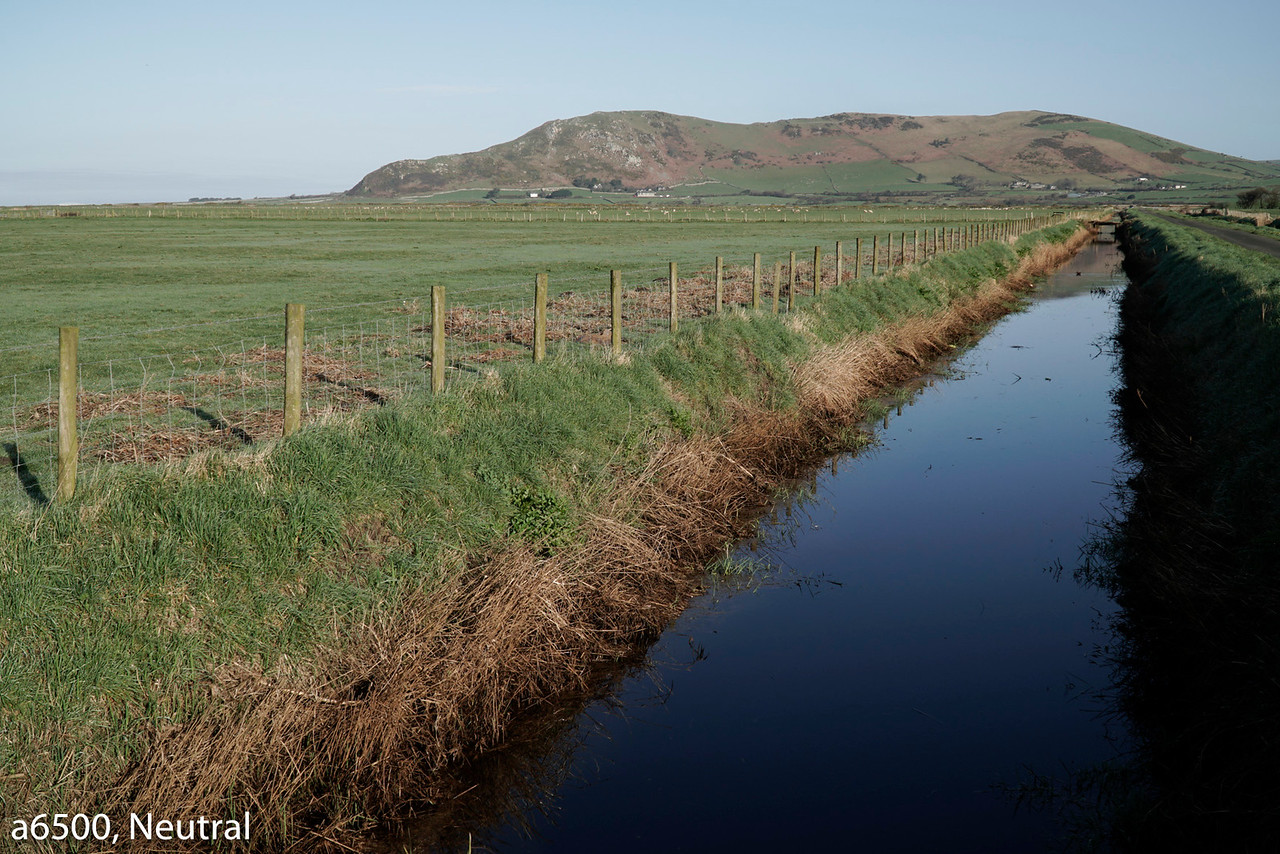
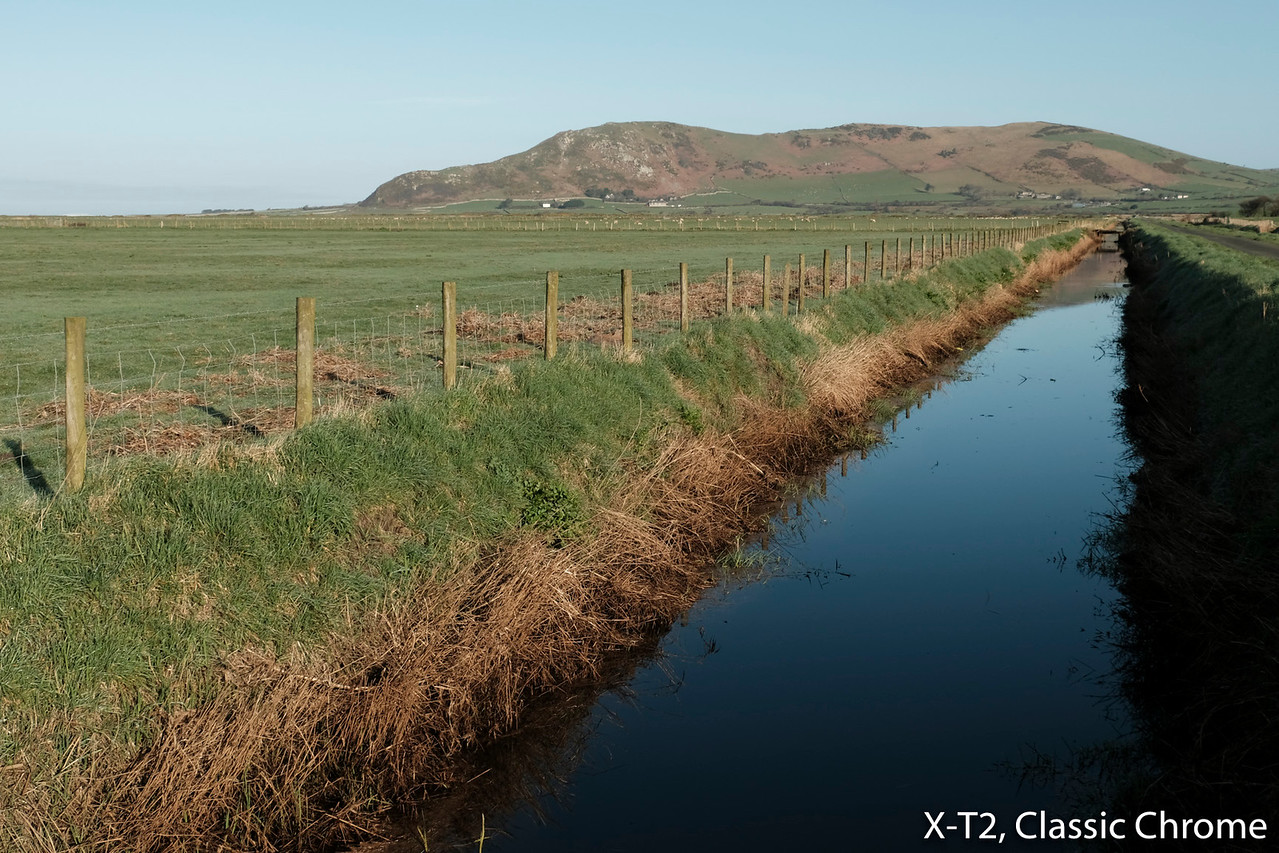
The first example below shows you a landscape shot taken in the morning with AWB and the Standard profile (also called Provia for Fuji). You can see that the Fuji image has a slightly warmer rendering and more saturation.
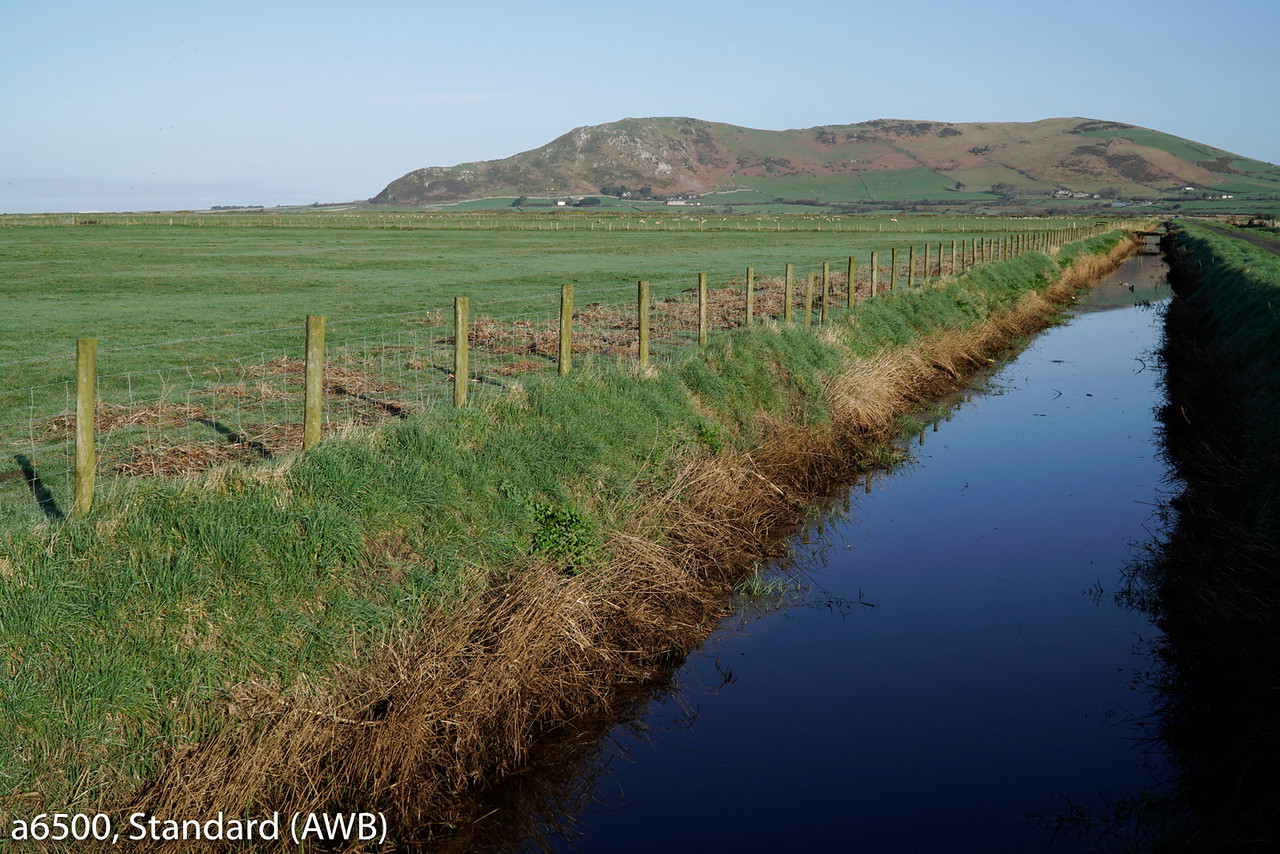

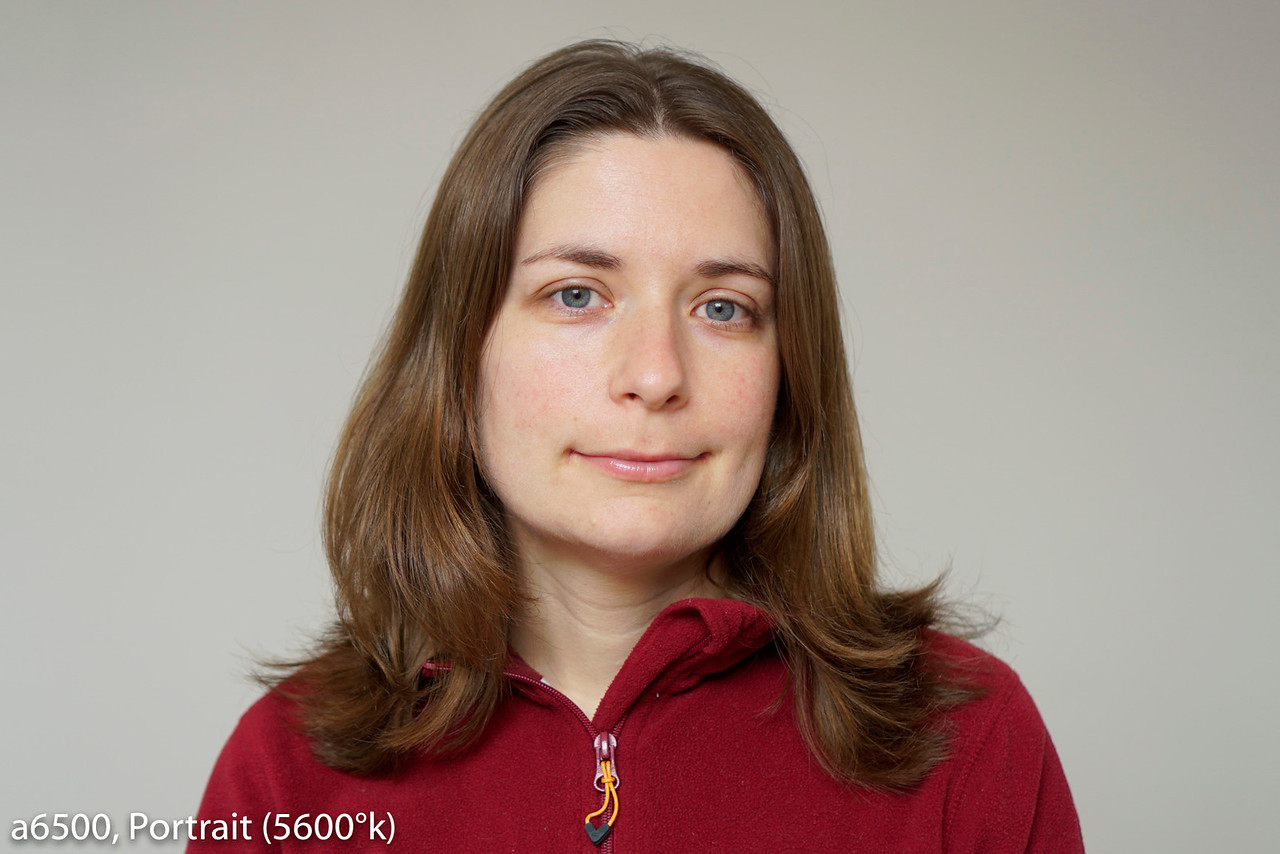
If I set the white balance to manual (in this case 5600°k), the a6500 gives a slightly warmer result but the profile of the X-T2 remains stronger in saturation and colour vibrance.


The a6500 has a total of 13 profiles including one monochrome and sepia option. The X-T2 has 9 profiles including one sepia and two monochromes. I am not going to show you the difference between them all, but you can see two additional examples that are representative of the individual colour palette of each camera.

Some of these profiles are better used with other types of scenes rather than landscapes but you get the idea.
If we have a look at the monochrome profiles, the a6500 has only one while the X-T2 has Monochrome and Acros, each with four different colour filter options to optimise contrast and tones. An example can be seen below: the Sony image is darker while the Fuji result is not only brighter but also has a richer set of grey tones.

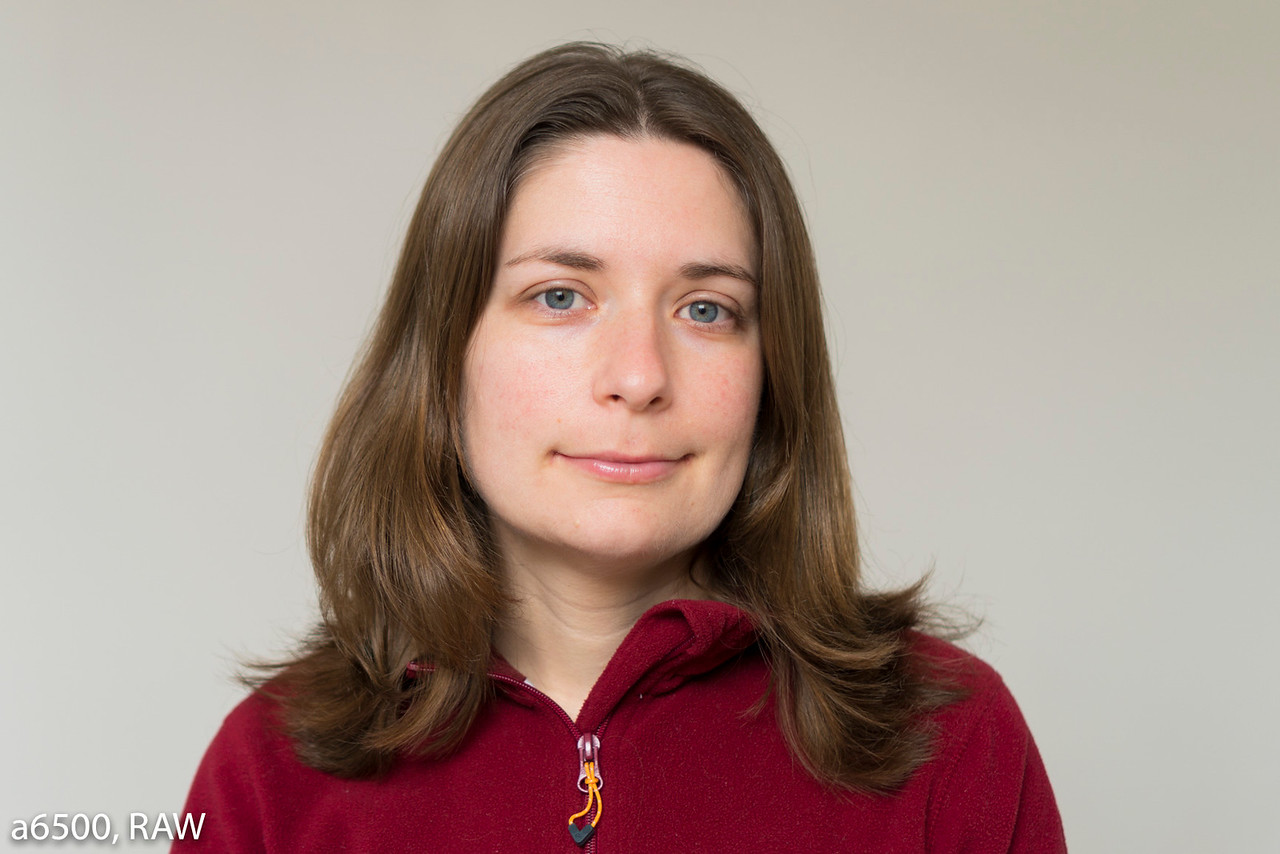
With the RAW format, the difference is minimal because it mostly comes down to the colour profile applied by your post-processing software.
If we take one of the most popular programs such as Lightroom, by default every RAW files is opened with the Adobe Standard profile. As you can see below, the differences produced by the SOOC JPGs are mostly erased. The influence of AWB matters less because it can be adjusted (one of the many advantages of RAW format). We can still notice a slightly warmer rendering from the X-T2 but then you have much more freedom to tweak colours and apply third party presets so it matter less.
With other software such as Iridient, a different profile will be applied for each camera but the differences here are minor as well.
Lightroom users can apply the same colour profiles found in camera because the software includes a copy of most of them. They are all available for Fuji while for Sony, a few such as Autumn leaves are missing.
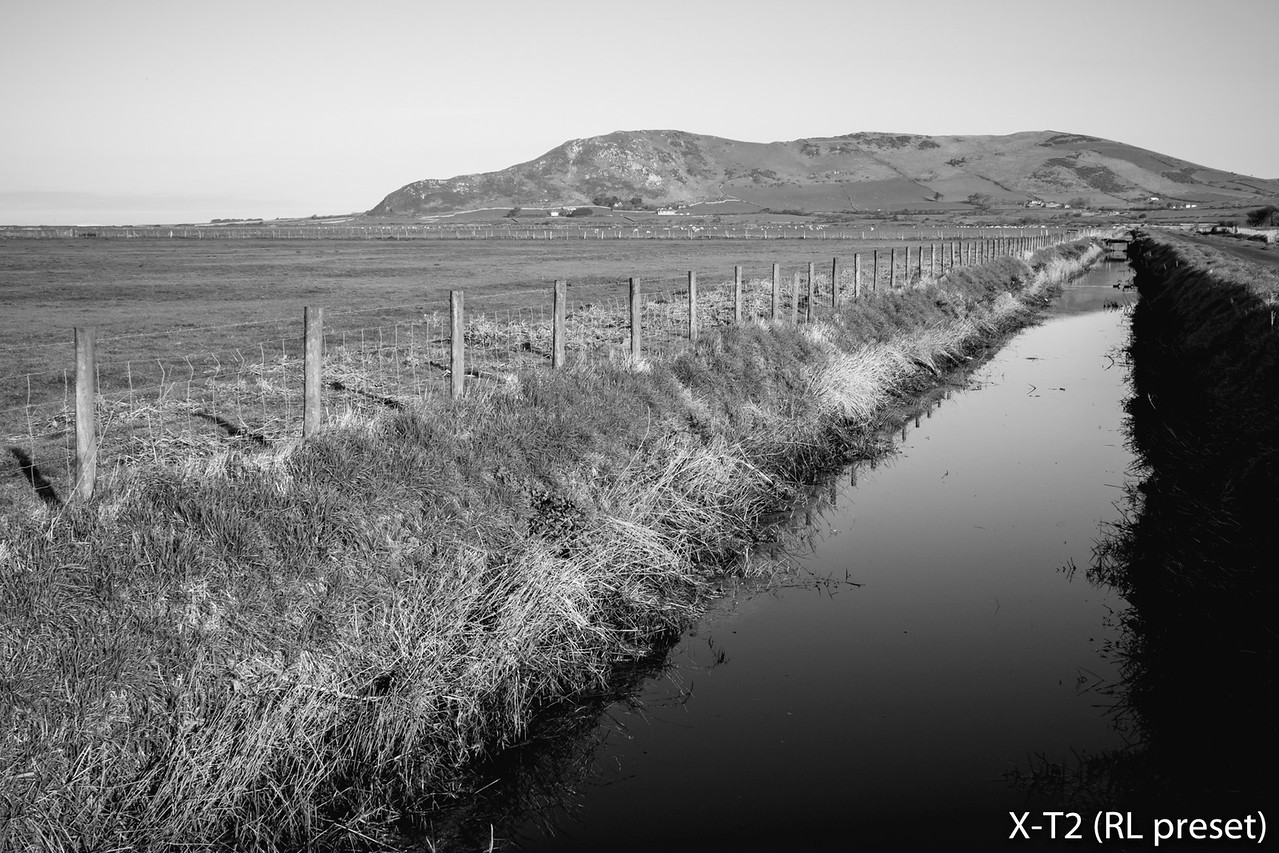
With monochrome, a similar reasoning applies. In the example below I applied a B&W preset from the Rebecca Lily collection to the two RAW files. As you can see, I easily obtained the same result without tweaking any other settings.

Of course when we talk about monochrome or colours in particular, there are many different variables to consider including the weather, the time of the day or the type of light.
Another situation that is interesting to analyse is portraits and skin tones. The example below was taken in a neutral environment with white walls and daylight coming from a skylight window. The first set shows the result with AWB, the Portrait Creative Style on the a6500 and the Astia profile on the X-T2, two profiles that in this case are close in character. We can notice a slightly warmer result from the Sony image but both look good.
Note that in other scenarios, Portrait Style and Astia can be a little too saturated for portraits (the Sony especially tends towards an unnatural yellow tint). In that case I usually choose Neutral on the Sony and Pro Neg Hi on the X-T2.

If I go with manual white balance (5600°k again) we can see that the X-T2 has a greener rendering in comparison to the Sony image. Remember that WB shift can be corrected in-camera with a dedicated setting.

Once again with the RAW files, I can obtain an almost identical result by adjusting basic settings in a slightly different way for each file.

As for the JPGs, you can find the basic settings on both cameras such as contrast, saturation and sharpness (±3 steps for the Sony, ±4 steps for the Fuji). I usually keep everything to 0 on the Sony. Increasing sharpness on the Fuji can be too much for portraits. The a6500 has an option to control AWB in artificial light (warmer or more faithful to whites but it’s not very precise).
The X-T2 has a few additional options such as controlling shadows/highlights, Dynamic Range when shooting at higher ISOs (400 and 800) and the possibility to add grain to the images (Weak or Strong) which can work particularly well in black and white. Here again to analyse each one of these settings would be time consuming but there are some additional examples in my a6300 vs X-Pro2 comparison.
Dynamic range and metering
Given that the two cameras have the same sensor size and the latest technology, it is normal to expect similar dynamic range performance. The a6500 and X-T2 are no exception to the rule.
The first difference is found at the base of the ISO sensitivity scale: the a6500 starts from a native ISO of 100 while the X-T2 starts from ISO 200. Then we have RAW depth and compression: they both output a 14-bit file but the Sony’s is compressed while the X-T2’s lets you choose between lossless and uncompressed (so no loss of data either way with Fuji).
Below I adjusted my exposure to record the same brightness to see what the cameras were capable of with their optimal settings (ISO 100 and ISO 200 respectively).
If we look at the shadow and highlight recovery capabilities, the results are very similar overall.
The only difference is found in the shadows: I had to set colour noise reduction to +20 to get rid of colour noise on the a6500 while the X-T2 shows no colour noise even with NR set to 0. Note that these difference can vary a little depending on the software used (Lightroom in this case).


If we take a look at a second example with stronger contrast, we find the same conclusion concerning noise in the shadows. Both cameras recover highlights in the same way.


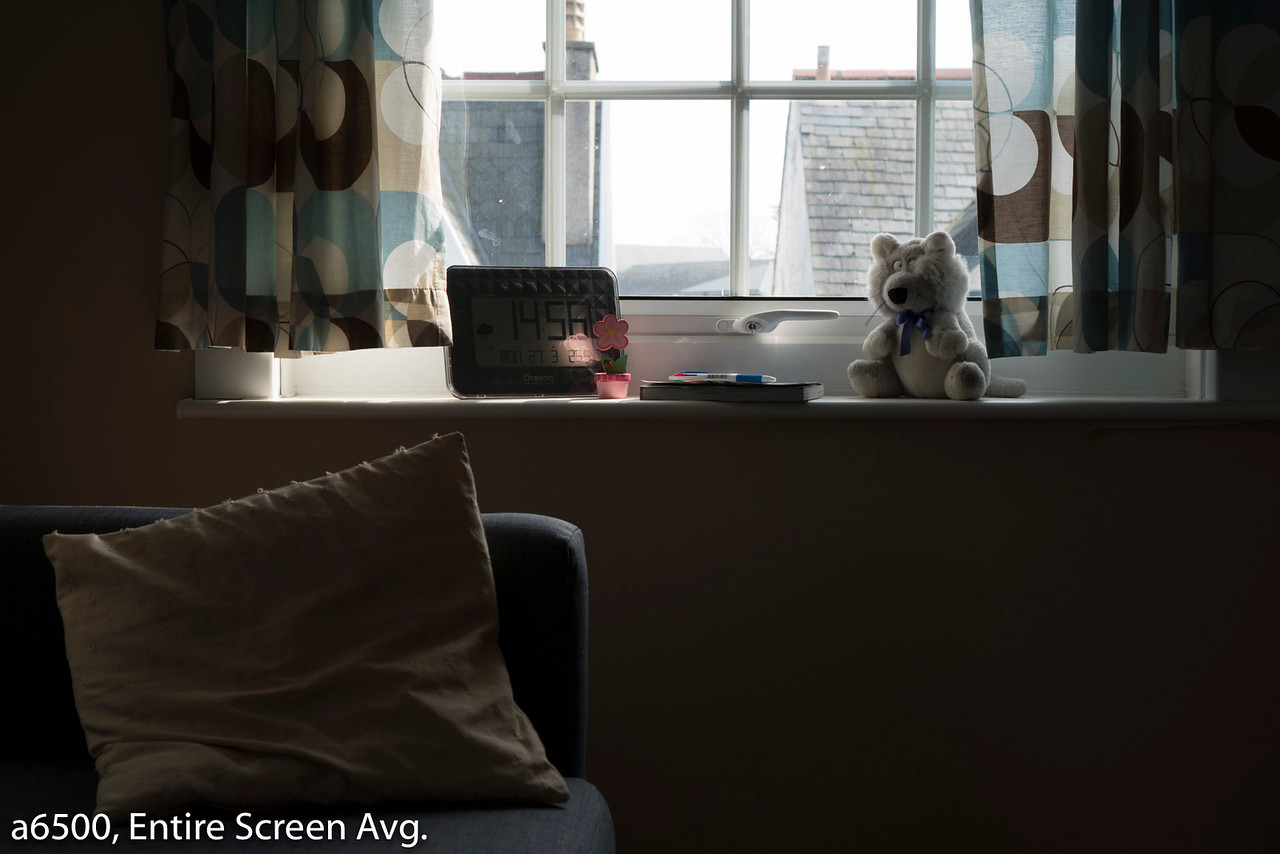
When it comes to metering, the Sony a6500 has five settings versus the four found on the X-T2. Both cameras have the default Spot, Centre-Weight and Multi options. Spot metering on the Sony camera can be set between Standard and Large.
If we analyse the scene below, we notice that they interpreted the light in a similar manner but the Fuji tends to underexpose more by 1/3 or 2/3 stops depending on the metering mode.


The Enrire Screen Average metering on the a6500 analyses the entire screen to determine the exposure. This often results in -1 or -2Ev in comparison to Multi. It behaves similarly to the Average metering of the X-T2.
The fifth metering option on the Sony camera is called Highlights. As the name suggest it gives priority to the brighter areas of your image to make sure no highlight is clipped. As a result the image is severely underexposed by 4/5 stops.

On both cameras you can decide to link Spot metering to the single focus point so that the camera measure the exposure based on where the focus point is rather than the centre of the frame.
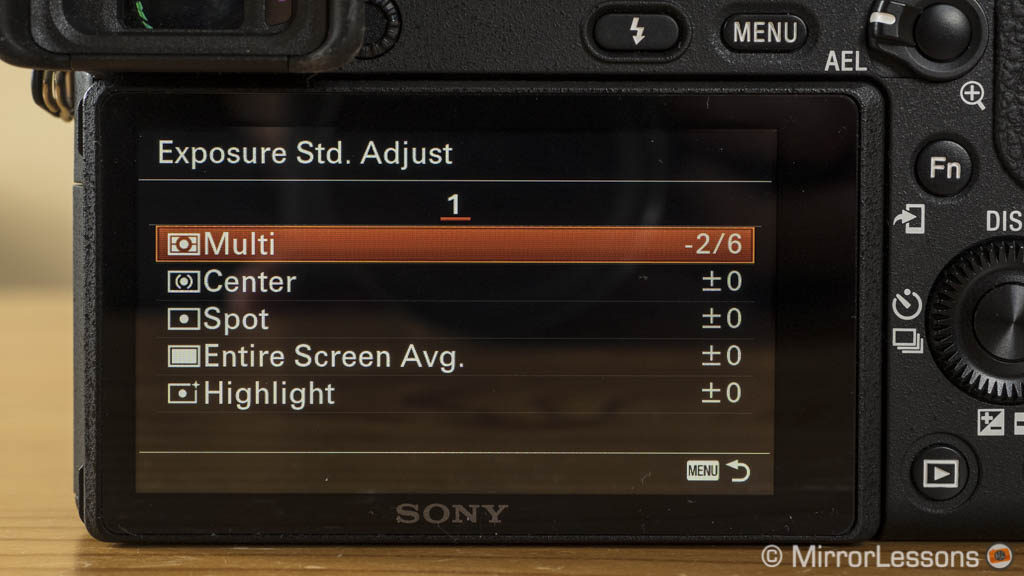
The a6500 has an additional option called Exposure Standard Adjustment where you can set a compensation value (±1Ev in 6 steps) for each of the five metering options. So if, for example, you find that your favourite metering setting tends to over or underexpose, you can fine-tune that behaviour in the Menu.
ISO Performance
The last part of our image quality test is the ISO performance. As I explained above, both cameras start from a different base sensitivity (100 for the a6500, 200 for the X-T2).
The Fuji camera can go down to 100 as well (and also 125 and 160 with firmware 2.0) but these are extended values, meaning that the camera records a 200 ISO image and then underexposes it using the image processor. On the other end of the ISO range, the a6500 can go as far 25600 and extend the brightness to 51200 ISO. The X-T2 native range stops at 12800 but two additional extended values are available (25600 and 51200 ISO).
Before analysing the high ISO performance, let’s have a look at the ISO invariance (or ISOless) capabilities of each sensor. If you haven’t heard of this, it is a characteristic of the sensor that allows you to adjust the brightness of your image either while shooting (by setting the optimal ISO value) or in post-production with your favourite RAW software (by increasing the Exposure/Ev). Long story short, instead of shooting at ISO 1600, you can underexpose your image by 4 stops (ISO 200), recover the brightness in post (+4Ev) and get the same quality as ISO 1600.
Now in real world situations, I honestly admit that I rarely find the need to use such methods and when I do, I usually underexpose by 1 or 2 stops. But from a pure performance point of view, it’s an interesting thing to test because not every sensor is ISOless.
Our first example is in daylight. Underexposing by two or three stops didn’t reveal any difference between the two cameras but things change a little when I underexpose a shot by 5 stops. As you can see below, the a6500 starts to show more noise and a reddish colour cast while the X-T2 result looks almost like it was shot at ISO 3200. Granted it’s not a huge difference and again it is unlikely you’ll need such extreme exposure recovery anyway. What’s interesting, however, is that the Fuji image recovered in post was shot at ISO 100 which is not a native sensitivity value.


The ISO invariance technique can work fine when there is lots of light hitting the sensor and the pixels, but what about an extreme recovery in low light? In the second example below, I pushed the exposure by 5Ev again. For the a6500 I used ISO 100, then ISO 200, and compared the results to the equivalent exposure of 3200 and 6400 ISO respectively. On the X-T2, I used ISO 200 and compared it to 6400.
Here we get a different result: the Sony retains more detail at ISO 100 with minimal magenta cast while the performance decreases at ISO 200. The X-T2 loses more detail. In both cases the high ISO images conserve better colours and more detail so in this situation the ISO invariance is less effective than the daylight example. At ISO 100, the Sony is more capable of an extreme exposure recovery.


When it comes to high ISO performance, both cameras perform in the same manner up to ISO 6400.
Here again the difference is the amount of colour noise reduction I had to apply to the RAW file: +15 for the Sony, 0 for the Fuji up to 1600 and then +5 up to 6400. Note that I had to slightly tweak the exposure settings in-camera to match the same exposure, otherwise the X-T2 files were 1/2 stop underexposed (which corroborates the findings shared in the a6300 vs X-Pro2 article).


At 12800 I had to raise noise reduction on the a6500 (+20) but once again the difference almost non-existent.

At 25600 ISO the Sony starts to show some colour artefacts and at 51200 both become too much noisy with a loss in colour information. Note that for the X-T2, the 51200 value of the RAW file is underexposed by one stop which means it get the same brightness as the 25600 value. Fuji probably designed it for the SOOC JPG by giving it that extra boost with the image processor.

When testing the ISO performance, my aim is always to get rid of colour noise which I find the most annoying type of noise. I don’t touch the luminance noise so that I can display the differences more easily. Of course when dealing with images without side-by-side comparisons in mind, you can adjust luminance noise to your taste to decrease the total amount of noise and make the result cleaner. Remember that pushing the sliders to the extreme can soften details too much. Again the performance can vary from software to software.

Finally if we have a look at the JPG performance we can see that with NR set to Off or minimum (-4 on the X-T2), the Fuji does a better job at getting rid of colour noise. With NR set to Low/0 the X-T2 looks cleaner but also starts to lose some detail. With the strongest NR setting (Normal / +4), the Fuji image looks washed out.

This article continues on page 2.
Check the price of the Fujifilm X-T2 on
Amazon | Amazon UK | B&H Photo | eBay
Check price of the Sony a6500 on
Amazon | Amazon UK | B&H Photo | eBay
Second-hand Sony cameras on
Second-hand Fujifilm cameras on