I’ve tested most of the high-end Fujifilm cameras for birds in flight, from the original X-T1 to the surprising X-Pro2. The X-T4, released in 2020, is not all that different from its predecessor in terms of its specifications, but it represents the best performance Fujifilm has to offer thanks mostly to an improved AF algorithm.
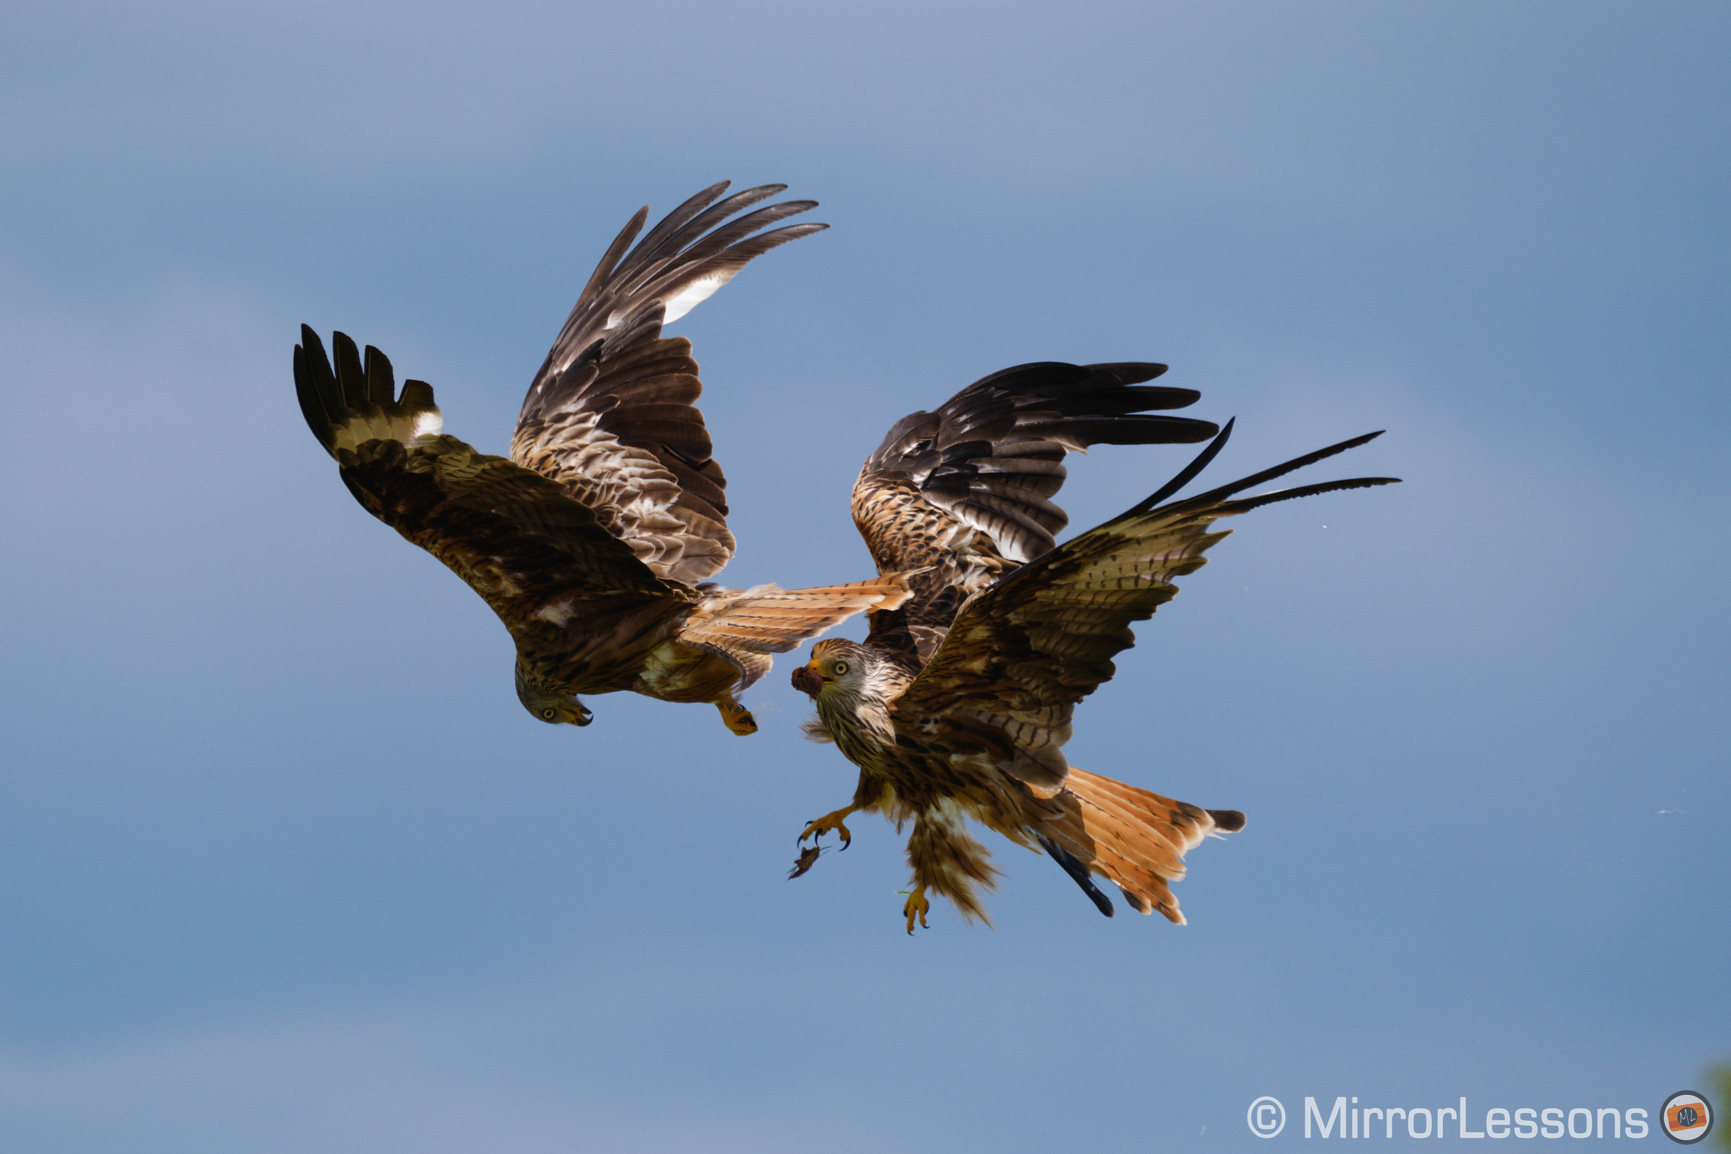
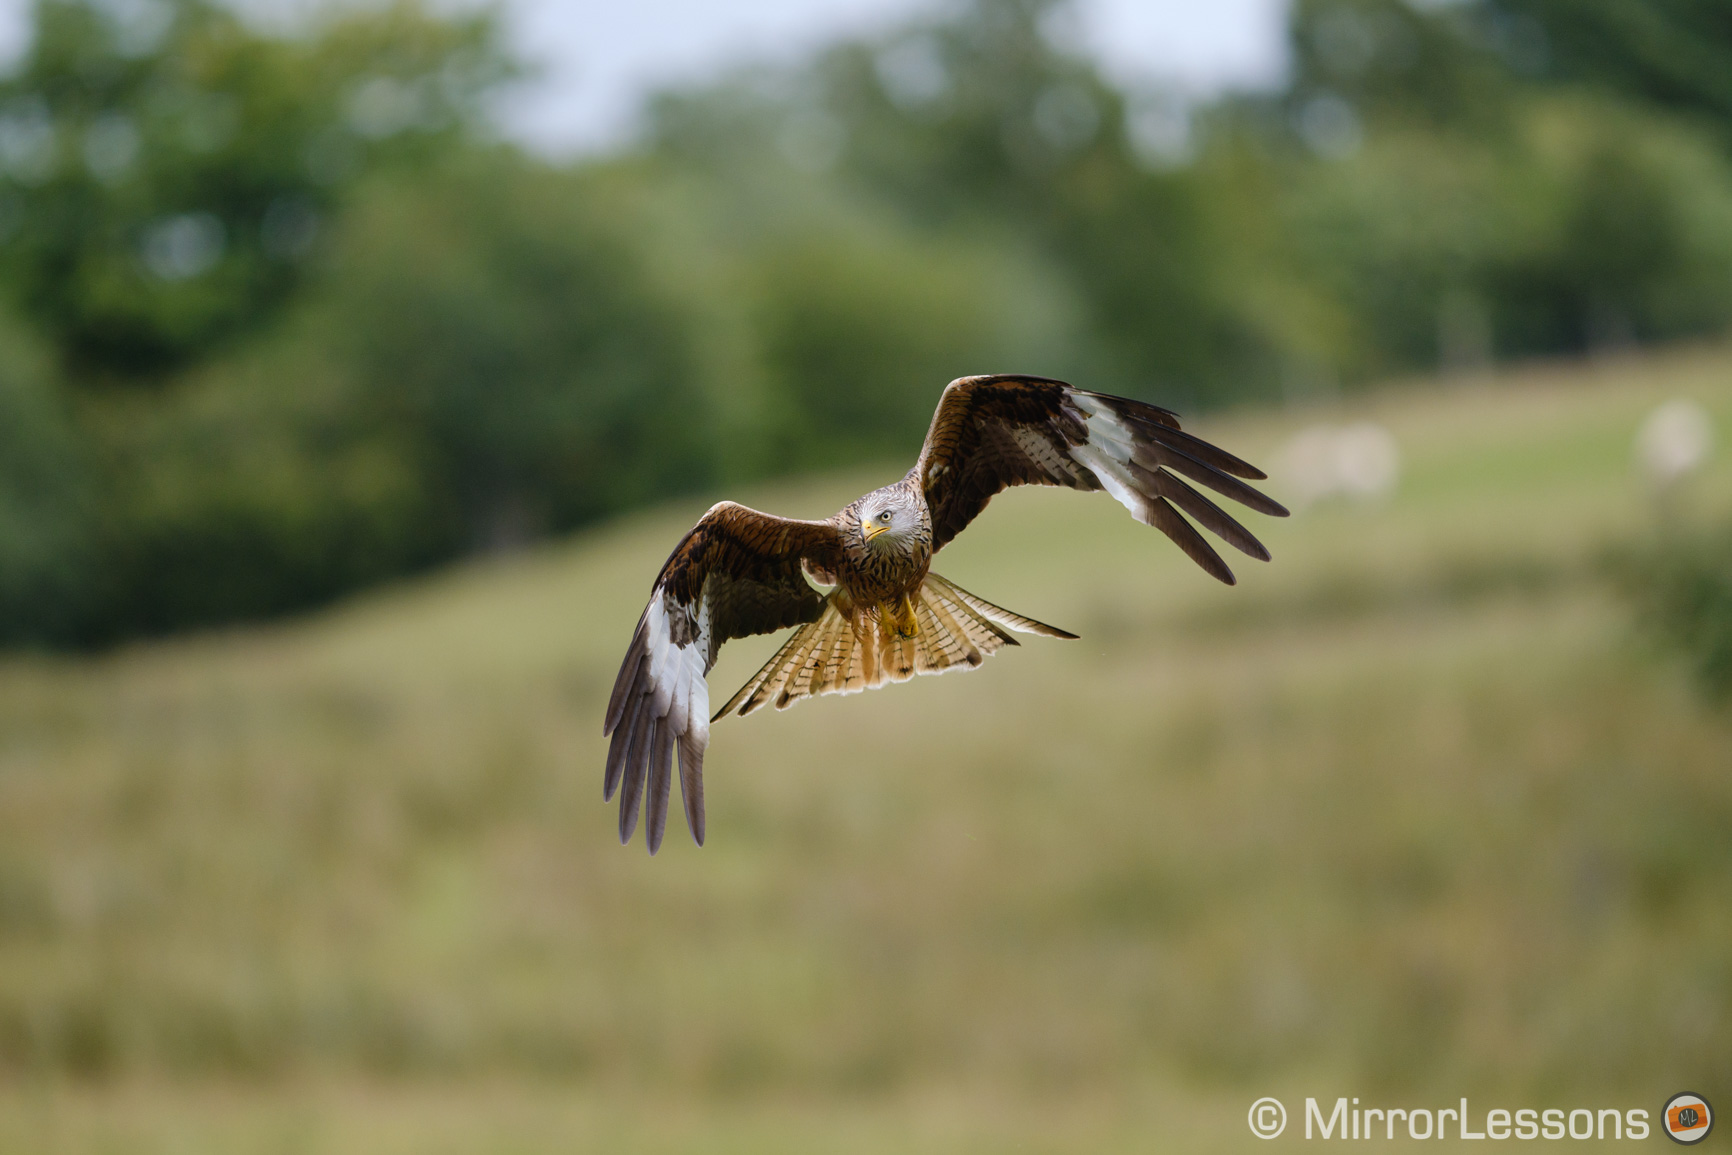
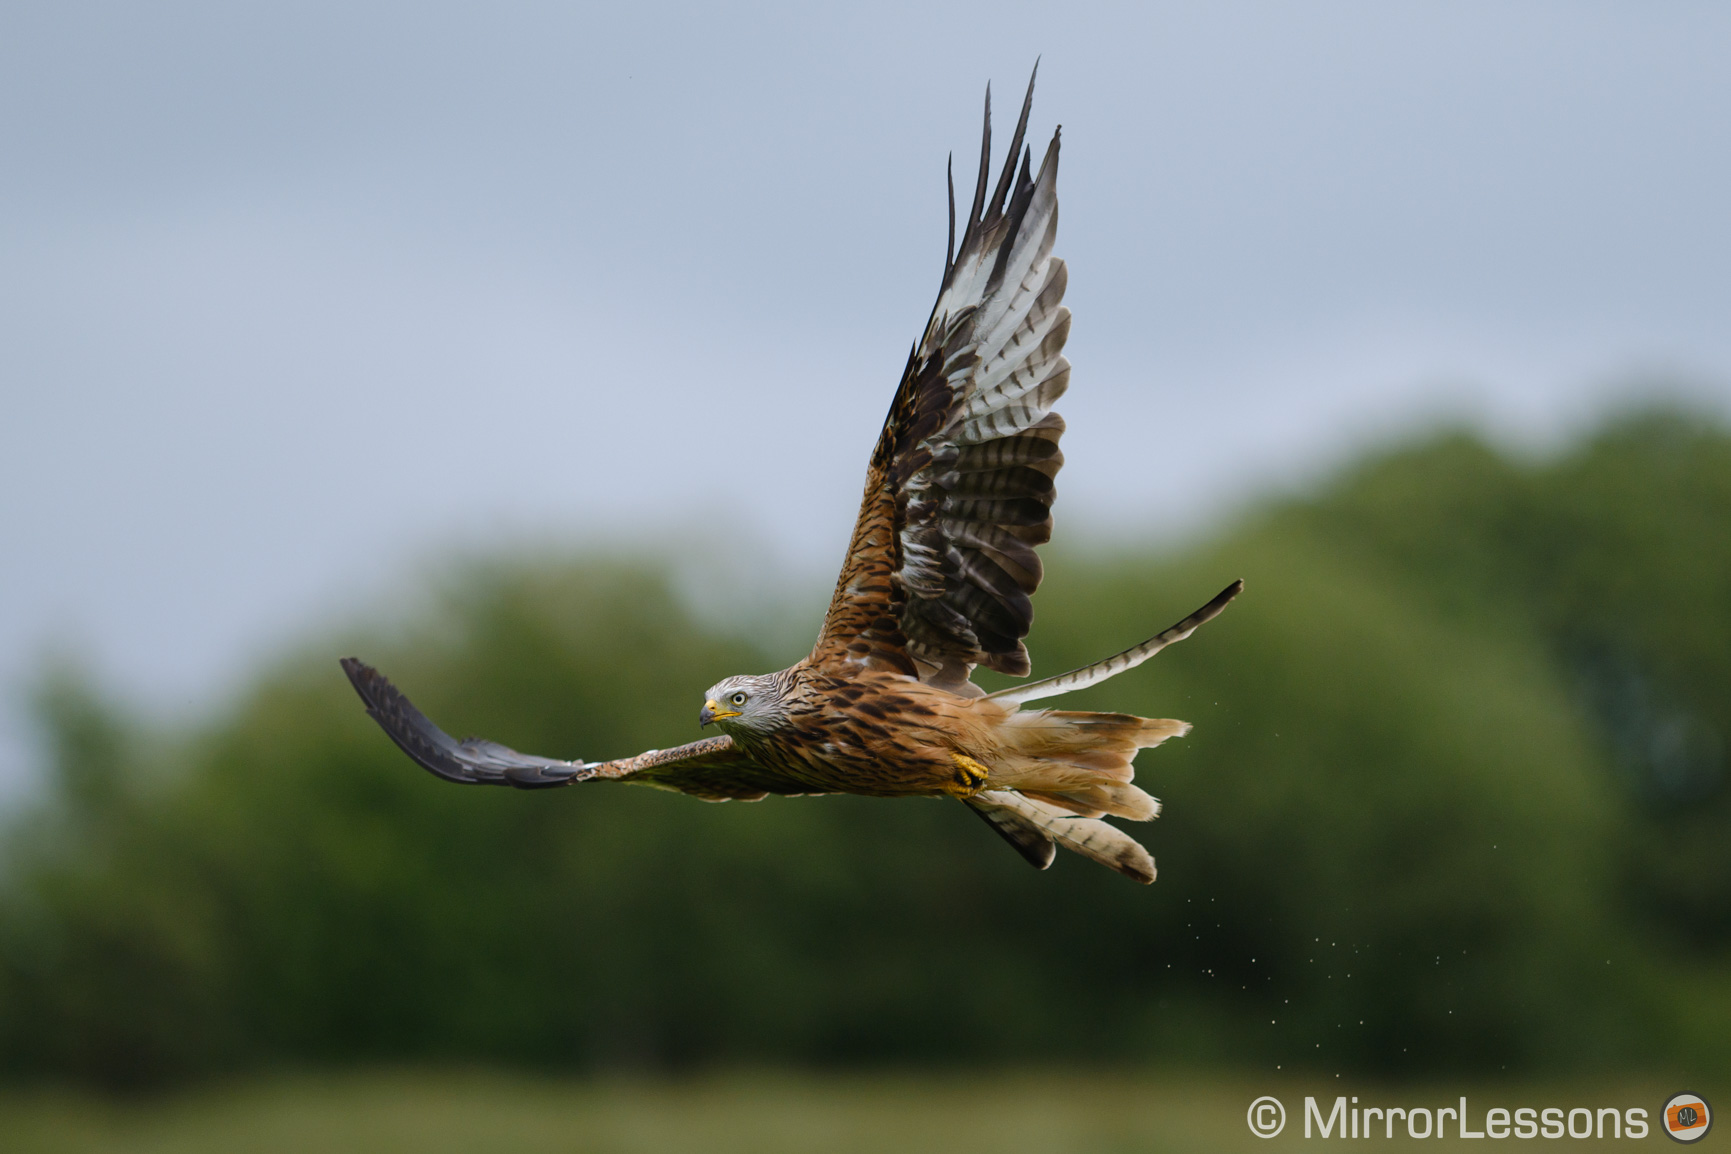
To find out if the X-T4 is a significant upgrade, I put it through its paces with the subject I love the most: red kites in rural Wales! The feeding station I regularly visit is still closed, so I had to wait for other sites to re-open to finally test the camera.
Fujifilm X-series compatibility
Although this article is built around the X-T4, many of the settings I explain and recommend are also available on previous models. I’ve included information about other cameras where relevant.
Ethics statement: we own the X-T4 and rented the lenses to conduct our test. We were not asked to write anything about this product, nor were we provided any other compensation of any kind. Within the article, there are affiliate links. If you buy something after clicking one of these links, we will receive a small commission. To know more about our ethics, you can visit our full disclosure page. Thank you!
Table of Contents
1. Video Tutorial
2. General Settings (Image Quality, Exposure)
3. Continuous Shooting Settings
4. Autofocus Settings
5. Analysis and Keeper Rate
6. Conclusion
7. Bonus: XF 200mm f/2 vs XF 100-400mm f4.5-5.6
Video Tutorial
If you fancy watching the content of this article in video form, start playing the video below and you’ll learn everything you need to know about the X-T4 and birds in flight. While you’re at it, make sure to subscribe to our YouTube channel!
General Settings
The X-T4 offers a lot of interesting settings. Let’s see what’s inside the menu and how to make the most of these settings.
Image Quality
Let’s start with some basic parameters. I always shoot RAW, and in the menu you will find three compression levels:
- Uncompressed (about 55MB)
- Lossless Compressed (about 18MB)
- Compressed (about 18MB)
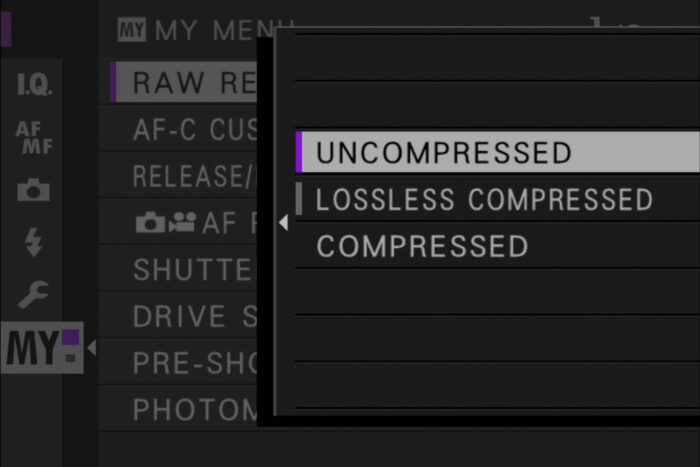
Because of the invisible difference between Lossless and Compressed RAW (18.5MB vs 18.1MB in my test), I tend to go with Lossless, which is the setting I’ve always used on previous Fuji cameras such as the X-T2, X-T3, X-H1 and X-Pro2.
Compressed RAW is only available on the X-T4
It’s important to shoot RAW because exposure can be a tricky business with birds, especially when they move from an area in the shade to direct sunlight or up into the sky. It is not uncommon to end up with shots that are under or over-exposed, and JPGs won’t give you the same flexibility in post to recover all the details.
With RAW, you can take advantage of the full dynamic range the 26.1MP sensor has to offer.

Original exposure

+2.3Ev, +50 shadows. -30 highlights, +10 contrast, +25 vibrance

There is a bit of green colour cast left on the wings, which you can adjust easily with the Adjustment Brush.
Older 24.2MP sensor (X-T2, X-H1, X-Pro2)
In terms of dynamic range, the difference between the third and four generation sensors is small (as you can see in our X-T2 vs X-T3 full comparison), so the feedback above is valid for older cameras too.
I leave White Balance to Auto, but you’re free to use one of the presets or even set it manually. I find Fujifilm cameras work well in Auto mode, plus I don’t bother because I’m used to post processing RAW files and tweaking the WB only takes a few seconds.
Most of the other settings you’ll find in the Image Quality section of the menu affect the JPG files (sharpness, clarity, film simulations, etc.) so unless you also want to record JPGs, you can ignore them.
Exposure Settings
You will need a fast shutter speed to capture the bird in flight: 1/1000s is the minimum recommended but go faster if you can. That way, you can freeze not only the movement of the body but also the wings. I often set it to 1/2000s or even higher.
If you don’t have a fast aperture lens, you’ll need to raise the sensitivity. I set ISO to Auto with a maximum of 6400, or if the light is really bad, even 12800 which is the highest level I found acceptable to work with. These may seem like very high values, but when it is cloudy or rainy and your settings are 1/2000s and f8 for example, the ISO can go up easily.
The exposure compensation dial is useful to tell the camera to over or underexpose if you want to keep the ISO higher or lower.
As for the metering mode (Photometry in the menu), I use Multi, where the camera determines the exposure by analysing composition, colour, and brightness in different areas of the frame.

If you choose a smaller metering mode such as Centre Weight or Spot, and the bird is flying against the sunlight, parts of his body and wings will be in the shade, and the camera might overexpose thinking that the subject is too dark.
There is another setting called Average, which is similar to Multi but evaluates the entire frame. The Fujifilm manual recommends that you use it for multiple shots that have the same lighting, which is rarely the case with birds.
Viewfinder Settings
Tracking wild animals often involves challenging light conditions, where the subject can go from a light to dark area in a matter of seconds.
If you leave the exposure preview enabled, the brightness in the EVF will go up and down and I often find this annoying when tracking the animal.

For this reason, I prefer to turn the Exposure Preview off in the menu, so that the viewfinder keeps an optimal brightness regardless of the light situation. I know that one of the advantages of an electronic viewfinder is being able to see if your image is too bright or too dark in real time, but in this specific situation I find it a bit distracting. I keep an eye on the exposure with the metering indicator on the left.
Alternatively, you can activate Natural Live View: it disables the effect of Film Simulation modes, white balance and other settings, giving you a more natural view with less contrast, but keeps the live exposure on.
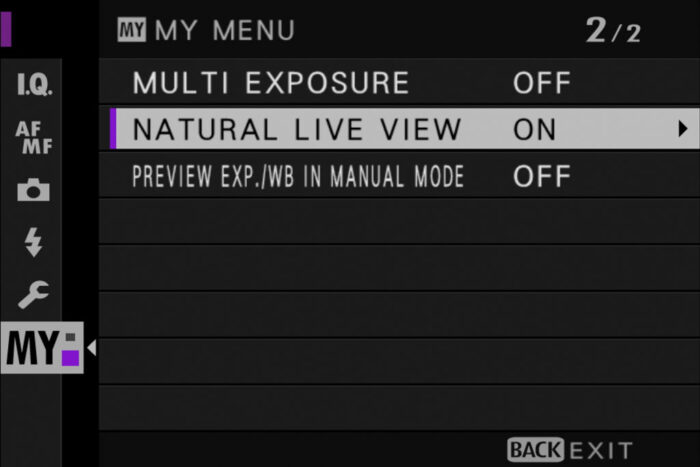
On older models such as the X-T2 and X-H1, Natural Live View is called Picture Effect.
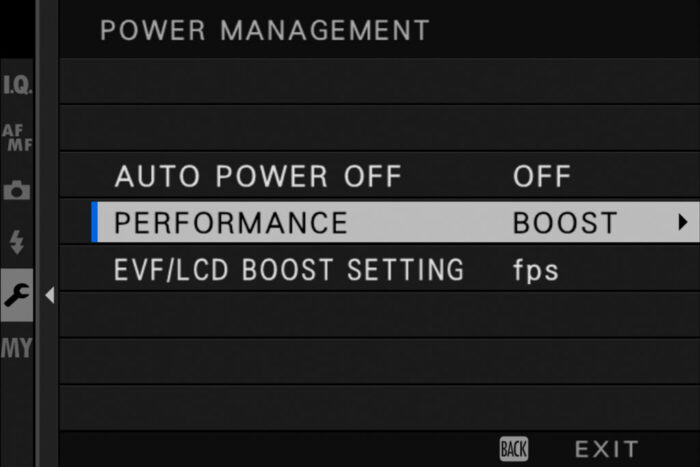
Then we have the Performance setting. You’ll want to choose Boost which does two things:
- ensures that the autofocus is working at its maximum capacity
- improves the quality of the display
There are three options within the Boost setting:
- EVF/LCD Low Light Priority: boosts the brightness of the screen but lowers the frame rate
- EVF/LCD Resolution Priority: increases the resolution to render finer details, but can also introduce more noise
- EVF Frame Rate Priority: increases the frame rate to 100Hz. This is the one I recommend.
On the X-Pro3, there are fewer options for the Boost mode. On older models, you just choose between Normal and Boost.
Continuous Shooting Settings
The X-T4 has excellent continuous shooting speeds:
- 15fps with the mechanical shutter
- 20fps with the electronic shutter
- 30fps with the electronic shutter and a 1.25x sensor crop
Note: slower speeds are available (10, 8, 5 and 3fps for the mechanical shutter, 10fps for the electronic shutter)
The X-T3, X-T30 and X-Pro3 share the same speed with the electronic shutter. The X-T2, X-T3, X-Pro3 and X-H1 have a maximum of 11fps with the mechanical shutter (battery grip needed for X-T2 and X-H1, otherwise it’s 8fps).
Older Fuji models such as the X-T2 or X-H1 go up to 14fps with the electronic shutter.
There are a few important things to talk about to understand the difference between mechanical and electronic shutter.
With the mechanical shutter and the CH drive mode (where you can reach 15fps), the camera doesn’t show you a live view of your scene in the EVF or LCD screen. Instead, you see the images that have just being recorded. There are no blackouts and you see an uninterrupted sequence up to 15fps but what you see is not what is happening, it is what happened a few moments ago.
This can make tracking a fast bird a bit more challenging, because the moment when the bird changes direction appears in the EVF with a delay of a few milliseconds. An untrained eye can lose track of the bird more quickly (even a trained eye such as mine if it is of any comfort).
With the CL mode (max. 8fps), you have live view so what you see is what is happening, but there are blackouts caused but the mechanical curtains going up and down in front of the sensor, so you don’t have a clean and uninterrupted view of the action.
With the electronic shutter, the camera offers the best of both worlds: there is live view and no blackouts because the camera doesn’t use the mechanical curtains, and has enough power to maintain live view while capturing the images. This offers a better chance to track the bird more precisely, even when it suddenly changes direction.
You can see the difference between no live view, live view with blackouts and live view with no blackouts in the video below at minute 6:57.
The X-T3, X-Pro3 and X-T30 have the same electronic shutter capabilities as the X-T4. The only other cameras capable of offering live view with no blackouts is the Sony A9 series.
The electronic shutter offers more speed: you get 20fps, or 30fps if you’re willing to accept a 1.25x crop on the sensor and a 16MP output instead of 26MP.
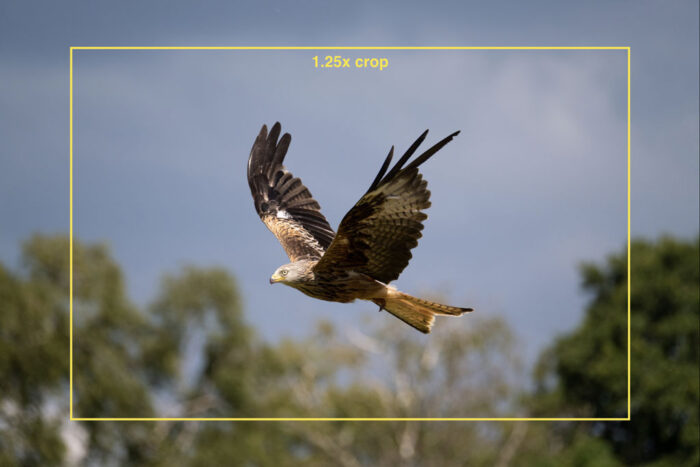
Now we could argue that unless you need 30fps, you’re better off using the full size of the sensor and cropping in post when necessary. However, hold that thought until you’ve reached the Analysis chapter further down, because I found that the 1.25x crop mode can give you a better hit rate.
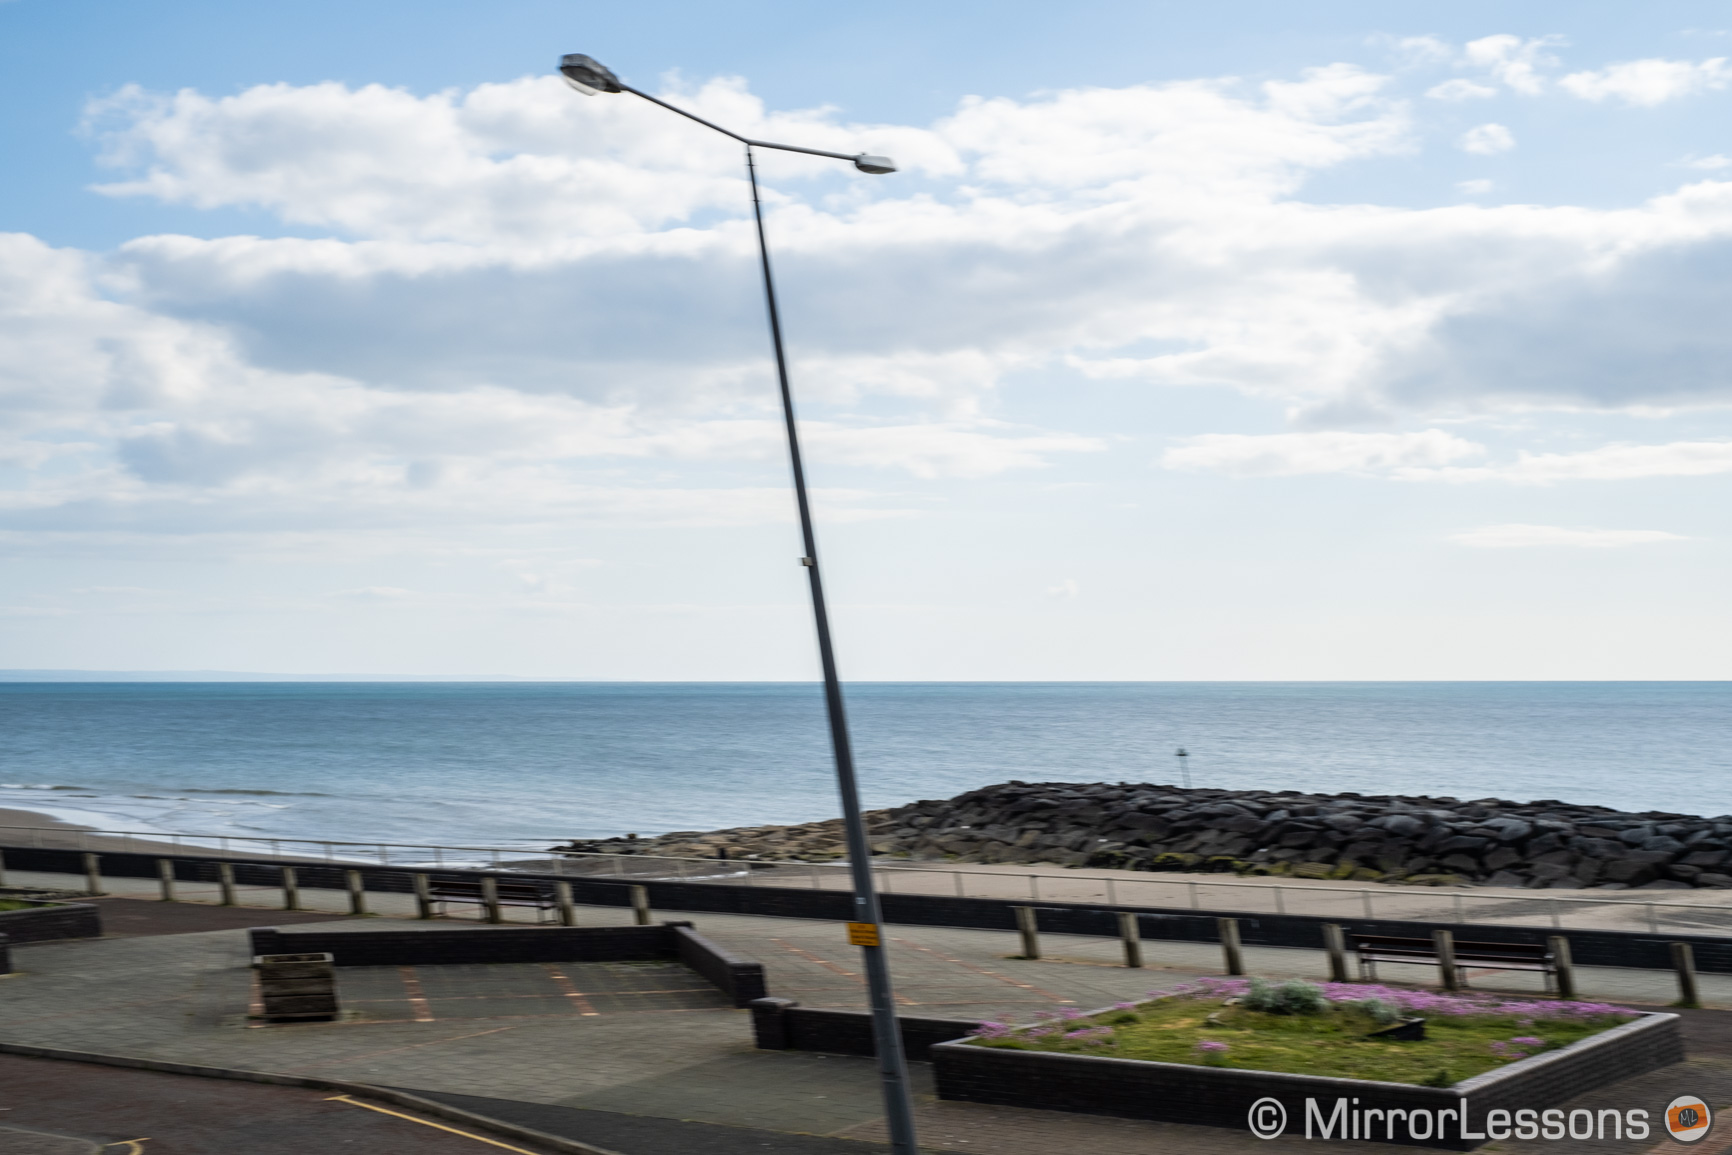
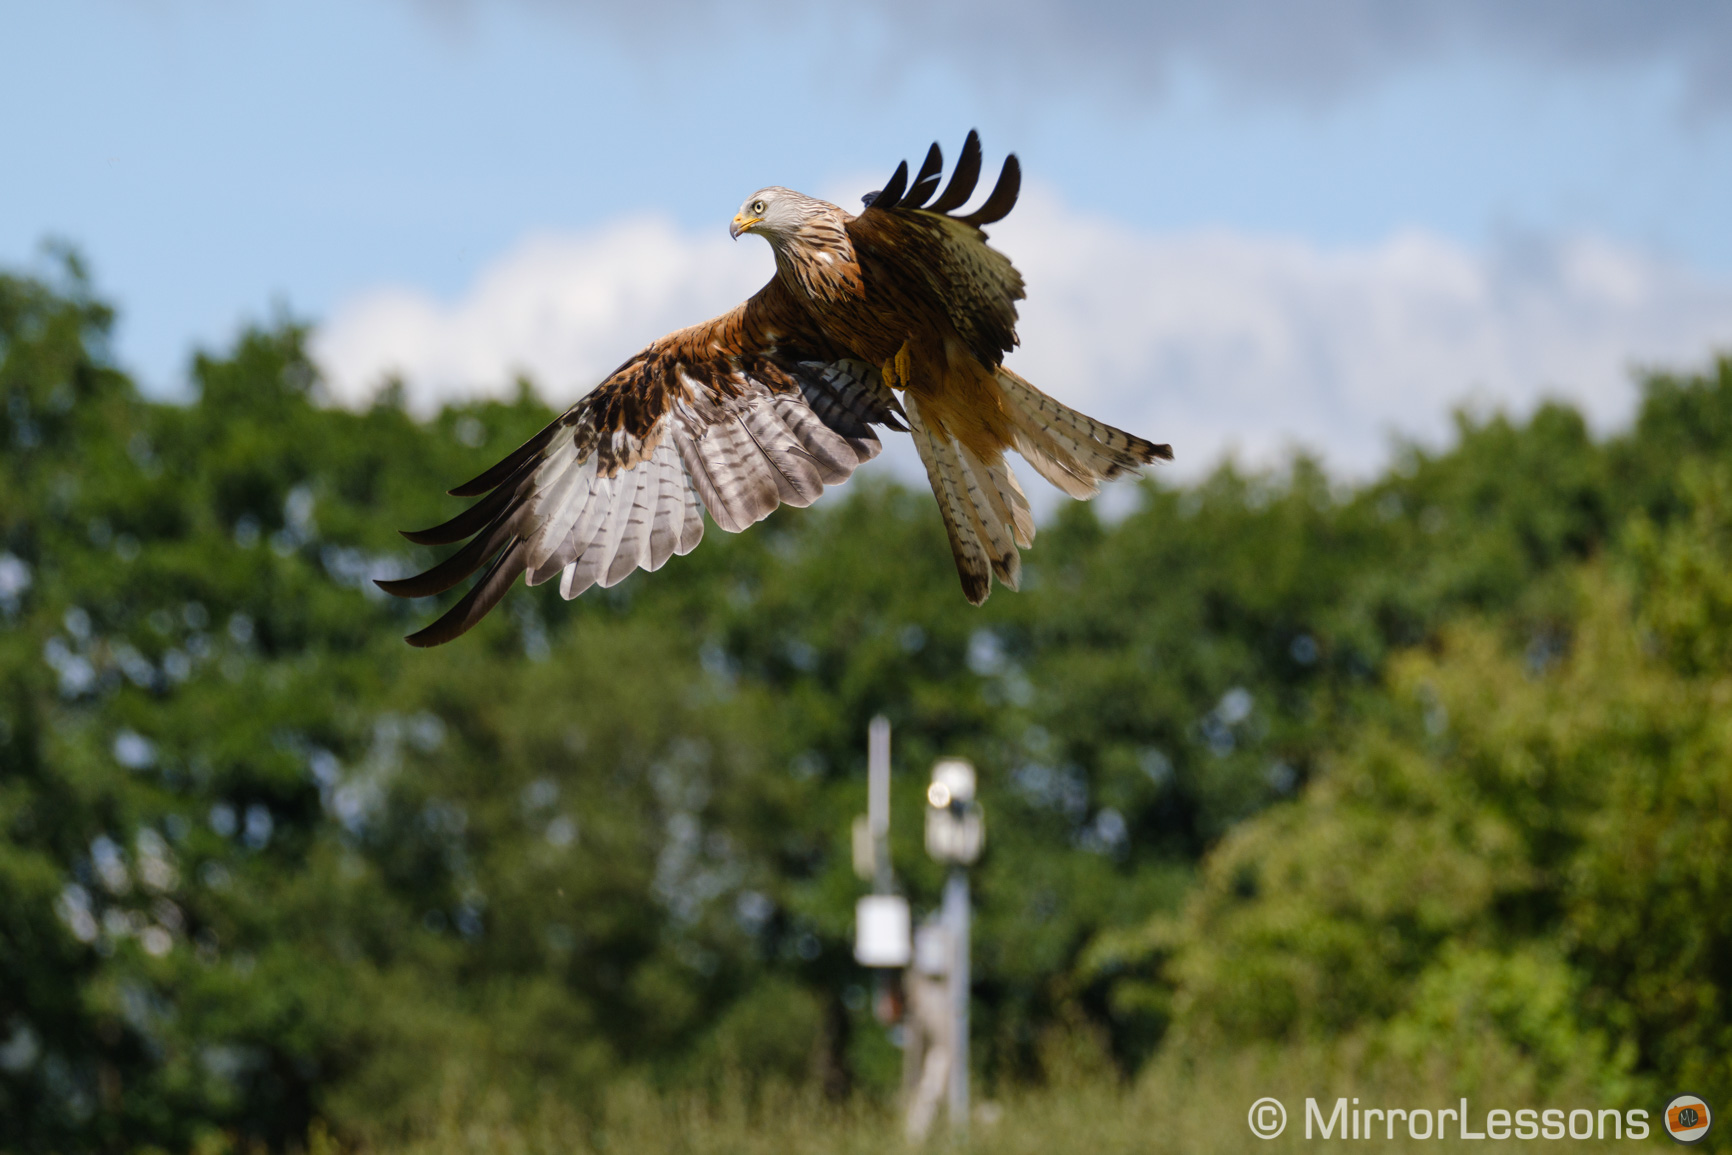
The electronic shutter may sound like the best setting to use, but like most electronic shutters, there is something called rolling shutter that can cause distortion in your image when moving very quickly, or when the subject is moving very fast in your frame. (To find out more about this, read our in-depth article about electronic shutters.)
Here is an example taken from one of the regular tests I do with the cameras I review. You can see how the horizon is perfectly level but the street lamp is distorted.
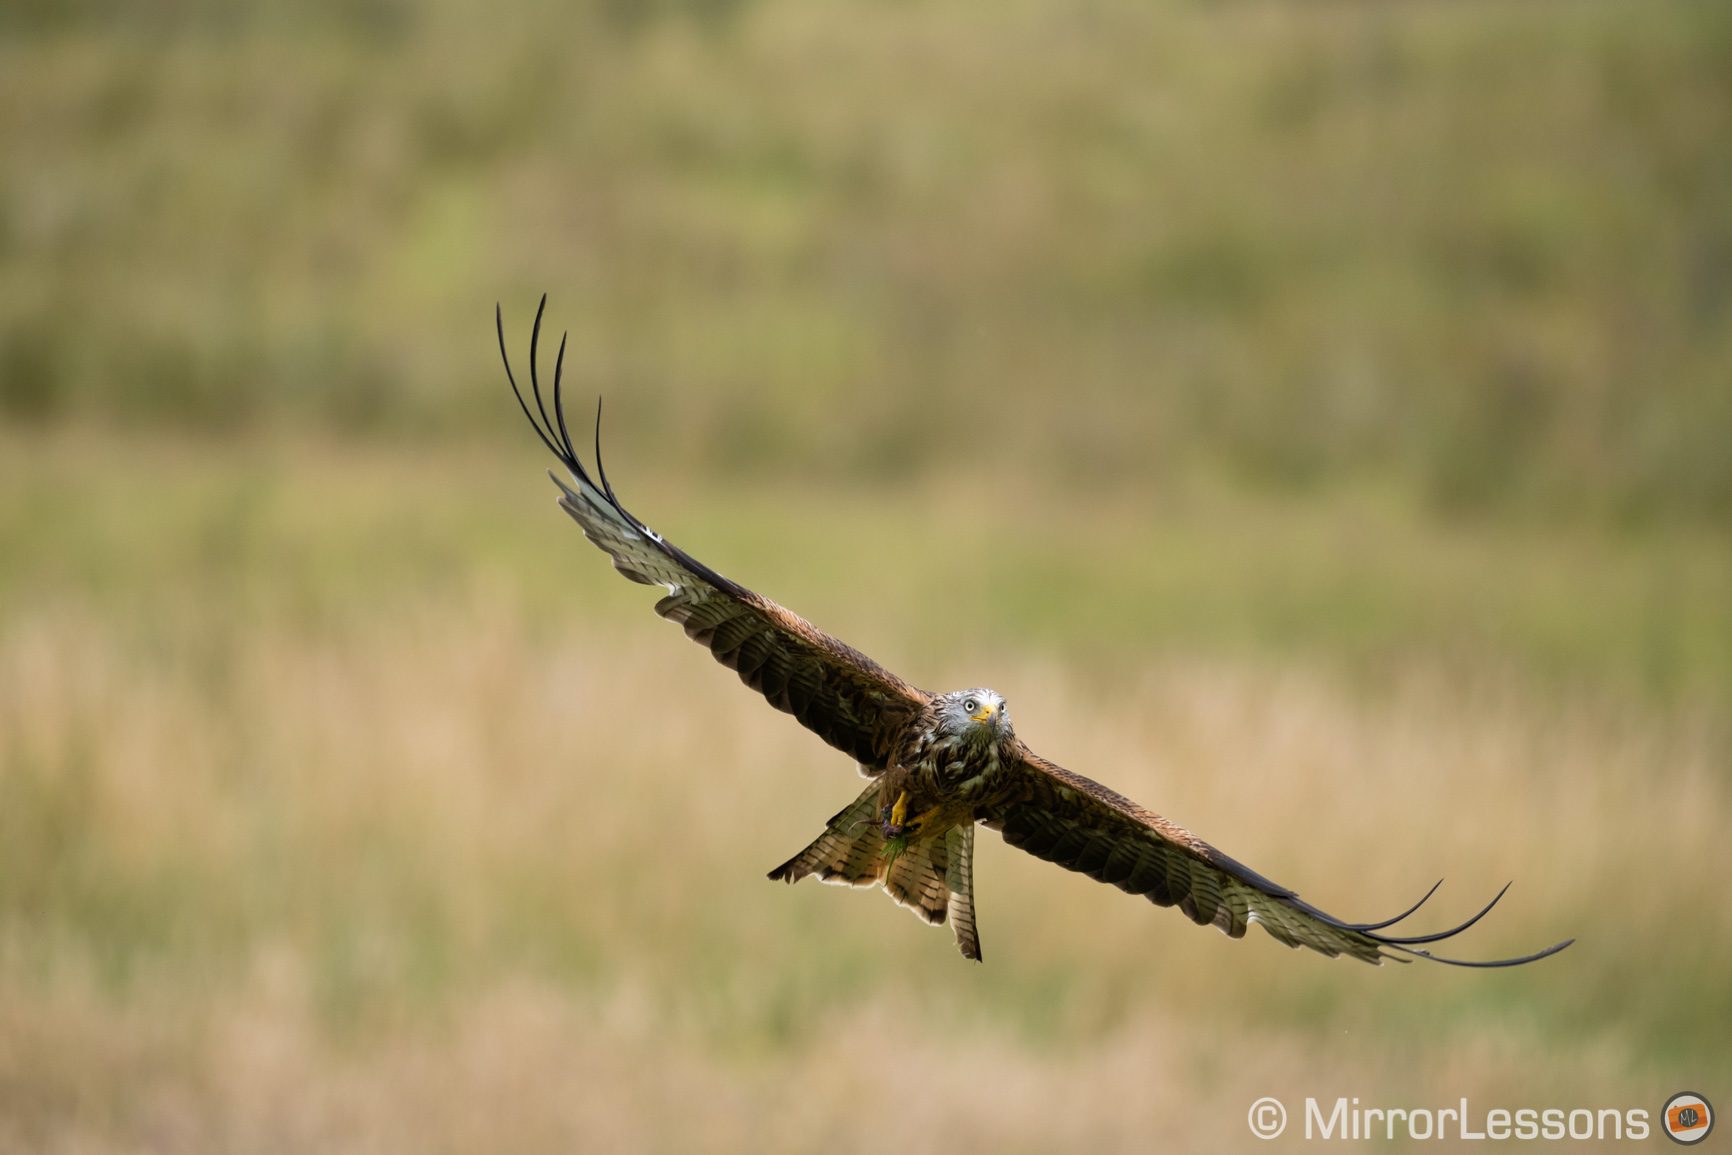
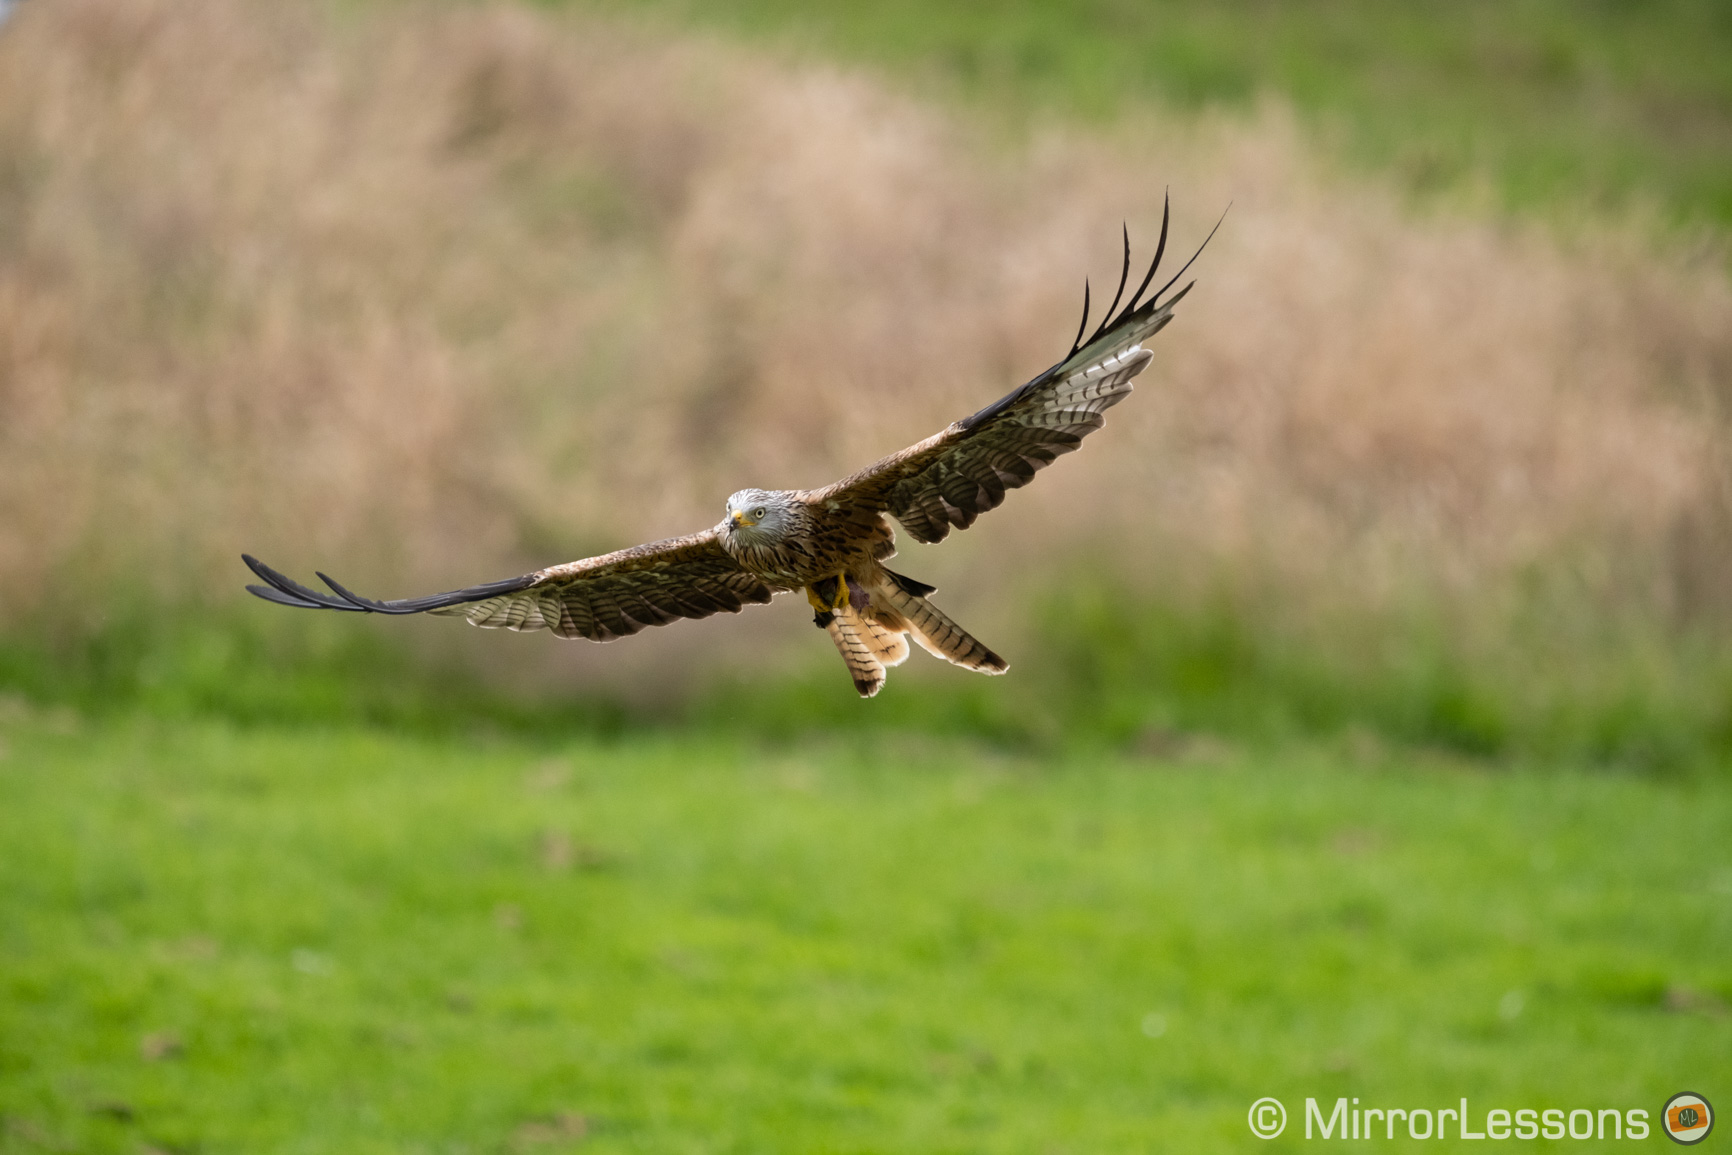
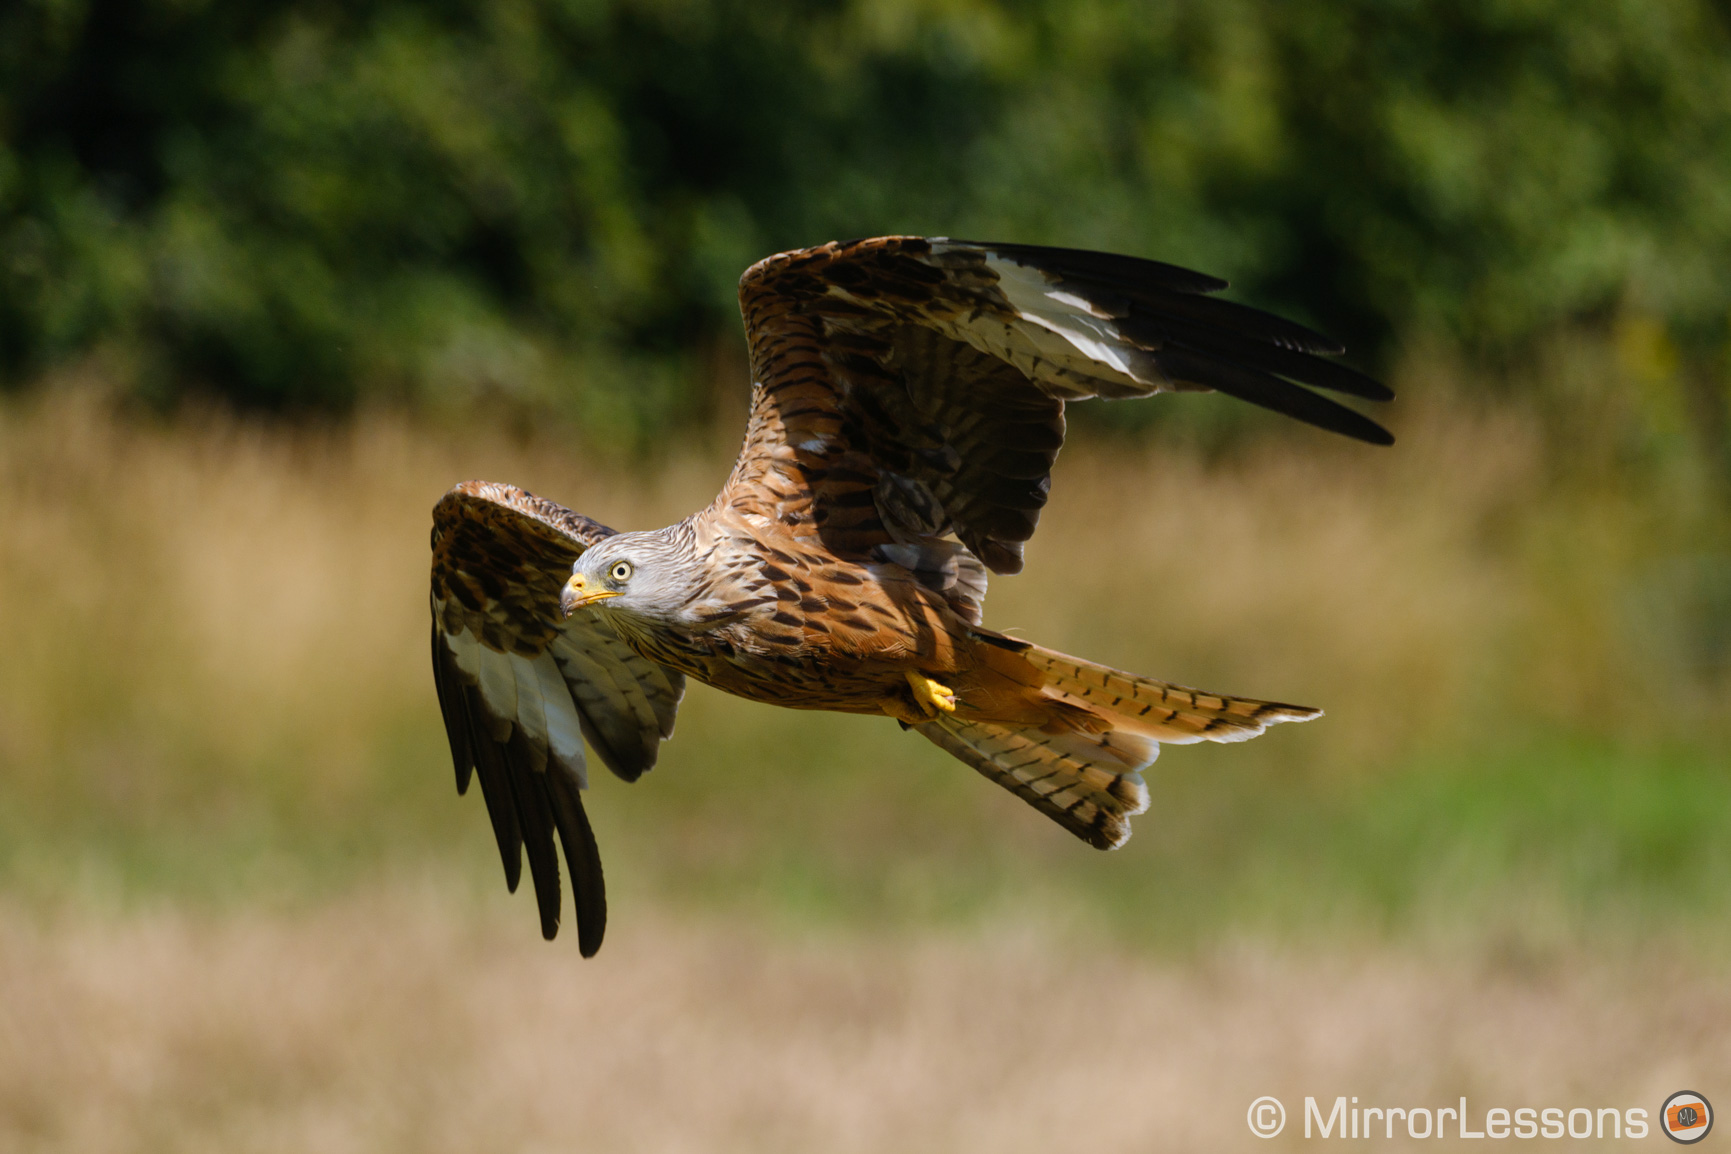
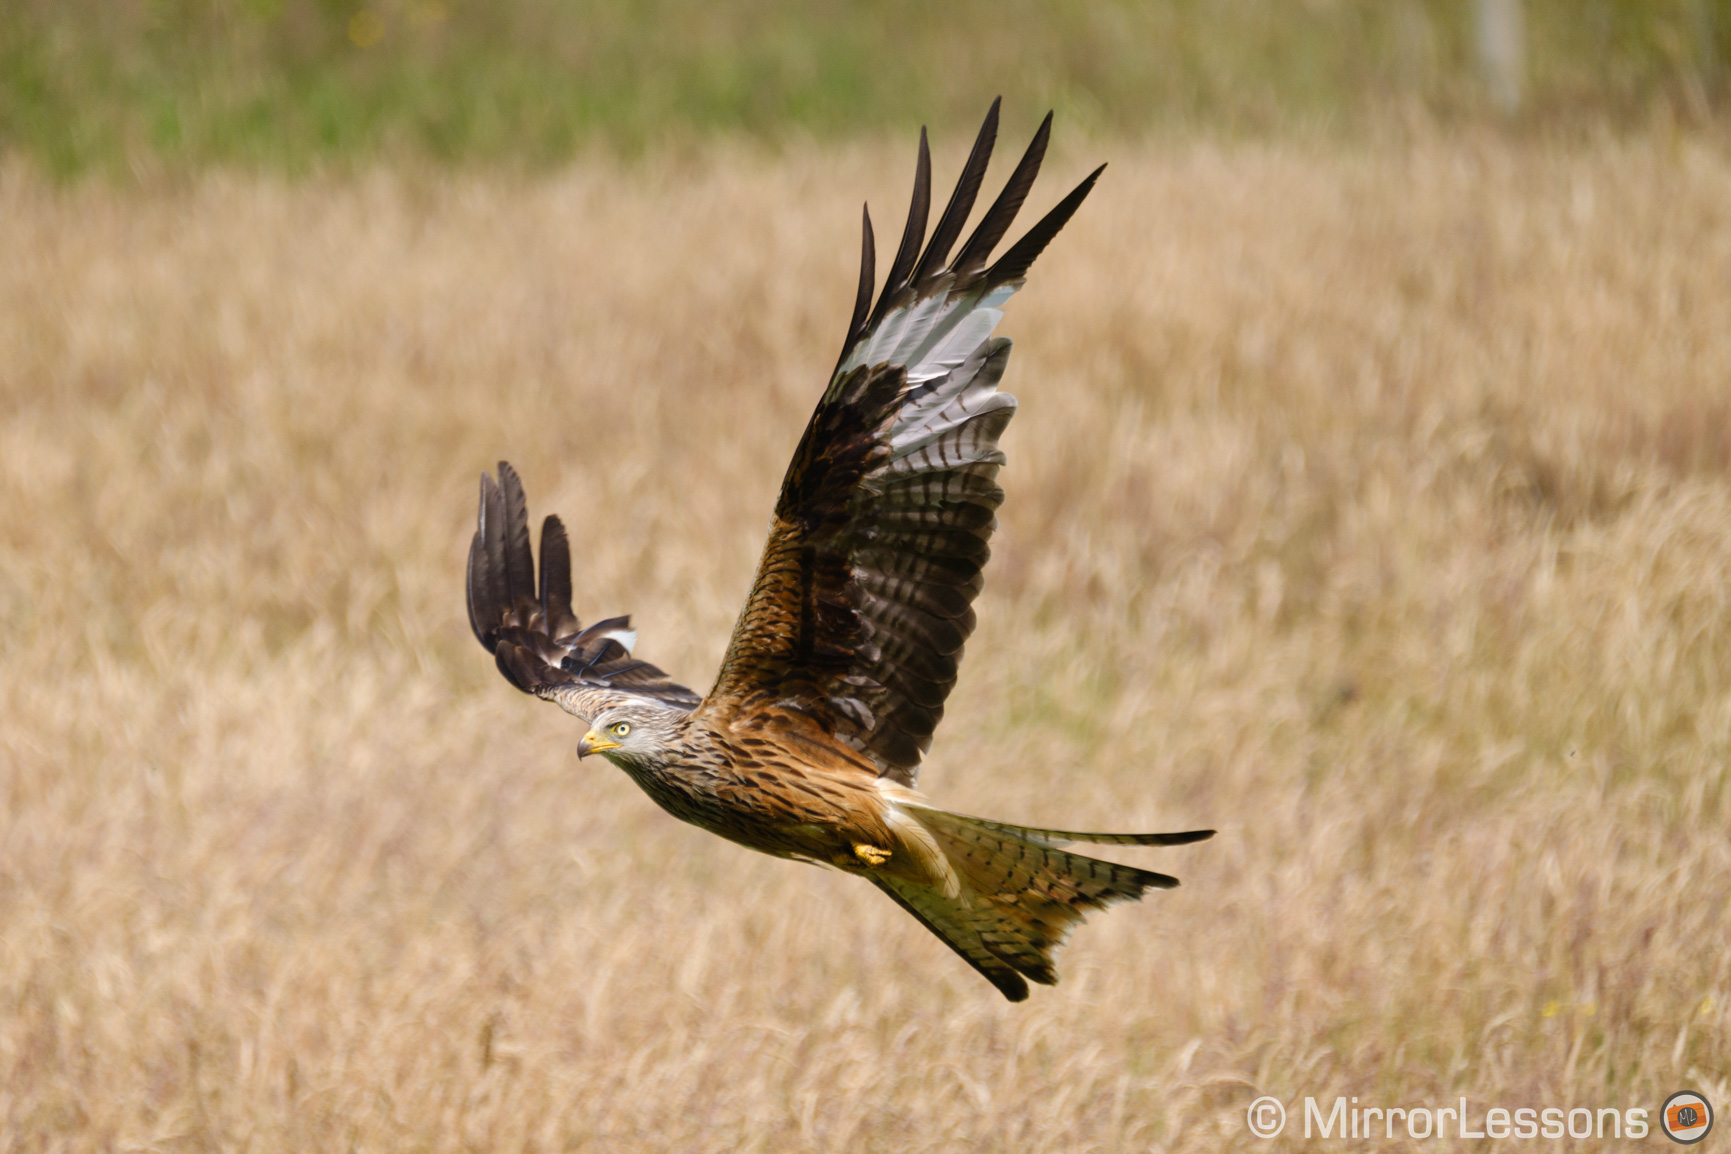
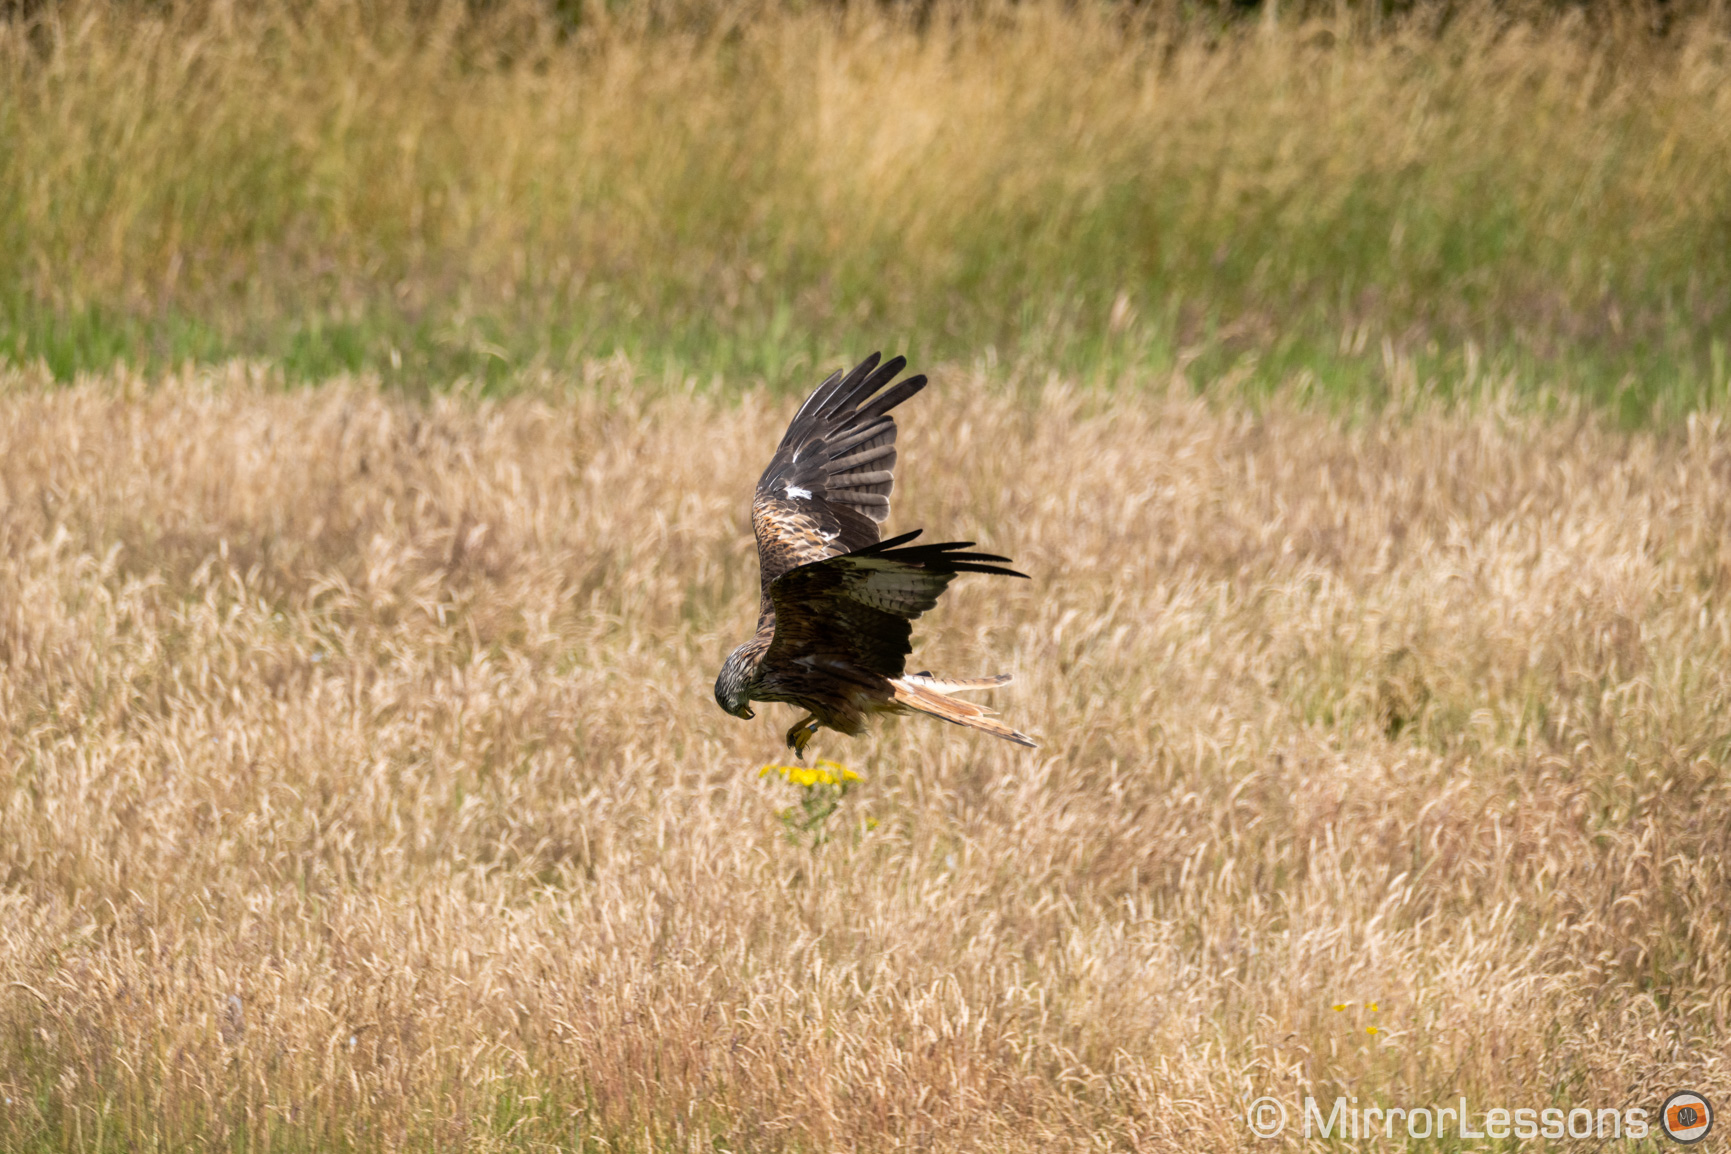
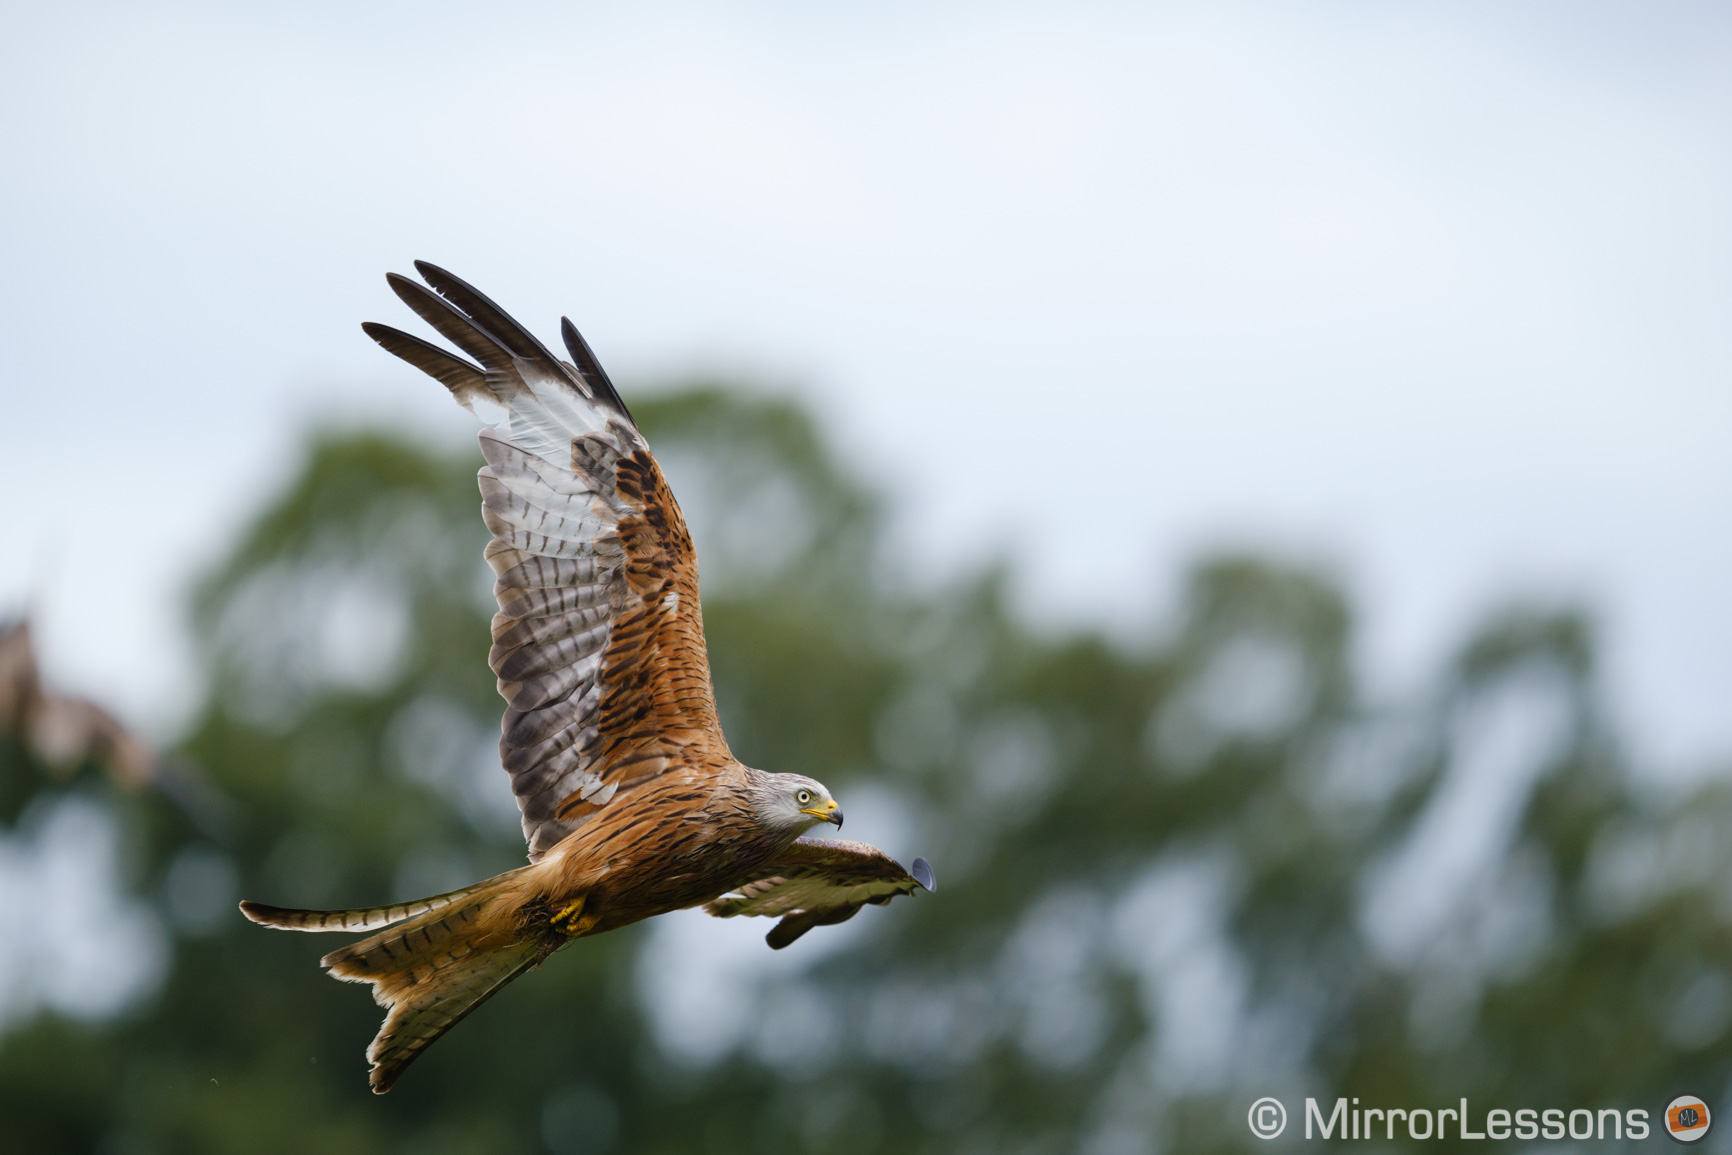
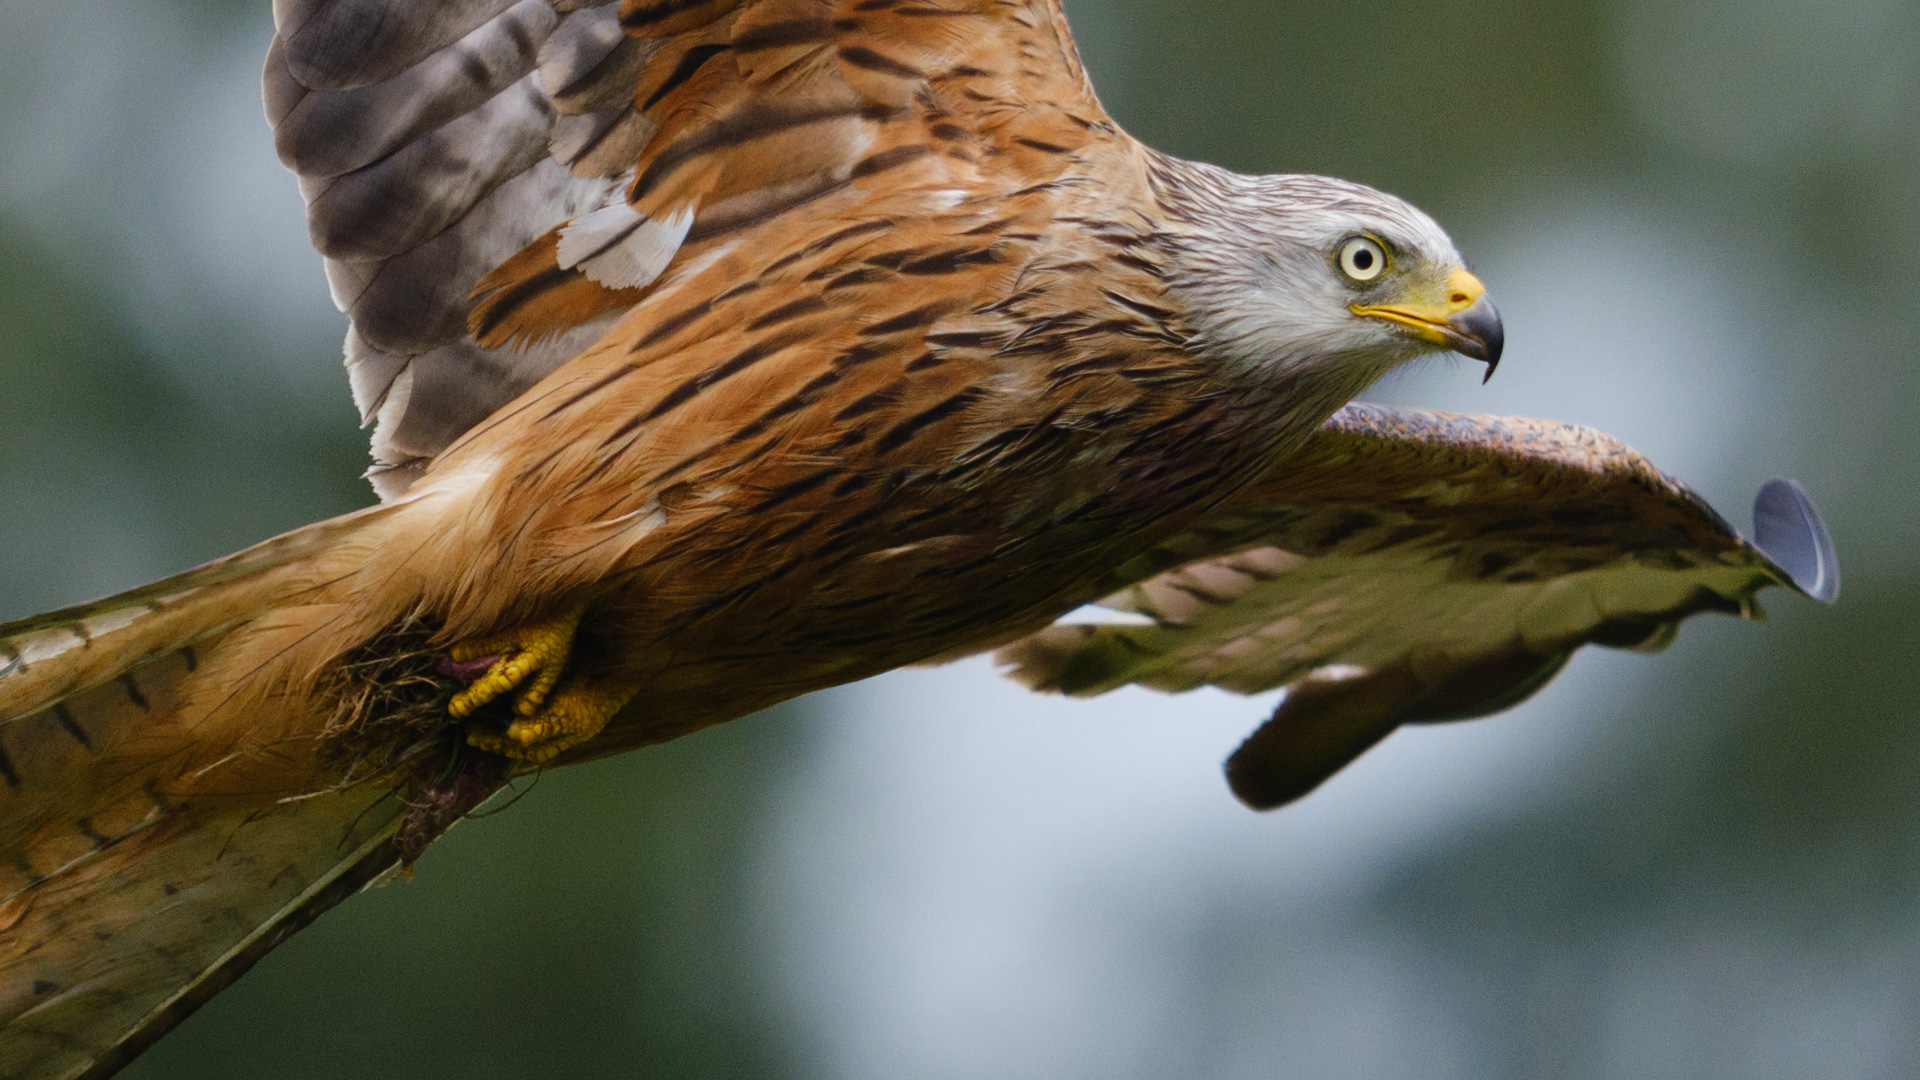
With birds however, the distortion is much more difficult to notice because the shape of an animal is more complex than a straight vertical line. If we look at the first image below, taken with the electronic shutter, you might think that the feathers at the tip of the wings are too distorted, but if you look at the second image (taken with the mechanical shutter), you’ll see that it happens there as well. We could argue that the feathers are more curved in the electronic shutter version, but it’s not a drastic difference.
There might be extreme situations where the rolling shutter effect can be more visible, but if I review my experience using other mirrorless cameras, I would say that 80% of the time, it is not something to be overly concerned about for this particular genre.
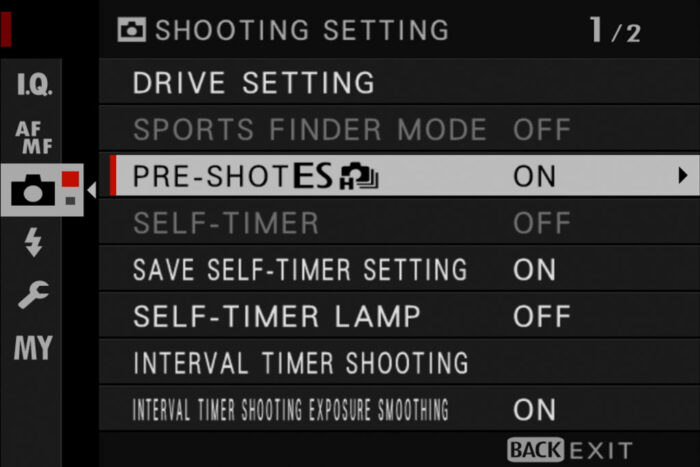
One last thing: in the menu you will also find something called Pre-Shot ES. Once enabled, the camera will load images in the buffer memory when you half press the shutter button. Once you fully press the shutter button, the latest frames loaded will be saved onto the memory card. This allows you to capture unpredictable moments such as a bird flying off a tree for example.
Autofocus Settings
The X-T4 has different parameters that allow you to control the autofocus behaviour.
Focus Area
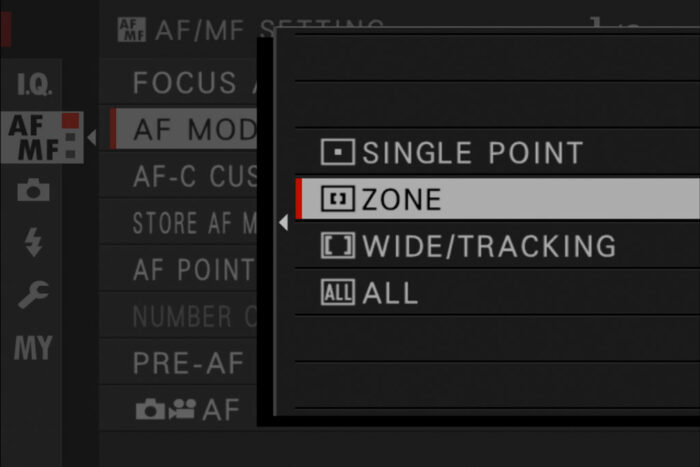
First, we have the Focus Area and there are three modes to choose from:
- Single Point: one area with six different sizes available
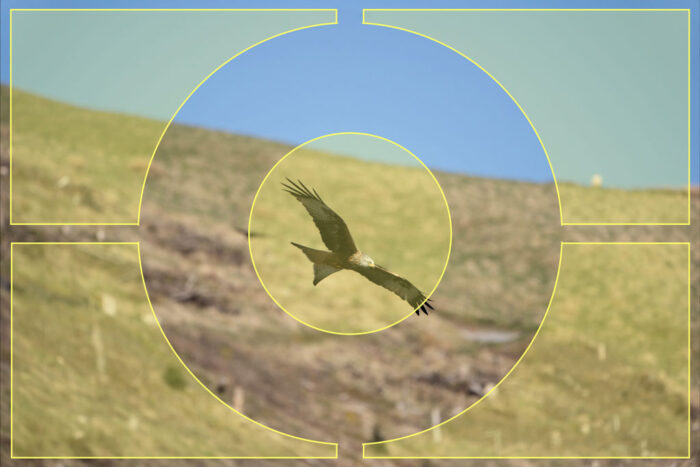
- Zone: a group of points with three grids available
- Wide/Tracking: it starts with a single area at the centre, but once the subject is locked, the camera tracks it no matter its position in the frame and by using all the 117 points available on the sensor
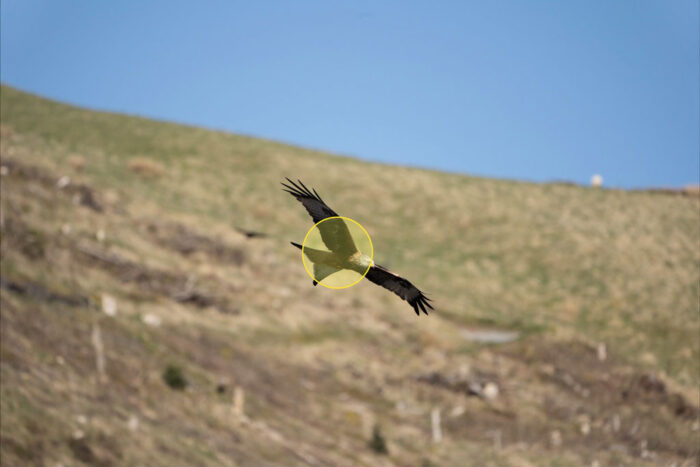
Single Point is too limiting. Even with the largest size, it is difficult to keep the bird in the focus area, and as soon as it goes out of it, the camera will focus on something else.
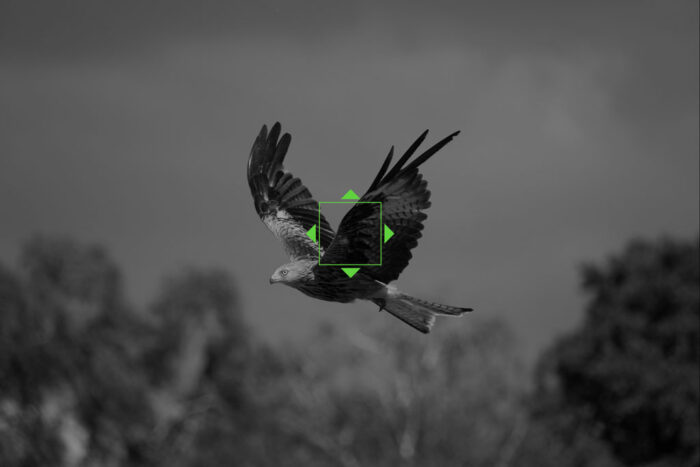
Wide/Tracking could be interesting, but my tests showed that the camera would get confused too easily and often switch from the bird to a tree in the background. It works better when the bird is up in the sky, where the plain blue or grey background confuses the camera less.
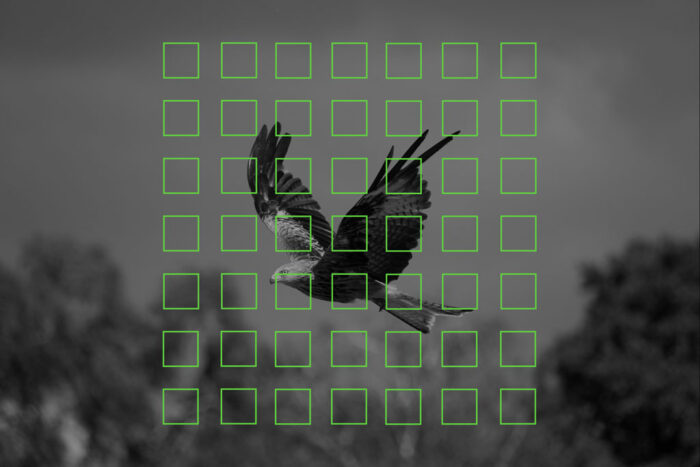
But whether your bird is flying against a rich background or in the sky, I found Zone to be the optimal solution. I select the largest grid available (7×7, the other two being 5×5 and 3×3) which gives me more leeway when I don’t manage to keep the bird in the same portion in the frame.
AF-C Custom Settings
Next we have the AF-C Custom Settings which allow you to configure the sensitivity of the autofocus with different presets or manual parameters.
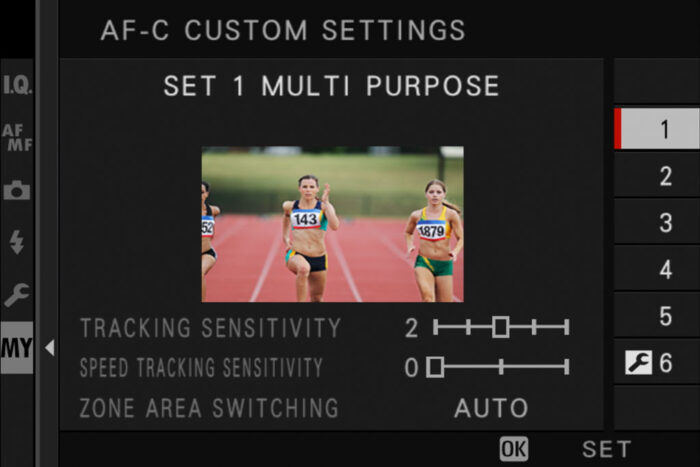
The five presets (Set 1 to 5) are designed for different situations. For example Set 1 is multi-purpose, whereas Set 2 prevents the camera from refocusing when momentary obstacles go in and out of the frame (a tree when tracking an animal for example). Set 6 can be configured manually.
On the X-Pro2, Set 6 is not available.
In my experience, there are two good options here. You can choose Set 4, which is designed for suddenly appearing subjects (Fujifilm shows you a skier going downhill as an example). But it works with the kites too because the preset makes the autofocus as reactive and fast as possible, and this is what you want.
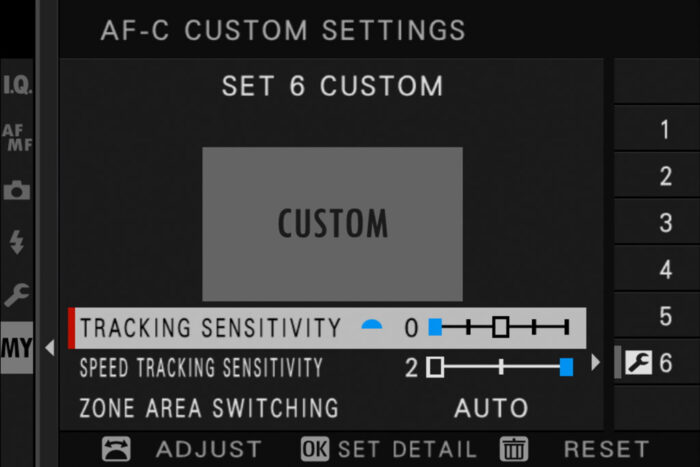
The second option is to choose Set 6 and manually configure the autofocus yourself. There are three settings to work on:
- Tracking Sensitivity: it defines how long the camera waits before changing focus. With 0, it changes as quickly as possible whereas with 4, it waits longer. When tracking birds, you want it to be as quick as possible so choose 0.
- Speed Tracking Sensitivity: this determines how the camera responds to changes in speed and movement inside your composition. At 0, you’re saying to the camera that your subject is steady with a constant speed. At 2, you’re saying that your subject changes speed constantly. With the kites, I choose 2.
- Zone Area Switching: here you choose which points to give priority to in your focus area (works with Zone Area only). With Front, the camera will prioritise the subject that is the closest to the camera (foreground). With Auto, it will first prioritise the center of the frame, then switch to other focus points if necessary to keep the subject in focus. With Center, the central area is given priority at all times. I select Auto, because I always start tracking the bird at the centre, but the difficulty is then to keep it at the centre and Auto is designed to help you with this.
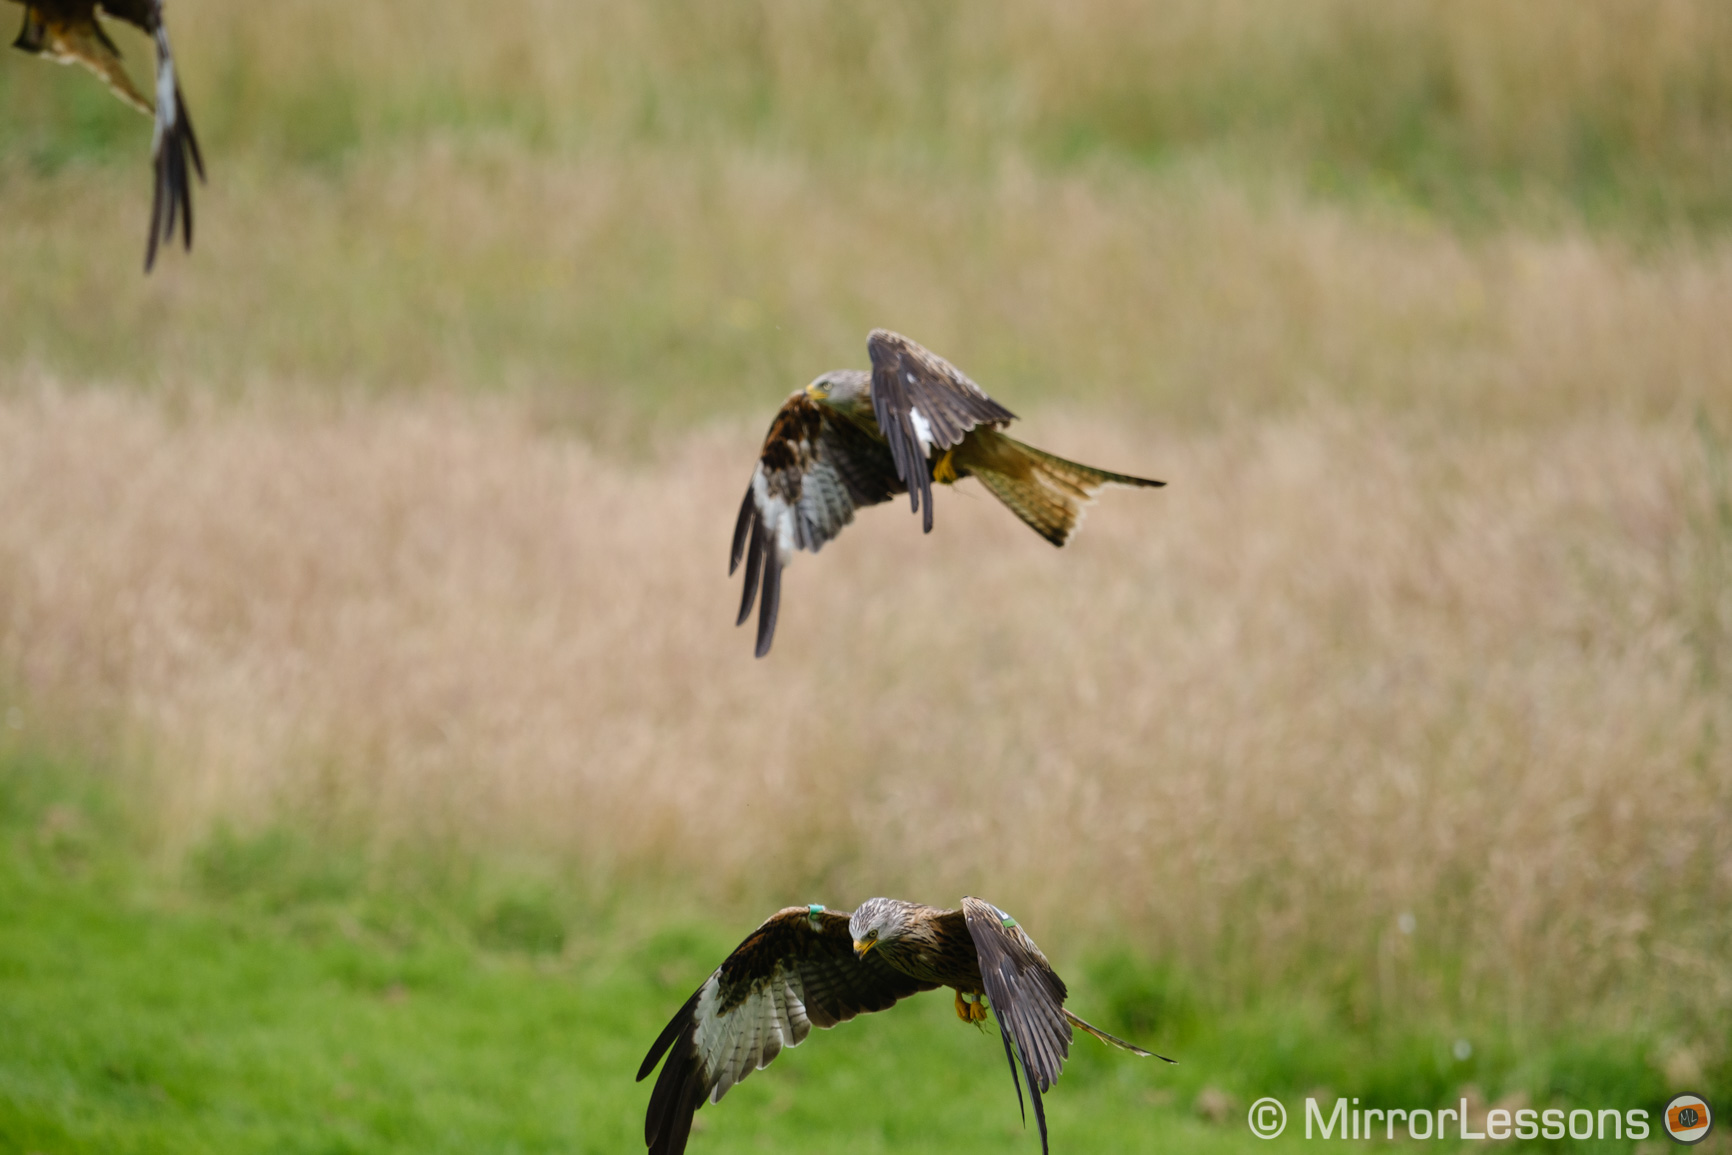
Making the AF as fast and reactive as possible works great for the kites. If the bird is slower and its movements are more predictable, you can tone down the settings a little.
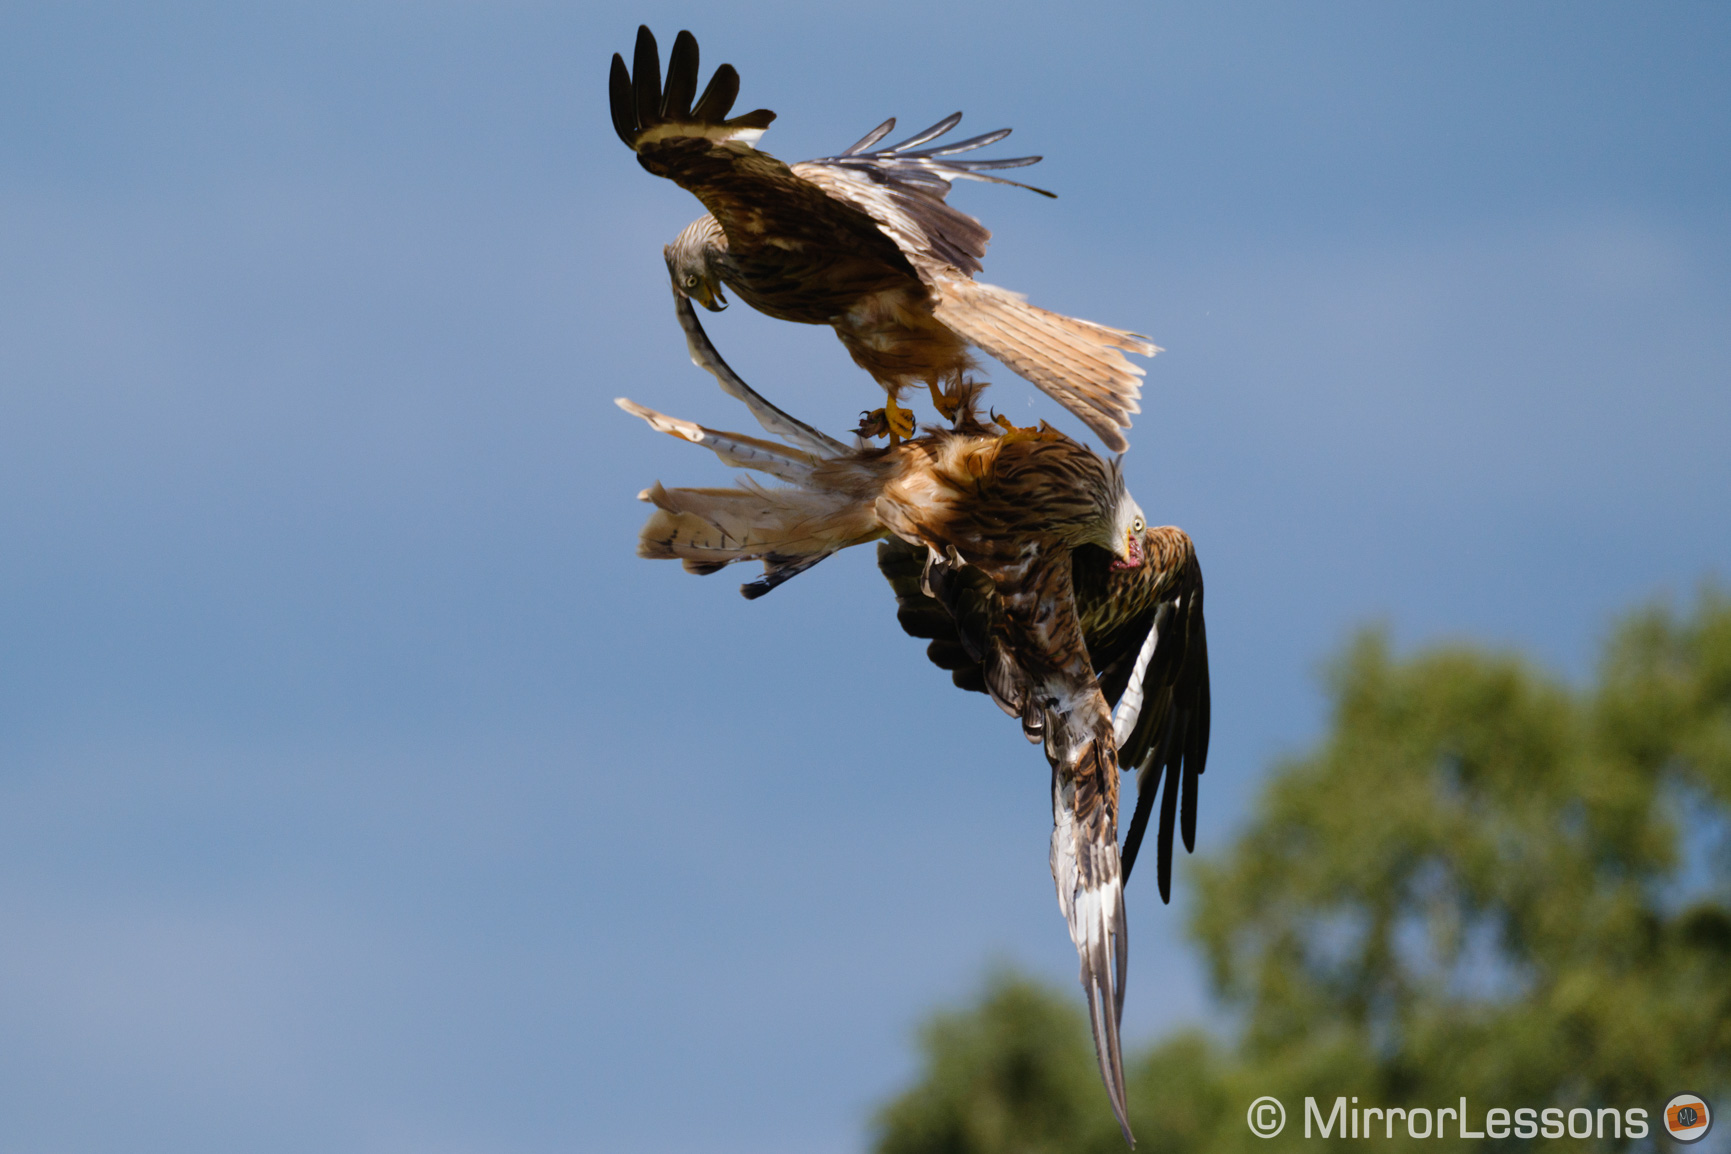
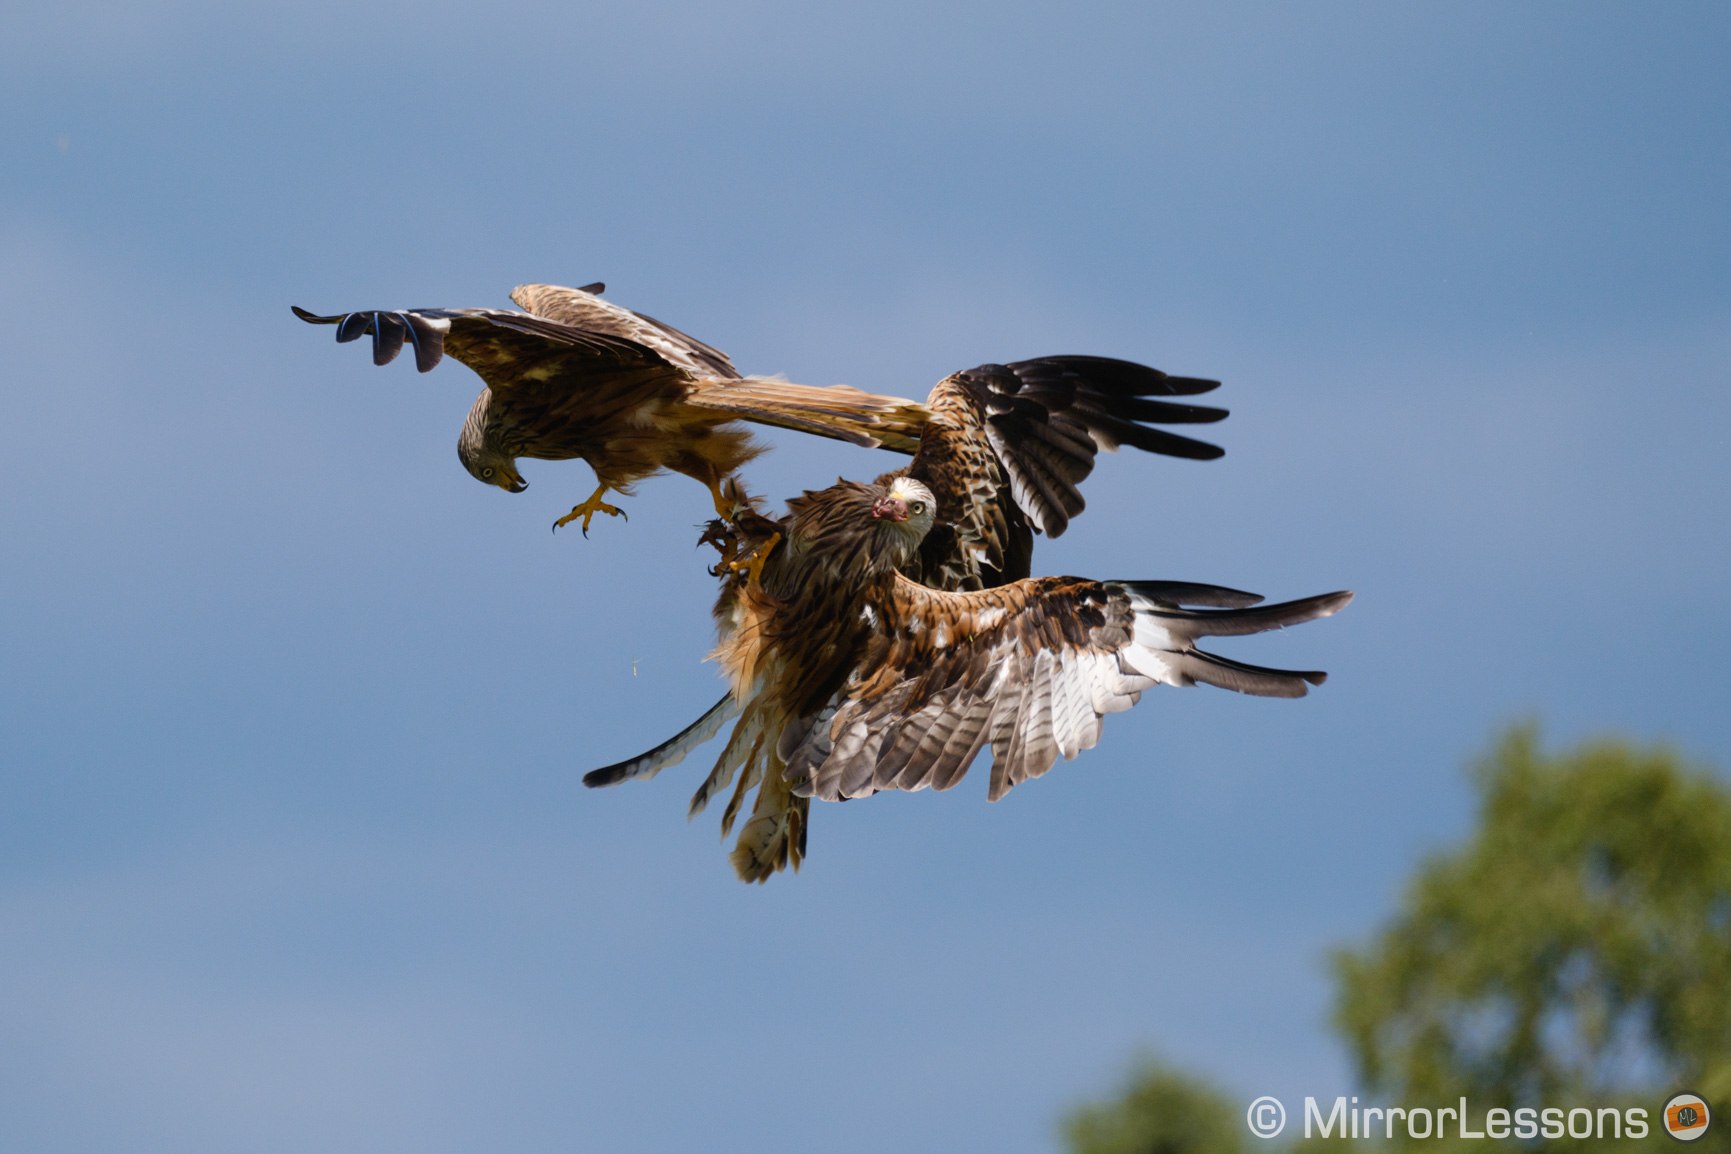
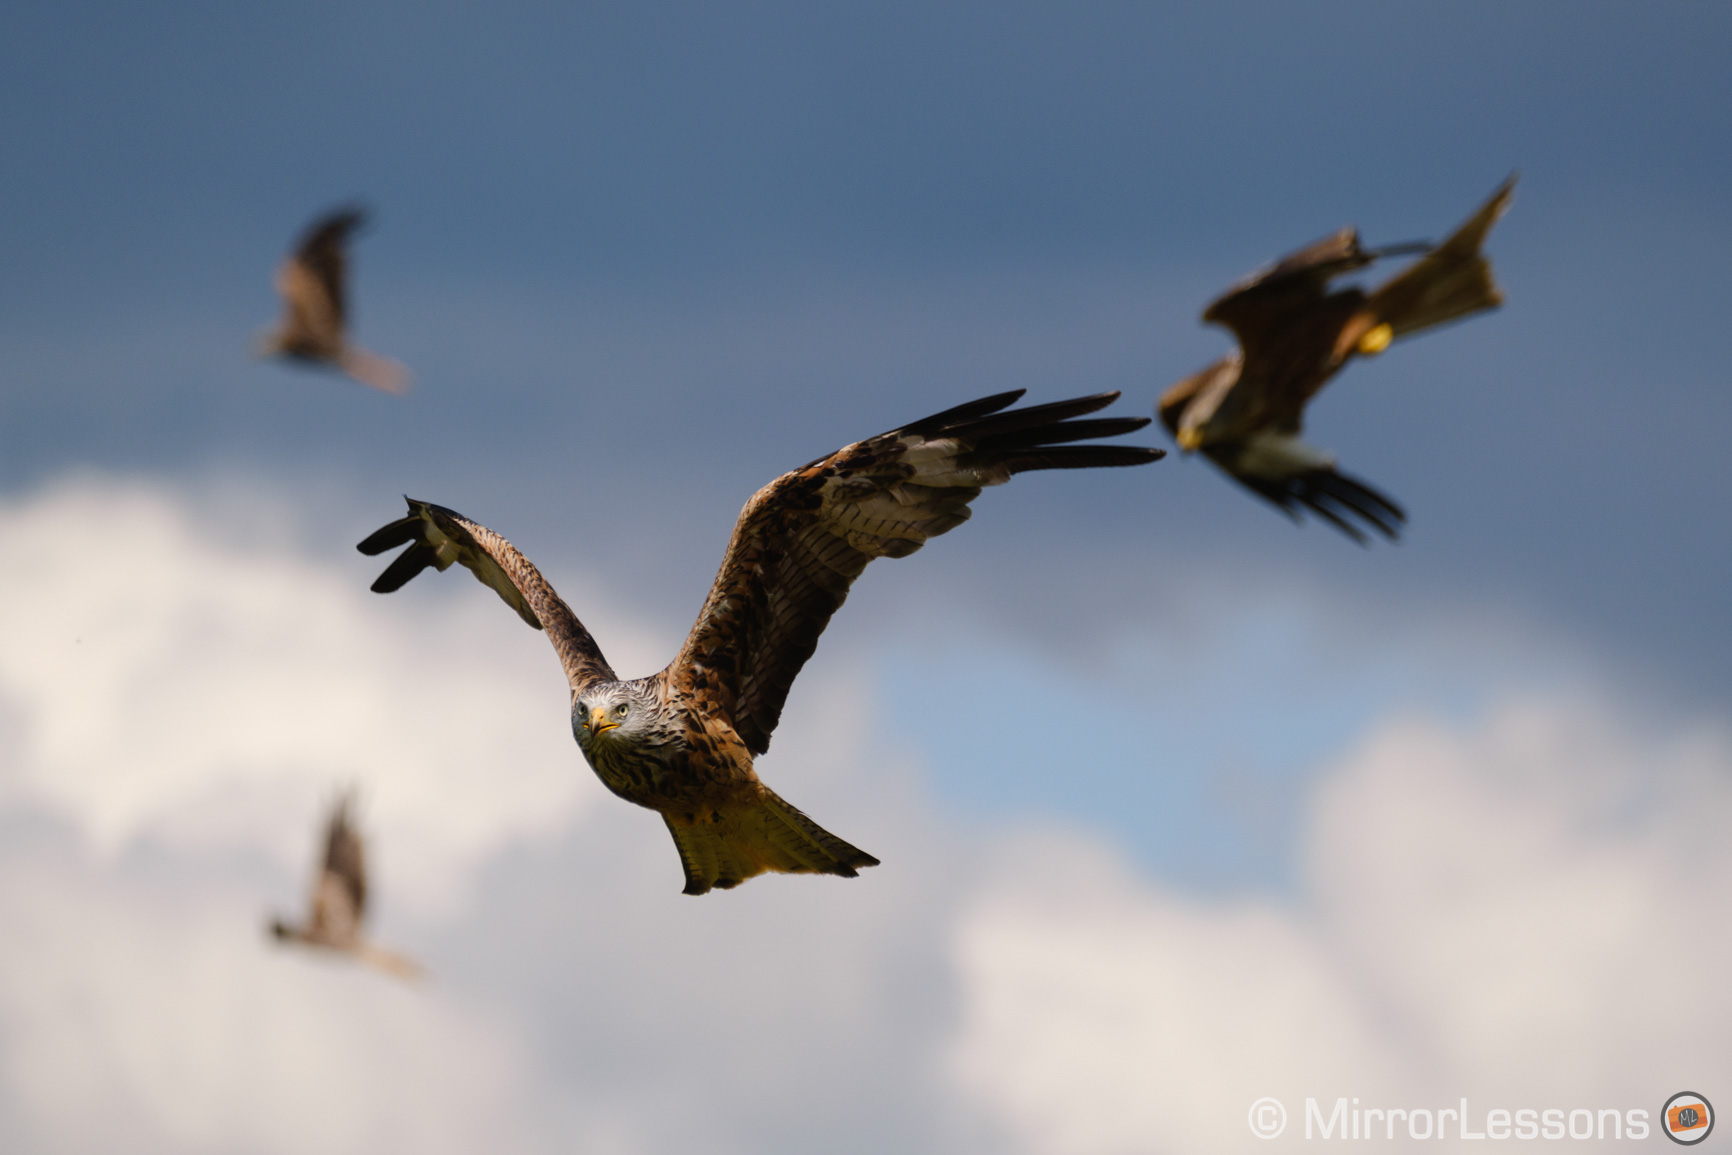
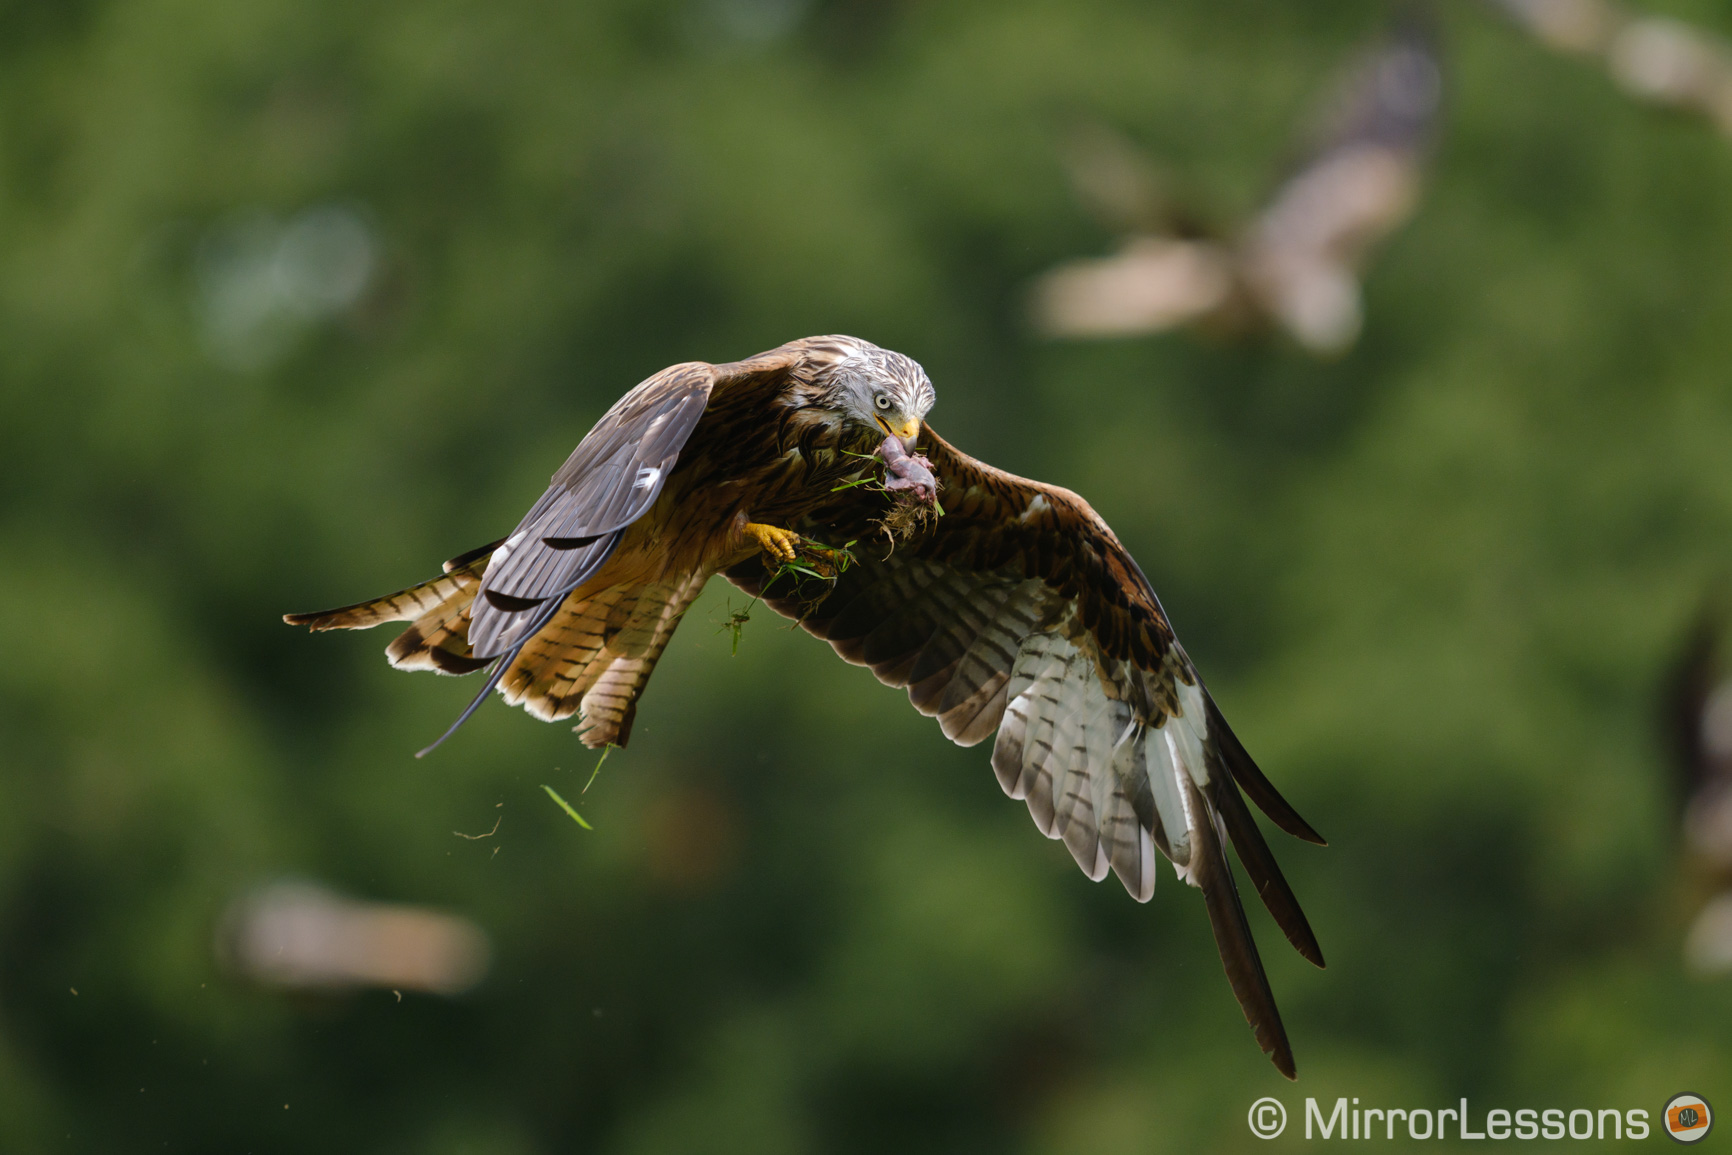
With the kites, the AF will occasionally switch too quickly between one subject and the other if there are multiple birds in the frame (as you can see in the example below) but fortunately this doesn’t happen too often.

Focus / Release Priority
Next we have Release / Focus priority.
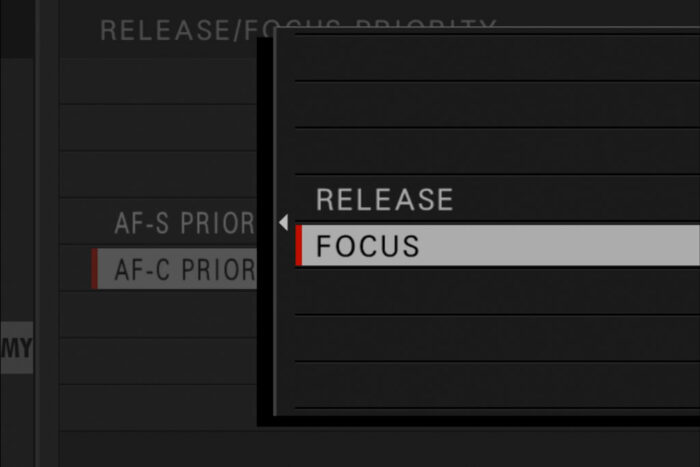
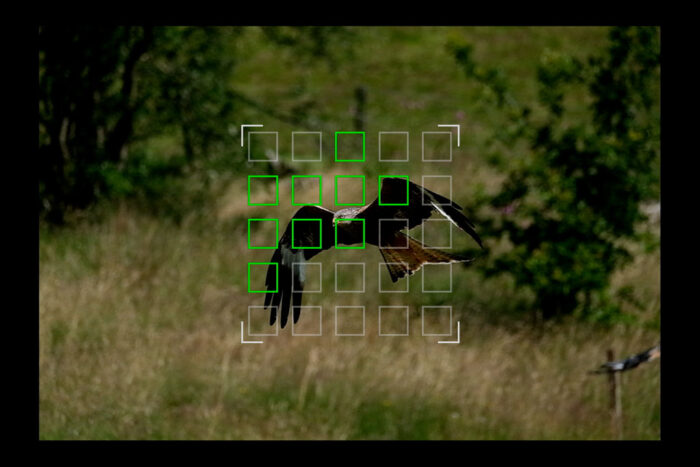
- With Focus Priority, the camera (theoretically) will take a photo only if the picture is in focus
- With Release Priority, the camera will capture the shots regardless of the image being in focus or not.
I tend to use Focus Priority when testing cameras and lenses because I want the best hit rate possible. With Release Priority, you can end up with an entire sequence of out-of-focus images because the camera prioritised the shutter release.
(Green = in focus, Red = out of focus)
One downside of Focus Priority however is that the X-T4 can slow down the burst speed if the AF is not fast enough to keep up. For example instead of 15fps, you might get 8fps or 10fps. I believe this happens because the camera is constantly checking focus before releasing the shutter, and if it has to correct it, it’s going to delay the next shot.
Whether you choose one or the other really depends on the situation you find yourself in. In my case, the kites can feed at the station for a minimum of 30 minutes or up to 3 hours. Sometimes they leave and come back 20 minutes later. This always gives me enough time to test all the things I want to test, and I often bring home more than 2000 frames. So even if the camera is not shooting at the maximum speed, there are plenty of opportunities to capture nice shots.
However if you are in the wild, and have been waiting all day for a particular bird to appear, you want to capture as many shots as possible and hope that the AF holds up its part of the bargain. Another example is if you’re pre-focused on a specific area where a bird is supposed to land, or you’re waiting for it to take off.
Just to clarify, Release Priority doesn’t mean you’re going to get out-of-focus shots all the time. I’ve taken nice sequences from start to finish, but it is more unpredictable and the keeper rate often decreases by 10 to 15%.
(Green = in focus, Orange = slightly soft, Red = out of focus)
The other settings in the AF/MF menu are not interesting for this genre, but I would recommend turning off Face/Eye Detection and Pre AF.
Finally, and it goes without saying, you want the camera to be in Continuous Autofocus, which you select with the dedicated switch at the front.
Analysis and Keeper Rate
With the usual feeding station I visit being closed, I opted for another one that is a bit further away (where I took pictures of red kites for the first time while testing the A7R II). It’s called Gigrin Farm and the hides are much closer to the action. This gives you a better chance of capturing the birds up close, but it also challenges the AF more because the change in focus distance is more significant, and in case I haven’t said this already, those kites are fast!
You can see how it looks like in our video at minute 16:28.
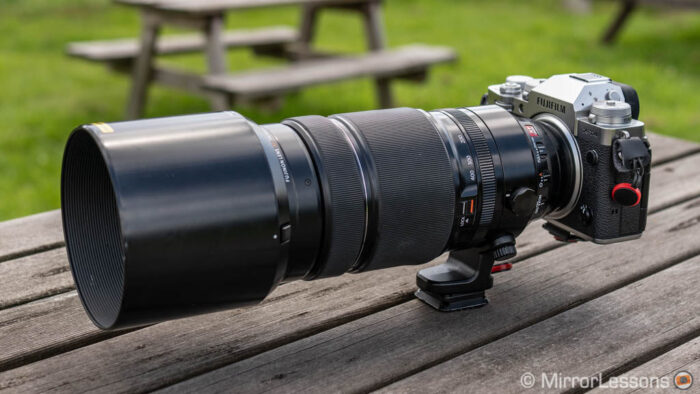
Fuji X-T4 and 100-400mm for BIF
The first day I went with the X-T4 and the XF 100-400mm f/4.5-5.6 LM OIS WR, a lens I know very well and have used multiple times on different X bodies. It has a fast AF motor, excellent sharpness and you have the versatility of the zoom.
Note: I kept the optical and sensor stabilisation off, because the shutter speed I used was more than safe.
There was a mix of sunshine and clouds, and the kites kept the show going for almost two hours, which allowed me to test all the different setting combinations that I wanted. The downside of this is that I came home with more than 4,000 images, a bit of a nightmare when you know you have to review every single one of them to check for focus accuracy! (But I’m lucky, I love my job!)
I evaluated focus accuracy by labelling the images in three different ways: perfect sharpness, slightly soft image and out of focus image. You can read more about how and why I evaluate the images this way in our Best Mirrorless Cameras for Birds in Flight article.
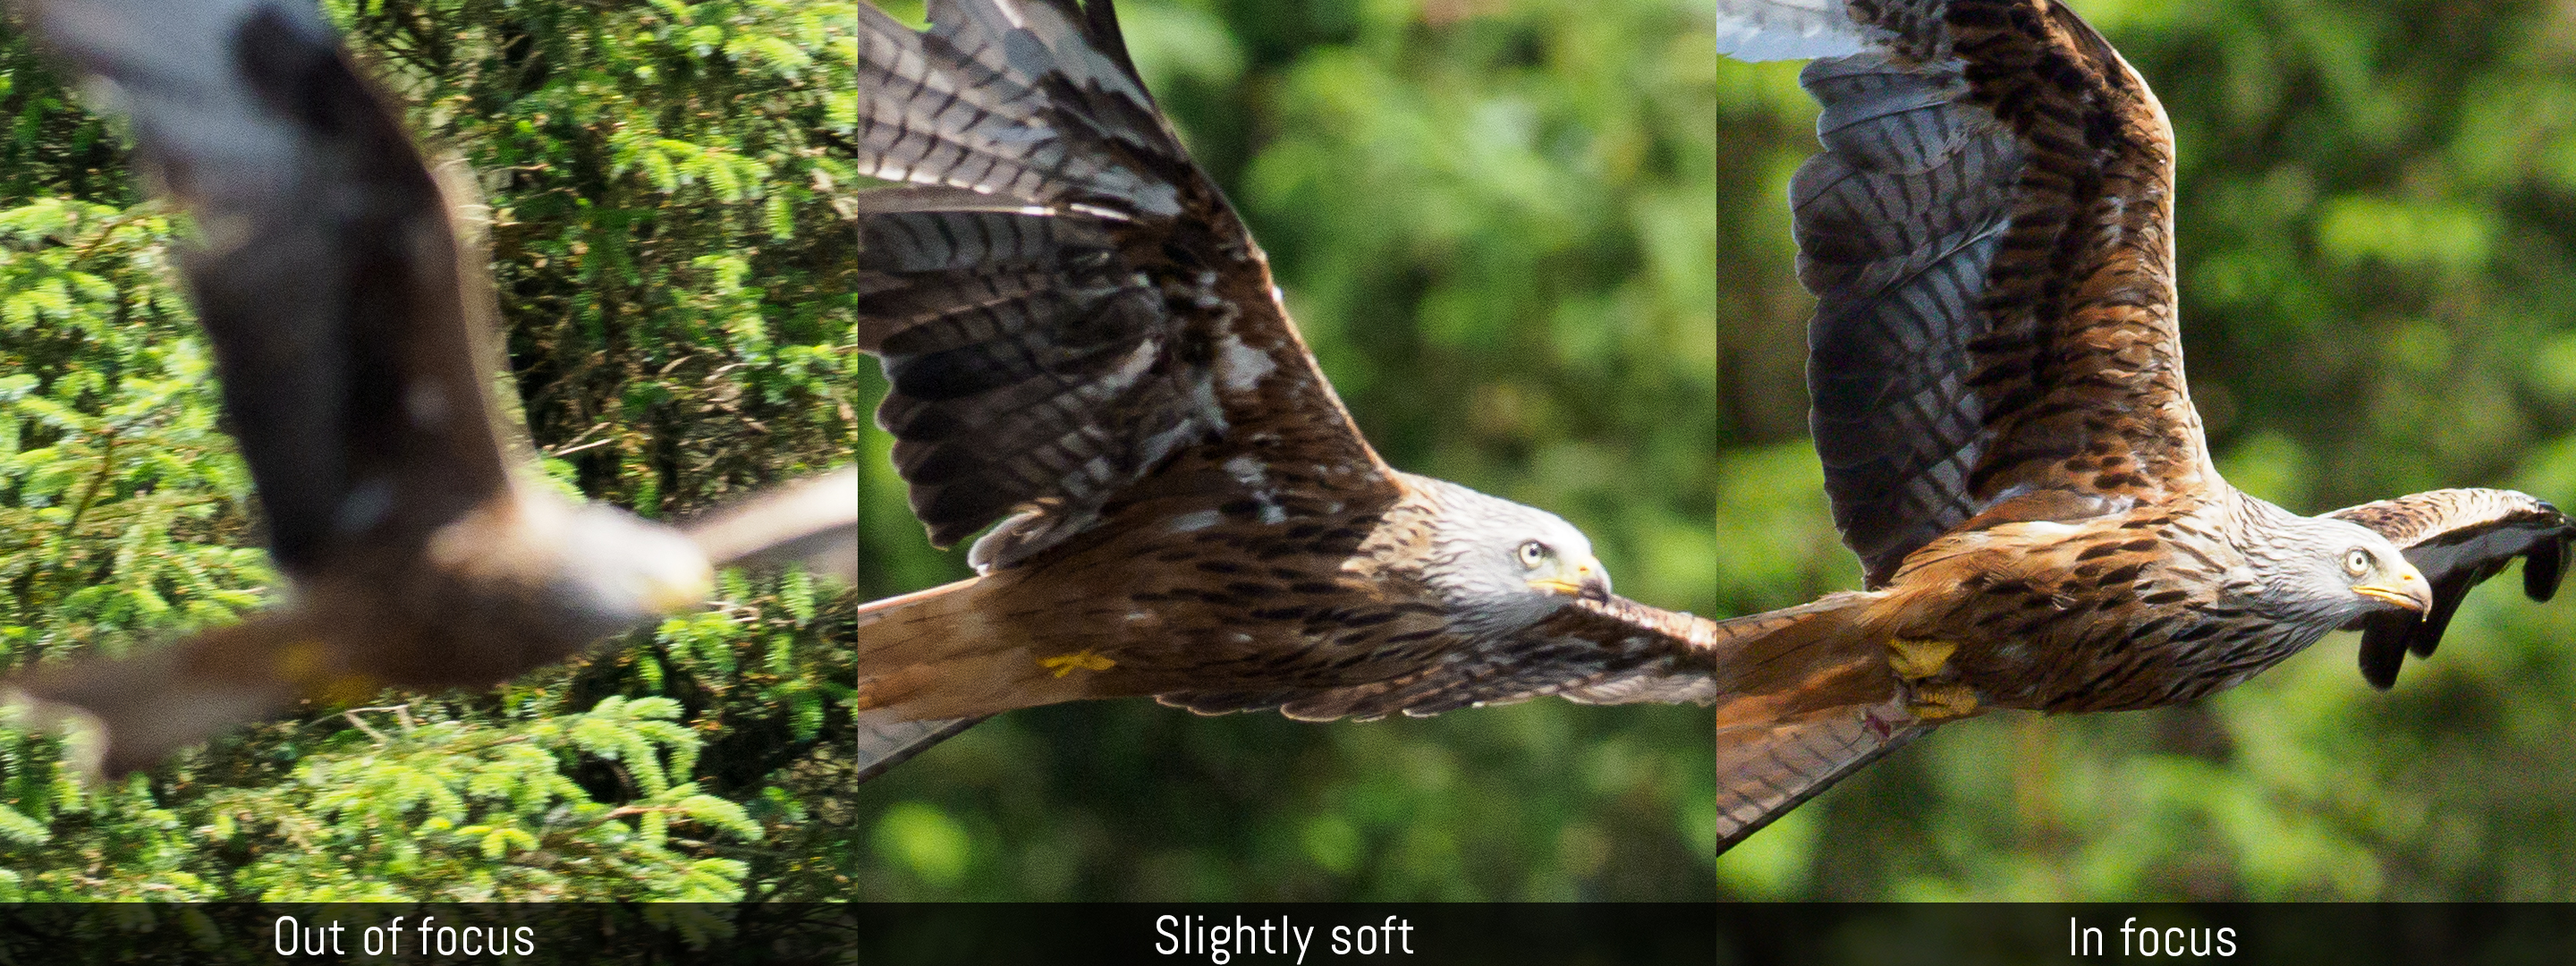
Best overall score
67%
90%
The best keeper rate I got the first day with the X-T4 and 100-400mm was 67% (perfect focus only) / 90% (perfect + slightly soft images) using the following settings:
- Zone AF 7×7
- AF-C Custom Settings Set 6 (0, 2 , Front)
- Focus Priority
- 15fps with the mechanical shutter (although 20fps with the electronic shutter was very close)
Worst overall Score
51%
61%
The worst keeper rate happened when I used the Wide/Tracking focus mode.

I got some decent shots with Wide/Tracking but many went in the bin.
Best score with the bird against a busy background
66%
82%
- Zone Area 7×7
- AF-C Custom Settings Set 6 (0, 2 , Front)
- Focus Priority
- 15fps with the mechanical shutter (20fps electronic shutter very close)
Worst score with the bird against a busy background
28%
33%
Again, Wide/Tracking is responsible for the poor keeper rate.
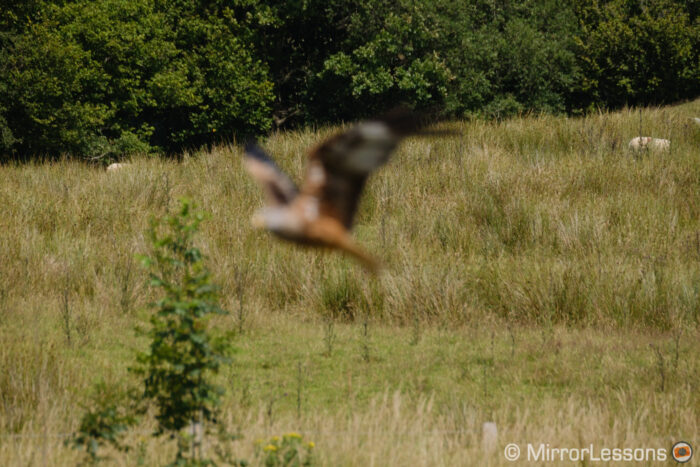
One of the many out of focus shots with this configuration and background.
Best score with the bird against the sky
71%
86%
- Wide/Tracking
- AF-C Custom Settings Set 4
- Focus Priority
- 20fps with the electronic shutter (15fps with the mechanical shutter very close)
Worst score with the bird against the sky
54%
82%
- Zone Area 7×7
- AF-C Custom Settings Set 4
- Focus Priority
- 20fps with the electronic shutter
A few interesting comments from these results:
- for most of the setting combinations I tested, the hit rate was always a little higher with the bird against the sky
- the Wide/Tracking mode does poorly when the bird is against a busy background, but gave me the best results when it’s up in the sky, something to keep in mind if you know in advance that your subject won’t fly low to the ground.
Other things I’ve noticed concerning the general performance of the camera:
- it can occasionally struggle with birds in the sky if there are dark clouds behind it
- if the bird is further away, meaning smaller in the frame, the keeper rate can go down by about 15 or 20%.
- at the end of the day, with more than 4,000 files on the SD cards, the battery icon was showing 2 bars left out of 5. Pretty good performance there!
Fuji X-T4 and 200mm for BIF
While I was taking pictures at Gigrin Farm, I realised that I didn’t need to use the longest focal length (400mm) as I usually do at the other site I go to. 300mm and sometimes even 200mm proved to be enough.
Note: 400mm on APS-C equals 600mm on full frame cameras in terms of angle of view. Likewise, 300mm is the same as 450mm and 200mm equals 300mm.
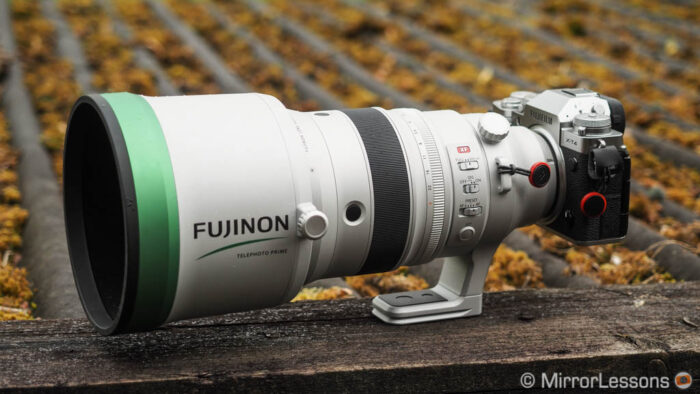
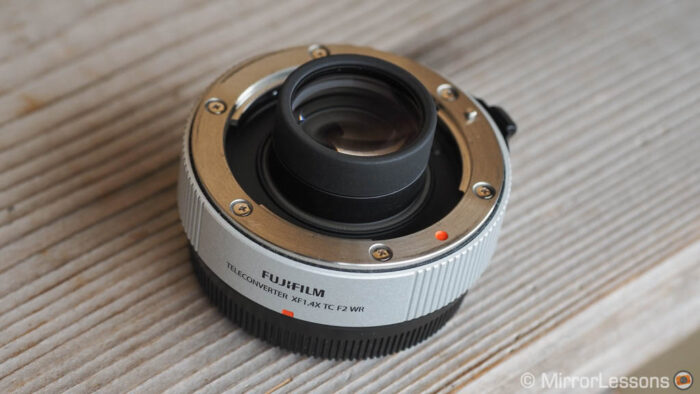
This gave me the opportunity to try a lens that I’ve wanted to test for a long time: the XF 200mm f/2 R LM OIS WR with its 1.4x teleconverter. It is the most expensive and largest lens Fujifilm has ever built for the X-system.
In addition to the advantage of the faster aperture, I was curious to see if the most expensive lens would deliver better results not just in terms of sharpness, bokeh and subject separation, but also in terms of AF performance.
I went back to the farm a second time, thankfully without filling my SD cards with as many images as the first time (still, 1600 is not bad!). I concentrated on images with the kites flying close to the land, since they are more distant when up in the sky.
In terms of optical quality, the 200mm is a magnificent lens. I was a bit too excited to try it out and shot wide open most of the time (f/2.8 with the teleconverter, f/2 without it). The subject / background separation is beautiful, the bokeh is very pleasant and sharpness is superb, even at the fastest aperture.

In terms of focus accuracy and keeper rate, I ended up with some interesting results.
Best score with the XF 200mm f/2
79%
94%
This is the highest score I’ve managed with any Fujifilm camera and lens to date, using the following settings:
- Zone AF 7×7
- AF-C Custom Settings Set 6 (0, 2 , Front)
- Focus Priority
- 10fps with the electronic shutter and 1.25x crop
Without the 1.25x crop, the best keeper rate was 70% / 89% which is similar to what I got with the 100-400mm.
Having a better keeper rater with the 1.25x crop burst is not news to me, because I had the same findings when I tested the X-T3 two years ago. What is curious however is that it didn’t make a difference when using the X-T4 and 100-400mm. I don’t know if it’s just a coincidence, or if it highlights some inconsistency in the camera’s performance.
Another interesting finding is that this time, release priority (70% / 89%) was a bit better than focus priority (67% / 90%). I think one of the possible reasons for this is that when shooting at f2 or f2.8, the depth of field is reduced not only between the subject and background, but also between different parts of the subject itself. For example if the body is in focus, the wings are out-of-focus when the bird is moving perpendicular to the camera axis.
While reviewing the images taken with Focus Priority, I noticed that the camera tried to refocus every time the wing covered the body, giving me an inconsistent sequence with changes between in-focus and out-of-focus shots for almost every frame. It looks like Release Priority reduces this behaviour. Possibly, lowering the Tracking Sensitivity in the AF-C Custom Settings can help (but I didn’t try this).

What about video?
I don’t know how many of you are interested in recording birds in flight in video mode, but out of curiosity I recorded a few scenes in 4K and Slow Motion with continuous autofocus and the 100-400mm.
The X-T4 can record up to 240fps in Full HD which is gives you a 10x slow effect if you set the output to 24p (8x with 200fps and 25p). We talk about it in-depth in our dedicated article. The quality in 4K is excellent and you can record up to 60p or up to 30p with 10-bit internal recording.
The autofocus performance is not bad at all and the camera tracked the birds well, although it got confused at times when they were passing in front of dark clouds. Busy backgrounds are too much of a challenge however.
There are only two focus areas available in video mode, Single and Multi and I chose the latter.
You’ll also find the AF-C Custom Settings but there are no presets, just two settings:
- Tracking Sensitivity: makes the camera quicker or slower to react to a change in focus (I chose 0 which is the quickest)
- AF Speed: makes the AF slower or faster at going from one focus point to the other (I chose 5 which is the fastest)
Below you can watch some of the sample footage I recorded in our video at minute 28:24.
Fuji T4 for Bird Photography: Conclusion
Overall, I am satisfied with the results I got with the X-T4. There is an improvement in the autofocus performance and keeper rate in comparison to the X-T3, but it’s worth bearing in mind that it’s not a difference you may notice right away. You need to find the settings that work best for you and the situation you are in. Also, if I compare all the results I got with different settings and the two lenses, there is some inconsistency, where some settings worked well the first time but not the second.
The number of out of focus shots is not too bad, but you may still wind up with many images that are slightly soft, meaning that focus is not 100% tack sharp. This is something I’ve seen from many mirrorless cameras, not just the X-T4. It can be a bit frustrating because you may have a shot that looks perfect in terms of composition, but then you realise the focus is a bit inaccurate.
Lens wise, the 200mm f2 gave me the best score and picture quality, but it is a very expensive lens. Also, depending on the situation, it might not be long enough. There is a 2.0x TC but it has been designed for a 2.8 aperture, not a f/2.0 aperture. Fujifilm says that the image quality can decrease a little but I didn’t have the opportunity to verify this myself.
There is also another point to mention: the design. The X-T4 lacks a prominent grip on the front, and with lenses like the 100-400mm or the 200mm, you’re going to feel the need for one. Holding the camera becomes tiring after a while. The vertical battery grip might improve the ergonomics a little but I have not tried it.
If I compare the X-T4 with all the mirrorless cameras I’ve tested (you can see all the ratings in our dedicated article), it doesn’t reach the performance of the Sony A9 series, but it is now in the league of the Sony A6400 / A6600 and the A7 III. The main difference is that on the Sony, there are fewer settings to worry about and only one configuration to use.
Check price of the Fujifilm X-T4 on
Amazon | Amazon UK | B&H Photo | eBay
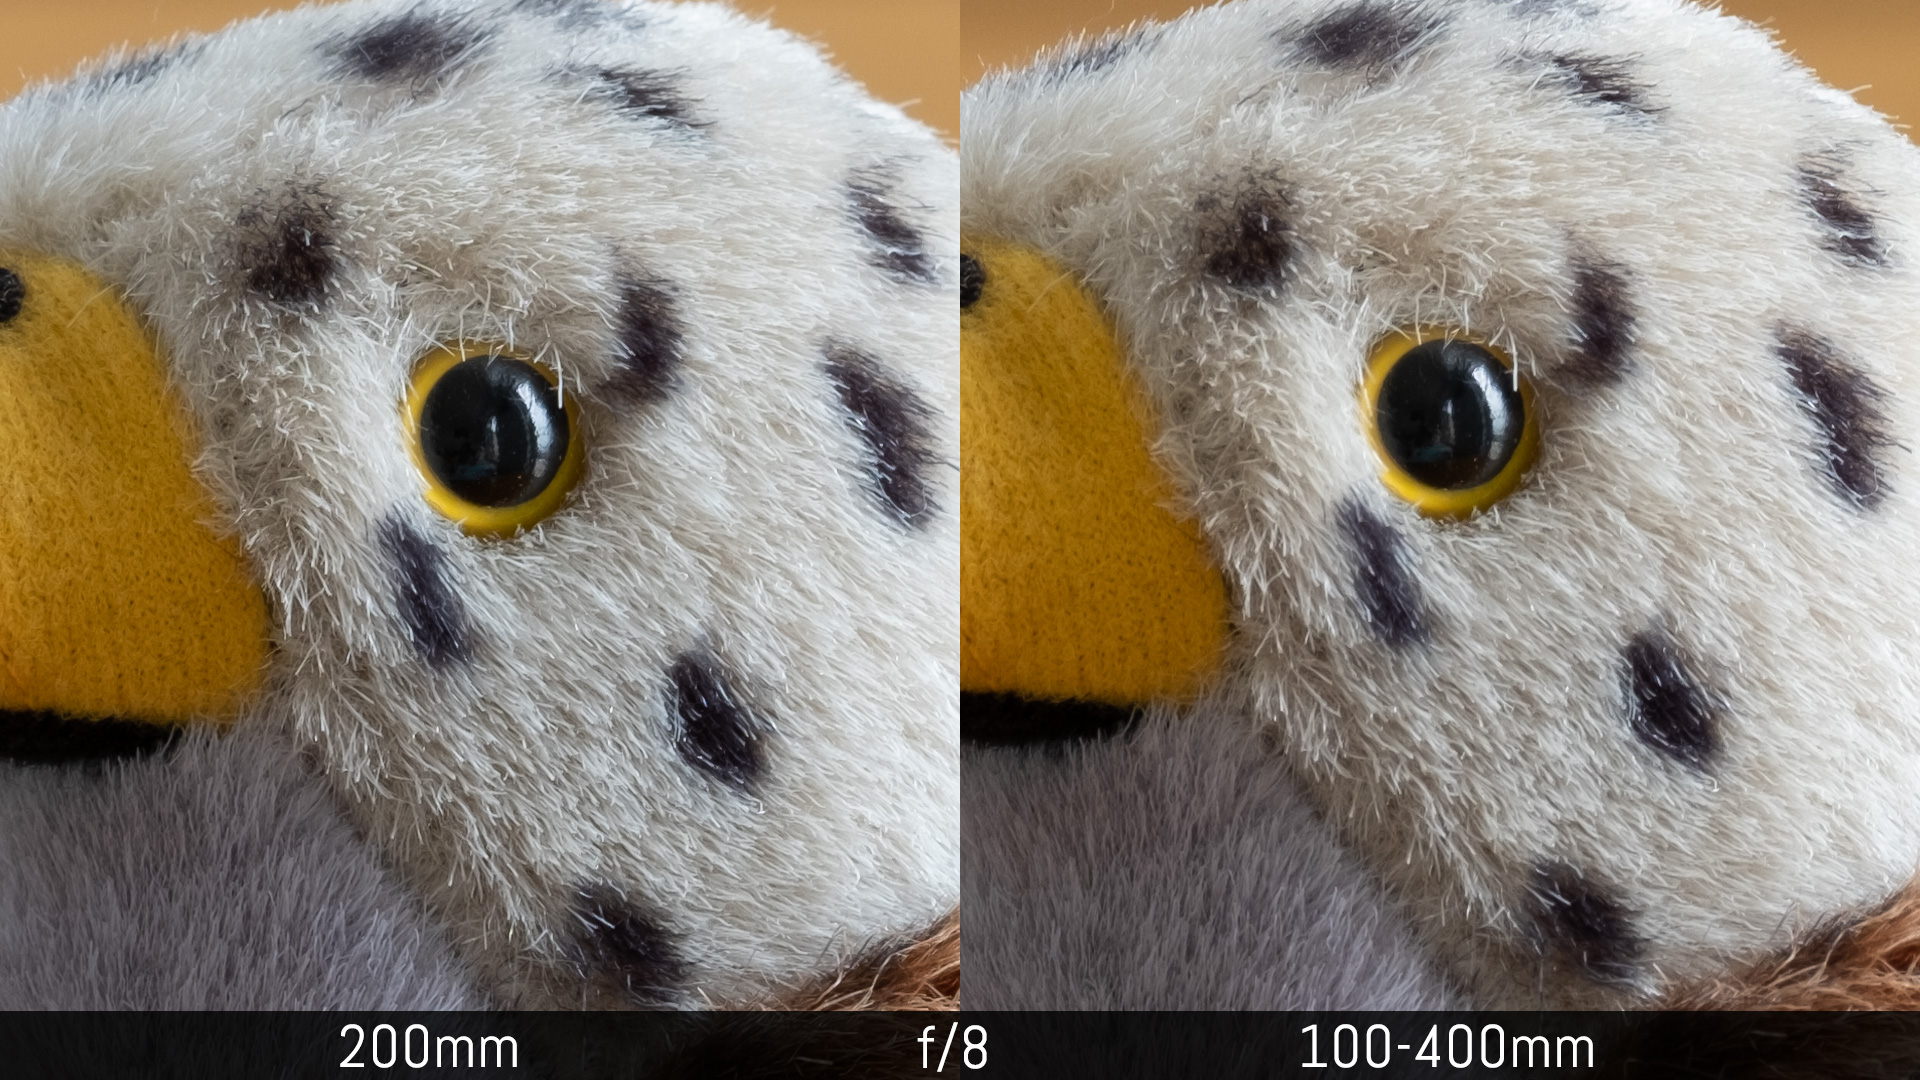
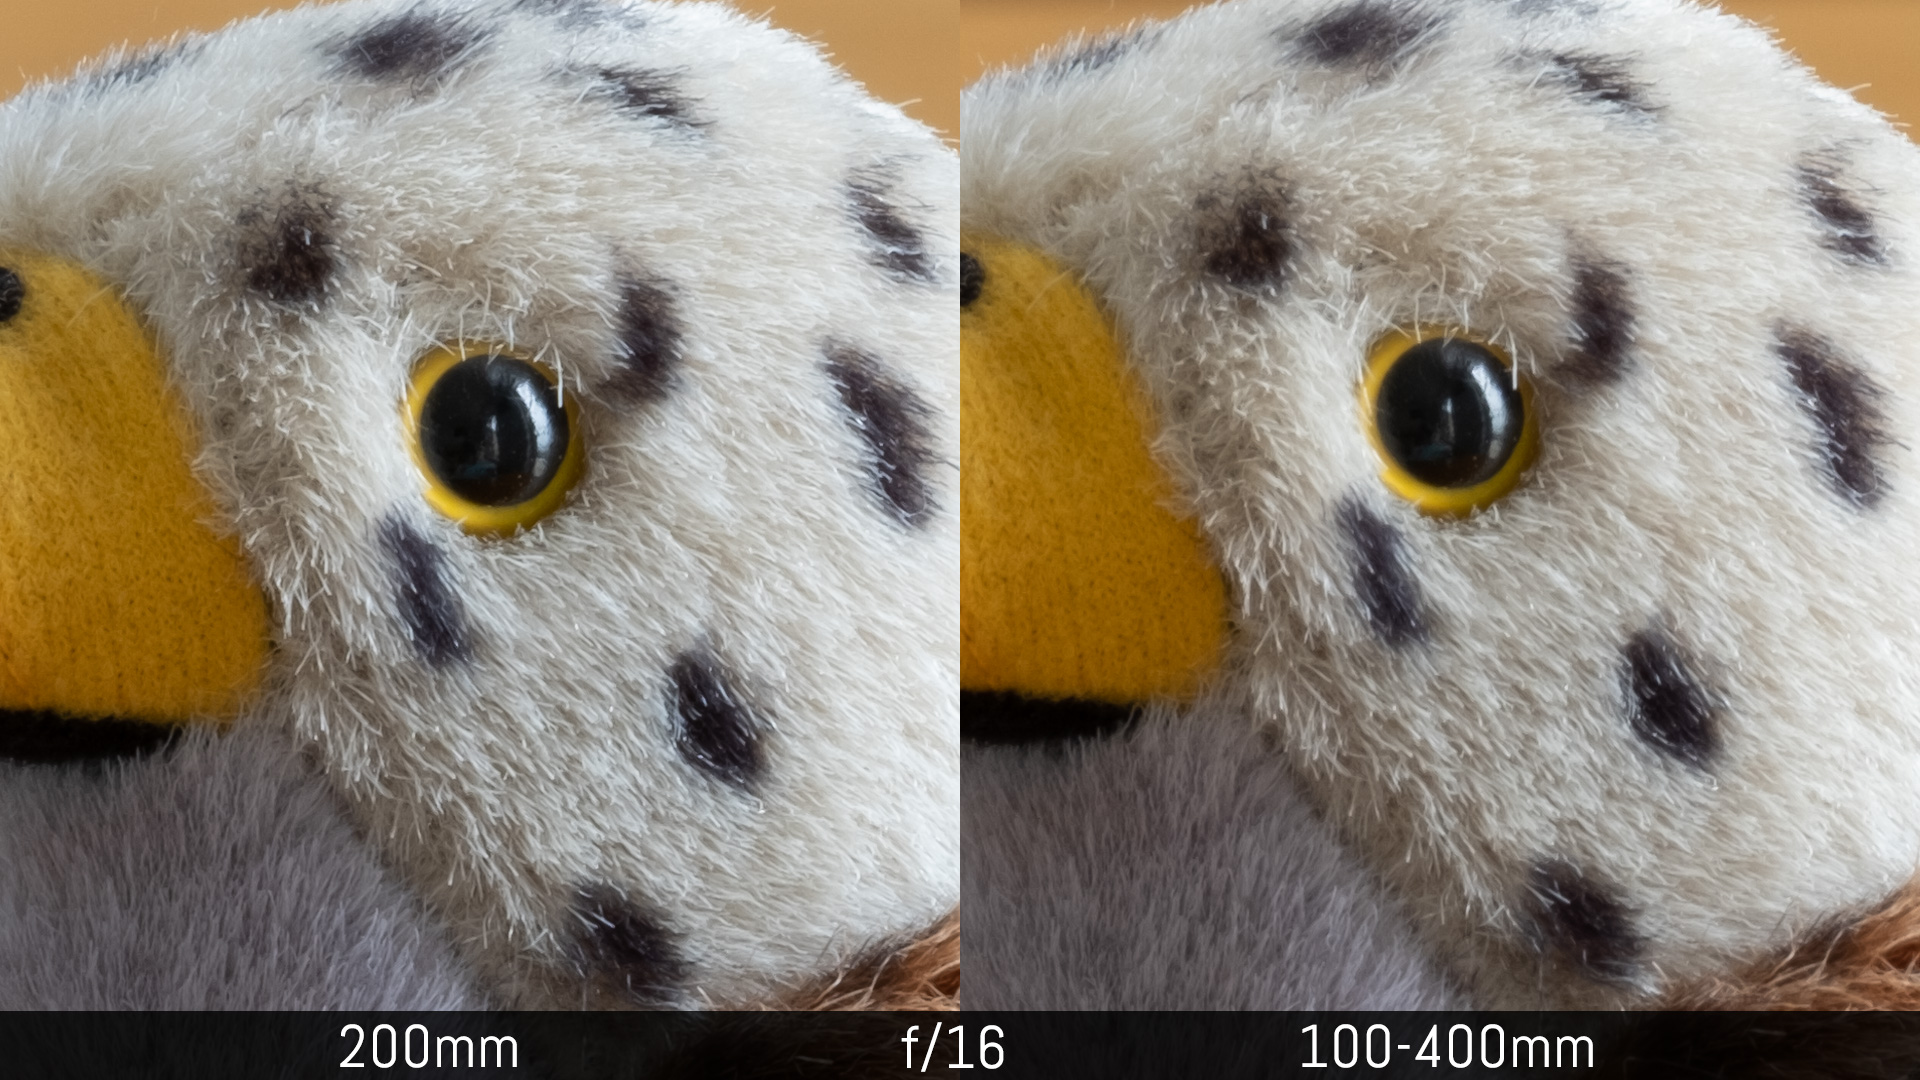
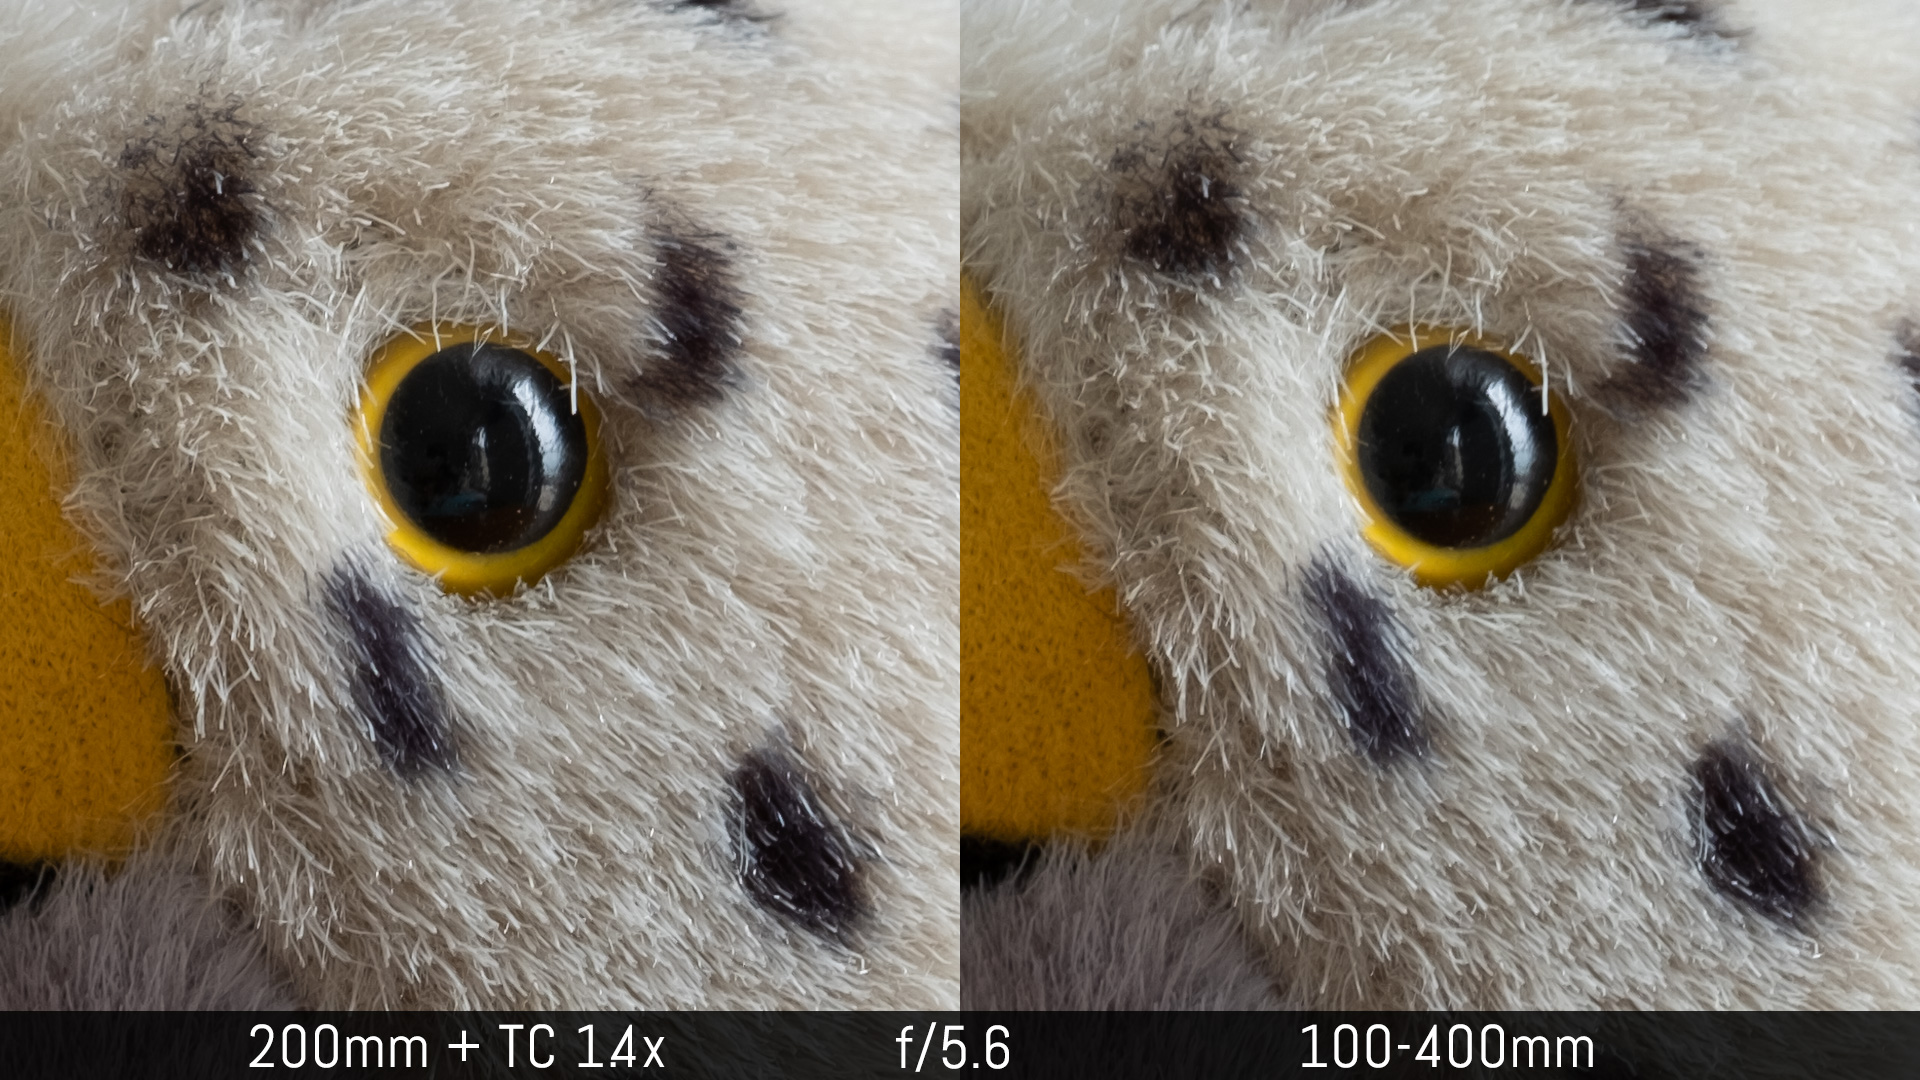
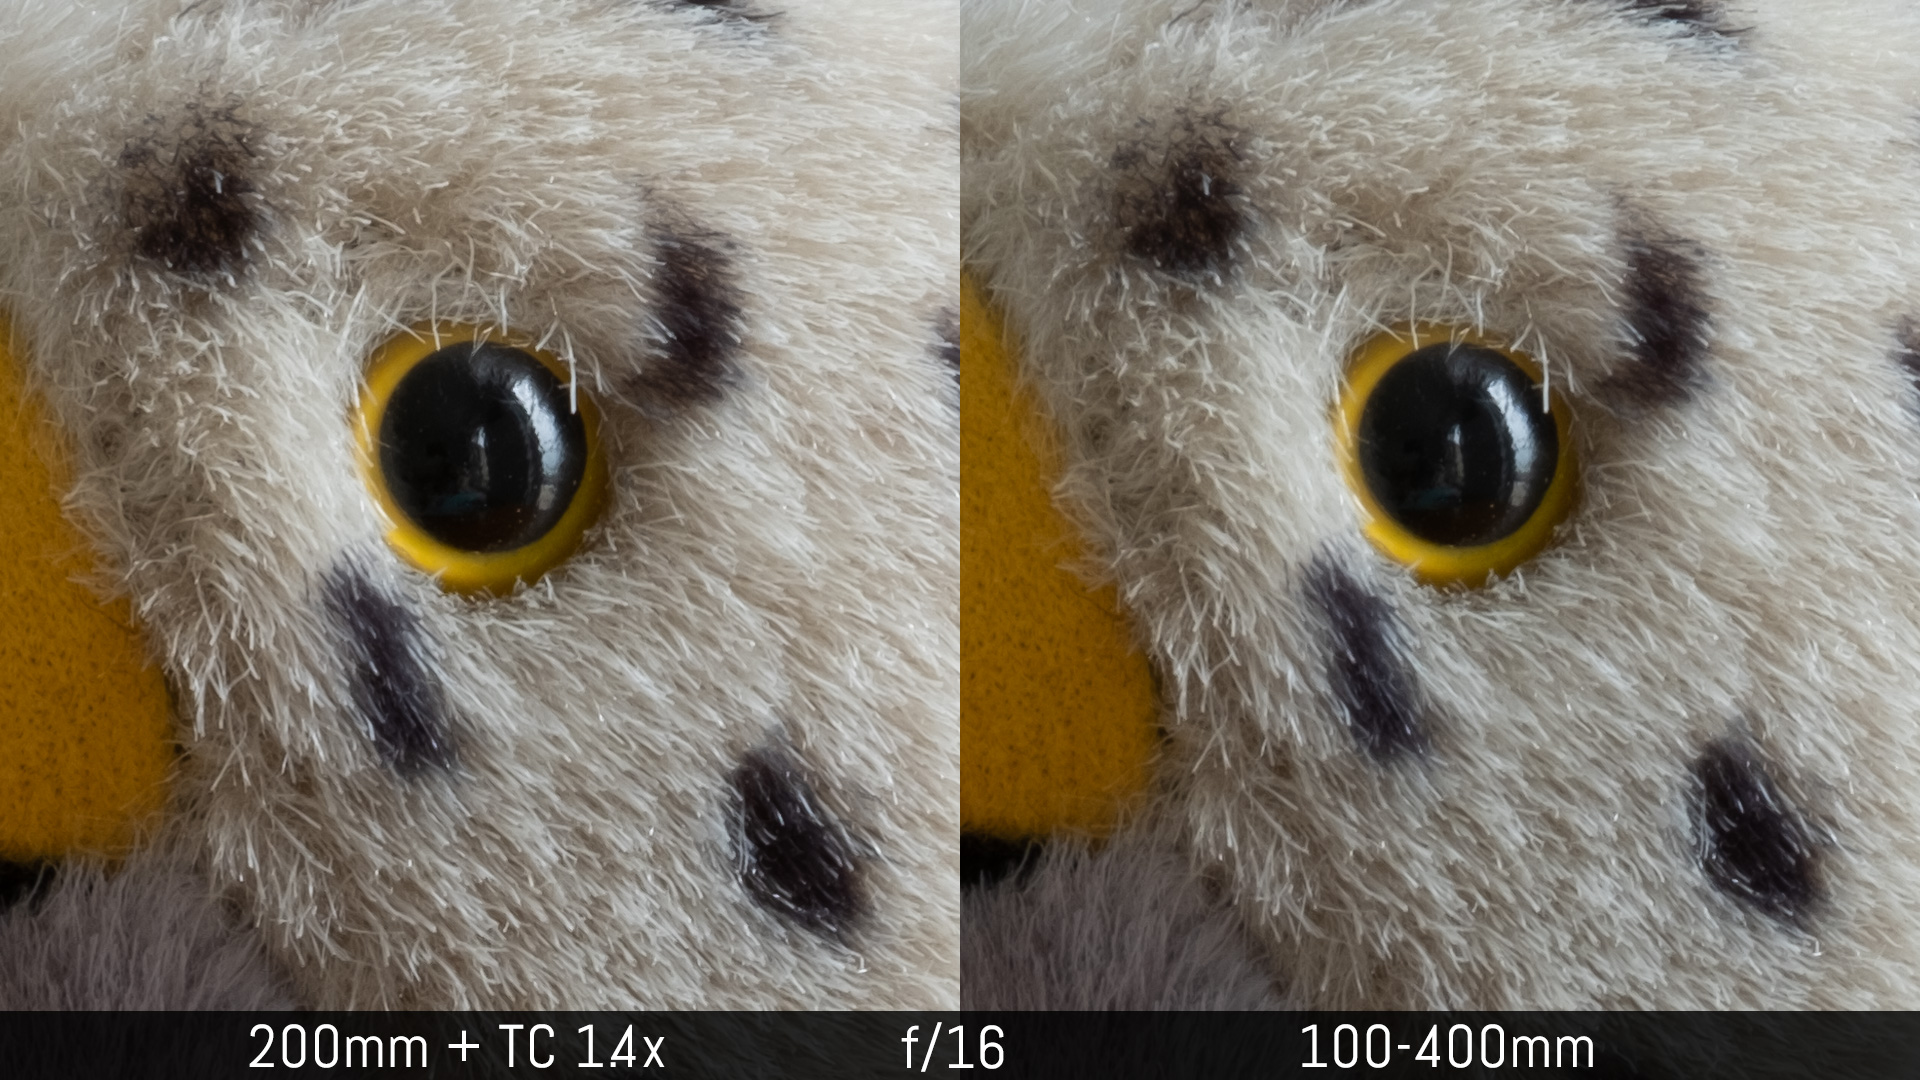
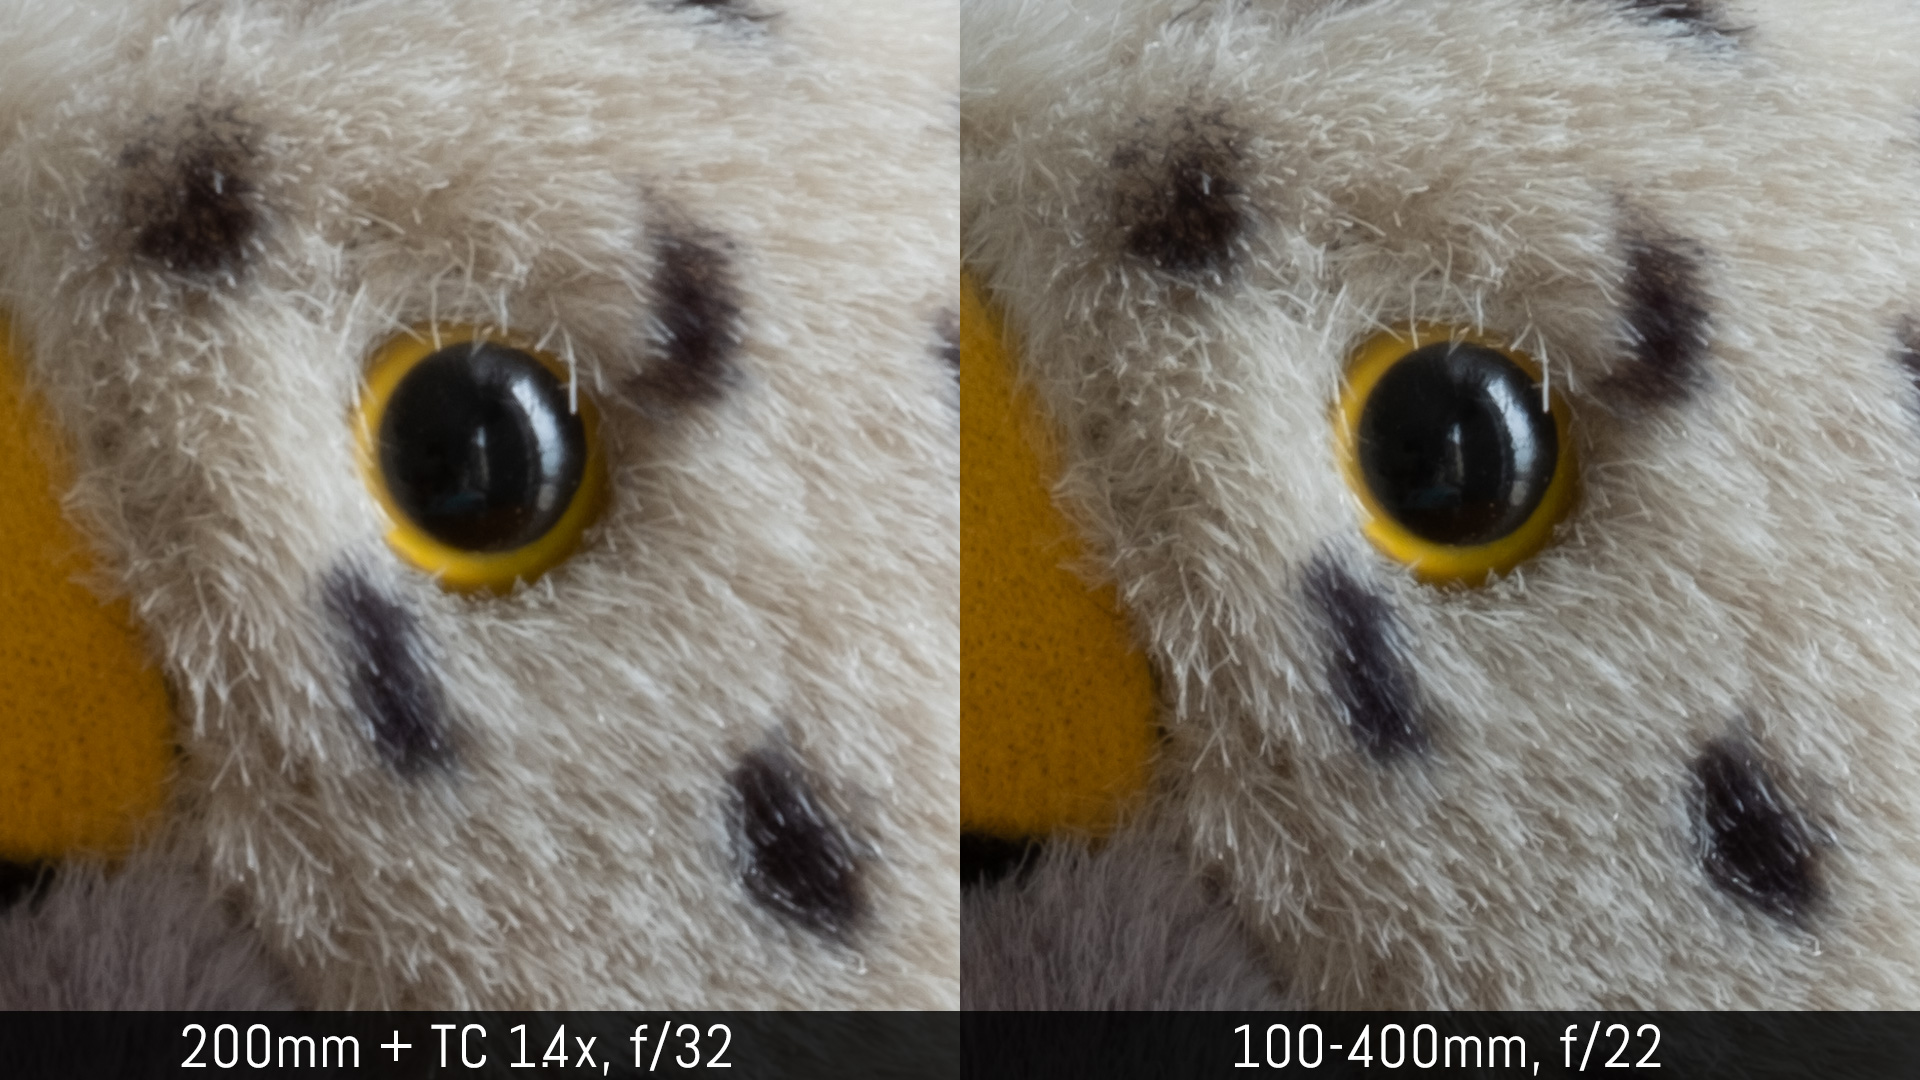
Bonus: Fujifilm XF 200mm f/2 vs XF 100-400mm f4.5-5.6
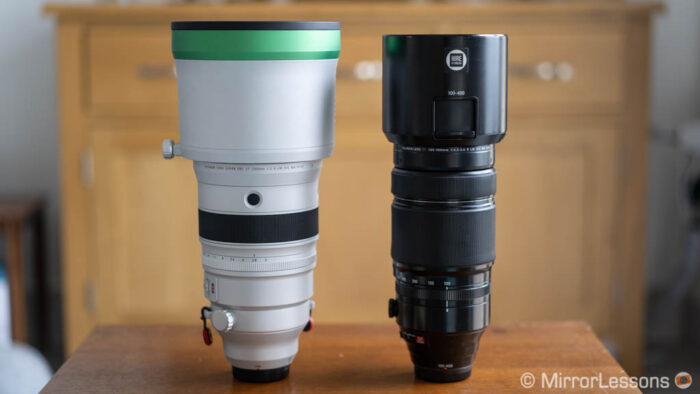
I know what you’re going to say: it’s an unfair comparison, one is a prime, the other is a zoom, one is three times more expensive than the other, and so on.
But, if there is one thing I’ve learned in 7 years of writing camera reviews and comparisons, it is that people like to know how apples compare to oranges more than you’d think. And many times I’ve received the question: how does such-and-such a zoom compare to such-and-such a prime lens at the same focal length?
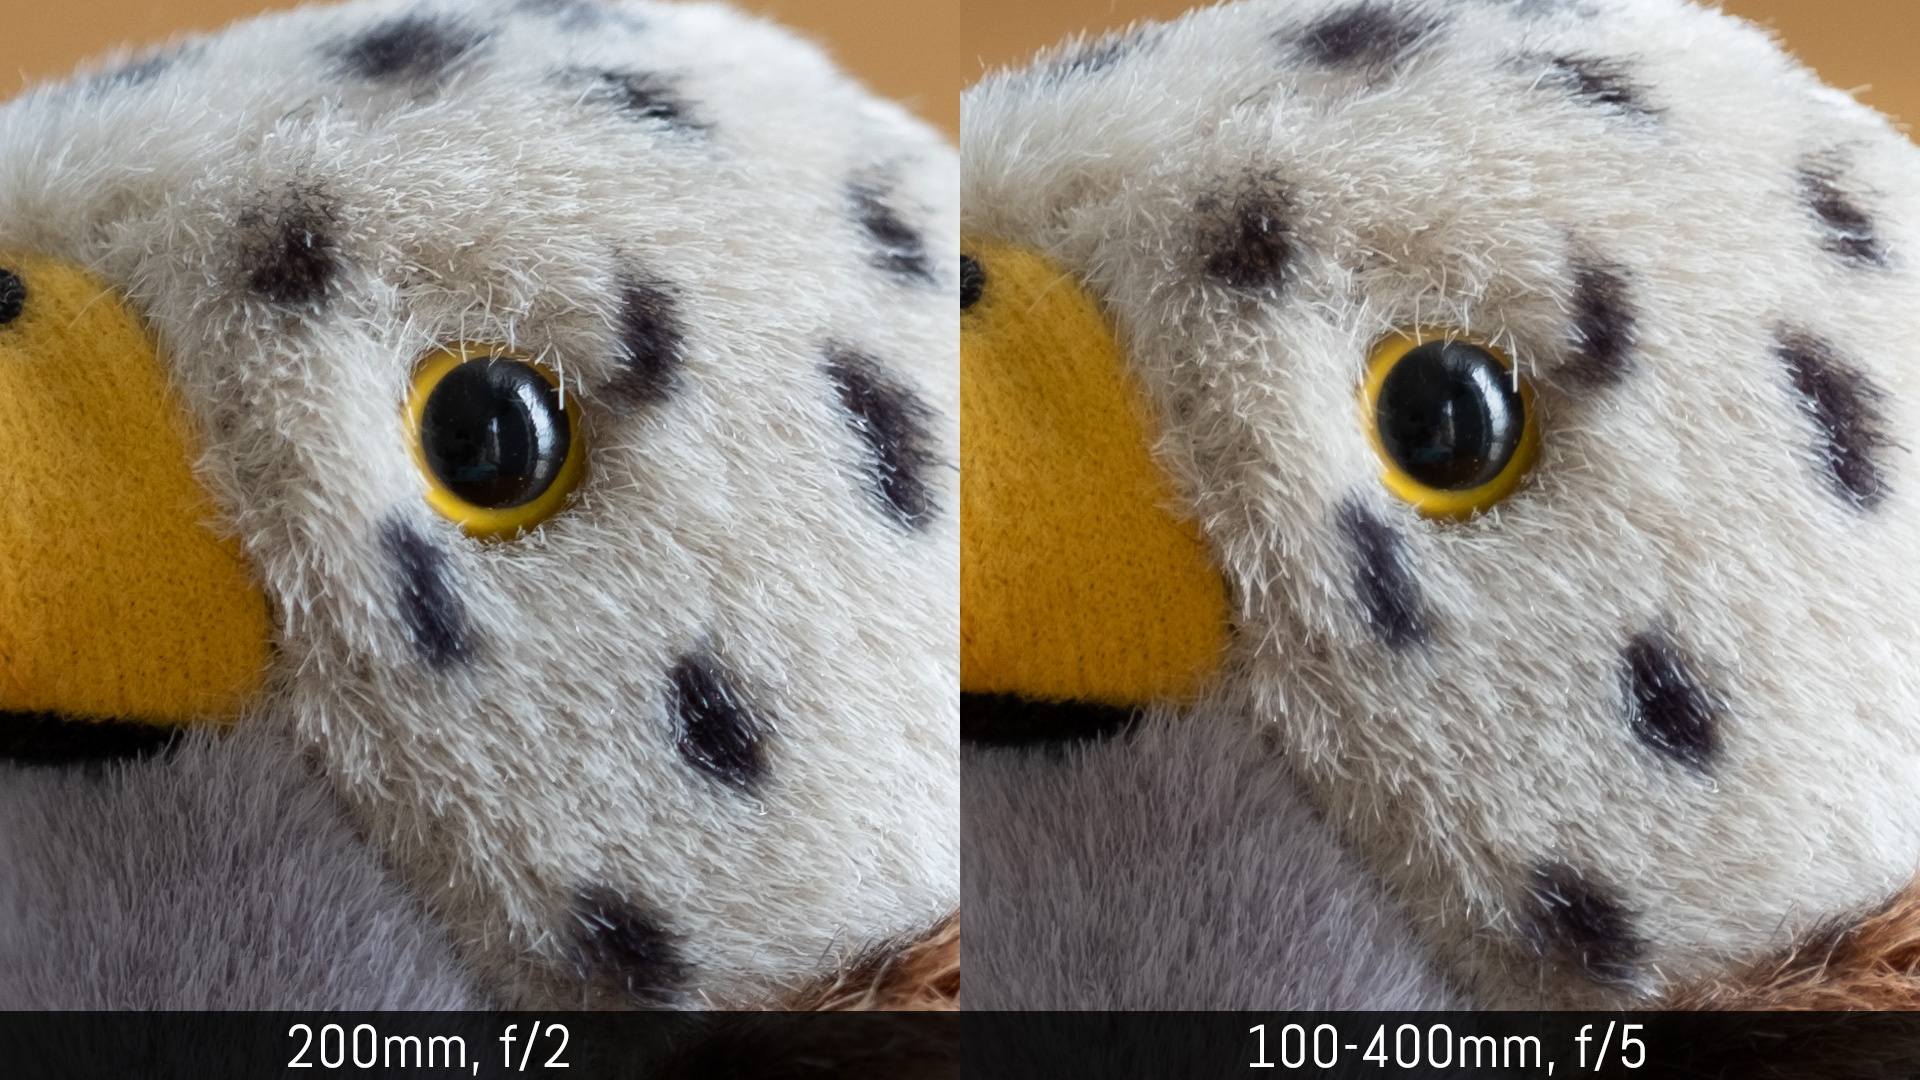
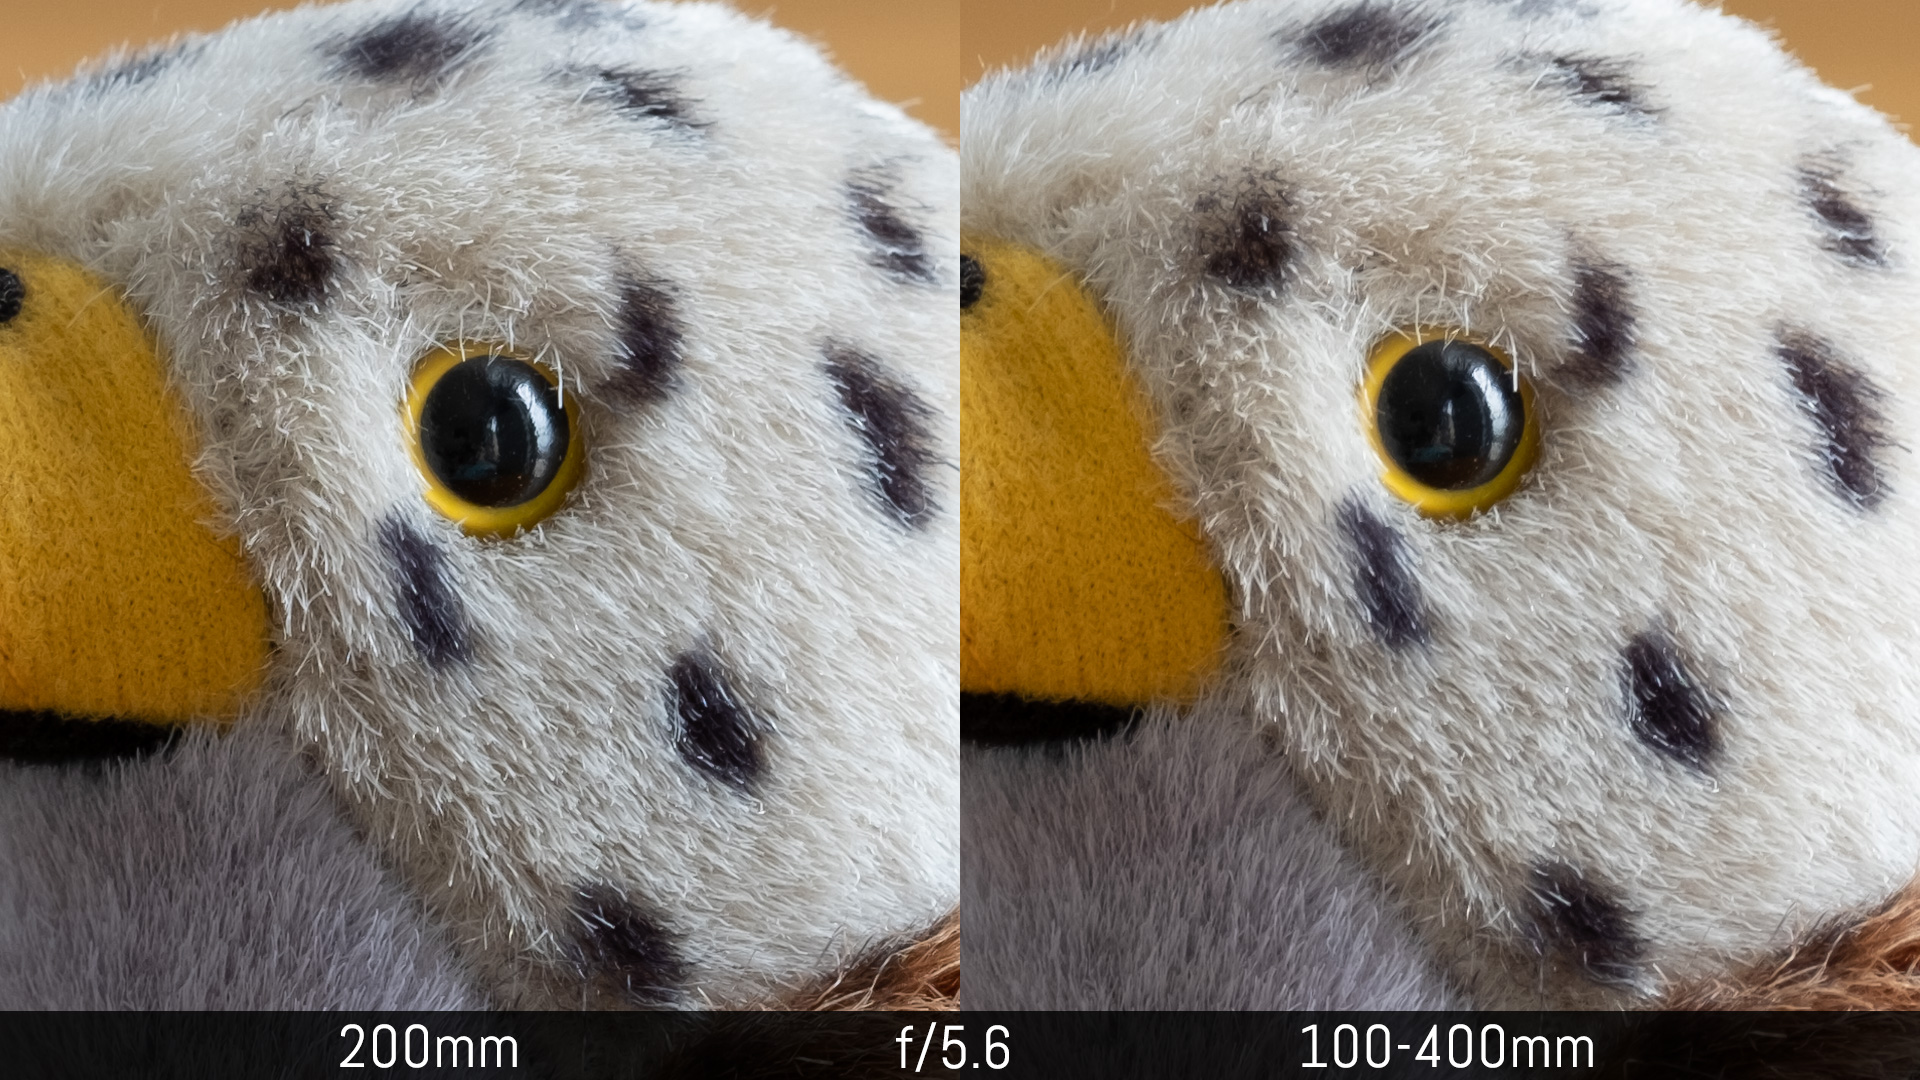
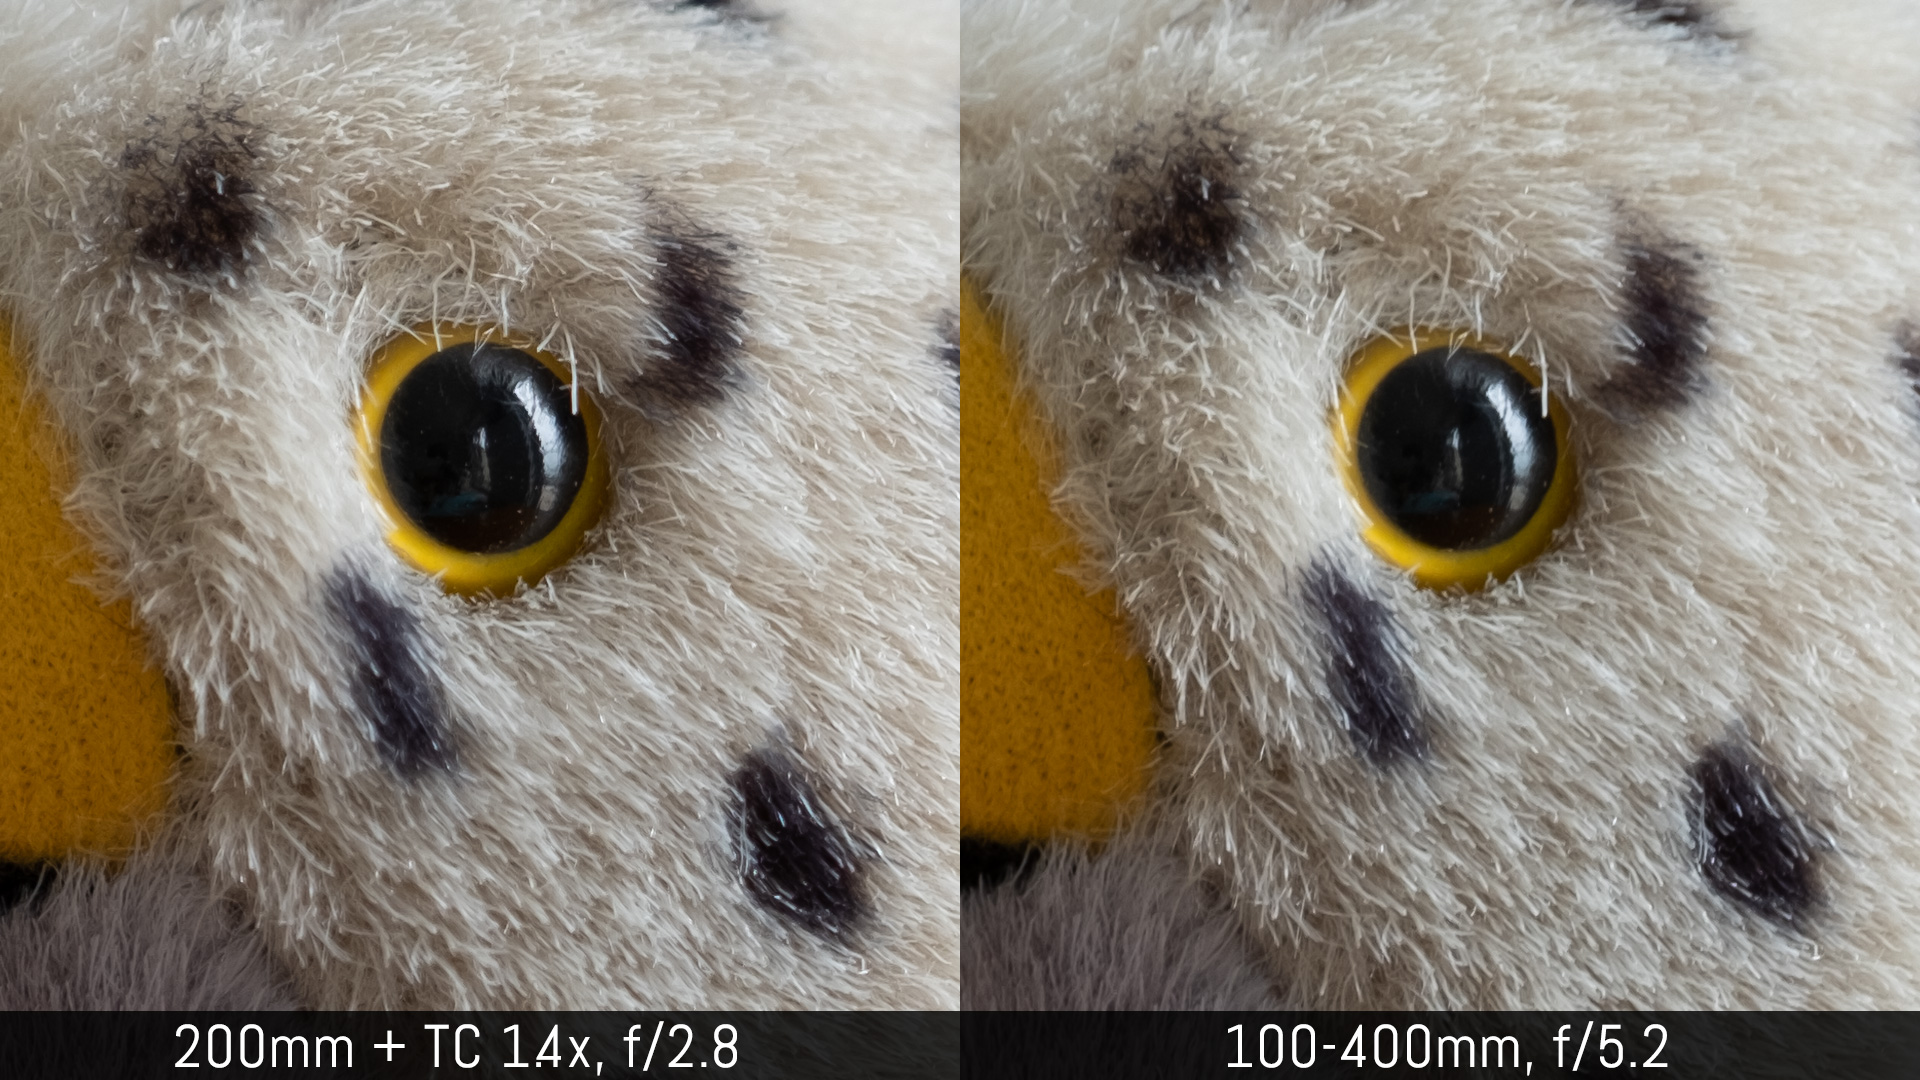
I rented the two lenses at different times, but they crossed paths for a couple of days, and I simply couldn’t resist at the opportunity. So here is a simple sharpness comparison at 200mm, and 280mm (200mm + TC 1.4x for the prime telephoto).
200mm comparison


280mm comparison


Reminder: the links below are affiliate links. If you decided to buy something after clicking the link, we will receive a small commission.
Check price of the Fujinon 100-400mm on
Amazon | Amazon UK | B&H Photo | eBay
Check price of the Fujinon 200mm on
B&H Photo | eBay