You are now on page 2. Here you can find an in-depth analysis of image quality.
- Page 1: design and functionality
- You are on page 2: image quality
- Page 3: autofocus and speed
- Page 4: image stabilisation, video, other features and conclusion
[toc heading_levels=”2″ label=”Table of contents – Page 2″]
Preface to image quality: sensor format and technology
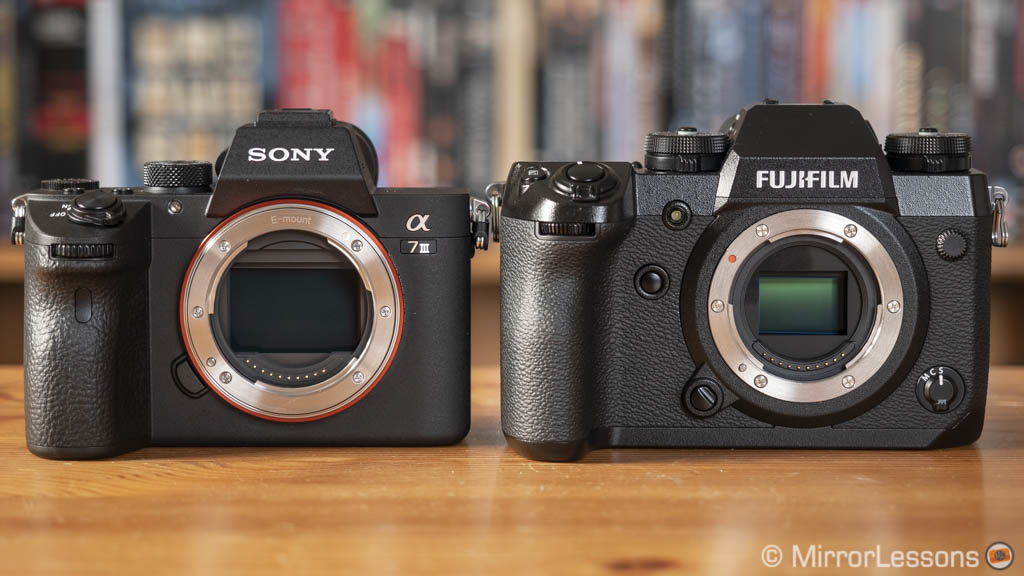
Before digging into real world side-by-side examples, let’s get a few technical aspects about the two sensors out of the way. The A7 III and X-H1 share the same resolution (24.2MP and 24.3MP to be precise) but their sensors are rather different.
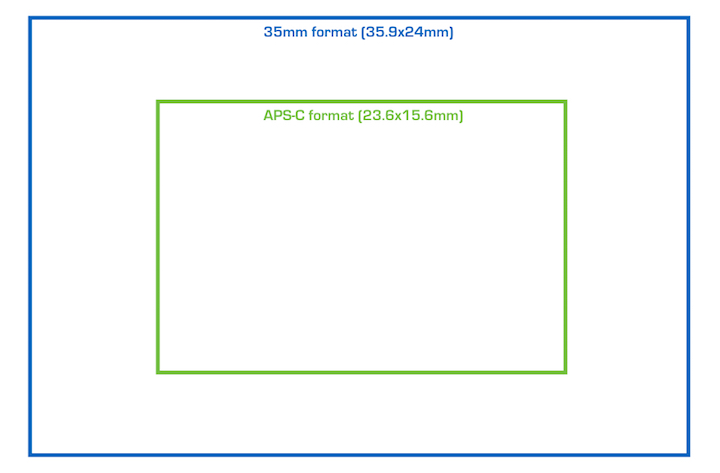
Firstly and most obviously, the Sony features a 35mm/full frame chip which is 2.3 times larger than the APS-C sensor found inside the Fuji.
Then we have the sensor technology itself: Sony uses a traditional Bayer sensor with back-illumination which means that the photodiodes are closer to the sensor’s surface and can collect more light as a result. There is an AA filter to reduce moiré while copper wires and a front-end LSI chip increase the data readout of the camera.
Fujifilm uses a modified sensor with its proprietary design called X-Trans. Unlike the bayer array, it guarantees the presence of at least one green, blue and red pixel on each vertical and horizontal line.
The Fuji sensor is a modified version of Sony’s 24MP APS-C bayer sensor and has a lower copper wiring that also improves light gathering. According to Fujifilm, the X-Trans pattern improves colour accuracy and eliminates moiré (there is no AA filter needed).
![]()
![]()
How does this technical jargon translate into the real world and more importantly, how much of a difference does it make? Keep reading to find out!
Sharpness and RAW demosaicing
As mentioned above, the cameras have the same resolution but since the sensors are different in terms of size, pixel array and filters, we have to ask: is there difference in detail rendering?
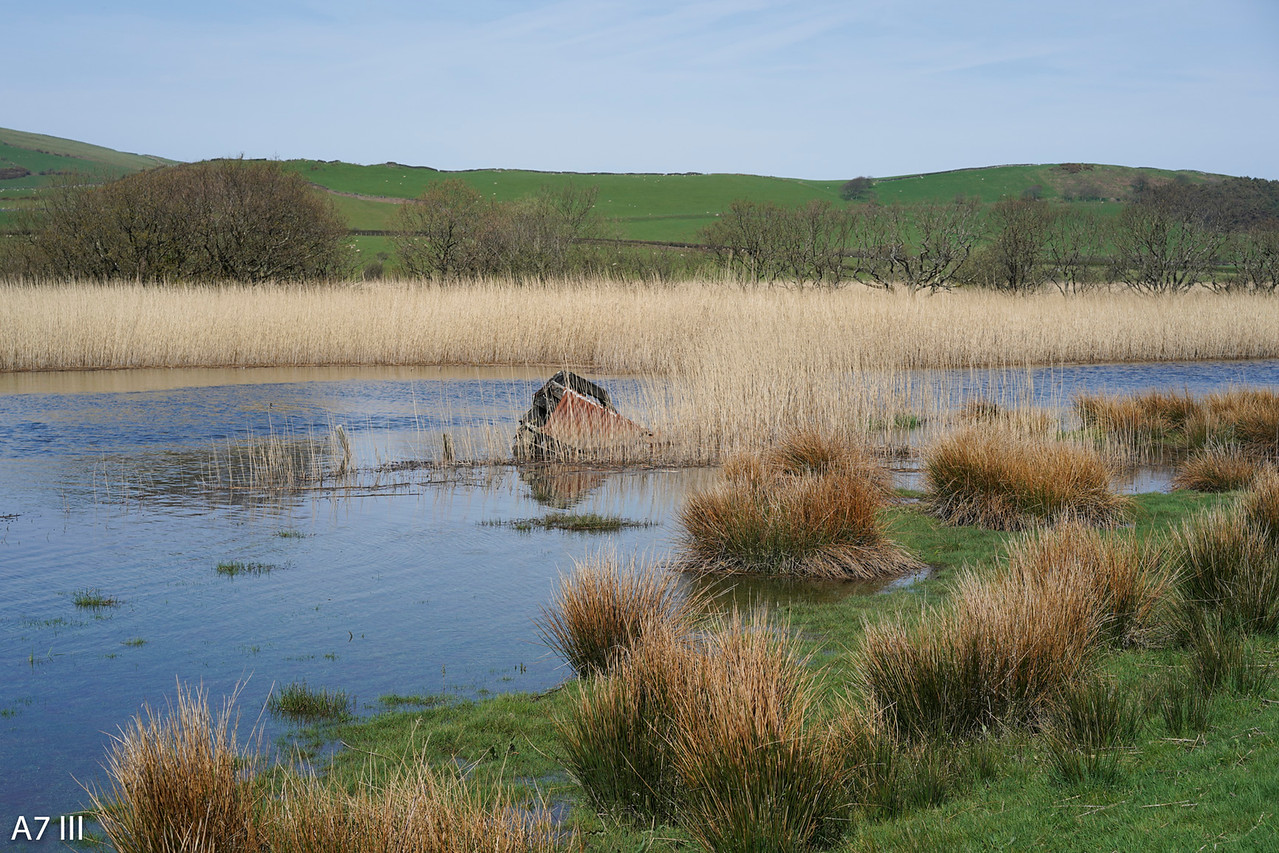
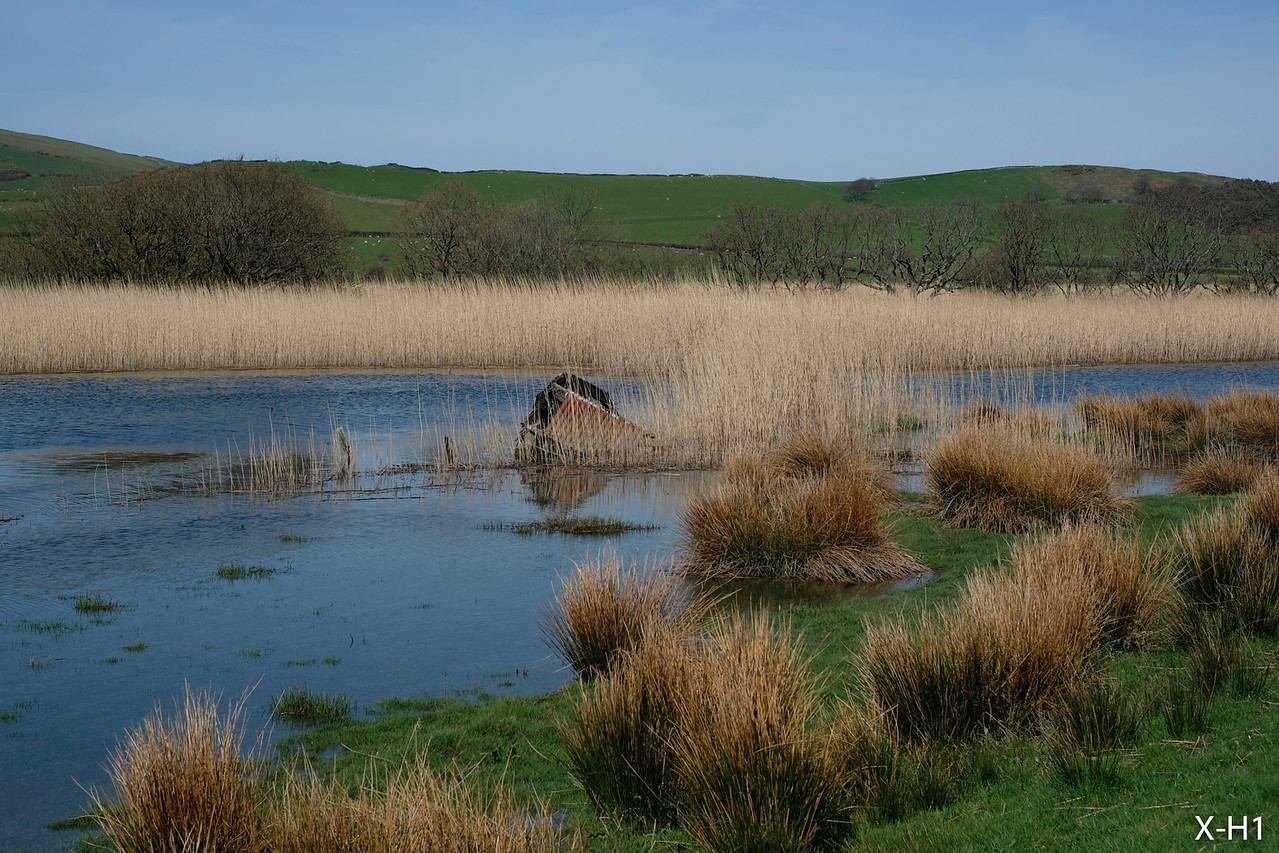
Well the answer is “yes” but there are two important factors to take into account. The first and most obvious one is the lens you put in front of the sensor. For my tests I used the FE 55mm f/1.8 and XF 35mm f/1.4 which, in addition to giving me a similar field of view, are also very sharp when stopped down between f/4 and f/8.
The second factor concerns RAW files and post processing. The demoisaicing process involved with Fuji X-Trans files can create more significant differences depending on the software you use, as well as the type of details you’re dealing with.
Below you can see how my go-to program (Adobe Lightroom) compares to two other powerful software programs: Iridient Developer and Capture One. I tested the differences for different types of scenes: streetscapes and landscapes. For each file and software, I applied as much sharpening as possible without sacificing a natural rendering, which can easily be lost if you increase the values too much.


With the buildings, the difference is subtle. The Sony file is handled well by the three programs whereas the X-H1 version shows a small advantage when used with Iridient: fine details appear a little bit sharper while Capture One gives more contrast just like with the Sony file.


In the second example, once again the Sony results are close, although Capture One is able to give extra contrast. For Fuji however, we can clearly see that Lightroom is the weakest when it comes to rendering foliage. Details appear more washed out, creating some kind of watercolour effect. Iridient does the best job in this case.
However Lightroom version 8.2 has a new function called Enhance Details that improves details rendering. I couldn’t spot a relevant difference with the A7 III while the improvement is visible on the X-H1 files.

Another small difference I noticed concerns moiré. Despite having an AA filter, the Sony displays some artefacts unlike the Fuji camera. However I wouldn’t be too concerned as I had to crop in at 200% to show you the difference clearly enough.

Exposure, Dynamic range and Flare
One thing I noticed on multiple occasions during this comparison and while producing previous content with Sony and Fujifilm cameras is a difference in sensitivity. Not only does their base ISO start from two different values (100 for Sony, 200 for Fujifilm) but there is a difference of approximately 2/3Ev when shooting with the same exposure settings on the two cameras as well.
This difference has been subject of many discussions and articles on the web. Some say that Fujifilm is cheating with its ISO rating, whereas a more plausible explanation is that the two companies use different ISO standards (REI – Recommended Exposure Index for Sony, SOS – Standard Output Sensitivity for Fuji).
Now the reason I’m bringing this to the table is not to feed the debate. In a realistic situation, photographers who are out taking pictures adjust their exposure based on what they see, what their metering is telling them and most importantly, what they want to achieve. They are certainly not worrying about how their camera compares to one they don’t own.
In my case however, I had to think about which solution was more fair: to shoot with the same exposure settings, or to overexpose the Fuji image by +2/3Ev to match the brightness of the Sony image. Well, for certain tests, I decided to do both. I think it’s the easiest way to show you how relevant (or irrelevant) this difference in sensitivity is. It made my job a bit more complicated, but hopefully it makes things clearer for you.
Before showing you my first dynamic range test, one other thing I should add is that both cameras have a 14-bit output with the RAW files, but while Fujifilm offers uncompressed and lossless compressed options, Sony has uncompressed and compressed settings. The difference mainly relates to the size of the files, but “compressed” on the A7 III means that there is a loss in data when selecting that option. That being said, I only found it to be relevant when doing heavy post-processing that involves lots of shadow recovery. For all my main tests, I stuck with uncompressed on both.
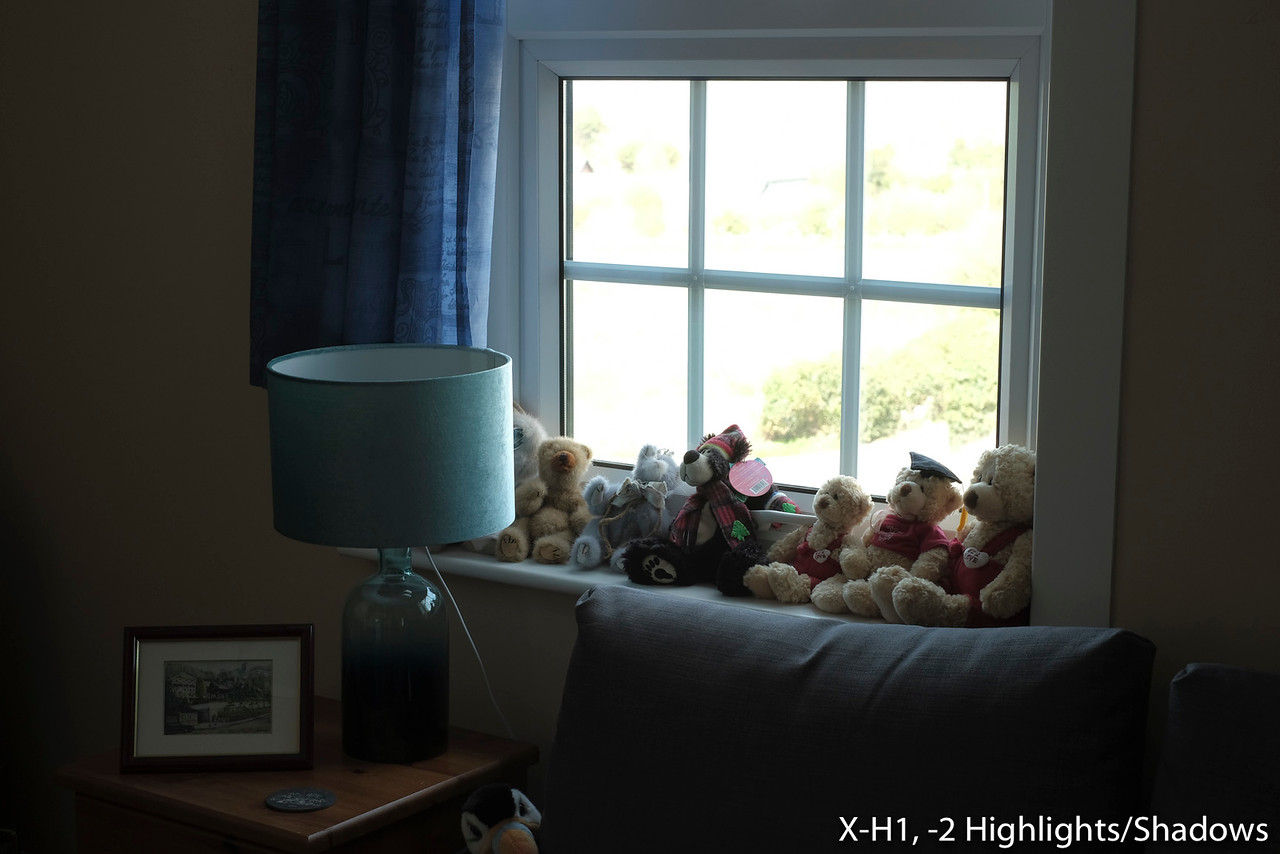
Our first scene deals with strong contrast between the interior and exterior light. The first example shows an underexposed image that preserves all the highlights. My aim was to see how many details both cameras can recover in the shadows.

As you can see, the Fuji produces more noise in the darkest areas of the image and has less smooth tonal transitions. If I compensate the exposure to match the brightness of the A7 III, the result improves but not enough to match the Sony result.

The second example is opposite to the first one: I overexposed the scene to see how many details I could recover in the highlights. When selecting the same exposure settings on both cameras, the result is pretty close. If I match the brightness of the Sony however, highlights recovery weakens on the X-H1.


The third and final dynamic range test is more extreme. I started by underexposing a low light scene by 4 stops at the cameras’ respective base ISO (100 and 200). Then I compensated by raising the ISO sensitivity and compared these results to recovering the same amount of exposure in post production.
As you can see below, the high ISO shot taken with the correct exposure gives less noise than bringing back the exposure in post. Once again, the A7 III has less noise.


If we turn to SOOC JPGs, obviously dynamic range is more limited than with the RAW files but both cameras include settings to optimise it a little. Sony has a function called DRO (Dynamic Range Optimiser) with five levels to choose from. It mainly helps you open the shadows but it is not very powerful with the highlights.
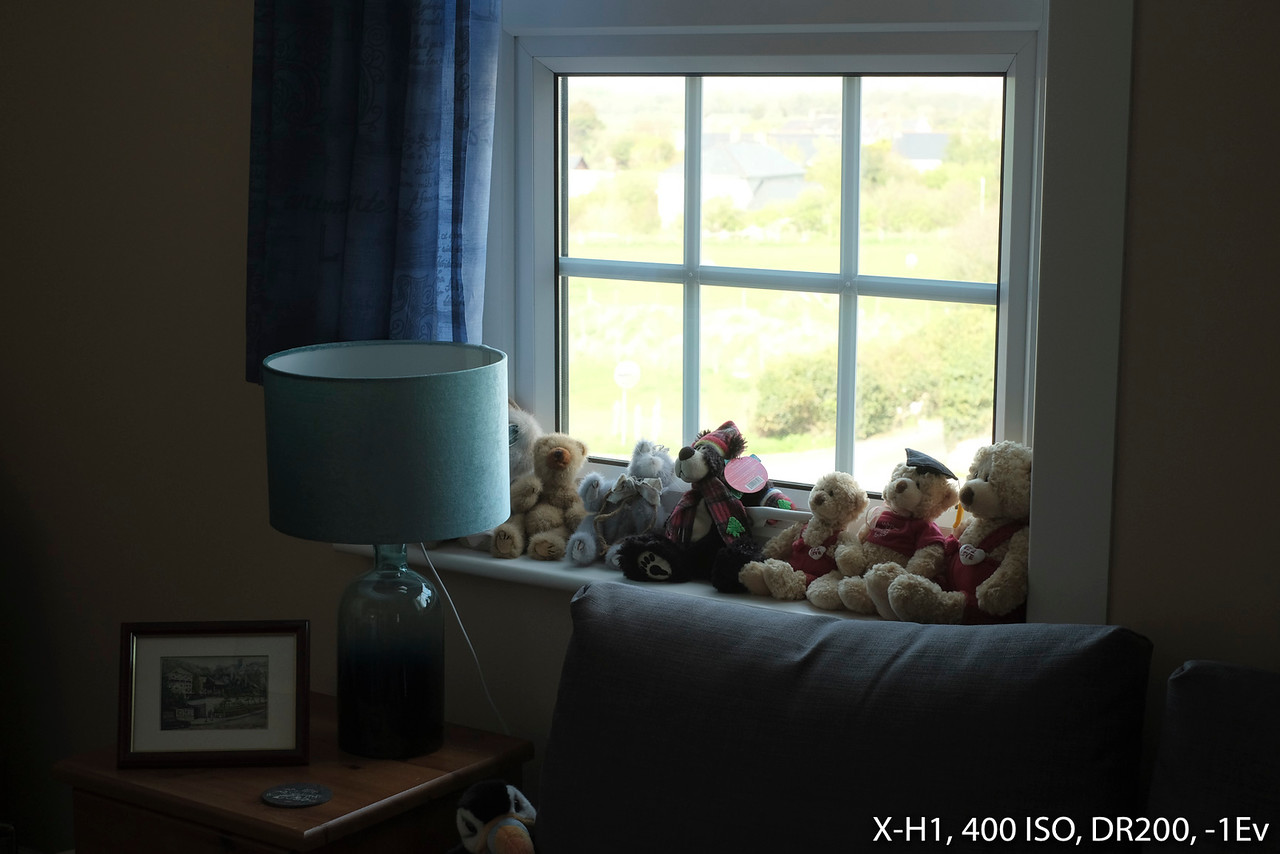
On the X-H1 you can play with the highlight and shadow settings but what makes a difference is the DR option. You can increase the ISO to 400 or 800 and set it to DR200% or DR400% to protect the highlight areas. As a result, you have more leeway to find a balanced exposure between shadows and highlights as you can see below.


When it comes to metering, the A7 III has six different options including: Multi, Centre, Spot (Standard and Large), Entire Screen Average and Highlight. The X-H1 has four settings: Multi, Centre, Spot and Average.
- Both cameras give similar results with the Multi mode, whereas the X-H1 tends to underexpose by 1 stop when using Centre Weight
- The Sony has two Spot modes with Large overexposing more than Standard. Spot on the Fuji gives a more balanced result.
- Entire Screen Average on the Sony overexposes slightly more than Average on the Fuji, whereas Highlight protects the brighter areas by underexposing severely.
Finally a word about sensor flare. Some reviewers and users have reported stripe artefacts in backlit conditions with the A7 III. According to DPReview, it’s likely due to light being reflected off the metal masks of the phase detection pixels. I had to push the camera to the limit to find some mild traces of it as you can see below.


Earlier versions of Fujifilm’s 24MP sensor produced strong purple flare and a grid artefact in the image when shooting in similar situations. Starting with the X-T20, the effect seems to have been minimised and this seems valid for more recent copies of the X-Pro2 and X-T2. The X-H1 is no exception and the only traces I found were in extreme conditions just like with the Sony. A vibrant sunset can also produce a similar effect.


ISO Performance
The A7 III has a normal range of 100 to 51200 ISO, plus extended values that go as low as 50 and as high as 204800 ISO. The X-H1 has a smaller range of 200 to 12800 ISO, with extended values of pull 100 and push 51200.
Similar to the topic mentioned in the previous chapter, the difference in brightness is valid at all ISO levels when choosing the same exposure settings.

To make the side-by-side crops easier to compare, I adjusted the exposure of the X-H1 during the shoot to match the same brightness of the A7 III. The example above is enough to make you aware of the exposure difference, which means that even before seeing which one produces more noise, you know that the Sony gives you an advantage in terms of sensitivity.
From ISO 1600, we start to see more noise on the X-H1, and the difference gradually becomes more relevant until we reach 12800 ISO. Similar to many other Fuji cameras I’ve tested, the X-H1 files need almost no colour noise reduction whereas I had to apply a little more to the Sony files.


The difference becomes more tangible from 25600 and 51200, which is not surprising since at these values I’m using the extended range on the X-H1.


The A7 III has two extra steps of sensitivity (102400 and 204800) where noise becomes really invasive.

If you choose to use straight out of camera JPGs, you can vary the noise reduction applied by the camera processor.
The A7 III has three levels: Off, Low and Standard and I tend to choose the middle level as it gives the best balance between sharpness and noise.
The X-H1 has 9 levels going from -4 (less NR) to +4 (more NR). It gives you more leeway for adjustments and does a better job in containing noise without sacrificing details if you stay between -4 and 0.

The final test I did at high ISOs was an astro-photography test. You may have heard of the “star eating” issue of many Sony cameras, where too much noise reduction is applied by default (even with NR for long exposure turned to Off), resulting in the camera confusing small stars with noise. Things have improved on the A7 III but I was curious to see how it would compare with the X-H1.


As you can see the number of stars capture by both sensors is similar but Sony does a little better and shows less noise after post processing the files.
Colour Profiles, White Balance and other Settings
When working with the RAW files, it is usually easy to match a similar colour rendition when using the same profile. The scene below proved a little more challenging than expected however. I applied the Adobe Landscape profile and adjusted colours and contrast to give both images lots of colour vibrance but a difference remains when it comes to how the cameras render blue, yellow and green.
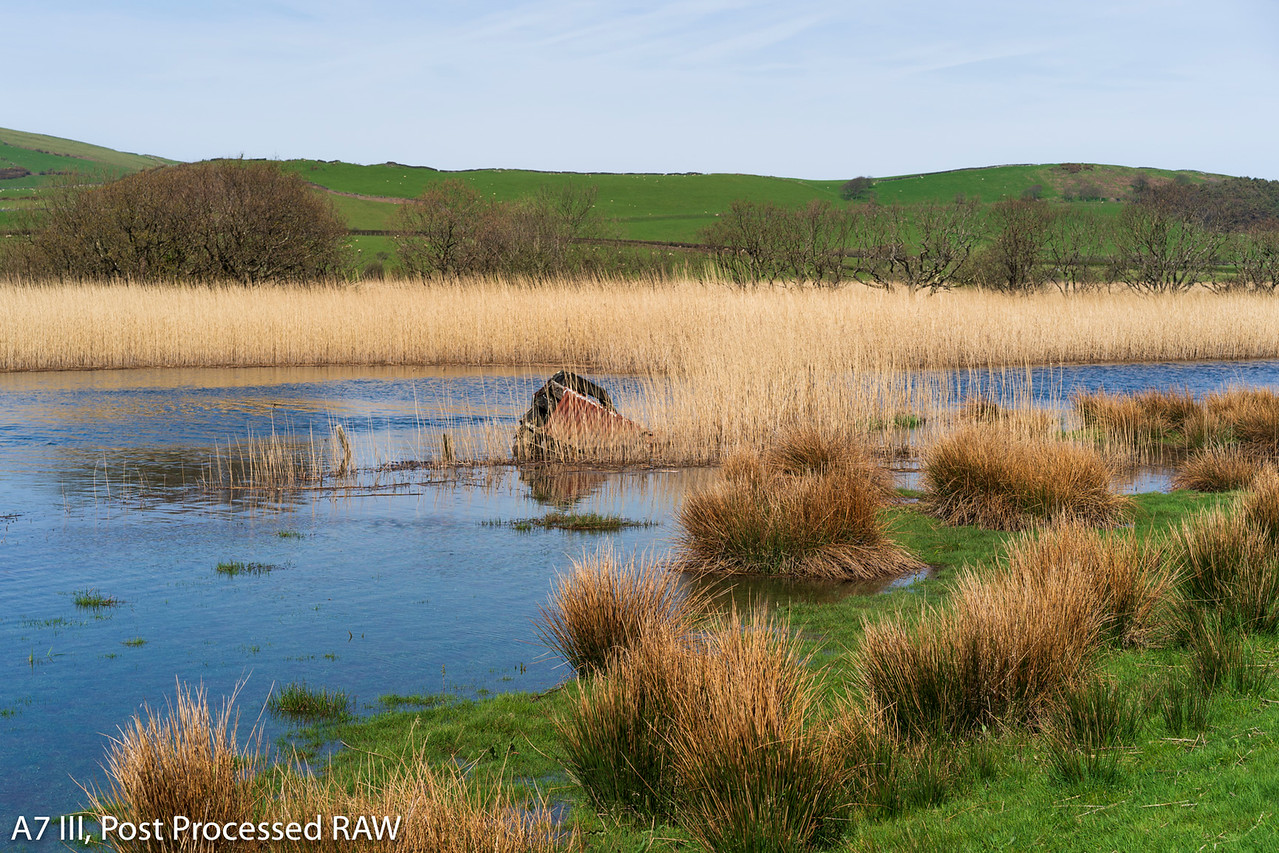
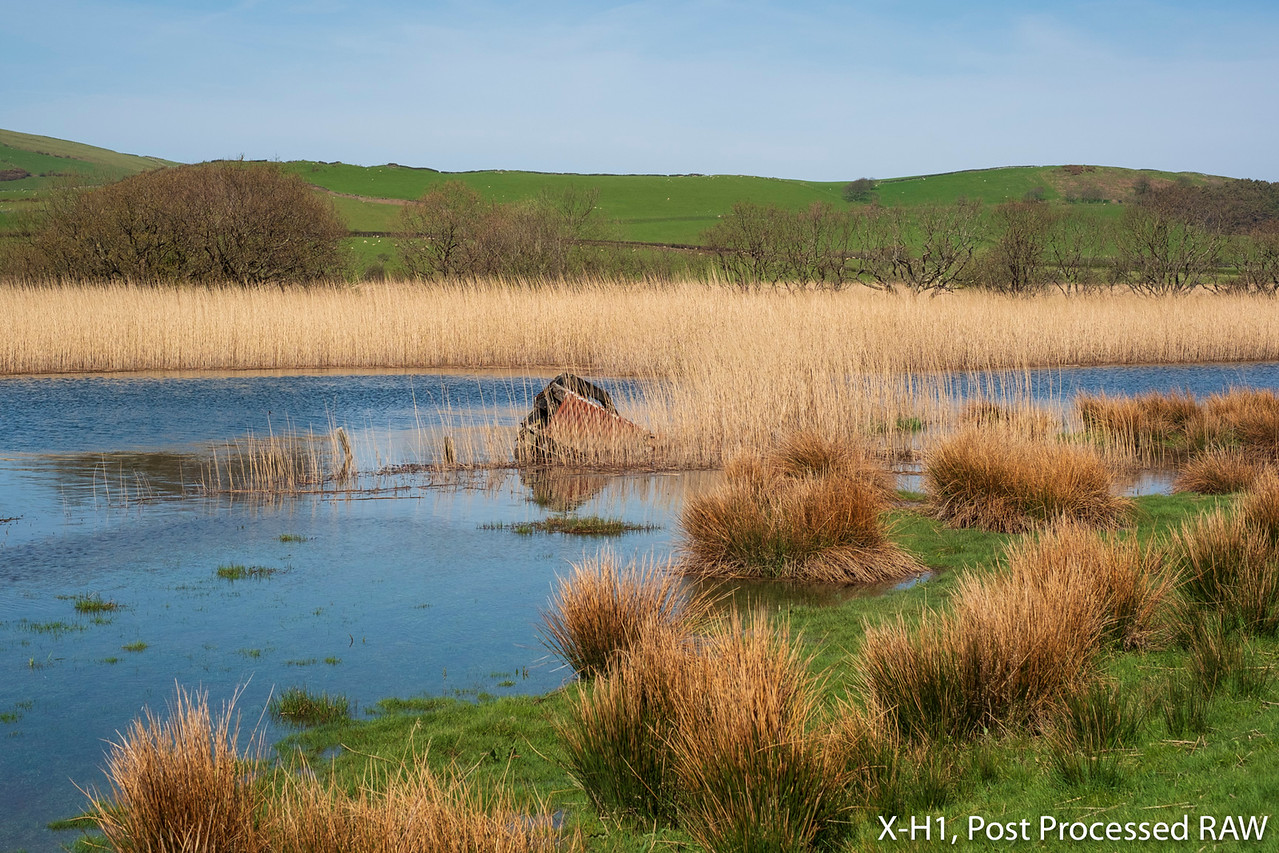
Note: colours can change depending on the software used. For example Capture One or Iridient apply a different colour profile for each camera.
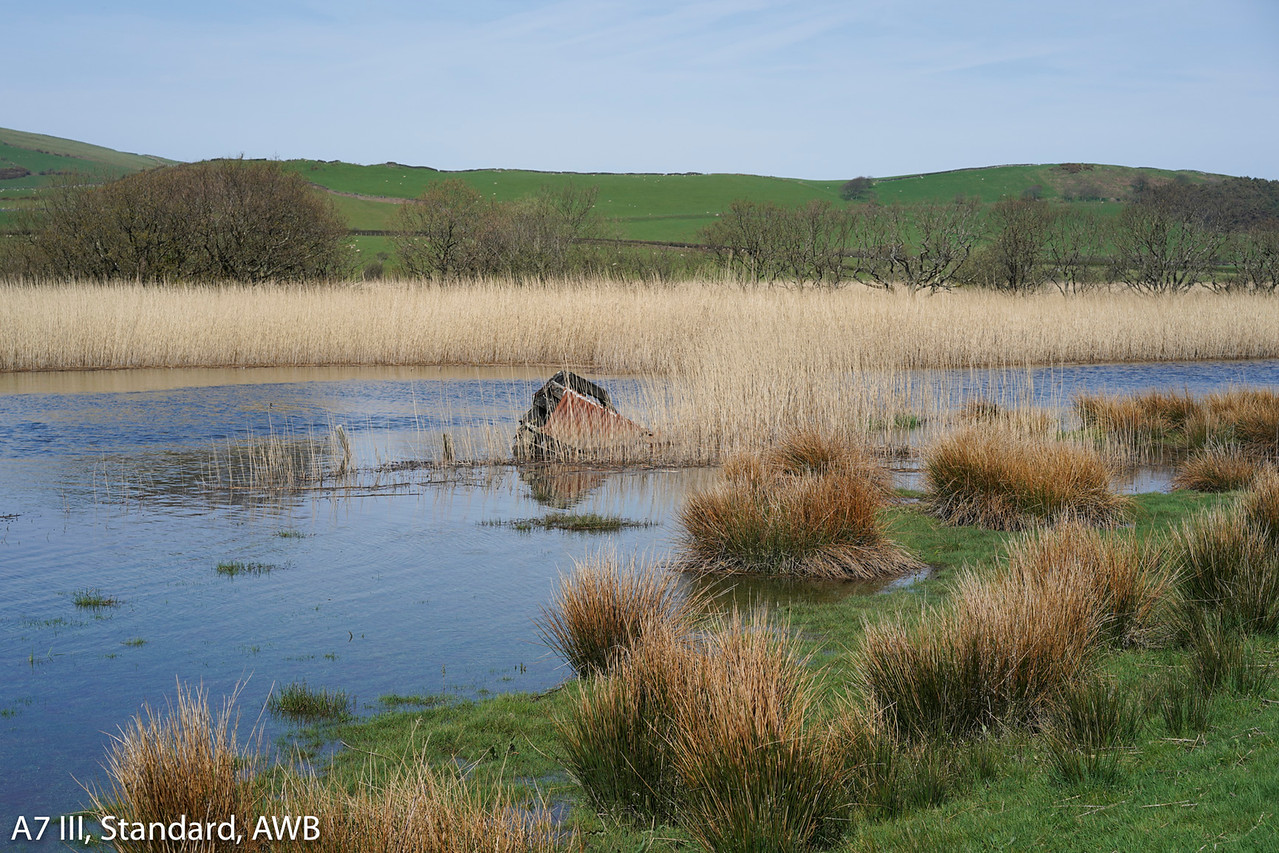
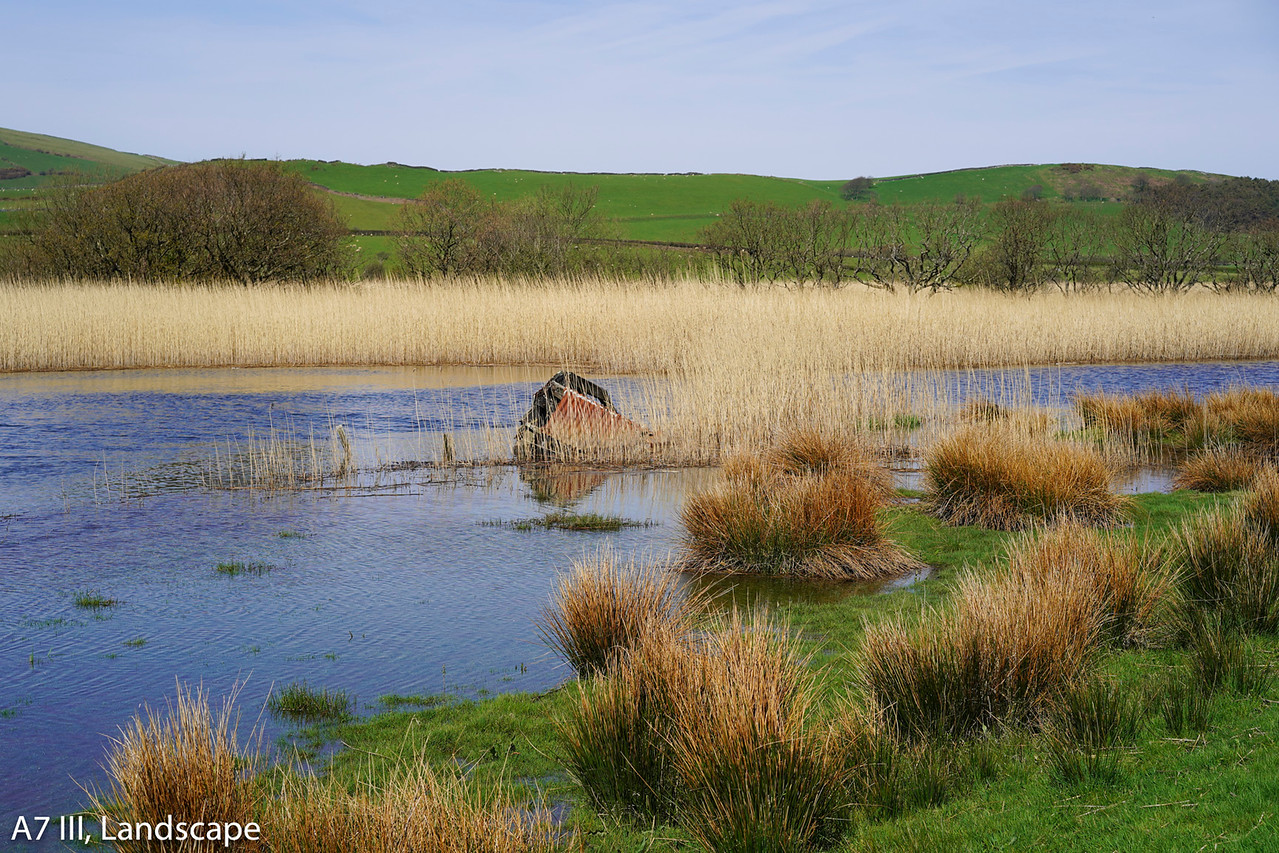
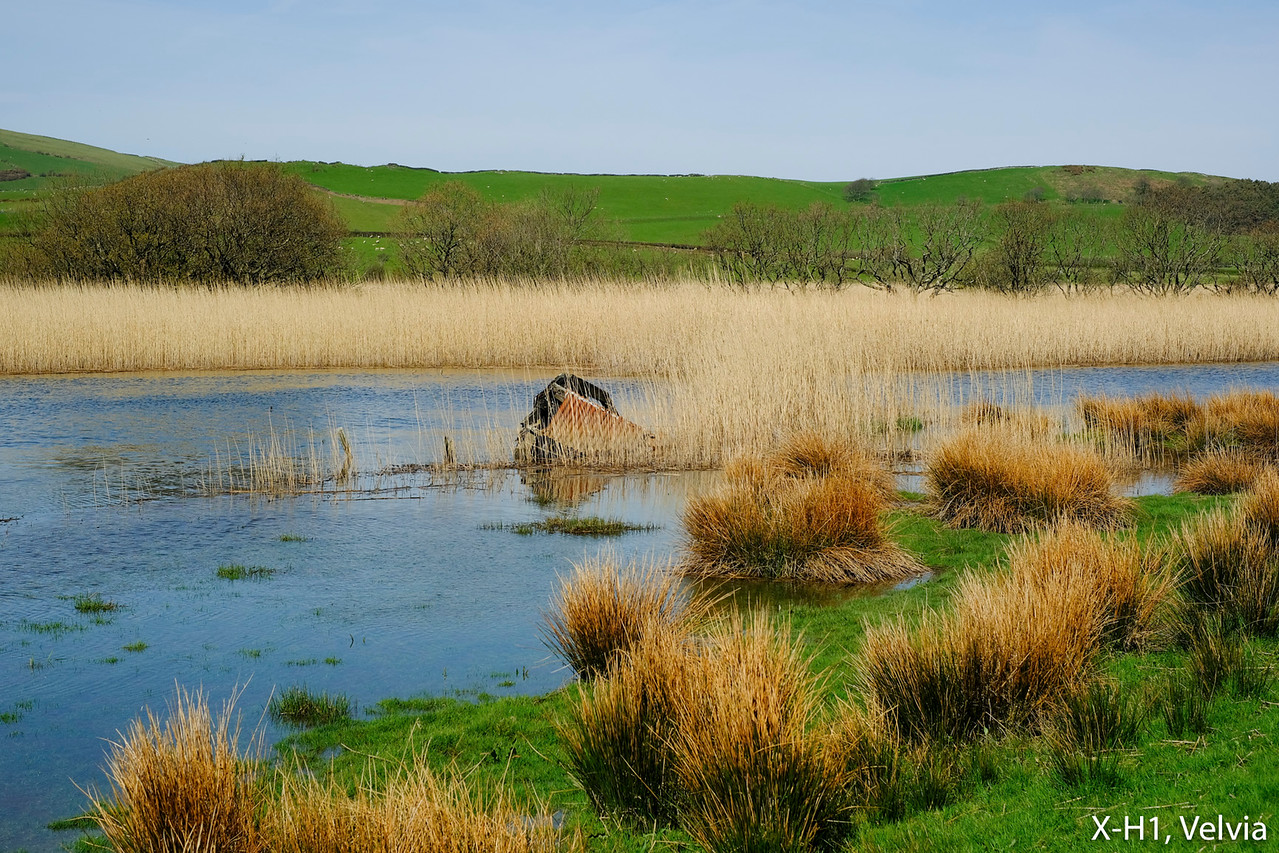
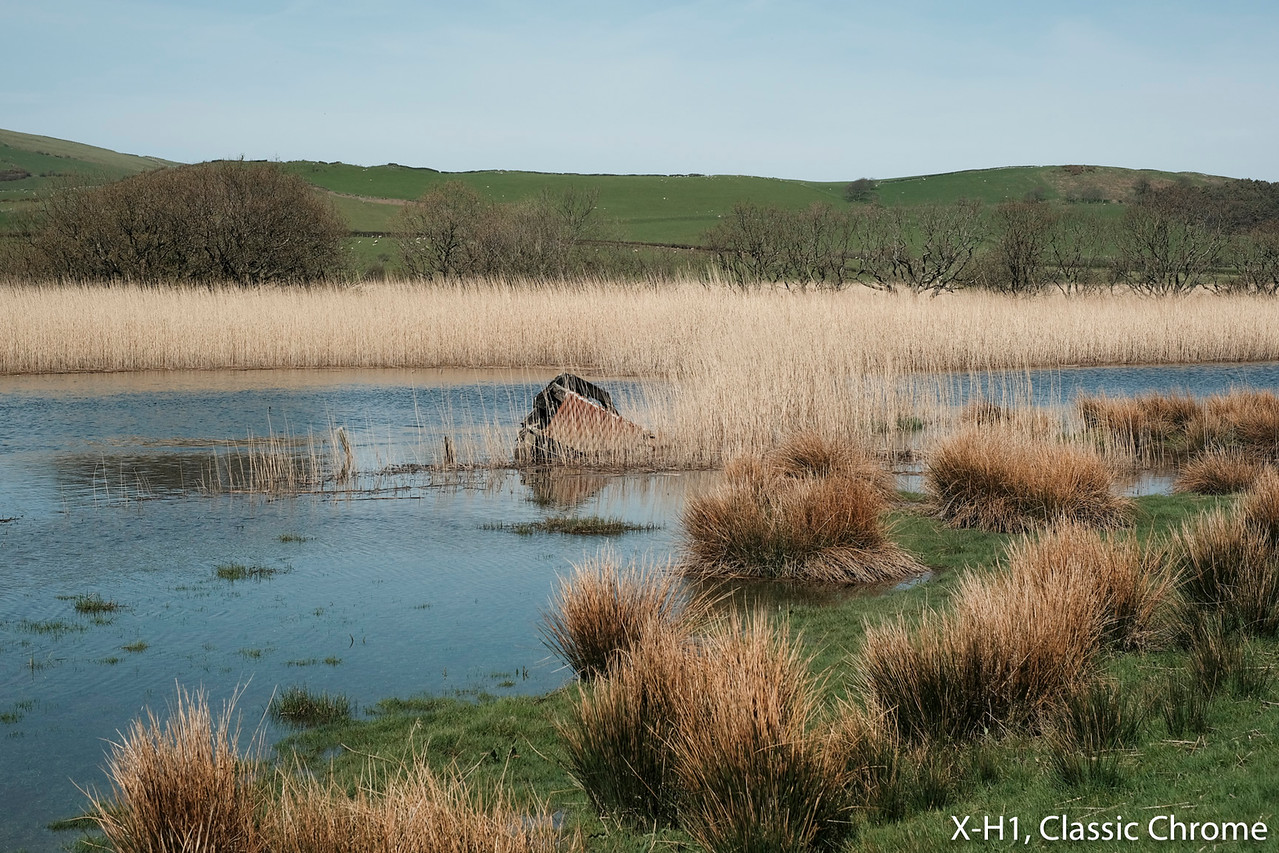
The difference in colour palette becomes more evident with the built-in camera profiles, called Creative Styles on the A7 III and Film Simulation modes on the X-H1.
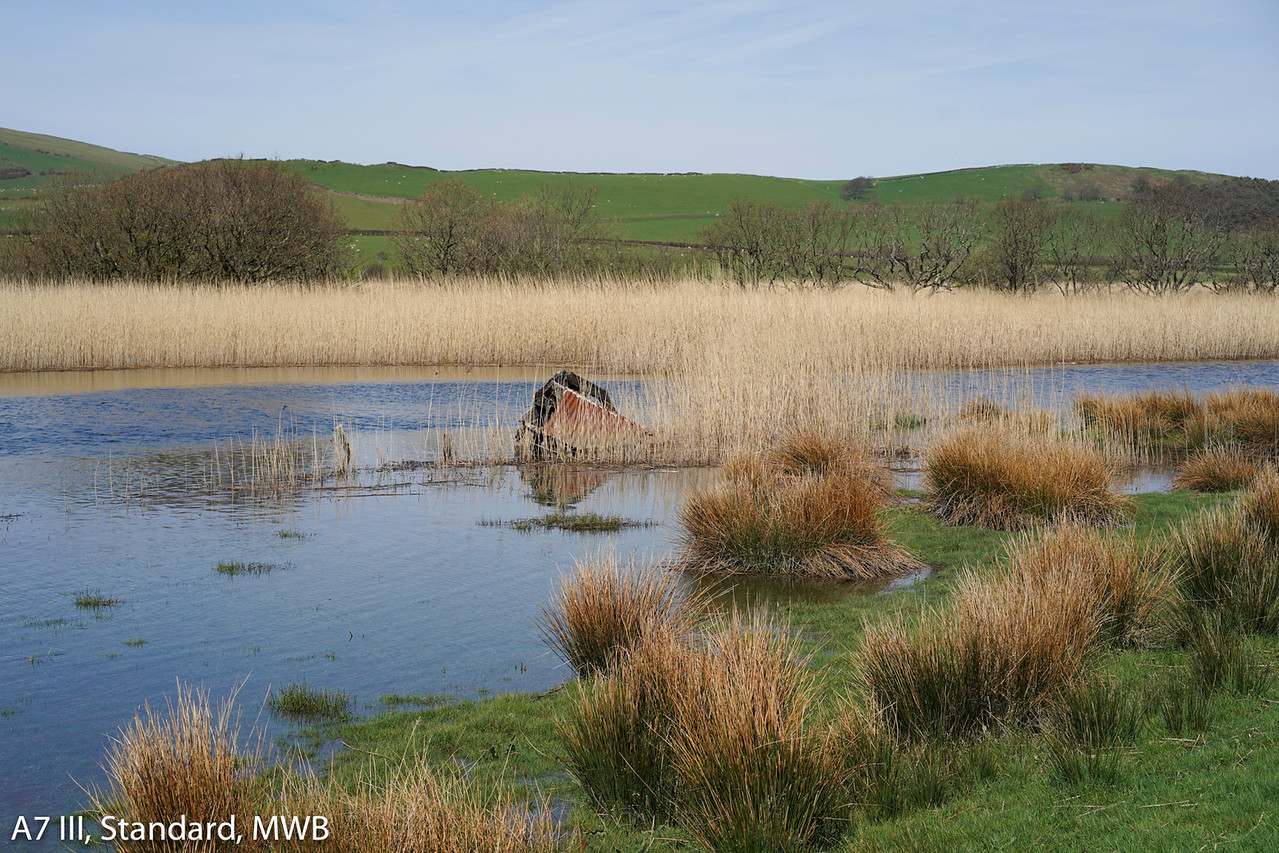
First let’s see how the white balance of the two cameras behaves. When set to Auto, both have a cooler rendering while with a manual adjustment, the X-H1 also displays a greenish tint.
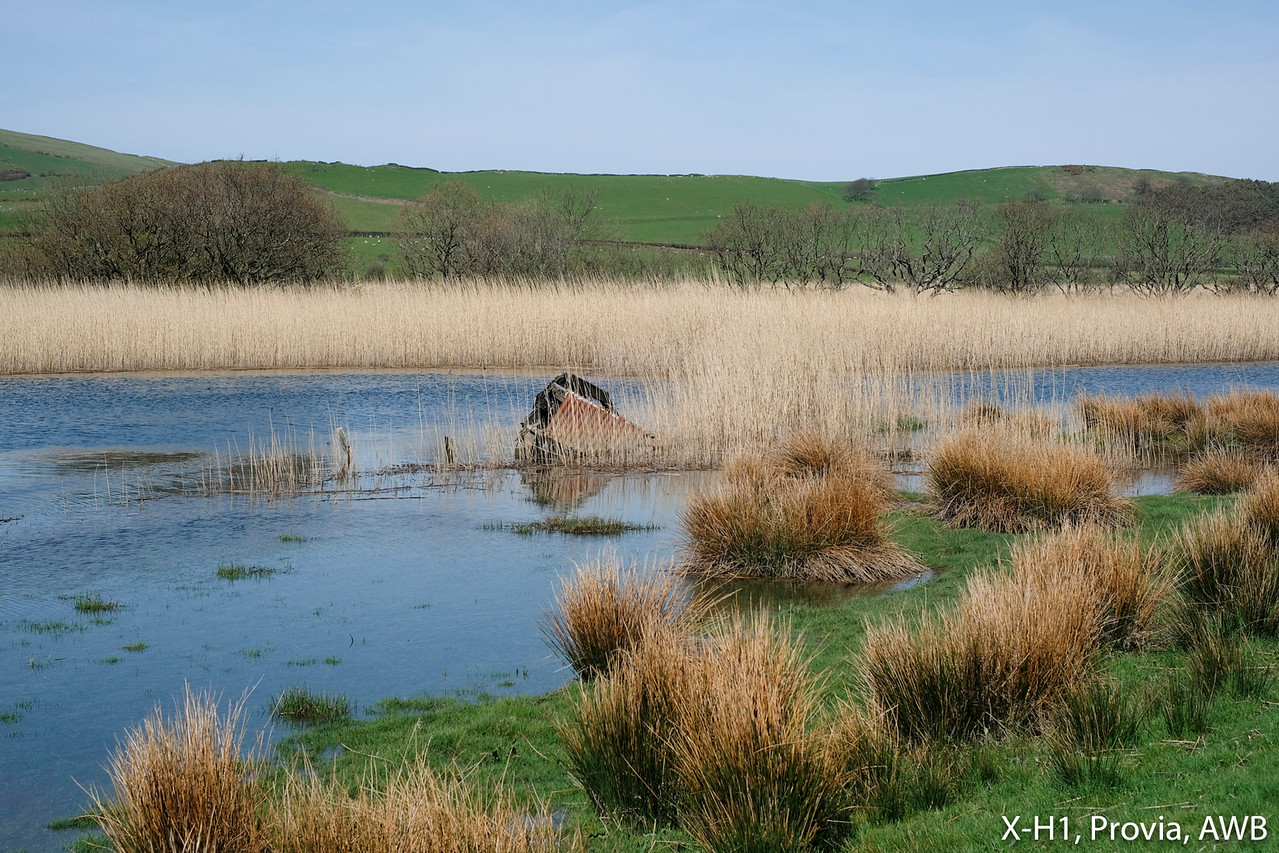

The two standard profiles above already give you a hint of the different directions the two companies have taken when it comes to colours. It becomes more evident with stronger profiles such as Landscape and Velvia. The same goes for profiles that have less saturation but retain good contrast such as Clear and Classic Chrome.

There are a number of profiles available on each camera of course. The A7 III has 13 plus six that can be customised, whereas the X-H1 has 8 colour profiles and two monochrome profiles with 4 variations each.
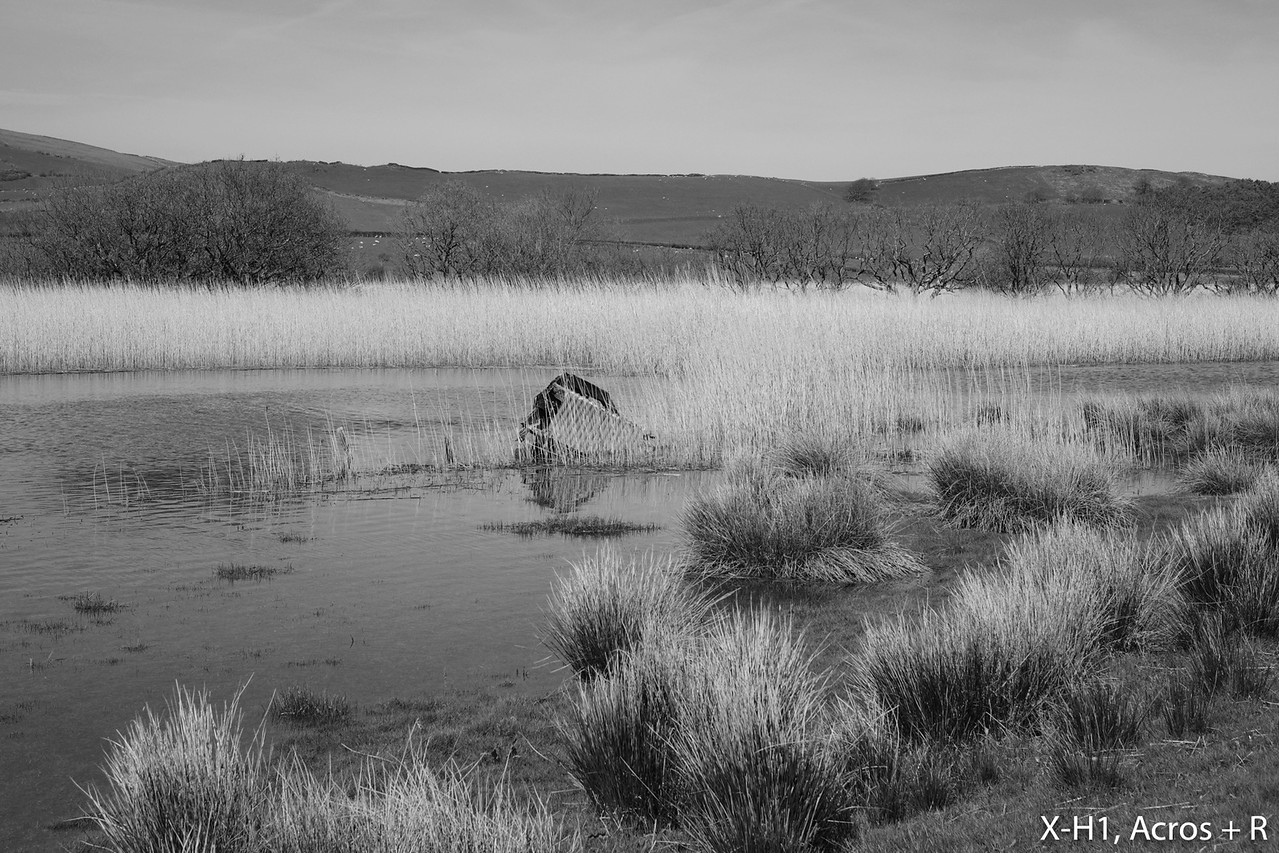
Speaking of black and white, the Sony only has one profile whereas the X-H1 gives you a choice between Monochrome and Acros (the latter has more contrast) and more importantly, a choice of different filters to increase contrast, as you can see in the example below.
Note: some software programs such as Lightroom include a version of the camera profiles that you can select when post processing your RAW file.

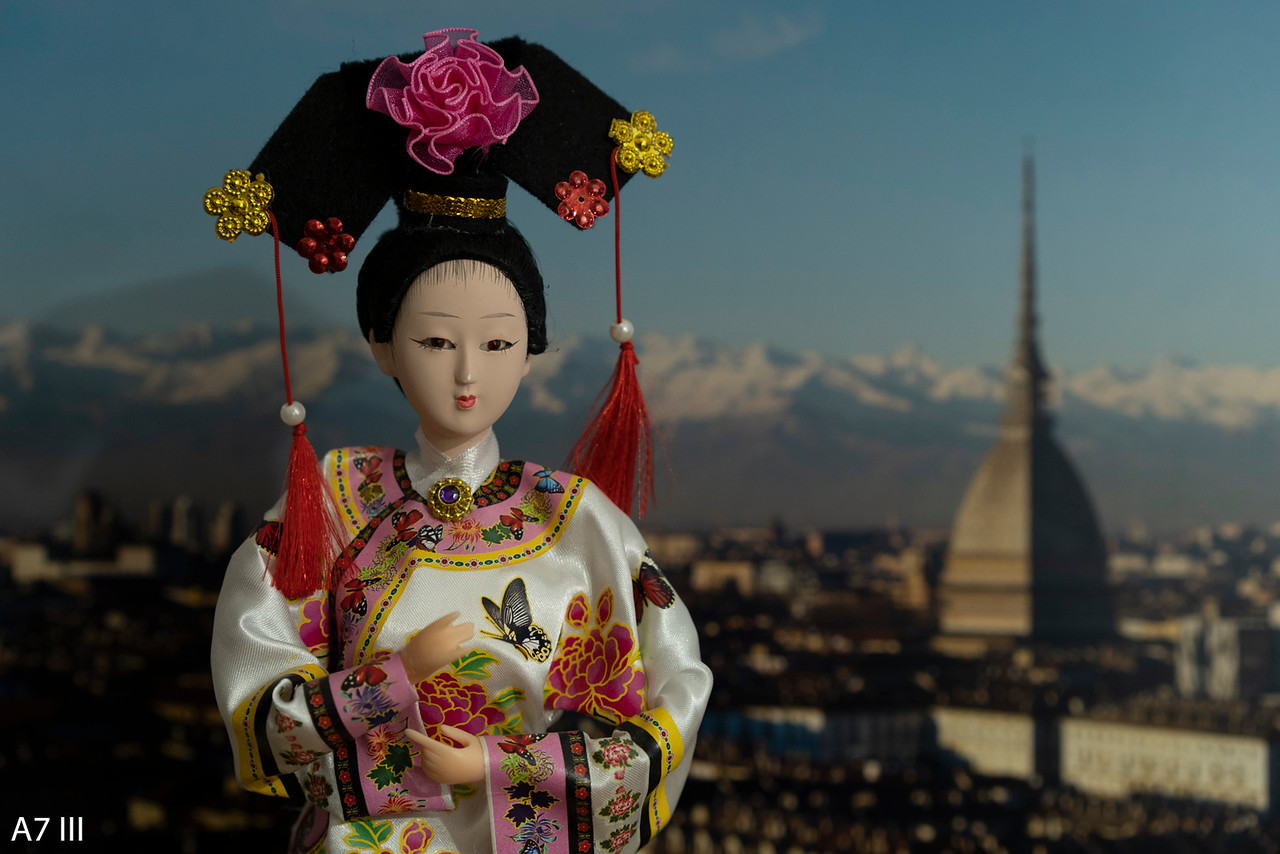
Then we move to another area of interest: skin tones. Here the RAW files look quite similar and I didn’t need to do much to have similar rendering using the Adobe Portrait profile.

The camera profiles tell us a different story once again and here the white balance can play a more crucial role depending on your light source.
In our set with one single LED light source, you can see that the X-H1 produces a much redder tone with AutoWB whereas the A7 is more natural. Switch to manual WB (around 5300°k) and both have a green dominance, with that of the X-H1 being stronger.


The best solution in this case is to customise the white balance either by recording it with the help of a grey card, or using the custom settings available on each camera to get rid of the green tint.

Most picture profiles on the A7 III tend to be a bit too sharp for the skin unless you choose the Portrait profile which gives a smoother rendering. Another solution is to decrease sharpness to -1 or -2. Be aware though that the Portrait style has a stronger tint dominance and depending on your white balance settings, can lean towards yellow or red.
The X-H1 has a more delicate rendering overall, although some profiles like Astia give lots of contrast in comparison to the smoother Pro Neg Standard.


Both cameras have different settings to control the JPG output including contrast, saturation, and so on. One I was curious to test was sharpness to see which was capable of producing the crispest JPG while maintaining the natural rendering of fine details.
The A7 III does well with sharpness up +2. You can increase it to the maximum of +3 but I prefer to remain one step below as it already gives an excellent result. The same reasoning applies to the landscape scene.

The X-H1 rendering is not as sharp as the Sony but increasing the value to +4 helps a little with the foliage. However it can also add too much contrast to edges in other situations so it’s probably better to stay around +2. And remember that for other subjects such as portraits, you may want to keep sharpness to 0, if not even lower.

Finally, let’s have a look at white balance with common artificial light sources such as a lamp in a room. The A7 III does well with Auto White Balance: the result is quite natural. The X-H1 Auto WB gives a warmer result by comparison.
On the Sony you can set the AWB Priority to Ambience to warm the colours or white to make it more natural, which is very close to what AWB does in standard mode.

With manual white balance, the default value of 3200°k gives a strong green dominance once again, so you need to tweak the White Balance adjustments to correct colours. The manual value on the X-H1 has a stronger green dominance than the Sony so you need to use the WB shift to correct it.

This article continues on page 3.
Check the price of the Sony A7 III on
Amazon | Amazon UK | B&H Photo | eBay
Check price of the Fujifilm X-H1 on
Amazon | Amazon UK | B&H Photo | eBay
Second-hand Sony cameras on
Second-hand Fujifilm cameras on