The X-Pro1 marked the birth of the Fujifilm interchangeable-lens series. I remember it quite well because from the start, it provided a unique user experience thanks to its hybrid viewfinder and retro style dials (the same concept as the X100 series that began one year earlier). Then came the X-Pro2 which, in addition to inaugurating the third-generation sensor and processor, also brought important upgrades in image quality and autofocus performance.
Seven years after the beginning of the interchangeable-lens X-series, the X-Pro3 arrives. This time it comes after other cameras of the same generation, the popular X-T3 and X-T30, which offer advanced video capabilities. The X-Pro series may not sell as well as the other two, but it has held on to a faithful audience that appreciates the unique shooting experience more than technical specifications.
In this comparison preview, we take a look at the major improvements the X-Pro3 brings compared to its predecessor, the X-Pro2.
What the X-Pro2 and X-Pro3 have in common:
- rangefinder design
- APS-C size sensor
- weather sealing
- Dual SD card slot
- NP-W126S battery
Ethics statement: the following is based on our direct experience with the X-Pro2 and official information about the X-Pro3. We were not asked to write anything about these products, nor were we provided with any sort of compensation. Within the article, there are affiliate links. If you buy something after clicking the link, we will receive a small commission. To know more about our ethics, you can visit our full disclosure page. Thank you!
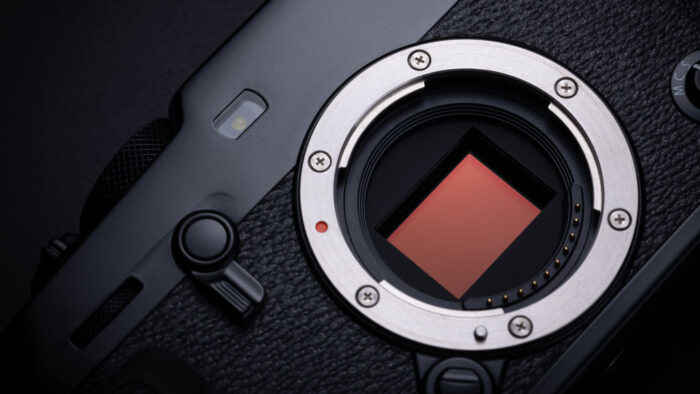
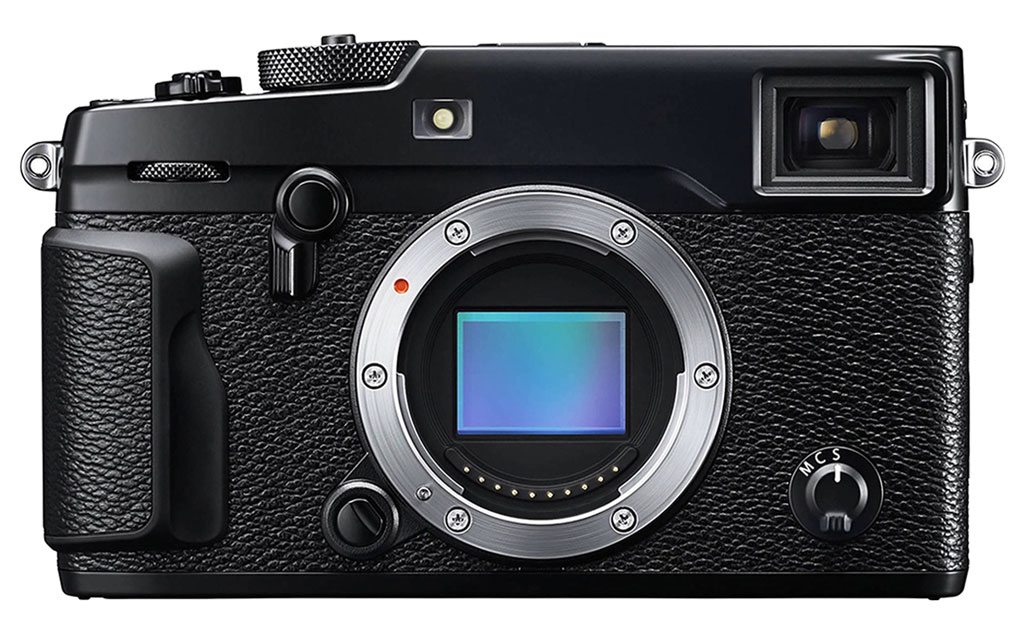
1. Image sensor
The X-Pro2 uses the third generation X-Trans APS-C sensor, which features 24.3MP, and the third generation X-Processor Pro engine. It is the same technology seen in the X-T2, X-T20, X-E3 and X-H1 mirrorless cameras.
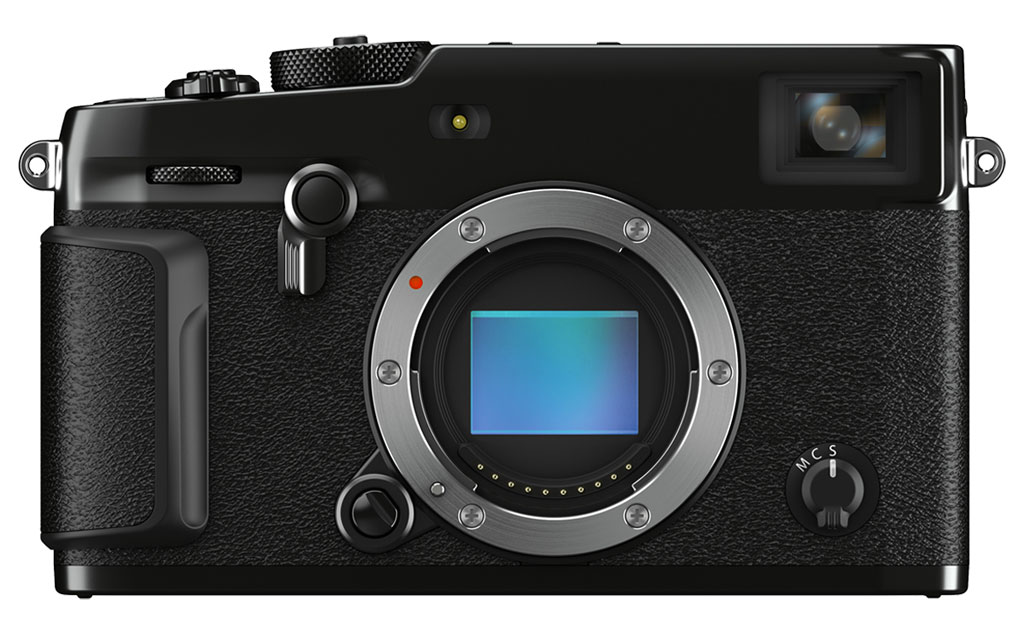
The X-Pro3 inherits the fourth generation X-Trans sensor with 26.1MP and a BSI (back-illuminated) design, as well as the X-Processor 4. It shares these specifications with the X-T3 and X-T30.
The sensitivity range is slightly different: the X-Pro2 starts from ISO 200 whereas the X-Pro3 begins at ISO 160. The extended “pull” values are also different: ISO 100 equivalent on the X-Pro2 and ISO 80 equivalent on the X-Pro3. The maximum output is the same however: 12800 ISO, or 51200 ISO with the extended levels.
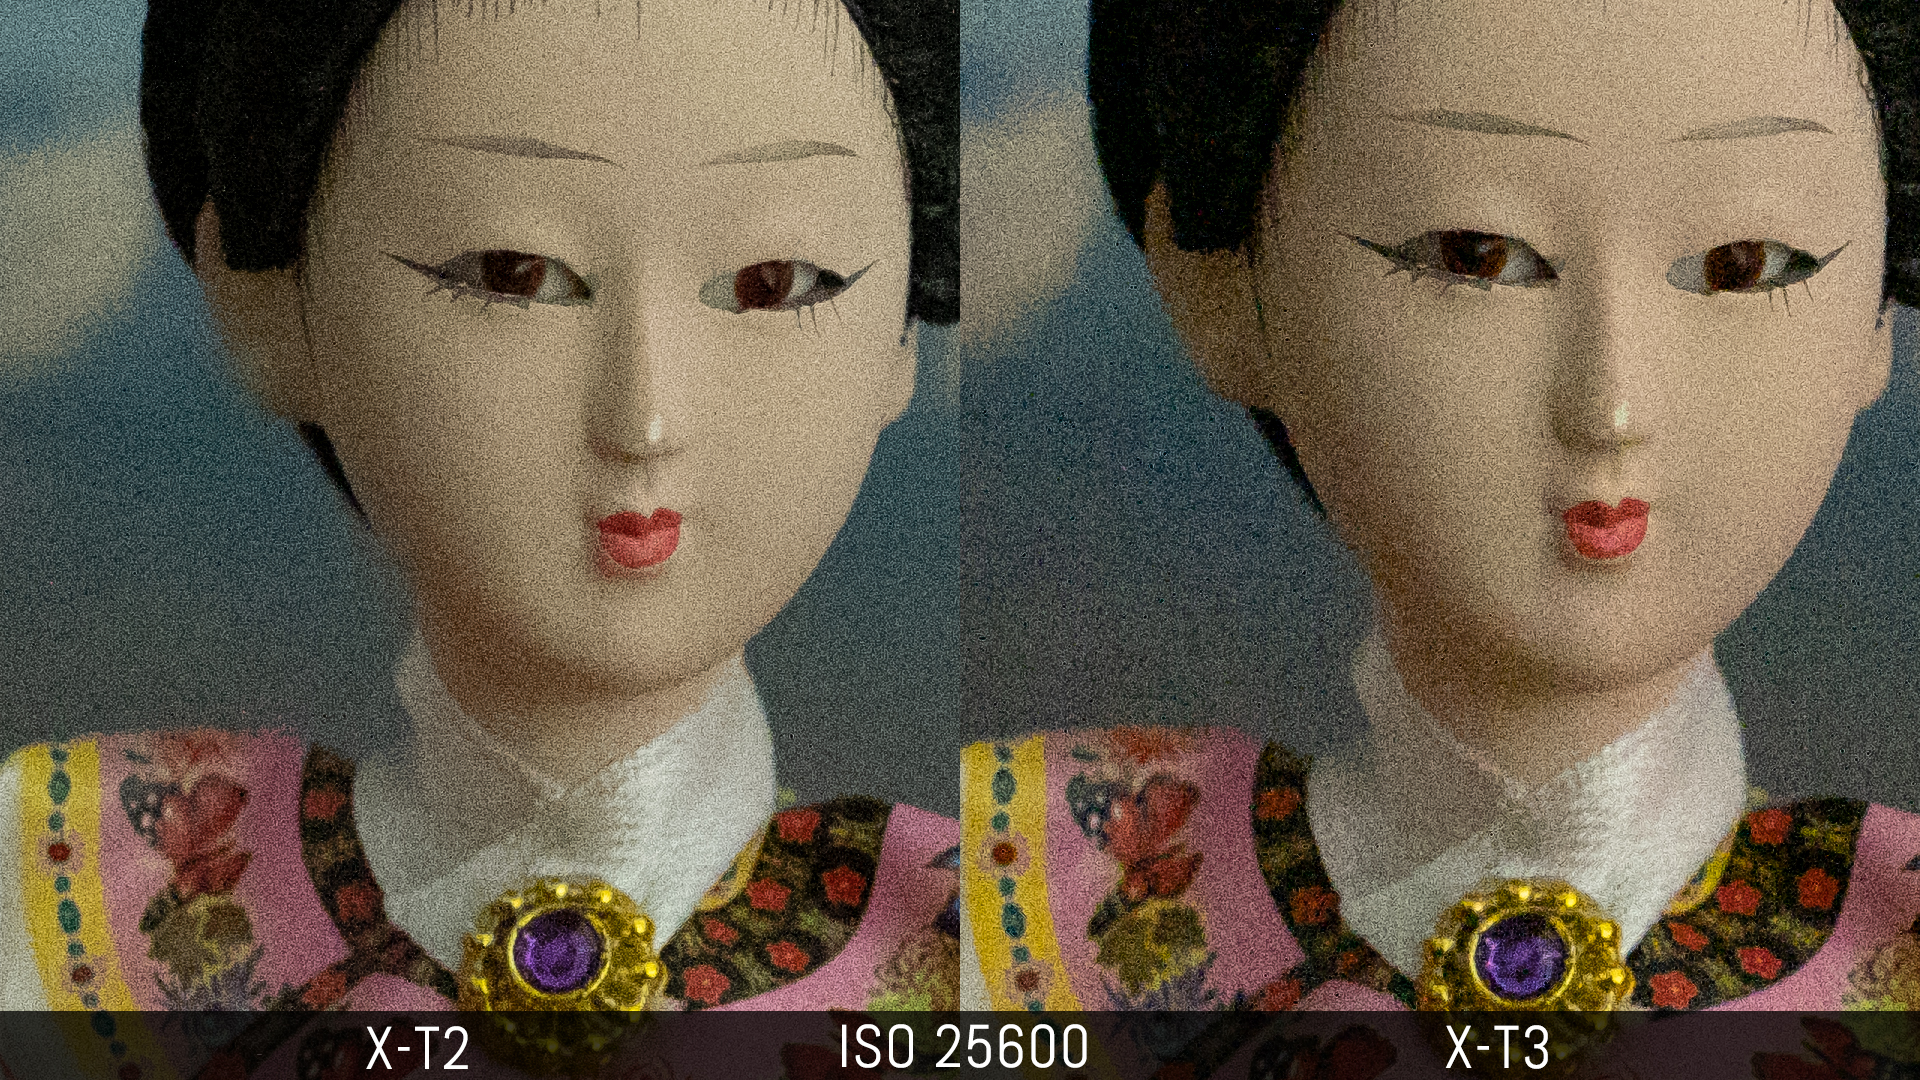
We compared these two sensors and image processors when testing the X-T2 and X-T3 side by side, so you can expect to see the same results with the X-Pro2 and X-Pro3. The truth is that there isn’t a huge difference in image quality between the 24MP and 26MP sensors, if not a small advantage for the X-T3/X-Pro3 when opening the shadows in post production (and the area is severely underexposed).
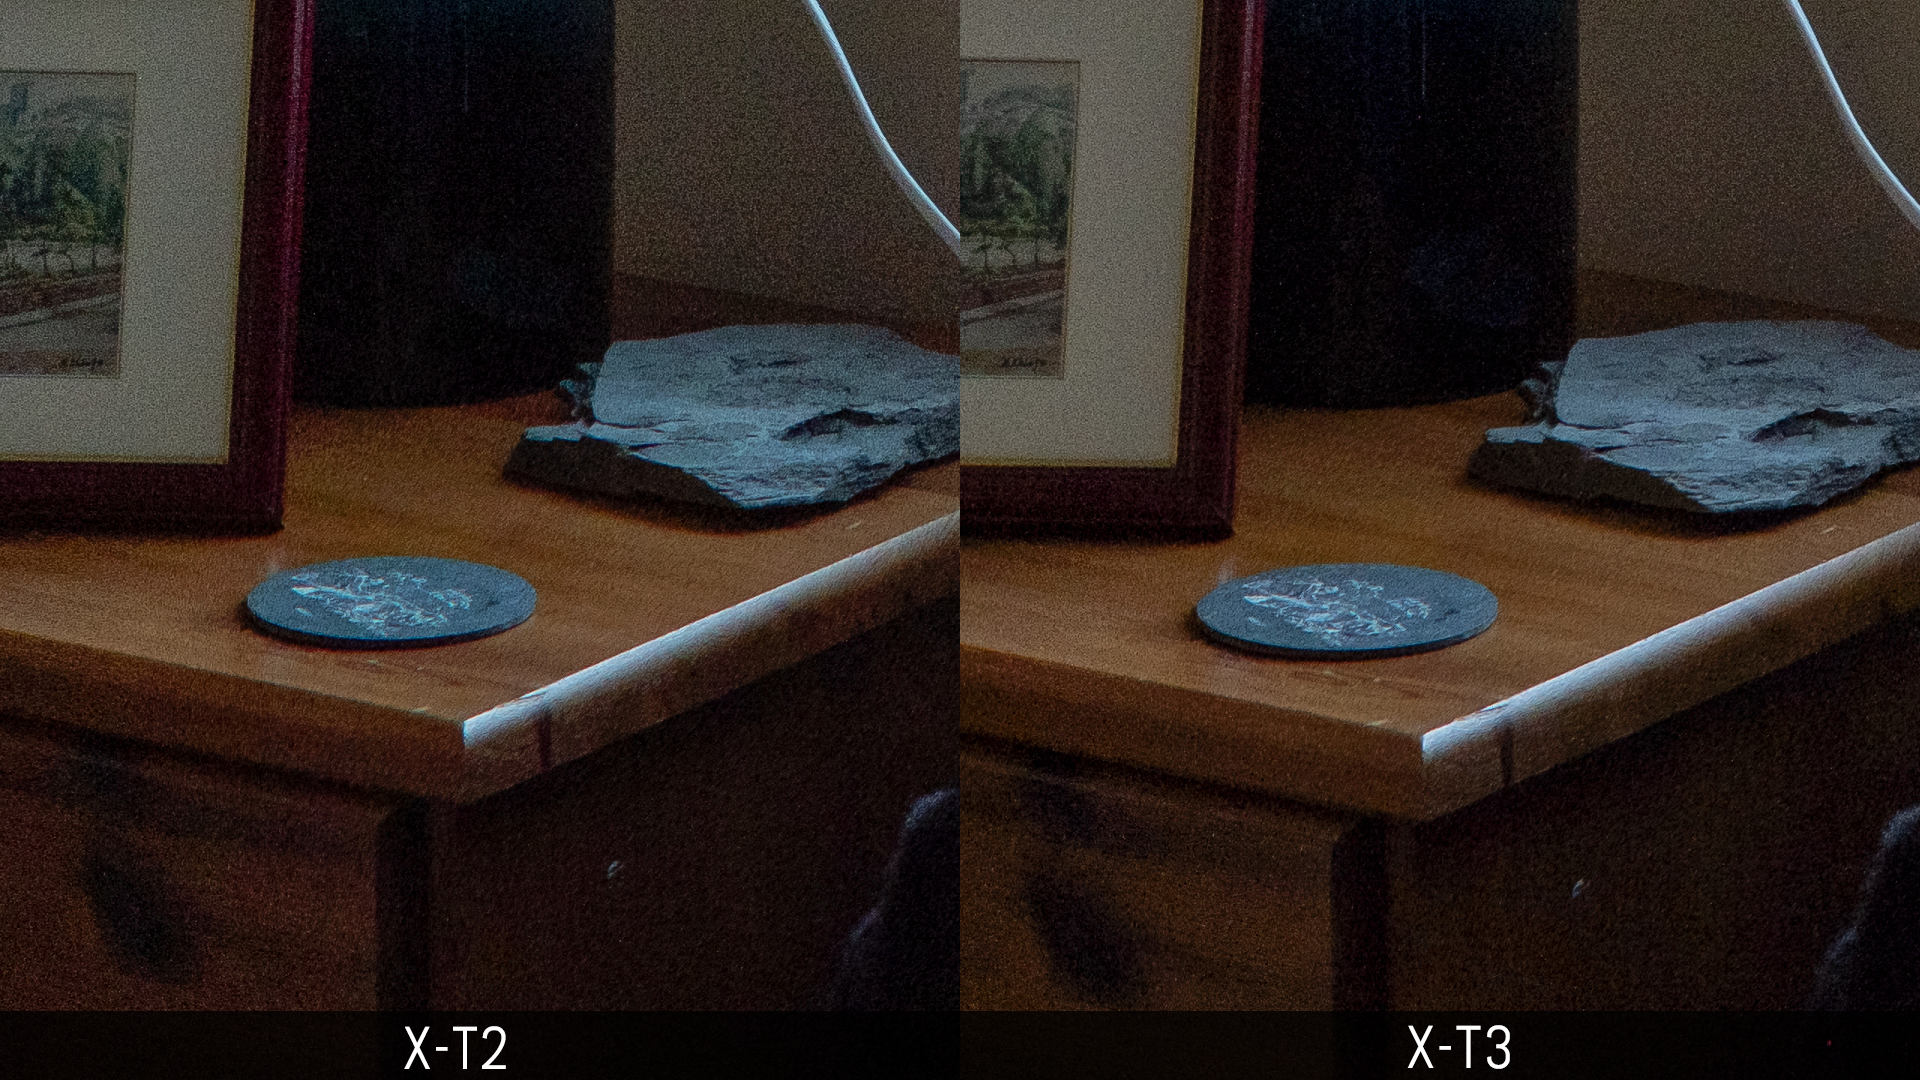
If we pixel peep, high ISO performance is slightly worse on the T3/Pro3 cameras.

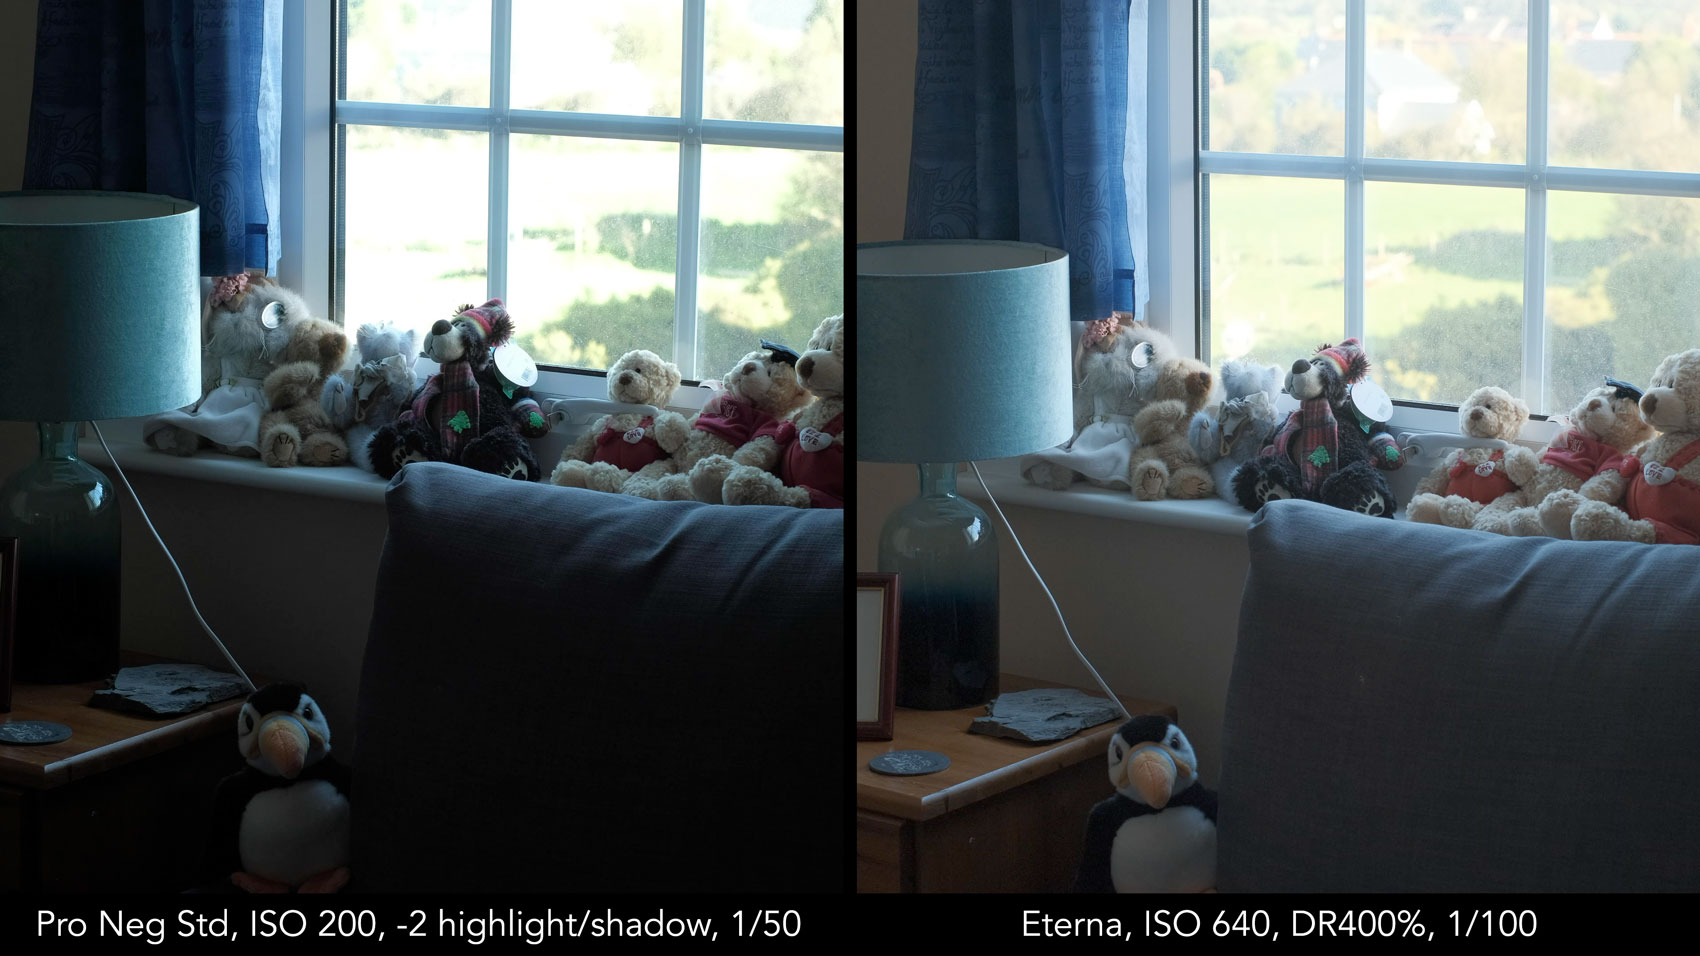
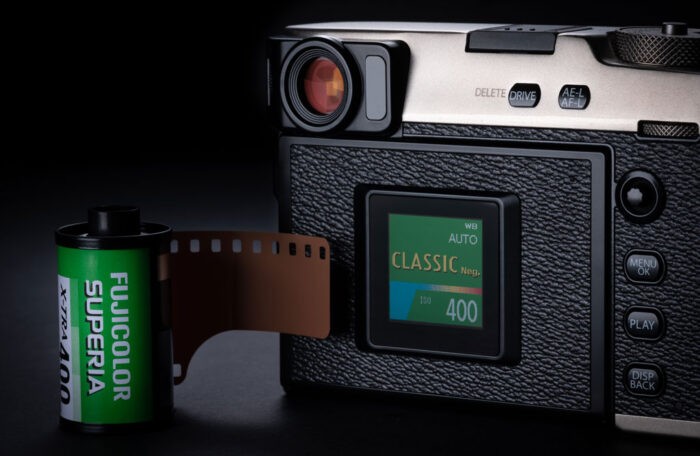
2. Classic Neg and image quality settings
Film simulation modes is Fujifilm’s name for colour profiles, or picture styles. They are inspired by the brand’s own 35mm film production.
Over the years, the company has introduced a new profile with each generation of camera. Classic Neg is the latest addition. According to Fujifilm, it is designed to emulate colour negative film used for everyday shots with rich chromatic contrast. The X-Pro3 also has the Eterna profile, which is designed for video and colour correction in post.
All the other Film Simulation modes are the same on both cameras. They include: Provia (Standard), Velvia (Vivid), Astia (Soft), Classic Chrome, PRO Neg Hi, PRO Neg Std, Black & White (with Yellow, and Green Filter options), Sepia and ACROS (with Yellow, and Green Filter options).
The X-Pro3 has additional settings to tweak the results of the in-camera JPGs that you won’t find on the X-Pro2.
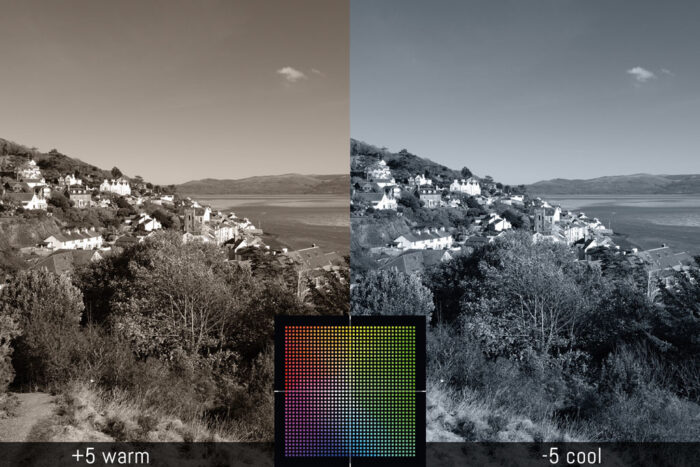
The first is Black and White adjustments. It was introduced on the X-T3 and allows you to add a colour tint with the help of the colour matrix slider (warm/cool, magenta/green).
Then we have Clarity and Tone Curve adjustments which are brand new to the X-series. The former works in ±5 steps to increase contrast in the mid-tones, while the latter allows you to adjust the tonal range and contrast of your photo. To do something similar on the X-Pro2, you need to work with the contrast, shadow and highlight settings. Note that Shadows and Highlights are integrated into Tonal Curve on the Pro3 model.
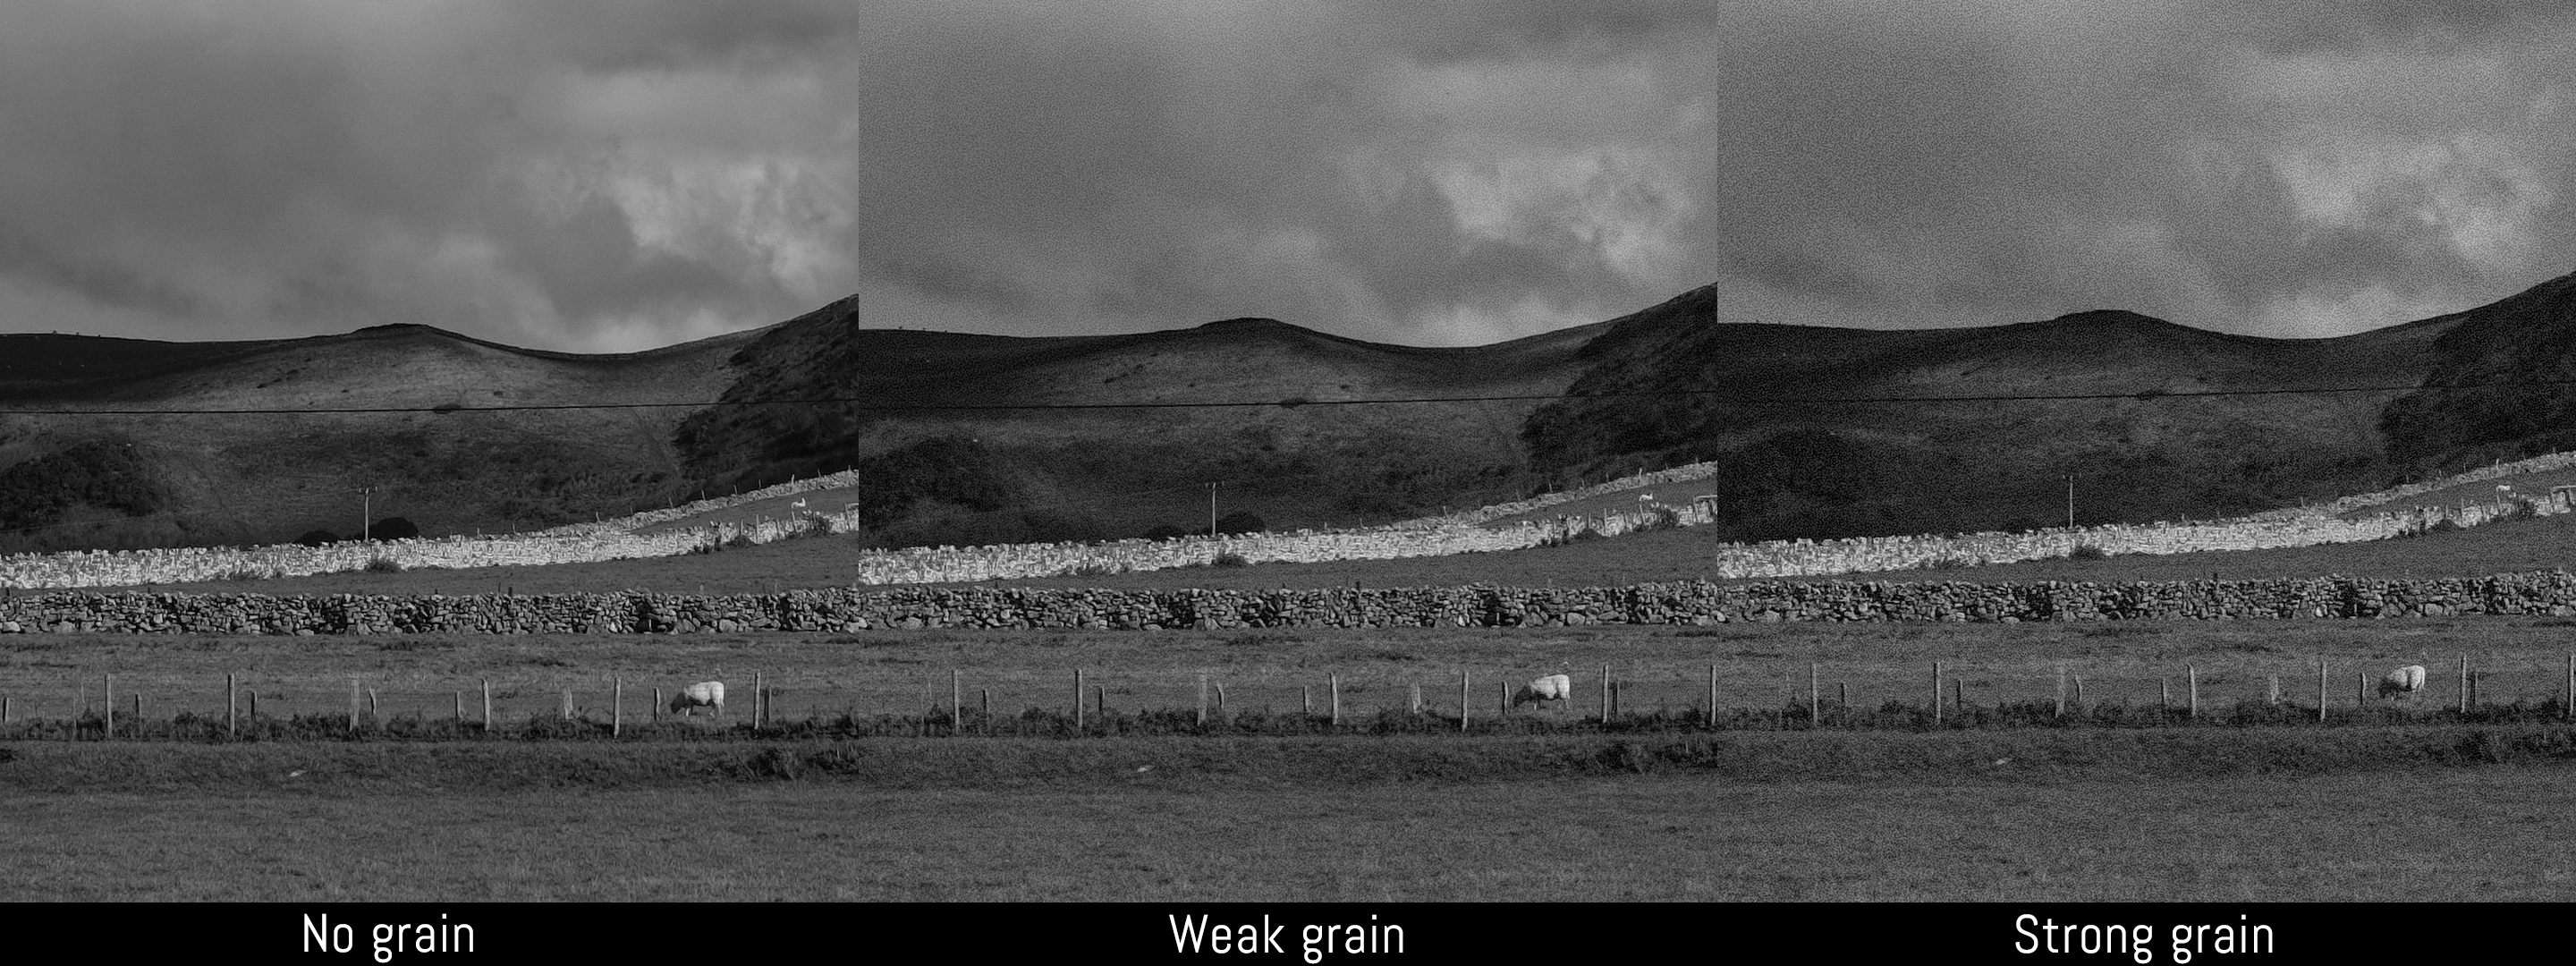
The Grain Effect can be adjusted with two new parameters, Size and Strength, which means you have more control over how the grain appears in your image. On the X-Pro2 there are Strong and Weak options only.
Finally, we have the Colour Chrome Effect which is once again only found on the X-Pro3. When activated, it produces deeper colours and tonal gradations.
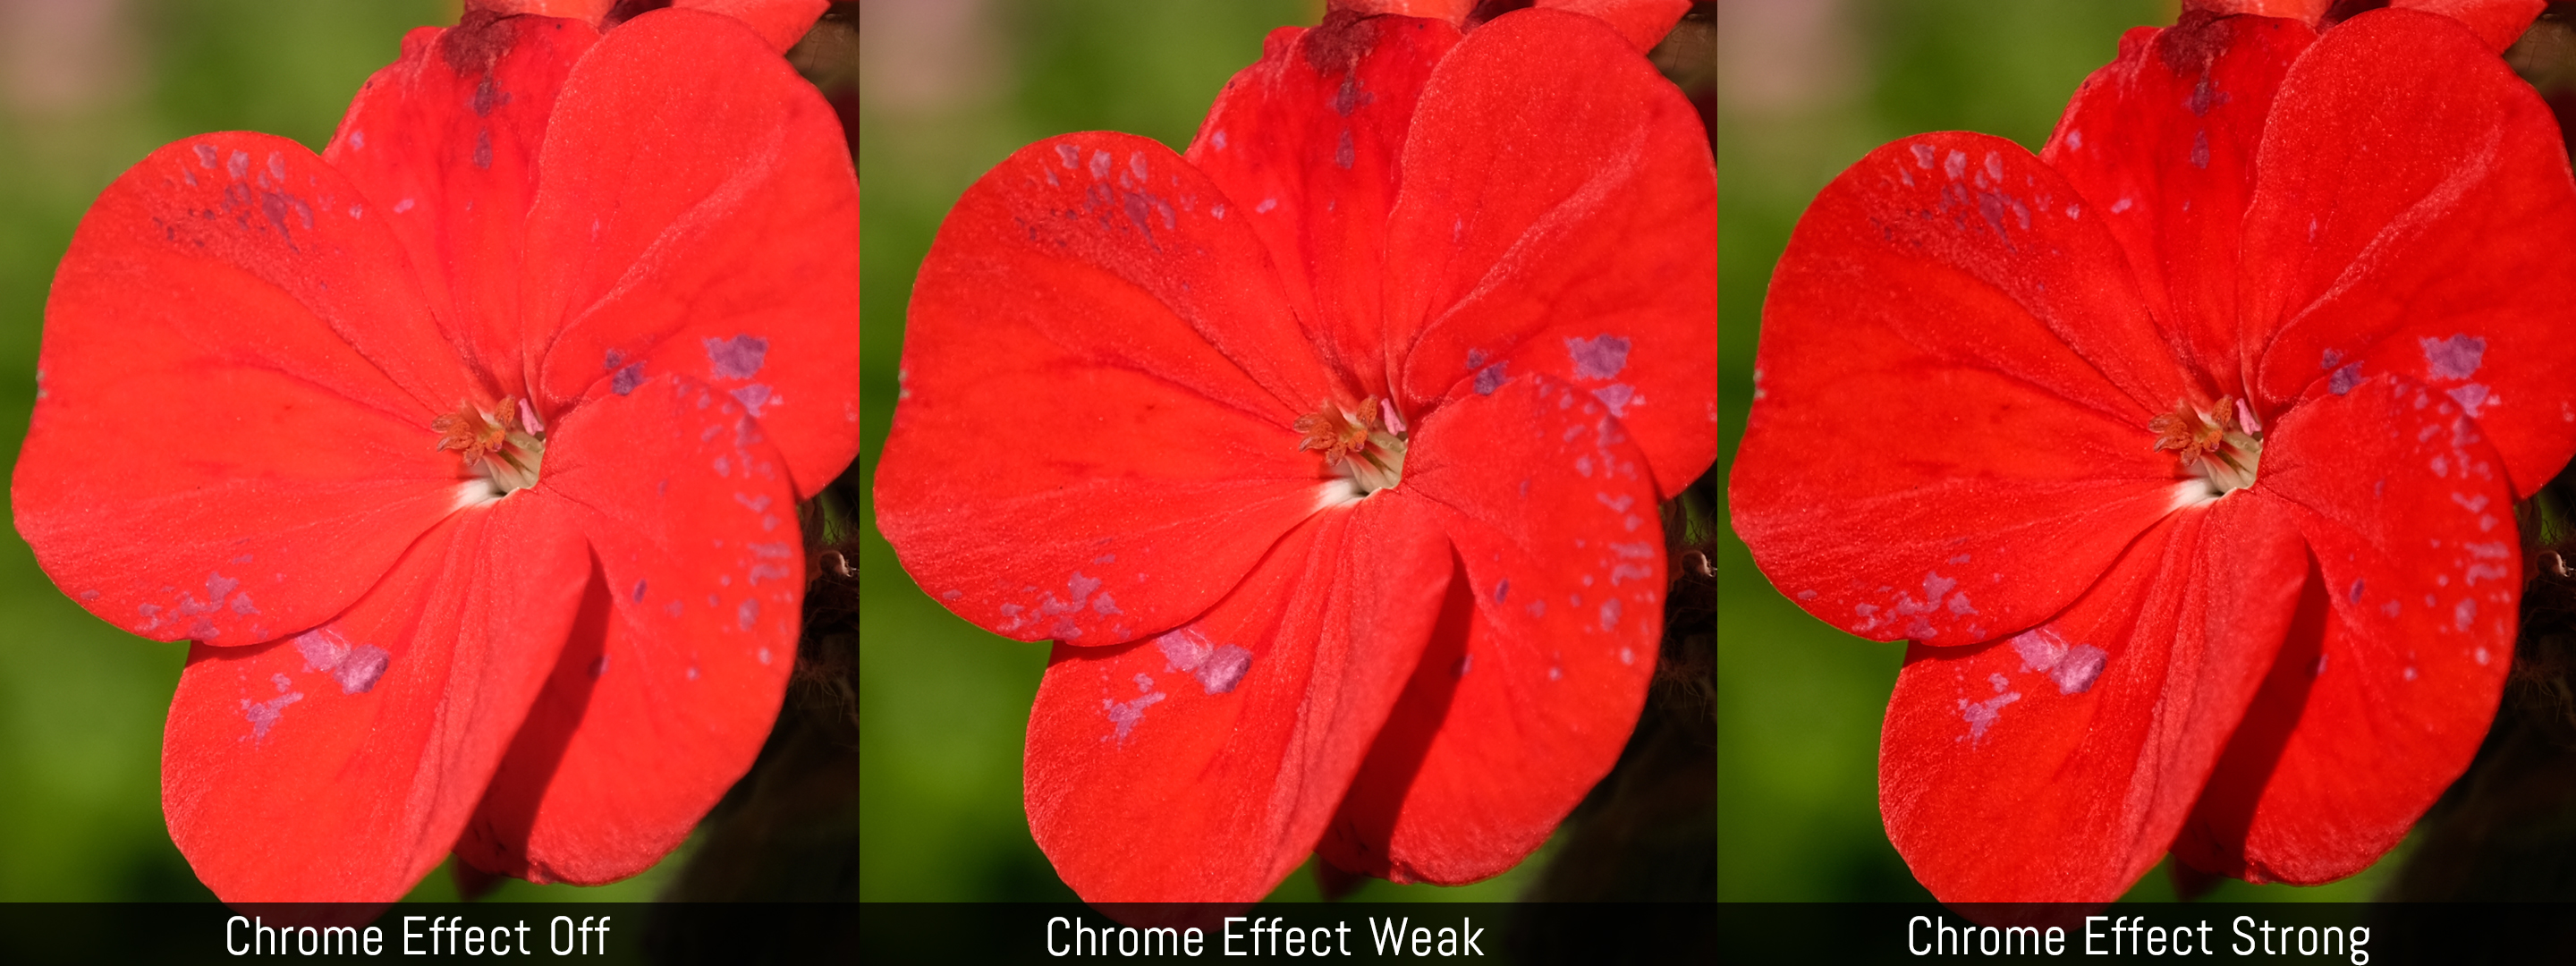
Fujifilm has added a new Colour Chrome Blue mode to improve vividness in the blue tones of an image.
3. Extra features
Both cameras share a number of extra features like an intervalometer, RAW conversion and Bracketing just to name a few.
Another function they both have is Multiple Exposure, but Fujifilm has enhanced this feature on the X-Pro3 by adding more settings. You can combine up to 9 frames and choose a merging mode between Additive, Average, Comparative Bright and Comparative Dark.
When using Multiple Exposure, the X-Pro2 can only merge 2 frames and there aren’t any other settings available.
Then we have a brand new feature called HDR. It takes multiple shots with different exposures to capture more dynamic range than the single frame. You can set it to Auto, or select four range values (200%, 400%, 800% or Plus).
This specific function is nothing new in the digital camera world but is a first for an X-series model. Fujifilm has advertised this by saying that it uses computational photography (software processing similar to what modern smartphones do) to create a natural looking result.
Another special function you will only find in the X-Pro3 is Focus Bracketing, and the new camera gets an additional option: once you set the closest and furthest focus point, the camera can automatically select the number of frames to capture based on the aperture and focal length used.
4. Autofocus
The X-Pro3 features the latest hybrid autofocus system. It has 117 points that can be subdivided into 425 with certain settings, just like the X-T3. They cover almost the entire area of the sensor (99%).


The X-Pro2’s older system is the same as the X-T2 and X-H1: it has 91 points (325 with select settings) and the phase difference points cover a smaller area of the sensor.

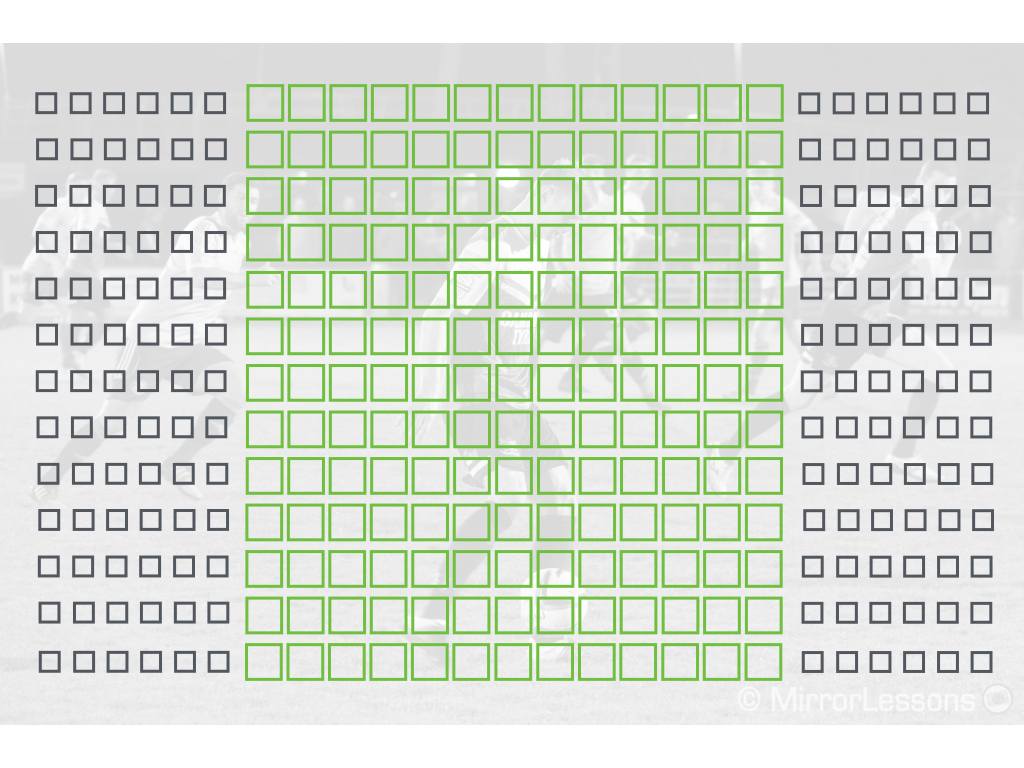
Having phase detection points across the entire surface of the sensor is useful when tracking erratic subjects that are difficult to keep at the centre of the frame. When they end up at the edge of your composition, even for a brief moment, contrast detection will kick in on the X-Pro2 which will result in slower focusing.
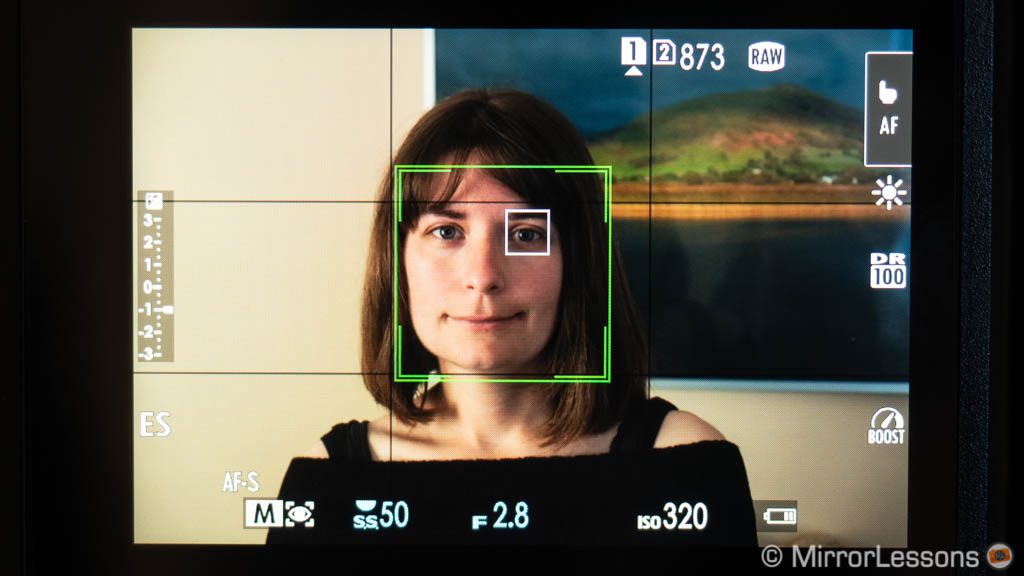
When we compared the X-T2 and X-T3 (same AF systems as the X-Pro2 and X-Pro3), we concluded that the benefit of the latest AF technology only made a difference in specific situations. The faster face and eye detection is useful for portraiture, while the more reactive autofocus helps with difficult subjects such as birds in flight.
Now the X-Pro line-up is not the first choice that comes to mind when we talk about sports or wildlife, so the X-Pro3’s advantage might not be that evident. However keep in mind that the new camera comes with some extra tweaks to the AF algorithm. One of them is low light sensitivity which goes down to -6Ev (with a 1.4 lens) whereas on the X-Pro2 it is -1Ev (aperture/lens not disclosed).
Finally, the new model introduces a new setting in the Fuji line-up: AF Range Limiter. Similar to that found on Olympus E-M1 cameras, it allows you to set a minimum and maximum focus distance range for any XF lens mounted on the camera. This can be useful to stop the camera from focusing too close or too far away when tracking specific subjects. It can be useful for street photography too.
5. Electronic shutter
The electronic shutter allows you to take a picture in complete silence because the camera doesn’t use the mechanical curtains, but rather “scans” the sensor from top to bottom in order to capture the light. Over the years, this function has been expanded to perform other tasks. For example both cameras can shoot up to 1/32000s, bypassing the limit of the mechanical shutter which is 1/8000s.
The X-Pro3 gets the same processing speed capabilities as the X-T3. This improves the continuous shooting speeds, which goes up to 20fps, or 30fps with a 1.26x crop. Furthermore, this burst is done with no blackouts while maintaining live view of the scene. The latter used to be an exclusive capability of the Sony A9 series, but now three Fujifilm cameras can do the same thing (X-T3, X-T30 and X-Pro3).
With the mechanical shutter, the X-Pro3 can shoot up to 11fps, whereas the X-Pro2 stops at 8fps.
6. Video
The X-Pro2 can record Full HD up to 60fps, and received 4K video capabilities up to 30p with firmware 4.0. The recording uses the entire width of the sensor but sub-samples (no full pixel readout).
The X-Pro3 doesn’t inherits all the specifications found on the excellent X-T3, but it does get 4K and Cinema 4K recording with a higher bitrate (200Mbps vs 100Mbps), as well as the High Speed Video mode that records 1080p up to 120fps and creates slow motion footage in camera.
There is no 10-bit internal recording, but on the X-Pro3 you can use the Eterna profile (Flat profile), which gives you a bit more dynamic range and “cinematic” colours. There are the DR200% and DR400% settings to further increase the range, as well as the F-log curve.


The recording limit per clip is also different. The X-Pro2 can record 4K for 10 minutes maximum, or Full HD for 14 minutes. The X-Pro3 can do 4K up to 15min and Full HD up to 60 minutes.
Both cameras have a microphone input but it’s a 2.5mm type, which is smaller than the standard 3.5mm. The X-Pro3 can output audio (for monitoring via a headphone) with the USB C type port but you’ll need an adapter.
The X-Pro3 doesn’t have an HDMI output, unlike the Pro2 model that has the Micro D type.
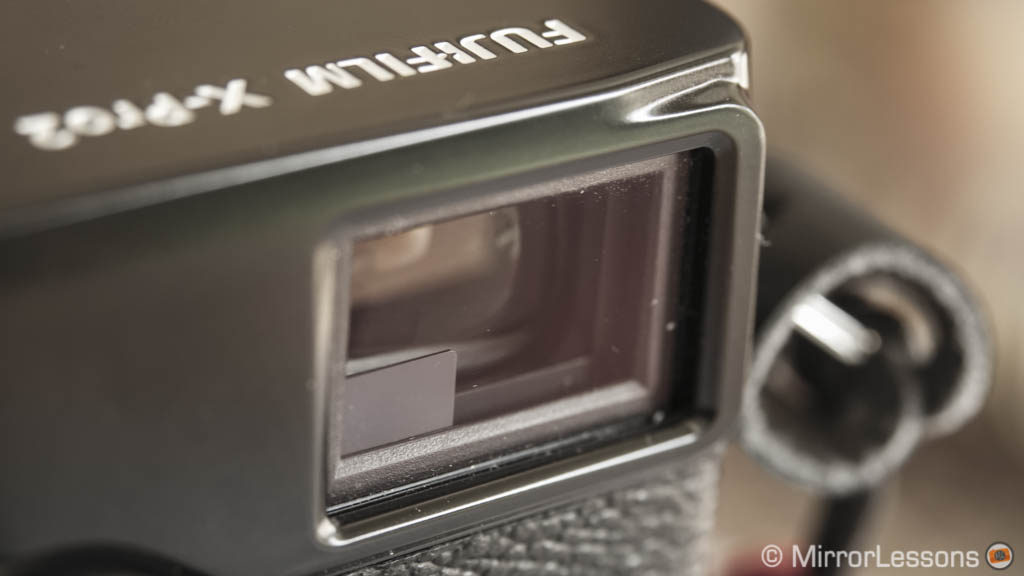
7. Viewfinder
The X-Pro series, like the X100 series, has a unique viewfinder solution that you won’t find anywhere else.
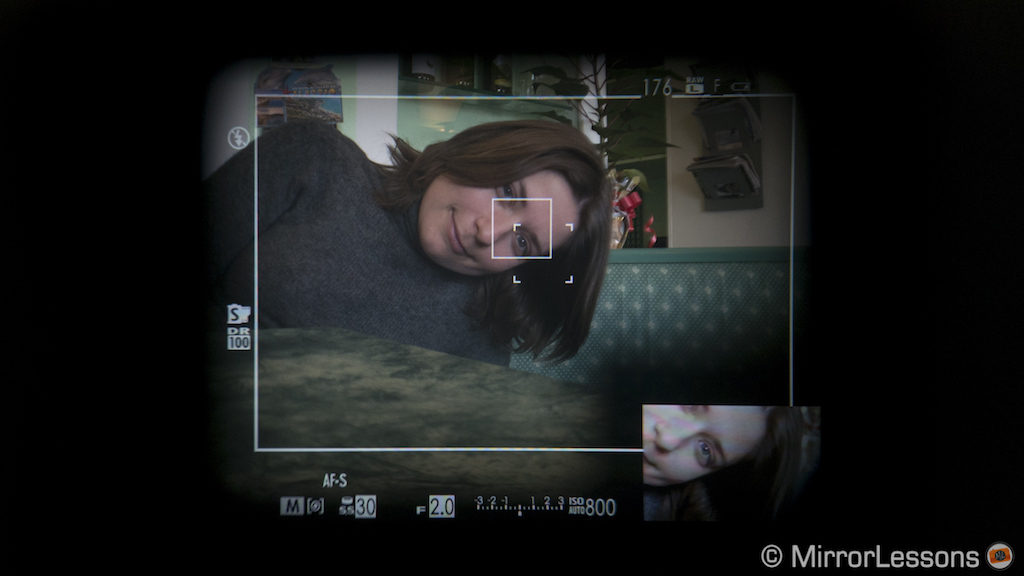
The module, which is located on the left side like a rangefinder camera, gives you the possibility to switch between an optical and an electronic viewfinder.

The optical finder is a reversed Galilean type with electronic bright frames that show your actual field of view and real-time parallax correction. On the X-Pro2, it offers a magnification of 0.36x or 0.6x depending on the lens used.
The OVF covers a maximum angle of view of approximately 83˚, which means you can see the entire frame down to 16mm (24mm equivalent). With wider lenses, you won’t see the entire field of view. Likewise at the telephoto end, the bright frames cover up to 90mm (135mm equivalent).
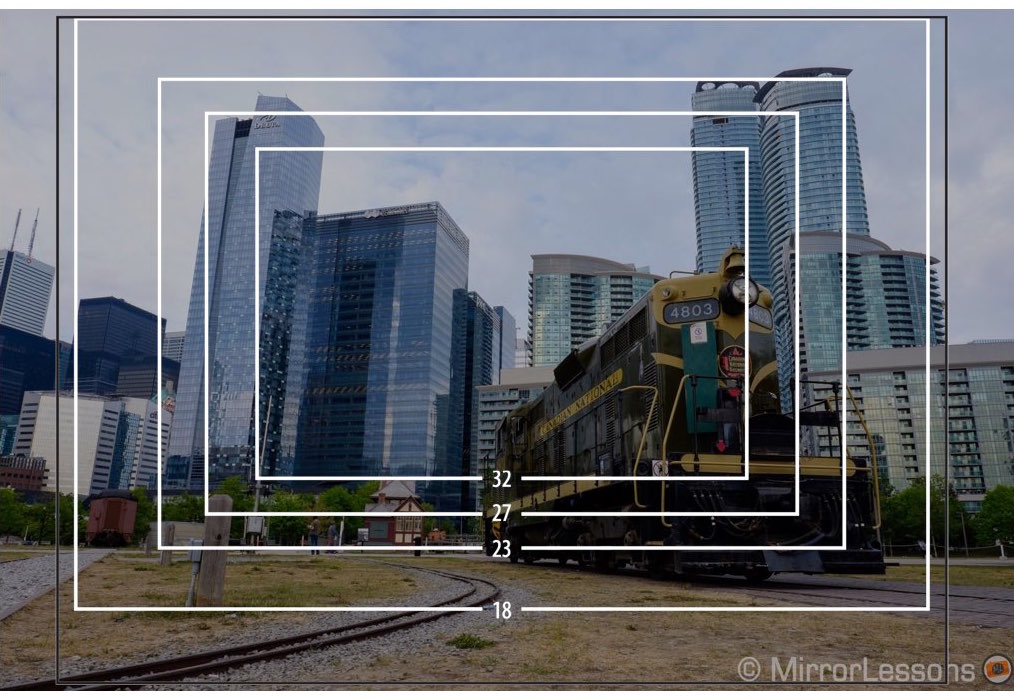
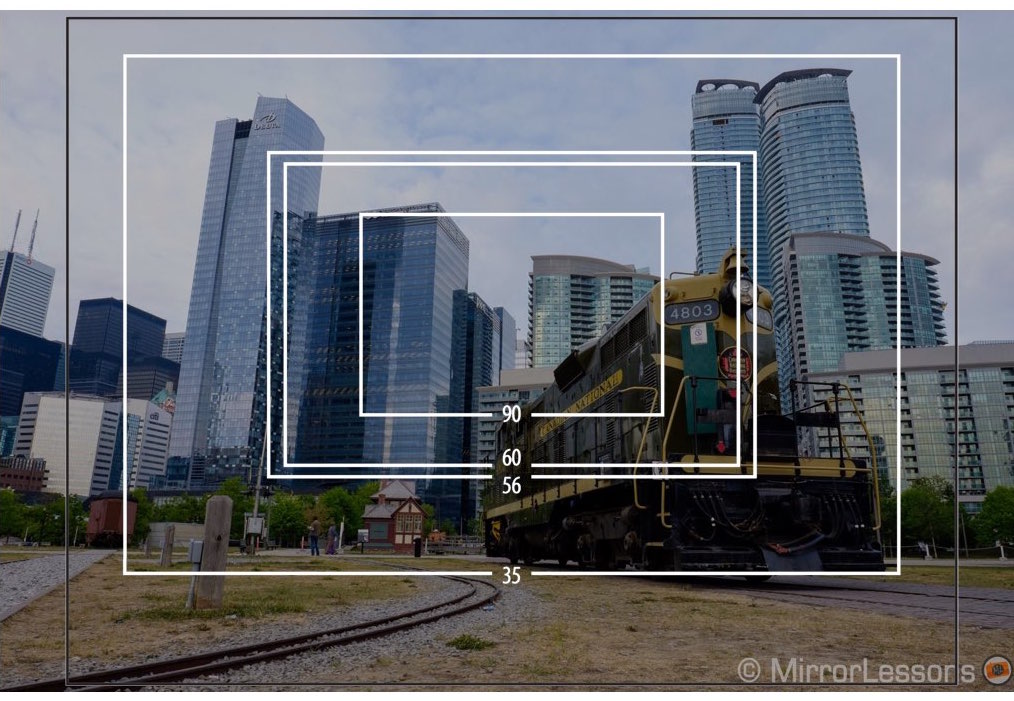
The OVF has been re-designed on the X-Pro3 and now has a fixed magnification of 0.52x. This means that it will work with focal lengths between 23mm and 50mm (35mm and 75mm equivalent), but won’t cover the entire area for shorter focal lengths. With longer lenses such as the XF90mm, the bright frame will be very small and at that point you’ll be better off using the electronic viewfinder.
The lever on the front of the camera allows you to activate the electronic rangefinder (ERF), a tiny screen that appears in the bottom right part of the OVF. It can display a magnified version of the image to check focus for example.
The same lever allows you to switch to the electronic viewfinder. Here as well Fujifilm brought improvements to the X-Pro3. It has more resolution (3.69M vs 2.36M dots), more magnification (0.66x vs 0.59x) and a faster refresh rate in Boost mode (100fps vs 85fps). Furthermore, the new Smoothness Priority setting when Boost is activated gives you a smoother view and emulates a 200fps refresh rate.
The electronic panel has also been updated: instead of TFT, the X-Pro3 uses an OLED EVF that offers more contrast, luminance and colour accuracy.
8. Rear LCD monitor
The X-Pro2 has a fixed LCD screen on the rear and no touch sensitivity. The lack of a tilting mechanism drew some criticism because we all know how useful a moving screen can be when composing at various angles. At the time Fujifilm justified the choice by saying that the camera was more robust that way.
With the X-Pro3, the company has come up with an original solution. There is an LCD monitor but it is hidden. You need to open it and tilt it down (max. 180°) to use it. It features touch sensitivity which means you can take a picture, move the focus point, activate functions or change settings in the Q menu by using the screen.
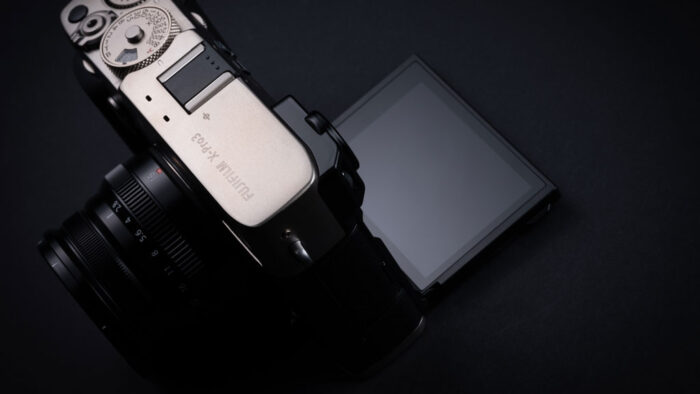
The hidden LCD monitor is an attempt to make the X-Pro3 more appealing to photographers who prefer to use the EVF and want to avoid the distraction of the large rear monitor. Perhaps it is also a solution to encourage users to compose with the EVF and open the 3-inch monitor in specific situations only (like shooting from the hip for street photography).
We could argue whether a gimmick like this is necessary or not. After all, most digital cameras allow you to deactivate the rear screen and keep the viewfinder on at all times. Perhaps this physical solution rather than a simple software command will be more tempting for some.
Thinking about pure real world use, I feel that the 3-way mechanism found on the X-T3 would have been more practical (especially when composing vertically). I’ll reserve judgement until the time I can properly test the camera.
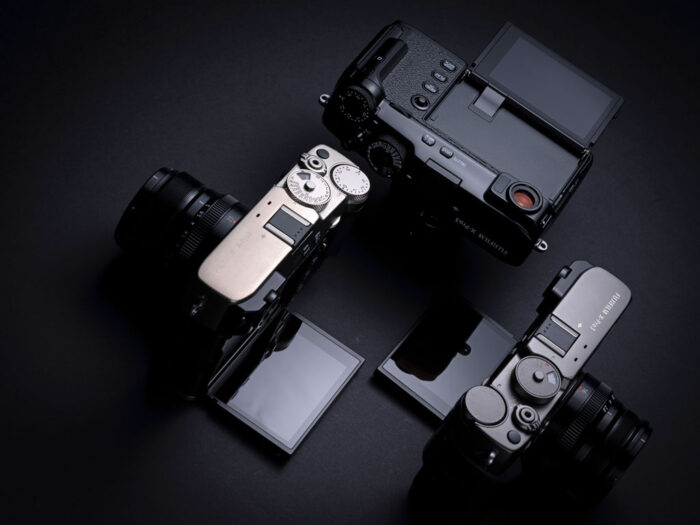
The design mechanism chosen for the X-Pro3 reveals another curious thing: when the LCD monitor is closed, there is another, smaller LCD (1.28-in) on the rear of the camera. Similar in concept to the top LCD monitor of the X-H1, it displays useful settings such as exposure, remaining shots, battery life, etc. If you choose the Classic view mode, it will show you the ISO, White Balance and Film Simulation used with a graphic interface that recalls the old film roll packaging.
9. Build quality and design
Both cameras have an internal magnesium alloy skeleton and are weather sealed but Fuji has improved the sealing on the X-Pro3 (70 points).
What’s new is on the outside. Fujifilm has chosen titanium to give the X-Pro3 a more premium feel and to make the body more resistant. In addition to Black, there are two extra colours: Dura Black and Dura Silver. The surface is hardened with a special DuratectTM coating which makes the camera even more resistant to scratching. The X-Pro2 is available in black or graphite.
As for the design and dimensions, they remain very similar and so is the weight.
- X-Pro2: 140.5 x 82.8 x 45.9mm, 495g
- X-Pro3: 140.5 x 82.8 x 46.1mm, 497g
There are a few changes concerning buttons and dials. On top, the ISO dial has a C step instead of H. I’m assuming you can customise any value with C rather than just selecting one of the two extended levels when using H.
On the rear, the 4-way D-pad is gone. Instead there is an AF Joystick that moves in 8 directions and can be used to navigate the menu. The metering button is replaced by a Drive button, AEL and AFL are combined into one, and there is a black button above the Q button. Also note how the markings on the X-Pro3 buttons have words rather than symbols.

The Quick menu can now display 16, 8 or 4 icons, and can have a transparent background if you wish.
Finally, the new camera has a USB Type C port which allows you to charge the battery inside.
10. Price
The X-Pro2 can be found body only for around $1500, £1350 or €1450. The graphite version is more expensive.
The X-Pro3 starts at a retail price of $1800, £1700 and €1950. The Dura Silver and Dura Black cost more.
Note that these prices are the ones found at the time of publishing this article. They may vary depending on multiple factors (country, deals, instant savings, cash-backs, etc.)
Conclusion
The X-Pro series sets itself apart not only from other Fujifilm models, but also other mirrorless cameras. Its design and hybrid viewfinder offer something different. You may or not may embrace it, but I think it is important that models like this continue to exist in a market that is becoming overcrowded.
The improvements brought to the X-Pro3 are what we would expect from a technical point of view, and they all come from the acclaimed X-T3 which is a good thing. The main changes are found on the outside – most notability the hidden LCD screen which has already caused some controversy on various forums online (no surprises, it’s the internet after all)!
Fujifilm has always looked for different solutions for the rear LCD screen. Just take a look at the 3-way axes mechanism on the X-T2, X-T3 and X-H1, or the multi-angle solution on the X-T100. With the X-Pro3, we have the company’s weirdest choice. Some will love it, others will hate it.
What do you think? Do you like the X-Pro3 LCD screen idea, or would you rather have the same one found on the X-T3? Let us know in the comments below!
Reminder: the links below are affiliate links. If you decided to buy something after clicking the link, we will receive a small commission.
Check price of the Fujifilm X-Pro2 on
Amazon | Amazon UK | B&H Photo | eBay
Check price of the Fujifilm X-Pro3 on
B&H Photo