You are now on page 2. Here you can read all my findings concerning autofocus and speed.
- Page 1: design, functionality and image quality
- Page 2: autofocus and continuous shooting
- Page 3: stabilisation, video, other features and conclusion
Table of Contents – Page 2
1. Autofocus system and general settings
2. Single AF, Eye and Face detection
3. Continuous autofocus and keeper rate
4. Continuous AF Settings and Tracking
5. Shutter modes, continuous shooting speeds, blackouts and buffer
Ethics statement: the E-M1 II and G9 samples were loaned to us to conduct our reviews and comparisons. We were not asked to write anything about these cameras, nor were we provided with any sort of compensation. Within the article, there are affiliate links. If you decided to buy something after clicking the link, we will receive a small commission. To know more about our ethics, you can visit our full disclosure page. Thank you!
Autofocus system and general settings
The autofocus chapter is perhaps the most important in this comparison for two reasons.
First, both cameras have been designed for sports and wildlife photography, a genre that many mirrorless brands are trying to tackle and that DSLRs have dominated for a long time. Second, these two cameras use different technology to achieve the same goal – and I admit that I was really curious to see how close the results would be.
Let’s talk about the technology first: the G9 uses DfD contrast detection AF with 225 areas while the E-M1 II uses a hybrid AF system with 121 contrast and cross-type phase detection points.
DfD (Depth From Defocus) is a more advanced contrast detection system than what you usually find on other products. Instead of just analysing the contrast of a scene to acquire focus, the Lumix compares two images with different depths of field. The difference in out-of-focus areas is analysed to calculate the correct focus distance. All this is done with a sensor readout of 480fps, which means that the camera analyses 480 images at a lower resolution (compared to 20MP) every second. This process makes the G9 capable of detecting and tracking a subject more accurately than any contrast detection autofocus system.
The G9 AF is based on the GH5 but the algorithm has been updated to give the camera a faster acquisition time (0.04s) and better subject detection (it can now recognise human body shapes instead of just faces).
Phase detection on the E-M1 II means that each focus point uses two small sensors to analyse the incoming light. If the image is in focus, the light passing through these two phase sensors converge at the same point. If the subject is out of focus, light rays converge to two different points. With the help of the Quad Core processor, the camera rapidly evaluates how many lens elements it must move to bring the subject into focus. Cross-Type points means that phase is analysed on a horizontal and vertical level for better accuracy.
The choice to use phase detection for Olympus is also related to its old DSLR lenses: with the MMF-3 adapter, they give you faster performance while with contrast detection, they slow down significantly. With native lenses, the camera may revert to contrast detection in low light conditions and other situations where phase detection reaches its limit (very narrow apertures for example).
Now let’s take a look at the other characteristics and useful settings.
The G9 gives you lots of options when it comes to the AF areas, which is something I really like. You can use a single point and vary its size in 7 steps. A small point will help you fine-tune focus for genres that require precision such as macro photography, while a larger point will help you acquire focus more quickly in situations with less contrast (a low light scene for example).
If you prefer to work with a group of points, there is lot to choose from as well. You can select the 225 area mode and vary the grid size (I often choose an 11×11 grid for birds in flight and a 5×5 grid for football or cars). You can also create your own custom group with different shapes.

On the E-M1 II there is room to customise the autofocus area thanks to firmware 3.0. You can work with the All-Group target (121 points), 5×5-Group, 9-Group target, 5 Group target or the single point. The final option can be reduced in size (Small Target).
With continuous AF, the best results are achieved with the 5×5-Group or the 5-group target but in some situations, dealing with a restricted number of points means that you need to be precise when following your target. That being said the improvements brought to firmware 3.0 have made the camera easier to use even with the All-Target mode.


Focus modes include Single, Continuous and Manual. On the G9 you will also find the AFF mode (Auto Focus Flexible) which re-adjusts the focus distance if the subject moves while the shutter button is half-pressed. It can be useful when taking picture of a child for example.
Then we have a good number of additional settings that can be used to control the behaviour of the autofocus in different situations, or help you focus more easily. I will talk about some of them in the next chapter but let’s have a quick look at the others here.
On the G9:
- AF+MF: allows you to fine-tune your focus manually after focusing in AF-S mode
- Focus Magnification: AF can be used while the frame is enlarged to check focus accuracy
- Balance priority: In addition to focus and release priority, you can choose Balance. With this mode, the camera picks the most appropriate behaviour depending on the scene photographed and the movements it detects. I find it to be very reliable for most purposes except birds in flight, for which I prefer the camera to prioritise focus at all times.
AF-ON Near Shift / Far Shift: you can tell the camera to focus on subjects nearby or subjects far away (firmware 2.0 needed)
On the E-M1 II:
- Home setting: you can save a specific position and focus mode, and recall it with the press of a button. It also allows you to jump between your preset and the settings currently in use. So for example you could have a single point on the left + S-AF and the 9-Group Target at the centre + C-AF, and switch between them really quickly.
- AF Limiter: like the limiter switch you often find on telephoto lenses but in this case it can be configured in-camera with any lens and distance you want. For example you can avoid near obstacles if you know that your subject will always remain far away.
There are different ways to move the AF or group of AF points as I already mentioned in the External Controls and Configuration chapter. Of course you can also use the back focus button (AEL/AFL on the Olympus, AE/AF Lock on the G9). Note that on the OM-D camera, you need to go to Custom Menu A1.
Single AF, Eye and Face detection
In single AF mode, both cameras perform well but I find the G9 slightly faster at acquiring focus. In low light situations, the performance slows down a little for both. The E-M1 II can occasionally mis-focus when there are specular highlights in the background, which is something I’ve noticed less with the G9.


Both cameras feature face and eye detection. On the Lumix, it automatically detects the face, the eyes and the body of a person and behaves accordingly. For the eyes, it chooses the one closer to the camera. If there are multiple people in the frame, the G9 can identify up to 15 people and you can prioritise one of them by moving the focus point onto the person or simply touching him/her on-screen.
Overall I find the performance quite convincing, especially when it comes to the reactivity of detecting the subject, even if he/she is far away. You also have the option of registering faces so that the camera can recognise the person straight away.
On the E-M1 II you can separate face and eye detection, and even choose to give priority to the left and right eye. It works well but the camera can be slower in recognising the face in comparison to the G9, as well as identify a person when he or she is more distant. If the subject is moving fast, it can struggle more with AF accuracy. However heavy make-up and low light don’t seem to be a problem.

With firmware 2.0, the G9 inherits a new setting called Animal Detect. Like the full frame S1 and S1R, it uses AI technology to recognise various animals and focus on them automatically. The camera applies the correct focus size depending on how large the animal is.
Continuous autofocus and keeper rate
In our first warm-up test featuring a subject running straight towards the camera, both the G9 and the E-M1 II delivered good results, although the Panasonic had a marginally higher keeper rate.

I used the M.Zuiko 40-150mm Pro on the E-M1 II and two lenses on the G9, the 35-100mm f/2.8 mark I and the DG 100-400mm. The reason I tested two different lenses with the latter is that the speed of Panasonic’s DfD AF system can vary depending on the lens mounted: an older Lumix lens with a less advanced AF motor can be slower. However in this first test, this was hardly the case since they 35-100mm proved less efficient by just a couple of frames.


Then I mounted the 40-150mm on the G9 to see how the camera would behave with an Olympus lens. Officially, Panasonic states that DfD is only compatible with Lumix/Leica lenses. Apparently the camera needs to know the exact level of micro contrast achievable by the lens as well as the characteristics of the out of focus area (bokeh) in order for the AF to work correctly.
In my earlier experiences with Olympus lenses on Panasonic bodies and the first generation DfD especially, I got very mixed results. The cameras would often mis-focus or “breathe” back and forth before acquiring focus, and the keeper rate with fast moving subject would also decrease by 25/35%.
However, given that the G9 is the fastest camera produced by Panasonic, I was curious to see if the performance with M.Zuiko lenses had improved, even though the user manual still states that DfD is incompatible. As you can see below, the camera gave me marginally worse results but it was still very close to the E-M1 II’s performance, which is very positive in my eyes.

The E-M1 II on the other hand works seamlessly with both Olympus and Panasonic lenses, as do many other OM-D cameras. The only thing to note is that new Lumix/Leica lenses can sometimes require a firmware update in order to work properly.
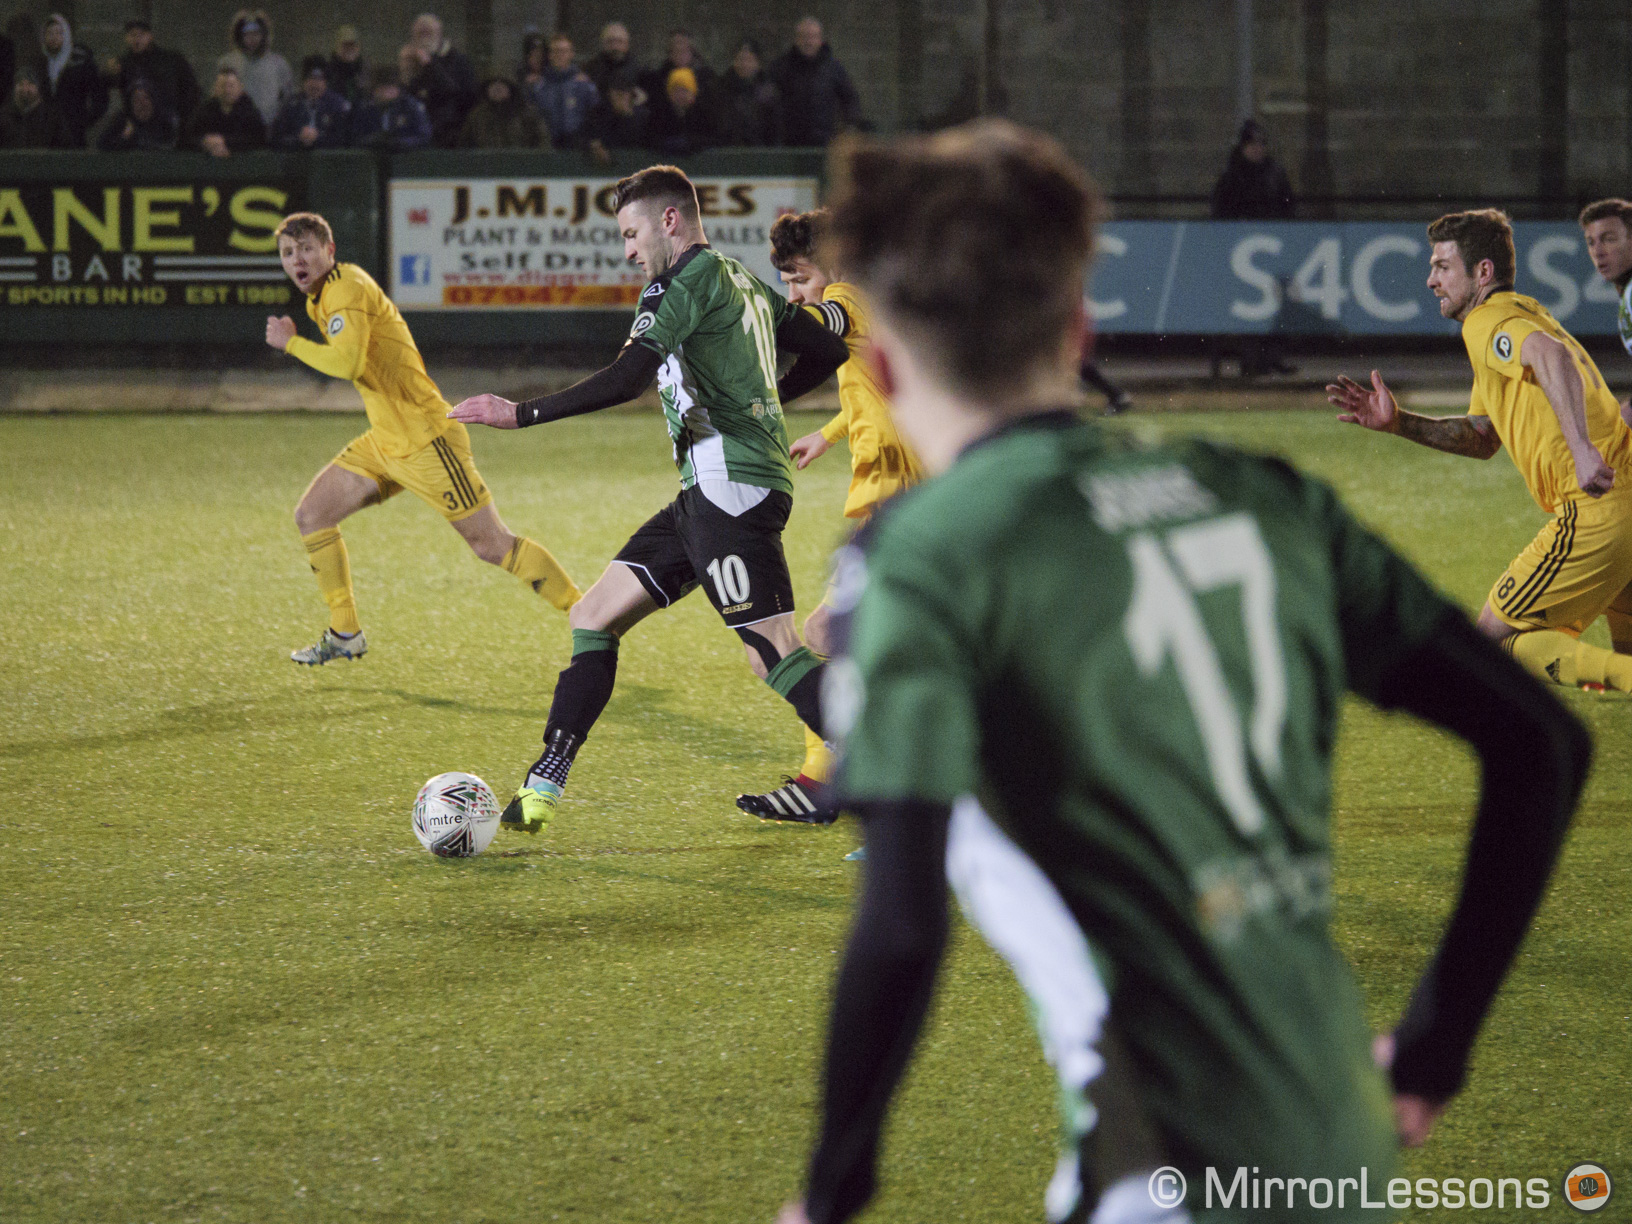
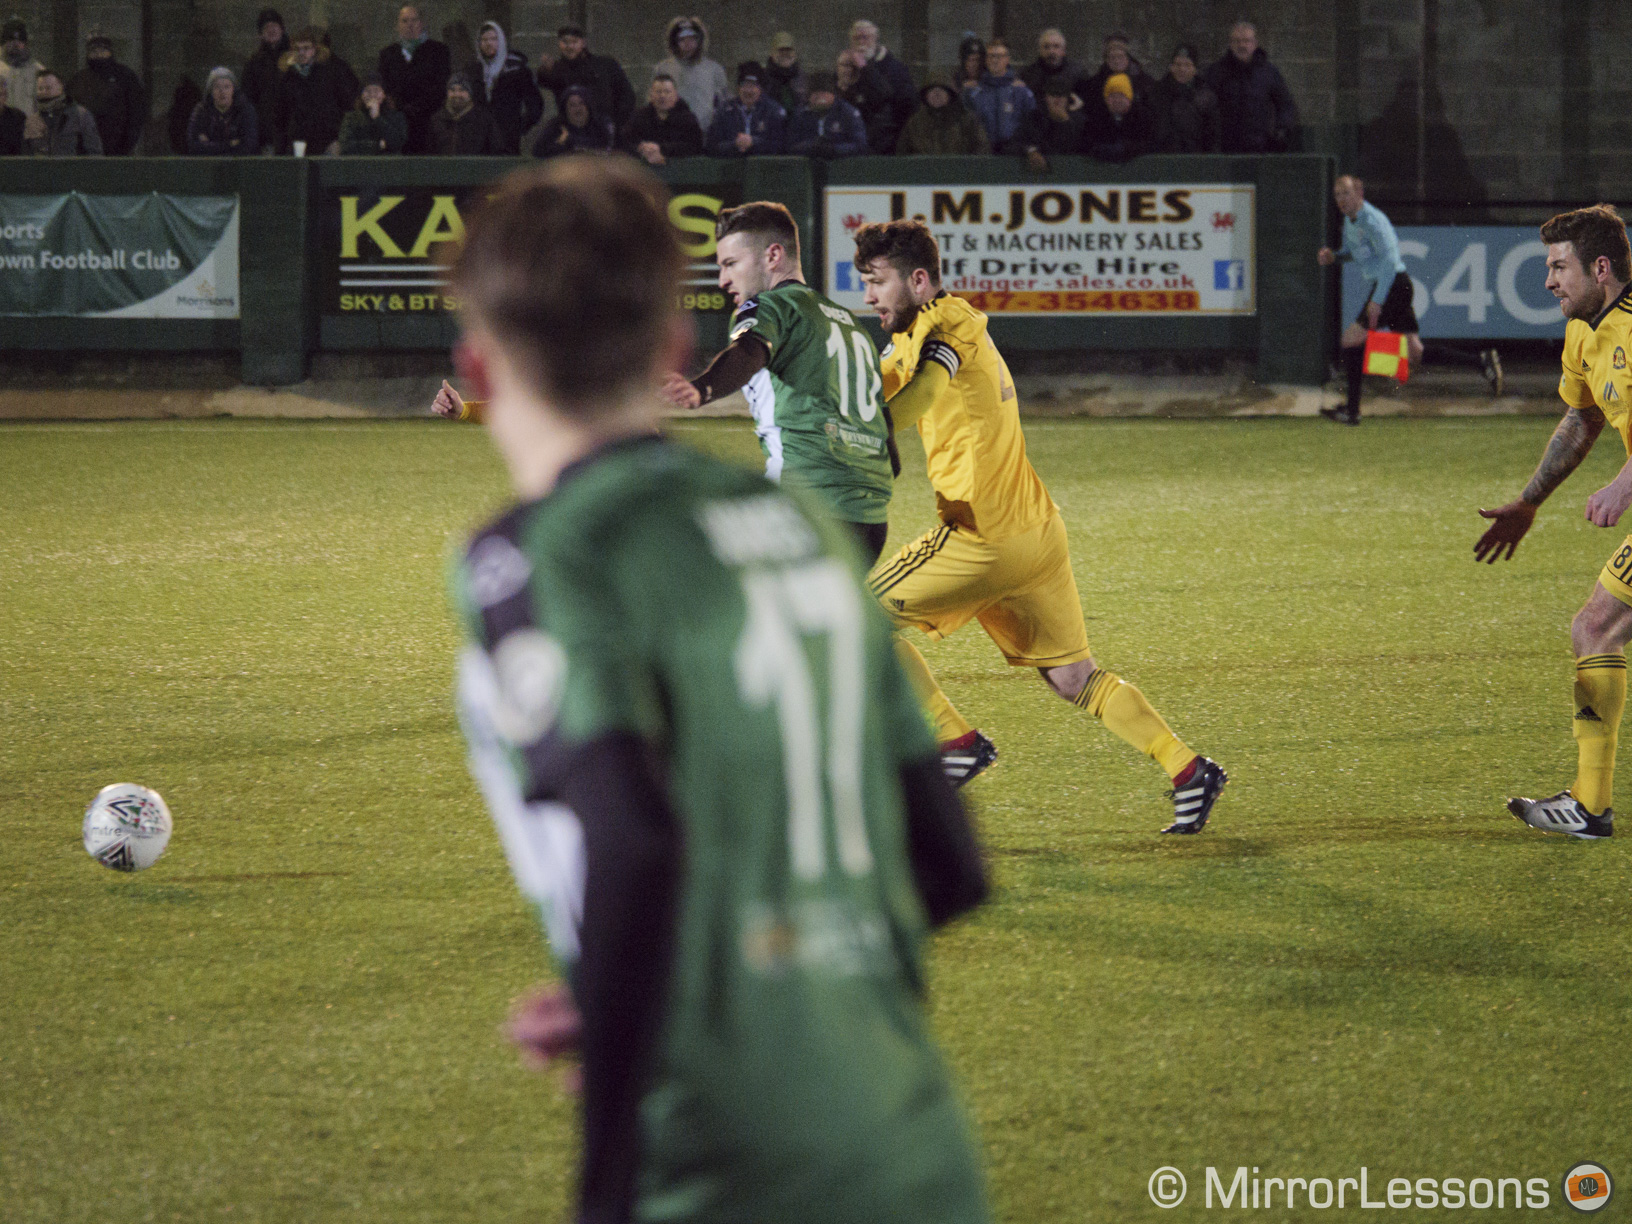
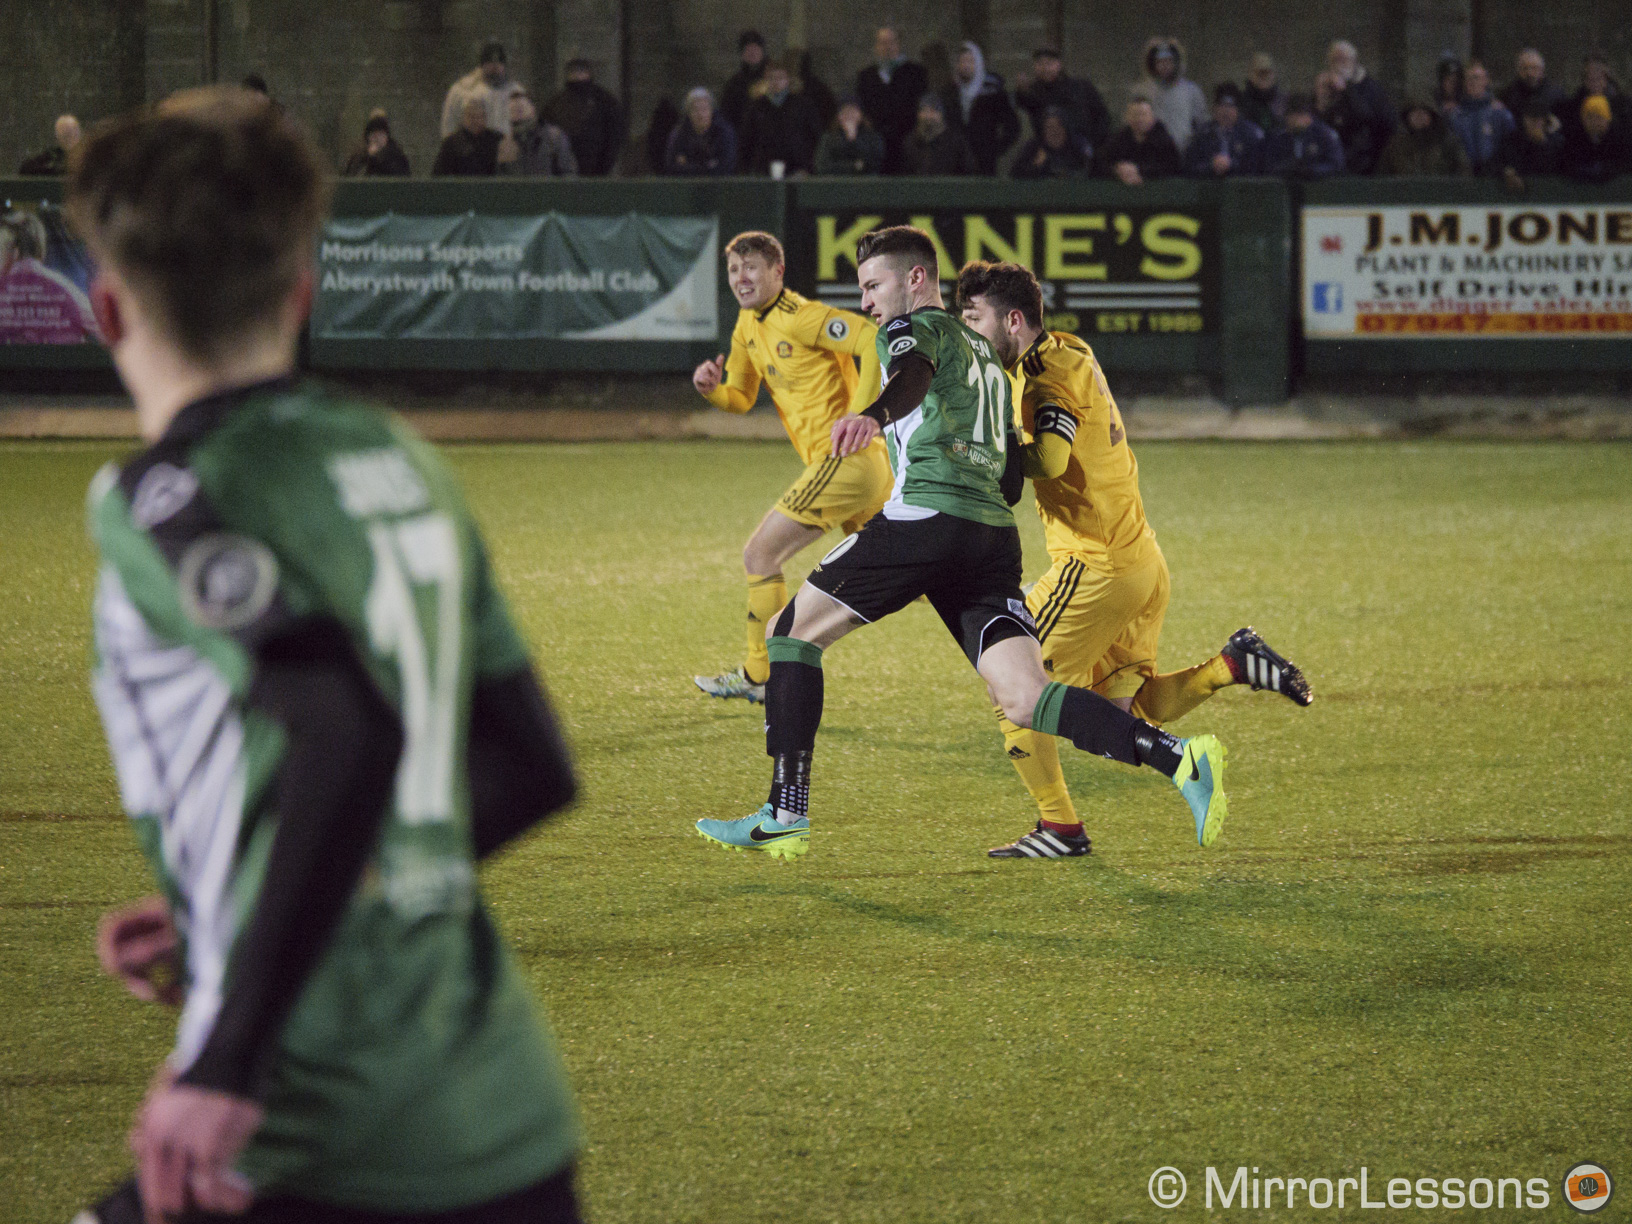
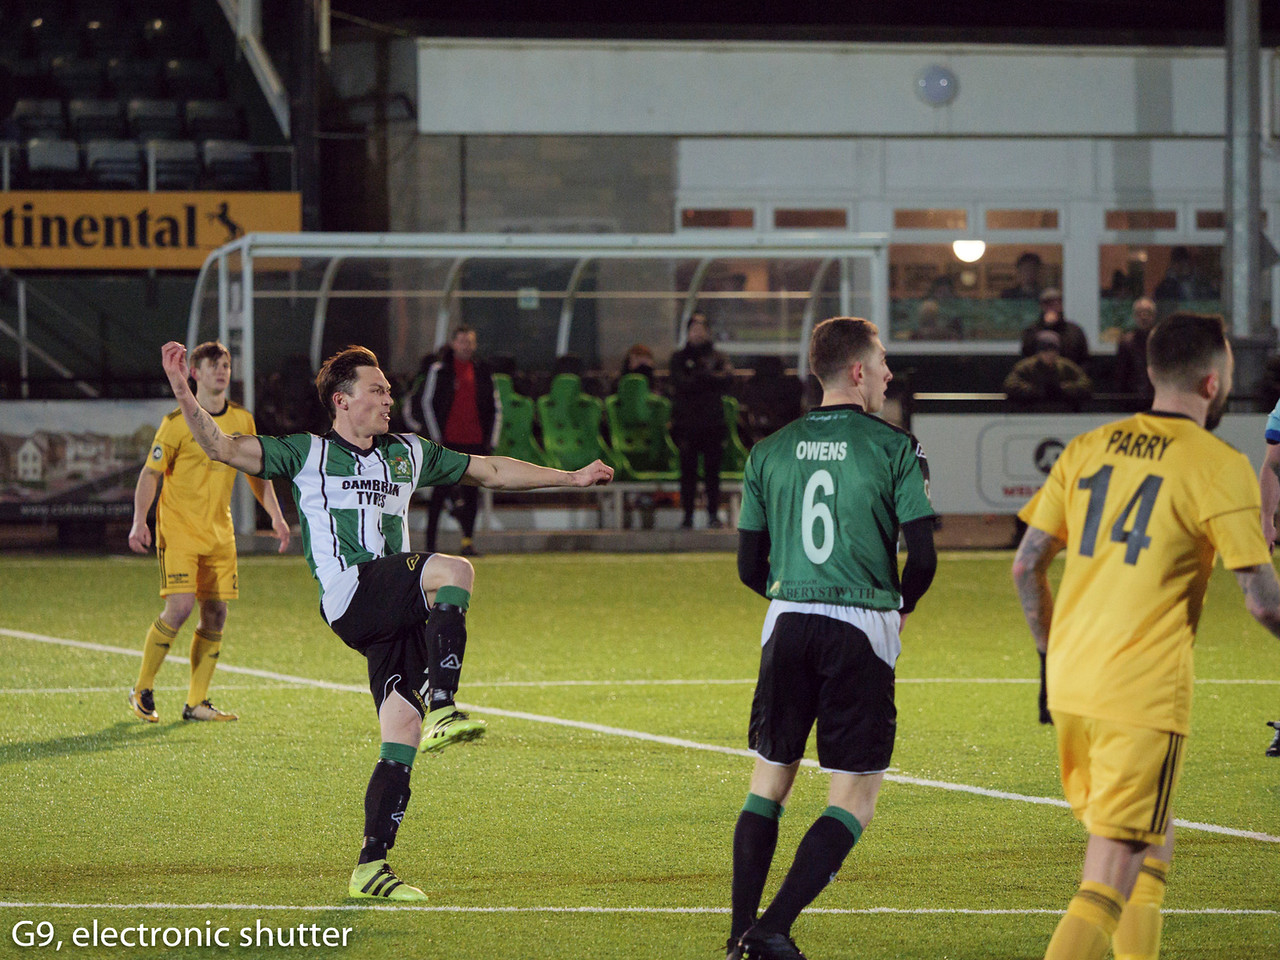
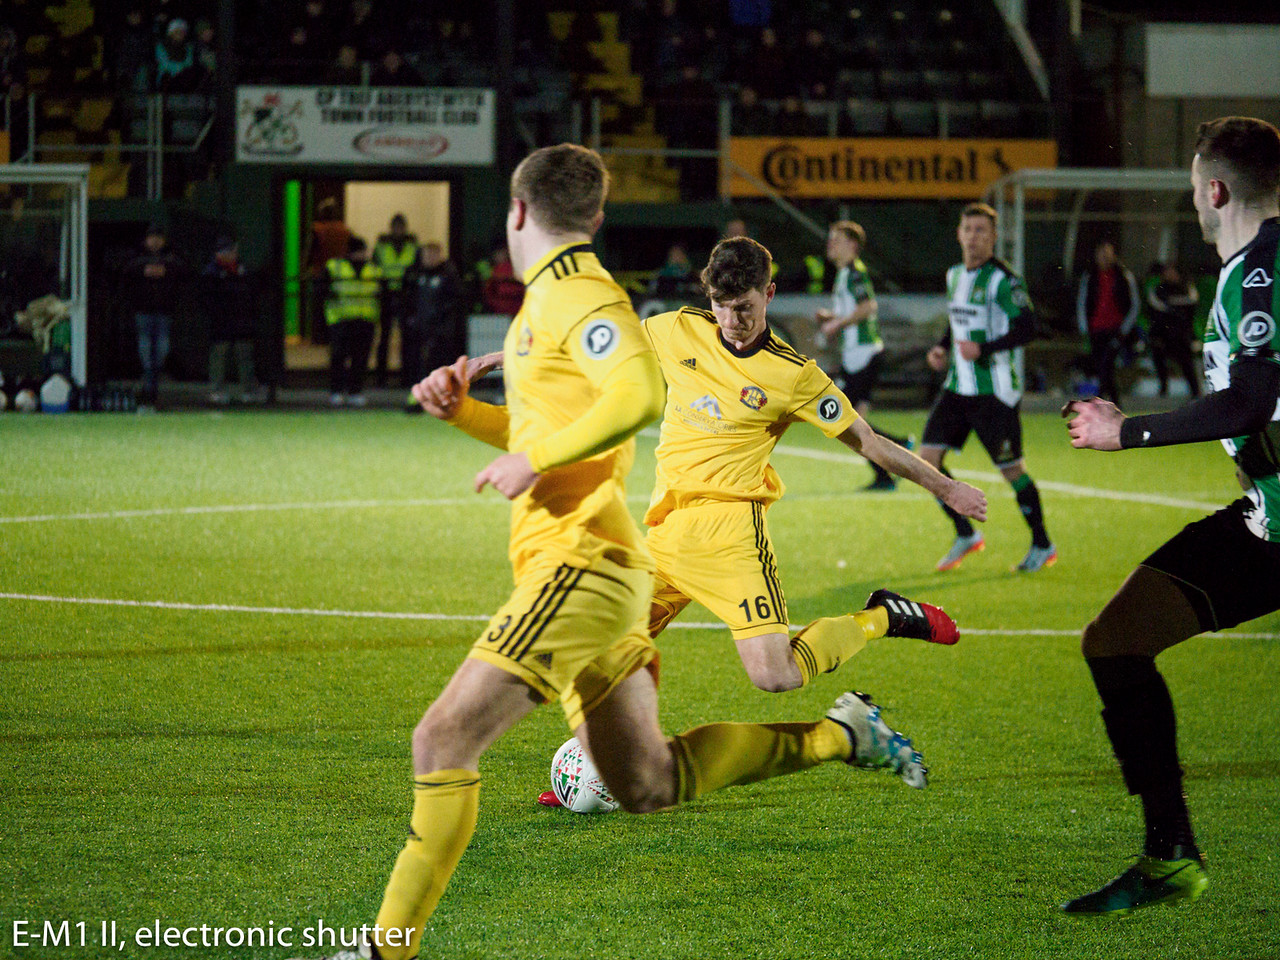
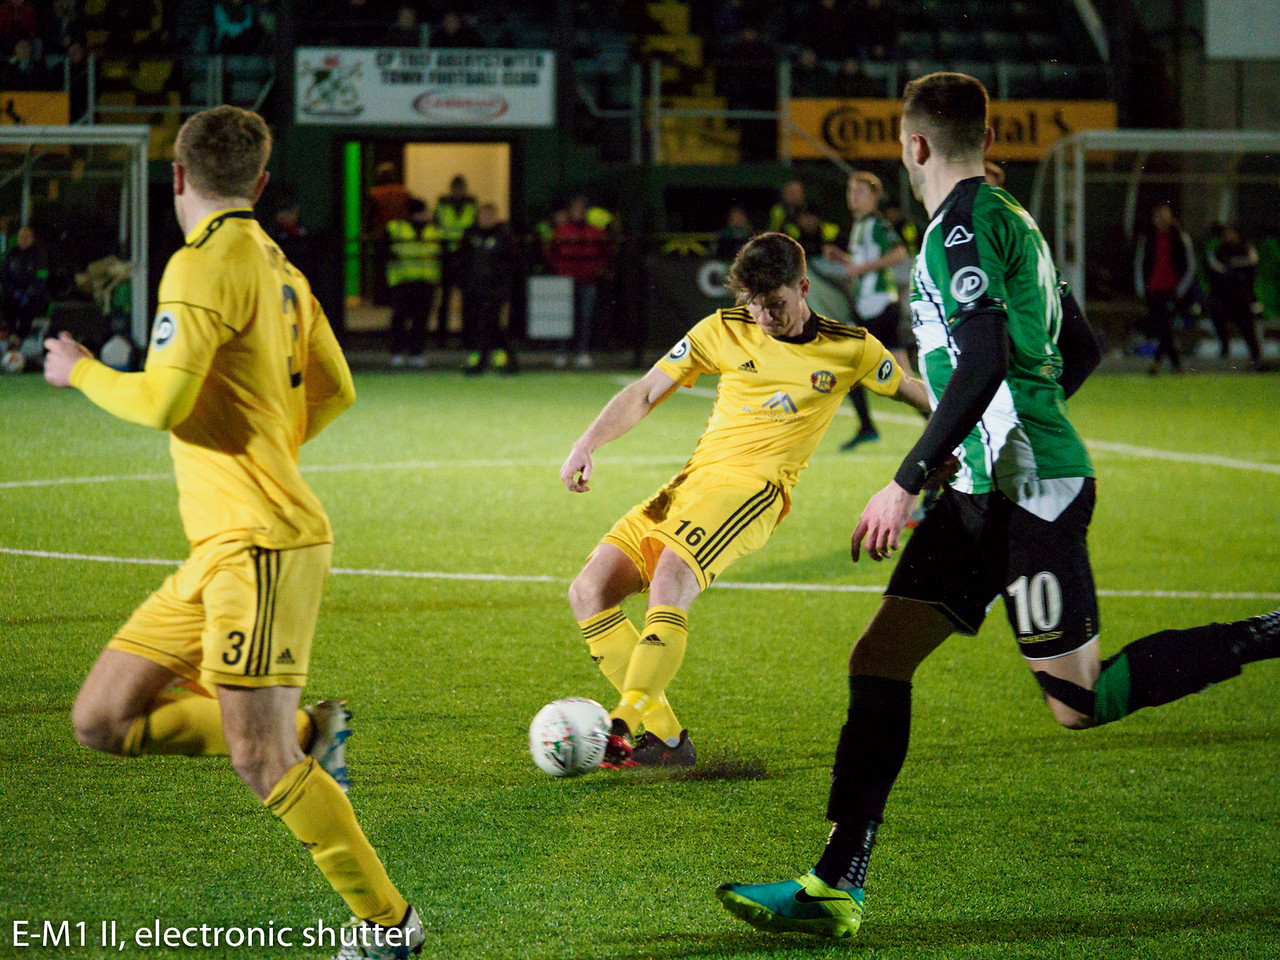
Now let’s move on to more some serious stuff, starting with sports. I wanted to test the cameras in the same conditions and the opportunity arose with an evening football game at Aberystwyth Park Avenue. The performance was similar but once again the G9 gave me a slightly higher keeper rate (75% vs 70%).


The Lumix does better at recognising human bodies and reading the scene. Even when using multiple points, it doesn’t jump from subject to subject too quickly for group shots and isn’t distracted by momentary obstacles such as a player passing in the foreground. Of course you need the right settings for this to be effective as we will discuss further down.
The surprise came when I mounted the Olympus 40-150mm Pro on the G9 for the second half of the game. Yes, the keeper rate was slightly lower (72%) and sometimes it had the tendency to alternate between in-focus and out-of-focus shots, but otherwise I was quite surprised to get similar results to the E-M1 II.


Although the E-M1 II’s performance was pretty close overall, I noticed that many times it took several frames to correct focus whereas the G9 is more reactive. Switching between Lumix and M.Zuiko lenses didn’t produce any substantial difference in AF behaviour.


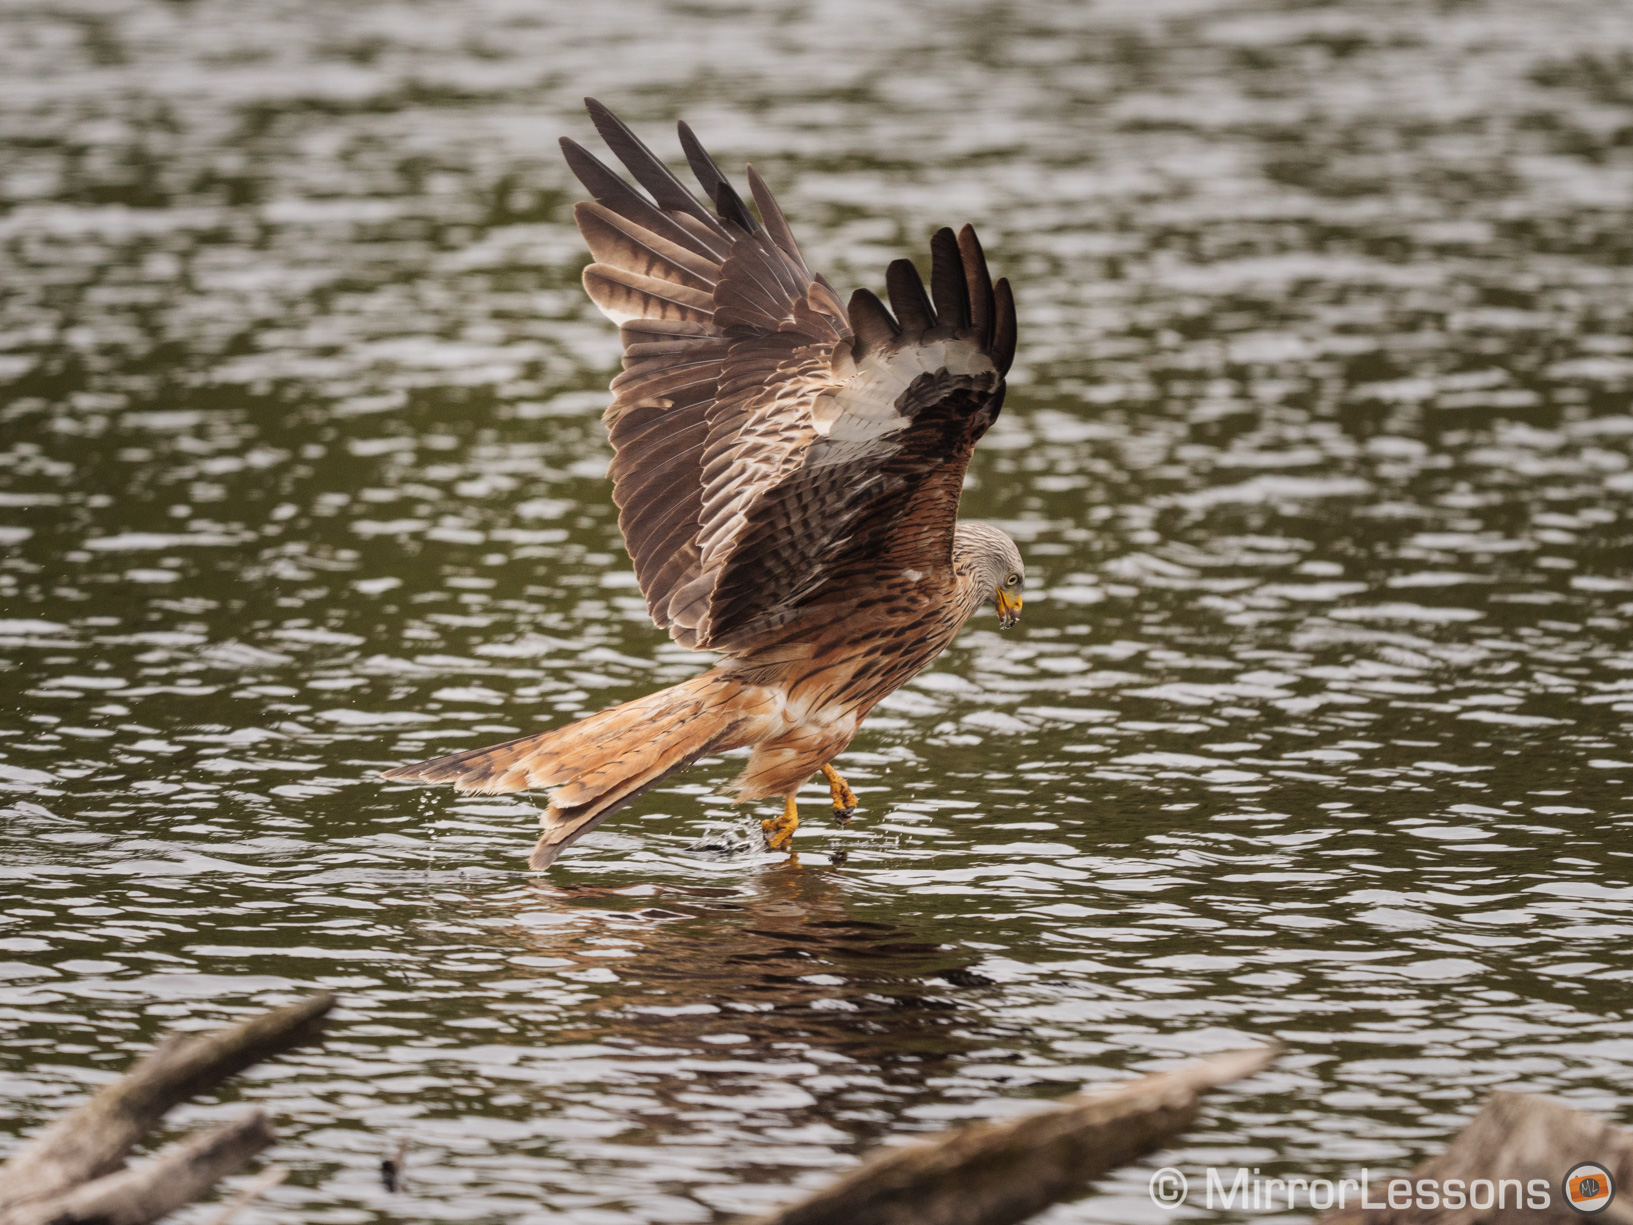
It was at my favourite testing ground – the Red Kite feeding station in Bwlch Nant Yr Arian – that I discovered the most relevant difference in AF performance. Because birds in flight is one of the main genres these two cameras are designed for, I made sure to go there multiple times to test various settings and lenses.


Originally, the E-M1 II gave me a keeper rate of around 55% whereas the G9 sat at around 45%. Note that this percentage only includes perfectly tack-sharp images. The performance on the Olympus improves to 66% with firmware 3.0 (read more about it here). Version 2.0 for the G9 also increase the score but only to 51% (report here).


Both cameras struggle to deliver a perfect sequence, especially when there are changes in background or the bird suddenly decides to fly closer to the camera. The fact that I got better results with the E-M1 II suggests that – despite the improvements made by Panasonic with DfD – phase detection remains superior for such difficult subjects whose feathers are similar in colour to the background.


Busy backgrounds can challenge the DfD AF of the G9 more (fortunately this one came out great!).
Using the DG 100-400mm on the E-M1 II didn’t alter the performance while the 300mm Pro on the G9 reduced the keeper rate to 35% (perfect sharpness only). Like with the 40-150mm Pro, the tendency is to alternate between out-of-focus and in-focus shots.

The Olympus performs better with busy background.

Here DfD had a toucher time with the Olympus lens
The most significant difference is found when switching to the electronic shutter to increase the continuous shooting speed (20fps on the G9, 18fps on the E-M1 II).
The performance on the Lumix decreased significantly and the keeper rate was pretty bad. Curiously though, it’s the only mode that gave me a few almost-perfect sequences, but I had to trash many others that were completely blurry from start to finish. The performance was better when the bird was against the sky (in bright sunshine especially) but whenever it flew against a busy background, the keeper rate decreased significantly.

A nice shot indeed, but too many of those came out completely out of focus when shooting at 20fps
With the E-M1 II, the performance at 18fps is no different to shooting with the mechanical shutter and its slower 10fps speed. Add to this the fact that the Olympus produces less rolling shutter (more on this in the next chapter) and you’ll see why the E-M1 II wins this specific battle.

Where the G9 does better than the E-M1 II however is with birds against the sky (in cloudy weather especially): the keeper rate was way better (around 78%) while the E-M1 II maintains the same performance as before unless you switch to AF Tracking (65%).

Panasonic has attempted to improve the autofocus algorithm via firmware update with version 1.2 and 2.0). The latest version added additional settings (Animal Detection and AF-ON Near Shift) that improve the keeper rate a little when the bird flies agains a busy background. You can find out more about this in our dedicated article here.
Before wrapping up this chapter, let me share a few extra words about my separate experiences with each camera.
I had the chance to test the G9 at the Cambrian Rally after sending the E-M1 II back, and the performance was spot on. I used the normal 9fps with the mechanical shutter and the keeper rate was near-perfect except a few slightly soft images, often at the beginning and end of the sequence. I got very similar results with the GH5 and a motorbike race last year, which confirms the great improvement overall that Panasonic has made to the second generation DfD autofocus.

When I reviewed the E-M1 II last year, I spent a day at the Revolution Bike Park photographing MTB athletes in the open air as well as in dark woods. The performance was less impressive, as the camera struggled in poor light and had difficulty capturing the riders when they came close to the camera, especially in the woods.

Of course each sport and situation is different, but my conclusion to this rather long chapter is that the G9 seems to have marginally better autofocus performance overall, except when dealing with birds in flight, particularly those flying against any background other than just plain blue/grey sky.
Continuous AF Settings and Tracking
To obtain the best results with continuous AF, it is important to select the right settings and this is why I decided to include them in this additional chapter.
Overall, I find the settings to be more complete and easy to understand on the G9 in comparison to the E-M1 II. I already mentioned the wider selection of AF points on the Lumix camera: you have more room to select a larger or smaller group without compromising the performance too much.
On the E-M1 II, the best results are obtained with the 5×5-Group or the 5-Group target. The All-Target mode can slow down the performance as the camera deals with AF points it doesn’t necessarily need.
Then there are the settings to tweak the continuous autofocus sensitivity and performance. On the G9, you have the AF Custom Settings with 4 presets that can be edited:
- AF Sensitivity: as the name suggests, it increases or reduces the reactivity of the camera when tracking the subject
- AF Area Switching Sensitivity: tells the camera how quickly it should move the AF points when the subject is outside of these points
- Moving Object Prediction: increases or reduces the reactivity of the camera to the subject’s speed and movements
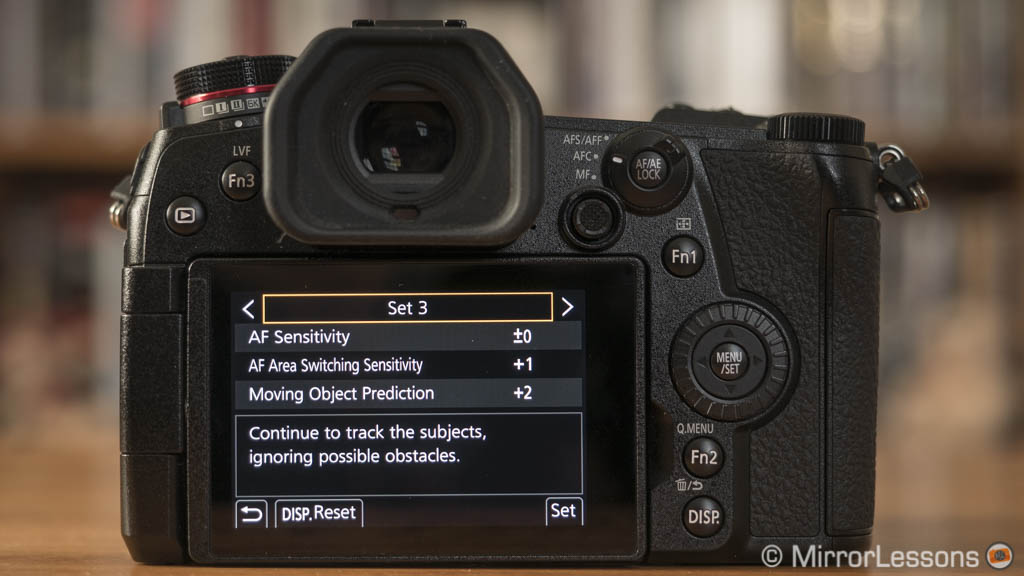
For example the default Set 3 (-1, +1, +2) which Panasonic describes as “Continue to track subjects, ignoring possible obstacles” did a great job at the football game. The camera never reacted too quickly when switching between subjects for group shots, or if a player momentarily passed in front of the camera in the foreground.
For birds in flight, raising the AF sensitivity to +2 gave me better results. For the rally race, I used the default Set 2 (+1, -1, 0) all the time since the trajectory of the car is easily predictable.
On the E-M1 II, the most important setting is called C-AF Lock: a higher value (max. +2) makes the camera more reactive when changing focus, while -2 makes it less reactive. For example +2 is best for BIF while 0 or -1 gives a balanced performance for group sports.
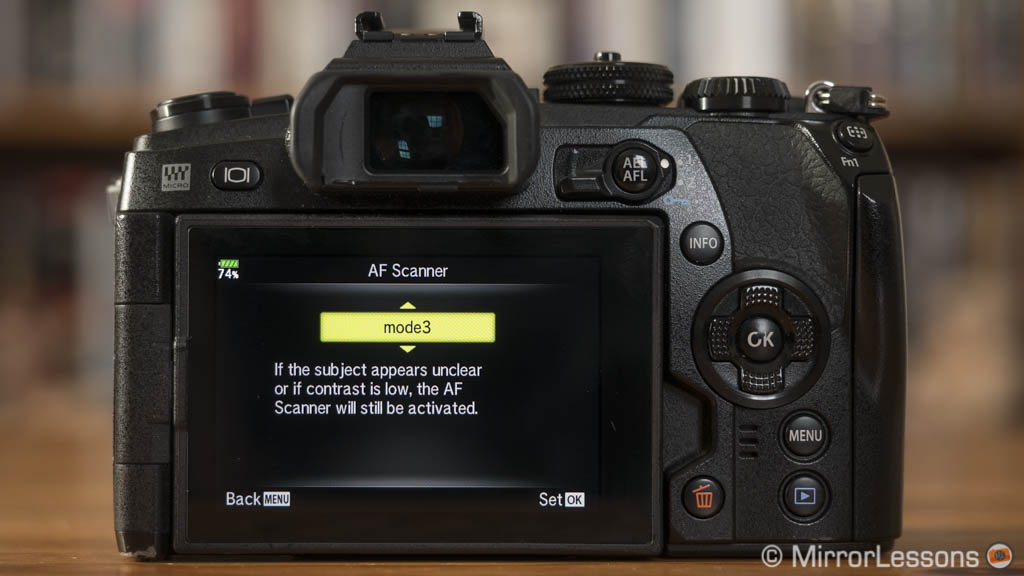
There is another setting called AF Scanner that forces the AF to run from the shortest distance to infinity once (mode 2), constantly (mode 3) or not at all (mode 1) if the subject appears dark or out of focus. I usually keep it on mode 2 for BIF or mode 1 for other sports.
As a final note, I tried the AF Tracking mode on both cameras which locks onto a subject and maintains focus no matter where it moves in the frame. However unless your subject is against a clear background, the AF point tends to jump between elements in your scene rather than staying on the subject, and panning quickly doesn’t help in any way. For these reasons, I rarely select this option.
Shutter modes, continuous shooting speeds, blackouts and buffer
Both cameras feature a quiet focal plane shutter with a minimum speed of 60s and a maximum of 1/8000s. You can extend the fastest speed to 1/32000s by using the electronic shutter. The latter is also key to some other impressive functionalities.
The G9 can shoot as fast as 12fps, or 9fps with AF tracking, when using the mechanical shutter. The E-M1 II in these conditions is slightly faster at 15fps (High) and 10fps (Low) respectively.
Activate the electronic shutter, and these speeds increase to 60fps (AF locked on the first frame), or 20fps on the G9 and 18fps on the E-M1 II with continuous AF. These are definitely impressive speeds for very fast subjects such as birds. Note that the E-M1 II also allows you to decrease the speed of the High and Low burst modes if the default ones are too fast.
The electronic shutter has some limitations such as distortion and banding. Both cameras feature a fast sensor readout so they don’t perform as poorly as some competitors, but you may still notice it when panning very quickly or when shooting sports at night under artificial light.


Overall the E-M1 II minimises these artefacts better: I noticed sligthly more distortion on the wings of birds with the G9 while the E-M1 II kept banding more contained during the evening football game. That said, a quick pan with the Olympus can still tilt vertical lines slightly.

These impressive speeds can be used to take pictures before releasing the shutter. The cameras start to load the buffer memory when the shutter button is half-pressed (or the back button focus is used). When you fully depress the shutter button, the camera saves these pre-loaded images to the SD card (the last 35 on the E-M1 II, I believe the last 15 on the G9) while it continues to take successive pictures.
On the G9, the function is called Pre-Burst. It works at 60fps – or 20fps if you switch to C-AF – and is compatible with all lenses including those from Olympus. On the E-M1 II it is called Pro Capture. Firmware 2.0 enables compatibility with all micro four thirds and four thirds lenses in the H mode (60fps), meaning that focus is locked on the first frame. With the L mode (18fps), only Olympus micro four third lenses work.


Another aspect to talk about is live view. When you record in burst mode, the camera may or may not show you a live view of the scene depending on the exact settings used.
The G9 offers live view with blackouts up to 9fps (mechanical or electronic shutter). With faster speeds it shows you the last images taken in rapid succession instead. So if you are shooting at 20fps, you see a very quick slideshow of what the camera has just recorded at 20fps.
On the E-M1 II, the last image taken is shown when selecting the High burst mode (60fps with e-shutter, 15fps with mechanical shutter). Live view is available with blackouts in Low mode (10fps or 18fps).
Let’s draw a direct comparison between the 20fps/18fps modes of the two cameras (electronic shutter and continuous AF).
On the G9, when I start shooting at 20fps, there is a delay at the beginning because the live view is interrupted and the EVF/LCD goes black before showing the images. This delay is very brief (less than a second) but is still noticeable when tracking fast subjects. However once you get used to it and manage to anticipate it, the quick frame rate you see in the EVF or LCD does help you track the subject better because you have a more fluid view (20fps is close to the 24fps rate you see in cinemas), even if what you see is what the camera captured a fraction of a second before.
The 18fps burst on the E-M1 II maintains live view, so there isn’t that initial delay you experience with the G9. However the constant blackouts between each frame make tracking more difficult.
Note: If you are curious to understand more about this (and why there are blackouts with the electronic shutter since there aren’t any mechanical curtains moving up and down), take a look at our explanation here.
Other interesting settings include an electronic first curtain shutter on both cameras (called Anti-Shock on the E-M1 II) which is useful to reduce shutter shock or when shooting at slow shutter speeds.
Finally, we have the buffer capabilities. At 9fps, the G9 is capable of holding that speed for a few more seconds (12s vs 10s) but then decreases to a slower speed than the E-M1 II.

At 20/18fps, the Olympus can hold the fast speed for longer than the G9 (8-10s vs 3-4s when using UHS II cards).
When shooting at 60fps, the G9 stops after 1 second and requires several seconds to empty the buffer, while the E-M1 II slows down to approximately 10fps after 1 second. Both cameras perform better with UHS-II cards.
The article continues on page 3.
Check price of the Panasonic G9 on
Amazon | Amazon UK | eBay | B&H Photo
Check price of the Olympus OM-D E-M1 II on