You are now on page 3. Here you can read all my findings concerning stabilisation, movie capabilities, battery life and other features.
- Page 1: design, functionality and image quality
- Page 2: autofocus and continuous shooting
- Page 3: stabilisation, video, other features and conclusion
Table of Contents – Page 3
1. Image stabilisation and High Resolution mode
2. Video
3. Flash
4. Other settings and extra features
5. Battery life
6. Lenses and firmware updates
7. Price
8. Conclusion
Ethics statement: the E-M1 II and G9 samples were loaned to us to conduct our reviews and comparisons. We were not asked to write anything about these cameras, nor were we provided with any sort of compensation. Within the article, there are affiliate links. If you decided to buy something after clicking the link, we will receive a small commission. To know more about our ethics, you can visit our full disclosure page. Thank you!
Image stabilisation and High Resolution mode
Olympus was the first mirrorless brand to introduce 5-axis image stabilisation. It remained an exclusive feature of the OM-D series for a few years, then other brands including Panasonic started to incorporate the same technology.
The two cameras represent the best each brand has to offer at the time of publishing, and they also represent two of the best cameras when it comes to image stabilisation, all brands combined.
In addition to the in-body stabilisation, they can work in conjunction with optically stabilised lenses to produce superior results. The Dual IS2 system of the G9 is compatible with more lenses, although the performance may decrease with older versions that feature a less advanced hardware. The E-M1 II uses Sync IS but so far only two lenses are compatible, the 12-100mm f/4 and 300mm f/4 Pro.
If we have a look at the torture test below, we can see that at 18mm, I got a good shot at 4s with both cameras and although the G9 gave me a more precise result, the E-M1 II had a better keeper rate. At 1 second, the Olympus nailed it almost every time while the G9 had a 50% keeper rate regardless of whether I used the IBIS alone or with Dual IS2 (Sensor + optical stabilisation).


Unfortunately I didn’t have a sample of 12-100mm Pro with me, but when I reviewed the lens on the E-M1 II last year, I was able to push shutter speeds down to 8s and 10s. I even managed a 20s image once while leaning against a wall and holding my breath – ah, the things we do in the name of camera testing! Certainly multiple attempts are needed and the keeper rate isn’t great, but I never got close to the same results with the G9 and Dual IS.


The second torture test was to see how well the camera would compensate with a very long focal length (300mm in this case). The E-M1 II managed a perfectly sharp shot at 1/8s and one almost perfect shot at 1/2s. With the G9, the best result was 1/15s.


One important thing to note is that the lenses don’t have cross-brand compatibility when it comes to Dual IS and Sync IS. So a Panasonic lens won’t work in conjunction with the IBIS of the E-M1 II. In the same way, a M.Zuiko IS lens won’t be compatible with the Dual IS of the G9. On the Olympus, there is a setting to give the lens IS priority when using Lumix lenses. On the G9, simply turn off the switch on the lens and use the IBIS instead.
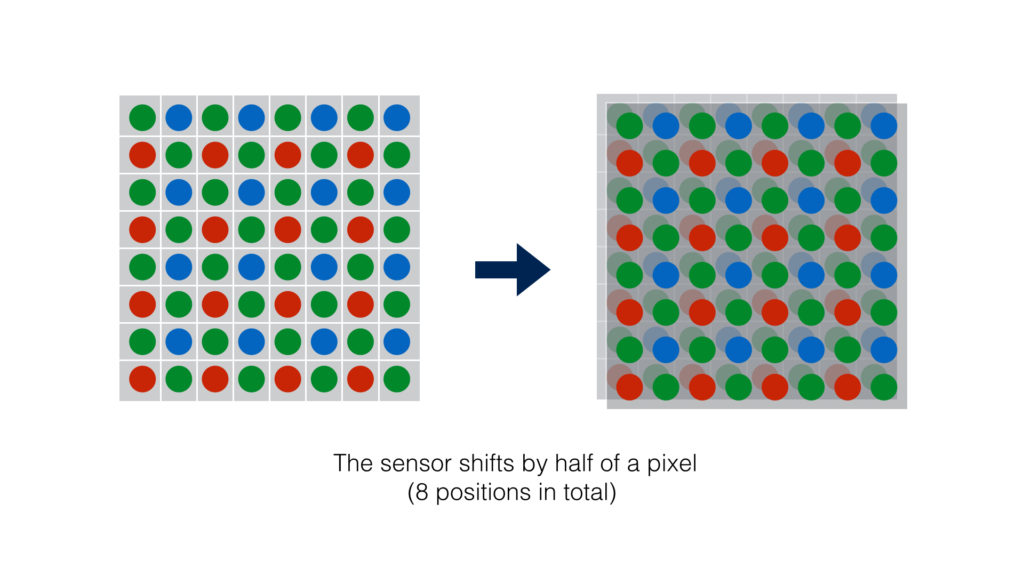
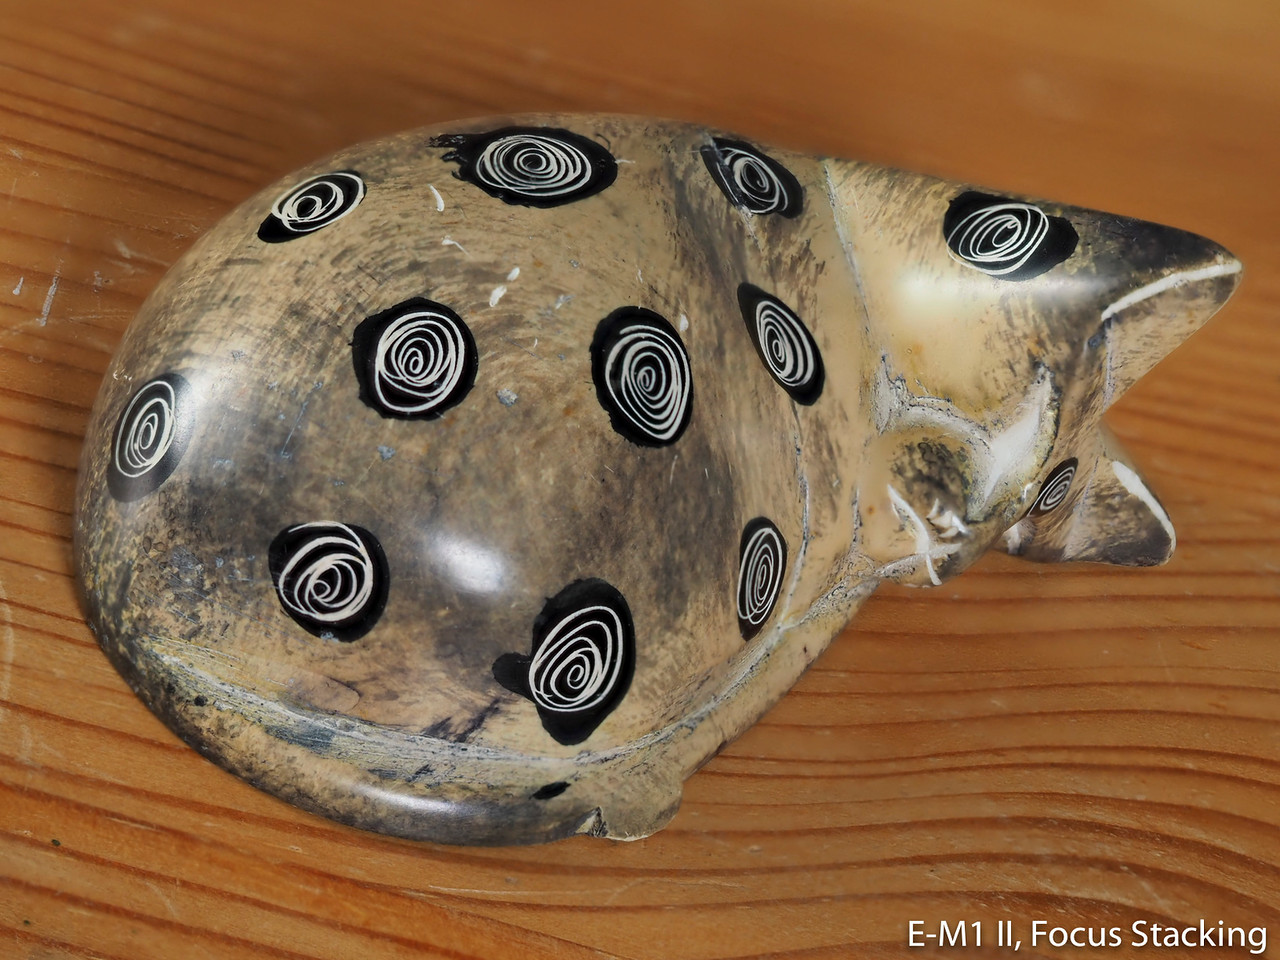
The sensor shift technology is used for another feature called High Resolution shot. Once again, Olympus pioneered this technology in the mirrorless segment with the E-M5 mark II, while it is a first for Panasonic.
By moving the sensor by half a pixel in between shots, the cameras can composite 8 consecutive images to create a picture with a higher resolution than the native 20MP of the sensor. Colour accuracy is also improved because each point on the image is captured by at least one red, green and blue pixel.
The G9 can output a maximum of 80MP for both RAW and JPGs, while the E-M1 II reduces the resolution to 50MP for JPGs. The maximum aperture available is f/8 on the OM-D and f/11 on the G9 (firmware 1.1). ISO sensitivity is limited to maximum of 1600 on both models.
The G9 composites the final image more rapidly in-camera. Plus, when working with the two RAW files, sharpness needs more tweaking on the E-M1 II file in order to bring back all the details, and even then, it still doesn’t match the level of detail produced by the G9.


Because the sensor moves between frames, this technology has some limitations. You need to place the camera on a tripod (IBIS won’t work obviously) and any moving subject, such as moving water or elements moving in the wind, will produce grid artefacts. In order to minimise these artefacts, Olympus improved the technology by blending part of the image with one of the single shots. The results aren’t perfect but you need to enlarge the image a lot to spot the grid pattern. The G9 behaves in a similar manner.

The High Res shot improves dynamic range in the shadows: there is less colour noise in comparison to a single image, however the G9 displays some bad tone transitions.


The E-M1 II is weaker in the highlights, where recovery is much worse in comparison to the G9. A curious thing I also noticed is that the composited G9 file is twice the size of the Olympus ORF file.

If you’re not sure about the final composite, you can always save a single 20MP RAW/JPG file. The E-M1 II does this automatically by saving an .ORI file. Simply change the “I” to “F” and it becomes an ORF RAW file that can be opened with any software. The G9 gives you the option of saving a single image when choosing the settings of the High Resolution mode.
Video
Video has always been Panasonic’s strength in terms of quality, frame rates and the number of advanced settings and features. Olympus is now making the effort to manufacture products that are more attractive to video makers and the E-M1 II is the first attempt. Unfortunately, this is also the department where Olympus needs to work harder to keep up with the fierce competition.
Below you can see our 4K video comparison. Scroll down to read our findings.
Let’s start with the specifications. Both cameras can record Ultra HD/4K (3840×2160) with a similar bitrate up to 30p (100Mbps for the G9, 102Mbps for the E-M1 II) and a maximum recording time per clip of 30 minutes. The Panasonic can extend the frame rate to 50/60p (150Mbps) for 10 minutes maximum, which can also be used for in-camera slow motion results.
The E-M1 II on the other hand can record in DCI 4K (4096×2160) at 24p at a higher bitrate of 237Mbps but the latter is variable and the camera often stays below 100Mbps.
Firmware 2.0 brings important specs to the G9: the camera can record in 10-bit 4:2:2 internally (up to 30p in 4K) just like the GH5.
Neither crops the sensor when recording in 4K or 1080p. The Panasonic produces better sharpness, which can also be tweaked with settings such as i.Resolution for crispier results, although it must be used with caution to avoid extra noise. On the E-M1 II you can increase the sharpness up to +2 but just like with the SOOC JPGs, it produces too much contrast.
The G9 has warmer colours overall and produces more pleasant results for skin tones. The E-M1 II appears cooler and skin tones can assume a greenish tint. Note that colours can vary a little when using Lumix/Leica or M.Zuiko lenses, although the difference is more visible on the G9 than on the OM-D.
Both cameras include profiles designed for video. The G9 has CineLike D and CineLike V. The former decreases the contrast to give you slightly more room in post production.
The E-M1 II has the Picture Mode that once enabled, decreases the contrast for the same purpose. I found the Olympus profile to be less gradable because tone transitions can shift towards unpleasant results more quickly.
The DR is similar, although the G9 has more to offer in terms of shadow recovery if you tweak settings such as Highlights/Shadows or i.Dynamic. Bear in mind that these settings will produce more noise in the shadows if you select the highest values. The E-M1 II loses some saturation when tweaking these settings though.
Firmware 2.0 ads V-Log L and HDR for the G9, although you’ll need to buy a software key to unlock V-Log. The E-M1 II now has ON-Log400 thanks to firmware 3.0.
At high ISOs, the G9 wins once again: it displays less noise from 1600 upwards, has an extra sensitivity step (12800 while the OM-D stops at 6400) and more effective noise reduction.
Both cameras shine when it comes the image stabilisation system. Dual IS and Sync IS can improve the smoothness of the result but even IBIS alone, the cameras deliver excellent results. The G9 in particularly surprised me as it can keep up with the OM-D, which shows the improvement made by Panasonic in this department.

You can add software/electronic stabilisation on both which is useful in various situations, last but not least when recording with extreme telephoto lenses. The G9 has an extra setting called IS Lock but it adds more jittering so I prefer to leave it off.
Be aware that distortion and jello effects produced by the IBIS can result in less pleasant footage if you move too quickly or erratically. Rolling shutter is fairly similar on both products.
The G9 used to be faster in continuous AF but the firmware 3.0 has added a significant boost in speed and reactivity on the Olympus camera.
You can take advantage of the touch screen to change the focus point but neither camera offers the possibility to control the speed or reactivity of the transitions. The G9 is faster here as well.
The G9 has a few extra settings such as Luminance Level, Flicker Reduction and Zebra Patterns.
Both cameras feature a mic input and a headphone output, and recording levels can be controlled and monitored in-camera. On the G9 there is a limiter, as well as a noice canceller setting.
You can take advantage of the HDMI output to record a clean 4:2:2 10-bit signal (up to 60p in 4K) to an external recorder on the G9 (firmware 2.0). The E-M1 II outputs a 4:2:2 8-bit stream only.
Flash
Neither product incorporates a built-in flash. Olympus gives you the small FL-LM3 for the E-M1 II while with the G9, you must purchase one separately.
You’ll find a flash sync port on the front of the two cameras to connect external studio strobes. Both have a maximum sync speed of 1/250s.
There are wireless capabilities on the two models: you can use compatible products for off-camera work via optical transmission. The supplied flash with the E-M1 II can be used as a trigger for other RC compatible units. Some Panasonic and Olympus flashes allows you to use HSS (High Speed Sync).
One advantage for E-M1 II owners is the possibility to work with Profoto flashes such as the B1 or B1 series with TTL and HSS using the Profoto Air Remote TTL-O. Unfortunately, as of now it is only compatible with OM-D cameras.
Other settings and extra features
Panasonic and Olympus have been spoiling us with extra features for many years, and of course these two flagship models are no different.
Let’s start with what they have in common:
- Metering: Multi and Spot behave in a similar way on both cameras, while Centre-Weight on the G9 overexposes more. On the E-M1 II you’ll also find Spot Metering Highlight (brighter) and Spot Metering Shadow (darker).
- RAW processing: develop a RAW file in-camera and save it as a JPG. The G9 offers a few extra settings.
- MF Assist, magnification: choice of magnification (max. 20x on the G9, 14x on the E-M1 II). It appears much sharper on the G9 than on the E-M1 II (EVF and LCD), and the Picture in Picture mode on the Lumix is very useful as well. (Magnification appears within a portion of the frame and can be moved on the LCD screen.). On the Olympus you can also select the magnification by zoom ratio and pixel equivalence.
- MF Assist, peaking: five colours to choose from on the G9 (blue, orange, green, red, grey), four on the E-M1 II (White, black, red, yellow). The Olympus allows you to decrease the brightness of the live view when using peaking to see the contours better, while on the G9 you can choose two level of colour intensity (High and Low). With firmware 2.0, peaking works in AF mode.
- MF Assist, focus ring: on the G9 you can disable the ring to prevent unwanted changes (firmware 1.1)
- Intervalometer / Timelapse: up to 999 frames and you can save a 4K video file as well, although on the E-M1 II the frame rate is limited to 5fps.
- Multiple Exposure: up to 4 images on the G9, two frames on the E-M1 II (three if you do it in playback mode)
- Special effects: called Creative Controls on the G9, Art Filters on the E-M1 II, they add effects such as toy camera, partial colour, bleach bypass and many others
- Wifi: remotely control the camera and transfer images to your mobile device.
- Tethering: connect the cameras to a computer via USB cable, automatically transfer the images and control the cameras remotely (Olympus Capture software needed for the E-M1 II, Lumix Tether for the G9)
Another thing you’ll find on the two products are different bracketing modes, although the options and settings can vary. Both have white balance, focus and exposure bracketing.
The E-M1 II has an extra mode called HDR bracketing which works like AE but with a larger exposure gap (up to 7 frames and ±2Ev, or 5 frames and ±3Ev). The G9 offers up to 7 frames and ±3Ev with AE Bracket.
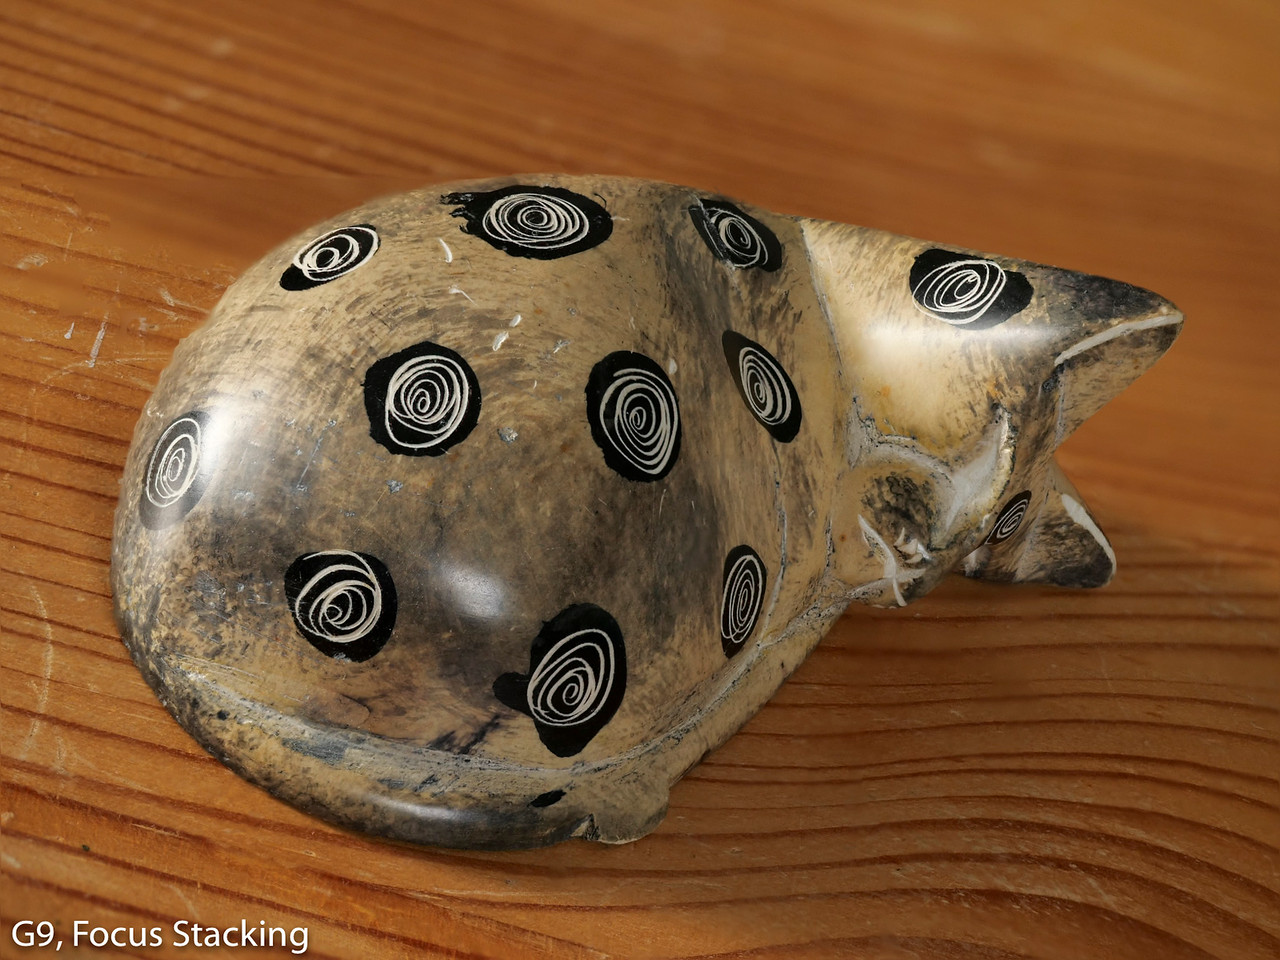
Focus bracketing works in a similar way and you can set the focus differential (how much the camera changes focus between each shot) in various steps. The E-M1 II can perform stacking in-camera but it’s limited to 15 frames and JPG output (but the individual frames are also saved meaning you can stack the images in post production if you prefer). The G9 has a stacking option but it works with the 4K/6K Photo and Post Focus modes: the camera records a video and changes the focus point between each frame. You can then select the frames you want to merge but the result is not as precise as the E-M1 II solution.
Note that on the E-M1 II, the Stacking option is limited to eight lenses (8mm F1.8 Fisheye, 7-14mm Pro, 12-40mm Pro, 30mm F3.5 Macro, 60mm F2.8 Macro, 40-150mm Pro, 12-100mm PRO and 300mm Pro).

The G9 has a few exclusive features including:
- Stop Motion Animation: creates an animated film frame-by-frame with live view and saves the result as a 4K video
- Aperture Bracketing: takes a sequence of images with different aperture values
- 4K Live Cropping: creates zoom or pan movements from a single static shot (the camera uses the 4K resolution to crop the video and saves the result in 1080p)
- Bluetooth: it extends the wireless capabilities by maintaining a constant connection between your phone and the camera and sends images automatically without draining too much battery life. It can also turn the camera on and off, synchronise the clock / time zone, geotag your images while they’re being captured and save the camera’s setup to your smartphone.
One of the most interesting features developed by Panasonic is called 6K/4K Photo. Also present on other Lumix cameras, it allows you to record a 6K video at 30fps or a 4K video at 60fps and save any frame you want into a 18MP or 8MP JPG. This feature may feel more unnecessary on the G9 since the camera can shoot at 60fps and 20fps with RAW files, but the advantage here is that – because the G9 records a video – there is no buffer limitation except for the 30 minute limit of video itself.
There are several options including Pre-Burst, Post Focus (select the focus point after recording the footage) and Light Composition. The final option merges the frames by saving just the brightest pixels, which is similar to what the E-M1 II does with Live Composite. However merging frames of a compressed video file means that the result is less precise and again, it’s only a JPG. Other settings include noise reduction and rolling shutter correction.
The OM-D doesn’t take advantage of its 4K capabilities as much as the G9 does. There is an option to extract a JPG file from video footage in playback mode, but the operation is not as quick as with the Lumix camera.
Finally let’s have a look at the features you will only find on the E-M1 II:
- Live Composite: merges different long exposures into a RAW or JPG file by saving the brightest pixels, useful for fireworks, light painting and star trails
- Live Time: very useful as well, it creates long exposures with live view on your LCD screen so you can see how the image is coming along and when to end the exposure
- Extra bracketing modes: flash, ISO and Art Filters
- Preset MF: allows you to set a specific focus distance for the lens to go to when switching to manual focus mode
- Keystone Compensation: corrects the perspective of buildings captured from the bottom, or deliberately exaggerates them
- Fisheye Compensation: it allows you to use the 8mm f1.8 Fisheye as a normal wide angle lens by correcting the distortion and it works with live view
- Copyright settings: adds the name of the photographer and copyright holder to the EXIF data of the images
- Flicker Scan: useful when using the electronic shutter with LED lights, it shows in the EVF or LCD how much flickering there is so that you can select an optimal shutter speed to minimise it.
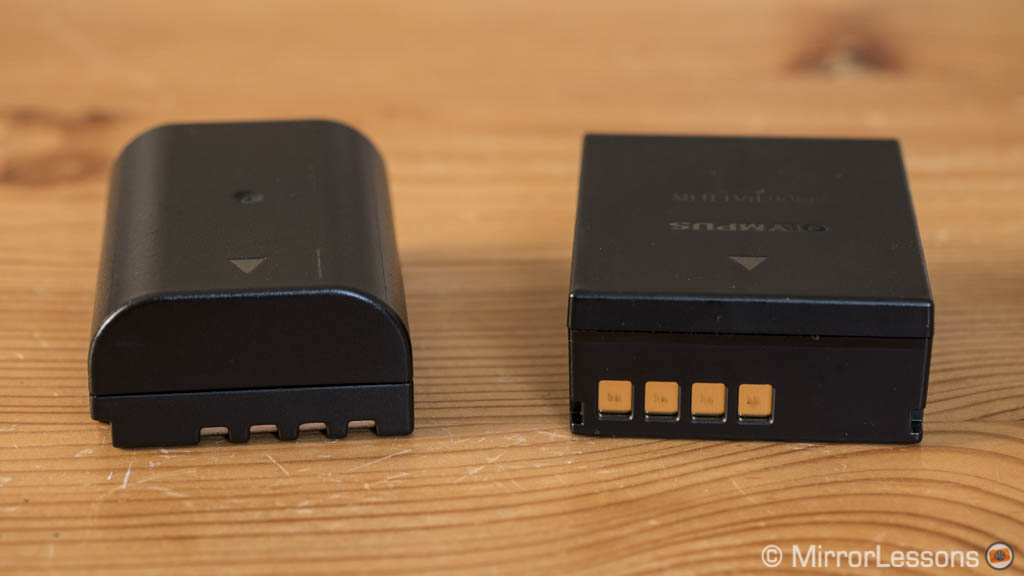
Battery life
The E-M1 II has a larger and more capable battery. You can take more than 1500 images, record a bunch of short 4K clips and still have more than 40% of the battery life left over. You can also check the battery status in the menu to see how healthy it is. The only problem is that the camera occasionally shows you an incorrect percentage. It decreases really slowly but can also drop from 31% to empty in a matter of minutes. That being said, the firmware 2.0 is said to fix this problem.
The G9 has a very good battery life but it isn’t quite at the level of the Olympus battery. Burst shooting (with the electronic shutter especially) and 4K video can drain it more rapidly.
For less intense use, you can take advantage of a few settings to improve the battery life. The G9 has an economy mode that allows you to set a duration before the camera goes into sleep mode or the EVF/LCD are turned off. The Power Save LVF Shooting setting can turn off live view after a short time (between 10s and 1s) when the Eye sensor is not triggered. You can choose to have both LCD and EVF turned off or just the LCD.
On the EM1 II, you can dim the brightness of the LCD, put the camera to sleep or turn it off after a certain amount of time. Additionally, the Quick Sleep mode disables live view and turn off the camera in a much shorter time.
Both cameras can be used with a battery grip to improve the ergonomics and prolong the battery life. Only the G9 can be charged or powered via USB though. The latter is a nice option and can be handy for different things. Here are two examples:
- you can use a USB mobile charger when shooting astro-photography or time-lapse so that you don’t need to interrupt the shooting to change battery
- you can power the camera with the supplied batter charger (which also connects with USB) when recording video indoor all day (note that the 30 minutes limit per clip still applies).
Lenses and firmware updates
Because they are part of the same system, you can take full advantage of all Micro Four Thirds lenses and use them on either camera.
There aren’t any major compatibility issues if not for a few minor things like:
- The DfD AF system of the G9 is supposed to work with Panasonic lenses only, but we’ve seen in the dedicated chapter that the camera works better than expected with Olympus lenses.
- Dual IS and Sync IS (sensor + optical stabilisation) are not cross brand compatible, so its Olympus with Olympus and Panasonic with Panasonic.
- Some special features of the E-M1 II such as Focus Stacking only work with select Olympus lenses
- The aperture ring of Lumix/Leica prime lenses is not effective on Olympus bodies, so you must change the aperture with the default dial on the camera.
Olympus has done a good job over the past couple of years with its flagship models, bringing relevant updates in performance and unlocking new features. They did it with the first generation E-M1 and E-M5 II and rumours are hinting at the imminent arrival of an update for the E-M1 II as well.
Panasonic has been less consistent but they recently showed with the GH5 that they are capable of releasing massive firmware updates as well. It’s too soon to tell if the G9 will receive such treatment but let’s keep our fingers crossed.
Price
Both cameras have seen a decrease in purchasing cost since their release.
Looking at the recent retail prices, the G9 is less expensive at $1200 / £900 / €1200, while the E-M1 II is priced at $1500 / £1370 / €1400.
Keep in mind that instant rebates, discounts, cashbacks and special offers can vary the price at different times of the year.
Conclusion
The Panasonic G9 and Olympus OM-D E-M1 II are two of the most impressive mirrorless cameras I’ve had the chance to compare. They feel robust, mature, give you plenty of features and deliver great performance. Who could have ever imagined nine years ago that Micro Four Thirds would come this far, challenging bigger and older systems for specialised genres such as sports and wildlife.
If I had to pick the one camera that surprised me the most, it would be the G9. Panasonic has long been trying to shake off its reputation as a video-oriented brand and let’s face it, several of its cameras are nice tools for still photographers (including the GH series). But the message has never been as clear as with the G9 and in my opinion, the brand has succeeded.
The design, grip and build quality are wonderful; the controls are more complete and comfortable to use; the viewfinder has more resolution and a higher magnification. Panasonic is also getting better at creating its own colour signature, and the improvements made to the SOOC JPGs and video are proof of that.
I also want to give Panasonic credit for insisting on its DfD autofocus system. I used to be skeptical about its evolving performance but the GH5, and now the G9, prove that there is more potential there than what my gut was telling me. That being said, there are weak points such as when tracking birds in flight (especially when they are against a busy background).

At this point you might think that I’m leaning towards the G9 but the truth is, if I had to buy one of these two products for myself, I’d have a really tough time making a decision.
There is something I love about the E-M1 II and that is the size. Panasonic did a wonderful job with the G9 but they also made it larger than the E-M1 II. Olympus managed to contain the dimensions, yet design an equally comfortable front grip, a tough body and space for a larger battery. Granted, the menu system is more confusing and some settings are hidden, but once you learn how to use it properly, it can be a really effective tool.
There are other aspects that make the E-M1 II an interesting choice. The image stabilisation remains superior, although Panasonic has admittedly made great progress with the G9. The faster burst speeds of 60fps/18fps with the electronic shutter are more effective because there is less rolling shutter/banding and continuous AF works better at 18fps than at 20fps on the G9.
The Lumix, unsurprisingly, remains a better choice for video in terms of quality and the options available (4K 60p and Full HD 180p). Knowing how well it performs for stills, the camera feels more well-rounded and this is perhaps the main reason I would choose the G9 over the E-M1 II. Furthermore, the addition of firmware 2.0, with 10-bit video internal recording and various other improvements, has made the Lumix one of the best camera you can possibly buy.

One final thought that came to mind while comparing these two products is that the E-M1 II isn’t really as much of a game changer as it was when it was first announced in late 2016. We all know that one year is a long time in the world of electronics and Panasonic used that time wisely to furnish the G9 with many of the same specifications introduced on the E-M1 II by Olympus.
But once you stop thinking about who came first, and simply look at what is available today, I can’t help but notice that some features on the OM-D are starting to appear a little outdated, the EVF resolution being a good example. Other specifications have been matched (60fps and 20fps) and the brand still struggles to compete more seriously in the video department. Yes, Olympus’ image stabilisation is still the best, but even there the gap isn’t as big as it used to be.
For now the E-M1 II remains our favourite choice for wildlife and birds in flight for the reasons I already explained, but the mirrorless market has become more competitive than ever before. I believe that Olympus will need to work extremely hard on the next flagship if they want to remain on top.
Why choose the Panasonic G9:
- larger body, which some of you may prefer when using big lenses
- more physical controls (AF joystick etc.) and user friendly interface including the handy top LCD
- larger EVF with more resolution (the optical distortion doesn’t bother me personally)
- better video quality (colours and ISO especially)
- more video frame rate options including 4K at 50/60fps and Full HD up to 180fps
- 10-bit 4:2:2 internal recording (firmware 2.0)
- better image processor for SOOC JPGs (colours, sharpness and noise reduction)
- the autofocus is faster for stills for most genres and there are more settings to customise the AF points and sensitivity
Why choose the Olympus OM-D E-M1 II:
- smaller and lighter body, with great ergonomics and grip
- larger battery with more endurance (hopefully Olympus will fix the remaining battery life indicator issue)
- phase detection makes the AF more reliable for birds in flight against busy backgrounds
- better AF performance when shooting at fast speeds such as 18fps using the e-shutter
- there is no decrease in AF performance when using Panasonic lenses
- more contained rolling shutter and banding when using the electronic shutter
- the image stabilisation is still the best you will find on a mirrorless camera
- better buffer capabilities
Check price of the Panasonic G9 on
Amazon | Amazon UK | eBay | B&H Photo
Check price of the Olympus OM-D E-M1 II on