The E-M5 III was released in late 2019, with an attractive design and various features take from the flagship E-M1X. One of its closest competitors within the Olympus range is the E-M1 II, which is now more than three years old and has a replacement (E-M1 III) but is still worth considering for various reasons.
Let’s see how these two OM-D models compare by analysing five key aspects.
Ethics statement: we tested the E-M1 II on several occasions and spent two weeks with the E-M5 III. Within the article, there are affiliate links. We were not asked to write anything about these products, nor were we provided any other compensation of any kind. If you buy something after clicking one of these links, we will receive a small commission. To know more about our ethics, you can visit our full disclosure page. Thank you!
TABLE OF CONTENTS
Main Specs
1. Design and Functionality
2. Image Quality
3. Autofocus and Speed
4. Image Stabilisation
5. Video
Extra Information
Conclusion
Main Specs
OM-D E-M5 mark III
- Sensor: 20 MP 4/3 Live Mos
- Lens system: Micro Four Thirds
- Weatherproof: Complete (splash, dust and freeze proof -10°C)
- Internal Stabilisation: Yes (5-axis), Sync IS compatibility on select lenses
- Autofocus: Hybrid with 121 points
- Continuous shooting: 10fps (AF-S), 6fps (AF-C), 30fps (AF-S) and 10fps (C-AF) with electronic shutter
- ISO Sensitivity: 200 – 25600 ISO (Pull 64)
- Shutter Speeds: 1/8000 to 60 seconds, 1/32000s with electronic shutter
- Viewfinder: 2,360K dots, approx. 100% FOV coverage and 1.38x (0.69x) magnification, 27mm eyepoint, 60Hz refresh rate
- Rear monitor: Multi-Angle 3″ LCD touch sensitive monitor (1,037K dots)
- Movie recording: 4K up to 30fps, C4K at 24fps, Full HD up to 120fps
- Built-in Flash: No but external FL-LM3 is supplied
- Extra Features: WiFi, Bluetooth, Timelapse, Live Time, Live Composite, Focus Stacking, High Res Shot, Pro Capture
- Dimensions: 125.3 x 85.2 x 49.7mm
- Weight: 414g (including battery and memory card)
- Firmware: 1.1
OM-D E-M1 mark II
- Sensor: 20 MP 4/3 Live Mos
- Lens system: Micro Four Thirds
- Weatherproof: Complete (splash, dust and freeze proof -10°C)
- Internal Stabilisation: Yes (5-axis), Sync IS compatibility on select lenses
- Autofocus: Hybrid with 121 points
- Continuous shooting: 15fps (AF-S), 10fps (AF-C), 60fps (AF-S) and 18fps (C-AF) with electronic shutter
- ISO Sensitivity: 200 – 25600 ISO (Pull 64)
- Shutter Speeds: 1/8000 to 60 seconds, 1/32000s with electronic shutter
- Viewfinder: 2,360K dots, approx. 100% FOV coverage and 1.48x (0.74x) magnification, 21mm eyepoint, 120Hz refresh rate
- Rear monitor: Multi-Angle 3″ LCD touch sensitive monitor (1,040K dots)
- Movie recording: 4K up to 30fps, C4K at 24fps, Full HD up to 60fps
- Built-in Flash: No but external FL-LM3 is supplied
- Extra Features: WiFi, Timelapse, Live Time, Live Composite, Focus Stacking, High Res Shot, Pro Capture, Tethering
- Dimensions: 134.1 x 90.9 x 68.9mm
- Weight: 574g (including battery and memory card)
- Firmware: 3.2
Design and functionality
The E-M5 III is smaller and lighter than the E-M1 II. The difference in weight is certainly what you’ll notice the most if you hold one in each hand. One of the reasons that the M5 model is 160g lighter is the predominant use of plastic (polycarbonate) whereas the E-M1 II is made of magnesium alloy.
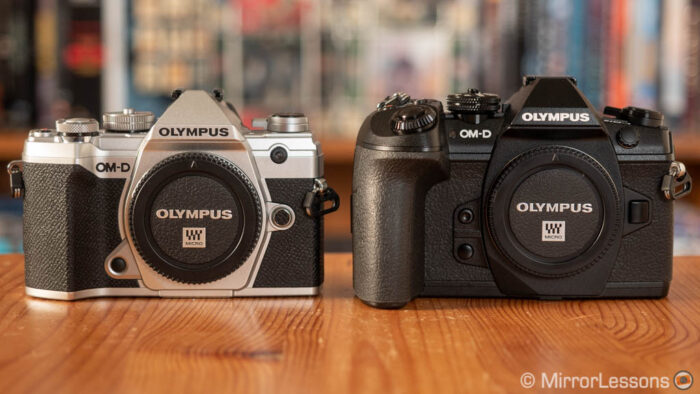
The difference in material is definitely noticeable and the E-M5 doesn’t feel as “premium” as its lovely design might suggest. However, I didn’t find its construction to be cheap by any means and Olympus guarantees the same level of weather-sealing as the E-M1: splash, dust and freeze proof (-10˚C).
The E-M1 II might be larger, but there is an advantage that mustn’t be underestimated: the front grip is more comfortable than the flat front design of the E-M5 III. This is something to consider when using large lenses in particular, although I have to say that I find the E-M1 II grip useful with lenses of any size.

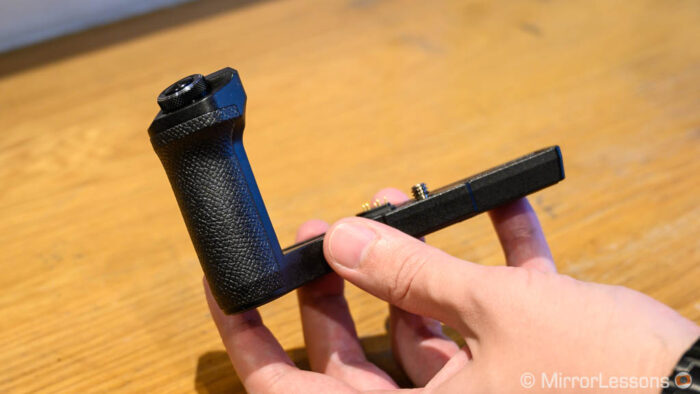
You can buy a grip extender for the E-M5 III (ECG-5) which makes the overall size similar to E-M1, but of course this reduces the difference in price. The advantage of the removable grip is the freedom to make your camera more compact or more comfortable. Also consider that you’ll need to remove the grip every time you want to change the battery.
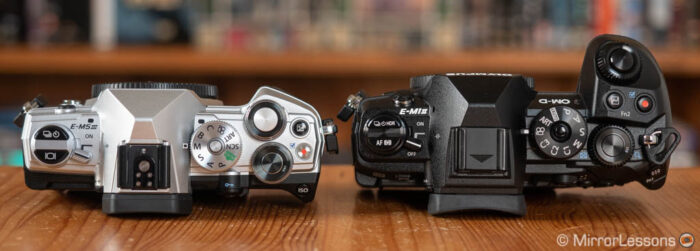
The dials are precise and smooth to turn on both cameras and overall, the button layout is quite similar. Some buttons have a different setting assigned by default and the E-M1 II has an extra button at the front. All of them can be configured. The dials can also be personalised, as can the rear function lever. Furthermore, the buttons, dials, and lever can be set separately for video.
There are three custom modes on each camera. The difference is that on the E-M1 II, you can access all of them with the main dial on top, whereas on the E-M5 III you need to assign two custom modes to the function buttons.
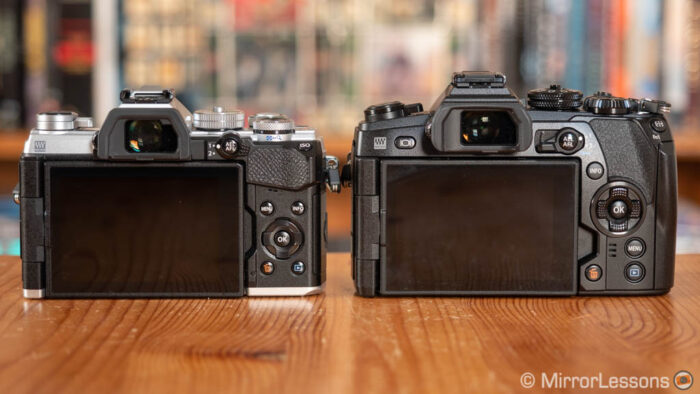
Then we have the viewfinder. Both cameras have 2.36M dots of resolution but the E-M5 III has an OLED panel, whereas the E-M1 II uses a LCD screen. OLED gives you more contrast and vibrant colours, although I have to say I didn’t find the difference enormous. The E-M1 II has a faster refresh rate of 120fps (when the Frame Rate is set to High).
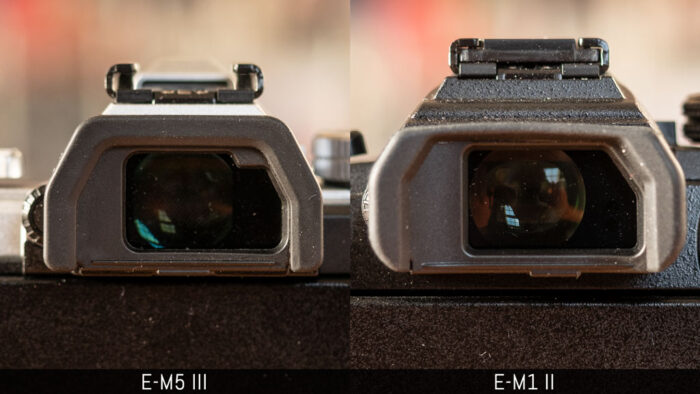
On a personal level, I like the longer eye-point of the E-M5 III EVF (27mm vs 21mm) as it allows me to see the entire frame including the four corners when wearing glasses. Otherwise, the E-M1 II viewfinder will appear a bit bigger thanks to the higher magnification (0.74x vs 0.69x).
There is nothing to declare when it comes to the rear LCD monitor. They both have a multi-angle mechanism, the same resolution and the same touch functionalities (take a shot, move the AF point, etc.). I did notice however that the E-M5 III AF Targeting Pad mode (using the touch screen to move the focus point when framing with the EVF) is a bit faster.

The E-M1 II can take two SD cards at the same time (slot 1 is UHS-II compatible), whereas the E-M5 III has just one UHS-II slot.

Finally, there is a big gap in the battery performance. The E-M5 III uses the small BLS-50 whereas the E-M1 II has the large BLH-1. If with the E-M5 III I can manage about 800 shots in the real world, I can easily double that with the E-M1 II.

Furthermore, the E-M1 II has a dedicated battery grip if you need more power. That said, only the E-M5 III allows you to charge the battery via USB.
Image Quality
The E-M5 III and E-M1 II feature a 20.4MP four thirds Live Mos sensor. There is no Anti-Aliasing filter and both cameras use the TruePic VIII image processor.
On paper, the image quality should be the same but given the gap between the release of the two cameras (late 2016 and late 2019), it is possible that Olympus might have tweaked the performance a little, especially on a software level. The only way to find out is with a side-by-side comparison.
The two cameras can record lossless compressed RAW files with 12-bit colour depth.

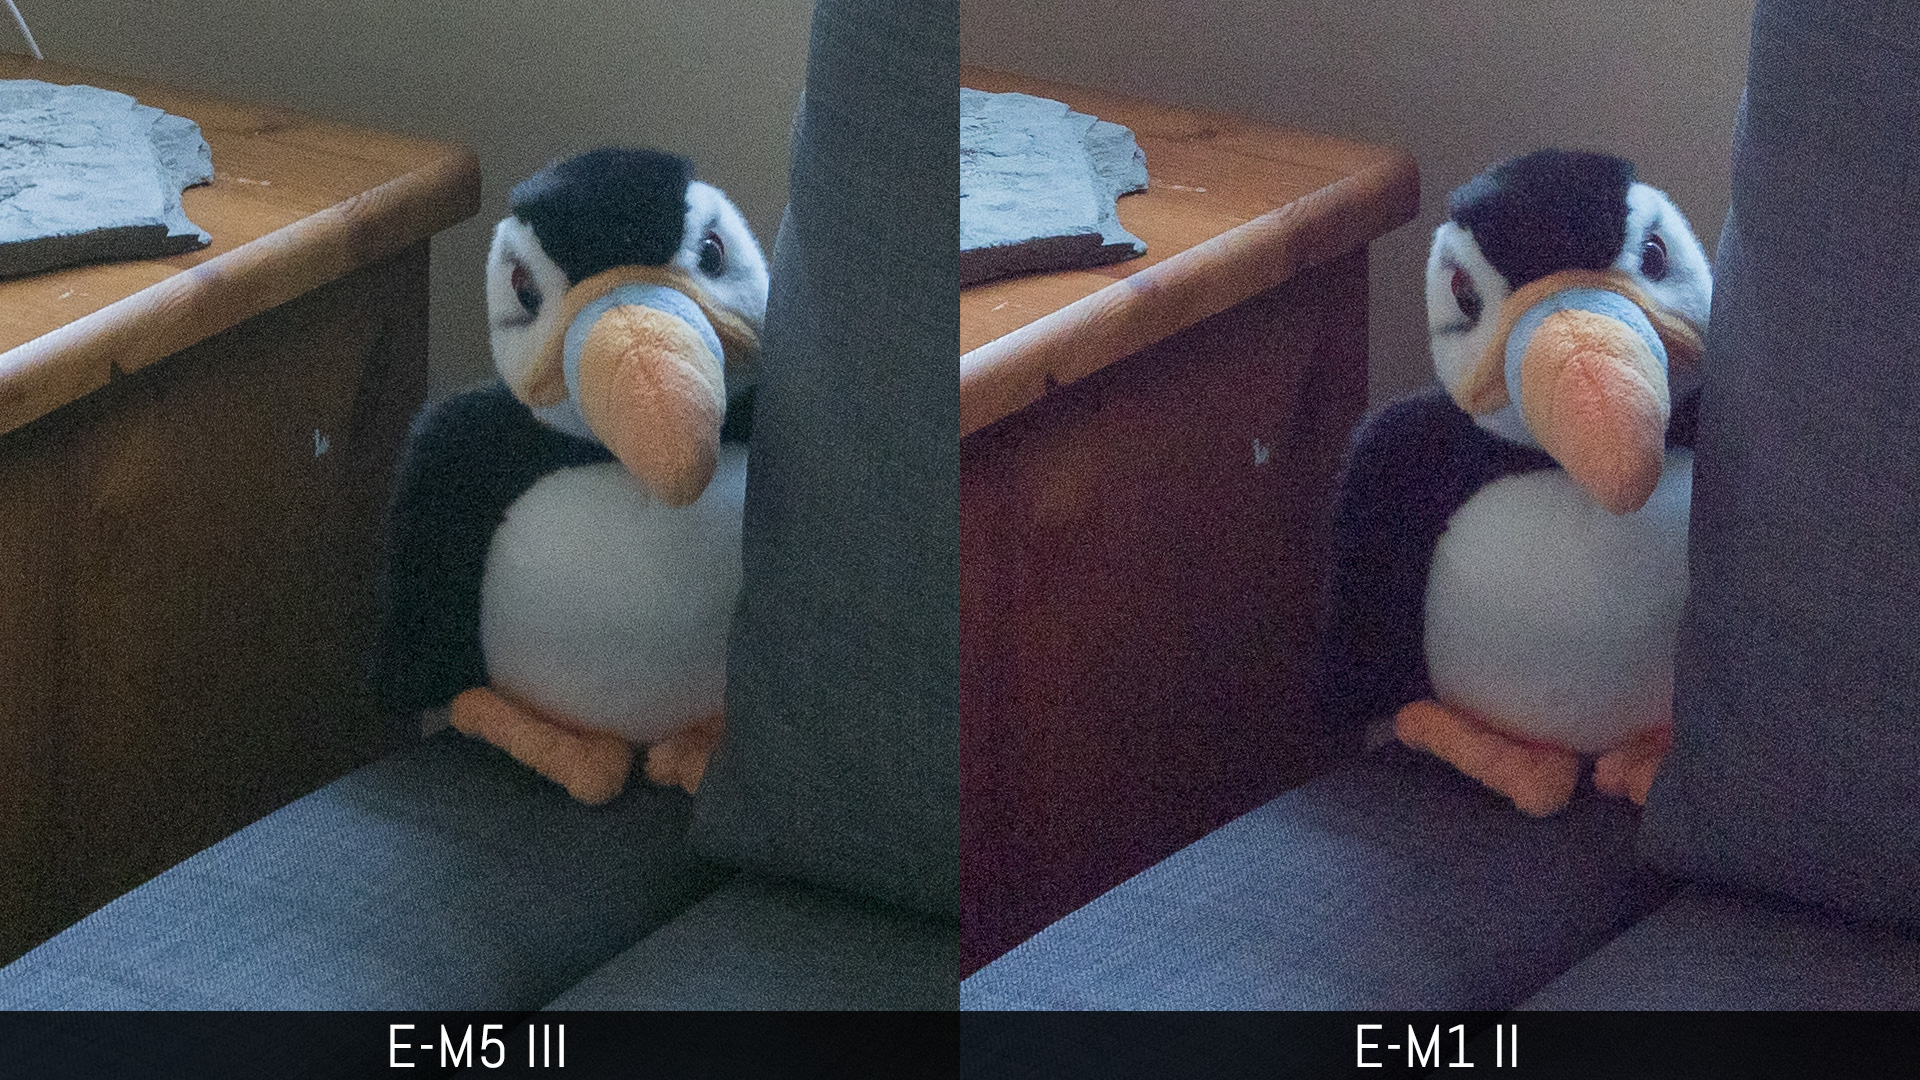
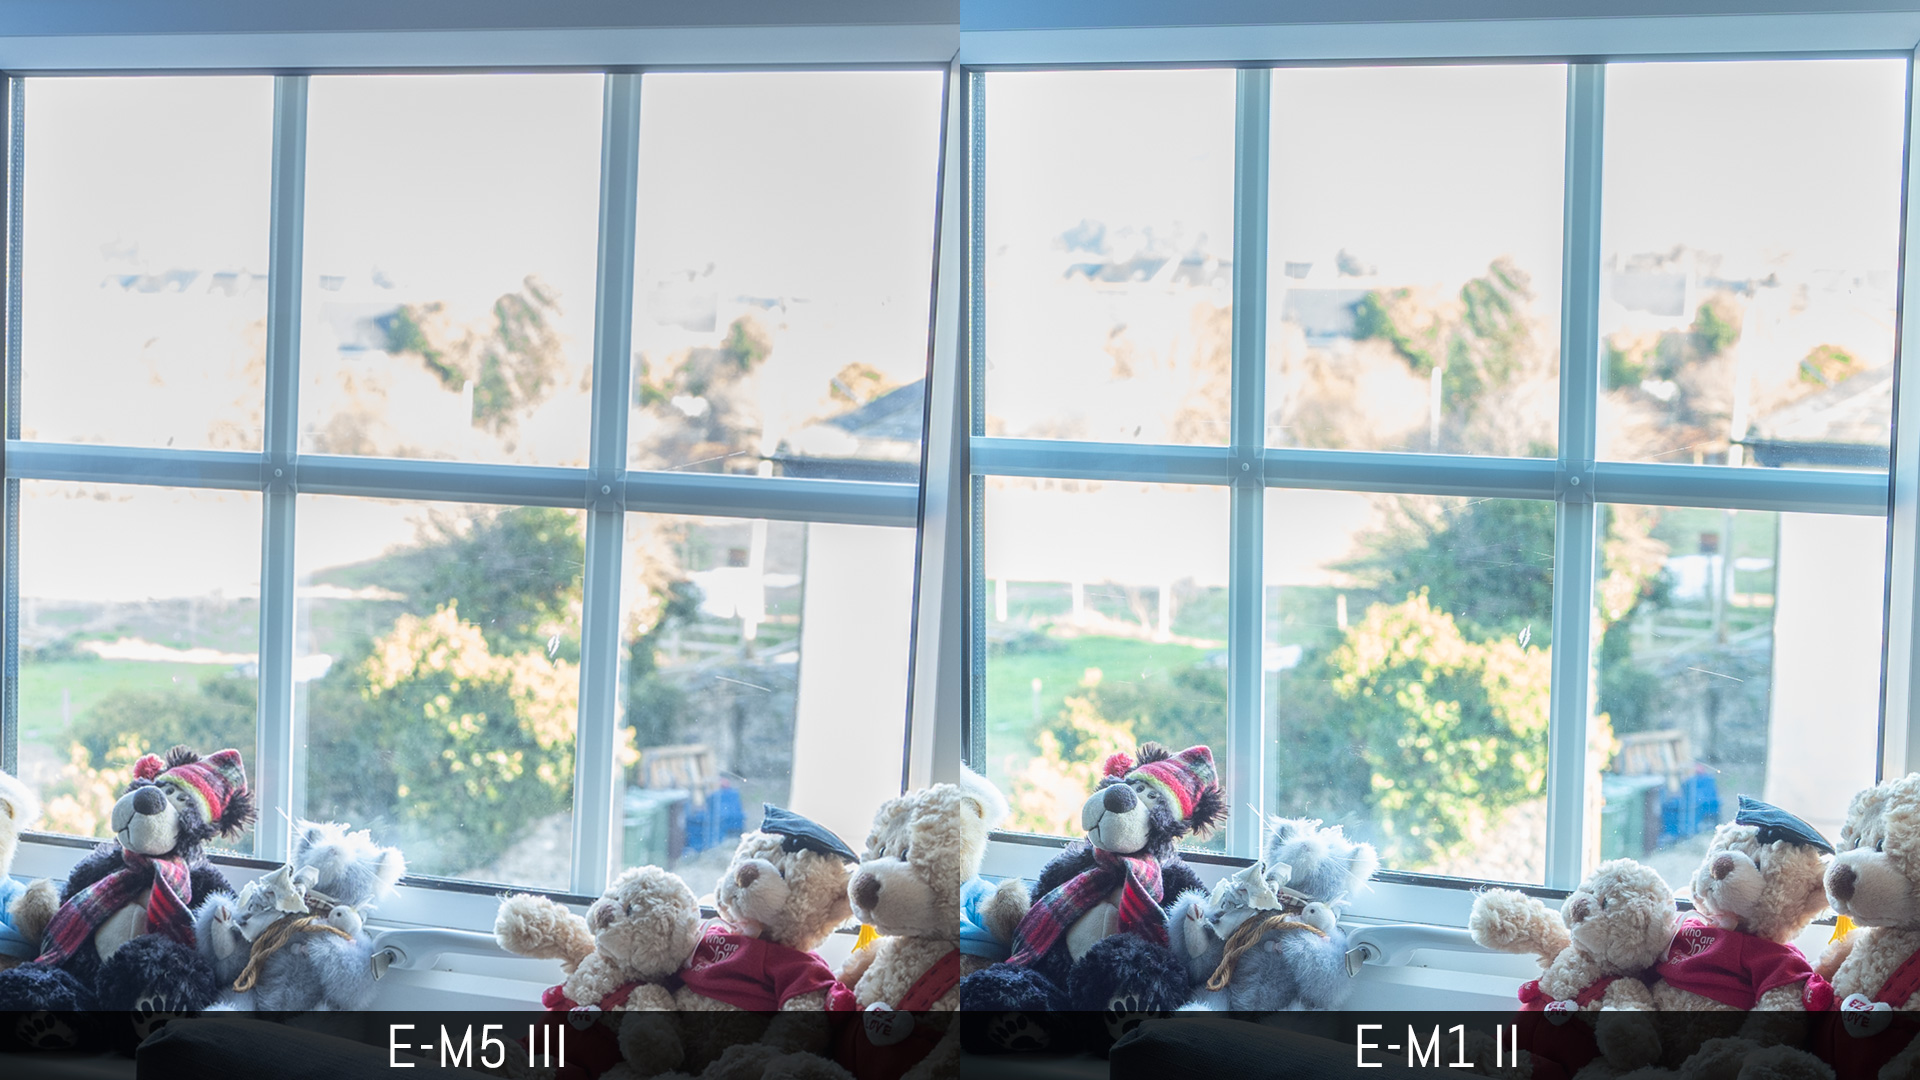
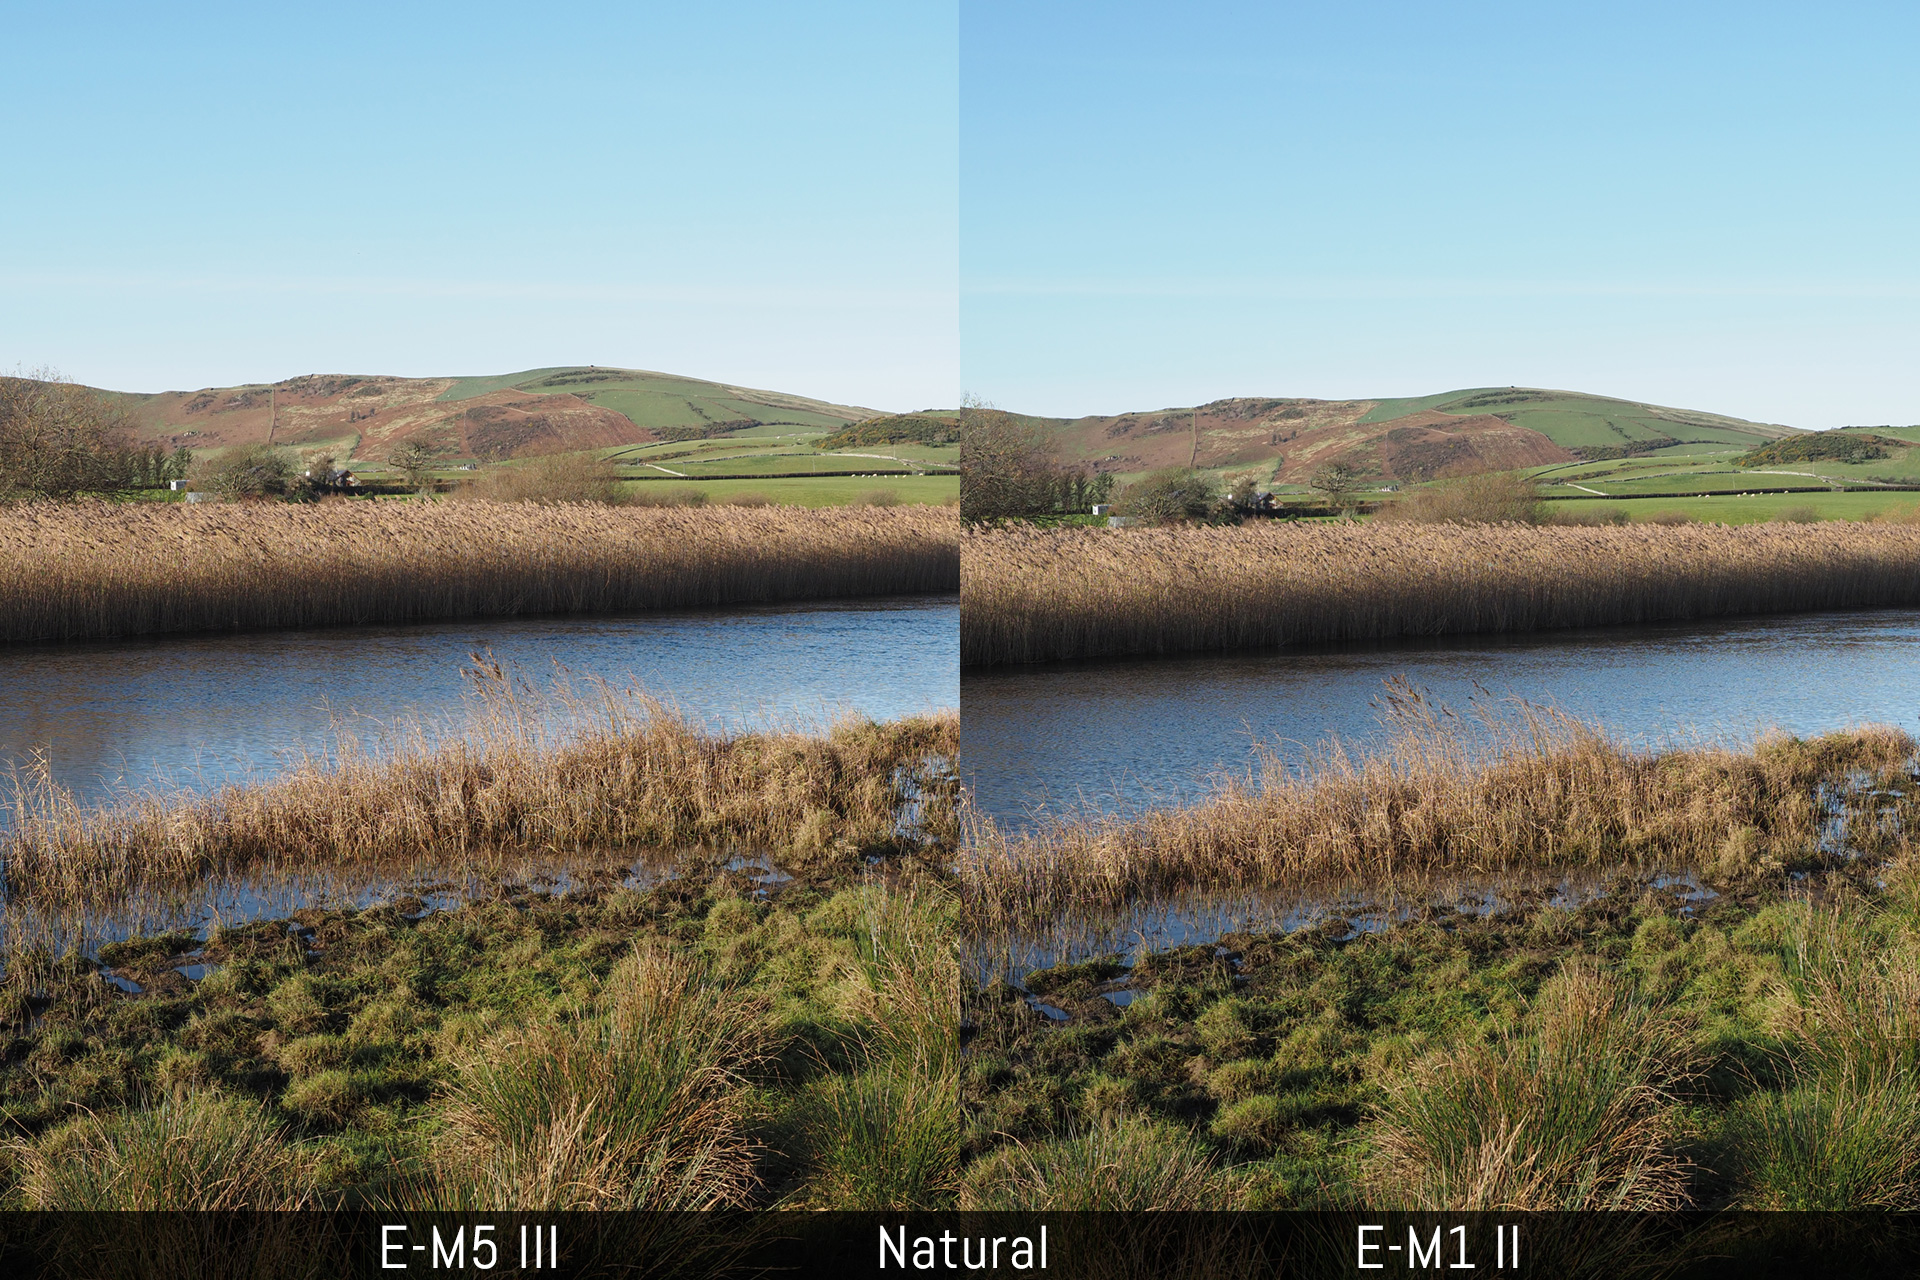
In our dynamic range test, the E-M5 III shows less noise when recovering details in the shadows. It’s not a massive difference but certainly worth highlighting.

Lightroom Classic treats the two files differently when it comes to colours, with a tendency of giving more saturation (but also more purple cast) to the E-M1 II files when raising the exposure. Don’t worry about it though, this can be easily corrected when working with the RAW files.
As for the highlights, the E-M1 II managed to recover a few extra details but the difference is small.
Other subtle differences concern the picture modes and straight-out-of-camera JPGs. Both cameras have the same number of colour profiles and extra effects you can apply to the image.
The E-M1 II tends toward a cooler rendering that’s predominantly green. It is less visible in the landscape example below but more relevant in the second image featuring the seaside town.
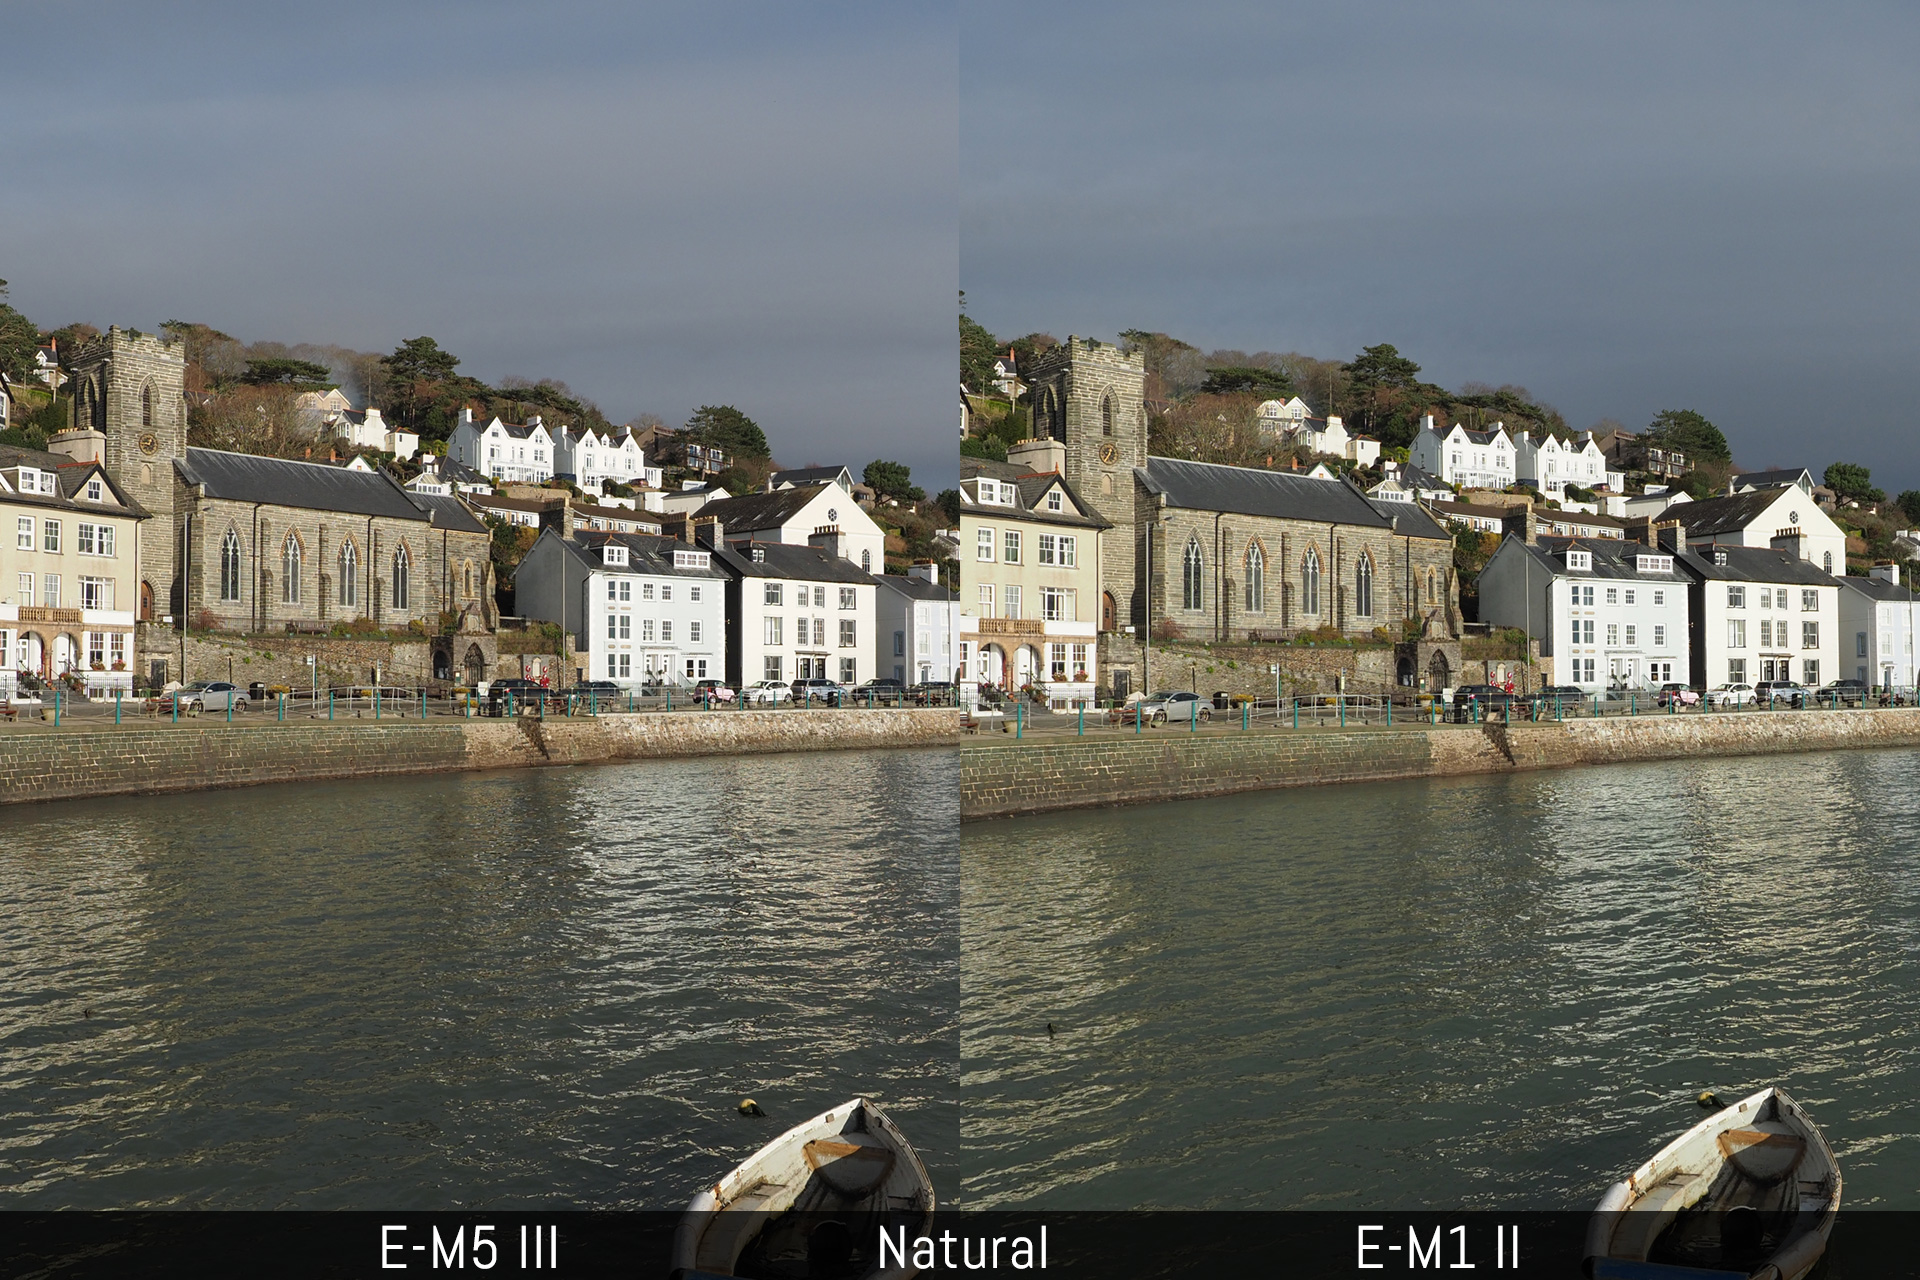
Note: the White Balance Compensation can be useful if you want to reduce the green cast on the E-M1 II files.
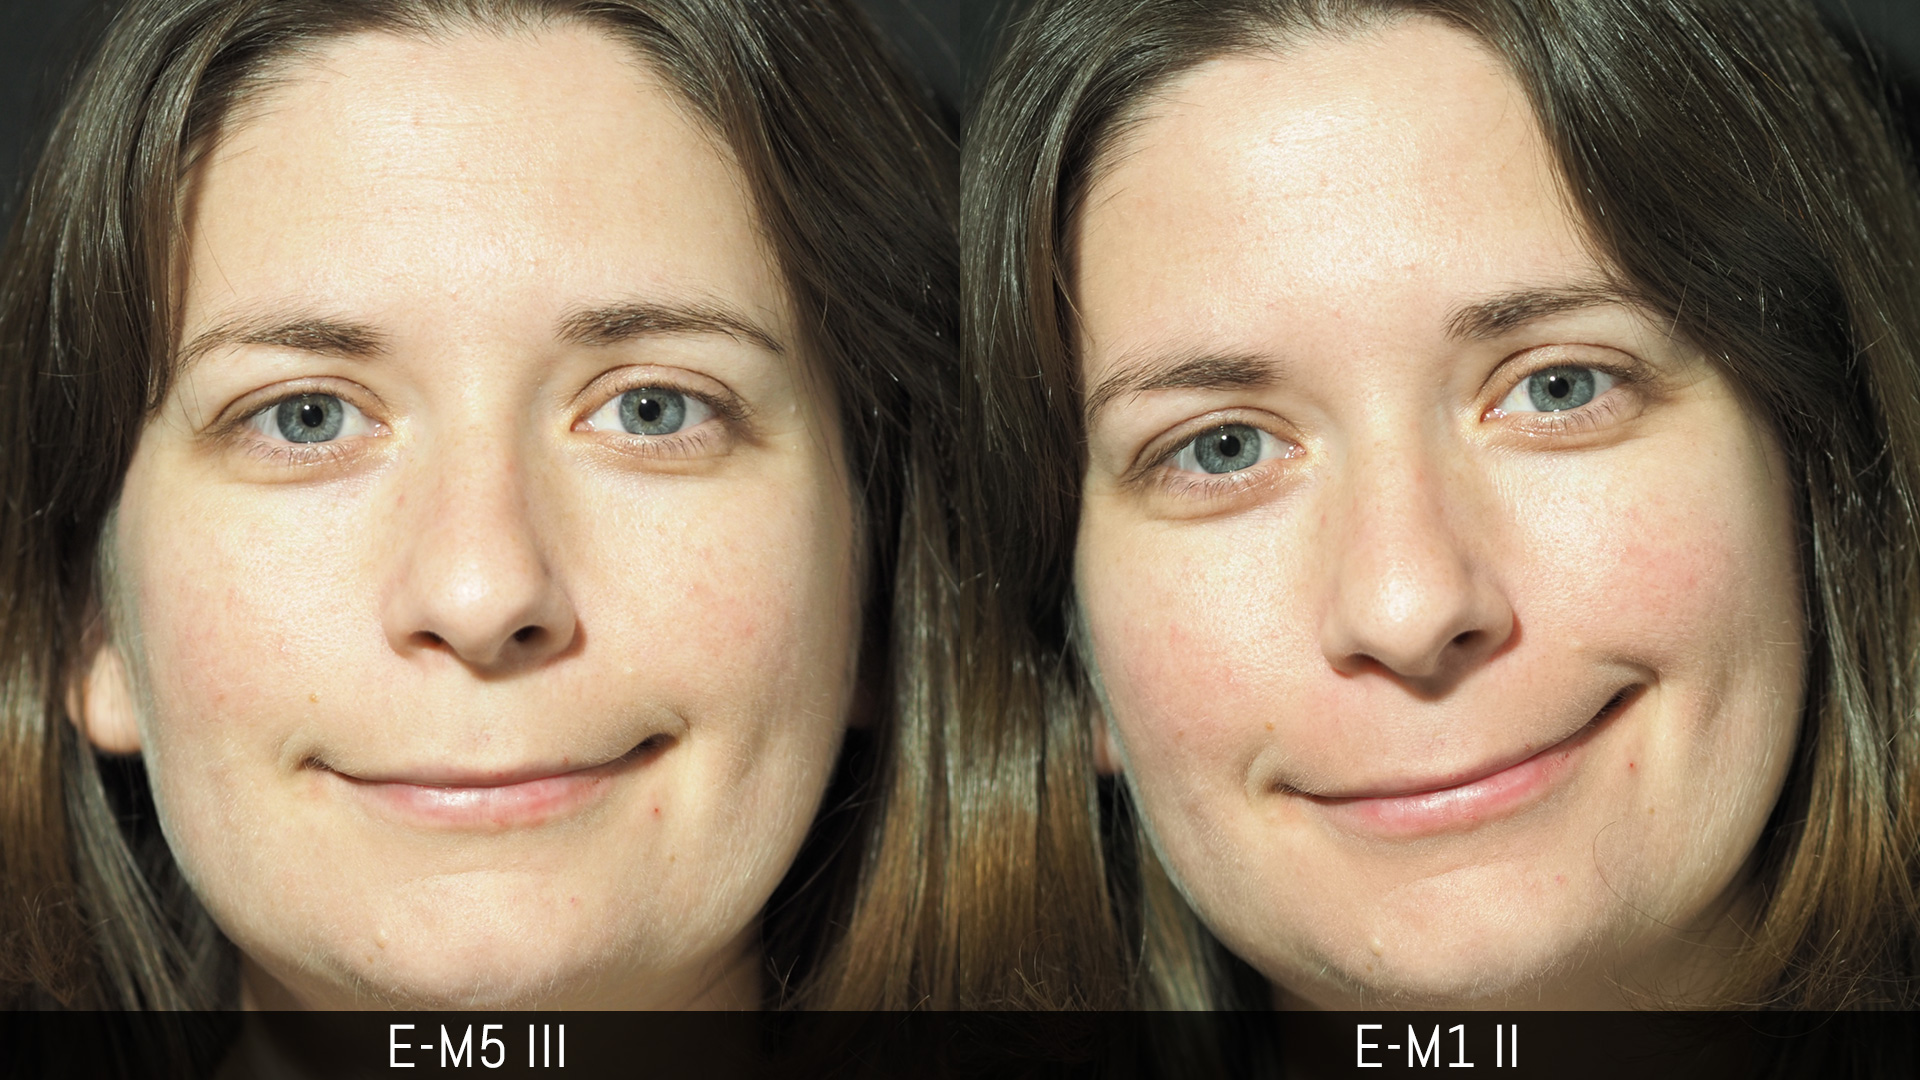
As for the skin tones, the E-M5 III seems to have a more uniform rendering overall, but lacks the extra punch in colours.
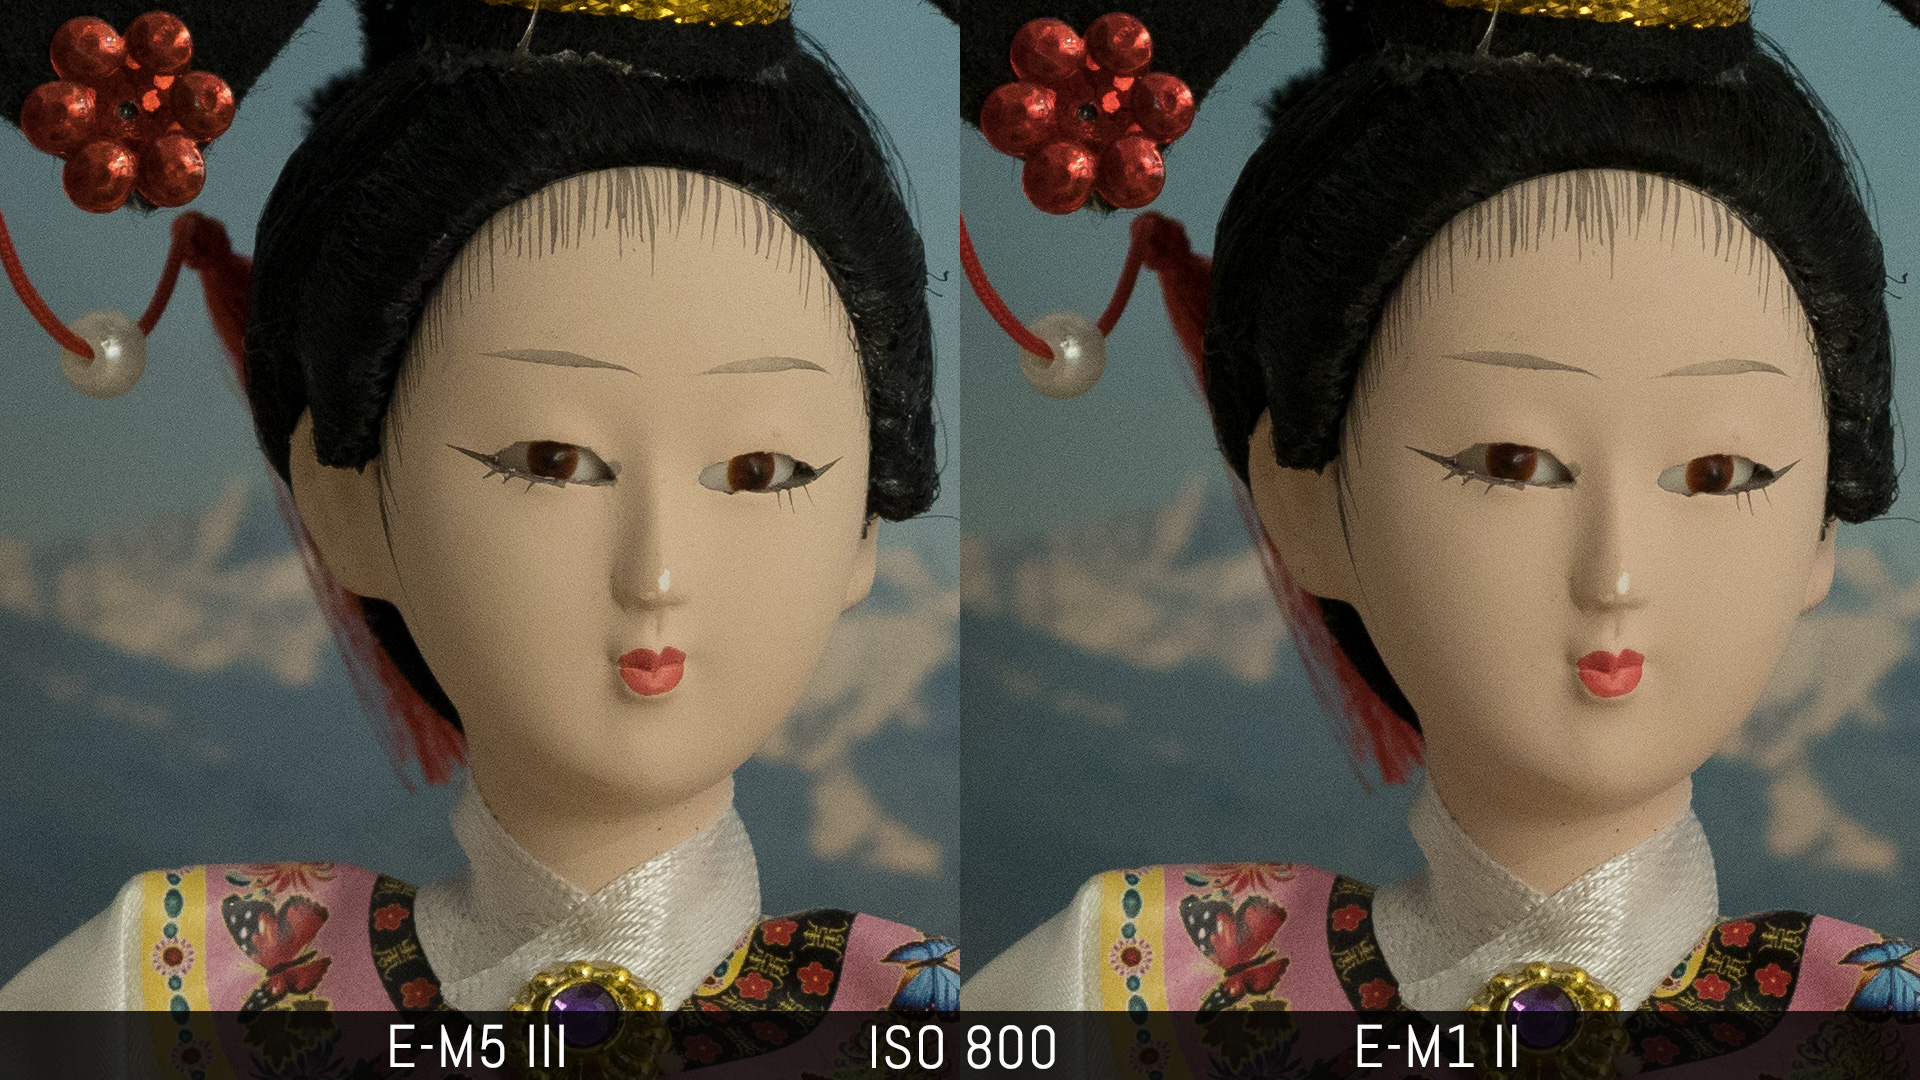
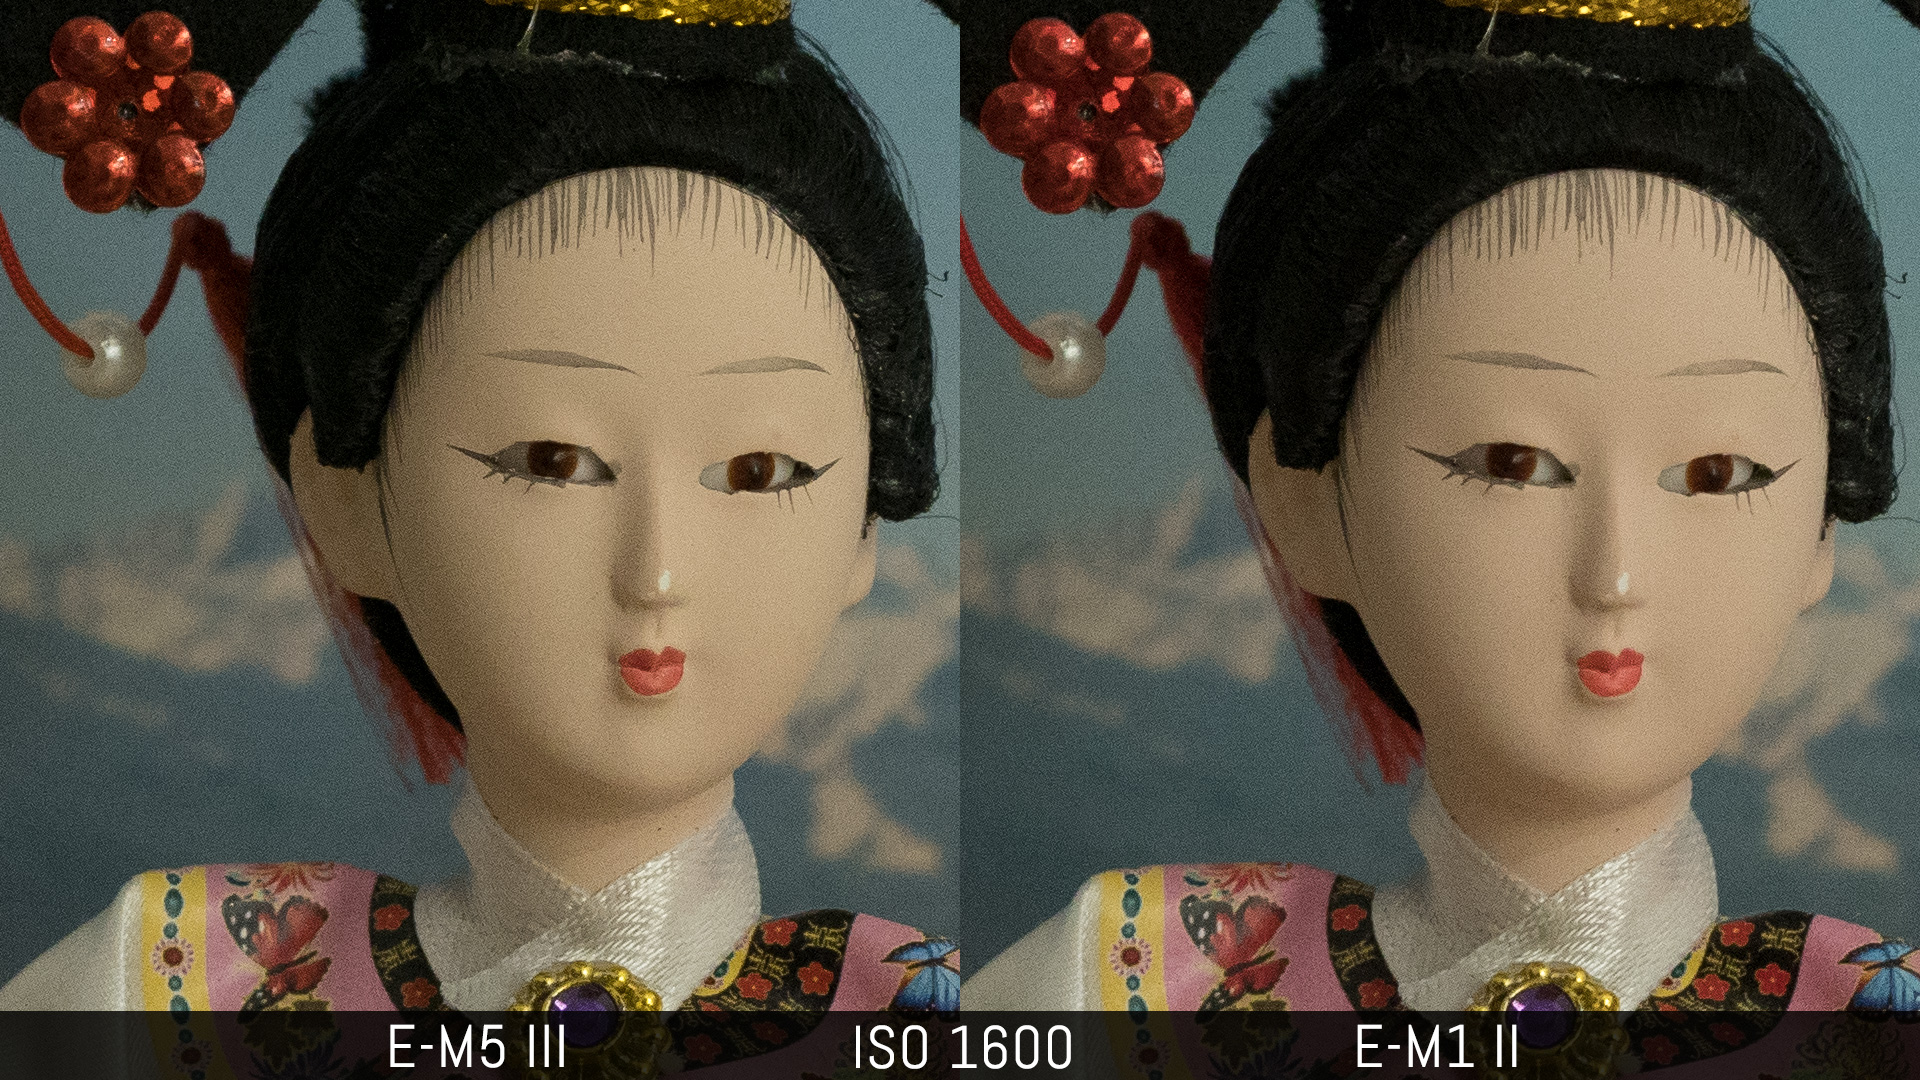
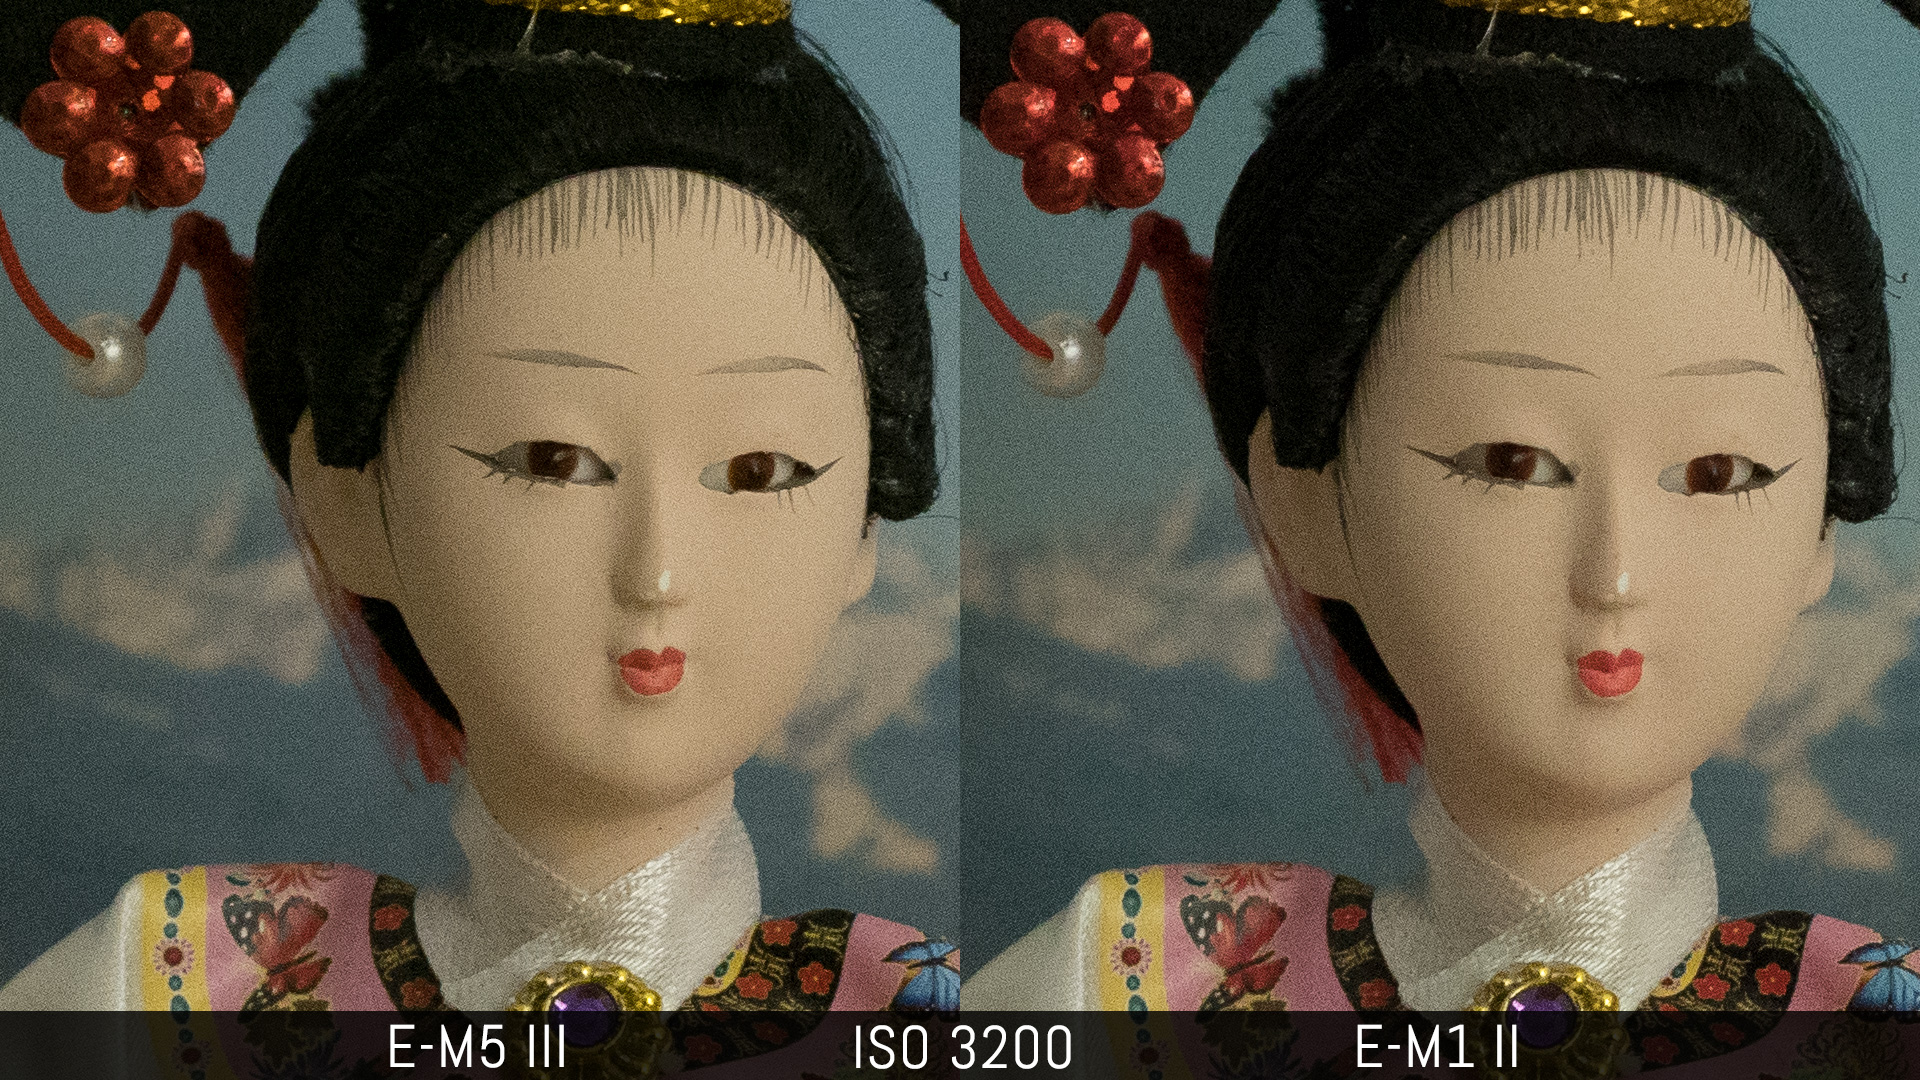
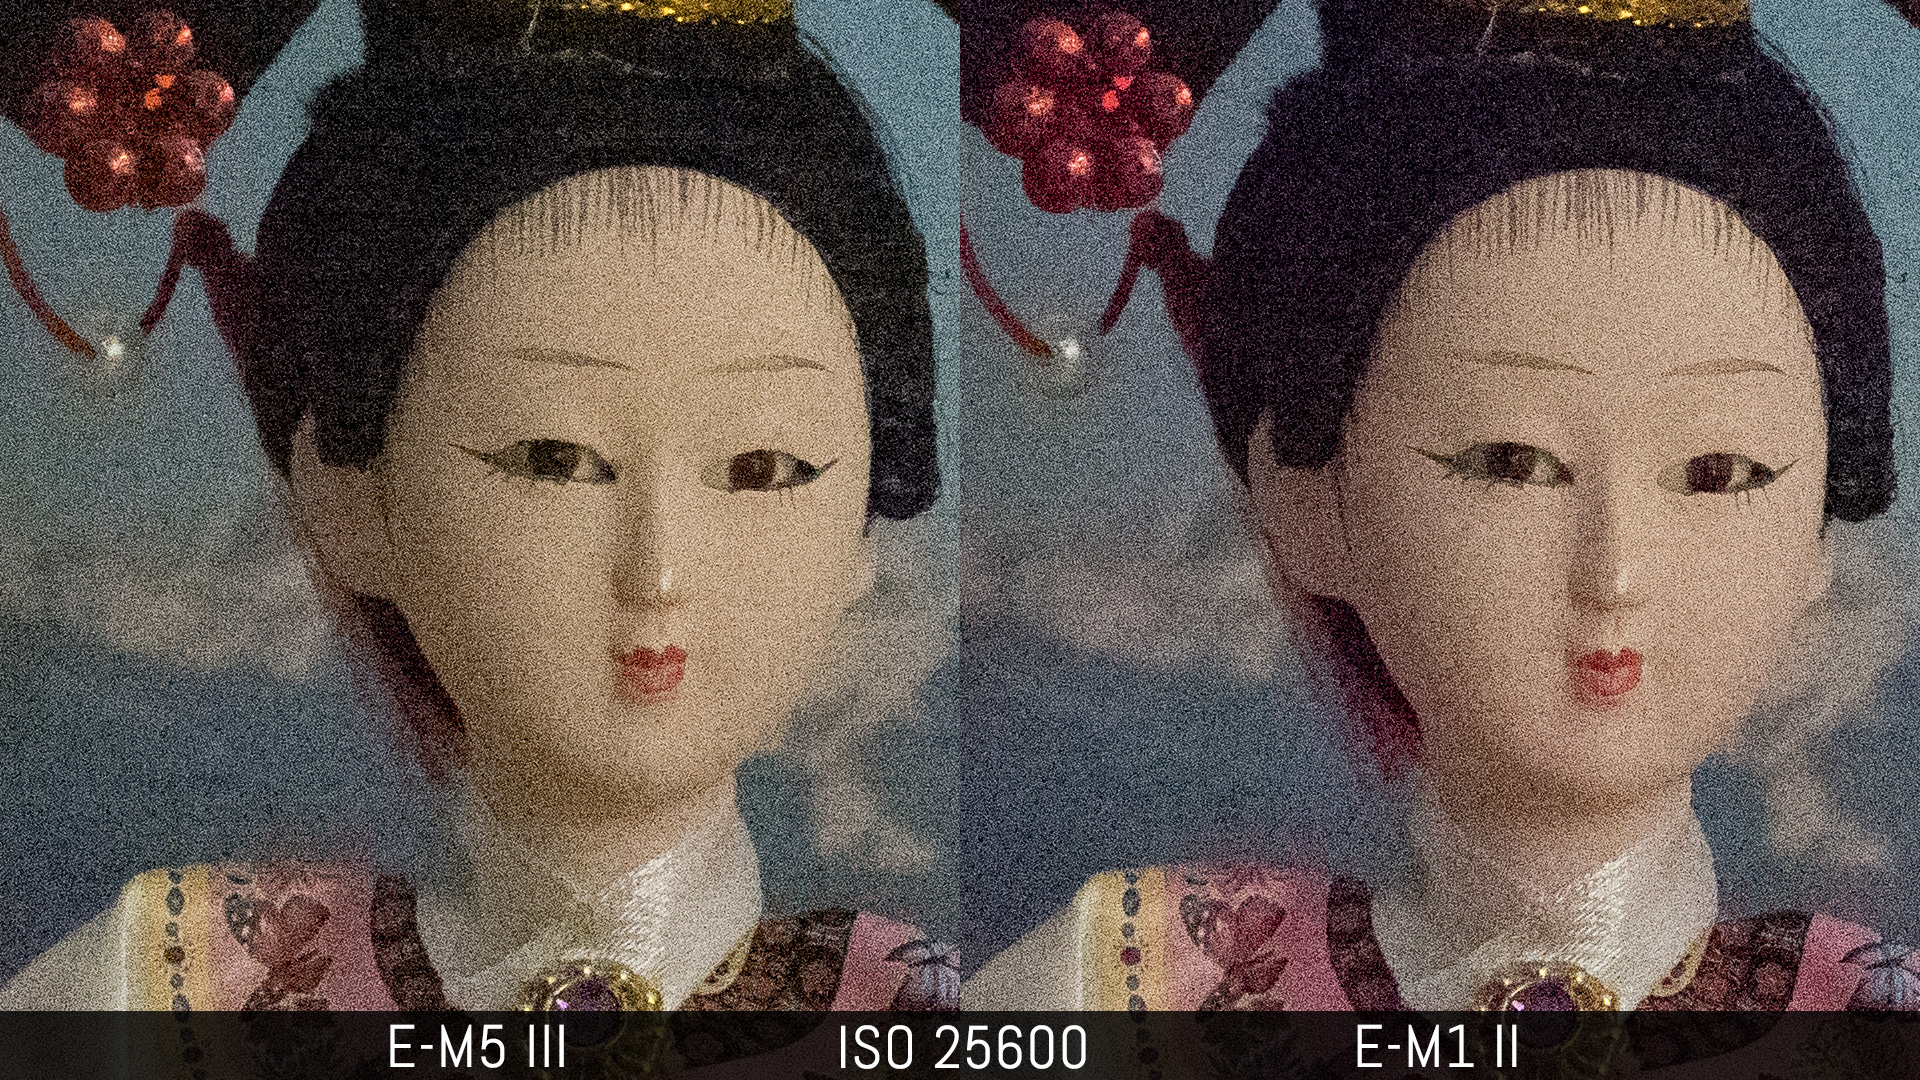
The ISO range is the same on both cameras: the normal range goes from 200 to 25600, and you also get an ISO Low level (extended) that is the equivalent of ISO 64.
Unsurprisingly, the performance is the same when it comes to the noise ratio. The performance is very good up to 3200. Noise becomes more visible at 6400 ISO and the files remain usable at 12800 ISO. I would avoid the highest value of 25600.


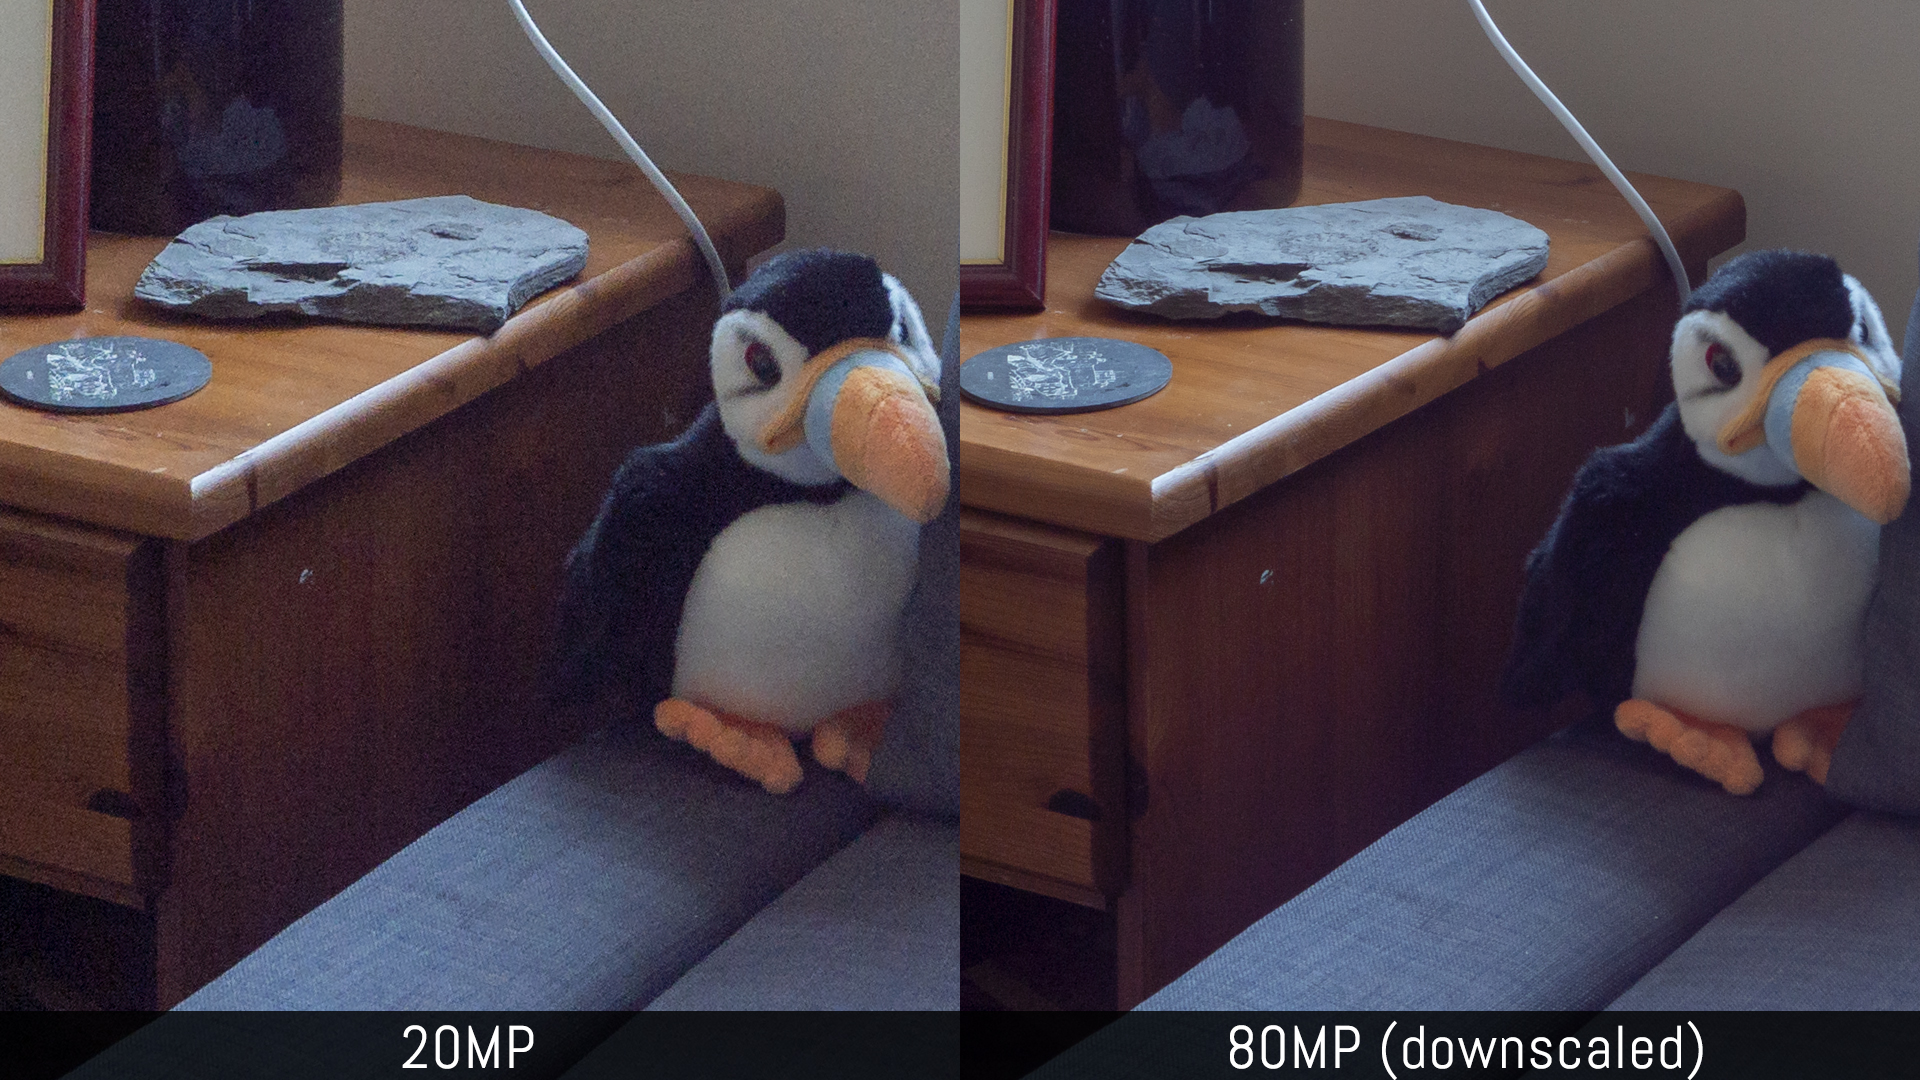
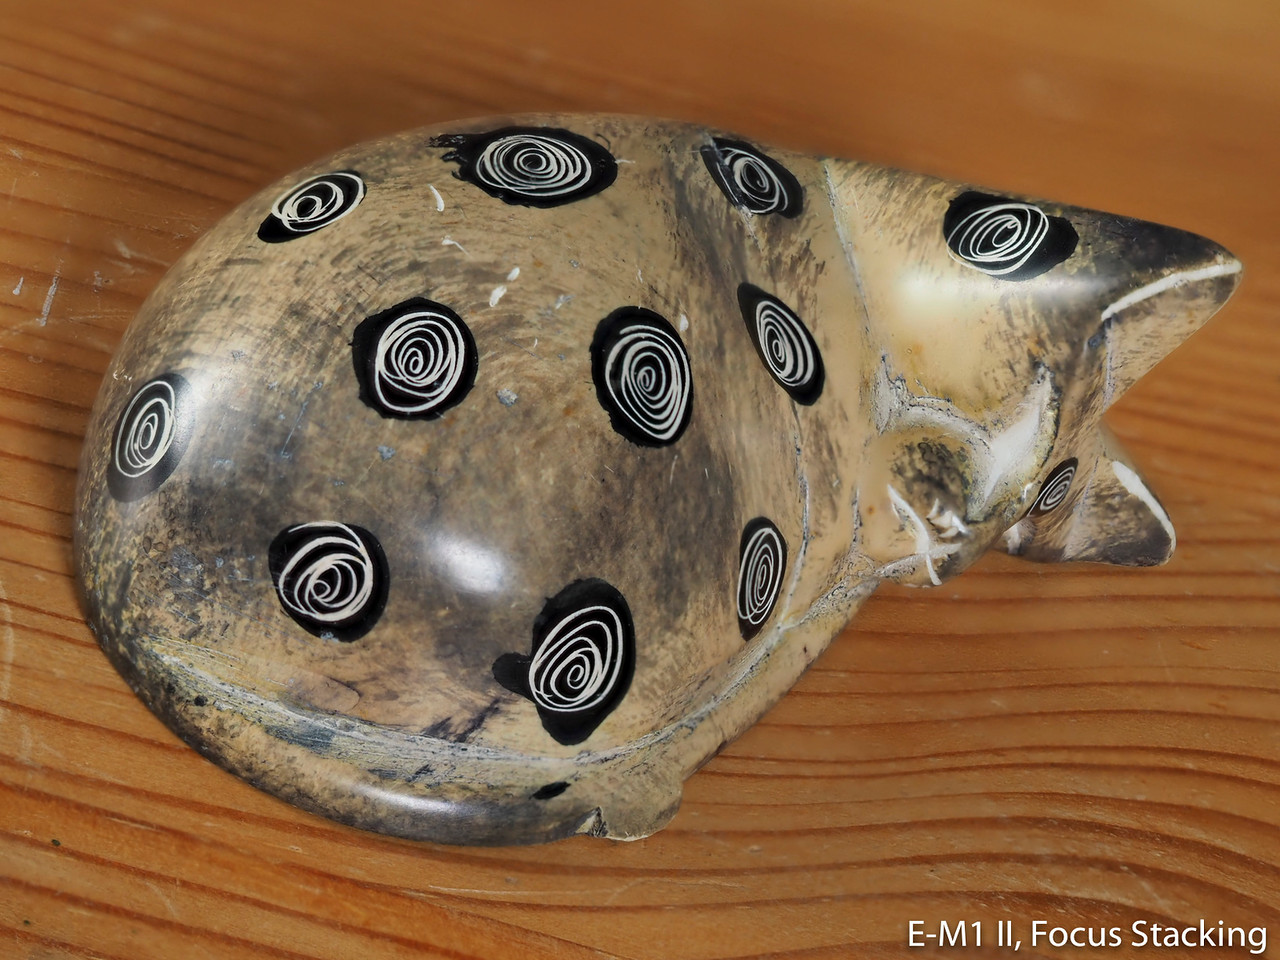
If 20MP are not enough, you can take advantage of the High Res Shot mode on both models. Thanks to its sensor shift mechanism, the cameras move the sensor by half a pixel between each shot for a total of 8 frames that are then combined to create one image with a resolution of 50MP (JPG) or 80MP (RAW).


Keep in mind that the HRS RAW file can appear a bit soft when opened in a photo editing software (depending on the program used) so you may need to tweak the sharpness settings to reveal all the details.
Because this method merges 8 shots together, it presents some limitations. First, you need to work on a tripod to avoid any camera movement and second, any movement inside your composition will result in a loss of details and artefacts.
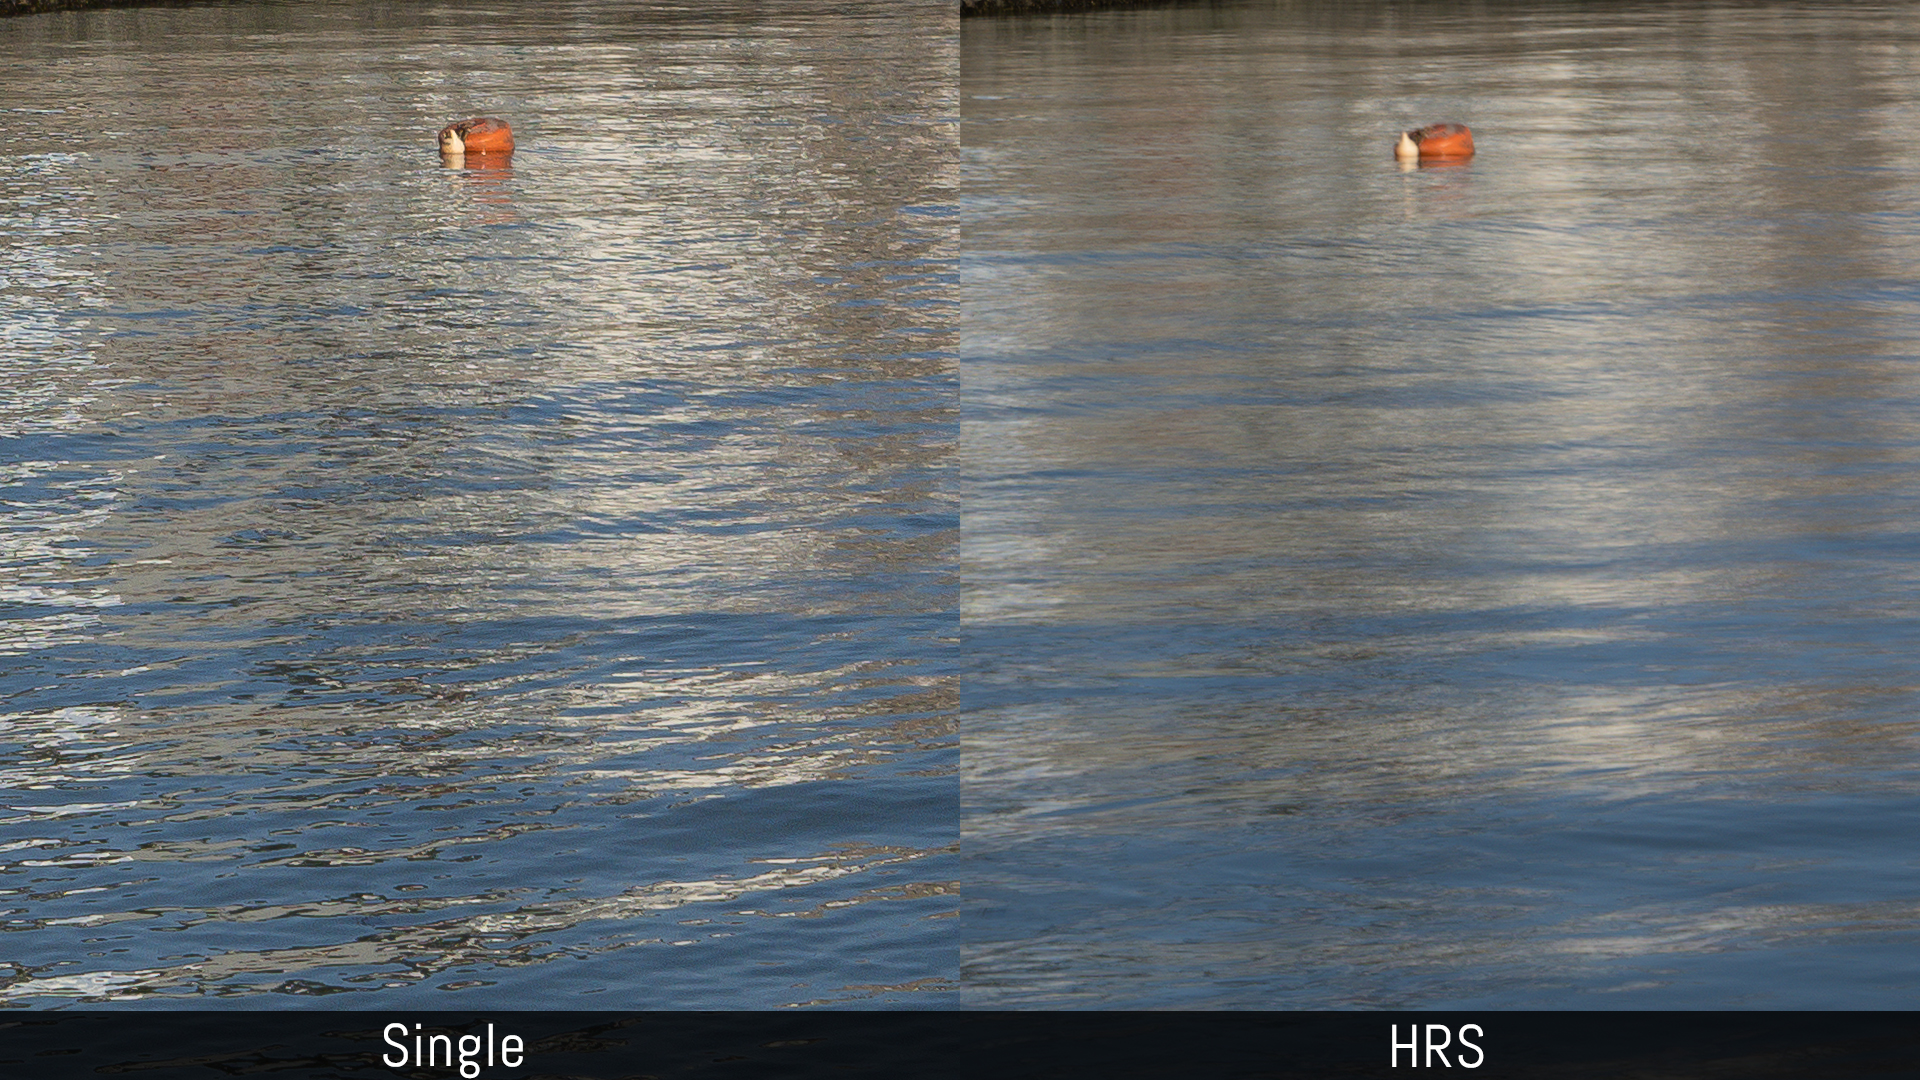
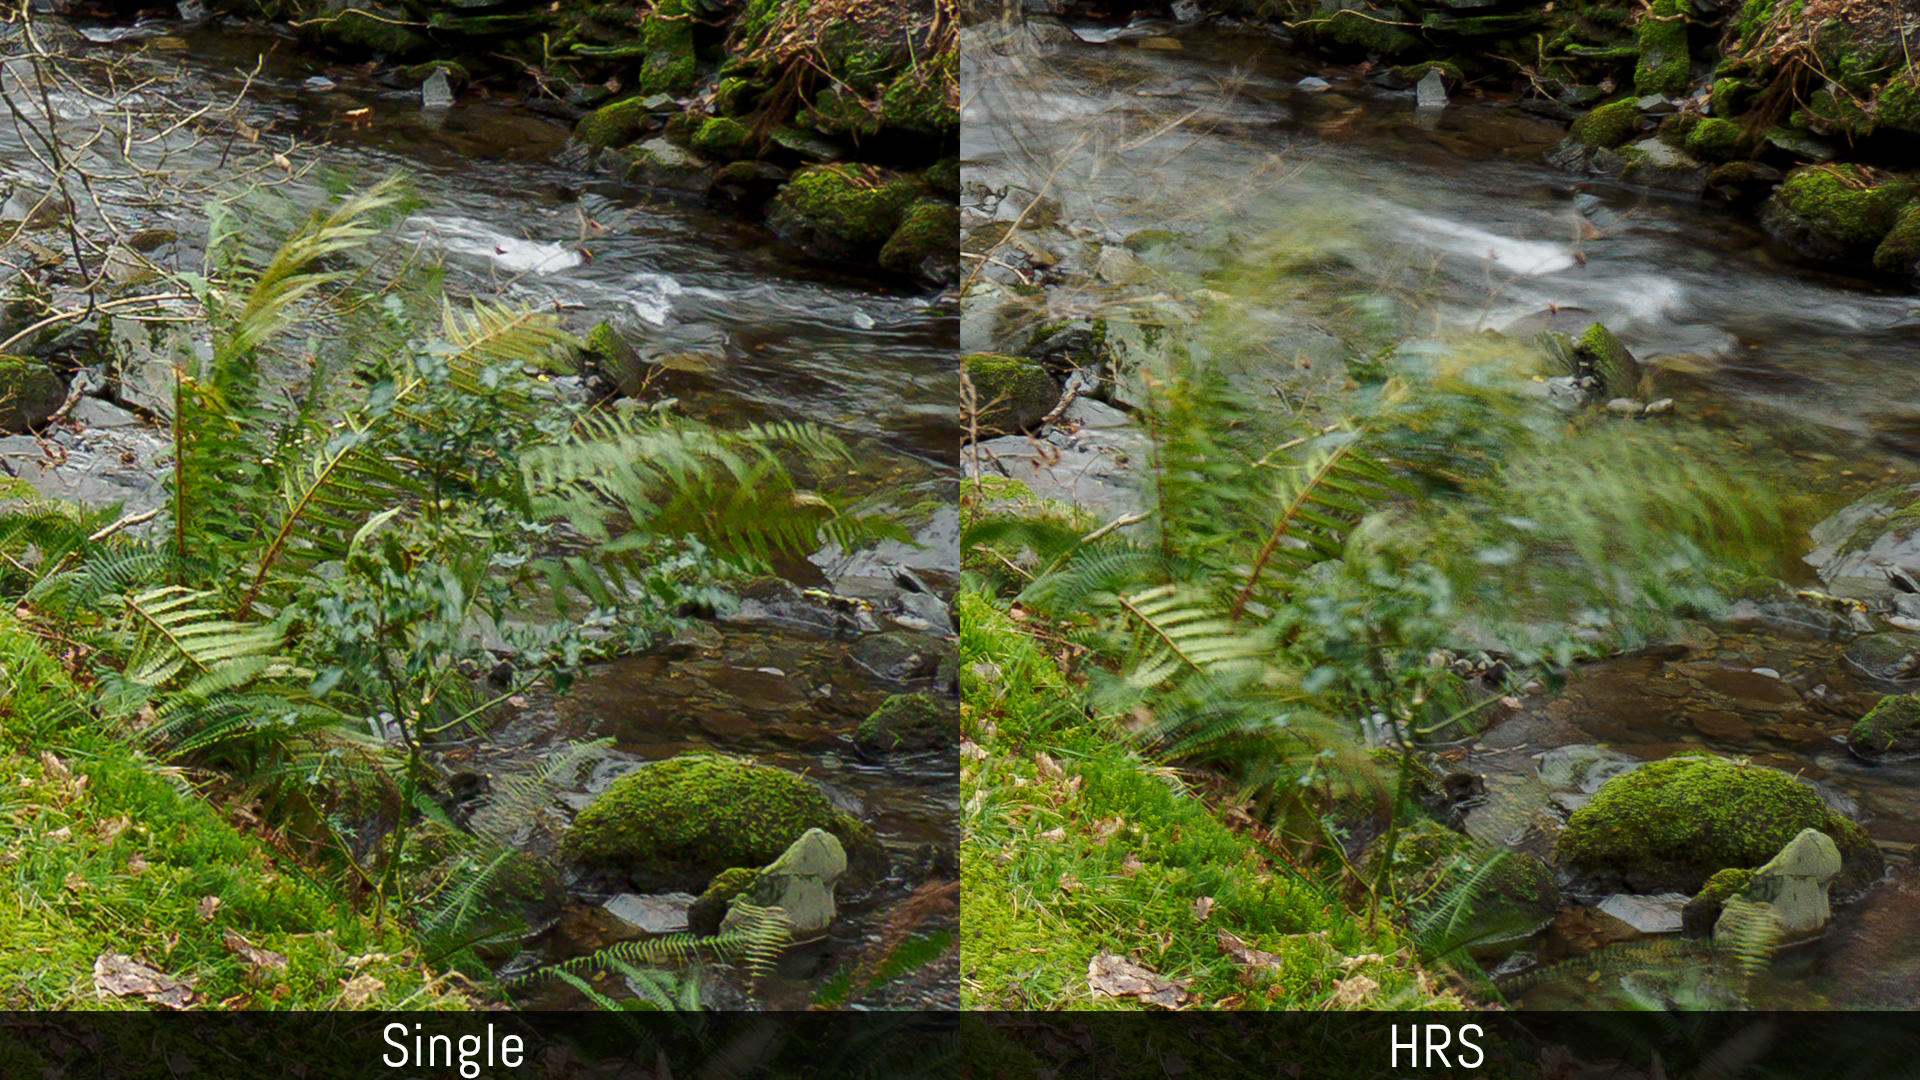
On the plus side, you get less noise when recovering the shadows in post with the RAW file.
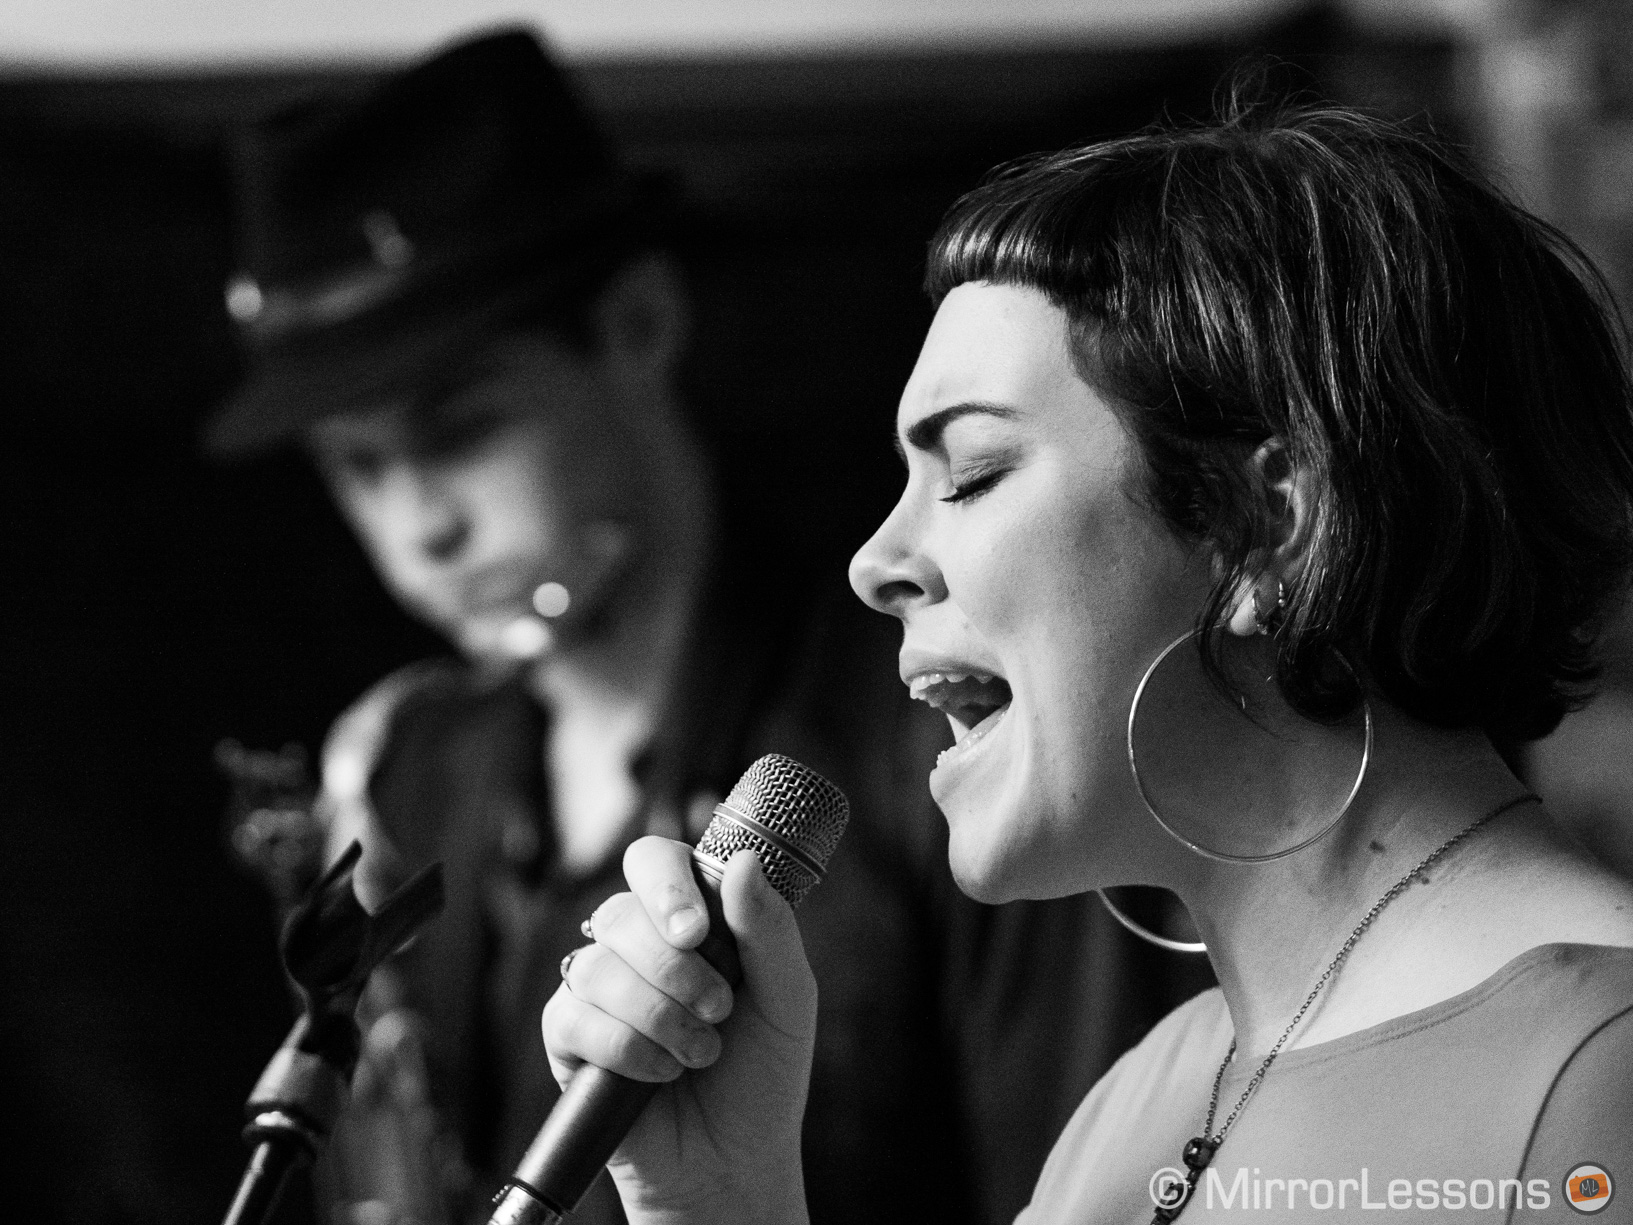
Autofocus and Speed
The E-M5 III and E-M1 II use a hybrid autofocus system with 121 areas (contract and phase detection). The phase detection points are cross-type meaning that they detect on a vertical and horizontal line. They share a minimum sensitivity of -6 stops (measured with a f/1.2 aperture).
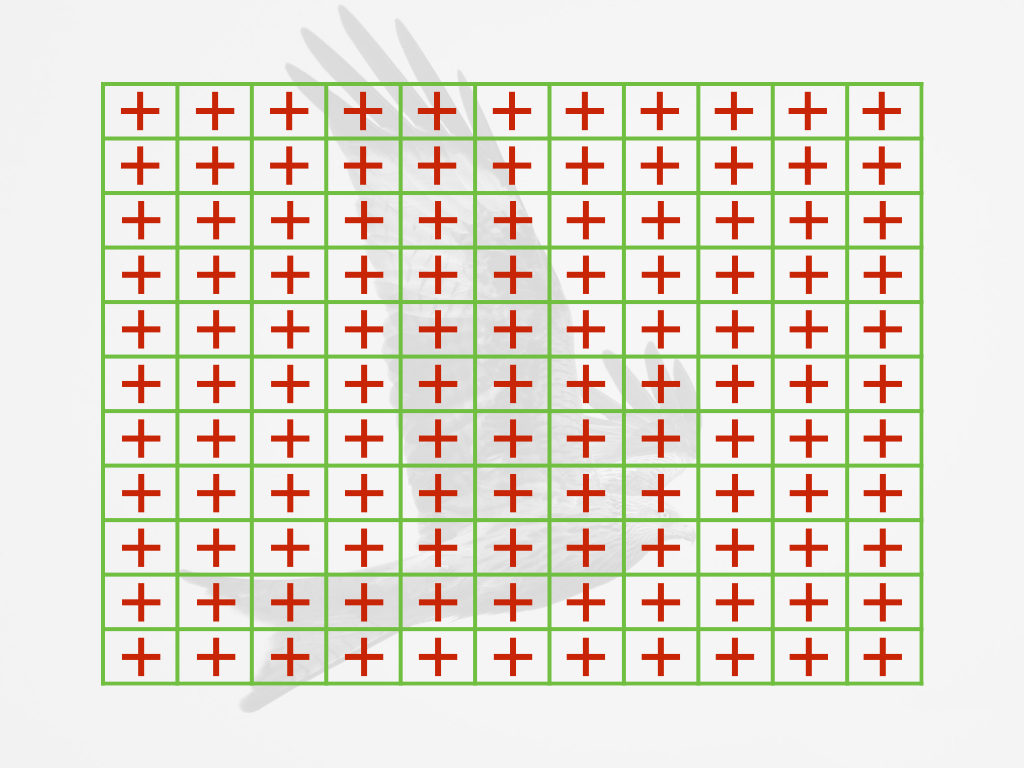
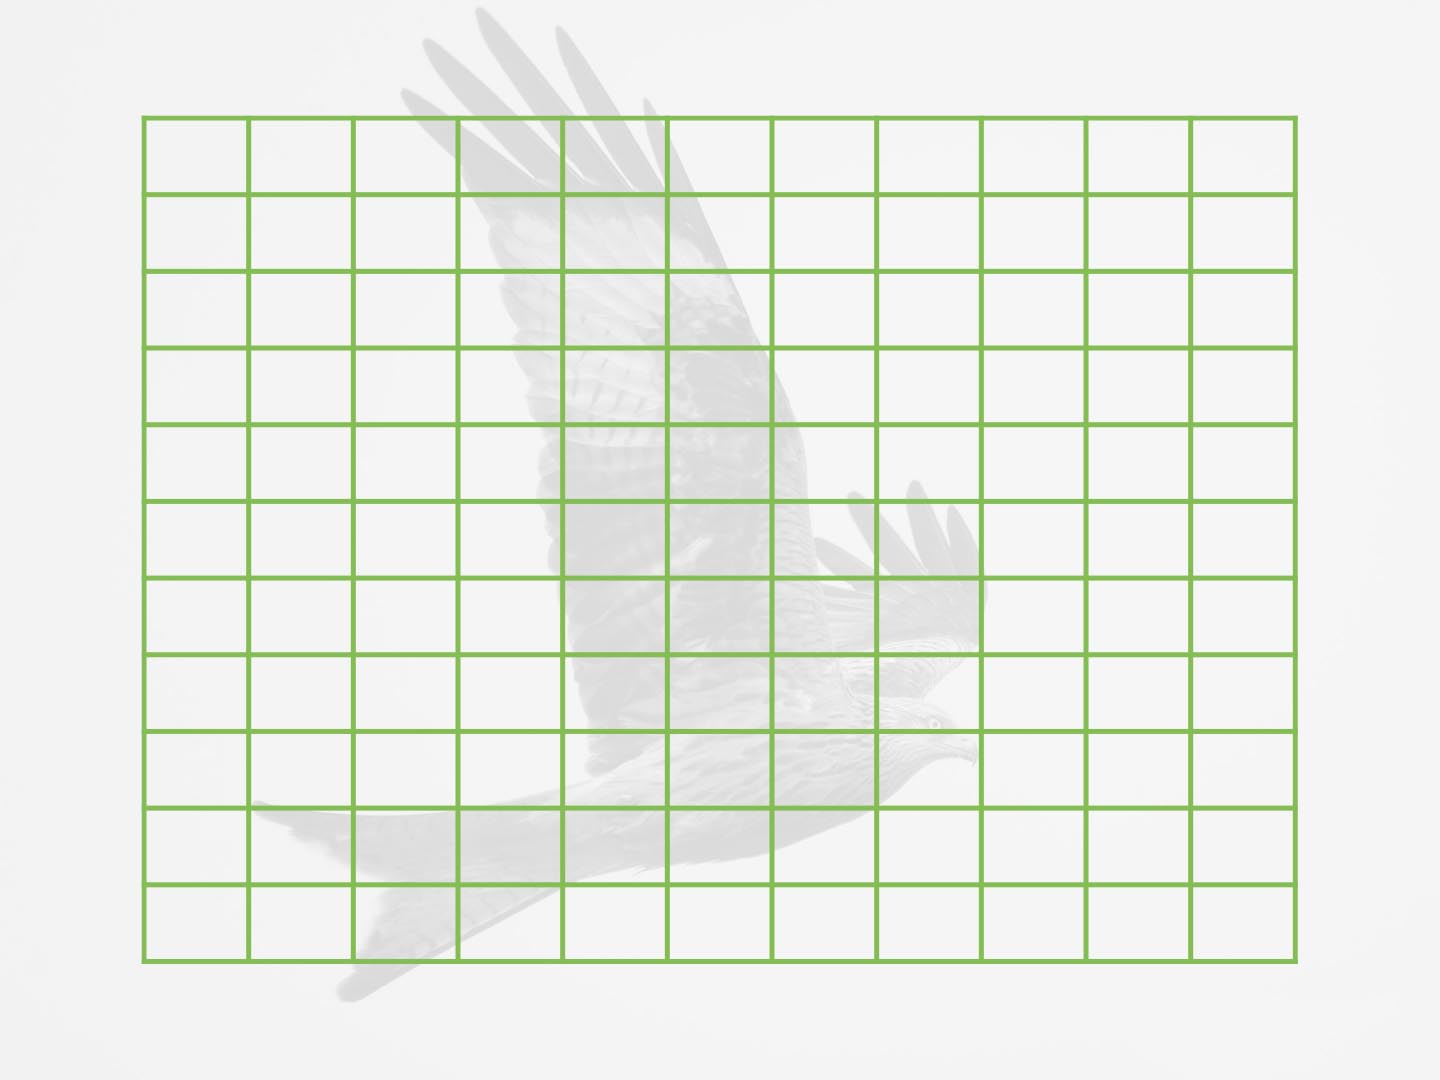
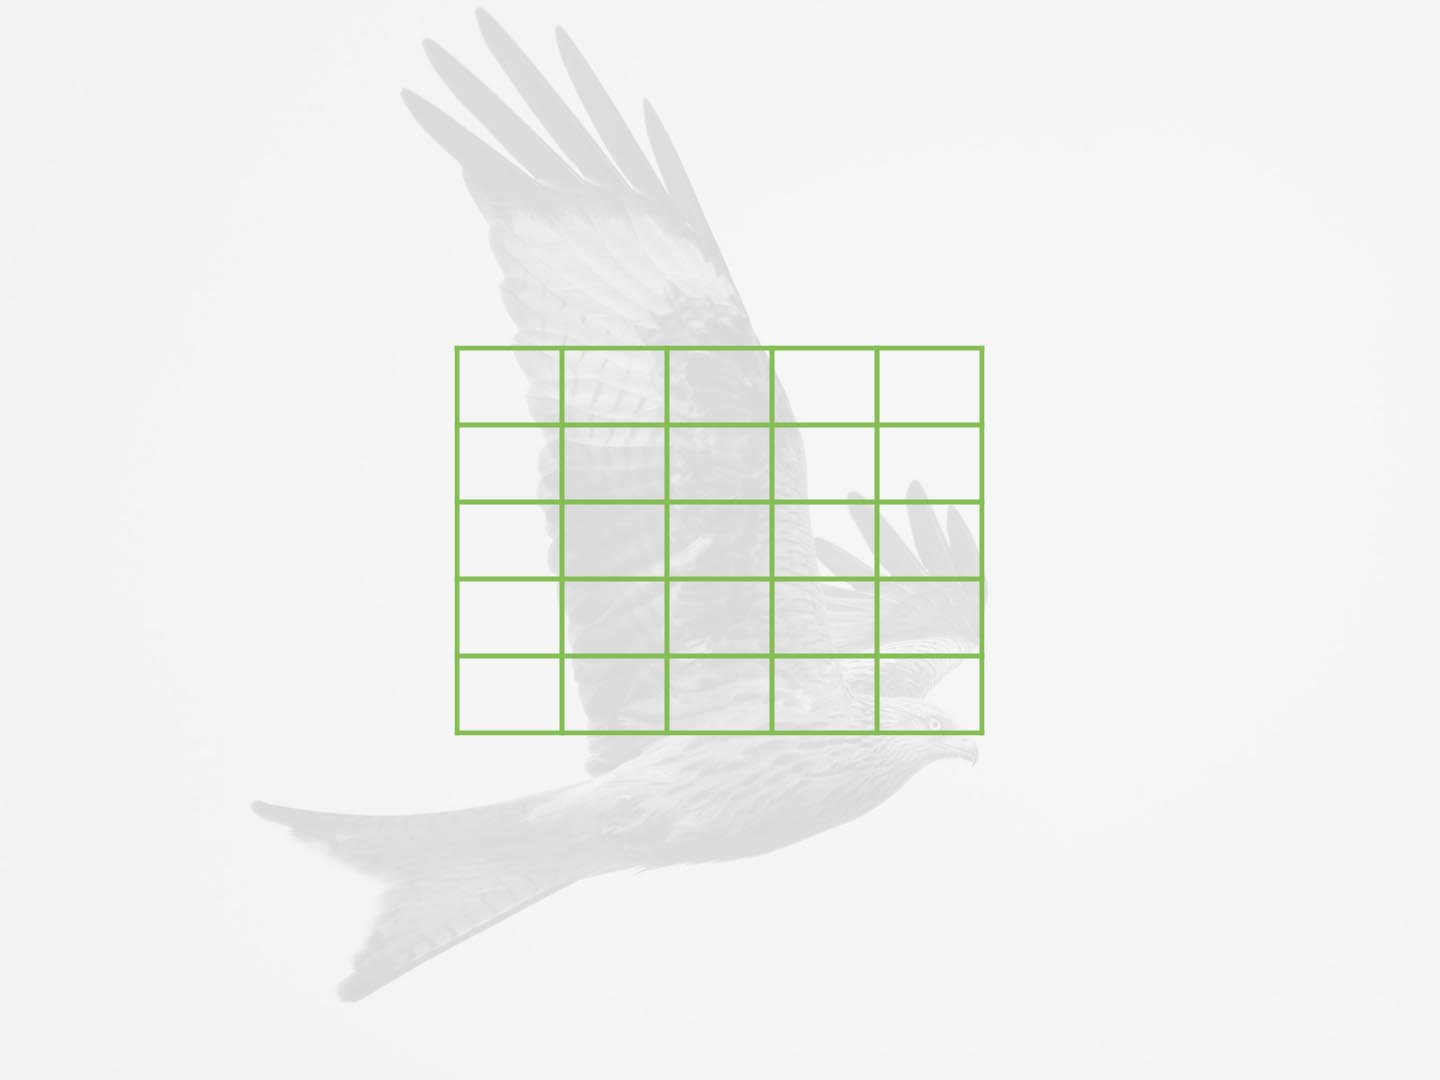
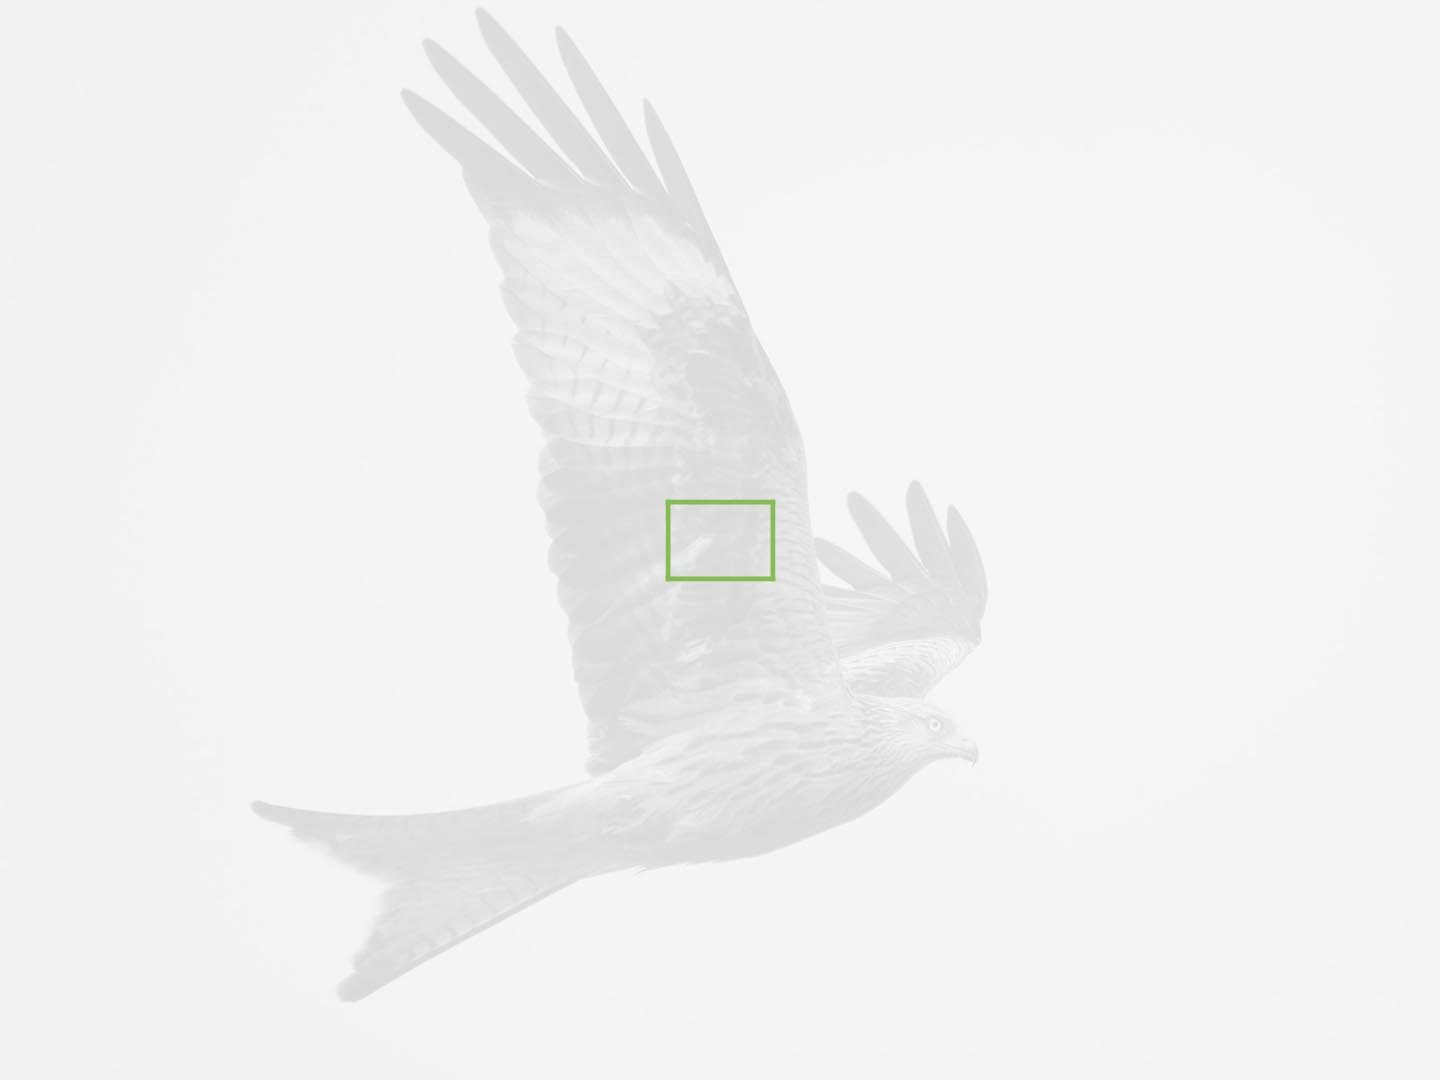
The settings and options are pretty much the same. There are five focus modes (single, continuous, continuous with tracking, manual and manual with presets). There are six different area modes (AF Targets) as illustrated with the images below.


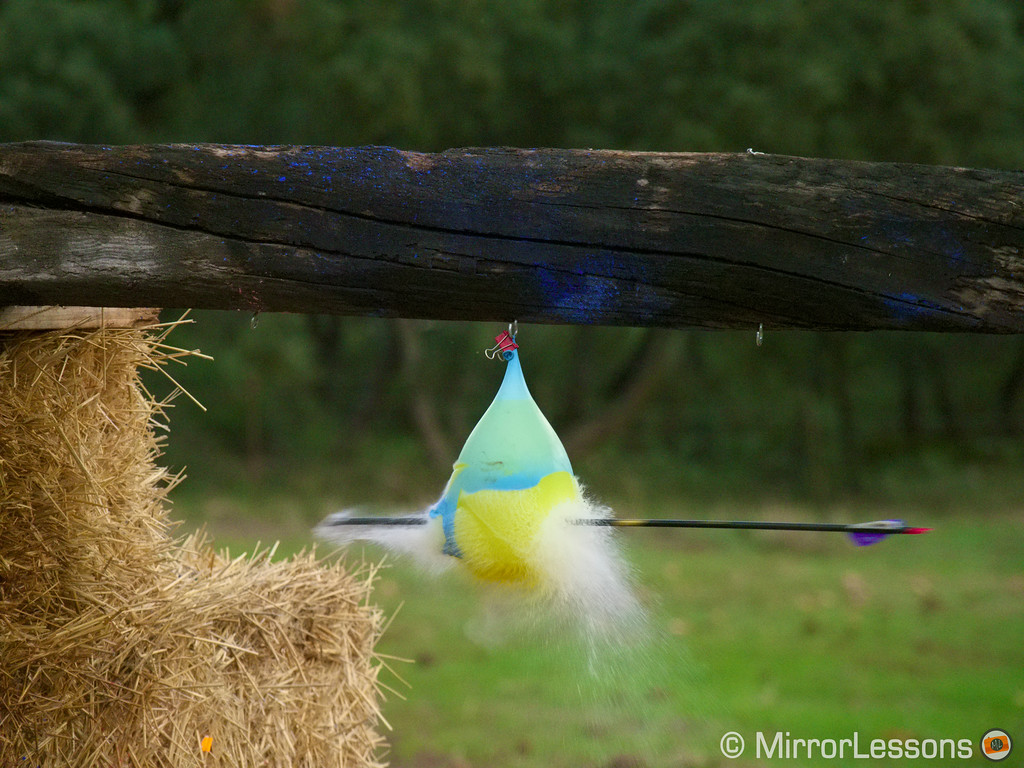
Both cameras focus fast in single AF, and the small Single Target gives you the most precision. The performance doesn’t slow down too much in low light, although you can get the occasional photo where focus is on the background rather than the subject.
Face and Eye detection also gave me similar results, and this is an area where neither camera really excels. The eyes are often not detected until the person is really close to the camera and the face fills most of the frame. With face detection only, there is often a lack of precision in that the focus point is a bit too close or too far. If the subject walks backwards, both cameras can mis-focus easily.

The E-M5 III, being more recent, benefits from an updated autofocus algorithm that is in fact the same found on the E-M1X. The E-M1 II also received some tweaks taken from the flagship model (thanks to firmware 3.0) but it is not exactly the same. For instance, the E-M5 III can analyse the images that have just being taken in addition to having live view to correct focus more quickly and increase the keeper rate.
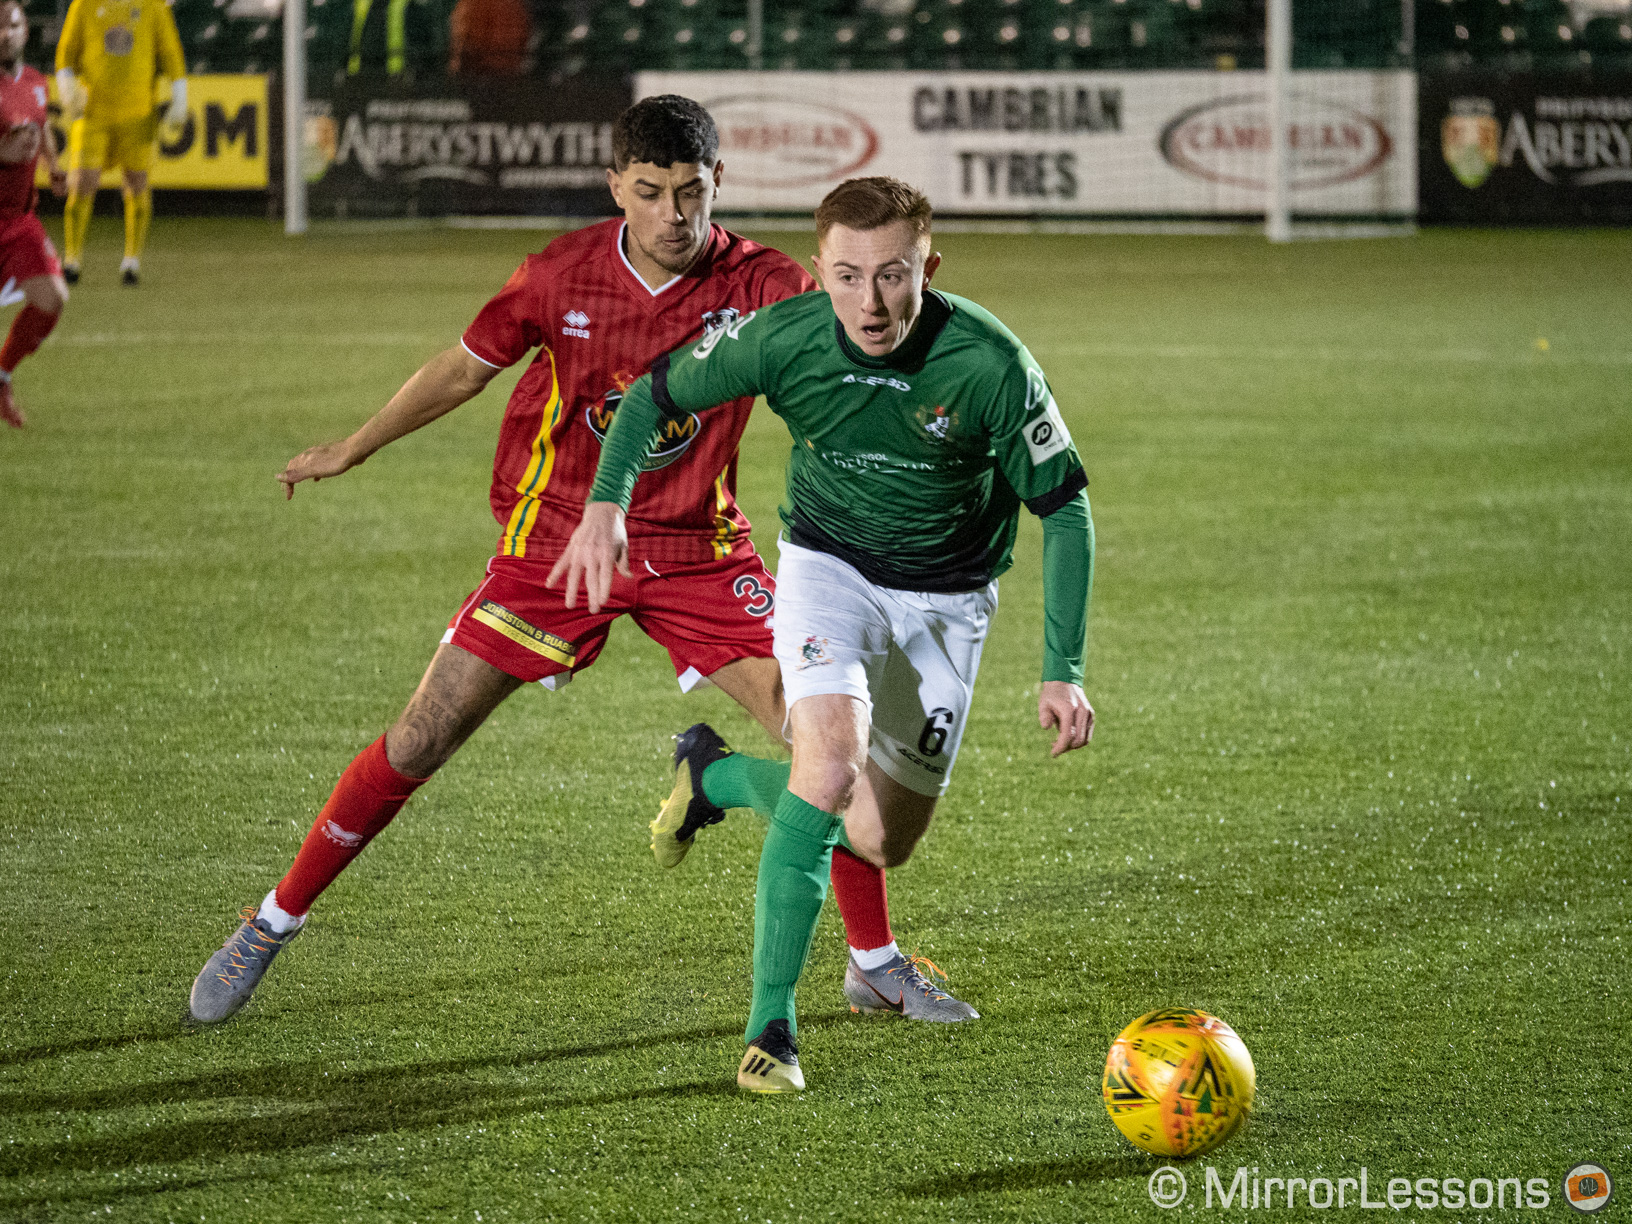

The first difference I noticed was during an evening football game. Whereas the E-M1 II gave me an average of 70% / 92%, the E-M5 III managed a keeper rate score of 80% / 91%. There weren’t a lot of out-of-focus shots, but many were not 100% sharp. Both cameras can mis-focus more easily when there a lot of players in the same shot.


Settings recommendation: I used a mix of 25-Target and 5-Target Group, with C-AF Sensitivity set to 0 and AF Scanner set to mode 3.
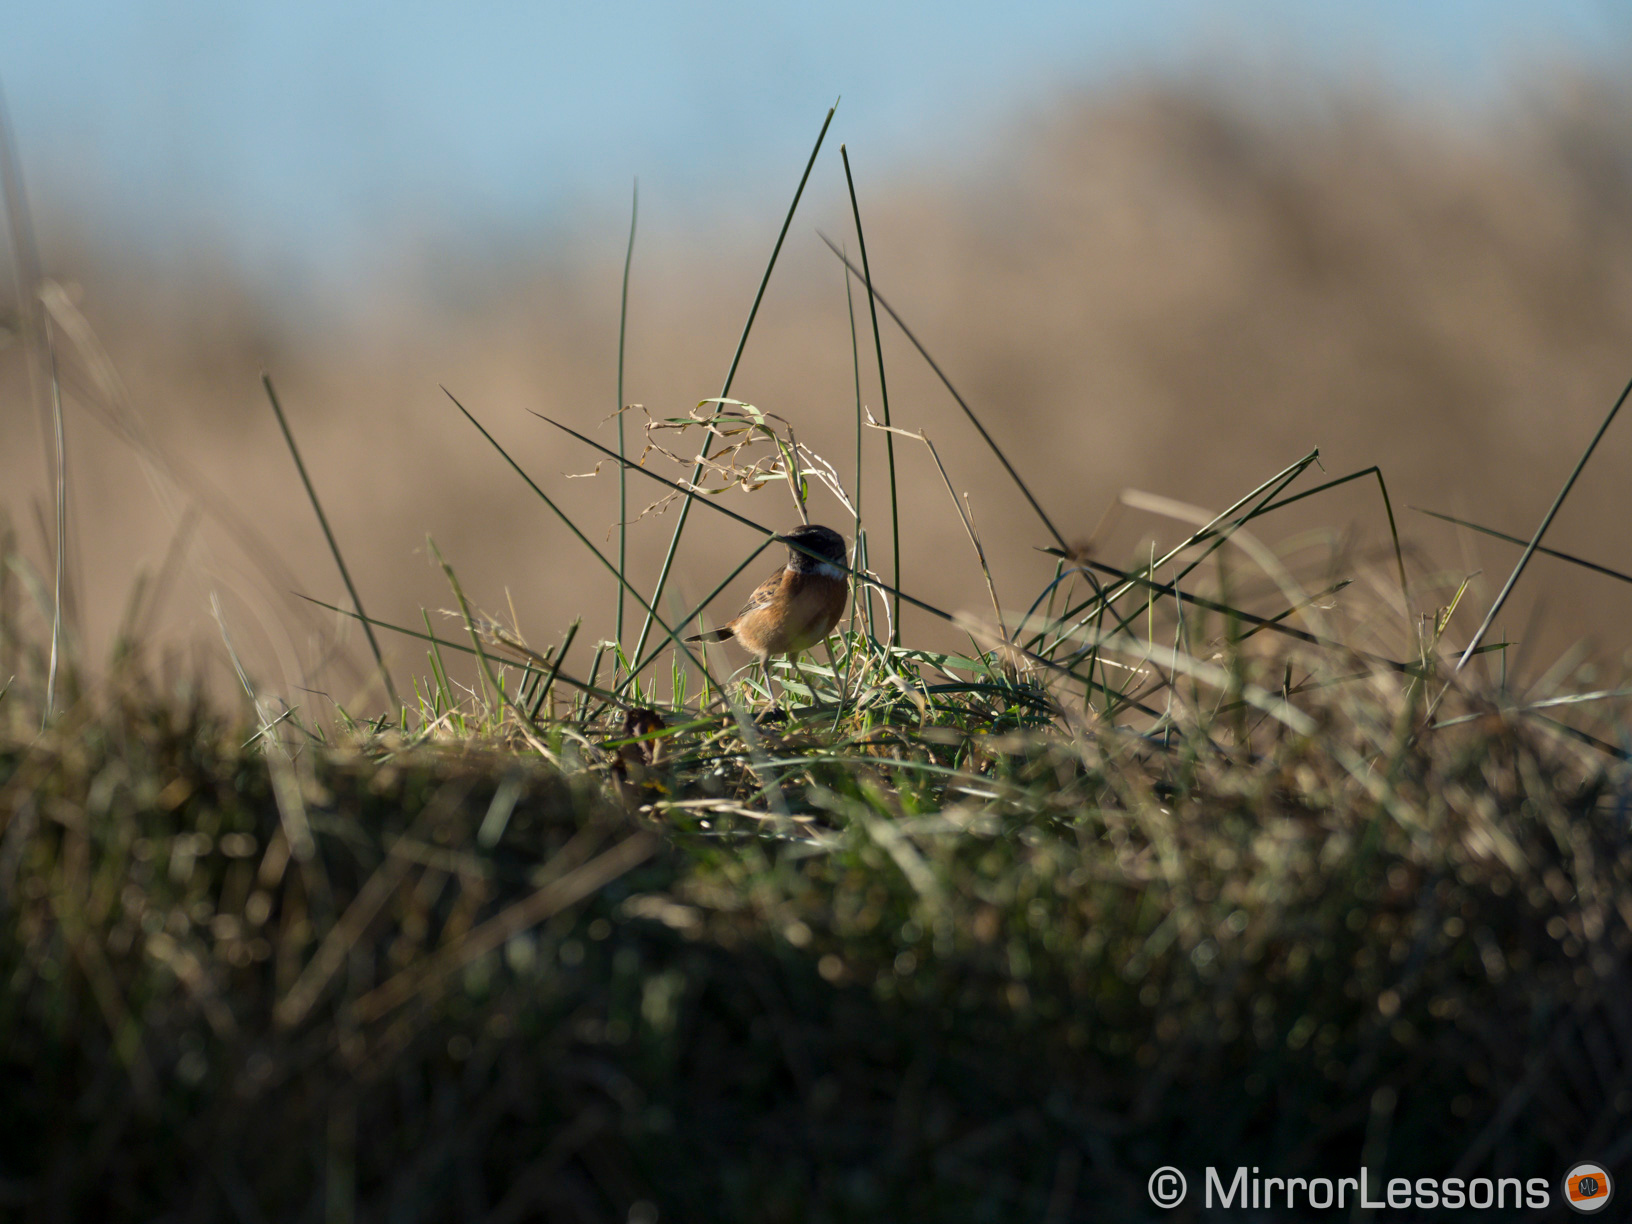
Then we have my go-to birds in flight test which confirms that the E-M5 III has a more elaborated autofocus algorithm. Whereas the score with the E-M1 II averages around 62% / 80%, the E-M5 III gave me 72% and 93% which is very close to the E-M1X. The E-M5 model does a better job at understanding where the bird is, not to mention that it feels quicker when locking or correcting focus.
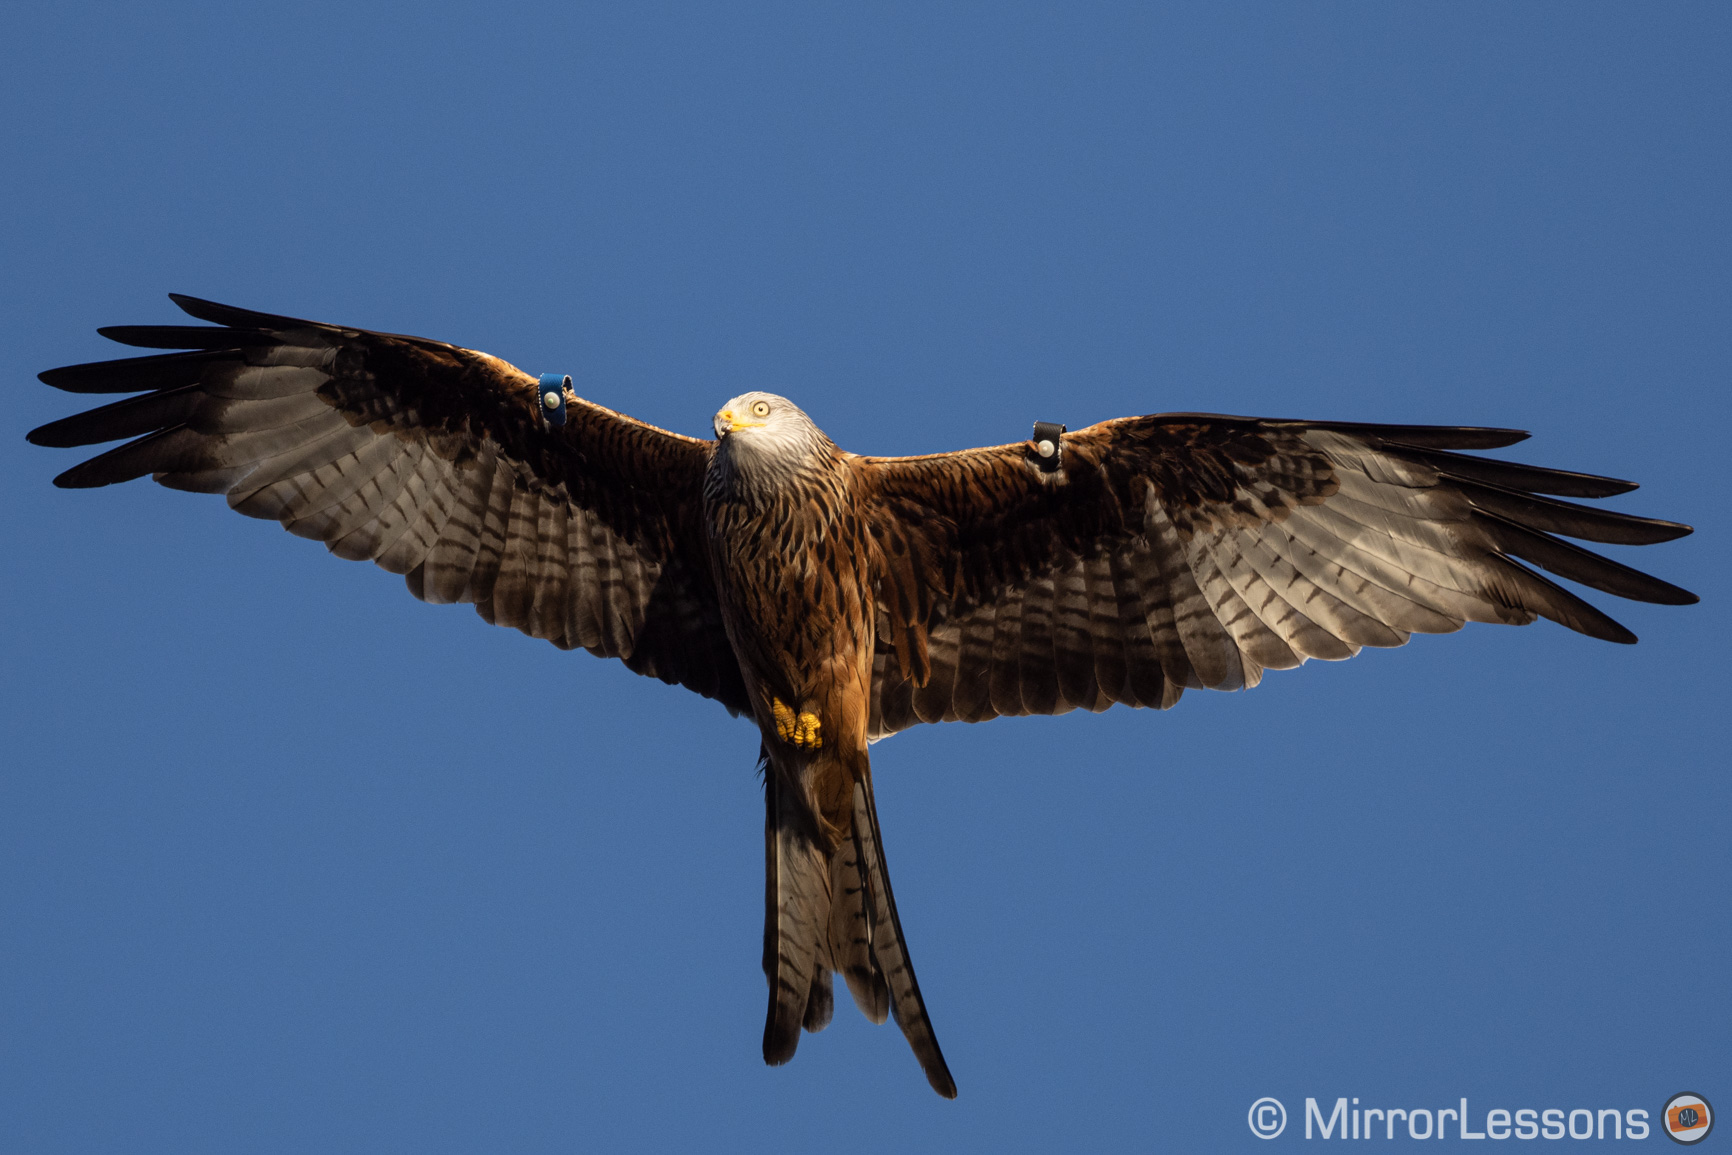

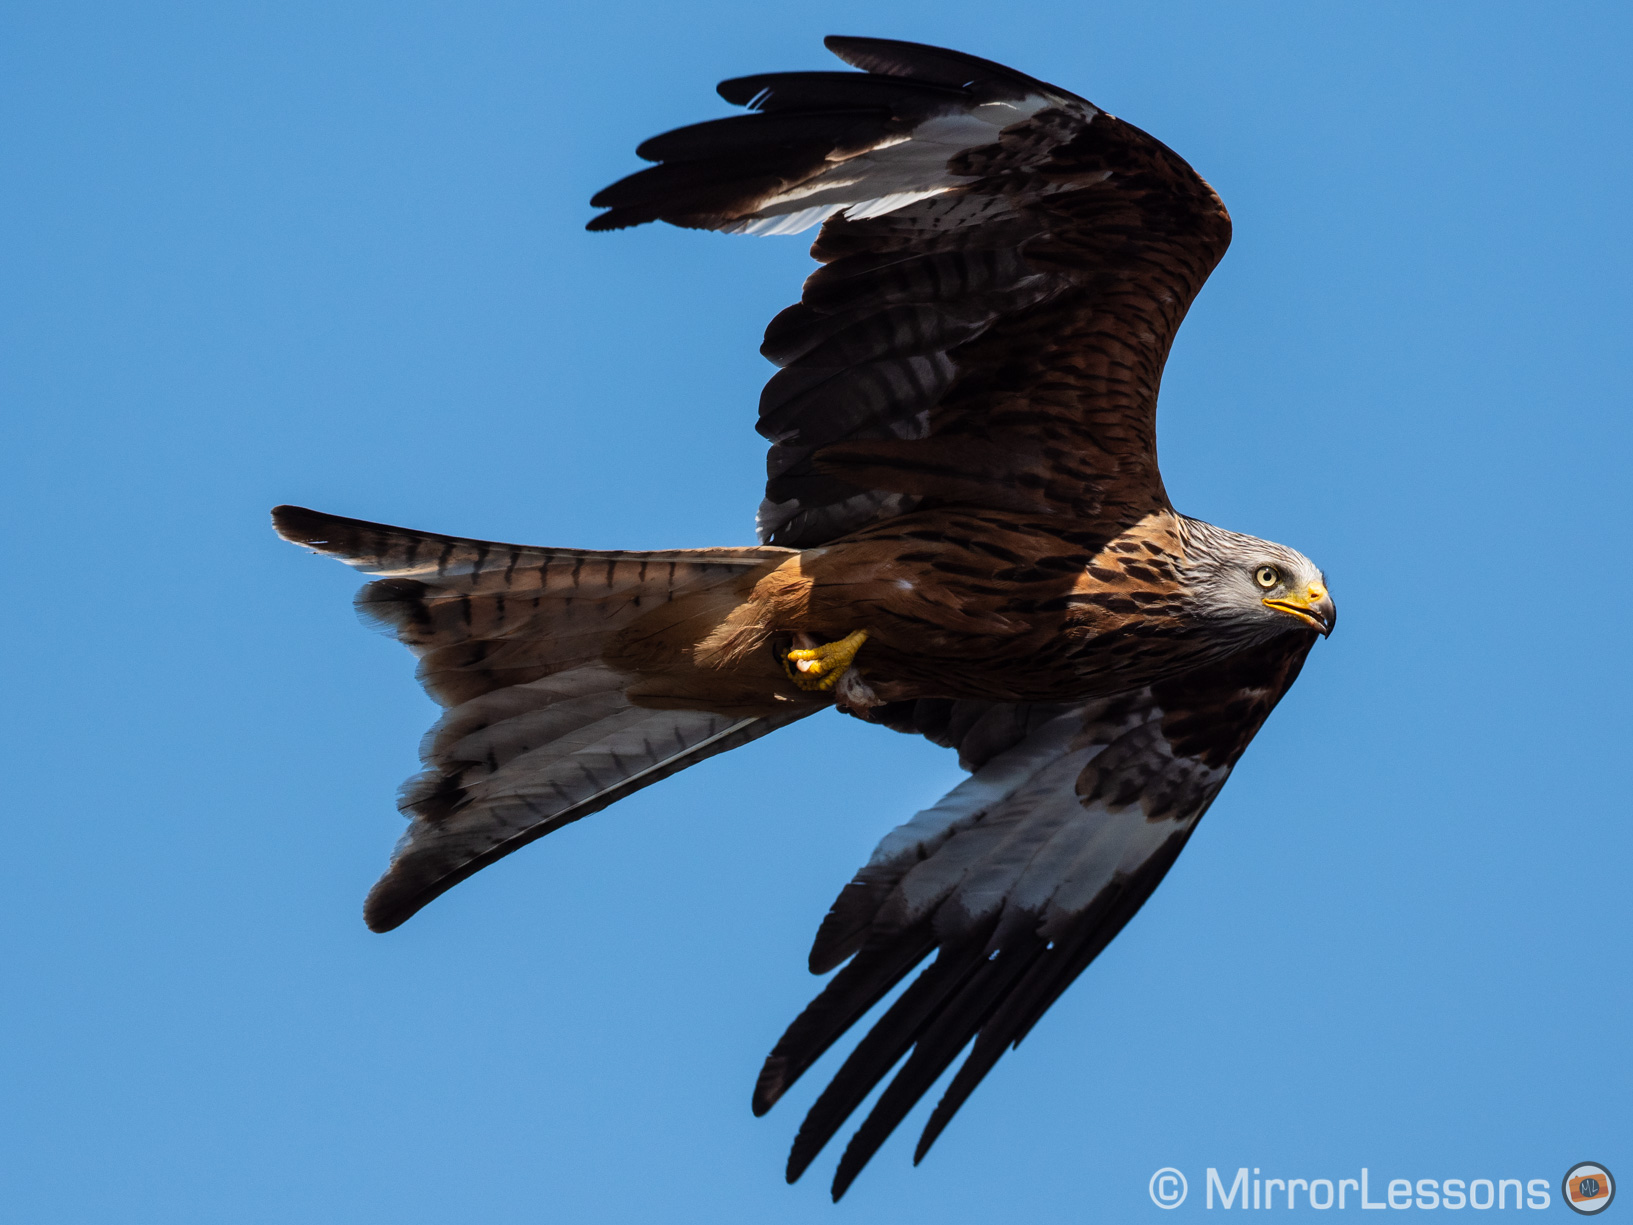
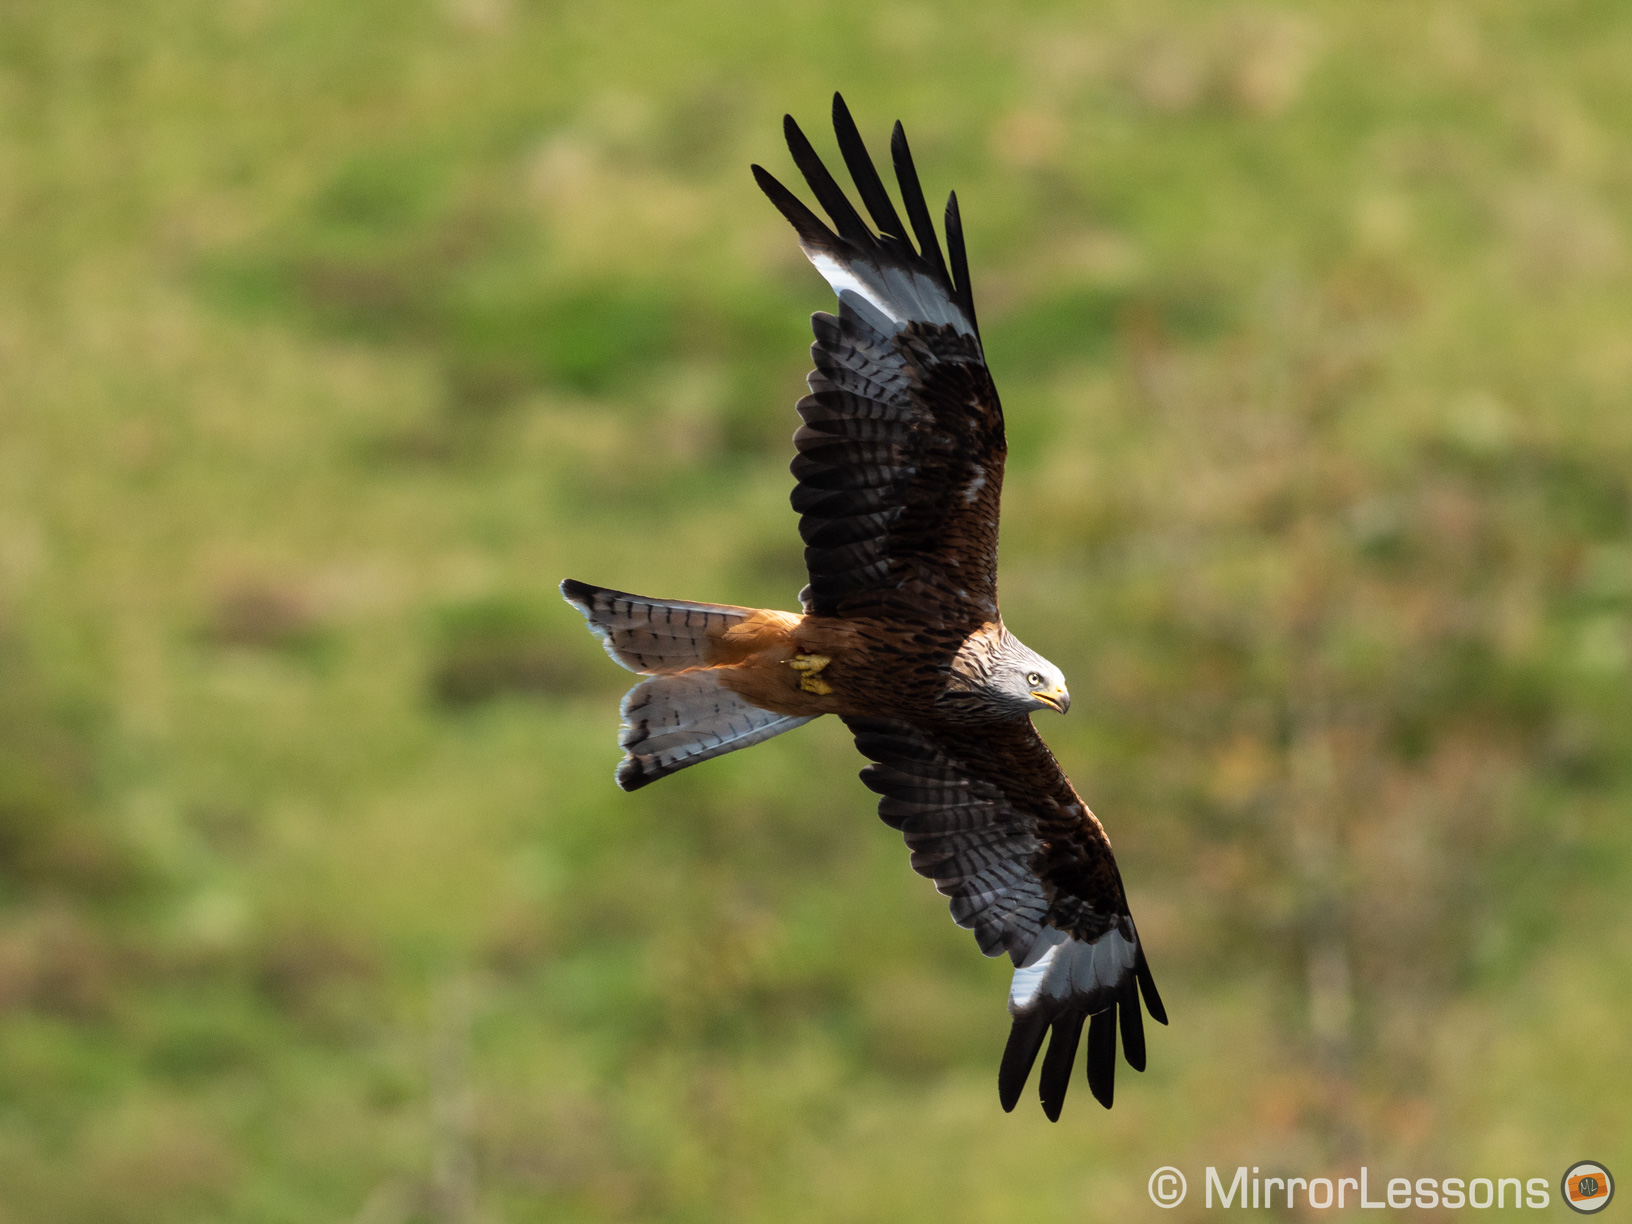
Setting recommendation: the 25-Target area mode gives you the best results. Set C-AF Sensitivity to +2, AF Scanner to mode 3 and turn off C-AF Release Priority. You can also use C-AF Centre Start (and select the 25-Target) which helps with erraticly moving subjects. Avoid C-AF + Tracking as it is not reliable in this kind of situation.
The E-M1 II has an advantage when it comes to continuous shooting speeds, where it outperforms the E-M5 III with the mechanical and electronic shutter:
- mechanical: 15fps vs 10fps (High mode), or 10fps vs 6fps (Low mode with C-AF)
- electronic: 60fps vs 30fps (High), or 18fps vs 10fps (Low with C-AF)
Both cameras take advantage of the fast speeds with the electronic shutter for a special mode called Pro Capture, where the camera loads up to 35 images and constantly refreshes them in the buffer memory while the shutter button is half pressed. That way, when you fully press the button, you already have 35 frames that can be saved to the memory card, giving you a better chance of capturing unpredictable moments.
Speaking of the buffer memory, the E-M1 II has the edge with RAW files as it can shoot at full speed at 10fps for about 7s before slowing down to about 4fps. The E-M5 III slows down earlier after 4s, but keeps a faster burst of 6fps after that.
With JPGs, the E-M5 model never slows down whereas surprisingly the E-M1 II has the same performance as with the RAW files.

E-M5 III, 10fps, RAW
E-M1 II, 10fps, RAW
E-M5 III, 10fps, JPG
E-M1 II, 10fps, JPG
Image Stabilisation
The E-M5 III and E-M1 II feature 5-axis stabilisation and their CIPA rating is the same: 5.5 stops with the sensor alone, or 6.5 stops with Sync IS. The latter means that sensor stabilisation is combined with optical stabilisation on select Olympus lenses (12-100mm Pro and 300mm Pro for now).

In practice, the performance of these two cameras is indeed very similar. I managed to push the E-M5 III exposure to 4s hand-held with the 12-40mm Pro lens at 17mm. Such results are possible with the E-M1 II as well, although the keeper rate will be higher from 2s or faster.
With the E-M1 II, Sync IS and the 12-100mm Pro at 12mm, I got sharp results at 8s and 10s with multiple attempts. I even managed 20s once by leaning against a wall and holding my breath, although this is really pushing it to the extreme.
With long focal lengths such as 100mm, you can get good results at 1s, or even more with Sync IS. So long story short, both cameras do really well and won’t let you down no matter which situation you are facing.
As always, remember that the performance is also linked to how stable you are when taking the shot, especially when trying very slow shutter speeds such as 2s or 4s. But most of time, you’ll find that 1s or half a second is enough to keep ISO or aperture to optimal levels, and both cameras will give a very high keeper rate at these speeds.

Stabilisation also works for video which we’ll be discussing in the next section.
Video
Unsurprisingly, the quality and performance of the E-M5 III and E-M1 II is very close when it comes to video recording. You can watch the video below, or read our quick bullet point summary.
The two cameras are identical when it comes to:
- sharpness and level of detail in 4K and 1080p (Full HD has more aliasing)
- dynamic range with all the normal picture modes and the flat profile
- amount of noise at high ISOs, with the maximum being 6400
- good autofocus performance with moving subject, as well as face and eye detection, but they can be a bit slow at following the subject at all times
- same degree of image stabilisation with static shots, panning and walking movements (best in class)
- microphone input
Some minor differences in favour of the E-M5 III are:
- warmer colours on the E-M5 III with less green dominance
- less rolling shutter when moving quickly
A few advantages of the E-M1 II are:
- larger battery and two card slots mean more recording time
- headphone output
- OM-Log400 profile gives you more dynamic range, although the difference is frankly quite disappointing so you’ll be fine with just the Flat profile most of the time
- displaying the remaining battery life in minutes rather than percentages.
Extra information
Because I’ve only covered the most important aspects of these two cameras, there are other things I decided to skip to keep the article shorter.
One important thing to know is that the two cameras come with a lot of extra features and some of them can be interesting depending on the photography genre you like to practise.
Here are all the things both cameras can do:
- Flash: the maximum sync speed is 1/250s, the Super FP mode works up to 1/8000s and the wireless RC mode is available. The small FL-LM3 is provided in the box
- Live Time and Live Composite for long exposure and light painting (with real time progression visible on the LCD)
- Keystone and Fisheye compensation to correct geometrical distortion (JPG only)
- AE and HDR Bracketing up to 7 frames and ±2Ev, or 5 frames and ±3Ev. In-Camera HDR (JPG only) is also available.
- Focus Bracketing and Focus Stacking up to 999 shots (15 for in-camera stacking). Note that stacking only works with select Olympus lenses
- Time-lapse up to 999 frames with the option of creating a video (but the frame rate is limited to 5fps in 4K and 15fps in 1080p)
- Multiple exposure: 2 frames (or 3 frames if you choose the pictures in playback mode)
- Manual Focus Assist with magnification or peaking (four colours)
- Art filters with 16 special looks (JPG only)
- In-Movie Image Capture extract a frame from video footage
- RAW processing process RAW files and export JPGs
- Copyright settings adds your personal information to the EXIF data of your photographs
- WiFi connect to mobile devices (the E-M5 III also has Bluetooth)
The one thing the E-M5 III cannot do is tethering, a function that Olympus has removed (it is available on its predecessor the E-M5 II). The E-M1 model on the other hand can work via USB.
Conclusion
Despite the gap in age, the E-M5 III and E-M1 II are fairy close competitors when it comes to quality and performance.
The E-M1 II’s main advantage is the design: it feels more solid, has a very comfortable grip that makes a difference with large lenses, has two SD card slots, a larger battery and a headphone output. These are all things that can come in handy when using the camera on a daily basis.
The E-M5 III is smaller, so it may suit your needs better if compact dimensions and less weight are important to you. It has a few benefits such as less rolling shutter for video, and better autofocus performance when dealing with difficult subjects such as birds in flight. Ironically though, the ergonomics of the E-M1 II along with the faster continuous shooting speeds suit that particular genre better.
As for everything else, there isn’t really a lot to add. Both cameras deliver fantastic performance when it comes to image stabilisation and the image quality is more or less the same. So perhaps the price will help you come to a decision. At the time of publishing, the E-M5 III can be found for $400 / £150 / €200 less.
Strengths of the E-M5 III
- less expensive (as of late March 2020)
- smaller and lighter
- longer eye point makes the viewfinder better for photographers who wear glasses
- slightly warmer colour rendering
- better autofocus for fast subjects such as birds
- less rolling shutter for video
Strengths of the E-M1 II
- larger grip improves comfort with big lenses
- better overall build quality
- larger battery and two SD card slots
- faster continuous shooting speeds
- tethering option
- headphone output
To consider:
- the E-M1 II has a Log profile for video, but frankly I don’t find it all that different to the Flat profile which is available on the E-M5 III too
- you can buy a landscape grip to improve the ergonomics on the E-M5 III if you need to use larger lenses
Choose the Olympus OM-D E-M5 III if:
- you want to spend less
- you wear glasses
- you prefer the smaller body
Choose the Olympus OM-D E-M1 II if:
- you want better ergonomics and a larger grip
- you want better battery life and two memory card slots
- you do studio work where the tethering function can be useful
Reminder: the links below are affiliate links. If you decided to buy something after clicking the link, we will receive a small commission.
Check the price of the OM-D E-M5 III on
Amazon | Amazon UK | B&H Photo | eBay
Check the price of the OM-D E-M1 II on
Amazon | Amazon UK | B&H Photo | eBay