Updated on: July 1st, 2018
The Olympus OM-D E-M10 Mark II rapidly became one of the most interesting offerings within the entry/mid-level mirrorless segment when it was released in 2015. Thanks to its attractive retro design, vast number of features and reasonable price, it is no wonder that it is still a popular choice among many Micro Four Thirds users.
The E-M10 Mark III arrives two years later and includes some welcome additions, the most important being 4K video. There are also a few downgrades, however, as it has been simplified in order to better target beginners. While this shift certainly makes the mark III a more straightforward camera to use, it lacks several things that a more experienced user might miss.
Is the new E-M10 III a step forward or backward? Let’s find out!
Ethics statement: We were loaned the two Olympus cameras for review and comparison purposes. We were not asked to write anything about these cameras, nor were we provided with any sort of compensation. Within the article, there are affiliate links. If you buy something after clicking the link, we will receive a small commission. To know more about our ethics, you can visit our full disclosure page. Thank you!
Main Specs
OM-D E-M10 mark II
- Sensor: 16 MP 4/3 Live Mos
- Lens system: Micro Four Thirds
- Weatherproof: None
- Internal Stabilisation: Yes (5-axis)
- Autofocus: contrast detection with 81 points
- Continuous shooting: 8.5fps (AF-S), 4fps (AF-C), 11fps (AF-S) and 5fps (AF-C) with electronic shutter
- ISO Sensitivity: 200 – 25600 ISO (Pull 100)
- Shutter Speeds: 1/4000 to 60 seconds, 1/16000s with electronic shutter
- Viewfinder: 2,360K dots, approx. 100% FOV coverage and 1.23x (0.62x) magnification
- Rear monitor: Tilting 3″ touch sensitive LCD (1,040K dots)
- Movie recording: Full HD up to 60fps
- Built-in Flash: Yes
- Extra Features: WiFi, Timelapse, HDR, Multiple exposure, Live Time, Live Composite, Focus Bracketing, Bracketing, Keystone compensation,
- Dimensions: 119.5 x 83.1 x 46.7mm
- Weight: 390g (including battery and memory card)
- Firmware version: 1.3
OM-D E-M10 mark III
- Sensor: 16 MP 4/3 Live Mos
- Lens system: Micro Four Thirds
- Weatherproof: None
- Internal Stabilisation: Yes (5-axis)
- Autofocus: contrast detection with 121 points
- Continuous shooting: 8.6fps (AF-S), 4.8fps (AF-C)
- ISO Sensitivity: 200 – 25600 ISO (Pull 100)
- Shutter Speeds: 1/4000 to 60 seconds, 1/16000s with electronic shutter
- Viewfinder: 2,360K dots, approx. 100% FOV coverage and 1.23x (0.62x) magnification
- Rear monitor: Tilting 3″ touch sensitive LCD (1,040K dots)
- Movie recording: 4K up to 30fps, Full HD up to 60fps, HD up to 120fps
- Built-in Flash: Yes
- Extra Features: WiFi, Timelapse, HDR, Multiple exposure, Live Time, Live Composite, Focus Bracketing, AE Bracketing, Keystone compensation,
- Dimensions: 121.5 x 83.6 x 49.5mm
- Weight: 410g (including battery and memory card)
- Firmware version: 1.1
Design and handling
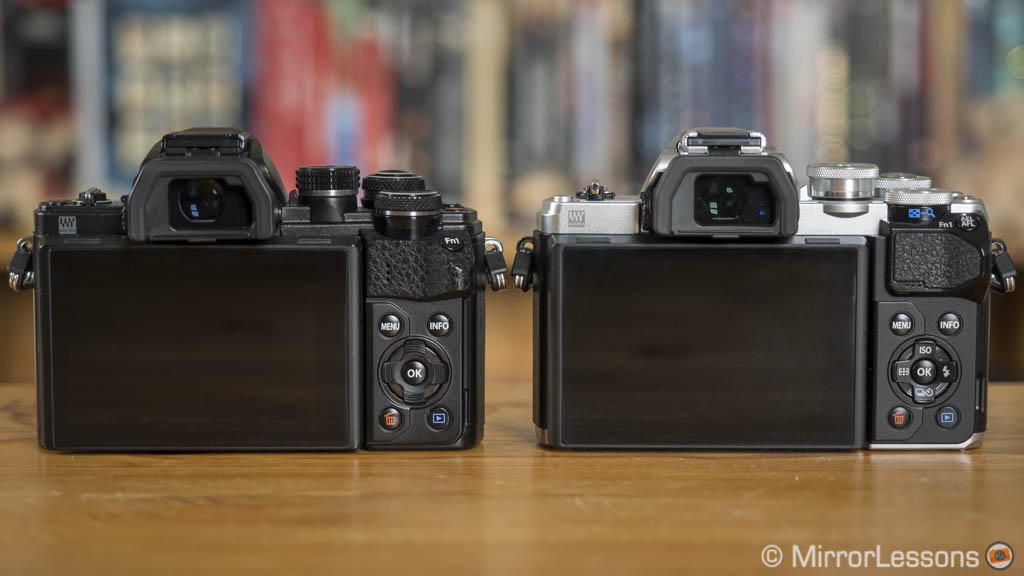
Olympus never disappoints when it comes to design and the new E-M10 III is no exception. Both cameras have a beautiful and elegant retro look and are available in either all-black or a black/silver finish. The E-M10 II can also be found in a limited brown leather edition (3500 copies only).
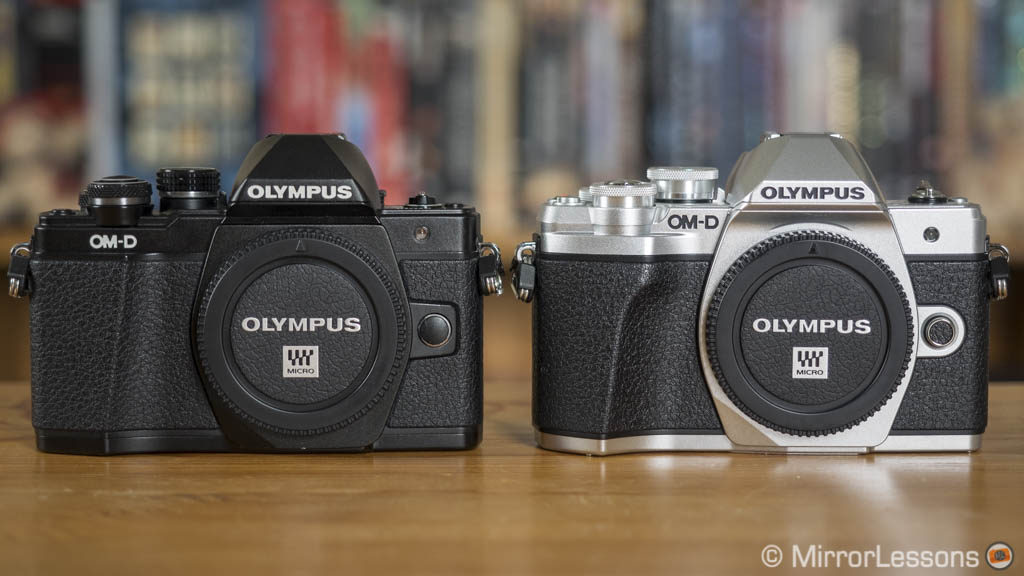
The size is roughly the same with the E-M10 III being ever so slightly larger and heavier. Neither cameras is weather sealed and the build quality differs as well. While the Mk2 has metal plates on the top and bottom, the Mk3 is mostly made of plastic. To be honest this downgrade didn’t bother me too much: yes, the new camera feels more plasticky but it doesn’t feel like a cheap “toy” either. Thankfully the dials on top are still made of metal just like the Mk2.
The few subtle cosmetic changes aside, the only relevant improvement to the Mk3 is the front grip. It is bigger and makes the camera more comfortable to hold with a mid-sized lens such as the 12-40mm Pro. On the E-M10 Mk2, you need the optional ECG-3 grip to have a similar level of comfort.


The E-M10 III has a larger grip. 
The optional ECG-3 grip for the E-M10 II

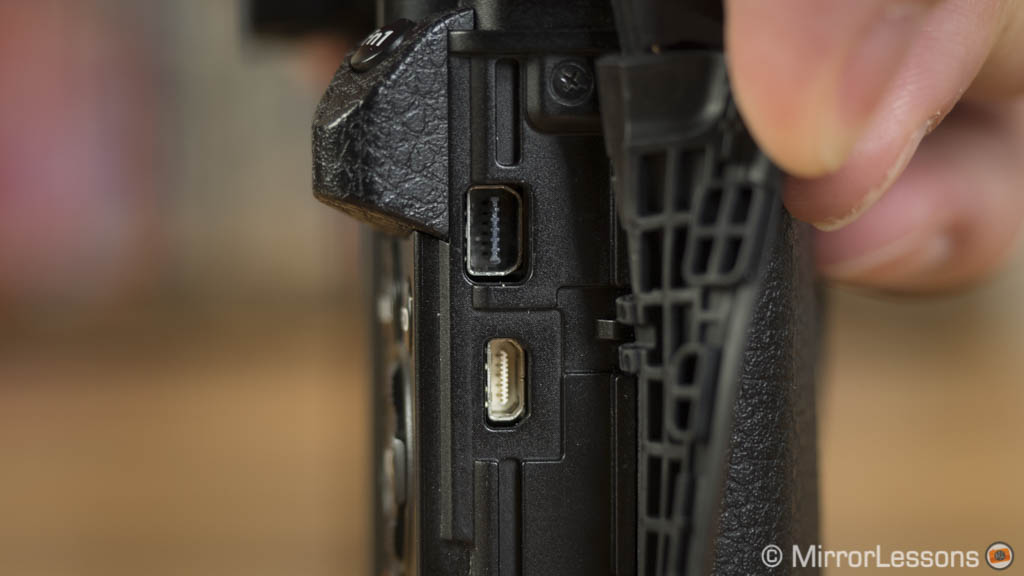
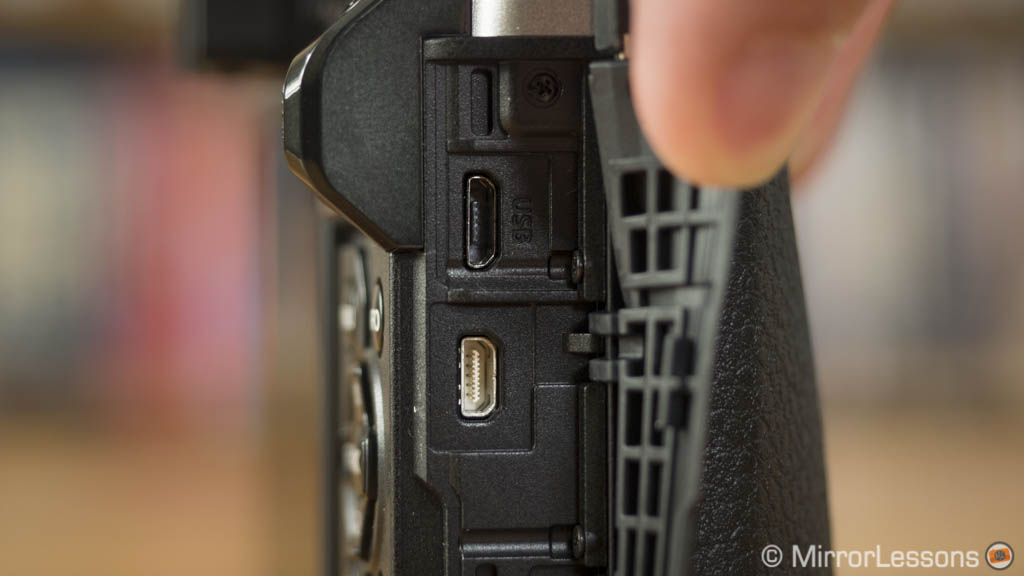
The two cameras come with one SD card slot found at the bottom within the battery compartment and are compatible with UHS-II cards. Then we have a Micro HDMI output, a proprietary USB/video output port for the Mk2 and a more standard Micro USB 2.0 connection on the Mk3.

E-M10 II: proprietary USB/vide output 
E-M10 III: Micro USB 2.0 terminal
Controls and customisation
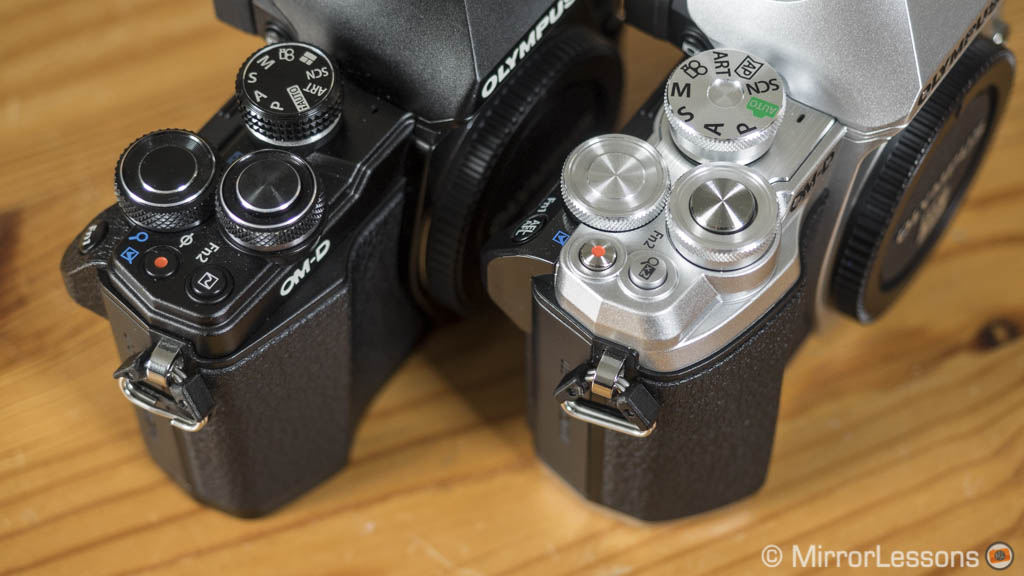
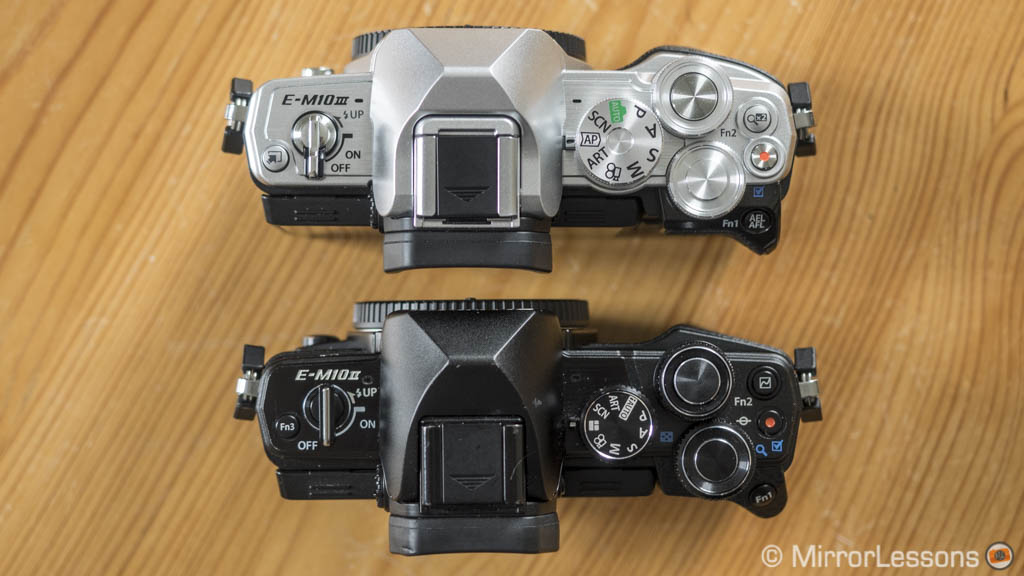
The shooting mode dial on top is larger on the E-M10 Mk3 and slightly stiffer to turn. The twin dials are thinner and more precise in operation on the new camera. All the other buttons are found in the same position with a similar positive tactile feel.

The E-M10 Mk2 has 6 function buttons with 26 options to choose from. There is the possibility to use the rear arrow pad to move the focus point and the twin dials to change ISO/WB once the option is triggered via a Fn button.
On the E-M10 Mk3, only two buttons are customisable with 10 options each. All the other buttons and dials have a pre-assigned function and cannot be changed. The new camera also loses the Myset mode that allows you to save your favourite settings and recall them quickly.
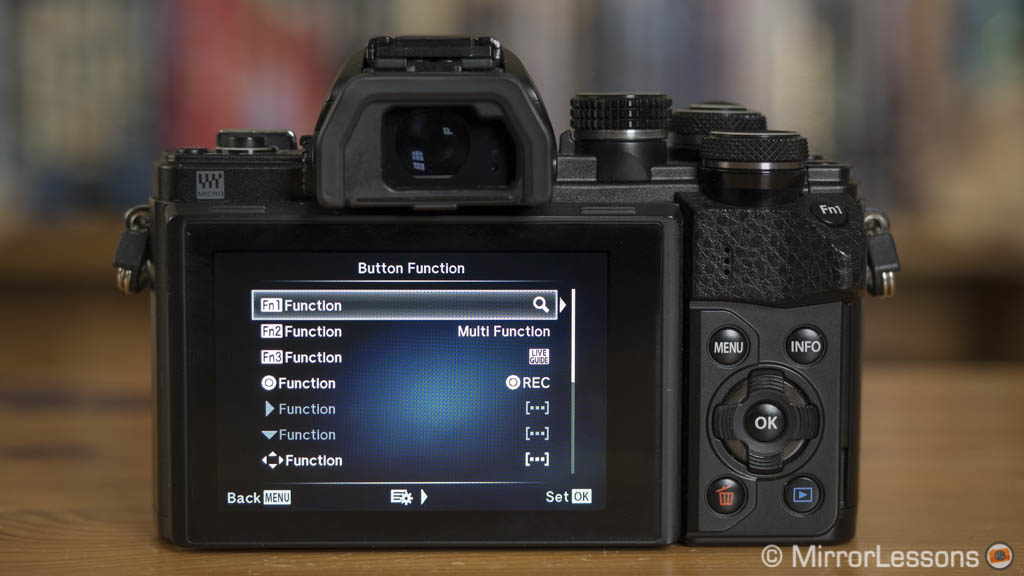
E-M10 II: 6 Fn buttons 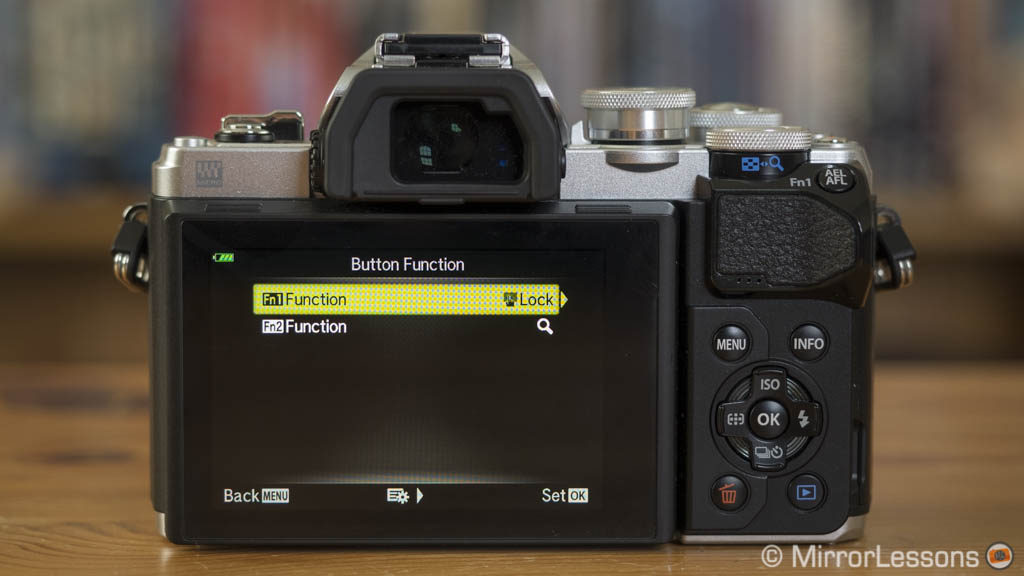
E-M10 III: 2 Fn buttons


That being said, the controls are intuitive enough on the Mk3 model. Once you trigger a setting, you can use the twin dials to change the value or navigate through the menu just like on the Mk2. The settings that are not available from the various buttons can be found in the Super Control Panel, so you learn to find everything you need quickly.
The E-M10 Mk3 introduces a new AP mode (Advanced Photo) on the main dial that re-groups various features found in different locations on its predecessor such as the silent mode, live composite, bracketing, etc. This mode works with auto exposure only which means that for many of these features, you lose total manual control unlike the Mk2 camera (more info about this throughout the article).
Menu system
The menu system on the E-M10 Mk3 has a new graphic interface (the same as the flagship E-M1 Mk2) and has been reorganised to make some categories easier to access. For example the Movie settings are in the main directory rather than under the Custom Menu section.
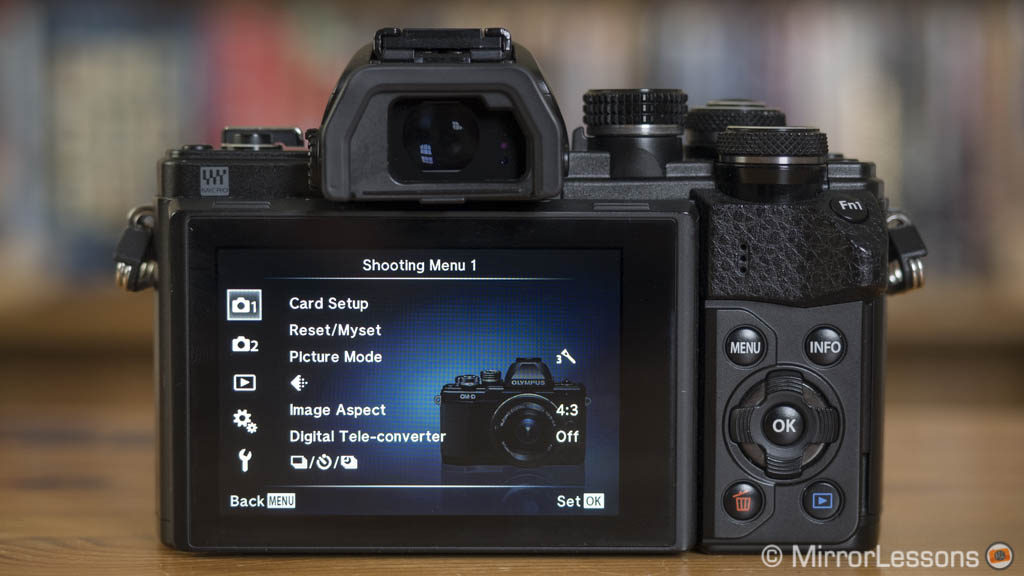
E-M10 II 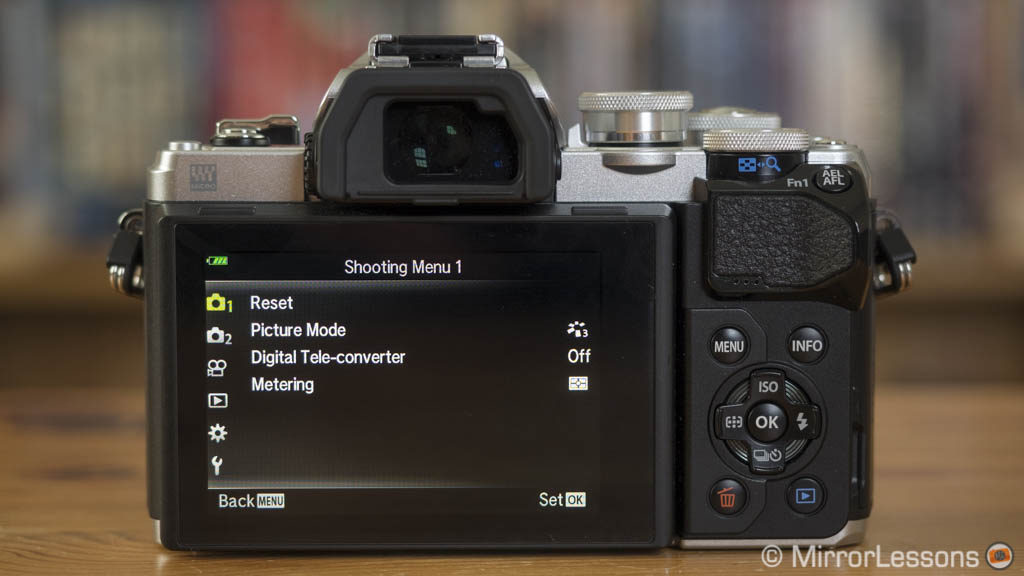
E-M10 III


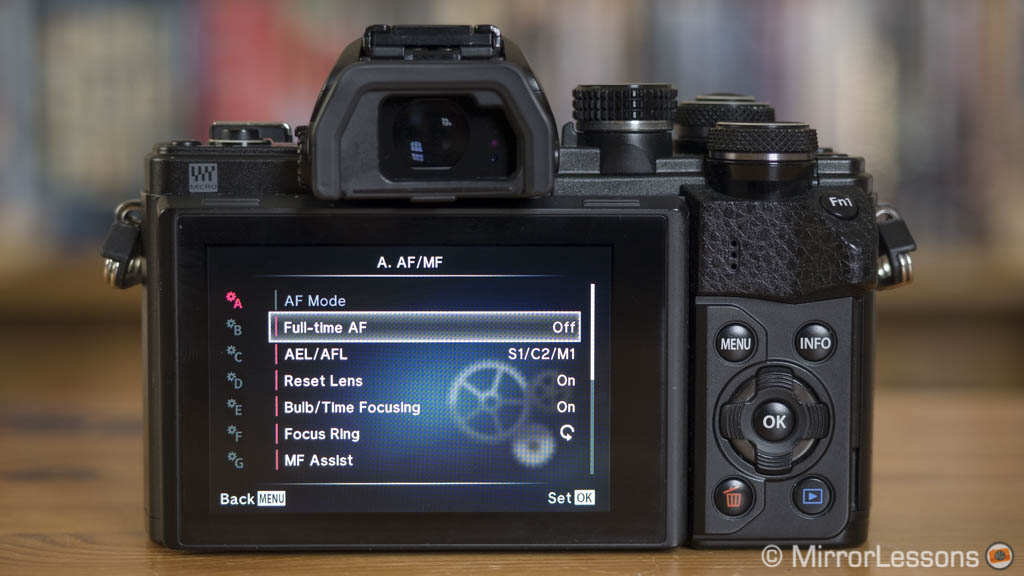
One thing that surprised me when browsing through the various pages of the new camera is how many fewer options there are in comparison to the E-M10 Mk2. A quick example is the Custom Menu A (AF/MF): whereas the predecessor has 11 settings divided into 2 pages, there are only five entries on the Mk3. As a result the new menu is definitely quicker to navigate but it is regrettable that some options are missing (more on these throughout the article).

E-M10 II 
E-M10 III

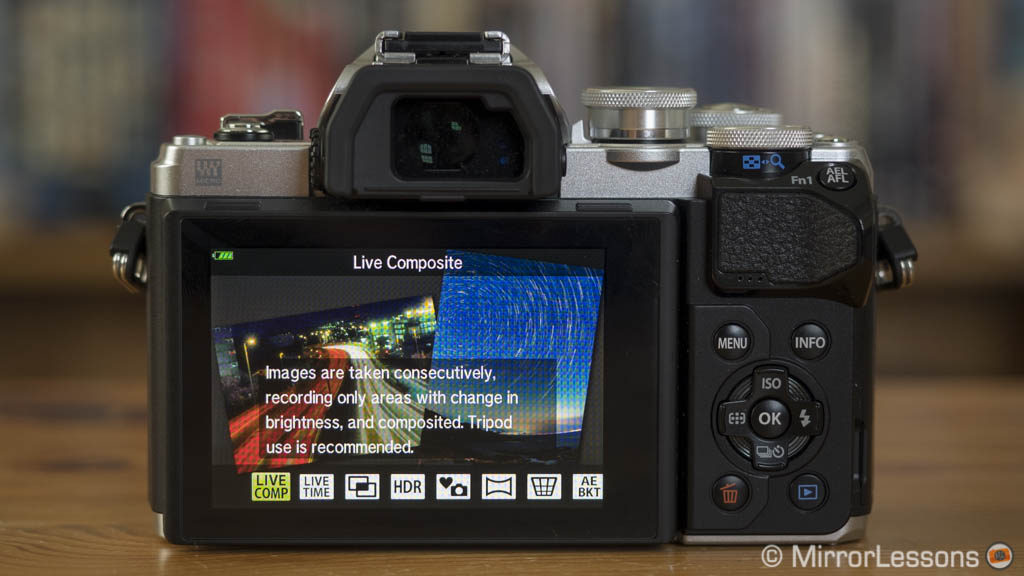
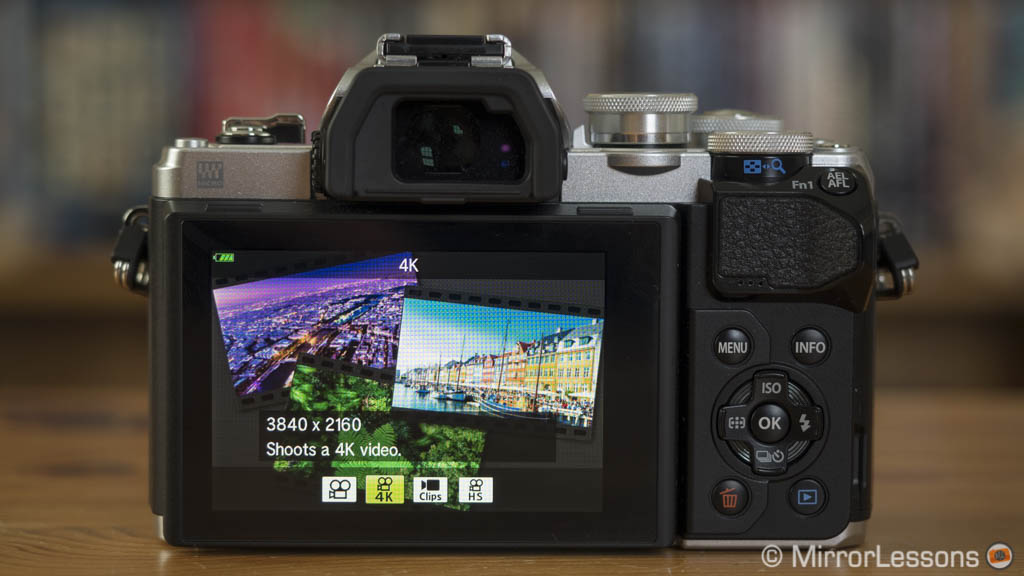
Olympus redesigned the welcome screens of select shooting modes (Art Filters, Scenes, etc) with new graphics on the new camera while adding one for the Movie mode as well. They appear as soon as the mode is selected to let you choose a scene or setting before creating your composition. You can recall them with a Shortcut button on the top near the On/Off switch or the OK button on the Mk2.

E-M10 III: new welcome screen in video mode 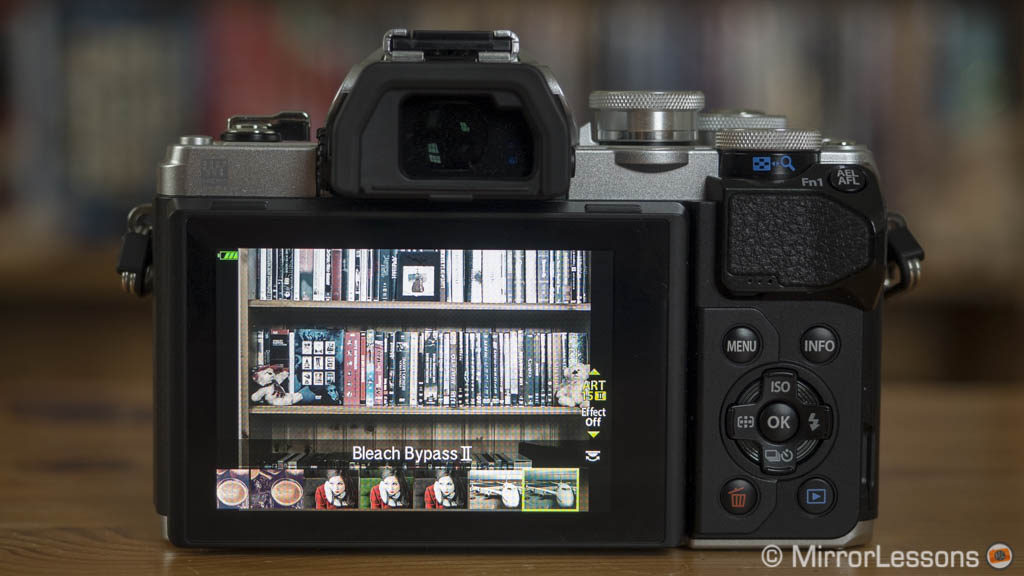
E-M10 III: Art Filter menu selection 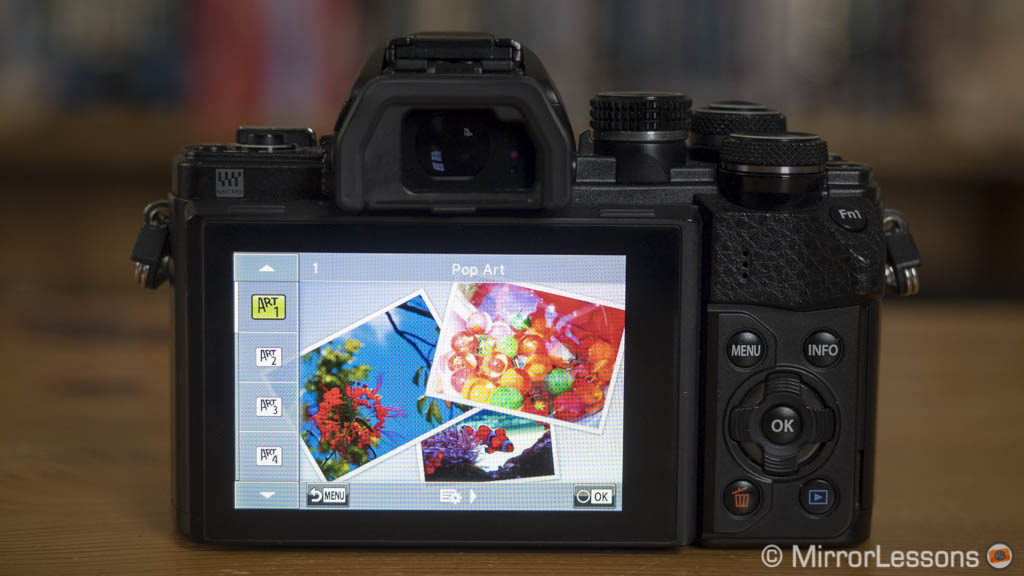
E-M10 II: Art Filter menu selection


They are intuitive to use and definitely beginner-friendly but they can also become annoying when you frequently change between two different modes (for example taking stills and video) and they sometimes have a delay of a few seconds. One time I switched to video mode and started recording right away so as not to miss the moment but then the welcome screen came up which caused the E-M10 Mk3 to freeze. I wish there could be an option in the menu to disable their automatic appearance when changing between shooting modes.
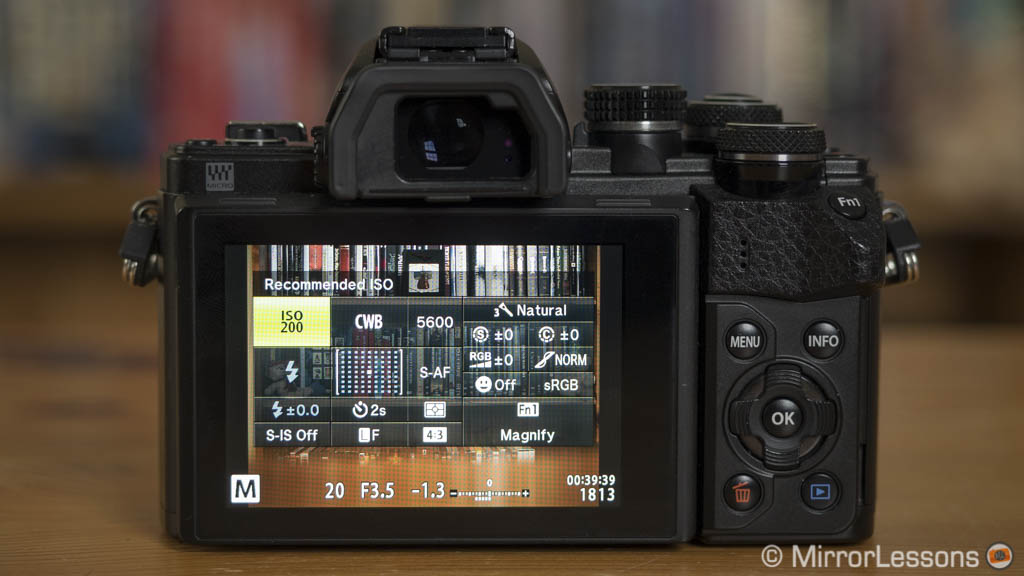
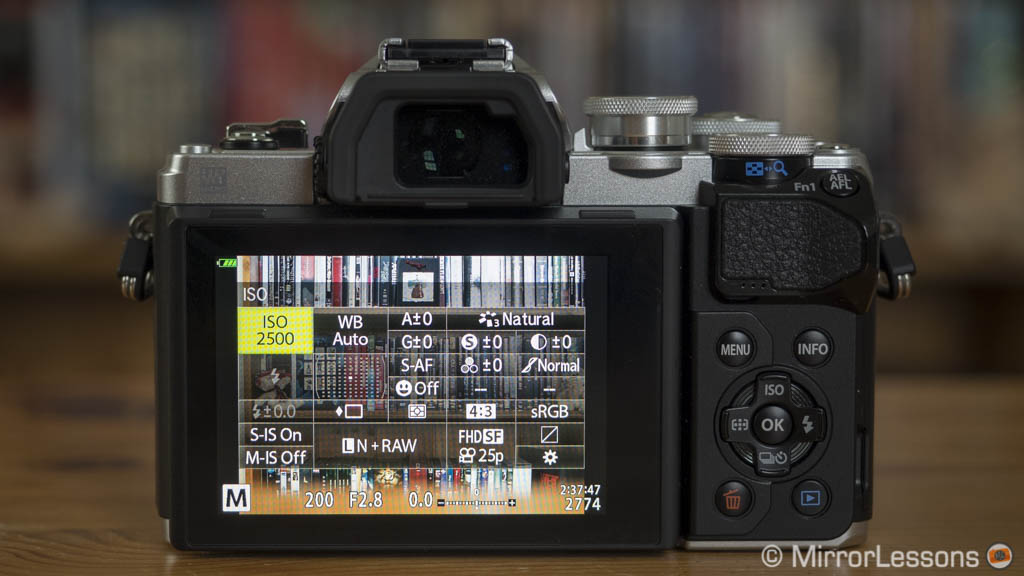
Finally we have the Super Control Panel which is available in most shooting modes except for video which is a shame. It can be activated by pressing the OK button (and the Top Shortcut button on the Mk3). The SCP on the new camera has a few more options.

E-M10 II 
E-M10 III
Viewfinder and LCD
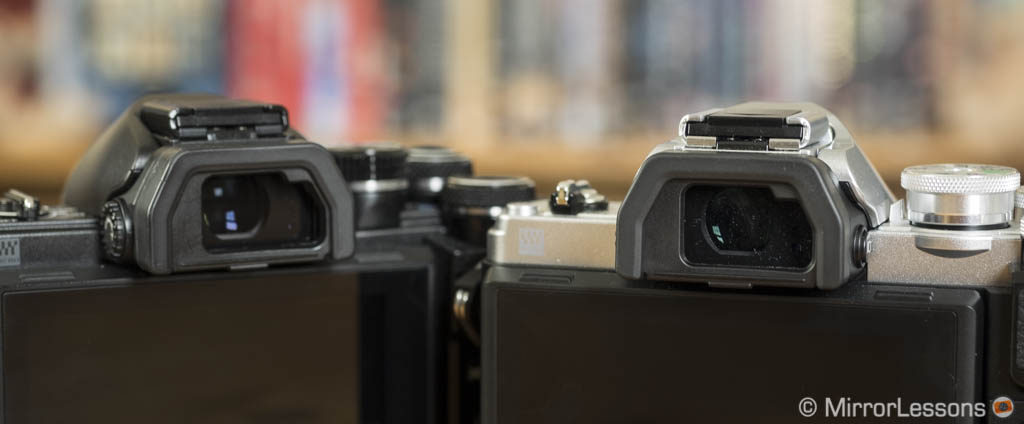
The electronic viewfinder is exactly the same on both cameras with 2,360k dots and 0.62x magnification. The OLED panel gives you a good level of brightness and contrast so overall you will find it comfortable to use on a regular basis. Those wearing glasses will find the 19.2mm eyepoint a little short because you have to squash your eye against the finder a little to have a 95% view of the frame.
There are a few differences in the settings. First we have the refresh rate: on the E-M10 Mk2 there is a Frame Rate option that allows you to increase it from 60fps to 120fps (High) albeit with a loss in resolution. That setting has disappeared from the E-M10 Mk3 so it is unclear which frame rate the camera uses. My impression is that it varies it automatically. Other options are gone on the new camera such as the S-OVF mode that simulates an optical viewfinder.
The rear monitors share the same specifications (1040k LCD panel) and are touch sensitive. You can use them to take a shot, move the focus point, focus, magnify and select other settings. The AF Targeting Pad option allows you to use the touch screen to move the focus point while composing with the EVF. Sliding your finger towards the edges can switch it from single to All target or switch the point from left to right. Touch sensitivity is very precise in operation on both cameras but beware that if you compose with your left eye, your nose may touch the screen and interfere with the operation.
There is one extra setting the Mk3 has that the Mk2 doesn’t: a Lock option to quickly disable or enable touch sensitivity which can be handy. It can be assigned to one of the two Fn buttons.
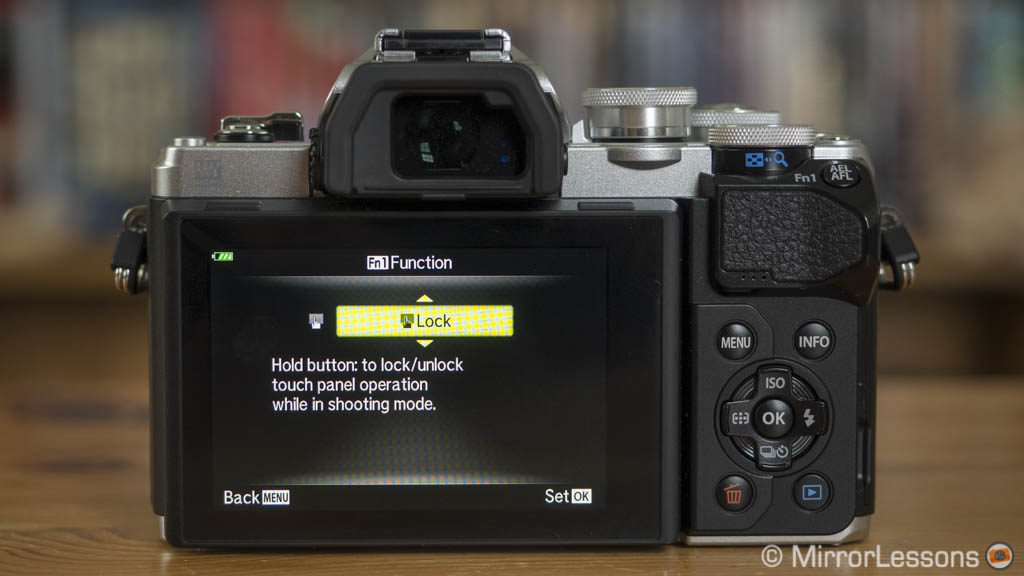
Touch Lock option on the E-M10 III 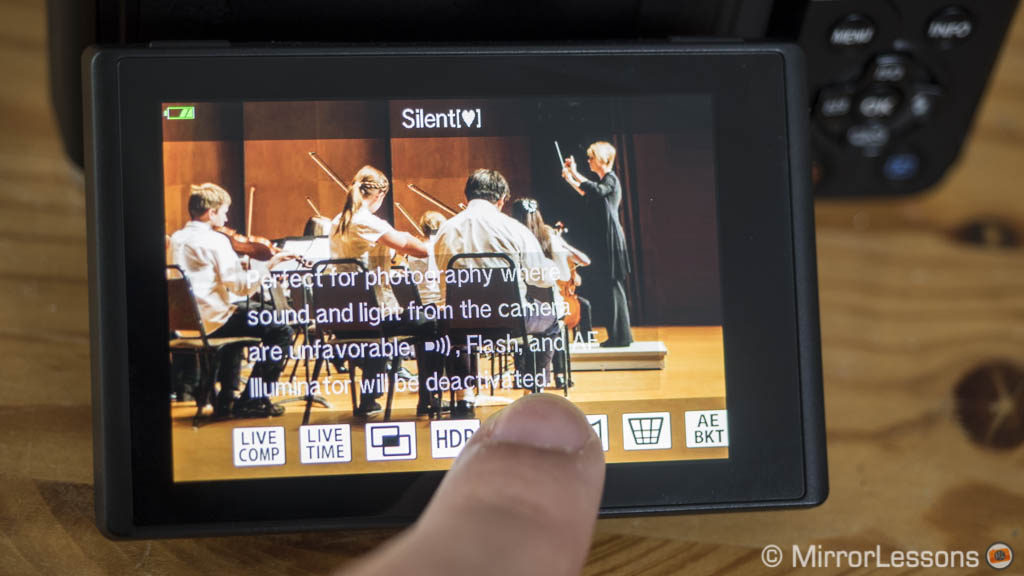
Both LCD screens are touch sensitive
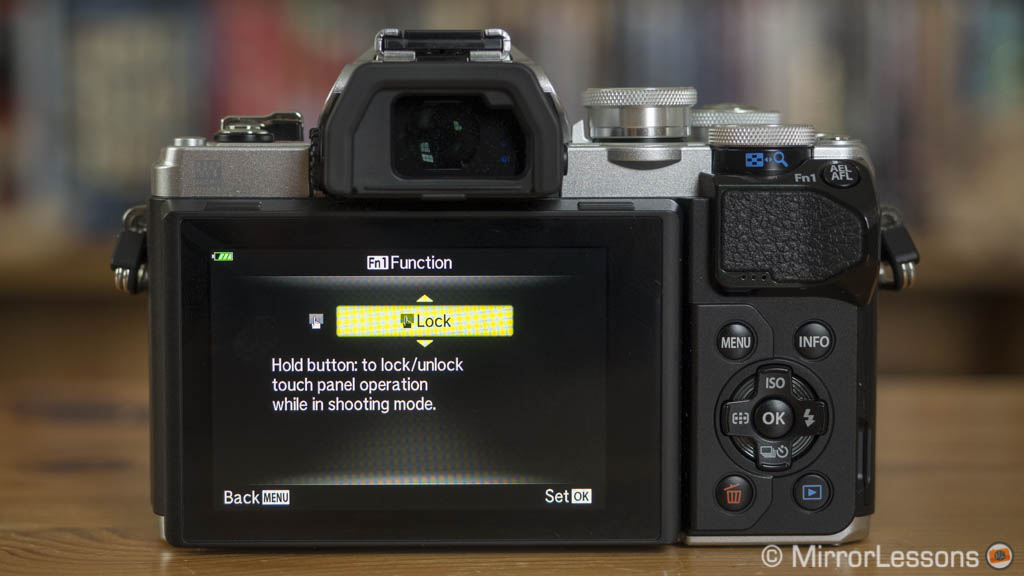

Image quality
Note: since Lightroom wasn’t compatible with the E-M10 Mk3 RAW files at the time of publishing the article, I processed them using Iridient Developer and Affinity Photo which, despite still lacking official support, were able to open them correctly. Once the files are officially supported by the major software programs, I will look at my images again to double check my conclusions and make sure I didn’t miss anything.
The two OM-D cameras share the same Four Thirds sensor with 16MP so when it comes to image quality, expect more or less the same results, starting with resolution and dynamic range. Shadow and highlight recovery with the RAW files is good but keep in mind that the sensor is weaker in the highlights and noise can be invasive in the shadows if you over-process the files. With balanced post production however, you get good looking results.


The two cameras have an identical range of ISO Low/100 to 25600. The native range is 200 to 5000 but the cameras perform well enough at 6400 ISO as well. From 12800 noise becomes more visible although I would say that the only truly unusable value is 25600. Of course you may be more sensitive to noise than me.
Note: in the examples below I kept NR to a minimum.


Note that on the new camera, you cannot change the ISO steps anymore (the default is 1/3) like on the E-M10 Mk2. Auto ISO is available but you can’t set a minimum shutter speed value. Both cameras tend to use the “1/equivalent focal length” ratio but it can sometimes go below the accepted minimum. In manual mode there is no way of controlling Auto ISO with exposure compensation.
The E-M10 Mk3 has a new processor – the TruePic VIII – which is the same found on the flagship E-M1 Mk2. It brings a few subtle improvements to the JPG output, such as for example slightly better detail rendering and fewer compression artefacts.
A more significant change is how noise reduction is applied to the JPG files. The E-M10 Mk3 gives you a cleaner result with NF turned Off. The two cameras are more or less on par at the Low and Standard levels. At the highest level, the Mk3 has a softer rendering in comparison to the Mk2 model.

The Picture Profiles are the same with a choice of Vivid, Natural, Muted, Portrait, Monochrome and many others. Natural and Vivid are my favourites as they do a good job in keeping the colours balanced and vibrant. Auto WB is usually very reliable on both cameras although it sometimes tends toward a colder rendering. There is an option in the menu to force warmer colours and it works fine with natural light but beware of yellow dominance under artificial light sources.


The metering measurement is similar on both cameras and the only difference I noticed is that the E-M10 Mk2 tends to slightly underexpose in comparison to the Mk3 but we’re talking about a 1/3 EV difference. Both cameras allow you to customise the exposure shift for three metering modes (Multi, Centre Weight and Spot).
Single and Continuous Autofocus
Both cameras feature an autofocus system with contrast detection but the E-M10 Mk3 has an updated version.
Whereas the E-M10 Mk2 includes 81 points, the new camera has 121 points that cover a similar area of the frame which means you can select a single point more precisely.
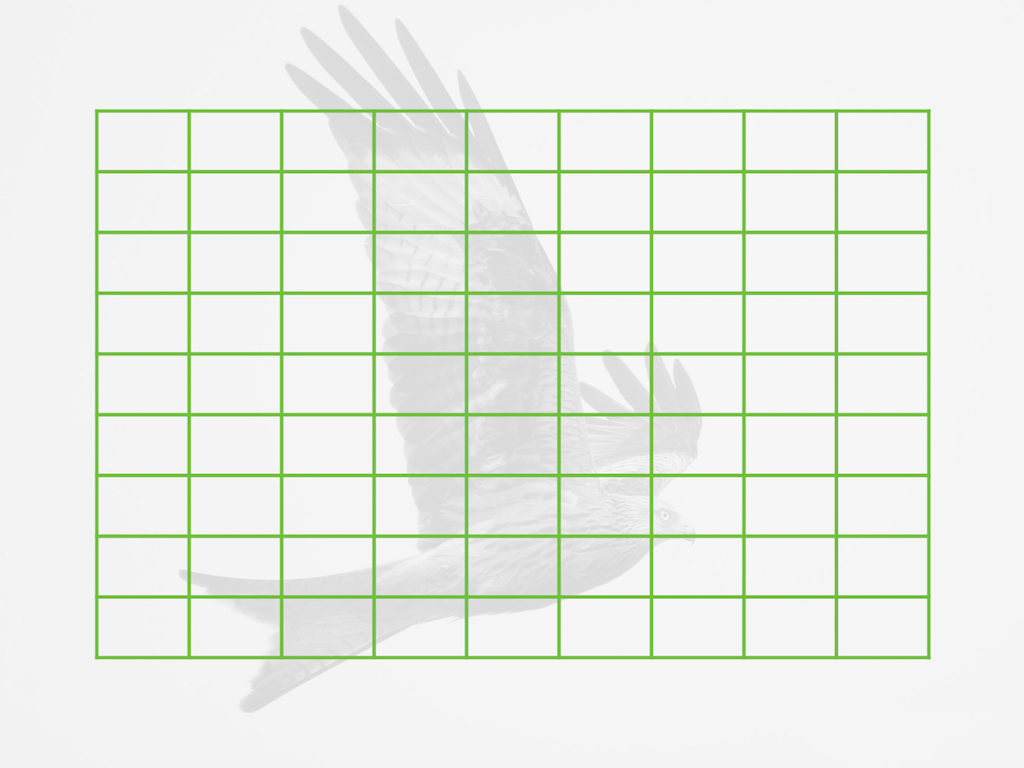

E-M10 II: 81 points 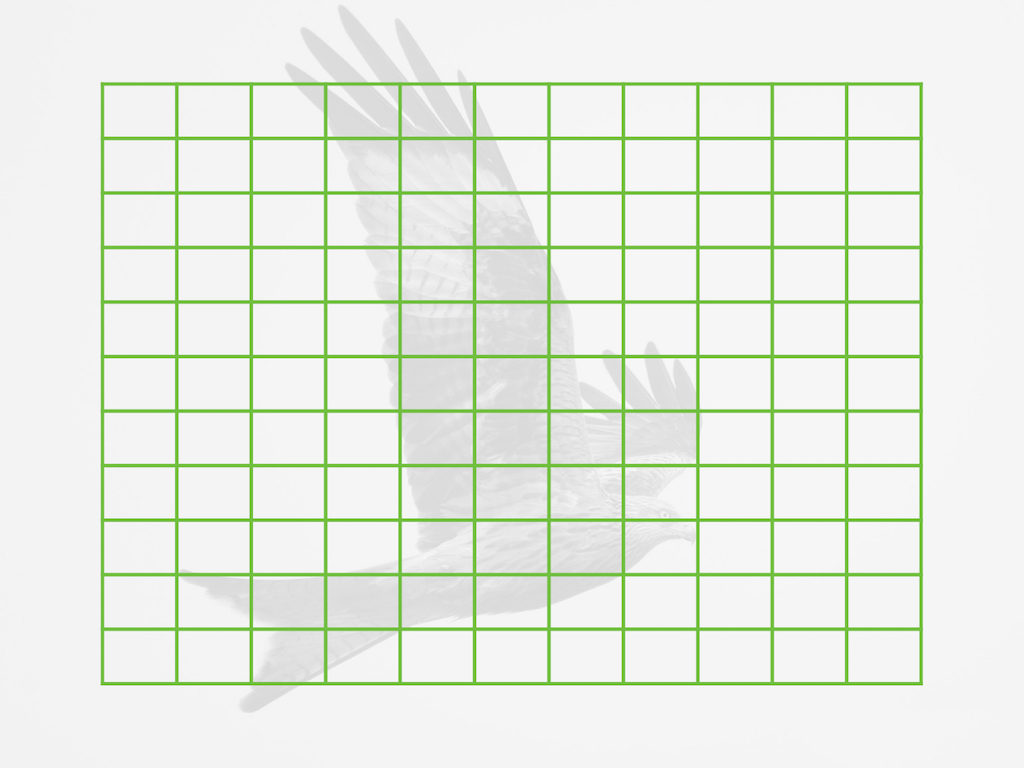
E-M10 III: 121 points
Among the AF areas available, there is All-Target (all points are active), 9-Group Target and Single Target but only on the E-M10 Mk2 can you choose a smaller single point.
With the All-Target mode, the AF on the E-M10 Mk3 works in cluster mode by selecting as many points as necessary to focus on the target while the E-M10 Mk2 always chooses 1 point only. However it’s a shame that the cluster mode only works in Single AF.
After several weeks of use and some side by side tests, I didn’t find a substantial difference in performance between the two cameras. They are both quick and reactive when locking onto a subject in good to average light conditions with Single AF and for macro shots as well.

In low light they can struggle more especially if the subject is moving or if there are bright elements in the background like street lamps. If the subject is relatively static however the performance remains more than decent as long as you use a fast lens and the amount of ambient light remains acceptable.

You can use face and eye detection with people although I find that both cameras can occasionally mis-focus. The E-M10 Mk2 allows you to specify left or right eye priority while the E-M10 Mk3 does it automatically.

In continuous autofocus, my basic running test gave me very similar results when using the single point (smallest target on the Mk2).
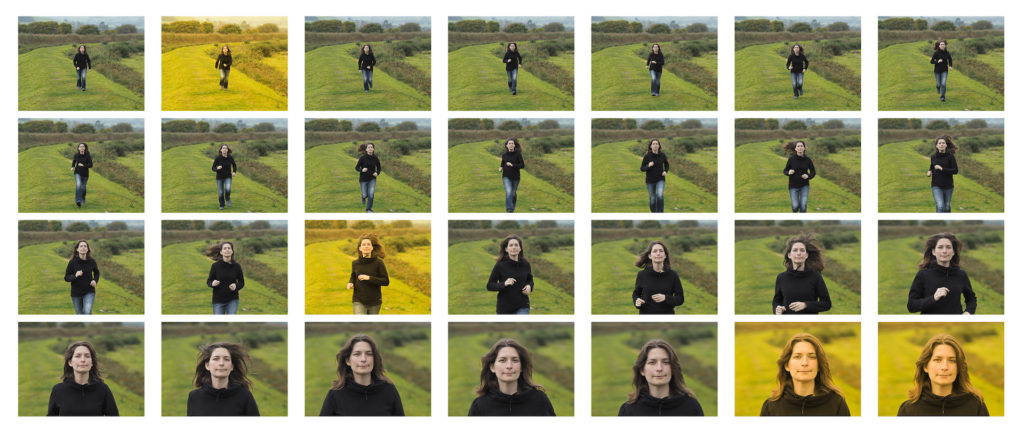
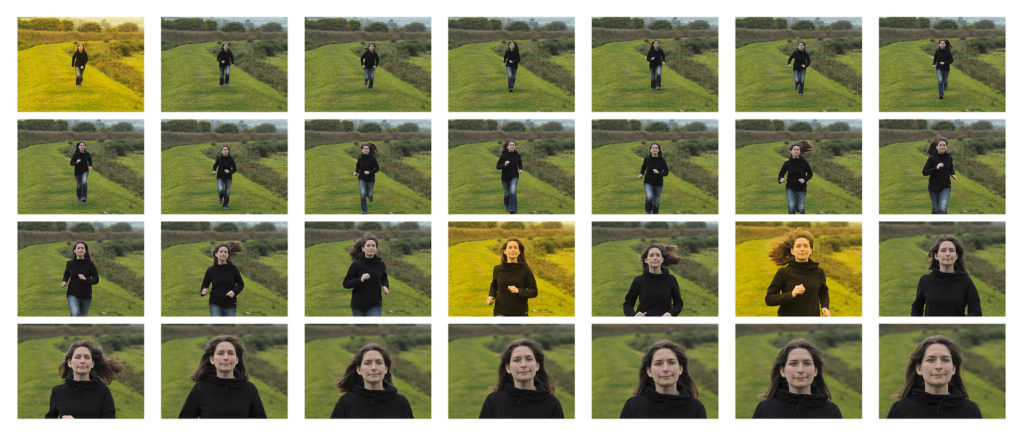
Overall I don’t find that the E-M10 Mk3 provides a relevant improvement in comparison to its predecessor. For action shots I would avoid the All Target mode on both (I actually found it to be less reliable on the new camera, and it would be much better if the Cluster mode worked in C-AF too). With slow subjects you can get a decent keeper rate of around 50 / 60% which can increase a little with a shorter focal length.


With faster subjects, the performance can decrease significantly. One way to compensate is to use C-AF + Tracking. Once the camera locks onto the subject, it does a better job of maintaining the focus but don’t expect miracles. The Tracking mode is not always a good solution however as the green rectangle can easily get confused and jump from the subject to the background or other elements.


One of the many out of focus shots in this series.
The new camera loses a few settings that I find quite useful on the E-M10 Mk2 (and many other Olympus cameras) such as:
- Home AF: assigned to a function button, it allows you to quickly recall a position or target mode and switch back and forth with the previous one used
- Release Priority: you can set where in the frame the camera should give priority to acquiring focus before releasing the shutter or taking the picture even if the image is not in focus.
Shutter, continuous shooting and buffer
The two cameras have a maximum shutter speed of 1/4000s that can be extended to 1/16000s with the electronic shutter. The latter allows you to shoot in silent mode but the way you can access and control these features differs on the two cameras.
On the E-M10 Mk2, the e-shutter can be selected in most shooting modes including PSAM. On the Mk3 however, the electronic shutter/silent option is only available via the AP mode where you can’t control the exposure manually except for the ISO sensitivity. Both cameras feature the Anti-Shock mode (electronic first curtain shutter) that remains accessible in manual mode on both cameras.
Then we have the burst speed. With the mechanical shutter, not a lot has changed: the Mk2 can do 8.5fps or 4fps with continuous AF. The Mk3 increases these speeds ever so slightly to 8.6fps and 4.8fps with C-AF. An additional difference between the High and Low speed is that the former shows you the last picture taken whereas the latter gives you live view with blackouts.
The Mk2 has an additional option to increase the speed to 11fps with the e-shutter, an option no longer available on the E-M10 Mk3. On the new camera you can’t vary the speed in the High and Low continuous shooting modes anymore and in fact the entire Custom C Menu has disappeared.
Finally concerning the buffer capabilities, they are not too dissimilar. When using UHS-II cards, the cameras can clear the buffer more quickly and maintain a faster burst speed as a result. For example if you shoot RAW at 8.6fps with the E-M10 III, it slows down after 2s but maintains a decent speed of approximately 7fps. With a UHS-I card, it slows down to 3fps after 2 seconds. When shooting JPGs, both cameras are able to maintain a higher speed, though the E-M10 Mk2 is ever so slightly slower at 8fps after 4s.
Image stabilisation
The two OM-D cameras share the same image stabilisation technology with sensor shift that works on 5 axes. It can compensate up to 4 stops by CIPA standards. Despite not having the best stabilisation technology Olympus has to offer, the two cameras behave better than most of the competition which reminds us that the company is still the leader in this category. If you are stable enough, you can manage a sharp shot down to one second. The keeper rate increases with speeds of 1/2s and above.


The settings are also different. On the E-M10 Mk2 you can choose between S-IS1 (all directions), S-IS2 (vertical stabilisation only), S-IS3 (horizontal stabilisation only) and S-IS Auto. On the Mk3 model, you simply turn it on or off and the camera picks the appropriate setting automatically.
Other options that the E-M10 Mk3 has lost are a) the possibility to turn the stabilisation on or off in continuous shooting and b) to preview it in the EVF when half pressing the shutter button (it does it by default).
Another setting available on the Mk2 is Lens IS priority for Panasonic and select Olympus lenses: you can choose to skip the IBIS and use the optical stabilisation instead. That setting is not longer present on the Mk3 and judging from my tests using the G 35-100mm f/2.8 OIS, it looks like the camera gives priority to the internal stabilisation even when you move the OIS switch of the lens to the On position.
Video capabilities
A major addition to the E-M10 Mk3 in comparison to its predecessor is 4K video: it can record in Ultra HD (3840×2160) up to 30fps.
The quality in 4K is good at low ISOs: the footage has good details without visible traces of aliasing or moiré. Although you don’t have any special picture profiles for video or Log gamma curves, the Natural Picture Mode gives balanced results just like it does for stills.
The maximum bitrate is 102Mbps but it is variable rather than fixed, and it often stays below 50mbps which is not a lot for 4K resolution really. A lower bitrate can introduce more compression artefacts with fast movements. I haven’t noticed any in my tests but it doesn’t mean that they won’t appear in other situations.
In 1080p, both cameras can record up to 60fps. The new image processor of the E-M10 Mk3 gives you better details and less rolling shutter effect in comparison to the Mk2 model. The latter is also valid when using the electronic shutter for stills.


The ISO range goes up to 6400 ISO. The E-M10 Mk3 exhibits more colour noise at the highest value when recording in 4K and more luminance noise in 1080p. The E-M10 Mk2 has less noise and fewer details which suggests that it applies stronger noise reduction.

Turning to slow motion capabilities, the new camera can record 120fps in 720p and conform the footage in-camera at 25fps, which gives you 5x slow motion. The quality is not great (lots of aliasing) but definitely better than the VGA resolution found in the E-M10 Mk2. Other options include the possibility to apply Art filters (1080p only) or to record and edit short video clips (max. 8s).
The 5-axis stabilisation system works for video as well and both cameras share the same settings: M-IS1 combines sensor and software stabilisation (the sensor is cropped a little) while M-IS2 uses the hardware stabilisation on its own. The former is advised for static shots and slow panning while the second is better when you’re moving with the camera.
Overall the stabilisation is quite effective, even when walking or going up steps and I haven’t noticed a difference between the two cameras. Note that there can be some heavy distortion – especially in the corners – due to rolling shutter.
For some reason, when you are in Movie mode on the new camera, the stabilisation setting can only be accessed in the menu rather than from the control panel on the right side of the screen like on the Mk2 model.
The autofocus performance isn’t great on either camera as soon as you start dealing with moving subjects, regardless of whether they’re slow or fast. Here as well AF-C + Tracking works better and in some cases with the E-M10 Mk3 you can keep the shutter button half pressed to force the camera to focus on the subject (it works particularly well with face detection).
Concerning sound, neither has a mic input so you must rely on the built-in stereo mic or an external microphone and recorder. As you might have guessed, the Mk3 has lost some settings here as well including:
- no volume limiter or wind noise reduction (I assume it does it automatically)
- no timecode or info settings
- no possibility to take a picture while recording (but you can save a still frame from a video in playback mode)
Another missing option on the E-M10 Mk3 that I find quite useful on the Mk2 is the possibility to use the shutter button to start the recording, which is more practical from an ergonomic point of view.
However there’s one thing the Mk3 does better: it allows you to change the exposure during recording (aperture and shutter speed) unlike the Mk2.
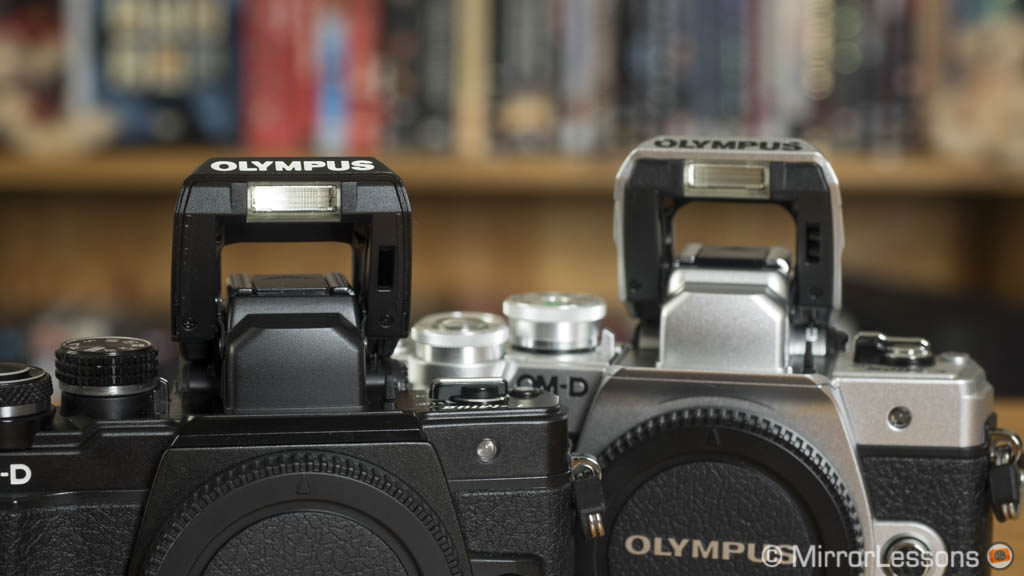
Flash
Both cameras include a built-in flash with a GN of 8.2 (ISO 200). The maximum sync is 1/250s but there is compatibility with the Super FP mode (HSS) and select flashes (up to 1/4000s).
Wireless remote control (Olympus RC mode) is possible and has been added back to the E-M10 III via firmware updated (1.1). This functionality can be very useful for portrait and macro photography. It works via optical communication which mean the flash units need to remain in sight of each others. For more versatility you can get a third party flash system that relies on radio triggers. There are many options and some brands like Nissin and Godox are reasonably priced.
Extra features
Olympus cameras are known for their generosity when it comes to extra features. However things have changed on the E-M10 Mk3 and not necessarily for the better.
The company has implemented a new shooting mode on the camera called AP (Advanced Photo), accessible from the top dial. Via a new graphic interface, you can quickly select various functionalities including Live Composite, Live Time, Silent mode, AE or Focus Bracketing and more. In a way, this is a welcome addition because some of these features have become much quicker to activate.
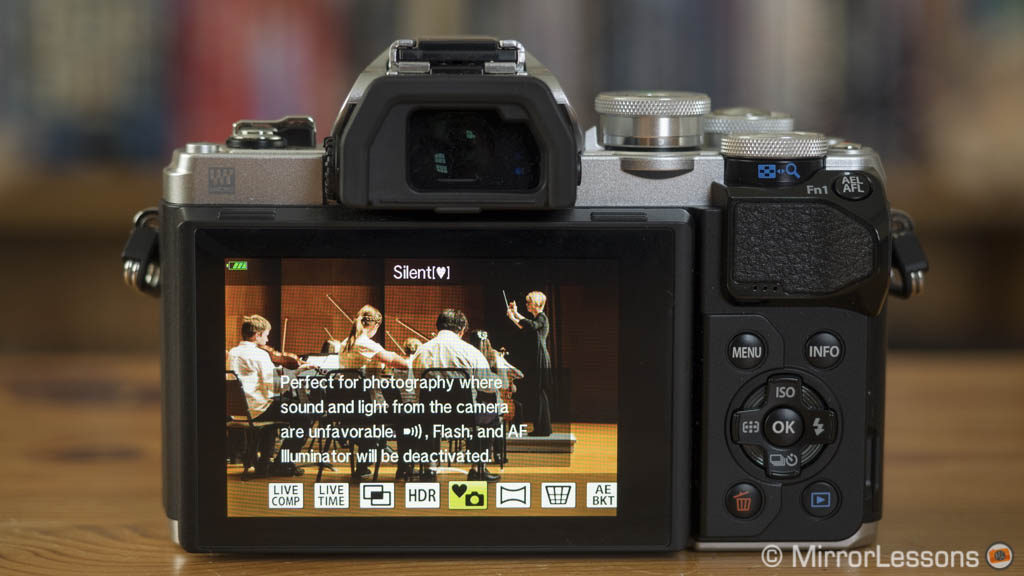
However AP doesn’t work with manual exposure but rather uses an automatic Program mode. Since some of these features can only be accessed with the AP mode, it means that the E-M10 Mk3 gives you limited control in comparison to its predecessor. In some cases you can select the ISO manually or use the rear dial to shift the program mode in order to force a smaller aperture, but it’s not always precise and as soon as you change the composition the exposure can reset itself.
Below I’ve summarised the main differences for each feature between the two cameras.
Multiple Exposure
Two frames when taken with live view, 3 frames if you merge them in playback mode (it works with RAW files too).
- E-M10 Mk2: available in PSAM modes + playback
- E-M10 Mk3: AP mode (Program Shift available) + playback
HDR
The camera brackets several shots by changing the exposure. It can also merge the result into a JPG file with two options available: HDR1 (more natural) and HDR2 (stronger effect).
- E-M10 Mk2: in addition to the JPG output, you also have an HDR bracketing mode where you can select up to 7 pictures and a 2Ev exposure difference (the RAW files must be merged with a third party software in post).
- E-M10 Mk3: AP mode (full Auto) with JPG output only (HDR1 or HDR2).

AE Bracketing
Similar to HDR but without the JPG output, the frames must be merged with a post production software (RAW and JPG available).
- E-M10 Mk2: works in PSAM modes with options ranging between 2 frames/0.3Ev to 5 frames/1Ev or 7 frames/0.7Ev
- E-M10 Mk3: AP mode (Program Shift and manual ISO available), you can only choose between 3 or 5 frames. In my tests the camera often varies the aperture rather than just the shutter speed.
Panorama
The screen displays an arrow and some markers to help you with the panning direction but you must manually take the shots one by one. The camera won’t merge them and you need to use the Olympus Viewer software or third party programs like Photoshop to create the final Panorama shot.
- E-M10 Mk2: Scene mode (full auto)
- E-M10 Mk3: AP mode (full auto)
Keystone Compensation
You can correct the perspective distortion when taking pictures of buildings with a wide angle lens for example, using the twin dials. It outputs a JPG only.
- E-M10 Mk2: works in PSAM modes, exposure must be set before activating the feature in the main menu.
- E-M10 Mk3: AP mode (manual ISO available)
Focus Bracketing
The camera takes multiple shots by varying the focus point between each one. Once the photos are stacked in post with a third party software, you have an image with more depth of field which is useful for macro or landscape work.
- E-M10 Mk2: works in PSAM modes, you can set the focus differential in 10 steps (how much the focus changes between each shot) and take up to 999 images.
- E-M10 Mk3: AP mode (Program Shift and manual ISO available), you can only choose the focus differential in 2 steps (little or large). Given the entry level nature of the camera and the new image processor, I do wonder why Olympus hasn’t integrated Focus Stacking directly.

10 shots, focus differential of 10 (hand-held)
Post-processed in Helicon Focus
Live Time and Live Composite
Two functions designed for long exposures with a live preview on screen. Live Time allows you to take a single shot with a duration of a maximum of 30 minutes. Live Composite merges multiple exposures by recording only the brighter areas which can be useful for light painting, star trails, fireworks, etc.
- E-M10 Mk2: available in Manual mode
- E-M10 Mk3: AP mode and Manual modes, in AP mode you can only record up to 4 minutes with Live Time.
Outside the AP mode, there are a few additional features to mention:
Interval. Shooting and Time-lapse video
This is one of the only extra features that hasn’t changed on the new camera. You can take up to 999 shots and create a video but the frame rate is limited to 5fps in 4K and 15fps in 1080p. Here as well I was expecting more given the new image processor of the E-M10 Mk3.
Art Filters
You can apply various effects like Toy Camera, Miniature, partial colours, vintage and many others. The Mk3 model has an extra setting called Bleach Bypass.
Photo Story
It allows you to create a collage with three images into one. It’s only available on the E-M10 Mk2 and is accessible from the main dial.
Finally, both cameras have WiFi capabilities: you can remotely control the camera via your mobile device and transfer images.
Battery life
The two cameras use the same BLS-50 battery type and the official rating is similar: 330 images with the Mk3 and 320 with the Mk2. In the real world, you can take more by shooting in single mode and not leaving the camera on unnecessarily when not in use.

When shooting in continuous mode or recording video, the battery will drop faster on both. 4K will draw power from the battery more quickly on the Mk3 model.
The new camera loses some extra settings here as well. Unlike the Mk2, there are no Backlit LCD or Auto Power Off options – all that’s left is the Sleep mode.
Price
The E-M10 Mk3, being brand new at the time of publishing this article, is more expensive and can be found for around $650 / £630 / €670 body only or $800 / £700 / €830 with the 14-42mm EZ pancake zoom. This is the same price as the E-M10 Mk2 when launched. Given the plasticky body and target market, it would have been interesting to see a drop in price, no matter how small, to make the camera even more appealing.
The E-M10 Mk2 is currently priced at around $550 / £450 / €540 body only or $650 / £550 / €690 with the lens. Note that it is more likely you’ll find this camera second hand since it is two years old.
Depending on where you live, you can also find it with the 12-50mm or in a bundle with the 14-42mm IR II and 40-150mm lens.
Conclusion
Were I to put myself in the shoes of a beginner wanting to step up from his or her smartphone and use a more advanced tool, the E-M10 Mark III is a compelling solution. It’s gorgeous to look at, very comfortable, and fun to use. Because it has been simplified, you’ll spend less time reading the manual or asking questions on an online forum. The image and video quality are fine, and there are enough features to develop your creativity and passion for photography over the long term.
If however you are looking for a budget solution, the E-M10 Mk2 is a better choice because it costs less, has a metal build and gives you the same quality and performance as the mark III minus 4K video. The sensor is the same, the autofocus performance is almost identical and it has all the extra features of its successor. Granted, the menu system and vast number of settings can require some getting used to but the fact that you have extra room for customisation is certainly a bonus.
Experienced Olympus or Micro Four Thirds users who are either looking to upgrade from an older camera or to buy a second body may be disappointed with the E-M10 Mark III. Yes, it brings a few welcome improvements like an improved front grip and better video capabilities, but it also loses many settings and options in the name of simplification. If you like to have control over every little aspect of your camera, it might not be the right choice for you.
Choose the OM-D E-M10 Mark II if you:
- want to save some money
- want more manual controls and customisation
Choose the OM-D E-M10 Mark III if you:
- want a camera that is beginner friendly and more intuitive
- are interested in recording 4K video hand-held
Check price of the Olympus OM-D E-M10 III on
Amazon | Amazon UK | B&H Photo
Check price of the Olympus OM-D E-M10 II on
Amazon | Amazon UK | B&H Photo | eBay
Second-hand Olympus cameras on
You may also be interested in:
Sample images
E-M10 mark II


Focus Bracketing (10 shots, focus differential of 5, hand-held)
Post-processed in Helicon Focus

Focus Bracketing (15 shots, focus differential of 5, hand-held)
Post-processed in Helicon Focus


E-M10 Mark III


