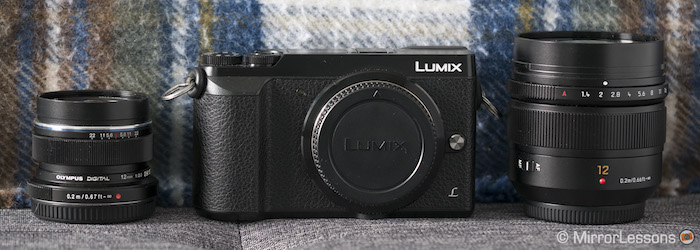
Two of the most logical competitors within the Micro Four Thirds lens range are the Olympus M.Zuiko 12mm f/2 and Panasonic Leica DG Summilux 12mm f/1.4 due to the fact that they share the exact same field of view. The former, released in 2011, has been around almost as long as the system itself whereas the latter arrived on the market in mid-2016.
Although we had plenty of experience with both lenses in the past, we never had the chance to test them side by side until now. Of course, the question on all of our minds is: does the larger and more expensive Leica 12mm provide superior optical quality in comparison to its Olympus counterpart, and if so, is it worth the extra money? It’s time to find out!
Ethics statement: We were provided with samples of the two 12mm lenses for a three-week loan period. We were not asked to write anything about these lenses, nor were we provided with any sort of compensation. Within the article, there are affiliate links. If you buy something after clicking the link, we will receive a small commission. To know more about our ethics, you can visit our full disclosure page. Thank you!
[toc heading_levels=”2″]
Main Specifications
Olympus M.Zuiko 12mm f/2
- Mount: Micro Four Thirds
- Focal length: 12mm (24mm in 35mm equivalent terms)
- Lens configuration: 11 elements in 8 groups
- Lens coating: ZUIKO Extra-low Reflection Optical coating
- Angle of view: 84°
- Minimum focusing distance: 20cm
- Magnification: 0.08x
- Aperture blades: 7 circular diaphragm blades
- Aperture range: 2 to 22
- Filter diameter: 46mm
- Weather sealing: No
- Optical stabilisation: No
- Dimensions: 56mm x 43mm
- Weight: 130g
Panasonic Leica DG Summilux 12mm f/1.4
- Mount: Micro Four Thirds
- Focal length: 12mm (24mm in 35mm equivalent terms)
- Lens configuration: 15 elements in 12 groups
- Lens coating: Multi layer coating
- Angle of view: 84°
- Minimum focusing distance: 20cm
- Magnification: 0.10x
- Aperture blades: 9 circular diaphragm blades
- Aperture range: 1.4 to 16
- Filter diameter: 62mm
- Weather-sealing: splash and dust proof
- Optical stabilisation: No
- Dimensions: 70mm x 70mm
- Weight: 335g
Design and Ease of Use
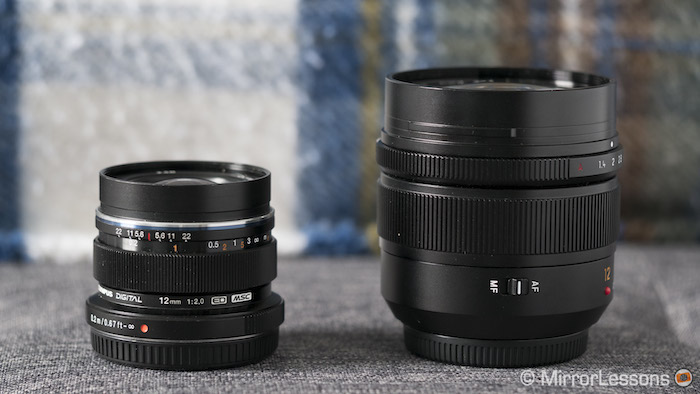
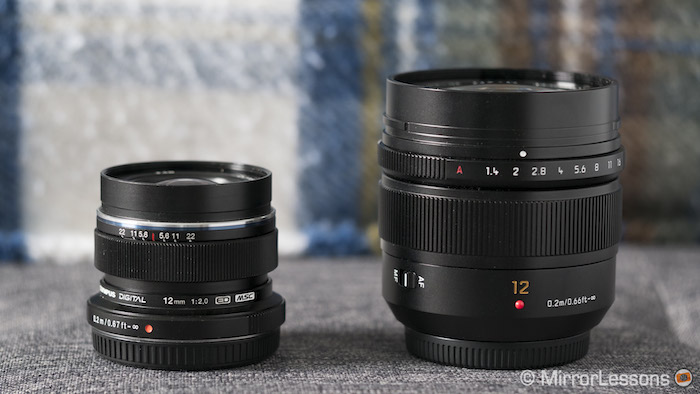
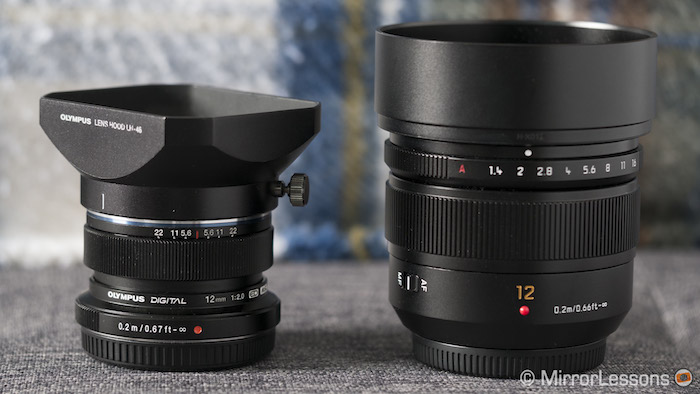
The first and most obvious difference between the M.Zuiko 12mm and Leica 12mm is the size and weight. Not only is the latter more than twice as heavy as the former but it is also significantly larger, making it a better choice for mid-sized to large Micro Four Thirds bodies. By contrast, the small and lightweight nature of the Olympus lens means it can comfortably be used on any body, even the tiny Lumix GX850 or Pen E-PL8. You can see how they compare in size to the mid-range Lumix GX85 below.
An interesting characteristic of both lenses is the ability to switch between manual and autofocus via controls on the barrel. In the case of the Olympus lens, it is simply a matter of sliding the focus ring forward to enter AF or backward to enter MF. In MF mode, a distance scale is revealed which is useful for zone focusing. On the Leica lens, there is a dedicated AF/MF switch on the side. Both solutions are very practical as they allow you to avoid entering the menu.
Both lenses feature a solid metal construction but only the Leica lens is dust and splash proof. We have also noticed that, with extensive use, the paint on the Olympus lens tends to scratch more than that of the Leica.
While there is a ribbed focus ring on both lenses, the Leica lens has the added bonus of a clicking aperture ring that turns in 1/3 stops between f/1.4 and f/16. Travel beyond f/1.4 and you’ll reach the A (auto) mode that lets the camera choose the value. To change the aperture value of the Olympus, you must use the control dials on your camera. Note that the aperture ring of the Leica only works on Panasonic bodies.
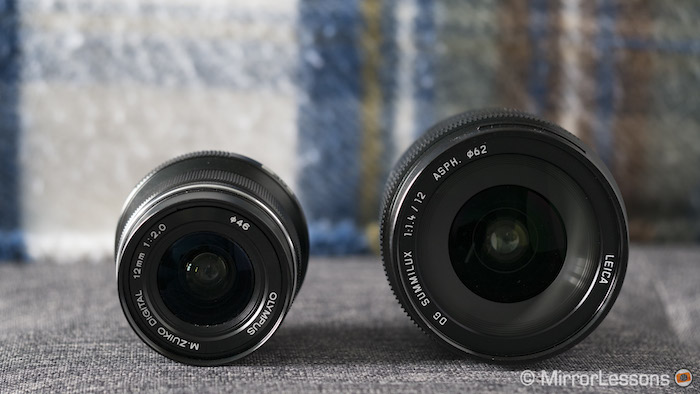
Both have a filter thread (46mm on the Olympus / 62mm on the Leica) that lets you mount filters directly to the lens.
The Leica lens comes with its own round metal lens hood that clicks into place very easily. The square-shaped hood for the Olympus, by contrast, must be bought separately and is a little more awkward in that it attaches via a screw on the side and can easily come loose if you don’t screw it on tightly enough. It too is made of metal.
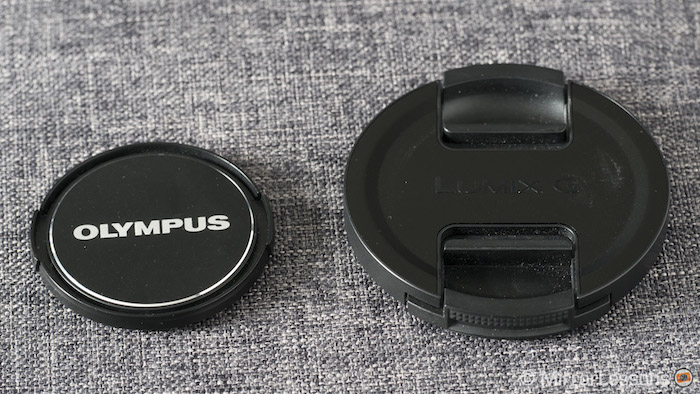
Both lenses come with a clip-on lens cap but the Leica cap, due to its centre-pinch design, is easier to attach and remove than the Olympus cap, whose pinch mechanism is on the sides.
Optical Quality – Through the lens


Sharpness
Comparing a set of images taken a long focus distance, we noticed that the Leica was consistently sharper – albeit by a very small degree – than the Olympus at the centre at all values they share from f/2 and f/5.6. Though both lenses peak between f/2.8 and f/4, the performance at f/2 and f/5.6 isn’t much worse.


Beyond f/5.6, the playing field becomes much more even. Diffraction really starts to show at f/11 but only causes noticeable softness at f/16 on the Leica or f/16 and f/22 on the Olympus.


As for their respective maximum apertures of f/1.4 (Leica) and f/2 (Olympus), they look more or less identical. Even at these values, sharpness remains surprisingly good.

Similar results can be seen in the corners; the Leica lens retains a very small advantage over the Olympus through the aperture range. Happily the amount of detail remains decent even at the fastest apertures.


As for sharpness at a close focus distance, we could barely see any differences between the two lenses at all regardless of the aperture value chosen. As with sharpness at a distance, the best performance is found at the fastest apertures (between f/2 and f/4).


Bokeh


Although neither lens is meant for macro work, you can achieve a nice bokeh with the right background and by focusing close to your subject. The Leica, due to its faster maximum aperture, can produce more shallow depth of field than the M.Zuiko when set to the same focus distance.


At their fastest apertures, the specular highlights are fairly round at the centre of the frame but start to lose their shape a little the closer you get to the edge of the frame. You’ll also notice some mild bokeh fringing around the edges of the specular highlights.
Minimum Focus Distance
The Olympus and Panasonic have the same minimum focus distance of 20cm but a slightly different magnification (0.08x vs 0.10x). The small difference in magnification is due to the fact that the minimum focus distance is measured from the sensor plane rather than the front of the lens. In field conditions, you won’t notice much of a difference at all.


Chromatic Aberration, Distortion and Vignetting
Chromatic aberration is more well-controlled on the Olympus lens, with very slight traces occurring at f/2. In the case of the Leica, it is fairly widespread at f/1.4 and to some degree at f/2 but it is almost completely absent by f/2.8. Keep in mind that the worst of it can be removed in a post production software like Lightroom as long as you use the RAW files.


Since the JPGs and RAW files of MFT cameras contain lens correction data, distortion doesn’t pose a problem with either of these wide-angle primes. I did notice that the Olympus lens suffers from a little more barrel distortion than the Panasonic but it isn’t a cause for concern.
Vignetting is most noticeable the maximum aperture of each lens (f/1.4 on the Leica and f/2 on the Olympus) but stopping down a value or two is enough to fix the issue. Alternatively you can lighten the corners by using a post production software.
Flare
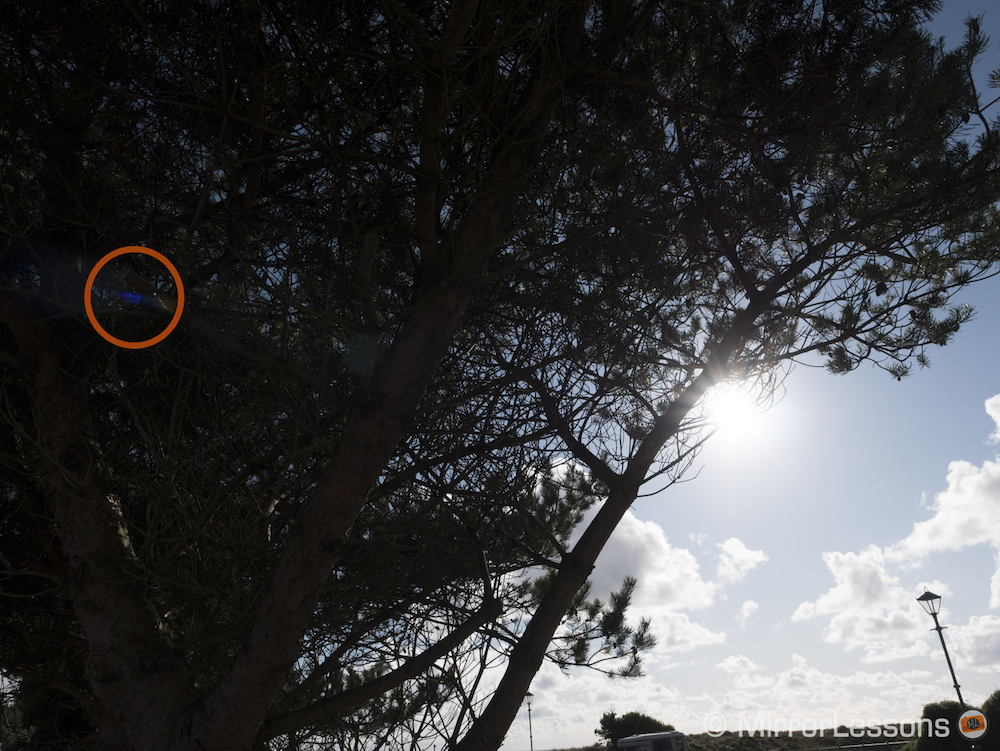
Both lenses feature coating to reduce flare and ghosting but the Leica lens is far less resistant than the Olympus. Given the price of the lens, I was quite surprised to find that flare could be so invasive.


Below is the worst example of flare I was able to produce with the Olympus, even after actively searching for it in my images.
Colours
A difference that you’ll often notice between Olympus and Panasonic lenses is colour rendering. Specifically, most Panasonic lenses produce a slightly cooler tint than Olympus lenses even when the same white balance settings are used.

Coma
Unfortunately the weather here in Wales wasn’t very cooperative when we had the two lenses in for testing, so we had to forego comparing them for astrophotography. I can confirm from previous tests that the Leica 12mm is an excellent choice thanks to the very low levels of comatic aberration and astigmatism at f/1.4. You can see some examples below from last summer.


According to the Matthew of the Olympus OM blog, you can shoot wide open with M.Zuiko 12mm without having to worry about coma or astigmatism. This, coupled with the fact that Olympus trailblazers such as Peter Baumgarten and Alex McClure frequently rely on this lens for astrophotography, would suggest that it is also an excellent companion for this particular genre. If we get the chance to use it for astrophotography ourselves in the future, we will be sure to update this section of the article with our own findings and some sample images.
Autofocus
Incorporating an inner focus drive system and a stepping motor, the Leica 12mm offers quick and silent autofocusing regardless of whether you use it on one of the latest Micro Four Thirds bodies like the Panasonic Lumix GH5 or an older model like the Olympus OM-D E-M1. It is also compatible with sensor drive at a maximum of 240fps on Panasonic cameras.
Despite being the older lens of the two, the M.Zuiko 12mm is also quick and silent on all MFT bodies.
The only time either lens struggled a little was in very dark places or in C-AF with fast moving subjects but this is also dependant on the AF speed and precision of the camera you’re using.
Manual Focus
Both lenses feature a ribbed fly-by-wire focus ring that is pleasant to use and accurate when combined with the latest manual assist of Micro Four Thirds cameras such as magnification or focus peaking.
As we touched upon in the design section, you can switch between AF and MF by using physical controls on the barrel – the Snapshot focus ring on the Olympus and the AF/MF switch on the Panasonic.
Once pulled back into MF mode, the focus ring of the Olympus lens will only move between the focus limits, which is roughly the equivalent of a 1/4 turn. If you switch into MF from the camera menu instead, the ring rotates indefinitely just like the focus ring of the Leica lens.
The speed at which you turn the ring determines how many rotations are required to travel from infinity to the minimum focus distance. The slower you turn the ring, the longer it takes to go from one extreme to the other.
Conclusion
Although both the M.Zuiko 12mm and Leica 12mm are very enjoyable lenses to use, I would personally recommend the Olympus lens for a number of reasons.
First and most important is the fact that there isn’t a large enough difference in optical quality to justify the extra $500 needed to cover the cost of the Leica lens. The sharpness of the Olympus lens is only slightly inferior, the character of the out-of-focus rendering is very close, and both seem to be viable options for astrophotography, which is one of the primary genres they suit. Plus, if we look at the handling of the chromatic aberration and flare, the Olympus lens actually outperforms its competitor (though the former can be dealt with quite easily in post production).
Another aspect not to be underestimated is the compactness of the Olympus lens, which, being half the size and weight of the Leica equivalent, brings two main advantages: it can be packed inside your camera bag at the last minute and used comfortably on any MFT body.
Granted, the Leica isn’t a large lens, but it certainly requires a space of its own inside a bag and your gear would have to be rearranged in order to make it fit.
The primary advantage of the Leica lens is its 1.4 aperture which lets you work in low light conditions while avoiding the higher ISO values, but it is up to you to decide whether if this characteristic alone is worth the extra expense.
Choose the M.Zuiko 12mm f/2 if you:
- are on a budget
- own a small MFT body
- frequently shoot into direct sunlight (flare resistance is better)
Choose the Leica 12mm f/1.4 if you:
- feel you can regularly benefit from the fast 1.4 aperture for low-light work or astrophotography
- want the very best optical quality across the frame
- require weather resistance
Check price of the Olympus M.Zuiko 12mm f/2 on
B&H Photo | Amazon | Amazon UK | eBay
Check price of the Panasonic Leica 12mm f/1.4 on
You might also be interested in:
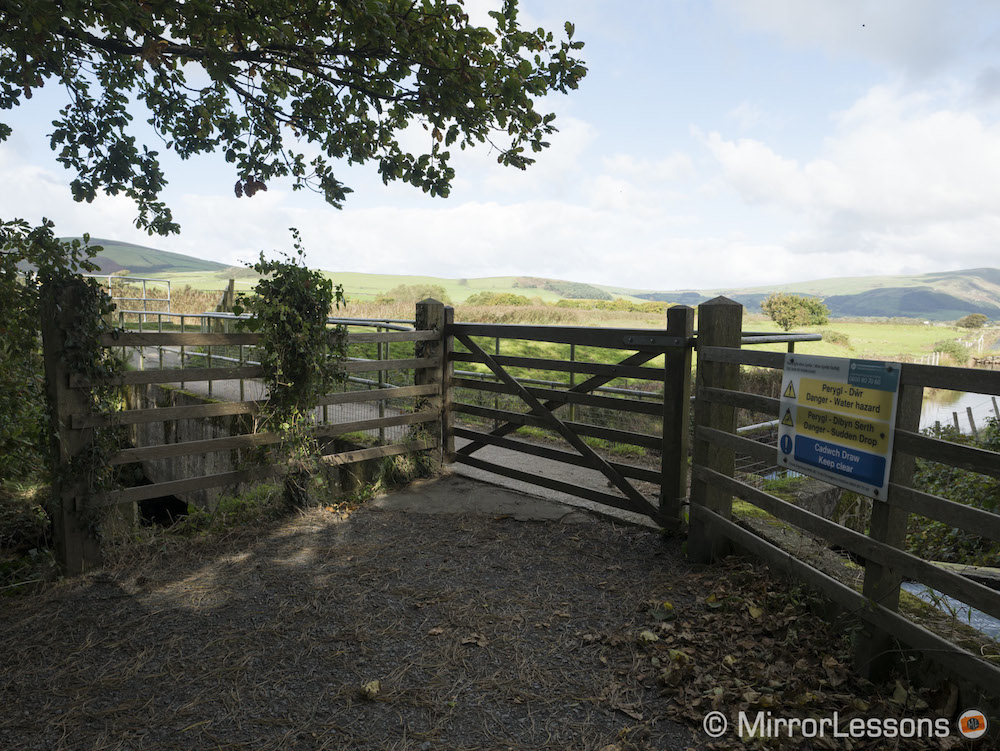
Sample Images
Olympus M.Zuiko 12mm f/2


Panasonic Leica DG Summilux 12mm f1.4


