Updated on: July 1st, 2018
Two brands we’ve always enjoyed comparing, despite the difference in sensor size and the technology they employ, are Olympus and Fujifilm.
The Micro Four Thirds brand is a master of producing beautiful retro-styled bodies and furnishing them with original and extremely powerful features, with 5-axis stabilisation being an excellent example.
Fujifilm has also played the retro card but in a slightly different way. By giving their cameras lots of physical dials, an APS-C sensor and one of the best autofocus systems on the market, they’ve appealed to an audience of photographers that long for an analog approach while simultaneously providing them with all the conveniences of a modern camera system.
This time we aren’t looking at the flagship models (you can read our full E-M1 II vs X-T2 comparison here) but rather two cameras that can attract both beginners and amateurs. The E-M10 mark III has been designed to be as straightforward as possible whereas the X-T20 features the same technology as the flagship X-T2 in a more affordable package.
The question is: which of these two cameras is better for a beginner or amateur photographer? Let’s find out!
Ethics statement: We were loaned the Olympus camera for review purposes whereas the X-T20 we tested is our own. We were not asked to write anything about these cameras, nor were we provided with any sort of compensation. Within the article, there are affiliate links. If you buy something after clicking the link, we will receive a small commission. To know more about our ethics, you can visit our full disclosure page. Thank you!
[toc heading_levels=”2,3″]
Article Updates
- July 2018: information about the X-T20 and E-M10 III latest firmware updates
Main Specs
OM-D E-M10 mark III
- Sensor: 16MP 4/3 Live Mos
- Lens system: Micro Four Thirds
- Weatherproof: None
- Internal Stabilisation: Yes (5-axis)
- Autofocus: contrast detection with 121 points
- Continuous shooting: 8.6fps (AF-S), 4.8fps (AF-C)
- ISO Sensitivity: 200 – 25600 ISO (Pull 100)
- Shutter Speeds: 1/4000 to 60 seconds, 1/16000s with electronic shutter
- Viewfinder: 2,360K dots, approx. 100% FOV coverage, 19.2mm eyepoint and 1.23x (0.62x) magnification
- Rear monitor: Tilting 3″ touch sensitive LCD (1,040K dots)
- Movie recording: 4K up to 30fps, Full HD up to 60fps, HD up to 120fps
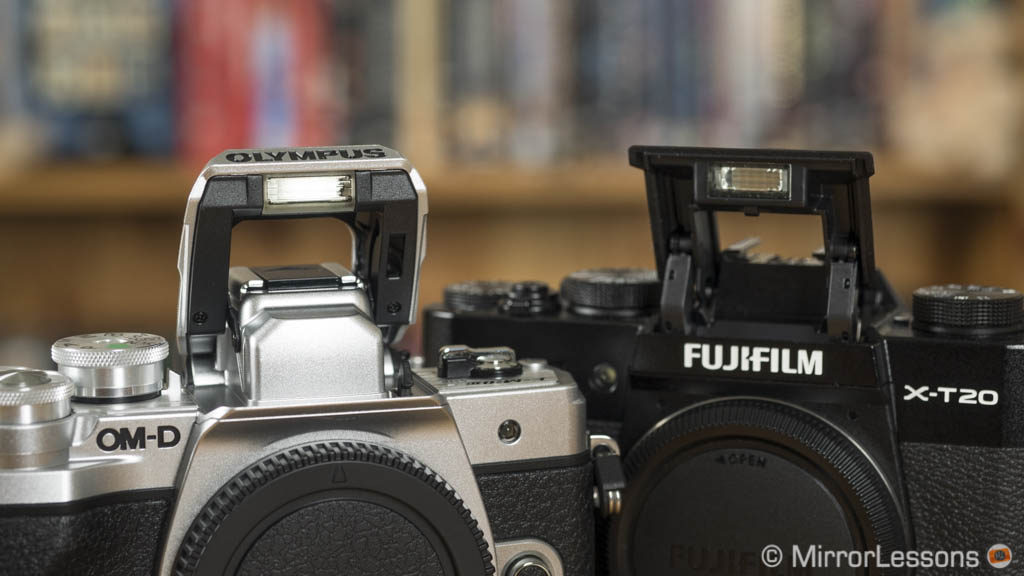
- Built-in Flash: Yes
- Extra Features: WiFi, Timelapse, HDR, Multiple exposure, Live Time, Live Composite, Focus Stacking, AE Bracketing, Keystone compensation,
- Dimensions: 121.5 x 83.6 x 49.5mm
- Weight: 410g (including battery and memory card)
- Firmware version: 1.1
X-T20
- Sensor: 24MP APS-C X-Trans III CMOS
- Lens system: X-mount
- Weatherproof: No
- Internal Stabilisation: None
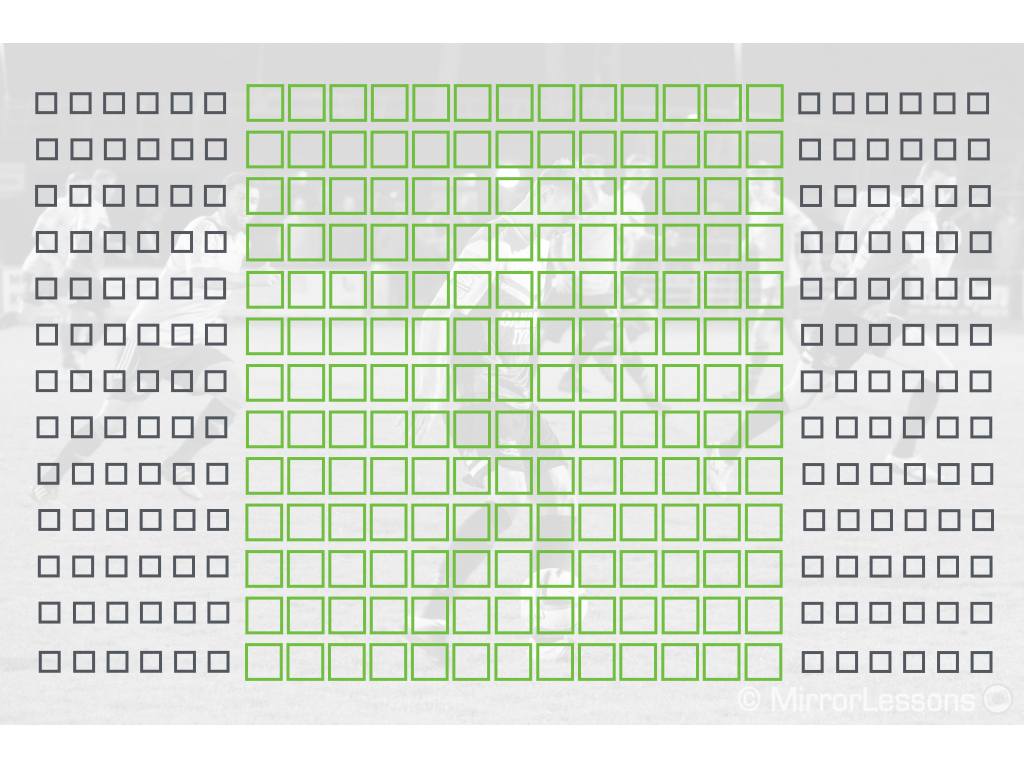
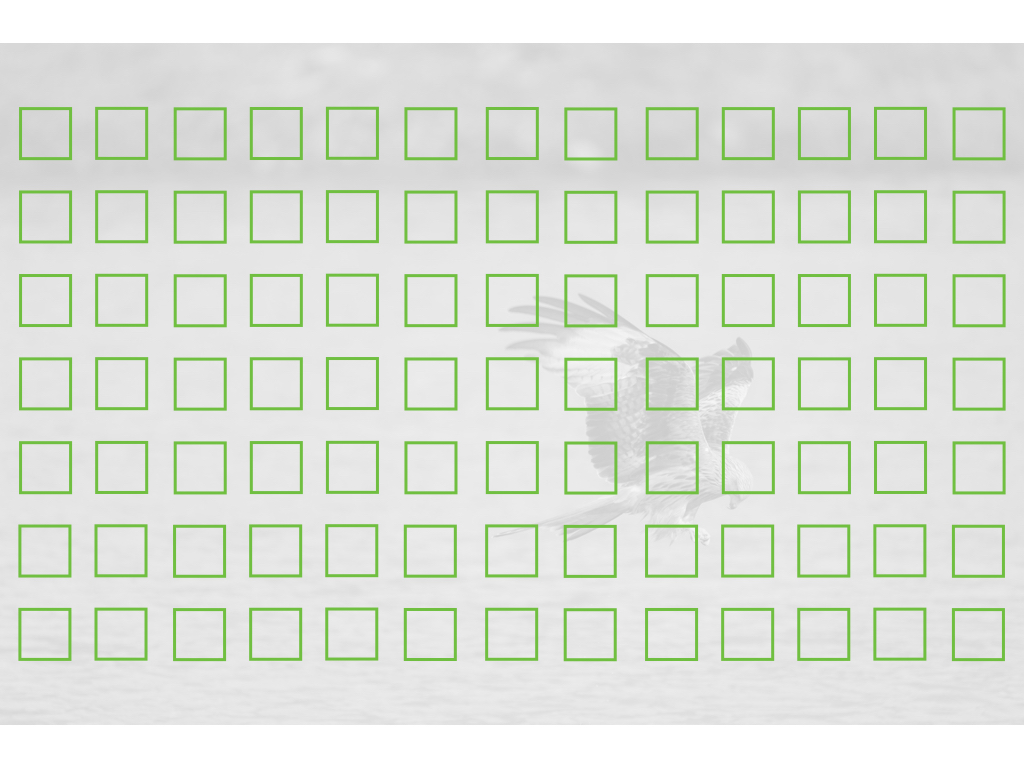
- Autofocus: Hybrid with up to 325 points (7×13 and 13×25 grids selectable)
- Continuous shooting: 8 fps and 5 fps, up to 14fps with electronic shutter (AF-S and AF-C)
- ISO Sensitivity: 200 – 12800 ISO (pull 100, push 25600 to 51200)
- Shutter Speeds: 1/4000 to 30 seconds, up to 1/32000s with electronic shutter
- Viewfinder: 0.39in OLED with 2,360k dots, approx. 100% FOV coverage, 17.5mm eyepoint, 0.62x magnification and 54fps refresh rate
- Rear monitor: Tilting 3″ touch sensitive LCD (1.04M dots)
- Movie recording: 4K up to 30fps, Full HD up to 60fps
- Built-in Flash: Yes
- Extra Features: WiFi, Panorama, Timelapse, Bracketing, Multiple exposure
- Dimensions: 118.4 x 82.8 x 41.4mm
- Weight: 383g (including battery and memory card)
- Firmware version: 2.00
Design and handling
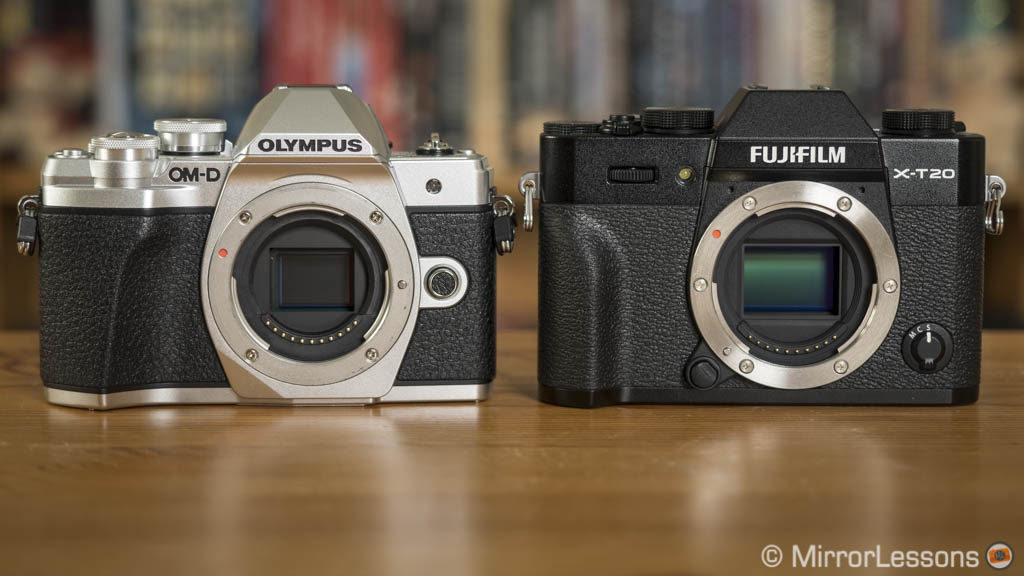
Were I to choose based on aesthetics alone, I would go for the E-M10 III. Olympus continues to improve the design of its camera and the new OM-D is the latest example. Of course beauty isn’t everything, but it’s a nice plus that users will appreciate. It is available in black or silver/black.
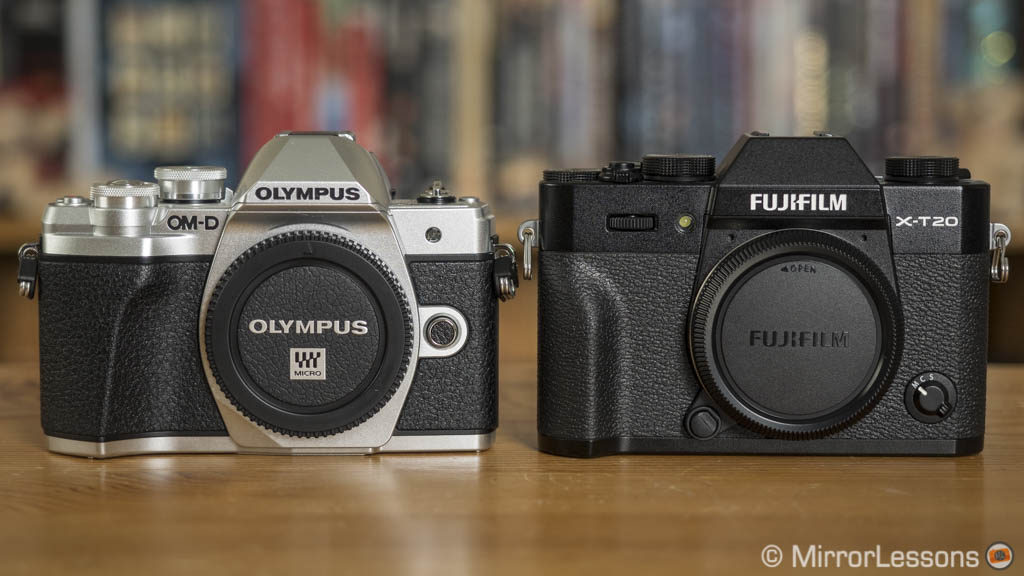
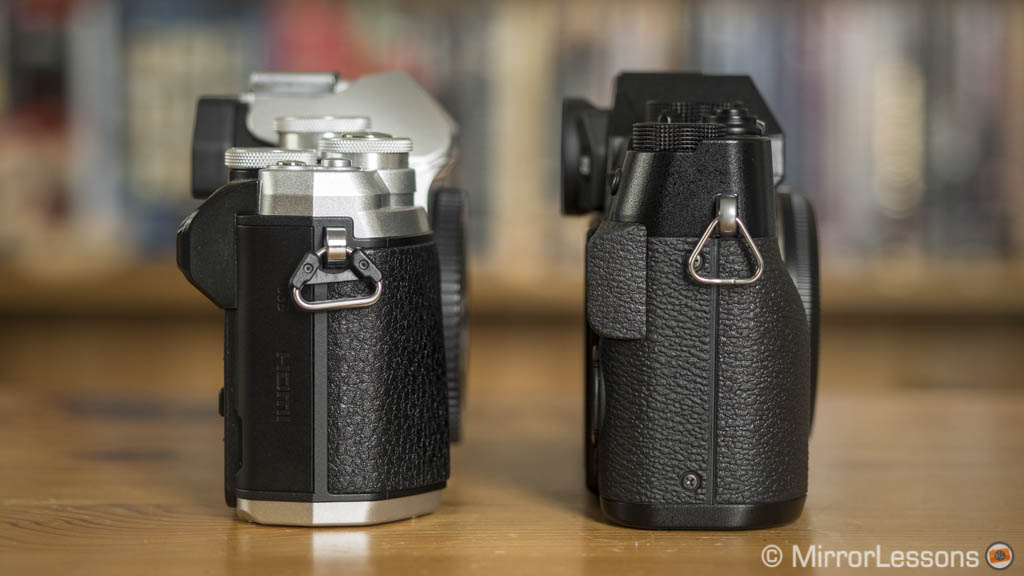
The X-T20 may not look as attractive but it features top and bottom metal plates unlike the OM-D whose exterior is mostly made of plastic. Furthermore the Fuji camera is lighter and smaller despite housing a larger sensor, which is a good example of the company’s ability to create compact bodies. Like the Olympus, you can choose between an all-black or silver/black body.
The E-M10 III has a better designed front grip which, combined with the good ergonomics of the body, makes it more comfortable to hold. The X-T20’s smaller dimensions can make it more uncomfortable to use with large lenses, so an optional grip can be a nice addition (see our recommended accessory list for the X-T20 here).

As for physical connections, neither body offers more than the basic Micro USB 2.0 and Micro HDMI Type D ports. On the X-T20 you also find a 2.5mm input that can be used with a microphone or remote controller.

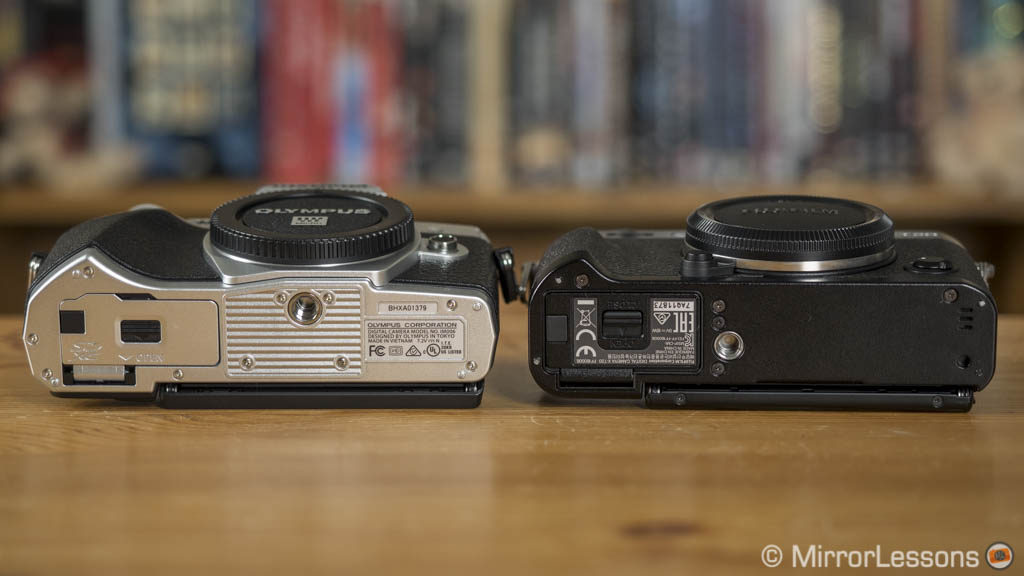
Both cameras take one SD card but only the Olympus is compatible with the faster UHS-II type. One annoying thing about the Fujifilm model is that the tripod mount is too close to the battery compartment which means you need to unscrew the tripod plate whenever you change the battery. With the Olympus this isn’t an issue.
Controls, customisation and menu system
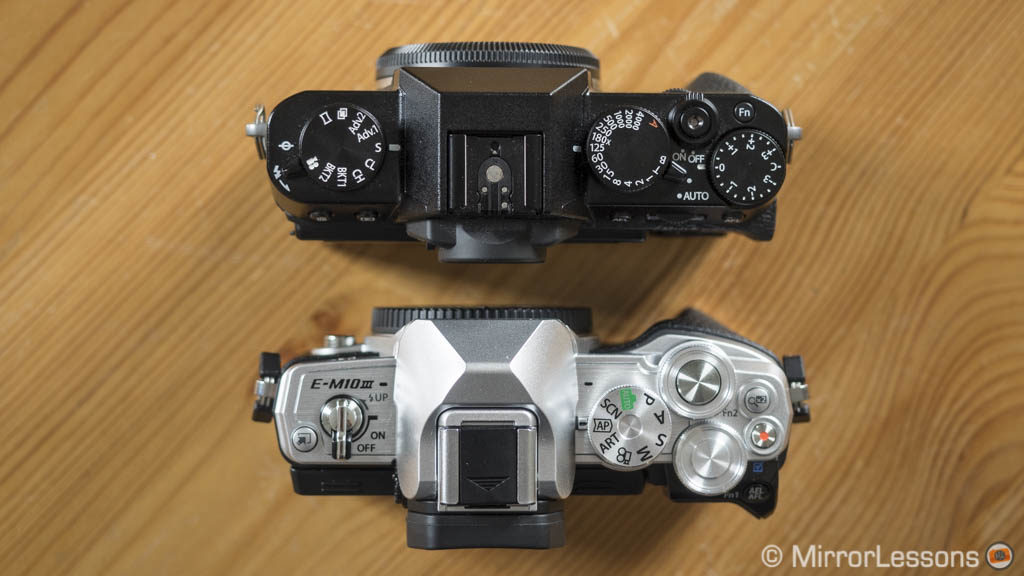
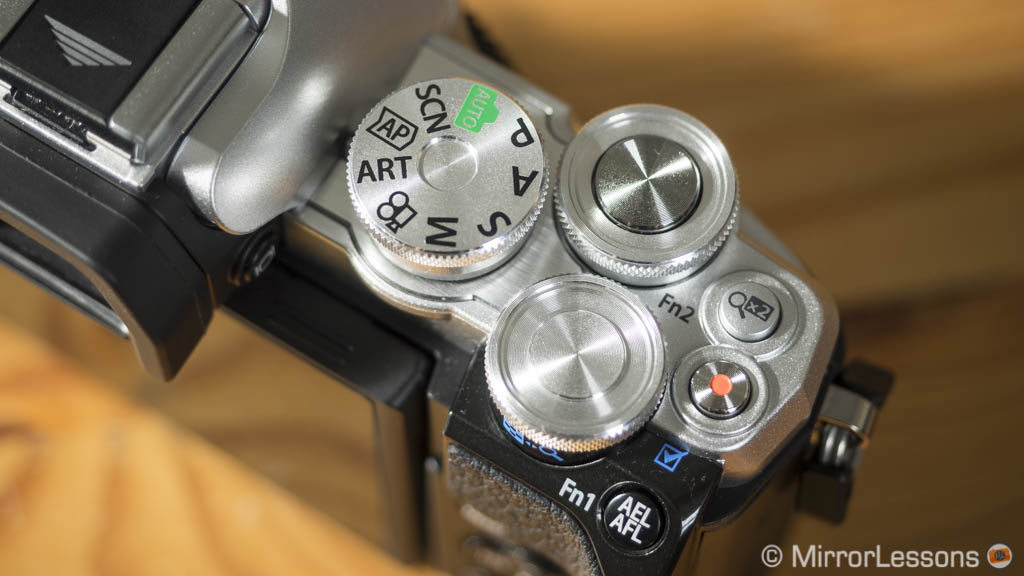
The E-M10 III is a traditional beginner-friendly camera. It includes an Auto mode that takes care of everything (exposure, AF, picture modes, etc.) and a Scene mode where you can choose the type of scene you want to photograph (for example the Sports scene will activate continuous AF and continuous shooting). The X-T20 on the other hand doesn’t feature a complete automatic mode. The Auto lever on top will take care of the exposure for you but you still have to deal with some manual adjustments such as the picture profile or the AF mode.
The E-M10 III is an enjoyable camera to use thanks to the precise twin dials on top that control the exposure and other settings. The various buttons have an excellent tactile feel but unfortunately only two of them are customisable. Also missing is the possibility to save a series of settings that you can recall quickly (something called the Myset mode on other Olympus bodies).
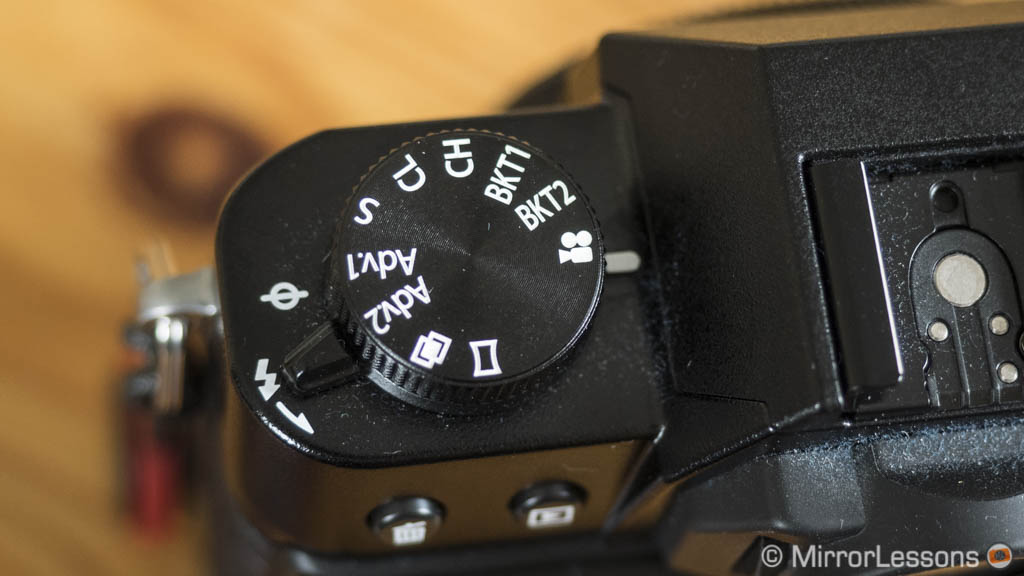
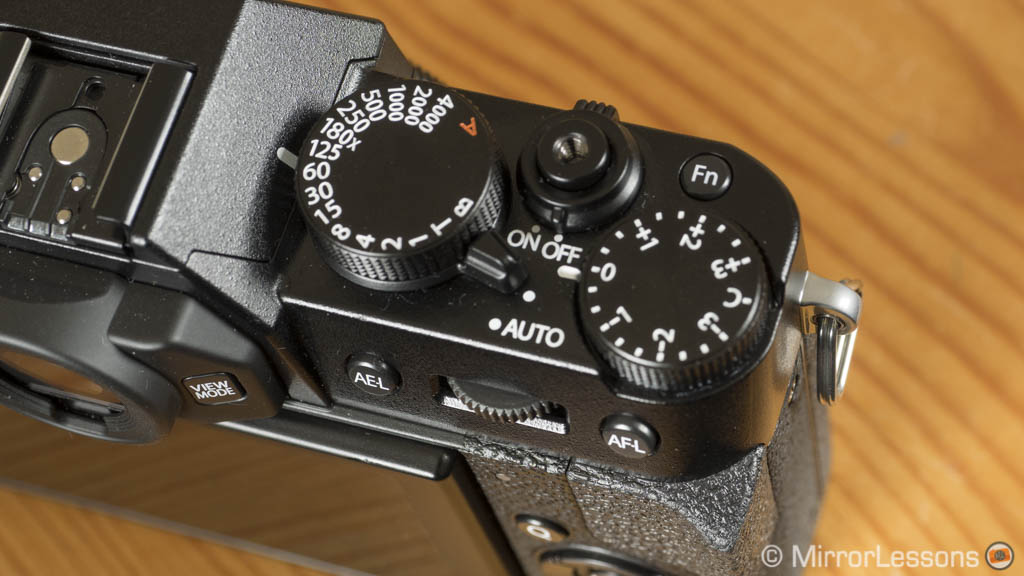
The X-T20 distinguishes itself with its physical shutter speed and exposure compensation dials. You can find a handy lever on top to switch the exposure control to Auto and a Focus mode selector on the front. There isn’t a classic shooting mode dial like on the Olympus but the Drive dial in the top left corner is a nice addition.
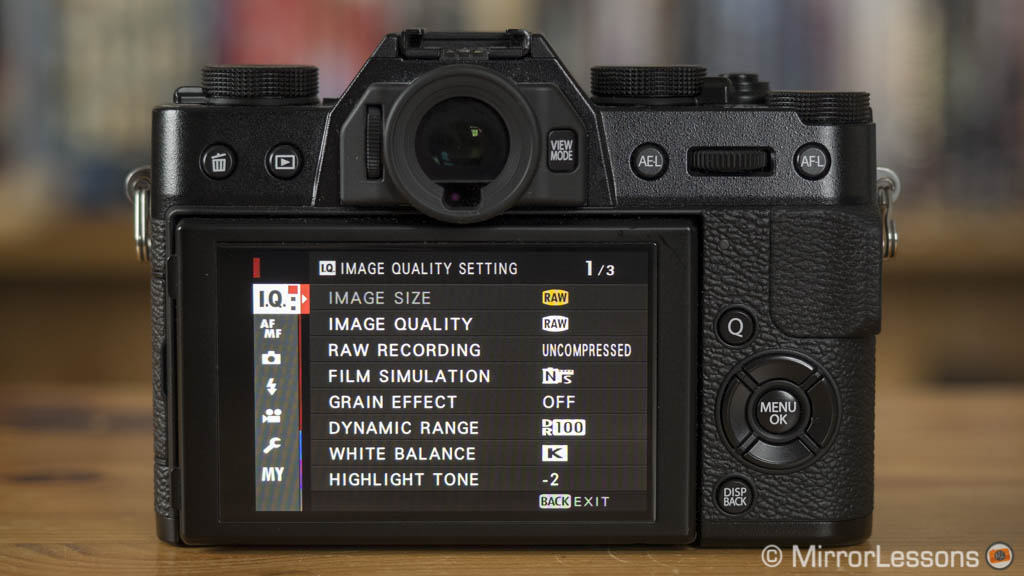
There is far more room for customisation on the Fuji camera, with no fewer than 8 function buttons, a Quick Menu with 16 customisable slots, the My Menu page where you can save frequently used settings and the Custom Setting where you can add your favourite values for image quality.


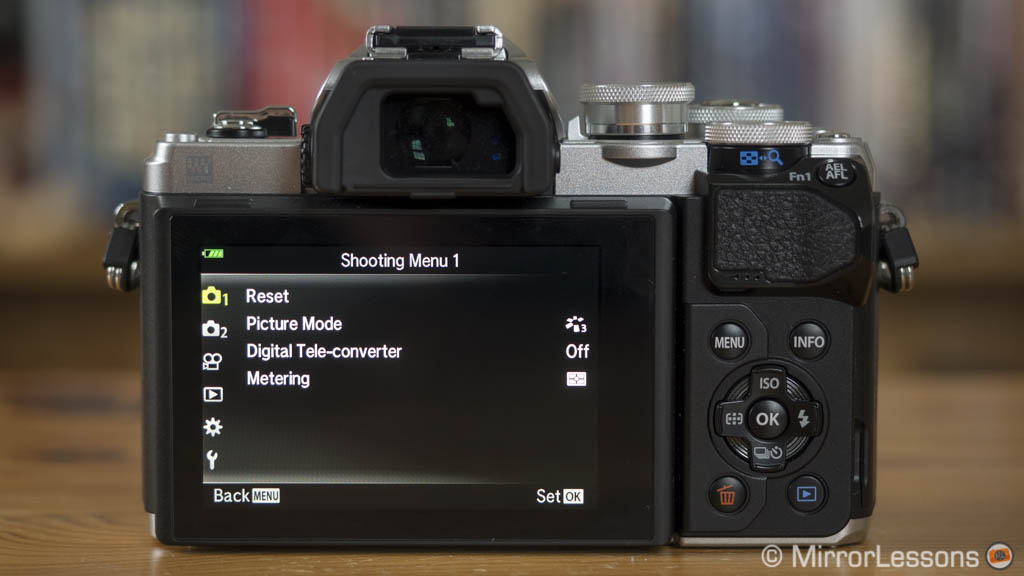
The OM-D has a Q menu equivalent called Super Control Panel that lets you change lots of useful settings but it isn’t customisable. As for the menu system, the one on the X-T20 is well organised and easy to navigate. The Olympus version lacks many of the extra settings and options its predecessor had, and as a result, is quicker and easier to navigate – though not quite as intuitive as the Fuji’s at first.
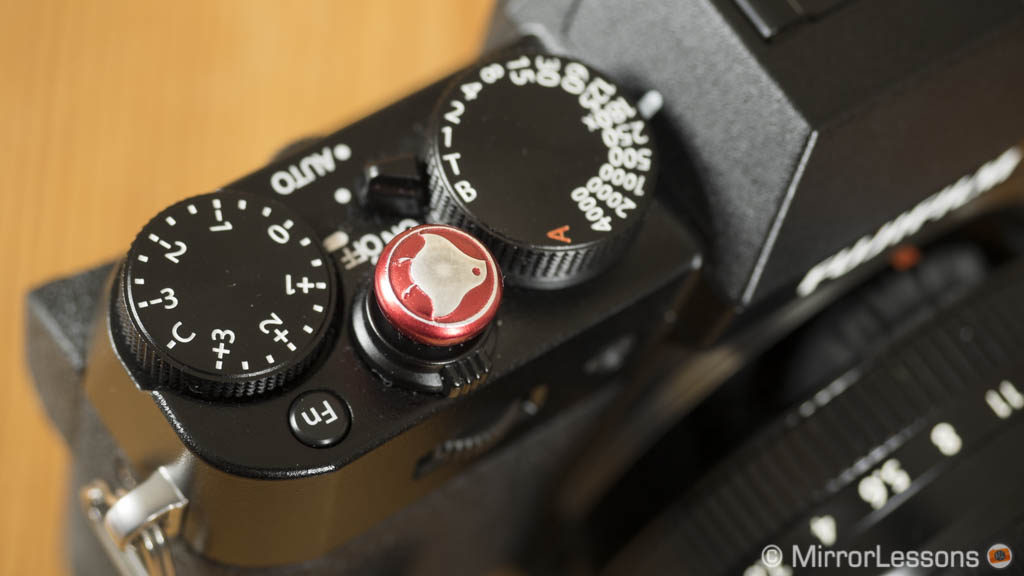
Coming back to the customisation topic, there is an extra detail on the X-T20 worth mentioning: the shutter release button has a threaded hole to mount a soft release button. It is an interesting addition, not just for pure aesthetic purposes, but also as a way of reducing micro shakes when pressing the shutter button at slow shutter speeds.
Viewfinder and LCD
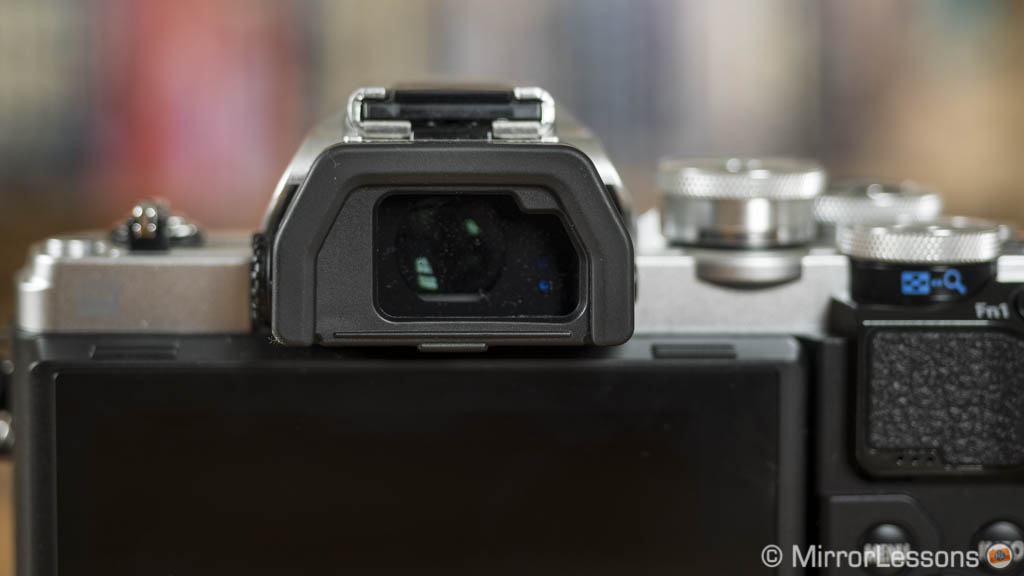
Both cameras feature an electronic viewfinder with a 2360k dot OLED panel and 0.62x magnification. They provide good clarity and brightness, and you can tweak contrast and saturation in the menu or leave it to Auto. On the X-T20 there is an option to disable the picture profile effect which gives you a more neutral preview.
The E-M10 III EVF has a longer eyepoint (19.2mm vs 17.5mm) which helps a little if you wear glasses. The circular shape of the X-T20’s eyecup makes it comfortable to use but at the same time, the material from which it is made is harder in comparison to the Olympus.

On the rear you’ll find a tilting LCD screen with the same resolution and touch capabilities. You can take a picture, move the focus point or swipe through your images in playback mode. You can use the touch screen to select certain settings or move the focus point while looking through the EVF.
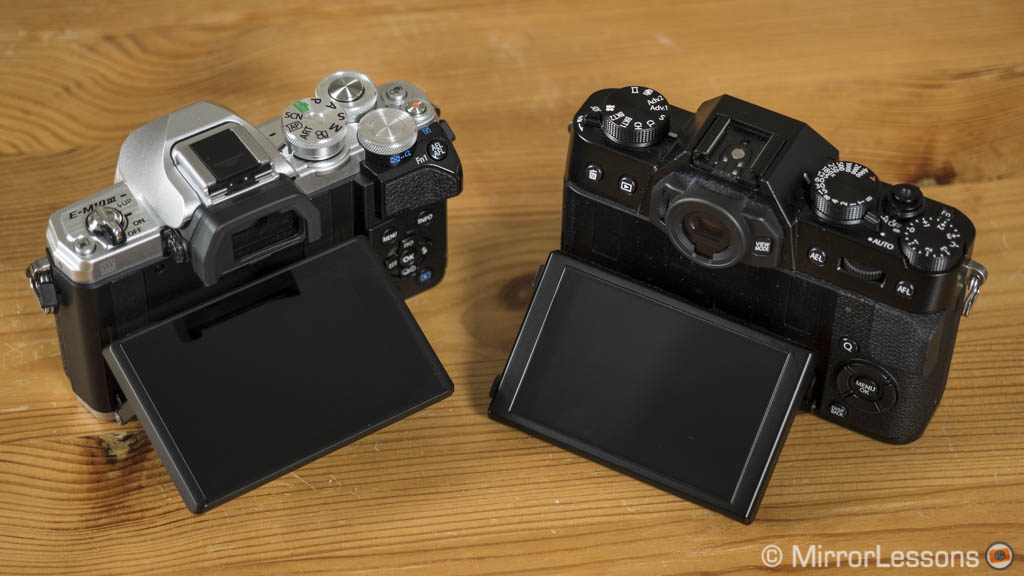
Image Quality
Let’s begin with the largest difference: the sensor size. The E-M10 mark III uses a four thirds sensor which is smaller than the APS-C format of the X-T20. The native aspect ratio is also different (4:3 vs 3:2).

Then we have the sensor technology: the OM-D uses a 16MP CMOS sensor with a bayer filter whereas the X-T20 uses Fujfilm’s proprietary X-Trans III CMOS chip with 24MP. In comparison to the standard bayer filter, the X-Trans array ensures the presence of a green, blue and red pixel on each vertical and horizontal line. Translated into simpler language, it should give better colour accuracy and resolution.
![]()
![]()
Last but not least, we have the image processor which plays an important role in the final image quality output. Both cameras use the latest generation processor available from each brand: TruePic VIII for the E-M10 III (same as the flagship E-M1 II) and X-Processor Pro for the Fuji (the same as flagship X-Pro2 and X-T2).
Because these two products can be of interest to beginners as well as more experienced amateurs, I’ve divided this chapter into two sections. The first analyses the straight out of camera (SOOC) JPG files while the second digs deeper into RAW file processing.
Straight out of camera (SOOC) results
Both cameras are capable of producing excellent JPG files with a good amount of detail as you can see from the first examples below. The details on the X-T20 appear larger when you zoom in 100% because the camera has more resolution (24MP vs 16MP).


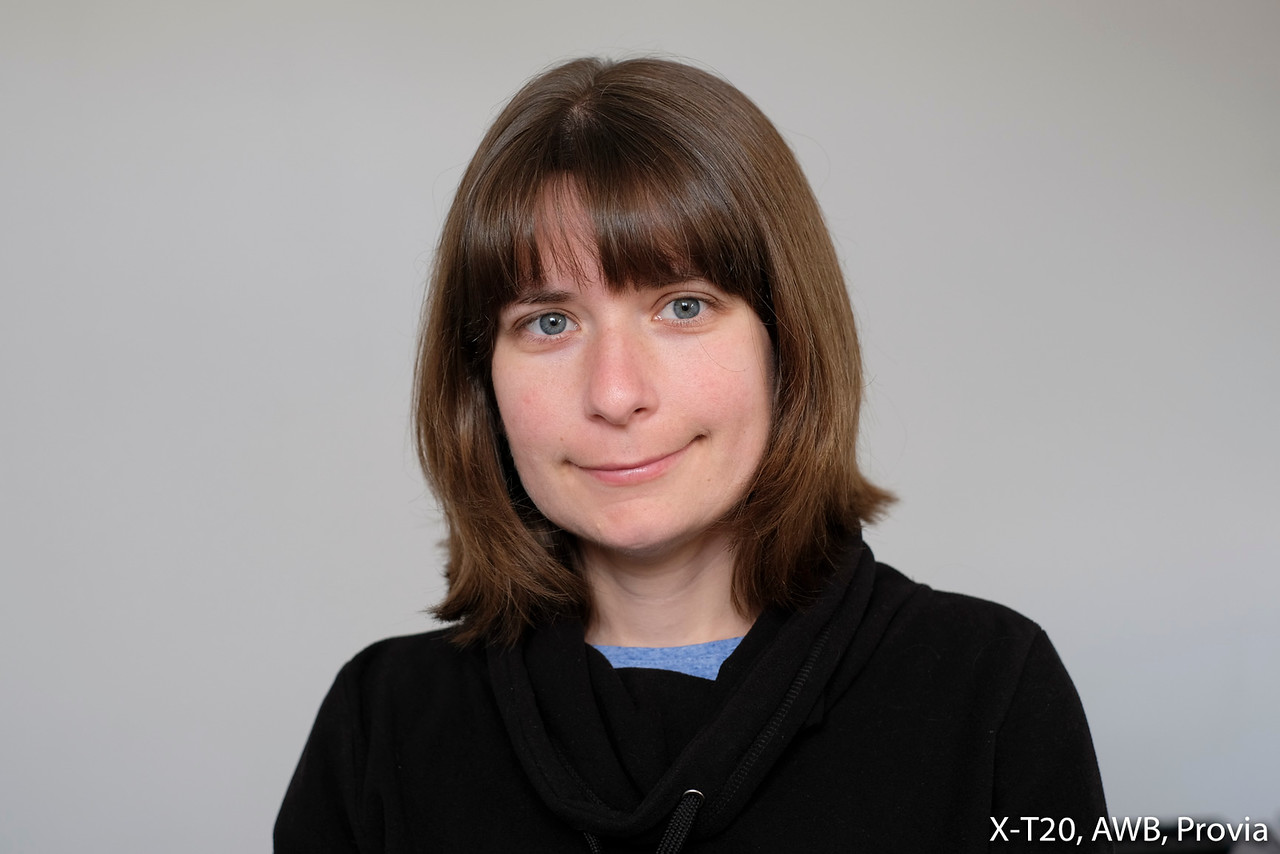
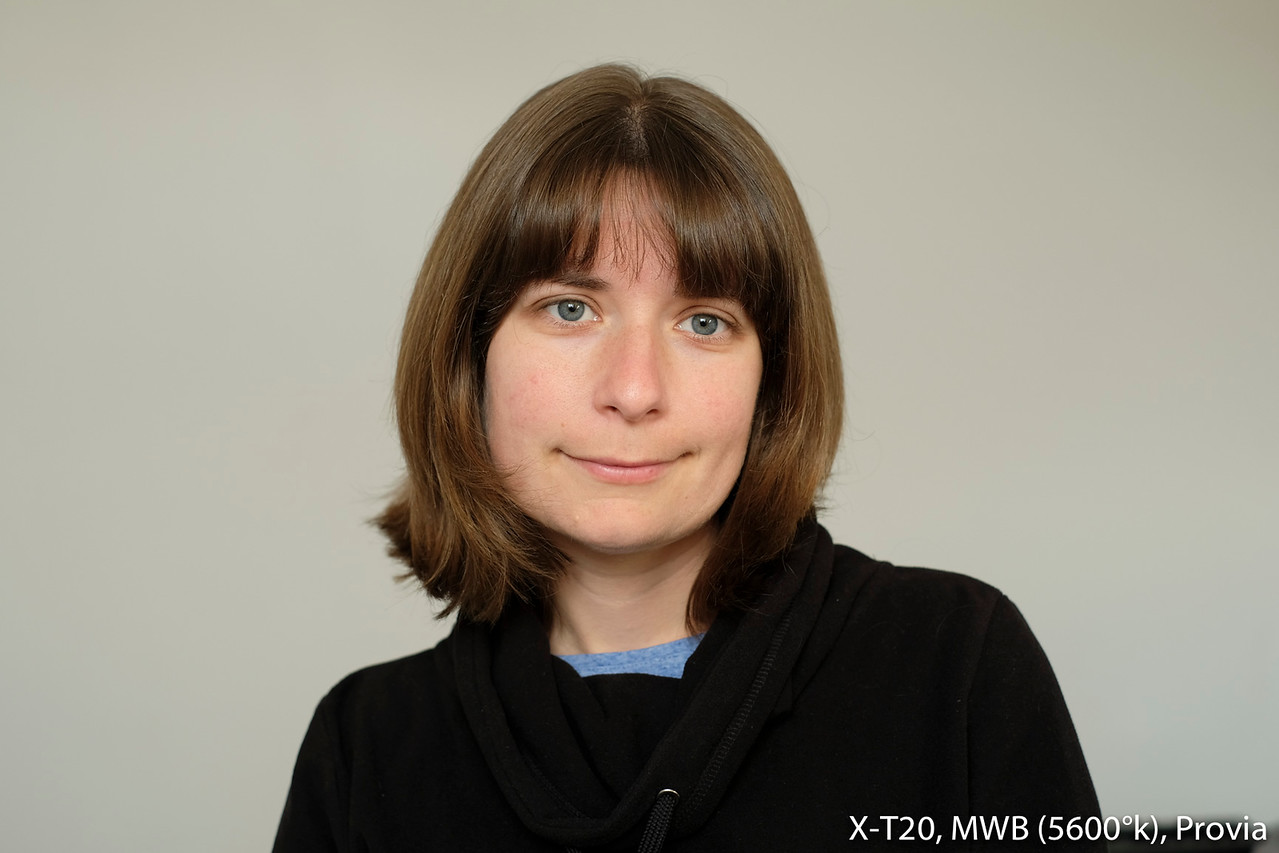
The look of your image will be heavily influenced by the colour profile selected (Picture Modes on the E-M10, Film Simulation Modes on the X-T20). They can adjust the saturation, contrast and in some cases, produce a more distinctive colour palette.
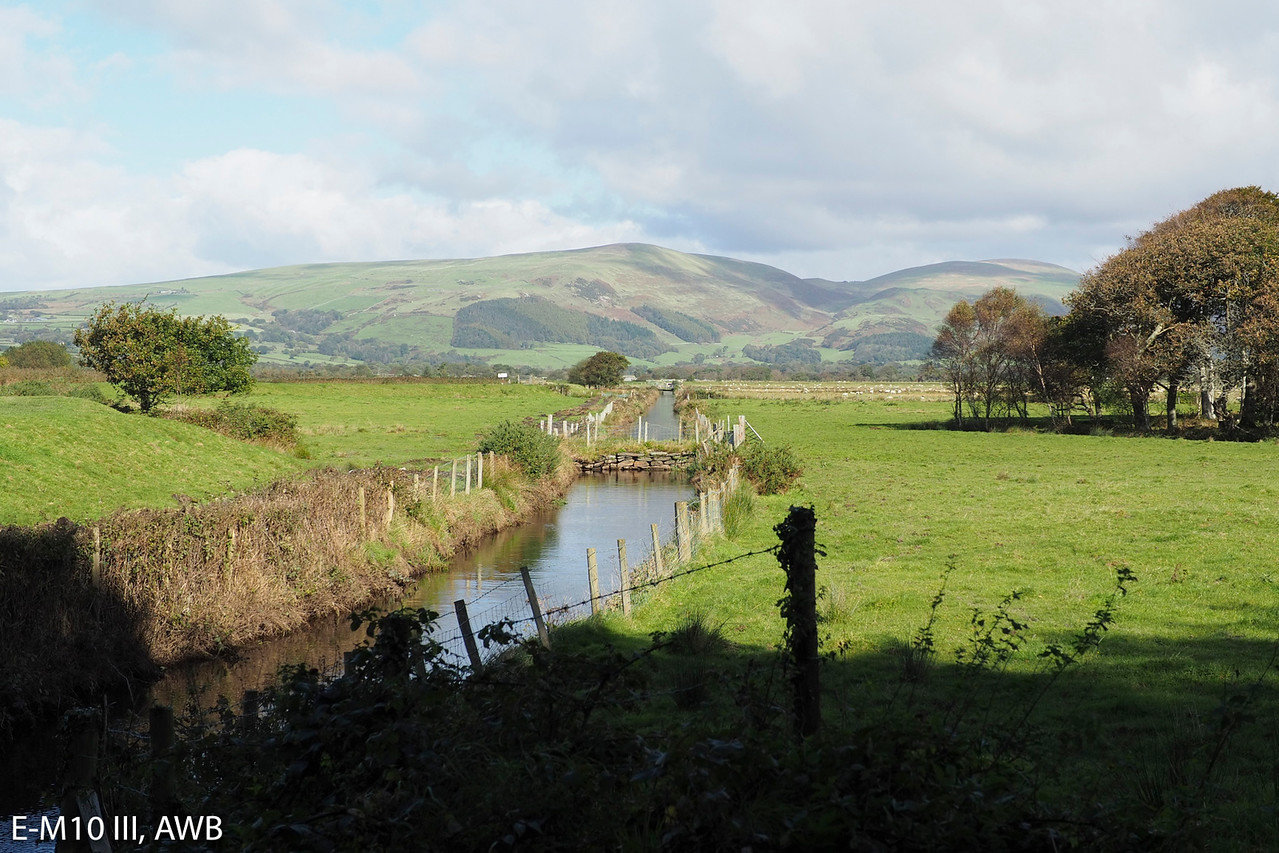
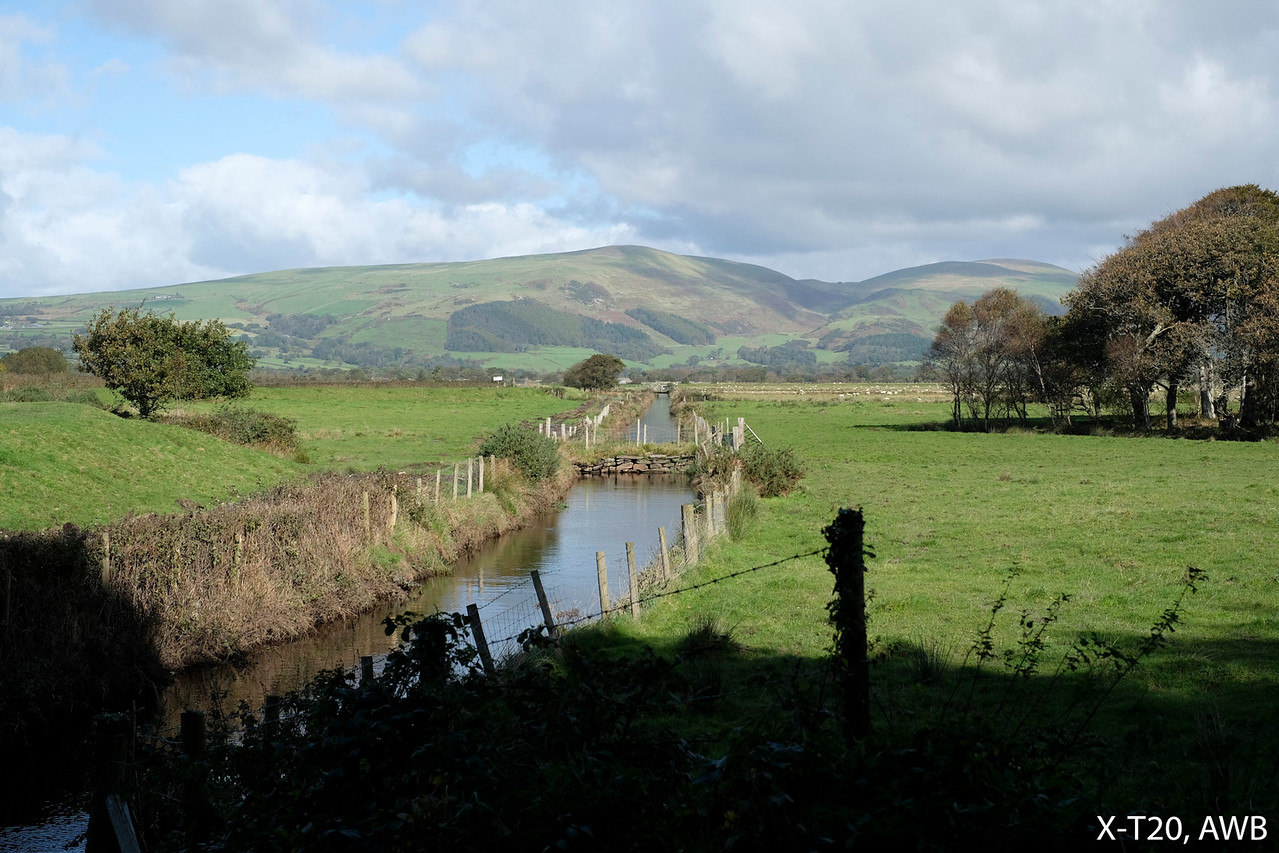
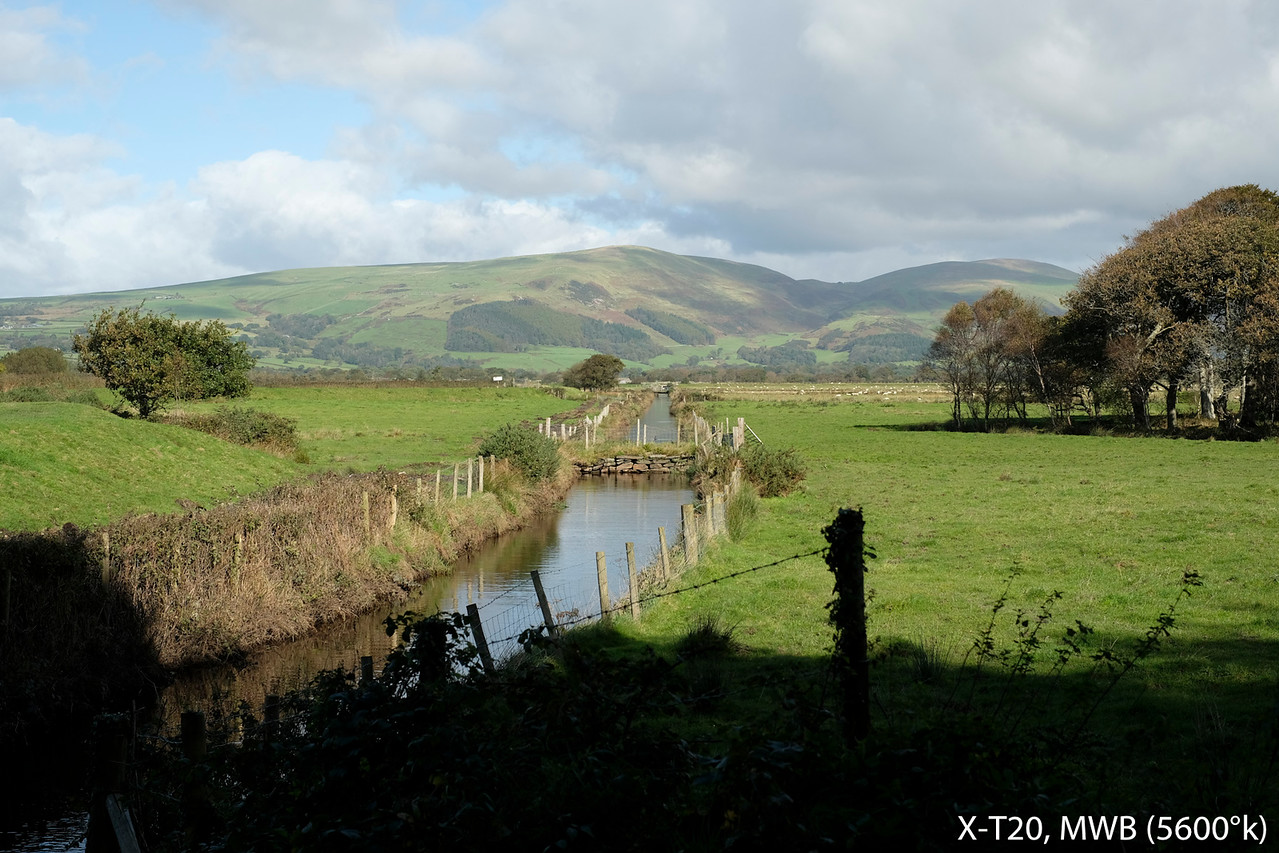
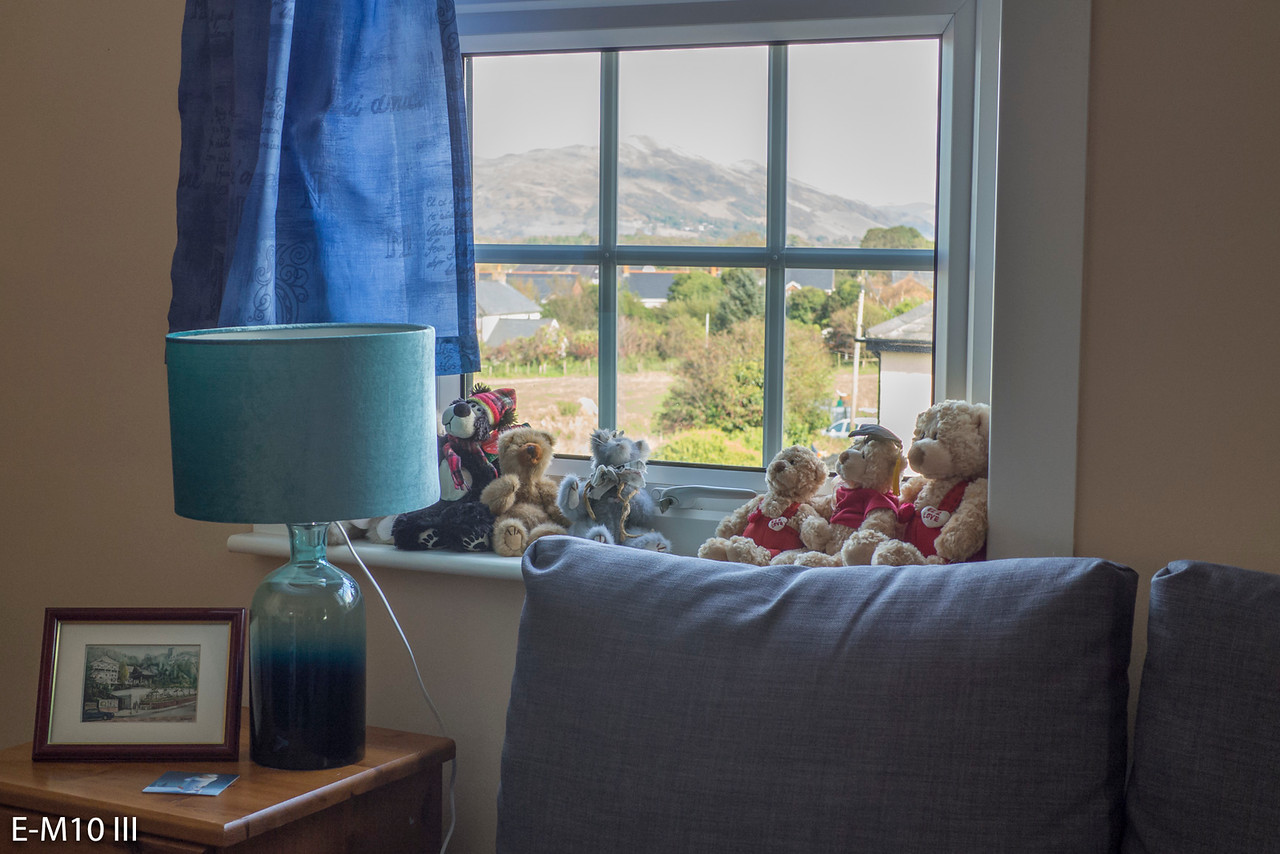
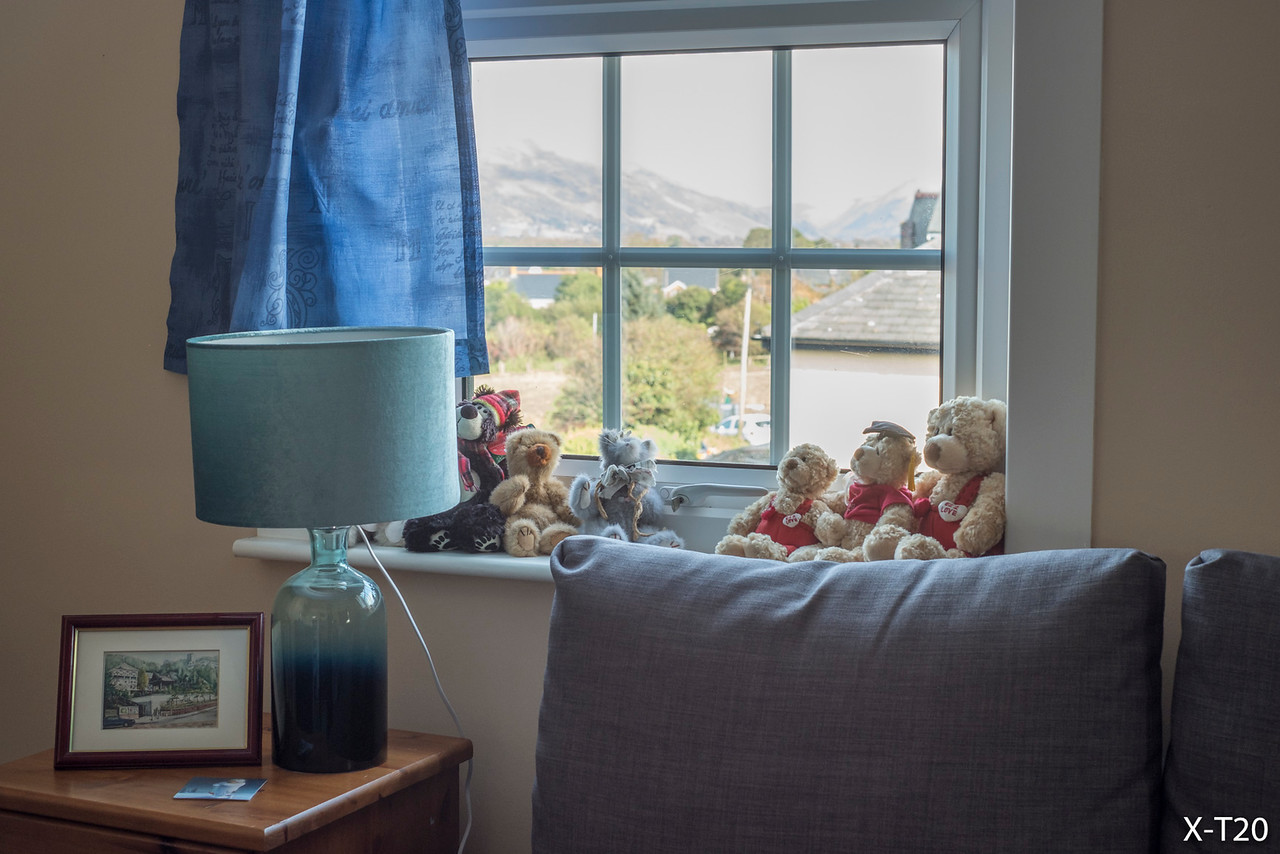
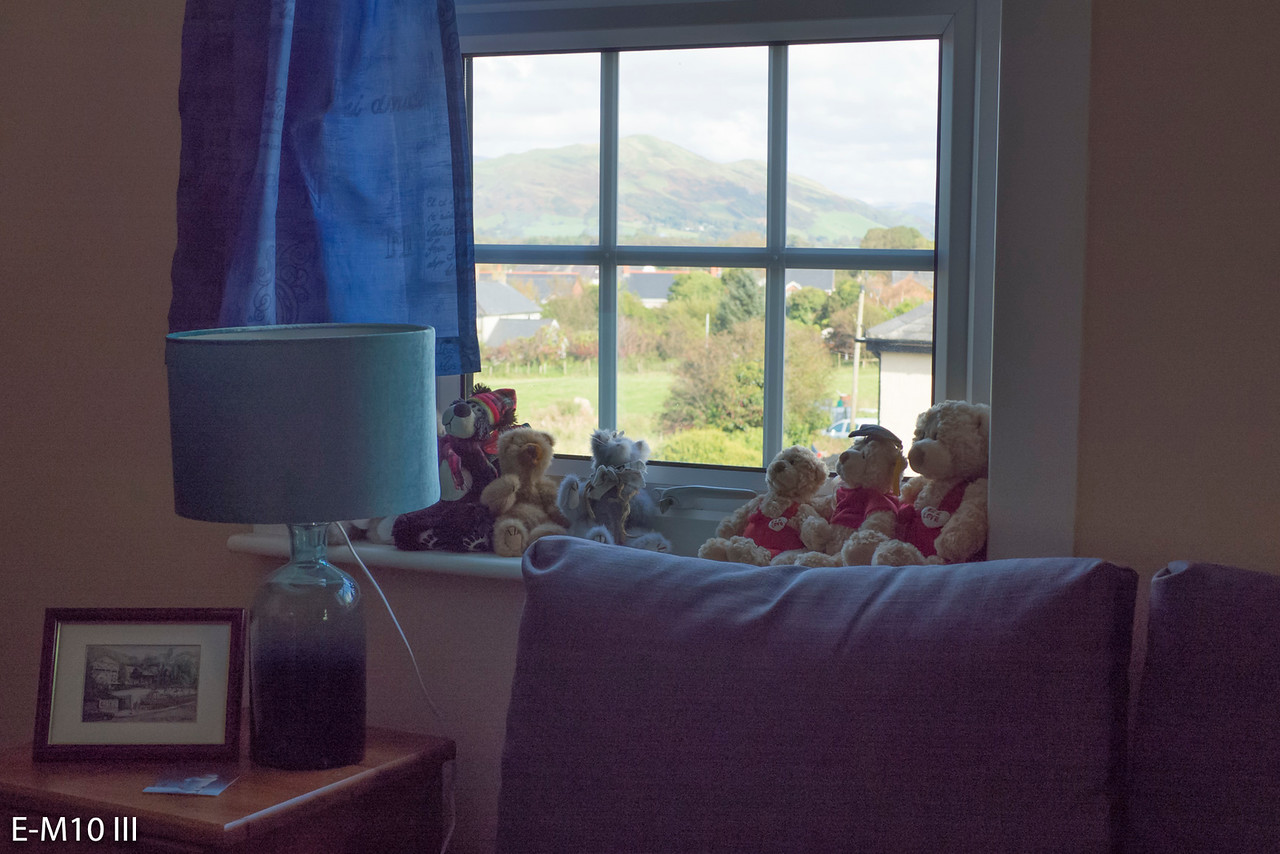
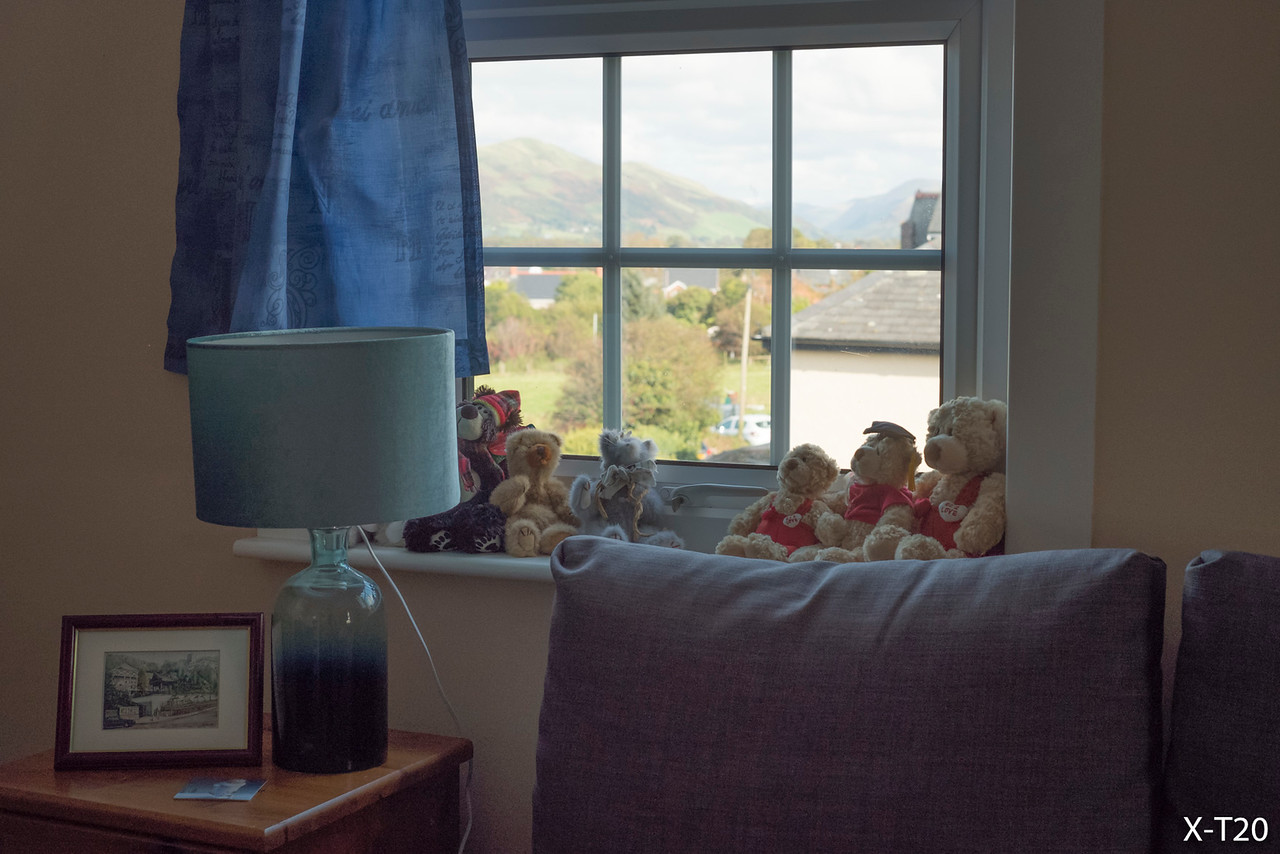
If we compare the standard profiles of the two cameras (Natural on the E-M10 III, Provia on the X-T20), the first interesting thing to note is how the behaviour changes depending on the white balance setting used. The Olympus produces a warmer result when both are set to Auto but when you select the Kelvin temperature manually, it’s the other way around.
Note: the Keep Warm Colours option for the AWB was turned off on the Olympus. Lenses can also play a minor role in influencing the tint. For example, the Leica DG 25mm f1.4 used with the E-M10 III gives a cooler rendering in comparison to M.Zuiko lenses. I cropped the E-M10 III images below to the 3:2 aspect ratio to match the composition of the X-T20.

The Natural profile on the Olympus is the one I use 90% of the time because I like its balanced appearance and vibrant colours. The Vivid mode further increase the saturation while the Muted profile decreases contrast and saturation a little. The i-Enhance mode optimises the settings to deliver the best result possible according to the scene photographed and you can choose three levels of intensity.
There are other modes like Color Creator where you can use the twin dials to vary the saturation and hue (more green or more magenta) but I rarely use it. With the free Olympus Viewer 3 software, you find two additional modes: colour and monochrome with various settings to modify the intensity of a single colour channel or colour filter (the same profiles as the Pen F).


On the X-T20 the Vivid/Velvia profile tends to saturate a little too much whereas Astia is more balanced. Classic Chrome stands out for certain genres where strong contrast but moderate saturation fits the image better (street or reportage for example).
Overall the X-T20 profiles offer more distinctive differences in comparison to the E-M10 III picture modes unless you use the creative options (Art Filters or Picture Filters).

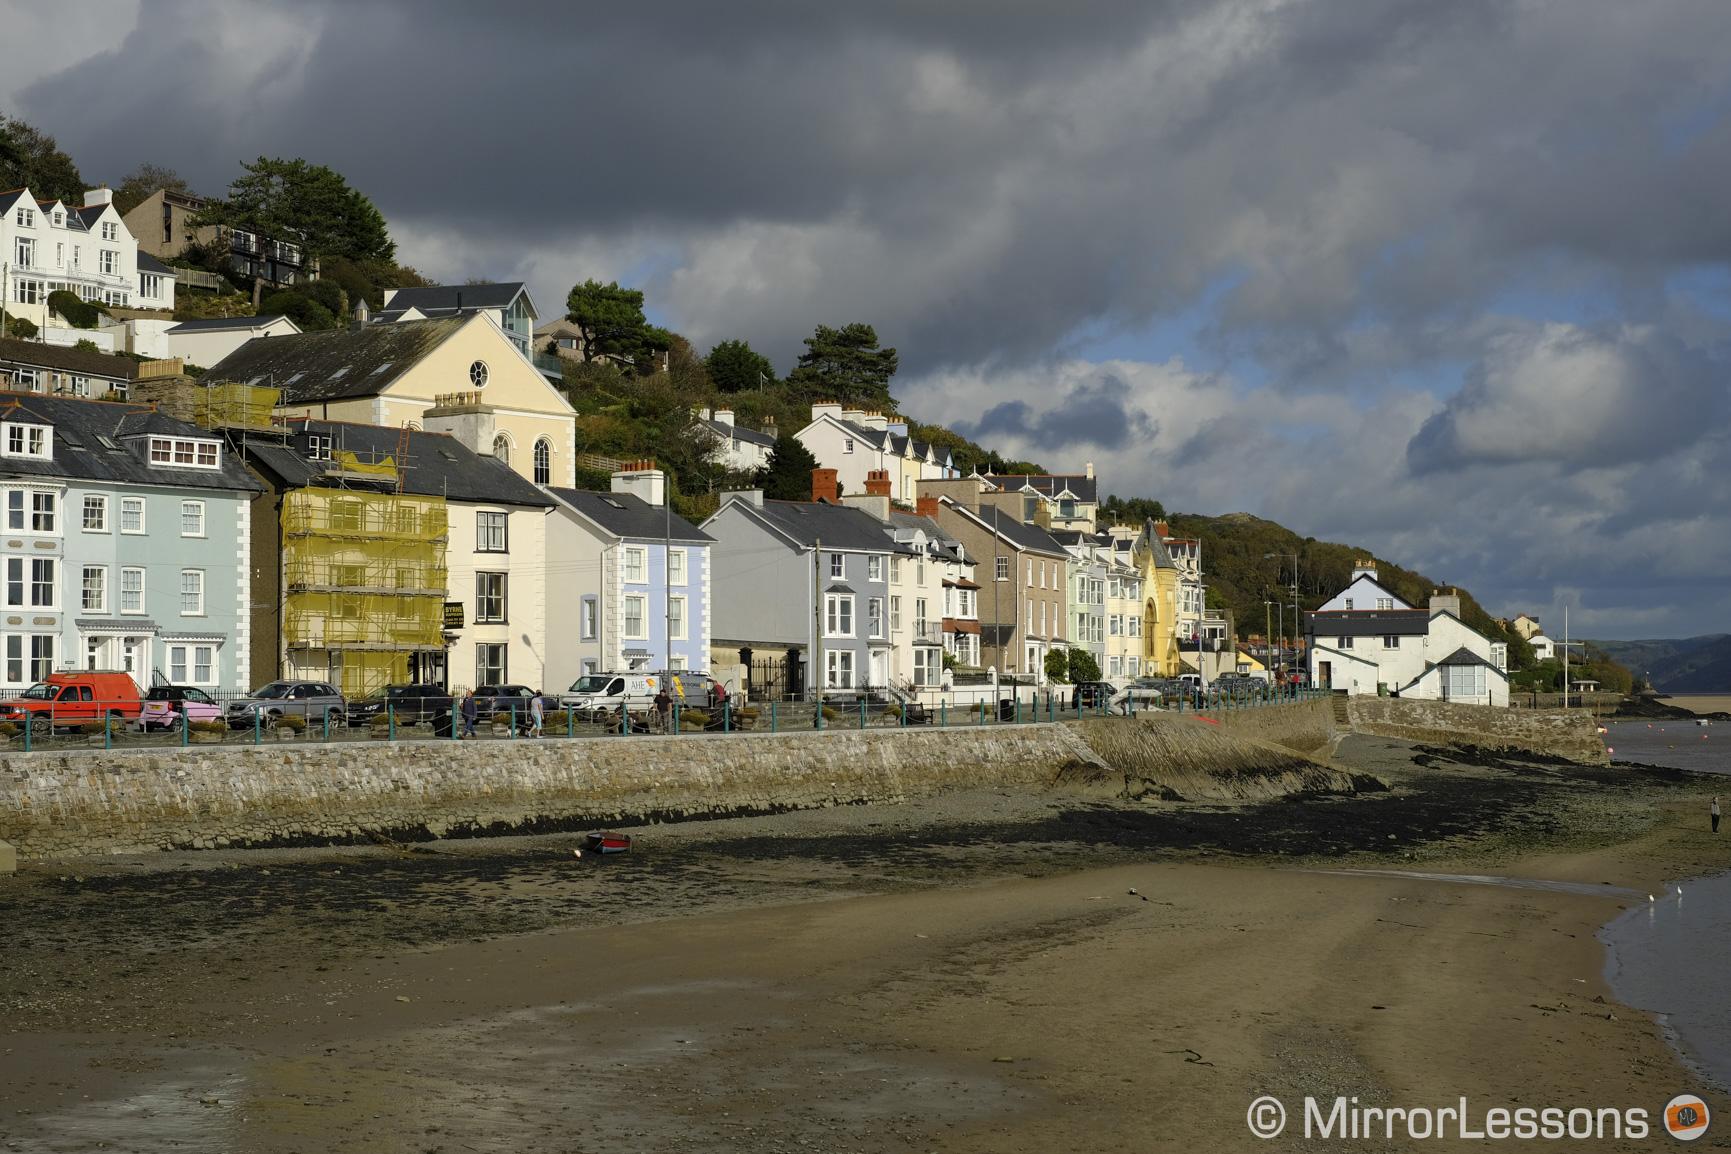
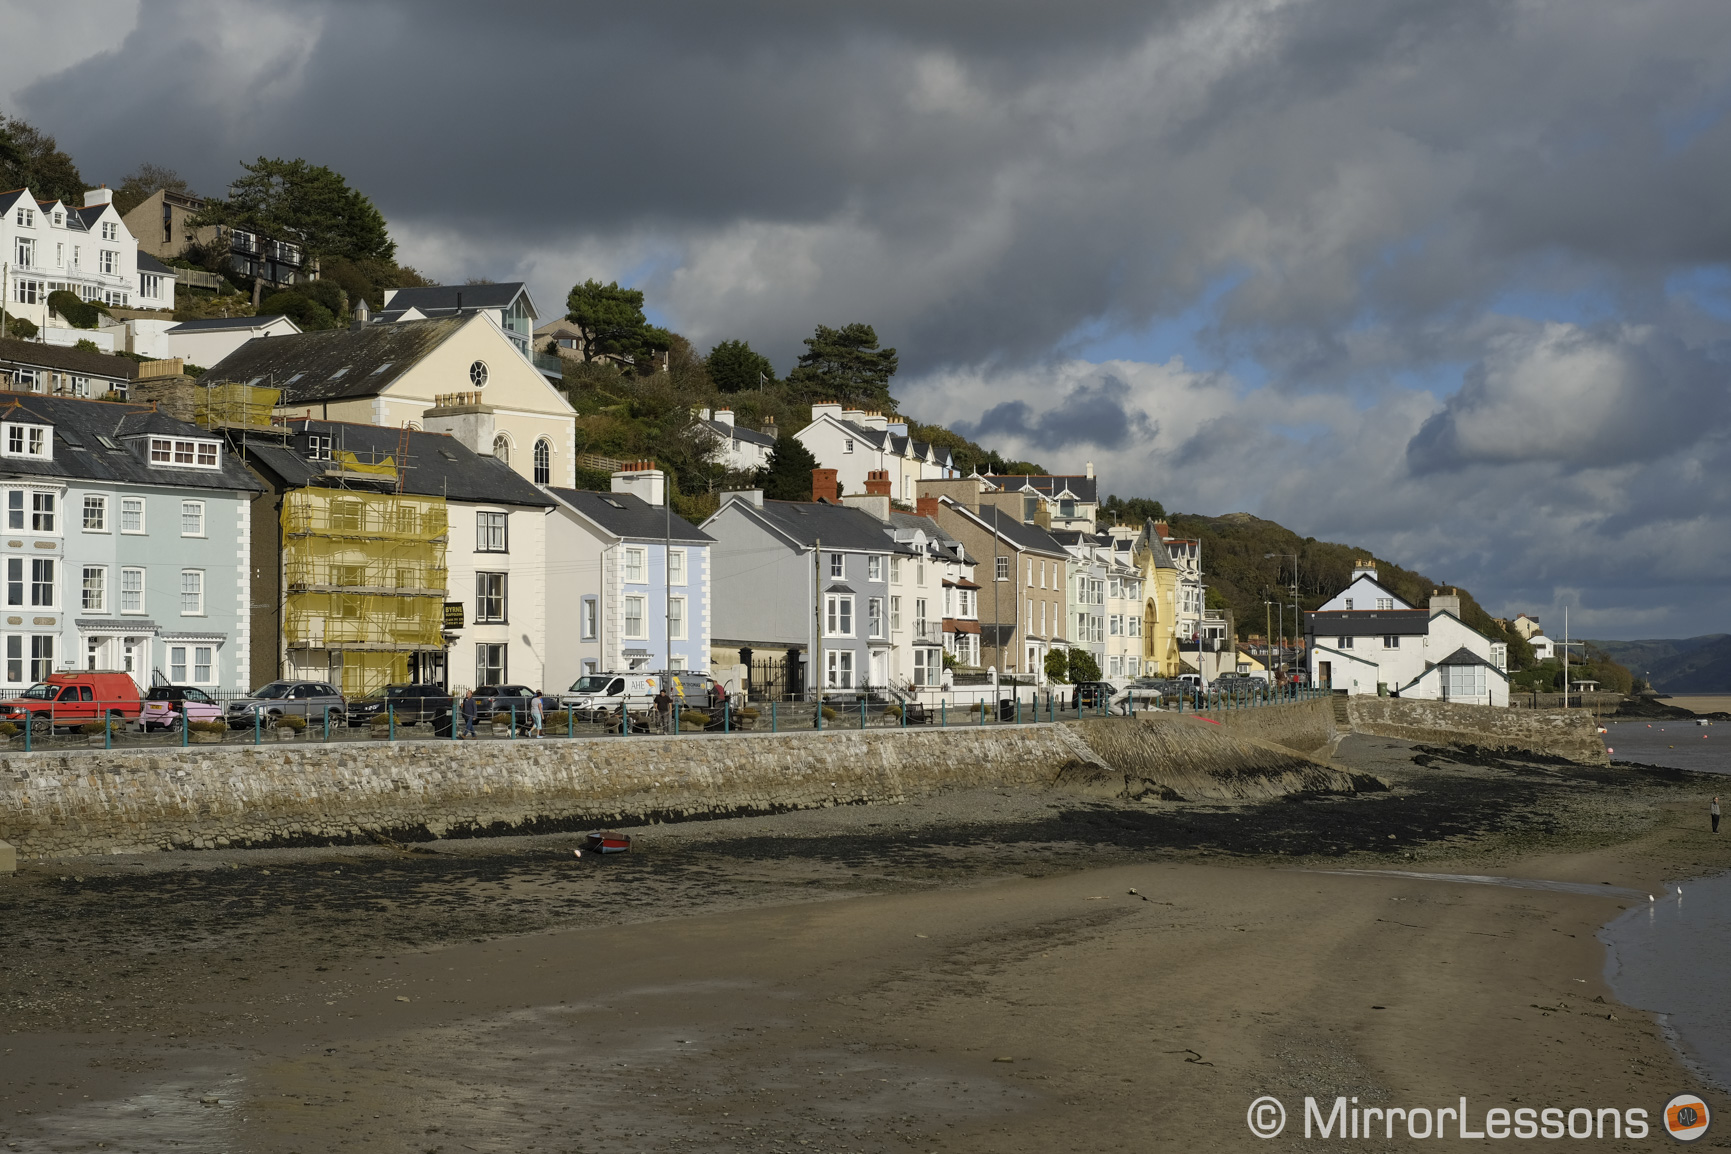
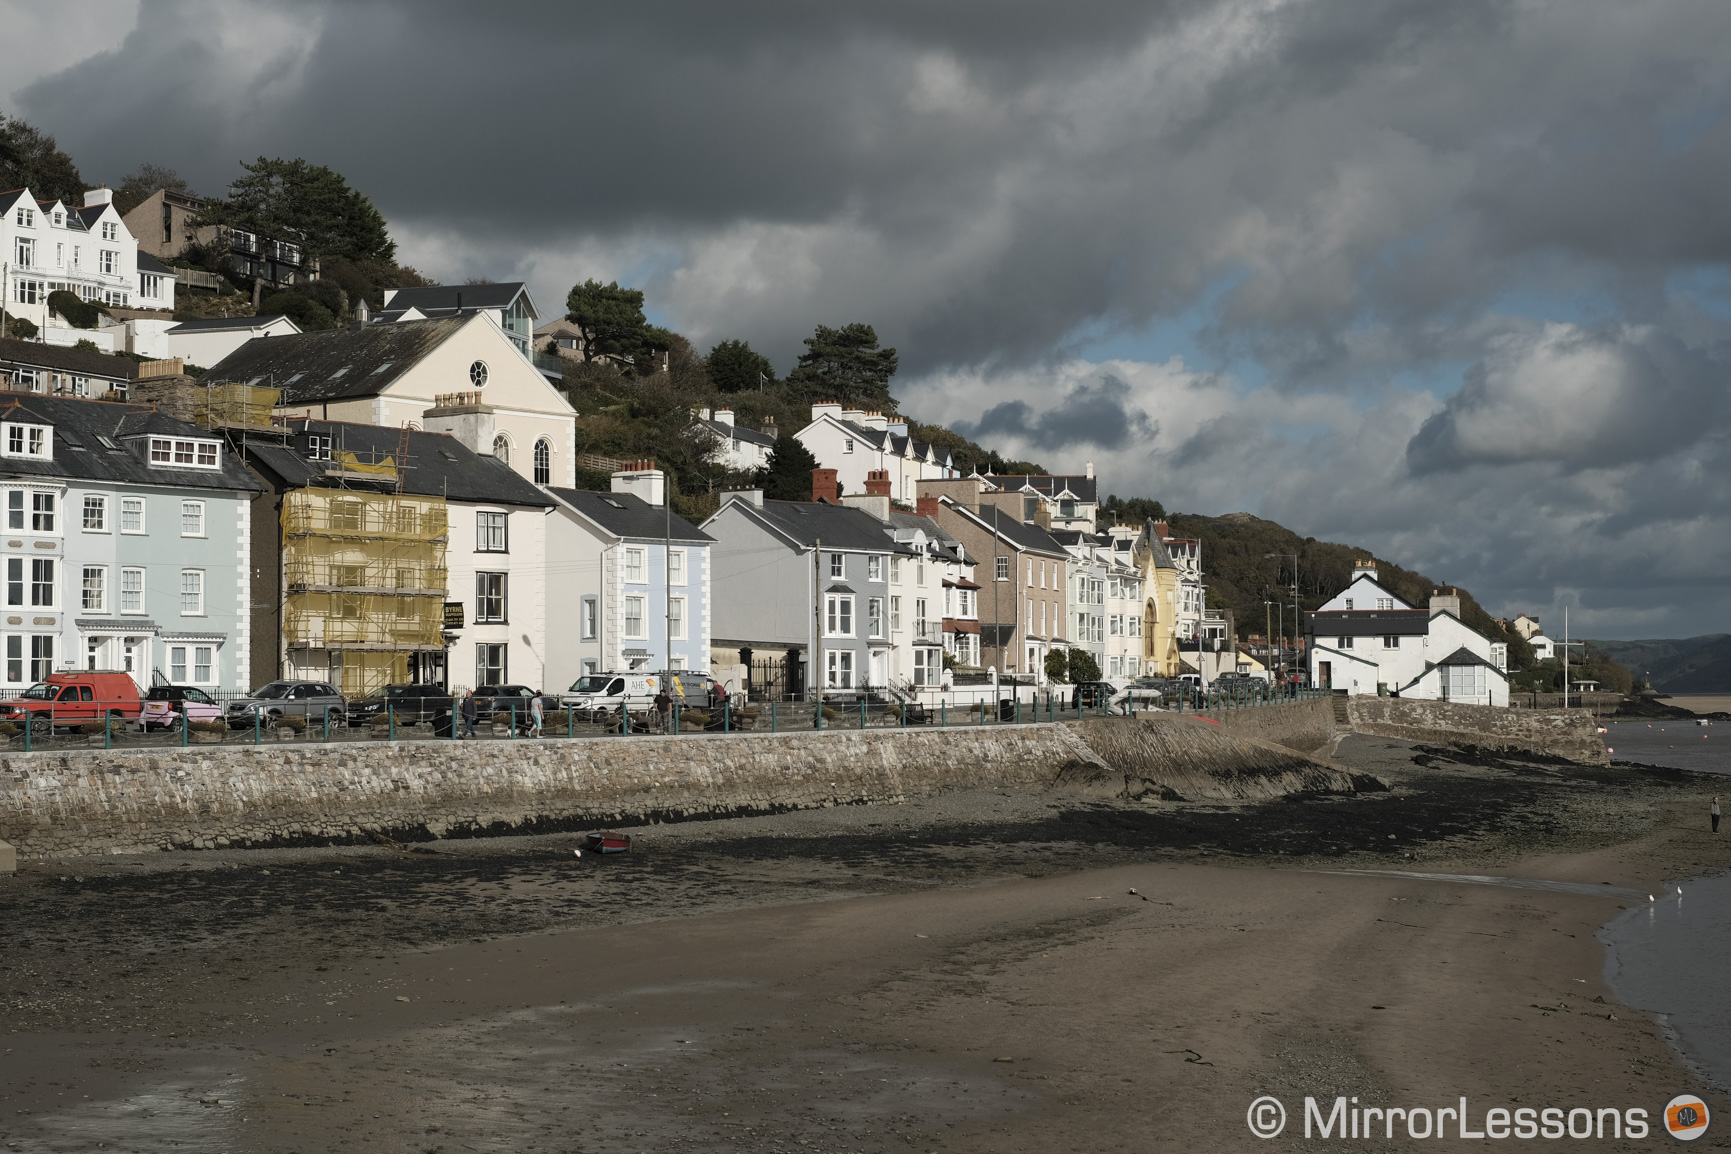


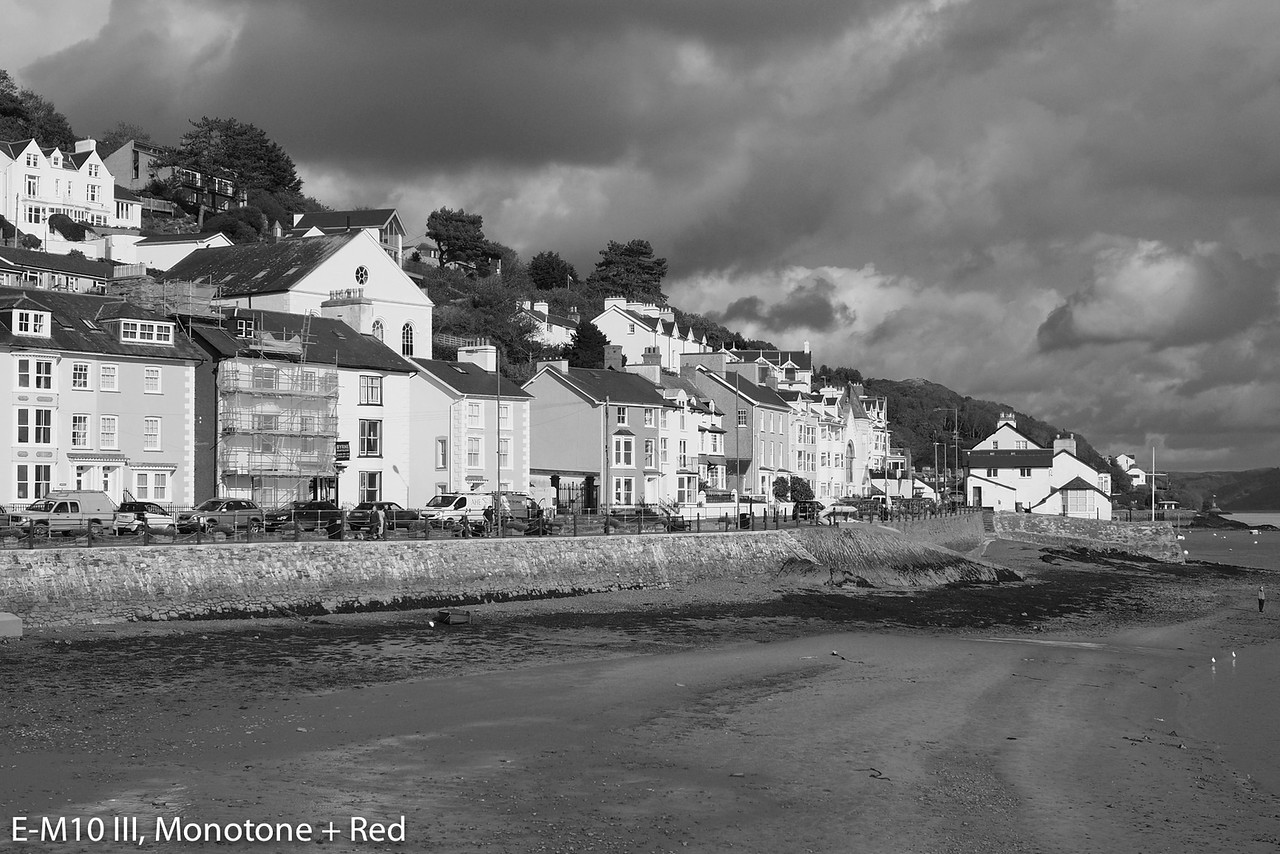
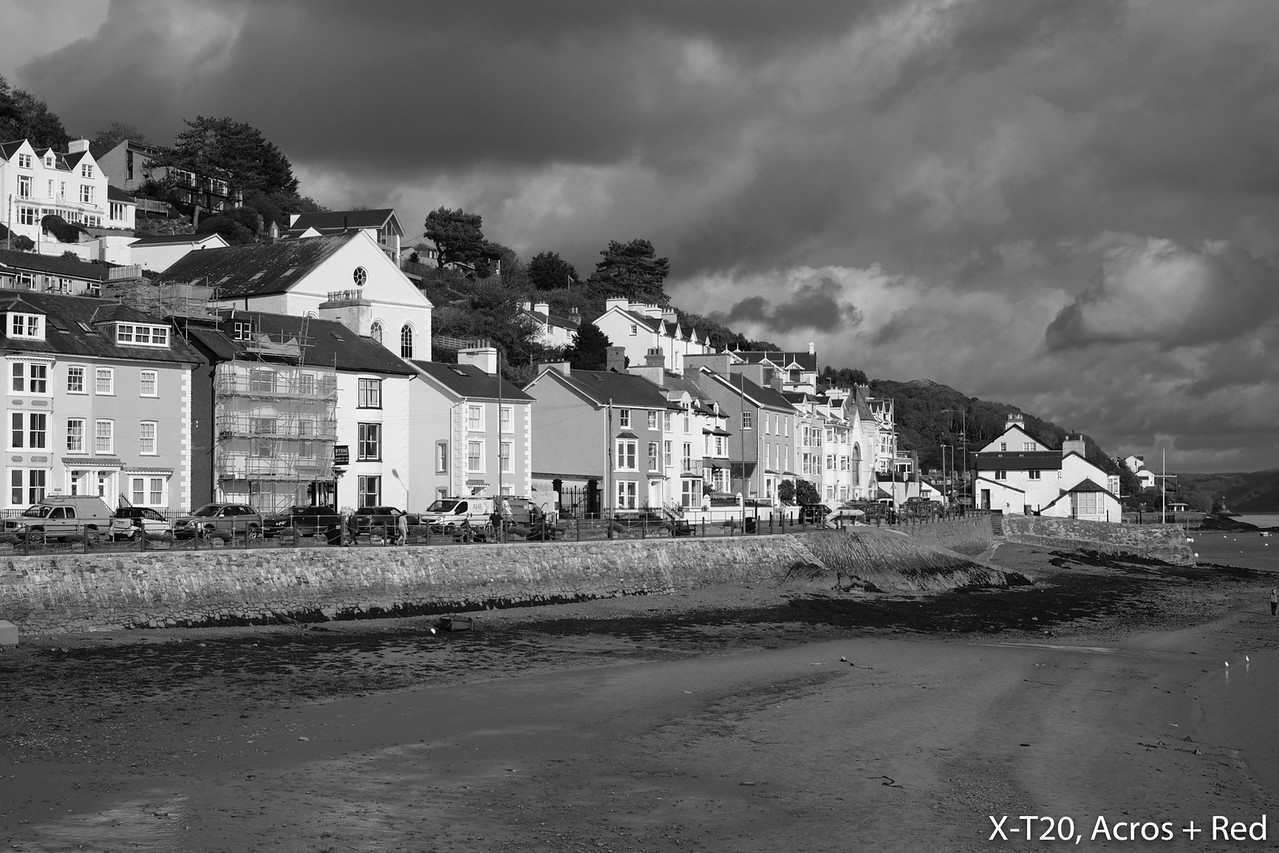
If you love to experiment with black and white, the E-M10 III allows you to apply different colour filters to the monochrome mode (for example the Red filter will increase the contrast in the sky and clouds). The X-T20 has two profiles – Monochrome and the more contrasty Acros – with three different colour filters available for each.
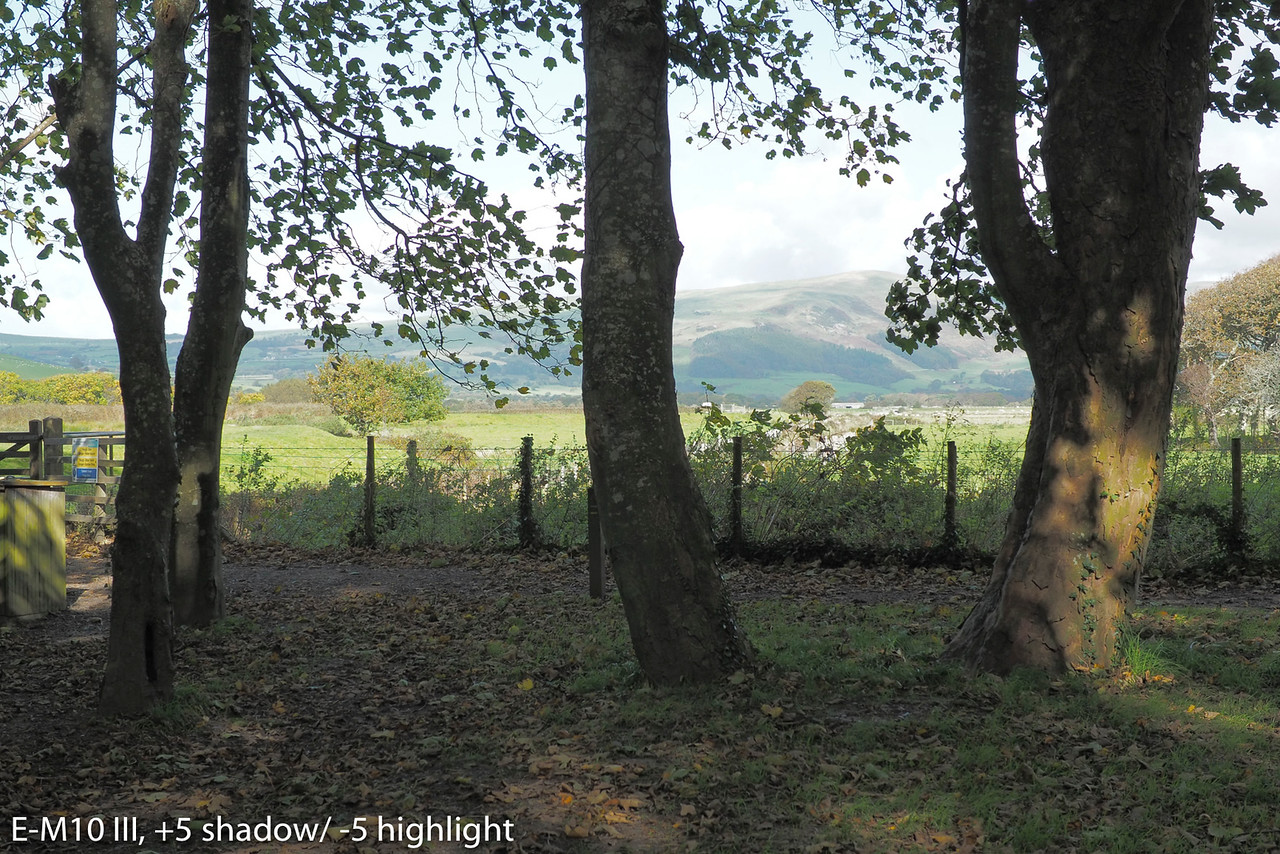
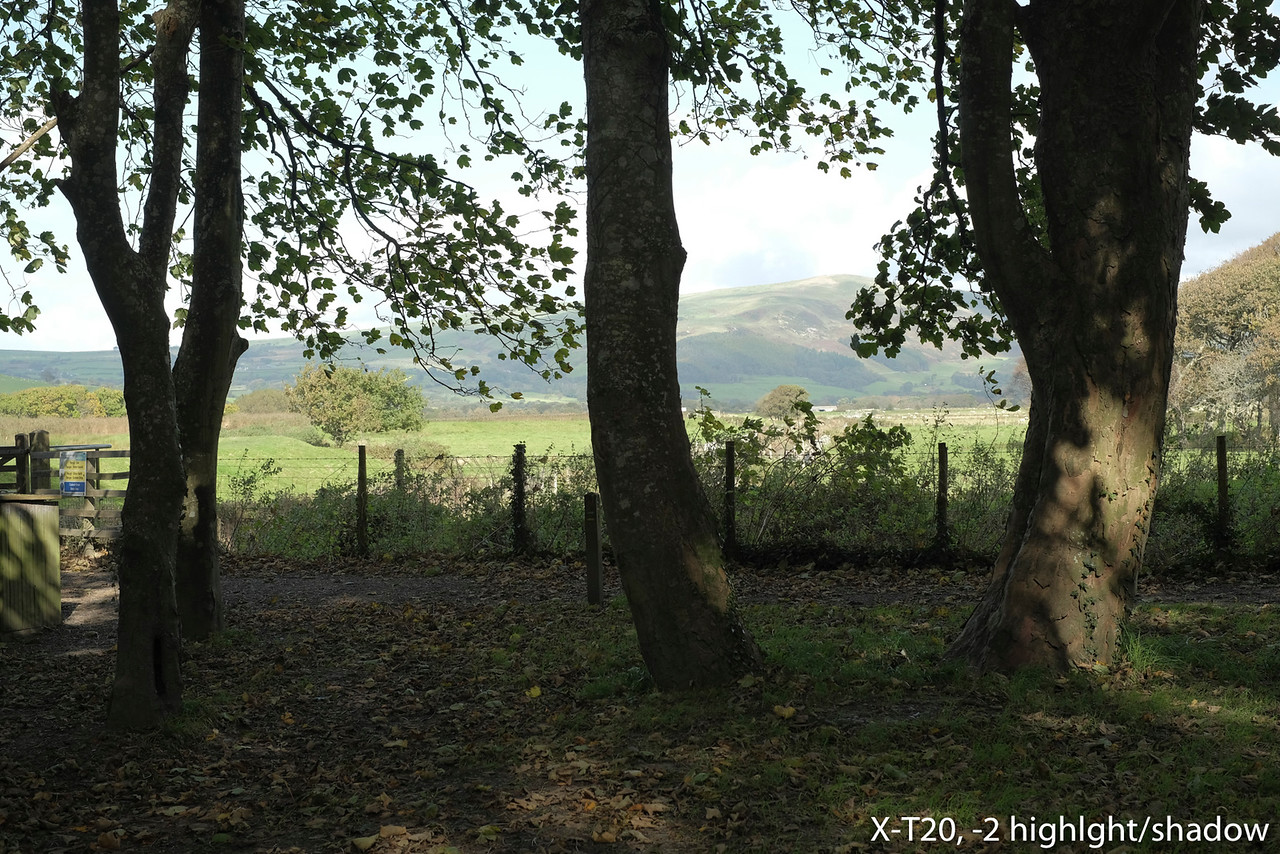
For each picture profile you can tweak some settings including highlights, shadows, contrast, saturation and sharpness. Highlights/Shadows have more steps on the E-M10 III and can be useful to increase the dynamic range of your image but be aware that if you push the values too much, you can end up with unnatural colour transitions. The same applies to the Fuji and portraits.
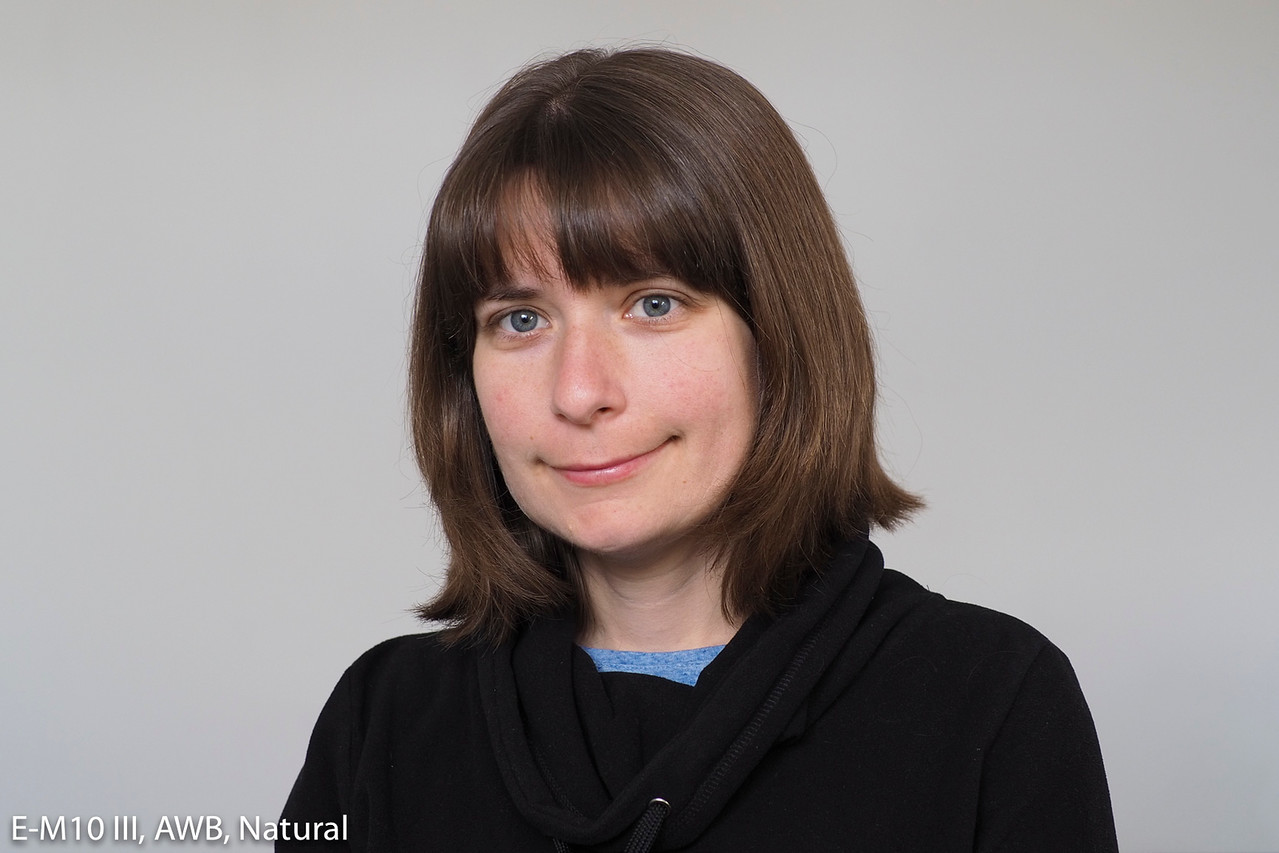
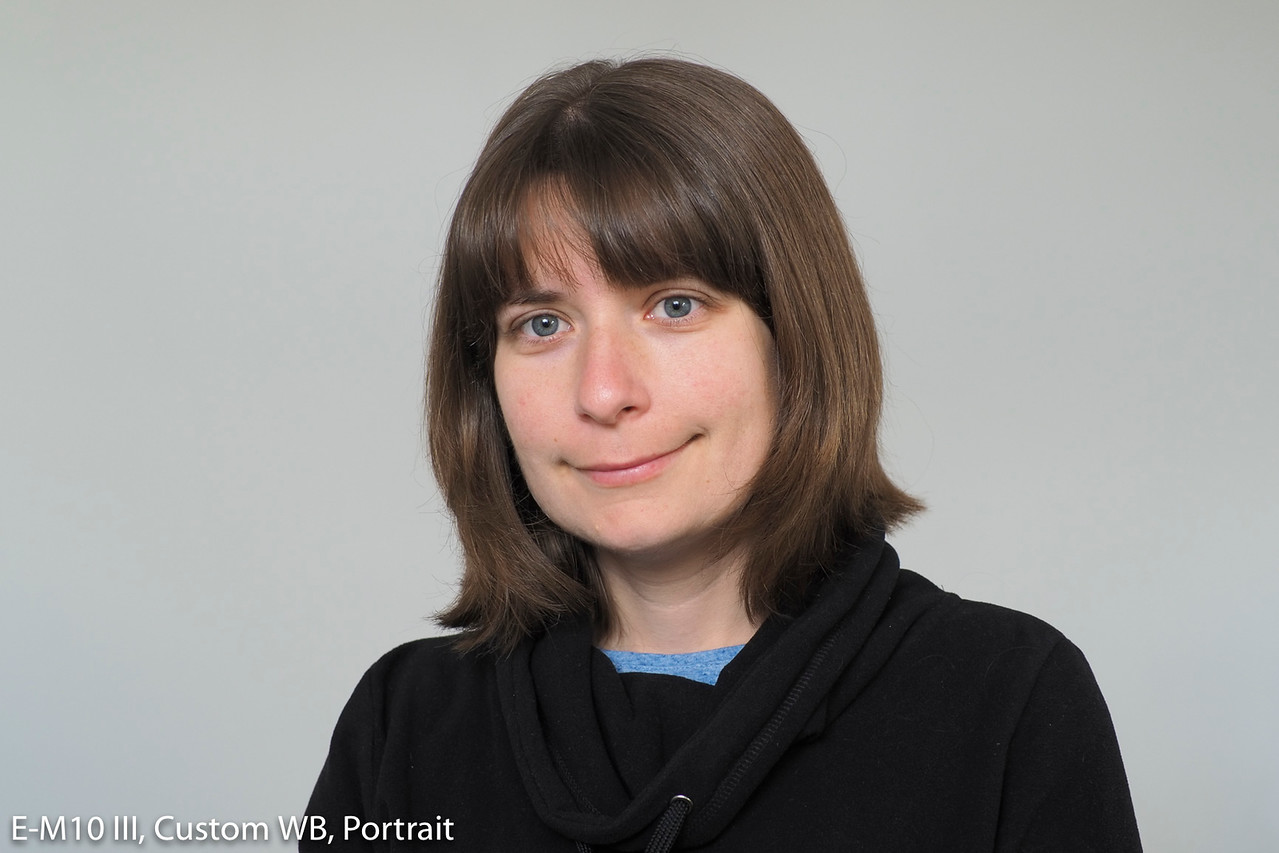
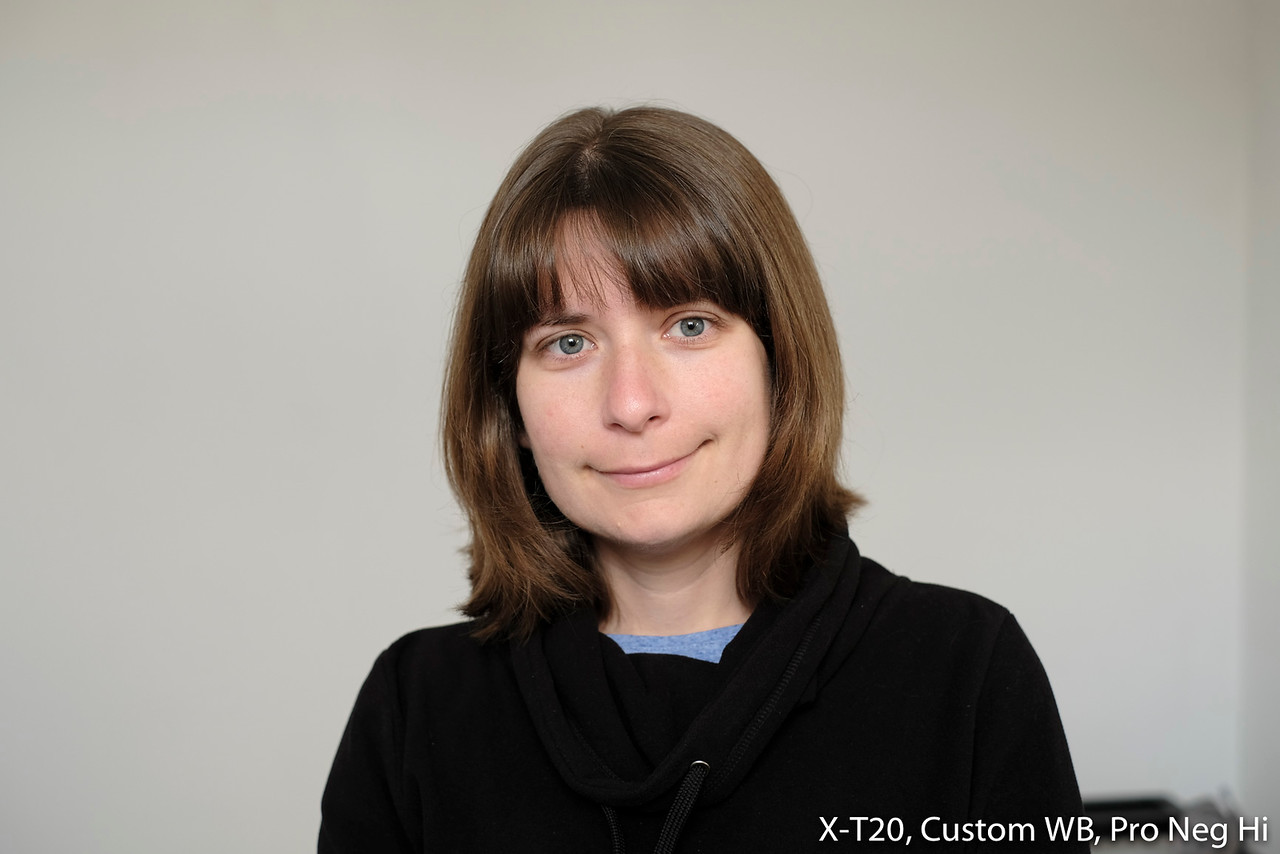
Another interesting aspect to analyse is the skin tone rendering. Here again we can see a difference when selecting Auto or Manual WB. With Auto, the results are quite close while with manual white balance, both suffer from tint dominance. By customising the WB rendering in-camera (WB compensation on the E-M10, WB shift on the X-T20) you can minimise some of that colour dominance. The Portrait profile on the E-M10 III gives you slightly softer tones which suit skin tones better and the Pro Neg Hi mode on the X-T20 maintains a good level of contrast without oversaturating.
Note: another way to set the white balance in a controlled environment is to measure it with a white or grey card (One Touch WB mode on the Olympus, Custom mode 1/2/3 on the Fuji).

Finally, let’s have a look at the JPG output at high sensitivities (ISO 6400 in this example). The two cameras have different levels of noise reduction. Overall the X-T20 performs better and you can keep NR between 0 and -2 for optimal results. On the E-M10 III, leaving the Noise Filter Off produces more noise but also more details, while the Standard and High levels soften the image a lot.


Post processed results
If you want superior results and more control over every aspect of your image, you will need to turn to the RAW files. This is because they keep much more information than the JPGs and give you more room to edit exposure, white balance, colours and many other parameters.
The first thing to remember is that RAW developer software programs can influence the result. I am a long time Lightroom customer and have been satisfied with the performance. However I acknowledge that there are other powerful software programs that can perform better in terms of noise reduction, colours and other aspects.
For example, when it comes to Fujifilm RAF files, Lightroom tends to produce more of a “watercolour effect” in comparison to Iridient Developer (a well known topic on the web). Note however that the latest version released by Adobe (8.2) has a new function called Enhance Details that improves a lot the rendering of Fuji RAW files.

I want to stress that the example above falls into the “pixel peeping” category. Choosing the best software becomes more important once your post-production skills reach a certain level and you want to extract the best possible quality from your files. If you are just starting out, most photo editor software programs (including the most affordable ones) will do the job just fine.
I won’t dig into colours because the results mainly depend on the profile applied by the software, which in most cases will be different from the one you selected in camera. Some software programs include a replica of your camera’s profile but others don’t. You also have the option of using presets included with the program or third-party ones that can give a specific look to the image (film or retro look, etc.).
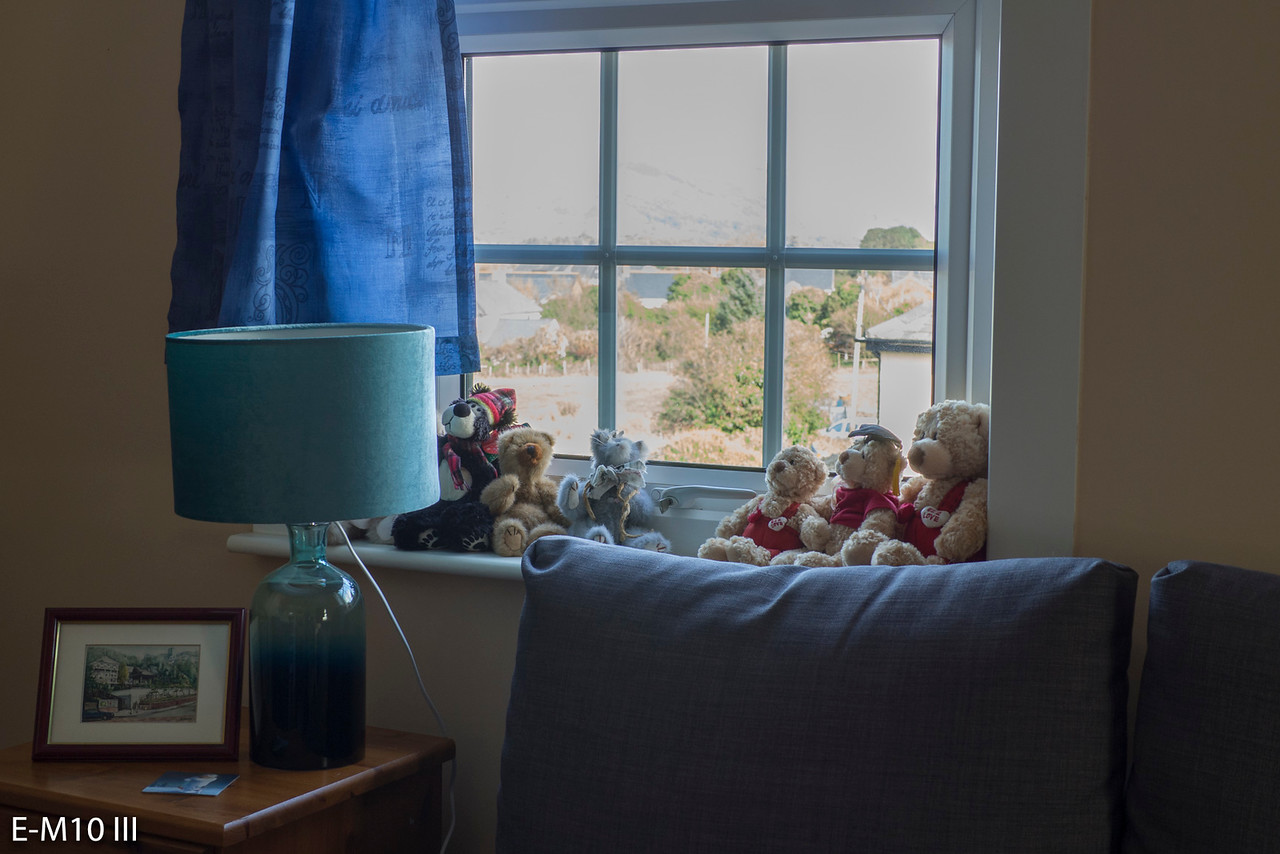
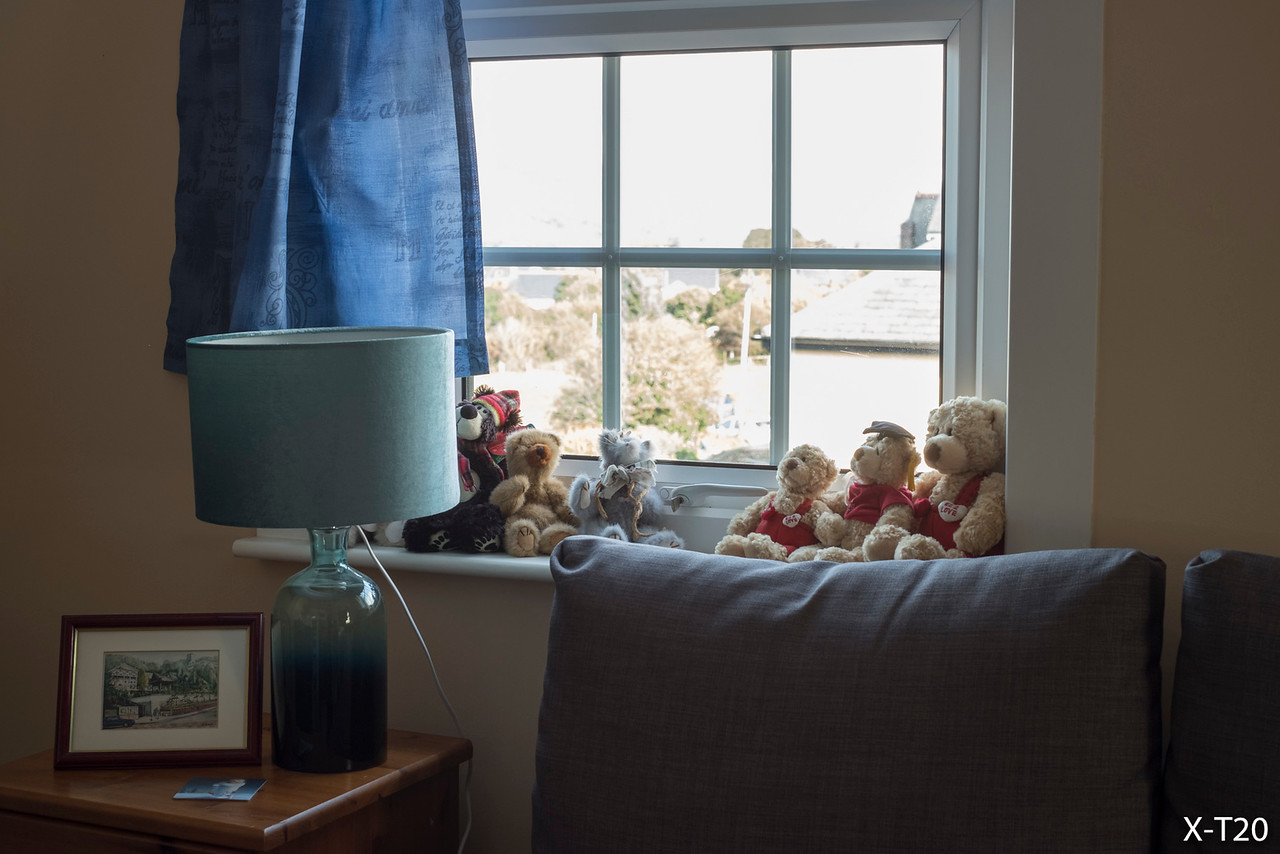
RAW files give you more leeway to increase the dynamic range as you can play with the exposure and highlight/shadow parameters. In the scene below which presents strong contrast between the external light and the dark interior, we can see that a middle ground exposure gives similar results on both cameras. The Olympus displays more noise in the shadows but with careful post production you can optimise the output.


If I purposely underexpose or overexpose the same scene, we can see that the X-T20 has cleaner shadows but the micro four thirds camera defends itself well in the highlight zones.


At high ISOs, the cameras behave well up to 3200. At this value, I don’t need to tweak the settings too much to keep noise under control. However the Olympus files require more colour and luminance noise reduction than the Fujifilm files.

From 6400, the X-T20 starts to show an advantage that increases from 12800 ISO onward. At 25600 ISO the E-M10 III is unusable while the X-T20 deteriorates at 51200.


Single and Continuous Autofocus
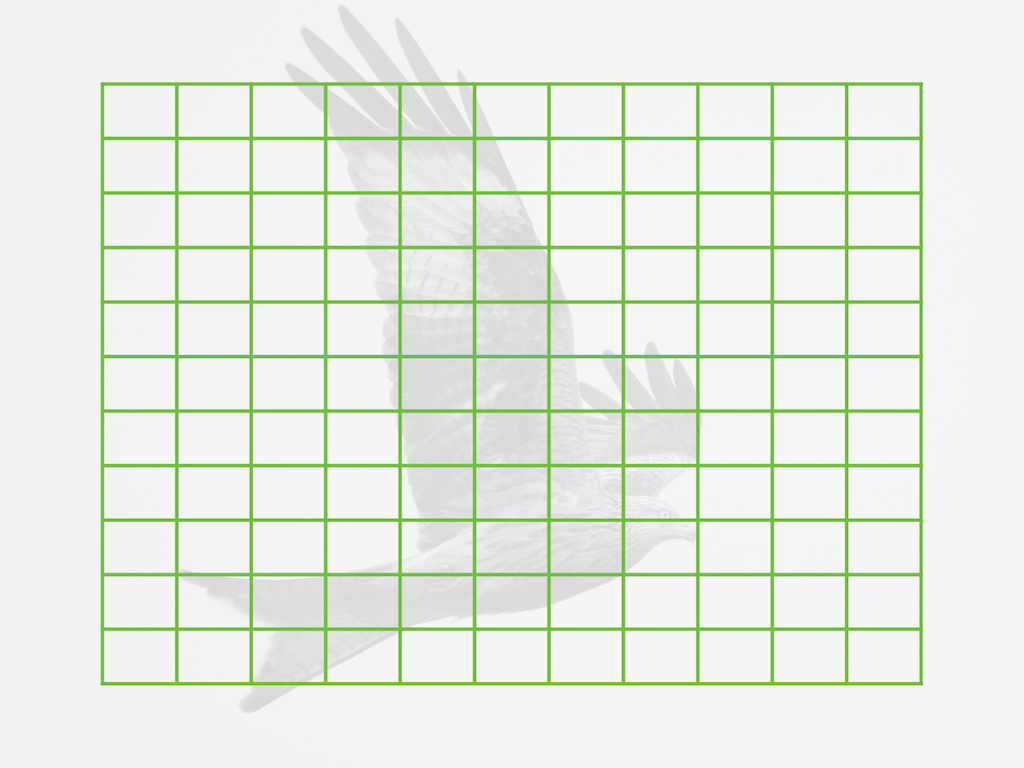
The two cameras use different technologies for the autofocus. The E-M10 III has a contrast detection system with 121 points while the X-T20 has a hybrid system with contrast and phase detection points (91 or 325 point grid). Phase detection is more accurate, which makes a difference when tracking fast moving subjects as we’ll see further down.
In single AF mode, the difference between the two cameras is negligible when shooting in good light conditions. They are both reliable and lock really fast but slow down in low light conditions. (That said, the X-T20 provides more consistent results than the E-M10 III.)


In continuous AF with slow subjects, the E-M10 III does a good job of tracking as you can see from our first test below (the single AF point was set on both cameras). However it would be a mistake to come to a final conclusion just from this initial result.


For faster subjects such as mountain bike racers, there is no doubt that the X-T20 has a significant advantage over the Olympus, which struggles to maintain a decent keeper rate in these situations. Except for a few nice shots, most of the images from the race that I photographed were out of focus. The X-T20 on the other hand delivers an excellent keeper rate just like the X-T2 and X-Pro2. The camera has also received a few tweaks concerning the AF algorithm with firmware 2.0.


One of the many out of focus shots in this series


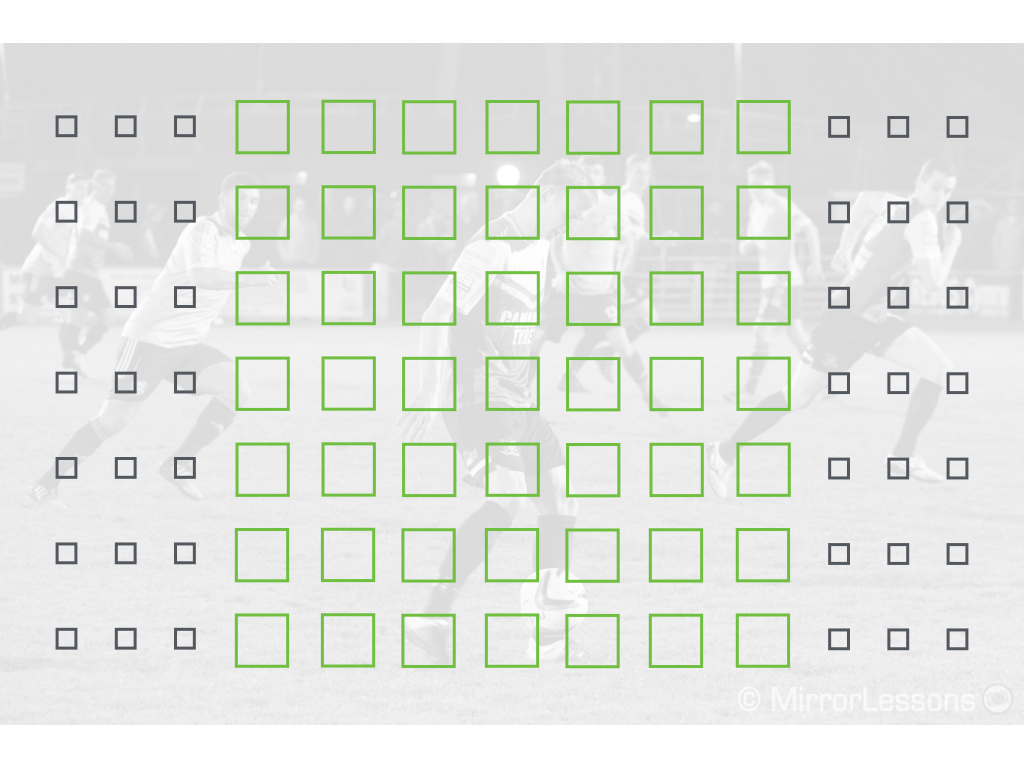
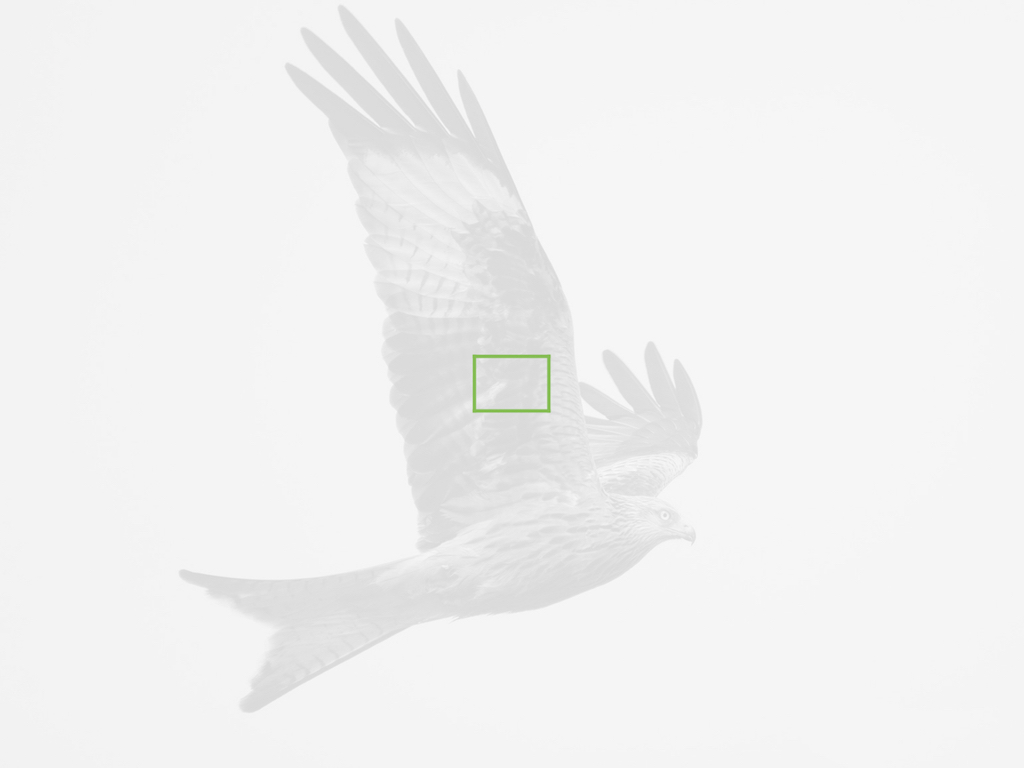
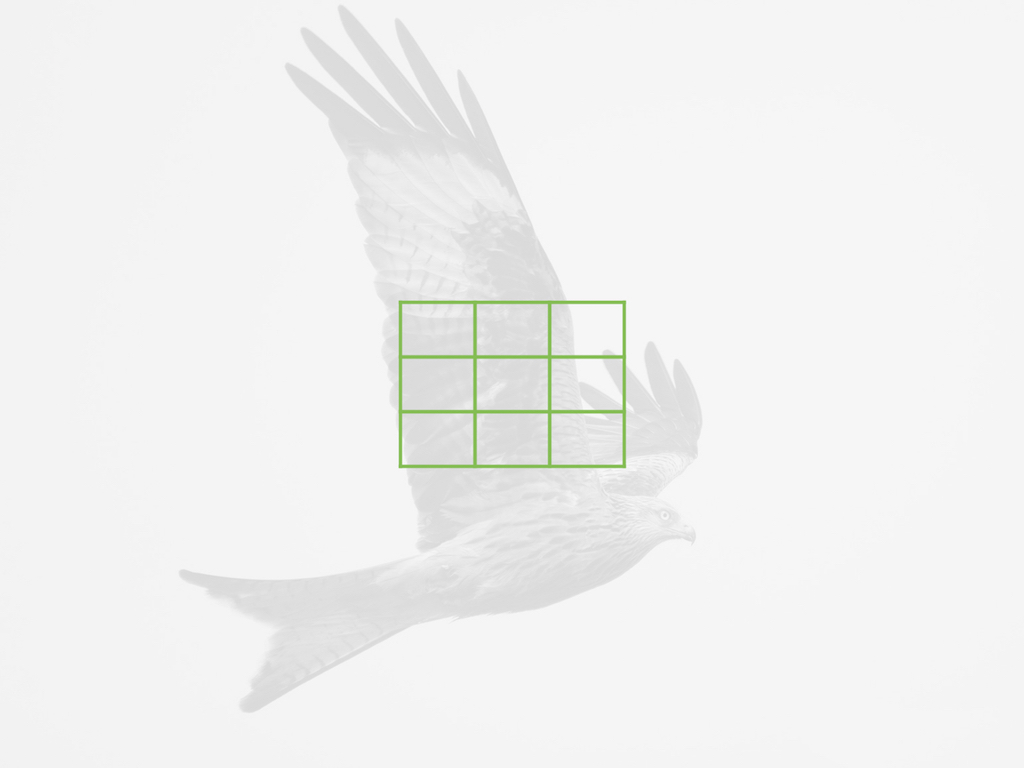
The AF settings of the Fuji are more helpful. First we have the autofocus areas: you can choose between single point (five sizes available), Zone AF with three groups (3×3, 5×5 and 7×7) or Wide/Tracking where the camera automatically picks the number of points necessary.


The E-M10 III has a single point, which is the most reliable, a 9-Group Target mode and an All Target mode. The final option only works with multiple points in S-AF (cluster), which means it becomes less effective in C-AF where only one point is selected. This is why I prefer to turn to the AF-C+Tracking mode which despite being unpredictable at times, becomes your best chance for fast moving subject.

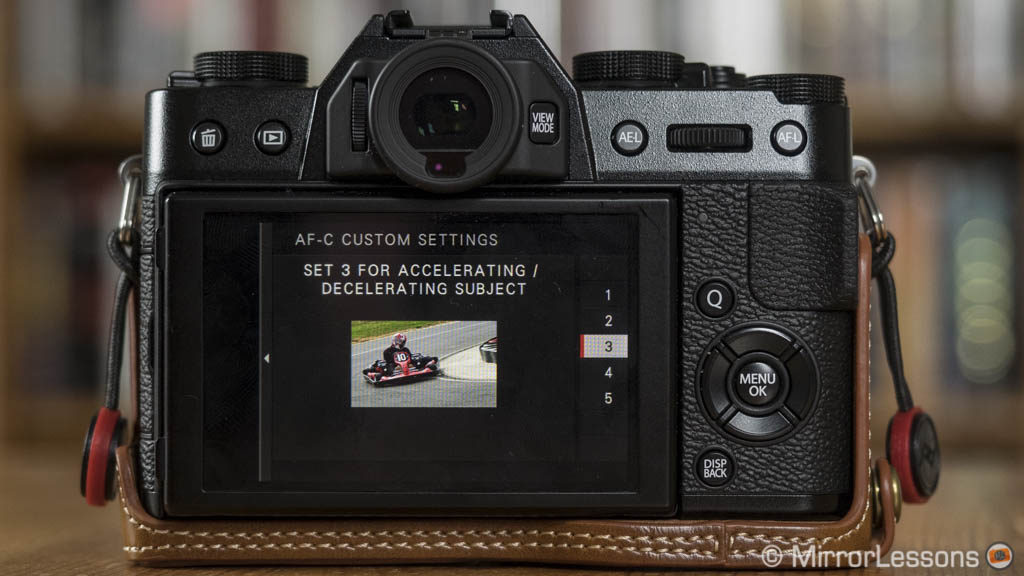
The X-T2 also benefits from the AF-C Custom Settings that allow you to choose between five different Sets depending on the type of subject you are photographing. They change the autofocus reactivity and take into account the speed of the subject and its position in the frame. They can make a relevant difference but be aware that the wrong setting can affect the performance considerably.
Other features include face and eye detection – which is good but not entirely reliable on either camera – and touch screen capabilities to move and focus as described in a previous chapter. As for the performance for video, here as well the phase detection points of the X-T20 make a difference. (More about this in the video section further down.)
Shutter, continuous shooting and buffer
Both cameras have a maximum speed of 1/4000s with the mechanical shutter but the E-M10 III has a slower minimum speed (60s vs 30s). If you switch to the electronic shutter, you can increase the speed to 1/16000s on the Olympus or 1/32000s on the X-T20.
One important thing to note about the electronic shutter, other than the fact that it lets you shoot in complete silence, is that it can’t be selected when working in manual mode on the E-M10 III, but only via the AP mode which I’ll discuss further down. The Olympus has a first electronic curtain mode (called Anti-Shock) which can be useful to reduce the chance of shutter shock in some situations.
As for the continuous shooting speeds, there are some important differences here as well. The E-M10 III can go as fast as 8.6fps (High mode) but the focus is locked on the first frame. If you want continuous AF, you need to reduce the speed to 4.8fps (Low mode).
The X-T20 can shoot up to 8fps (Hi) or 14fps if you select the electronic shutter, and these speeds are available with C-AF. There is a Low mode up to 5fps which, just like the Low mode of the E-M10 III, gives you live view with blackouts rather than the last image taken.
The Olympus can shoot RAW files at 8.6fps for about two seconds before slowing down to 7fps when a UHS-II SD card is being used. With a UHS-I card, the speed drops to 3fps in less than 2 seconds. With JPGs, it never slows down in either case.
The X-T20 is not compatible with UHS-II cards but has a better buffer. It can last up to 4s with RAW files and an 8fps burst. With JPGs it lasts for more than 20s before slowing down slightly.
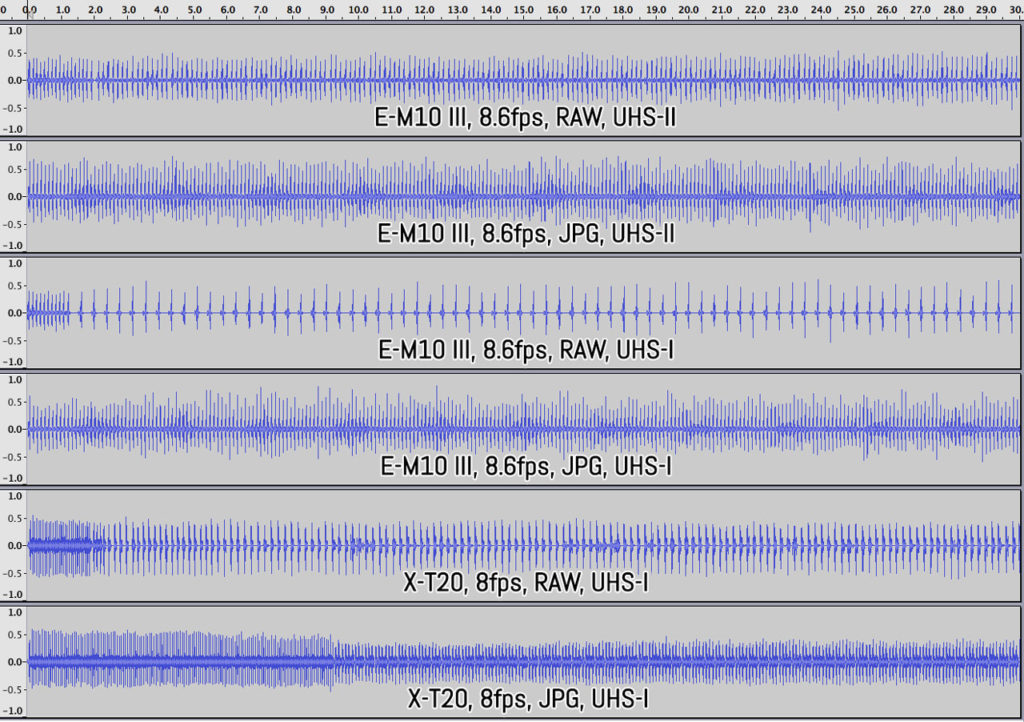
Image stabilisation
If the X-T20 demonstrated better capabilities for sports and action, the E-M10 III get its payback with image stabilisation. The camera features an internal mechanism that works on 5 axes, meaning that the sensor literally floats to compensate for camera movements. Despite not being the most advanced version Olympus has developed, it still works really well.
In my tests I managed a sharp shot down to 1 second hand-held but you will have a better keeper rate by staying at 1/2s and above. The performance decreases slightly at mid to long focal lengths.

Note that when you mount a lens with optical stabilisation, the E-M10 III can’t combine the two stabilisation systems as other cameras can; instead it will give priority to the sensor shift.
The X-T20 doesn’t have in-body stabilisation so it relies on the optical stabilisation of select lenses, which are mostly zoom lenses except for the recent XF 80mm Macro. The OIS of some lenses isn’t bad at all. For example the XF 18-135mm gave me decent results at short focal lengths but the performance is not as good at the telephoto end.

It is worth noting that the E-M10 III gives you stabilisation with any lens, be it a prime or a zoom, native or adapted, which means you can always count on it. The advantage becomes even more relevant for video as you will see below.
Video capabilities
Neither Olympus nor Fujifilm has prioritised video on these cameras but at least they have updated the performance to meet today’s standards. This means that they can record 4K video up to 30fps and 1080p/Full HD up to 60fps.
In 4K, the E-M10 III records with a variable frame rate of 102Mbps while the X-T20 uses a fixed frame rate of 100Mbps. During my testing period with the Olympus camera, I noticed that the bitrate would often stay around 50Mbps and sometimes even drop to around 30Mbps. Although I haven’t noticed any issues in my footage, such a low bitrate for such a high resolution could introduce some compression artefacts in certain situations (strong contrast, fast panning, etc).
The differences in colour rendering are similar to the ones we saw with the SOOC JPGs. Sharpness and details are good but since neither camera does full pixel readout, there can be some aliasing in the fine details. The X-T20 produces less noise at high ISOs while the E-M10 III shines for its internal stabilisation. As expected the Fuji has a much faster autofocus but the image processor of the Olympus minimises rolling shutter more.
The E-M10 III has a 120fps mode and the footage is conformed to 25p, so you get a slow motion result in-camera. Unfortunately the resolution drops to 720p and the quality decreases significantly.
You won’t find any profiles specifically designed for video nor a log gamma curve. On the E-M10 III you can apply some special effects such as vignetting or create a video out of short 8s clips.
One thing I like about the X-T20 is that I can use the shutter button to start recording whereas on the E-M10 III, you’re limited to using the REC button on the top plate.
Flash
Both cameras are equipped with a built-in flash. The one on the Olympus is slightly more powerful (8.2GN vs 7GN at ISO 200).
The E-M10 III has a maximum flash sync of 1/250s while the X-T20 goes up to 1/180s. Flash compensation is ±3Ev on the OM-D camera and ±2 Ev on the Fuji. Among the various settings you can find, there is TTL, slow sync and red eye reduction. They are compatible with HSS up to 1/4000s with select flash units.
Concerning off camera flash, the E-M10 III features the Olympus RC mode (firmware 1.1 required) which is compatible with Olympus and Panasonic flashes. The X-T20 can work in wireless mode with the EF-X500 and other compatible units.
Extra features and other settings
Despite having been stripped of many settings and options in comparison to its predecessor, the E-M10 III still has lots to offer when it comes to special features.
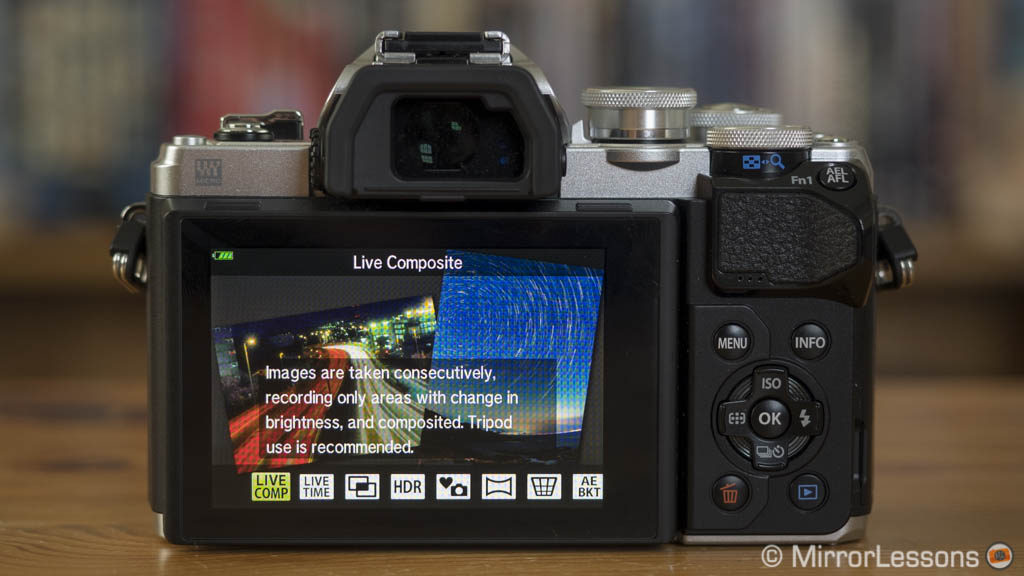
The AP mode – selectable from the top main dial – allows you to select many functionalities such as:
- Live Time: preview a long exposure live on the LCD screen
- Live Composite: it takes multiple shots and merges them by saving the brighter pixels, which is very useful for fireworks, light painting and star trails
- Multiple Exposure: two frames or three frames if you merge them in playback mode
- HDR: the camera takes multiple shots by varying the exposure and combines them in a JPG file with more dynamic range (two settings to choose from, with a more natural or more dramatic result)
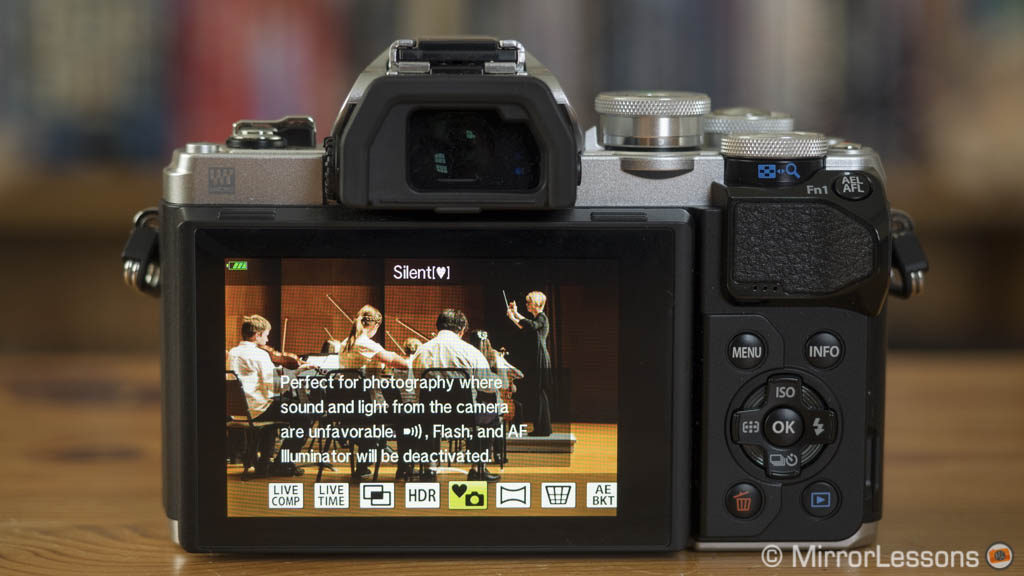
- Silent mode: it activates the electronic shutter to avoid the noise of the mechanical shutter
- Panorama: not really useful as the camera won’t stitch the photos in-camera (you need Olympus Viewer 3 or a third party software)
- Keystone compensation: corrects the perspective distortion of buildings (JPG output only)
- AE bracketing: choose between 3 or 5 frames and bracket various exposures that need to be merged in post production
- Focus Bracketing: a sequence of shots taken in rapid succession with slightly different focus points (you can choose between little or large changes). You can then stack the images in post production to increase the depth of field (useful for macro or landscapes).
Bear in mind that none of the features above offer complete manual exposure control. The only exceptions are Live Time and Live Composite which can still be accessed in M mode.
The Fujifilm X-T20’s list of special features isn’t as rich as that of the E-M10 III. You can find:
- Panorama: unlike the Olympus, it is done in camera (JPG only) but the result isn’t always perfect
- Multiple exposure: two images (JPG only)
- RAW conversion: develop your image in camera, or on your computer where the Fujifilm X RAW Studio app allows you to use the camera’s image processor (firmware 2.0 required)
- Bracketing: ISO, Film Simulation, White Balance, Dynamic Range and AE bracketing (3 shots and ±3 Ev)
- Backup/Restore: you can save and restore you camera settings with the help of the Fujifilm X Acquire software (firmware 2.0).
Other features you will find on both cameras include time-lapse, focus peaking, special image effects (called Art Filters on the E-M10 III, Advanced Filters on the X-T20), copyright information and WiFi capabilities. The final option allows you to remotely control the cameras with a smartphone and a dedicated app.
One last note is about metering: on the E-M10 III you can choose between the usual spot, centre weight and multi options and there are two extra settings called Highlight and Shadow that preserve one or the other. On the X-T20, there is a fourth option called Average, which aims to keep the exposure consistent when shooting in continuous mode.
Both cameras behave in a similar way when it comes to exposure metering except for the centre weight mode where the X-T20 tends to underexpose by 2/3 of a stop.
Battery life
In real world conditions, I found both cameras to be similar when it comes to battery life. One charge can get you through the day with moderate shooting or by turning the camera off when not in use. You can also turn off High Performance on the Fuji or activate the Sleep mode on the E-M10 III.
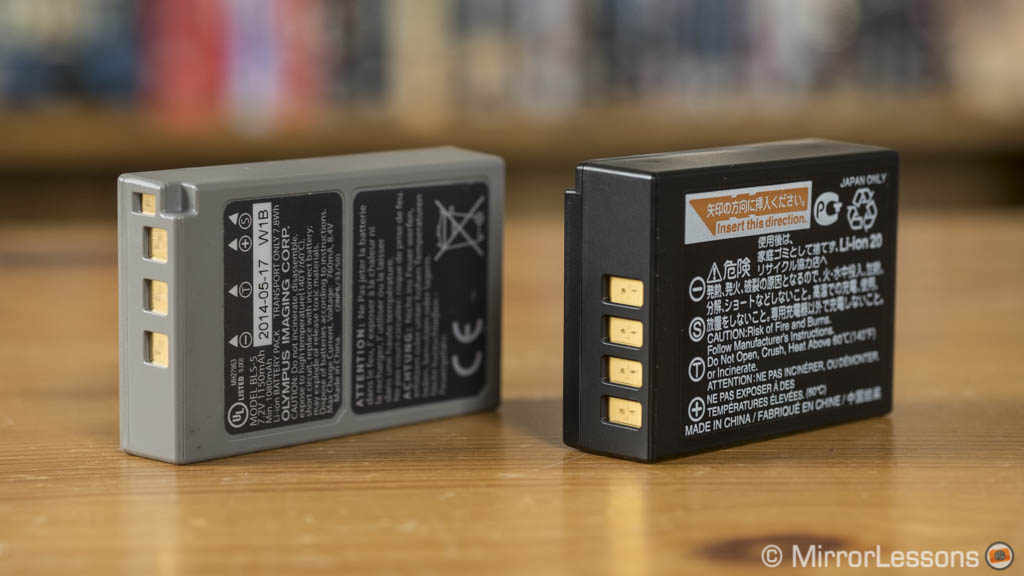
However as soon as you start to shoot in continuous mode or record 4K video, the battery life drains faster. For a full day of shooting, I would advise having at least one spare battery for each (two are better for 4K video).
One advantage of the X-T20 is that it can be charged via USB unlike the Olympus.
Price and lenses
The OM-D E-M10 mark III can be found for around $650 / £630 / €670 for the body only or at $800 / £700 / €830 with the 14-42mm EZ lens. Depending on your country, there may be other bundles available.
The X-T20 is more expensive. Body prices start from $850 / £800 / €850 and increase to $950 / £900 / €950 with the XC 16-50mm kit lens or $1150 / £1100 / €1200 with the XF 18-55mm f2.8-4. The latter is definitely the best kit lens option you can find.
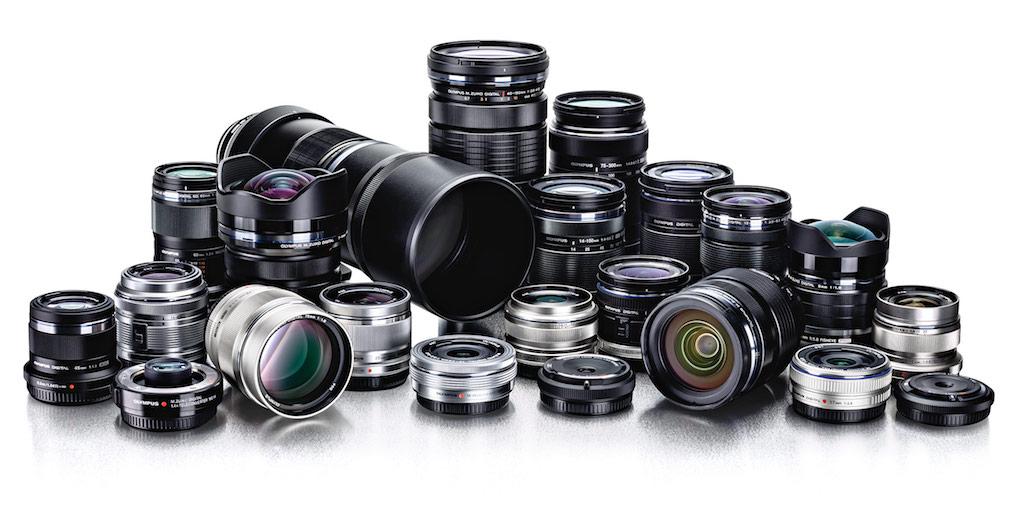
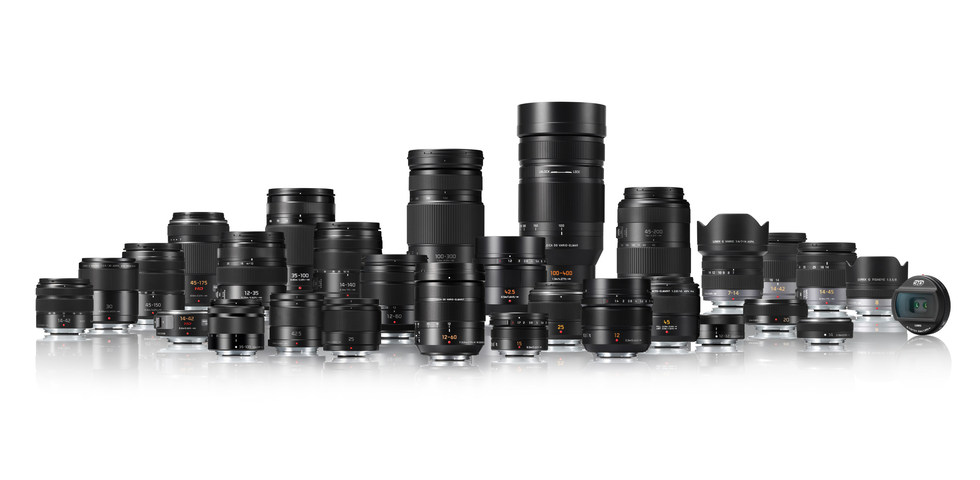
Because the two cameras are part of two different systems, it is important to mention the lenses available for each.
The E-M10 III has a larger selection partly because the micro four thirds system has been around for longer and partly because there are two main brands behind it (Olympus and Panasonic). There are more than 50 lenses to choose from plus many options from third-party manufactures. You can find small, fast prime lenses at an affordable price which means you can create a compact and high-quality set-up without spending too much.
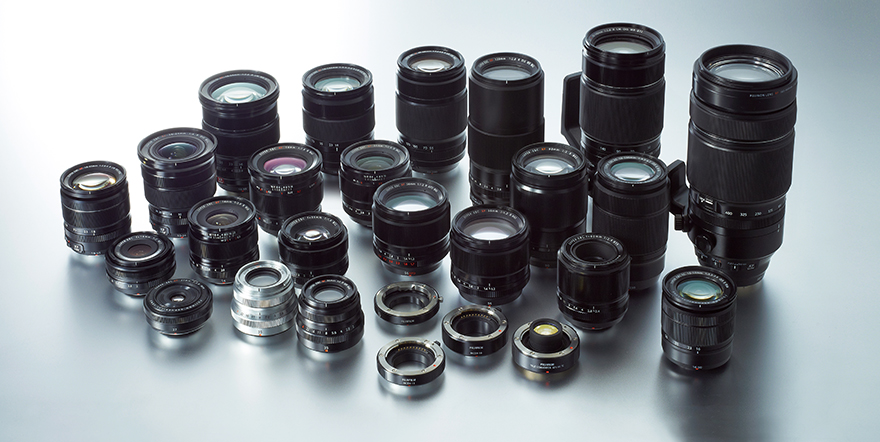
Fujifilm has no fewer than 23 lenses for the system and there are some options from third-party manufactures as well. You won’t find lenses as affordable as the ones in the micro four thirds catalogue though. One of the best offerings is the f/2 prime trio (23mm, 35mm and 50mm) which provide excellent optical quality at a reasonable price. There are fewer macro lenses, affordable zooms and ultra wide angle lenses but that may change in the future as the system continues to grow.
Another topic that I won’t cover in depth here is depth of field. Because the X-T20 has a larger sensor, it will give you a shallower depth of field in comparison to the E-M10 III when the same aperture and field of view are used (for example, a shot taken at 1.4 with the 25mm on the Olympus, and 35mm on the X-T20). However don’t confuse depth of field with bokeh as the latter is a characteristic of the lens’ internal design. In other words, you can get a great bokeh with a micro four thirds camera as long as you have the right lens, and many fast primes from Olympus and Panasonic have excellent sharpness wide open.
If you are keen to work with the shallowest depth of field possible, especially at short to medium focal lengths, the Fuji system certainly gives you something extra but otherwise, I would concentrate on the other characteristics the two cameras and systems have to offer.
Conclusion
As we’ve seen, there are many decisive factors that could sway you in the direction of one camera or the other. Price is certainly the first thing that comes to mind. The E-M10 III is less expensive and aims squarely at beginners thanks to its intuitive interface, automatic shooting modes and plethora of easy-to-use features. It has a lovely design, is very comfortable to use and is part of a system that offers lots of choice when it comes to lenses and accessories.
The Fujifilm X-T20 may not fit into the beginner’s class by official marketing standards, but it isn’t difficult to use at all. Yes, it is more expensive but you will be rewarded with a faster autofocus if you’re interested in action shots. More advanced users will appreciate the higher level of customisation, as well as manual control over certain features such as the silent/electronic shutter. The 24MP APS-C sensor gives you something more in terms of image quality but the Olympus remains very capable in various situations and has the advantage of a great image stabilisation system.
Whichever you choose, you’ll end up with an excellent camera with which to begin your photography journey. And if after this long comparison, you still can’t make up your mind, go to a camera store, try them yourself and pick the one that feels better in your hand. That’s often what matters most.
Choose the OM-D E-M10 mark III if you:
- want a beginner-friendly interface with lots of extra features
- want better image stabilisation for stills and video
- want a wider selection of lenses
- want to spend less
Choose the Fujifilm X-T20 if you:
- prefer a camera with simple controls and more customisation
- want better autofocus for action and video
- want a little bit extra in terms of image quality (resolution, dynamic range and high ISOs)
To consider:
- if you are leaning towards the OM-D camera and don’t care about 4K video, you should consider the E-M10 mark II as well. It has the same sensor but more customisation options and extra settings (check our full comparison here).
Check price of the Olympus OM-D E-M10 III on
Amazon | Amazon UK | B&H Photo
Check price of the Fujifilm X-T20 on
Amazon | Amazon UK | eBay | B&H Photo
Used Olympus cameras on
Used Fujifilm cameras on
Sample images
E-M10 III


X-T20


