Finally! That’s the word that best describes this review. I’ve been trying to get my hands on the Nikon Z9 for a while now, but there was always something in the way, whether it was a private matter or camera / lens availability.
December was the lucky month: I found a sample to rent, and ended up with more lenses than expected, so everything worked out for the best.
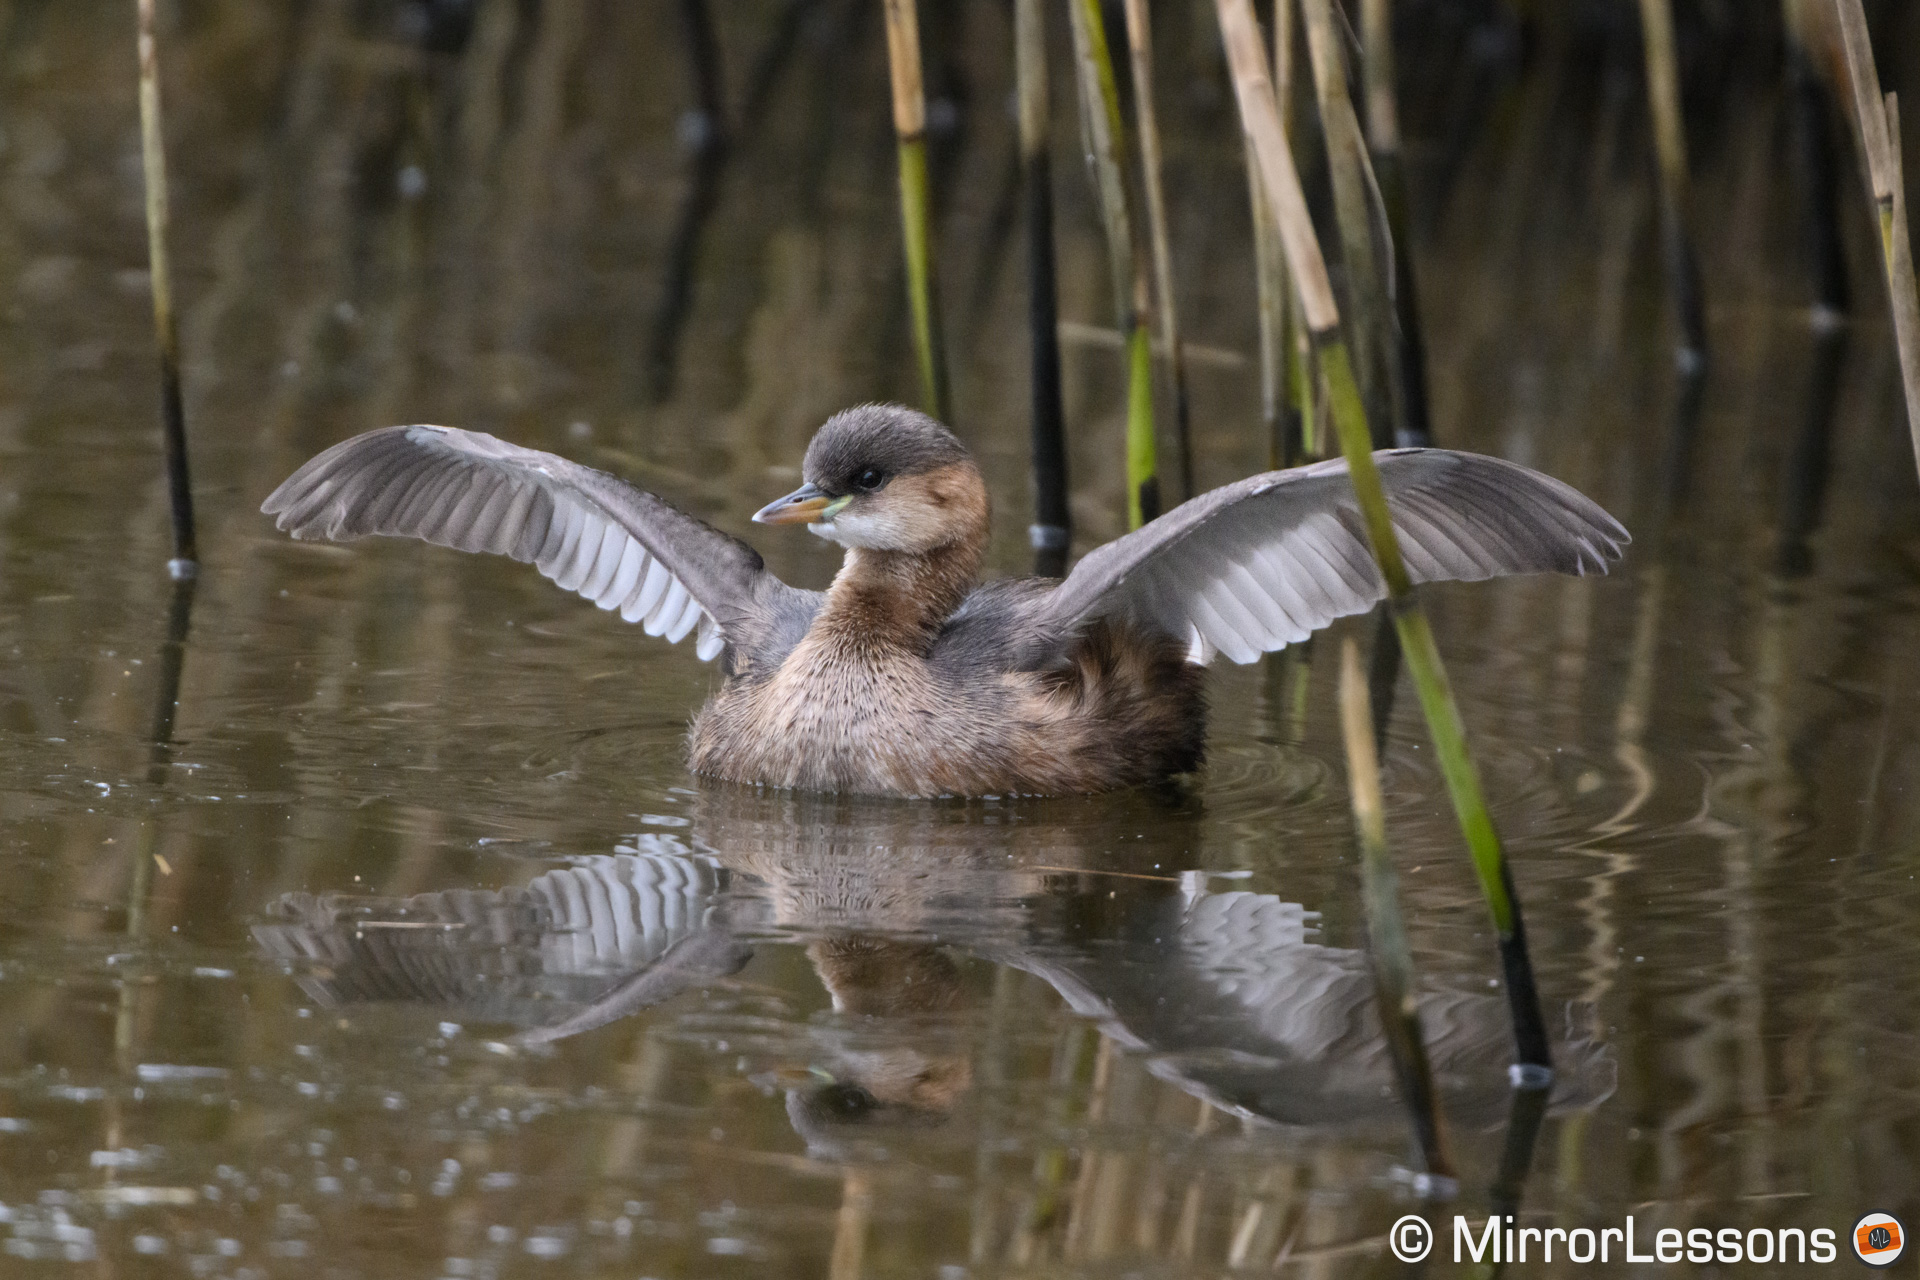
I didn’t have enough time to write a complete review – there is so much to talk about that I would need a month if not more – so, as usual, I’ve concentrated my efforts on the genre many of you like: bird photography!
Ethics statement: we rented the Z9, 100-400mm, 500mm and teleconverters for a week. The 800mm was kindly provided by Nikon UK. We were not asked to write anything about this product, nor were we provided any compensation of any kind. Within the article, there are affiliate links. If you buy something after clicking one of these links, we will receive a small commission. To know more about our ethics, you can visit our full disclosure page. Thank you!
TABLE OF CONTENTS
1. Main Specs
2. Design and Ease of Use
3. Battery, Cards and Connections
4. Viewfinder and Rear Monitor
5. Image Quality
6. Shutter and Drive Speed
7. Subject Detection
8. Birds in Flight
9. Stabilisation and Video
10. Lenses I Used for This Review
12. YouTube Video
12. Conclusion
Main Specs
- Sensor: 45.7MP Stacked FX CMOS
- Lens system: Z-mount
- Weather resistant: Yes
- Internal Stabilisation: Yes (5-axis)
- Autofocus: hybrid with 493 points
- Continuous shooting: 20fps, up to 120fps with JPG
- ISO Sensitivity: 64 – 25,600 ISO (32 to 102,400 extended)
- Shutter Speeds: 1/32,000s to 30s, Bulb
- Viewfinder: 0.5-in OLED with 3.69M dots, 23mm eye point, 0.8x magnification, 120fps
- Rear monitor: 4-axes 3.2″ LCD (2.1M dots) with touch sensitivity
- Movie recording: 8K up to 30p, 4K up to 120p, 12-Bit RAW (internal), Prores RAW, Prores 422, HLG and N-Log
- Built-in Flash: No
- Extra Features: WiFi, Bluetooth, Focus Bracketing, Pre-Release Capture, Tethering, Time-lapse, Dual CFexpress B card slots
- Dimensions: 149 x 149.5 x 90.5mm
- Weight: 1340g (including battery and memory card)
- Firmware version when tested: 3.00
- Release: 2021
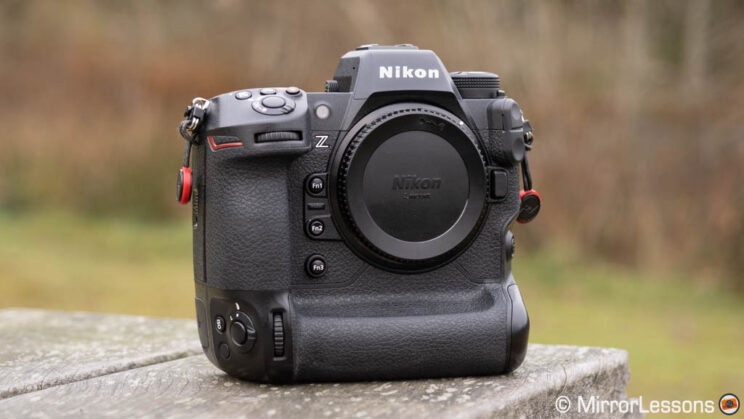
Design and Ease of Use
This chapter won’t be too long because there aren’t a lot of things to say about the design, and I mean this in a positive way.

Nikon has years of experience producing flagship cameras for the most demanding photographers, and the Z9 doesn’t fall short. It’s very comfortable to hold and very satisfying to use, so much so that I quickly forgot the weight (1.3kg) and simply enjoyed working with it.
The camera is smaller and lighter than its DSLR counterpart, the Nikon D6, but a bit taller and deeper than the Canon R3.
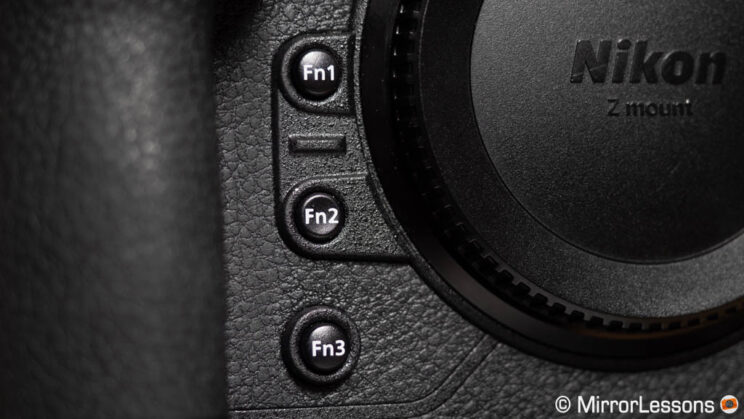
The buttons are easy to reach and give you fast and precise feedback. Most of them are retro-illuminated, so that you can locate them easily when working in low light conditions.
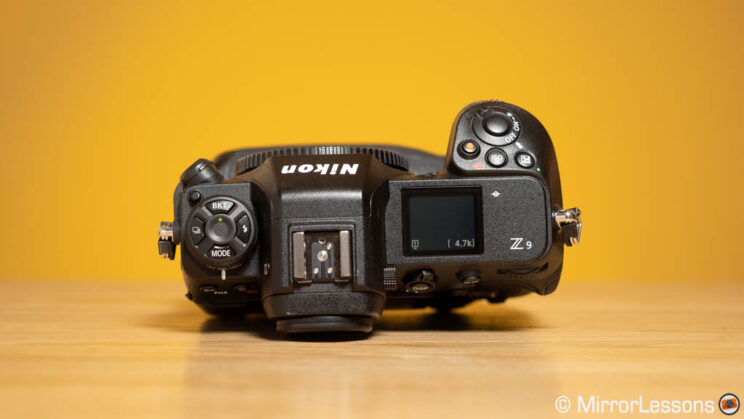
On top, we find a large monochrome LCD screen that displays all the main settings, as well as the battery status, the number of images left and the card on which they are recorded. Toggle the on/off button to the right to increase the brightness (which also backlights the buttons).
The amount of customisation is very good. There are 13 custom buttons, including three at the front, near the grip. Additional buttons are found on select Nikkor lenses, and Z-mount lenses also have a function ring, so there are plenty of possibilities to find your favourite set-up. To be honest though, I didn’t find the need to change too many things, the default configuration is already an excellent starting point.
One complaint, and it’s the same I’ve written for other products, is that some buttons have more settings to choose from than others. It’s a small quirk, but I struggle to understand why the same list of options cannot be given to all the buttons present on the camera. I was also surprised to find a few parameters are missing entirely, like the Vibration Reduction setting. If there is no switch on the lens, you need to use the iMenu, the My Menu or the main menu to change that.
Quick tip: if there is one setting you need to change often, and you can’t assign it to a function button, a workaround is to save it to the My Menu section, and place it at the top of the list. Then, assign “Access top item in MY MENU” to a function button. This way, every time you press it, you will be taken to the first item in the My Menu section.
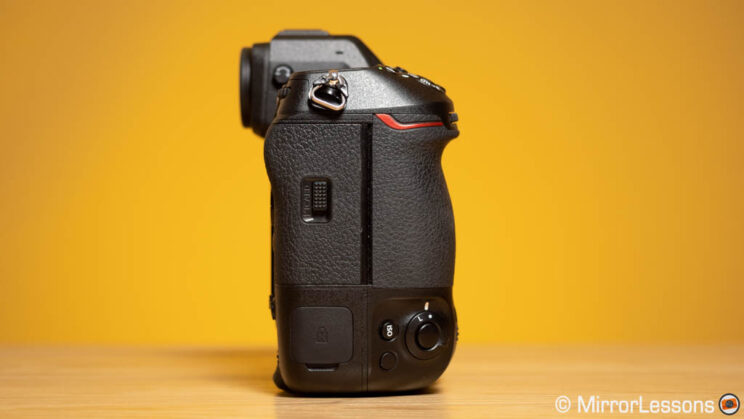
The Z9 has a built-in vertical grip and, when used in portrait mode, you’ll find a few key buttons have been duplicated, including AF-ON and the AF joystick. All the buttons/dials designed for the vertical orientation can be locked, so that you won’t press them accidentally when working in landscape mode.
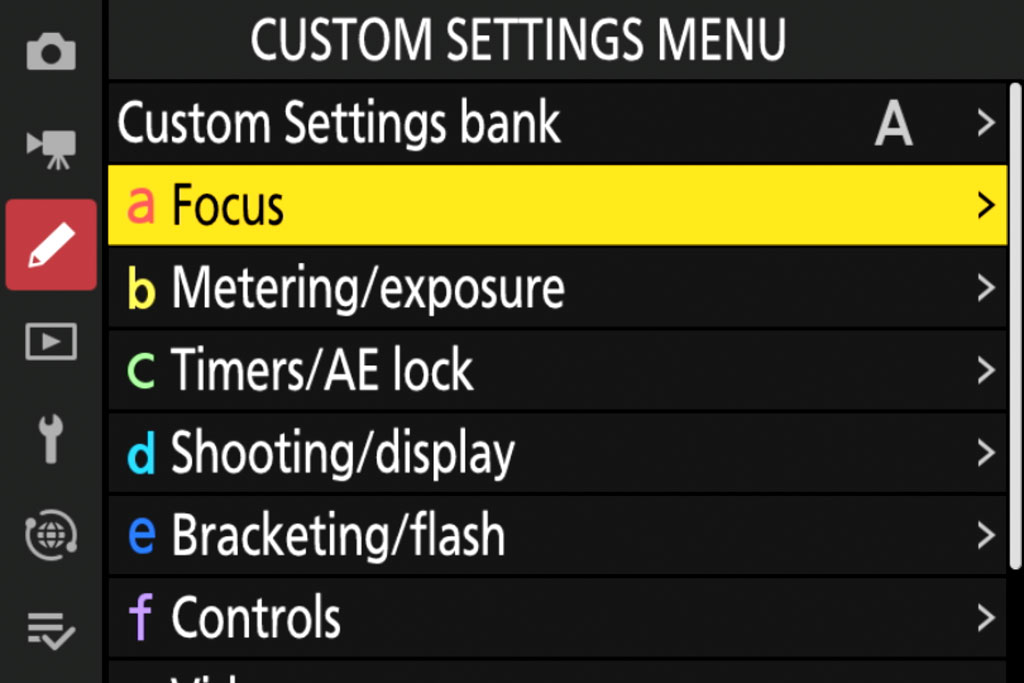
The main menu system is typically Nikon and the same you find on many other cameras. There is the MY MENU section I’ve already mentioned above, where you can shortcut most of the items found in the main menu. The iMenu, that offers a quick selection of 12 settings, can also be edited.
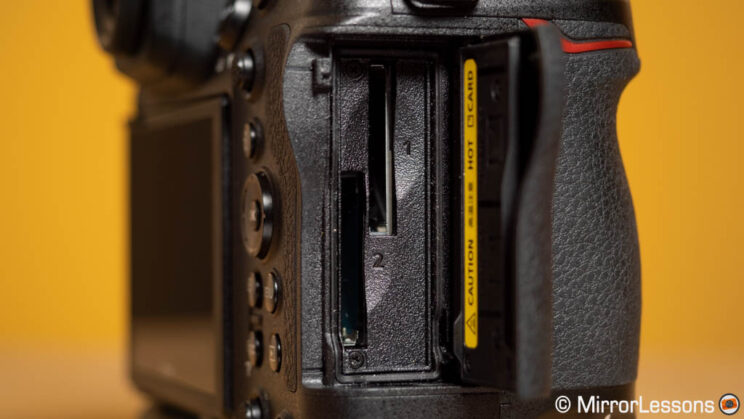
Battery, Cards and Connections
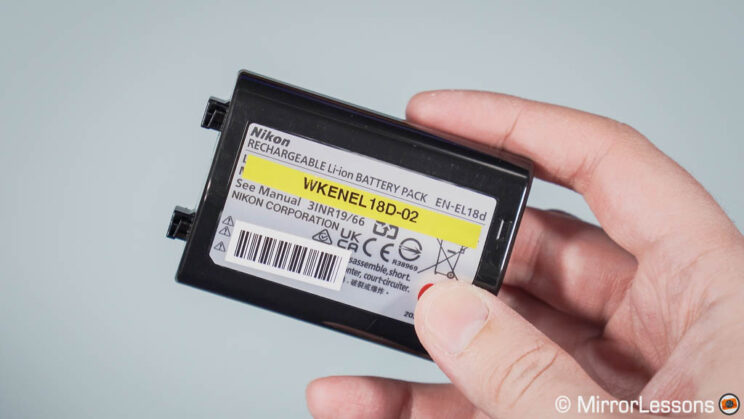
Battery life didn’t disappoint. One day, I captured 3,400+ images of birds in flight, and recorded several 8K and 4K 120p clips with stabilisation and C-AF. 59% of the battery was left at the end of the day, plenty to double all that.
The camera can be powered or charged with a PowerBank connected to the USB port. Keep in mind that not every device will work, I suggest getting a high current model for peace of mind.
The Z9 uses two CFexpress Type B cards. They are larger, thicker and offer superior writing / reading speed than the popular (and less expensive) SD cards. You have the usual options (back-up, separate RAW and JPG files) but you can’t record video simultaneously on the two cards.
The camera includes the following physical connectors:
- 3.5mm microphone input
- 3.5mm headphone output
- full size HDMI output
- USB Type C (I couldn’t find confirmation about the speed, DPreview states 5Gbps)
- Ethernet port
- Flash sync terminal
- Ten-pin remote terminal
- Security lock for an anti-theft cable
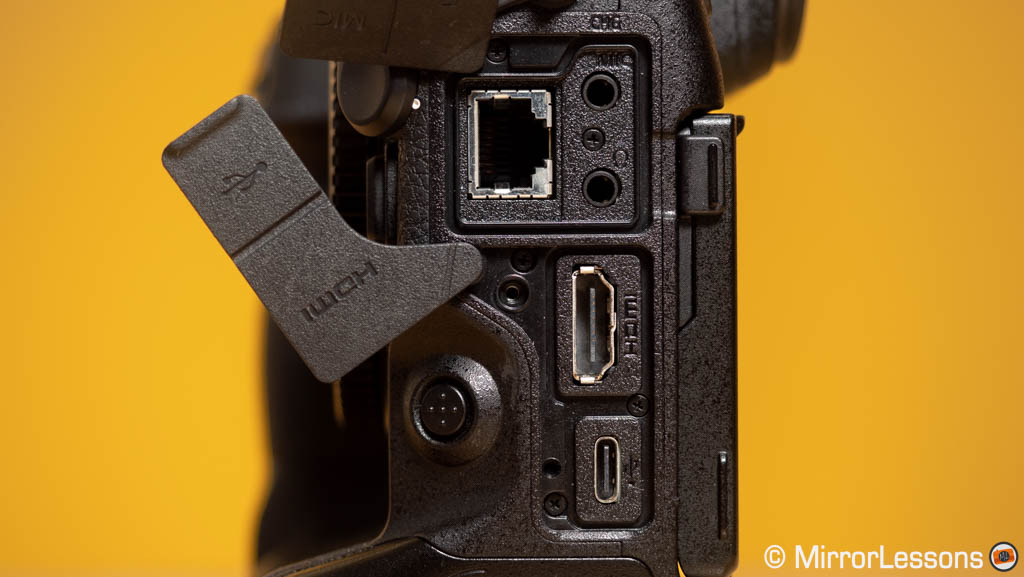

Finally, you will find Bluetooth and Wifi capabilities, as well as a built-in GPS to record location data.
Viewfinder and Rear Monitor
The electronic viewfinder doesn’t have a list of impressive specs for a camera of this level:
- 0.5-in OLED with 3.69M dots
- 0.8x magnification
- optional 120HZ (firmware 2.0 required)
- 23mm eyepoint
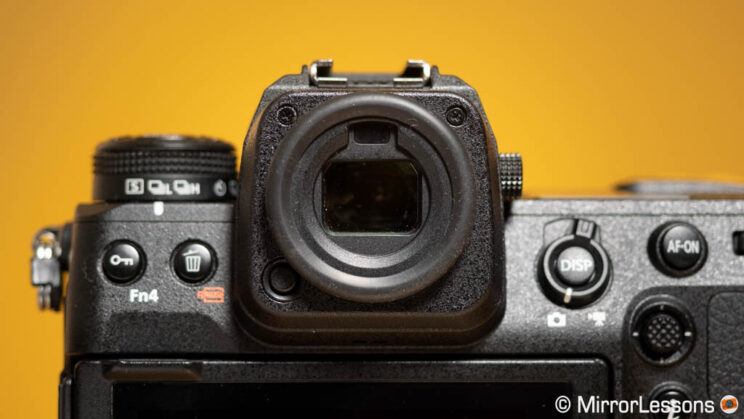
However, the Z9 is a good example of how specs on paper don’t always tell the full story. I found the EVF to be really good, with excellent brightness (Nikon claims a record 3000-nit), excellent clarity and colours. It may not have the highest resolution or the largest magnification, but it is very well balanced overall.
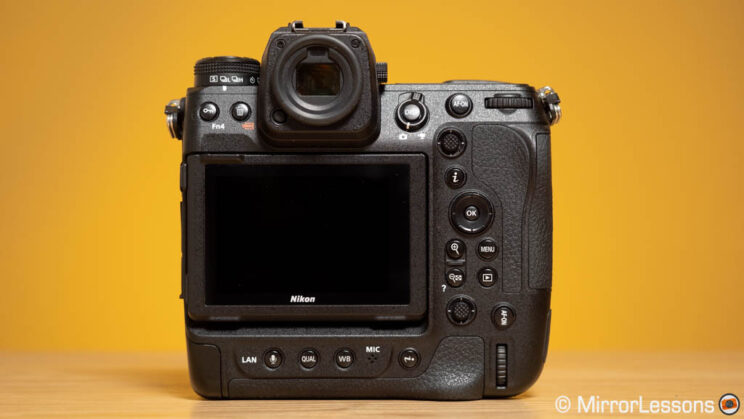
The rear monitor has a distinctive 4-axis mechanism. You can tilt it up 90˚, down 45˚, but you can also orient it to the left or right. This solution gives you the possibility of a 90º position when working in portrait mode.
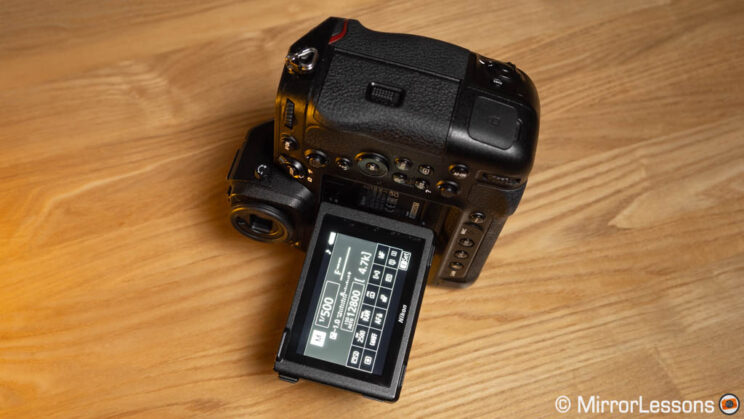
The LCD is large (3.2-inches) and has a good resolution of 2.1M dots. There is touch sensitivity which allows you to do various things, including navigating the entire menu.
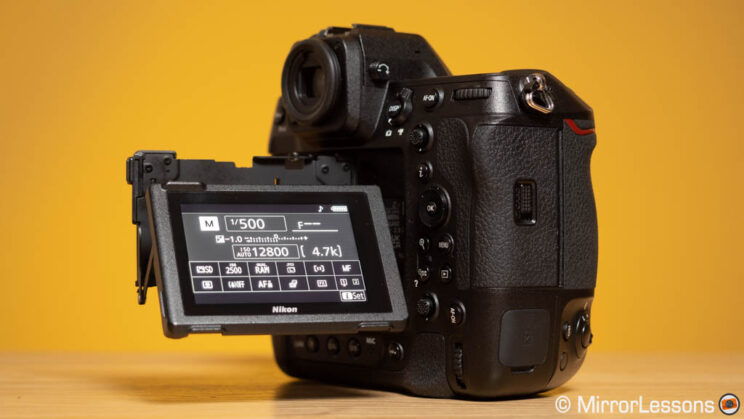
Image Quality
This time I’m not presenting the usual tests to evaluate dynamic range and noise levels. I didn’t have other cameras to compare the Z9 with, so I decided to spend all my time outside, and evaluate the quality with my wildlife images only. This means the results you’ll see are a combination of the sensor and image processor of course, but also the lenses and the image stabilisation, because most of my photos were taken hand-held.
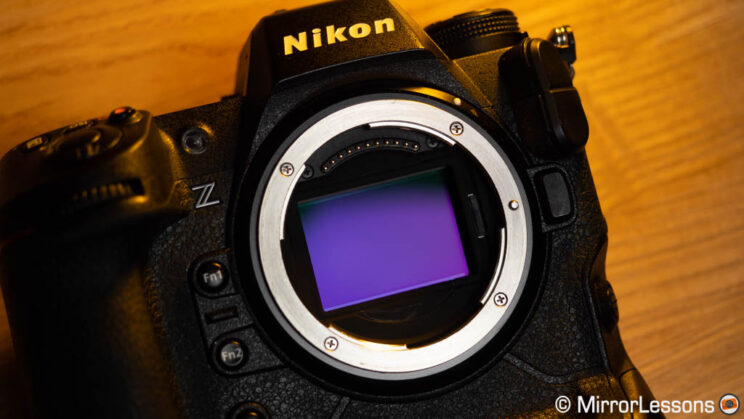
At the heart of the camera, we find a stacked CMOS sensor with 45.7MP. It’s plenty of resolution to resolve the fine details of animals, as well as crop in post when you can’t get close enough to your subject.
The photos that follow were processed in Lightroom Classic with a small amount of sharpening applied.
NIKKOR Z 100-400mm f/4.5-5.6 VR S at 400 mm
Uncropped version
NIKKOR Z 100-400mm f/4.5-5.6 VR S at 400 mm
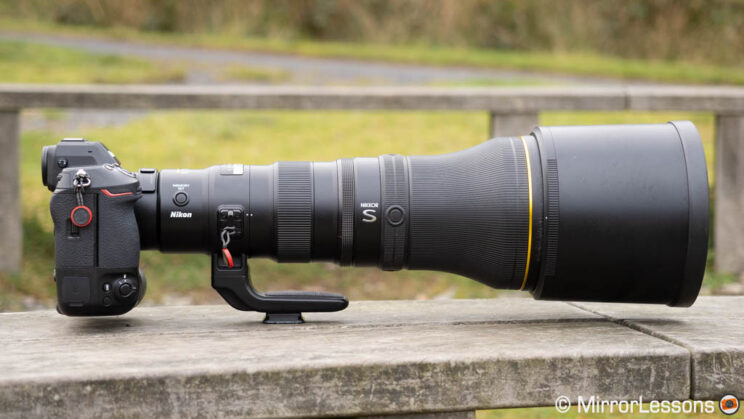
NIKKOR Z 800mm f/6.3 VR S

After editing hundreds of images, I’m happy to say that overall, the RAW files of the Nikon Z9 are very nice to work with. They’re flexible, you can push the parameters with ease, and I like the colour rendition I got from the camera and the lenses I used. In most of my images, I applied the Camera Standard profile in Lightroom, which emulates the one found in the Nikon body. It gives you a good balance of contrast and saturation, and I find it to be a good starting point.
Flexible RAW files with good colour rendition is what you expect for a modern mirrorless product of this kind. But what happens with more extreme adjustments?
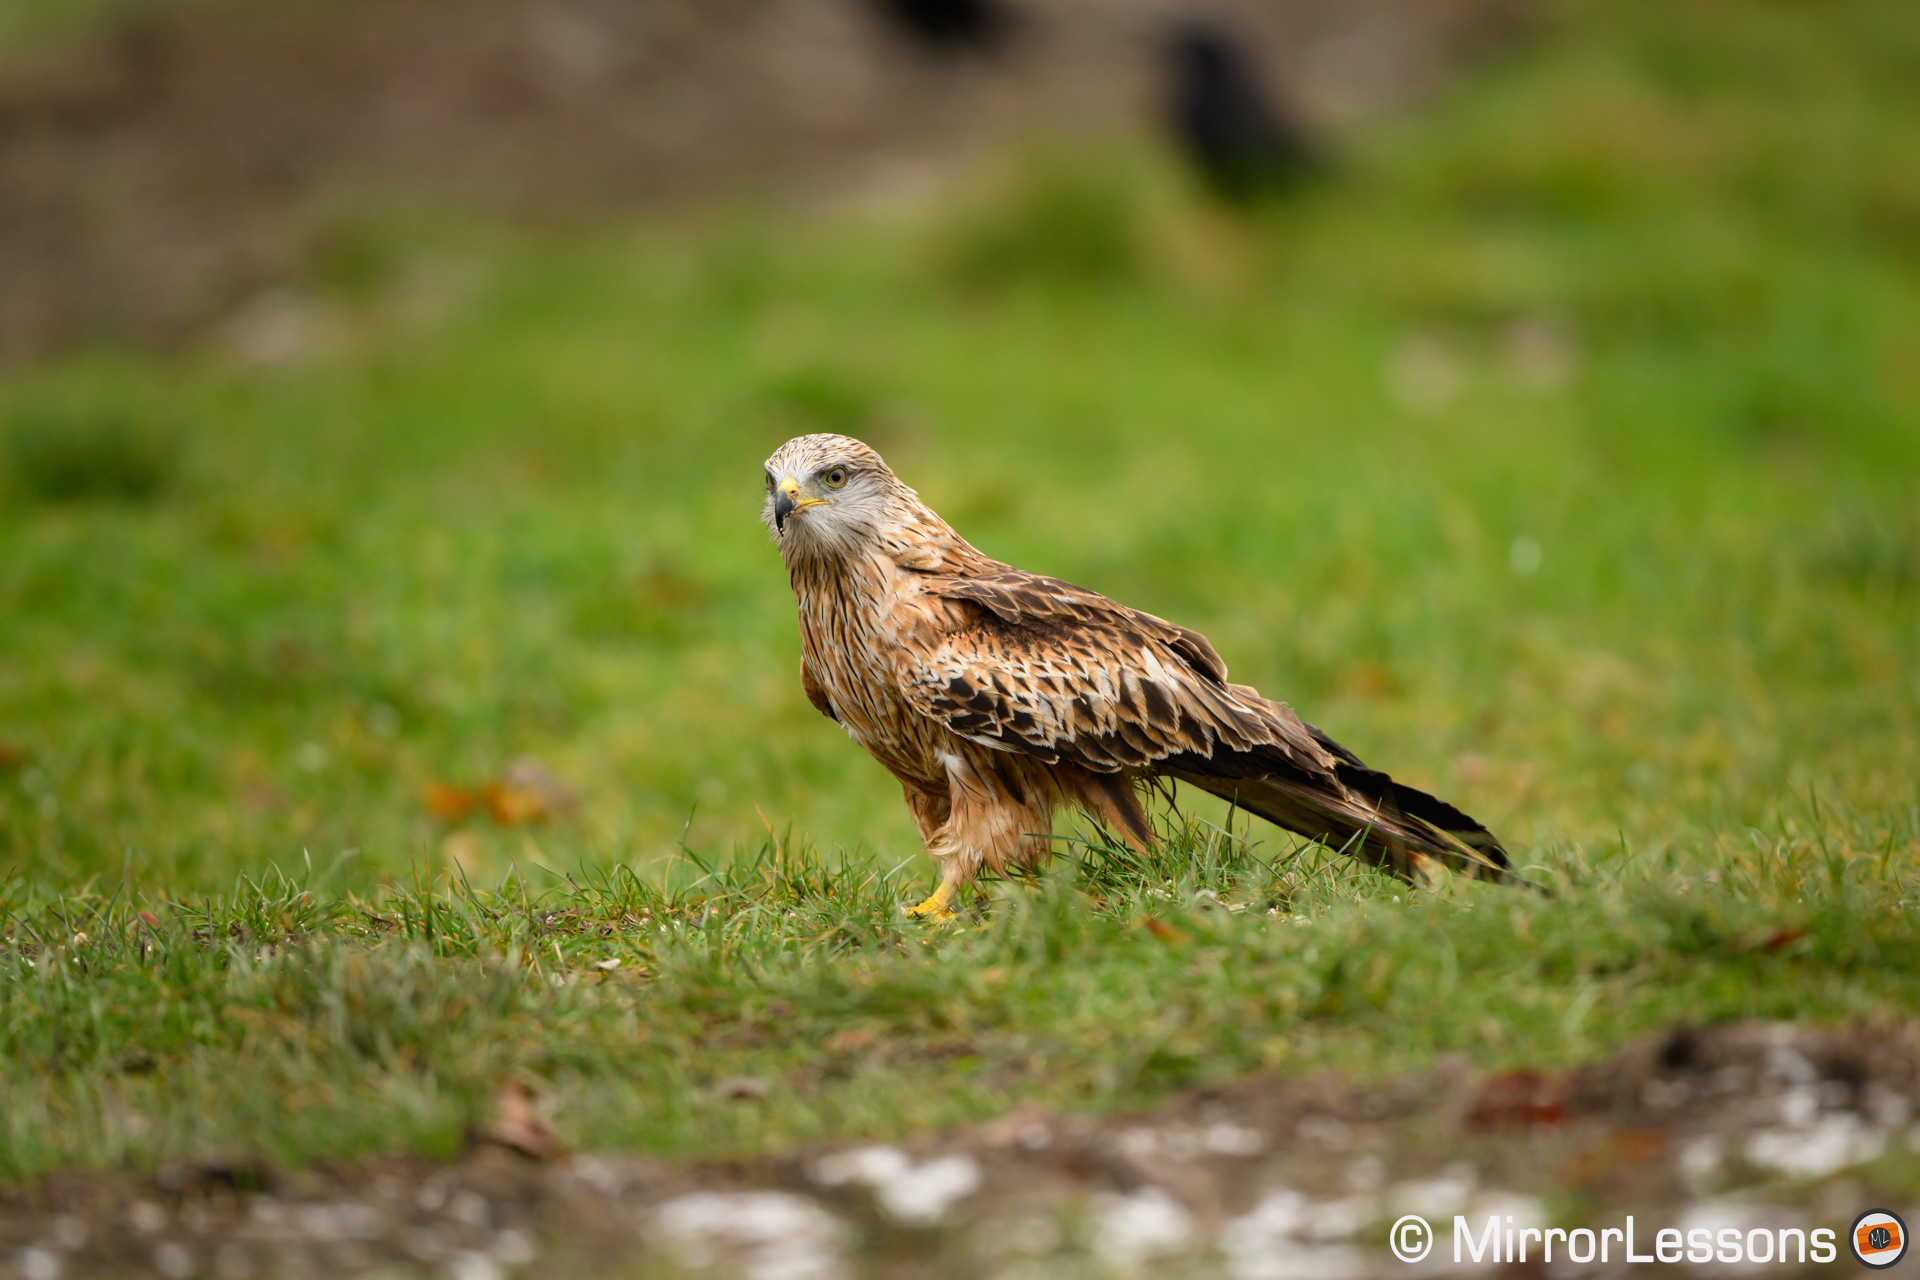
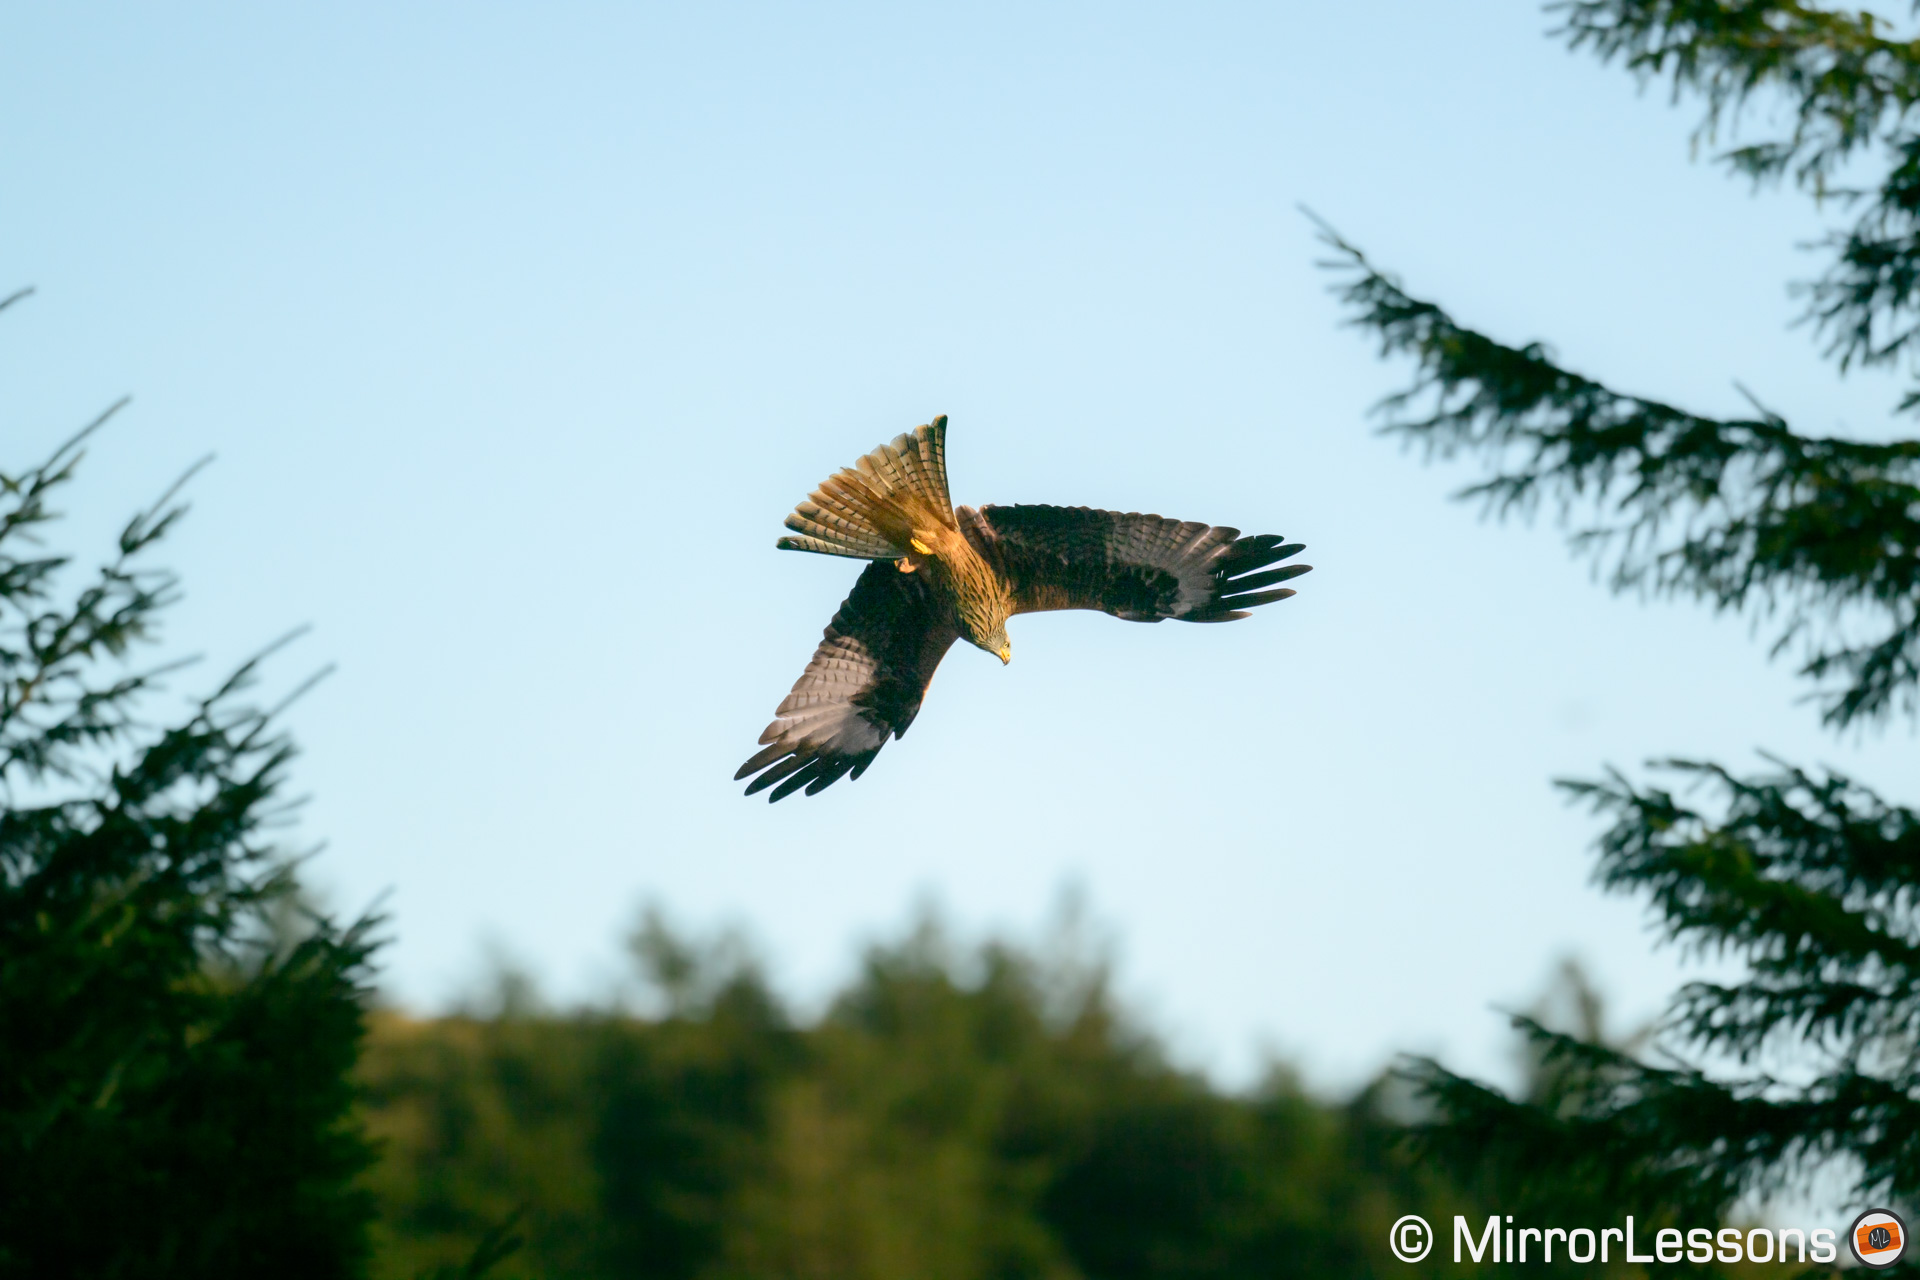
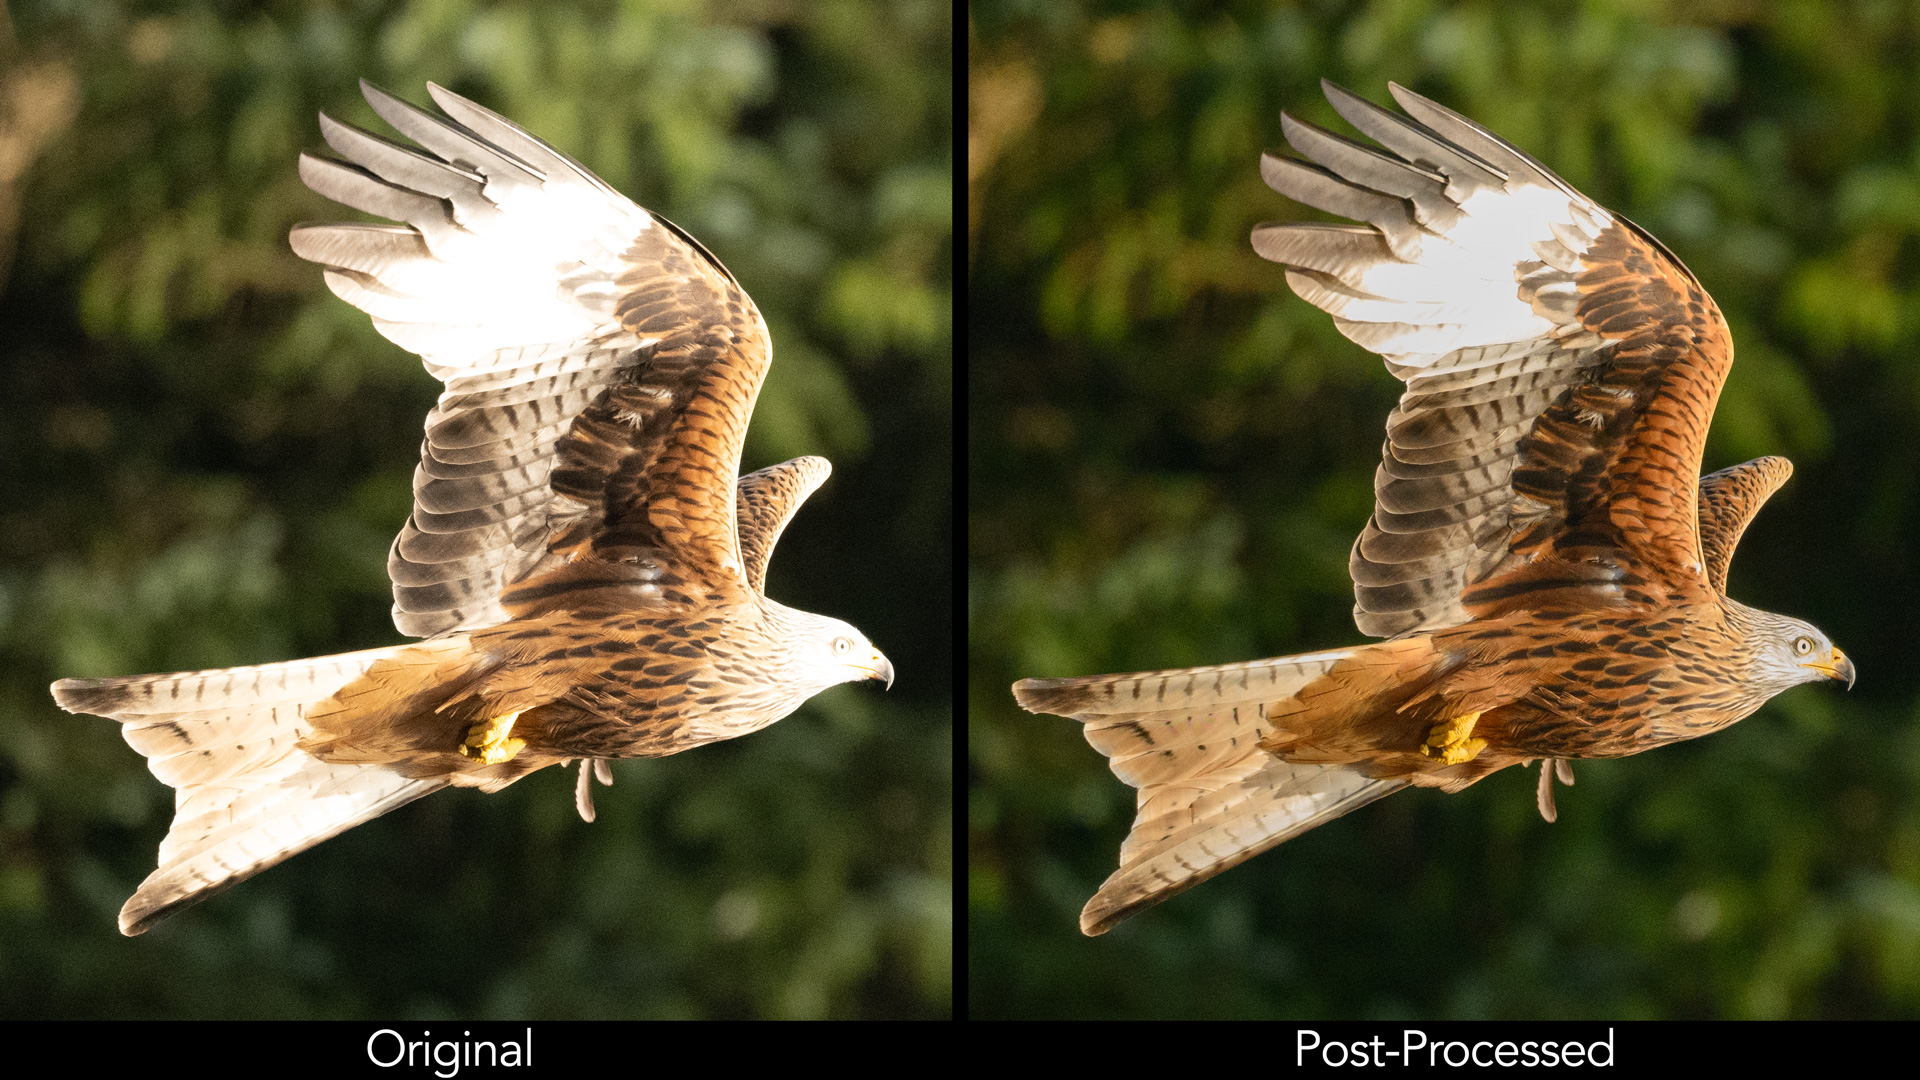
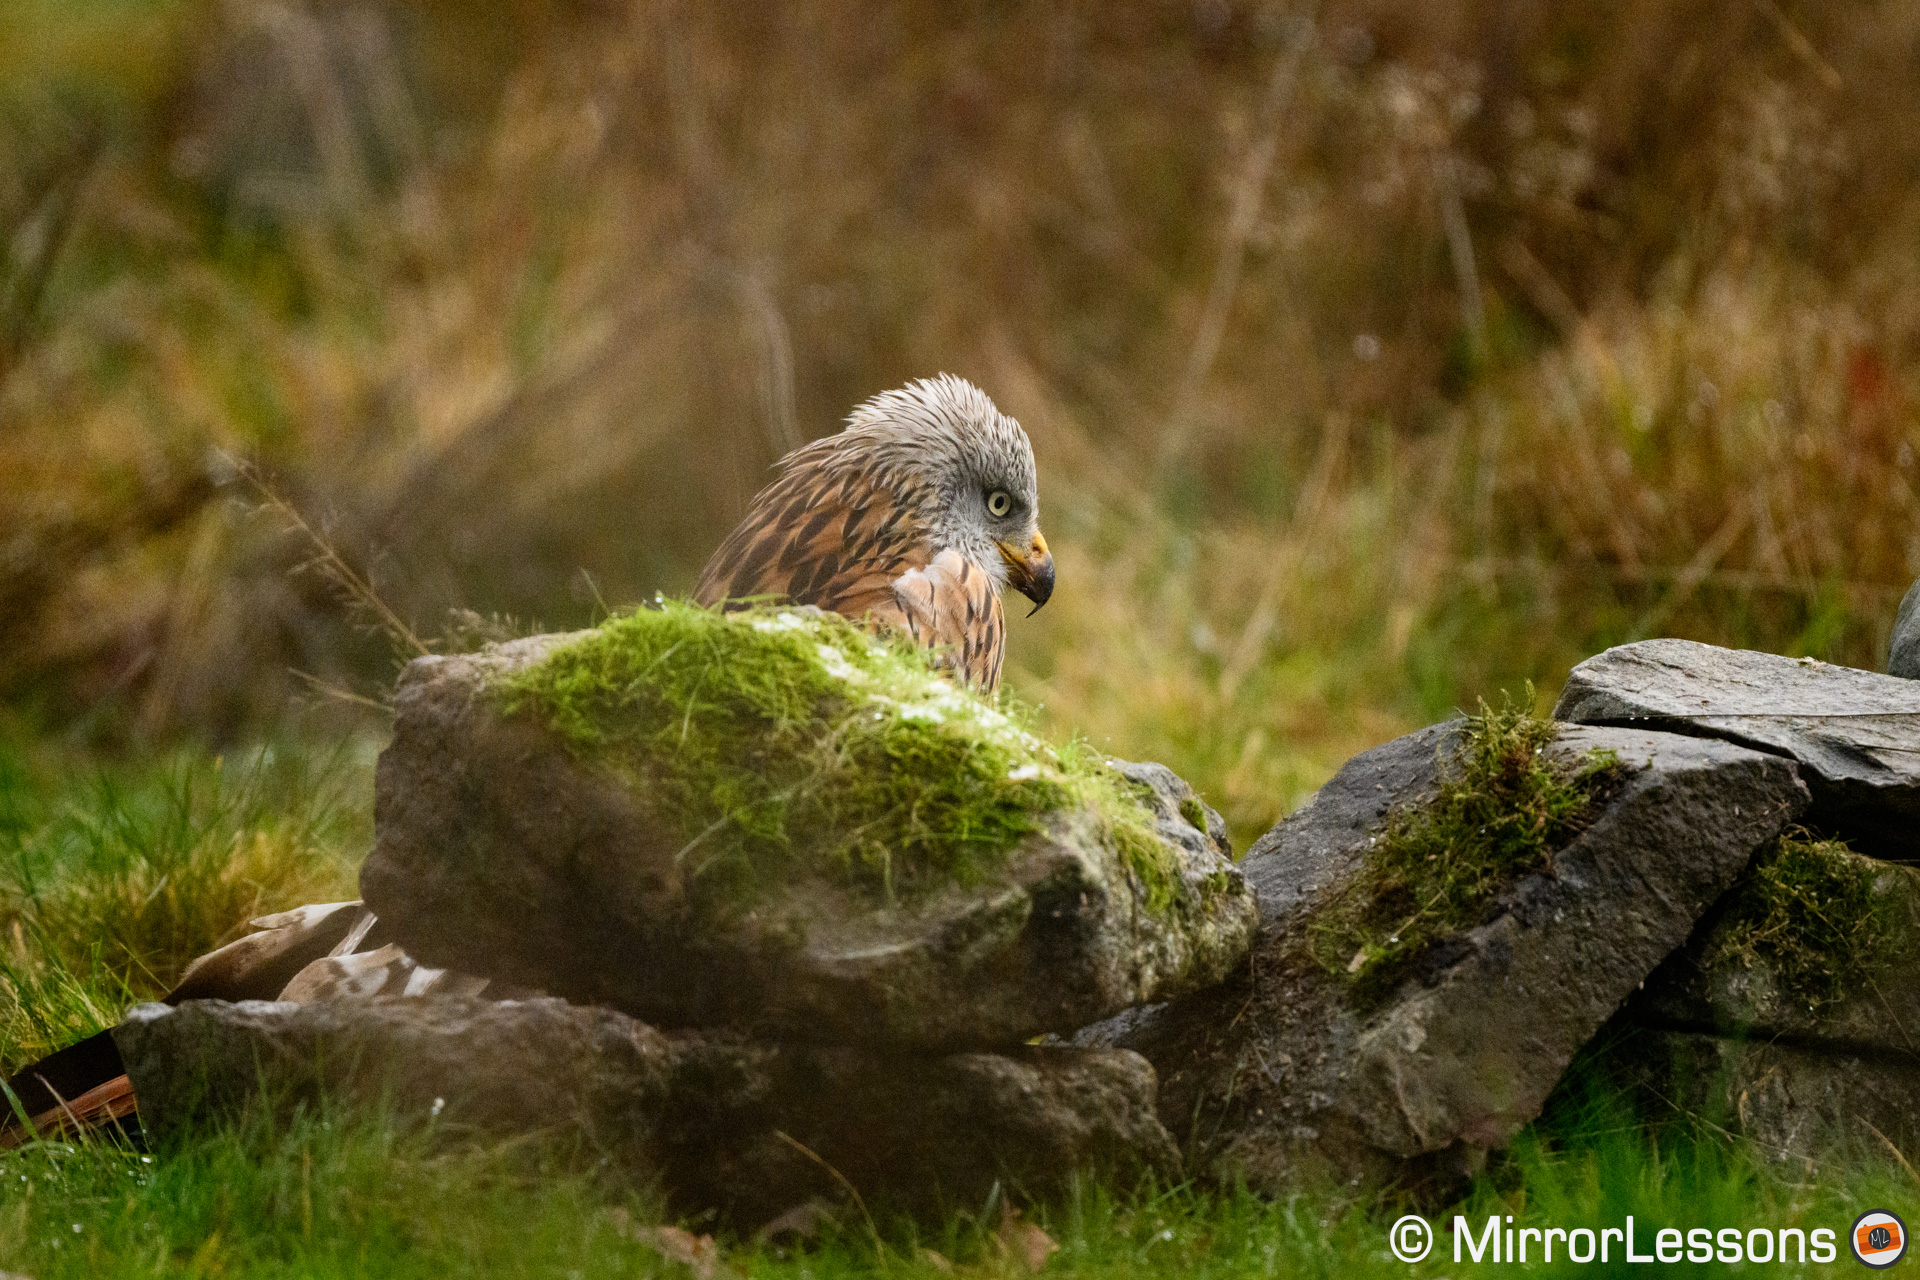
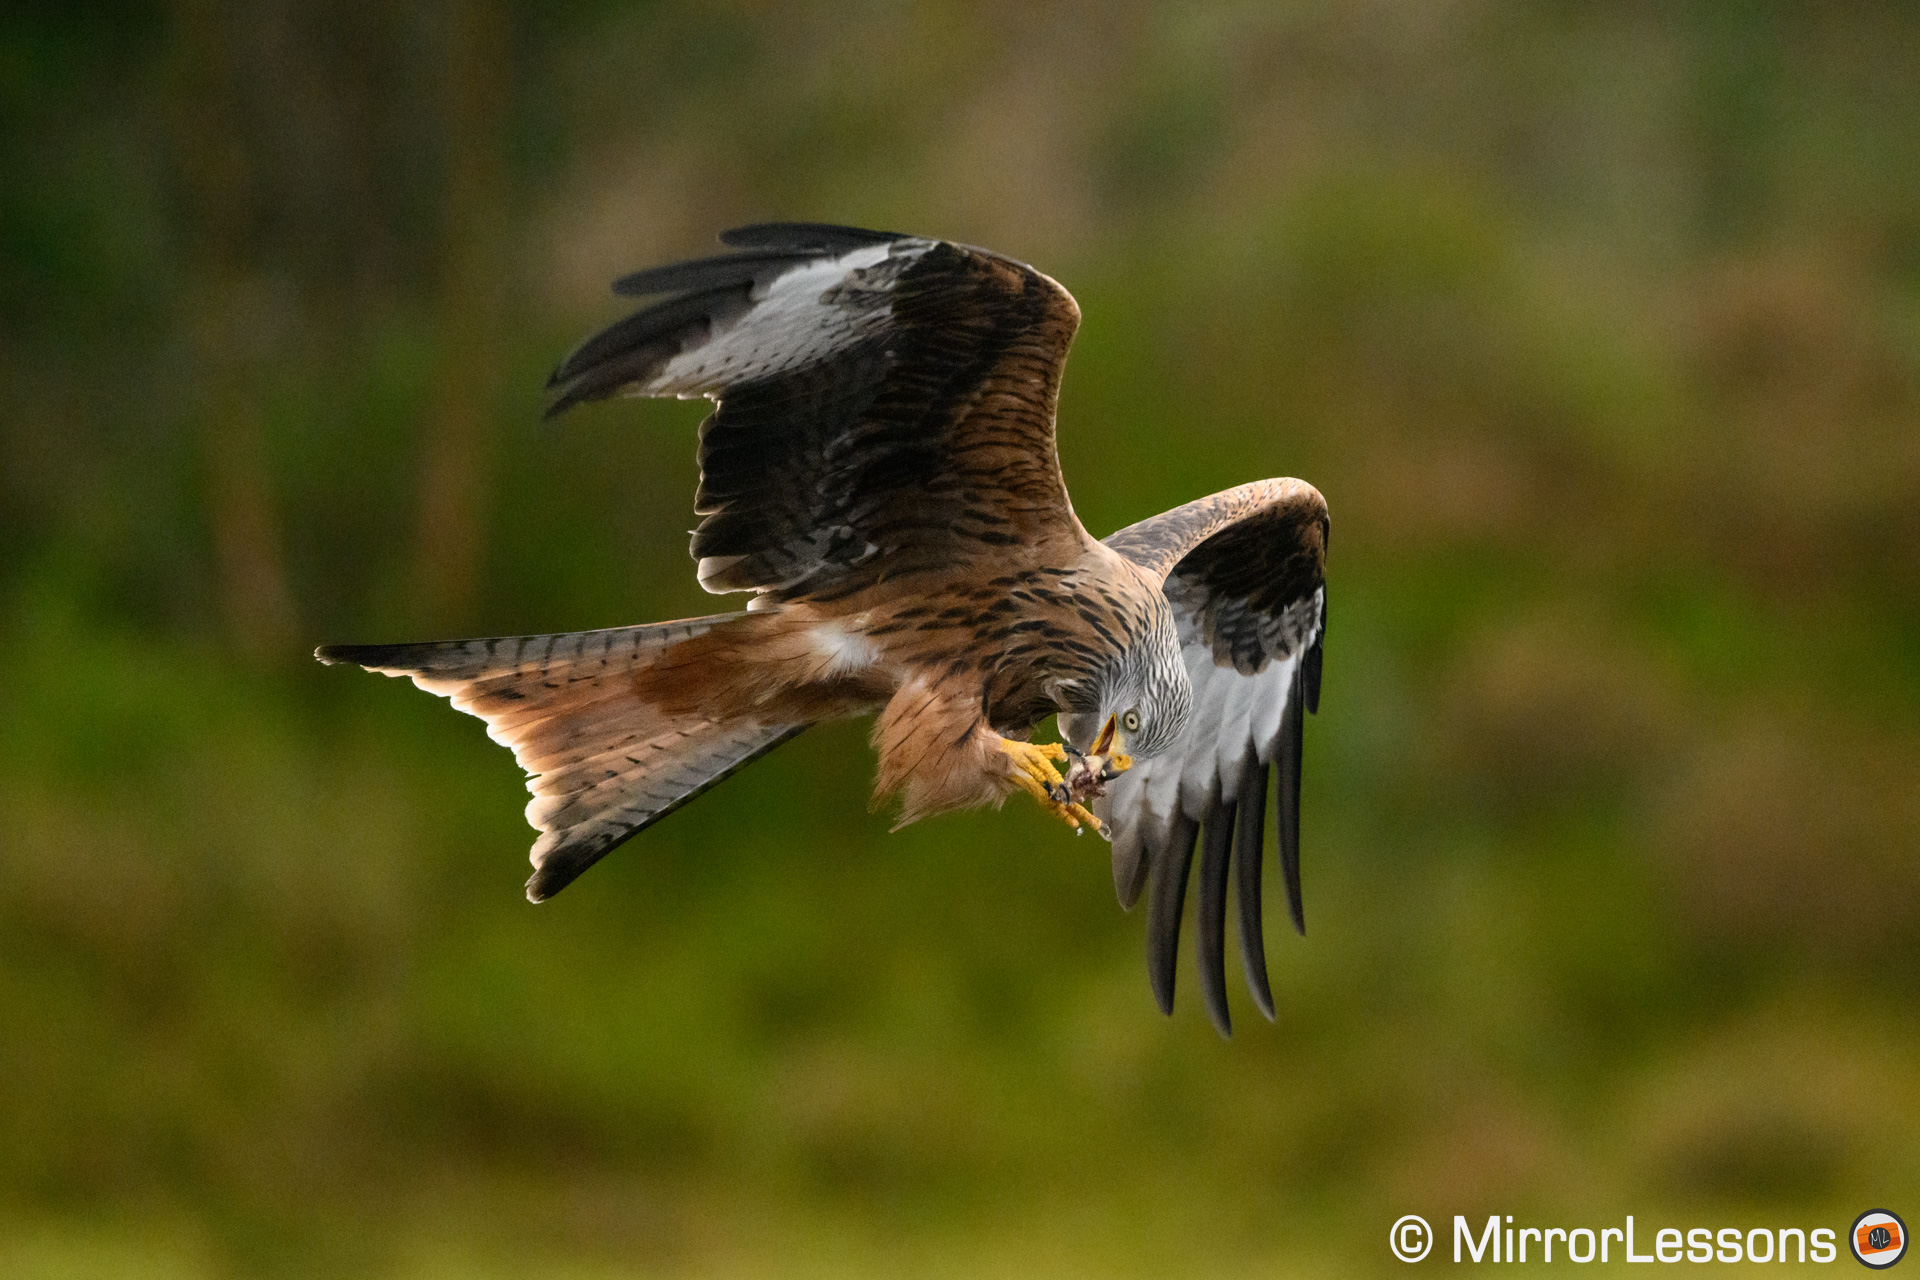
Let’s have a look at second set of images where the camera’s metering struggled to deliver the correct exposure. It’s not just the Z9’s fault: birds are not easy subjects to meter correctly, and picking the right setting can be a bit of a gamble. The contrast in their plumage, their size in the frame and the rapid change of brightness in the background when they’re flying can confuse the camera. Very often if not always, I end up with a few shots that are too bright or too dark.
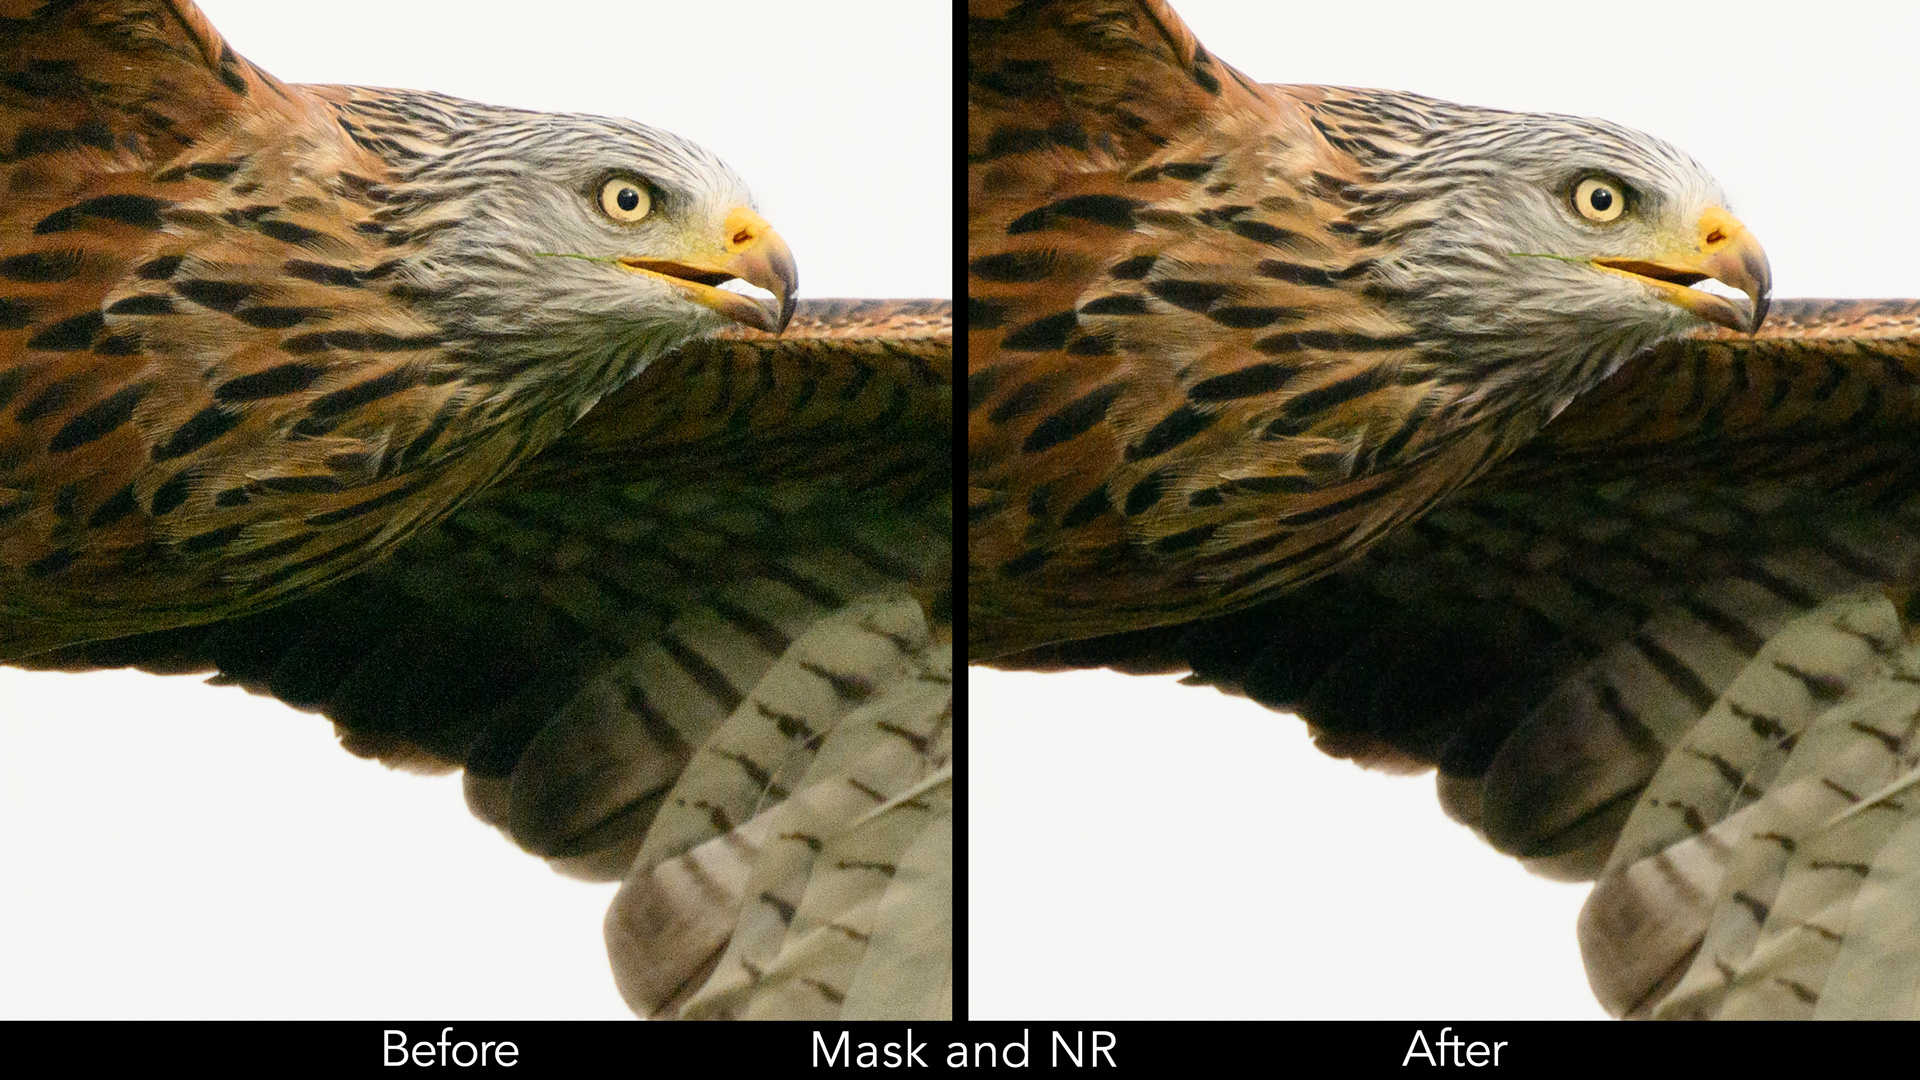
With the first photo, I recovered about 2.7EV to get the kite properly exposed. This generated a bit of noise and green colour cast, particularly on the wings, but with some local adjustments using masks, I got a decent result out of it.
NIKKOR Z 100-400mm f/4.5-5.6 VR S at 400 mm

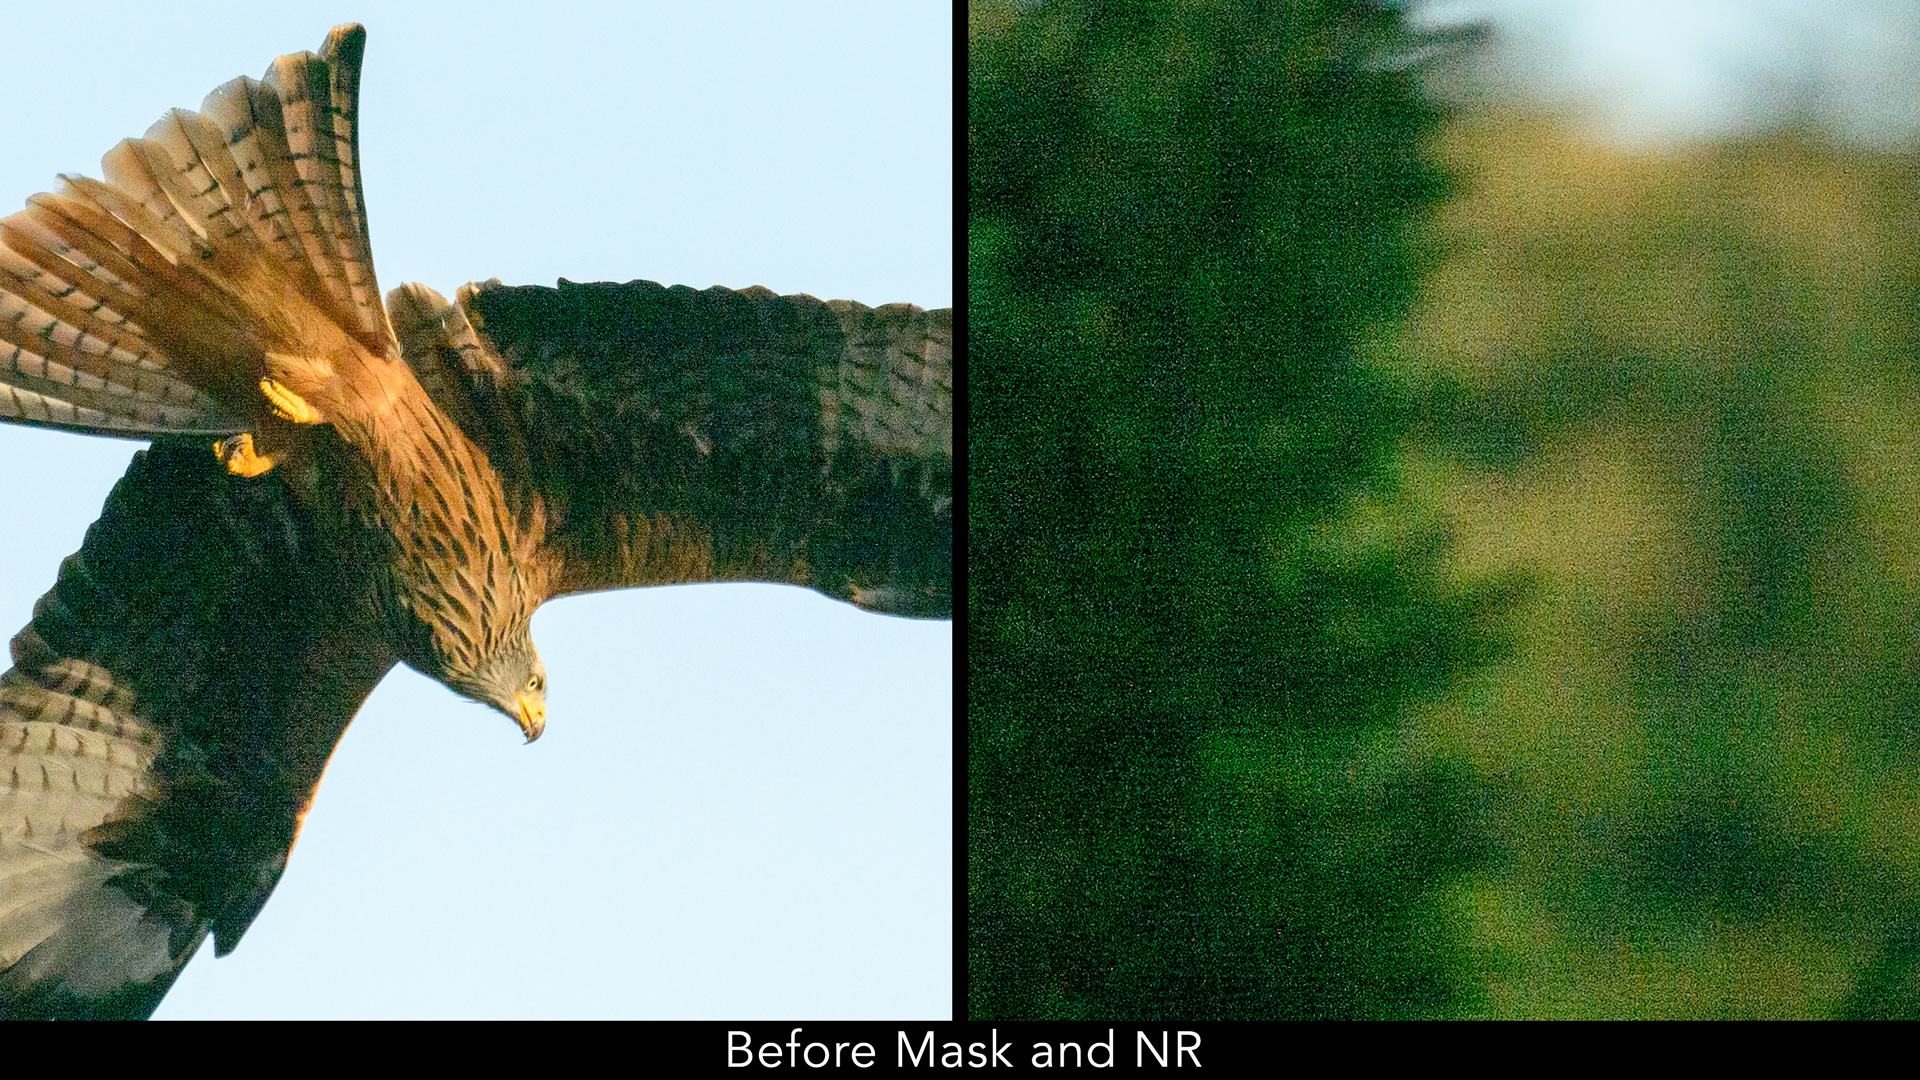
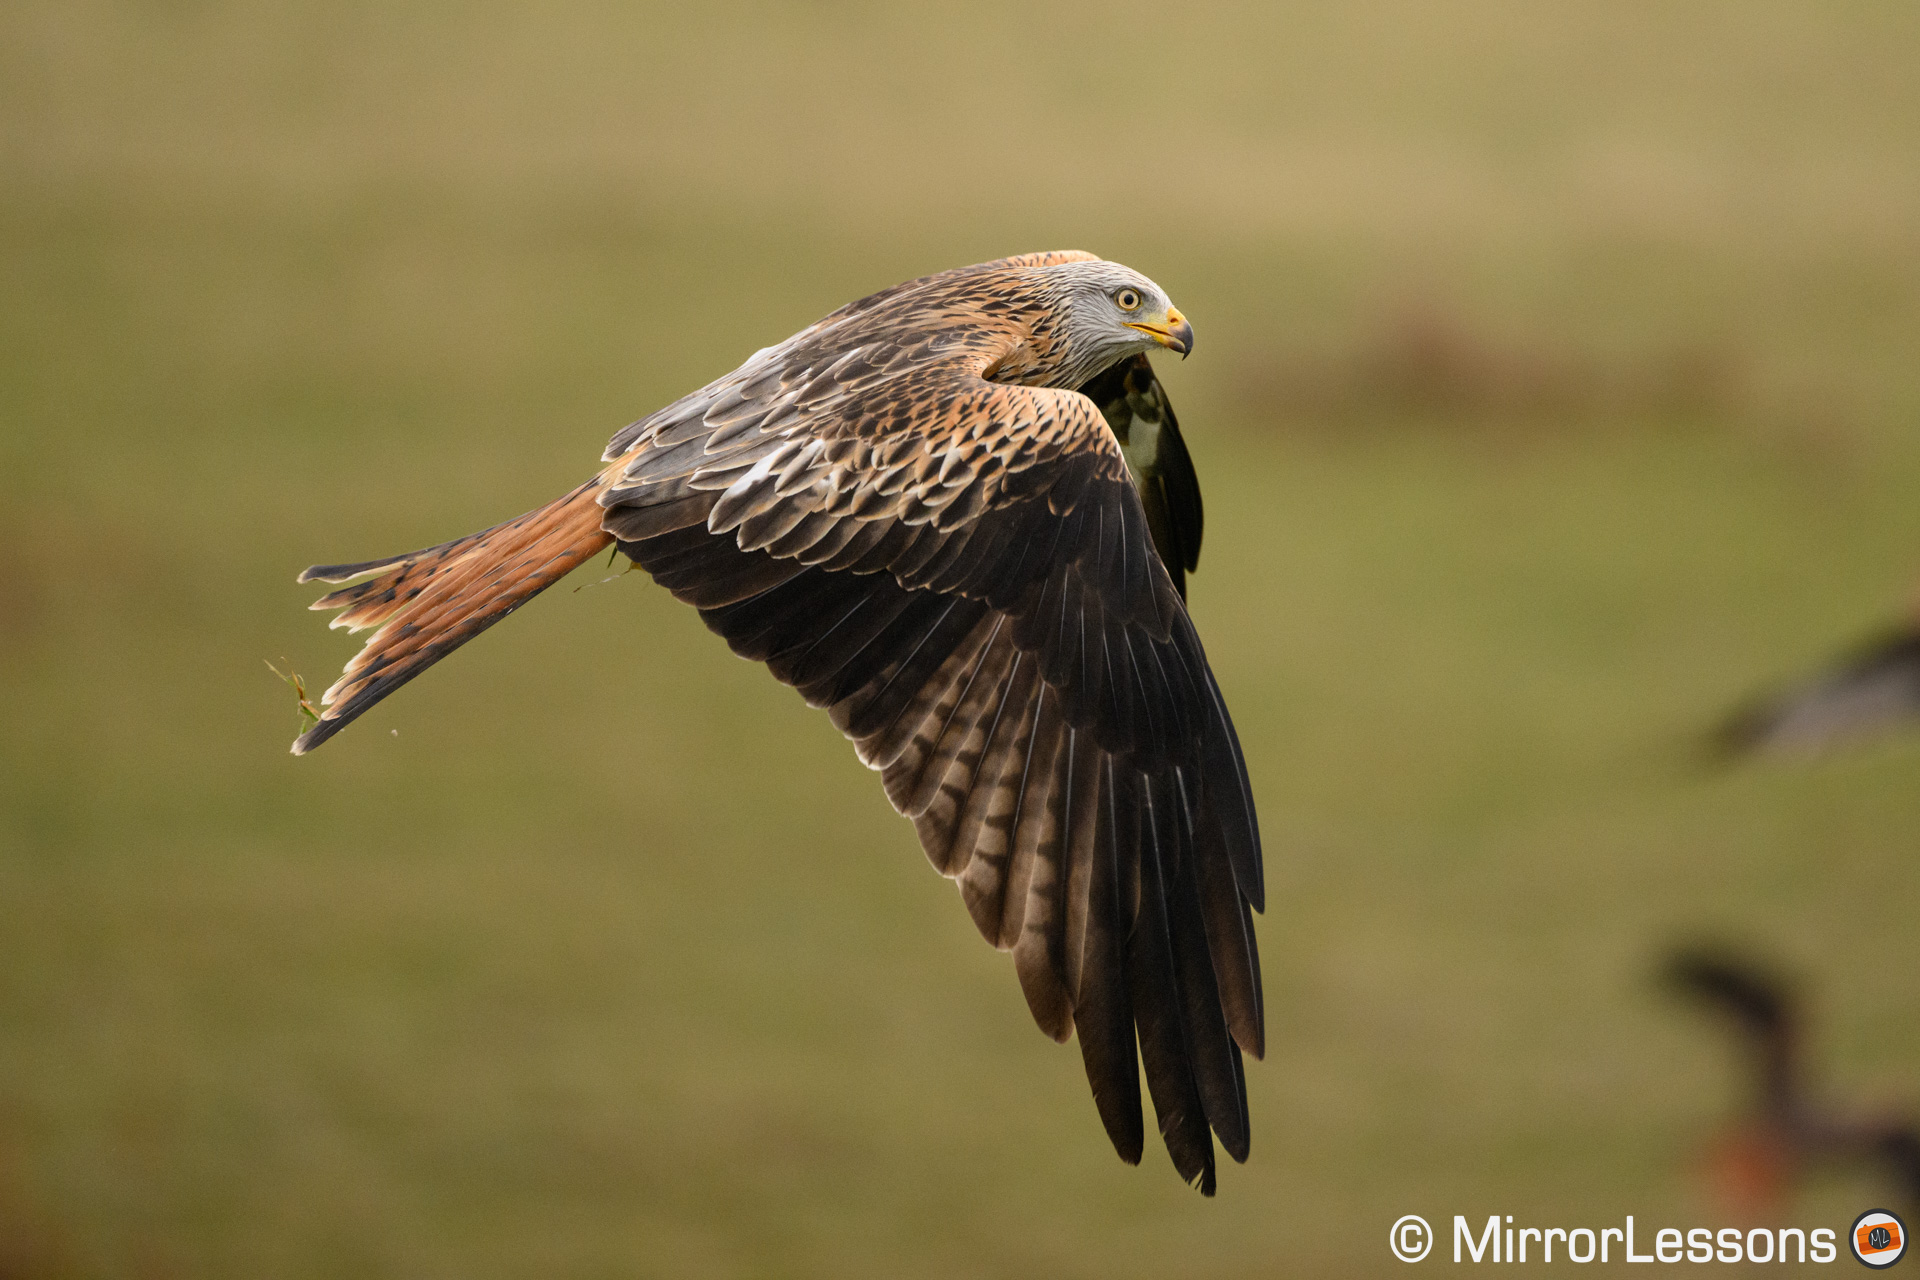
The second image is more severely underexposed: it’s almost a 4 stop recovery, and the colour cast as well as the noise level are more invasive. The bird is smaller in the frame, so the details are smaller too and get mixed up with noise more easily.

AF-S NIKKOR 500mm f/5.6E PF ED VR
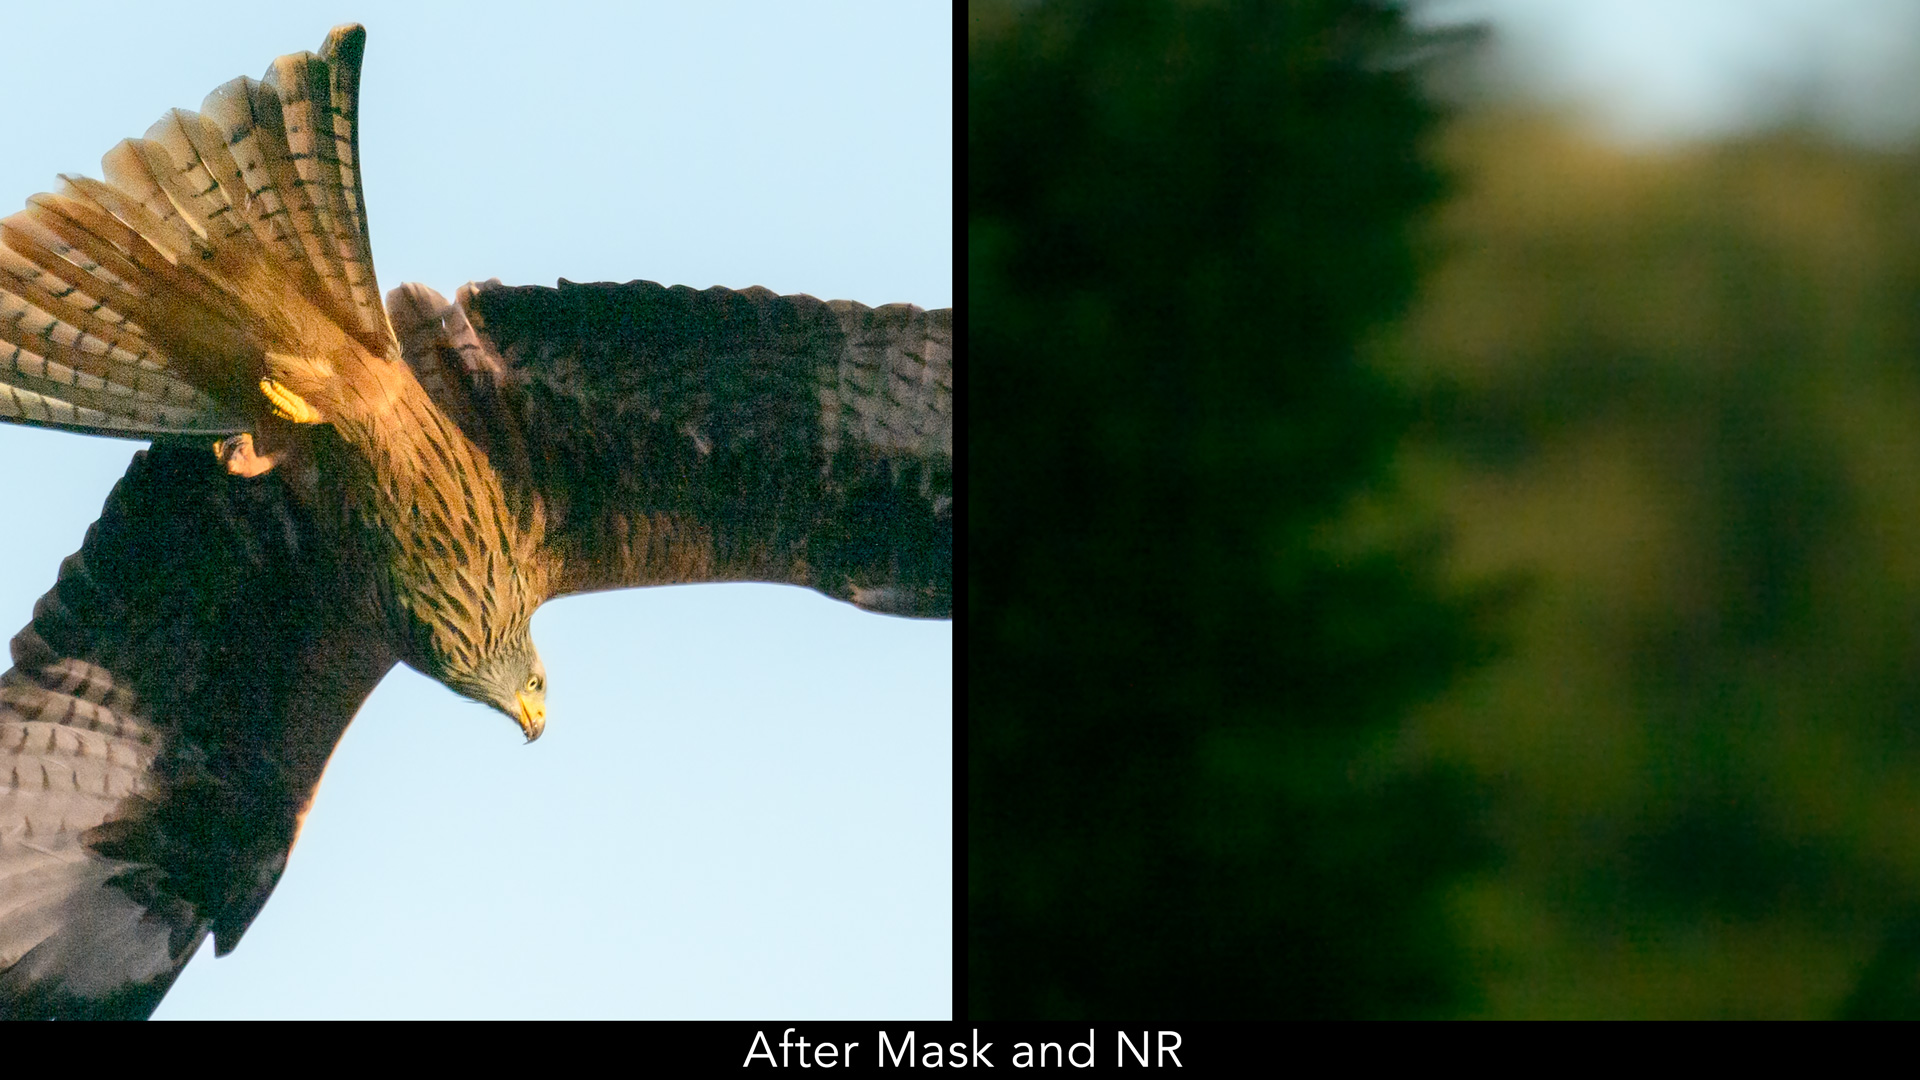
If I look at the trees in the background, there is a bit of banding, which reminds me of the Nikon Z7. This is where you start to see the limit of the Z9 sensor. Can I improve it in post? Again, with patience and masks, I can reduce the noise, particularly that of the background, but the details on the bird are more difficult to recover entirely.
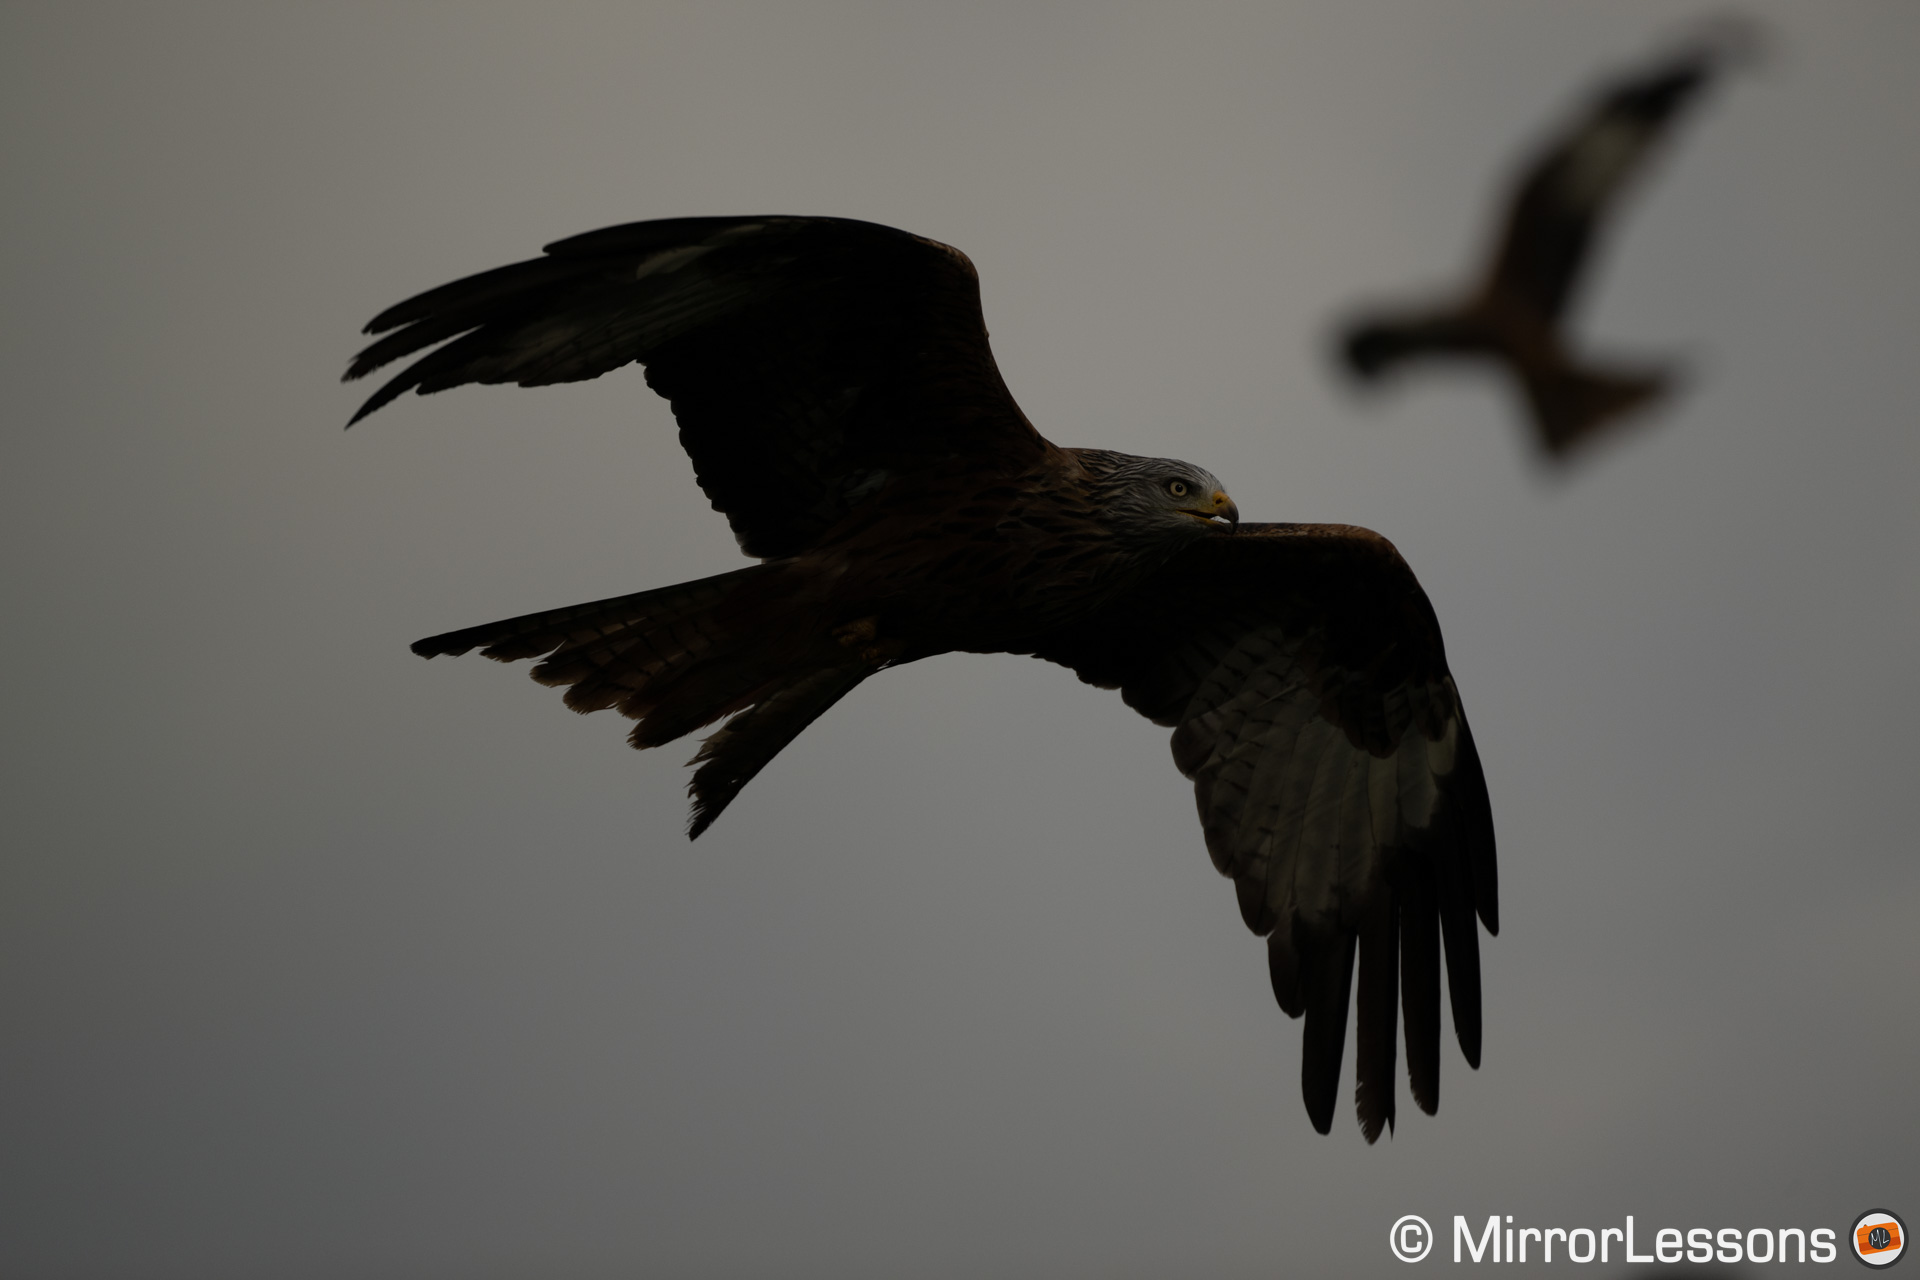
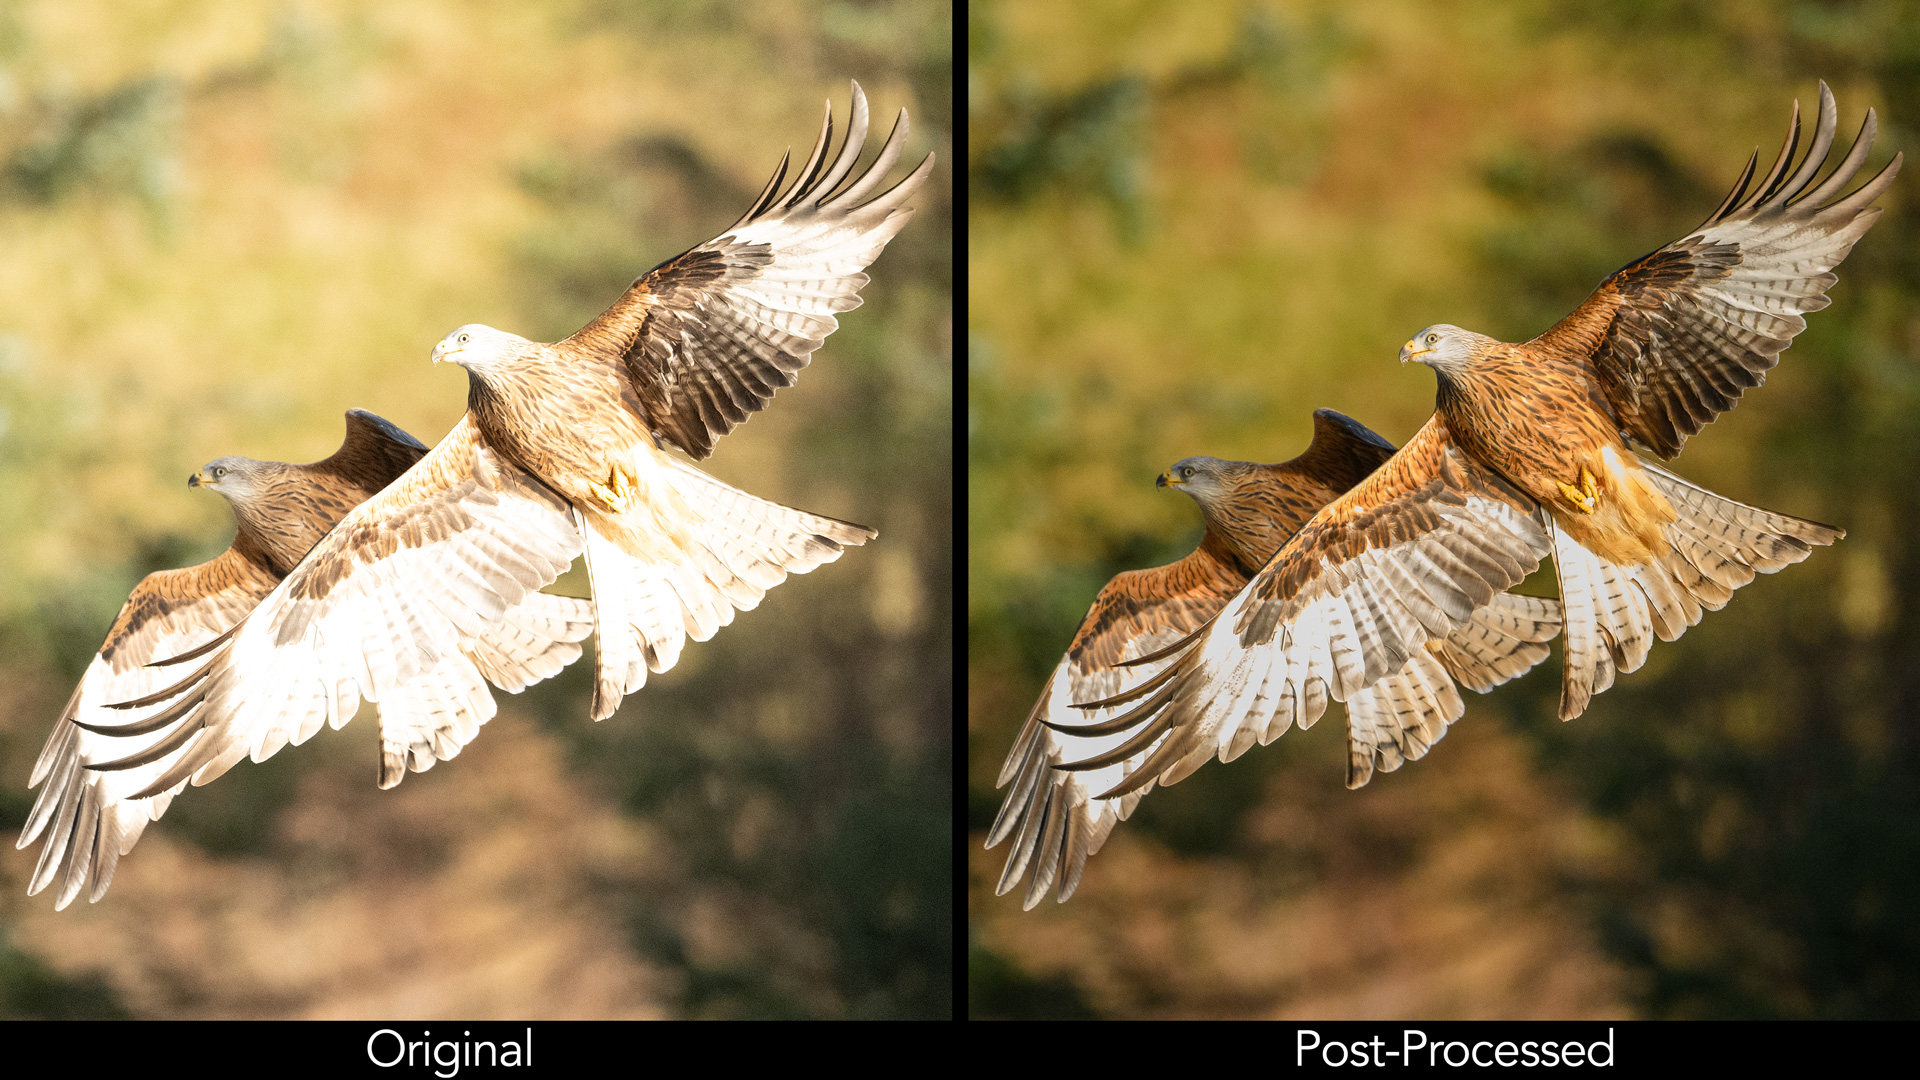
On the other end of the histogram, we can look at the highlights. Digital sensors are weaker in the bright zones than in the dark areas, and the Z9 is no exception. Overexpose more than one stop, and it becomes difficult to save everything.
In the third image below, I was able to recover most of the details on the kite except the brightest part near the tip of the wing.
The fourth image is brighter to begin with, and more details are lost in different parts of the animals’ bodies.
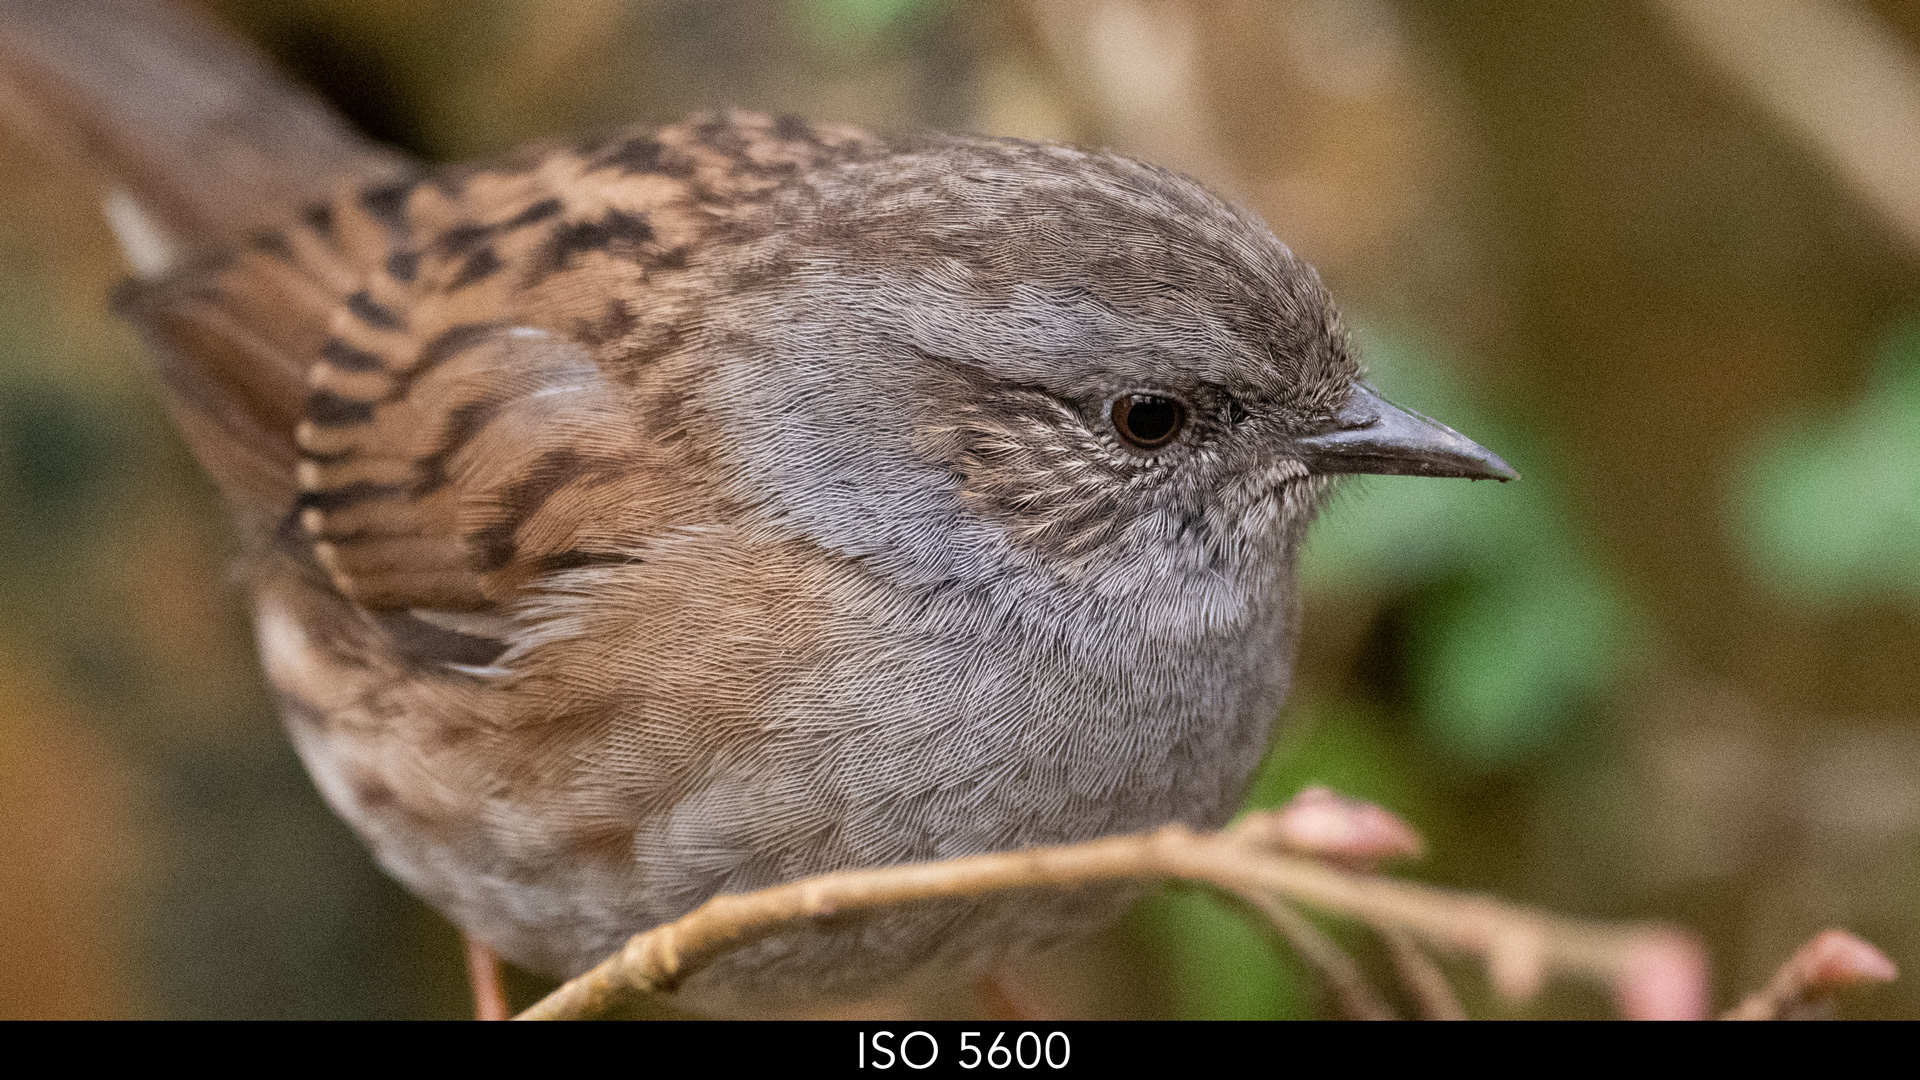
Next we have the high ISO performance, and this plays an important part when working in nature. Excluding the king and queen of super telephoto lenses, the 600mm F4 and 400mm F2.8 that give you bright apertures (and whose prices are prohibitive for many of us), you have to settle for smaller aperture lenses: F5.6, F6.3 or even smaller. In a genre where you often need fast shutter speeds, the ISO will inevitably go up, not to mention if you use teleconverters and the sun disappears behind clouds.
The Z9 has a normal range of ISO 64 to 25,600, with extended values going down to 32, and up to 102,400.
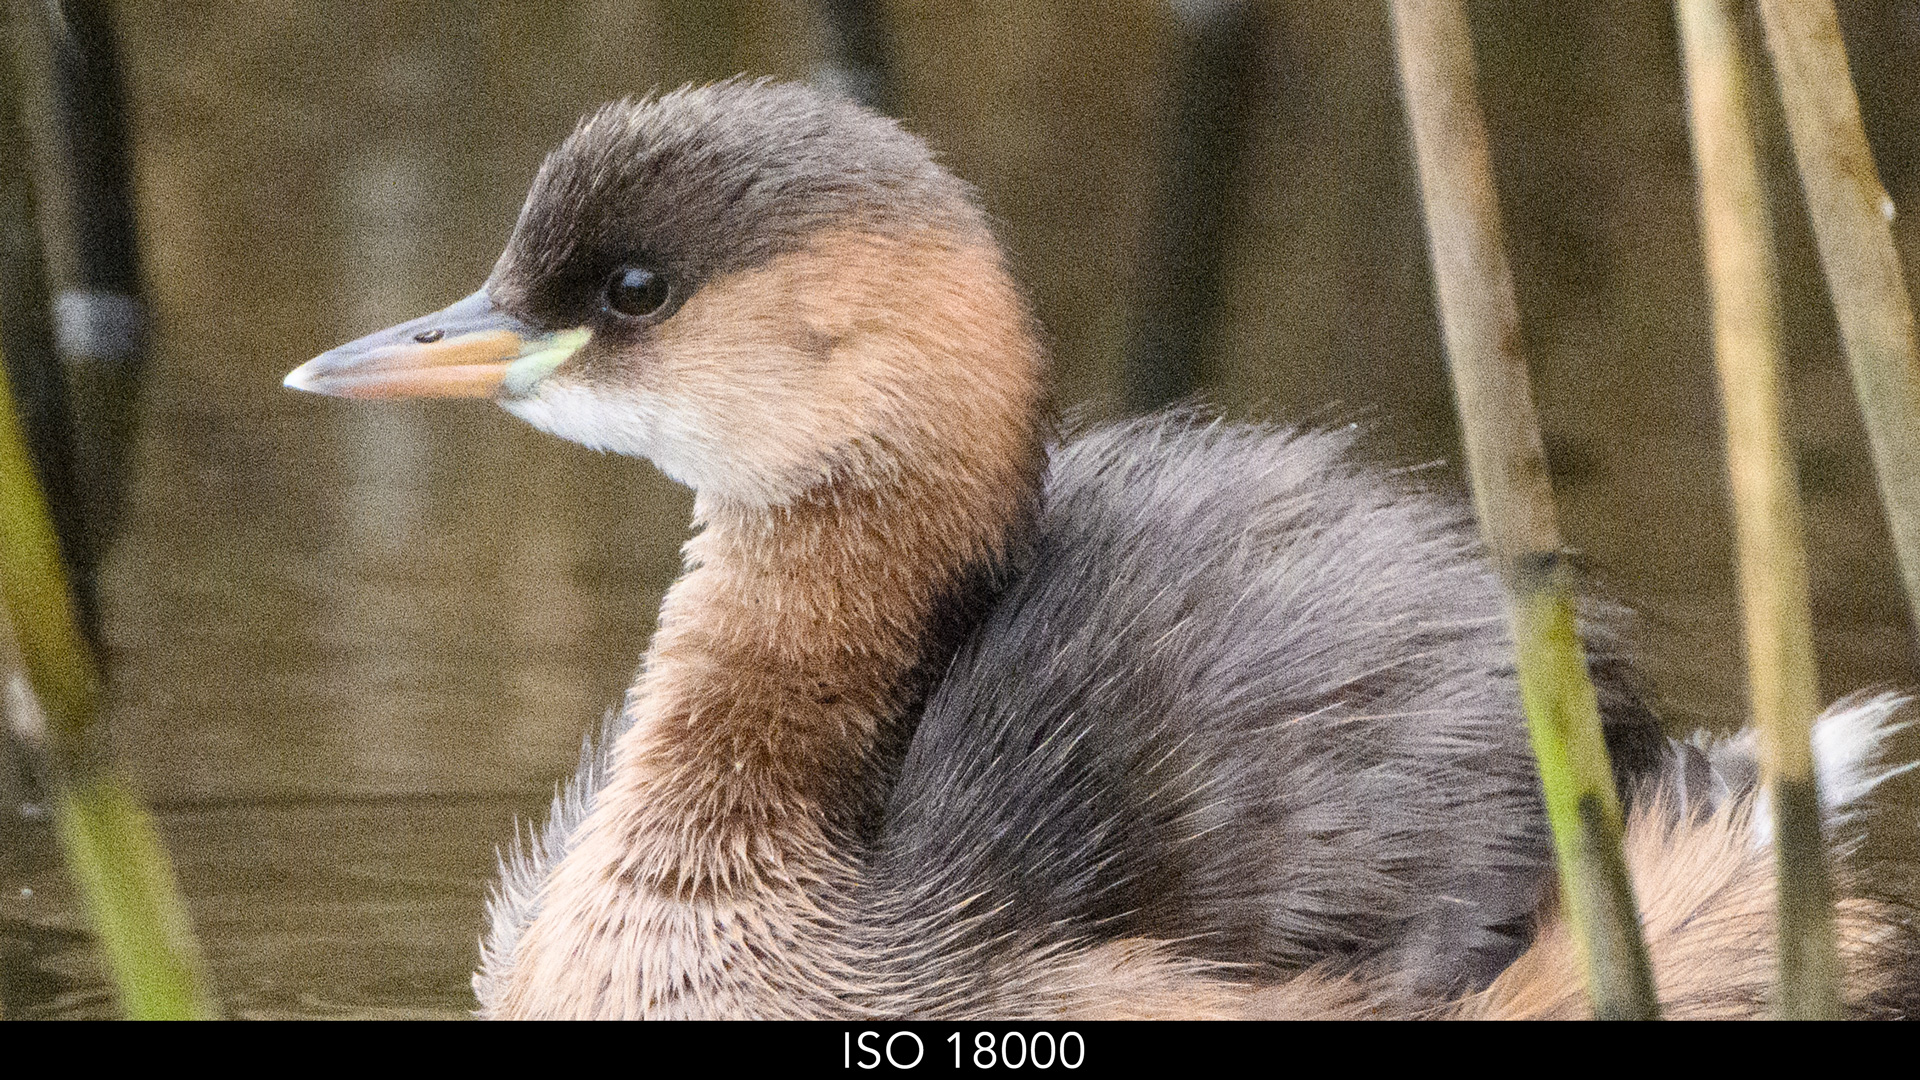
Considering the high megapixel count, I was satisfied with the quality of the RAW files up to 6,400 ISO. Push it further, and you start to lose more details to noise.
To be fair, images taken around 12,800 ISO still look fine, and 25,600 ISO will give you a decent result when there is no alternative. To note that I set Auto ISO for the entire week of testing.

AF-S NIKKOR 500mm f/5.6E PF ED VR
AF-S NIKKOR 500mm f/5.6E PF ED VR

AF-S NIKKOR 500mm f/5.6E PF ED VR

NIKKOR Z 800mm f/6.3 VR S
NIKKOR Z 800mm f/6.3 VR S

NIKKOR Z 800mm f/6.3 VR S Z + TC-2.0x
You can improve the final result with a bit of post processing, using masks once again. The AI Subject Selection in Lightroom is fantastic to quickly isolate the bird from the rest of the image. I don’t add too much sharpening or texture, but then I duplicate and invert the mask, which allows me to work on the rest of the image, and there I can be generous with noise reduction knowing it won’t affect my subject.
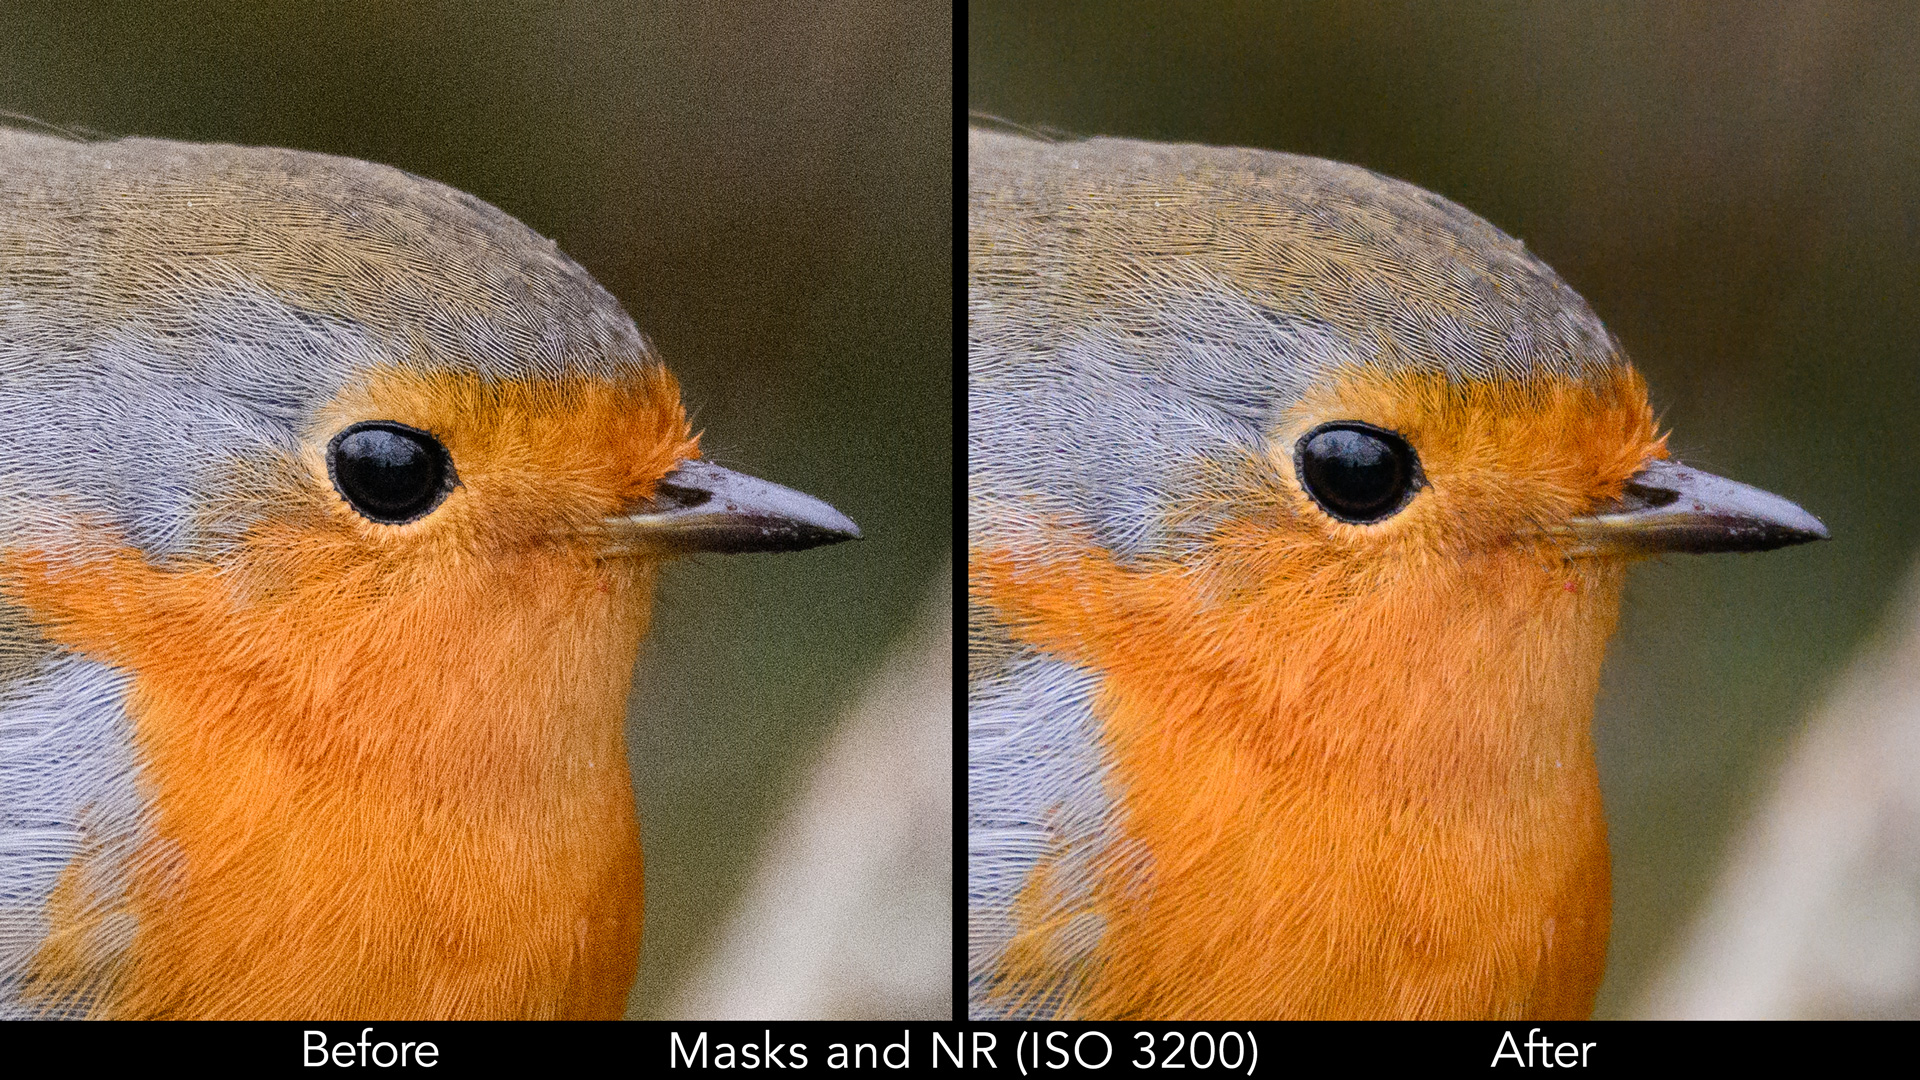
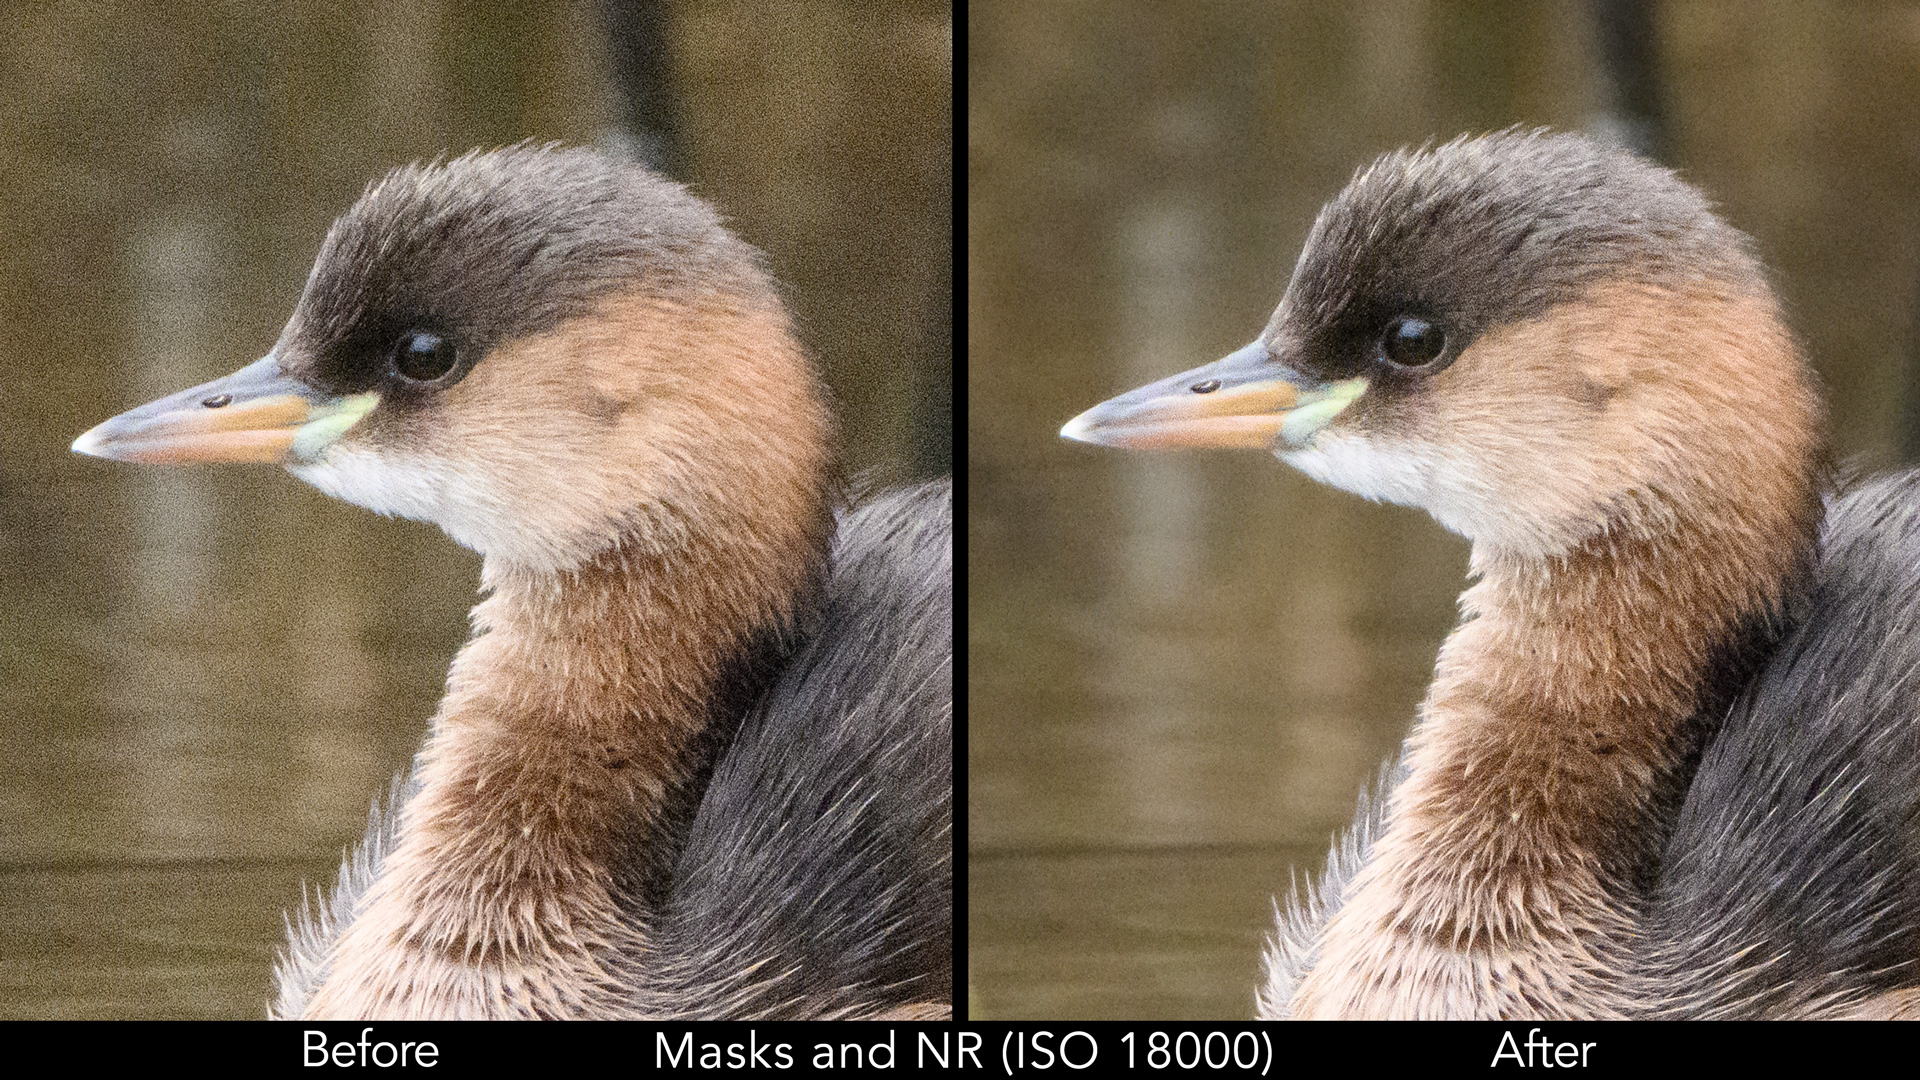
Of courses these are just a few quick examples to show you what is possible, I’m sure some of you have a different method, perhaps you use a different software as well. If you’d like, you can share your feedback in the comments!
Shutter and Drive Speed
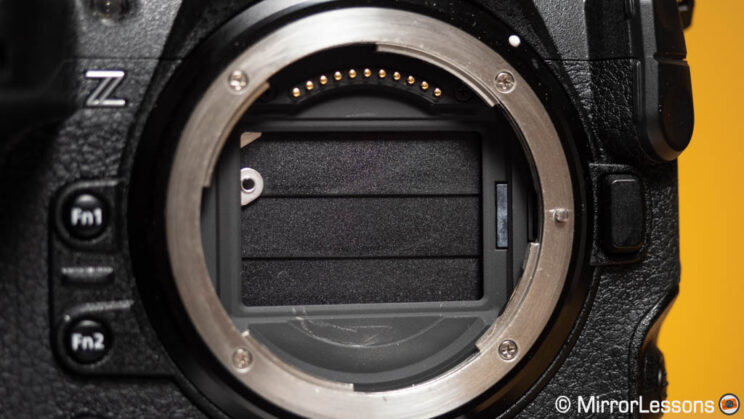
The Z9 features an electronic shutter only. You read that right: you won’t find the traditional mechanical curtains that cover and uncover the sensors when you take a picture. This means no mechanical shutter, and no electronic-first curtain shutter.
The Nikon is not the first mirrorless camera to ditch the mechanical shutter entirely, but the company did it before its main competitors Sony and Canon, a move that surprised me at the time of the announcement.
There is one physical curtain that can cover the sensor when the camera is turned off, but that only serves the purpose of protecting the sensor when you change lenses.
Nikon is obviously confident the readout speed of its 45.7MP sensor is fast enough to not need any mechanical components anymore. The camera can shoot as fast as 1/32,000s, or 1/250s when using a speedlight. It seems to cover all the basics of a mechanical shutter, and then some. I didn’t spot any issue with distortion (rolling shutter) in the 11,000+ images taken with the camera.
Another characteristic is the blackout-free live view experience. Taking a single picture, or multiple images in a row, doesn’t alter the view in the EVF or LCD screen in any way: there is no blackout, not delay and no lag. The transition between composing and taking pictures is seamless. This is possible thanks to the image processor that is powerful enough to handle live view and data recording simultaneously.
This technology, first seen in the Sony A9, is the best thing you can wish for when following fast and erratic birds, although I like it for any genre really. The funny side of it is that you may not even notice you’re taking pictures. This is why you can activate a fake shutter sound, or have blinking markers at the edge of the screen to make you aware the camera is recording.
The electronic shutter allows the continuous shooting mode to reach 20fps. You can increase the drive speed further to 30fps, 60fps and 120fps, but you’ll have to settle for JPGs only. Also, the resolution drops as you increase the frame rate.
20fps
RAW
FX
45MP
30fps
JPG Normal
FX
45MP
60fps
JPG Normal
DX
19.4MP
120fps
JPG Normal
FX
11.4MP
When doing wildlife and birds, I always prefer to work with RAW, because light conditions can be challenging as explained earlier, and I prefer the flexibility in post when needed. Working with JPGs is of course perfectly fine, but requires more diligence in getting the exposure as perfect as you can, because the amount you can recover later is more limited.
But, limitation of JPGs and megapixels aside, 120fps is an impressive speed to work with, and one you can use for various applications. One example is to select the photo with the best wing position, or one with the most dramatic action.
NIKKOR Z 100-400mm f/4.5-5.6 VR S at 400 mm
When we talk about drive speed and frame rate, we also need to mention the buffer, and my tests showed excellent performance. At 20fps with RAW, the Z9 works at full speed for approximately 4 seconds, but doesn’t drop the FPS by much afterwards, which means you can continue to work in optimal conditions.

You won’t find the usual options concerning RAW compression and bit depth as with other Nikon cameras. Instead, the Z9 offers three different 14-bit RAW modes:
- lossless compressed (approx. 55MB)
- high efficiency★ (approx. 33MB)
- high efficiency (approx. 22MB)
Unsurprisingly, choosing one of the two High Efficiency options increases the buffer at full speed.
If you select a faster burst, between 30 and 120fps, the camera offers a decent duration at the maximum frame rate, but then stops shooting entirely, rather than continuing at a reduced speed.
Regardless of the settings used, the buffer resets very quickly, at least with the cards I used.
One last thing to talk about in this chapter is the Pre-Release Capture mode, a feature wildlife photographers can find very useful. It allows you to save frames before you press the shutter button all the way down, a great aid to capture moments that are difficult to predict.
NIKKOR Z 100-400mm f/4.5-5.6 VR S at 400 mm
NIKKOR Z 100-400mm f/4.5-5.6 VR S at 400 mm
You can choose the number of frames the camera will record before the shutter is fully depressed. For example, if you choose 1 second and you’re working at 120fps, the camera will save 120 frames before the shutter is released. You can also choose how long the camera continues after the shutter is released.
Nikon Z9 Bird Eye AF (Subject Detection)
The Z9 features a hybrid autofocus system with 493 phase and contrast detection points. These becomes 405 when selecting the Auto-area mode. The camera works with 120 AF calculations per second, a specification it shares with the Sony A1 (the Canon R3 does 60 calculations/s).
The software includes machine learning, and the Z9 can recognise humans (eyes, faces, torsos), animals (including birds) and various vehicles.
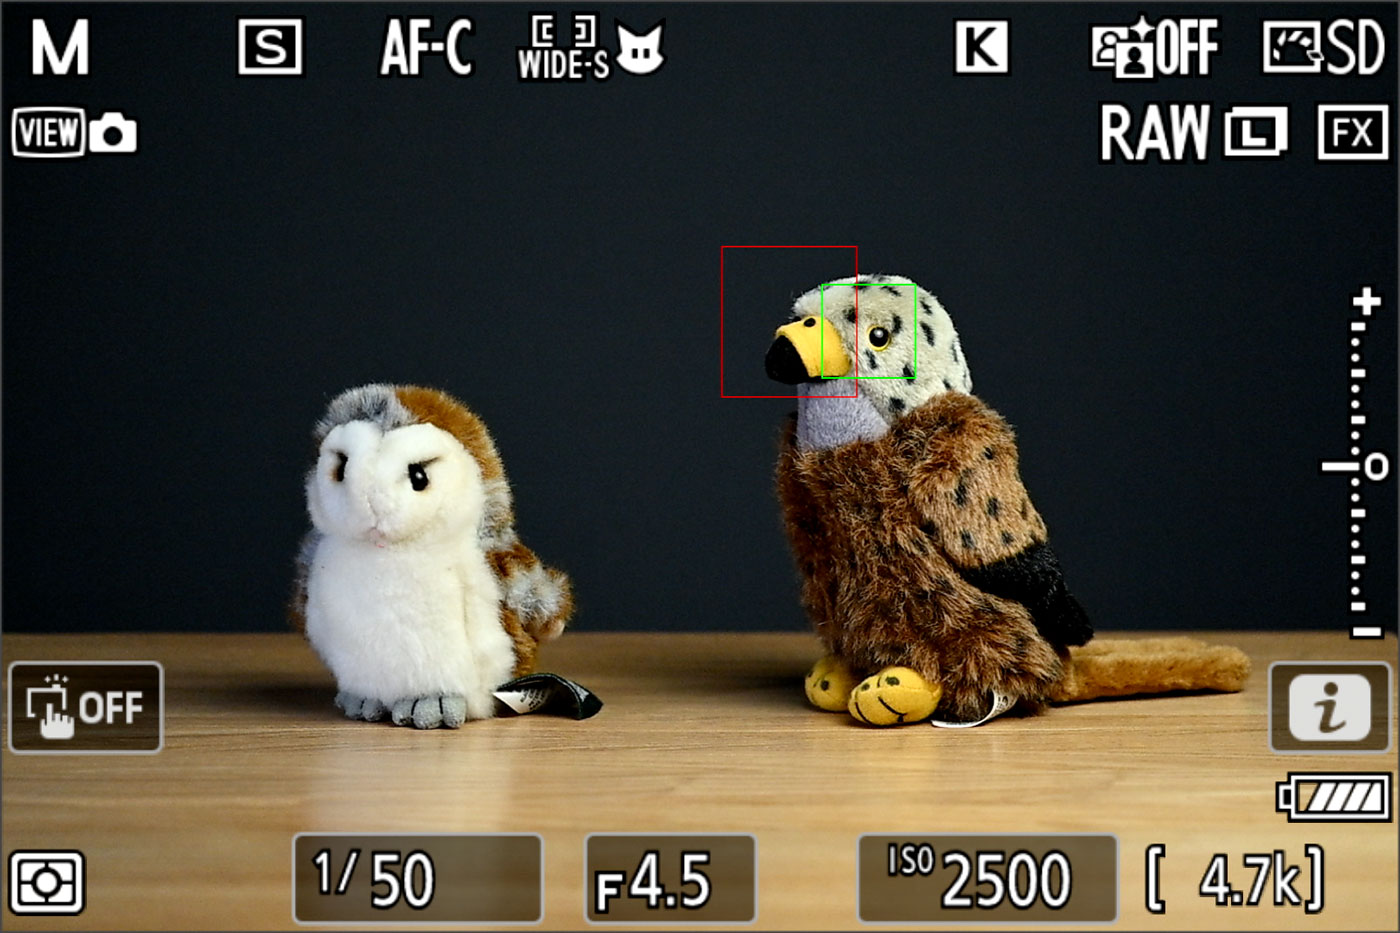
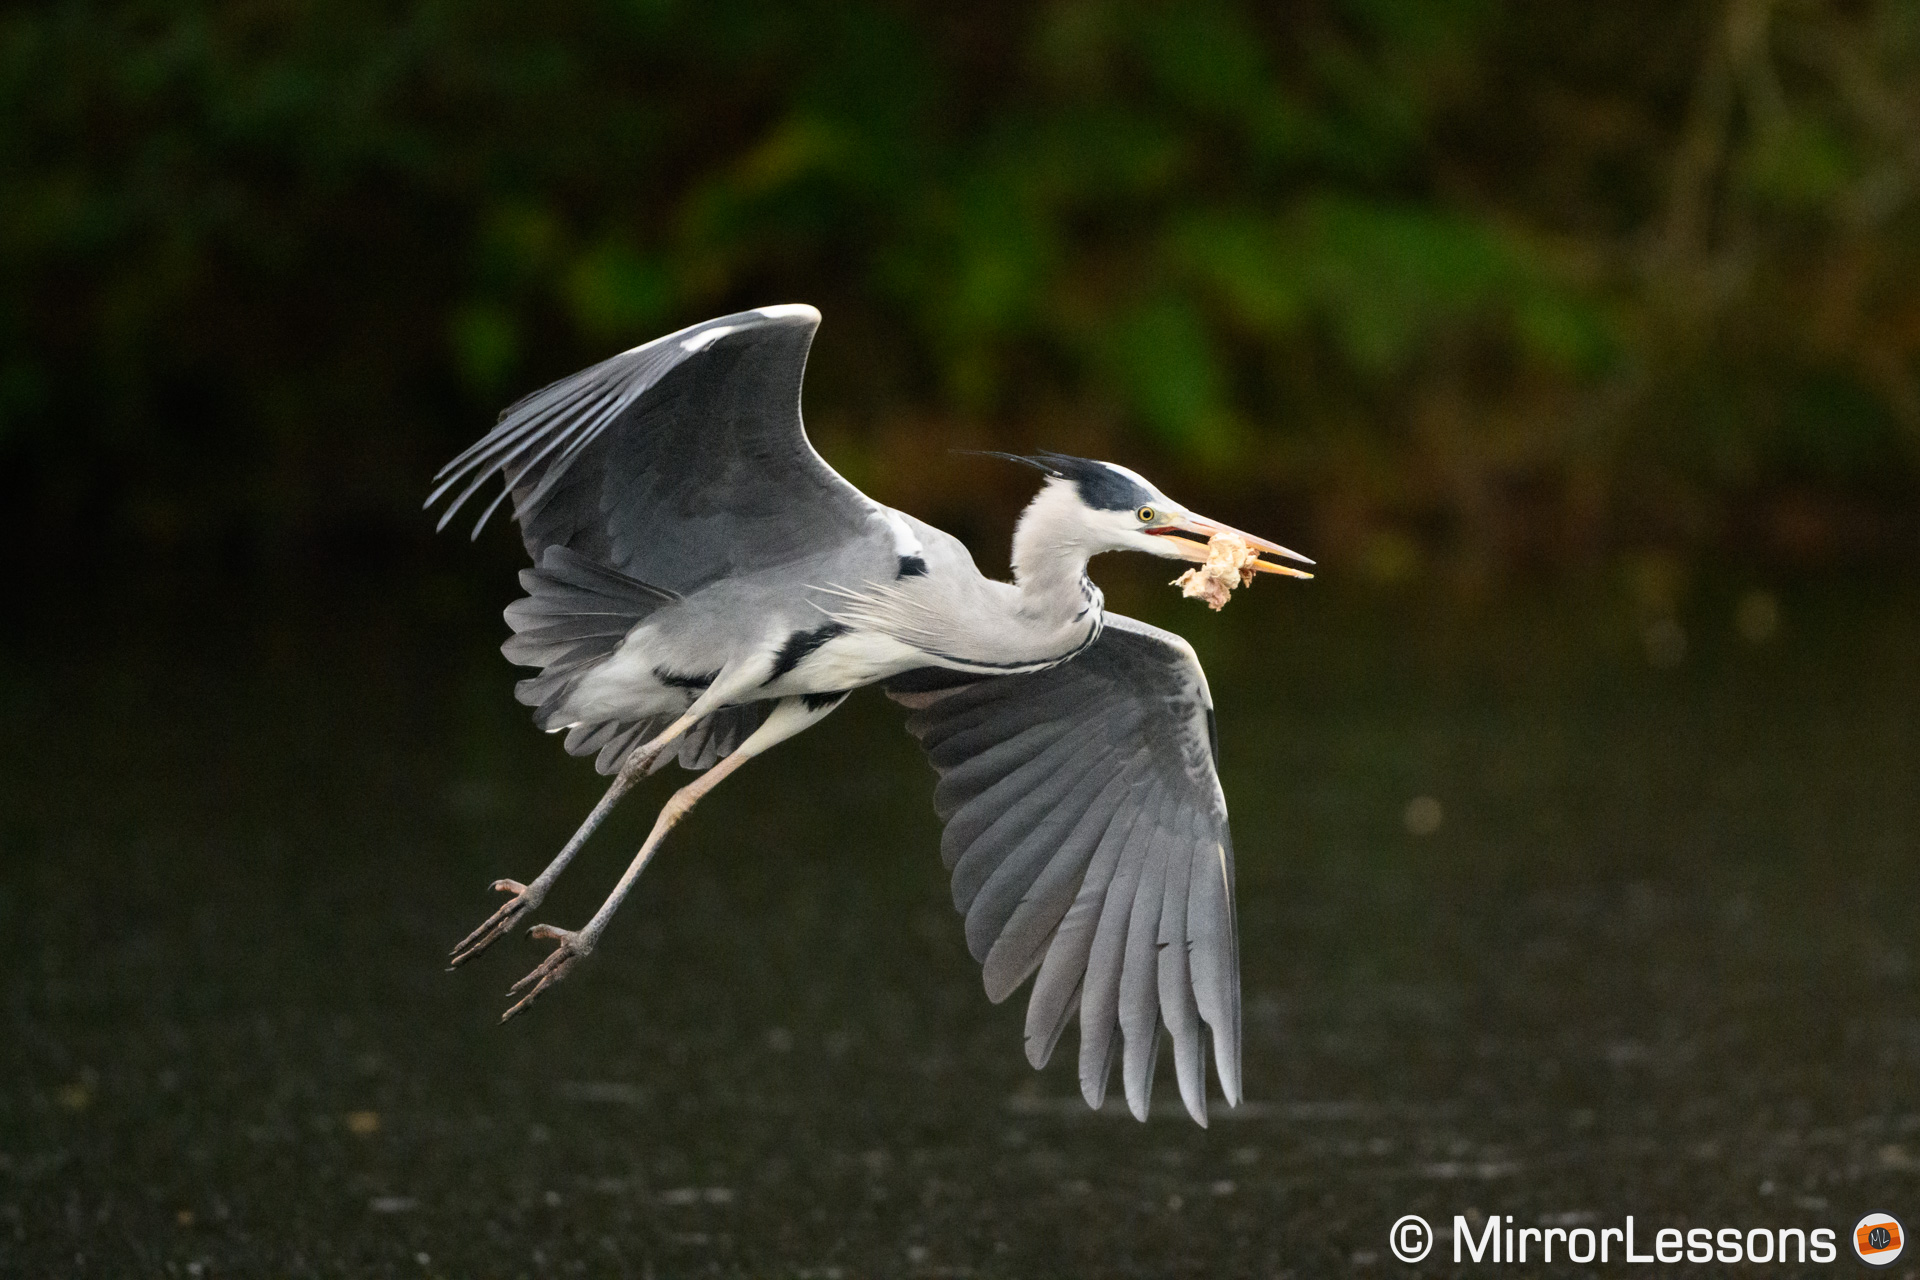
Overall, Subject Detection works really well, especially when it comes to speed and precision. The Z9 can recognise not only the body, but also the head and the eye of the bird, and will prioritise the latter as much as possible.
NIKKOR Z 800mm f/6.3 VR S
AF-S NIKKOR 500mm f/5.6E PF ED VR + TC 1.4x III
NIKKOR Z 800mm f/6.3 VR S Z + TC-2.0x
AF-S NIKKOR 500mm f/5.6E PF ED VR + TC 2.0x III
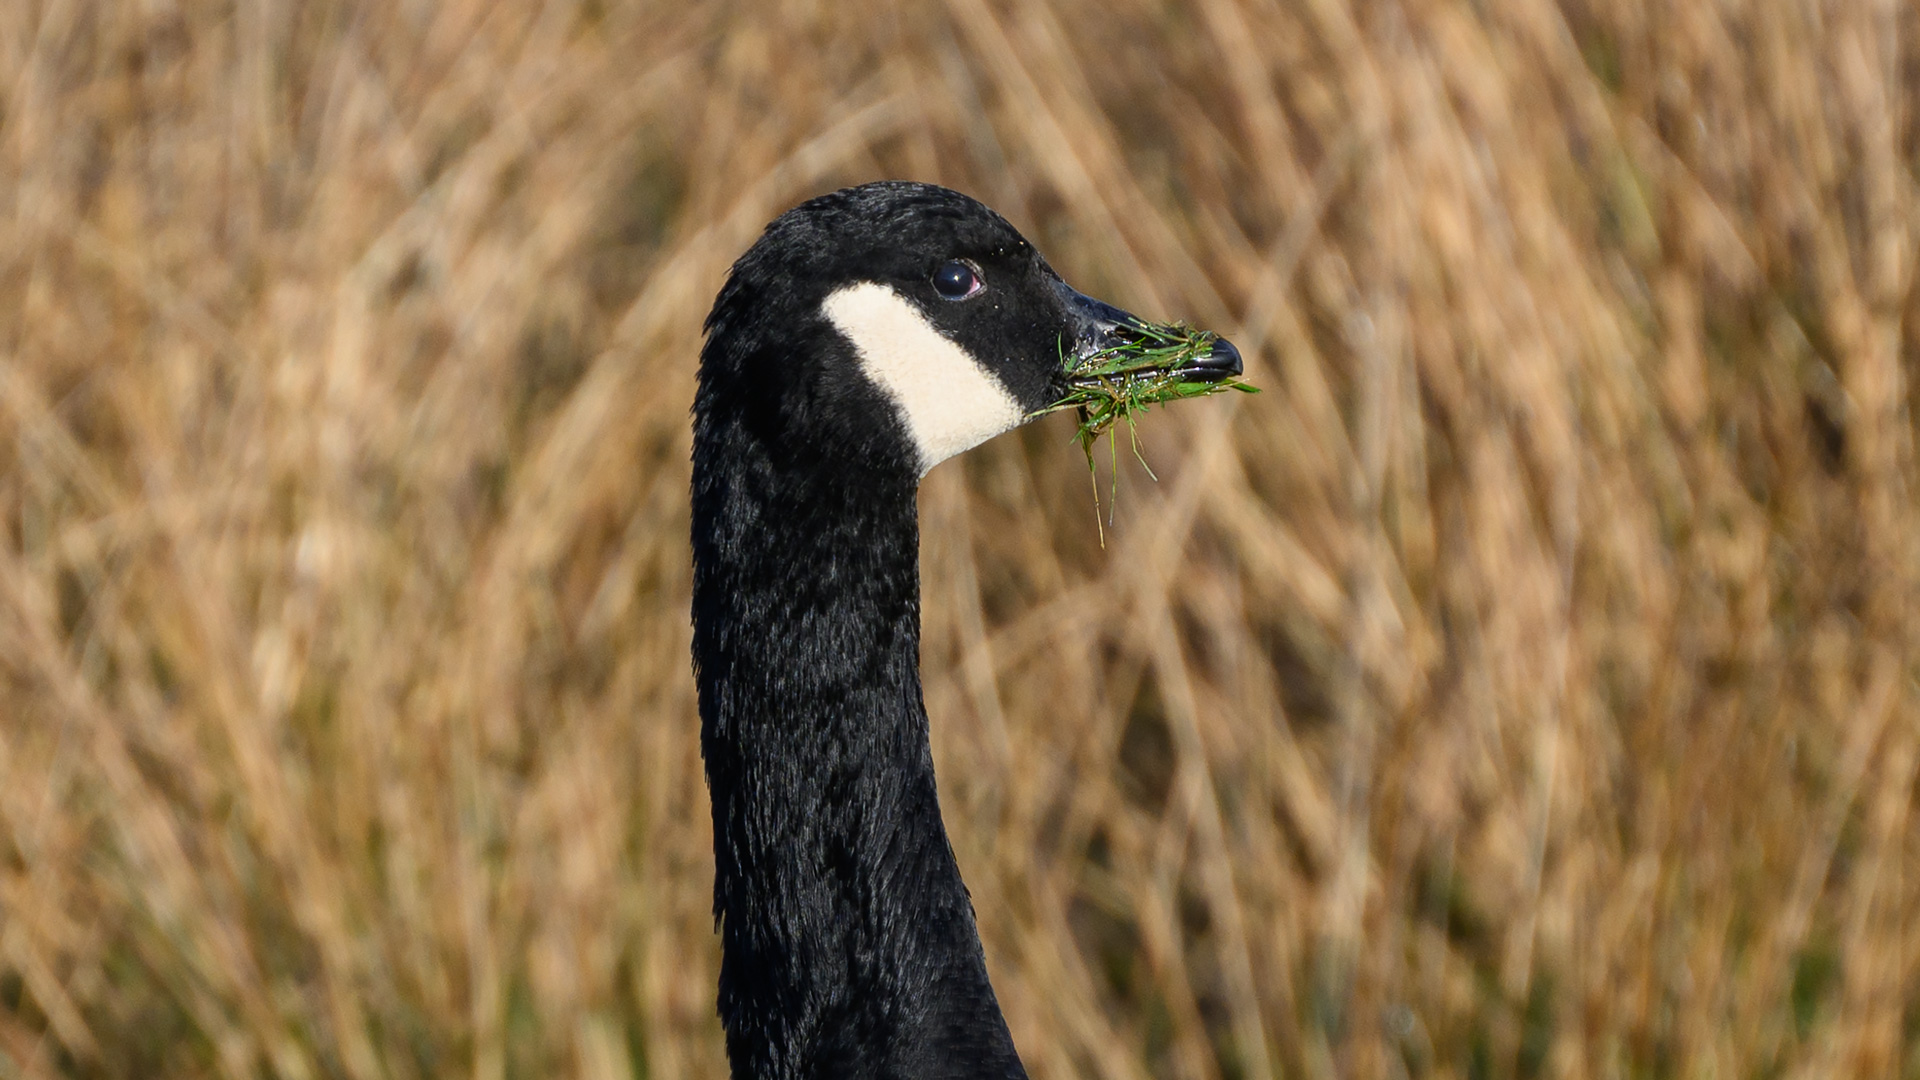
What impressed me the most is the Z9’s ability to track the head even when the bird is not in a favourable position. You can see an example below where the camera kept the head in focus when the bird turned away from the camera.
NIKKOR Z 800mm f/6.3 VR S
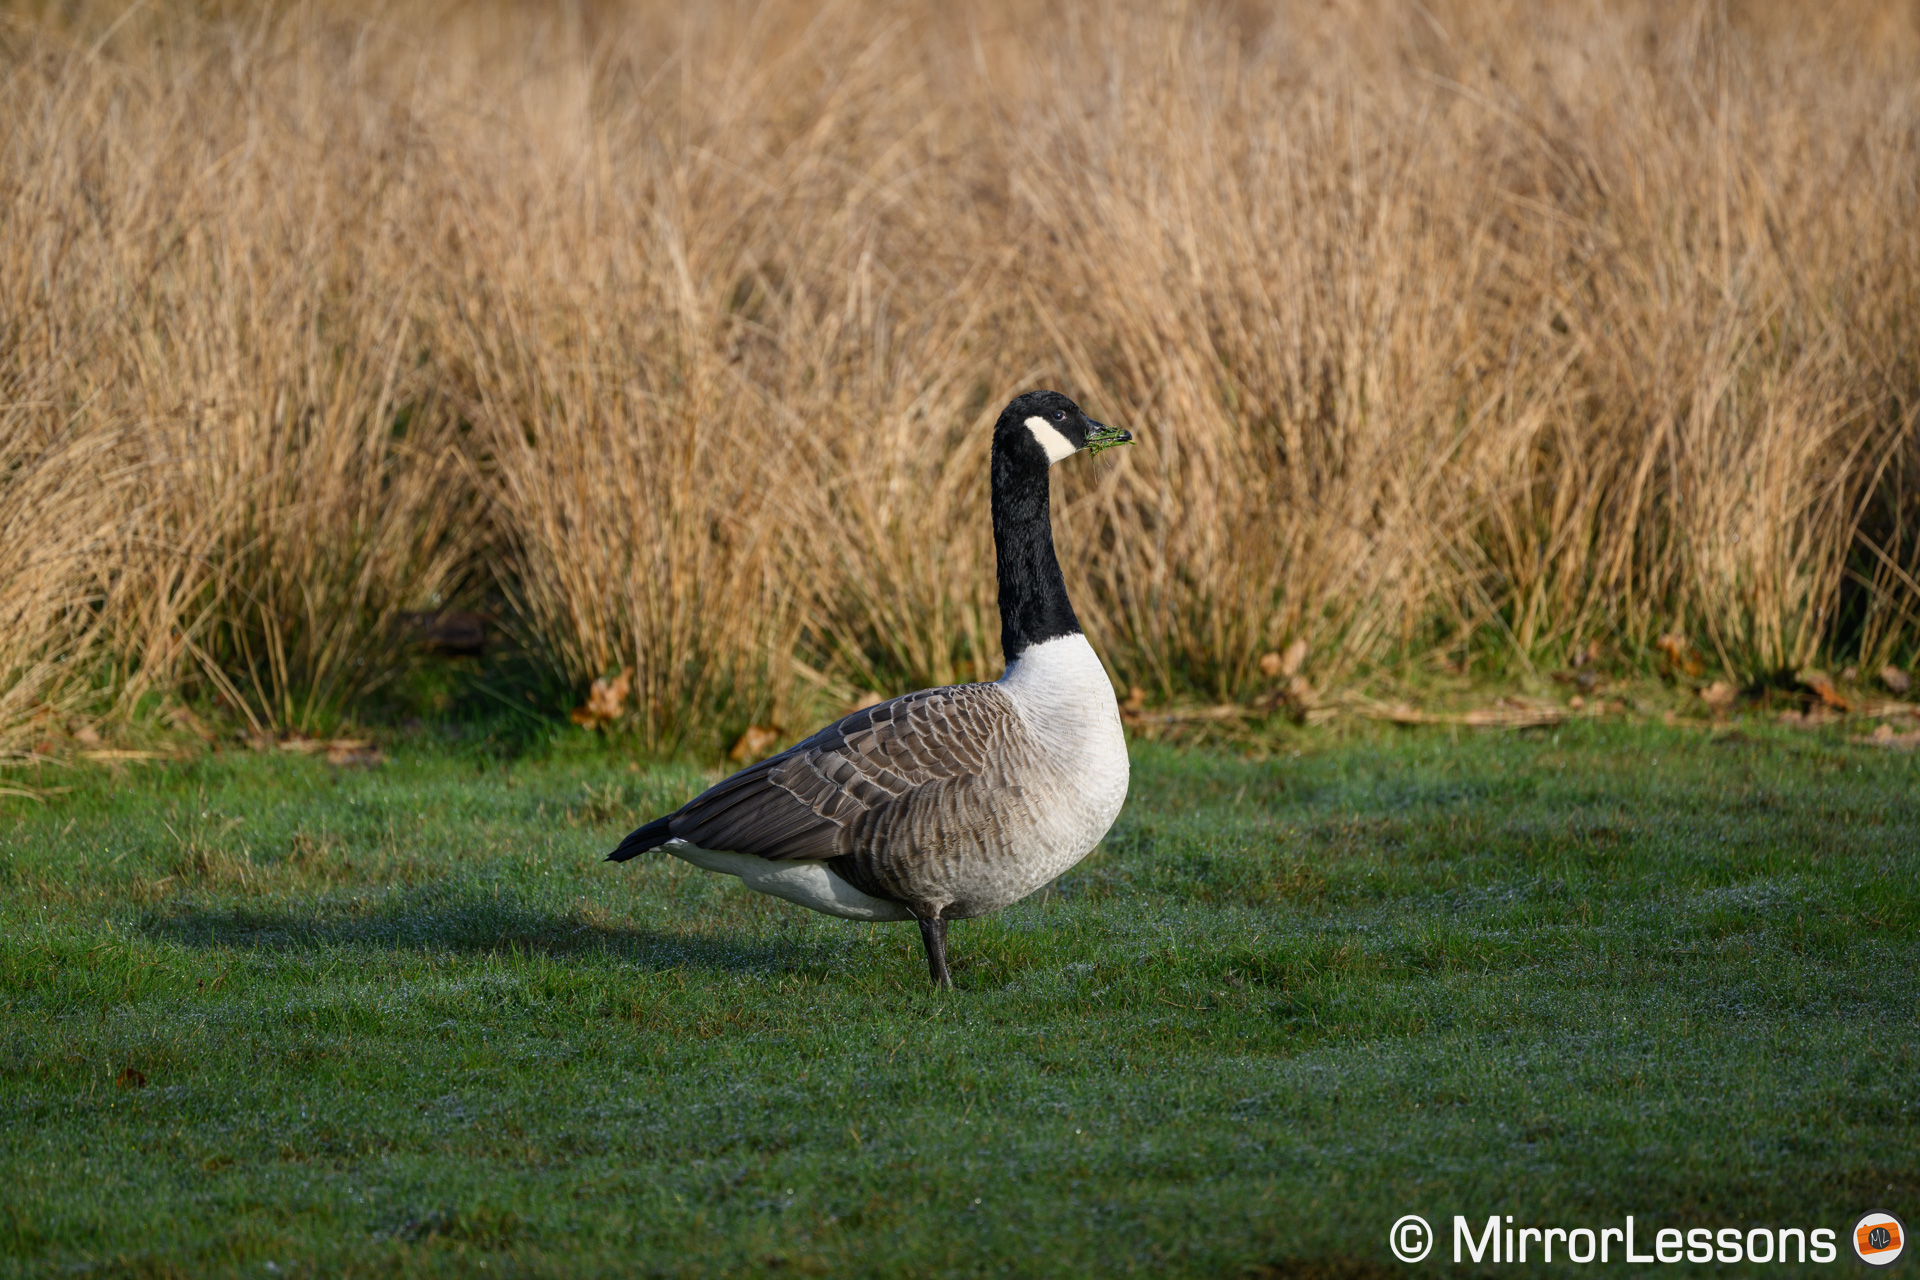
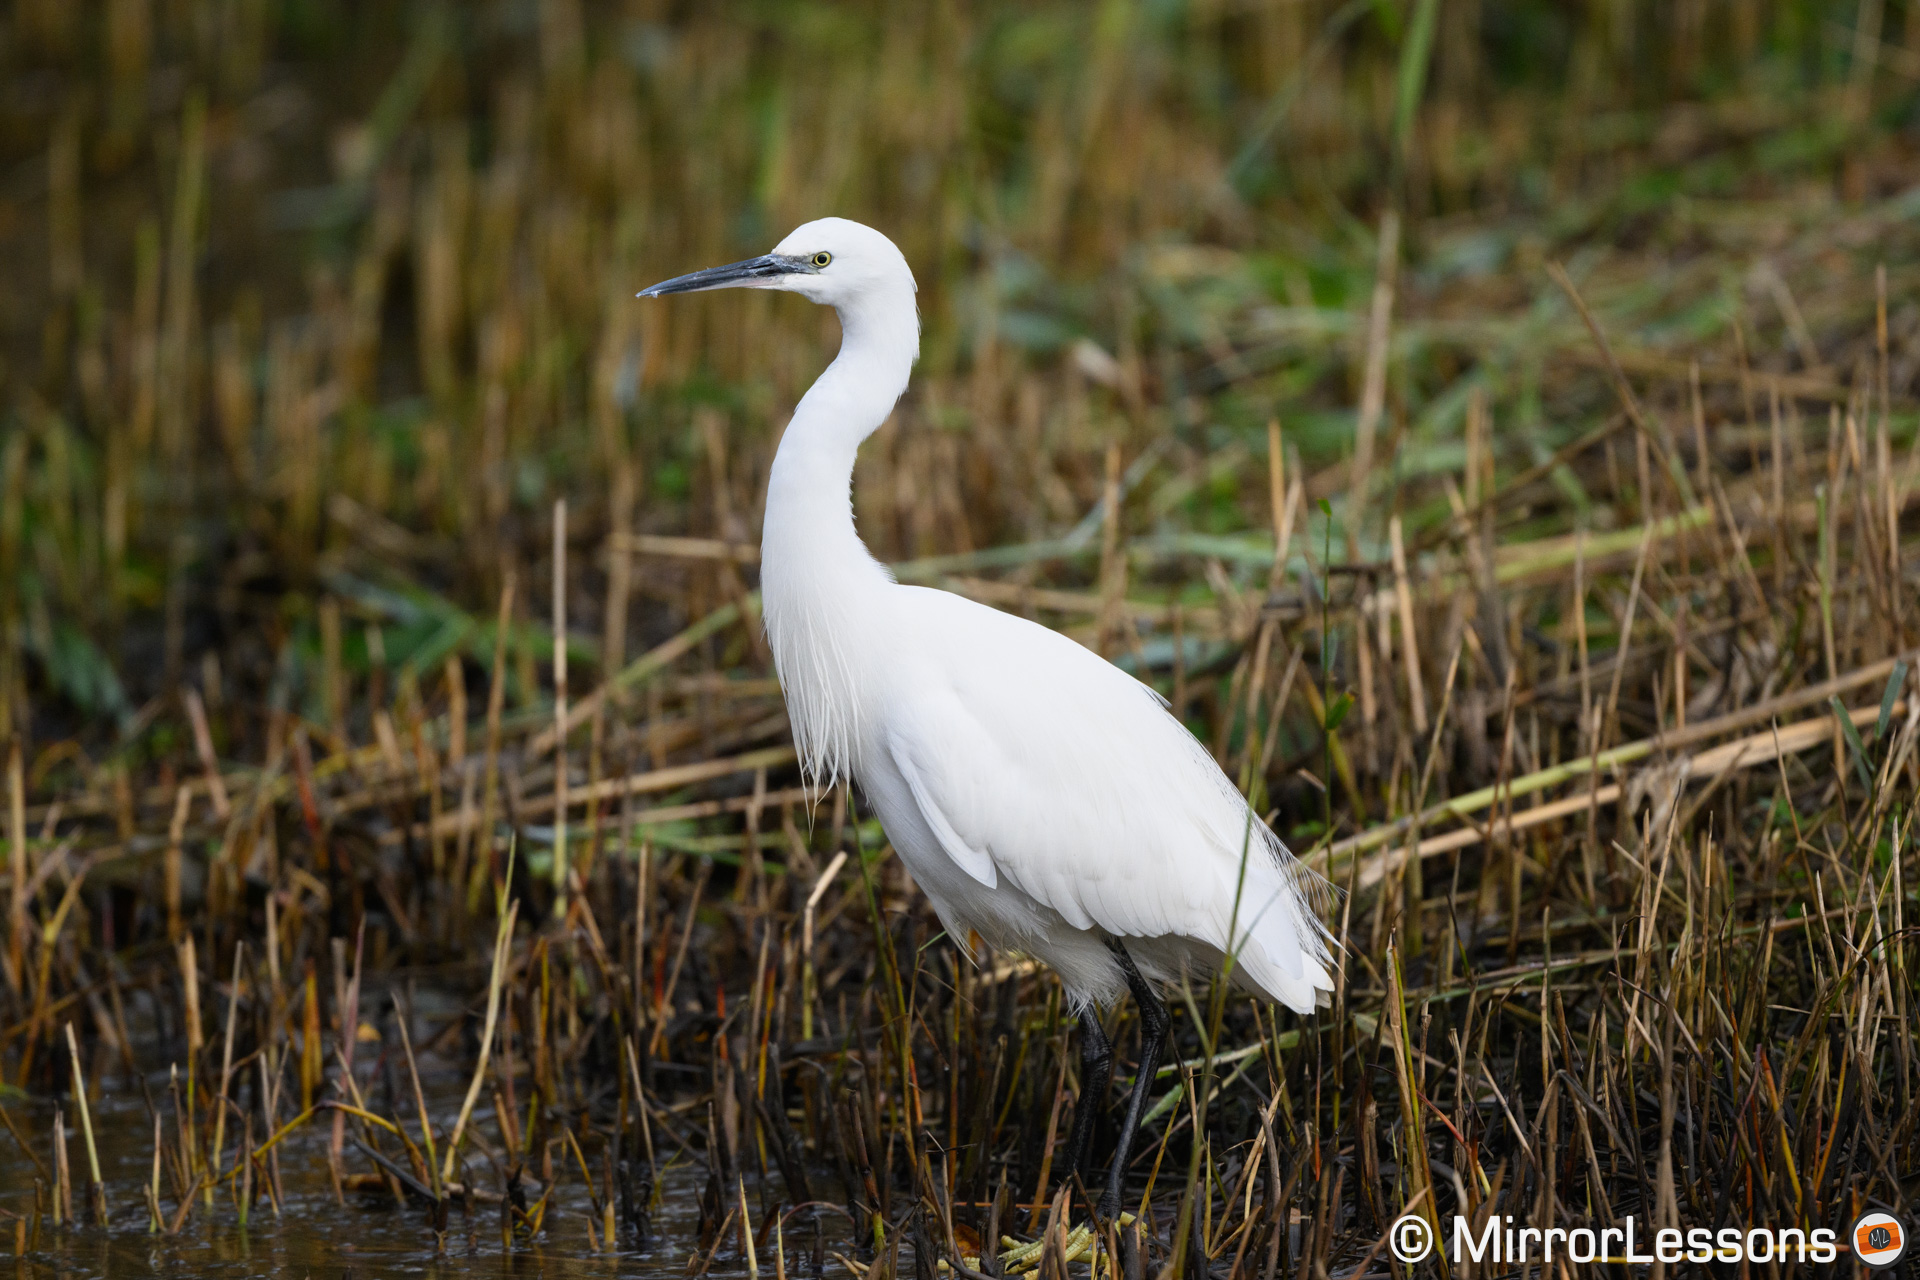
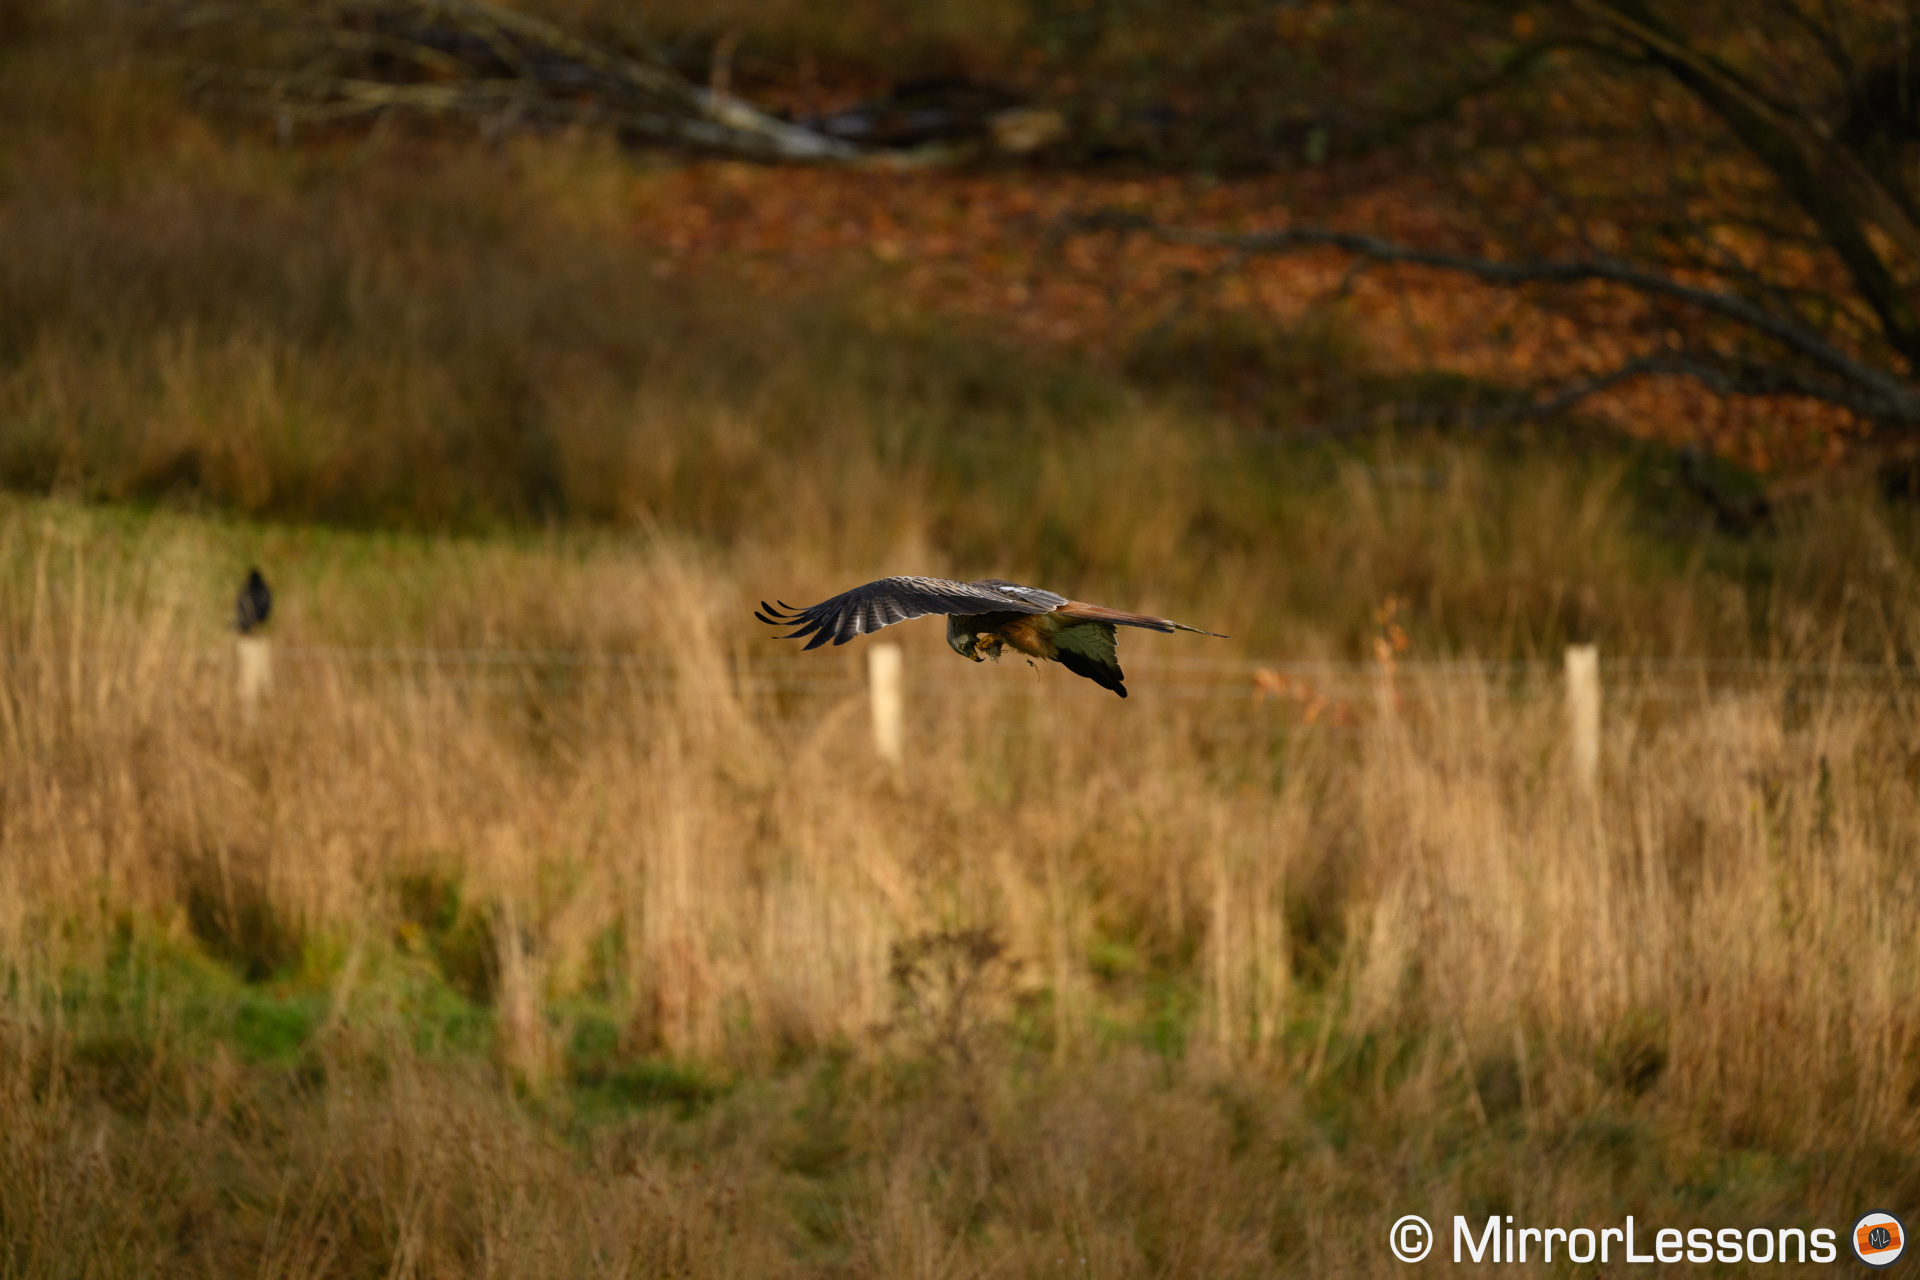
The animals are recognised quickly even when they are distant. In the following scene, the Z9 recognised the black bird straight away, despite its distant position and the grass in the foreground.
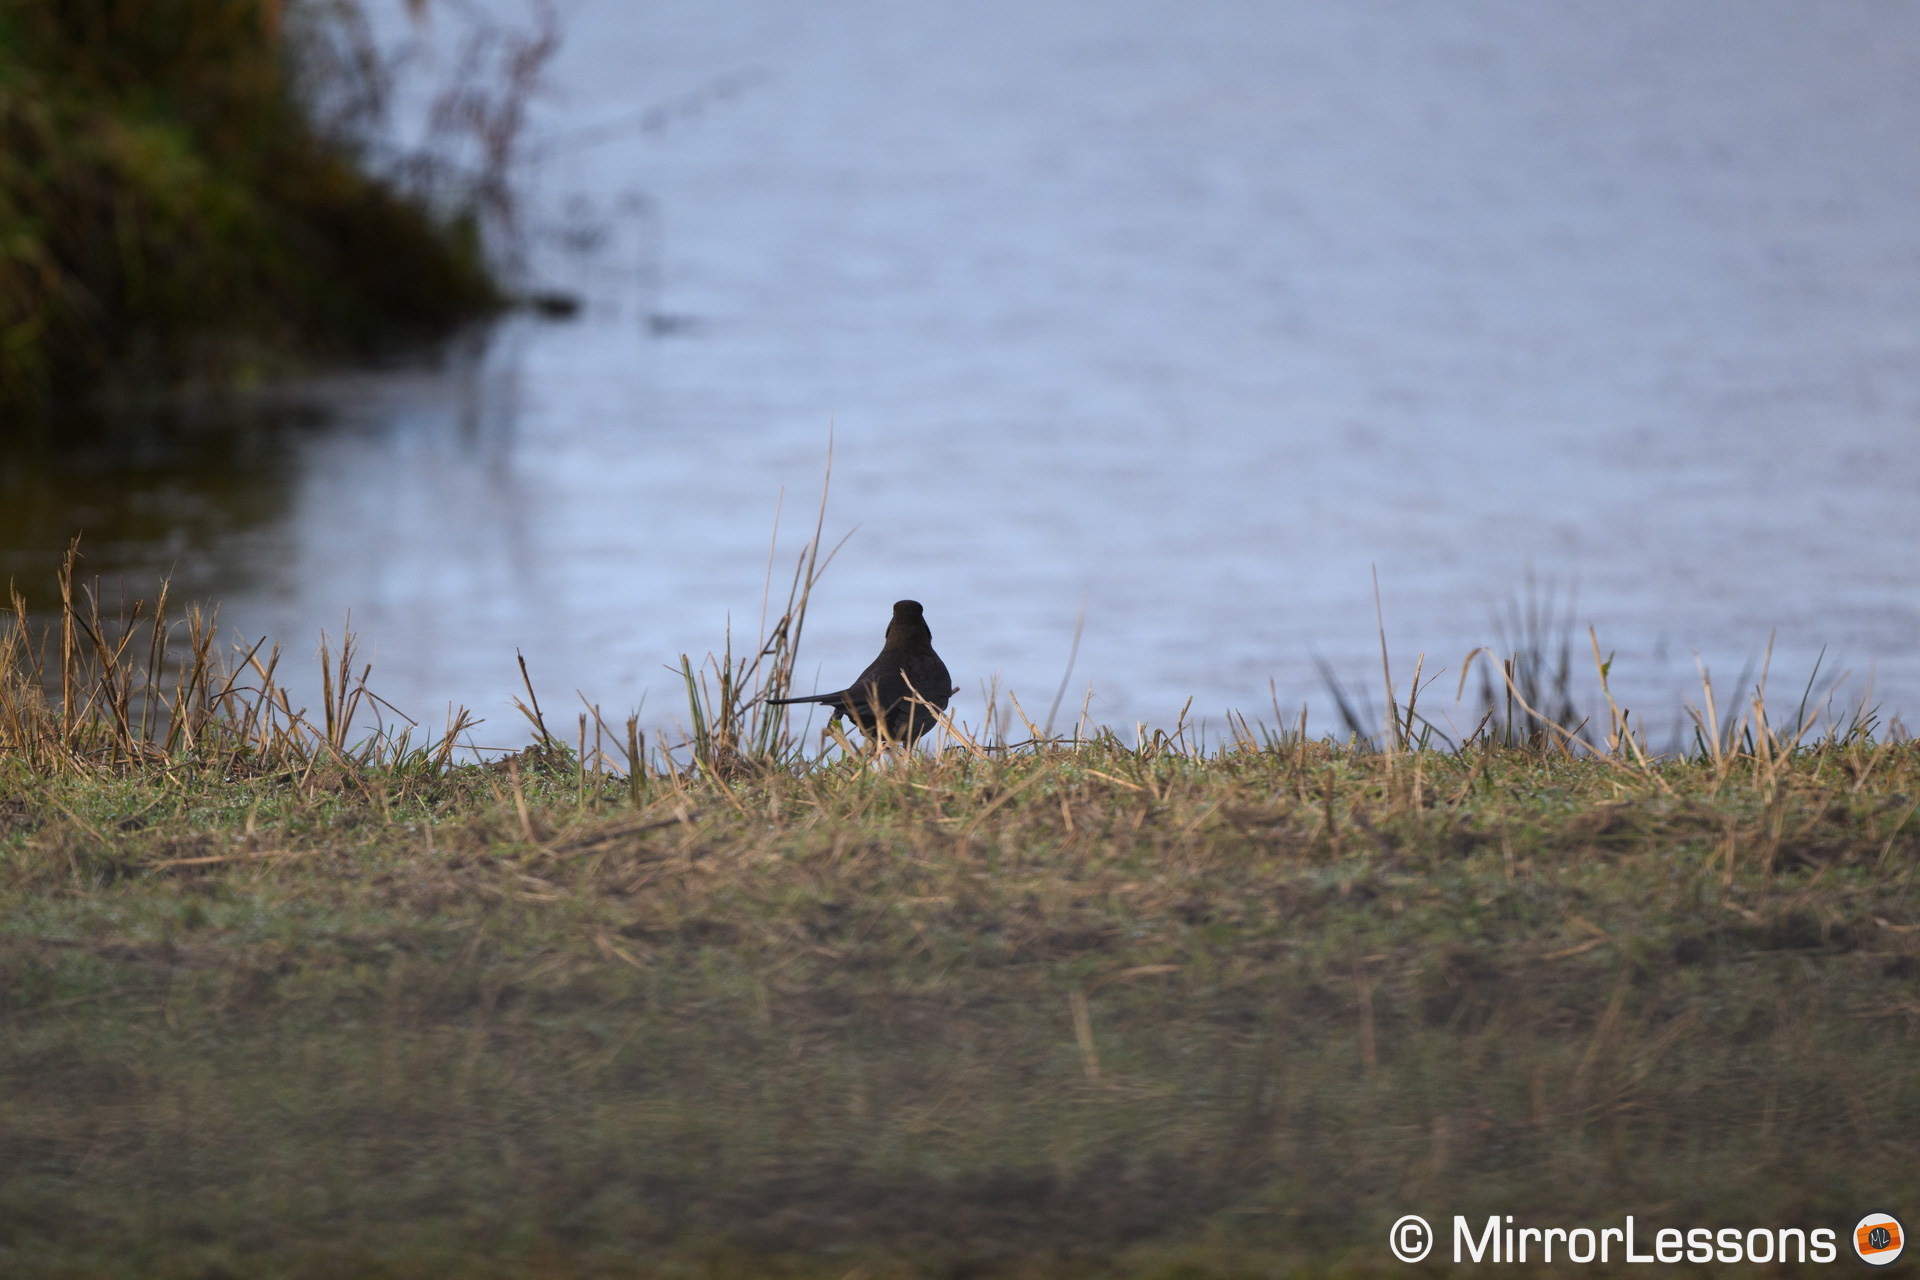
NIKKOR Z 800mm f/6.3 VR S
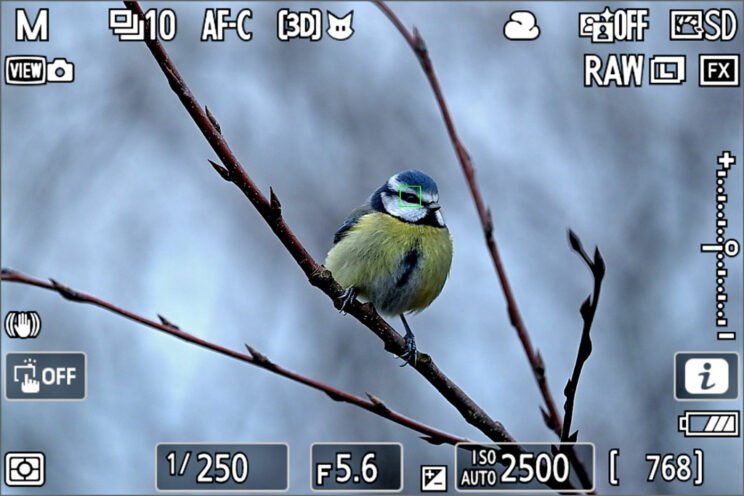
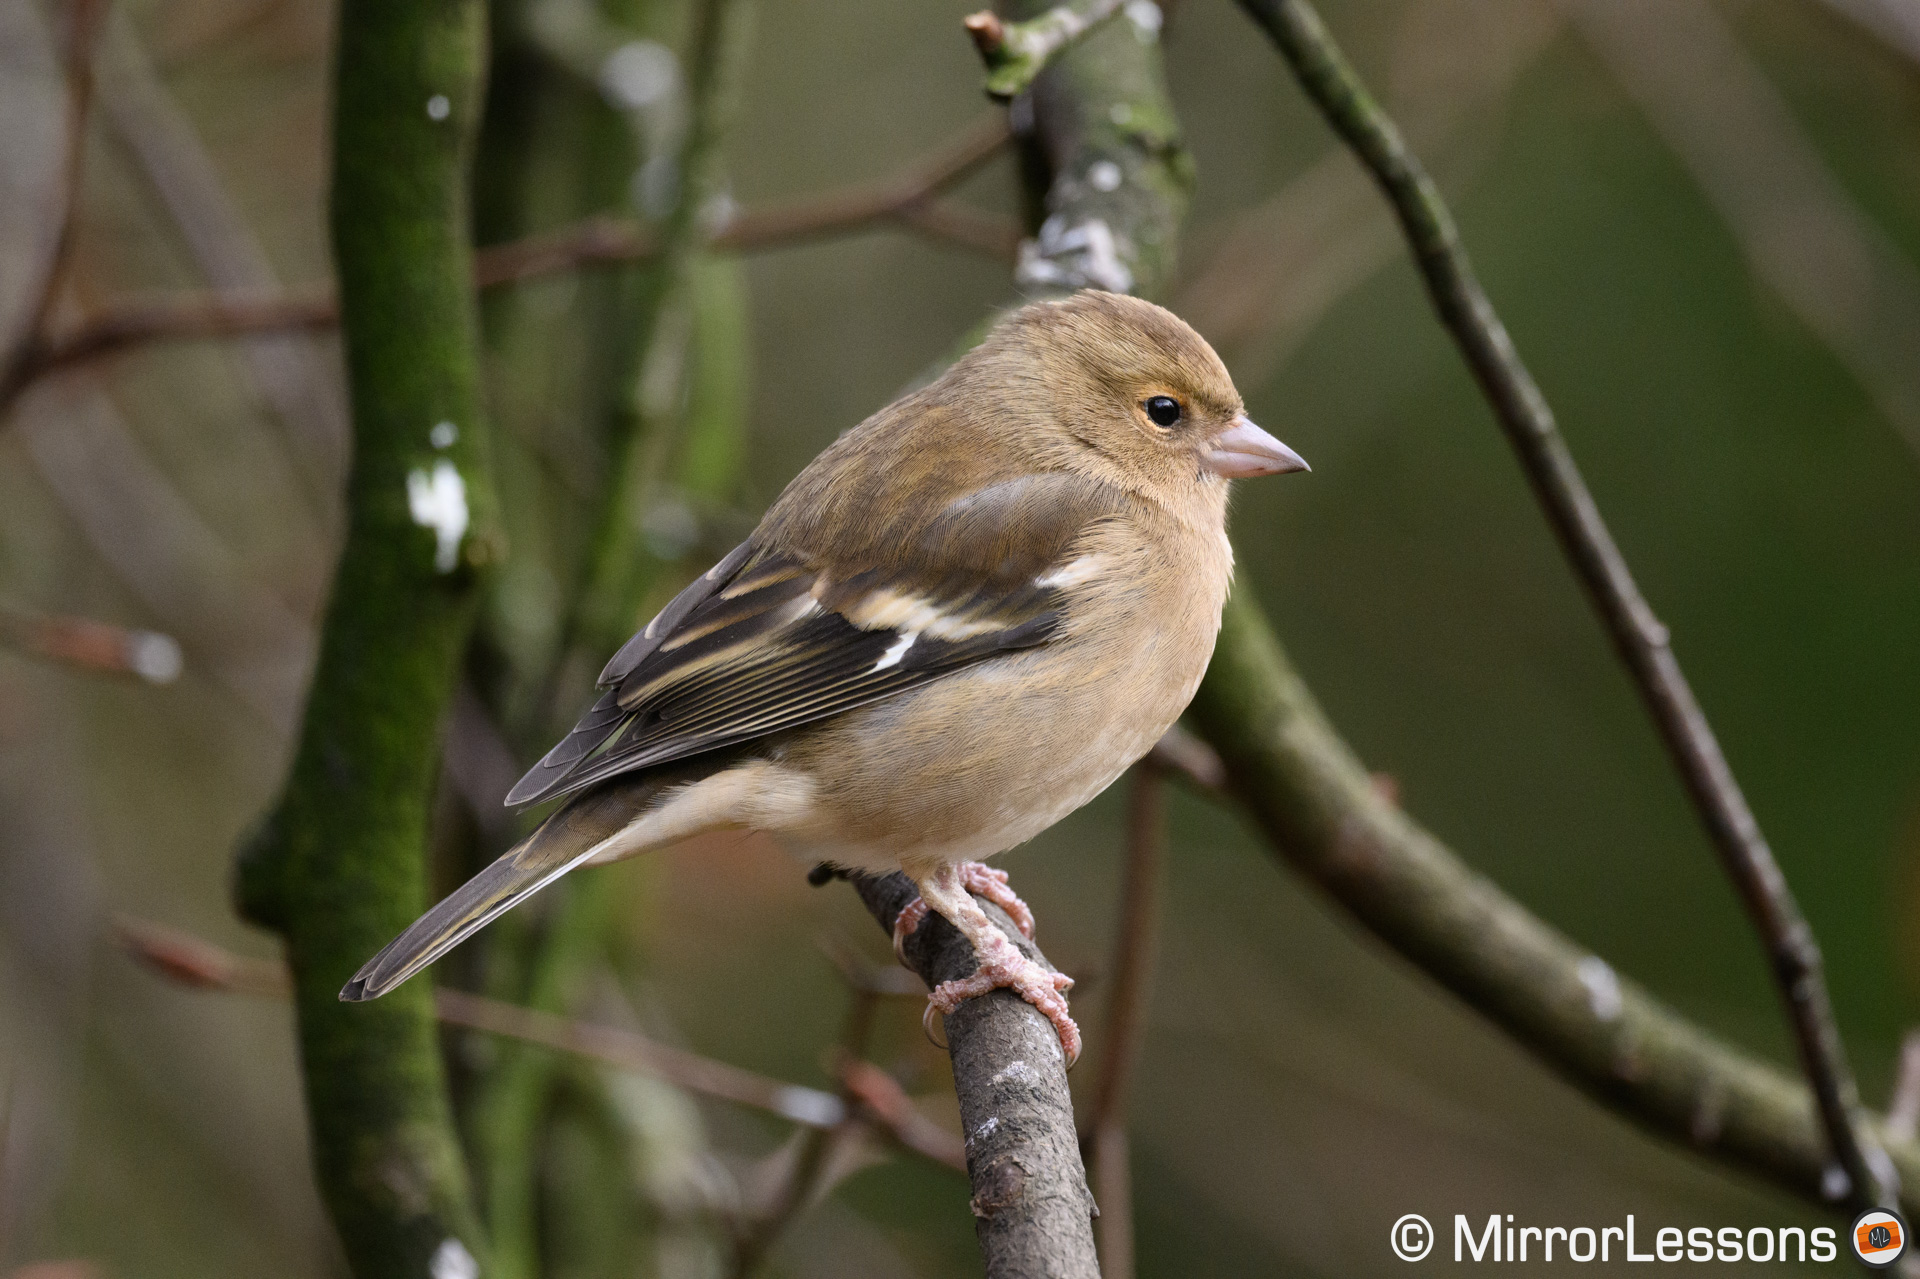
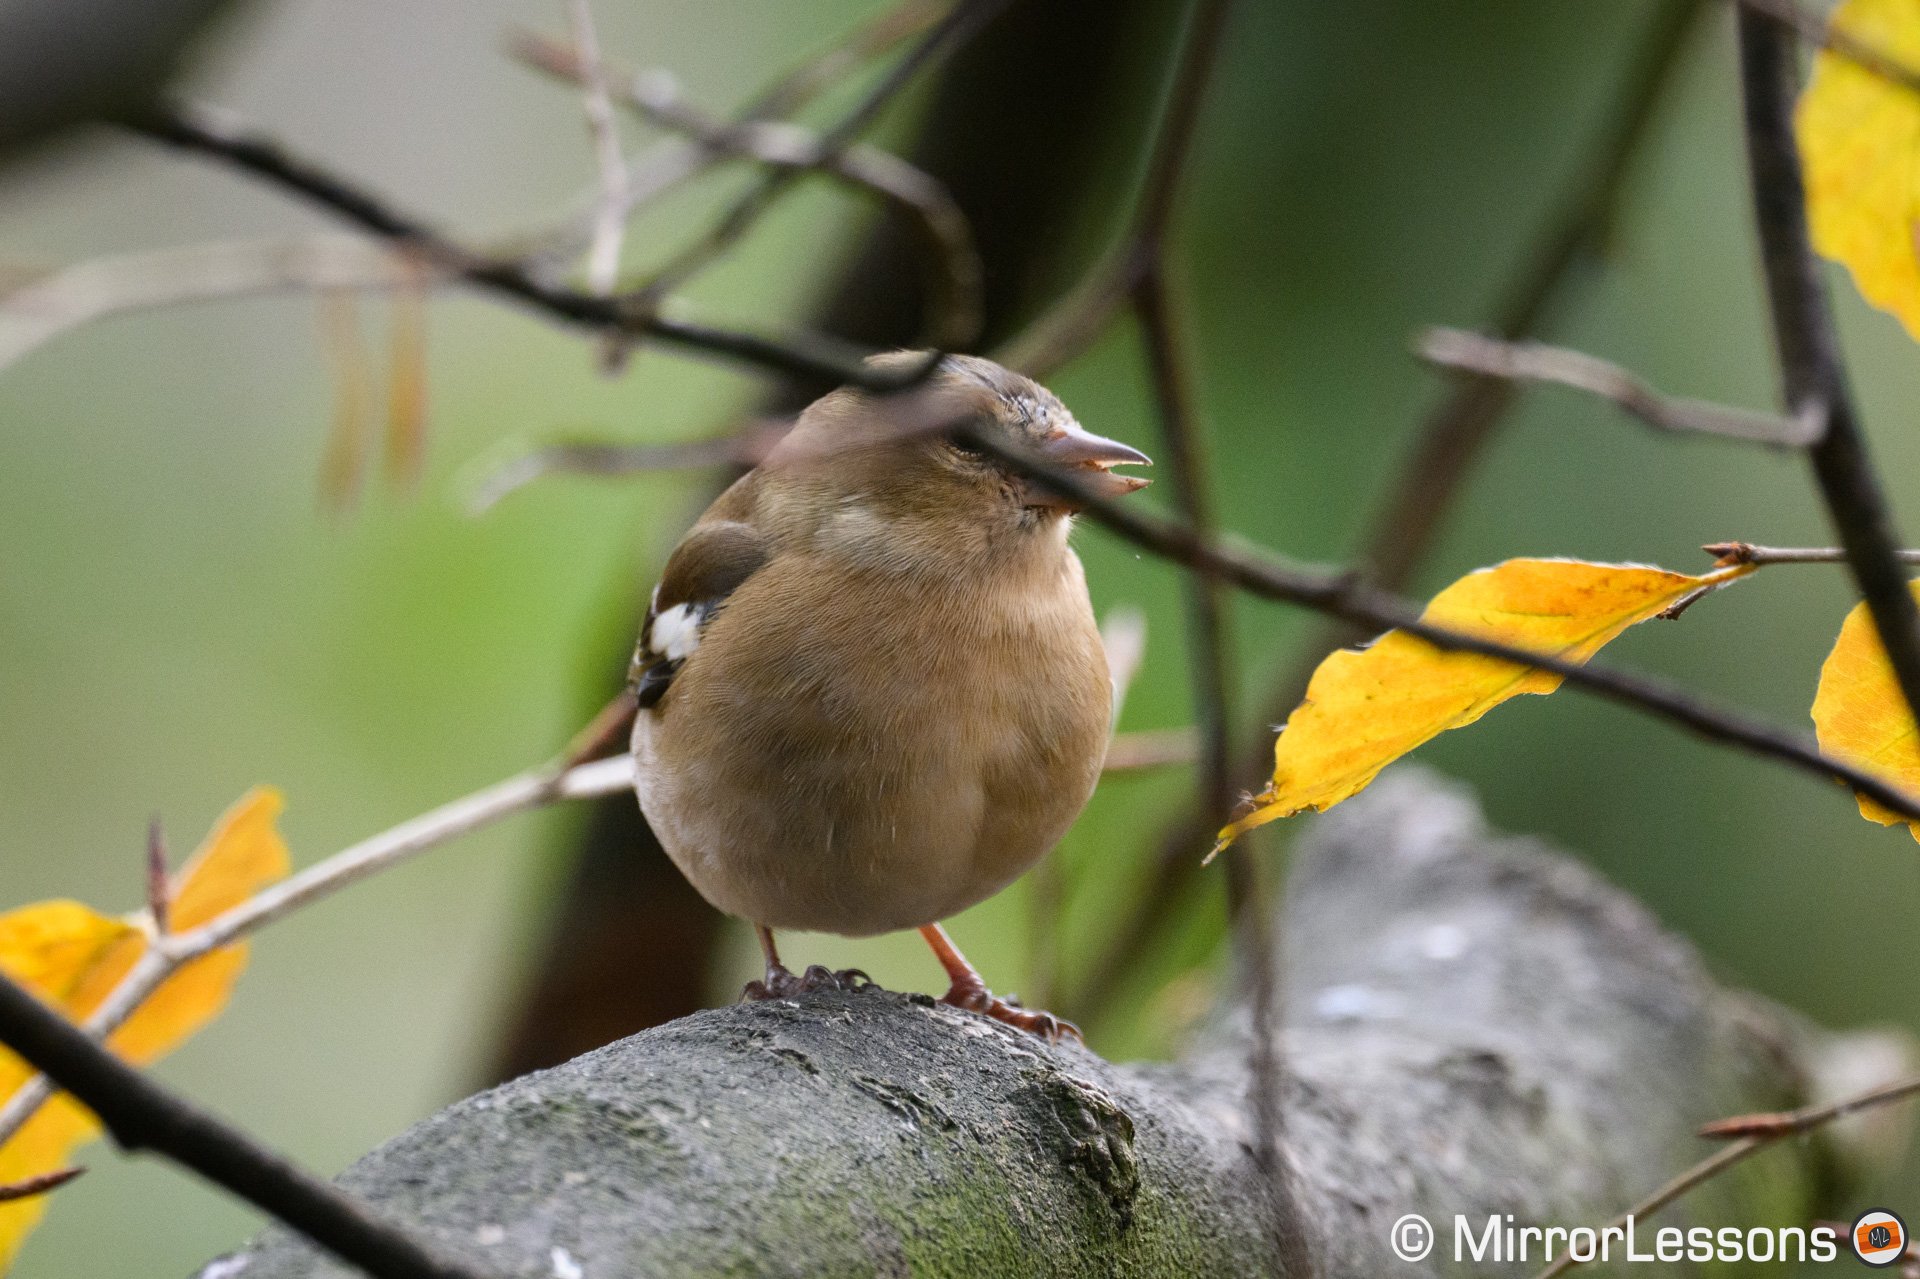
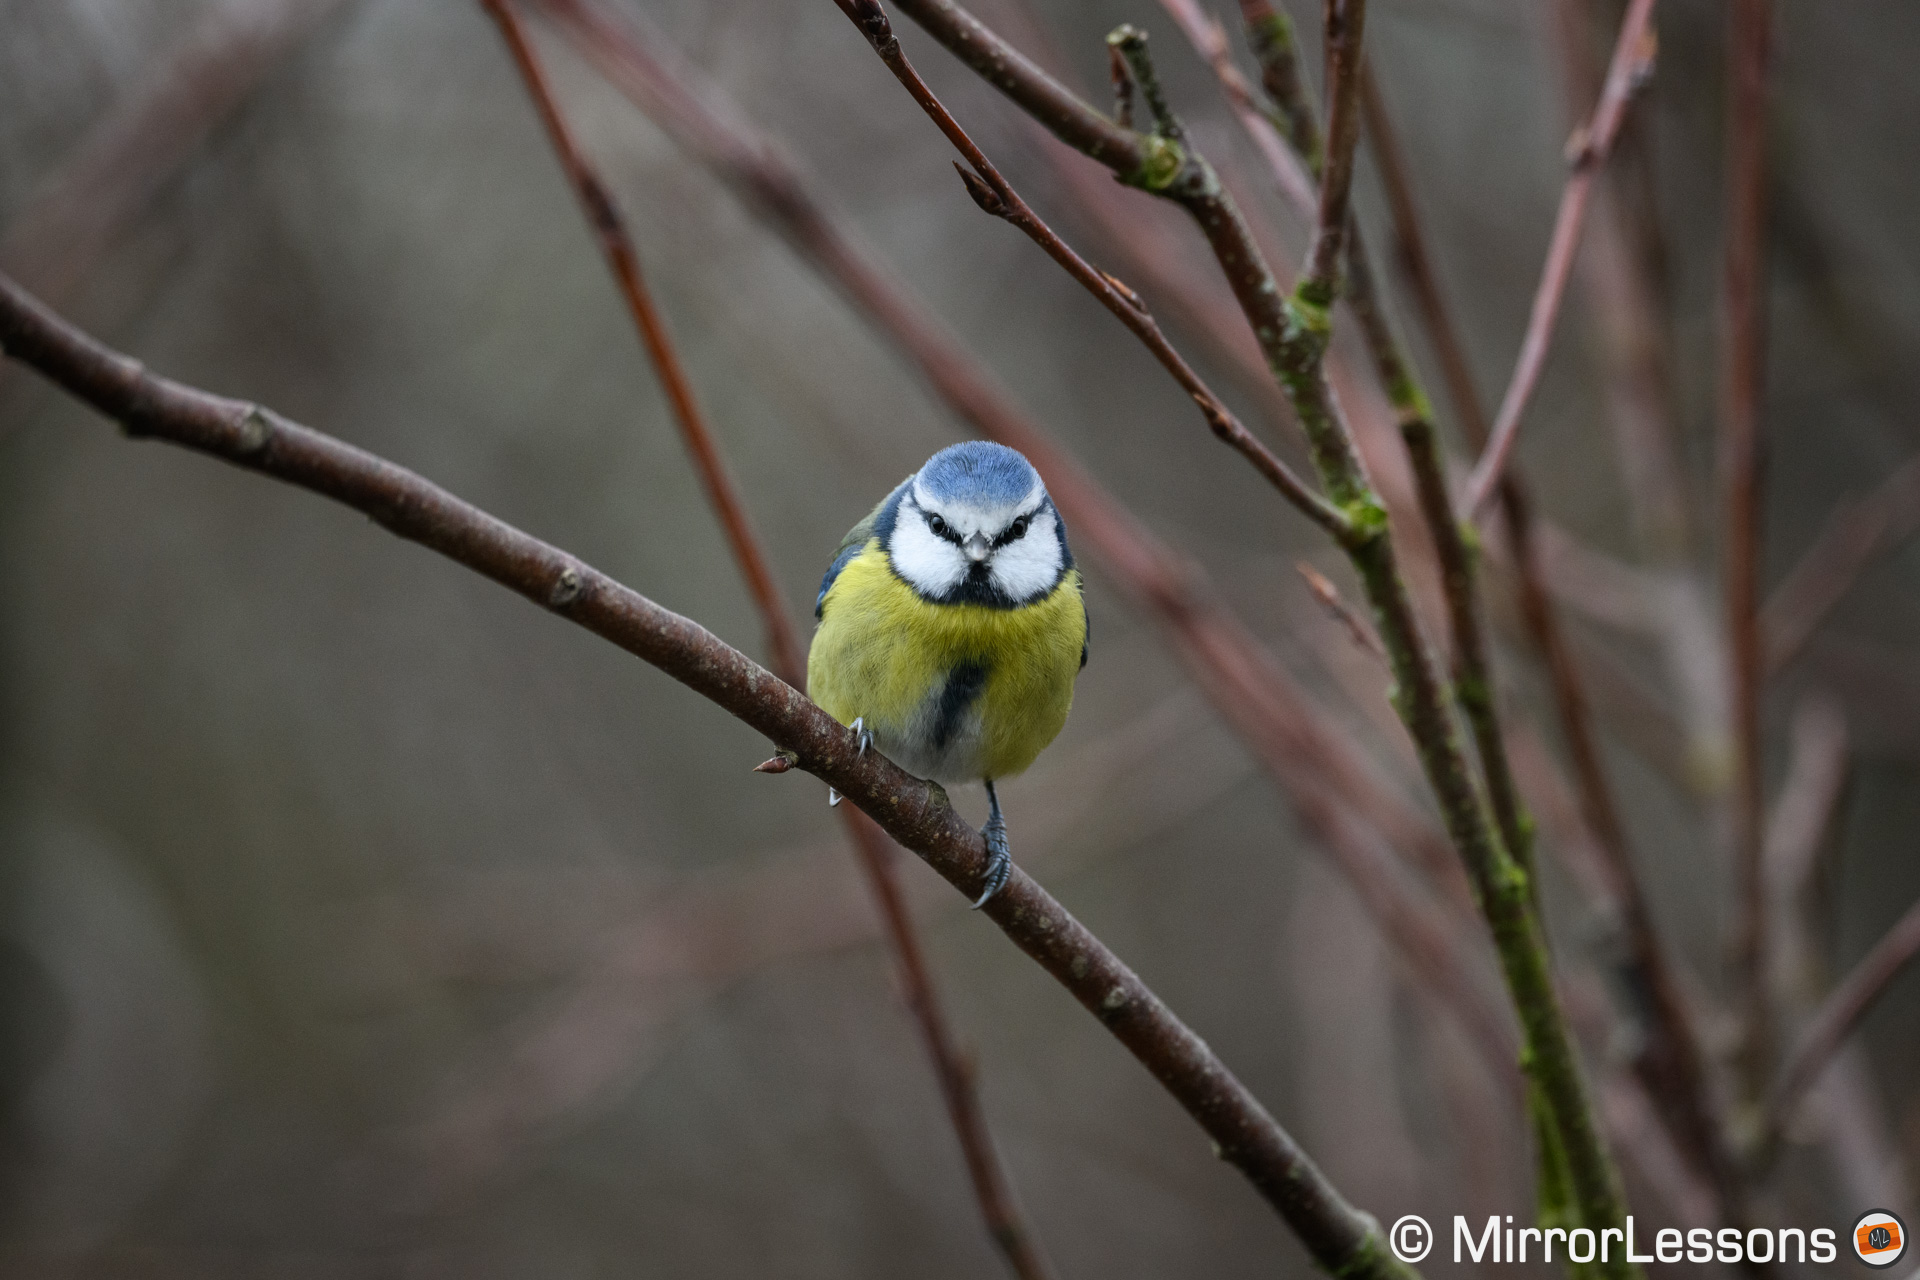
Another photo where the camera had no problem detecting the blue tit despite being small in the frame and not in favourable light.
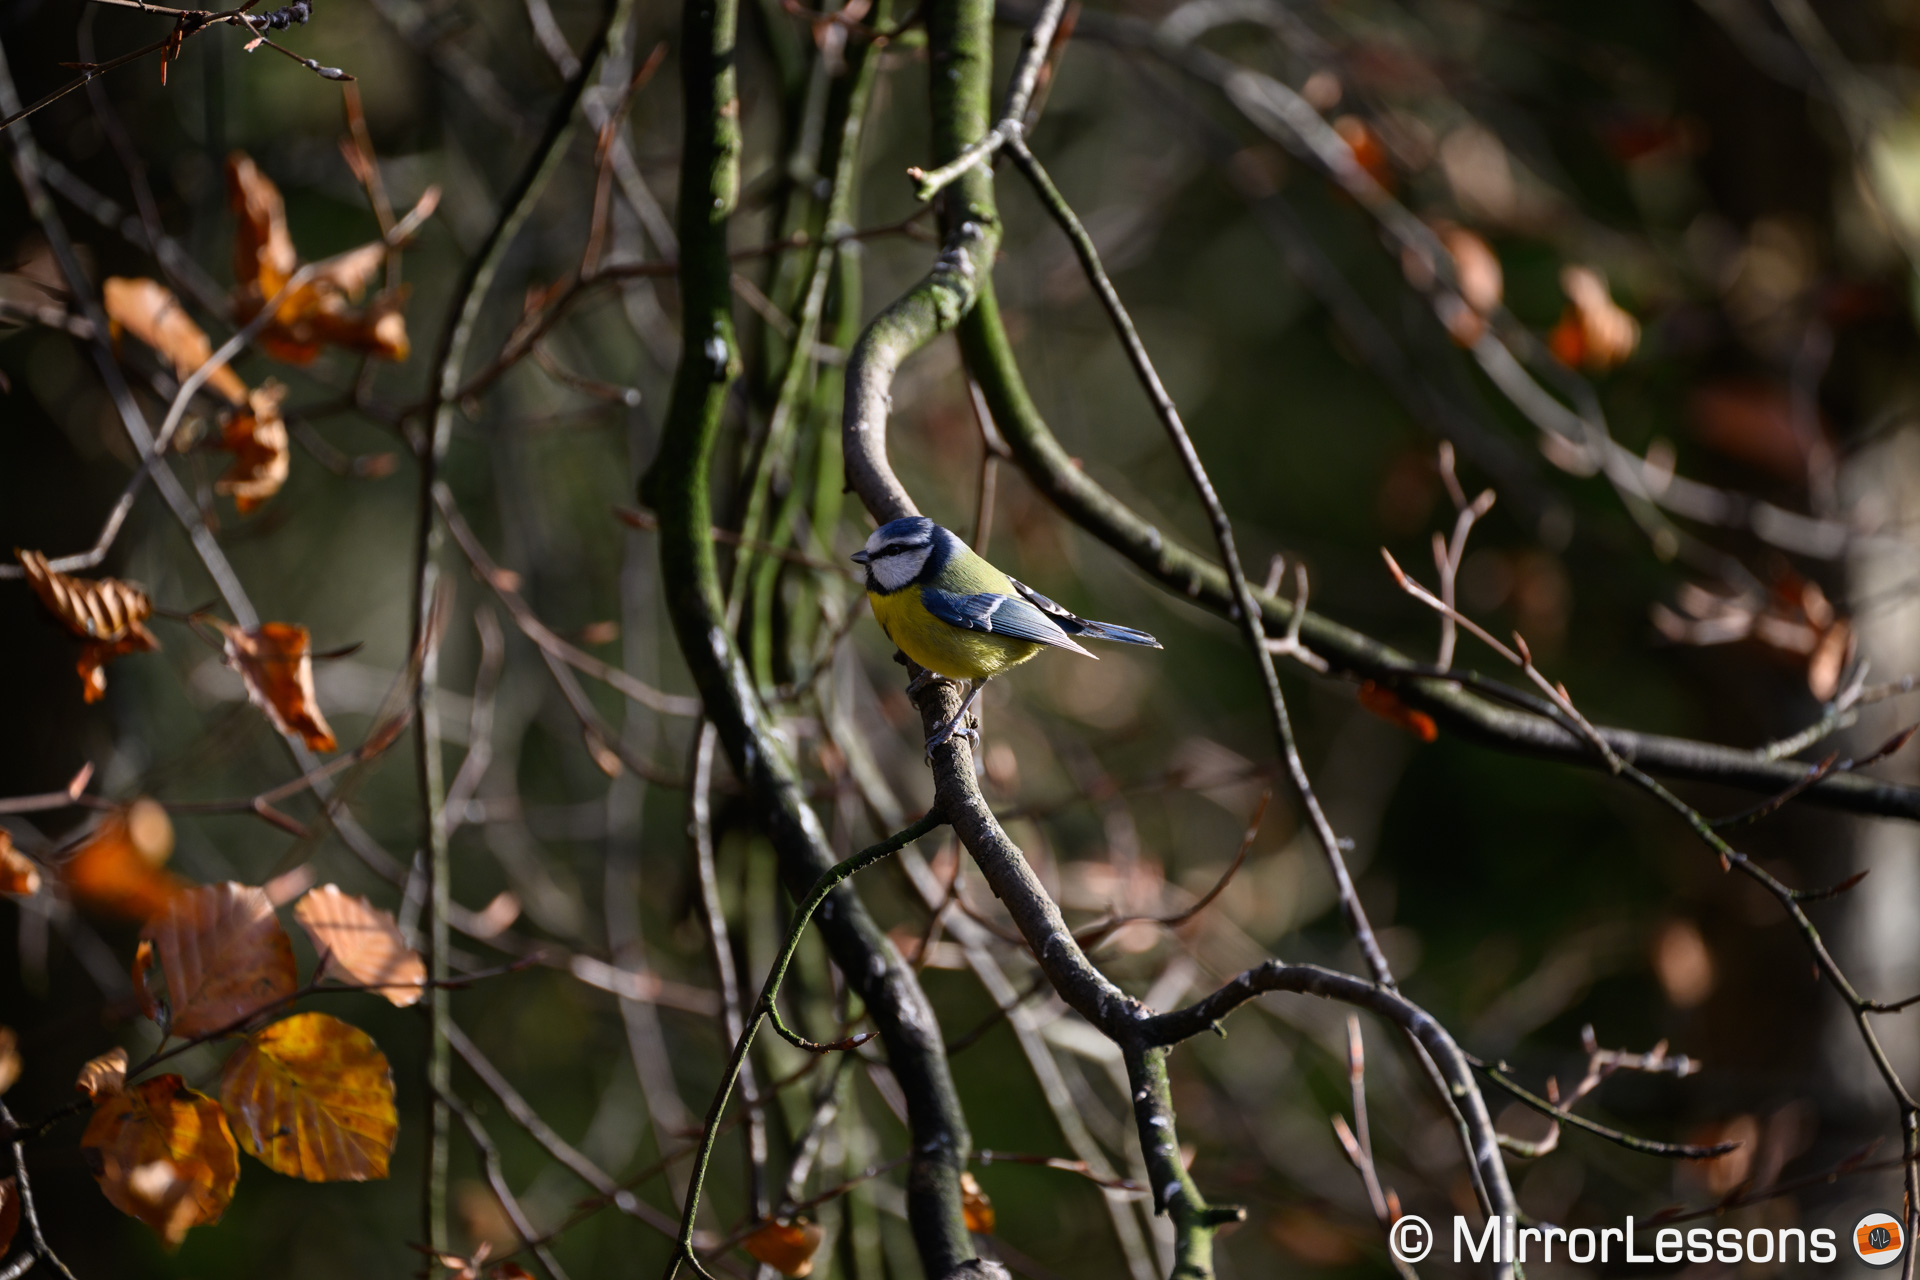
NIKKOR Z 100-400mm f/4.5-5.6 VR S at 400 mm
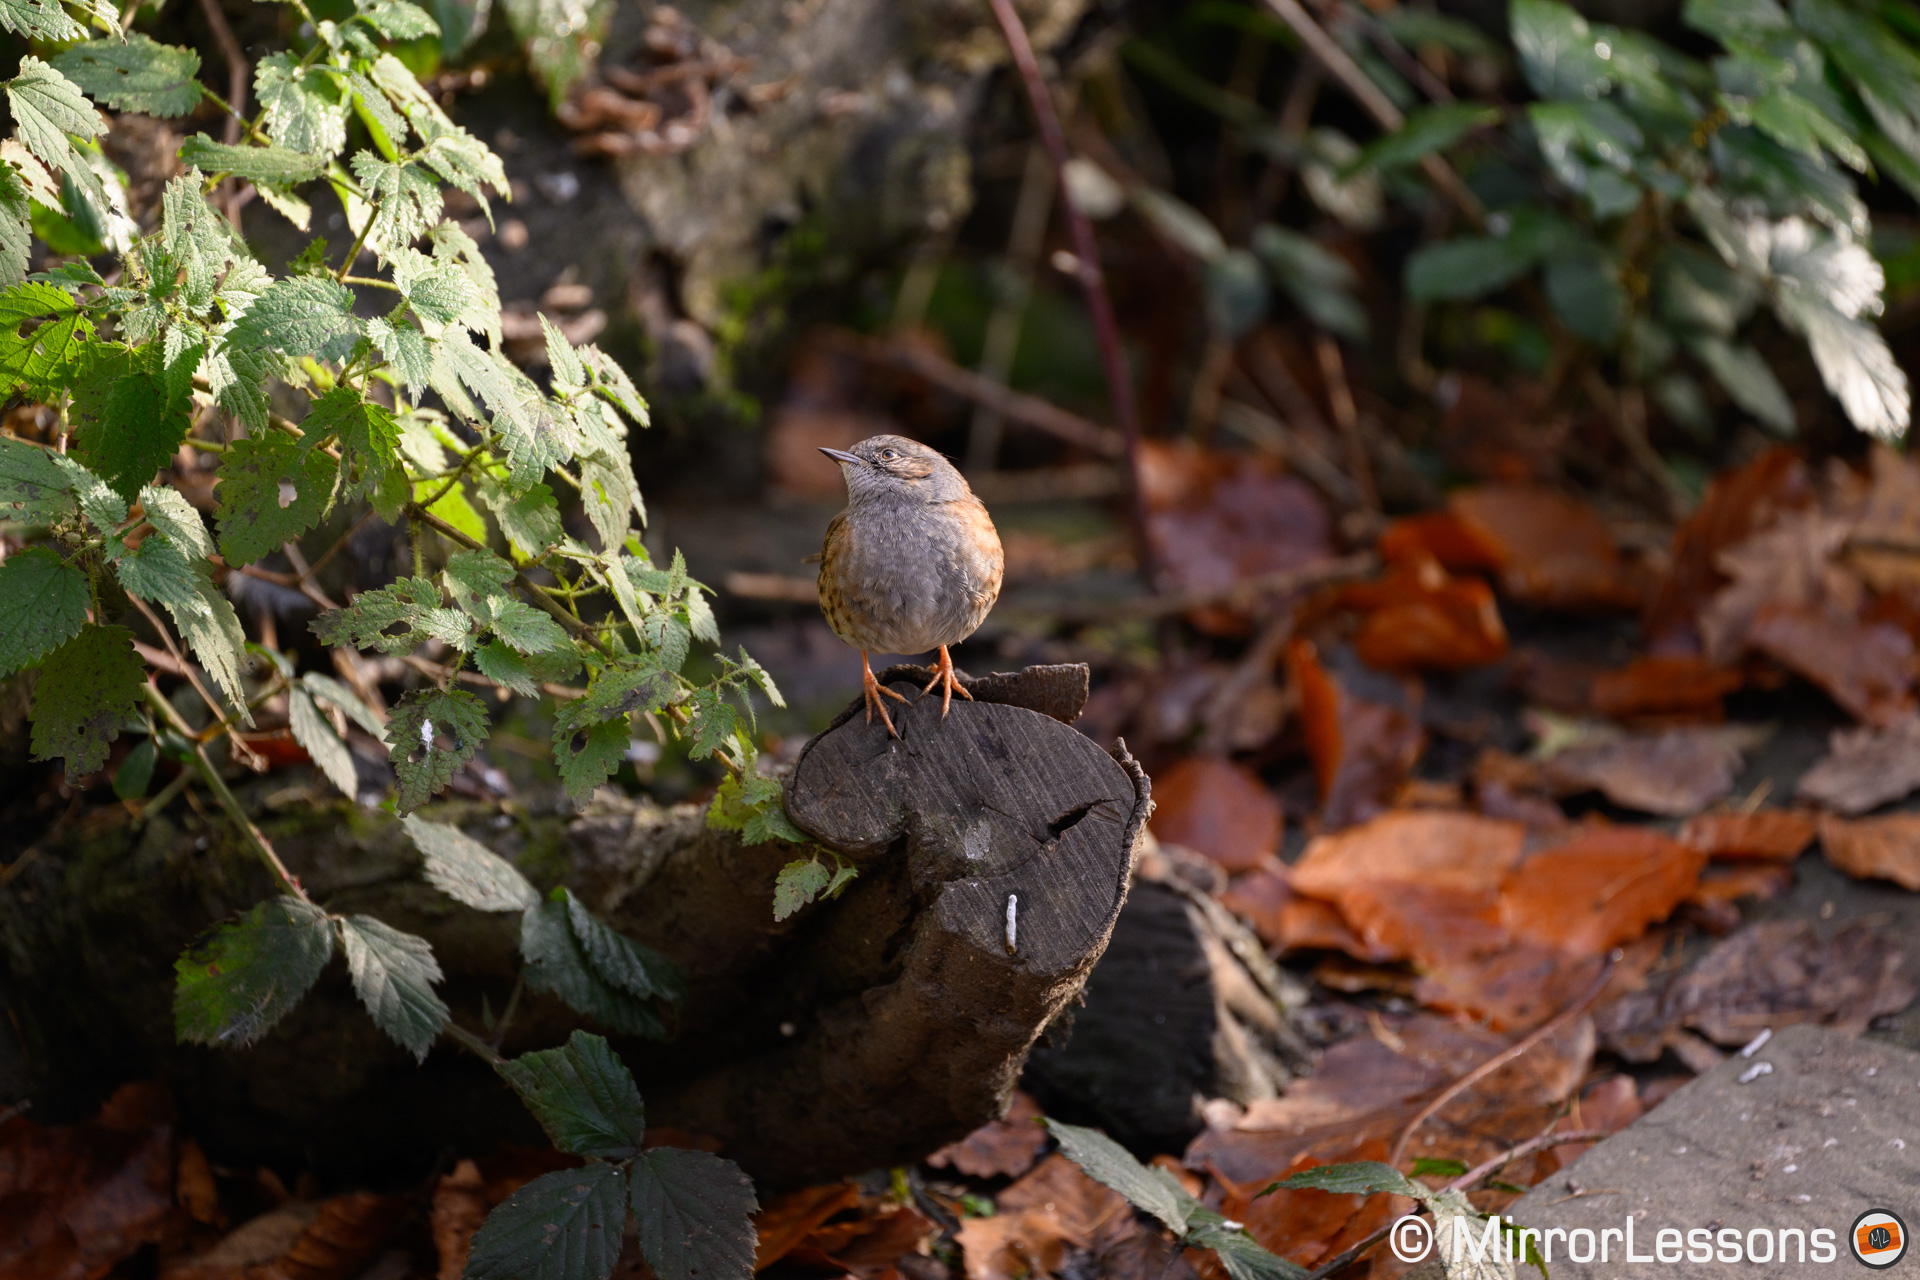
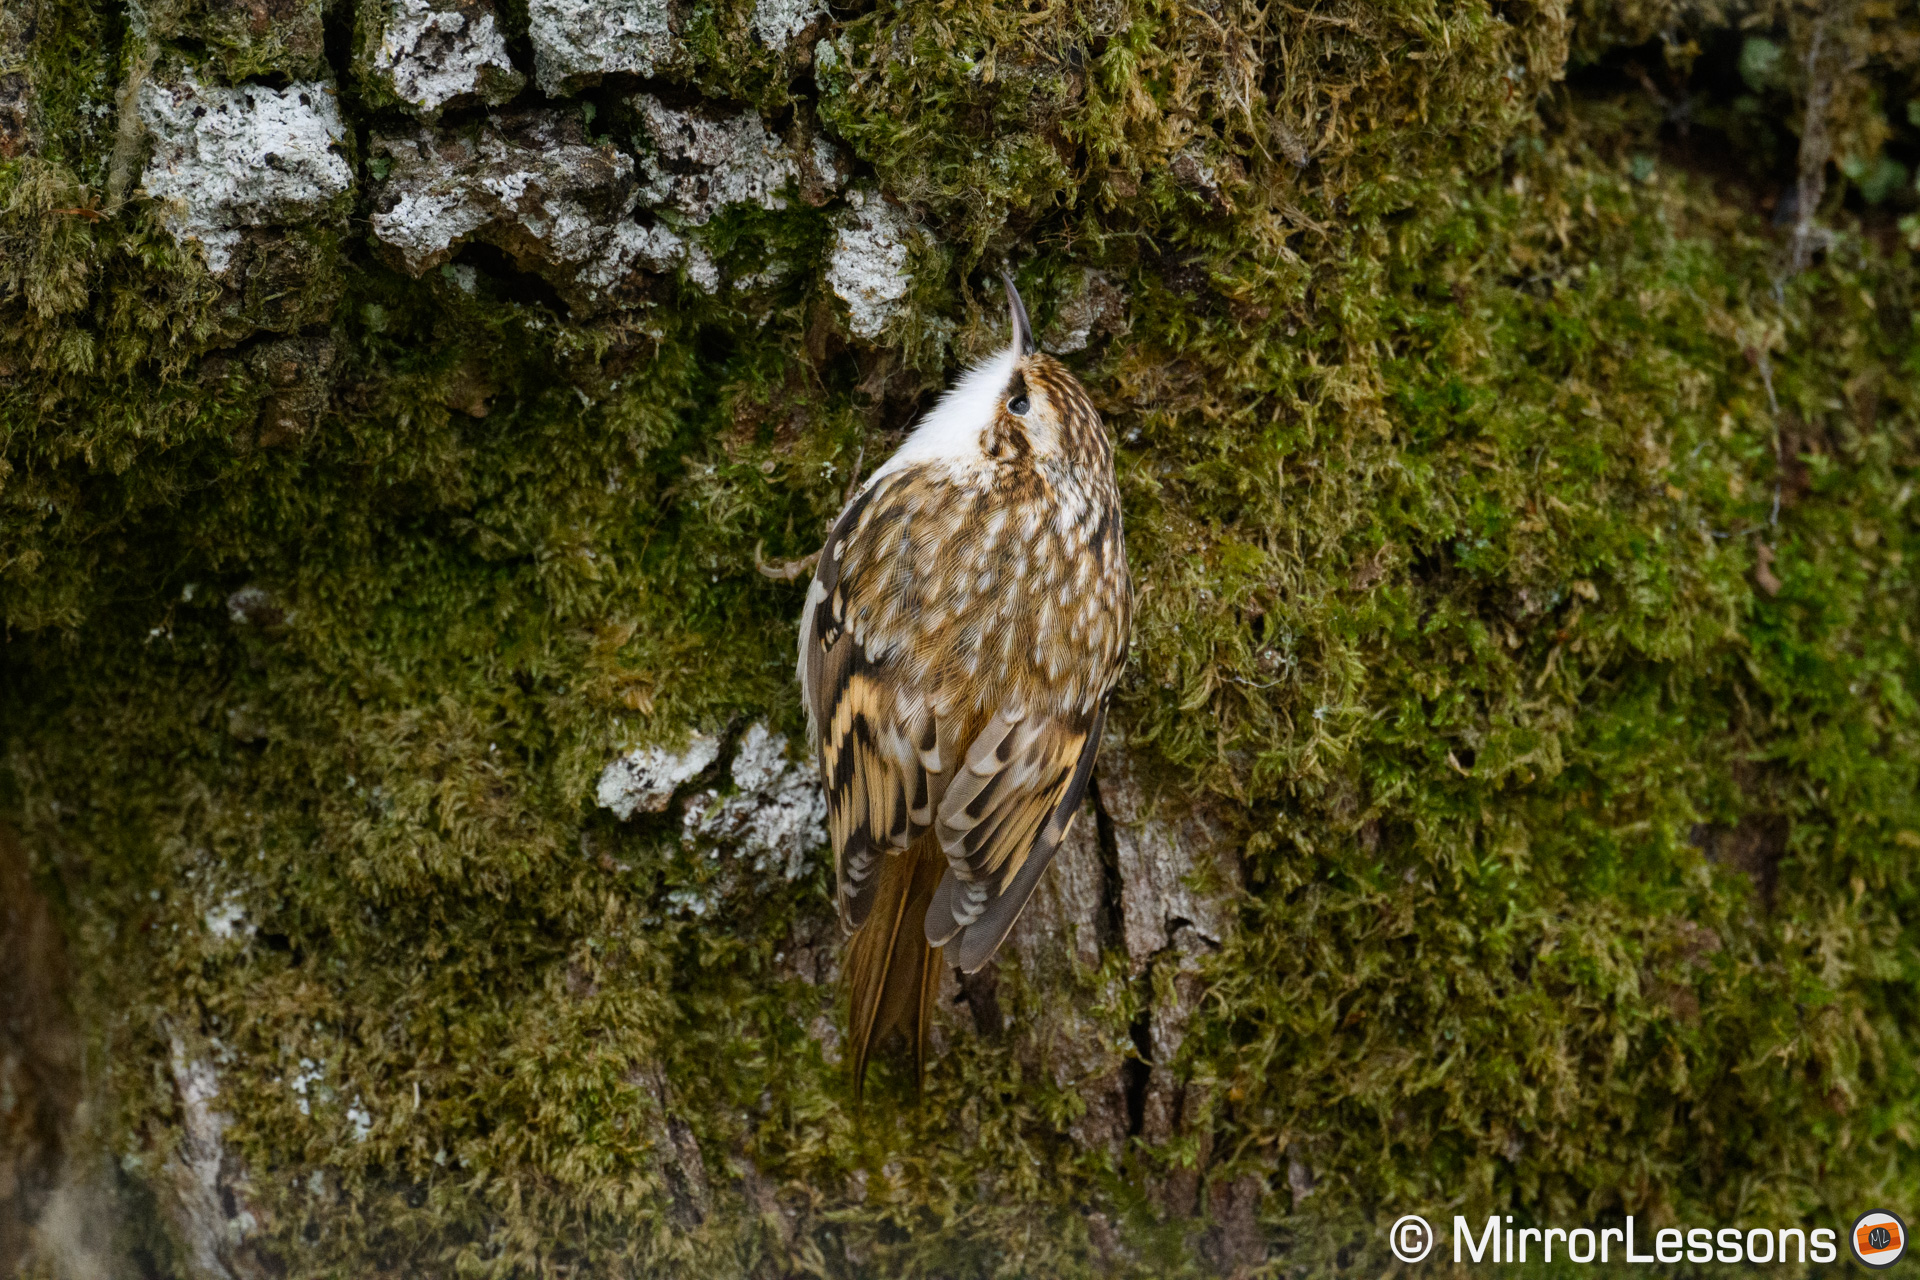
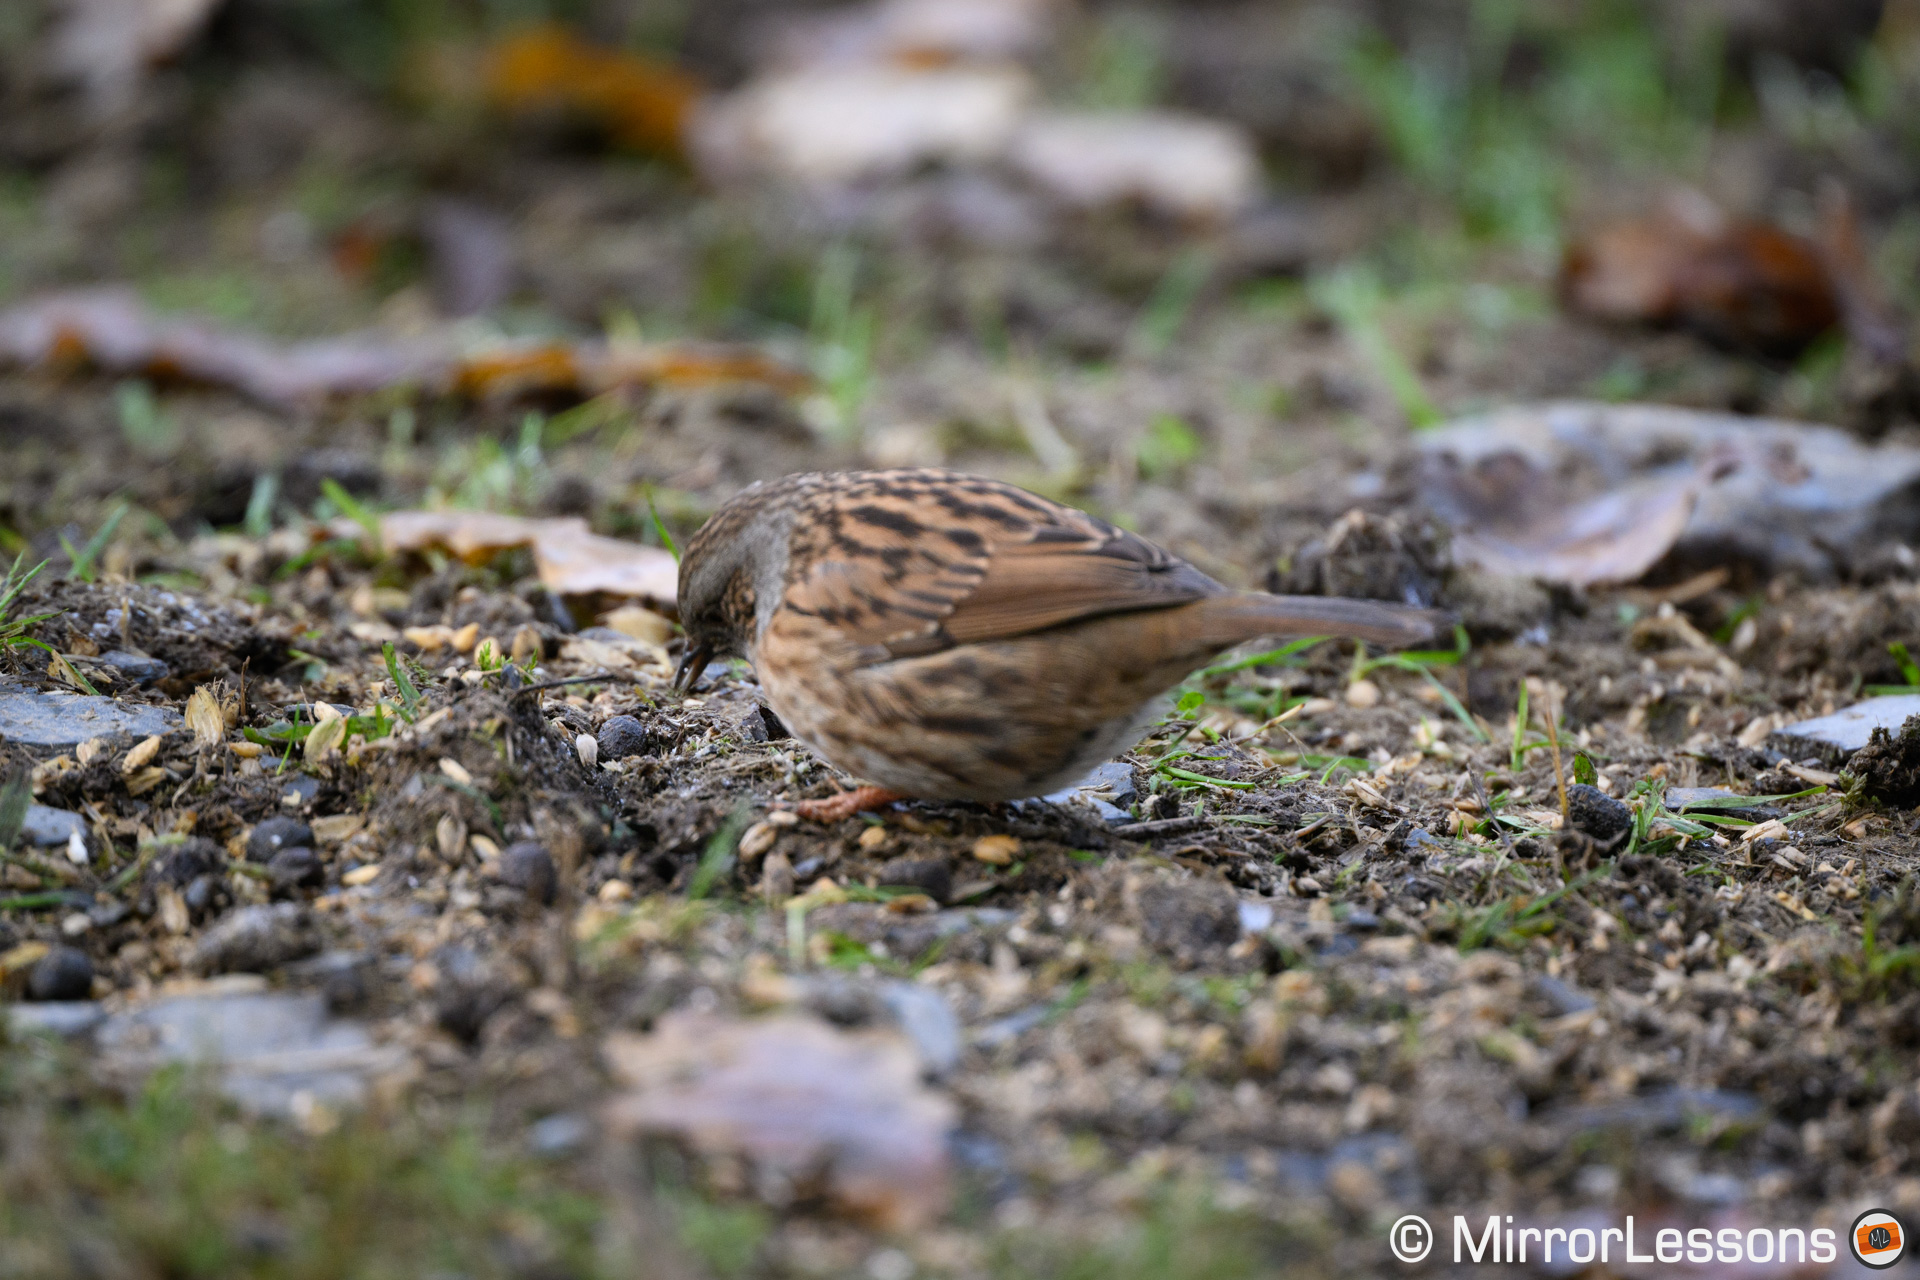
A third example where animal detection was effective and locked onto this cute treecreeper right away.
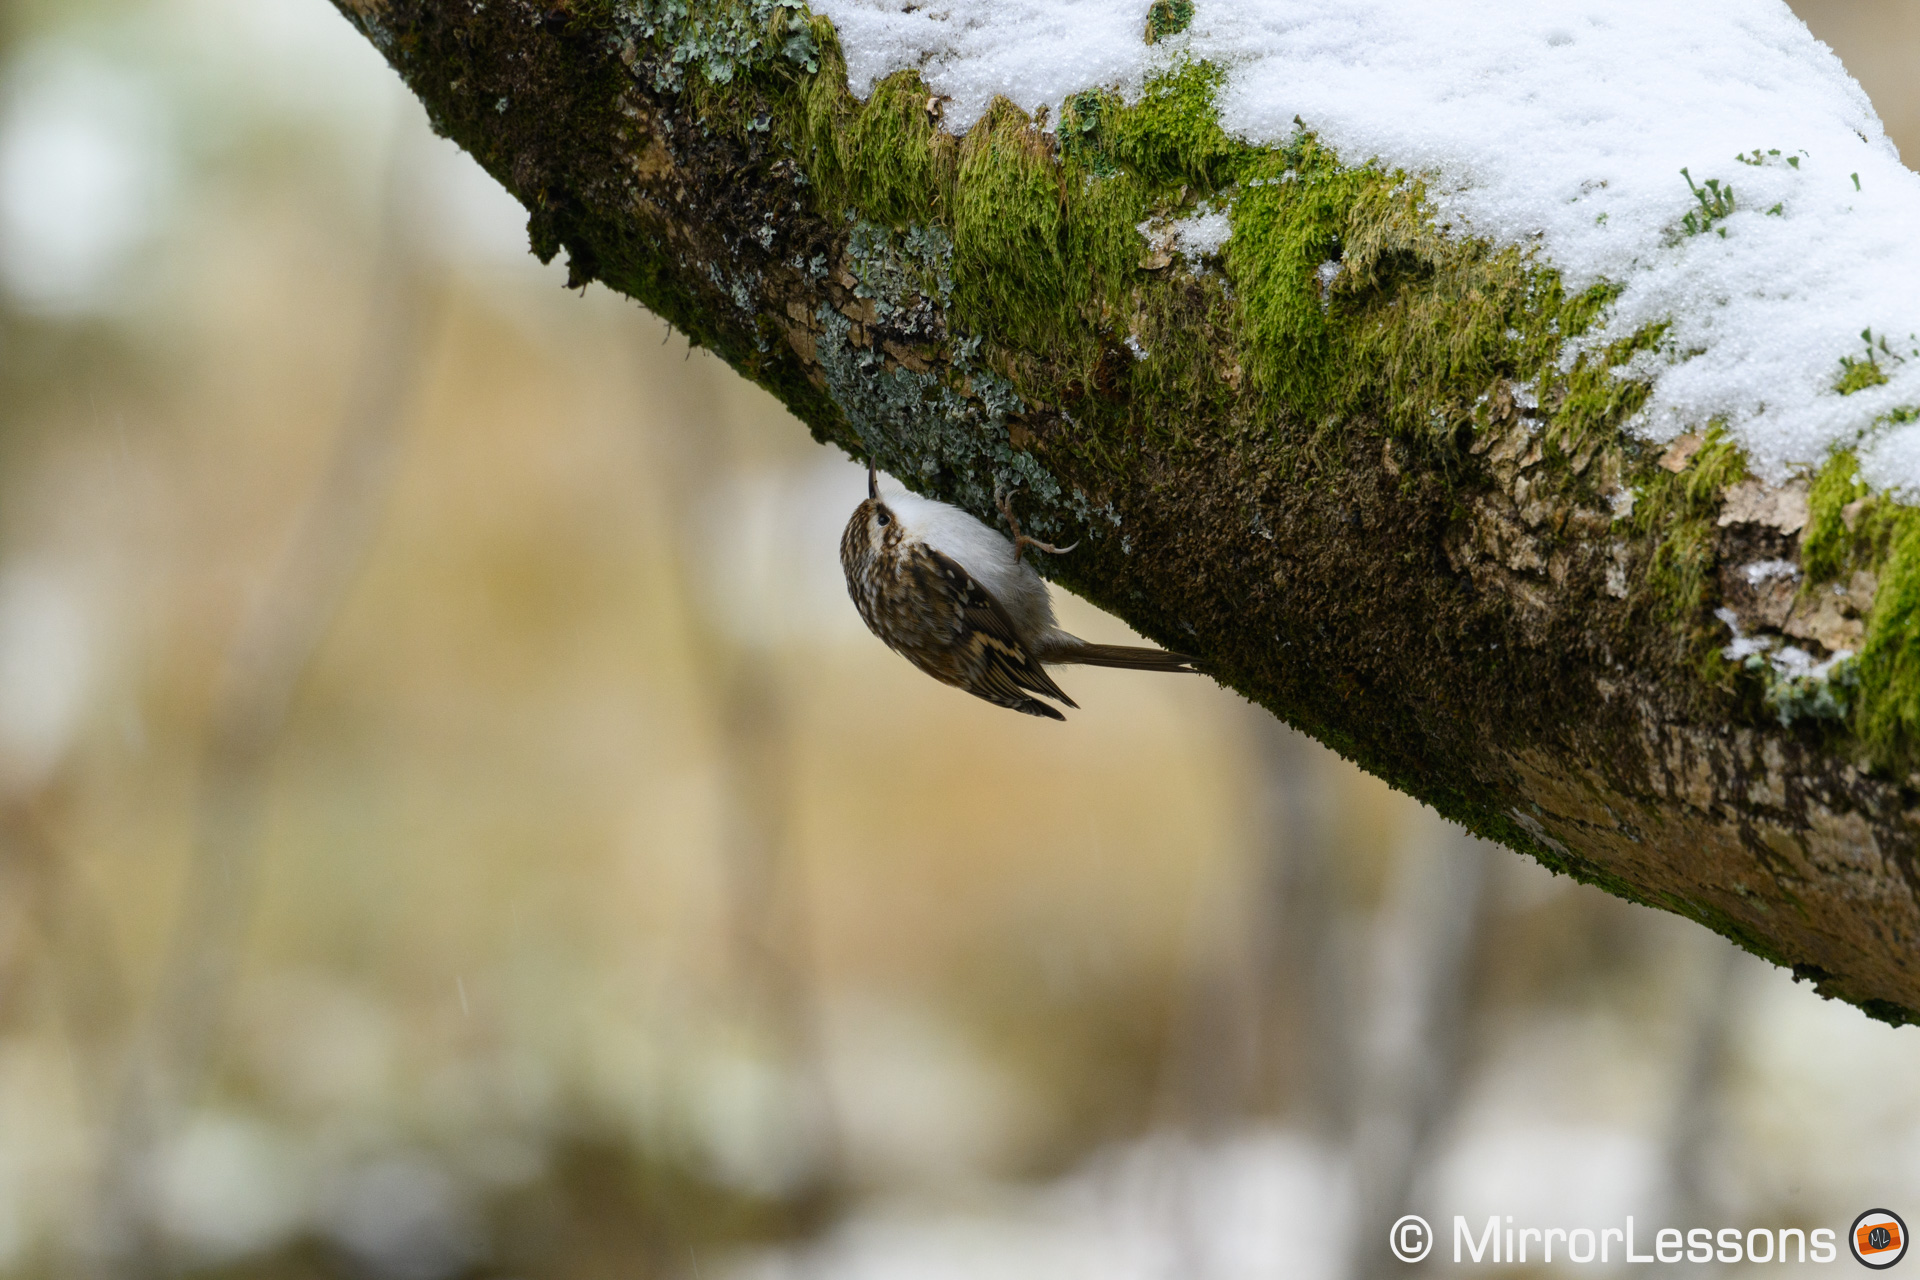
AF-S NIKKOR 500mm f/5.6E PF ED VR + TC 2.0x III
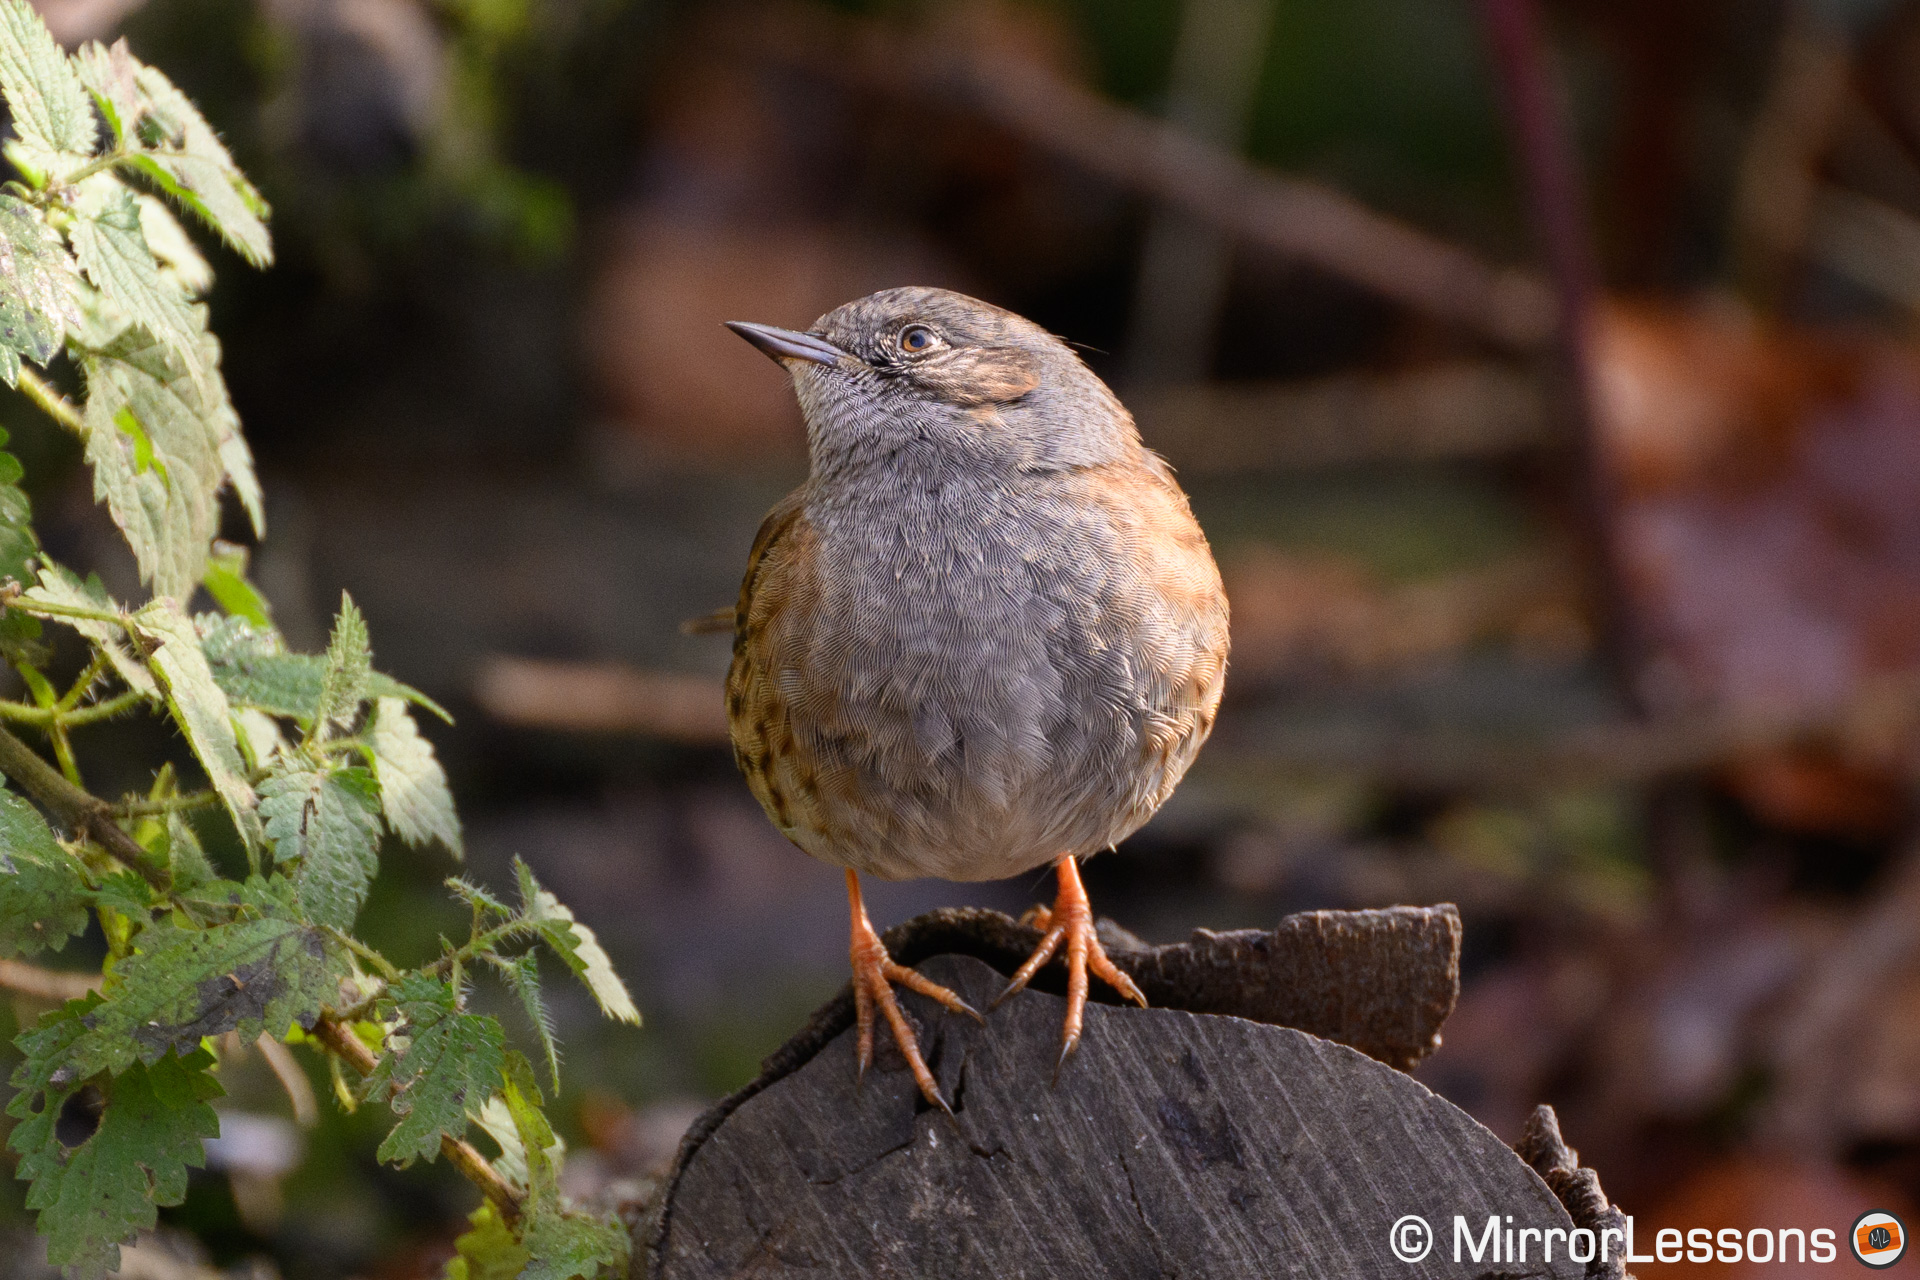
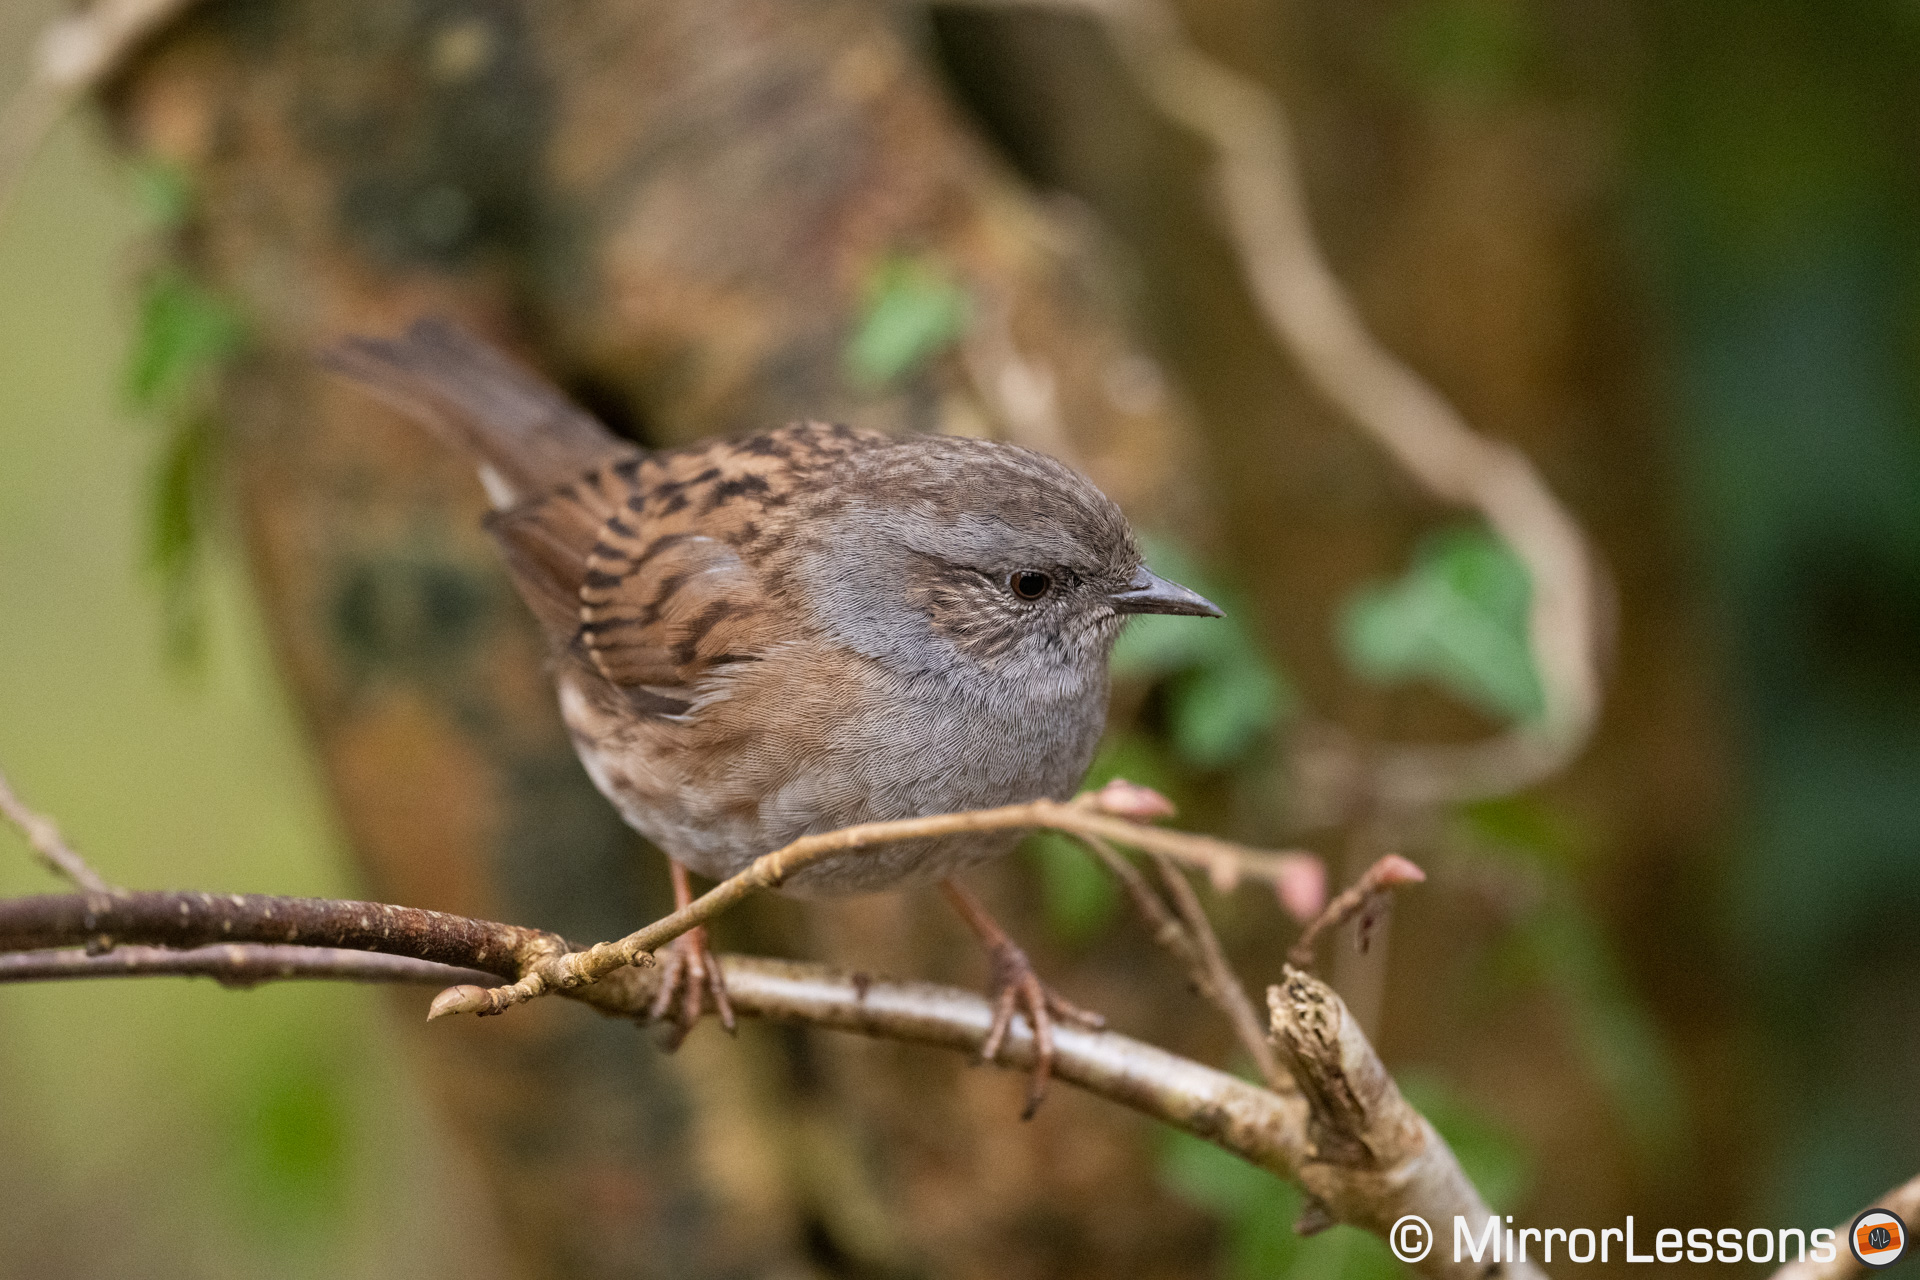
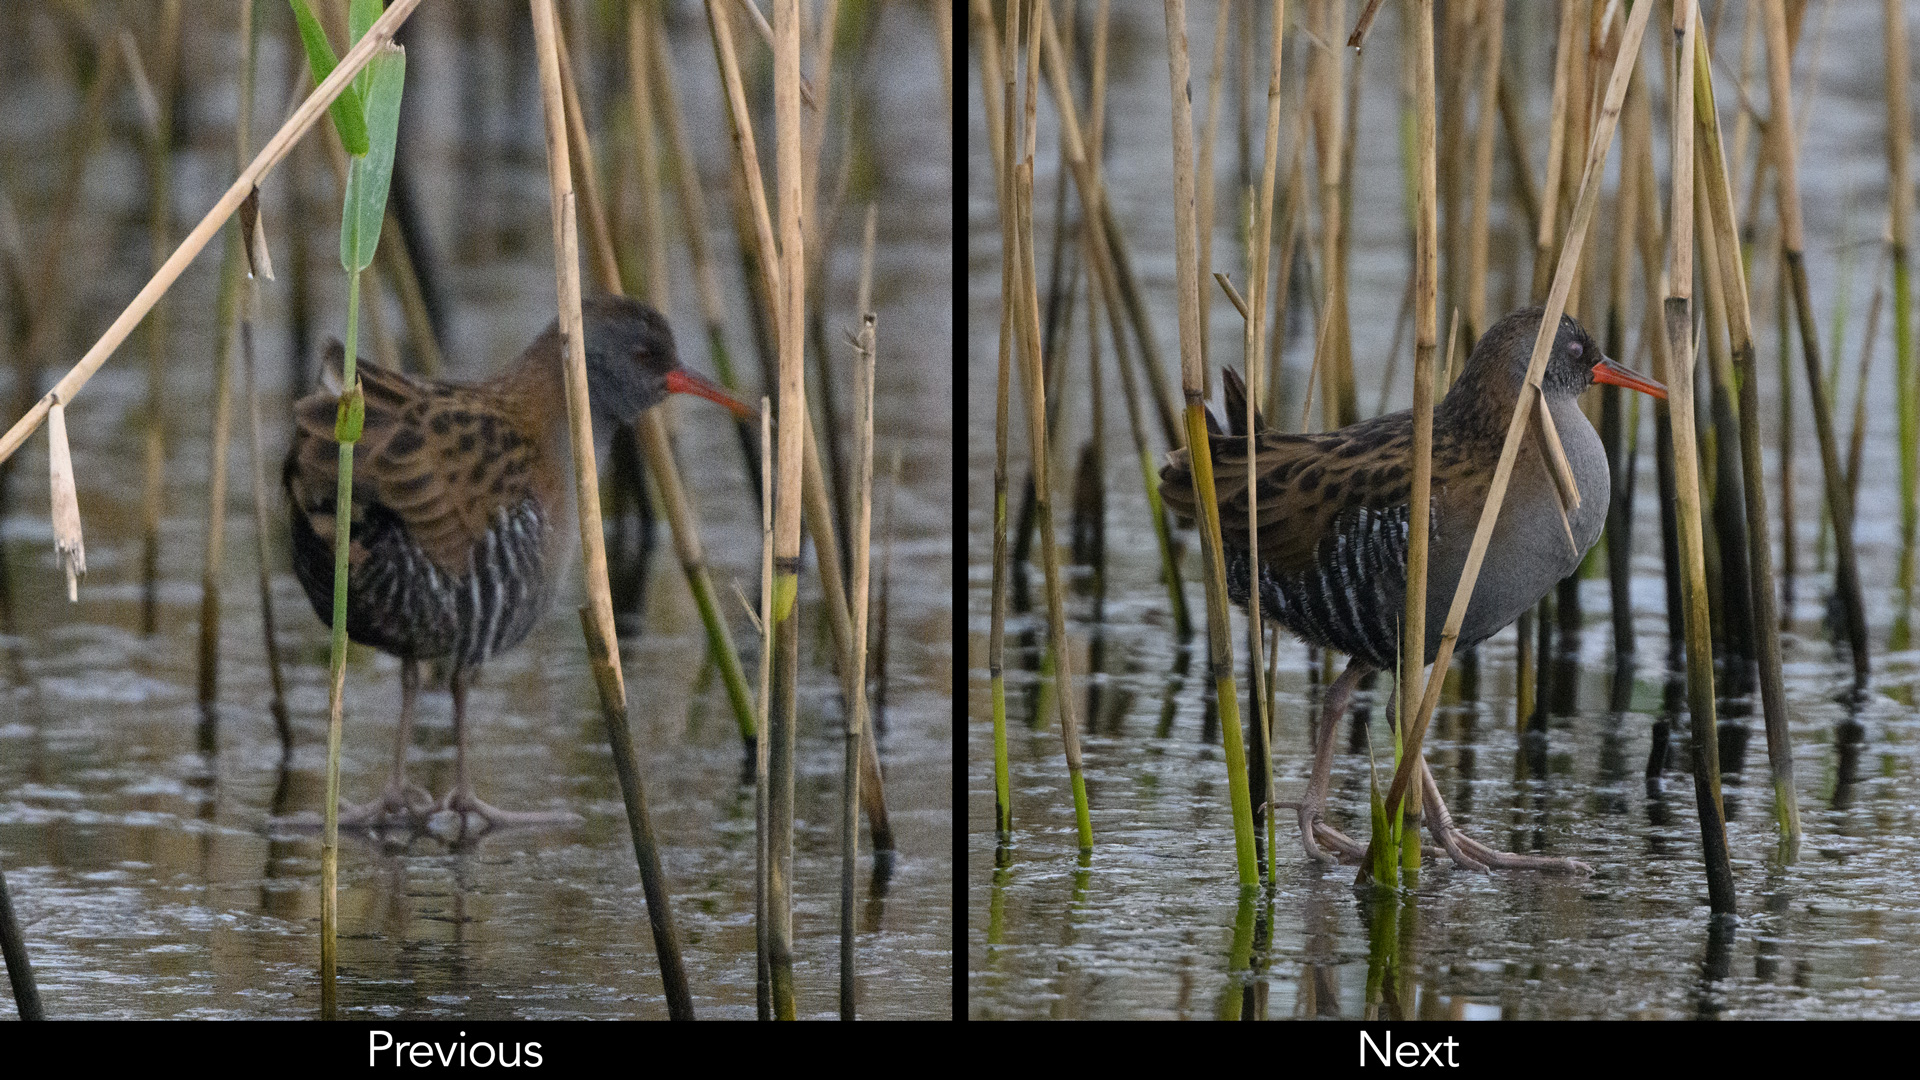
The interesting thing about animal detection is to see how this technology behaves when there are elements covering part of the subject’s body. In many occasions, the Z9 managed to focus on the eye successfully, ignoring any obstacle.
AF-S NIKKOR 500mm f/5.6E PF ED VR
AF-S NIKKOR 500mm f/5.6E PF ED VR + TC 1.4x III
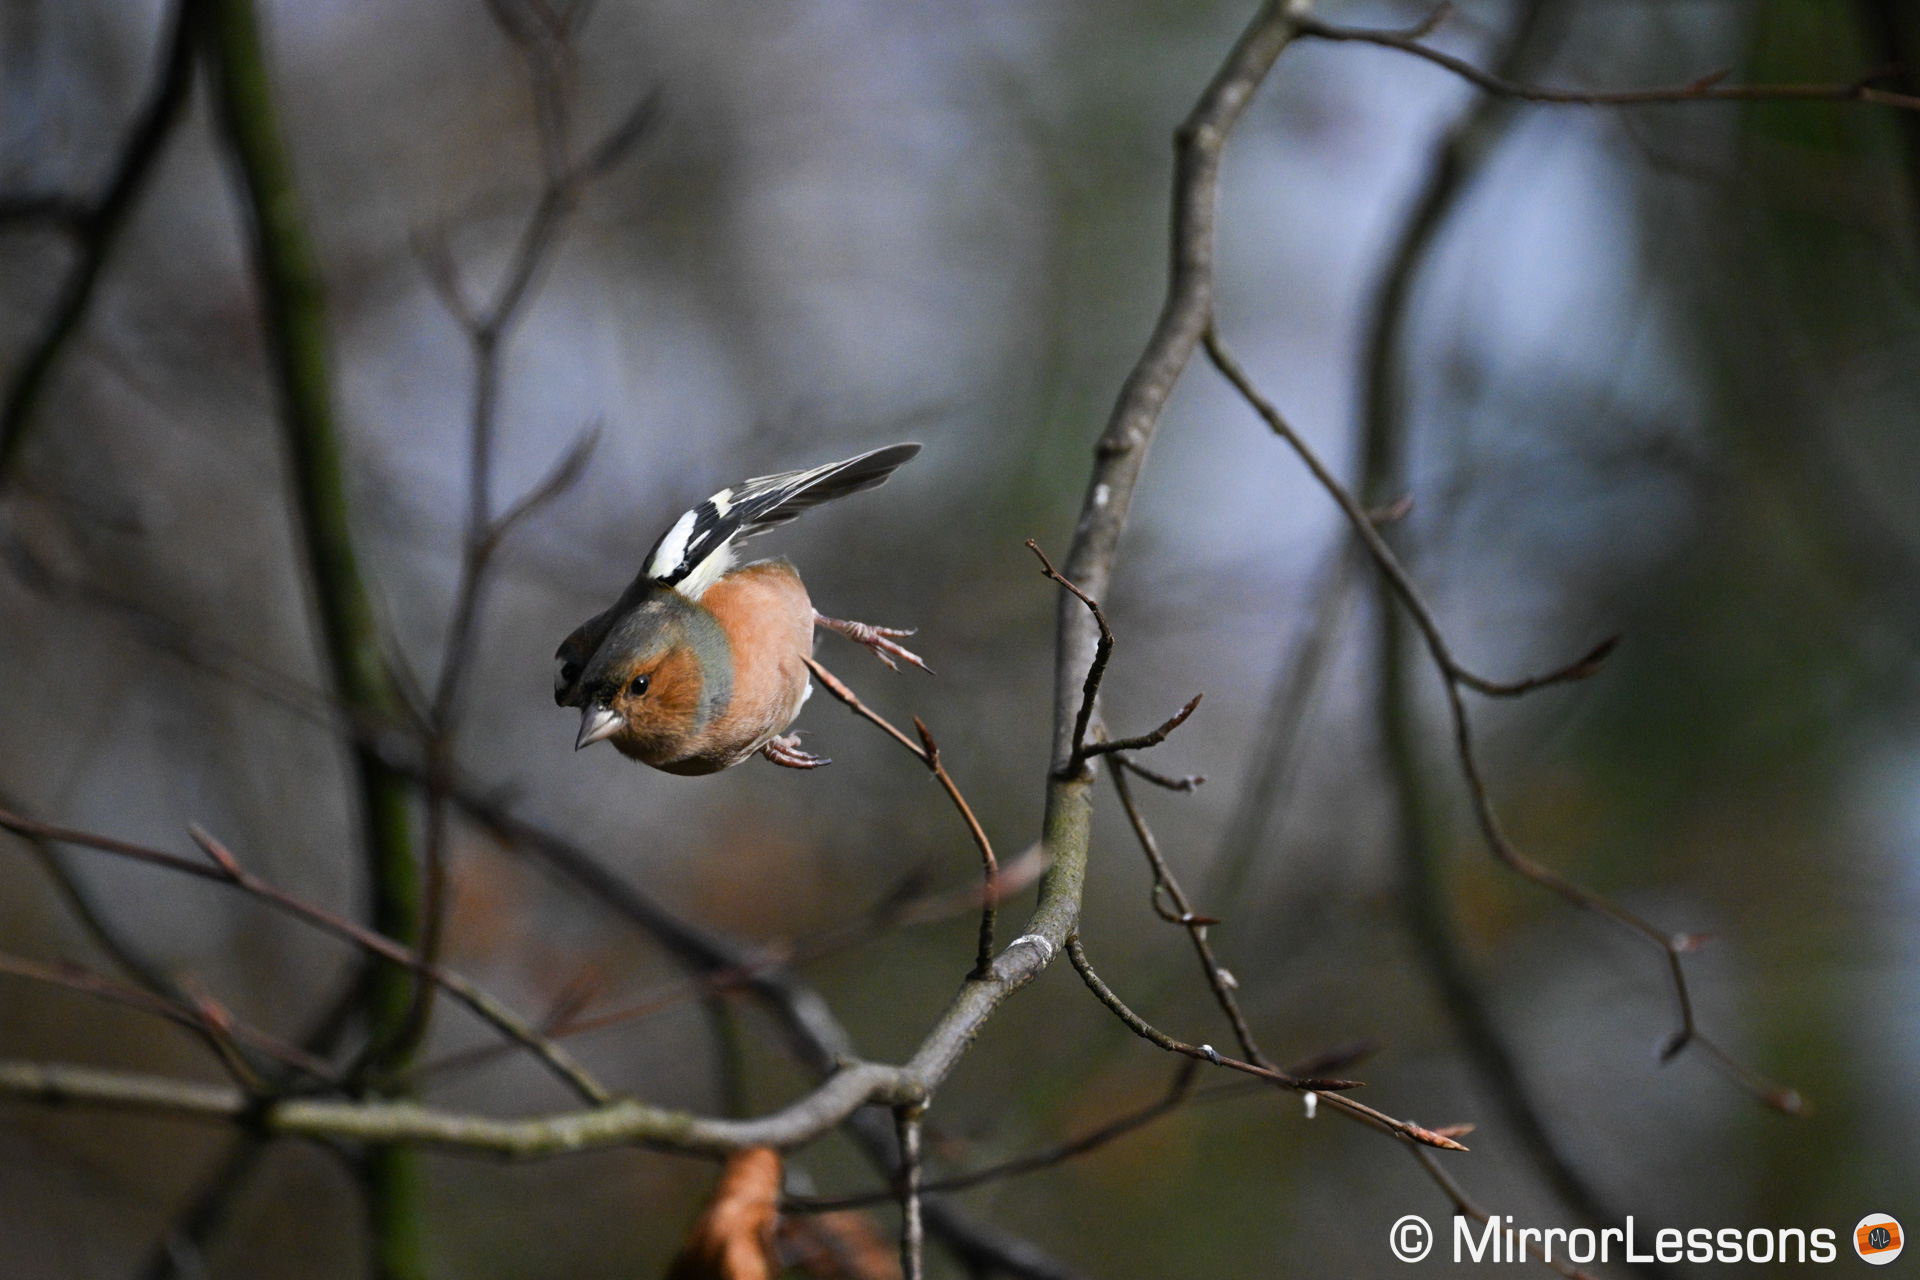
Ok, I was probably just lucky with the photo below but still, it’s quite an impressive picture considering it was taken rapidly just before the bird hid entirely.
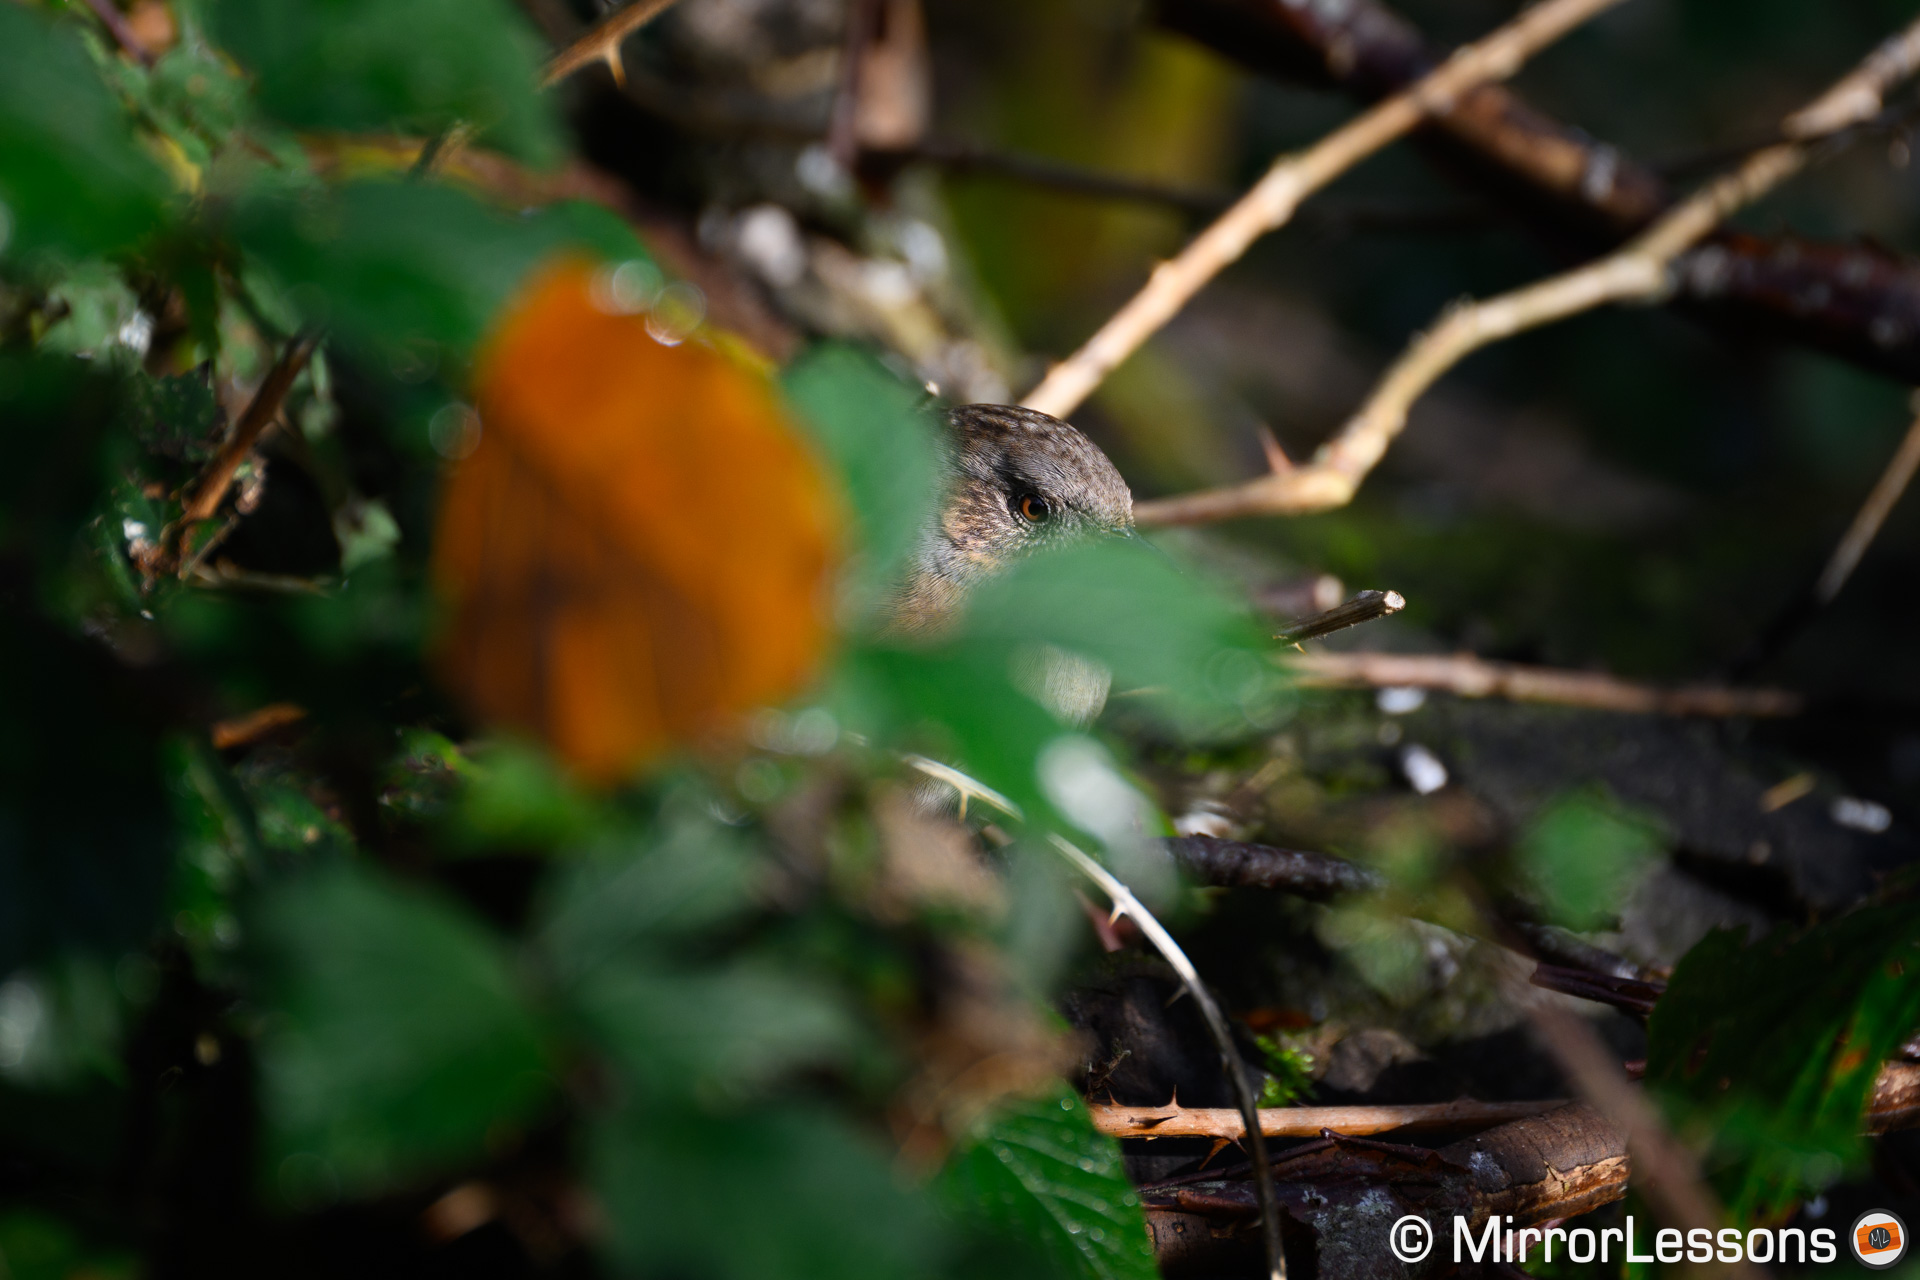
NIKKOR Z 100-400mm f/4.5-5.6 VR S at 400 mm
With all that said, Subject Detection is not 100% perfect. An element in the foreground can mislead the autofocus, other things such as water splashes can lead to incorrect focus, or occasionally the Z9 will just miss the subject if its texture is too similar to that of its surrounding.
NIKKOR Z 800mm f/6.3 VR S

NIKKOR Z 800mm f/6.3 VR S
NIKKOR Z 800mm f/6.3 VR S
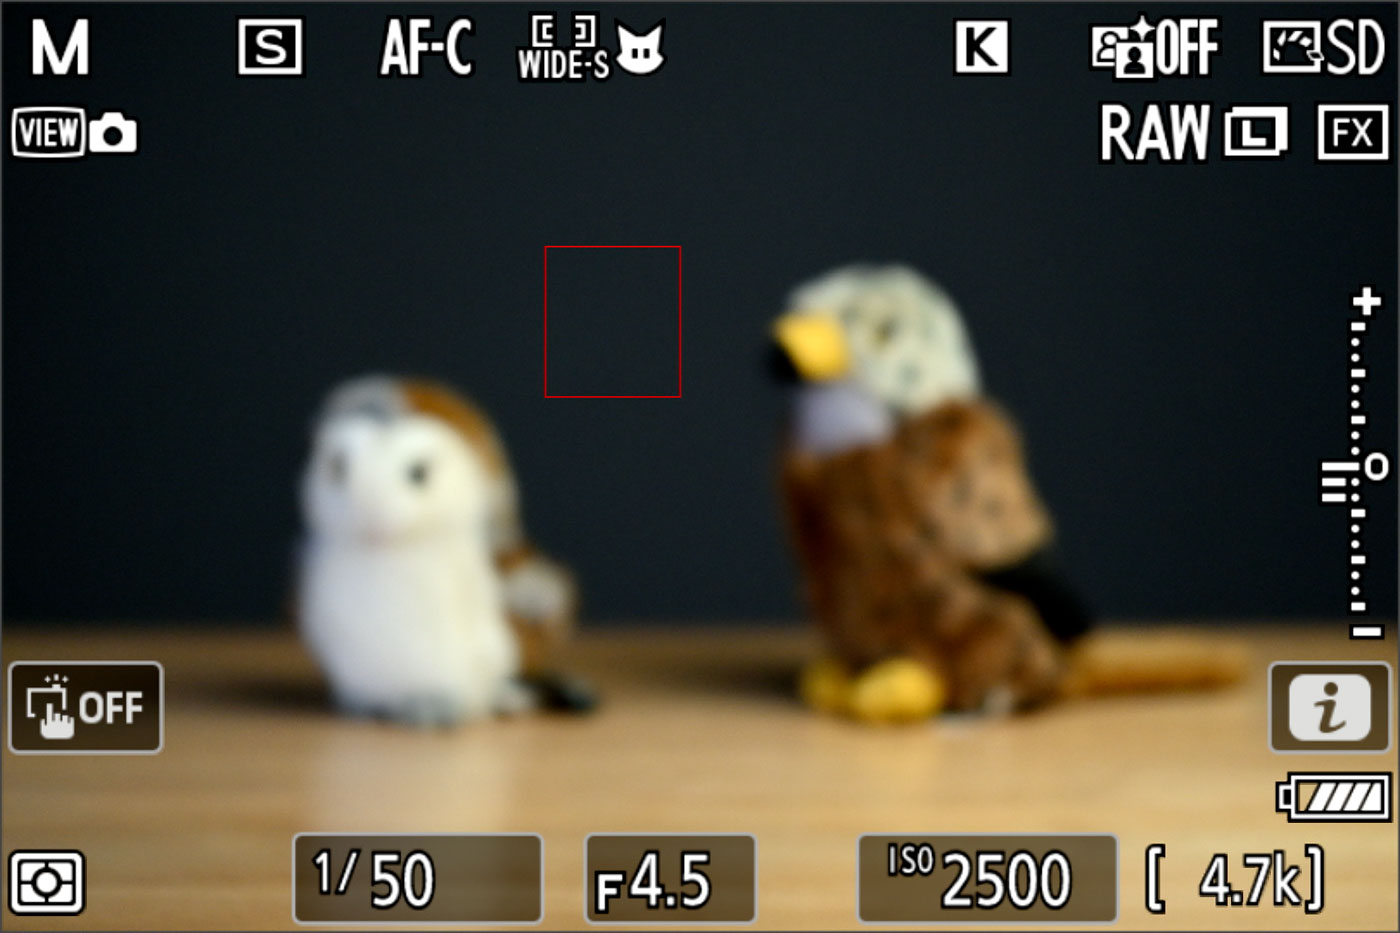
In this other scene, there were too many elements in front of the bird for the camera to recognise it, so I had to disable Subject Detection and use the small AF area instead.
NIKKOR Z 800mm f/6.3 VR S Z + TC-2.0x
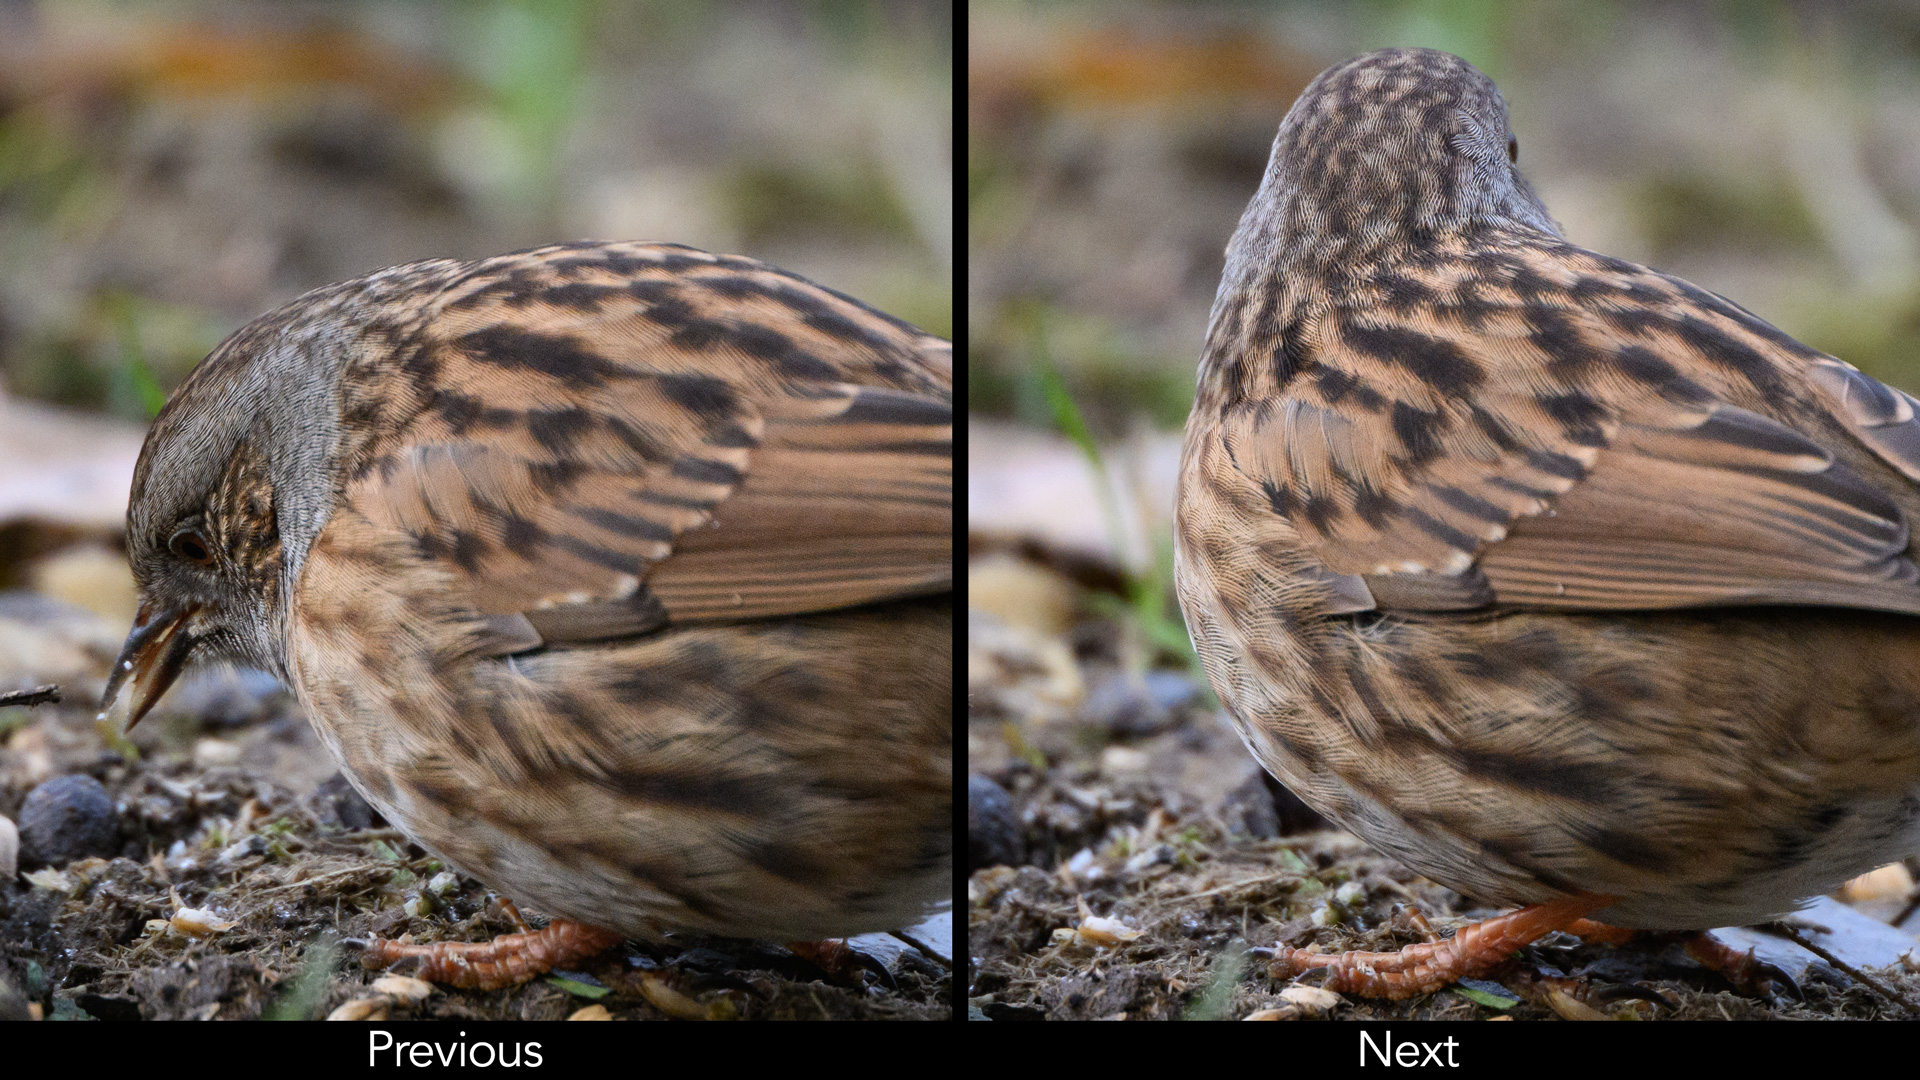
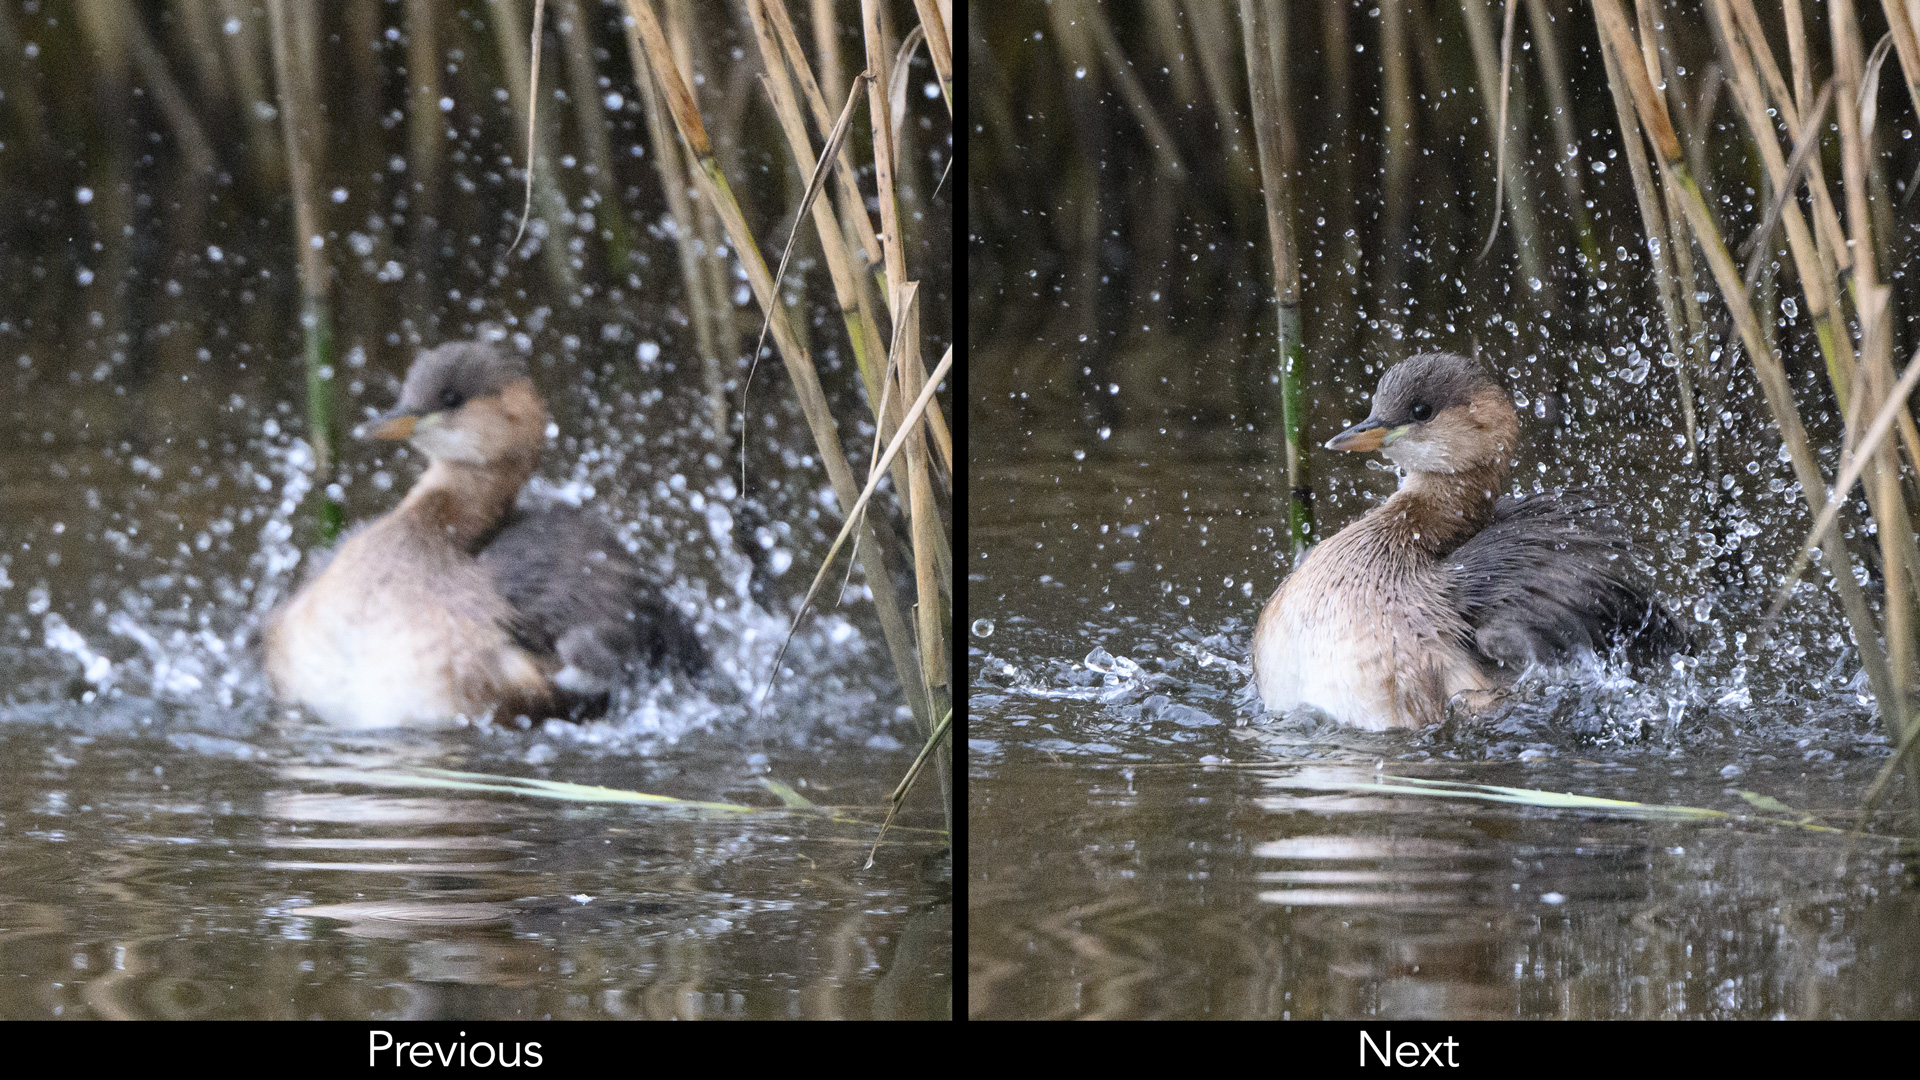
Occasionally, the camera may stop detecting the head or the eye briefly, only to resume a few seconds later. If you’re taking pictures in burst mode, you can end up with a few shots where the focus point is in the wrong place. This is especially true when dealing with shallow depth of field.
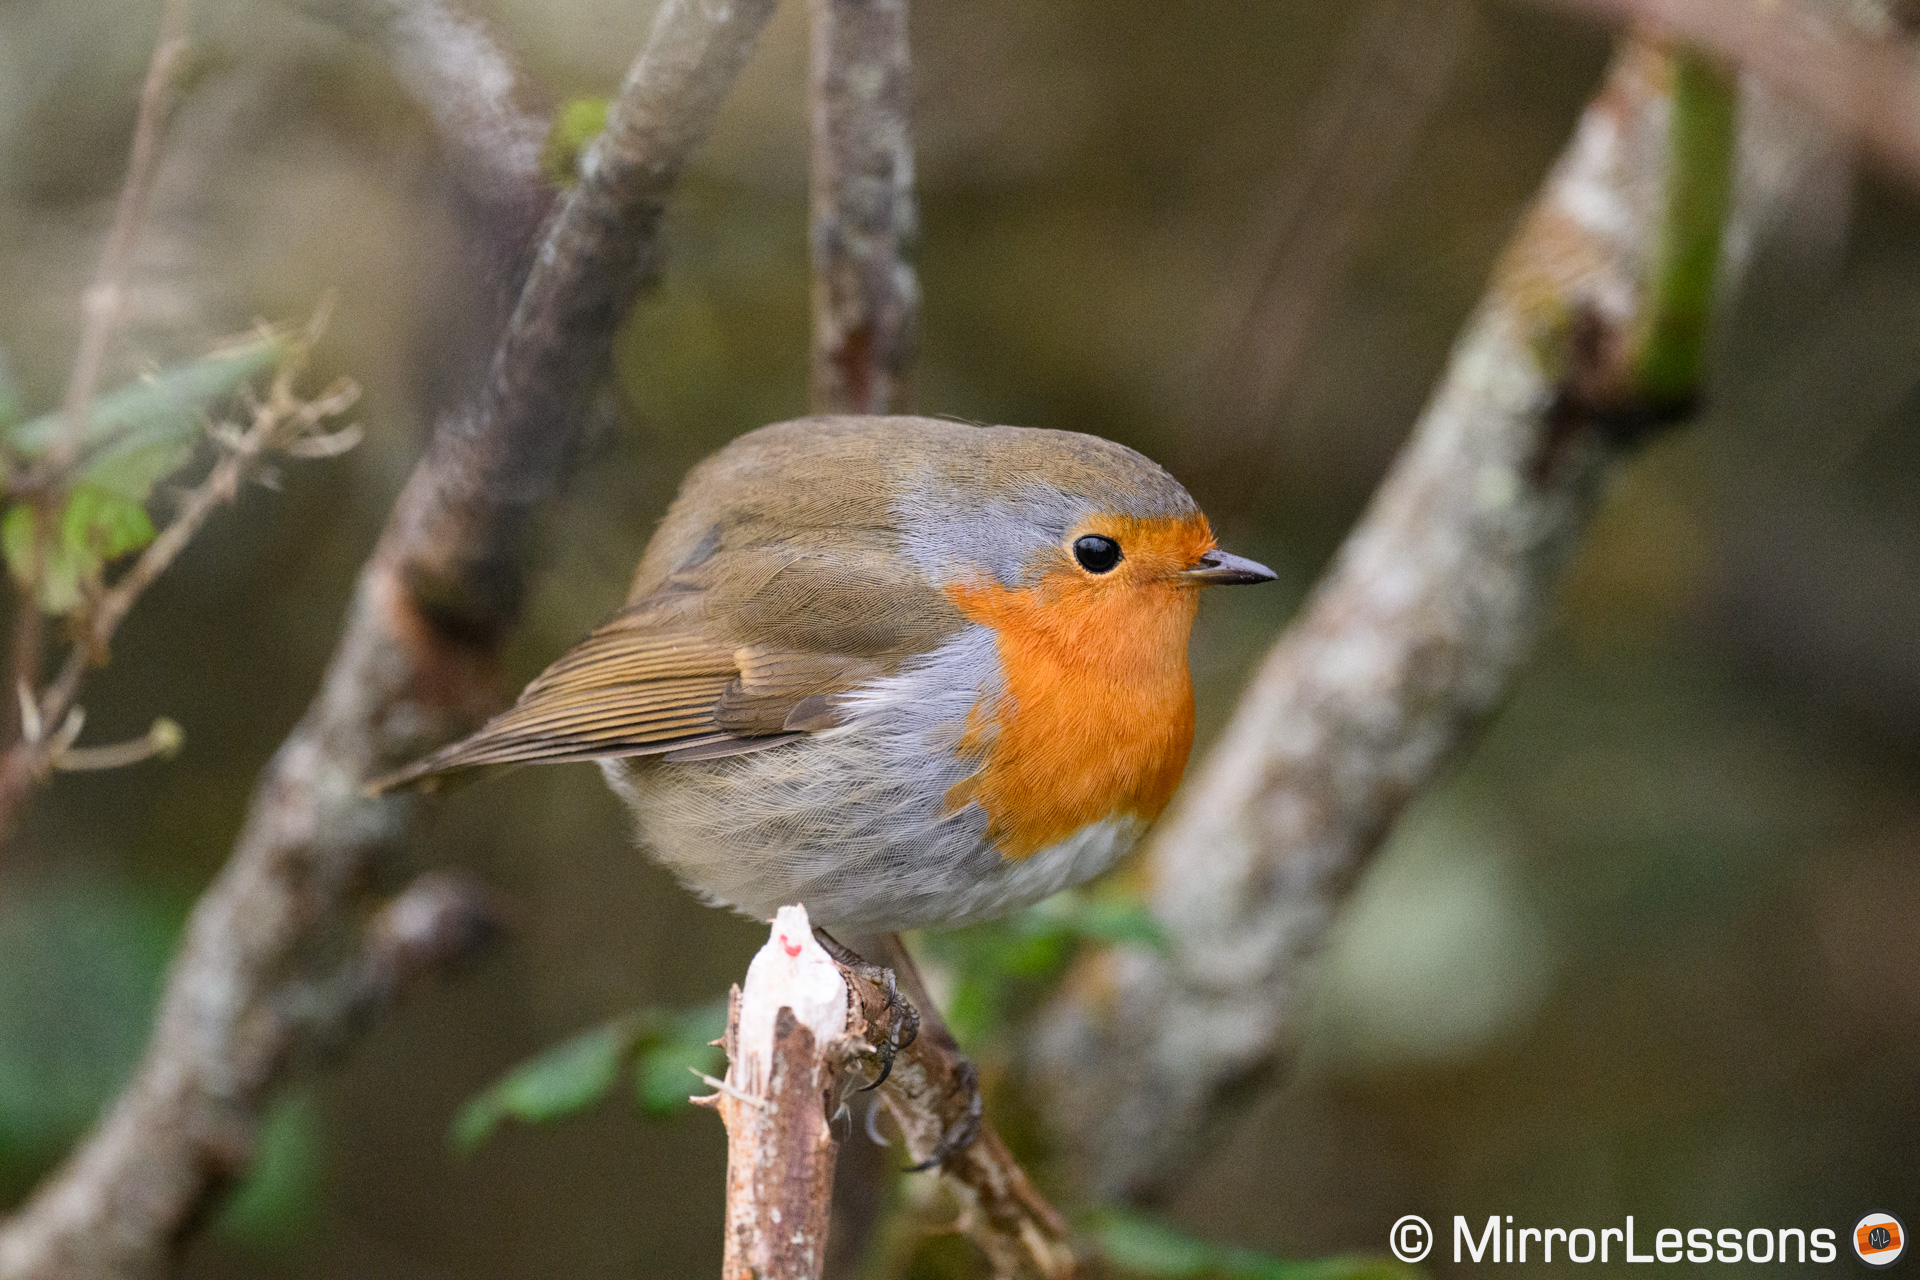
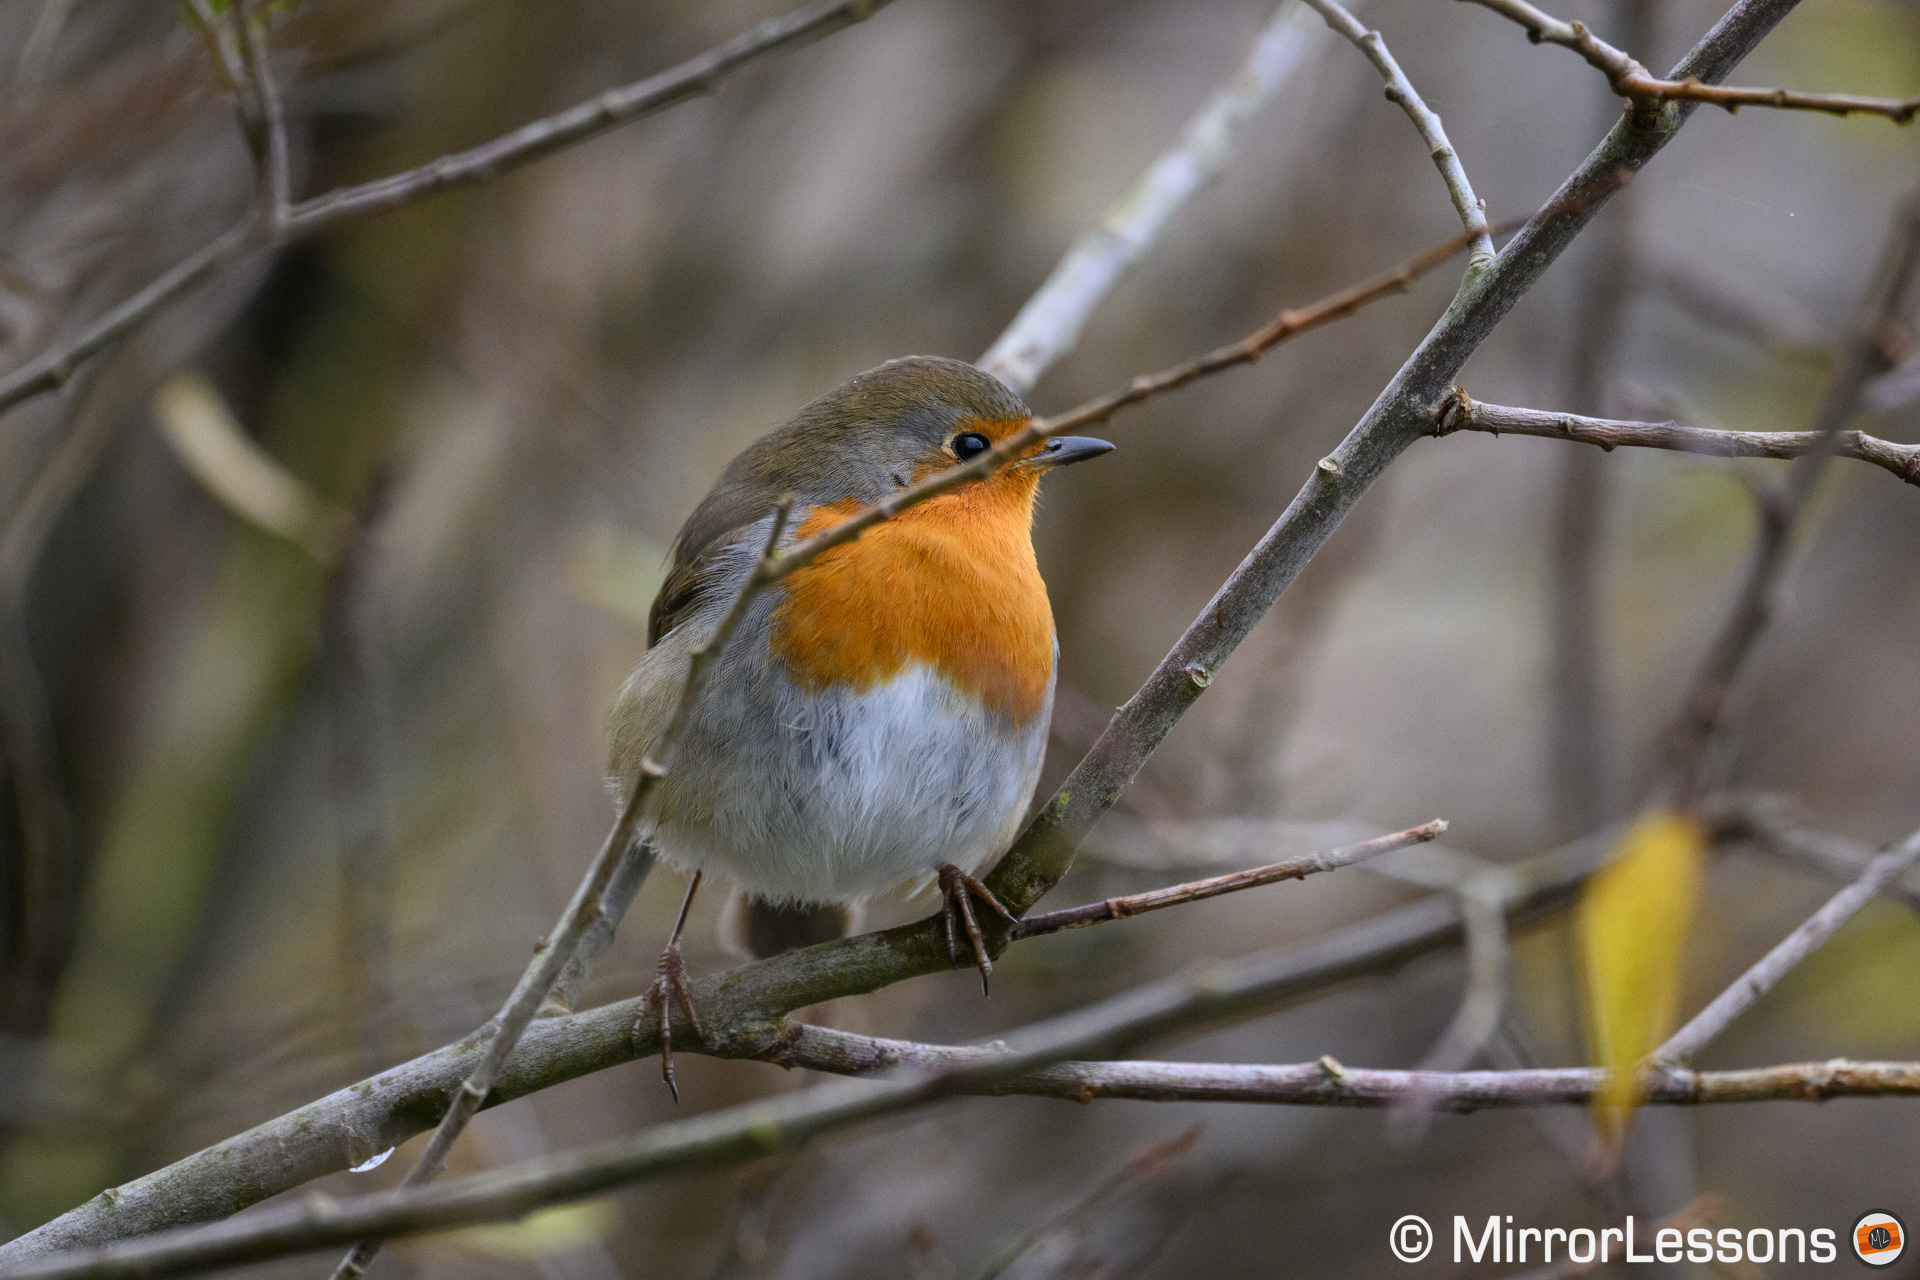
In the example below, the camera didn’t “see” the eye of the robin for a brief moment, and focused at the centre where the small AF area was. The result was the body being sharp, and the head being soft. A few frames later, eye detection was working again and I got the result I wanted.
To be fair, no cameras I’ve tested so far with this technology are flawless, and overall the number of “failed” shots is low, so the Z9 is right up there with the best.

NIKKOR Z 800mm f/6.3 VR S
The Nikon works a bit differently than other cameras I’ve used. For example, on the Canon R3, you can select a small AF area and have subject detection enabled. If the animal is recognised, the camera can track it on the entire frame, regardless of the AF area size and position. You can also configure a button to prioritise Eye AF at all times, overriding any other focus mode.
With the Z9, Animal Detection is available only with select AF areas, not all of them, and is active only inside those areas. For example, if you choose Wide Small and the bird goes outside that AF frame, the camera will stop tracking the animal and focus where the AF point is. This may seem like a limitation at first, but it is simply a way to have more control over what the camera does. It can also help you to prioritise one animal over the other, if more than one subject is in the frame. Just move the small AF area near the bird you want to focus on.
If you want the bird to be tracked across the entire frame, you have two options.
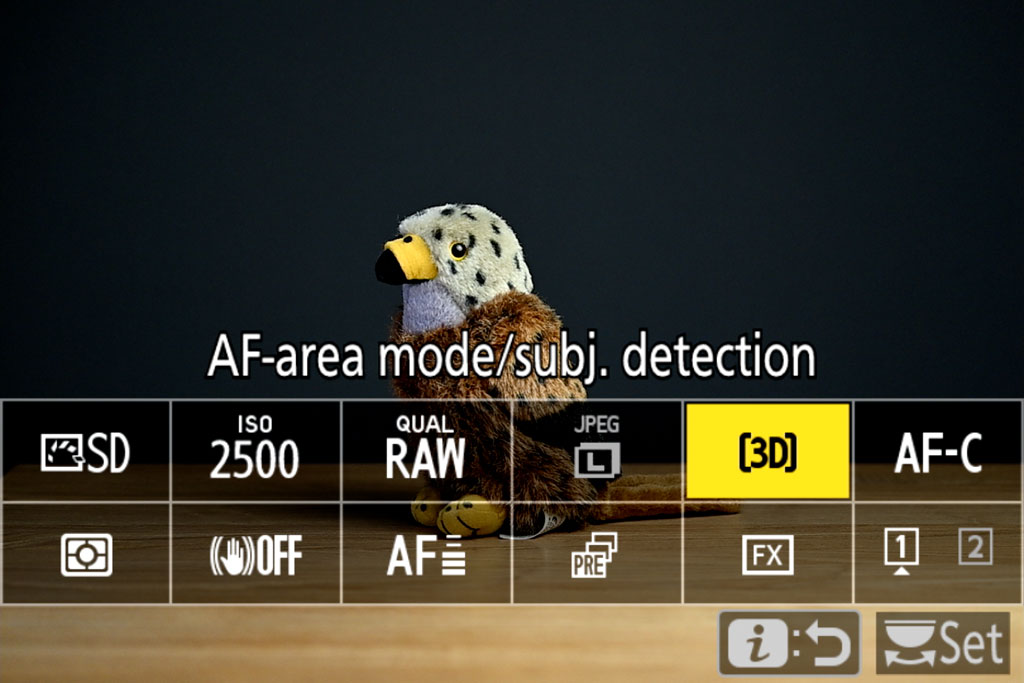
The first is 3D Tracking. You need to position the small AF area precisely on the bird at the beginning, but once the autofocus is engaged and the camera tracks the animal, it can follow it on the entire scene. It works pretty well and this setting rapidly became my favourite method, because it gives more freedom of composition without the need to move the AF point manually

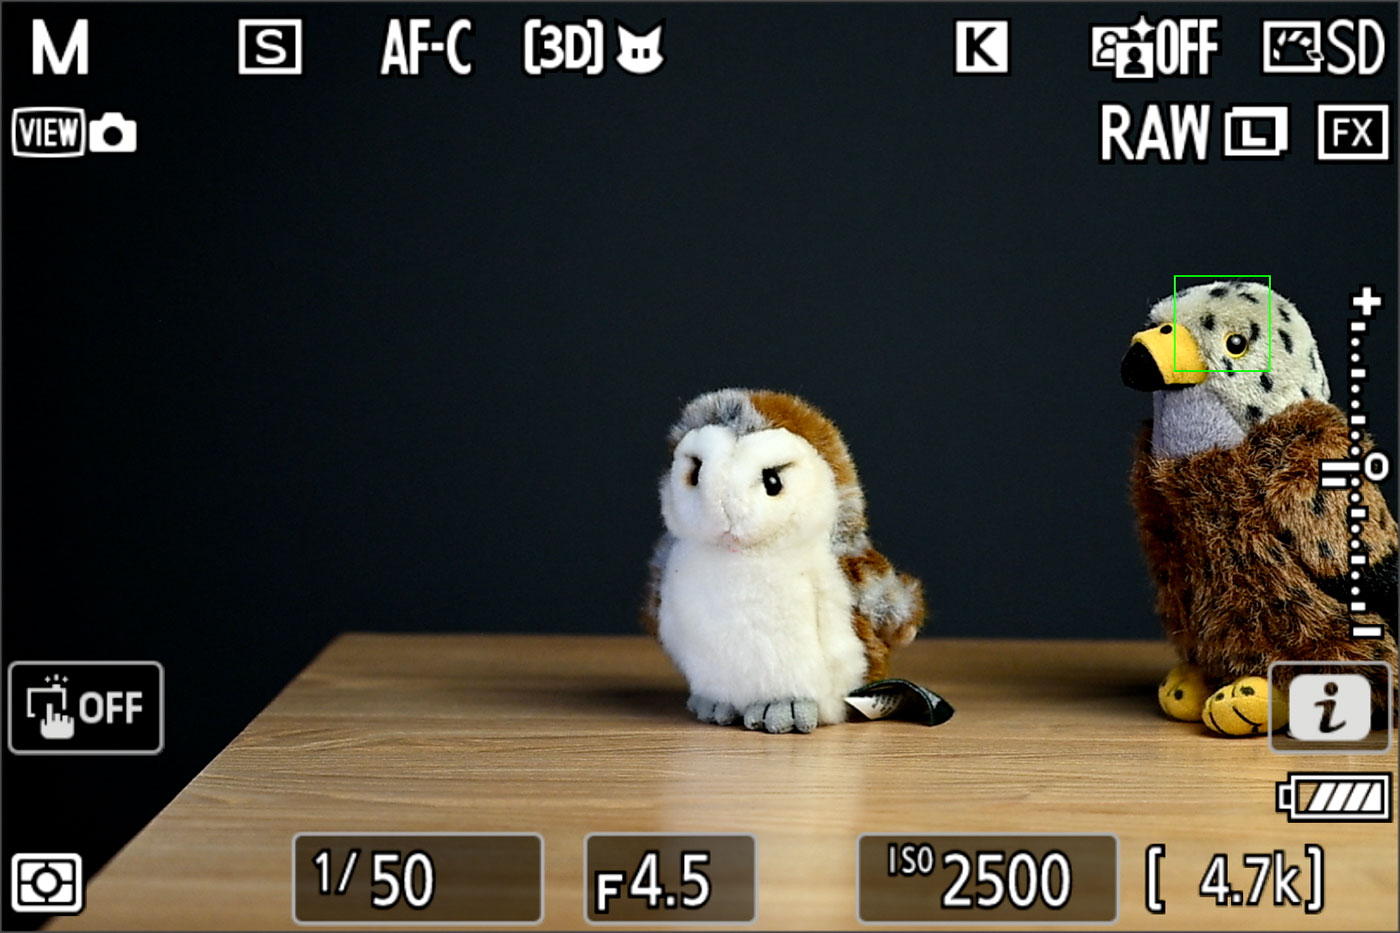
The second options is to use the Auto-area mode. Here the bird is detected automatically, and if there is more than one, you can switch between the two with the AF joystick, which is quick and convenient. I find 3D Tracking to be more precise once the AF is engaged, but with static or slow moving subjects, Auto-area AF can work well, especially if the animal is in a clear spot without a busy background or disturbing elements in the foreground.

Nikon Z9 Birds in Flight Settings and Performance
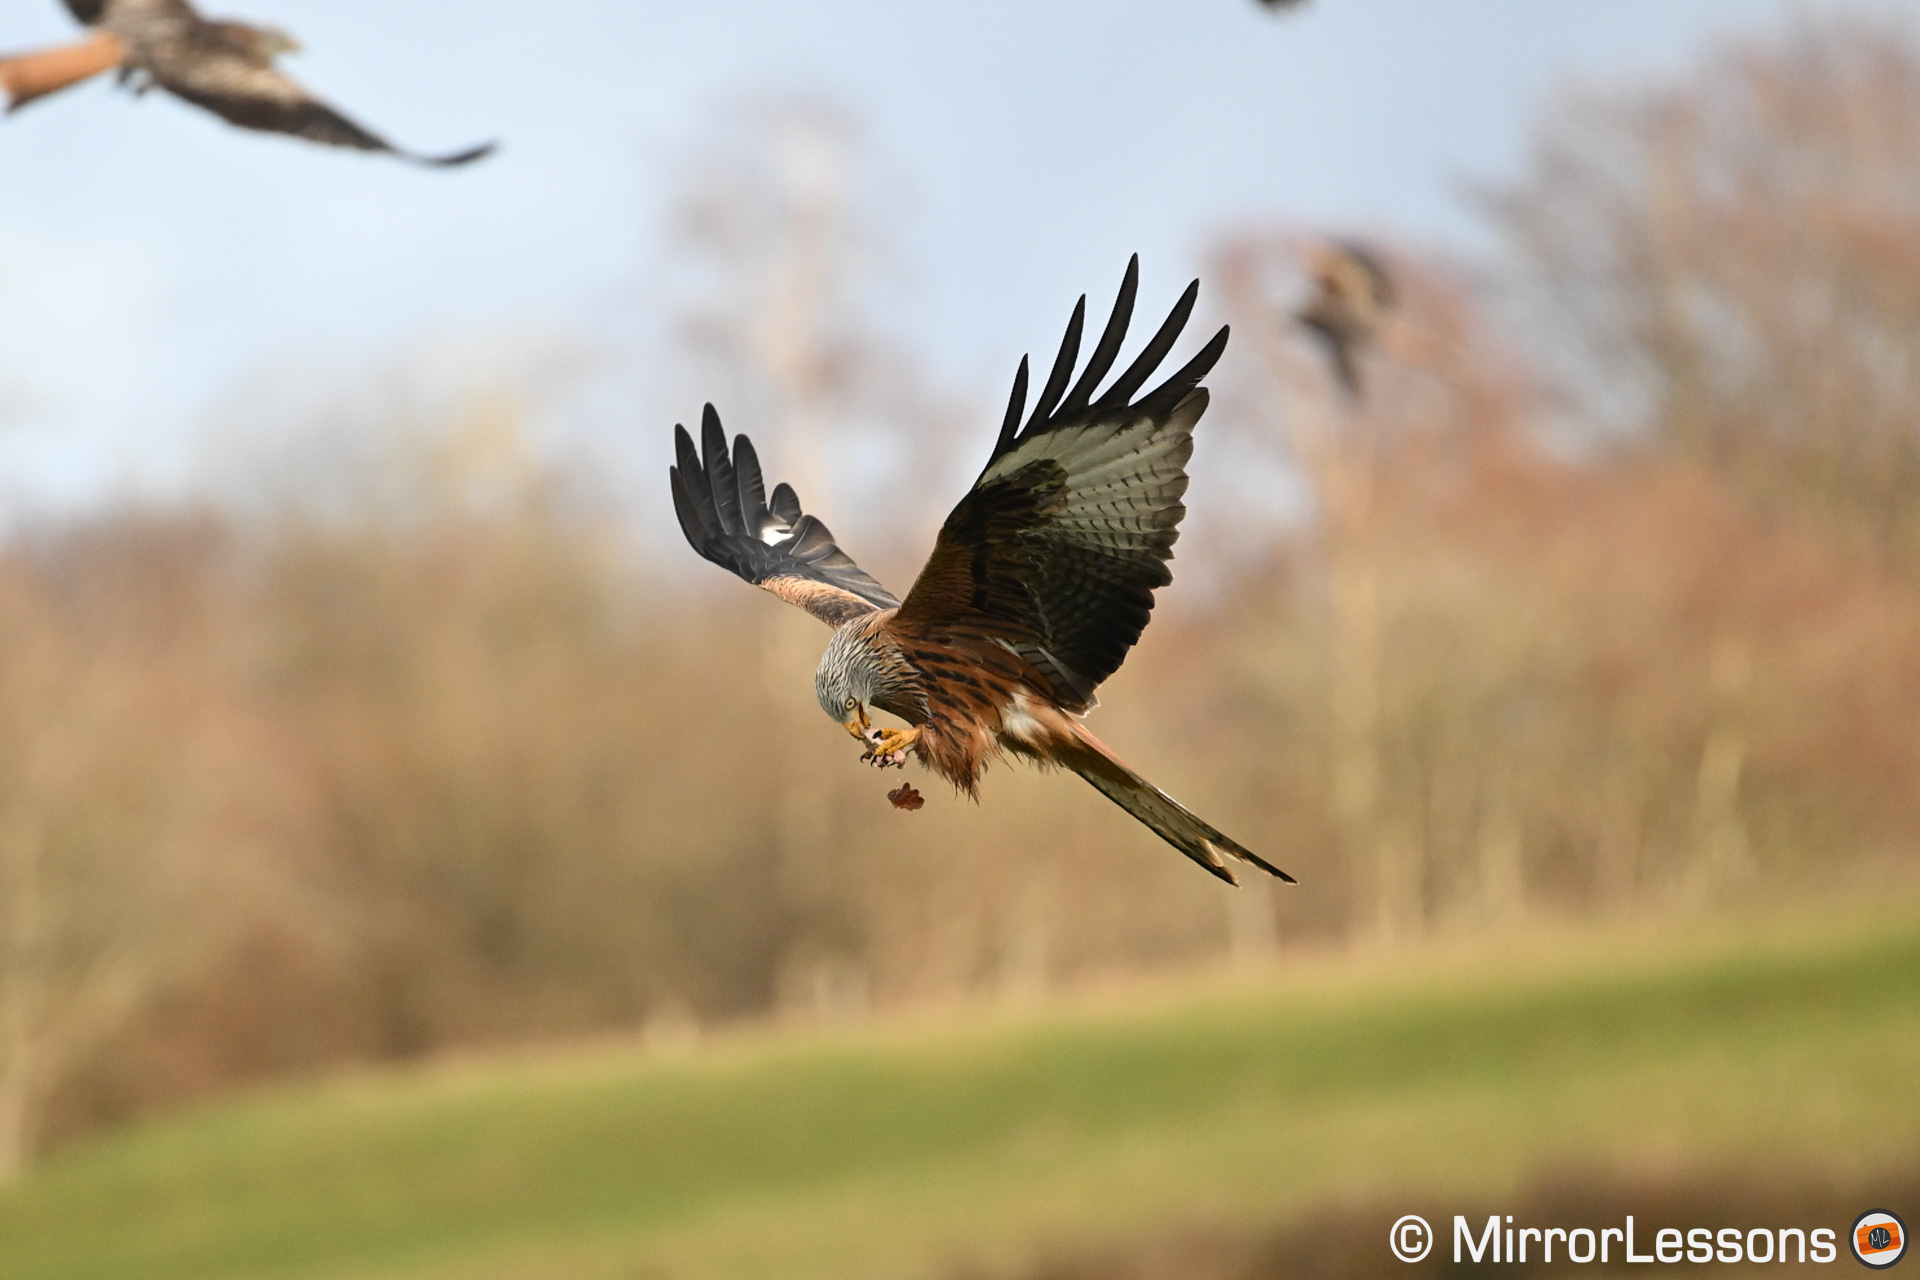
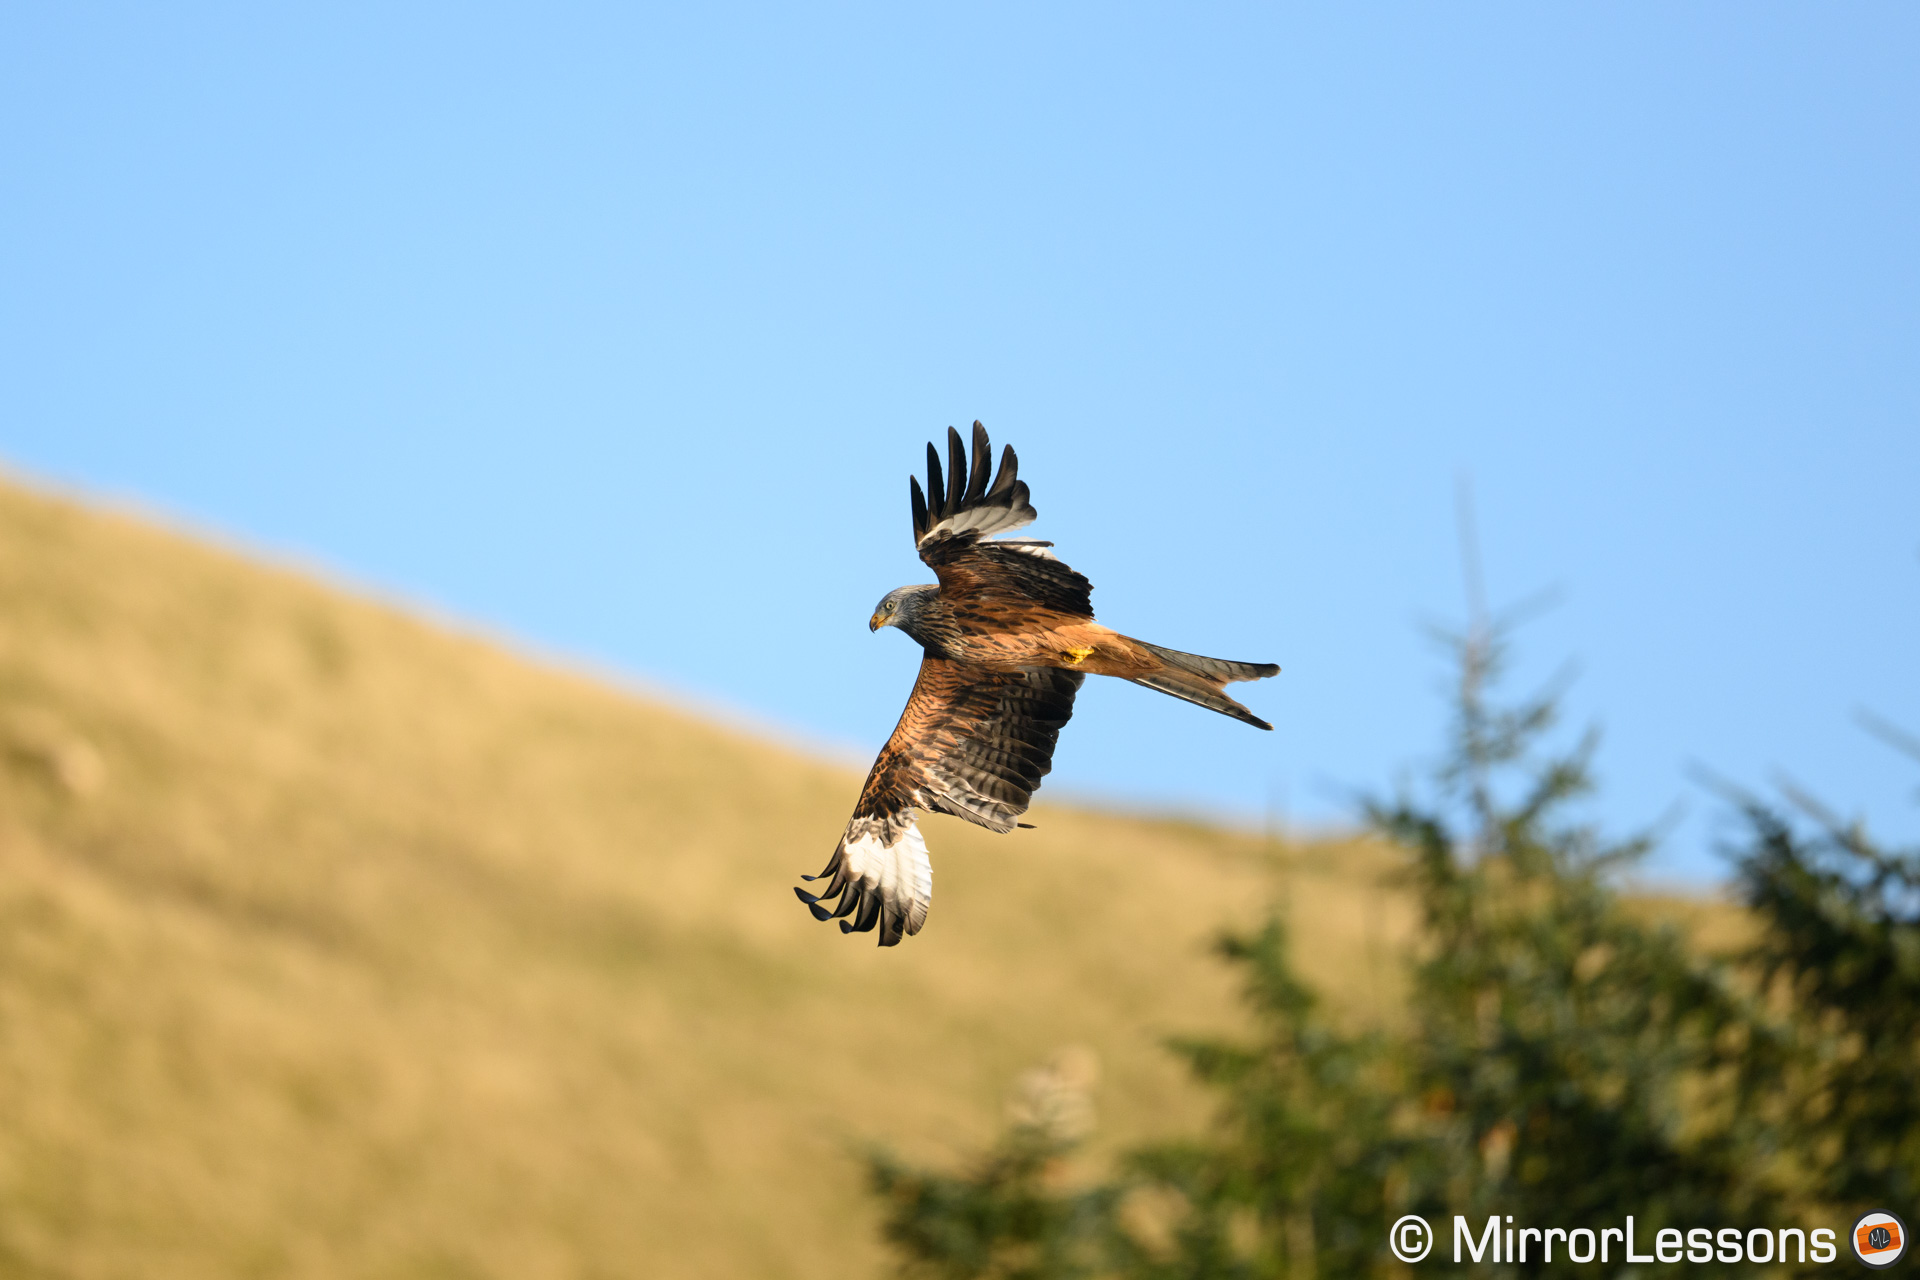
Now the stars of the show, my beloved red kites. The Z9 gave me one of the best AF scores ever. In the three days of shooting at the feeding stations, trying all sorts of settings and no less than three different lenses, the camera always delivered a very consistent performance.
96%
100%
The green score includes 100% sharp images only; the blue score also includes slightly soft results.

AF-S NIKKOR 500mm f/5.6E PF ED VR
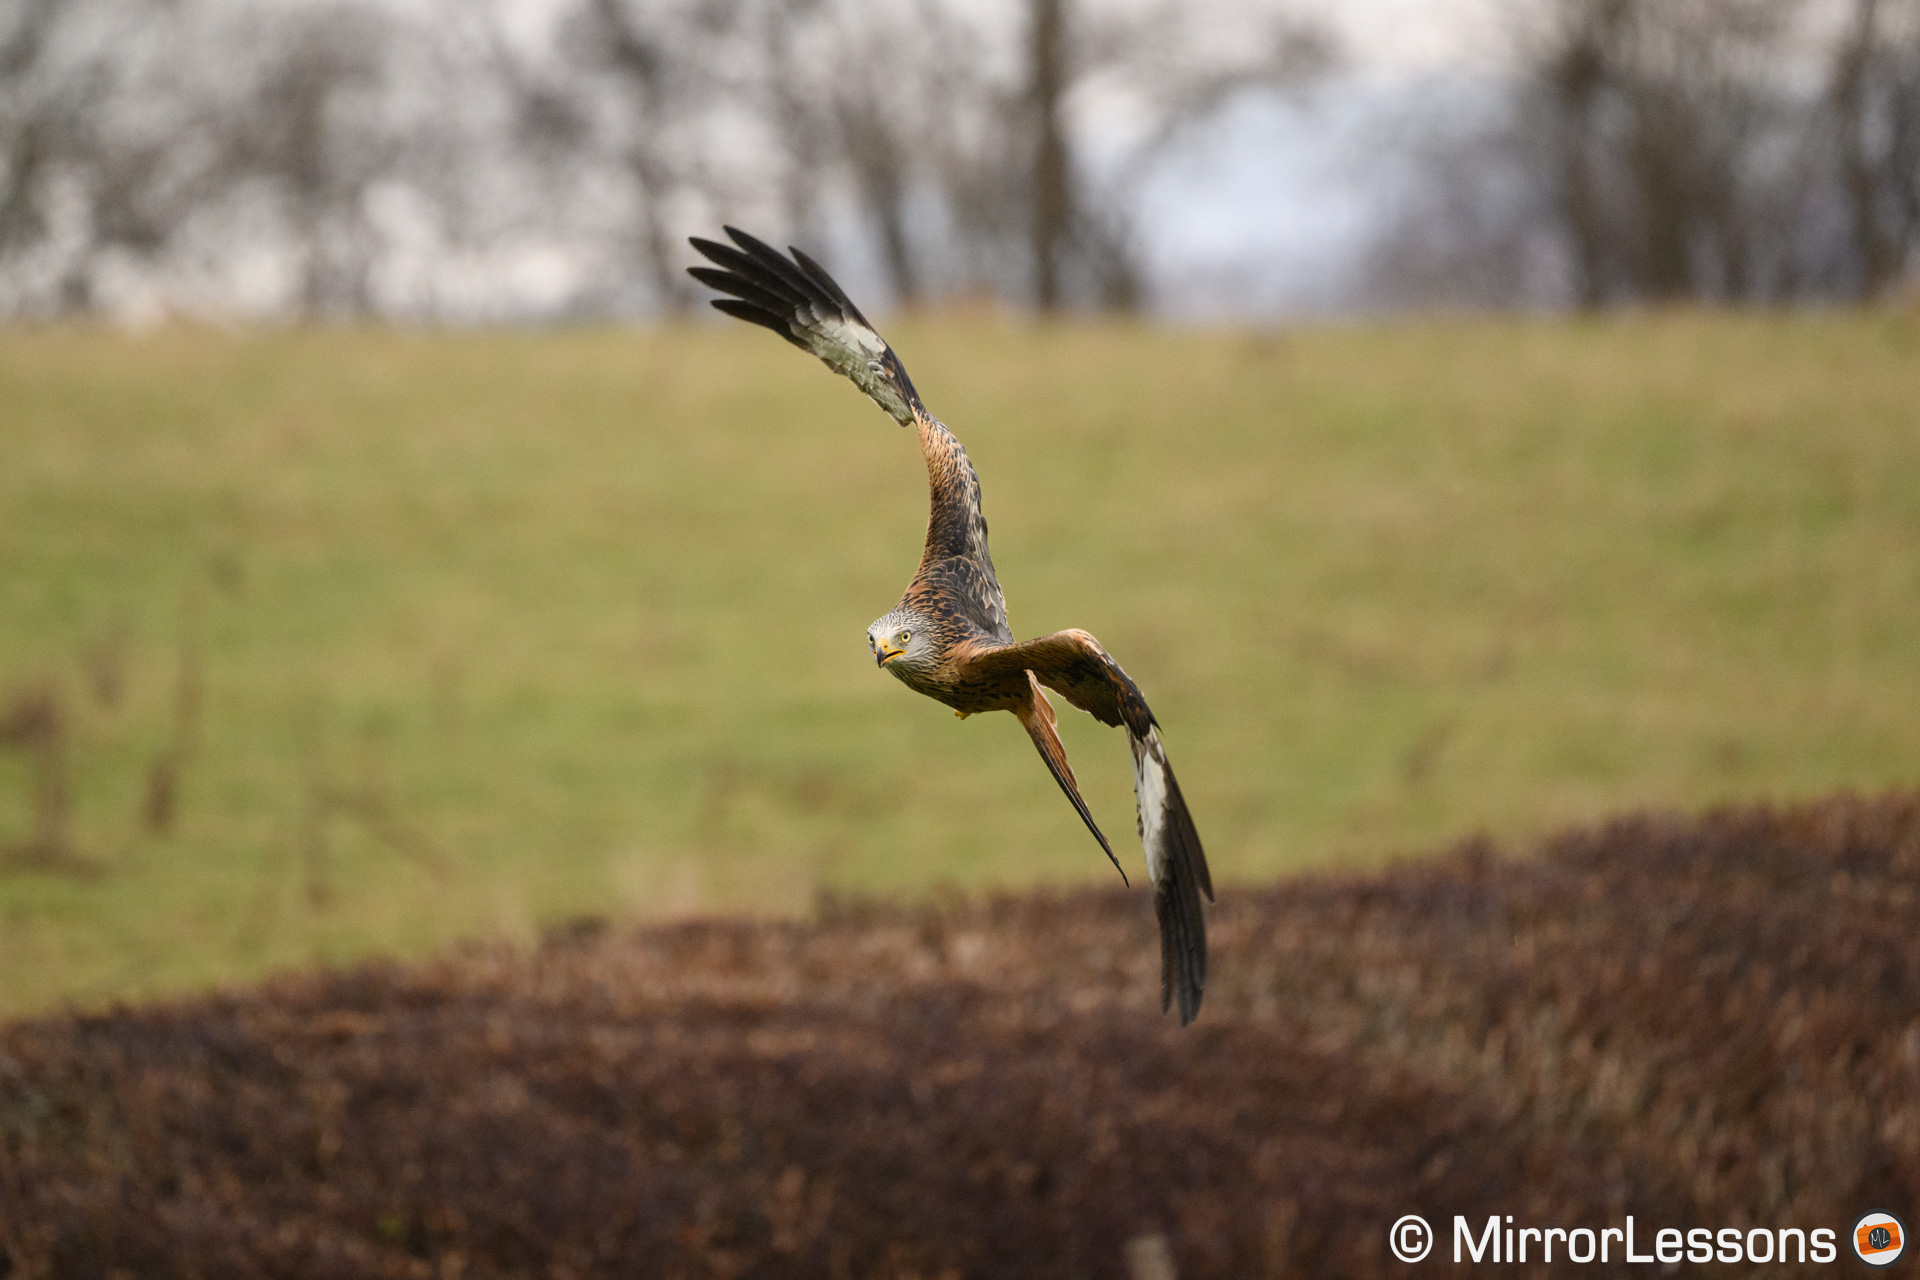
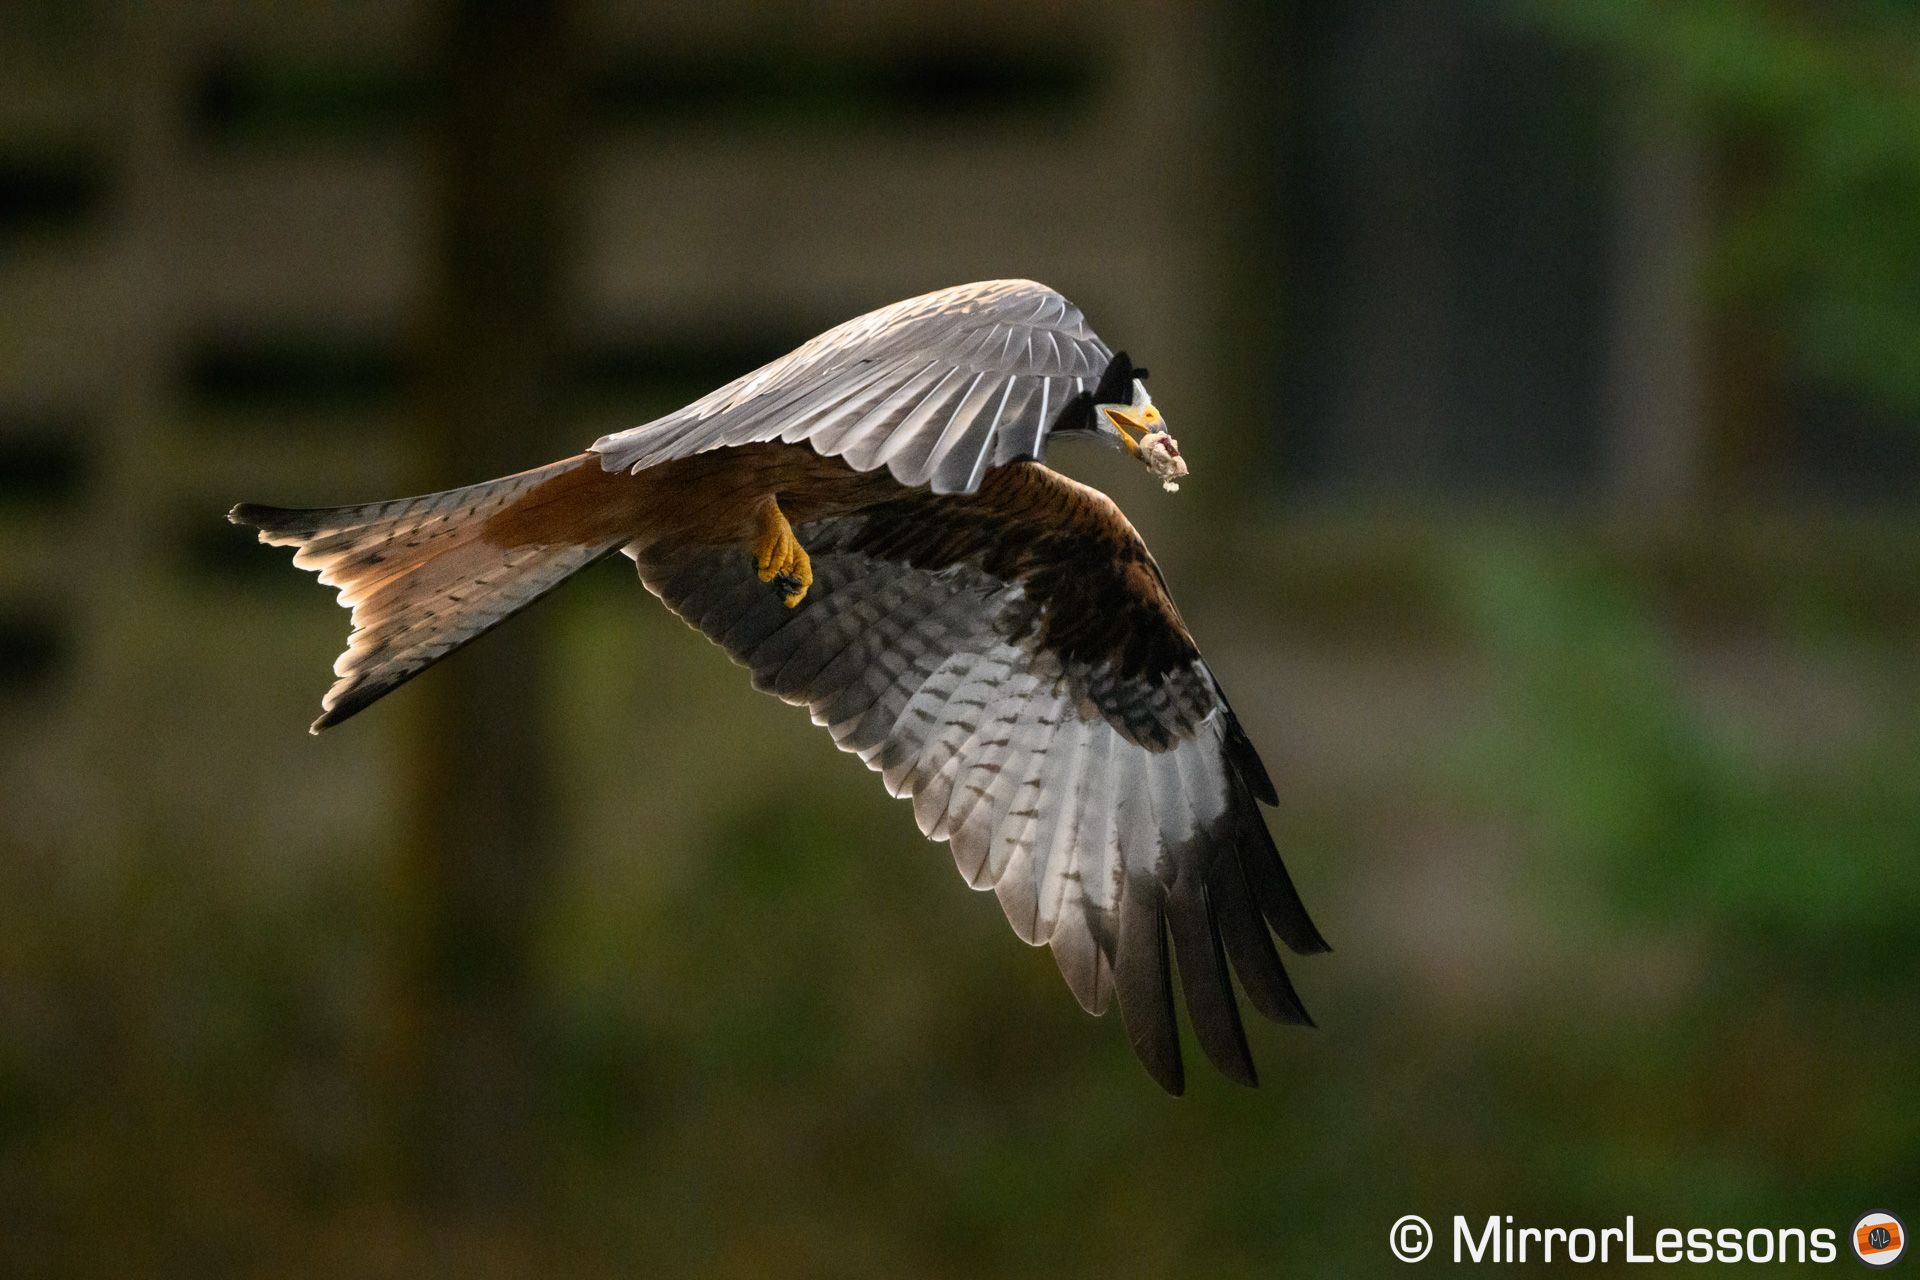
Like its main competitors, the key to such a high keeper rate is that the camera rarely mis-focuses on the bird, and it rarely shifts focus to the background. It is also very quick to react and correct focus when needed. If there is one frame out of focus (or slightly soft) inside the sequence, the Z9 will take 1 or two frames maximum to make the correction.
NIKKOR Z 800mm f/6.3 VR S
NIKKOR Z 100-400mm f/4.5-5.6 VR S at 400 mm
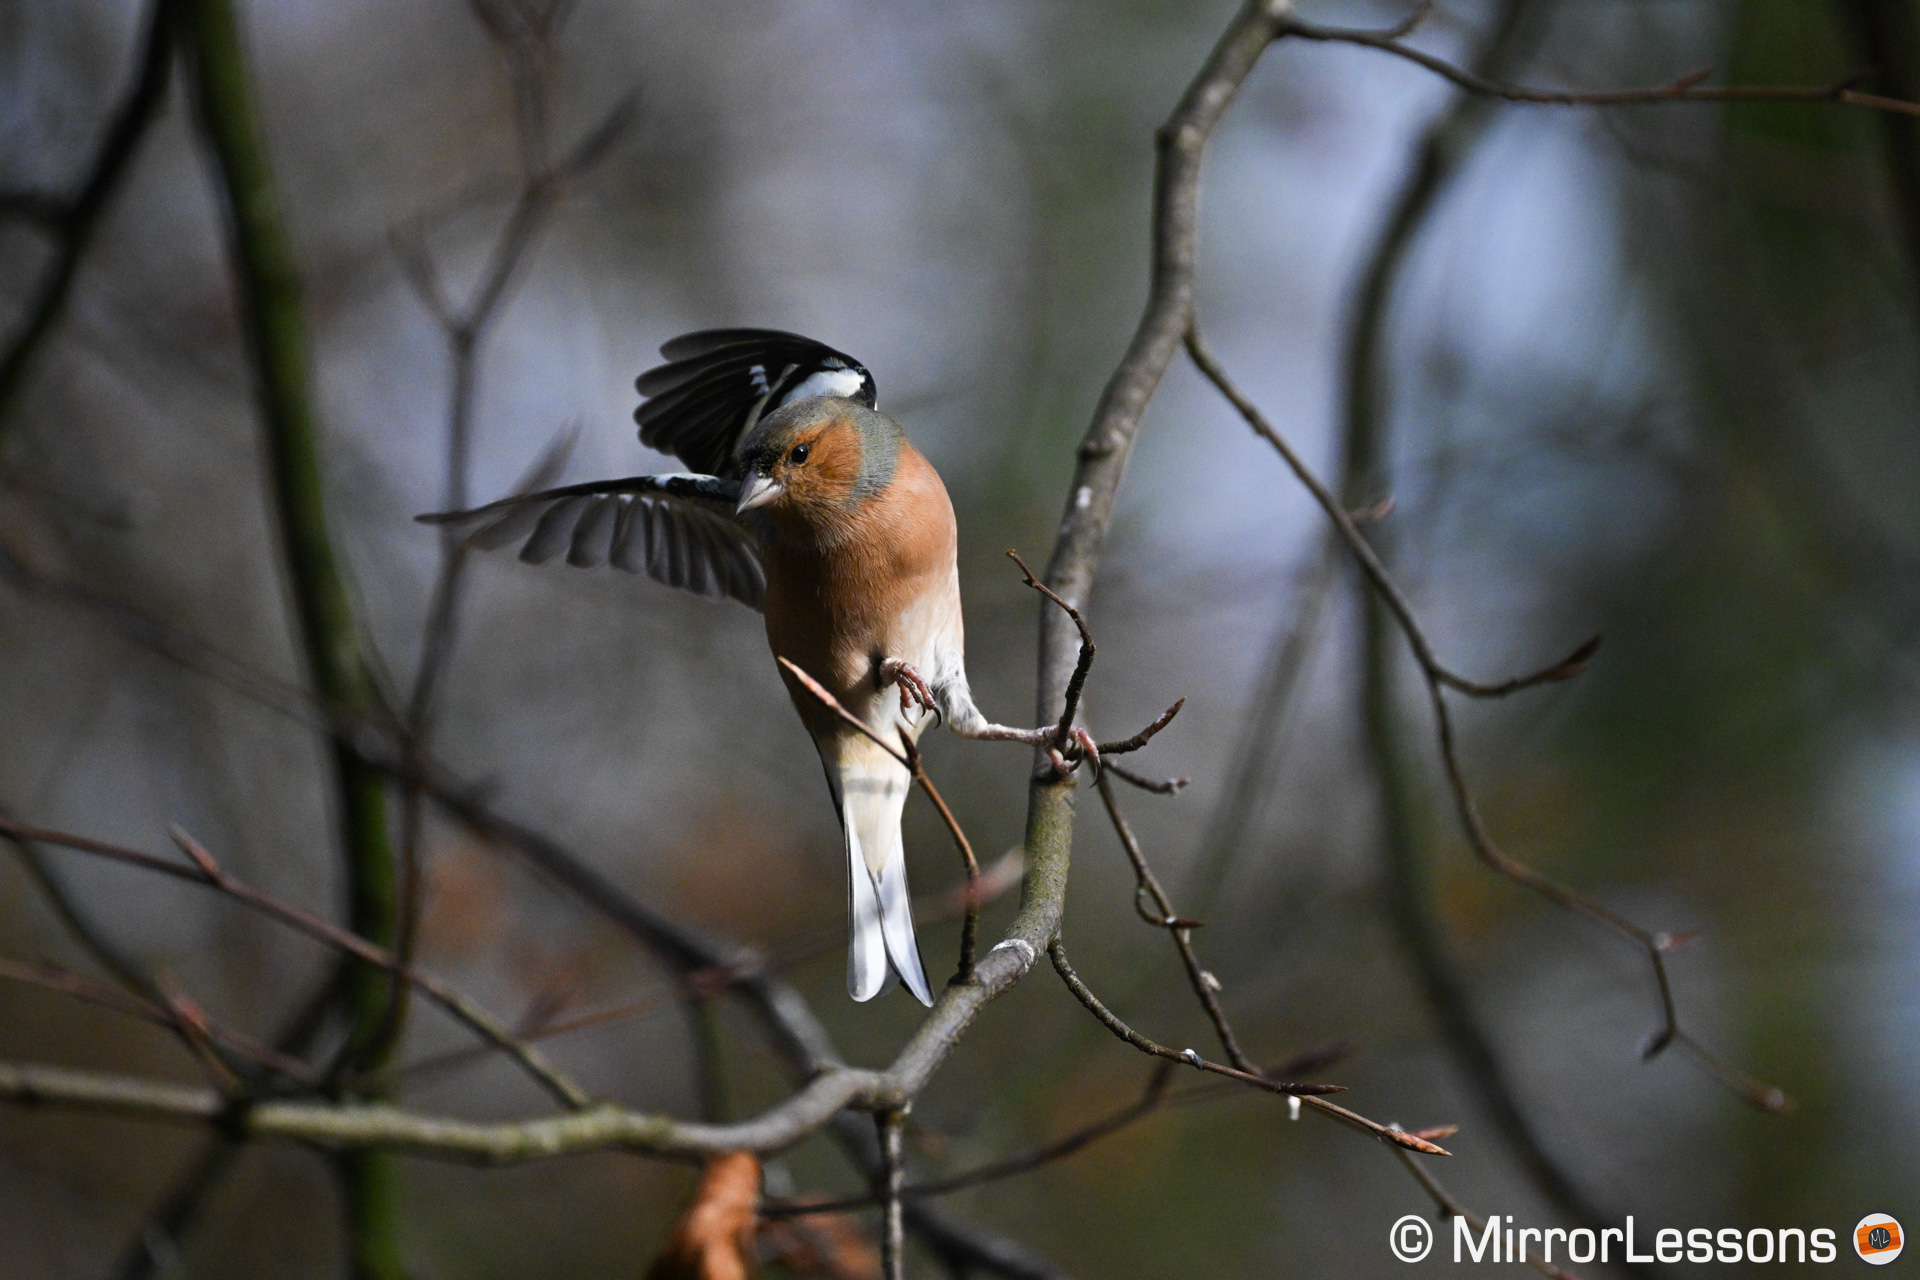
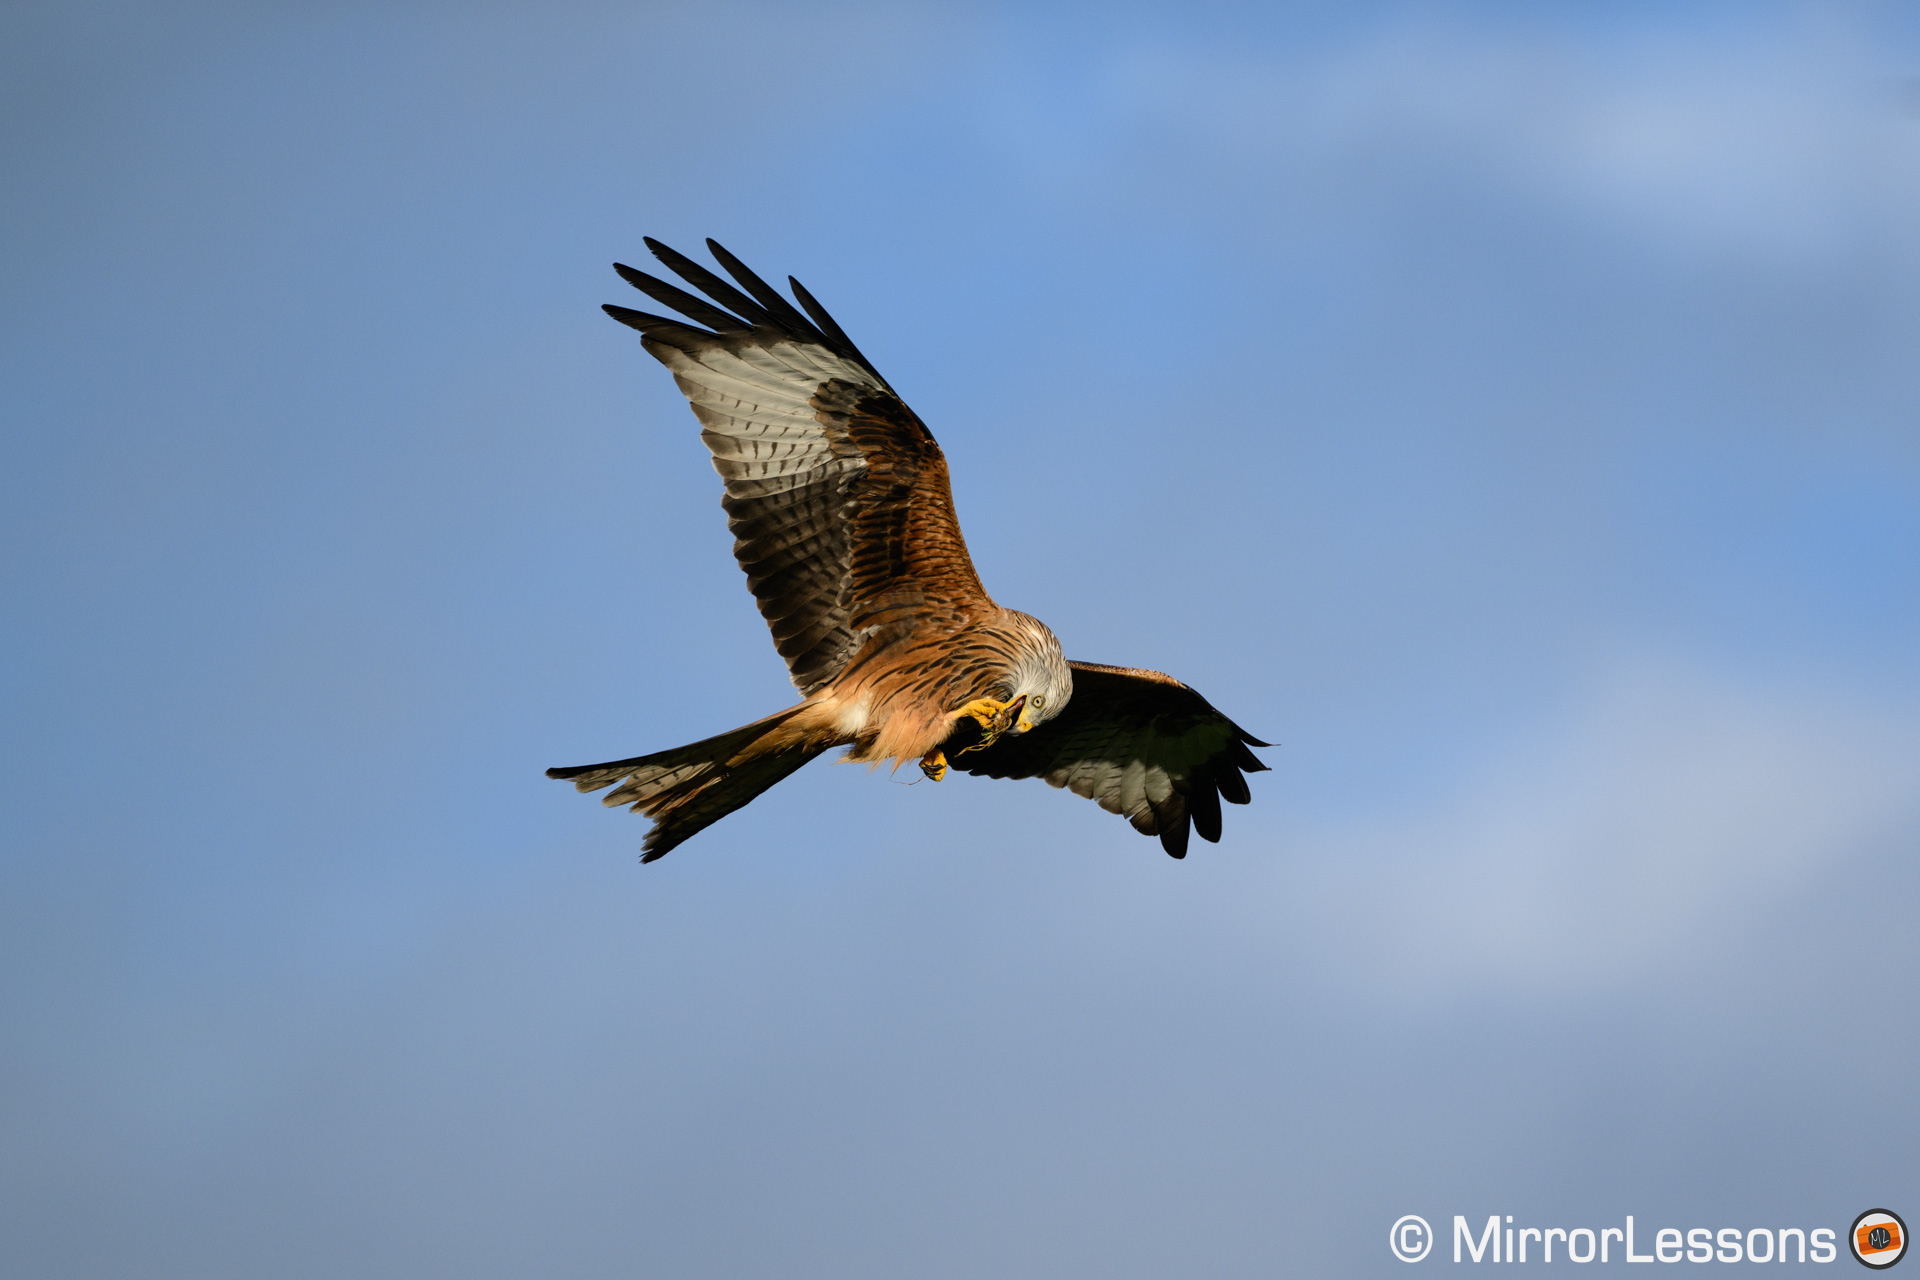
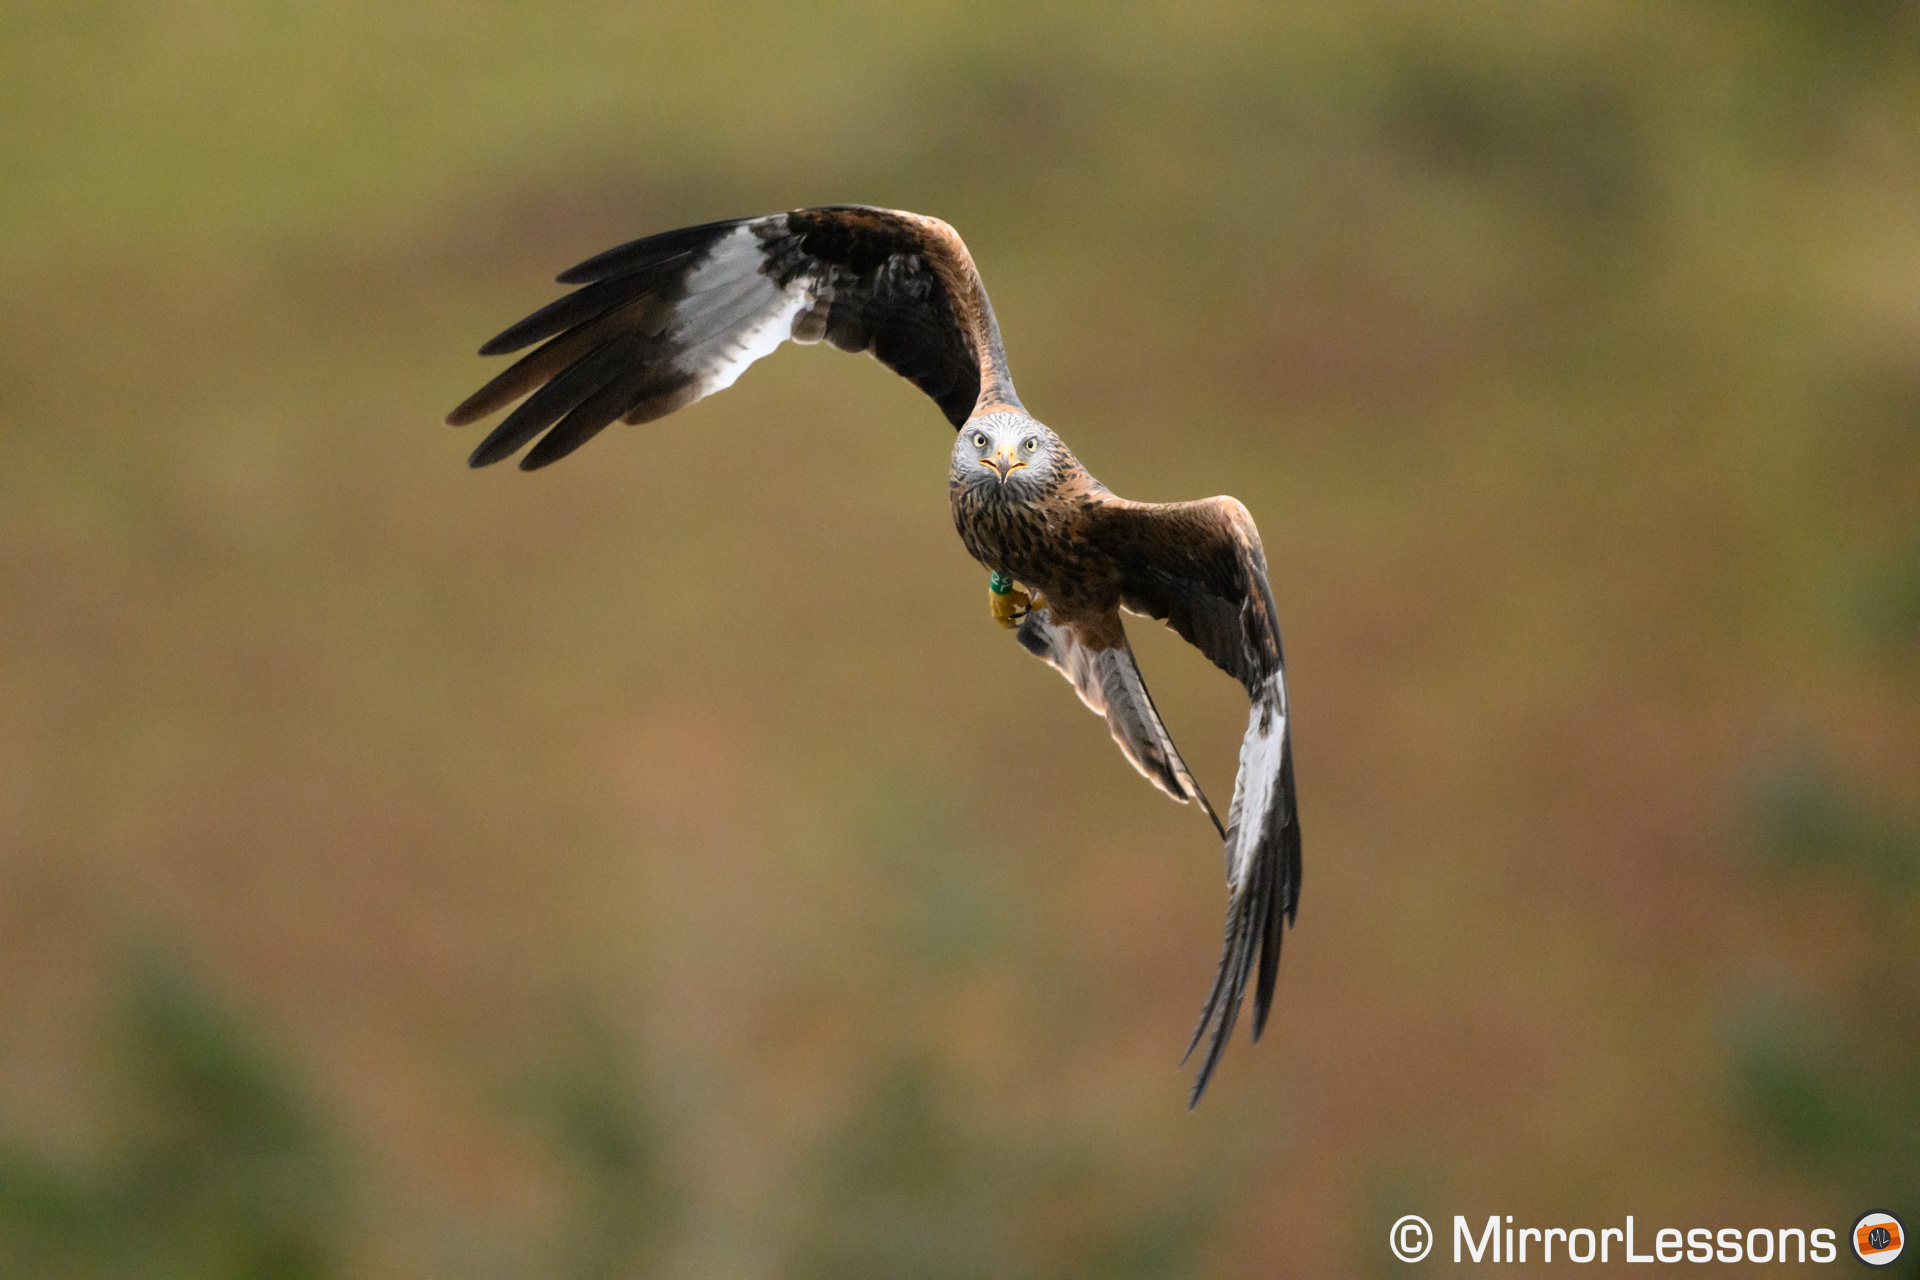
As I said in the previous chapter, the camera is capable of tracking the birds when they are small in the frame, as well as when they are in various positions.
NIKKOR Z 100-400mm f/4.5-5.6 VR S at 400 mm
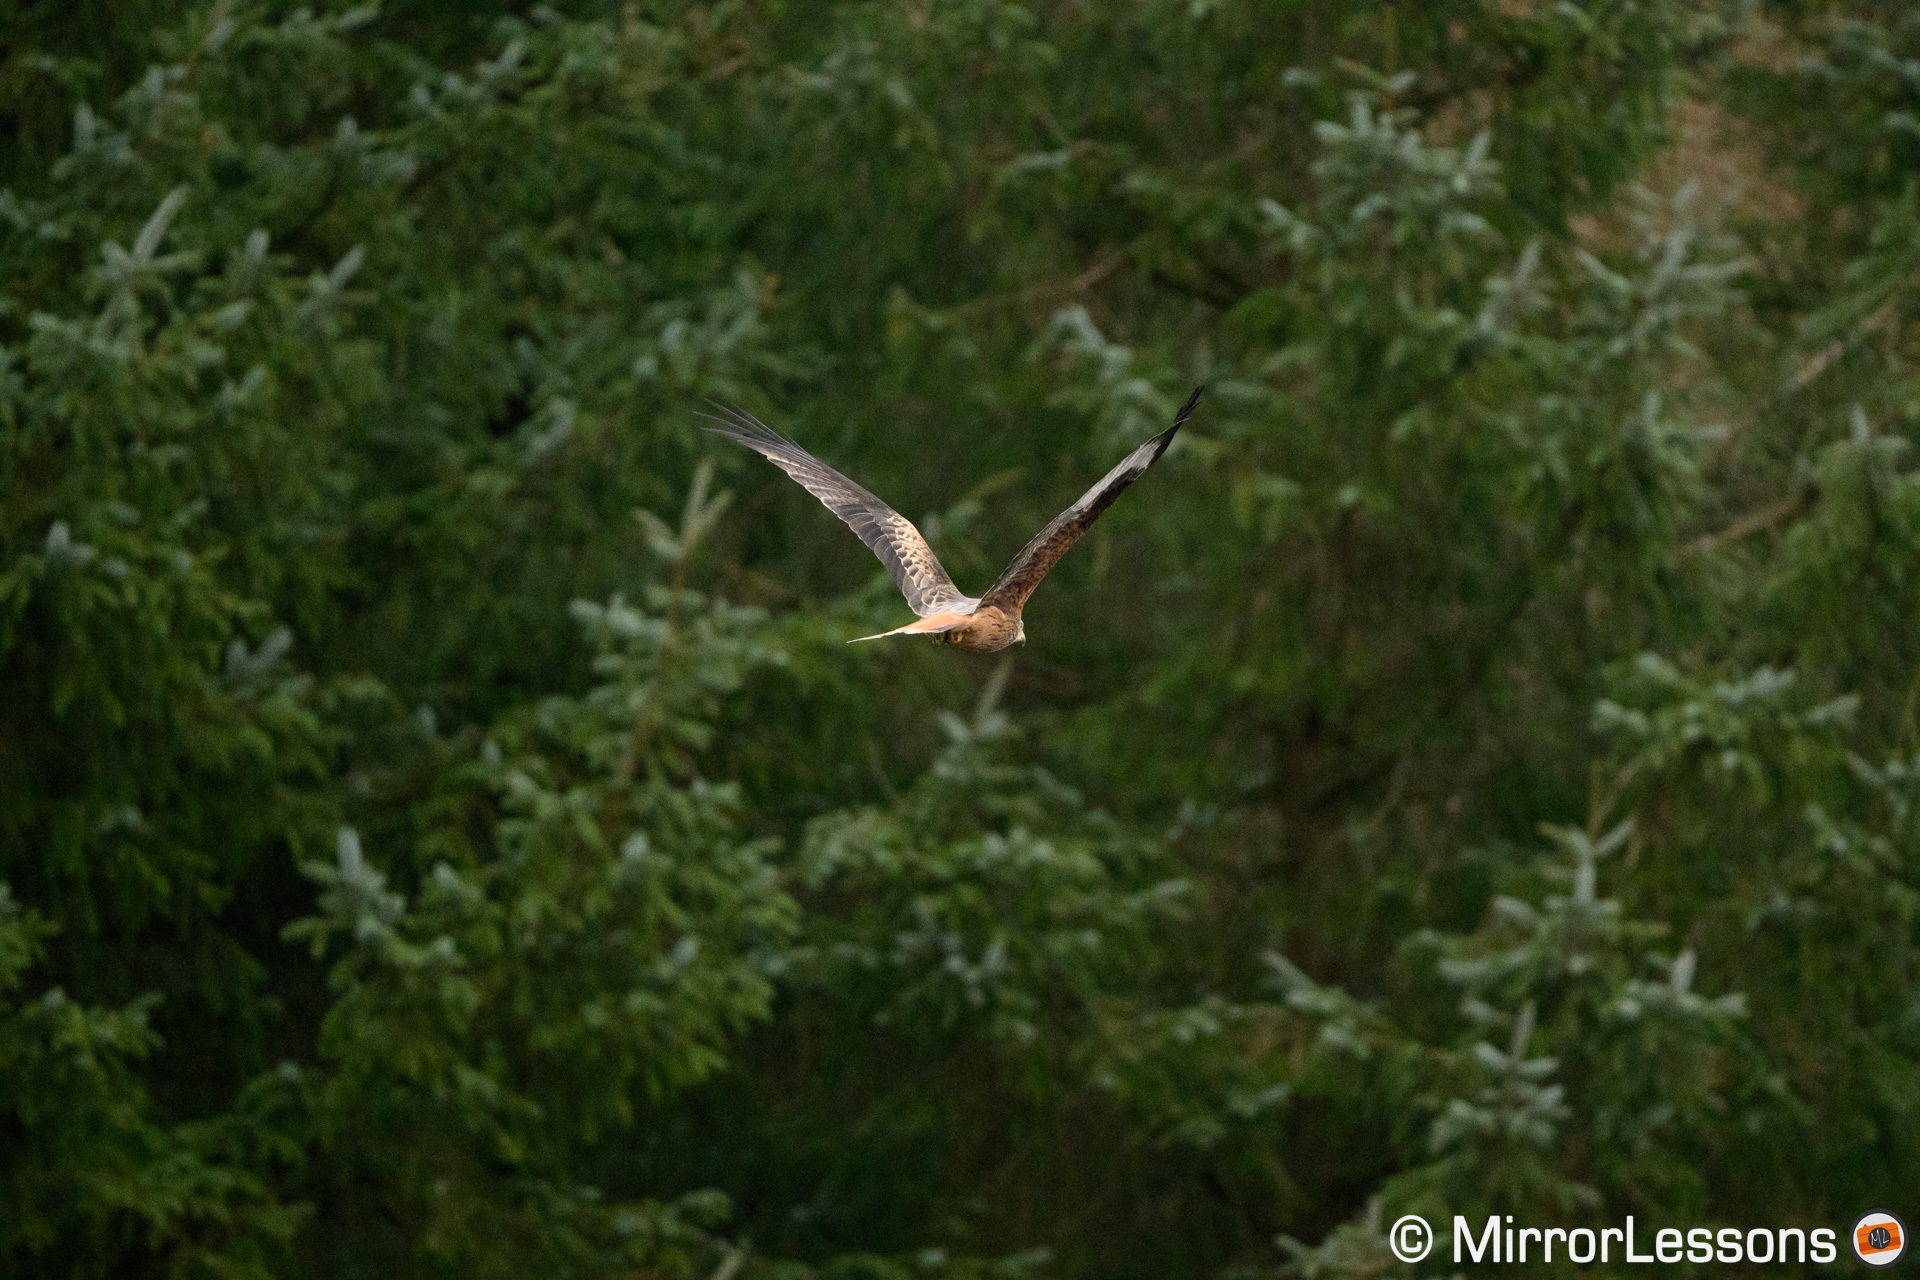
NIKKOR Z 800mm f/6.3 VR S
The keeper rate is very similar whether the bird flies against the sky (so, a clear background) or against hills and trees (meaning a busy background).
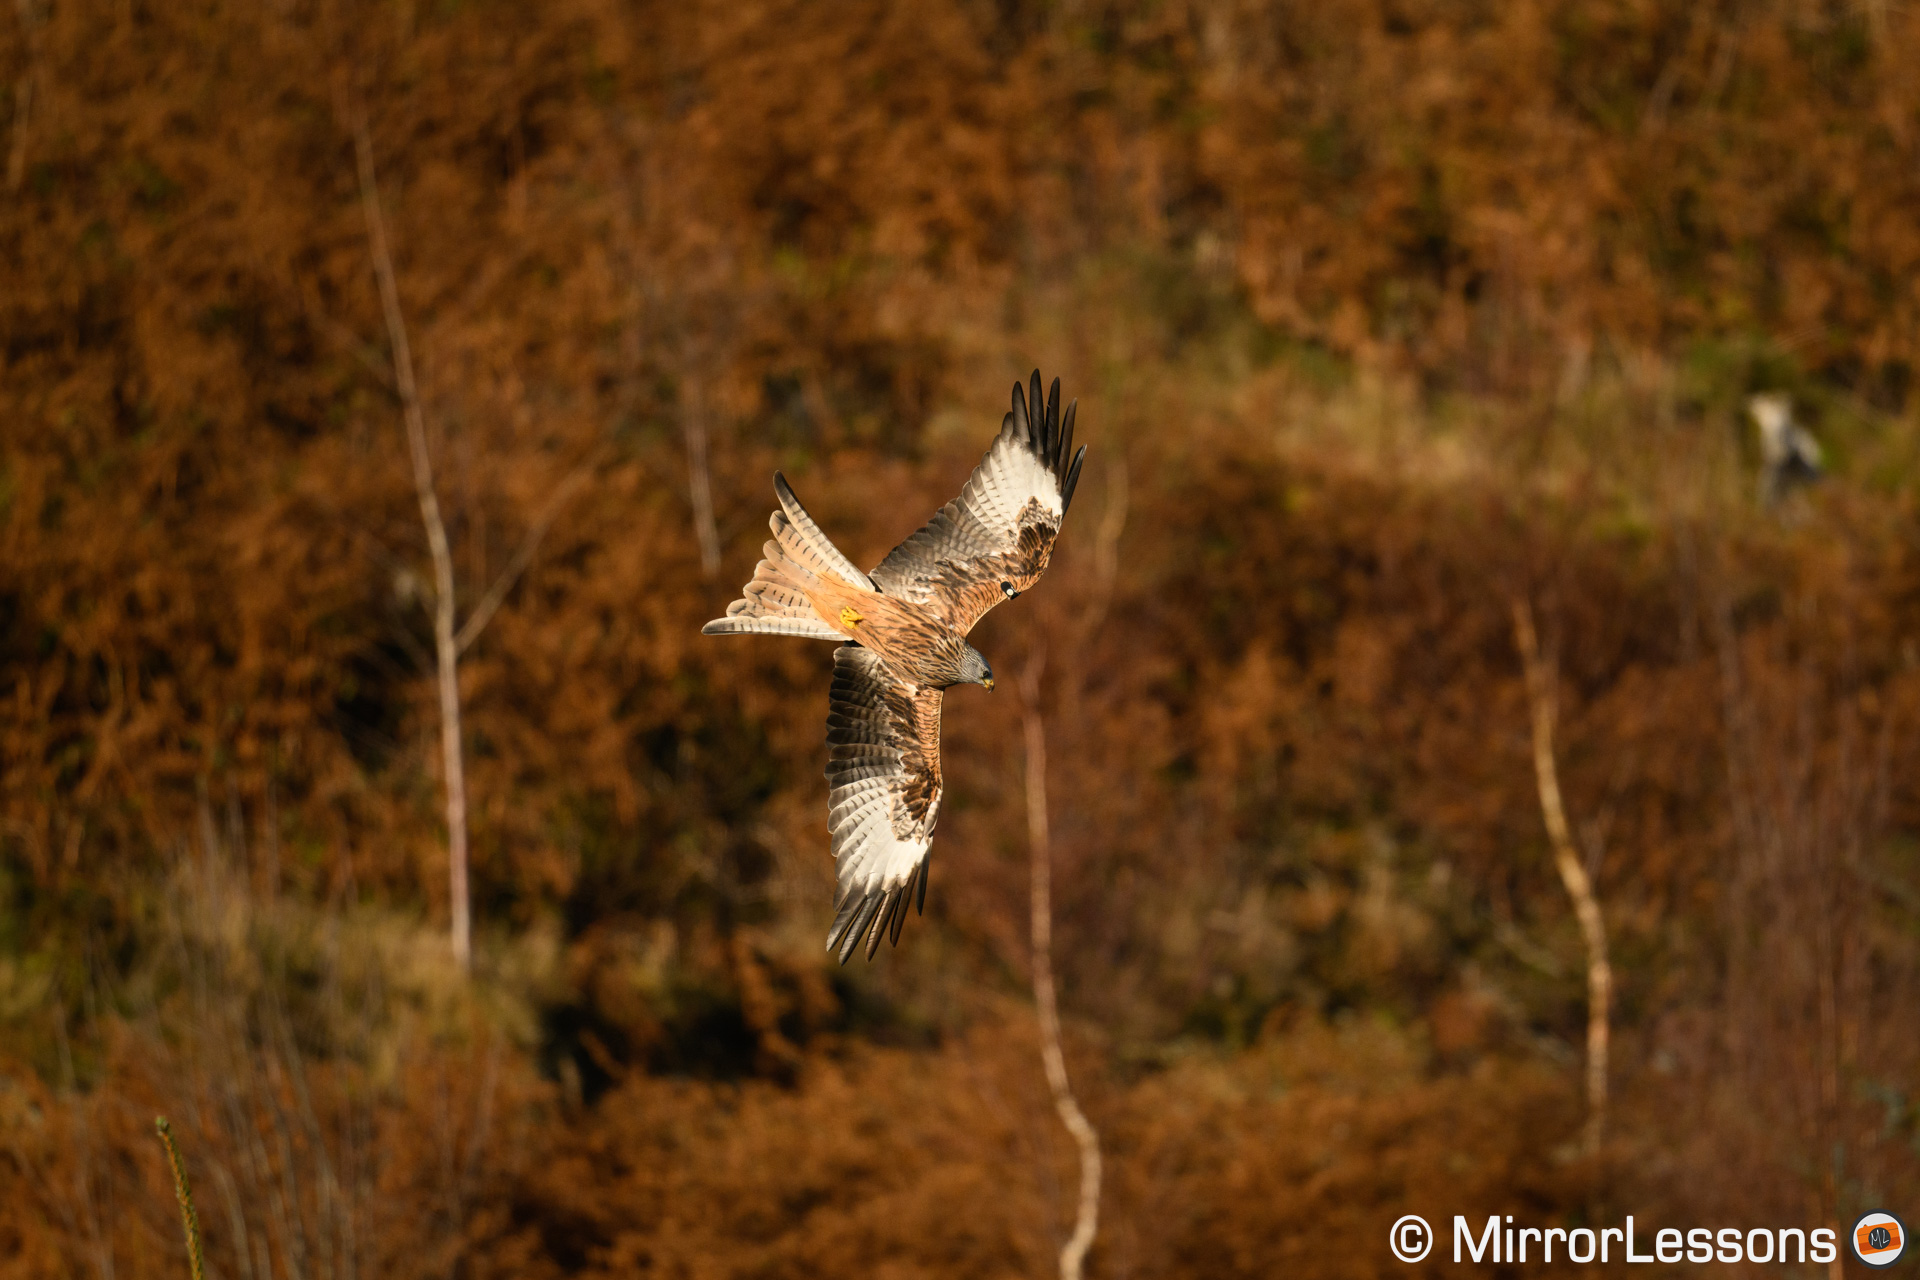
AF-S NIKKOR 500mm f/5.6E PF ED VR
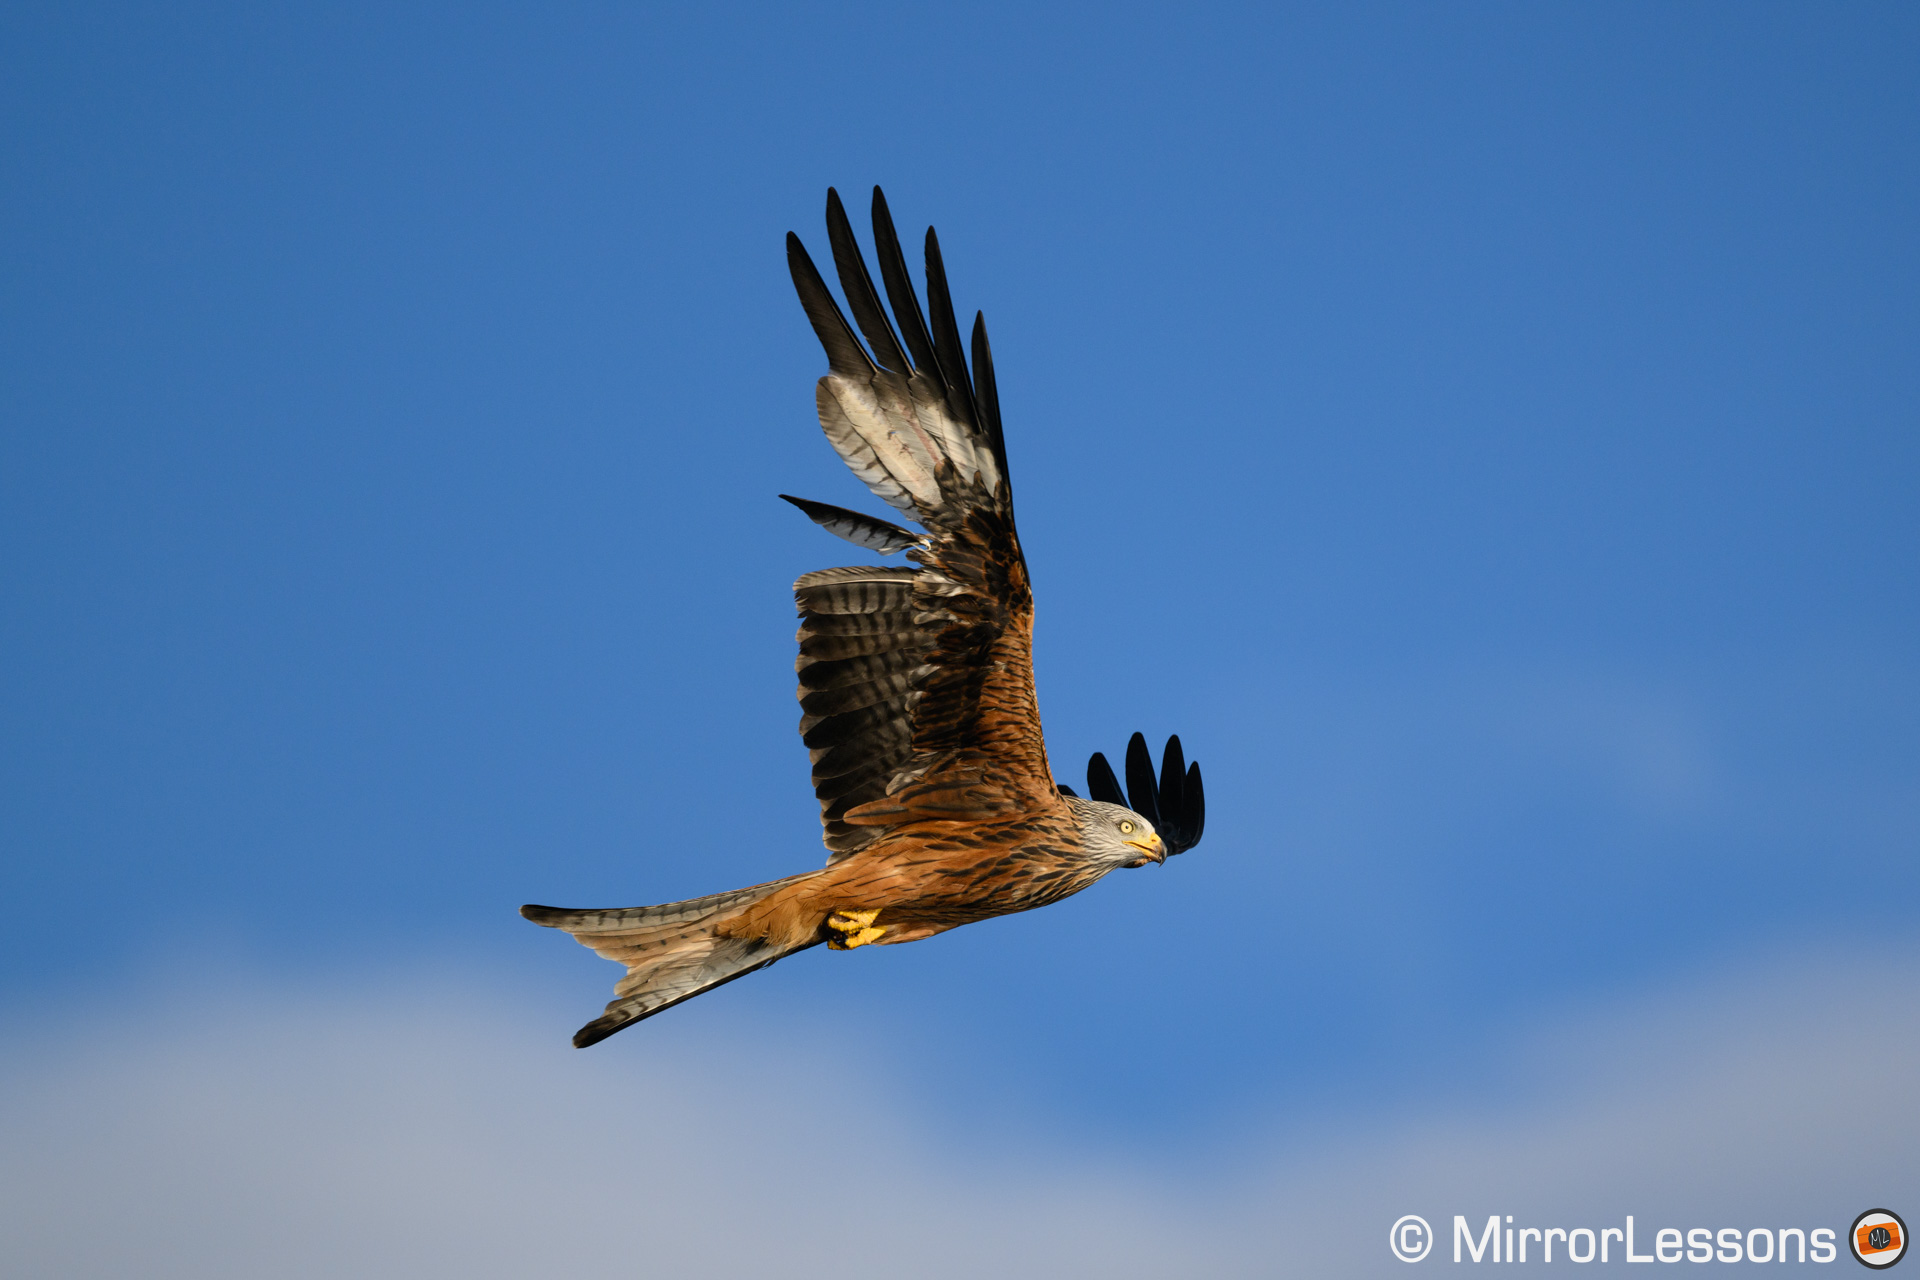
AF-S NIKKOR 500mm f/5.6E PF ED VR
NIKKOR Z 100-400mm f/4.5-5.6 VR S at 400 mm
Subject Detection, combined with 3D Tracking, gave me the best result for birds in flight. As I explained earlier, the initial focus area is very small, so you have to engage the autofocus when that area is precisely over the bird. If not, the camera can easily focus on something else (the background most likely) and lose the bird before it even starts tracking it. It just requires a bit of practice: once the lock is successful, the camera won’t let go easily.
NIKKOR Z 100-400mm f/4.5-5.6 VR S at 400 mm
The Wide-Large area is another option but, despite the name, it is not very big. It is larger than 3D tracking’s initial point, so it provides more flexibility while you’re composing but, once the tracking has started, you need to keep the bird inside that Wide-Large area, or over the edge of that area at the very least. If the bird goes outside it entirely, the Z9 will most likely focus on something else. Here again, it is a matter of practice and getting the experience.
AF-S NIKKOR 500mm f/5.6E PF ED VR
Although Wide-Large didn’t give me the same result, it was not too far off. It is worth keeping in mind as a second option, especially if you want to limit where the camera focuses in the frame. You can also create your own custom area with C1 and C2.
Without subject detection, the keeper rate was always lower by 10%, or worse. 3D Tracking in particular struggled, with the Z9 losing the kites more easily in favour of the background. So, at the risk of stating the obvious here, Animal Subject Detection is the setting to keep active at all times.
Animal Detection + 3D Tracking
96%
100%
Animal Detection + Wide Large
90%
98%
3D Tracking without animal detection
73%
82%
Wide-Large without animal detection
87%
97%

NIKKOR Z 800mm f/6.3 VR S
The other setting that made a difference is Focus Tracking with Lock-on. Officially, this is described as a setting that determines “how quickly focus responds if something passes between the subject and the camera when AF-C is selected”.
There are two parameters to adjust. The first is Blocked Shot AF Response:
- choose 5 (Delayed) and it will maintain focus on the original subject rather than shifting immediately.
- choose 1 (quick) and the Z9 will respond right away
- choose 2, 3 or 4 to find a balance between the two behaviours
The important thing to understand here is that when using 3D Tracking, this setting always works with the 3 value, so right in the middle. Setting it to 1, 2, 4 or 5 doesn’t make any difference.
When using the Wide-Large area, it will make more of a difference although, in my tests with the red kites, I didn’t find a big gap in the keeper rate. With 1 (quick), I have examples where a second kite passed in front of my subject, and the camera didn’t flinch, probably because the action was too quick for the camera to react. It will be more effective if you’re tracking a bird that goes behind trees, and re-appears a few seconds later.
The second parameter in this setting is called Subject Motion:
- Steady is designed for subjects that move at a, you guessed it, steady pace
- Erratic is for subjects that are prone to sudden starts and stops.
Red Kites definitely have a more erratic behaviour, slowing down then accelerating, as well as changing direction very quickly. The Erratic setting gave me the best result, and it was the one that allowed my keeper rate to go above 90%.

NIKKOR Z 100-400mm f/4.5-5.6 VR S at 400 mm
The only time when the combination of the 3D Tracking and Erratic Subject Motion settings struggled, was when there were a lot of birds in the frame. In a few occasions, the Z9 focused on the kite near the edge of the frame, rather than the one at the centre. Thankfully, it only took a small number of frames for the camera to switch to the subject I wanted.
The Erratic option can also confuse the Z9 a little when the bird is small in the frame, and close to a busy background. That can be especially true if the colours of the background are similar to the bird’s feathers. But we’re talking a small amount of out of focus images, out of the thousands I captured.
Next we have the drive speed, and here I got some curious results. First of all, the best AF score was obtained with 20fps and 45MP RAW, as well as 120fps and 11MP JPGs. The Z9 seems capable of delivering the best performance regardless of the continuous shooting speed selected.
I wrote “seems” because when I tested the 30fps mode (45MP JPG), the score was lower. The camera had a harder time correcting focus quickly, so instead of having one or two out of focus images in a sequence, I would end up with 5 or even 10. Perhaps 30fps and full resolution images is too much for the Z9 to handle.
20fps (RAW, 45MP)
96%
100%
30fps (JPG, 45MP)
79%
93%
120fps (JPG, 11MP)
96%
98%
NIKKOR Z 800mm f/6.3 VR S
How does the Nikon compares to some of the mirrorless competitors, you may ask? Pretty well! Its AF score is only second to the Sony A1.
Sony A1*
98%
100%
Nikon Z9
96%
100%
Sony A9 II
96%
100%
Canon R3
94%
100%
*Note: the A1 score is valid at 20fps. At 30fps, it is slightly lower at 94%/99%. Check my dedicated article to read more about all these cameras and birds in flight.
To recap, here are the settings that gave me the best results with the Nikon Z9 and the red kites:
- AF-Area Mode: 3D Tracking
- AF Subject Detection: Animal
- AF-C Priority Selection: Focus
- Focus Tracking With Lock-On: 3, Erratic
NIKKOR Z 800mm f/6.3 VR S
A quick word about AF-C Priority selection: I find Focus Priority in C-AF to be a more precise tool to evaluate the AF performance in the field. However, many photographers prefer to choose Release priority to reduce any chance of missing a shot (they’ll decide later if they keep it or not). I totally get that. With a camera like the Z9, the AF performance is fine with either option. There is also a third Focus + Release mode where the camera will give priority to focus if the subject is dark, or contrast is low.
Stabilisation and Video
The Z9 features 5-axis in-body image stabilisation (built-in VR, aka Vibration Reduction as Nikon calls it). The official rating is 6 stops of compensation.
With wildlife and long telephoto lenses, the performance will be influenced by VR on the lens more than that of the sensor. I was able to capture sharp images at 1/50s with the 500mm F5.6 PF, or 1/400s with the 800mm F6.3 and TC 2.0x teleconverter. Pretty good performance!
AF-S NIKKOR 500mm f/5.6E PF ED VR

AF-S NIKKOR 500mm f/5.6E PF ED VR + TC 2.0x III
NIKKOR Z 800mm f/6.3 VR S Z + TC-2.0x
There are two settings available: VR Normal, and VR Sport. Both can automatically detect the type of movement and compensate vertically or horizontally, as needed.
VR Normal is supposed to enhance the performance further, but it has one drawback: there is a jiggle in the viewfinder every time you press the shutter release button. It only happens with VR lenses according to the user manual, but it’s very annoying. The Sport setting doesn’t have this problem, so it’s the one I decided to use. Note that this only affects the photo mode, not video.
Where the performance of Nikon’s system really surprised me was during video recording, and that’s why I included these two things in the same chapter.
The Nikon Z9 is an impressive camera for movies. It can record:
- 8K up to 30p (oversampling, no sensor crop)
- 4K up to 60p (oversampling, no crop)
- 4K up to 120p (pixel binning, no crop)
- 10-bit 4:2:2 internally (H.265, Apple Prores)
- 12-bit RAW (N-RAW, Prores RAW)
- N-Log and HLG internally
- up to 5780 Mbps
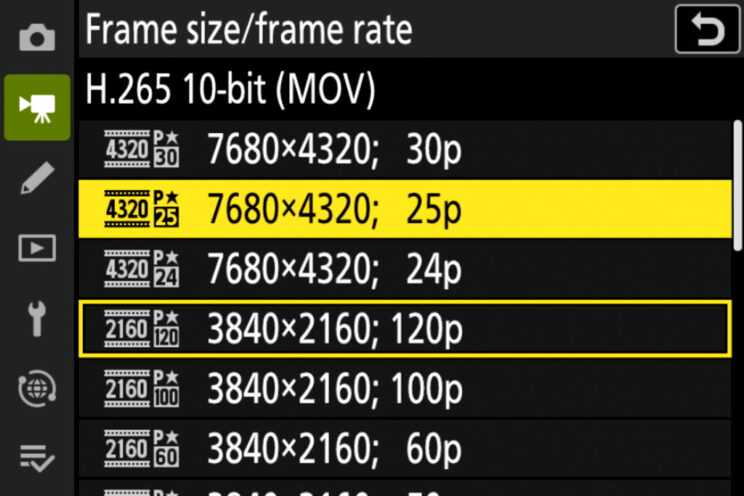
I recorded several clips in 8K 25p and 4K 120p, most of them hand-held, and I was really impressed by how stable the footage is. It’s not perfect by any means, you get a bit of jittering (more visible in 8K) and small jerks, but when you consider the focal length used, it is astonishing to see that all the clips I recorded are usable.
The best recording format to use in this case is 4K 120p, because you can slow down the video on a 24p or 25p timeline and get a 4.8x o 5x slow motion effect, which makes the shaking smoother and less distracting. It also extends the duration of those parts inside a clip that don’t have jerks, giving you more seconds of fine stable footage.
In 4K 120p, there is no oversampling, and I believe the Z9 does pixel binning instead, but I find the quality to be good nonetheless. I recorded with the Flat Picture Control, which lacks a bit of sharpening by default, so I added a small amount in post to make the image crisper.
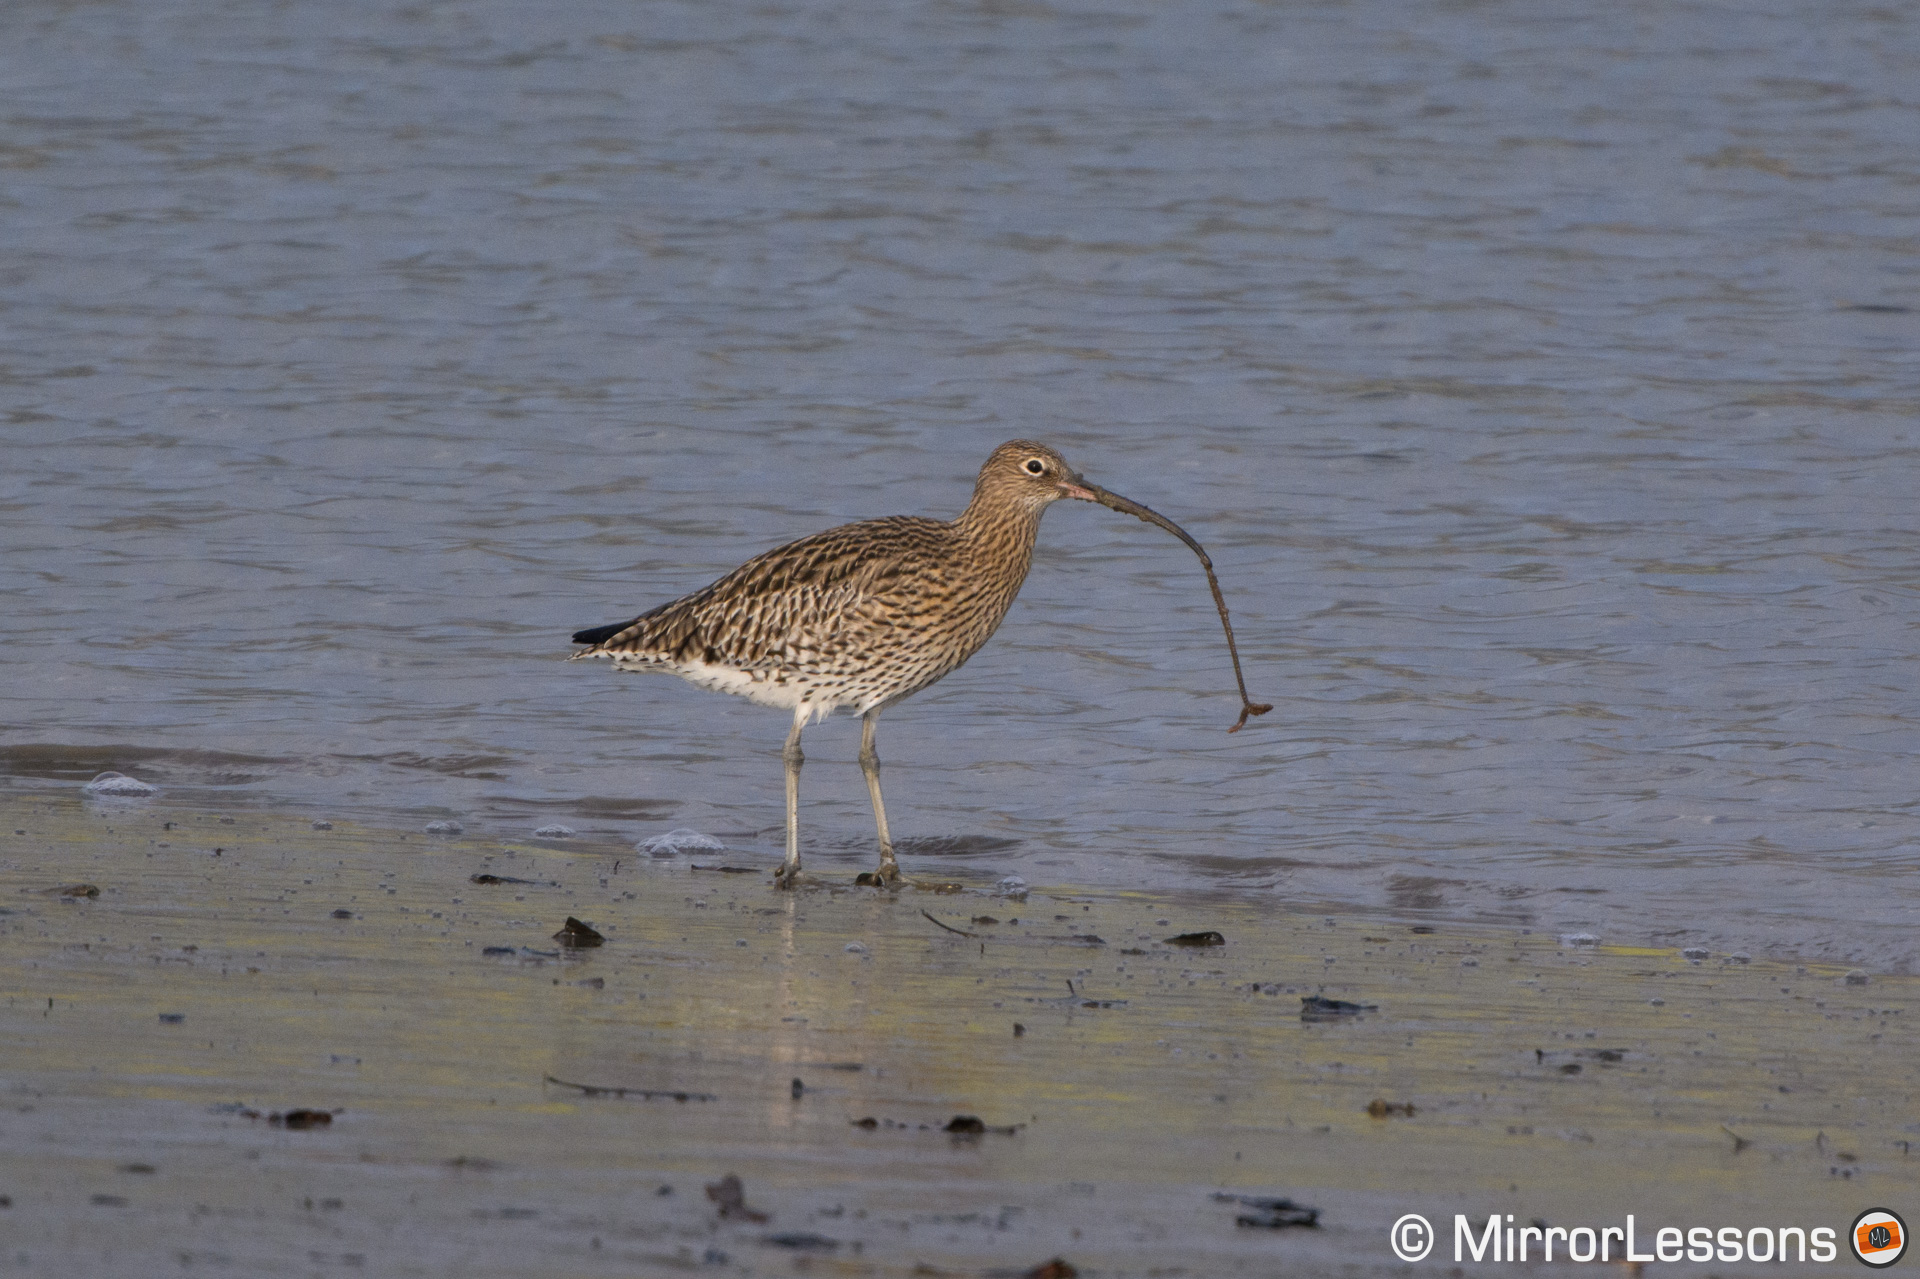
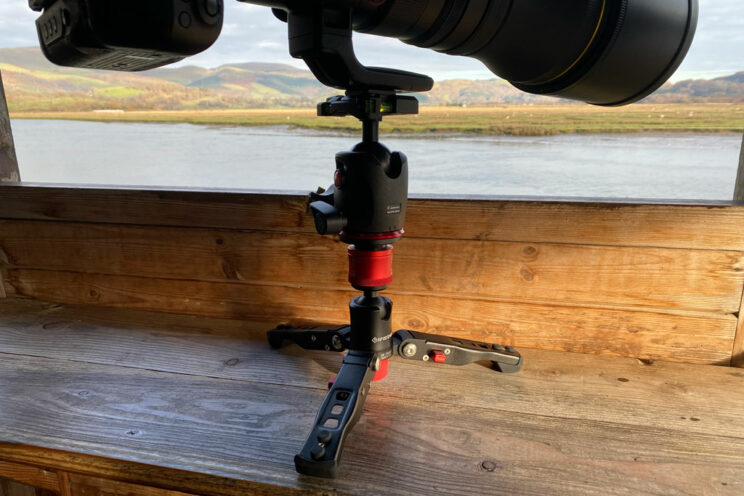
The most impressive moment I recorded was a scene of a curlew catching worms in the wet sand. I had the 800mm F6.3 with the 2.0x teleconverter attached, and I was working in DX mode. Now the thing to understand is that in APS-C mode and 4K 120p, the sensor crop is more severe (2.3x instead of the default 1.5x), so here we’re talking about a total equivalent of 3680mm in terms of field of view.
All I had to help my arms was a tiny monopod with a Manfrotto XPro Ball head, a set-up that is part of my iFootage Cobra 2 monopod. The results were simply stunning. This is the first full frame mirrorless camera that I was able to push that far.
The performance is pretty good with continuous autofocus too. The Z9 was able to follow the fast red kites with precision, and it includes two parameters to control the speed and reactivity. Subject detection works as well as it does for still photos.
You can watch the footage in our video review, available at the end of this article.
Lenses I Used for This Review
I used three lenses with the Nikon Z9, plus the converters:
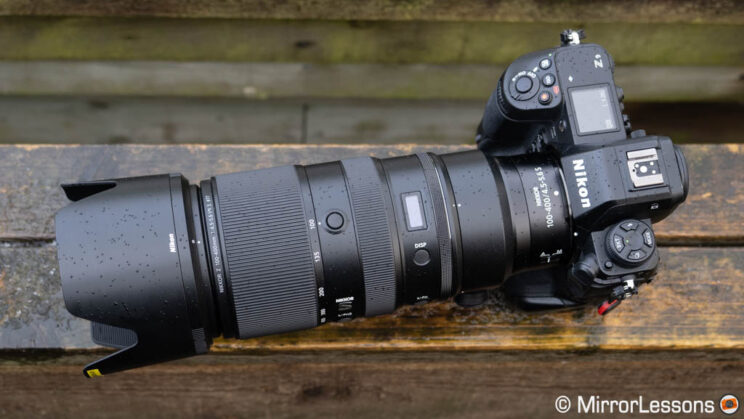
- Nikkor Z 100-400mm f/4.5-5.6 VR S
- Nikkor Z 800mm f/6.3 VR S
- Nikkor Z Teleconverter TC-2.0x
- AF-S Nikkor 500mm f/5.6E PF ED VR with FTZ II adapter
- AF-S Teleconverter TC-14E III
- AF-S Teleconverter TC-20E III
My thoughts about all of them is very positive. In terms of sharpness and AF performance, they deliver great results, and I’ve already praised the VR stabilisation in the previous chapter. It was also nice to see the F-mount 500mm prime work so well on the Z9 with the adapter.

The AF score for birds in flight was the same with the 100-400mm and the 500mm. With the 800mm, it was lower but I believe there are two main reasons for that. It was the first day of testing, so I wasn’t using the best settings yet (particularly the Erratic option for Focus Tracking With Lock-On). I was also a bit too close to the action, which makes tracking more challenging. I should have positioned myself further back.


The lenses worked well with the teleconverters, and even the two 2.0x TC didn’t compromise the AF performance or the optical quality too much.
Among the three lenses, my favourite was the 500mm. I first saw it at the UK launch event for the original Z6 and Z7 cameras, and I was impressed by how compact and lightweight it was. Walking around nature reserves with it made everything more enjoyable. The focal length and fastest aperture are a good compromise, and the aperture remains decent with the teleconverters attached. It’s a stellar lens, just like the 300mm F4 PF.
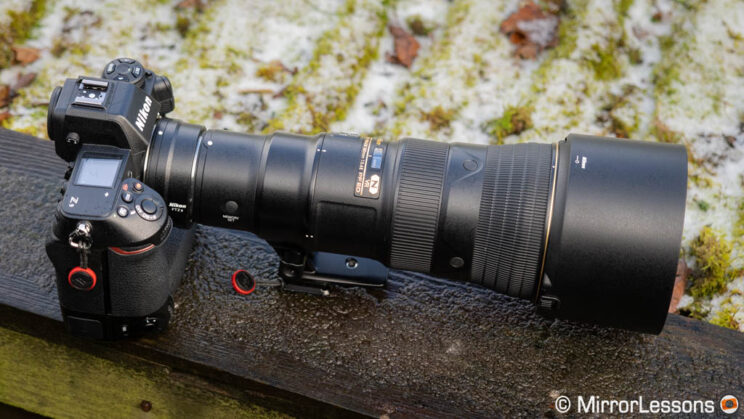
The 800mm is another product that gave me a very positive impression. It is bigger and has a higher price tag than the other two lenses I used, but we need to put that into perspective. The older DSLR version (800mm F5.6) is much larger, heavier and way more expensive.
Z 800mm f/6.3 VR S
$6,500
2,4kg
140 x 385 mm
AF-S 800mm f/5.6E FL ED VR
$16,300
4,6kg
160 x 461 mm
Nikon decided to give Z-mount users something more affordable and lighter, and I like this philosophy. I can’t comment on the difference in optical quality, but the Z-mount version delivered excellent performance, with just the loss of a 1/3 of a stop.
The 100-400mm is a lens I used a bit less, mainly becomes of the lack of time, but it does everything you’d except from a zoom of this kind, it offers great versatility and works really with the teleconverters. Perhaps my only criticism is the price, I find it a bit expensive.
YouTube Video
As always, this article is also available as a video review on the MirrorLessons YouTube channel.
Conclusion
The Nikon Z9 has been praised in many reviews since it came out, and I can confirm it lives up to the hype, at least when it comes to bird photography.
The camera delivers fine image quality, top of the class autofocus performance, an excellent drive speed and buffer. It is a powerful workhorse for video, with beautiful 8K footage and a large selection of formats for internal recording. The combination of 4K 120p and VR lenses can work wonders and, since the release, Nikon has released generous firmware updates that add a lot of new features to the Z9.
NIKKOR Z 800mm f/6.3 VR S
Sure, I can find a few things to criticise, like being limited to JPG when shooting at 30fps (or faster), and banding when doing heavy shadow recovery on the RAW files. But the truth is, we can find something negative to say about pretty much every camera, if we try hard enough. It’s fair to mention these drawbacks, but it’s also honest to say that none of these limitations got in the way of what I wanted to do with the camera.
NIKKOR Z 100-400mm f/4.5-5.6 VR S at 400 mm
I also like what Nikon is doing with the Z-mount telephoto lenses. In addition to the ones I tested, there is a 400mm F4.5 that I’m eager to try, and there is a 200-600mm on the roadmap. Give it a few years, and the Nikon mirrorless system could become the most complete for wildlife photographers in terms of lenses, even more so if we will get support from third party brands. And that of course excludes all the DSLR lenses already available, like that beautiful 500mm prime.
Check price of the Nikon Z9 on
B&H Photo
Check price of the Nikkor Z 100-400mm on
Amazon | Amazon UK | B&H Photo | eBay
Check price of the Nikkor AF-S 500mm F5.6 on
Amazon | Amazon UK | B&H Photo | eBay
Check price of the Nikkor Z 800mm F6.3 on
B&H Photo