Sitting at the entry-level end of Fujifilm’s range of interchangeable lens cameras is the Fujifilm X-A3, and a small step below it, the X-A10. Because they have been designed for beginners, they are also the most affordable cameras in the range, but this hasn’t stopped Fujifilm from gifting them with a number of appealing features.
Looking at them side by side, you could easily mistake them for the same camera but a closer look inside and out soon reveals a handful of differences – some minor, others that could impact your decision to choose one instead of the other.
Since we’ve had the chance to use both cameras at various events over the past three weeks, we decided to put together this complete comparison and take an in-depth look at what these differences are!
Ethics statement: We were sent the X-A3 and X-A10 to conduct our full reviews and comparisons. We were not asked to write anything about these products, nor were we provided with any sort of compensation. Within the article, there are affiliate links. If you decided to buy something after clicking the link, we will receive a small commission. To know more about our ethics, you can visit our full disclosure page. Thank you!
[toc heading_levels=”2″]
Main Specifications
X-A3
- Sensor: 24.2MP APS-C CMOS
- Lens system: X-mount
- Weatherproof: No
- Internal Stabilisation: None
- Autofocus: contrast detection with 77 areas
- Continuous shooting: 6fps (High) or 3fps (Low)
- ISO Sensitivity: 200 – 6400 ISO (pull 100, push 12800, 25600)
- Shutter Speeds: 30s to 1/4000s (mechanical) or 1s to 1/32000s (electronic)
- Viewfinder: None
- Rear monitor: 3.0-inch, 1040K-dot, touch sensitive, tilting LCD monitor
- Movie recording: Full HD at 60p / 50p / 24p
- Built-in Flash: Yes
- Extra Features: WiFi, Timelapse, Bracketing, Multiple exposure
- Dimensions: 116.9 x 66.9 x 40.4mm
- Weight: 339g (with battery and memory card)
- Firmware version: 2.0
X-A10
- Sensor: 16.3MP APS-C CMOS
- Lens system: X-mount
- Weatherproof: No
- Internal Stabilisation: None
- Autofocus: contrast detection with 49 areas
- Continuous shooting: 6fps (High) or 3fps (Low)
- ISO Sensitivity: 200 – 6400 ISO (pull 100, push 12800, 25600)
- Shutter Speeds: 30s to 1/4000s (mechanical) or 1s to 1/32000s (electronic)
- Viewfinder: None
- Rear monitor: 3.0-inch, 1040K-dot tilting LCD monitor
- Movie recording: Full HD at 30p / 25p / 24p
- Built-in Flash: Yes
- Extra Features: WiFi, Timelapse, Bracketing, Multiple exposure
- Dimensions: 116.9 x 67.4 x 40.4mm
- Weight: 331g
- Firmware version: 2.0
Design and build quality
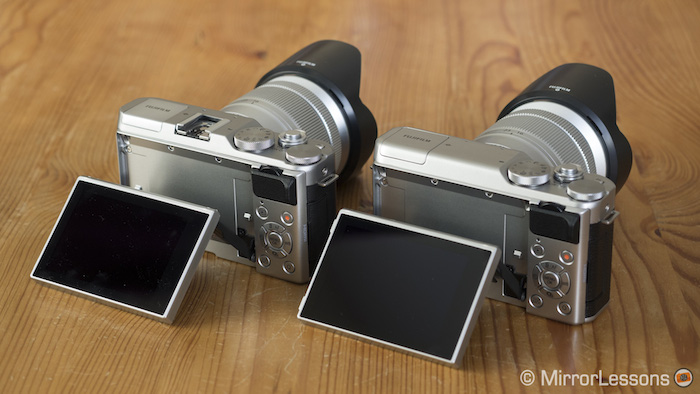
As I hinted in the introduction, the Fujifilm X-A3 and X-A10 are so similar physically speaking that it might take you a second or two to distinguish them. (I recall doing a double-take the first time I saw them!)
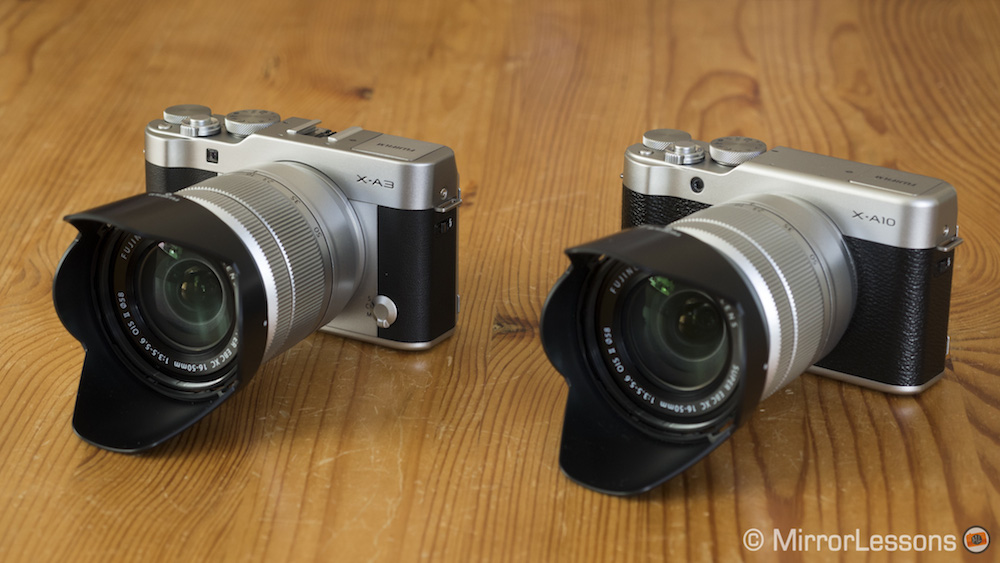
Both feature the same retro styling as other cameras in the X series, albeit with a cheaper and more “plasticky” build quality. The X-A3 does seem to be made of slightly tougher stuff thanks to the top plate being metal rather than plastic but neither model is particularly robust – and I certainly don’t think they’d survive a fall onto hard concrete as our Fujifilm X100T did a couple of years ago.
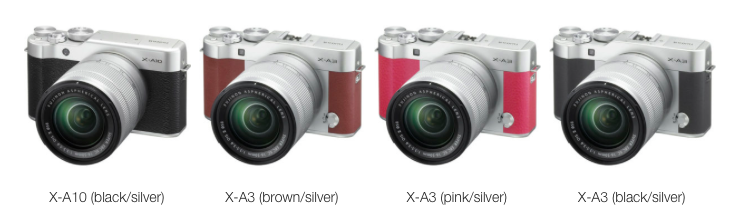
We received the silver/black version of these cameras to test but those who like a bit of colour will be happy to know that the X-A3 also comes in brown and pink. On the X-A3, the silver finish extends around the lens mount whereas on the X-A10, it is restricted to the top plate. The remaining surface area is covered with black faux leather that is slightly more textured (and therefore a little grippier) on the X-A3 than on the X-A10.
Both feature a contoured grip on the front and a small thumb rest on the rear which together help you to hold the camera. Since neither camera body is very large, it is best to use them with lenses that are the same size or smaller than the 16-50mm kit lens that comes bundled with the two cameras.
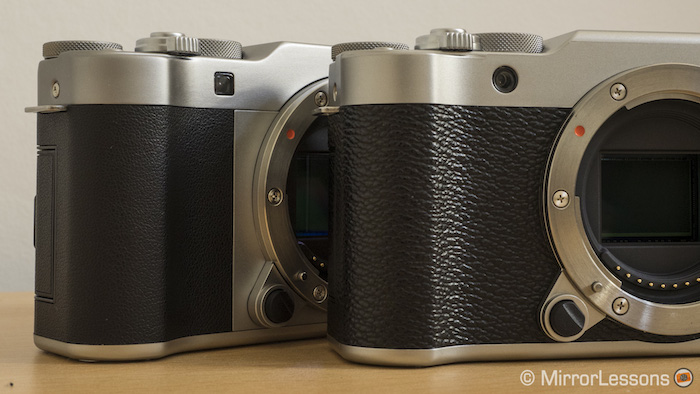
The mount of both cameras is metal but the same cannot be said of the 16-50mm kit lens whose mount is plastic.
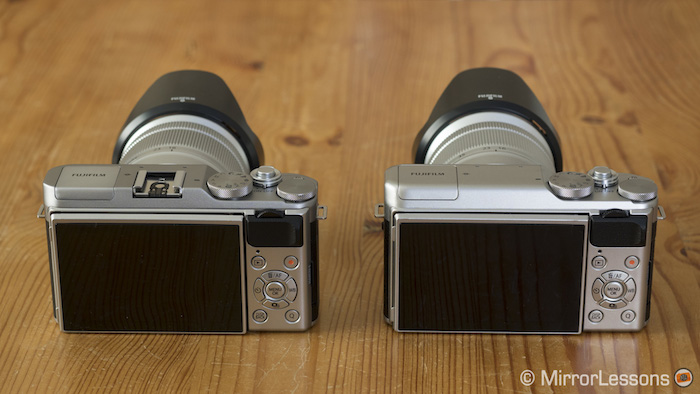
Rear monitor
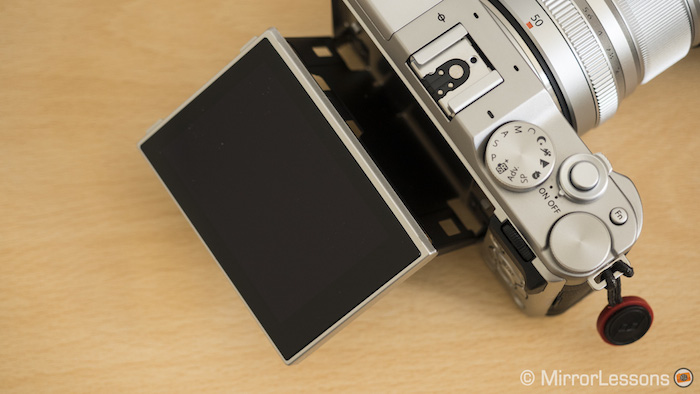
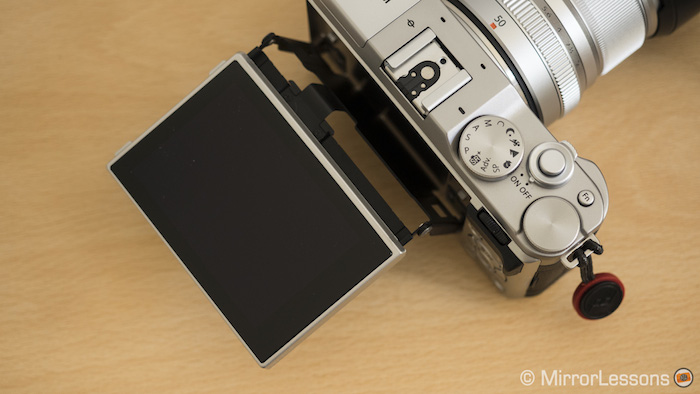
A similarity shared by the two cameras is the tilting 3-inch rear monitor with a resolution of 1040K dots. Because it is attached to a hinge mechanism, it can swivel up 180° for selfie taking and down by about 30° for high-angle shooting. I’ve heard people express concerns about the robustness of hinge mechanisms in general but they seem very sturdy on both cameras.
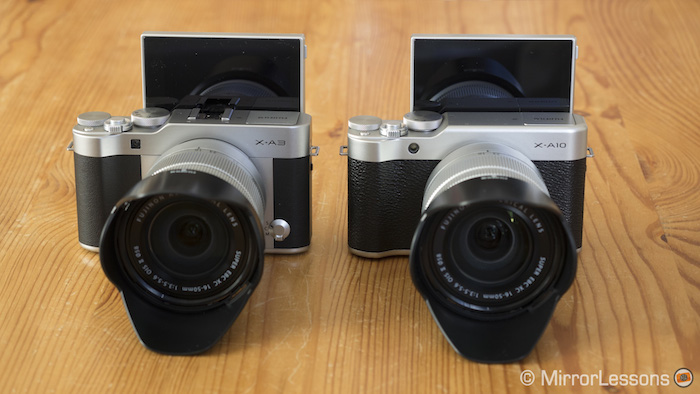
To activate the selfie mode, it is necessary to slide the monitor out of its hinges before flipping it up 180°. Doing so will also give you 100% visibility of the monitor when it is fully flipped up. If you don’t slide it out, you’ll notice that the image on-screen remains upside-down.
The only difference between the two monitors is that the X-A3’s has the option of touch sensitivity. With it activated you can select the focus area, take a picture, autofocus, swipe though your images in playback mode, and pinch/double tap to zoom. It isn’t as reactive as some other touchscreens I’ve tried on cameras from other brands, but it is certainly better than no touchscreen at all.
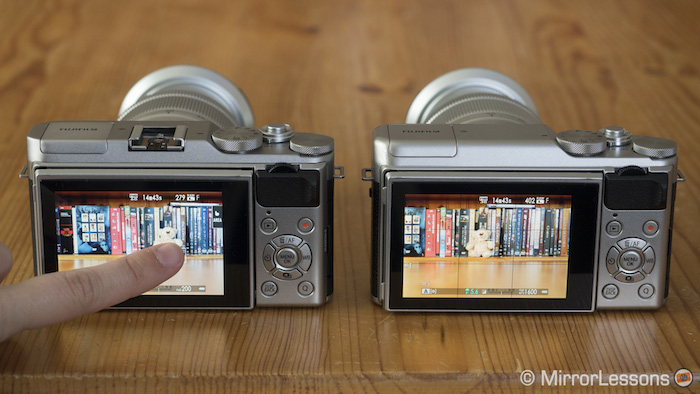
Because the X-A10’s screen isn’t touch sensitive, all operations must be performed via the buttons, dials and menu. It is a little more cumbersome but to be fair, it isn’t the only Fujifilm camera to lack touch sensitivity – in fact, not even the high-end Fujifilm X-T2 or X-Pro2 have it!
External controls and customisation
The X-A3 and X-A10 both have a decent number of external controls considering that they are on the budget end of the spectrum.
On top you’ll find a standard PSAM mode dial with extra options such as:
- Advanced SR Auto (if you’d rather leave the camera to do the hard work)
- Advanced Filters (apply fun effects to your JPG images)
- SP (a portrait mode)
- portrait enhancer (makes automatic adjustments to enhance skin tones in three levels – the higher the level, the brighter the skin of your subject)
- landscape, sport, and night modes
- C (a custom mode to which you can save your favourite settings)
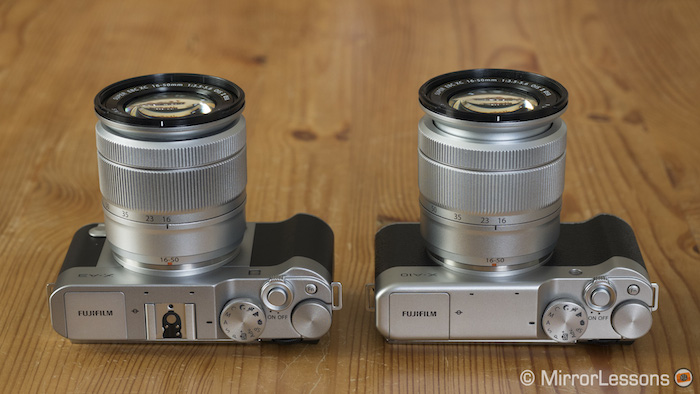
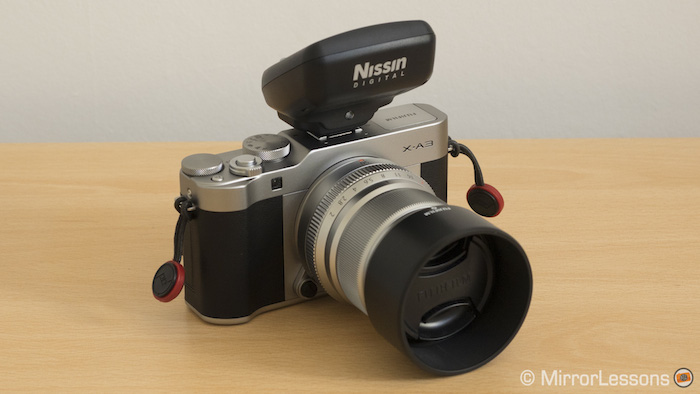
One significant difference between the two cameras is that the X-A3 comes with a hot shoe while the X-A10 does not. The hot shoe is useful if you plan to mount accessories such as a flash for example.
Many budget cameras don’t come with twin dials to manually change the exposure (shutter speed and aperture) but the X-A3 and X-A10 are an exception. The first is found on the top plate and the second is above the thumb rest. At times, I’ve found the dial on the top plate somewhat tricky to turn as it lacks some height and sits a little too flush with the edge of the plate but otherwise it’s a nice addition.
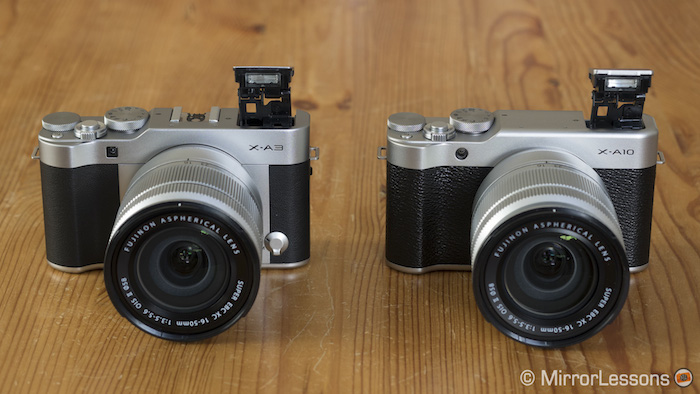
Additional controls you’ll find on the top plate of both cameras are a pop-up flash that activates via a switch on the side of the camera body, a shutter release button surrounded by a sufficiently stiff on/off switch, and a function button (Fn) to which you can assign one of 25 different settings. By default, the Fn button is set to ISO sensitivity which is the optimal choice if you work in any one of the PSAM modes.
Turning to the rear, we find a second array of buttons that are identical on both cameras: the four way pad with AF/Trash, WB, Timer and Burst options, the Playback button, Movie Record button, Display/Back button and Q menu. The Q menu is interesting because it gives you quick access to 16 of the most important settings and is also customisable from the menu.
The bottom of the two cameras reveals a compartment that is home to both the NP-W126S battery and the SD card. An unfortunate oversight is that the tripod mount is located directly beside the compartment, so if you want to change batteries or SD cards while using a tripod, you have no choice but to remove the tripod mount.
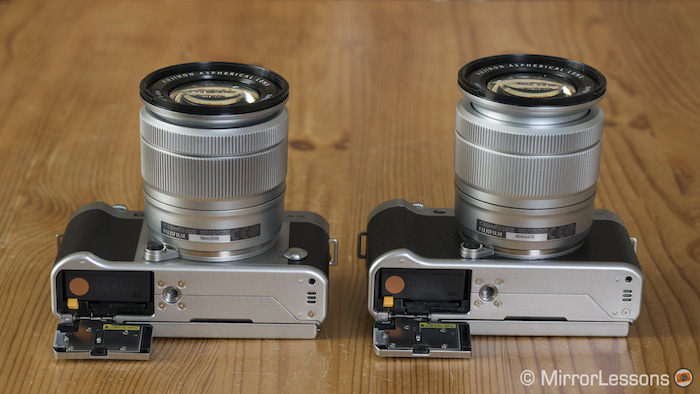
Finally, on the side of both bodies is a door that hides two ports: one an HDMI port and the other a USB 2.0 port. Unless you purchase a separate battery charger, the USB port is the only way to charge the battery.
Image quality


Unlike the mid-range and flagship models which use variations of Fujifilm’s proprietary X-Trans sensor, the X-A series – including the X-A3 and X-A10 – utilises a traditional Bayer pattern colour filter which is the standard for most cameras from other brands.
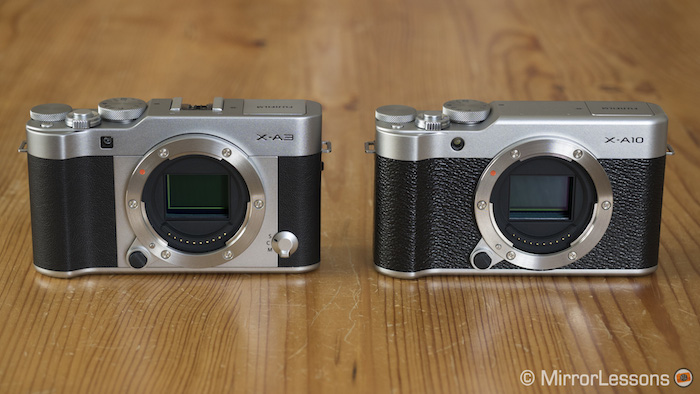
The biggest difference between the sensors of the X-A3 and the X-A10 is that the former has a higher resolution – 24.2MP versus 16.3MP to be precise.
Most photographers can be just as satisfied with 16MP as with 24MP given that the resulting image quality isn’t all that different, but the extra resolution does have its advantages. Not only do you have more leeway to crop or downsize your images, but you can also produce larger and more detailed prints.


The two cameras have the same native ISO sensitivity range of 200 to 6400 and extended 100 (Low), 12800 and 25600 (High) values. These extended values can only be used when the image quality is set to Fine or Normal JPG in the menu and the shutter is set to mechanical.
Looking at a series of side by side images, we can see that their performance is very similar across the range. We personally find the results useable up to their shared maximum sensitivity of 6400 ISO on both cameras but those more sensitive to noise probably won’t want to go beyond ISO 3200.
Below you can see some side-by-side 100% crops taken at ISO 1600, 3200 and 6400 (RAW).


As for the extended values of ISO 12800 and 25600 on the X-A3, it is best to avoid using them where possible as there is a clear loss in detail and contrast and a noticeable increase in noise. It is also much more difficult to tweak them in post production due to the fact that they are only available as JPGs. Below you can see an example of how much detail is lost at these values on the X-A3.

If you mostly shoot JPGs, you will want to keep an eye on the Noise Reduction (NR) settings of the camera. By default it is set to 0 but you can reduce or increase it by 2. I generally try to keep NR between 0 and -2 because I find it too aggressive at the + values.


There are also three Auto ISO options that let you select a default ISO sensitivity, ISO limit and minimum shutter speed of your choice so that you don’t have to worry about the camera choosing an ISO value that is too high. As for the minimum shutter speed, the camera will do its best to avoid going below your selected value but it will select slower speeds if it judges that the image is underexposed.
While the high ISO performance is similar, we did noticed a very small difference in the white balance algorithm of the two cameras. Specifically, the X-A10 produces a slightly warmer tint than the X-A3 in Auto WB whereas setting them to the same Kelvin value (in this case, 5600) resulted in a cooler tint from the X-A10.


All this means is that you may want to keep an eye on how warm or cool your image appears – especially if you’re a JPG shooter – and adjust the white balance according to your taste.
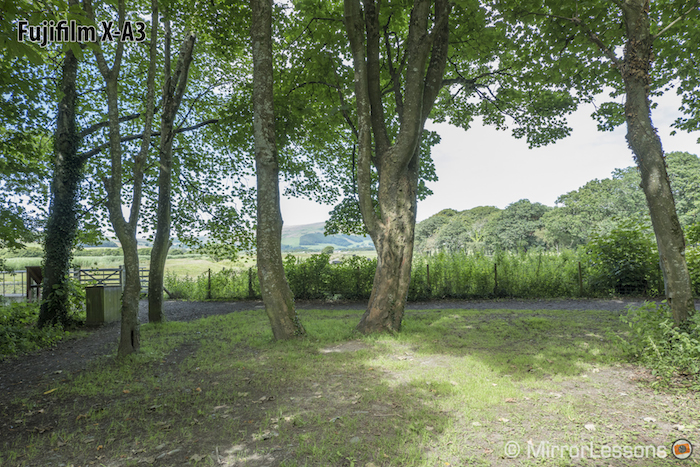
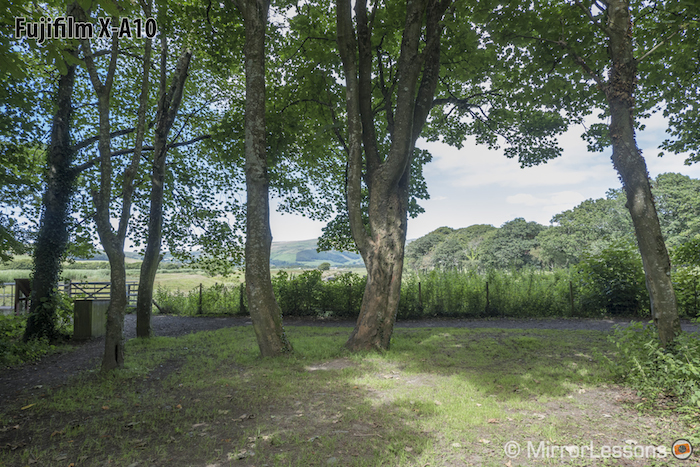
The real surprise was our dynamic range test. Whereas shadow recovery is about the same on both, the older 16MP sensor of the X-A10 seems to retain more detail in the highlights (e.g. the sky in the background) when you recover them in post production. Note that the following examples were taken at the same time with the same exposure, lens and focus point.


As with most of today’s digital cameras, the X-A3 and X-A10 come with an array of picture profiles (known as Film Simulation Modes) that affect the final look of the JPGs. The FSMs they share are: Provia (Standard), Velvia (Vivid), Astia (Soft), Classic Chrome, Monochrome and Sepia. Because the X-A3 is the slightly more advanced model, it also comes with five additional profiles: PRO Neg. Hi, PRO Neg. Standard, and Monochrome + Ye/R/G/ filter. Below you can see some examples of the profiles found on both.


There is also a series of fifteen fun filters found in the Adv. menu alongside Panorama and Multiple Exposure. Below are a few of my favourites:


Like the Film Simulation Modes, these filters only affect the out-of-camera JPGs.
Single and continuous autofocus
The X-A3 and X-A10 both use a similar contrast detection AF system, with the former providing up to 77 areas on a 11 x 7 grid and the latter, a more conservative 49 points on a 7 x 7 grid. However, their focus options differ somewhat as we’ll see below.

The X-A3’s autofocus system is the more advanced of the two. It comes with Single AF (S-AF), Continuous AF (C-AF) and Manual (MF) modes, all of which are easily accessible from the dial on the front. The first two can be used in conjunction with the three focus modes found in the menu:
- Single Point: One focus point you can move around the screen. You can adjust its size in five steps.
- Zone: Choose a set of points on a 3×3, 3×5, or 5×5 grid. Good for groups, large subjects or moving subjects.
- Wide/Tracking: The camera automatically selects a number of focus points when it detects high contrast subjects in S-AF. When in C-AF, it tracks the subject when the shutter button is half-pressed.
The X-A10, being the most budget friendly of the two, features a less advanced autofocus system. Since the S-AF/C-AF/MF dial doesn’t exist, the only way to change the camera’s behaviour is to use the following focus modes found in the menu:
- Manual: Manual focus.
- Multi: Like Wide/Tracking in S-AF on the X-A3. The camera selects a number of focus points automatically when it detects high-contrast subjects.
- Area: Like Single Point in S-AF on the X-A3. One moveable focus point whose size you can adjust in five steps.
- Continuous: Like C-AF on the X-A3 but you cannot select any AF points. The camera continuously adjusts focus to reflect changes in the distance to the subject.
- Tracking: The equivalent of Wide/Tracking in C-AF on the X-A3. Place the subject in the focus area and press the left button on the four way pad to track it.
If all this sounds too complicated, you can always turn PSAM dial to Sport when tracking a moving subject and the camera will choose the optimal settings for you.
In our experience, the contrast detection autofocus system of Fujifilm’s budget cameras doesn’t match the phase detection autofocus of the flagship models but this only matters if you regularly shoot fast-moving subjects. For static or very slow moving subjects, both the X-A3 and X-A10 are capable of delivering good results.


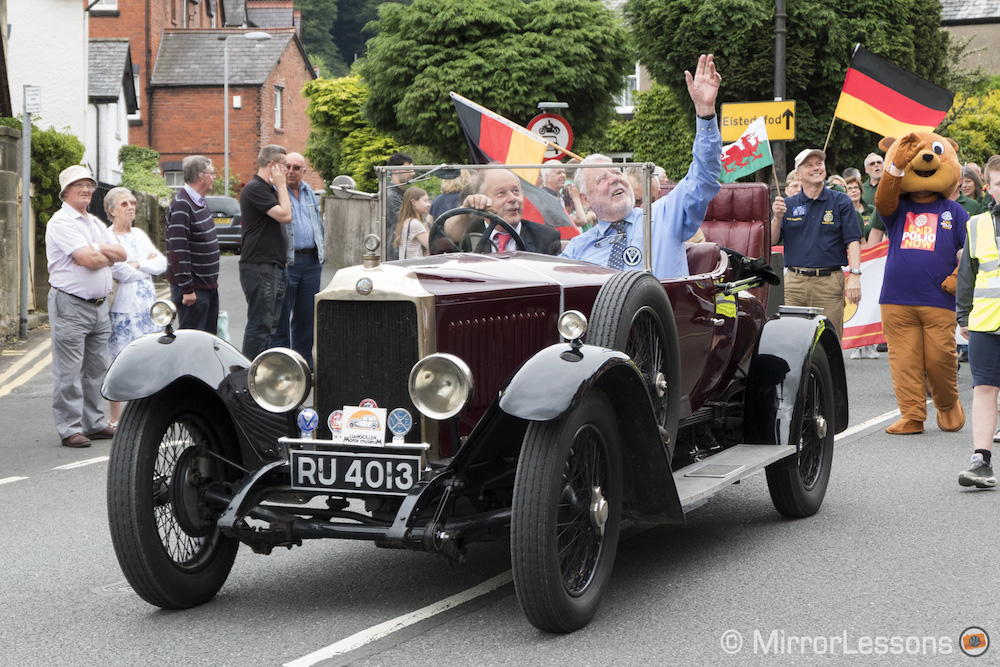
With the X-A3, we found that the best combination for moving subjects was Zone AF with the dial on the front switched to C (continuous AF). With the X-A10, we got the best results with Continuous AF in the AF menu. While photographing the Llangollen Eisteddfod parade that was made up of people walking at a slow pace and dancing, we ended up with a keeper rate of around 40-50% with both cameras. Both were usually able to lock onto the subject on the first frame but as the subject moved closer to the camera, they would tend to mis-focus or lock onto another subject in the background.


Both cameras also offer face/eye detection which is useful if you are taking a portrait of someone or photographing an event.
You can choose to have just face detection, or face detection with various eye detection settings including auto (the camera chooses the eye), right eye priority or left eye priority. Alternatively you can turn it off altogether. We found it works quite well as long as the face is clear and there aren’t too many other faces in the scene.

An additional option only found on the X-A3 is Release and Focus priority. By choosing the former, images can be taken even when the camera hasn’t focused, whereas with the latter, pictures can only be taken when focus is acquired.
It also comes with Pre-AF, which tells the camera to continue focusing even when the shutter button isn’t half-pressed. However keep in mind that it can drain the battery life more rapidly.
Both cameras come with an AF/MF option that lets you make manual adjustments while in an autofocus mode (you must be in S-AF on the X-A3 or in Multi or Area on the X-A10).
Shutter, continuous shooting speed and buffer
There isn’t much to compare here since the shutter speed capabilities and continuous shooting speeds of the X-A3 and X-A10 are identical.
With the mechanical shutter, you can shoot at speeds as high as 1/4000s but switching over to the electronic shutter will push the maximum speed up to 1/32000s. The slowest shutter speed is 30s in all modes except P which is limited to 4s and the maximum time in Bulb mode is 60 minutes.
As for continuous shooting, you can shoot at a maximum of 6fps (frames per second) in High mode or 3fps in Low mode.
The only difference is the buffer depth, which is better on the X-A10 than on the X-A3. The official specifications are as follows:
- X-A3: maximum of 10 frames at 6fps (JPG only), maximum of 50 frames at 3fps (JPG only)
- X-A10: maximum of 20 frames at 6fps (JPG only), unlimited frames at 3fps (JPG only)
To see if the official specifications reflect the actual capabilities of each camera, we fired off a round of shots (RAW and JPG) with the same SanDisk Extreme 16GB memory card and the 16-50mm kit lens. Our results can be found below:
Fujifilm X-A3
- 10 frames at 6fps after which it slows down but keeps shooting (JPG only)
- unlimited frames at 3fps (JPG only)
- 5 frames at 6fps after which it slows down significantly but keeps shooting (RAW only)
- 7 frames at 3fps after which it slows down but keeps shooting (RAW only)
Fujifilm X-A10
- unlimited frames at 6fps (JPG only)
- unlimited frames at 3fps (JPG only)
- 18 frames at 6fps after which it slows down but keeps shooting (RAW only)
- 53 frames at 3fps after which it slows down but keeps shooting (RAW only)
The results reveal that the X-A10 does indeed have a much better buffer overall which isn’t all that surprising considering that the images have a lower resolution. This came in handy during the aforementioned parade as the X-A10 allowed me to take longer bursts of the people walking by.
The good news is that it doesn’t take either camera very long to record the images to the card, so you can enter playback mode almost immediately after taking a burst.
Video capabilities
The X-A3 and X-A10 have primarily been designed for still photography, so there is little to whet the appetite of the budding filmmaker.
Recording is possible in HD (1280 x 720 pixels) and Full HD (1920 x 1080 pixels) on both cameras but with different frame rates:
- X-A3: Full HD and HD (both 60/50/24p)
- X-A10: Full HD (30/25/24p) and HD (60/50/24p)
The only way to start recording is to press the dedicated movie button on the rear. Once you press it, the camera will automatically switch from the default 3:2 aspect ratio to a 16:9 aspect ratio. If you want a preview of what your scene will look like in 16:9 before pressing the movie button, you can always select the 16:9 aspect ratio for stills in the menu. (It is close but not identical because the camera performs a slight crop.)
You can change the exposure compensation, aperture and shutter speed even while recording but the ISO sensitivity must be set beforehand within the movie menu (minimum 400 and maximum 6400). Be aware that changing the ISO for stills will not affect the ISO value for movies and vice versa.
Whereas the X-A3 lets you choose the focus mode directly from the dial on the front, the X-A10 provides a sub-menu called Movie Focus Mode with Centre, Continuous and Manual options. When you start recording with the X-A3, the camera automatically activates face detection in S-AF or the Zone area in C-AF. The X-A10 uses a single central point in Centre mode and switches to Multi in Continuous.
The recording time on both cameras is limited to 14 minutes in Full HD or 27 minutes in HD and microphone level adjustments can be made in four steps.
Concerning the quality, the X-A3 has an advantage in terms of sharpness: the details are crisper than those of the X-A10. The ISO performance is also better particularly from 3200 where the X-A10 starts to display a lot of noise. As for the autofocus, however, the X-A10 performed as fast – if not slightly faster – than the X-A3. Below you can watch a quick video comparison between the two cameras.
Flash and other features
As mentioned in the design section, both cameras come with a built-in pop-up flash that activates via a switch on the side of the body. They have identical specifications: flash compensation between -2 and +2, red eye removal and various modes including forced flash, slow synchro, 2nd curtain flash, commander and suppressed flash. If you own the X-A3, you can take advantage of the hot shoe to attach a flash unit. Note that the flash will only synchronise with the shutter at shutter speeds of 1/180s or slower.

There are also numerous bracketing options on both cameras. Beyond the standard exposure (AE) bracketing mode that lets you take three shots with different exposures, there is also bracketing for ISO, film simulations, white balance and dynamic range.
The Panorama mode, which is often found directly on the PSAM dial on many cameras, has been hidden away in the Advanced Filter menu alongside Multiple Exposure. The former automatically stitches a series of frames together as you pan across a scene, whereas the latter layers two or more exposures in camera. Keep in mind that while these modes can be fun, they only produce JPGs.

Unique to these cameras is the Selfie mode, which is activated by pulling the screen out from its hinges and flipping it up 180 degrees. Once the screen is fully rotated up, the image will flip around, allowing you to compose the perfect self or group portrait. Doing so automatically activates face and eye detection regardless of whether you’ve selected it or not in the AF menu. For the best results, switch the PSAM dial to SR+ mode so that the camera has full control over the exposure.

Battery life
Both the X-A3 and X-A10 accept NP-W126 or NP-W126S batteries but they come boxed with the latter which is the more powerful of the two. Having shot with both cameras for nearly a month now, I can confirm that the battery life is very good. I can easily get through a day of moderate shooting (stills and video) and still have some juice to spare. Still, I wouldn’t be against the idea of carrying around a spare just in case.
Since the cameras don’t come boxed with a separate charger, the only way to charge them is via USB.
Price
The X-A3 and X-A10 are both entry-level cameras and have been priced accordingly. The former is available for around $599 with the XC 16-50mm lens included, whereas the latter costs an average of $100 less.
Conclusion
If we ignore superficial aspects such as design and body colour, it becomes clear that there are just three main factors that could influence your decision to choose the Fujifilm X-A3 over the X-A10.
The first is the additional sensor resolution, which is handy if you often crop your images or enjoy making large prints.
Second is the touch sensitive screen which allows you to rapidly change your autofocus point, take a picture, and scroll through your images. On more than one occasion during our testing period, having the touch screen made the difference between getting the shot and missing it.
Finally we have the hot shoe. Though there is a built-in pop-up flash on both cameras, the X-A3’s hot shoe lets you attach a variety of accessories including a more powerful external flash unit.
However, if you are on a tight budget or don’t care about the extra features of the X-A3, there is no reason not to choose the X-A10 and put the $100 difference towards something else.
I also mentioned the autofocus system in our comparison preview between the two cameras but having tried it in a variety of real world situations, I can confirm that there isn’t a significant difference in performance with the exception of the better buffer of the X-A10. That said, some additional settings found on the X-A3 like Zone AF are more practical in certain situations.
Choose the Fujifilm X-A3 if you:
- like the idea of having more resolution for cropping or printing purposes
- want a screen with touch sensitivity
- plan to take advantage of the hot shoe by attaching accessories
- want better sharpness and high ISO performance for video recording
Choose the Fujifilm X-A10 if:
- you are on a very tight budget
- you want a better buffer in continuous shooting mode
Check price of the Fujifilm X-A3 on B&H Photo
Check price of the Fujifilm X-A10 on B&H Photo
You may also like:
- Fujifilm X-T2 vs X-T20 – Complete comparison
- Fujifilm X-T1 vs X-T20 – Five key aspects analyzed
- Fujifilm X-A10 Sample Image Gallery
- The Best Accessories for the Fuji X-T20 compared
Sample Images
Fujifilm X-A3


Fujifilm X-A10